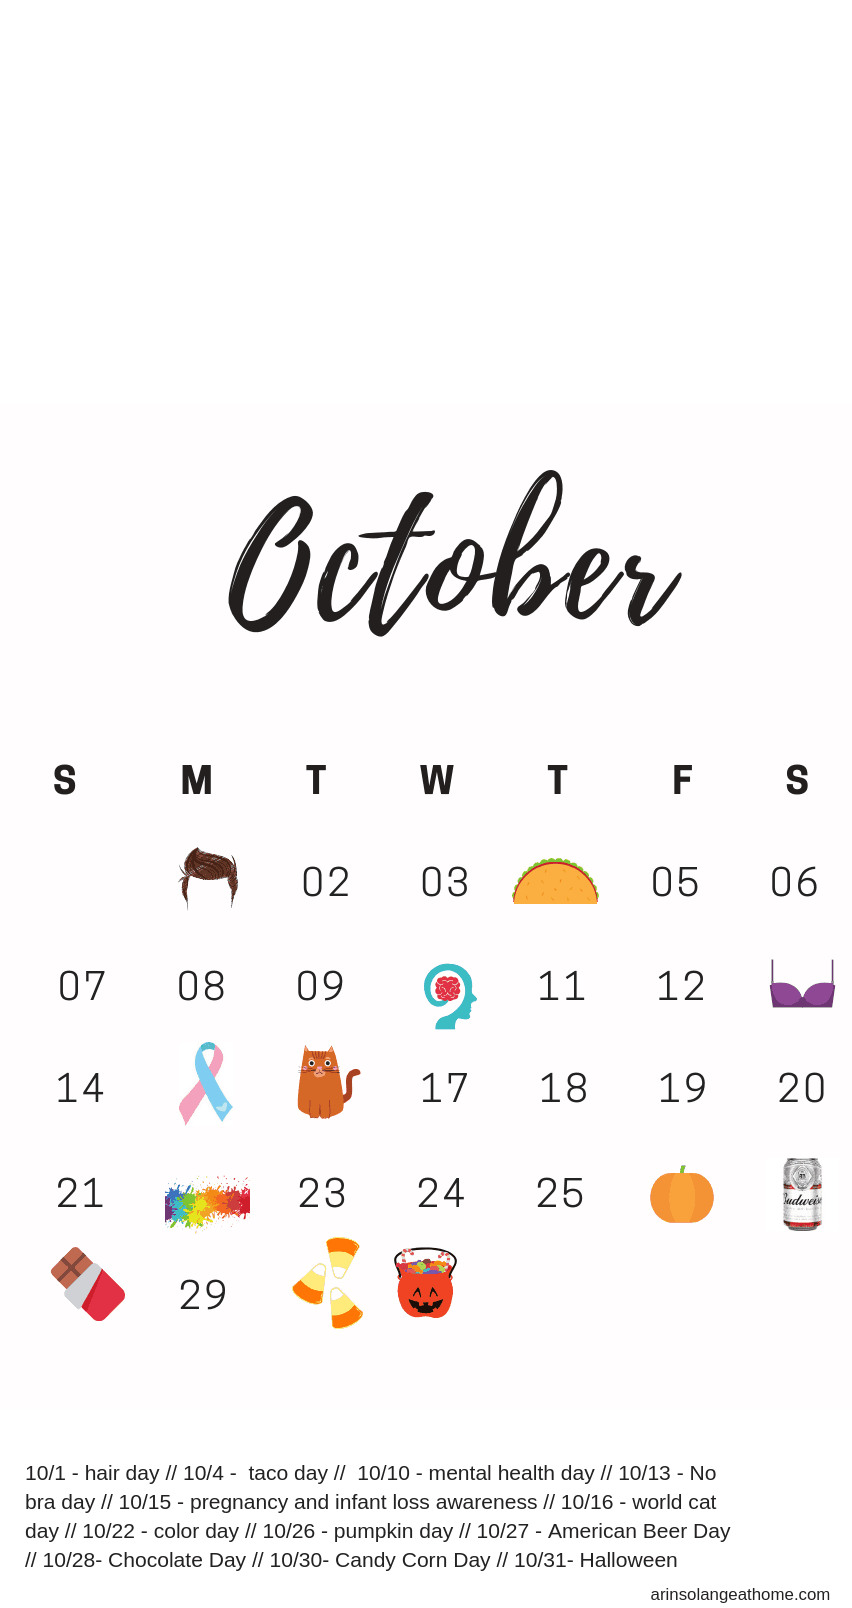
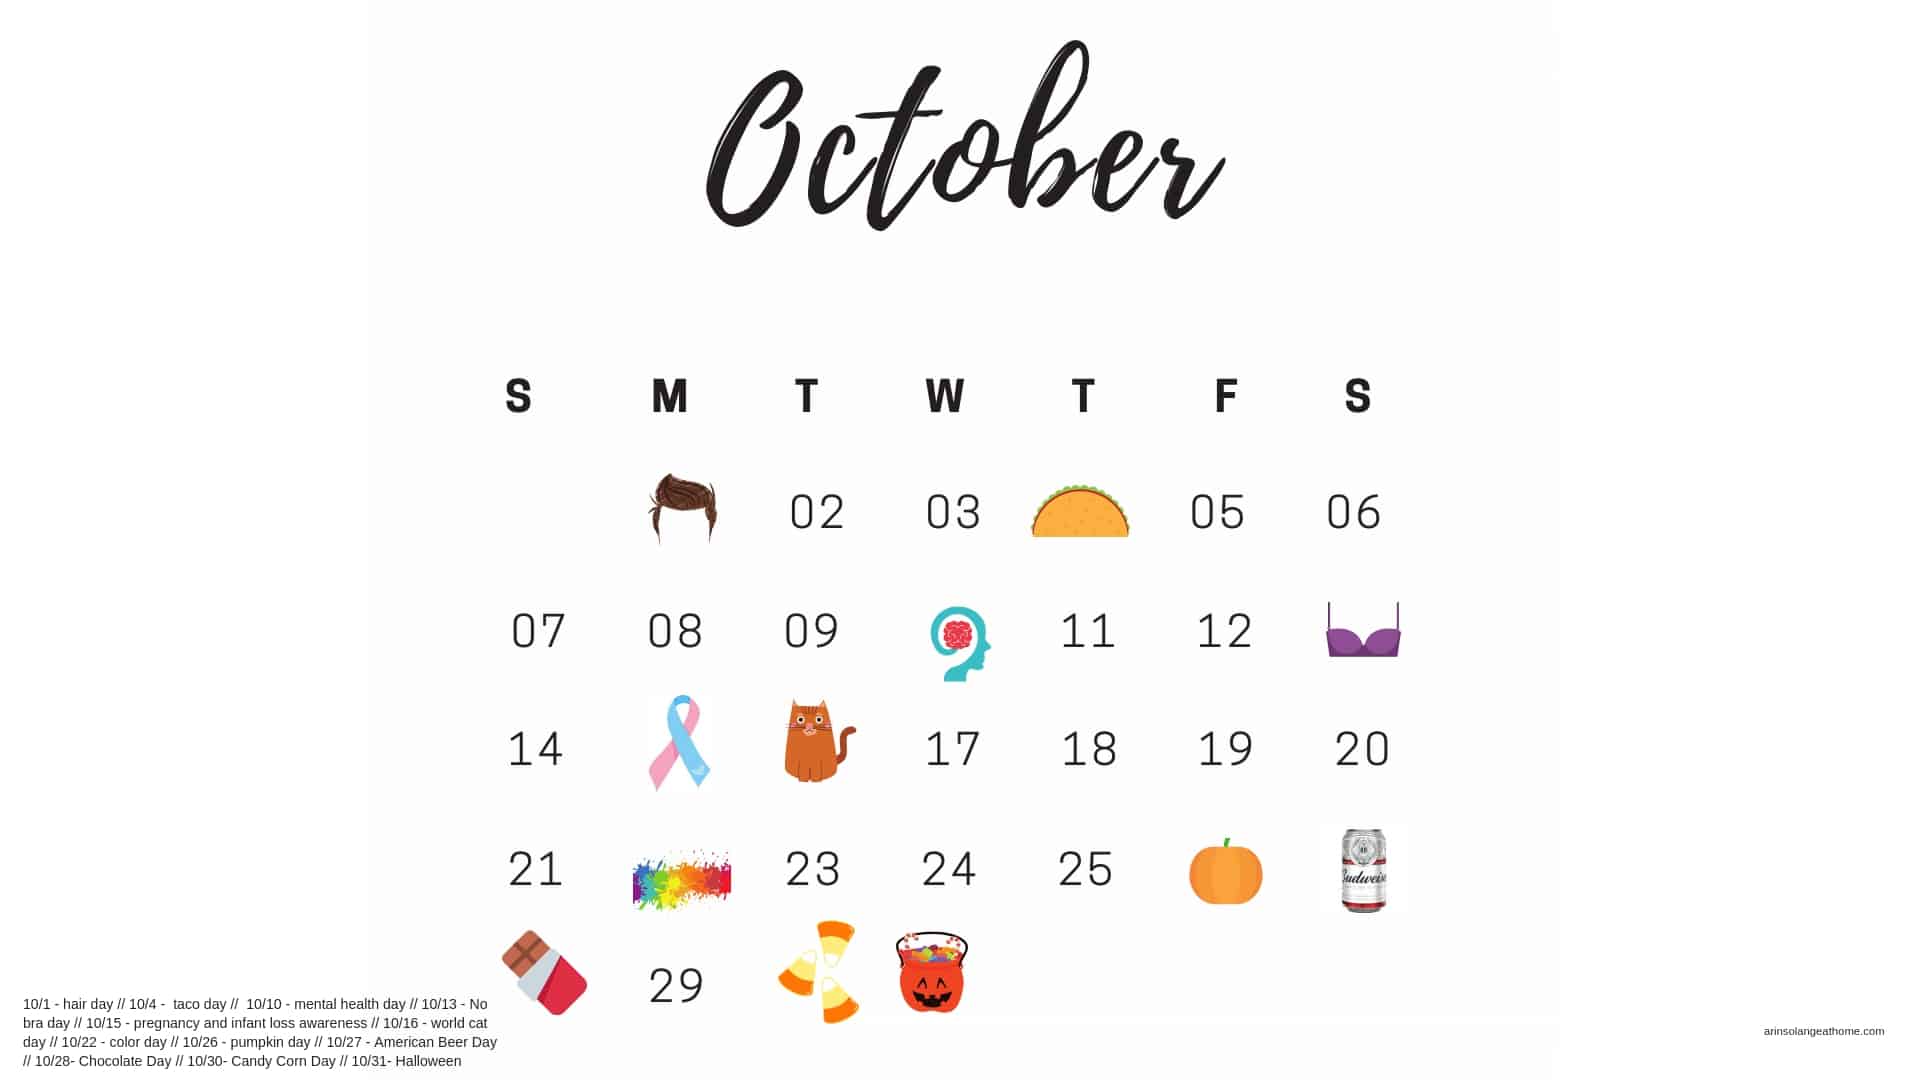
Incase you haven’t seen the previous monthly calendars this year, make sure you check out the previous months here, and be sure you have subscribed to my blog so that you can get the full year in just a month or two for 2019. I have been rounding up the National days into a convenient phone lock screen, printable or desktop background for you to use all year so be sure to save this October National Days Calendar so you don’t miss any fun days!
October National Days Calendar
Save the above version for your phone lock screen so you won’t miss anything this month, or download the printable version below to print!
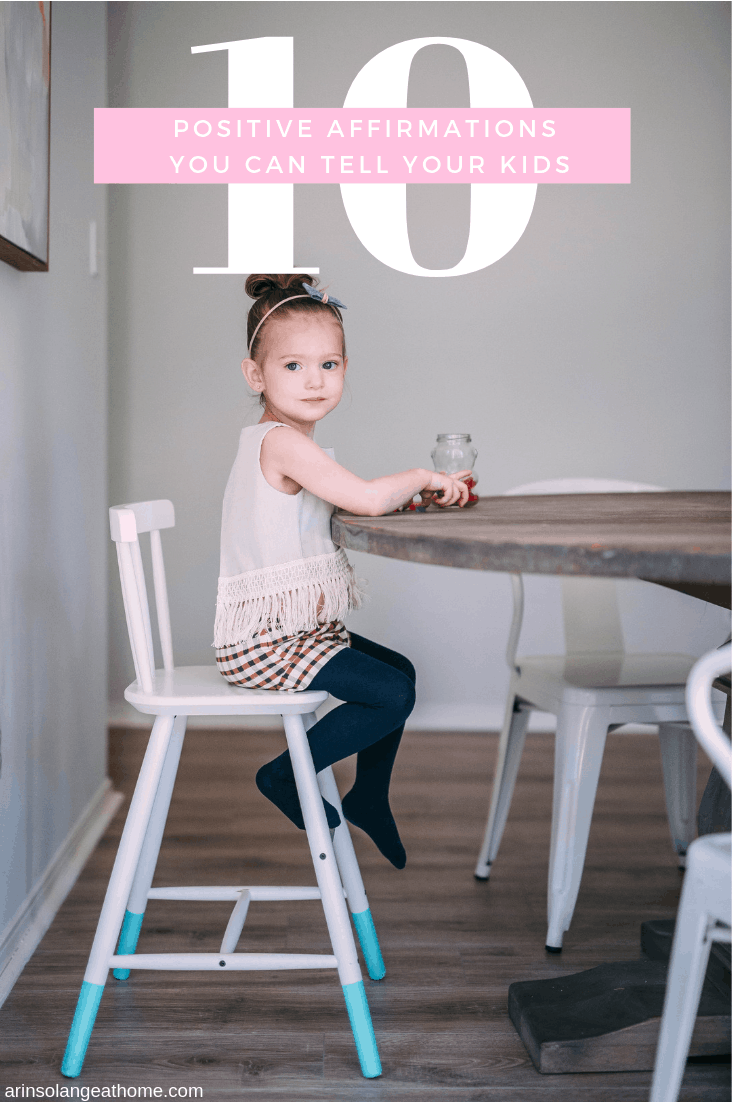
Parenting is SO hard today. I mean I’m sure it’s been just as hard for forever, but regardless, its hard to be raising babies in a world where there is SO much outside influence from tv, social media, and so on. So for me one thing that has been really important in my day to day life with my kids is to tell them small affirmations throughout the day that hopefully will stick with them and be a statements they KNOW to be true as the grow up. I thought I would share with you ten positive affirmations to tell your kids.
1o Positive Affirmations to tell your Kids
You are loved
You are Brave
You are Kind
You are Smart
You are handsome
You are beautiful
You are loving
You work really hard
You’re a great friend
You’re a great son/daughter/sister/brother
There are so many other affirmations you can tell your children, but I have found that taking time in the car or in moments where we are one on one to say some of these things has made me more purposeful in using those positive phrases. It’s far to easy to forget those reminders and only tell your kids negative things when they do something wrong, so if you try to say a few of these each day to your child you are making sure that they know the things that you already know to be true about those beautiful kids of yours!
If you liked this post be sure to read this post and sign up for emails for future posts!
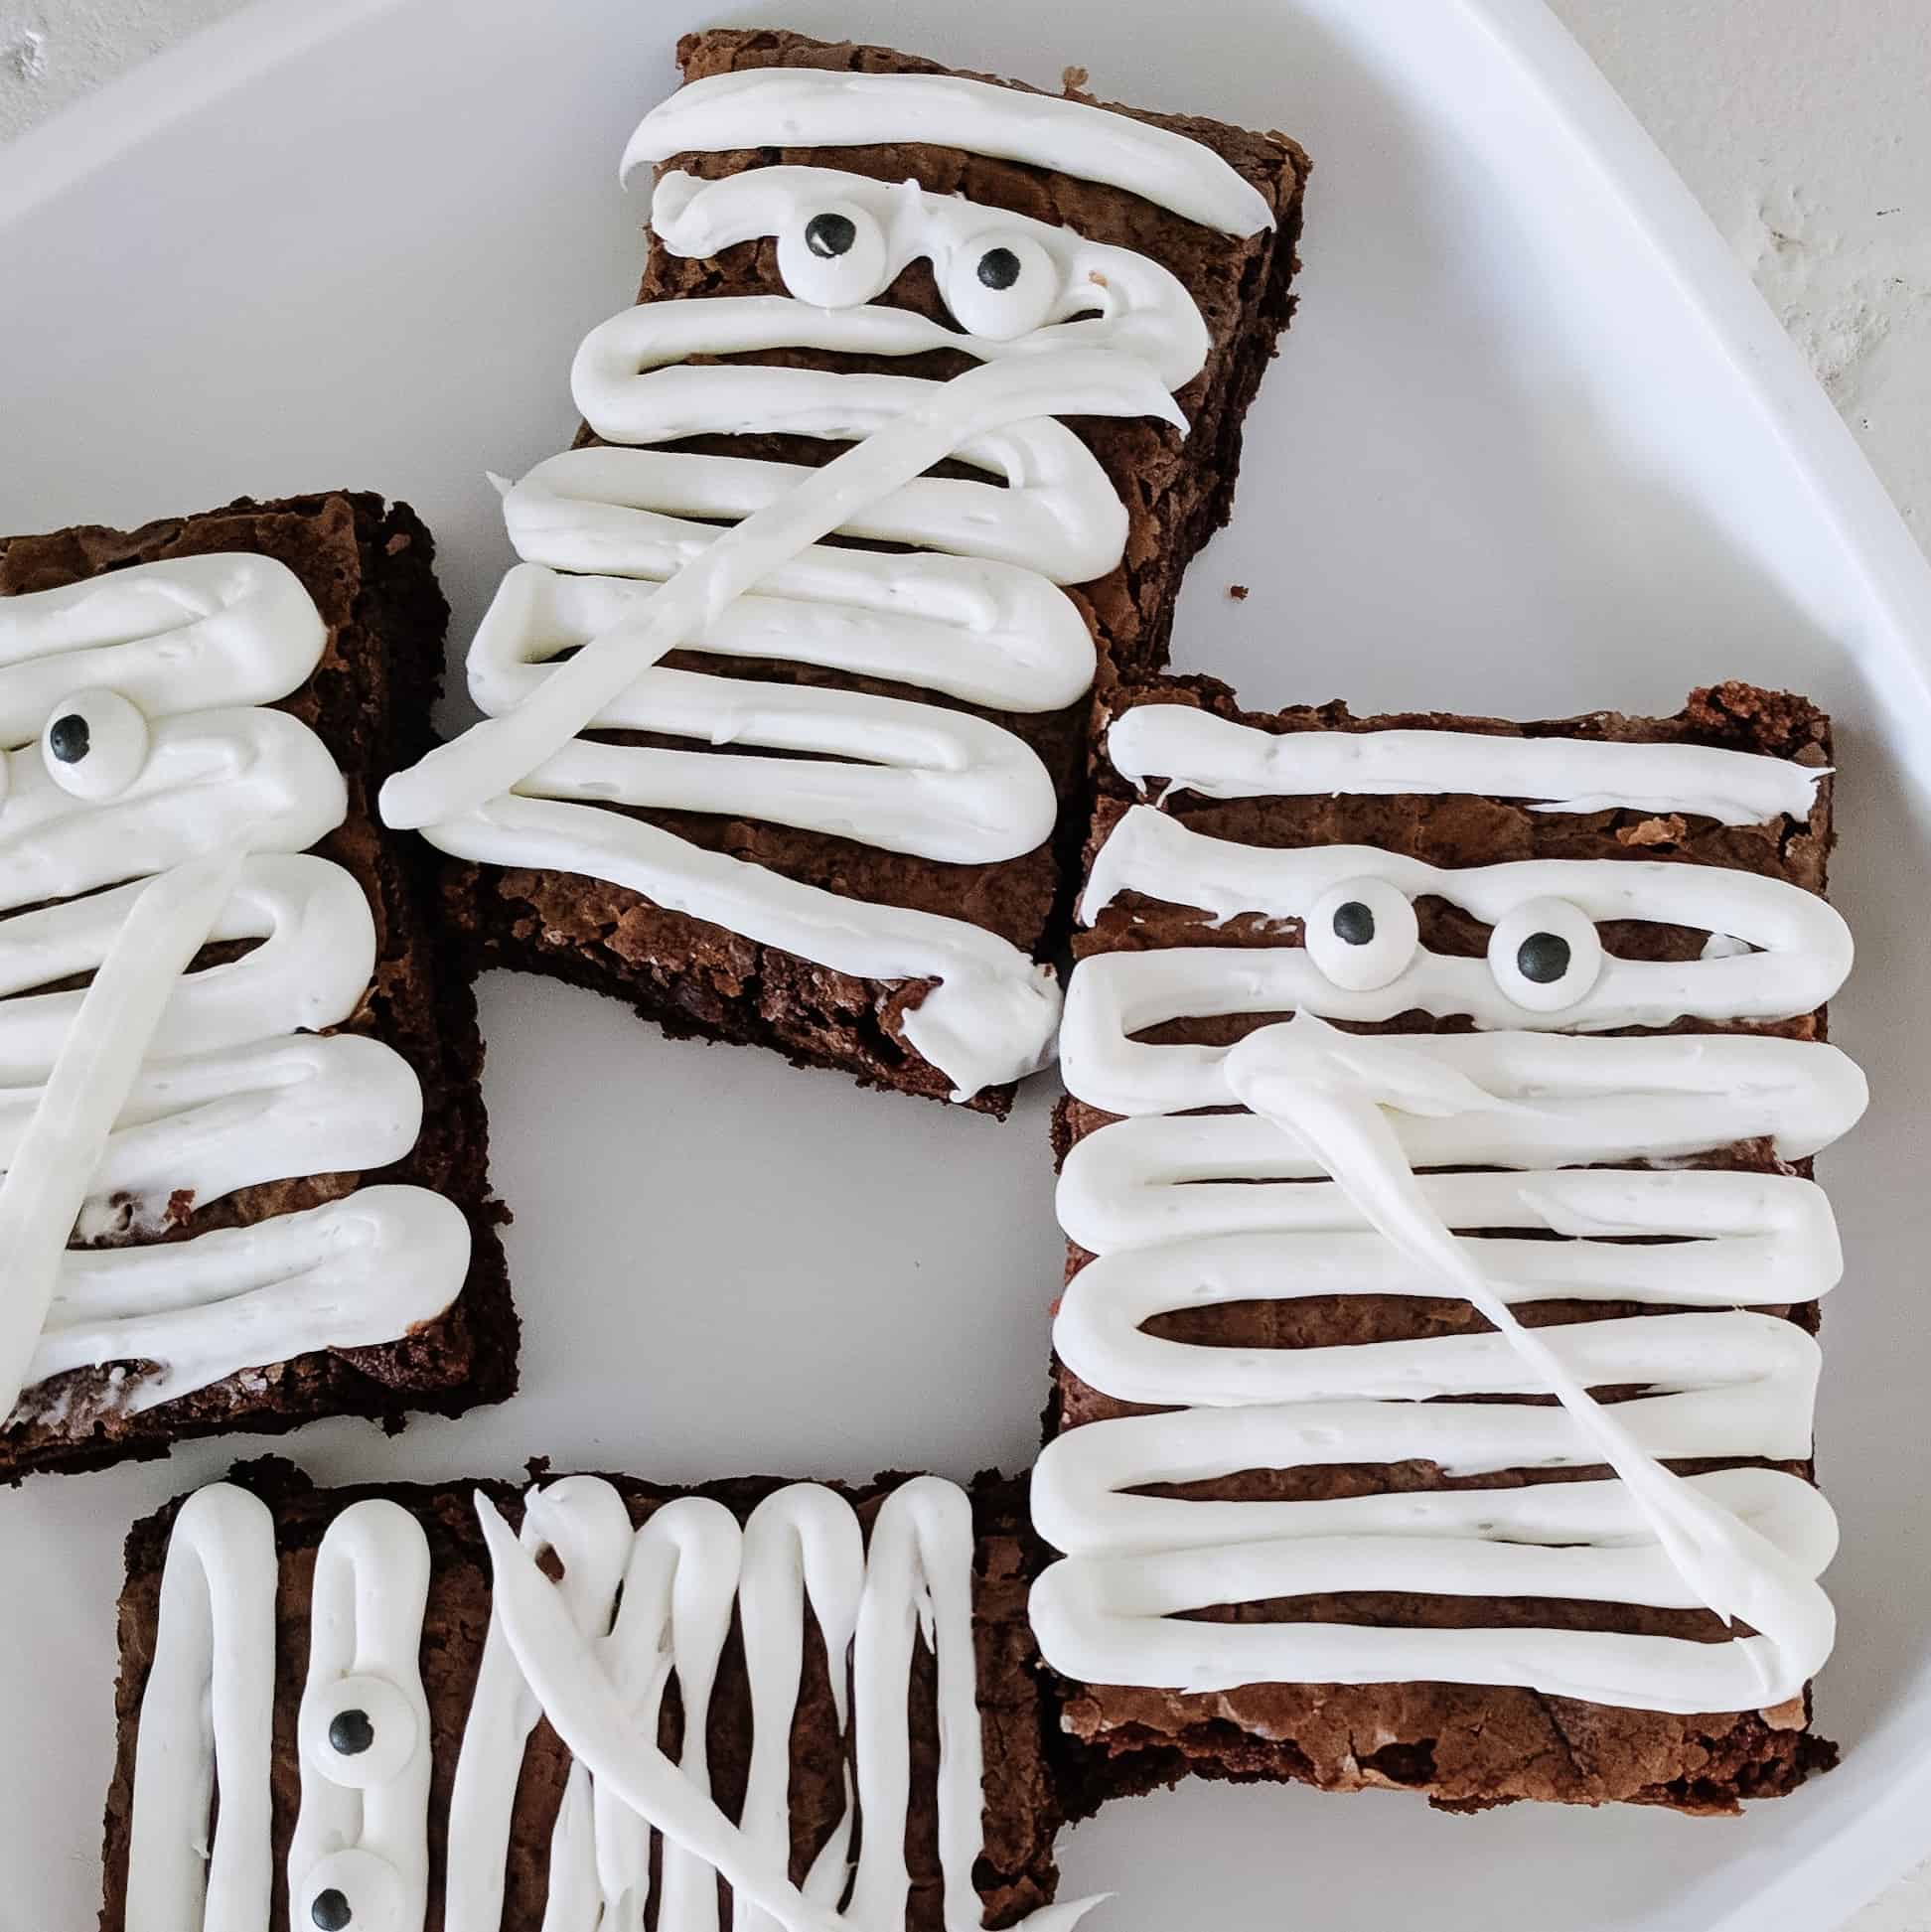
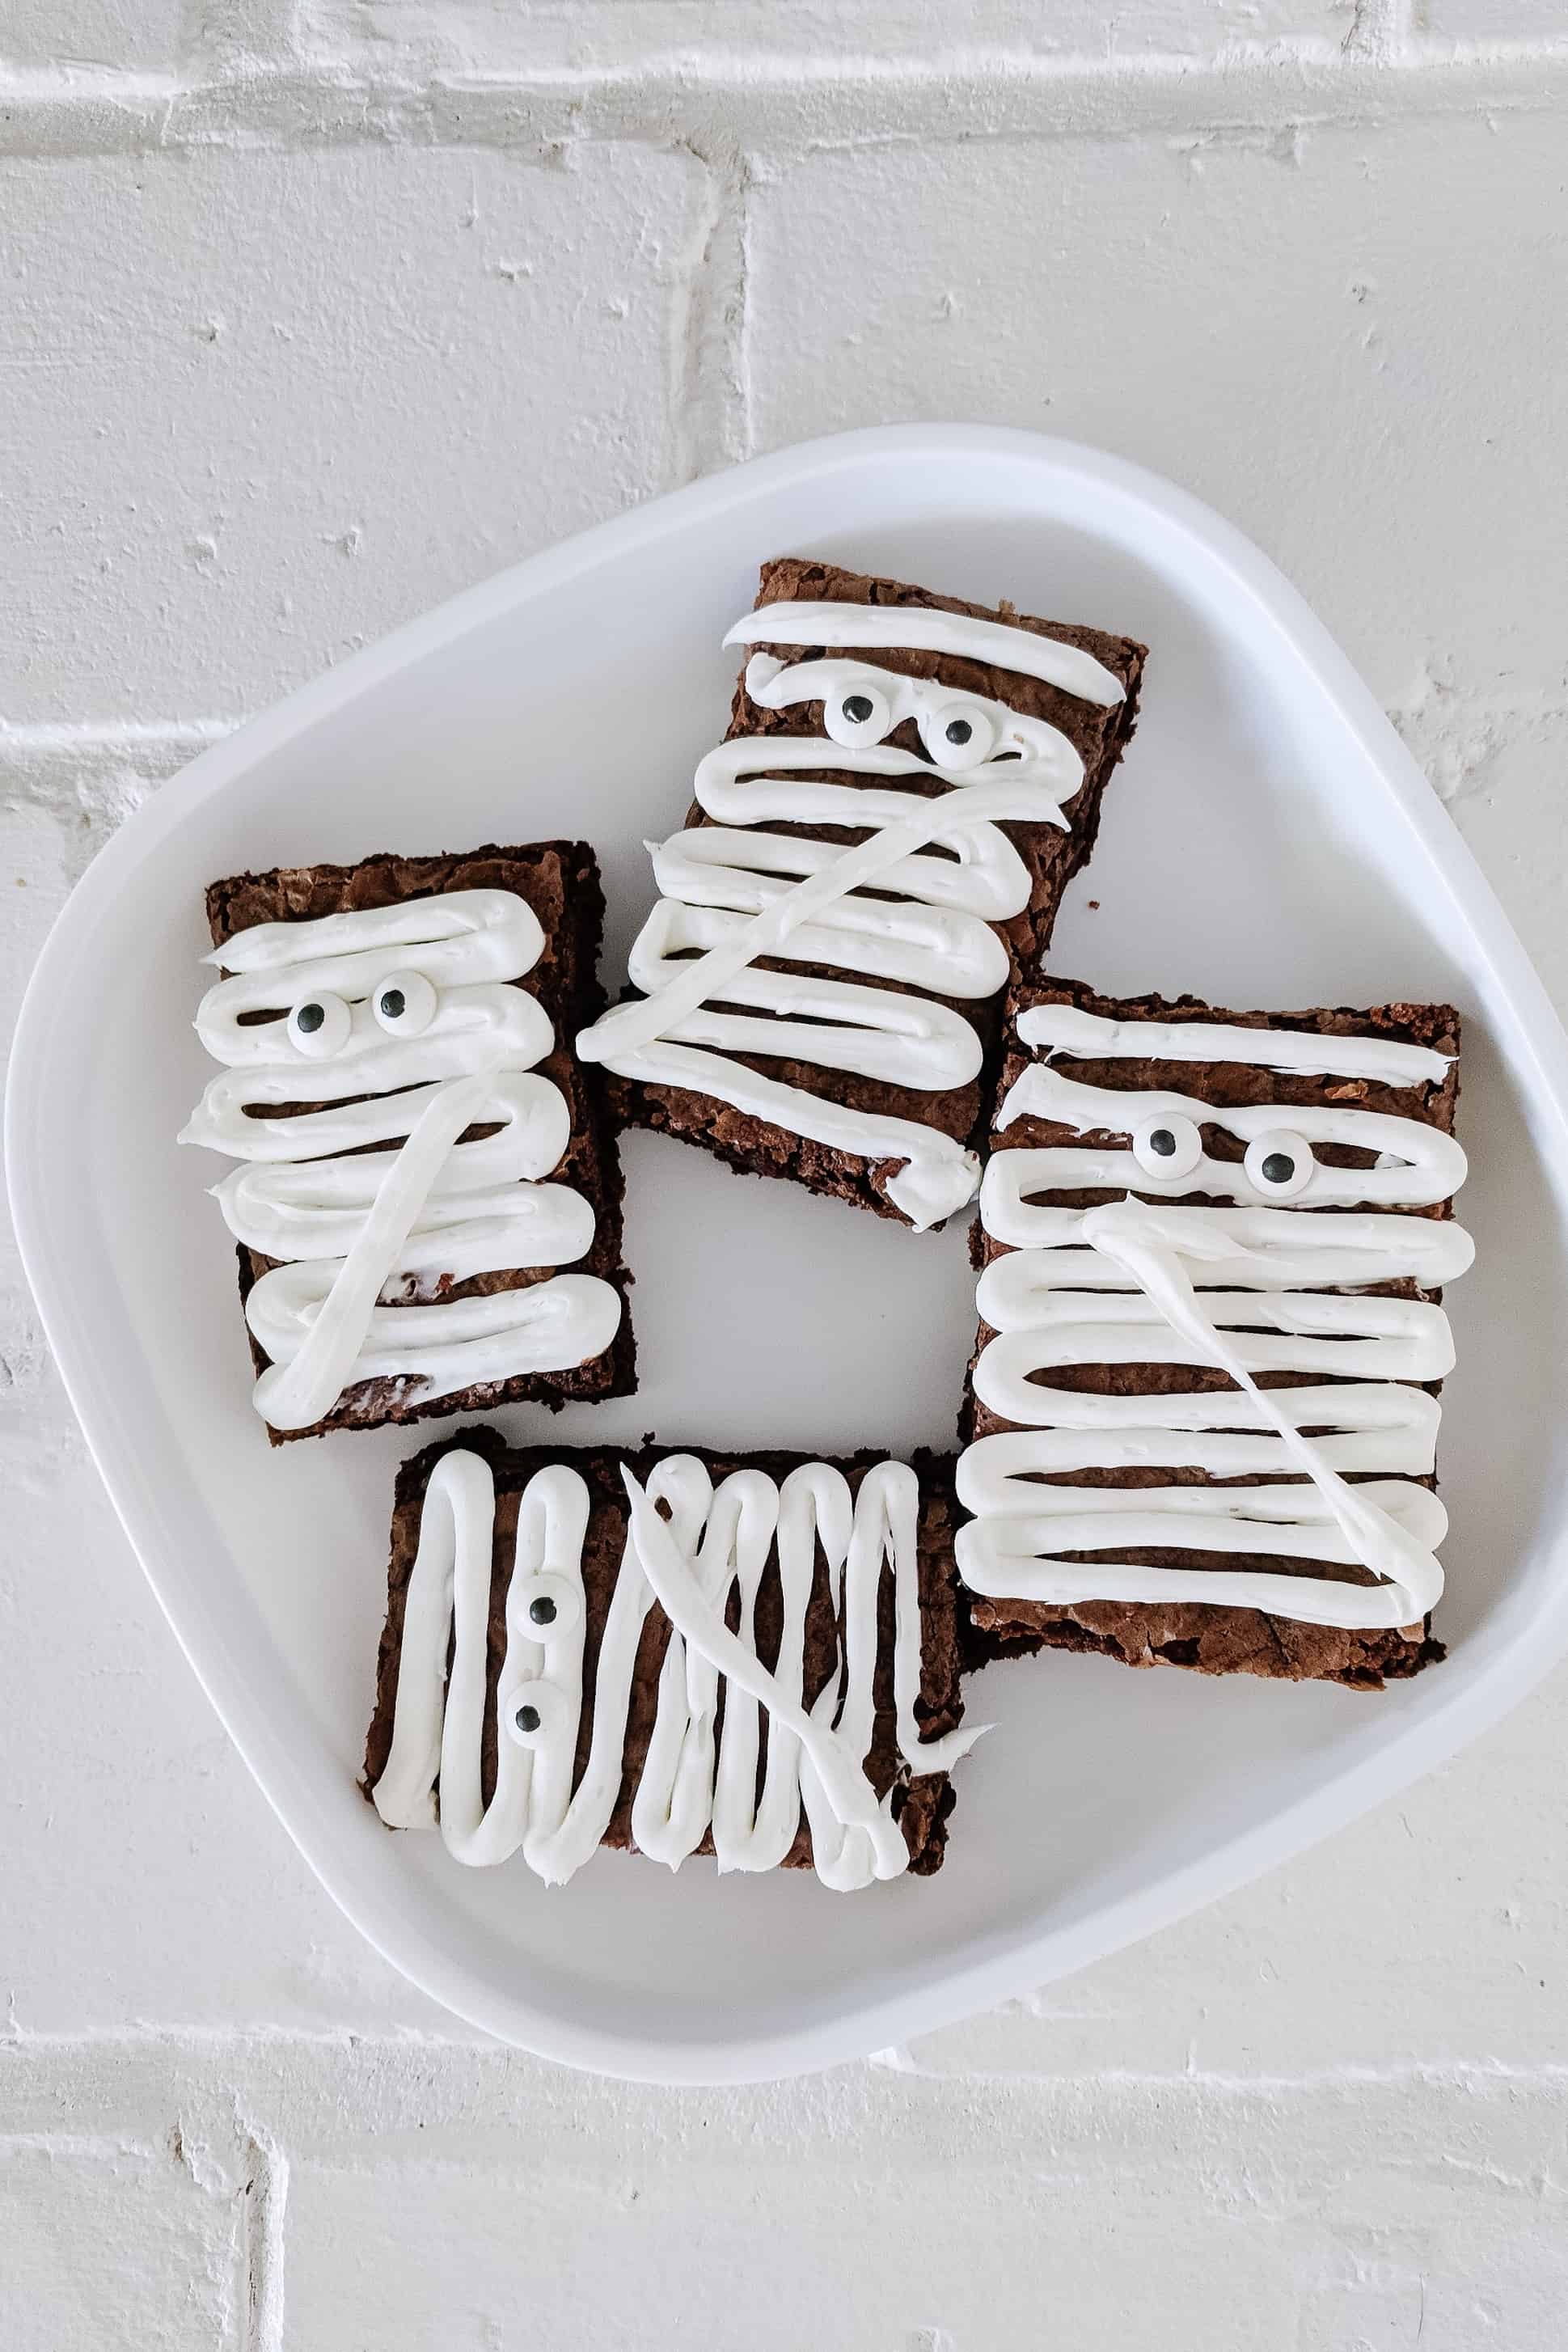
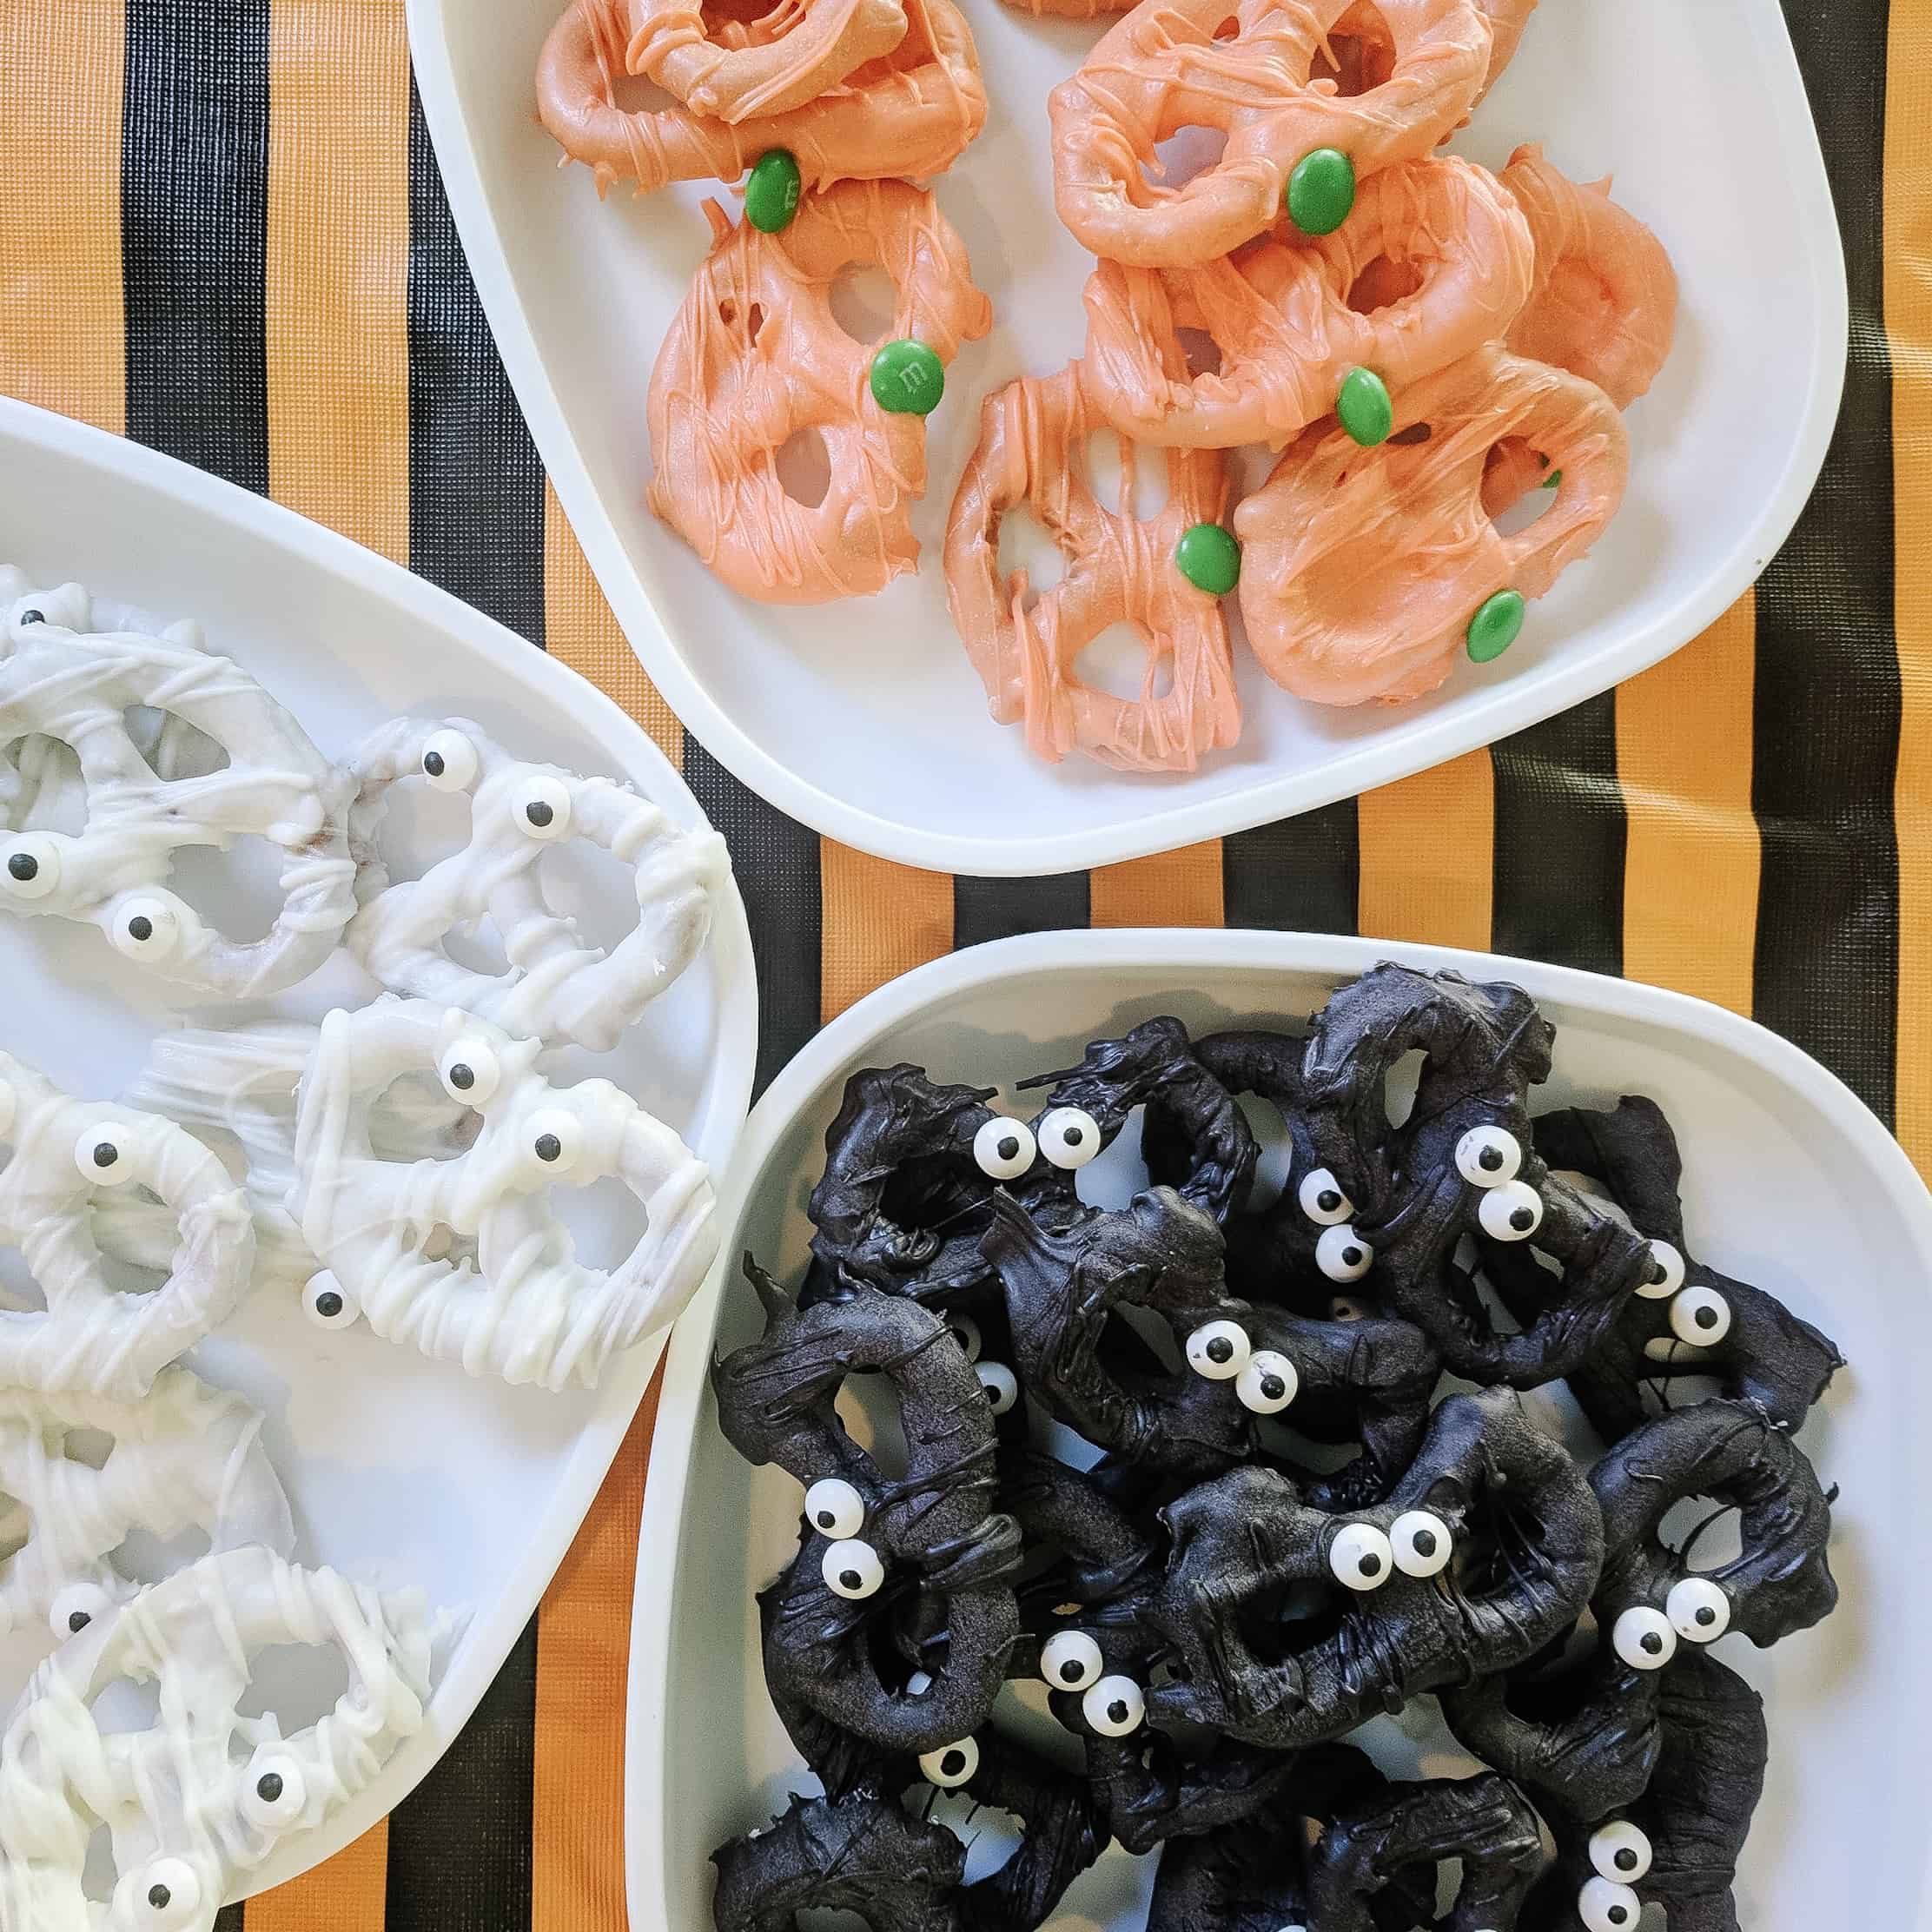
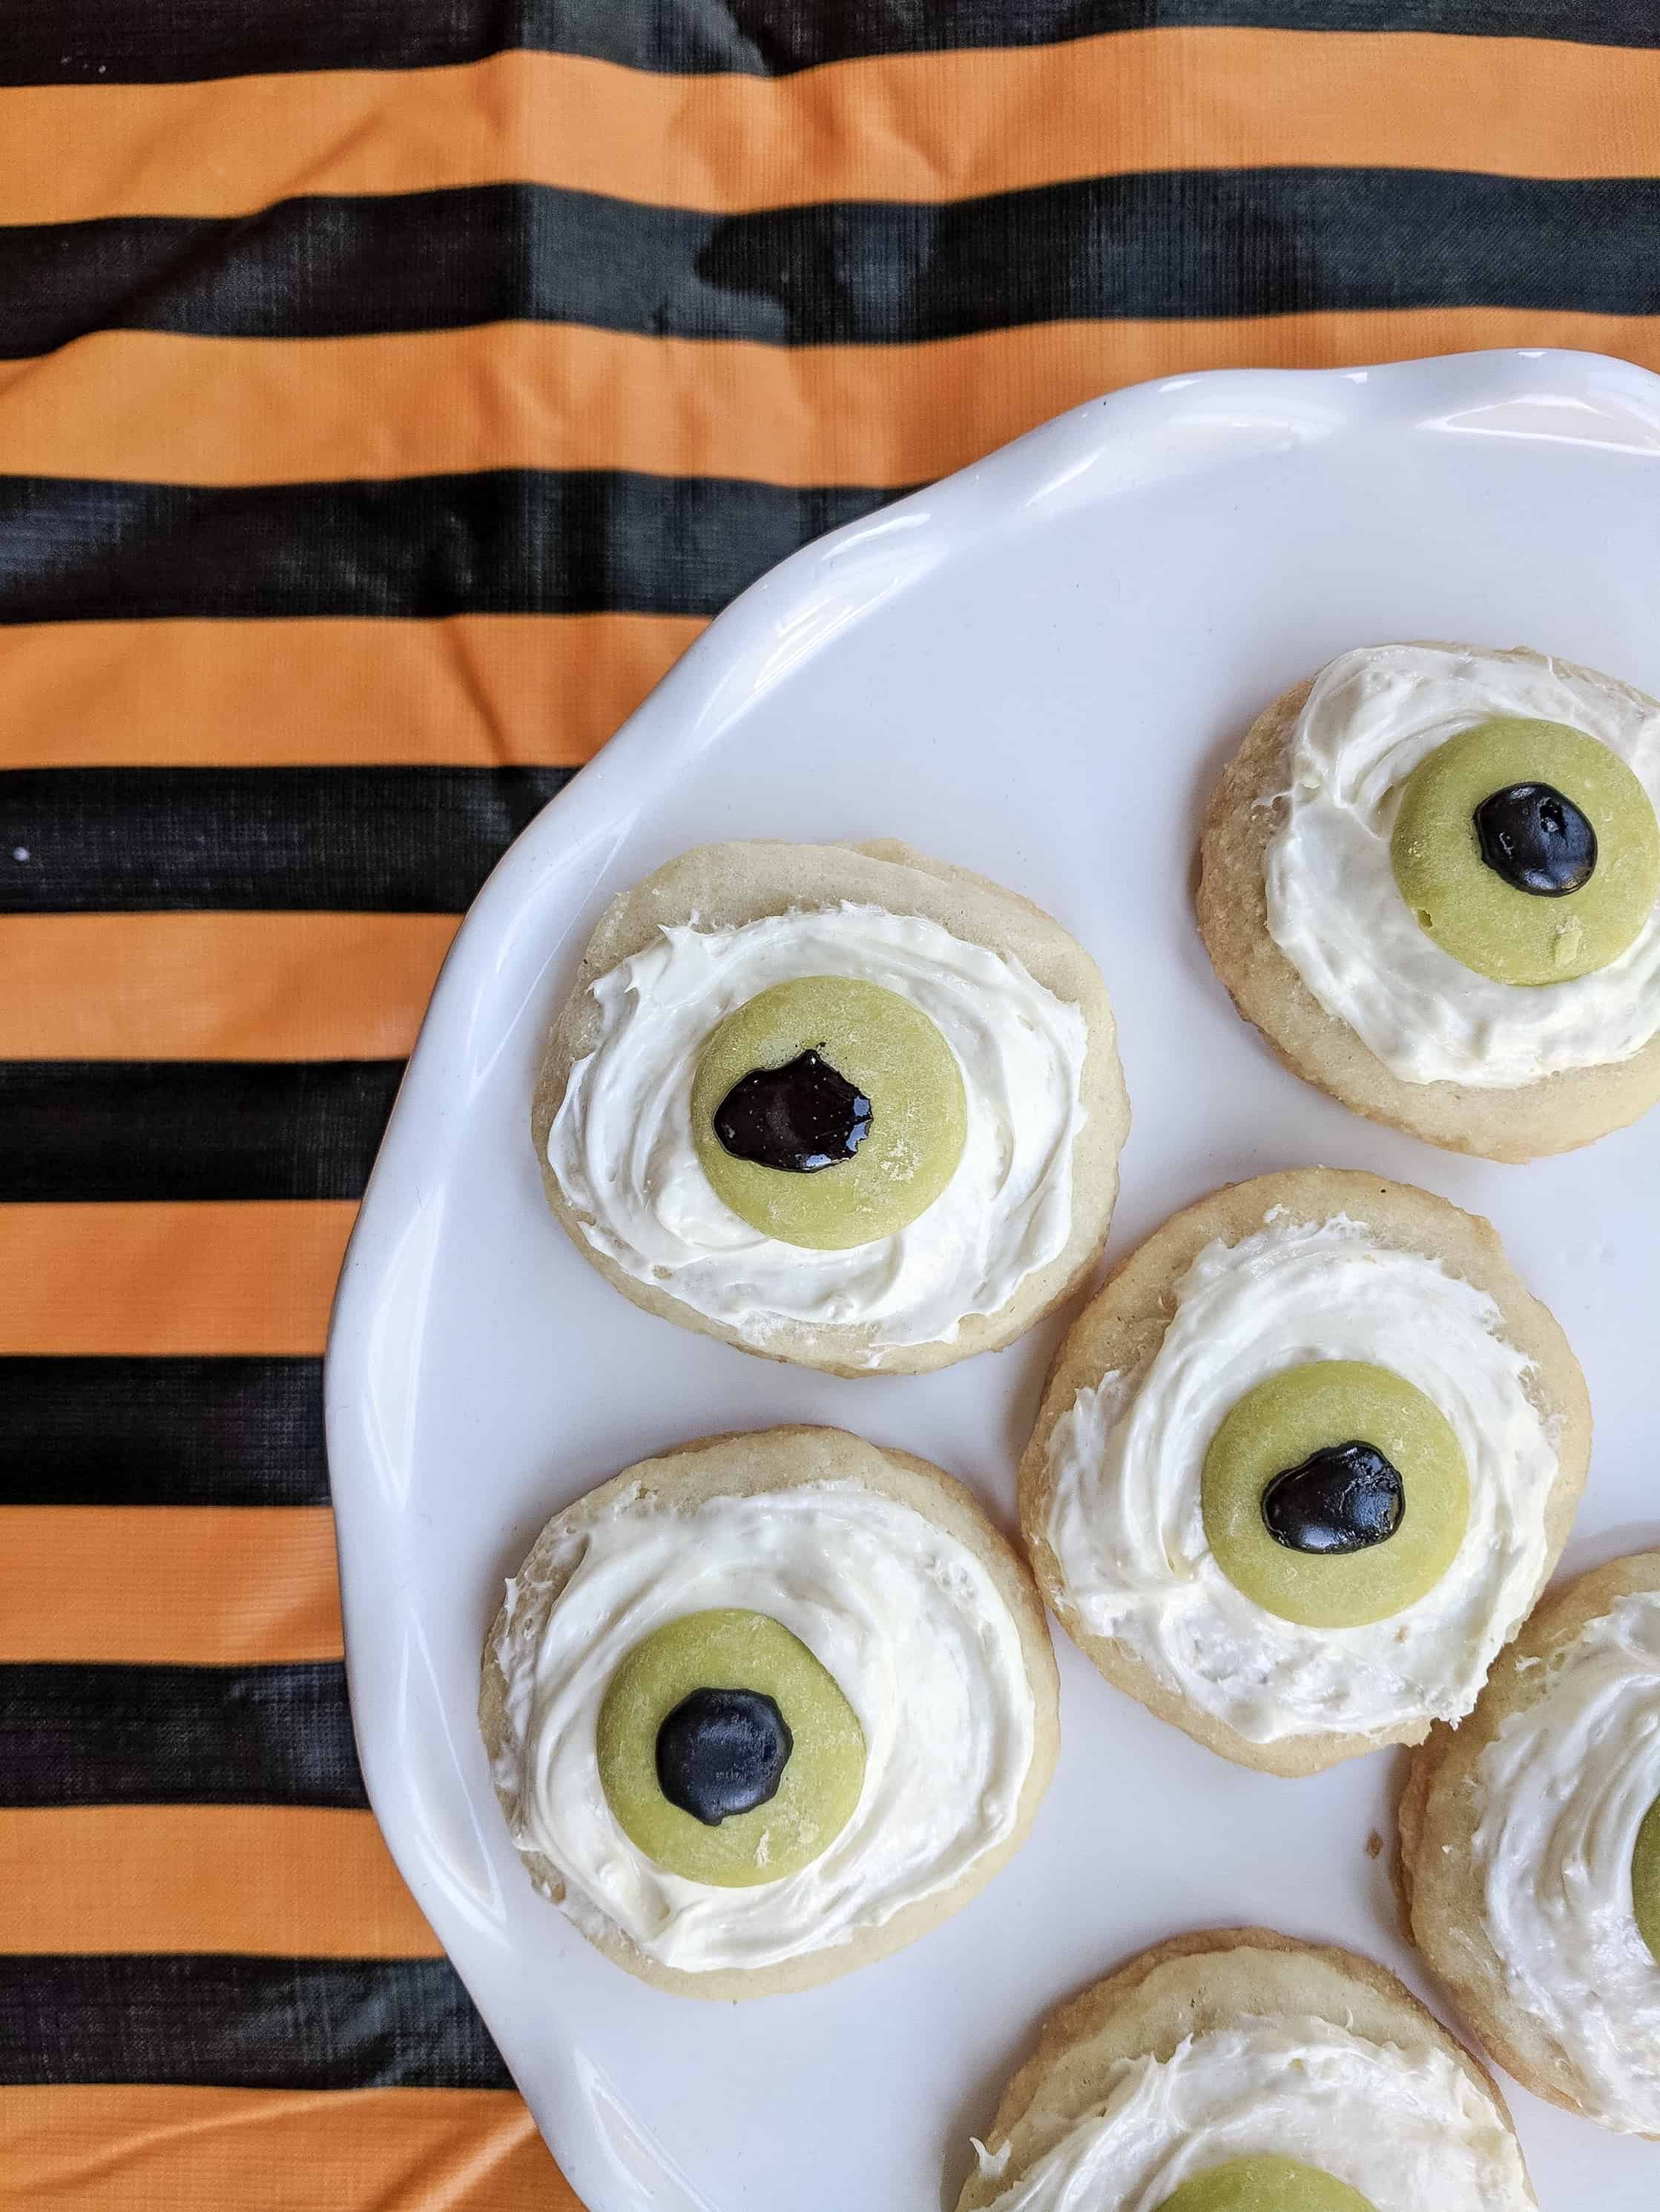
I know it’s early but I am trying to finish up all of my my Halloween blog posts for you all in the next week or so, so you have time to plan your holiday. Today I wanted to show you all 3 quick easy Halloween treats you can make for your kids or neighbors. I made all of these in NO time with my kids help, so grab the ingredients and make it a fun afternoon activity with your kids.
Quick Easy Halloween Treats
Mummy Brownies
Directions:
Make boxed brownies per instructions
let cool and cut into rectangles
put icing in a plastic baggie and cut the corner
drape the icing across the brownie in swooping motions
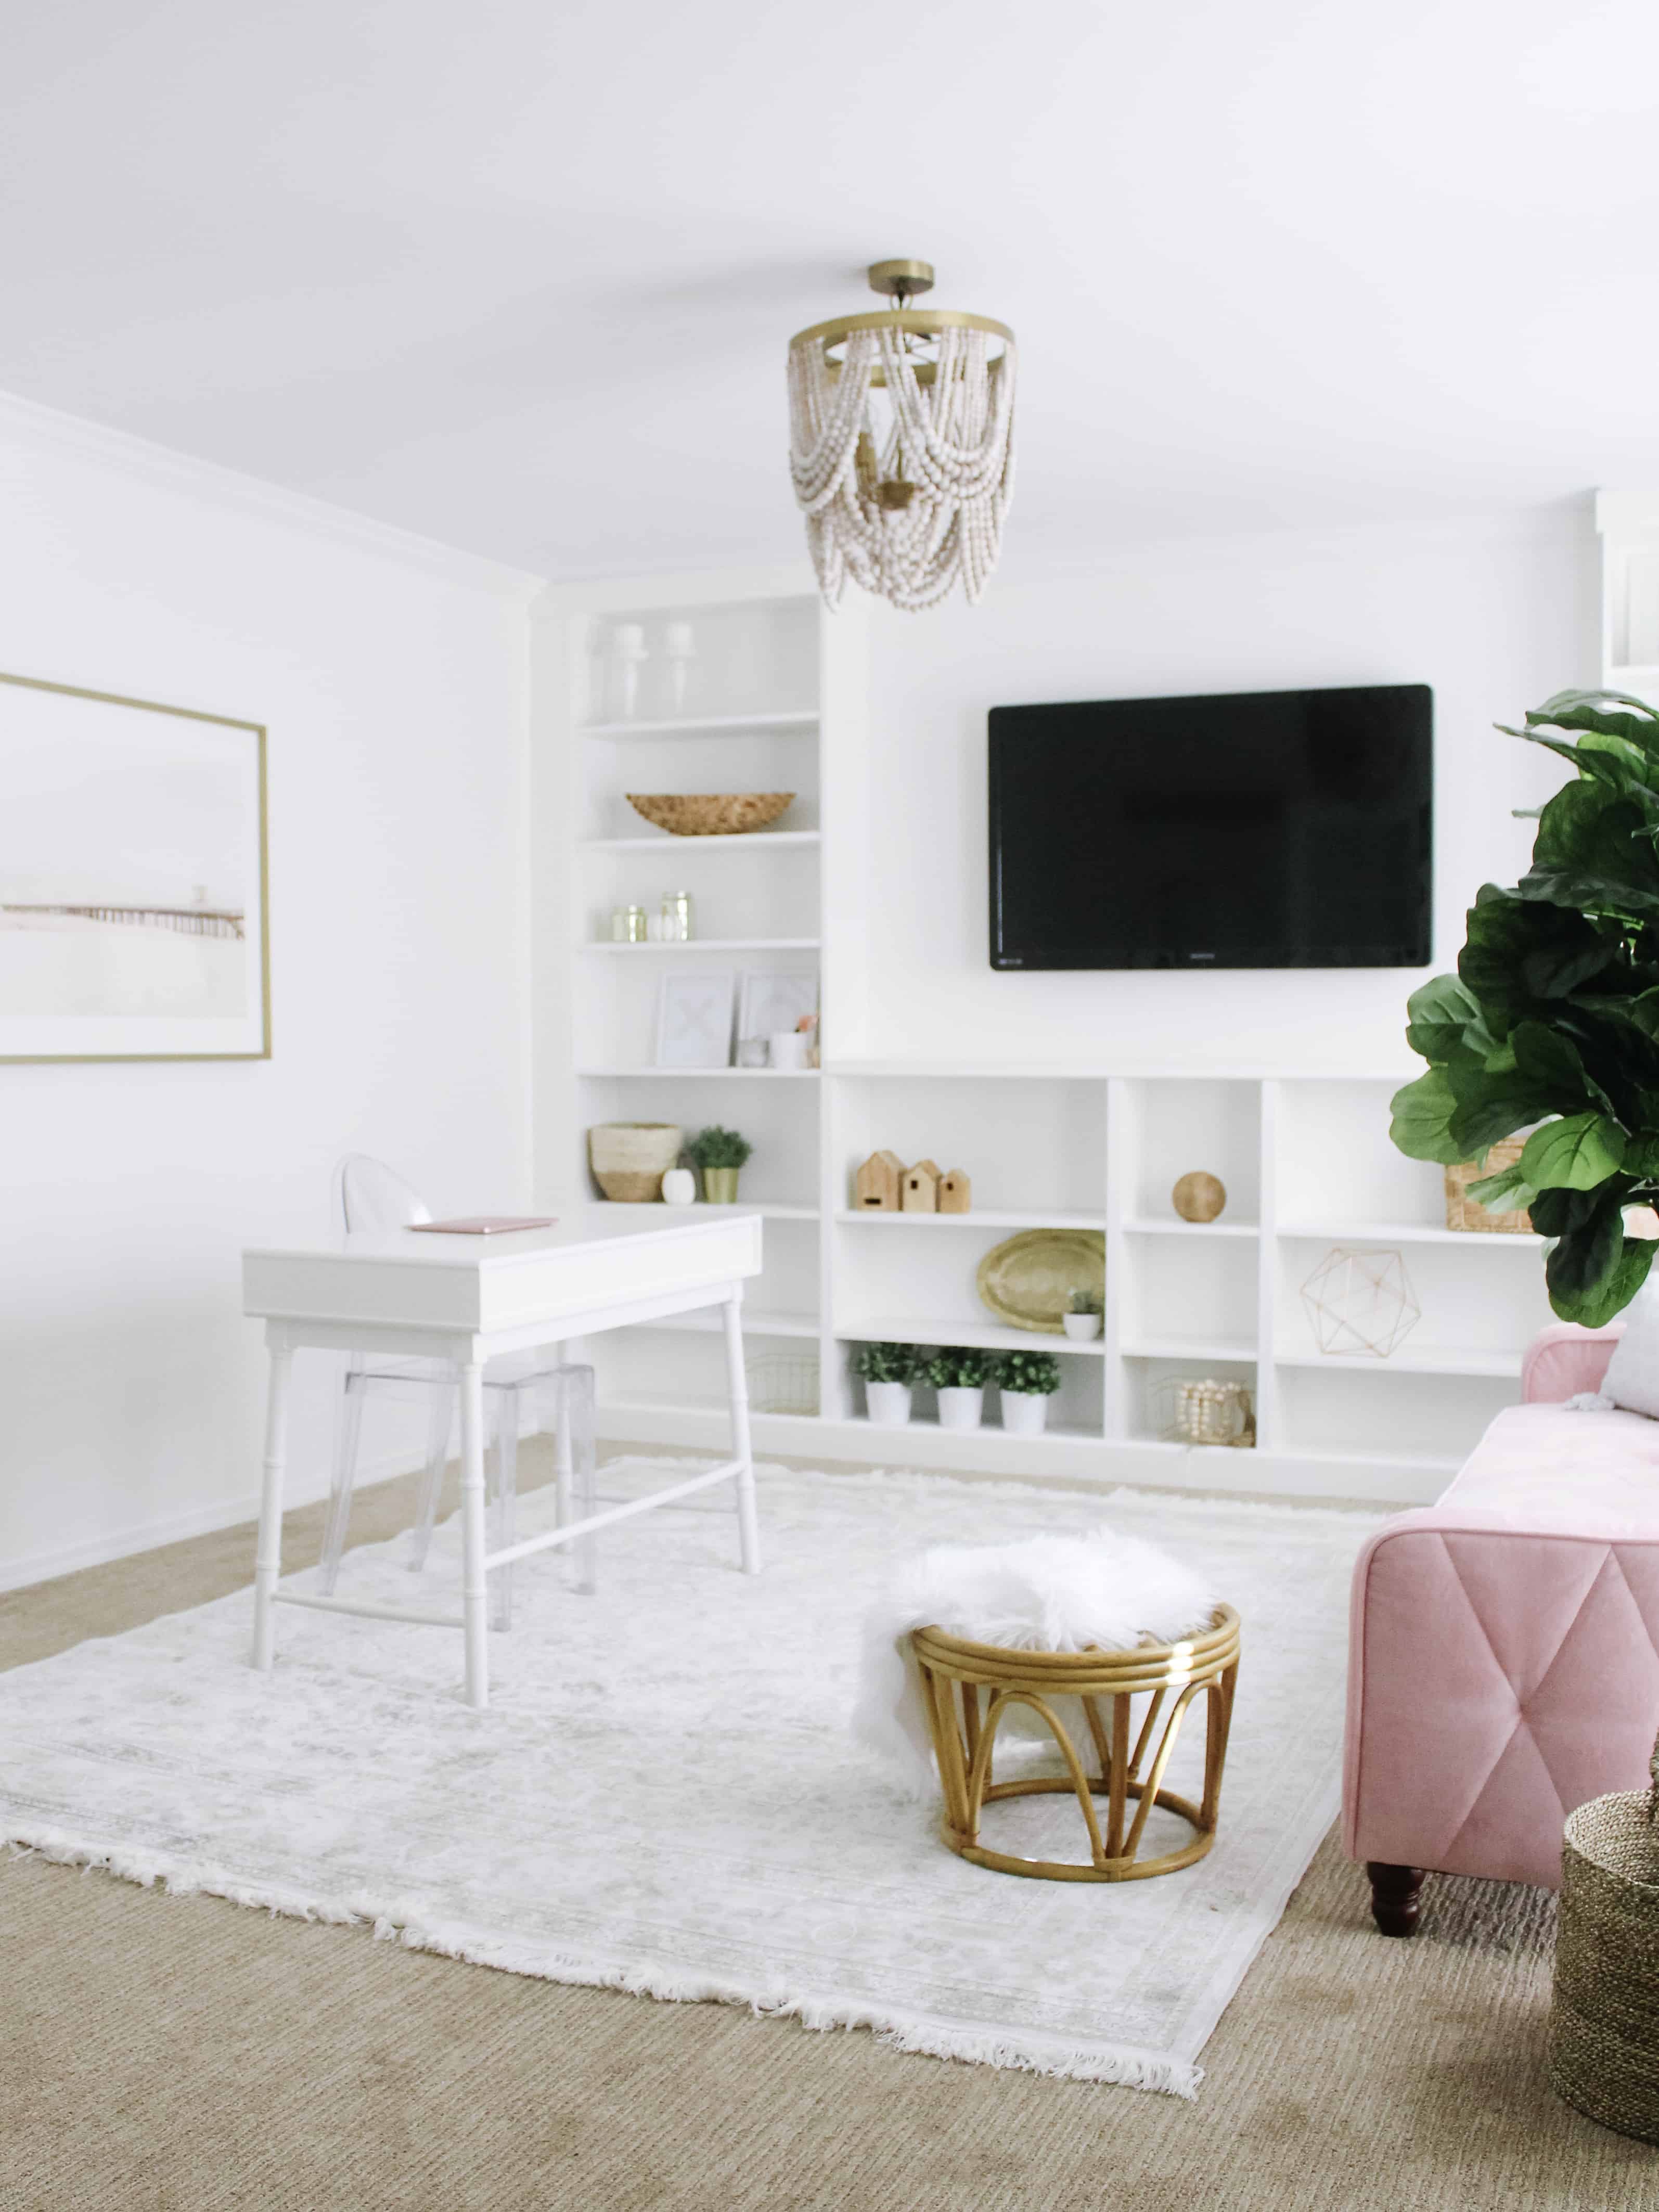
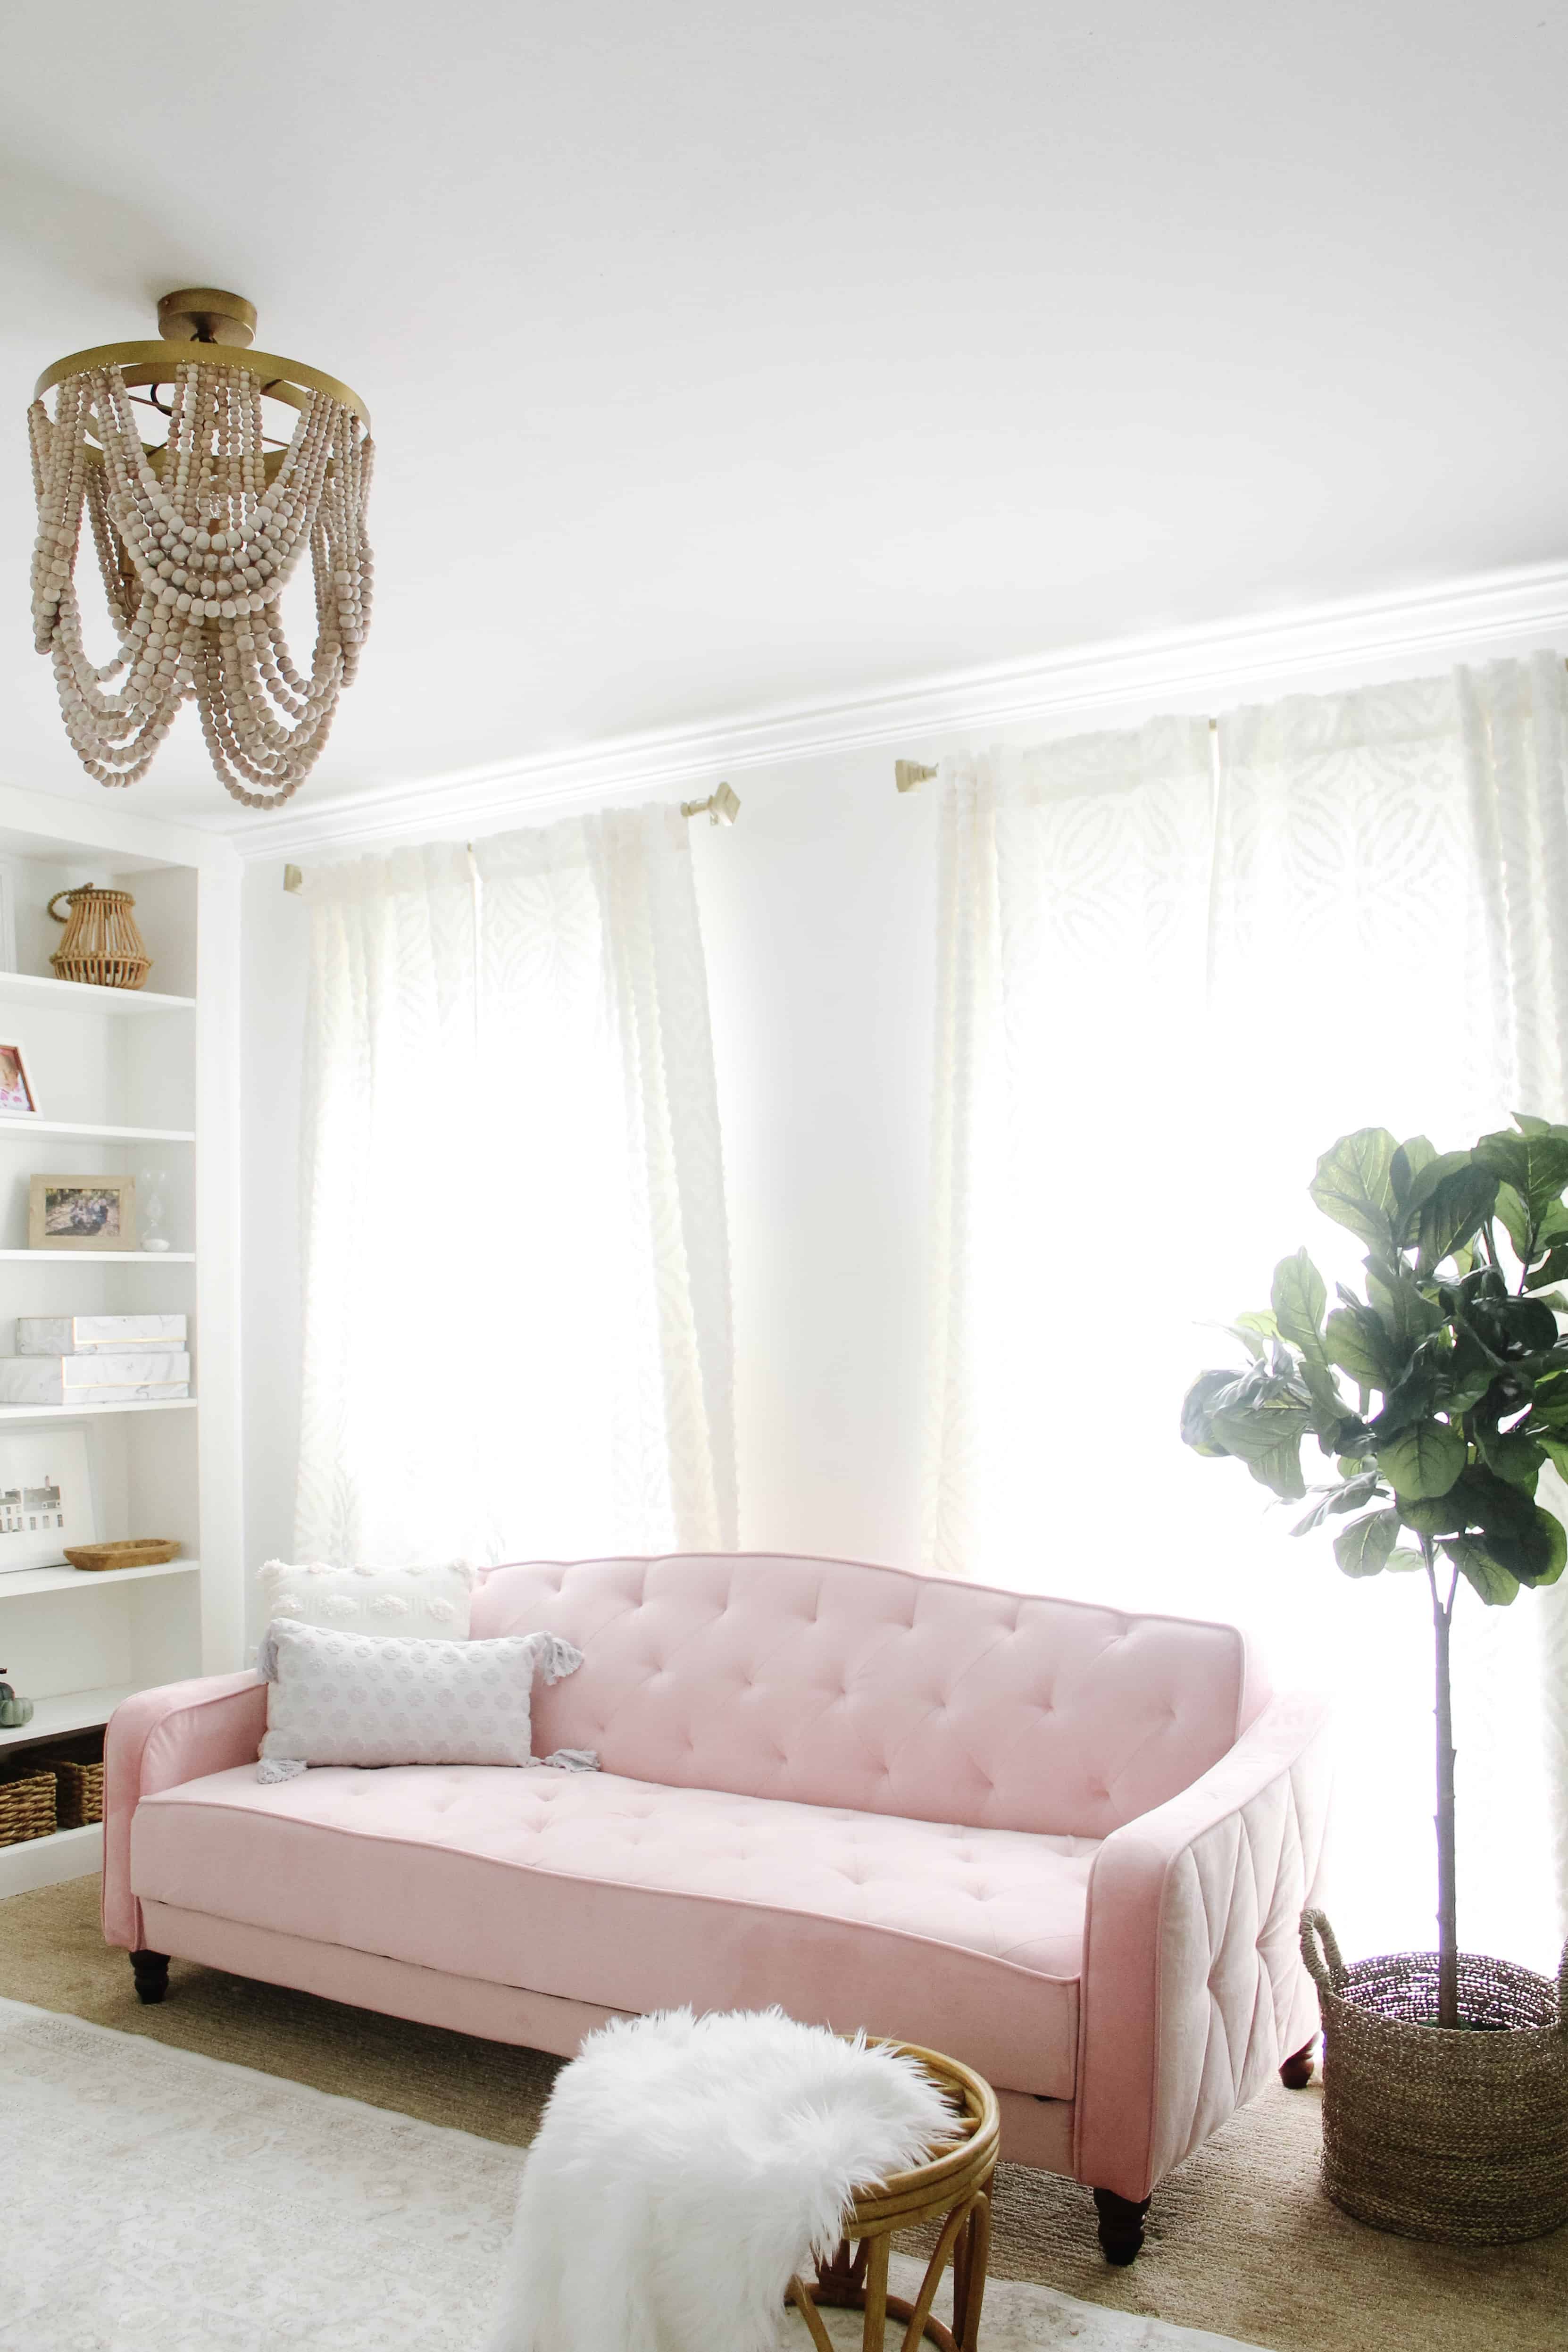
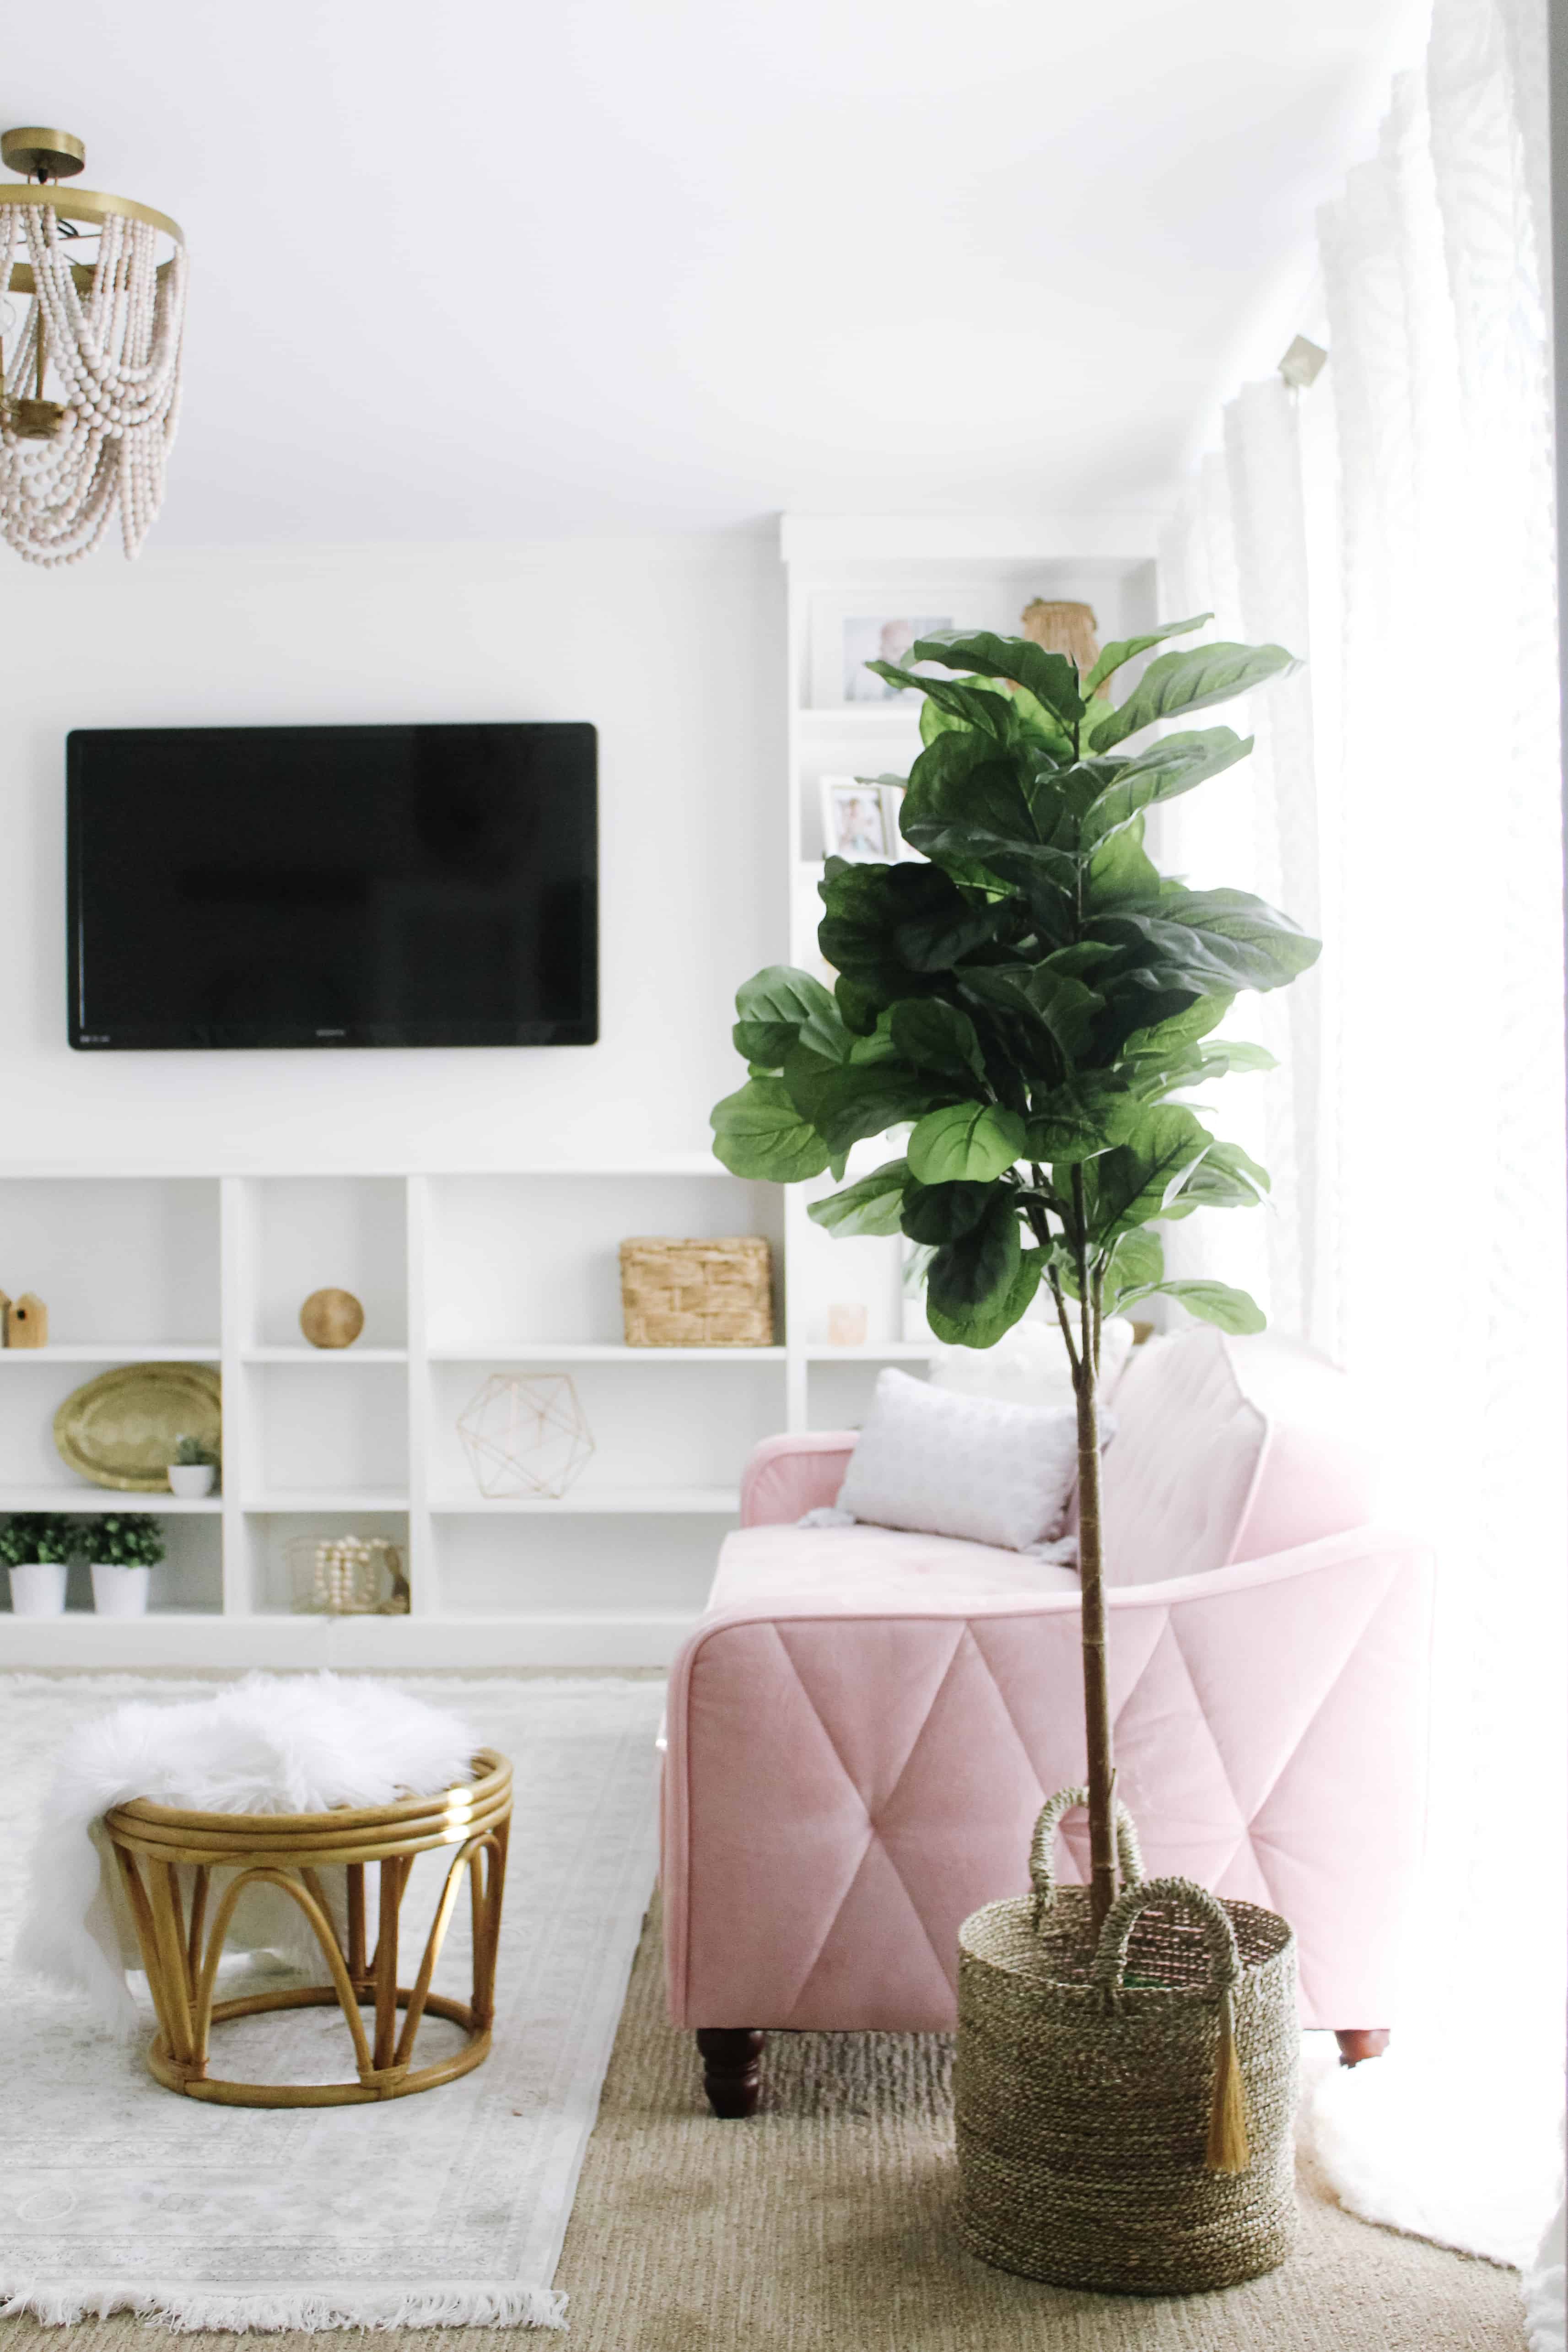
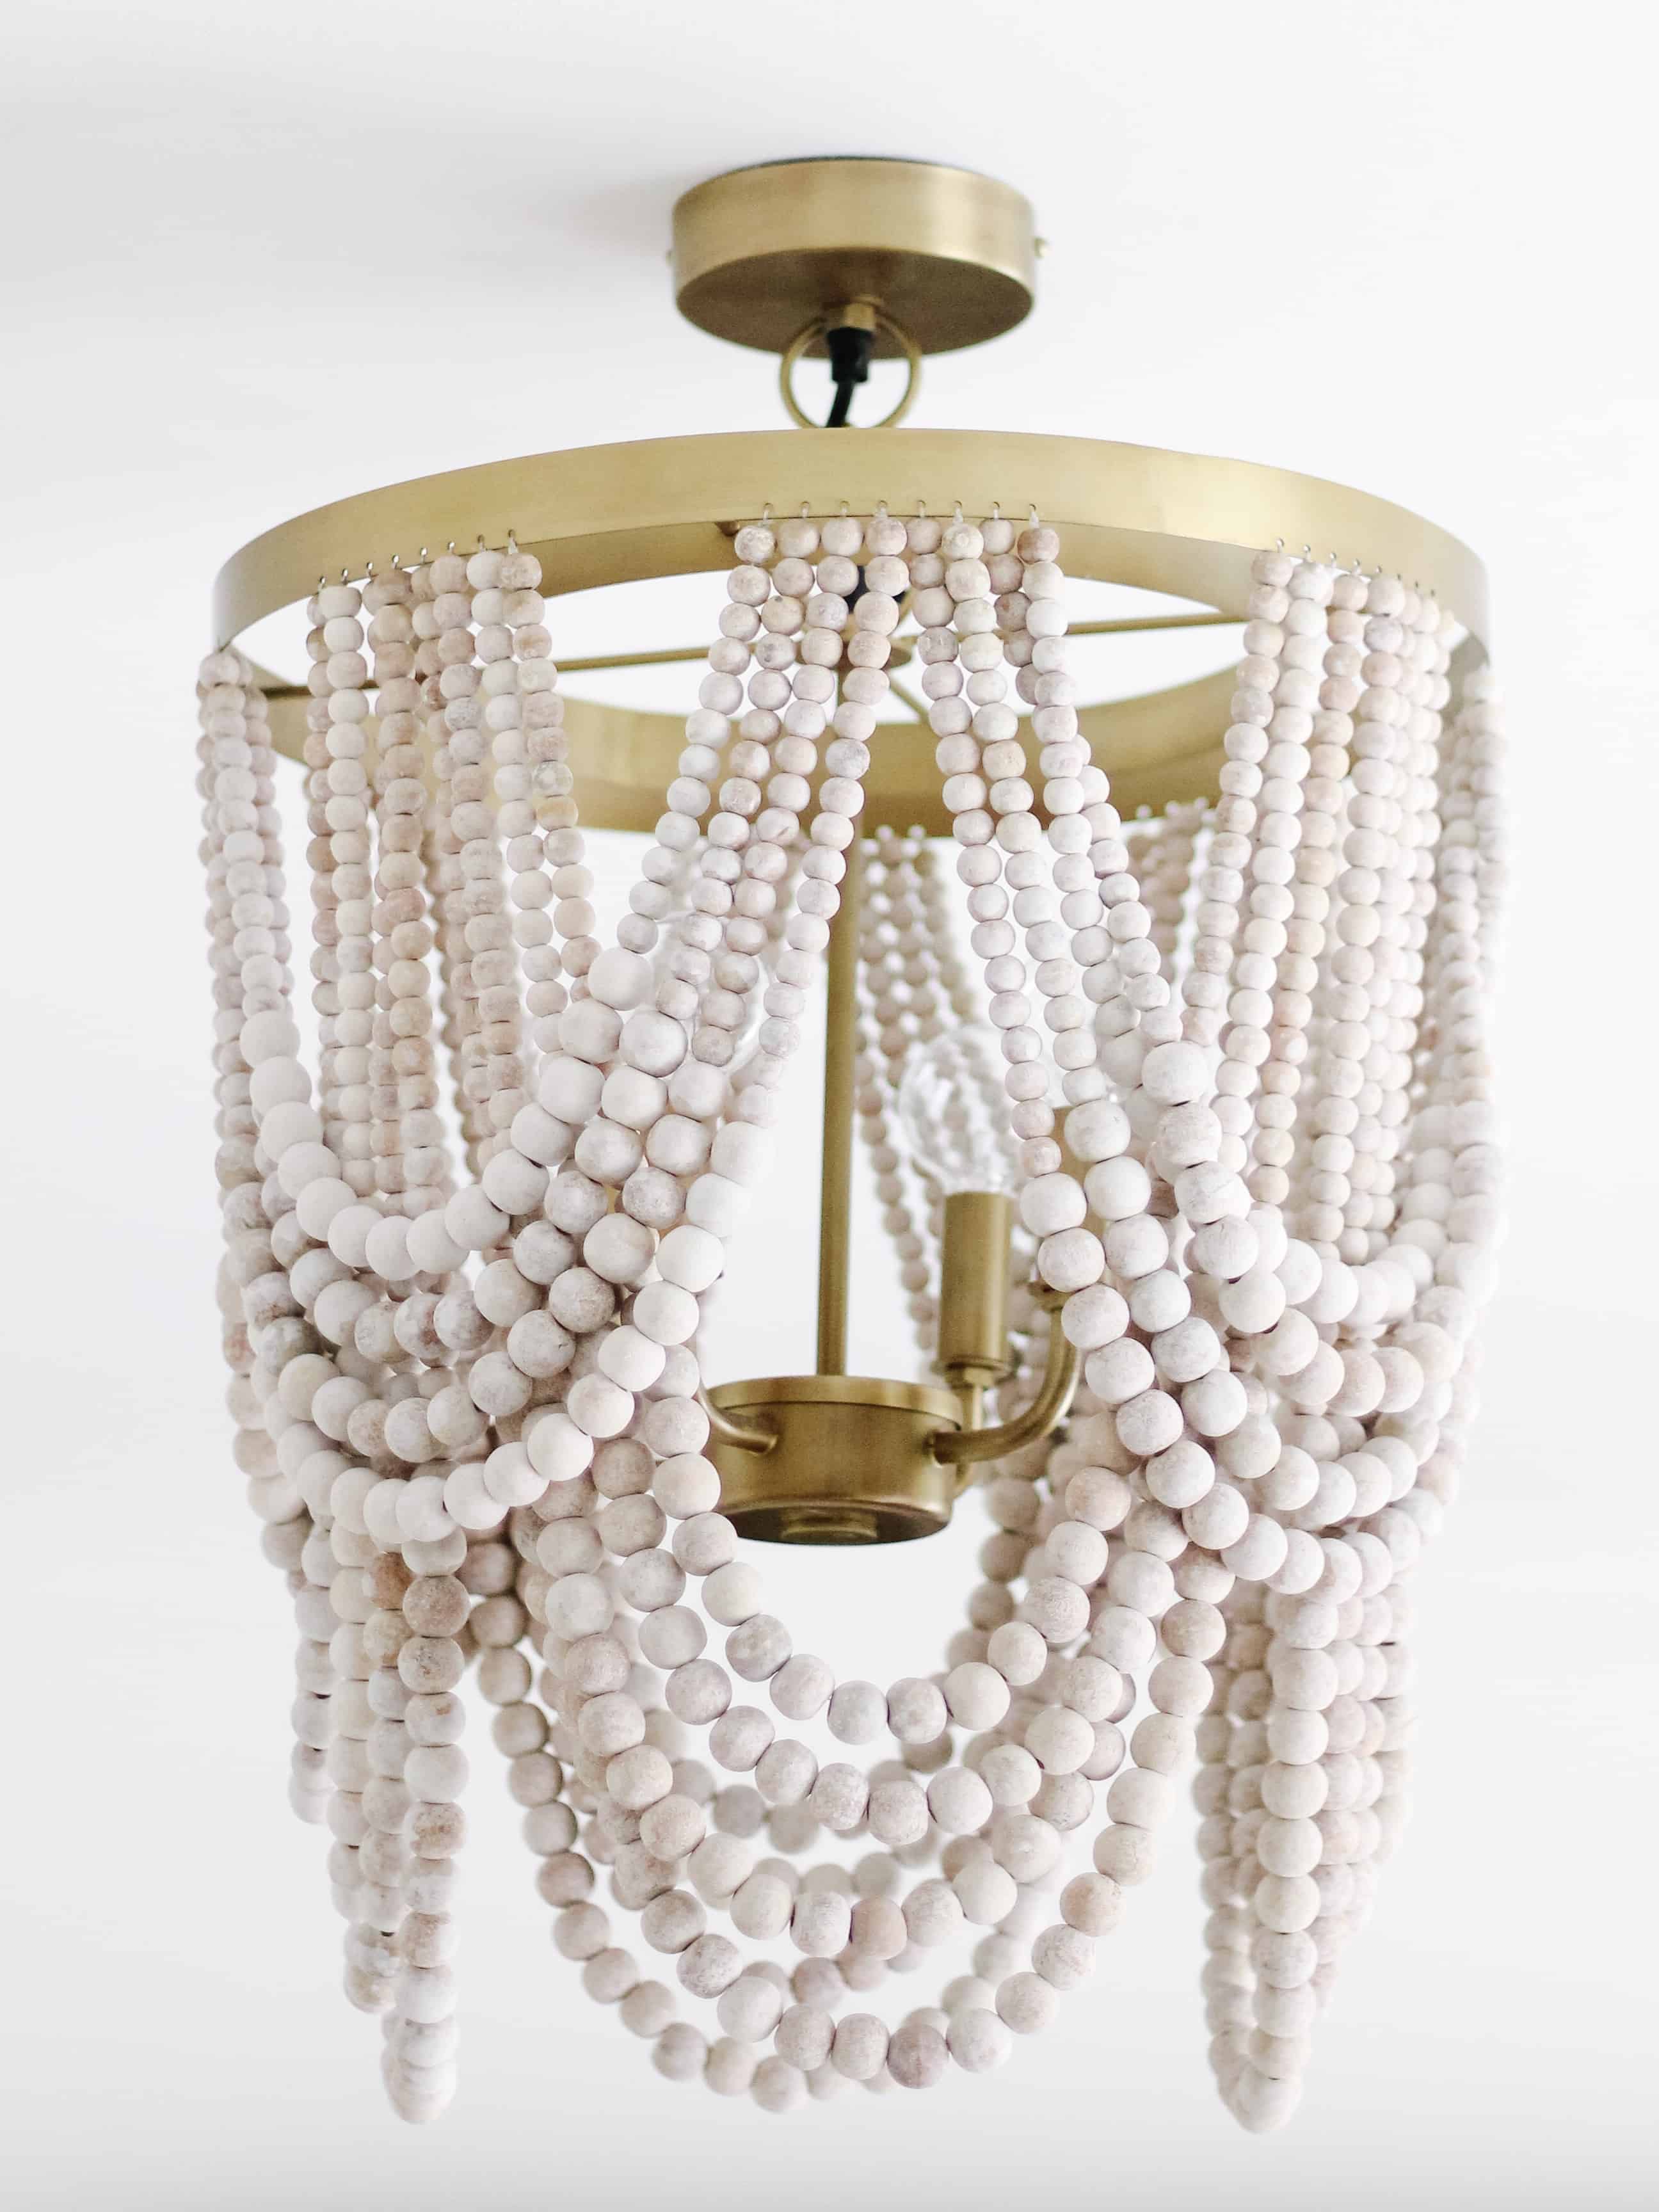
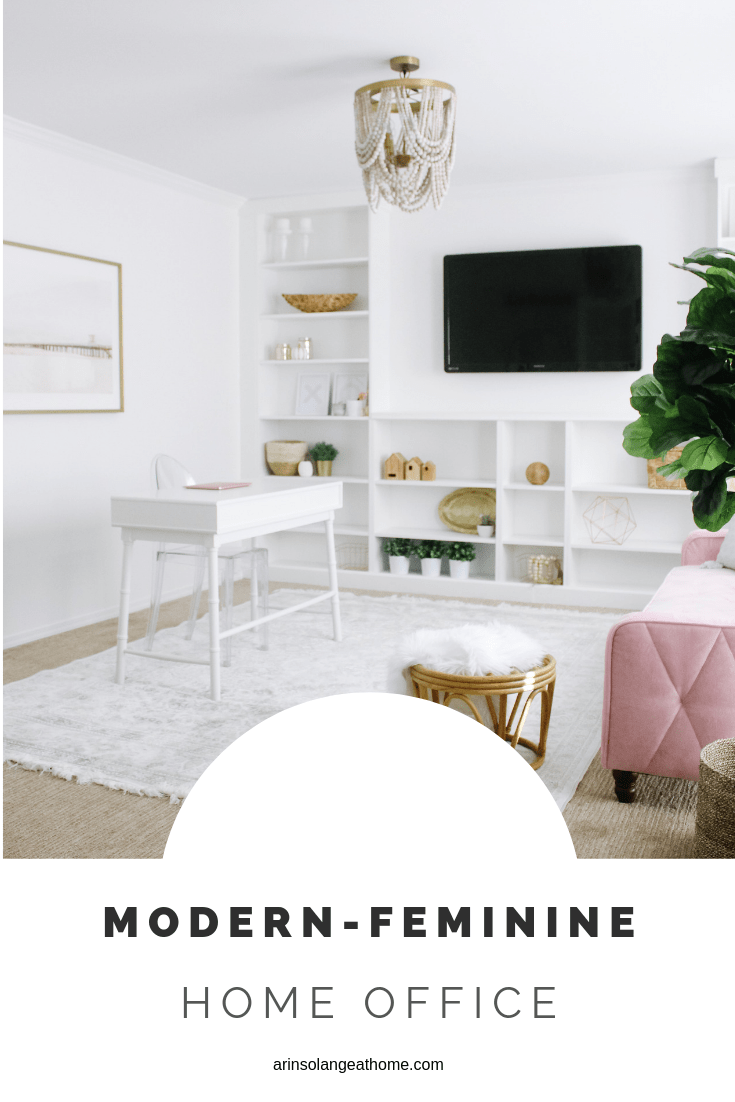
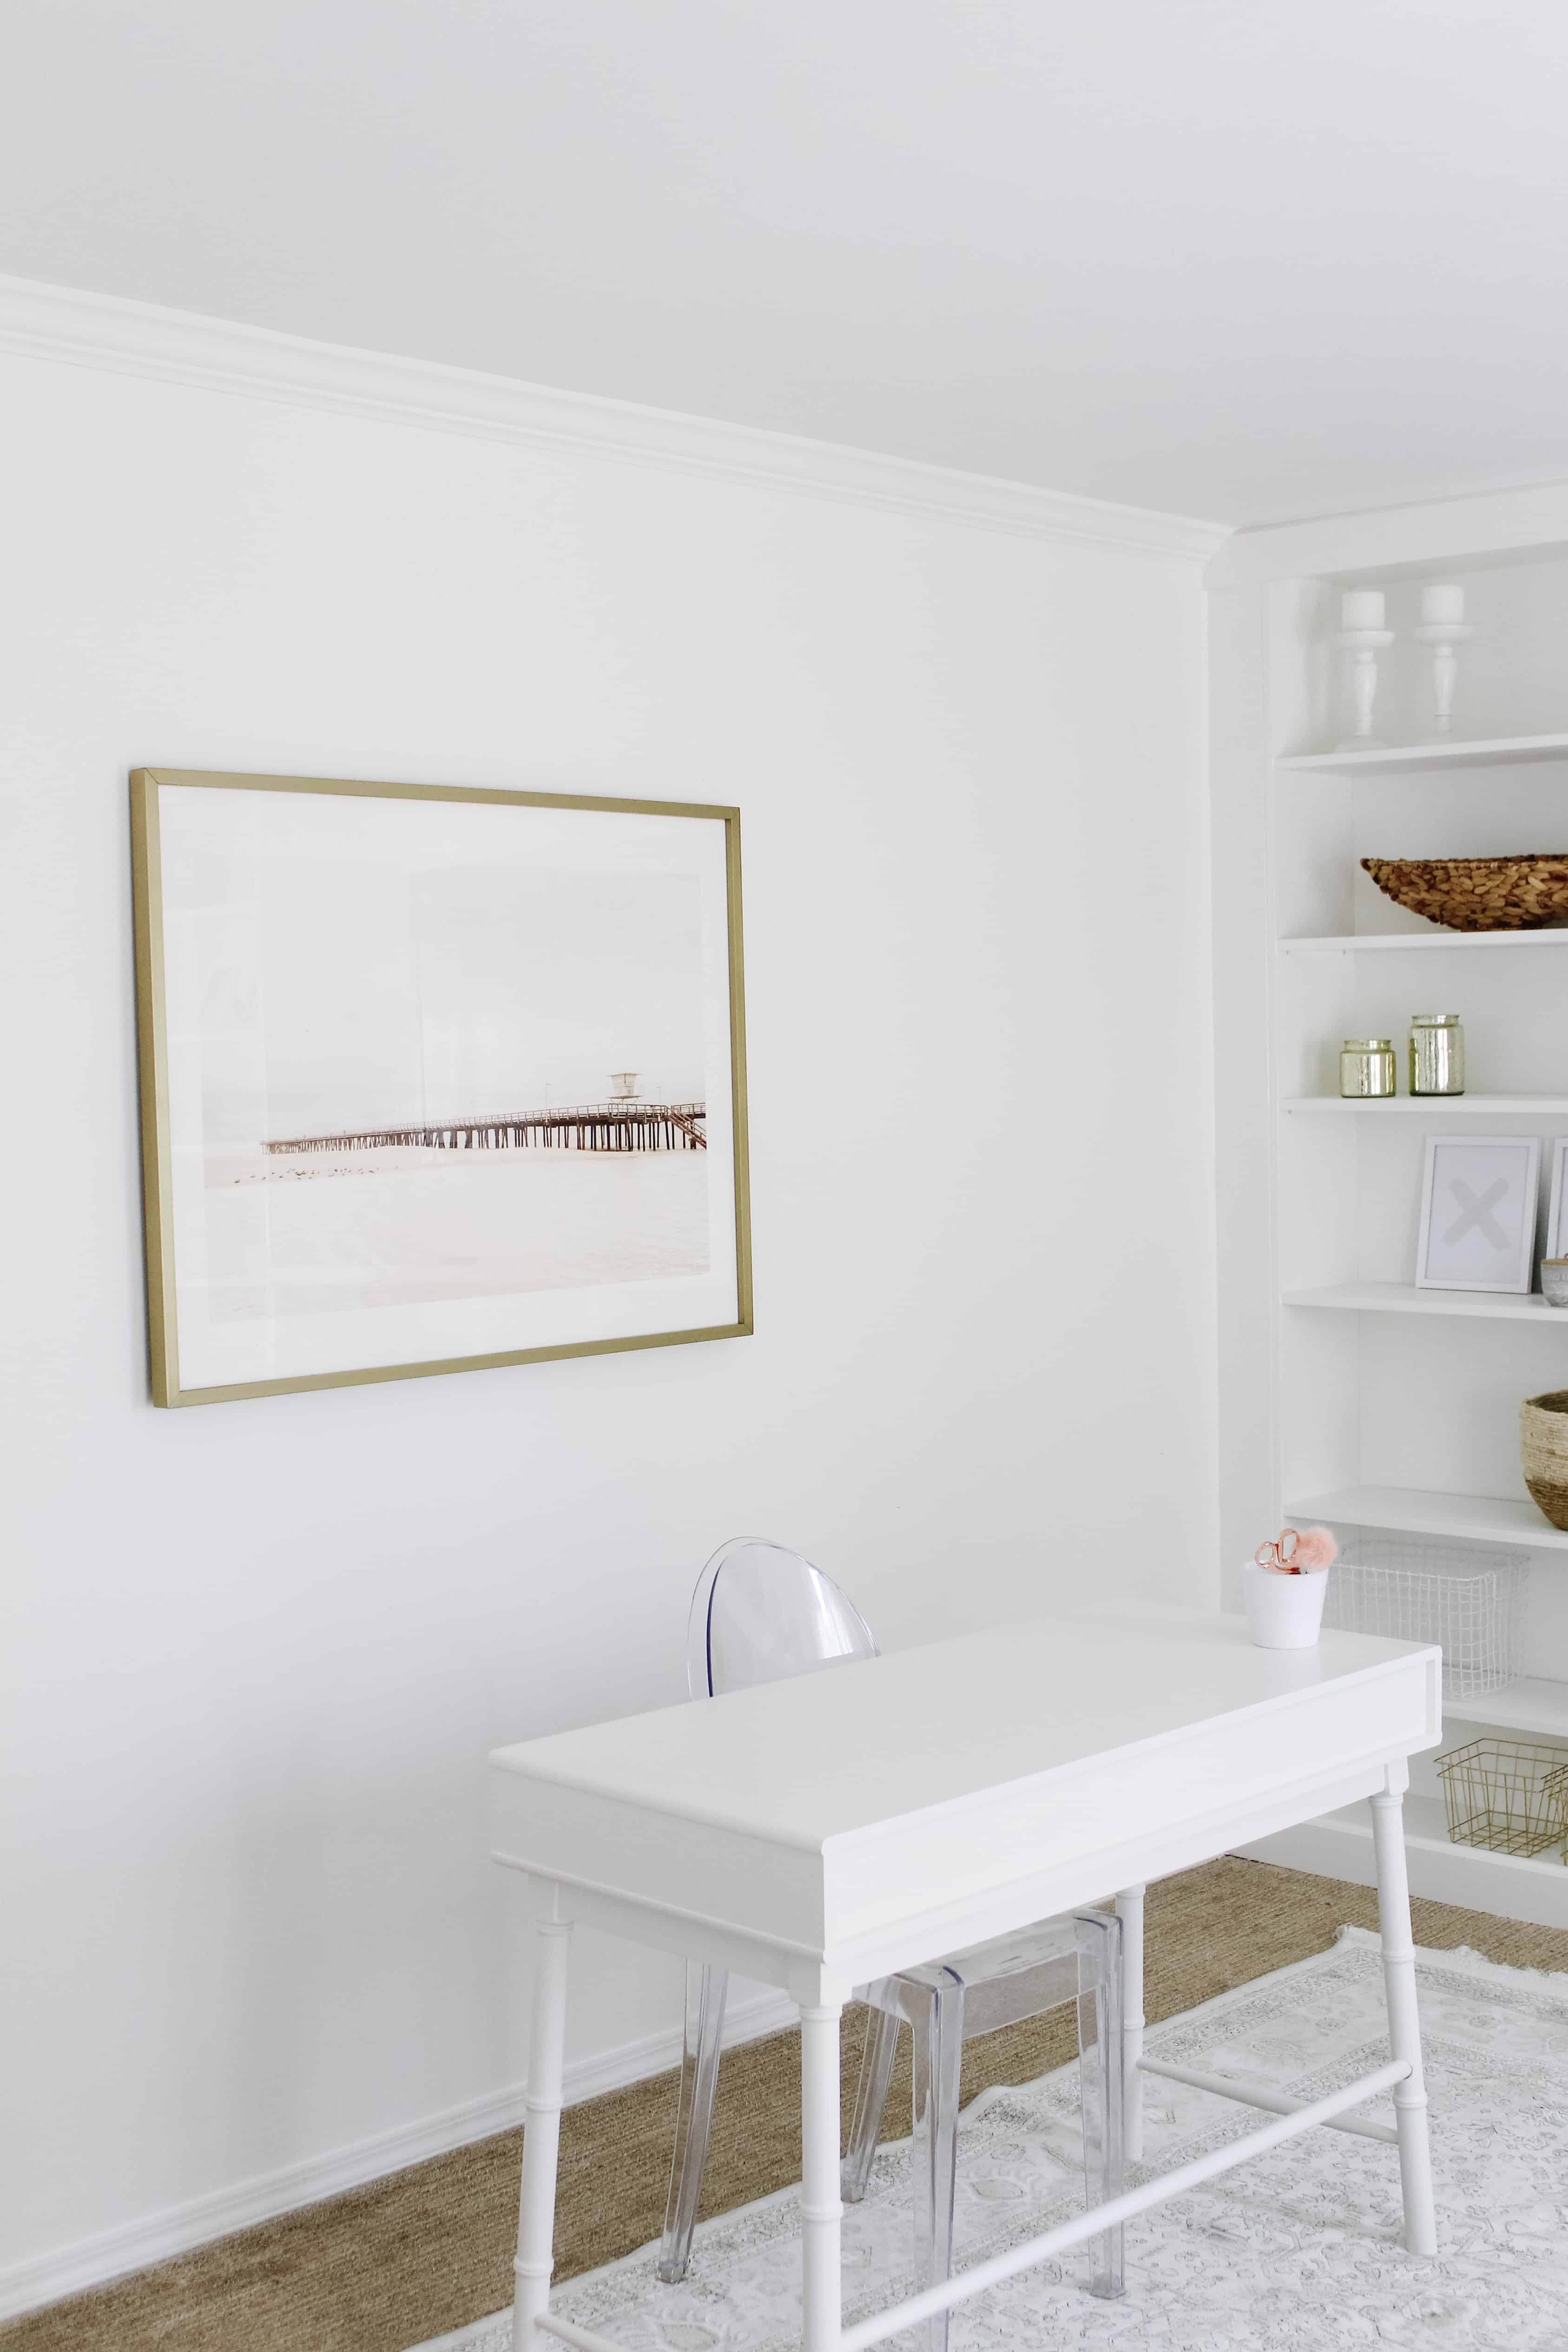
I’ve been talking about my home office for what feels like FOREVER over on Instagram, and finally it is finished and ready to reveal. There were so many steps to complete, and finding a light fixure loomed over me for forever before I found the perfect one, but FINALLY I am revealing my modern feminine home office. Leave me a comment with any questions you might have!
this post contains affiliate links
Modern Feminine Home Office
I went with a bright white space with lots of natural splashes in the office. You can see a little bit more about where my starting point was in decor and how I picked the art on the wall in this post, but the pink couch was definitely a focal point.
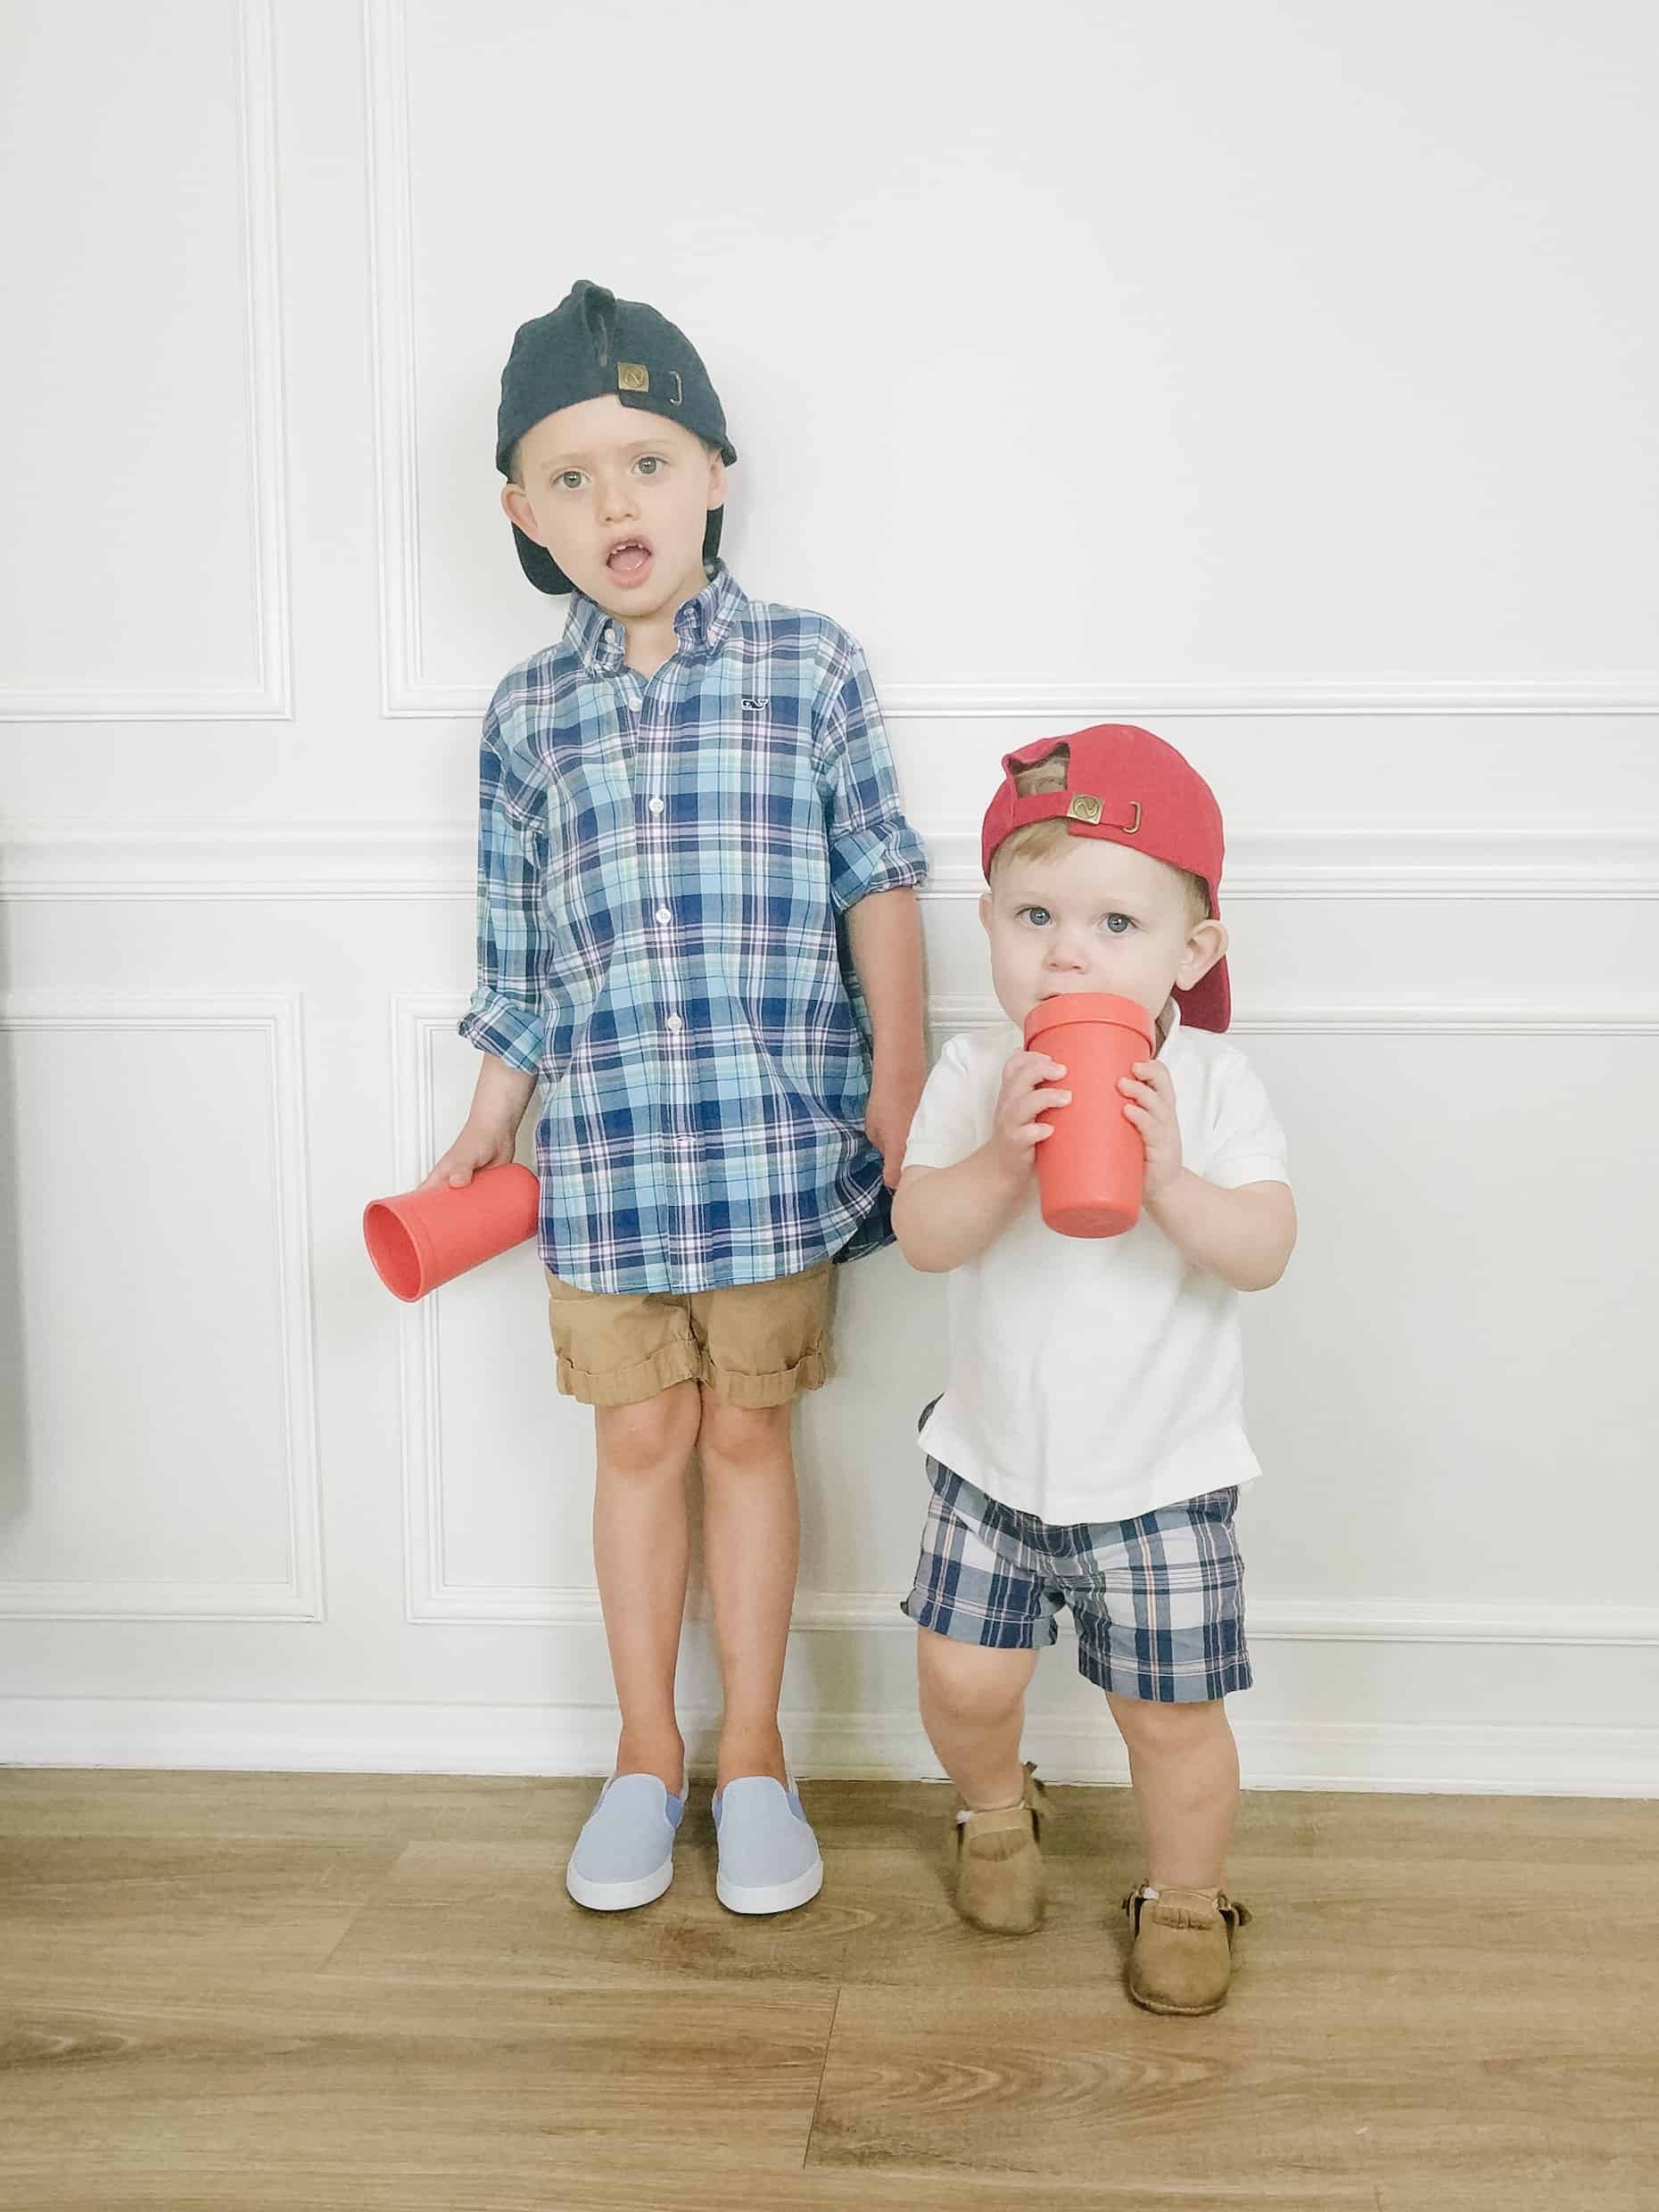
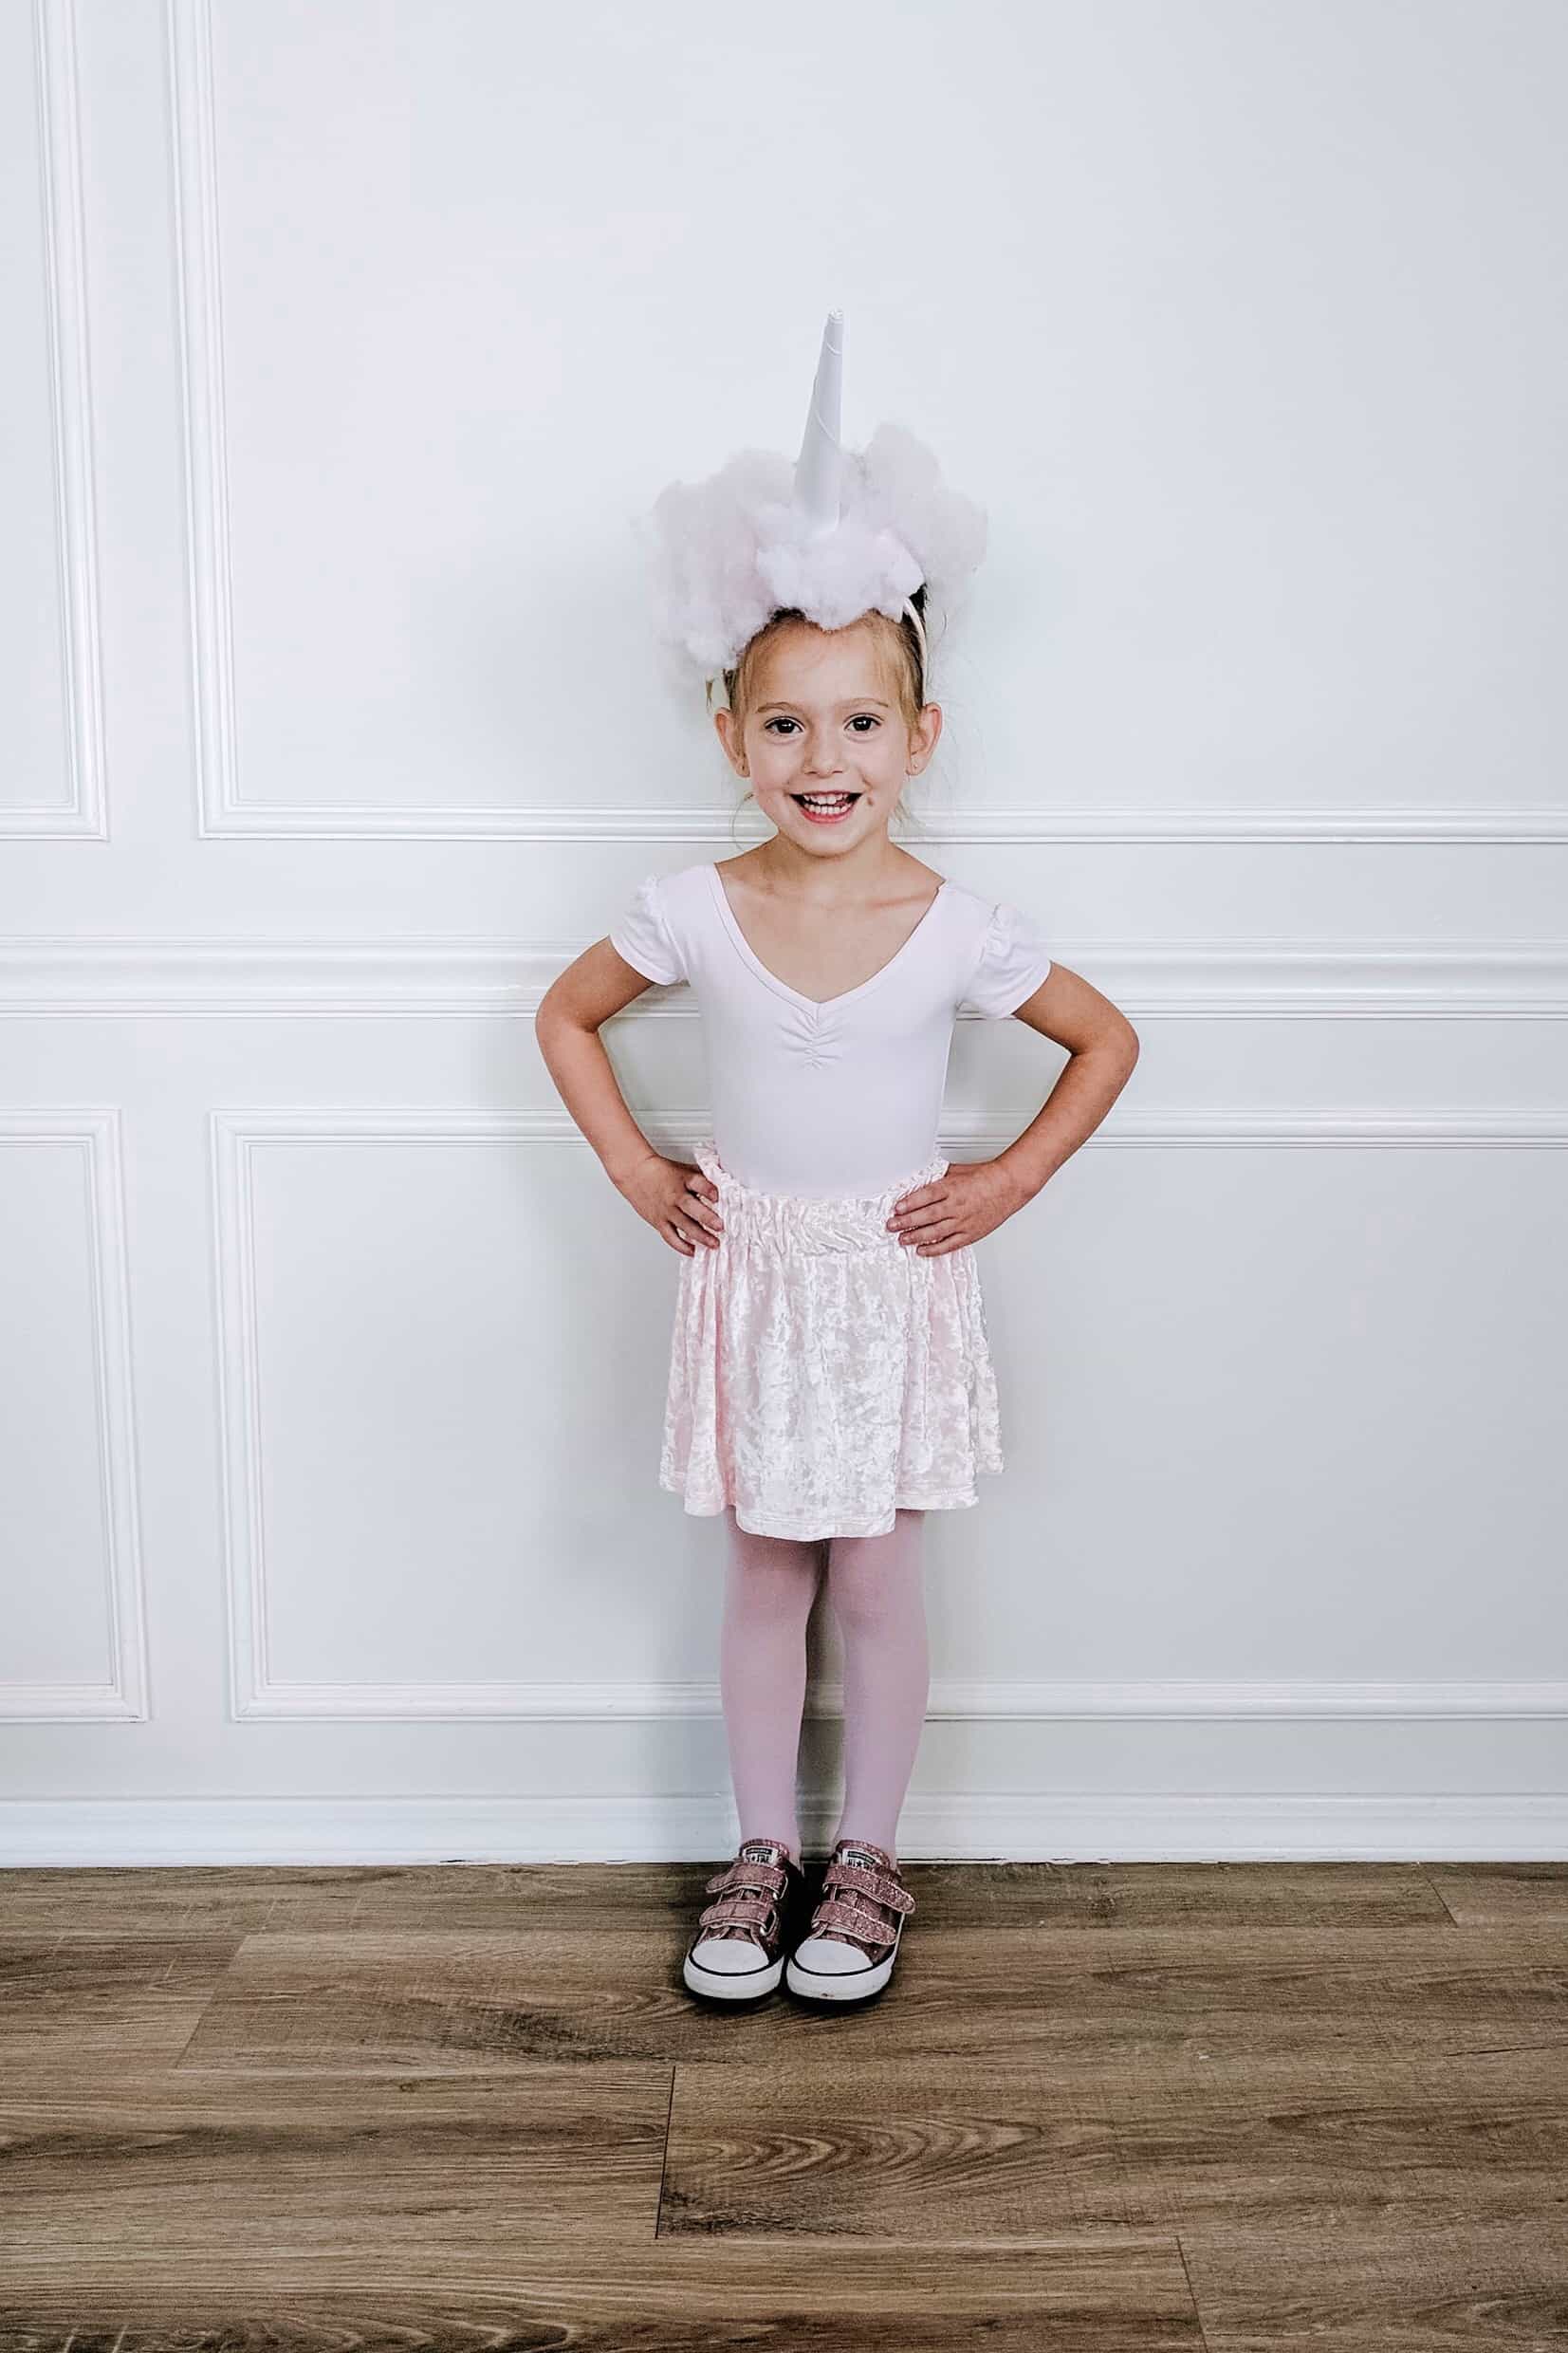
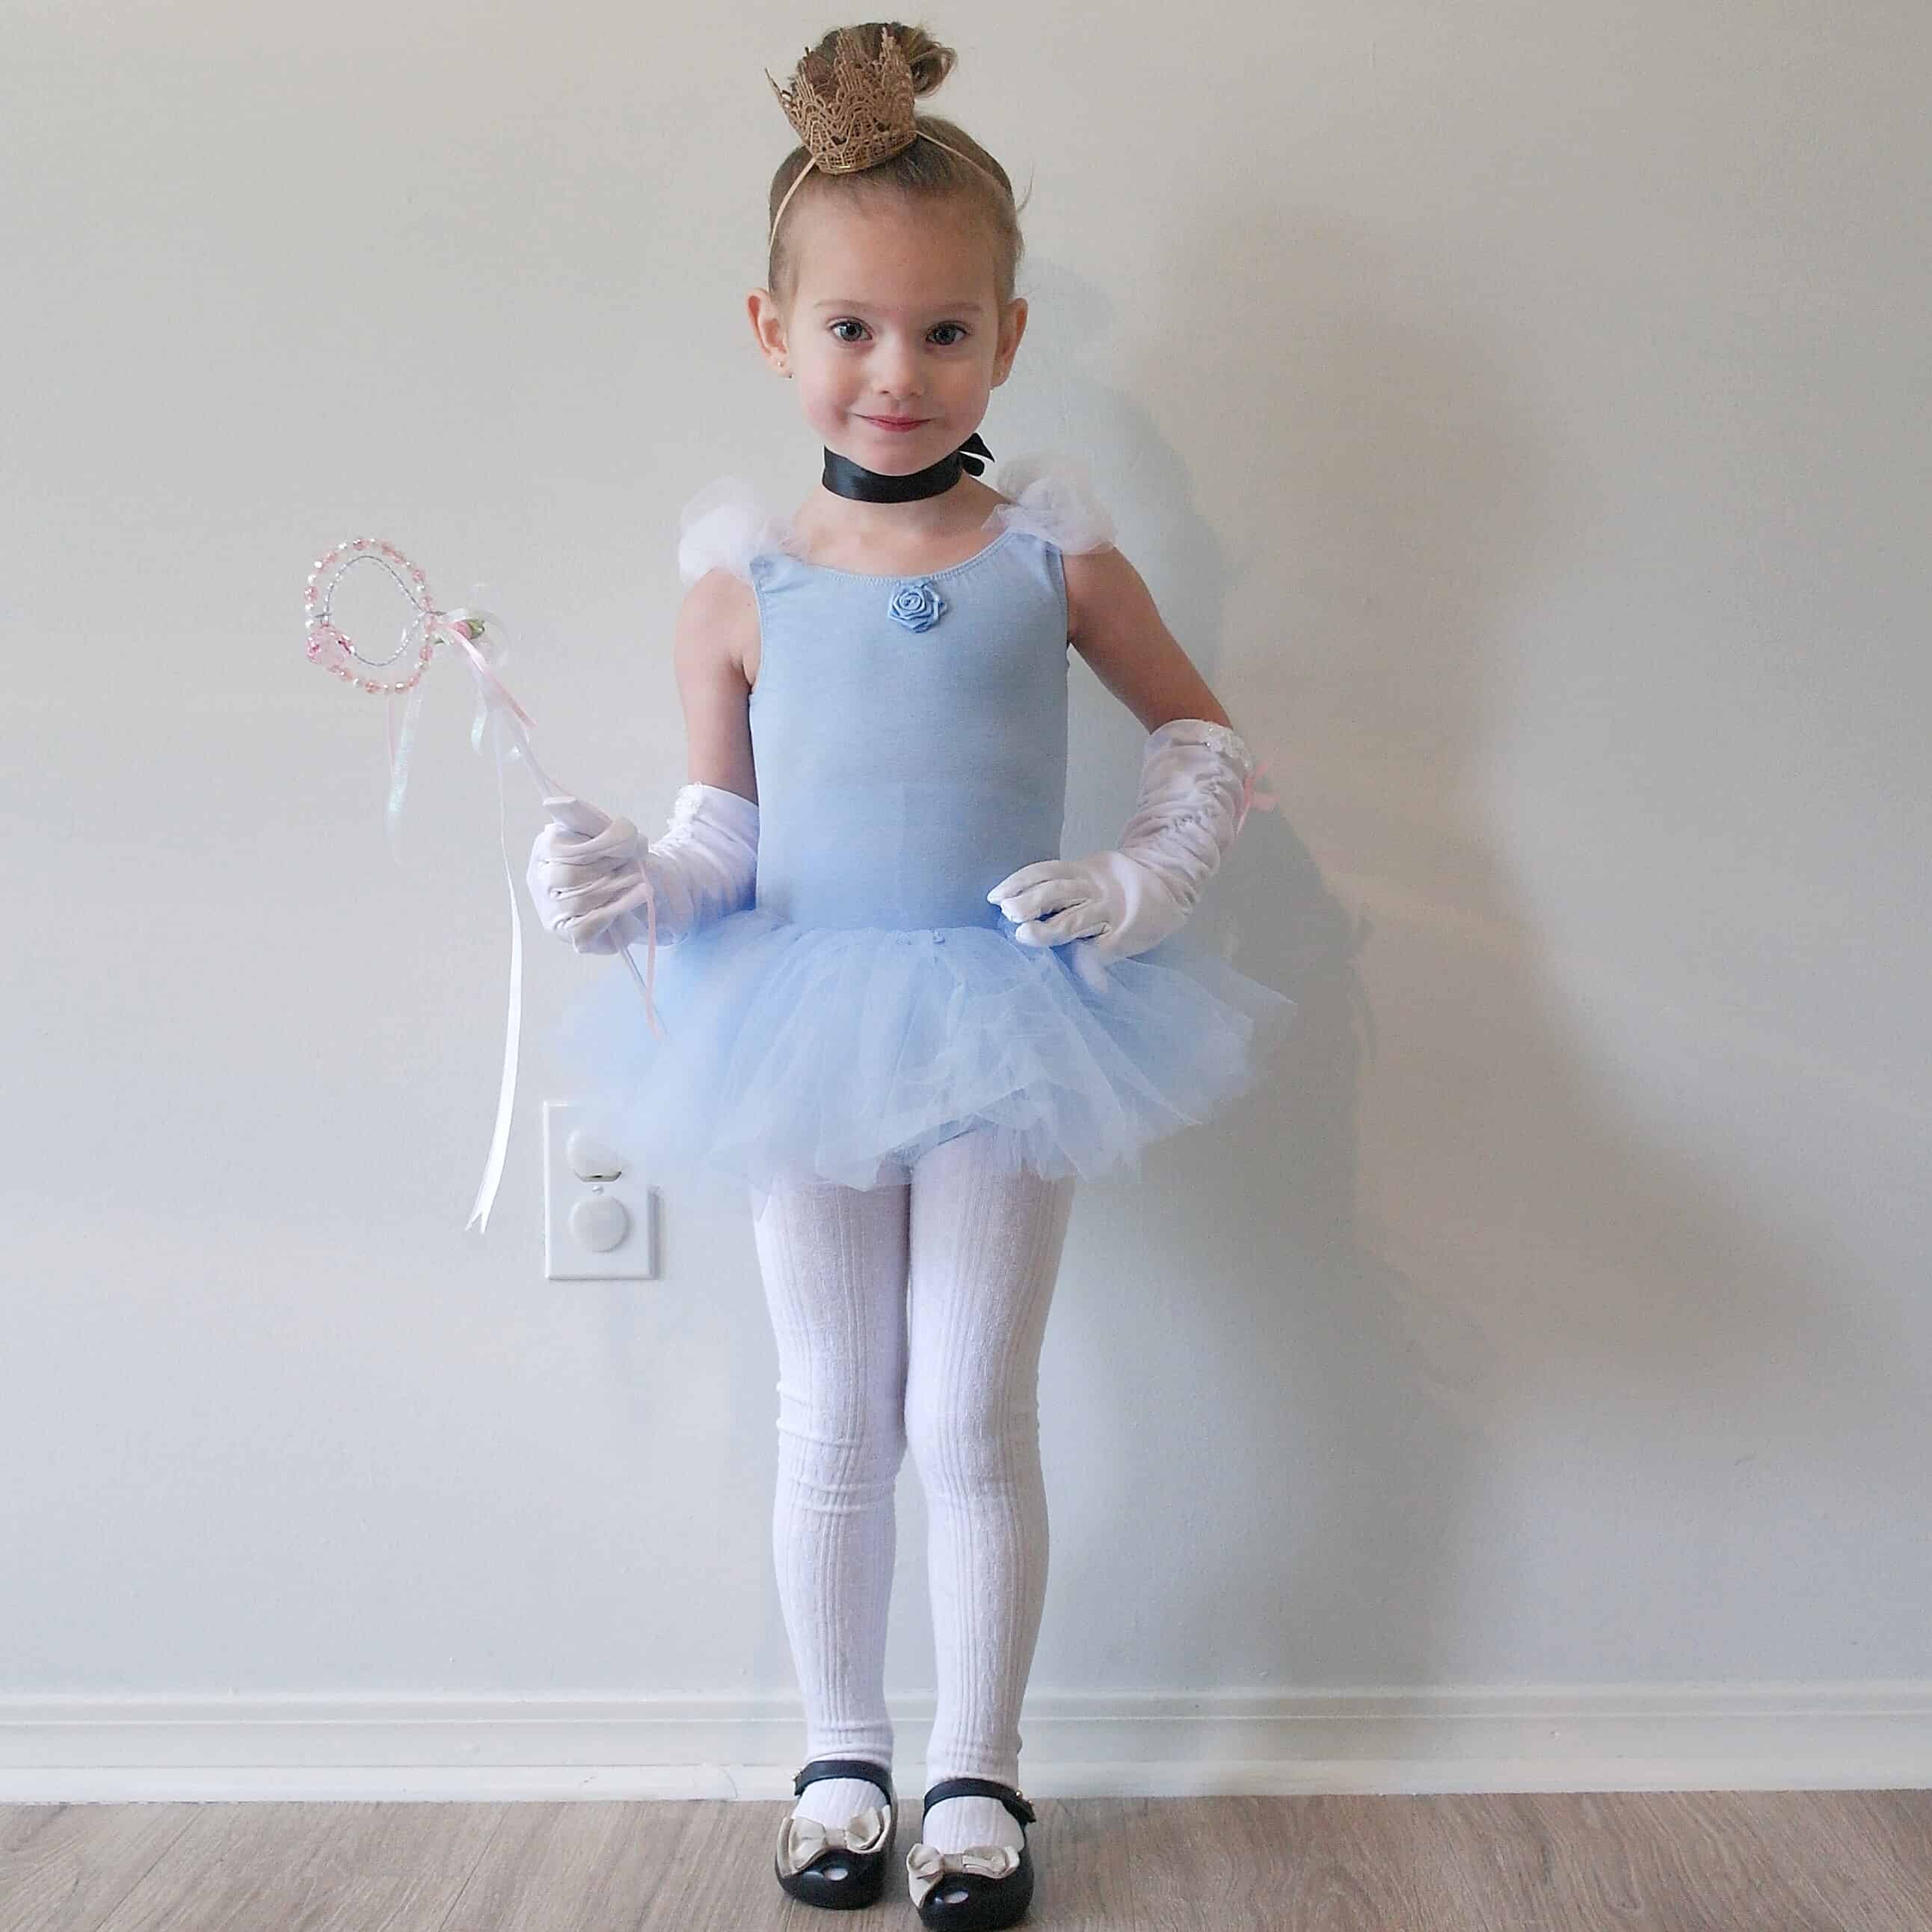
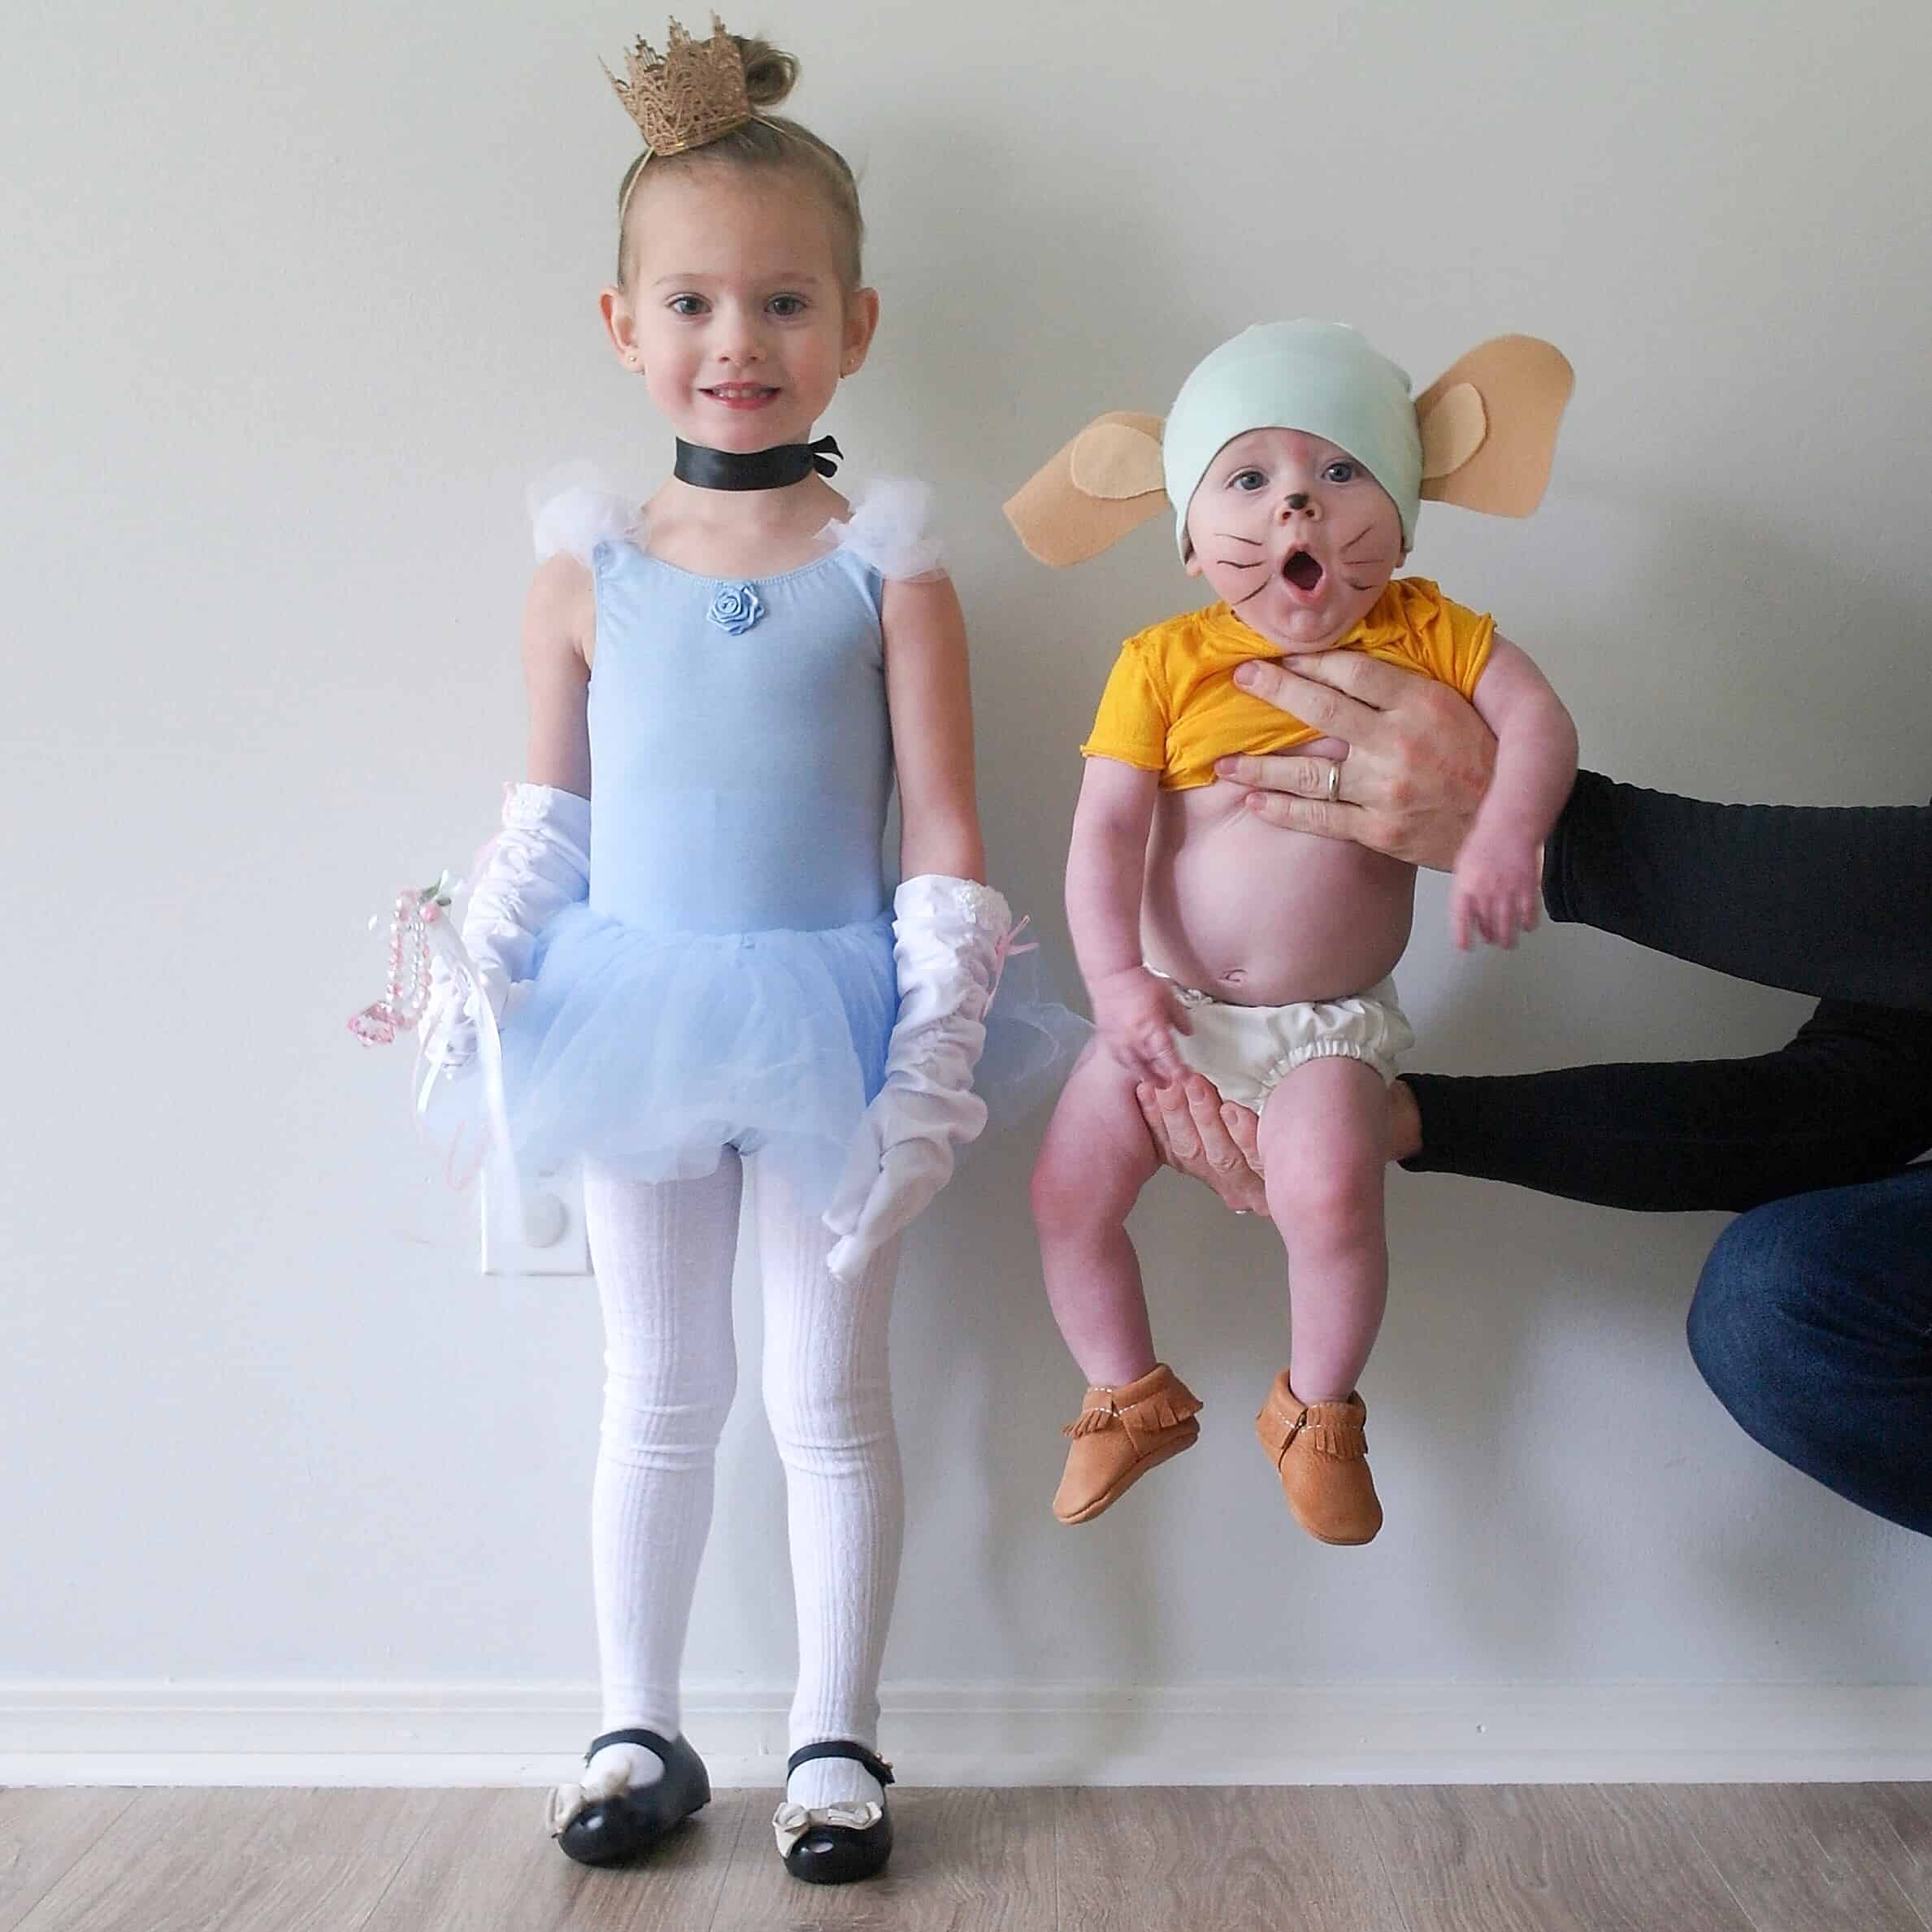
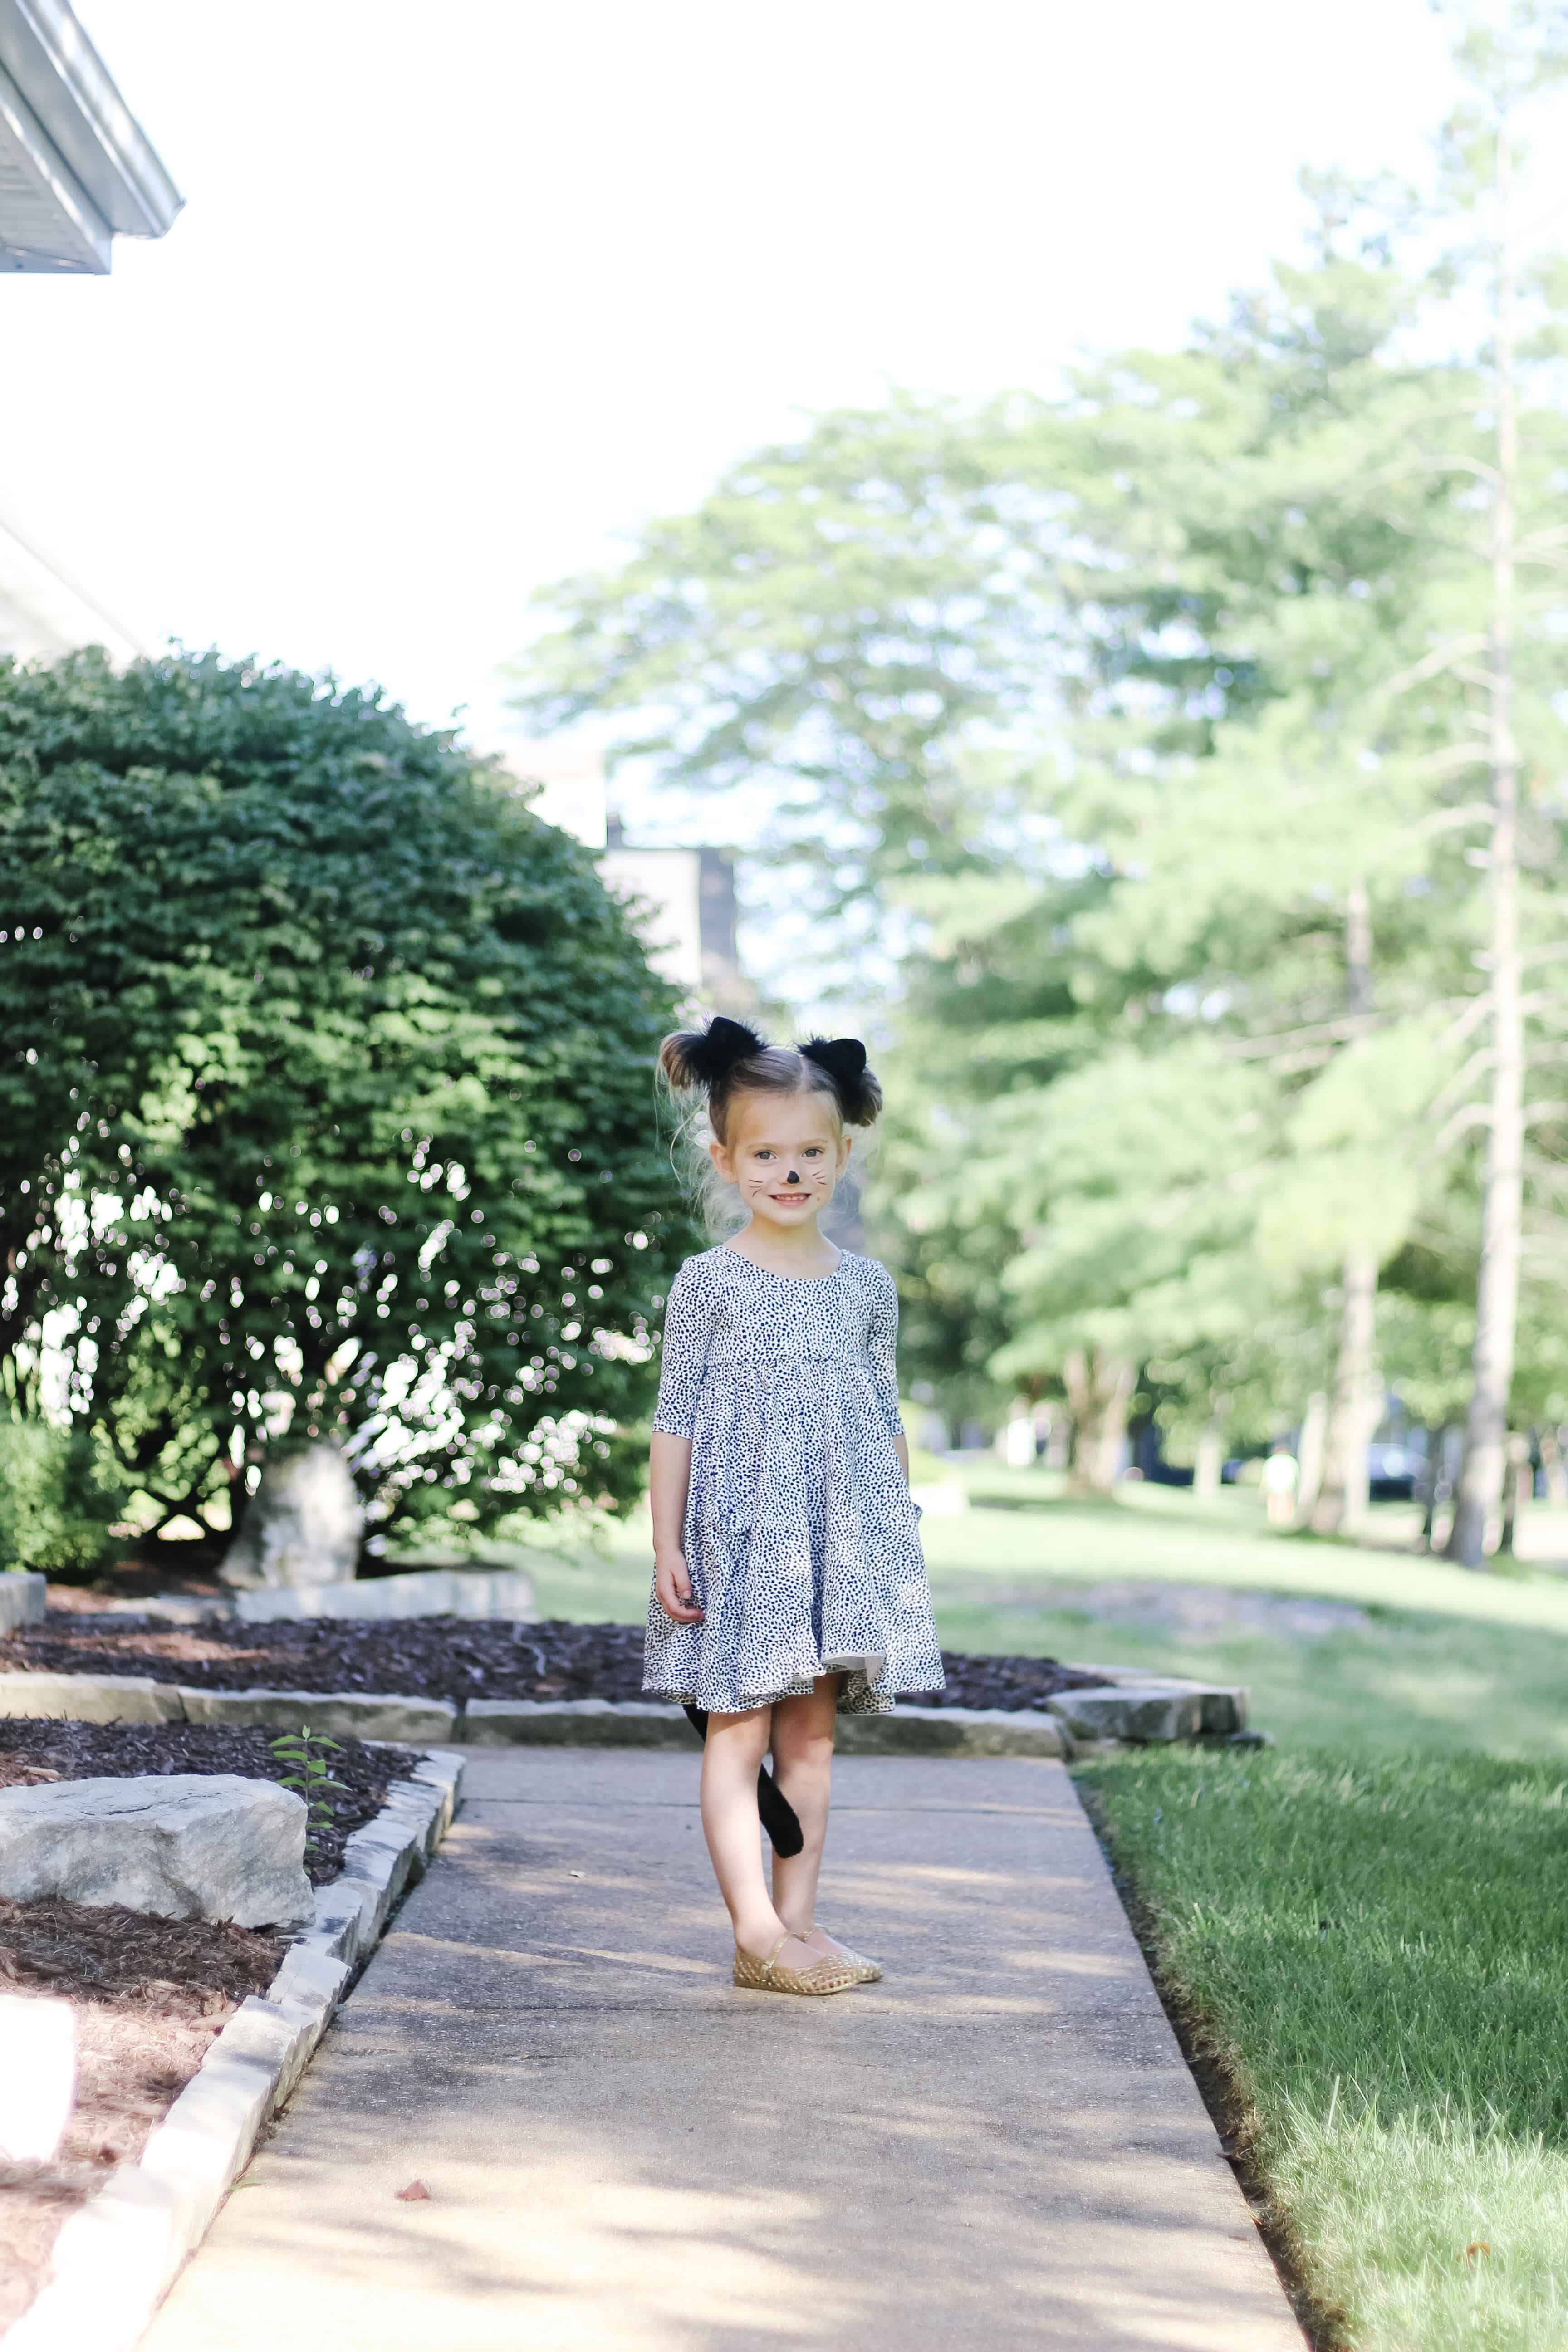
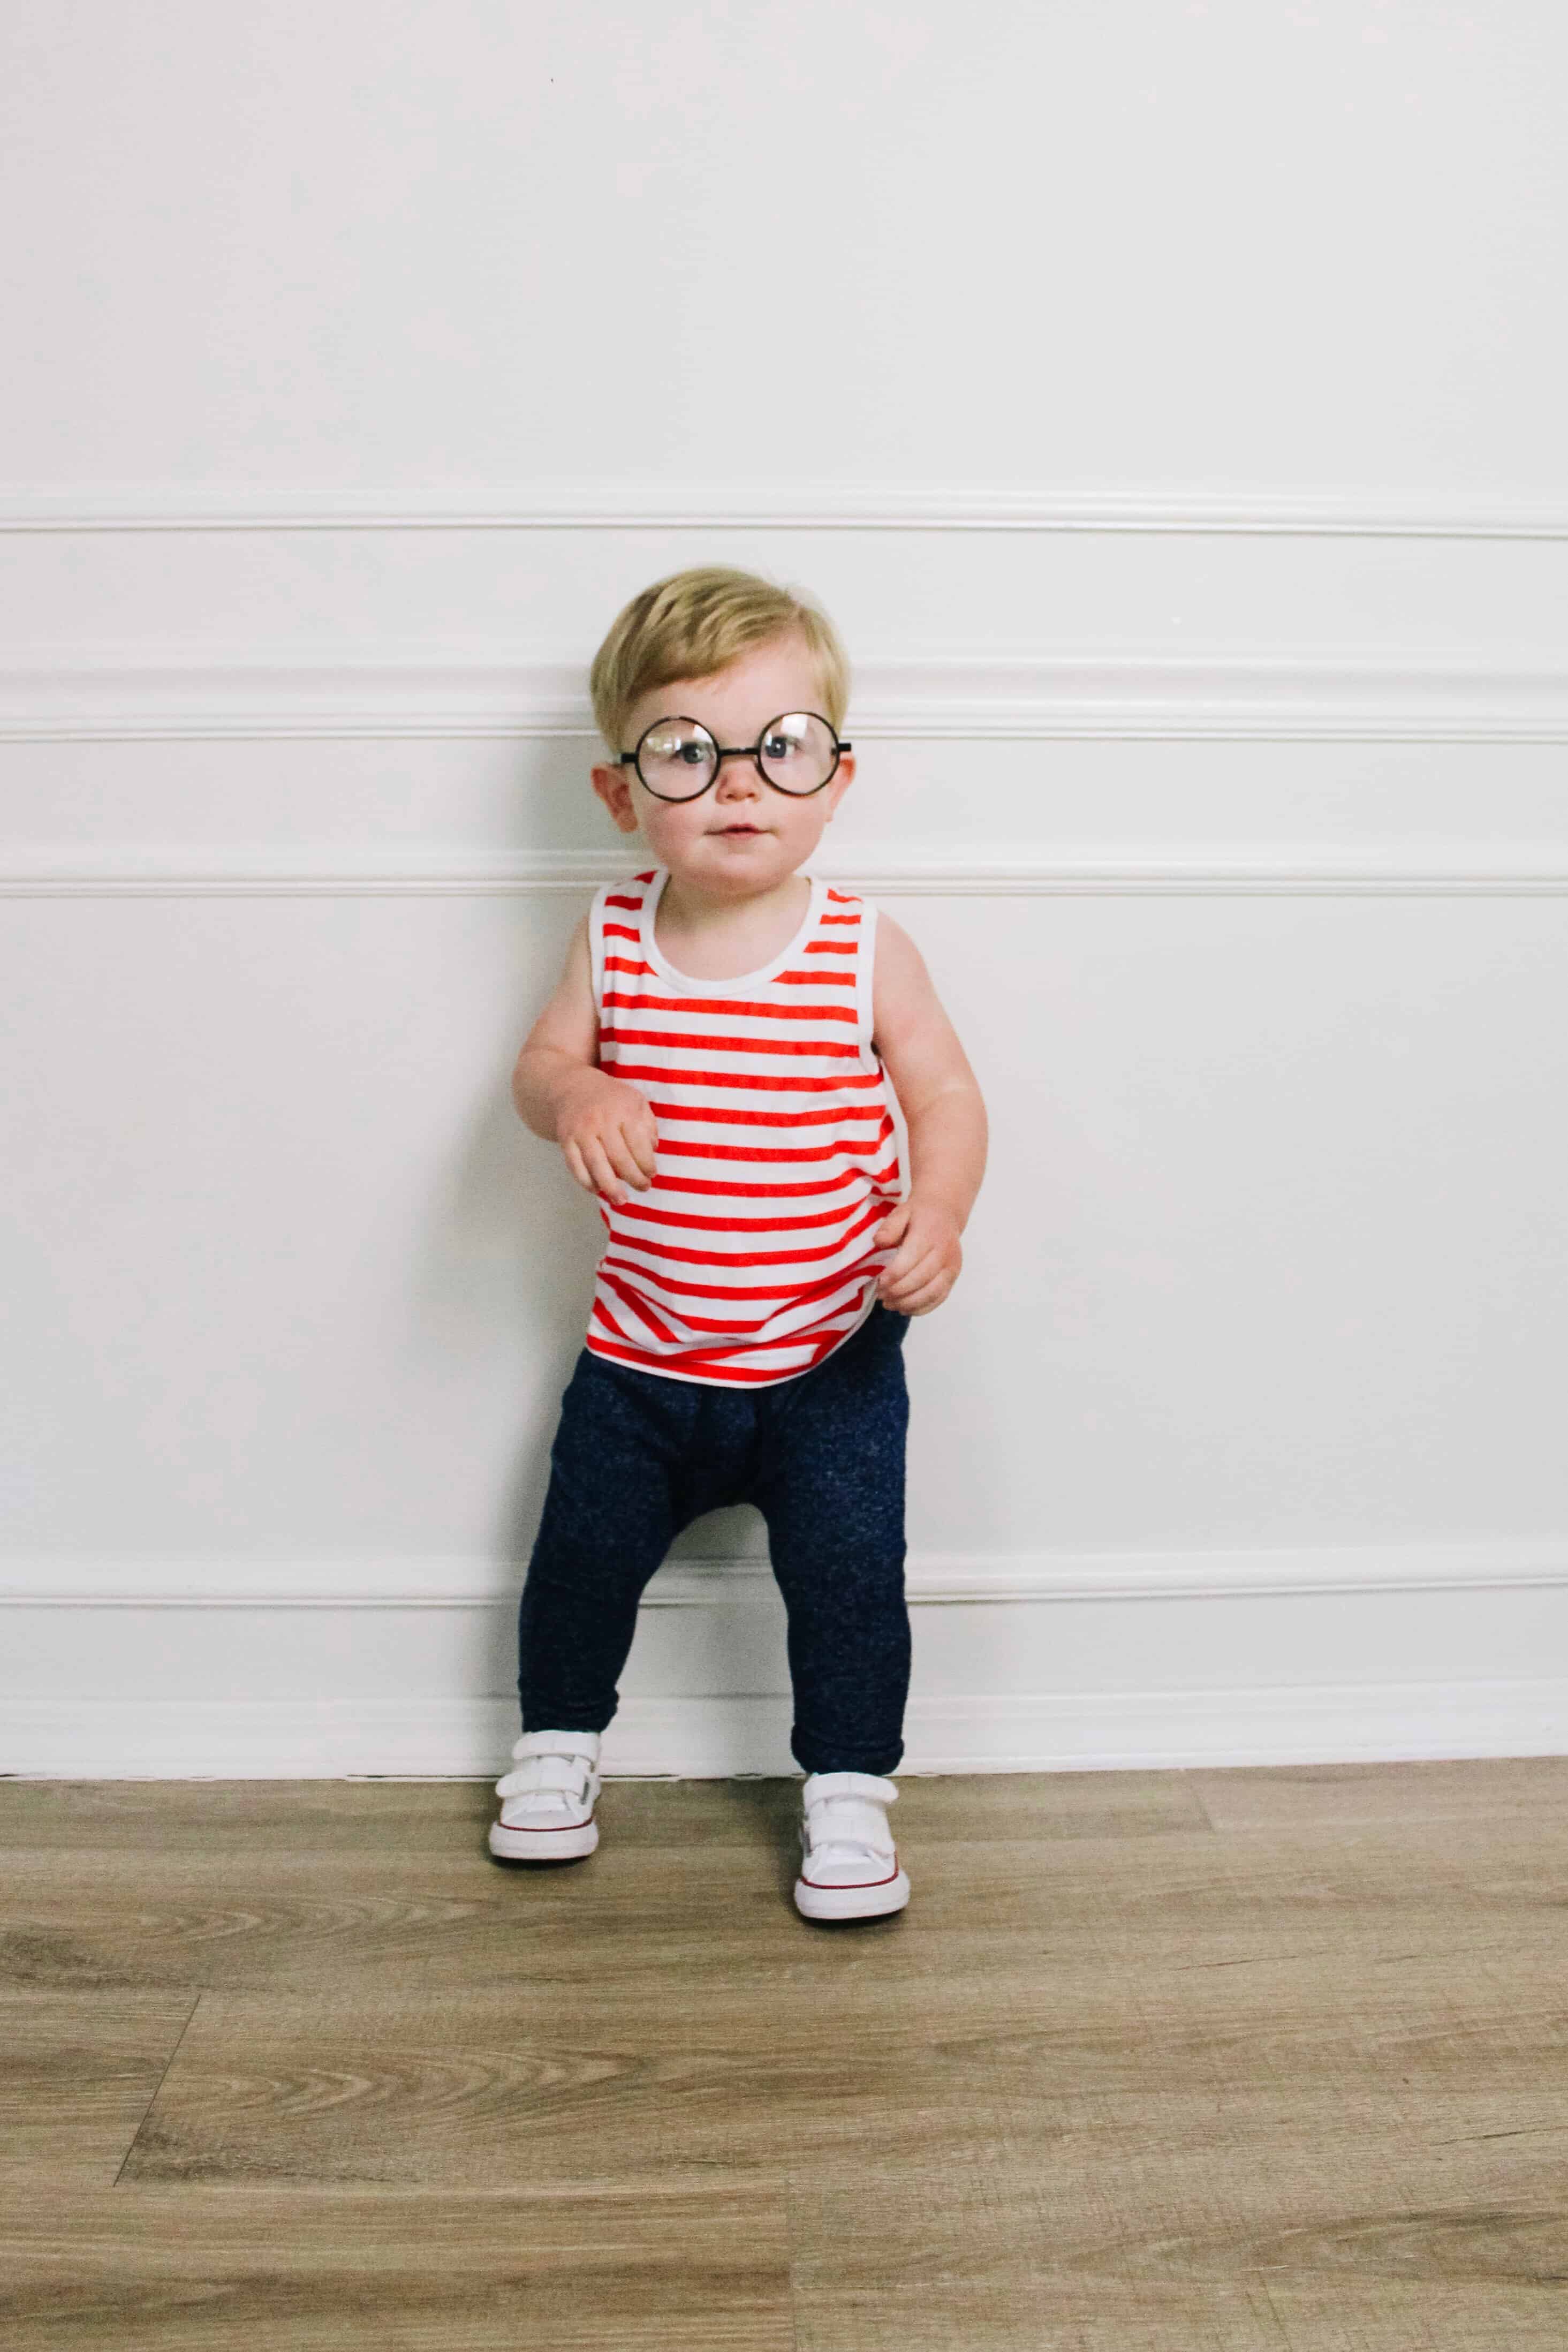
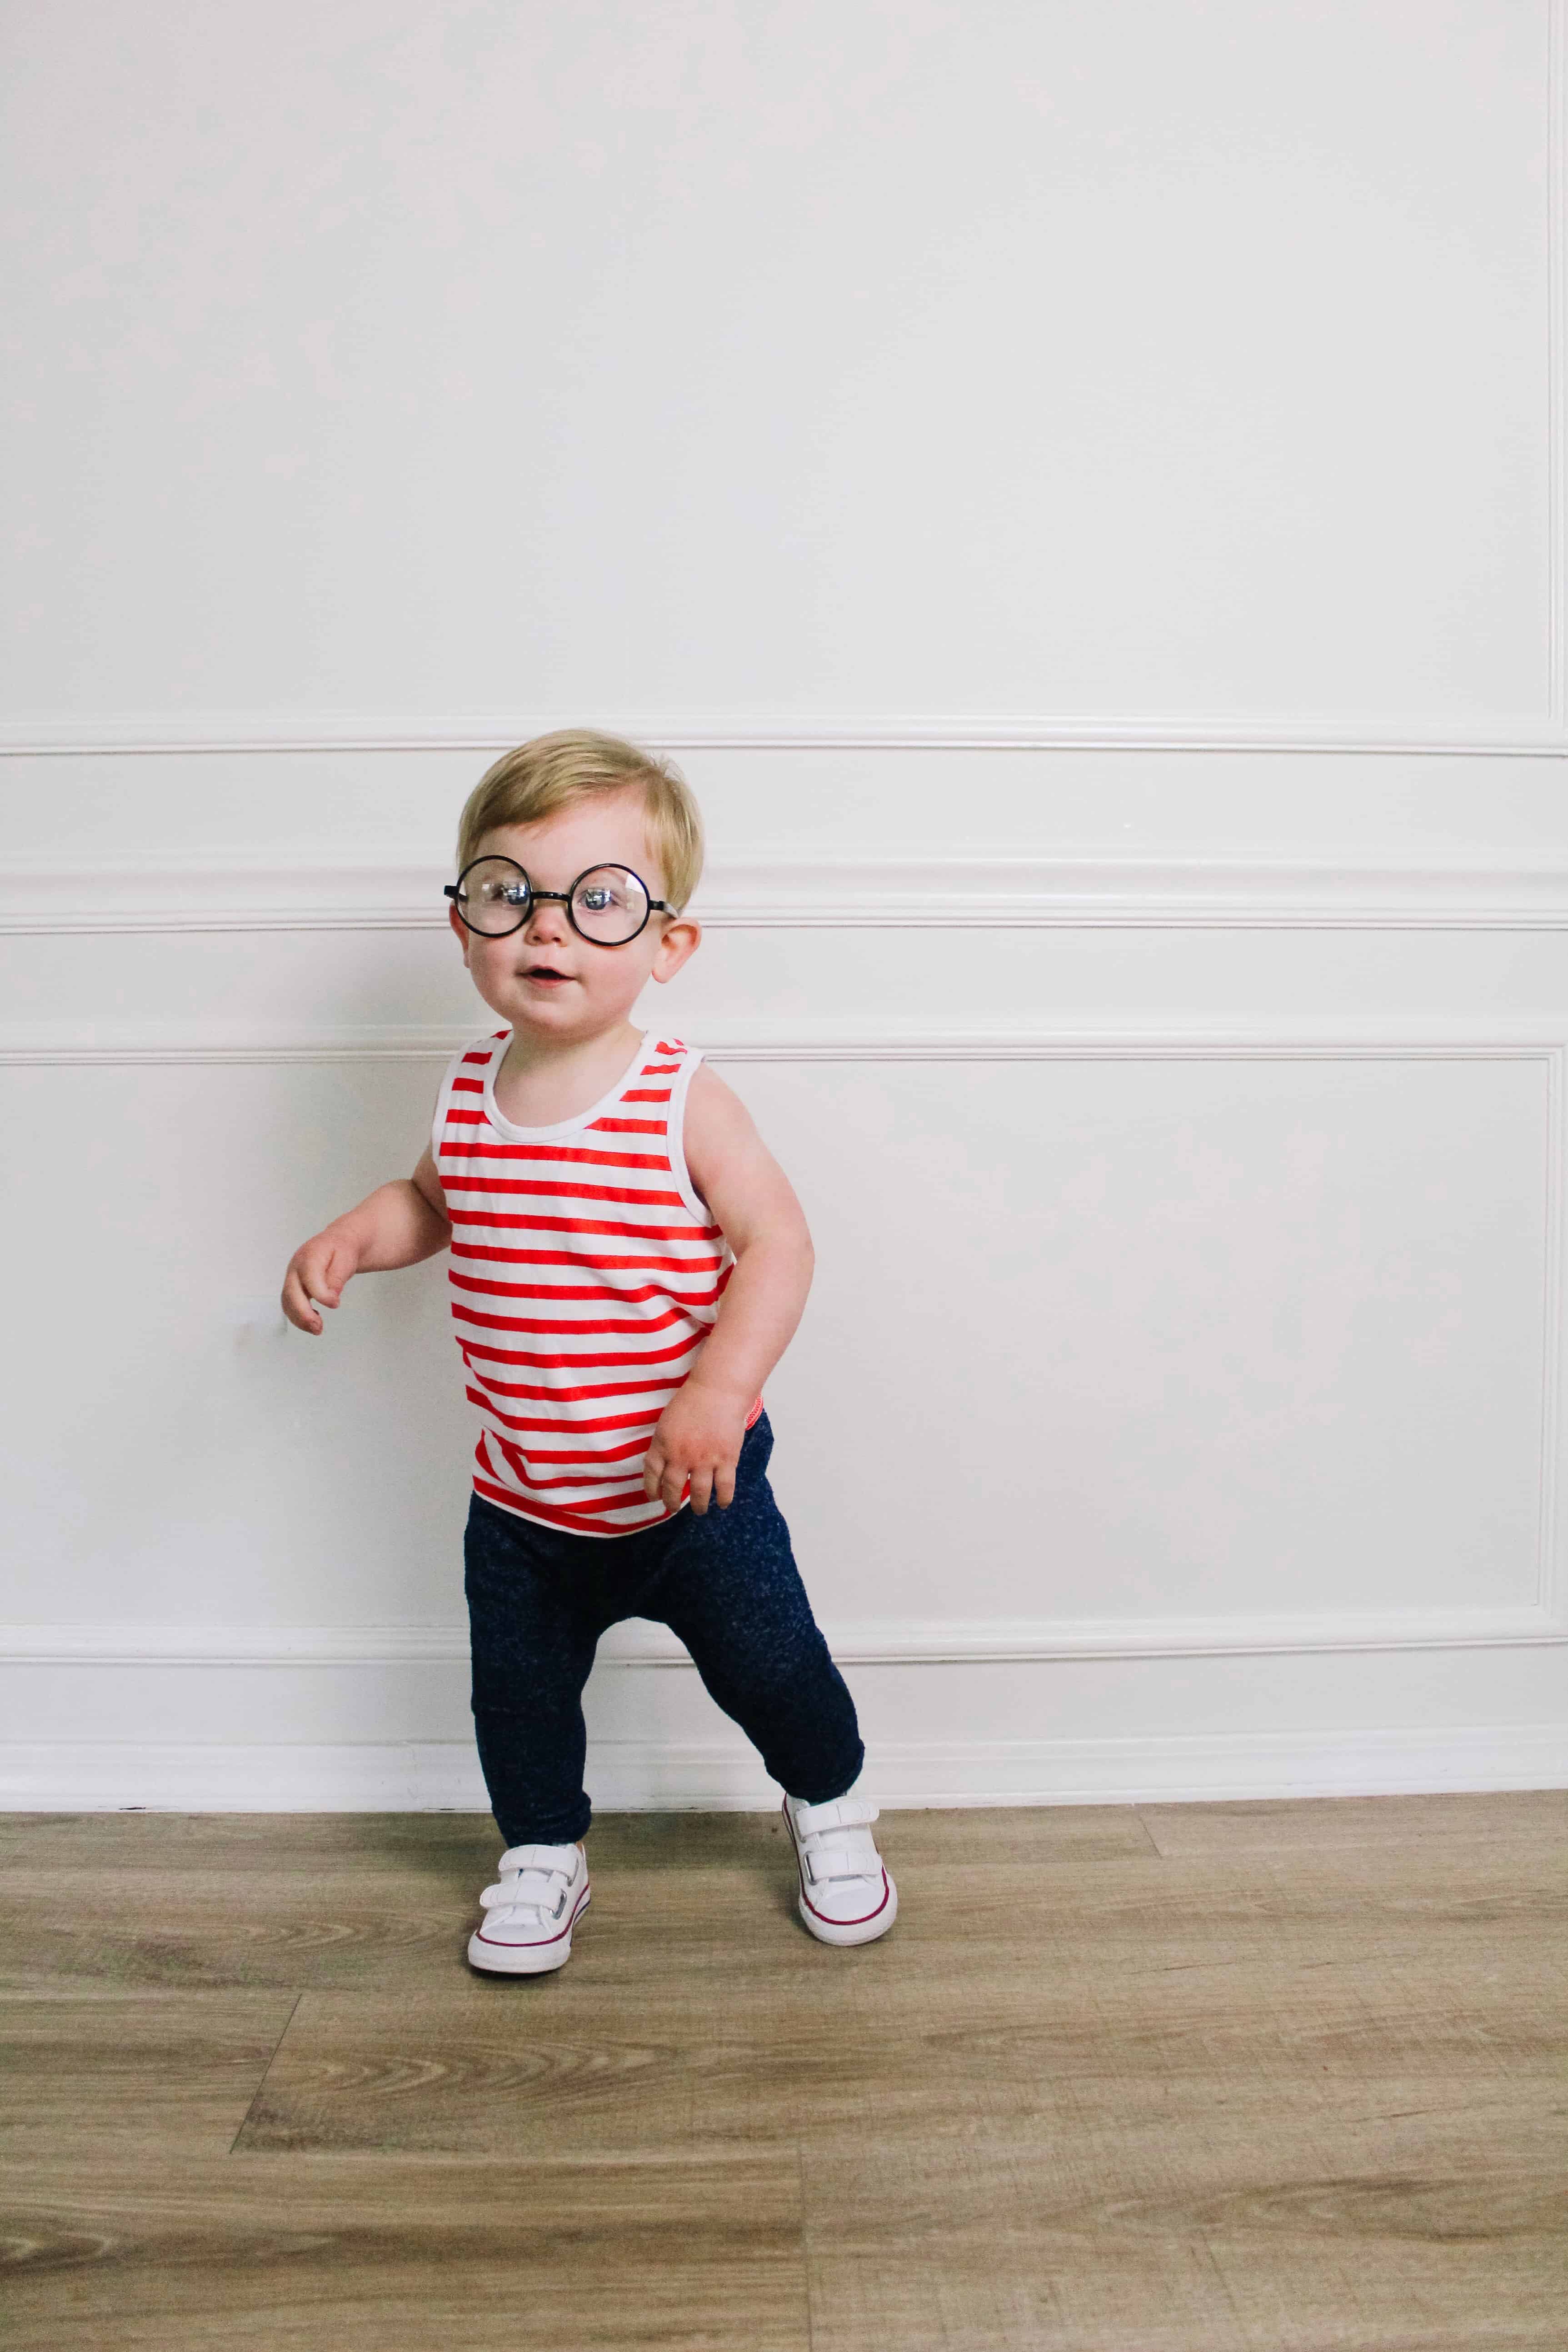
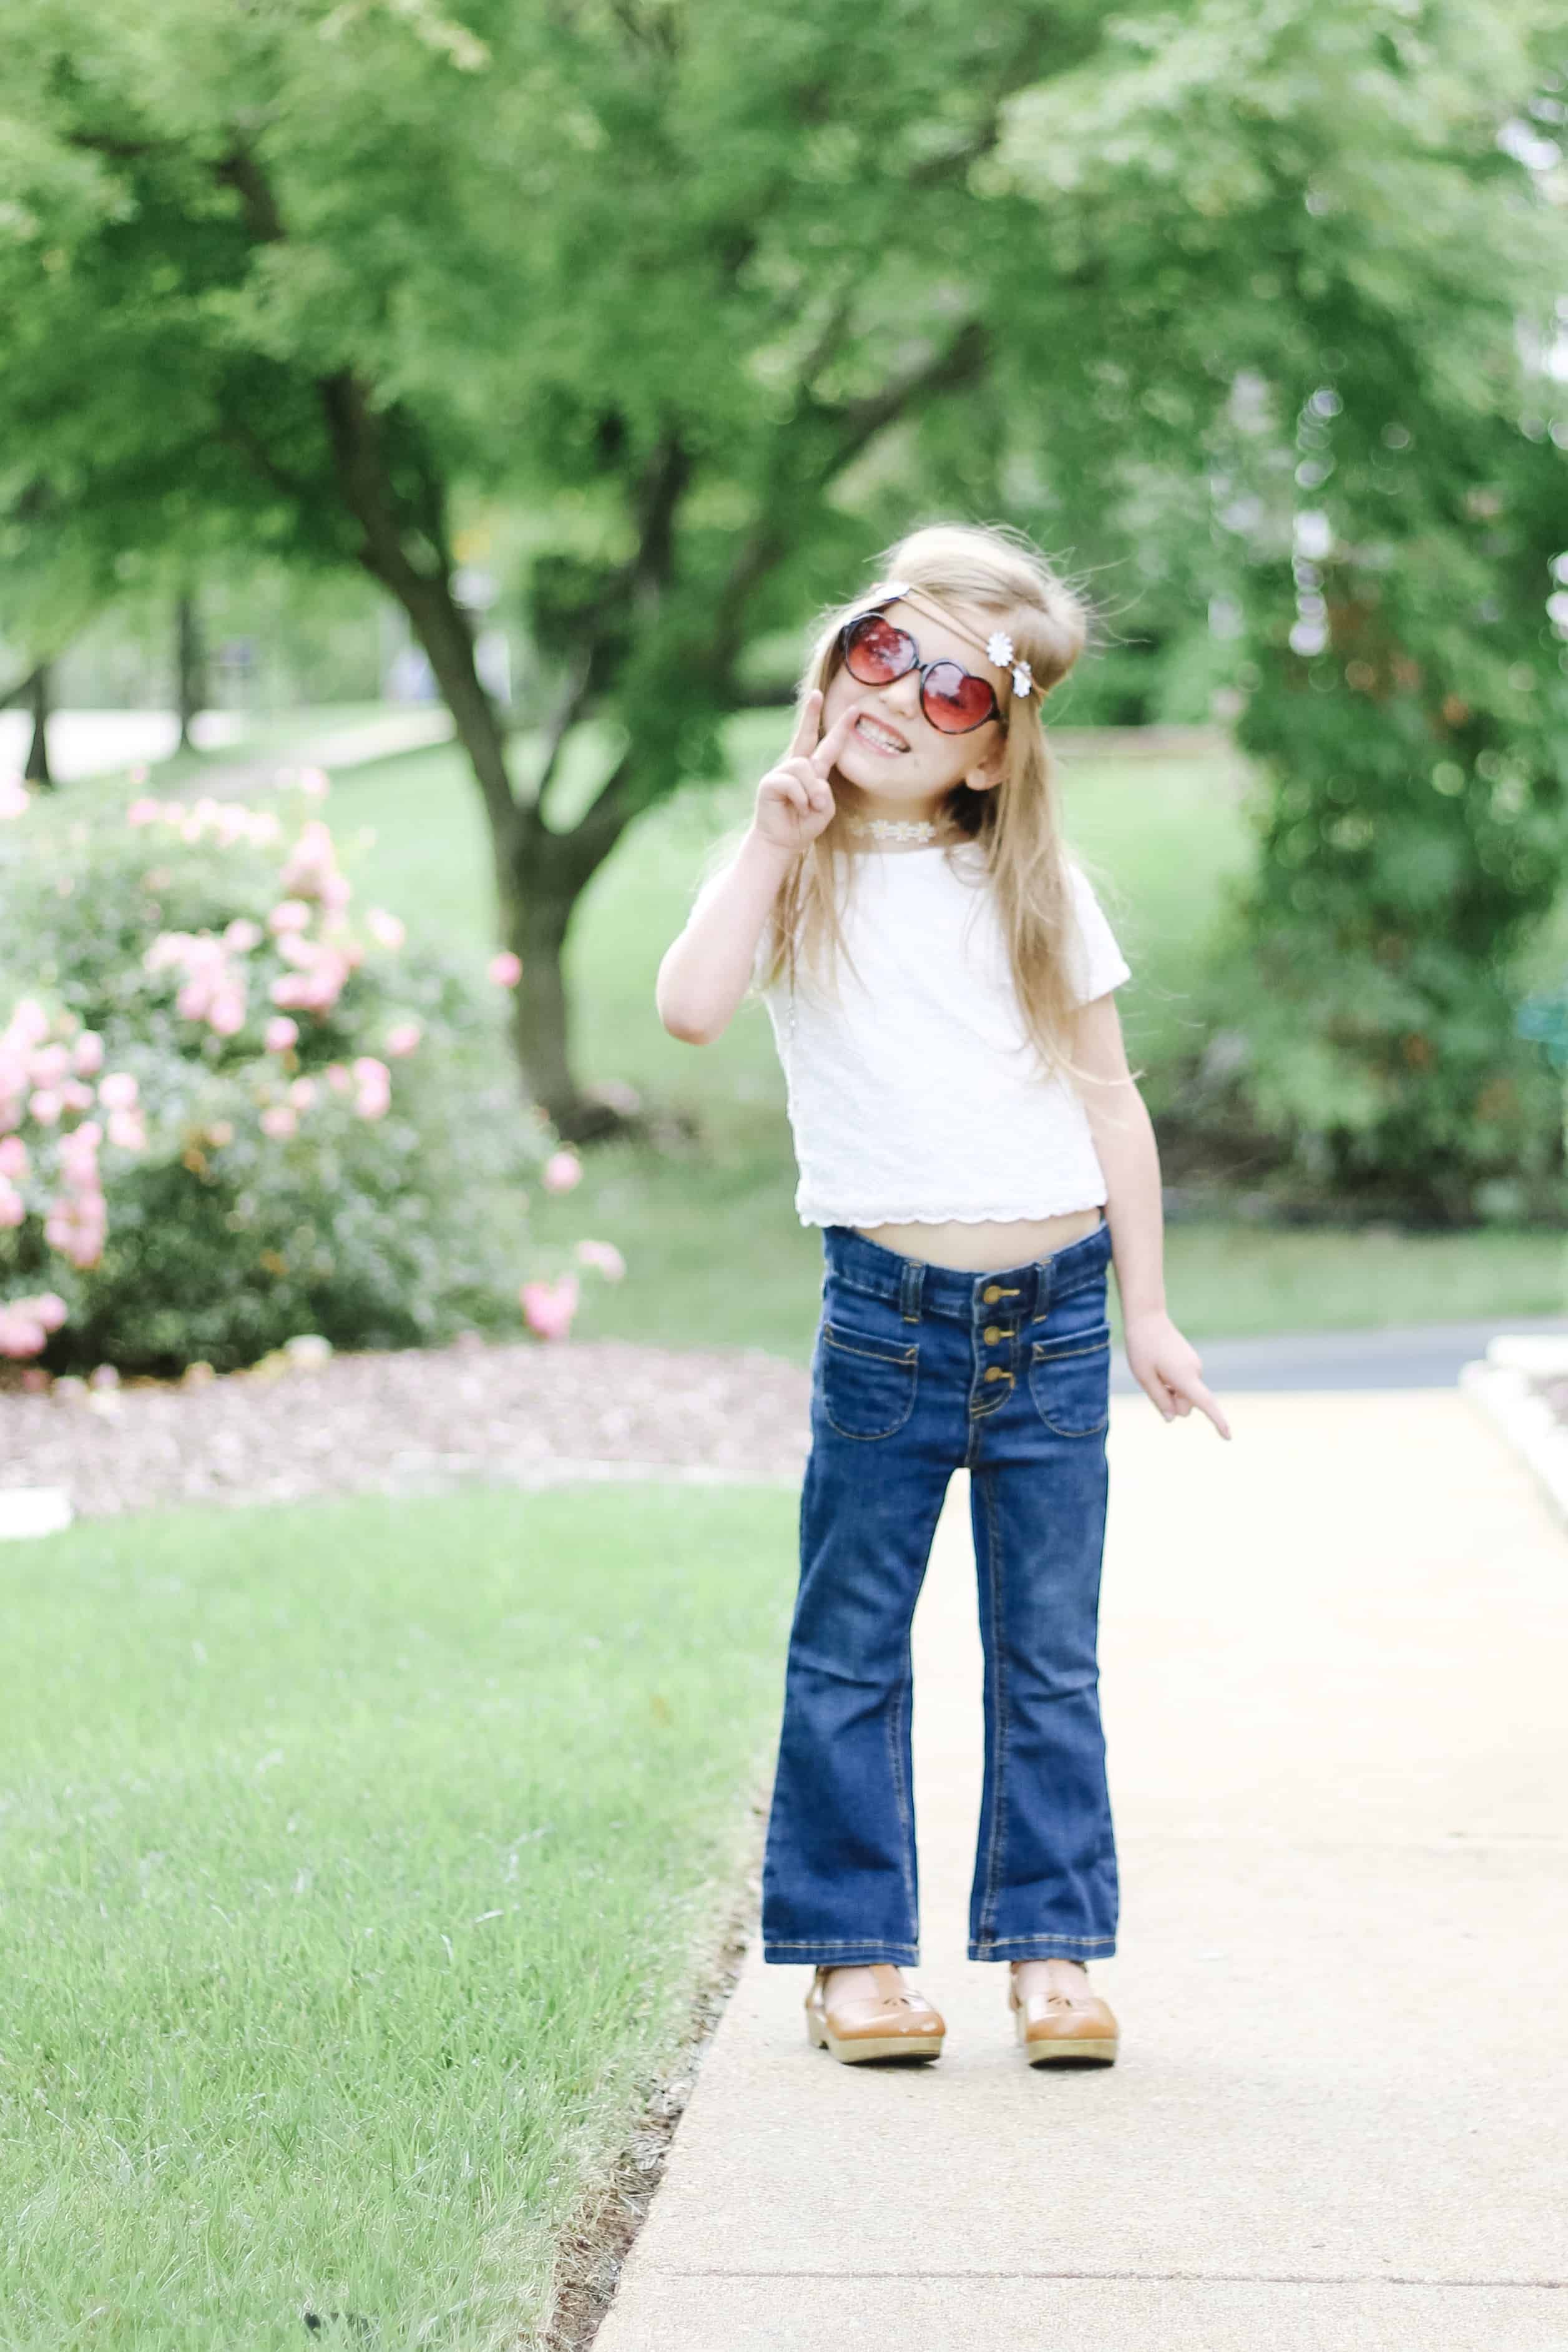
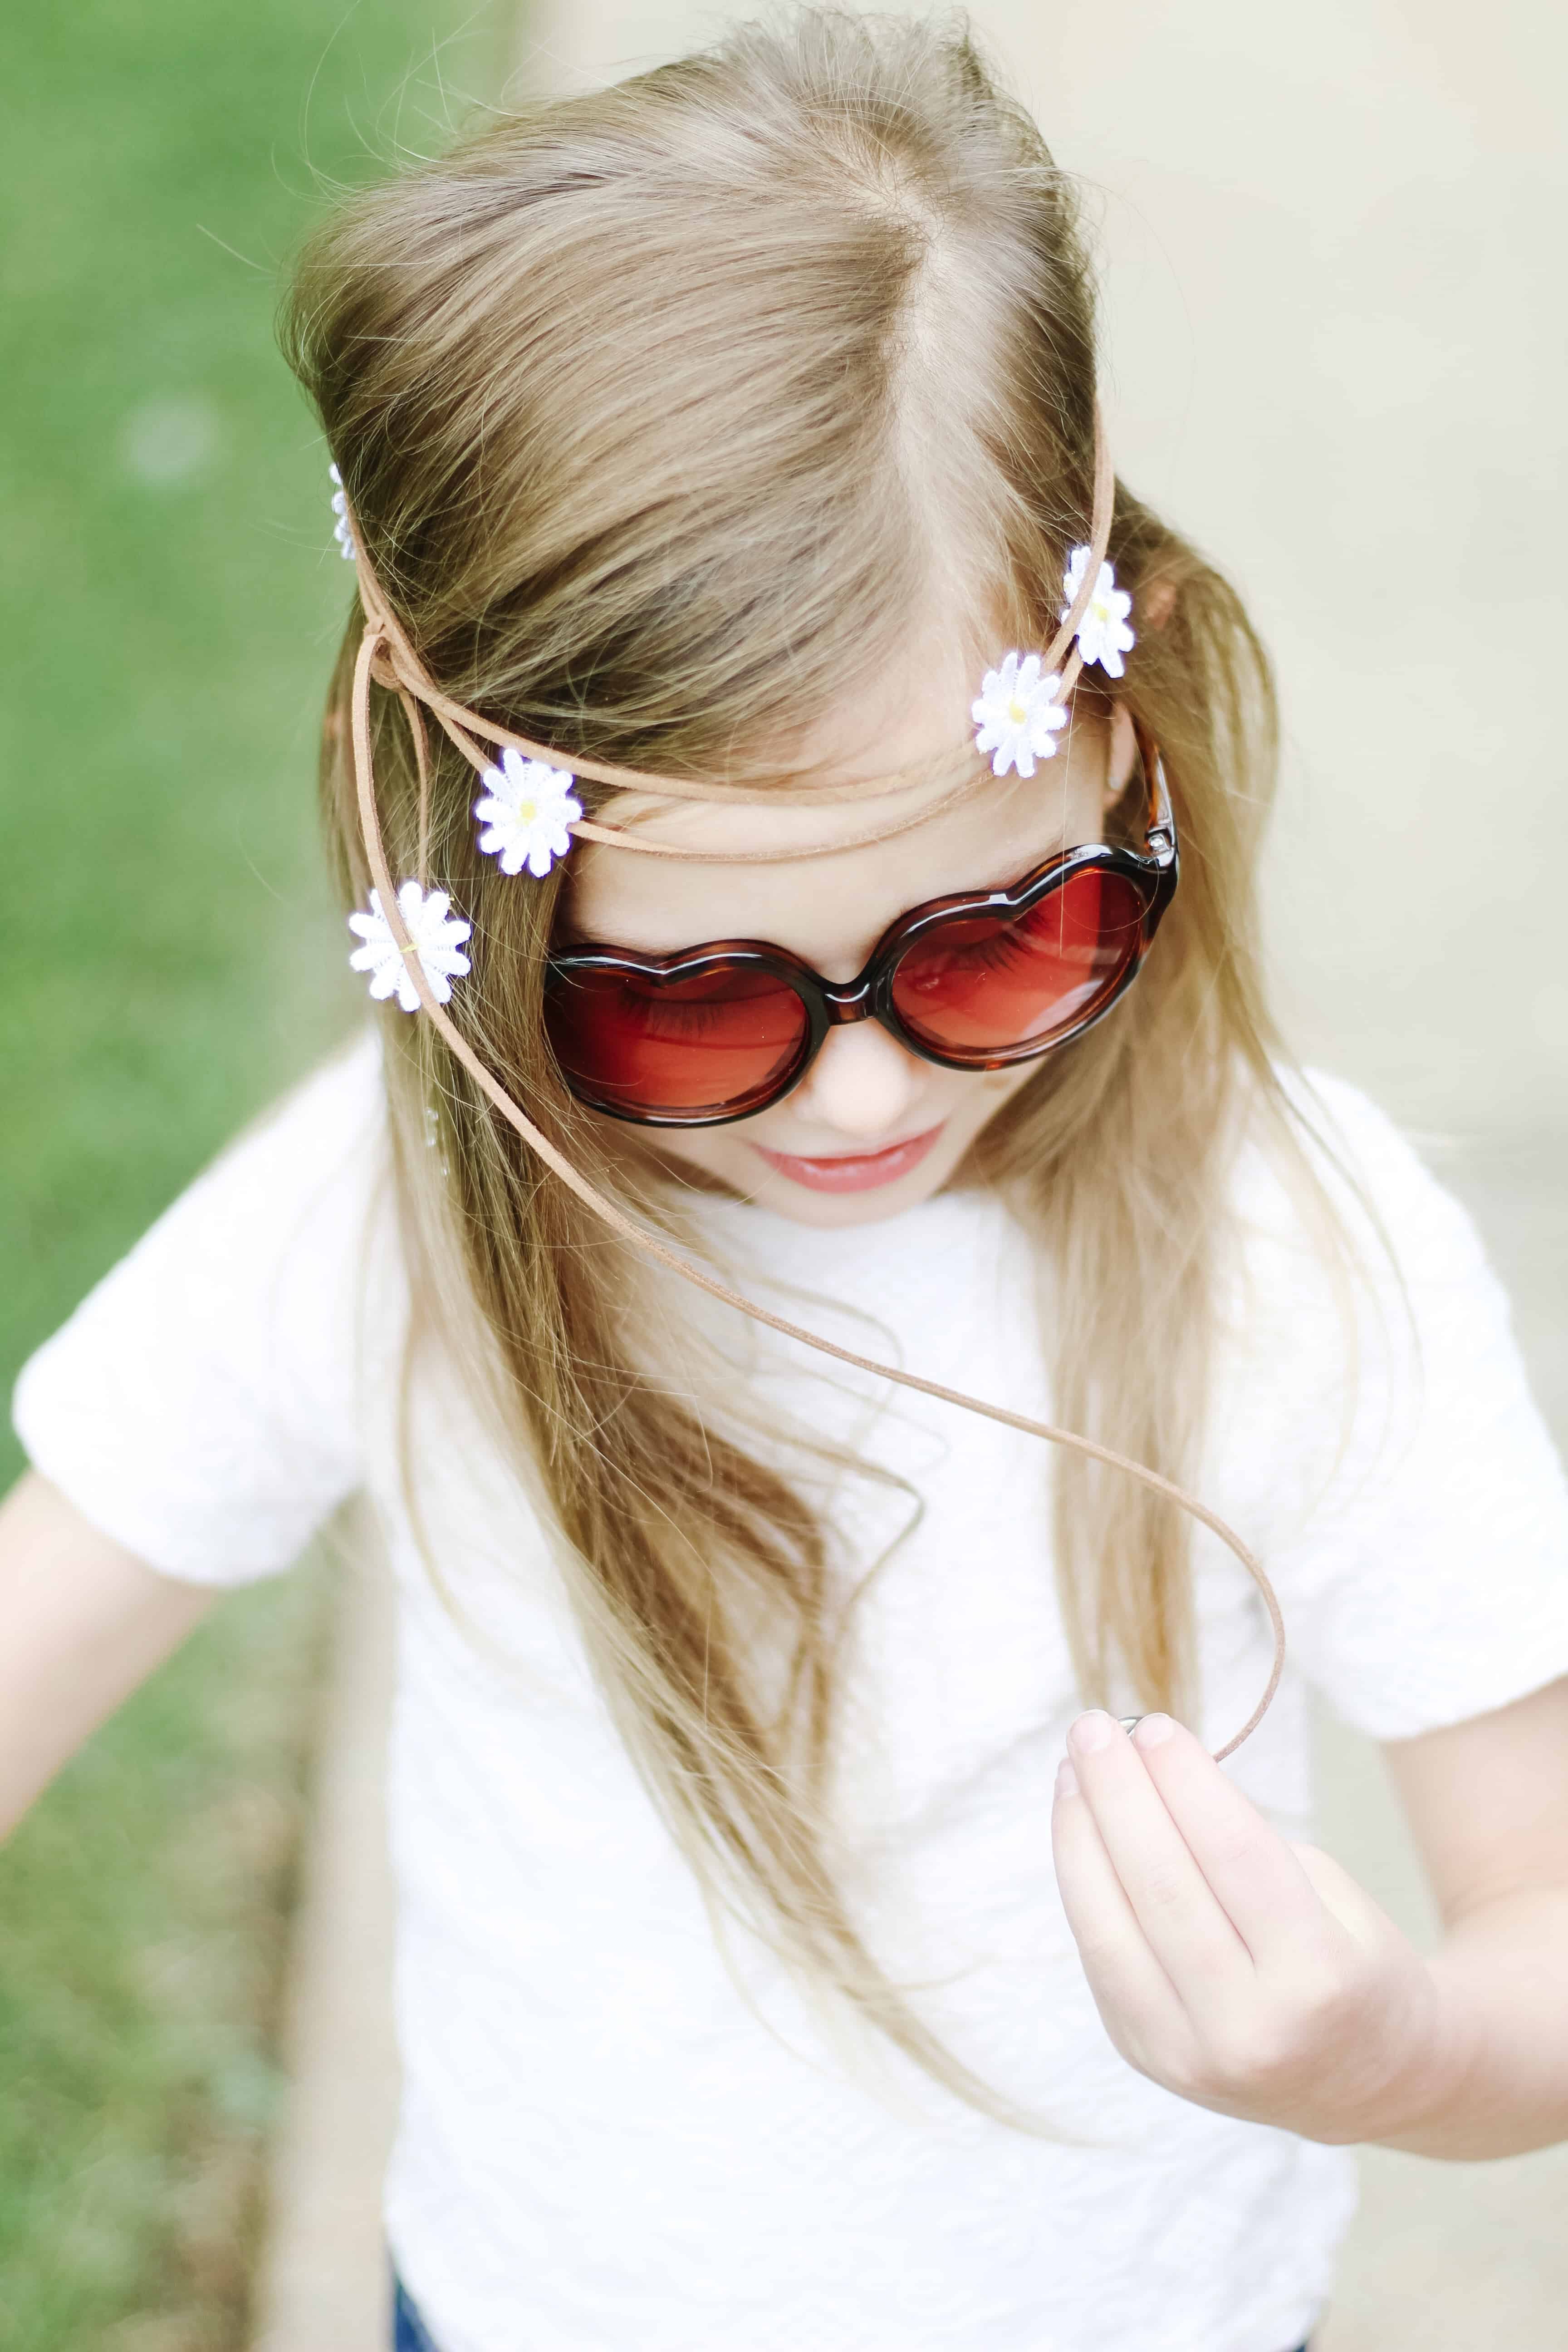
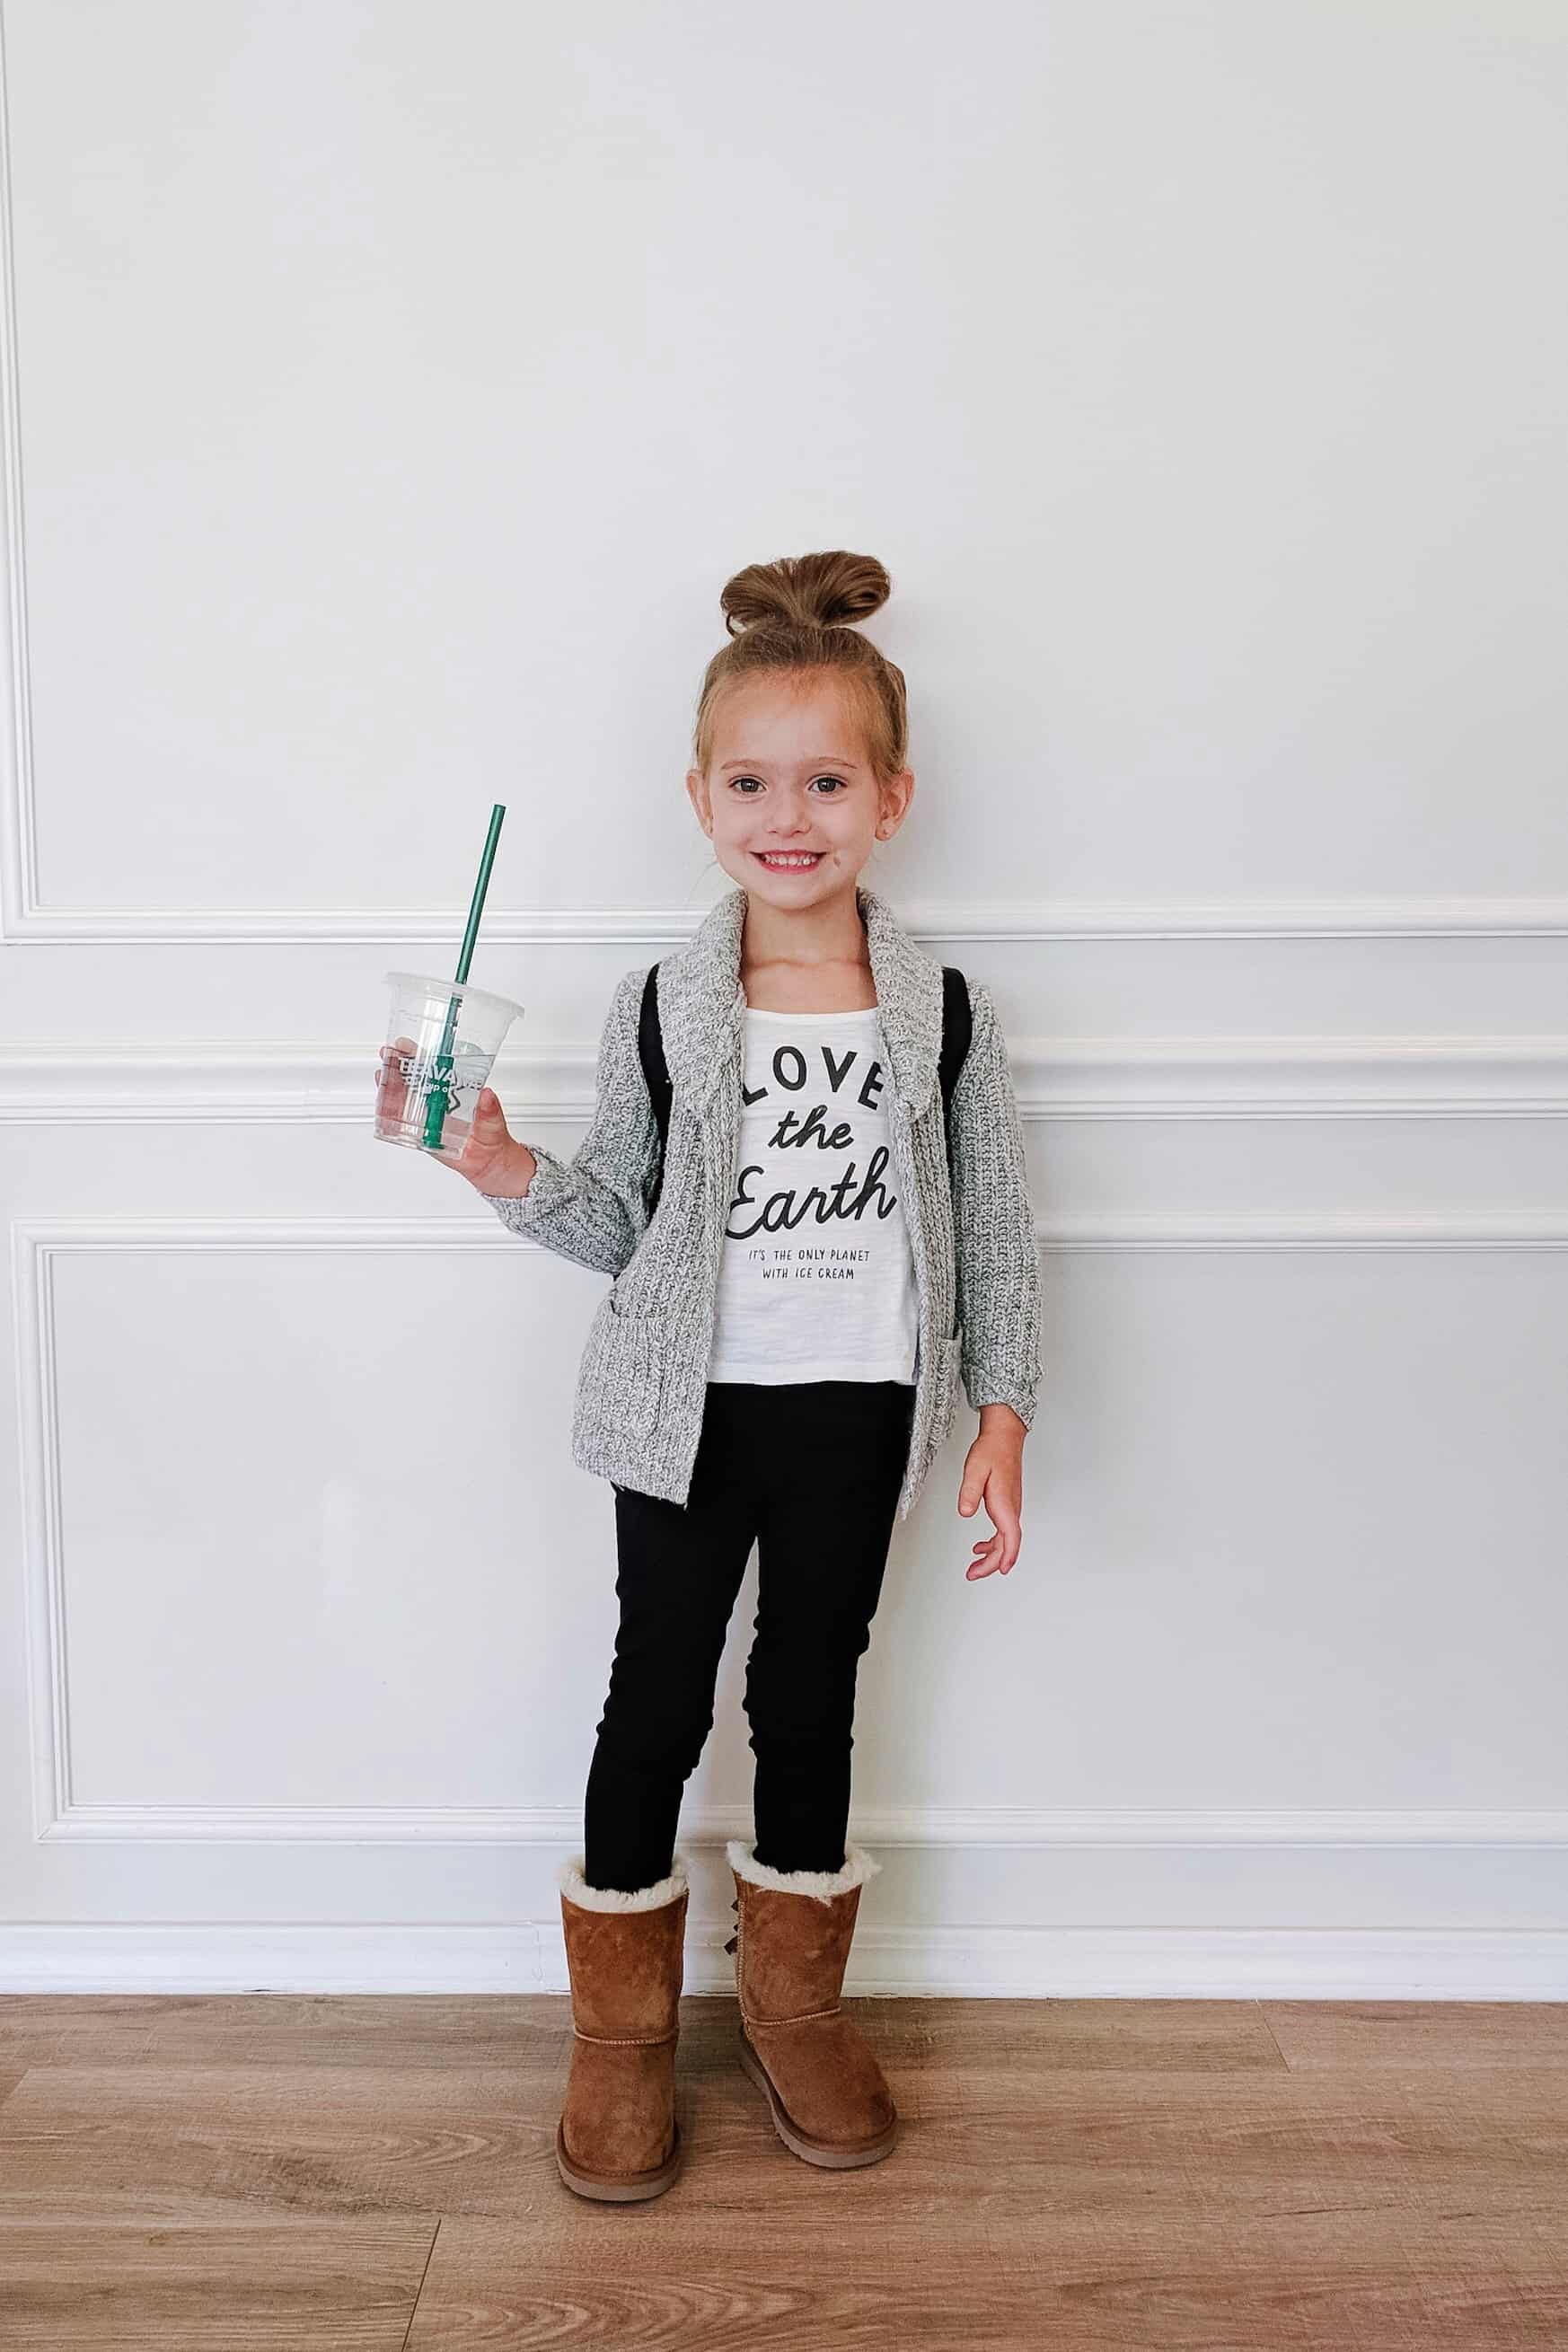
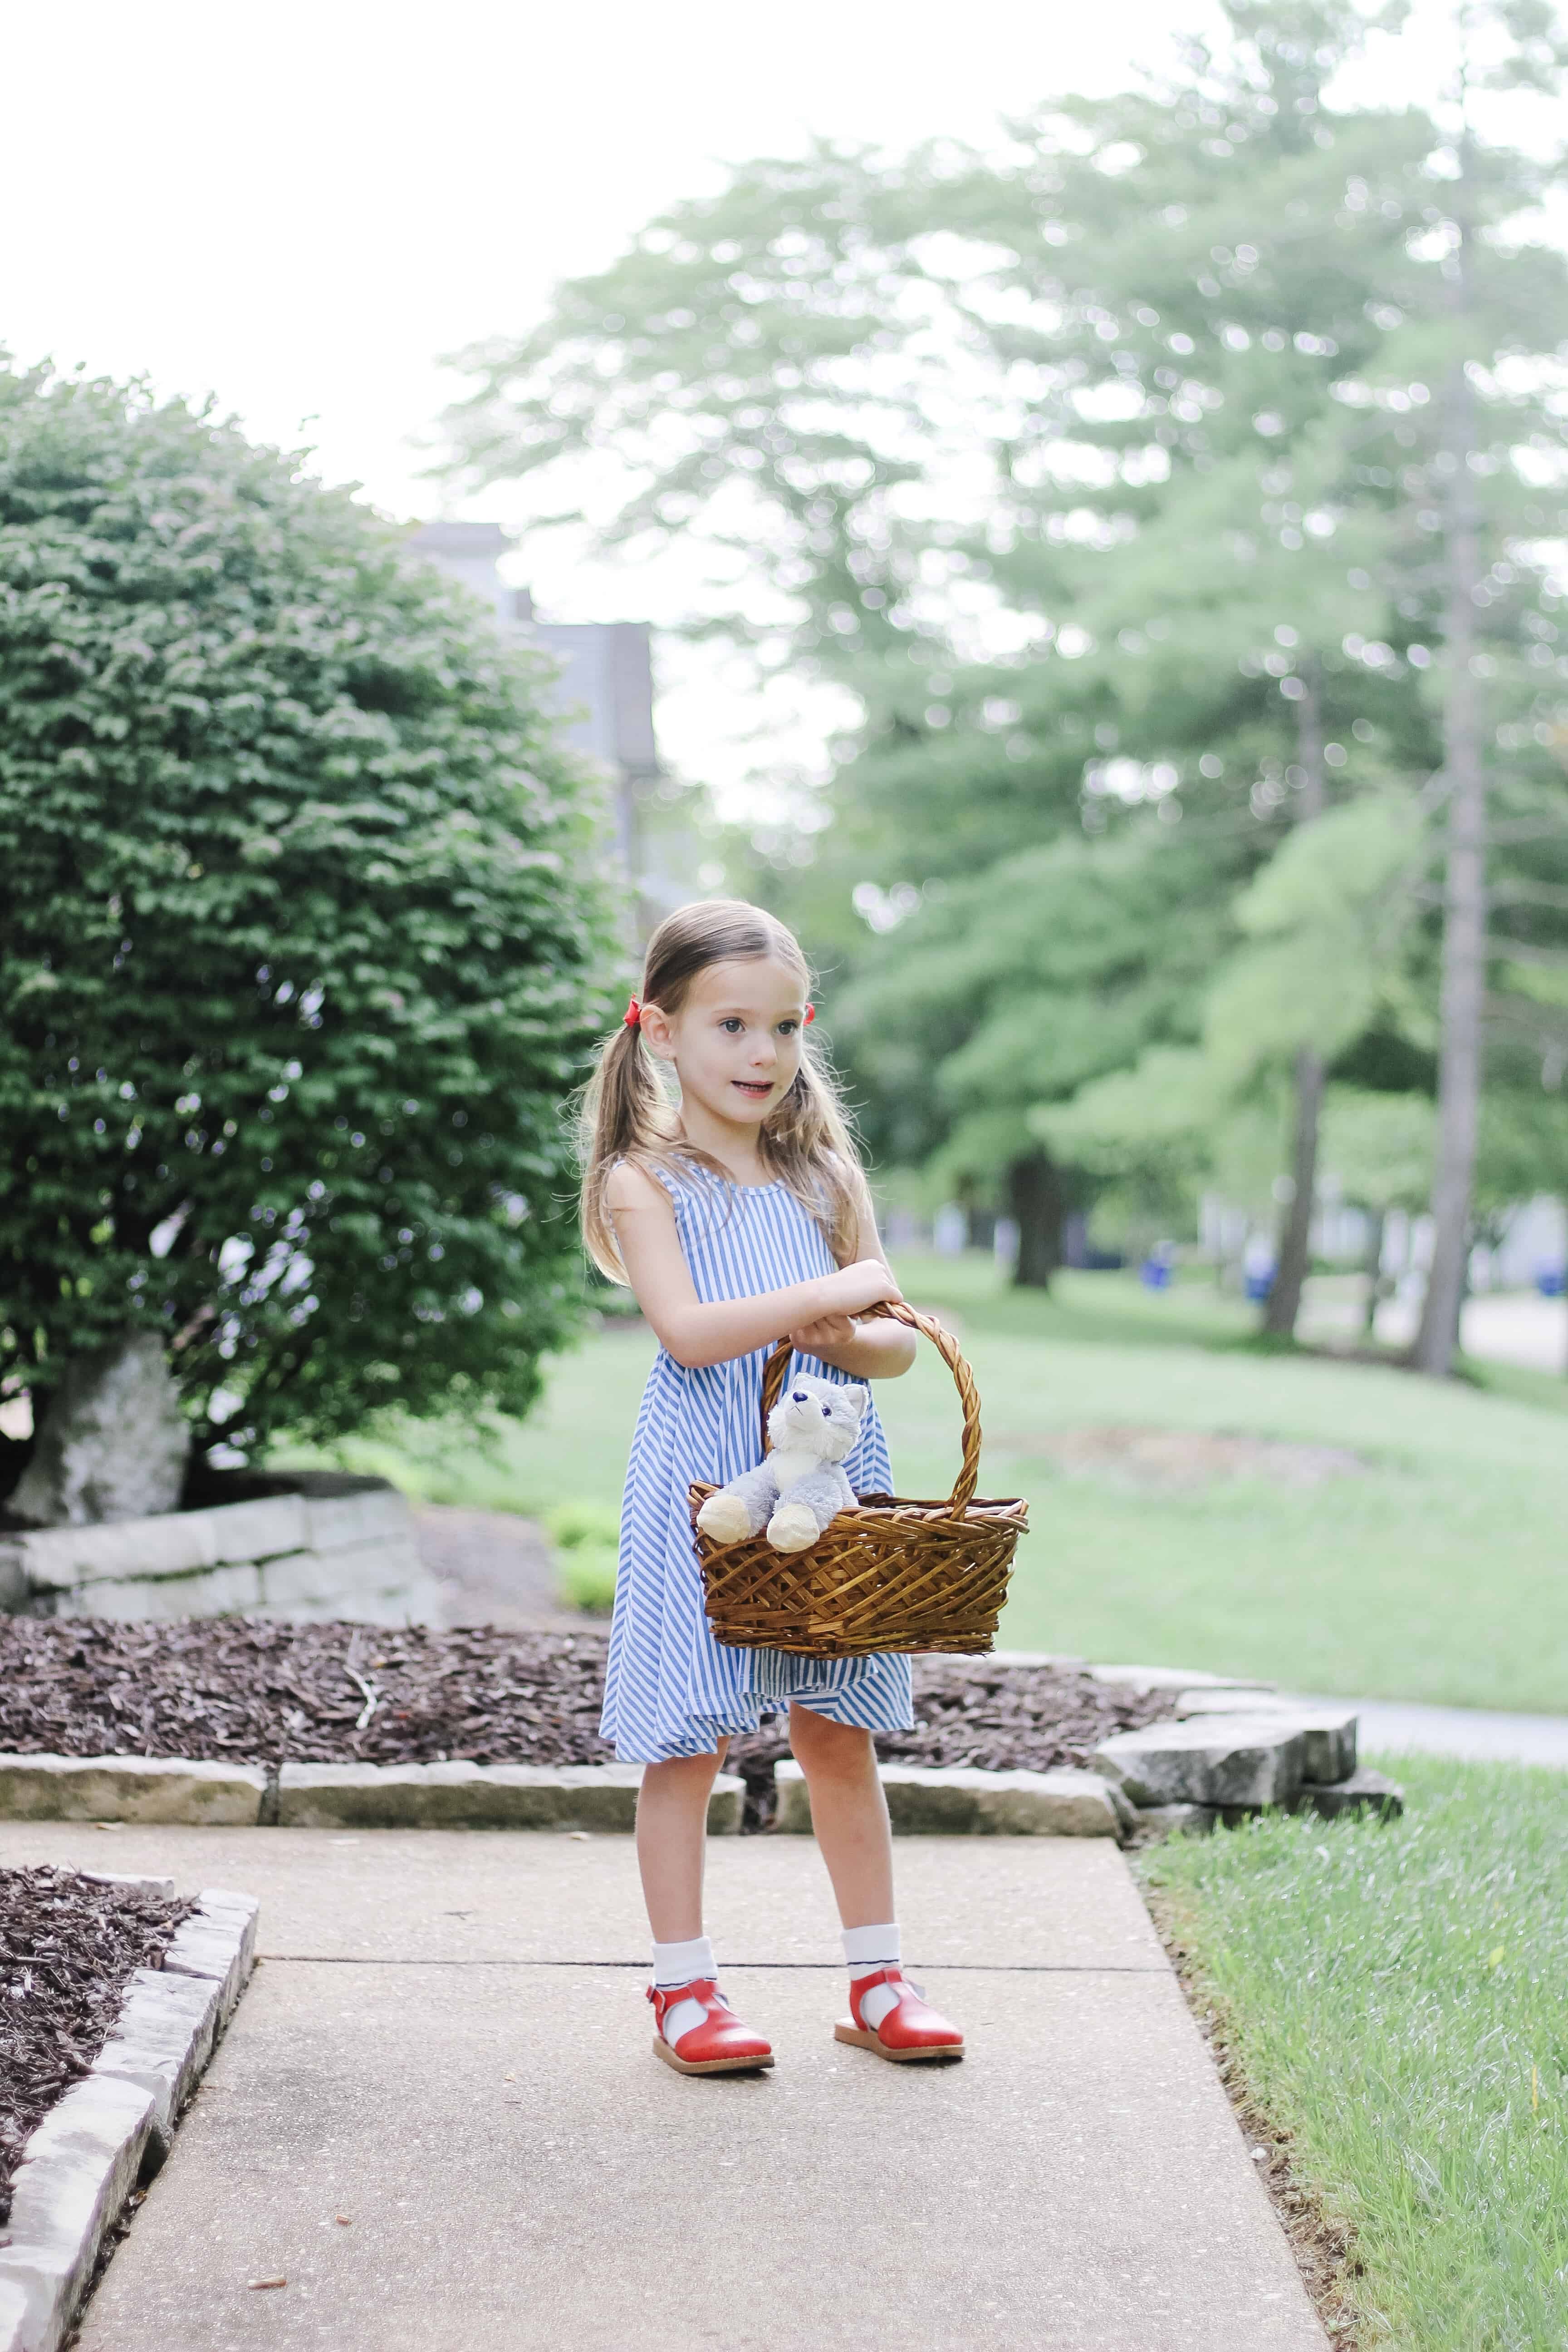
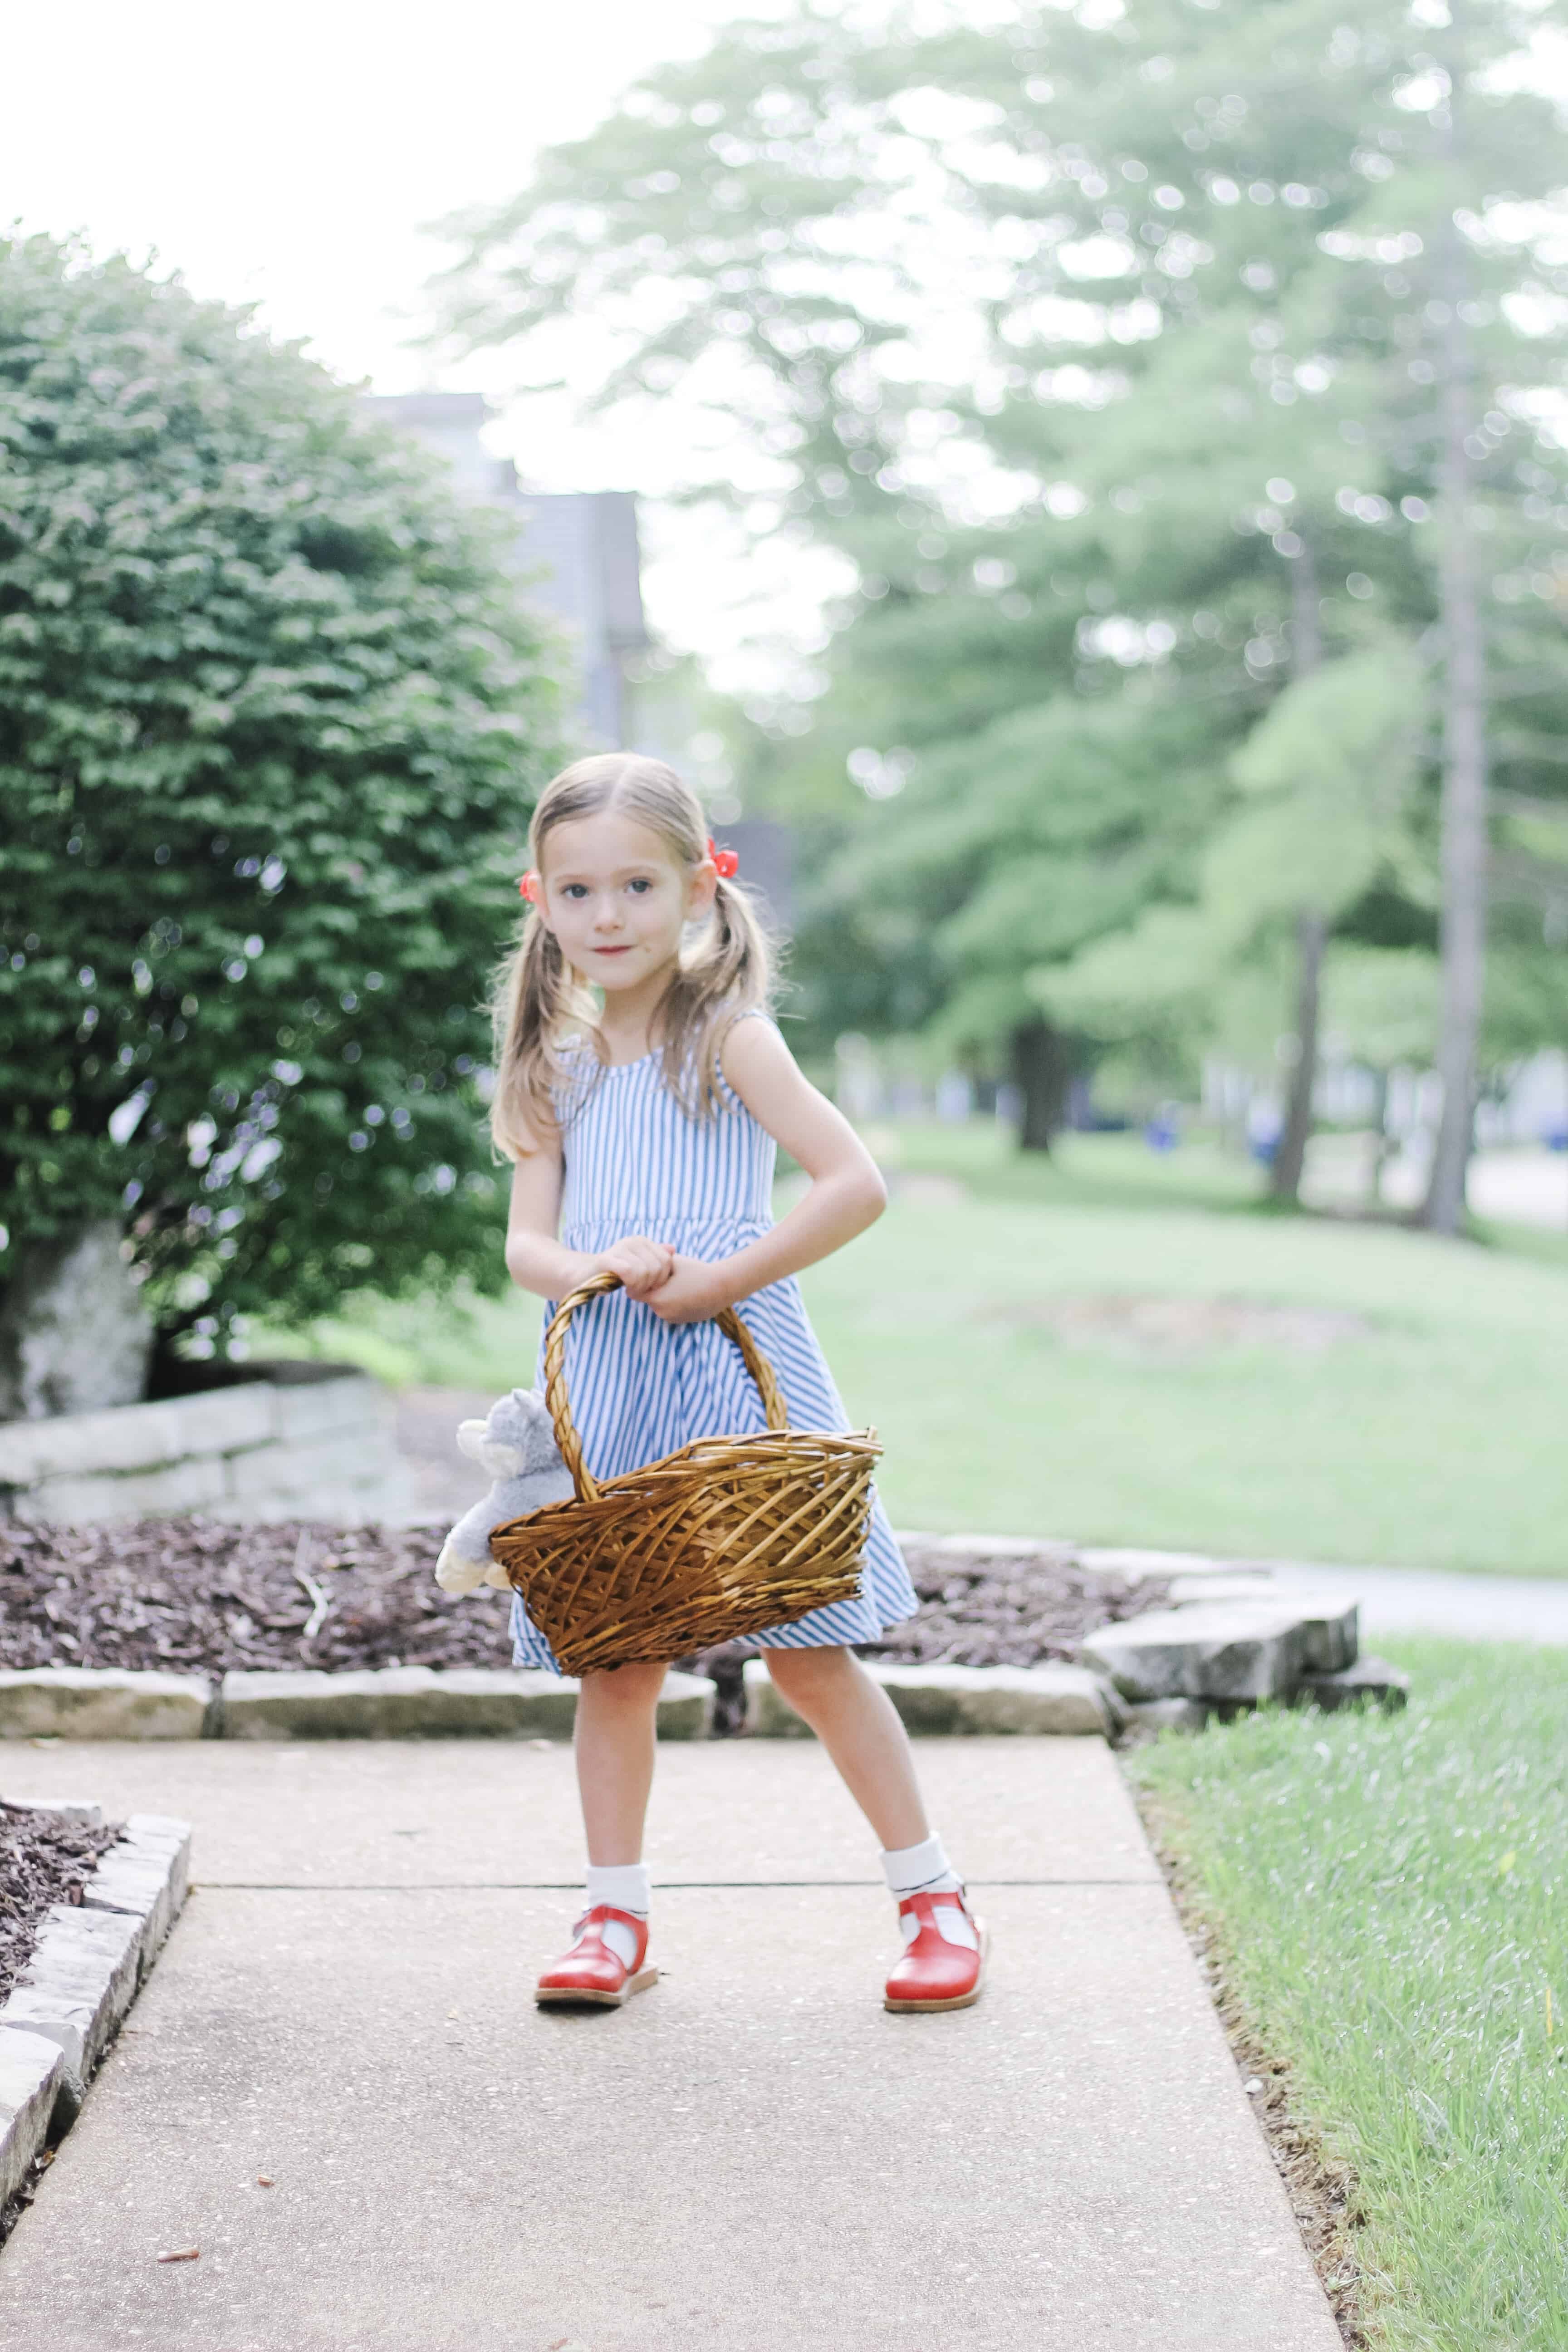
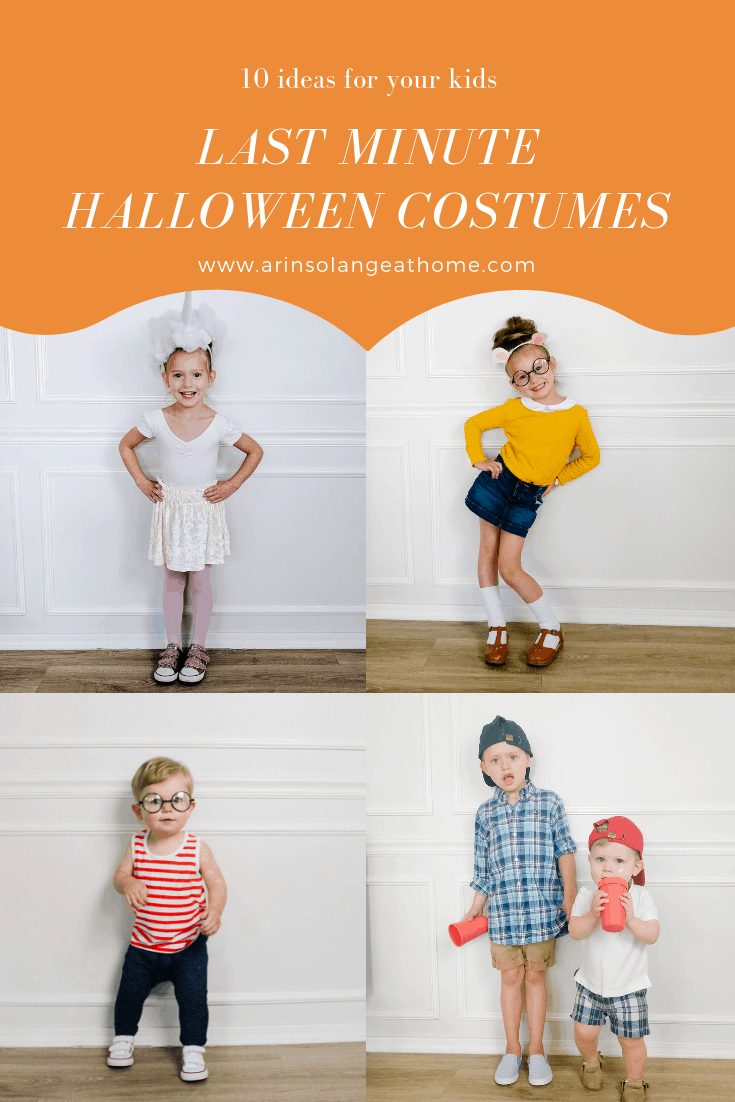
Alright we’re all busy moms, and I am not going to lie, even with how creative and into holidays as I am I have been stuck in a few pickles on Halloween trying to find last minute toddler Halloween costumes the day of or before we trick-or-treating. I wanted to round up 10 costumes for everyone that I did with only a prop or two, and all outfits I had at home. I am hoping to do a second round of these for 10 more in a couple of weeks so stay tuned. But in the mean time check out these options and start getting excited for that spooky day!
this post contains affiliate links
10 Last Minute Halloween Costumes
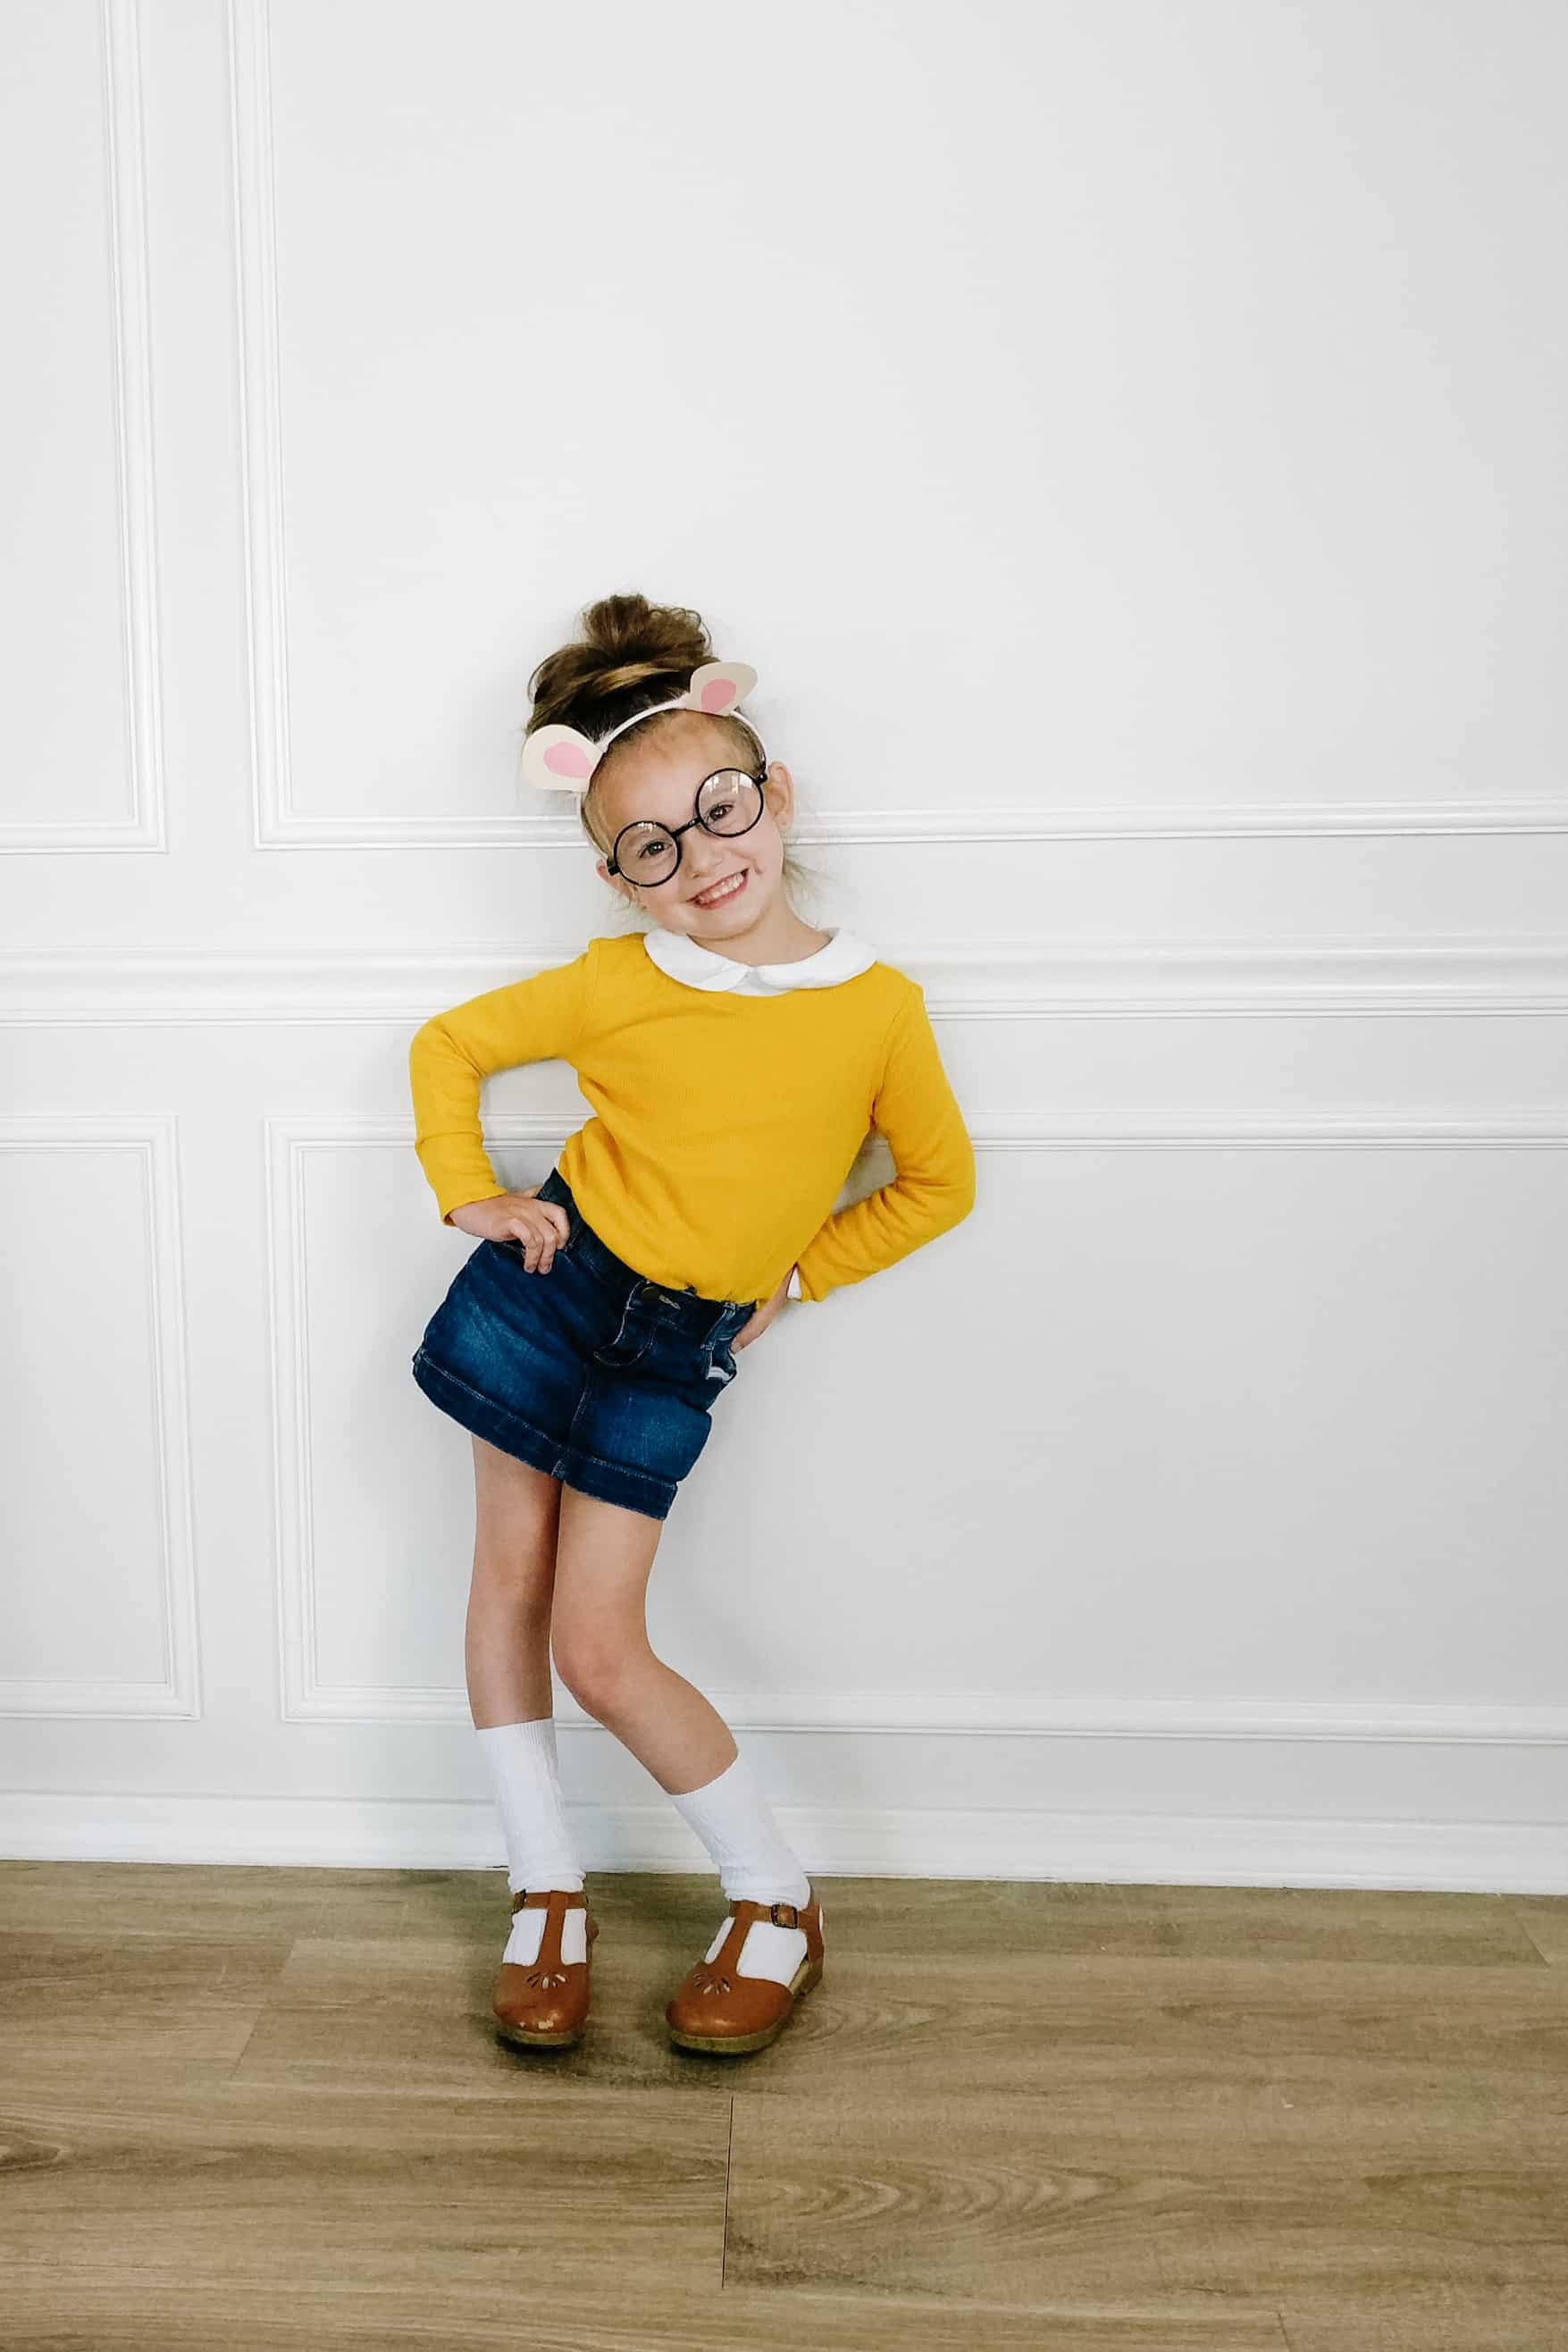
#1: Arthur
The only props needed for this were some glasses and the ears I made out of paper!
Ave´ did this a couple of years ago but with a bit more effort. I actually saved the headband but to do an easier headband you could also just do noms and a paper cone (this is RIT dyed stuffing and a paper cone).
This was Avé last year on Halloween. It was a super easy DIY with things we had around the house. I wrapped white tulle around her shoulders, used black ribbon around her neck and a little gold crown headband we owned. Add white tight and gloves and she was set.
Add a stuffed animal to the basket and red ribbons in her hair.
Let me know if you have any questions on these costume ideas and please let me know if you’re interested in part two that I have already thought up! Would love to hear your favorite in the comments below and make sure you pin the below image so you don’t forget these fun ideas!
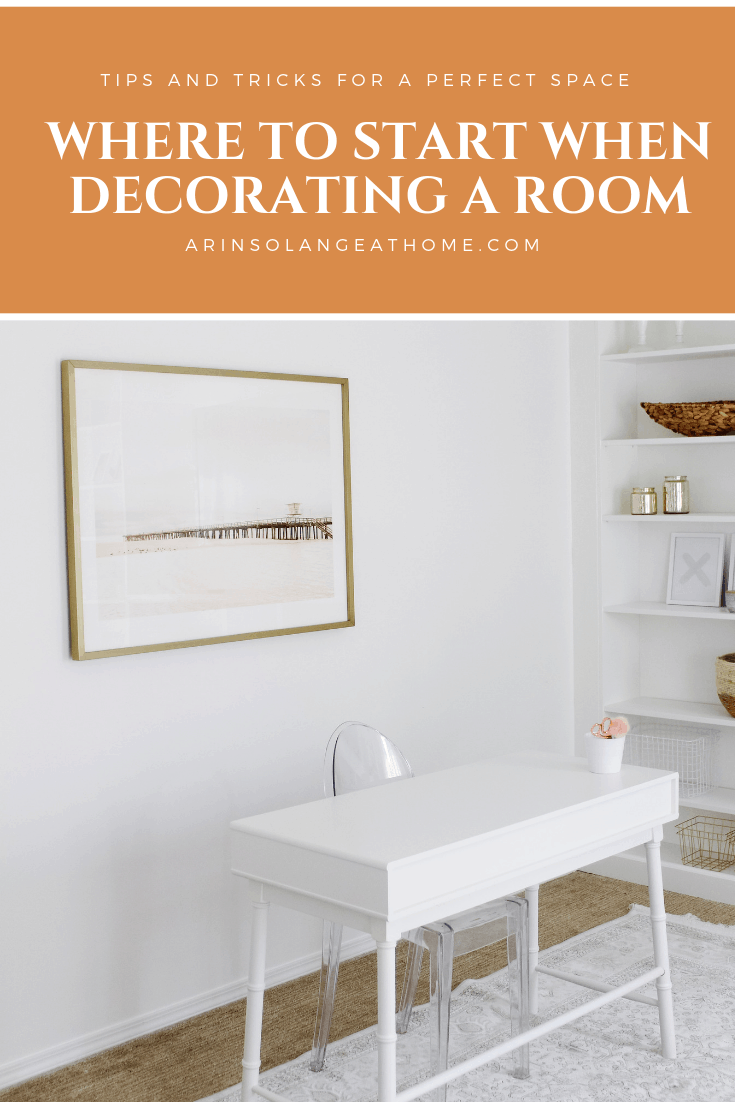
Incase you missed my DIY IKEA hack built– in post a couple of weeks ago, you may not have known that we are working diligently on finishing up my home office. This room has been such a big transformation that I can’t wait to share with you next week, but in the mean time I wanted to talk to you about how I went about decorating and designing this room. I feel like one of the biggest struggles people have with home decor is where to start on the design process, so I wanted to go over what that looks like for me.
this post was sponsored by Minted however all opinions are my own
Where to Start on the Design Process
When it comes to decorating a room you probably have one or two items that you already own, or you are loving that can be a starting place. It’s fairly important to let those pieces take the lead in your decor process in that room. Wall art tends to be a focal point of most rooms, and one that creates the biggest impact. For me if wall art will be incorperated in a room I try to pick it as soon as we are ready to start decorating so I can set the tone.
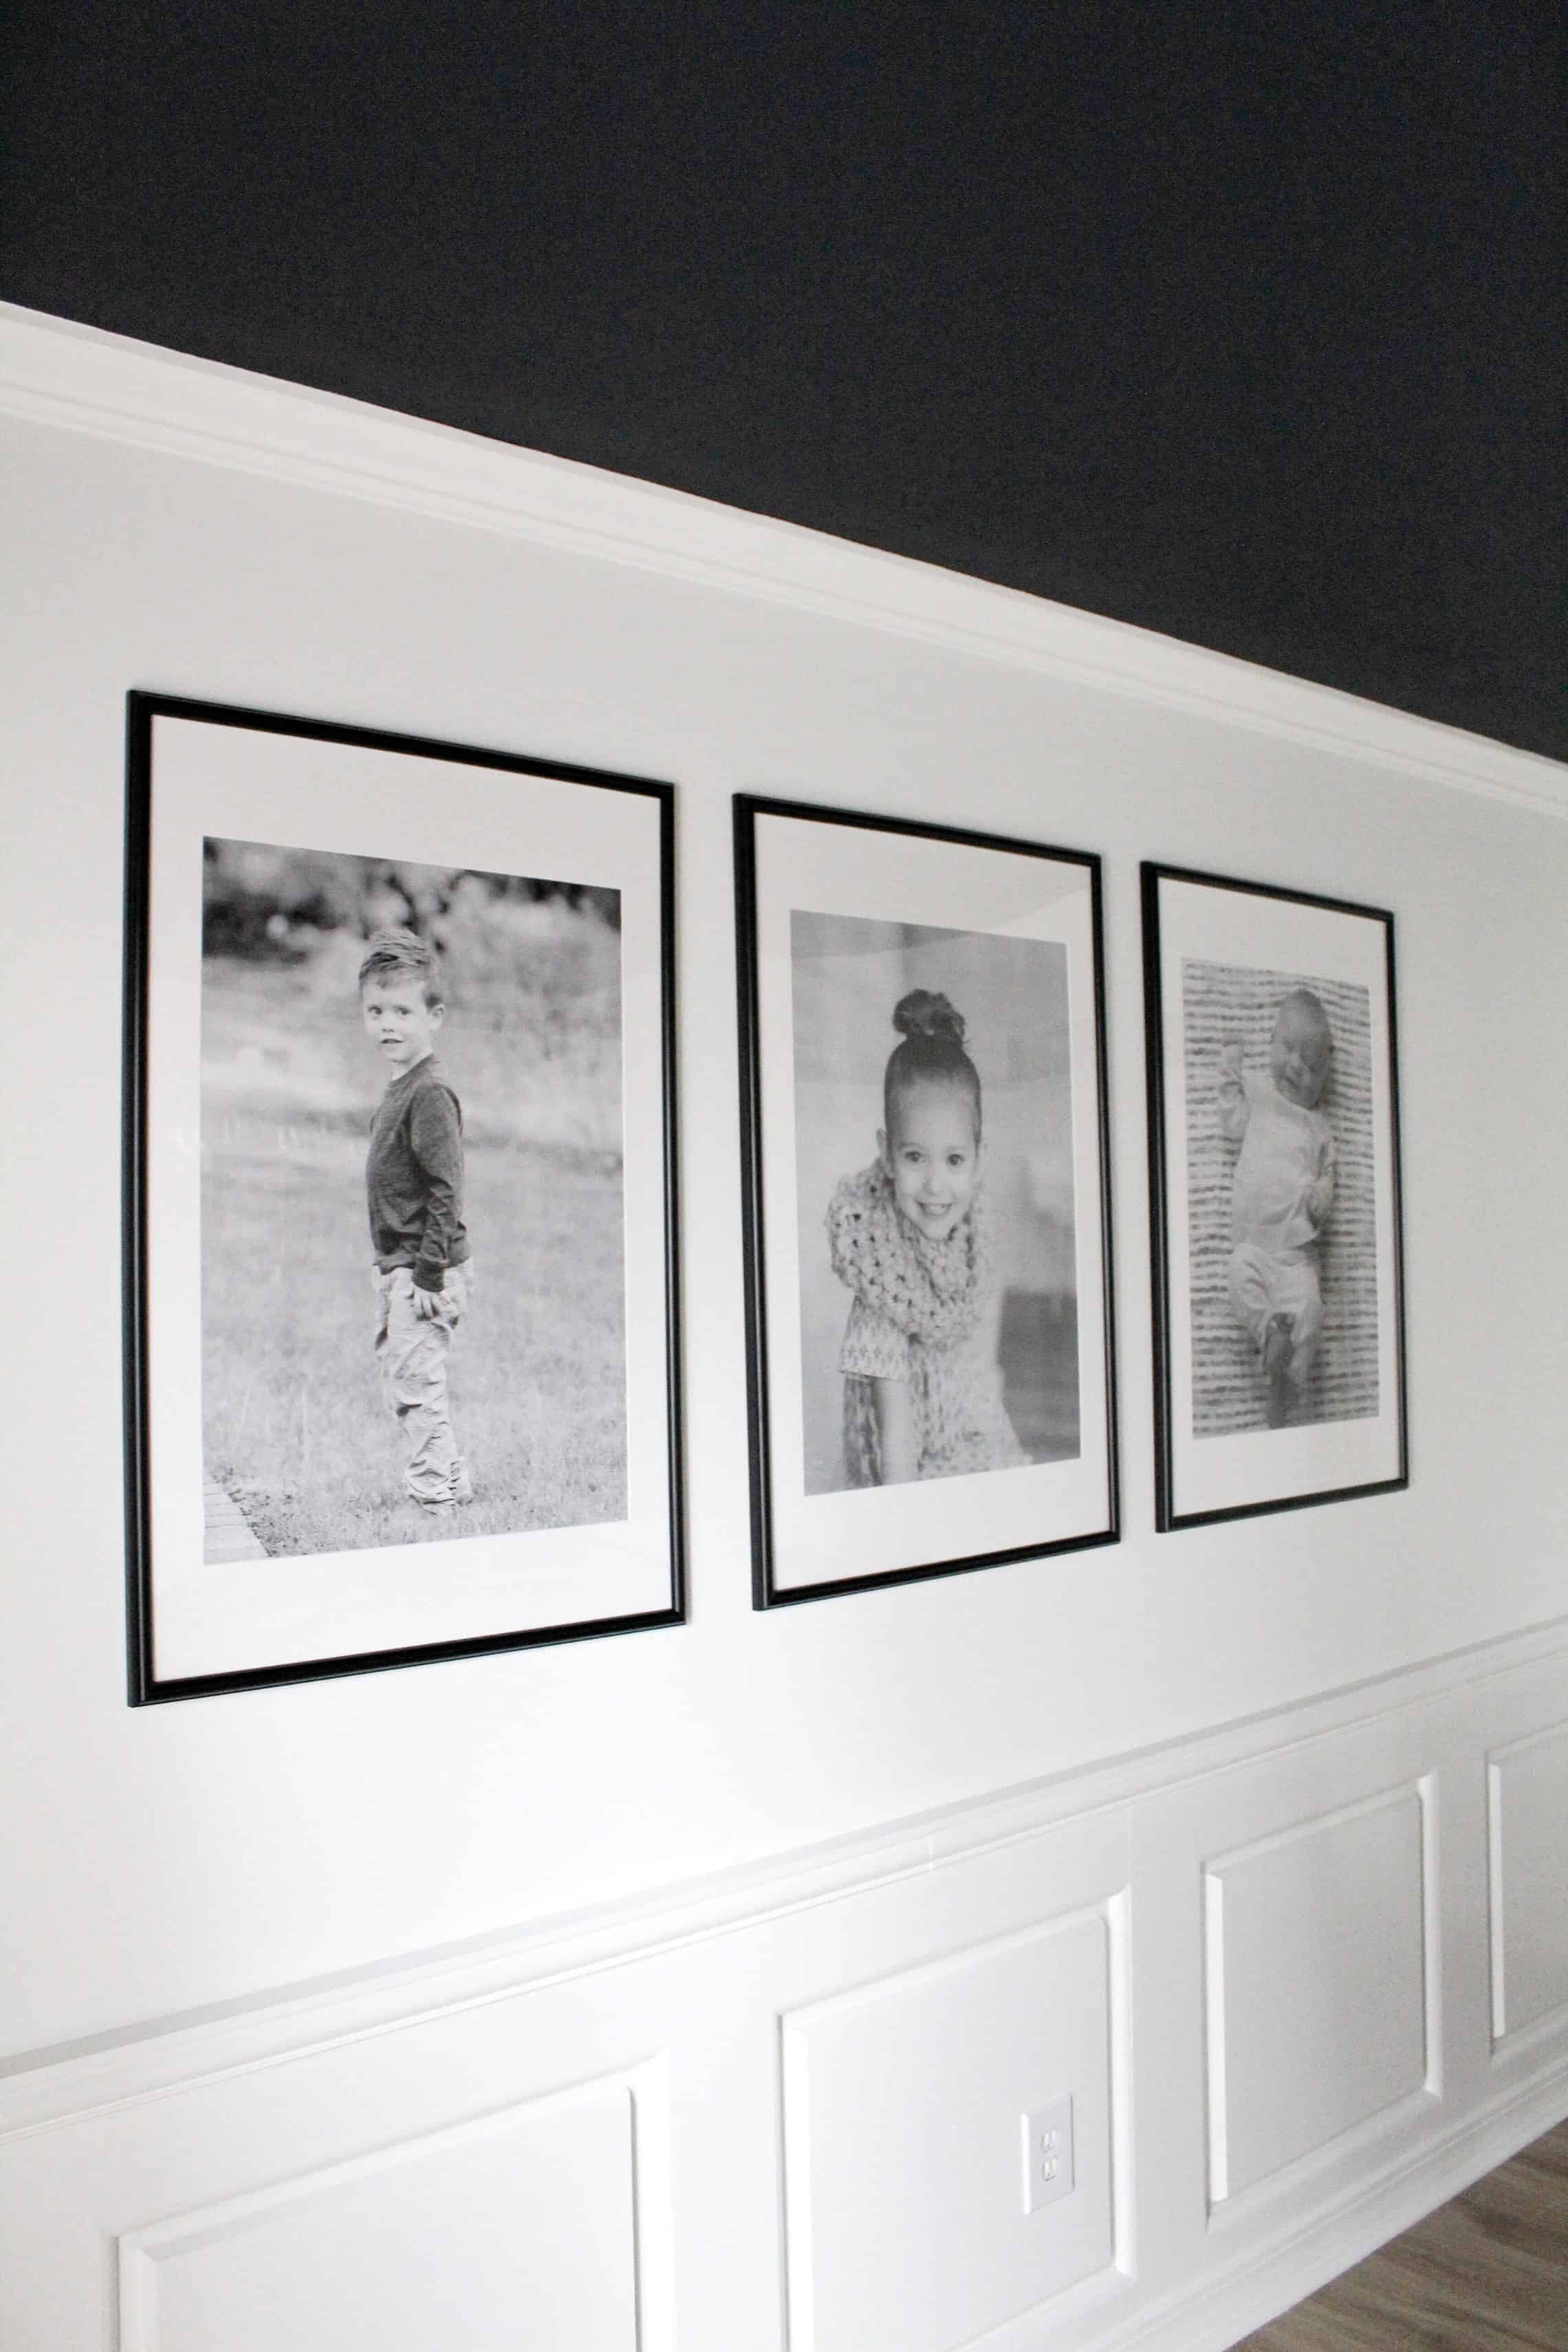
In my office the first two Items and the true focal points of the space are the sofa, and the Minted Print that I had selected to hang on the wall behind the desk. I really waited on the other decisions knowing that they needed to compliment yet take a back seat to those other focal points. When I am selecting those large feature pieces for a room I think about the overall feel I want for the room so that it is compatible with the use of the room. For instance I wanted my office to be bright, airy, feminine, and keep me in a calm head space when working. In a nursery you might want something serene or happy, or silly. My master bedroom I always lean towards romantic, and somewhat abstract artwork. Minted is always my go to for my printed wall art because they find exceptional artists from around the world, allowing for unique and broad options to choose from, and the finished product is always stunning.
Selecting the Finishing Touches
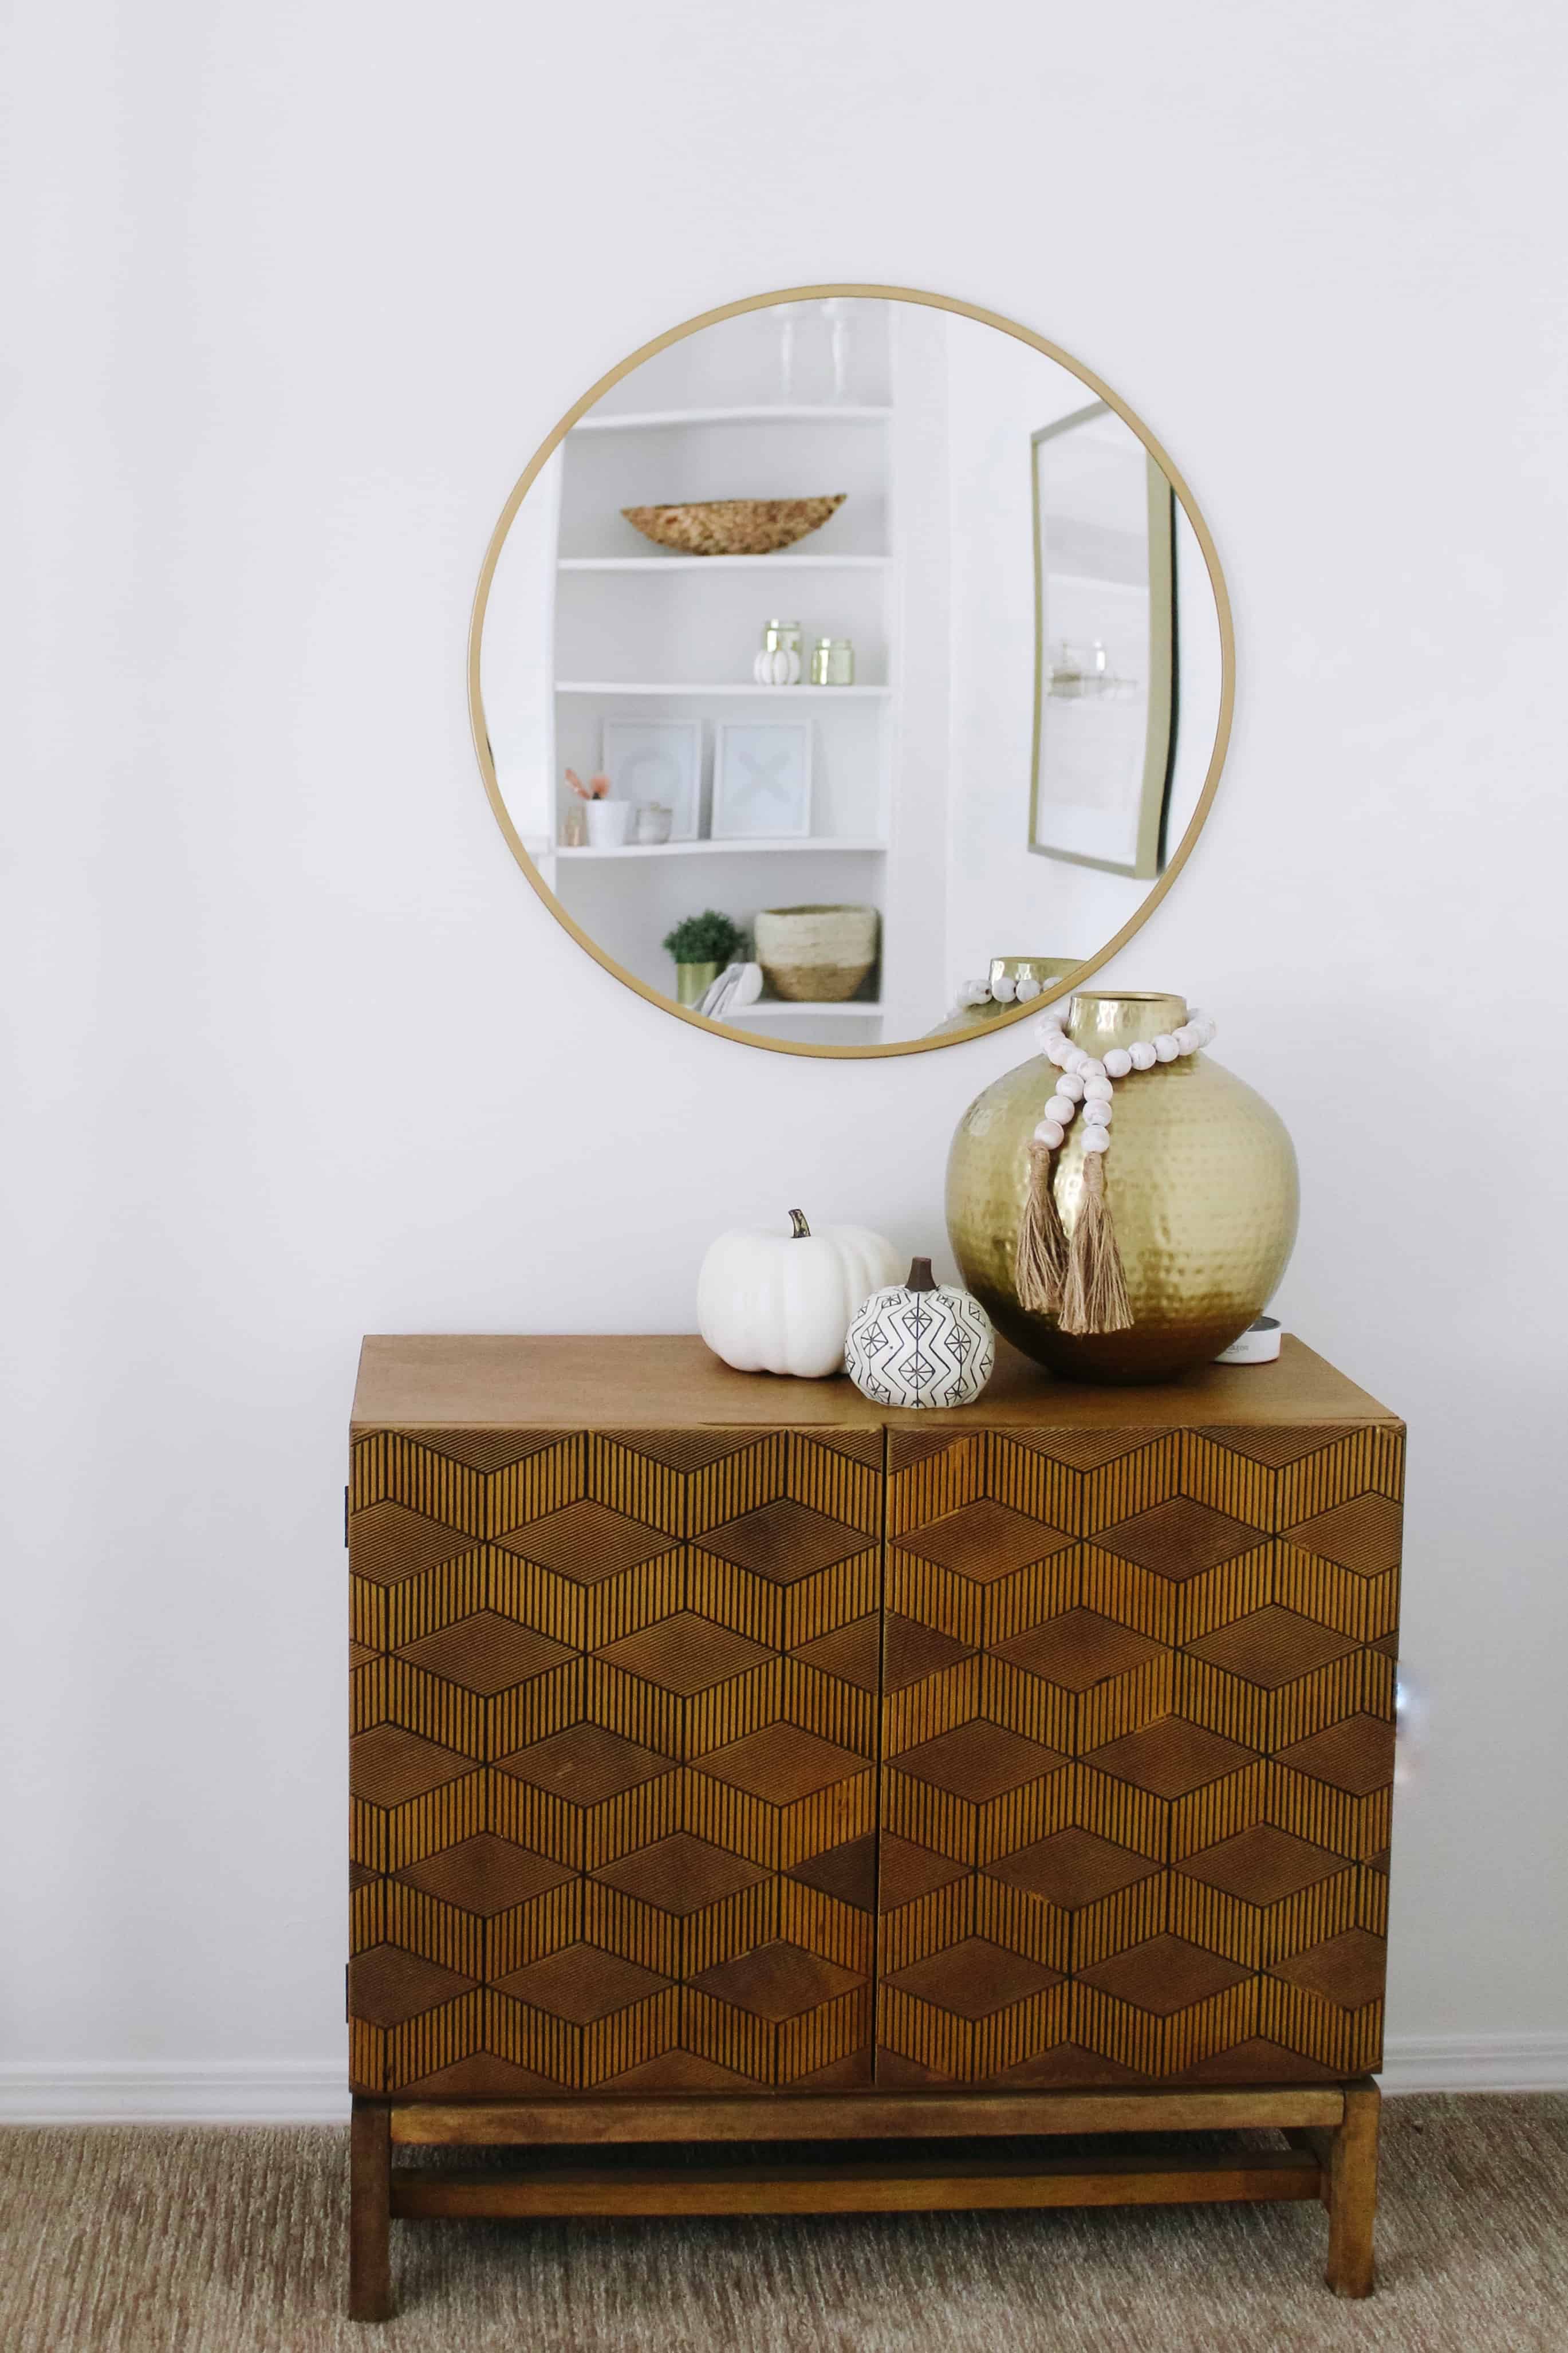
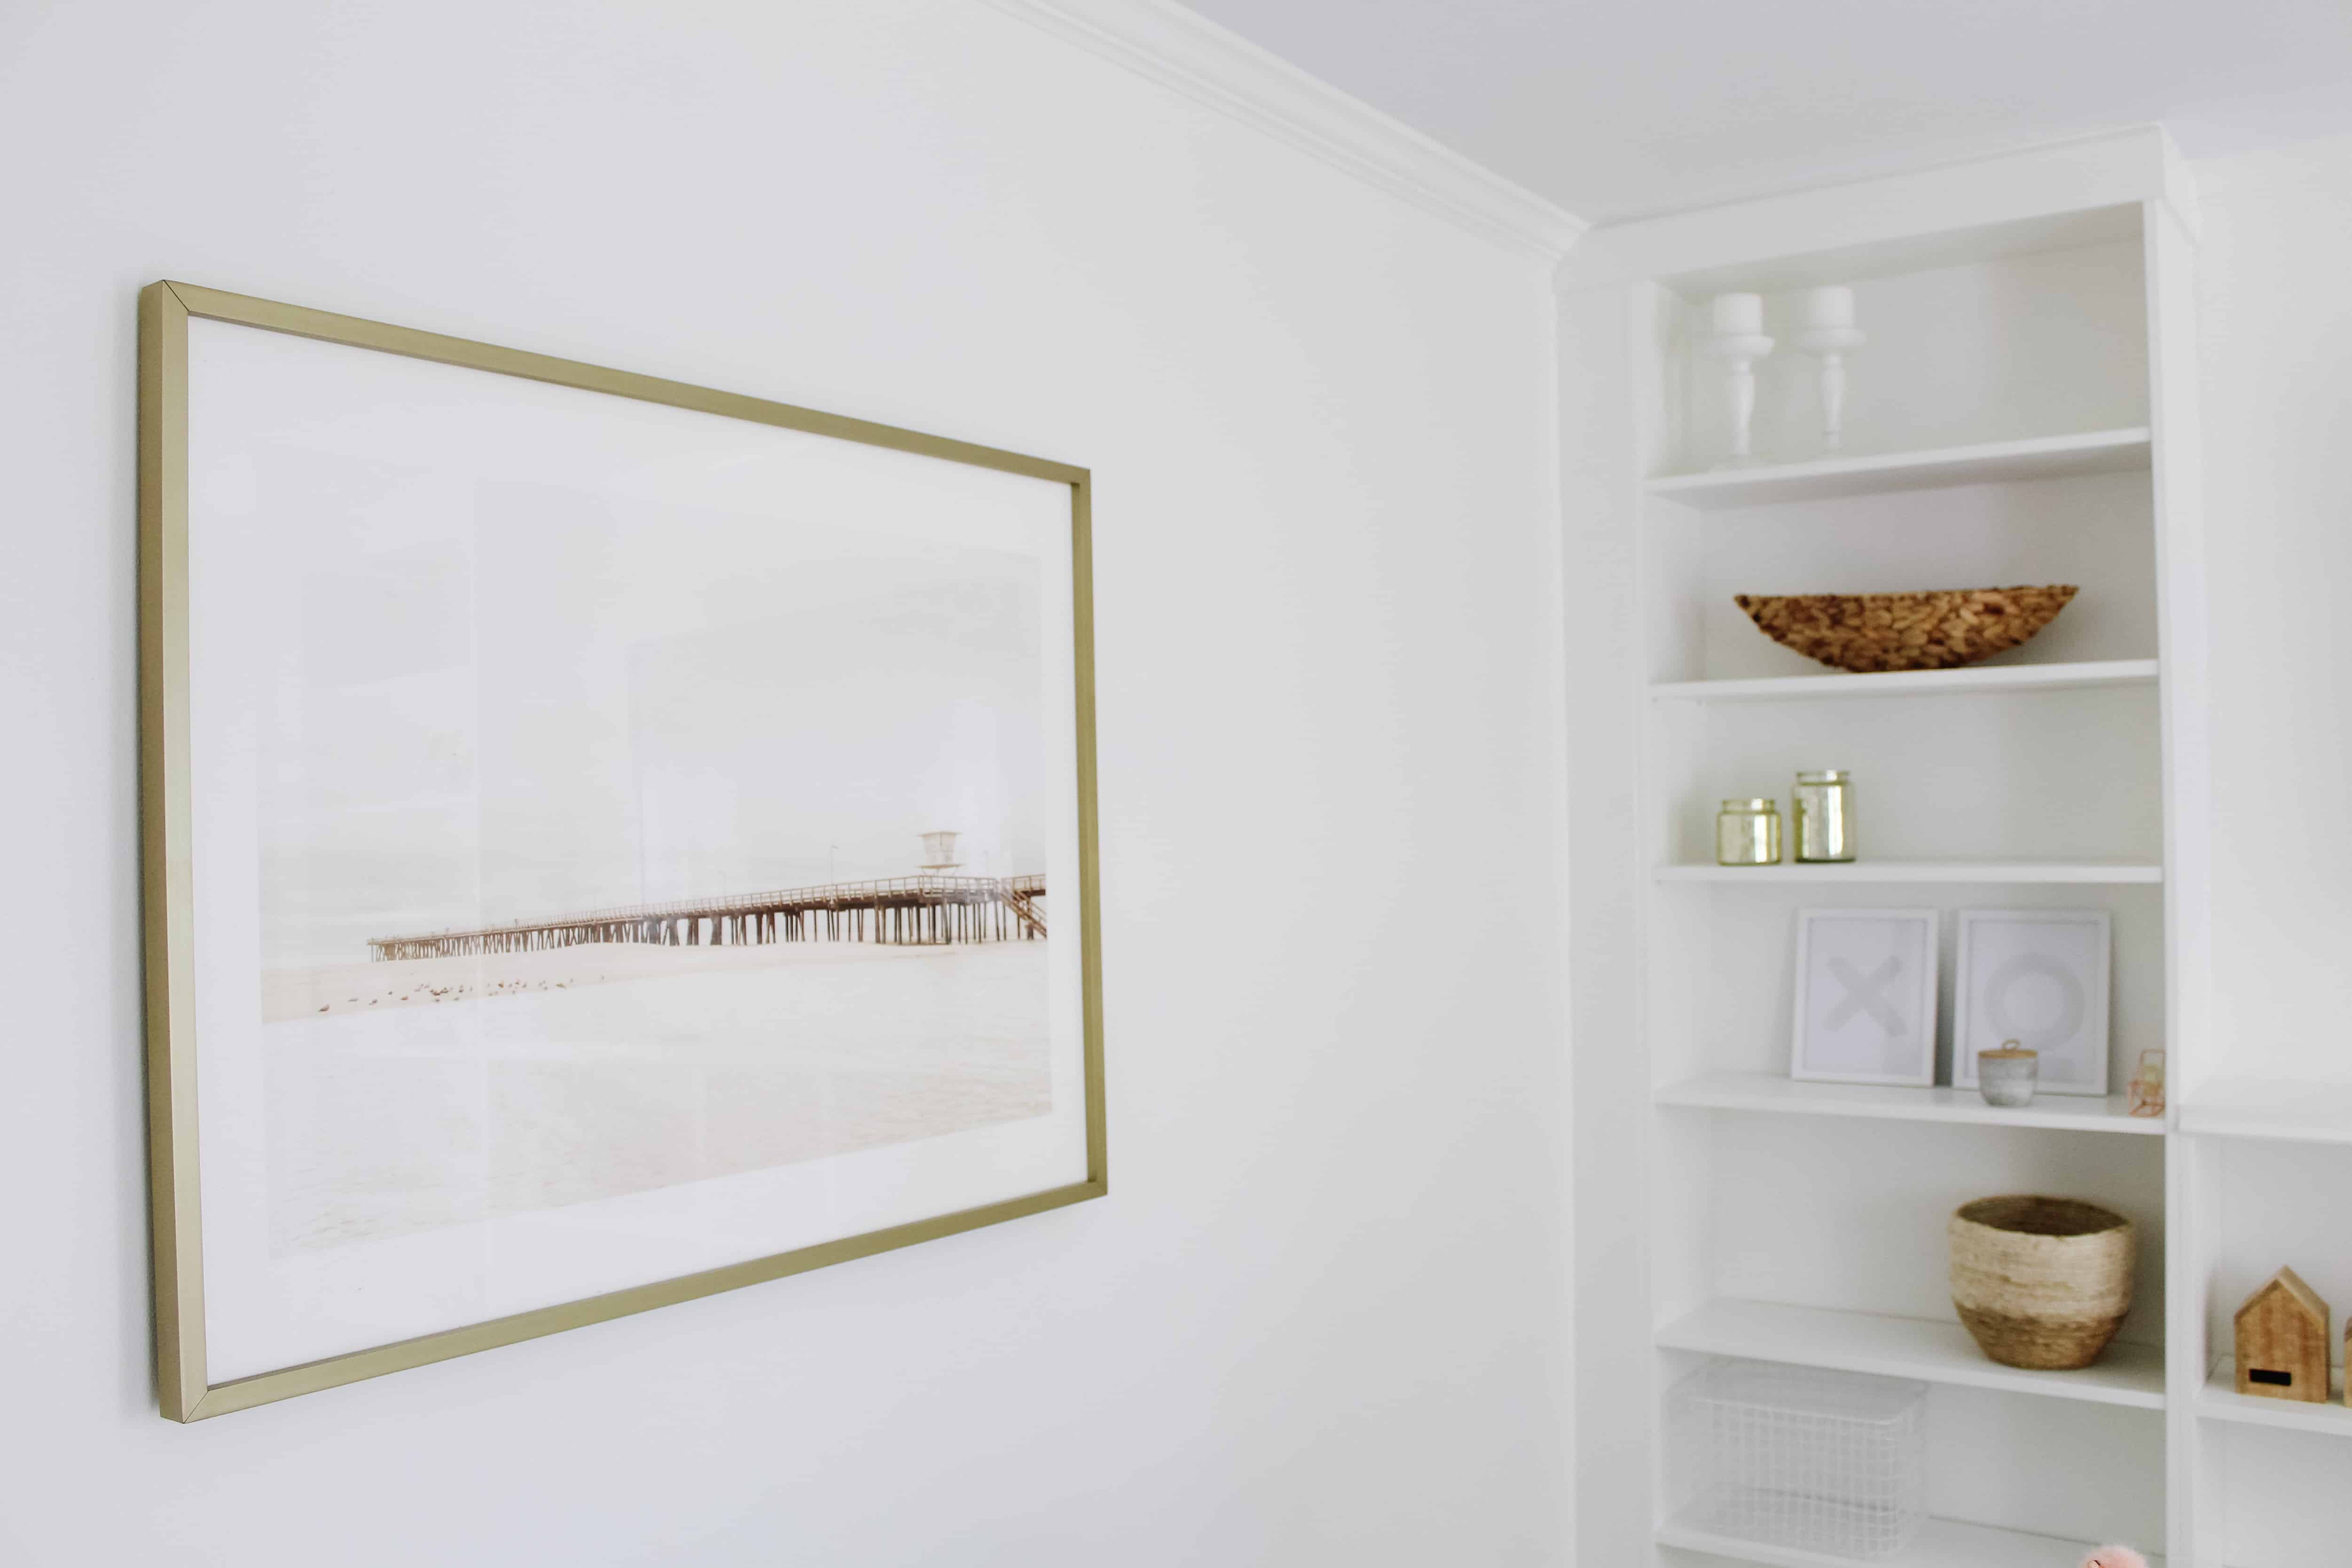
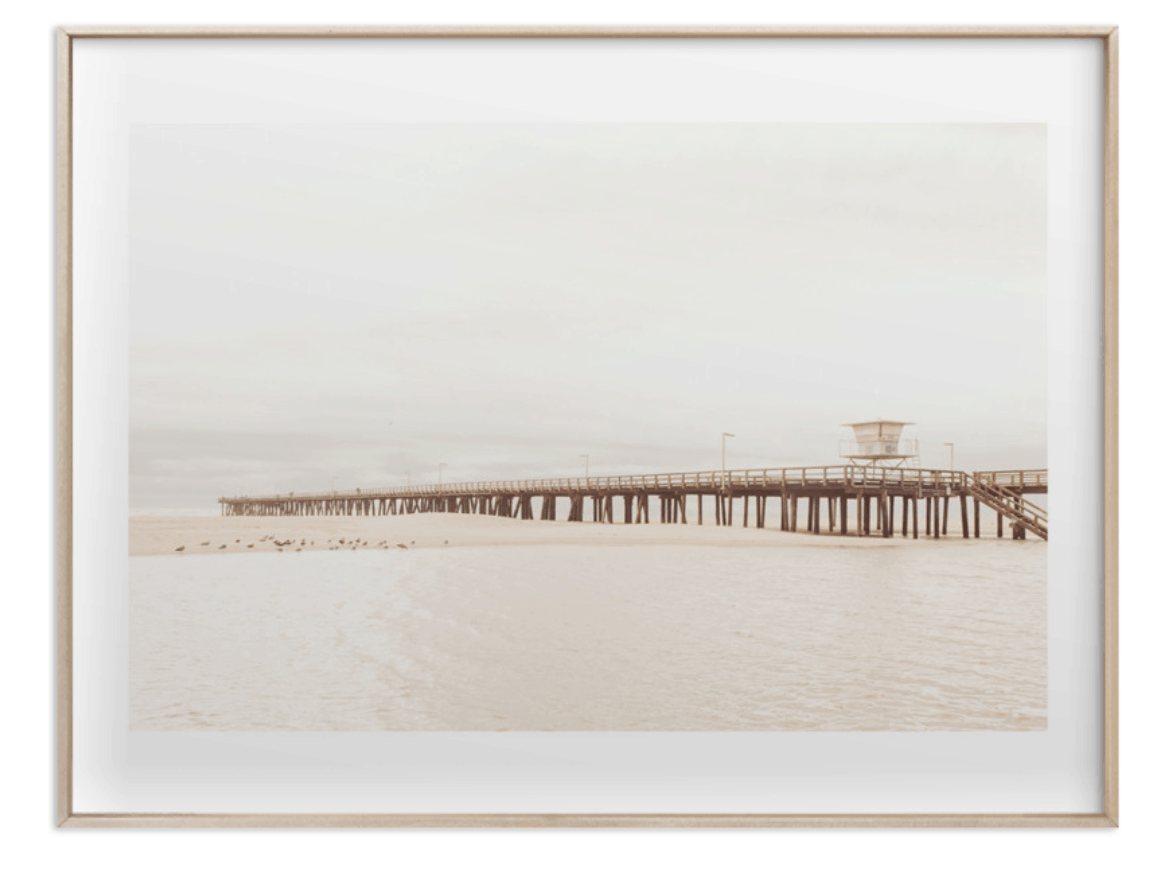
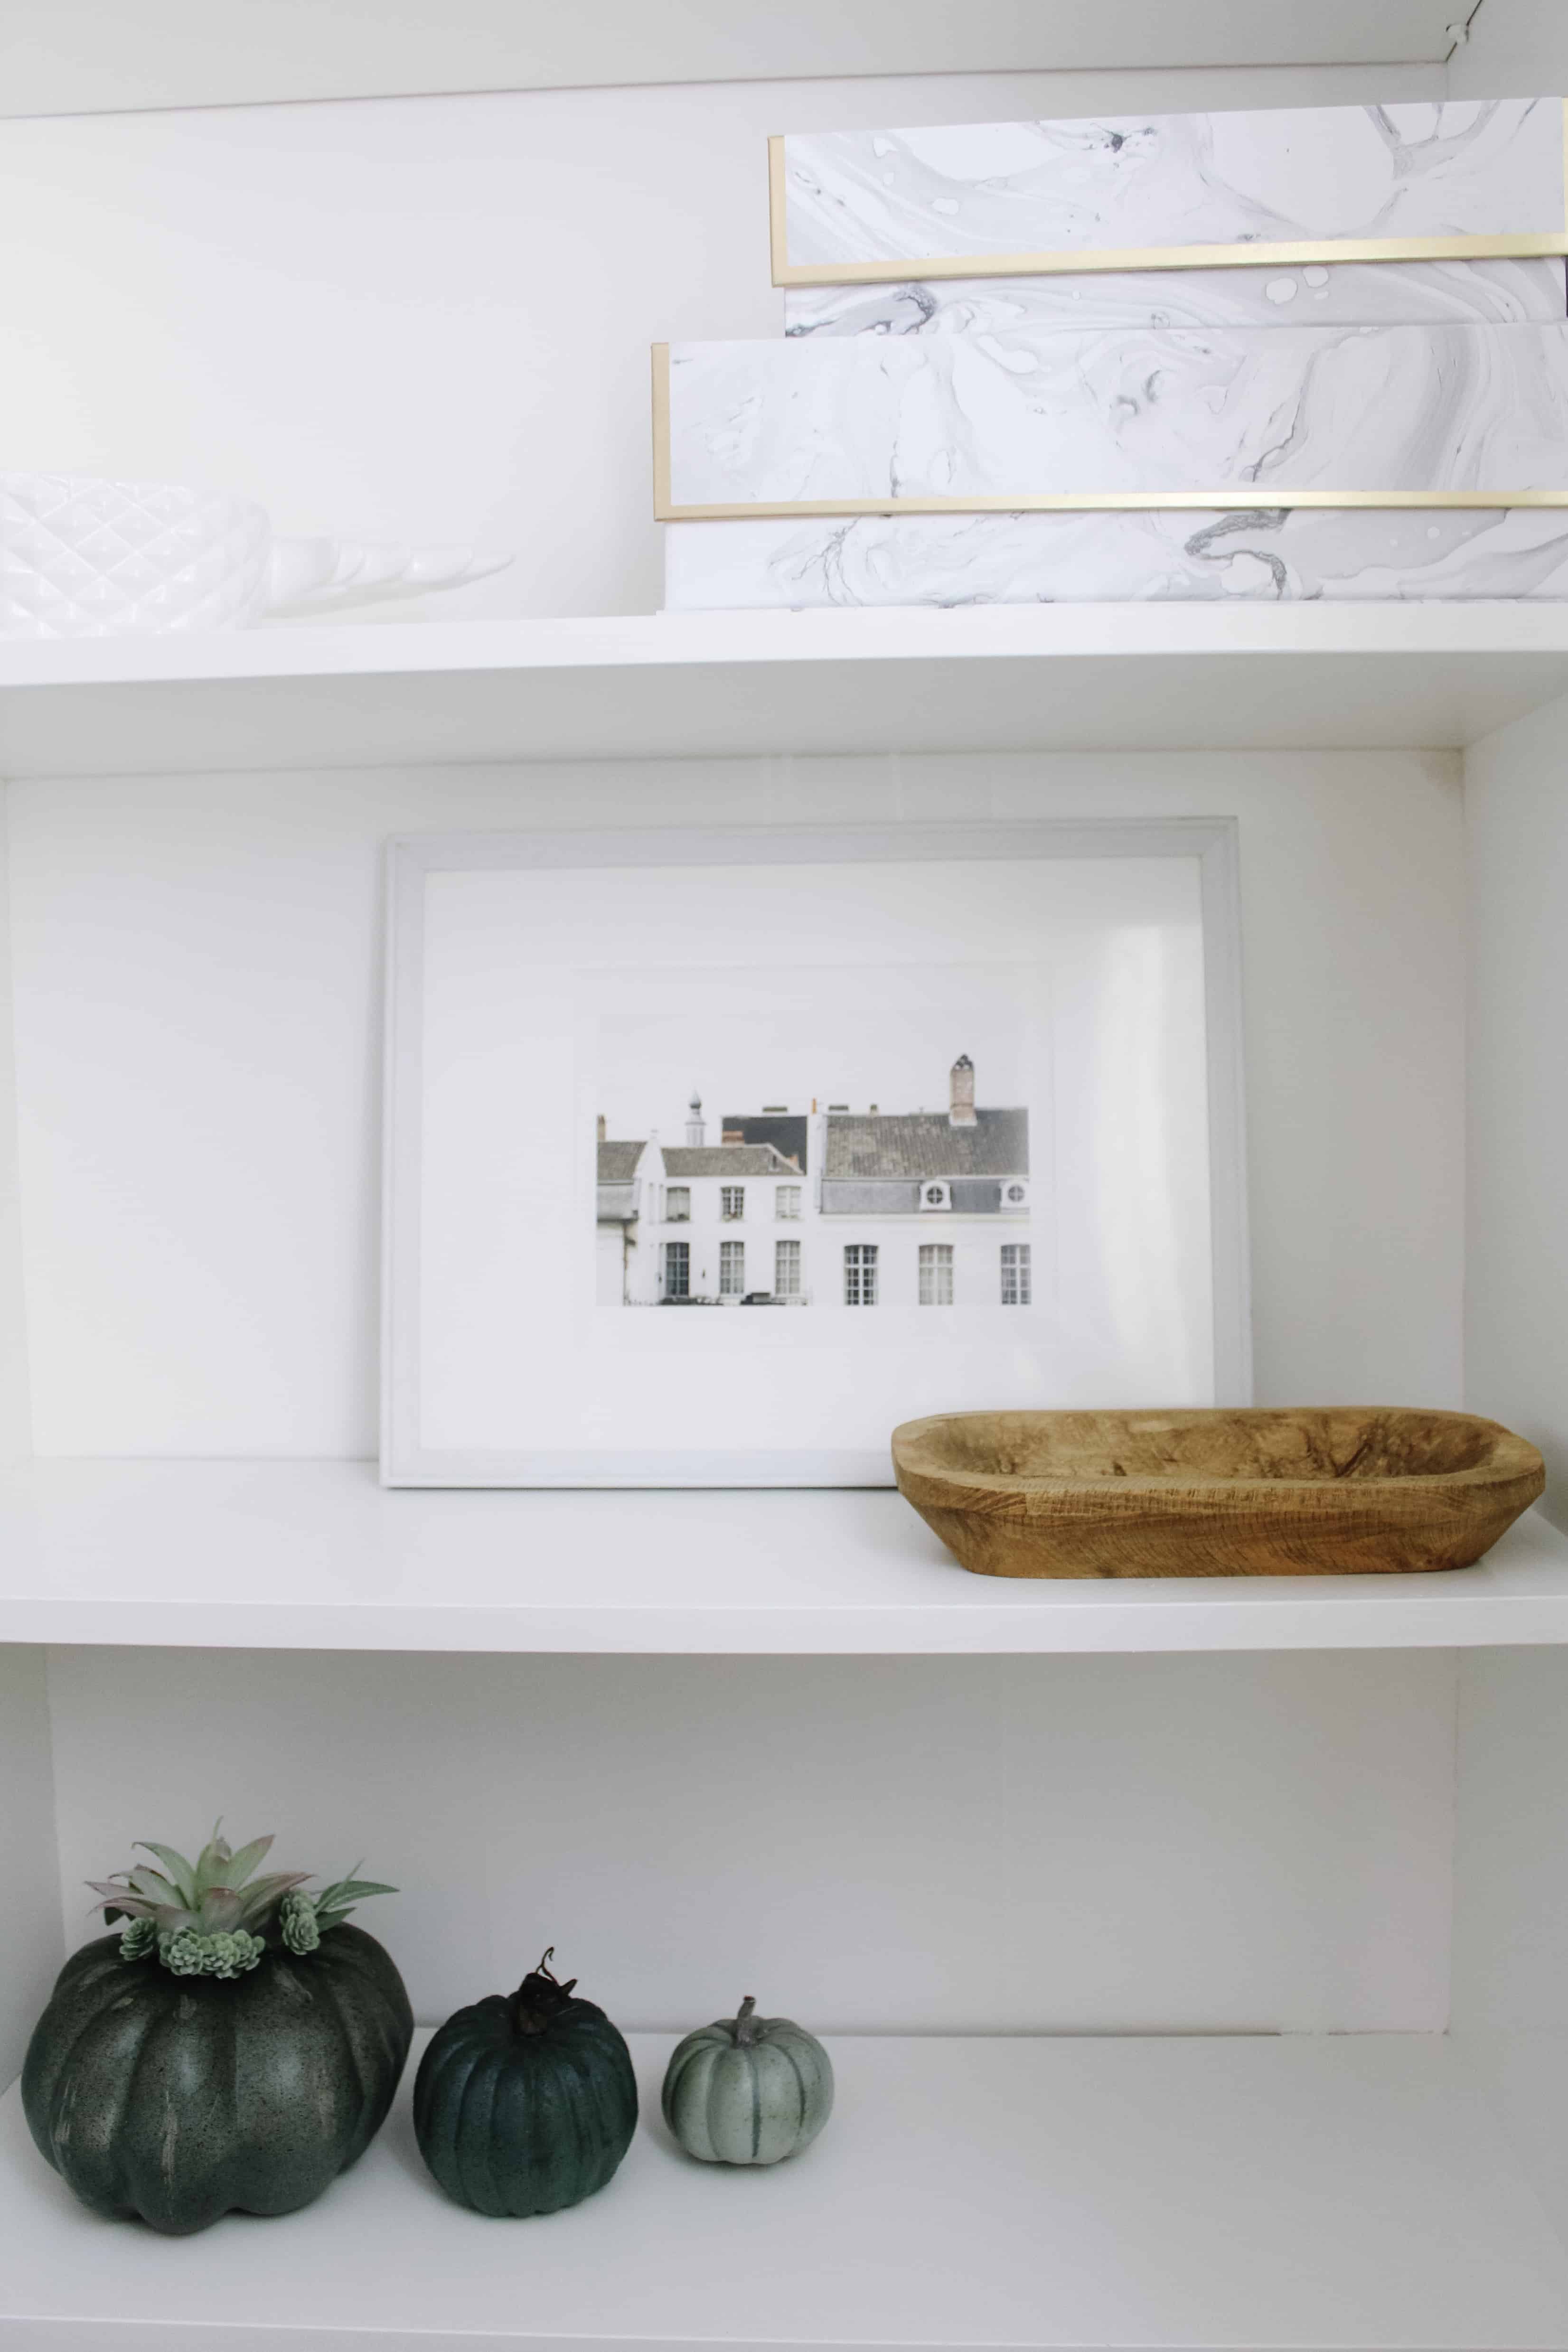
One thing most people don’t realize is that sometimes the size of the item isn’t a factor in its importance of the room decor. For instance in my home office the desk and rug were very much after thoughts based upon the focal point pieces. I went with Stormy Pier for my art work, and wanted 1 large framed piece to keep things simple and grounded on that wall. I loved how serene the scene was and how it instantly took me to the beach where it was quiet, but the tones used allowed for a more classic vintage look.
Based upon that I really tried take tones from the print and frame to start adding layers of texture in the room. There were so many neutrals and the beachy scene allowed me to go in a slightly coastal modern direction with the decor. I used lots of mixed textures and materials on both the built ins, but also all the way onto the curtains. I also loved how the smaller print Ghent from Minted was such a great little addition on the built-ins. As a home decor blogger, it was such a nice homage to that, and literally takes me to that space when I look at it.
Stick to your Style
Overall I know when I decorate that I will be happiest with a fairly neutral space and that includes art work. I try to pick pieces that allow for changing small details when I am itching for a change, but over all I stick to my style throughout my home. A clean modern look always ends up making me happiest so that is the direction I try to go! Do you have a go to look or plan when you’re picking art work? Do you start small or large when you’re decorating a space? I would love to hear your process in the comments!
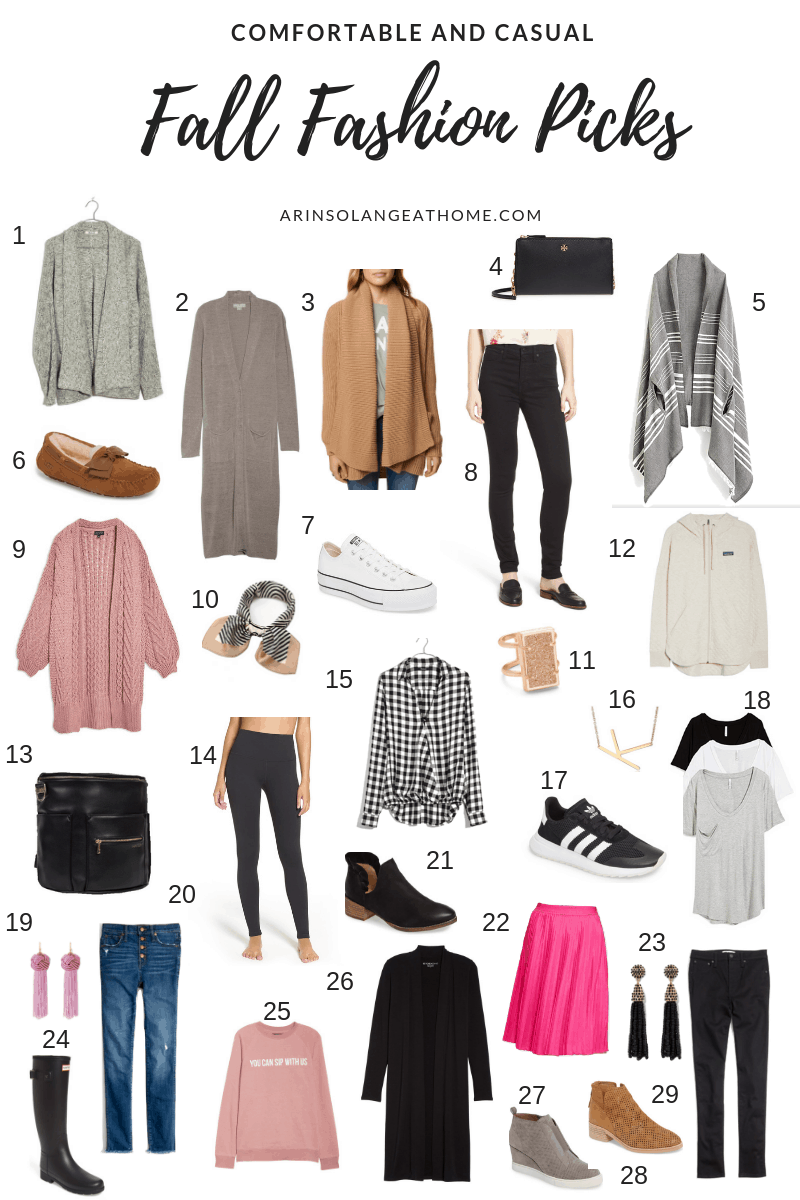
I am finally finishing up my Fall fashion trends series with my friend Navy. If you missed the other three you can check out my pick for baby boys, toddler girls, and little boys here, and enjoy shopping this post. I tend to like pieces I can layer that are easy to transition from day to evening in the fall. Many times I’ll wear the same thing all day but change from leggings to jeans, which happens to be the best part of fall fashion!
Now for me to buy everything I don’t own above since the temps are finally dropping here in St. Louis, so I can dive into the best fashion season of them all! Leave me a comment to let me know your favorite.
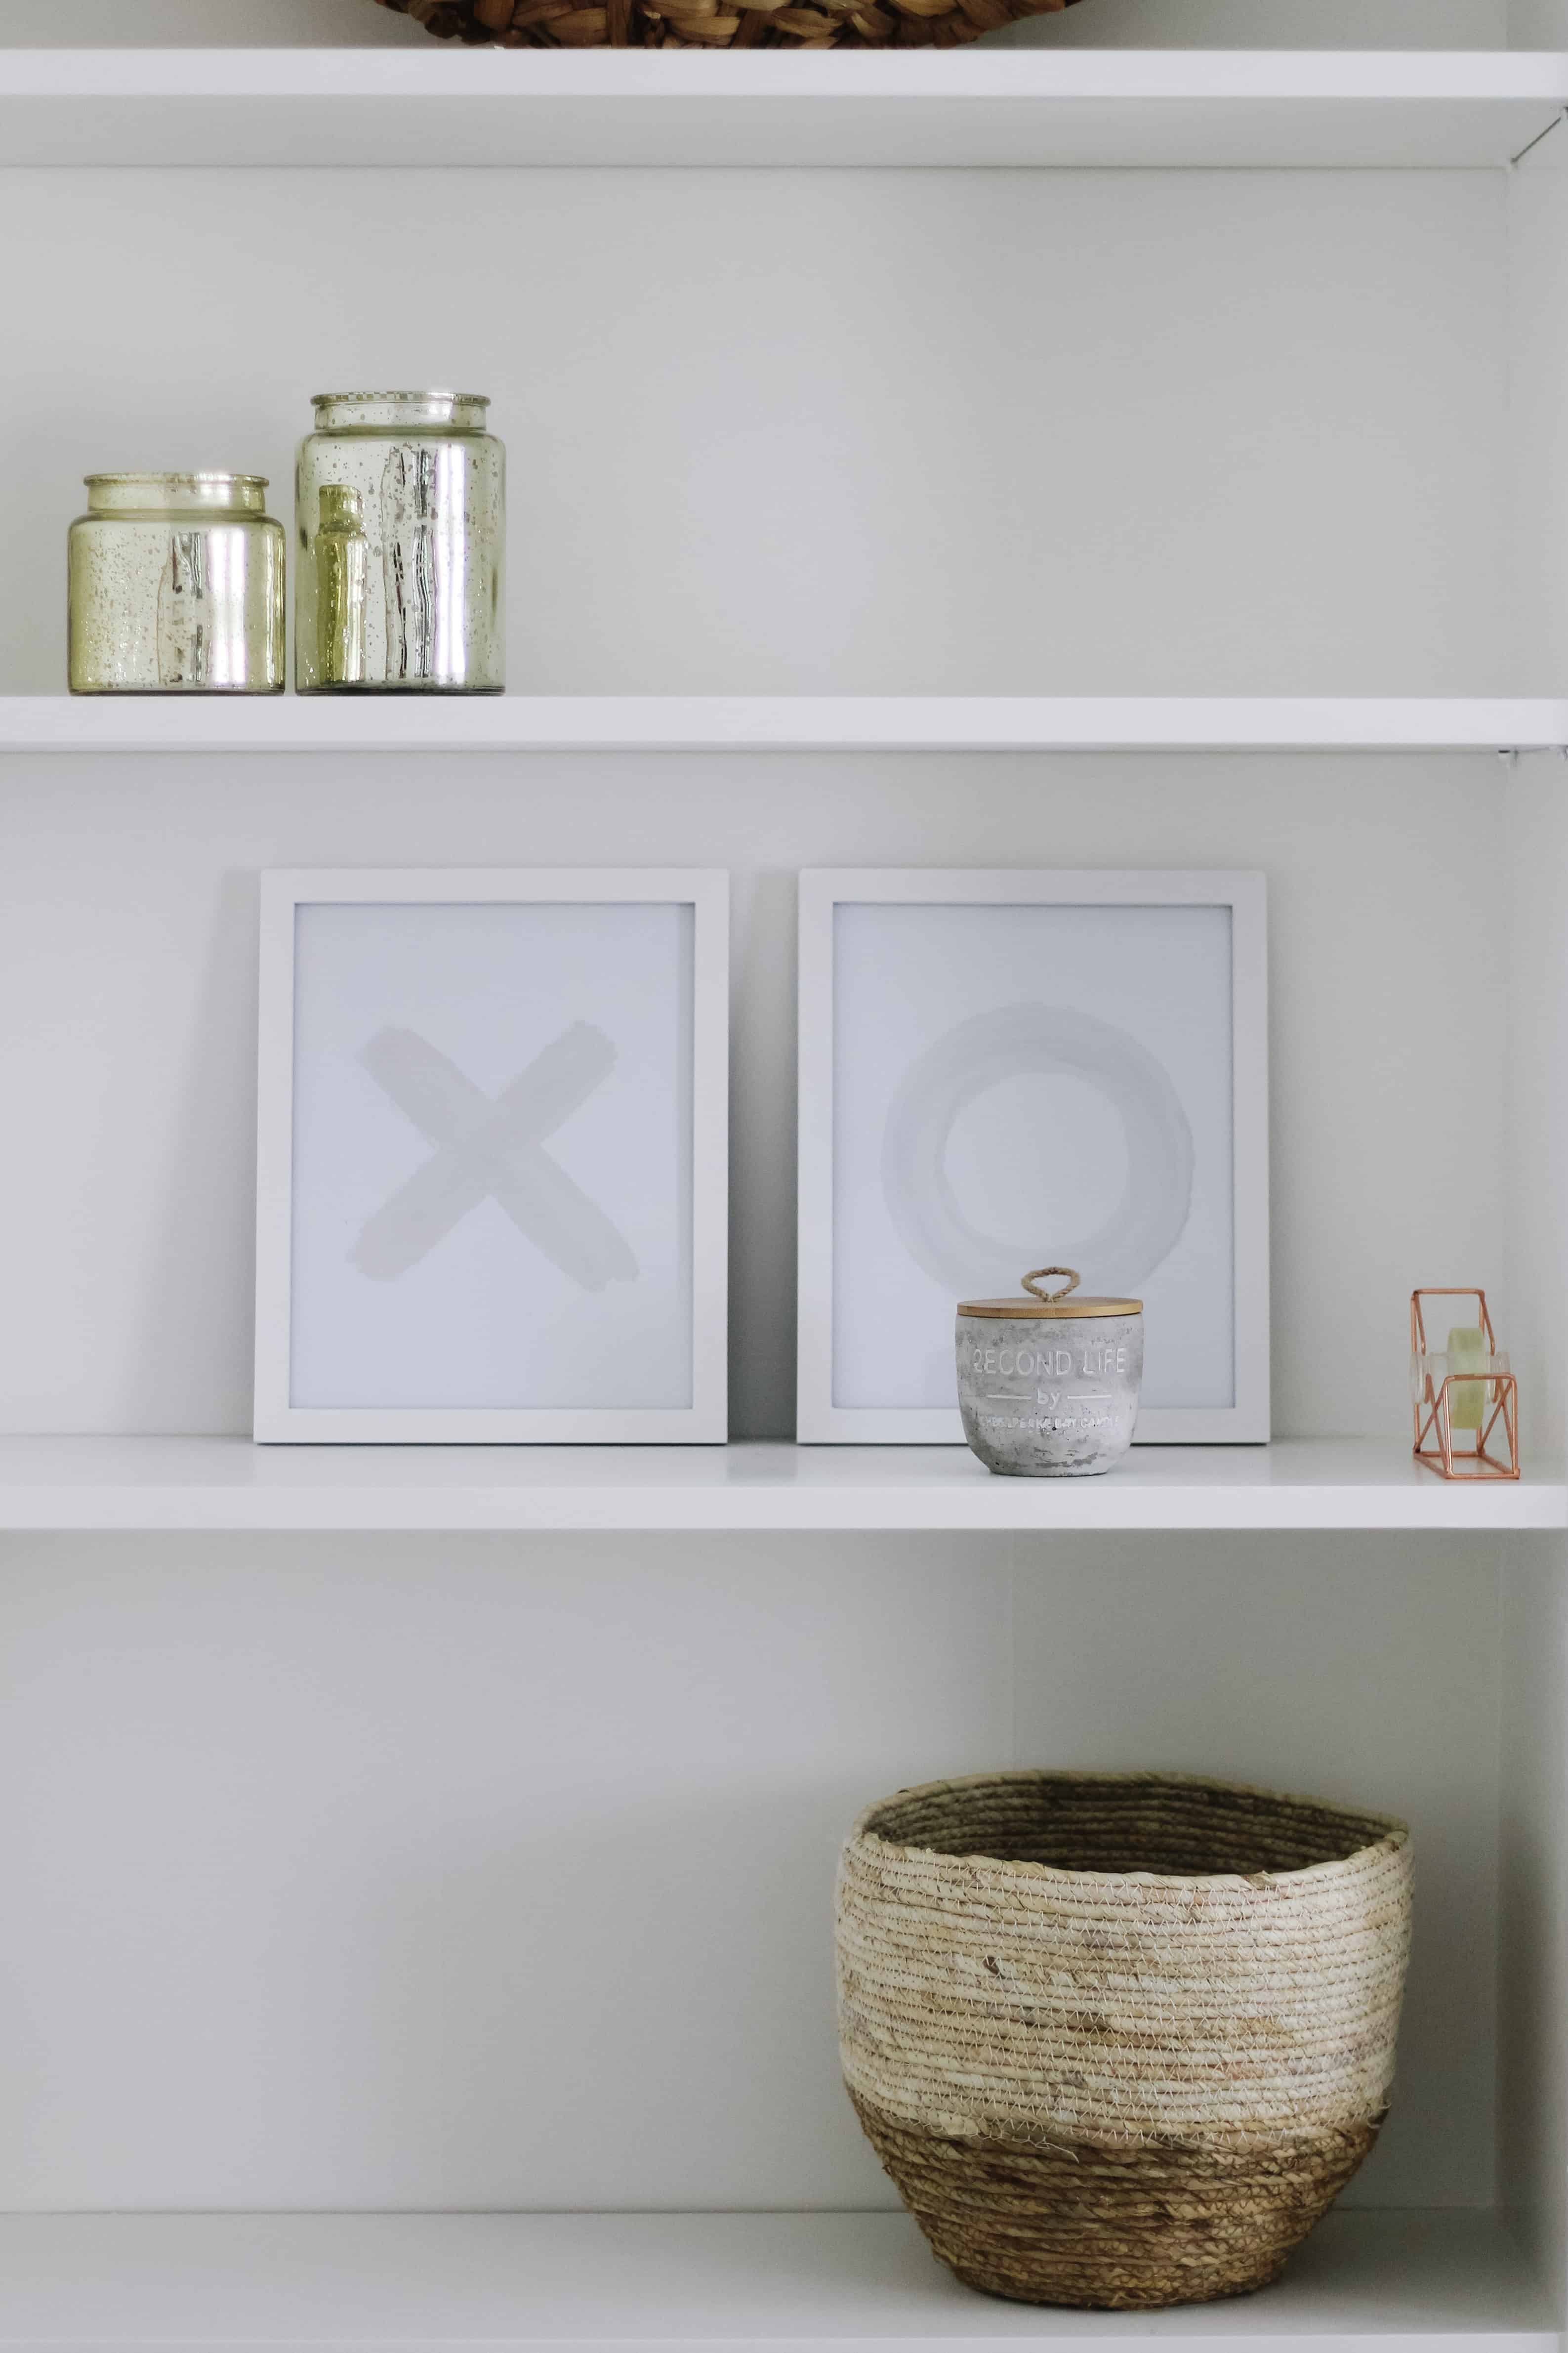
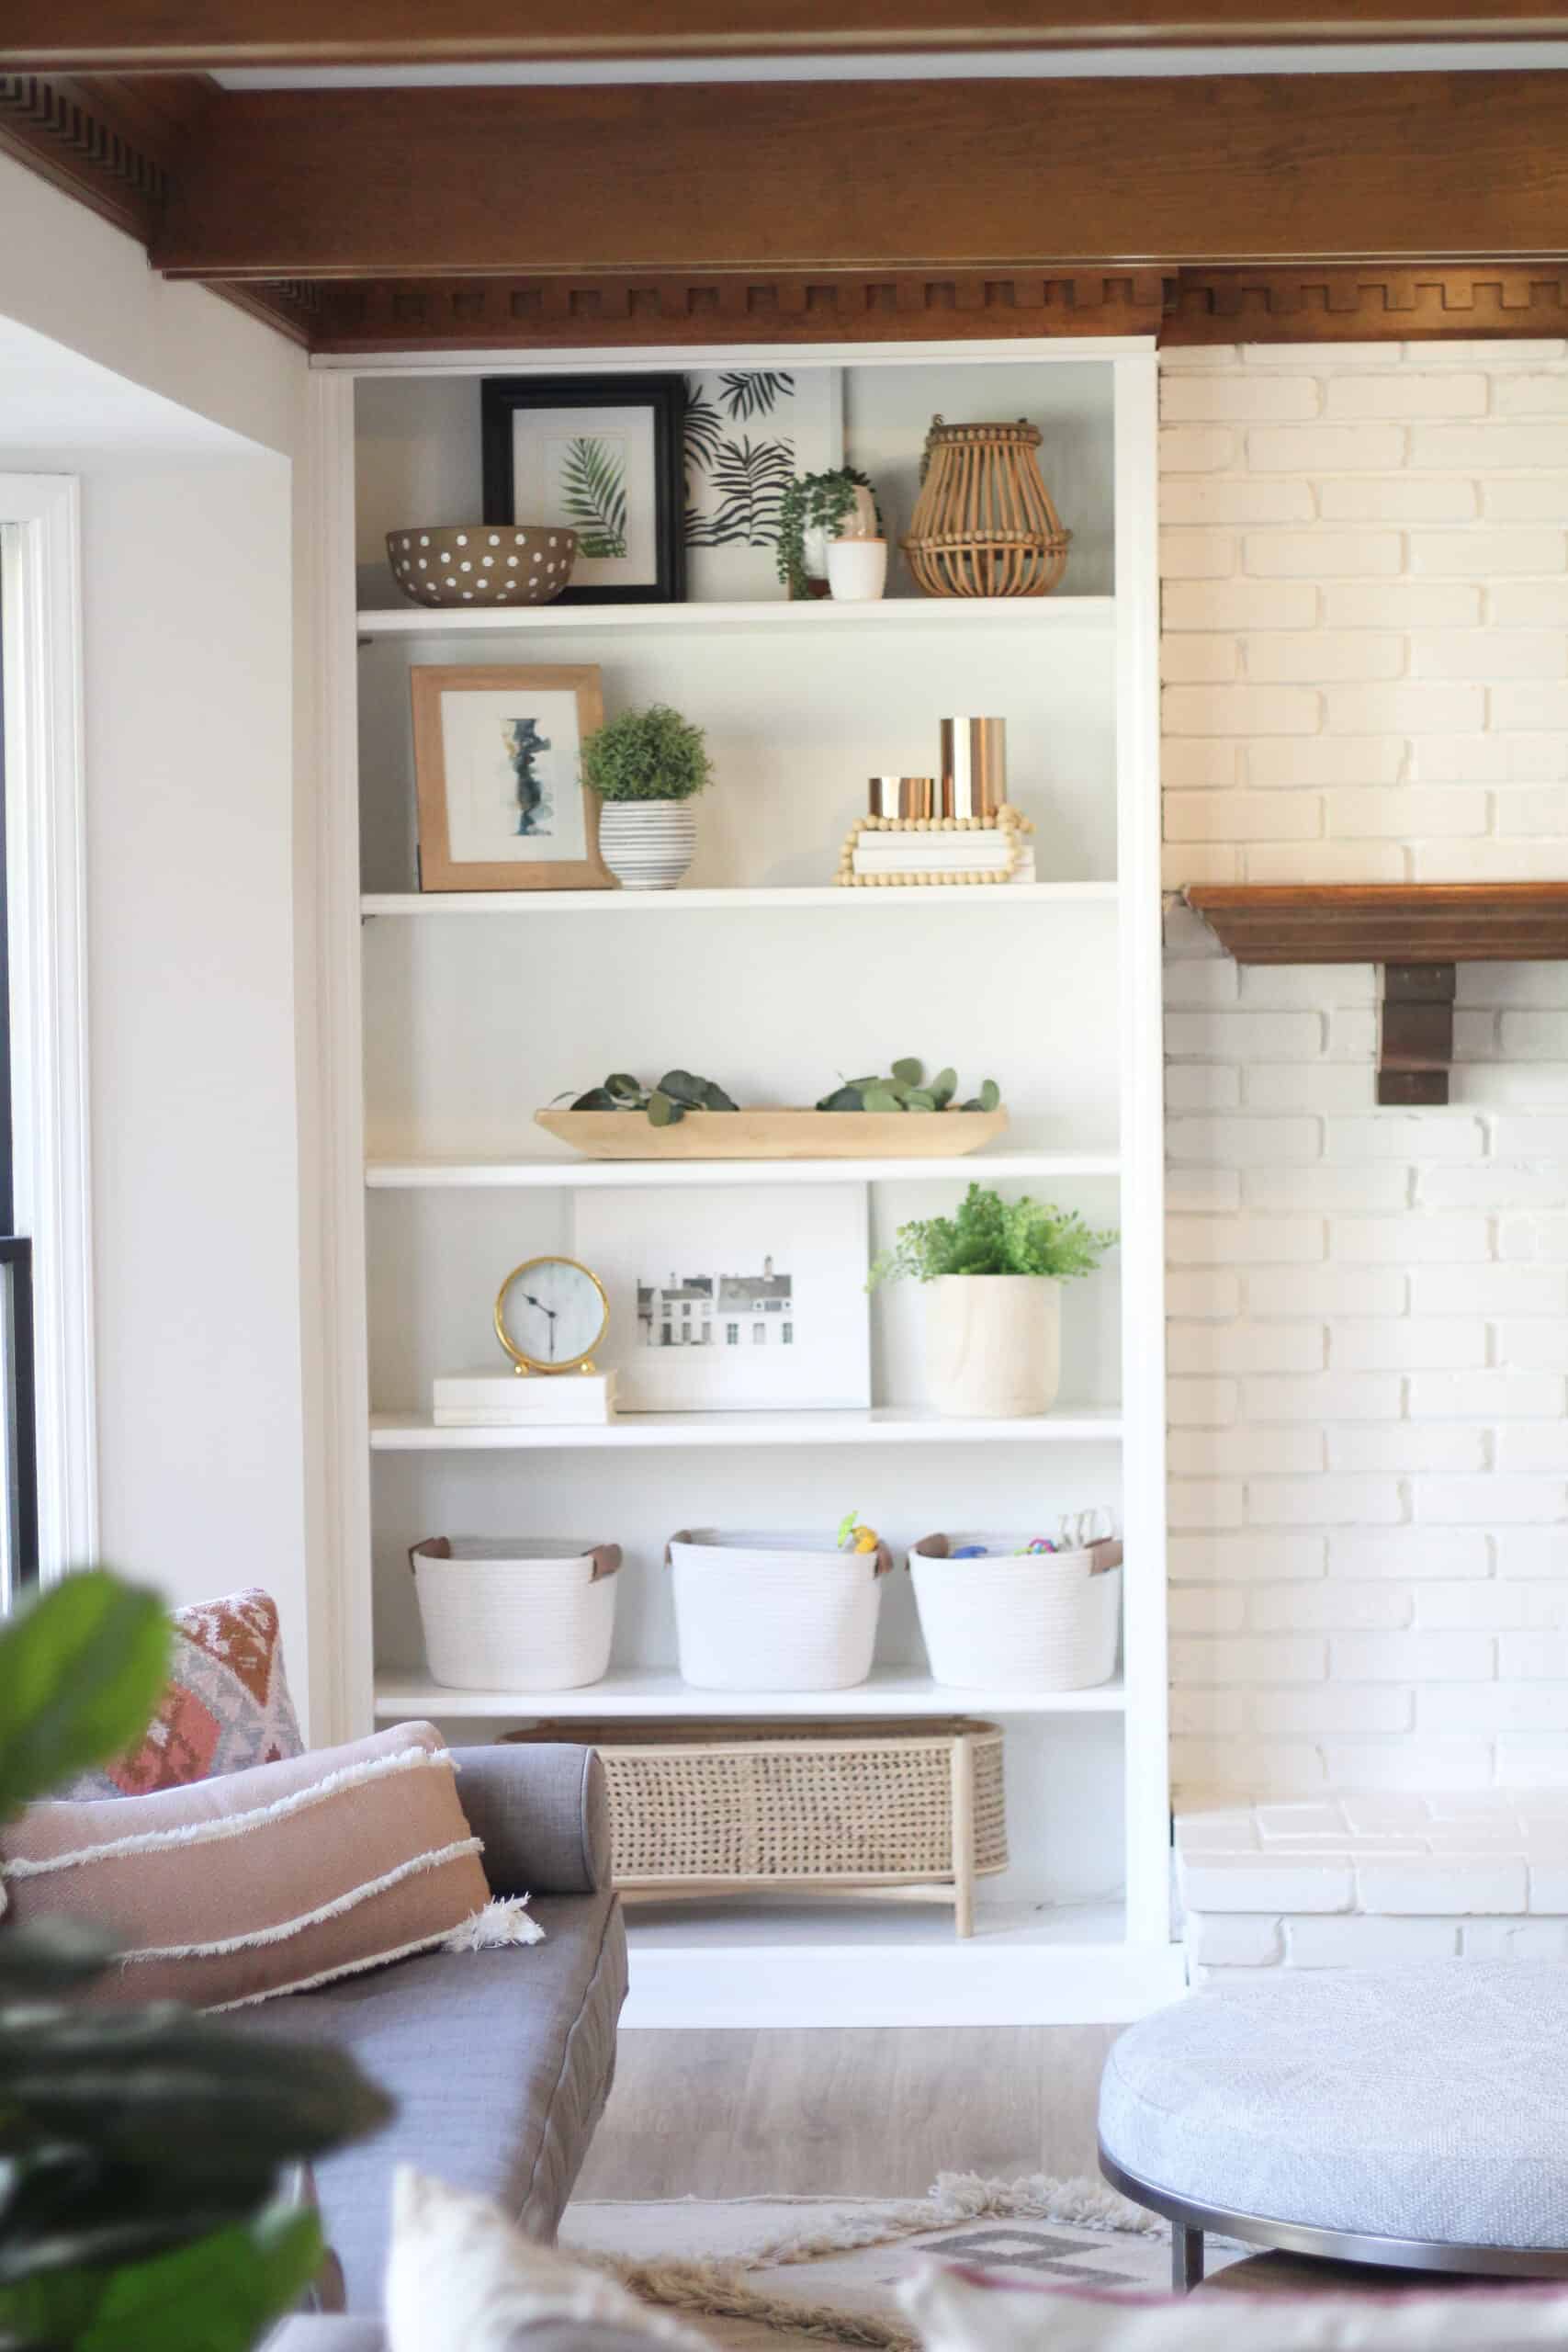
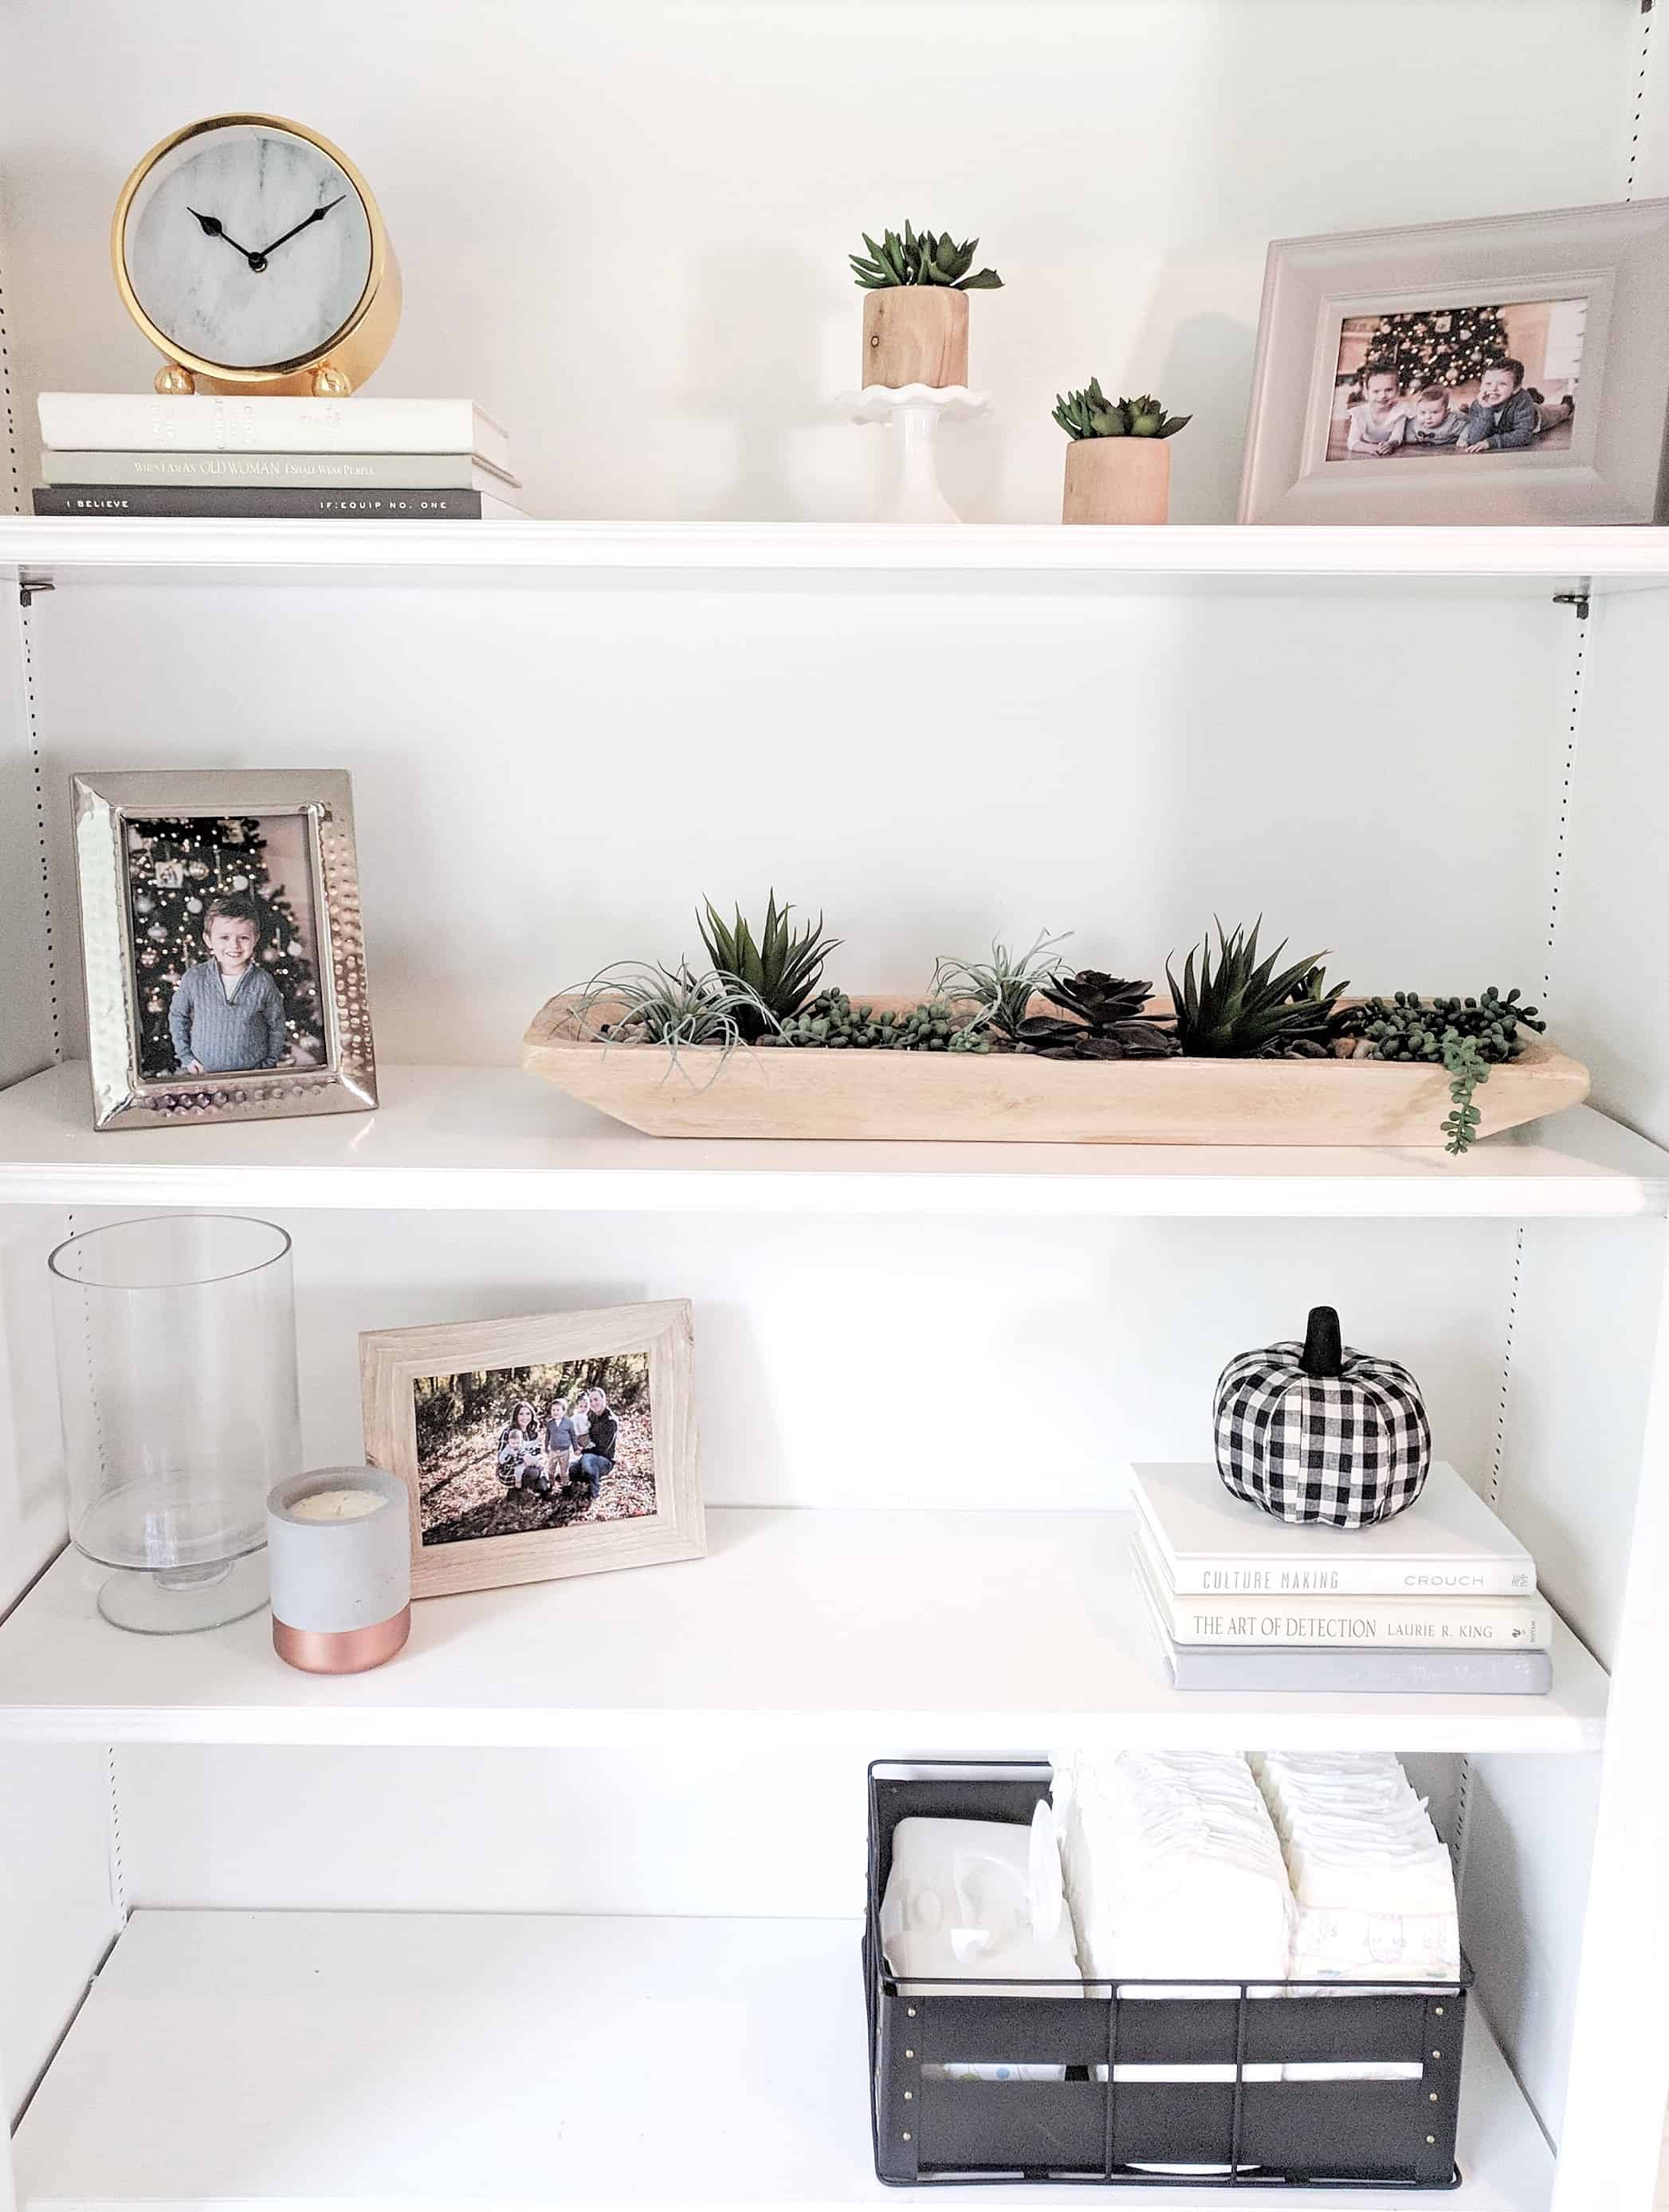
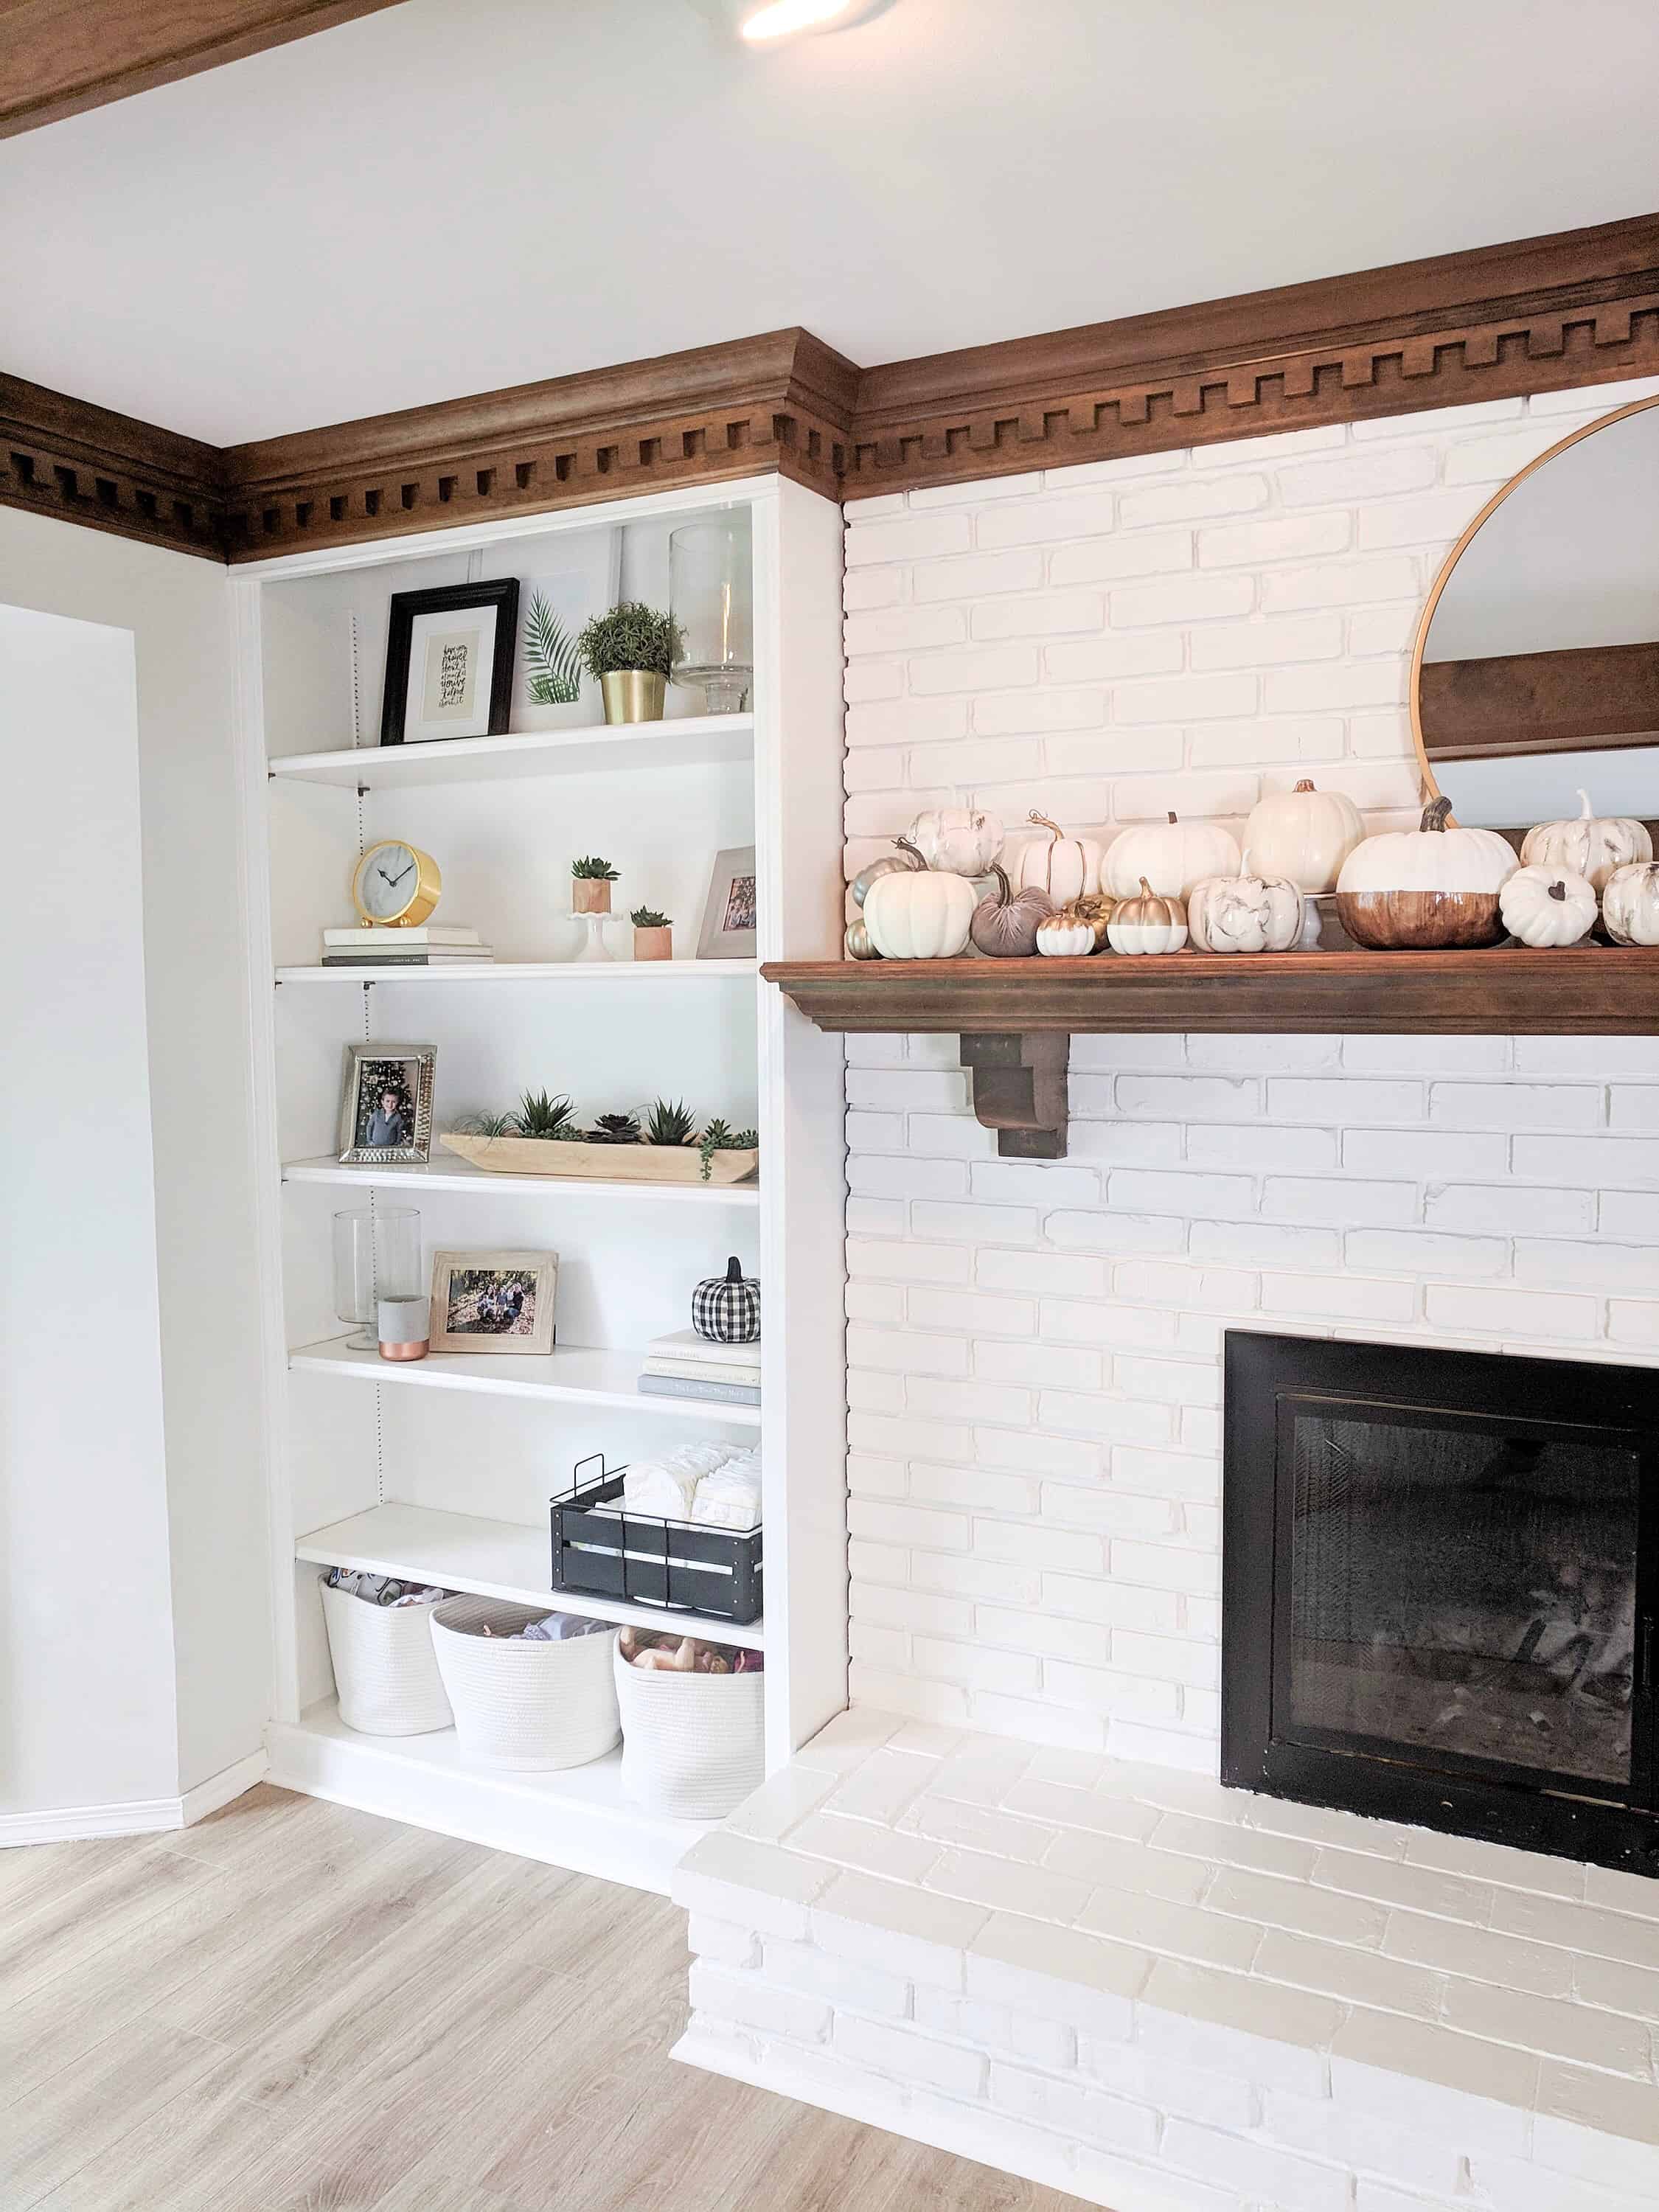
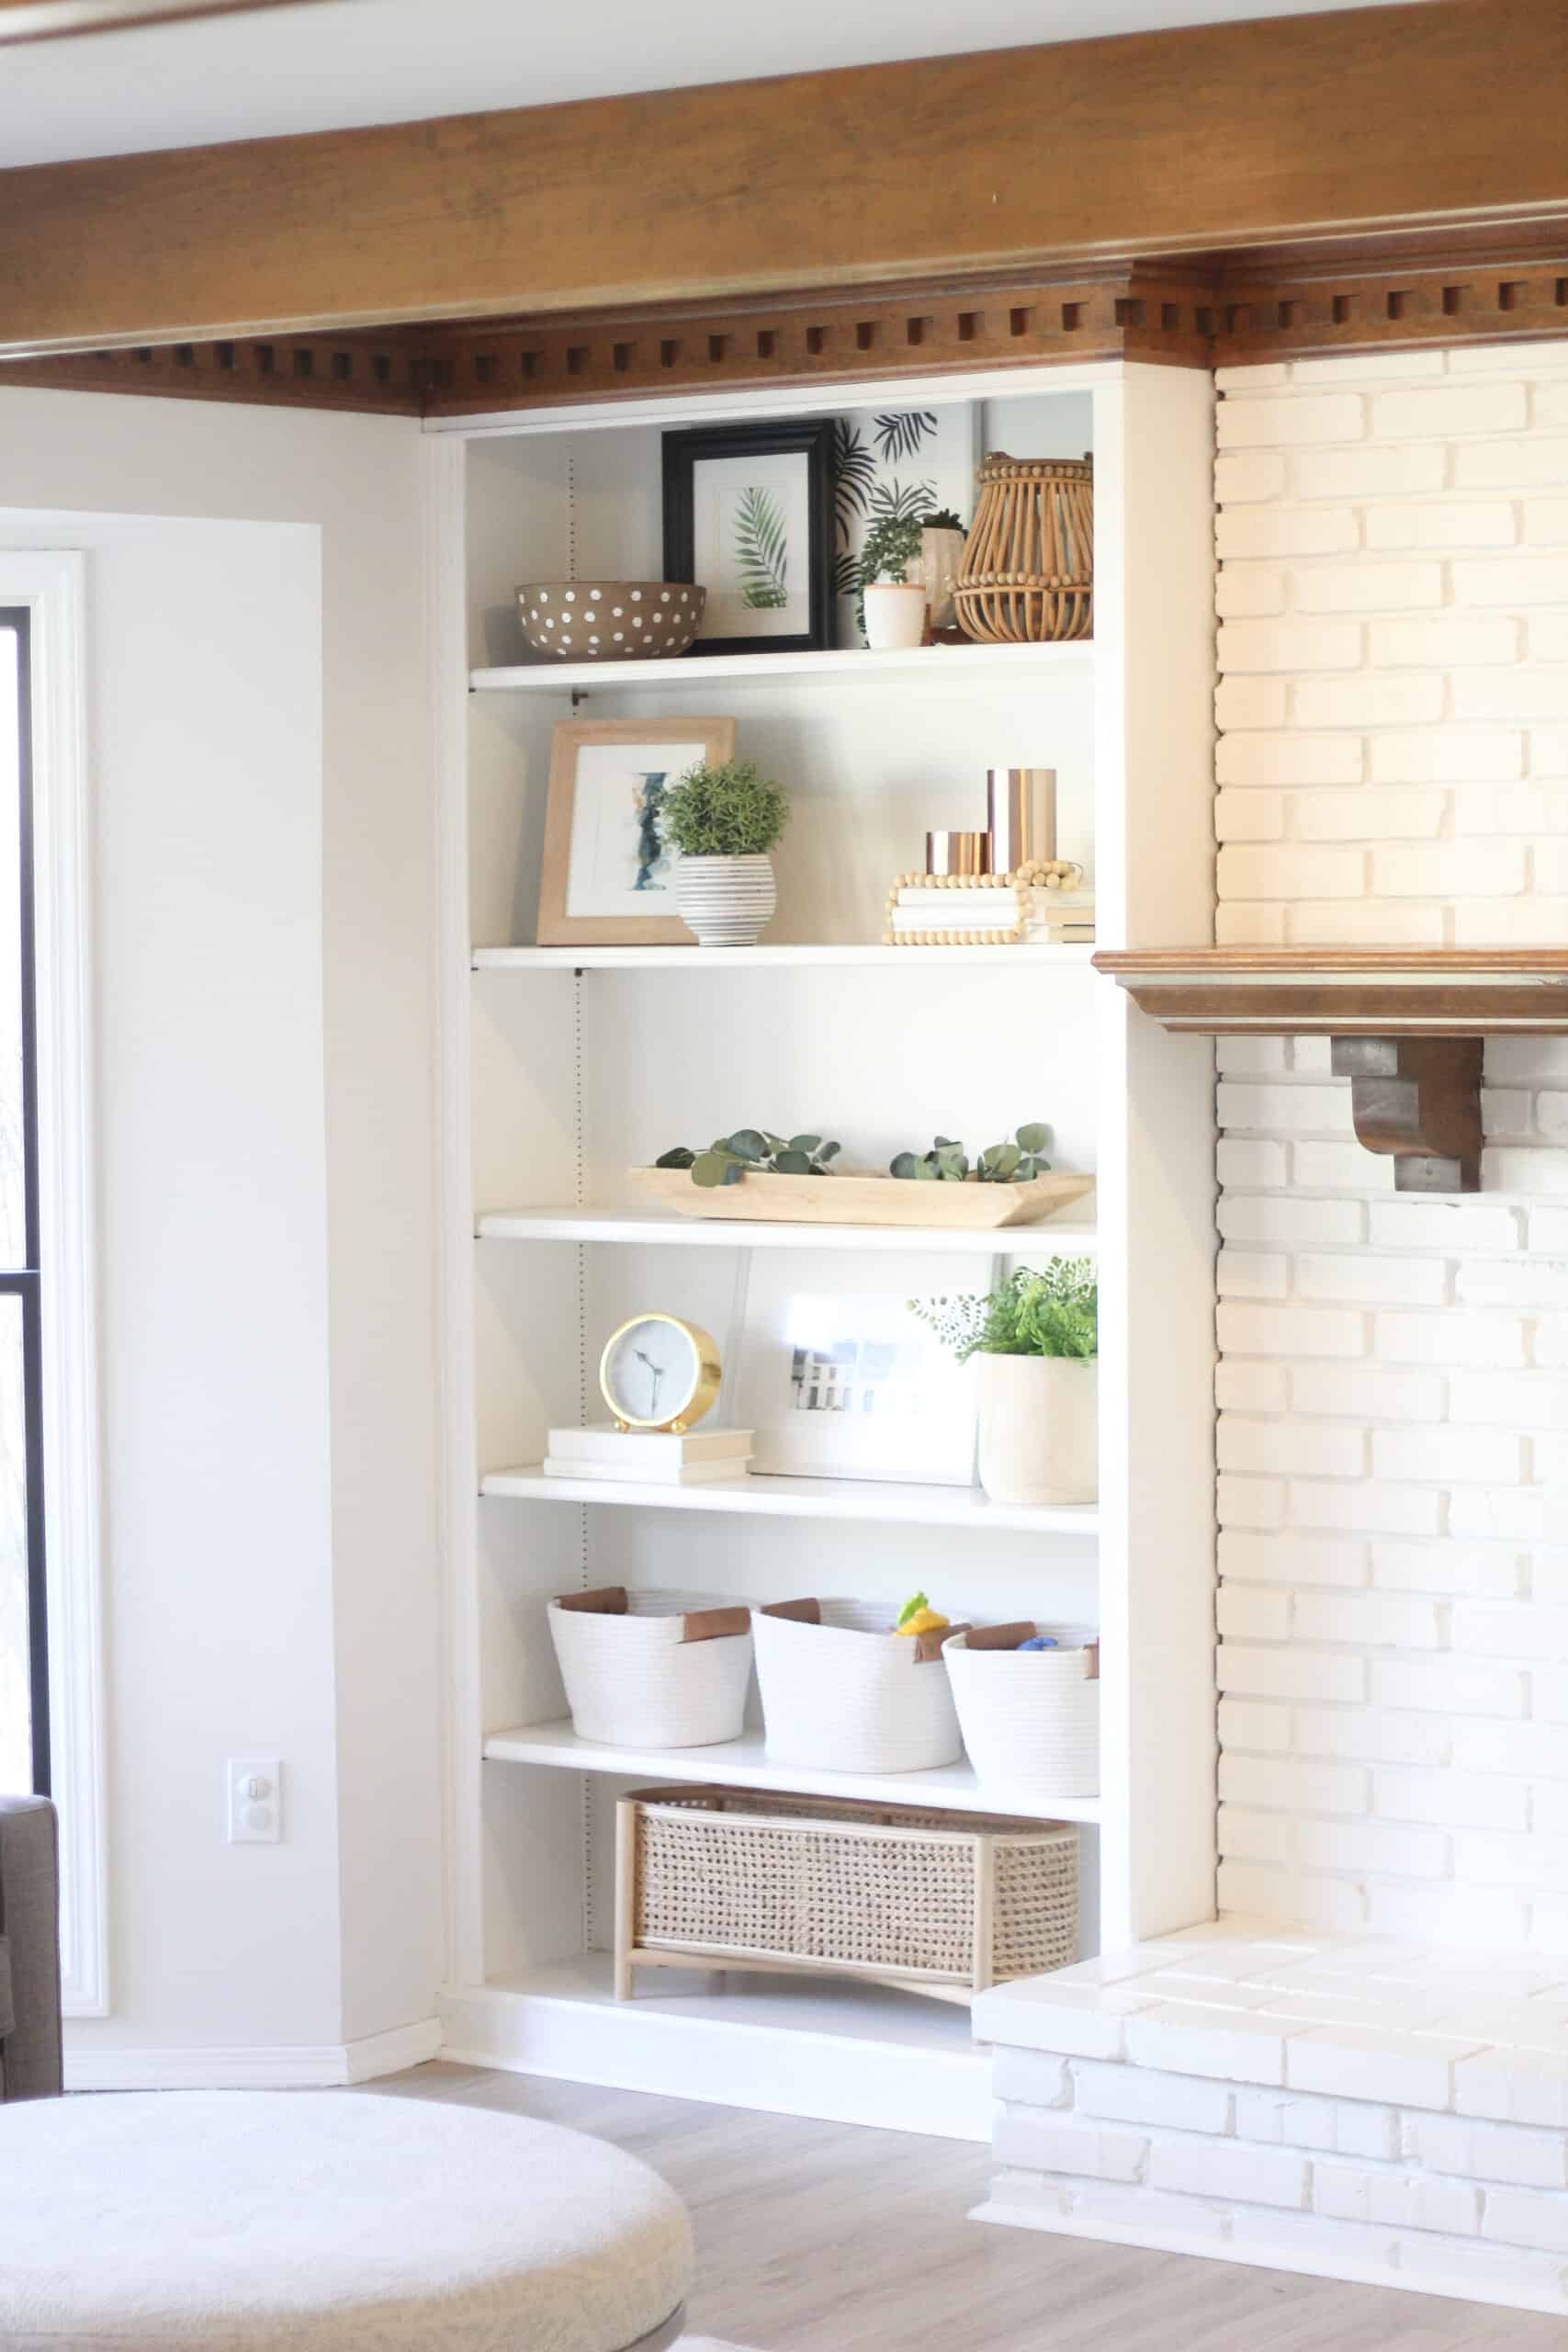
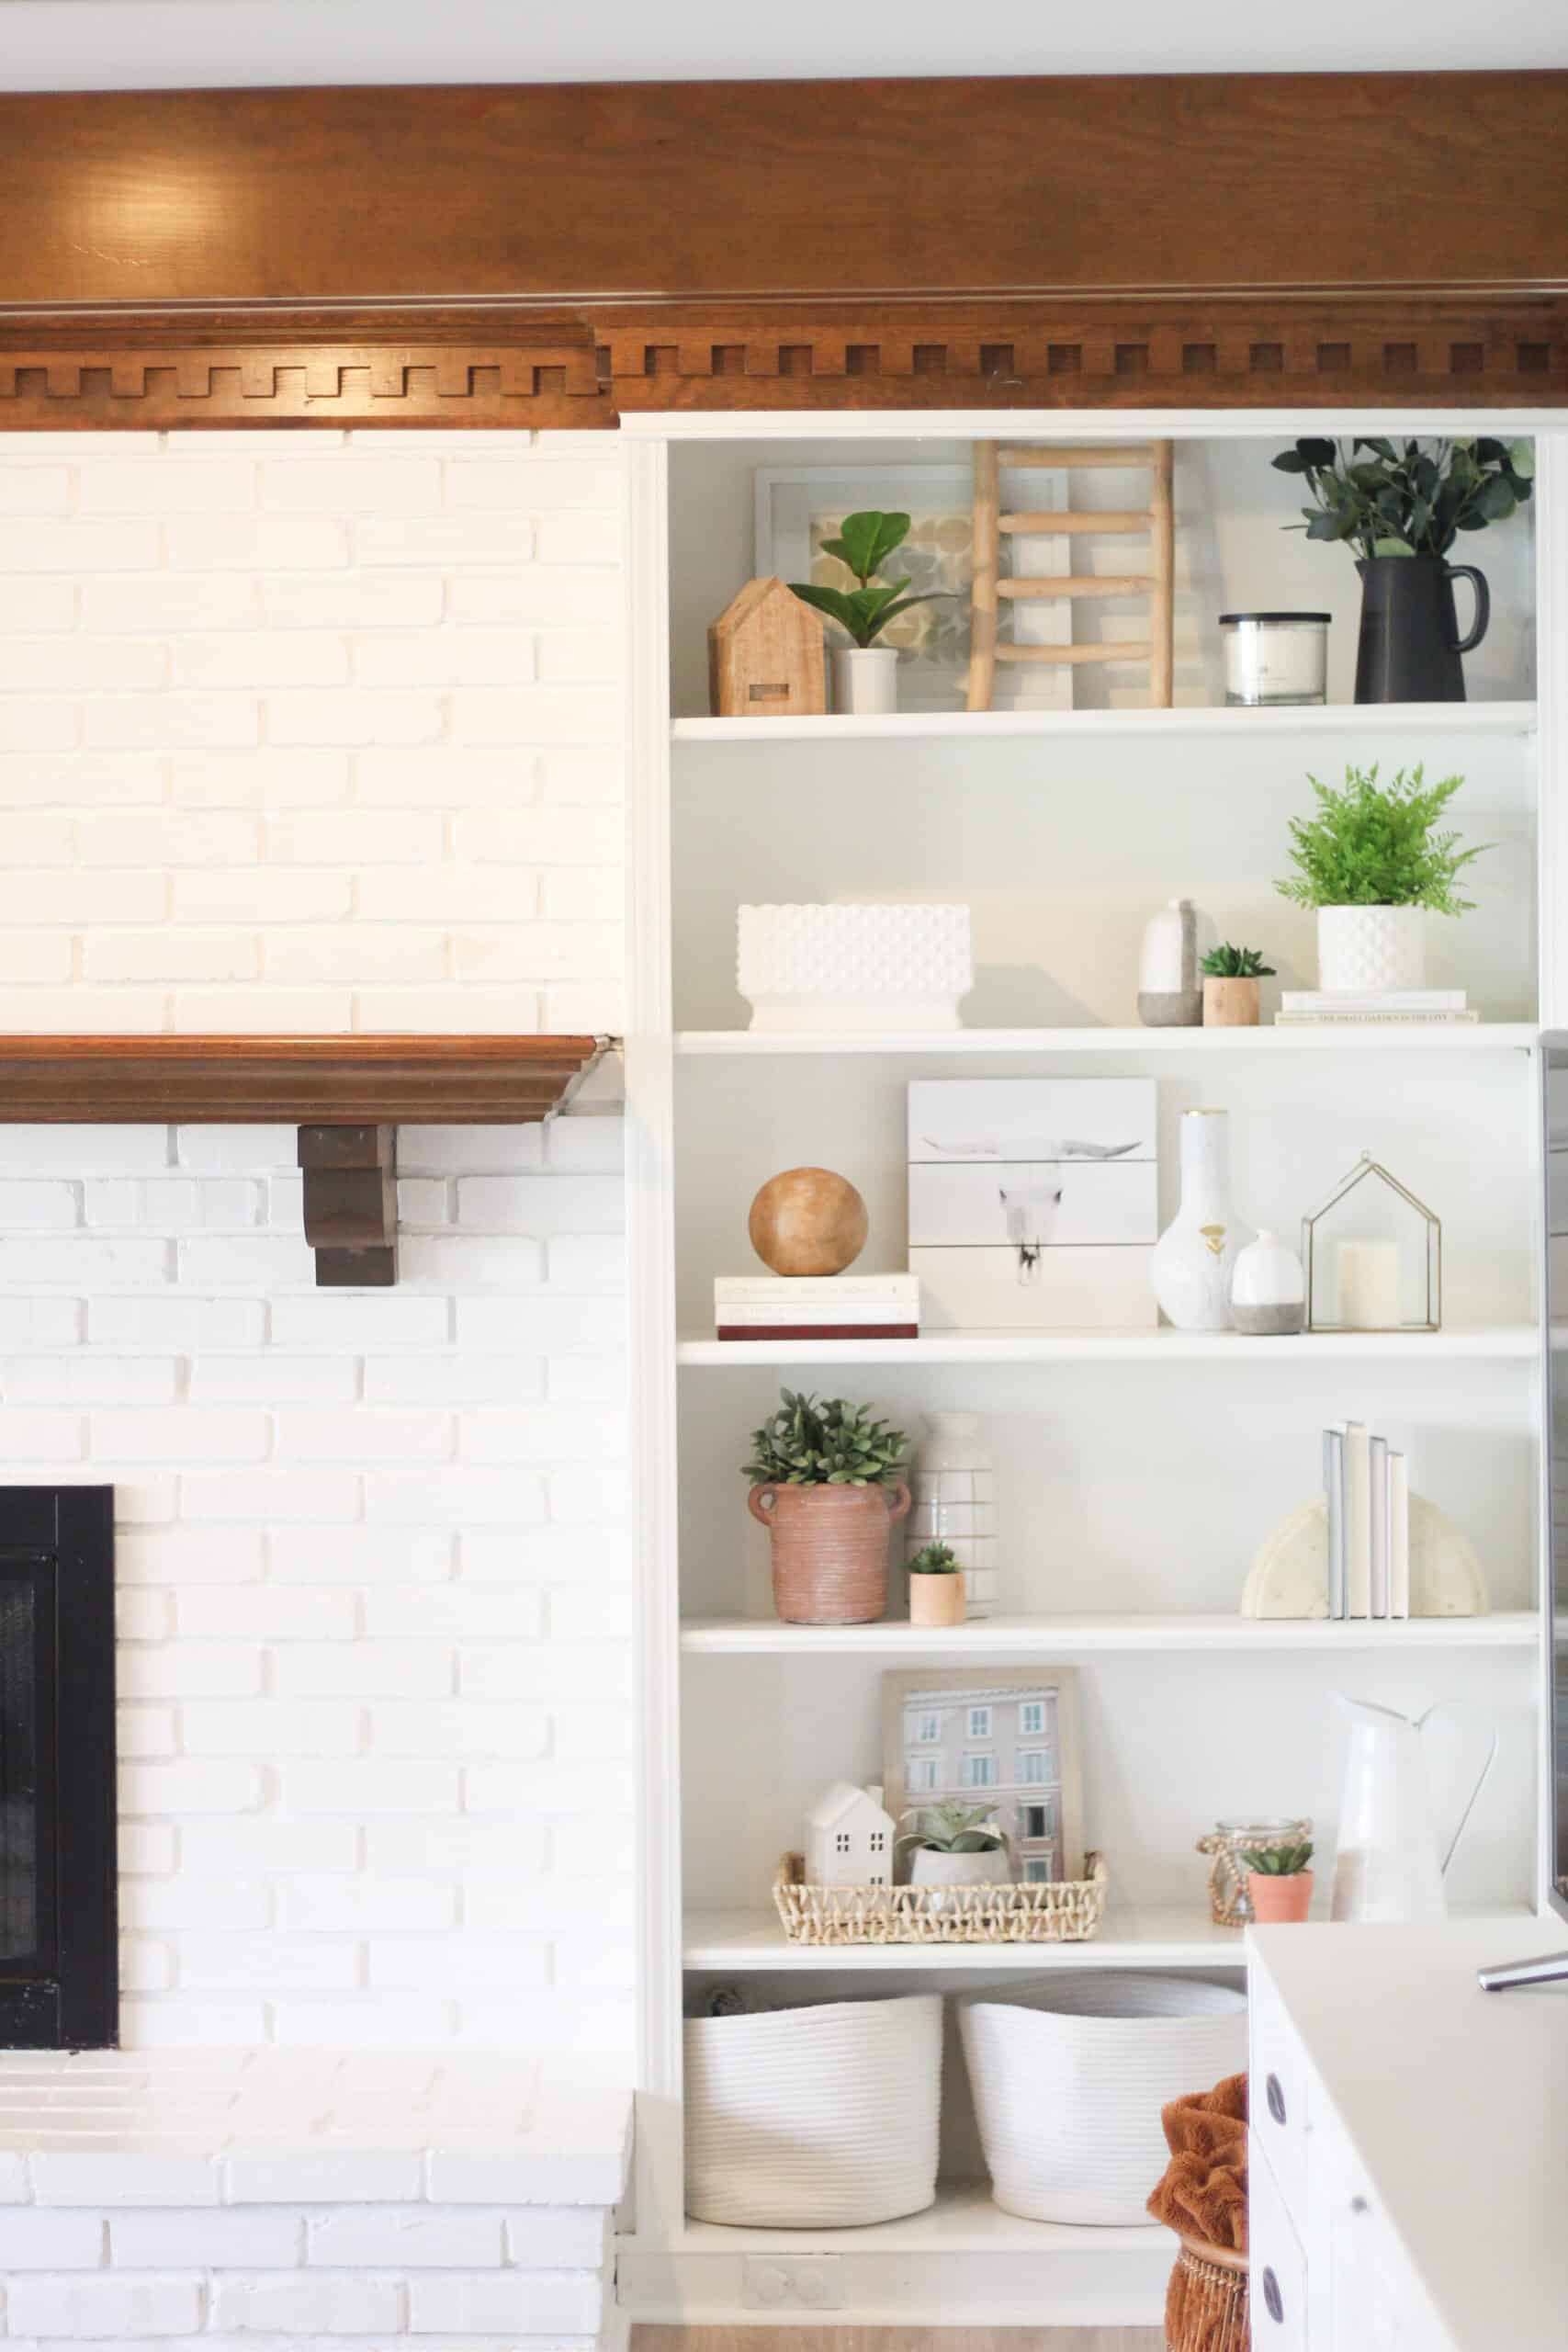
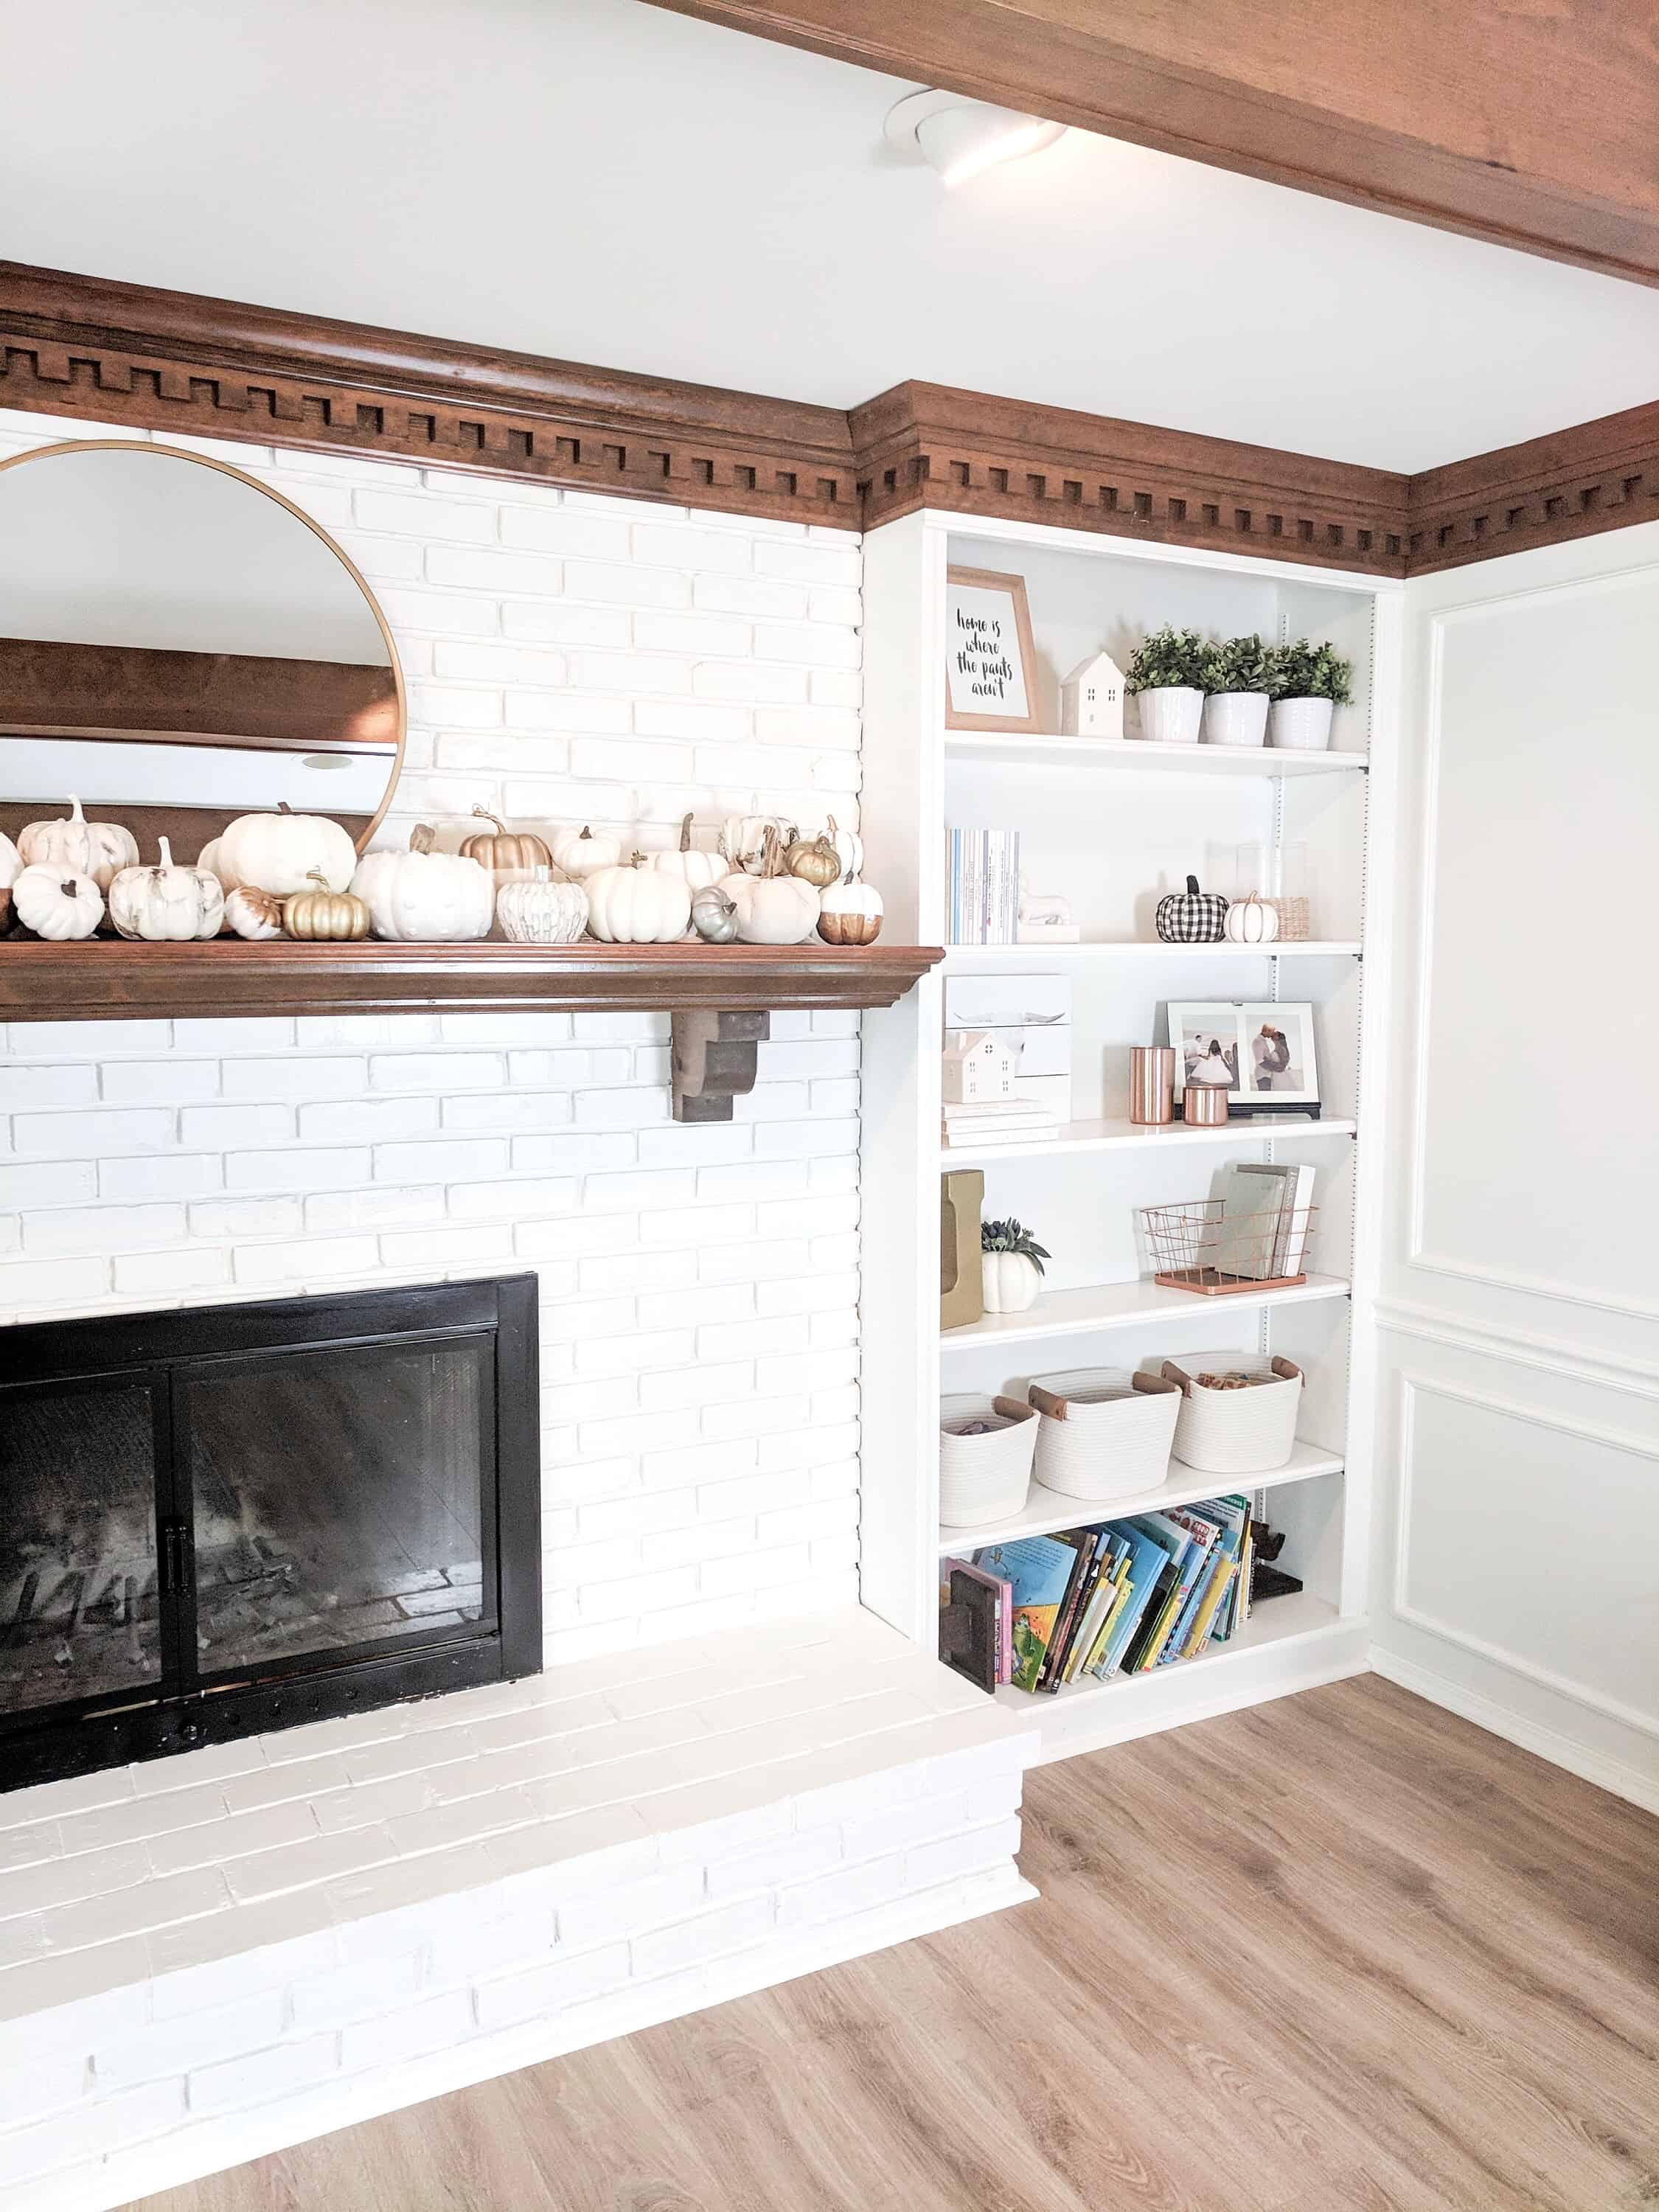
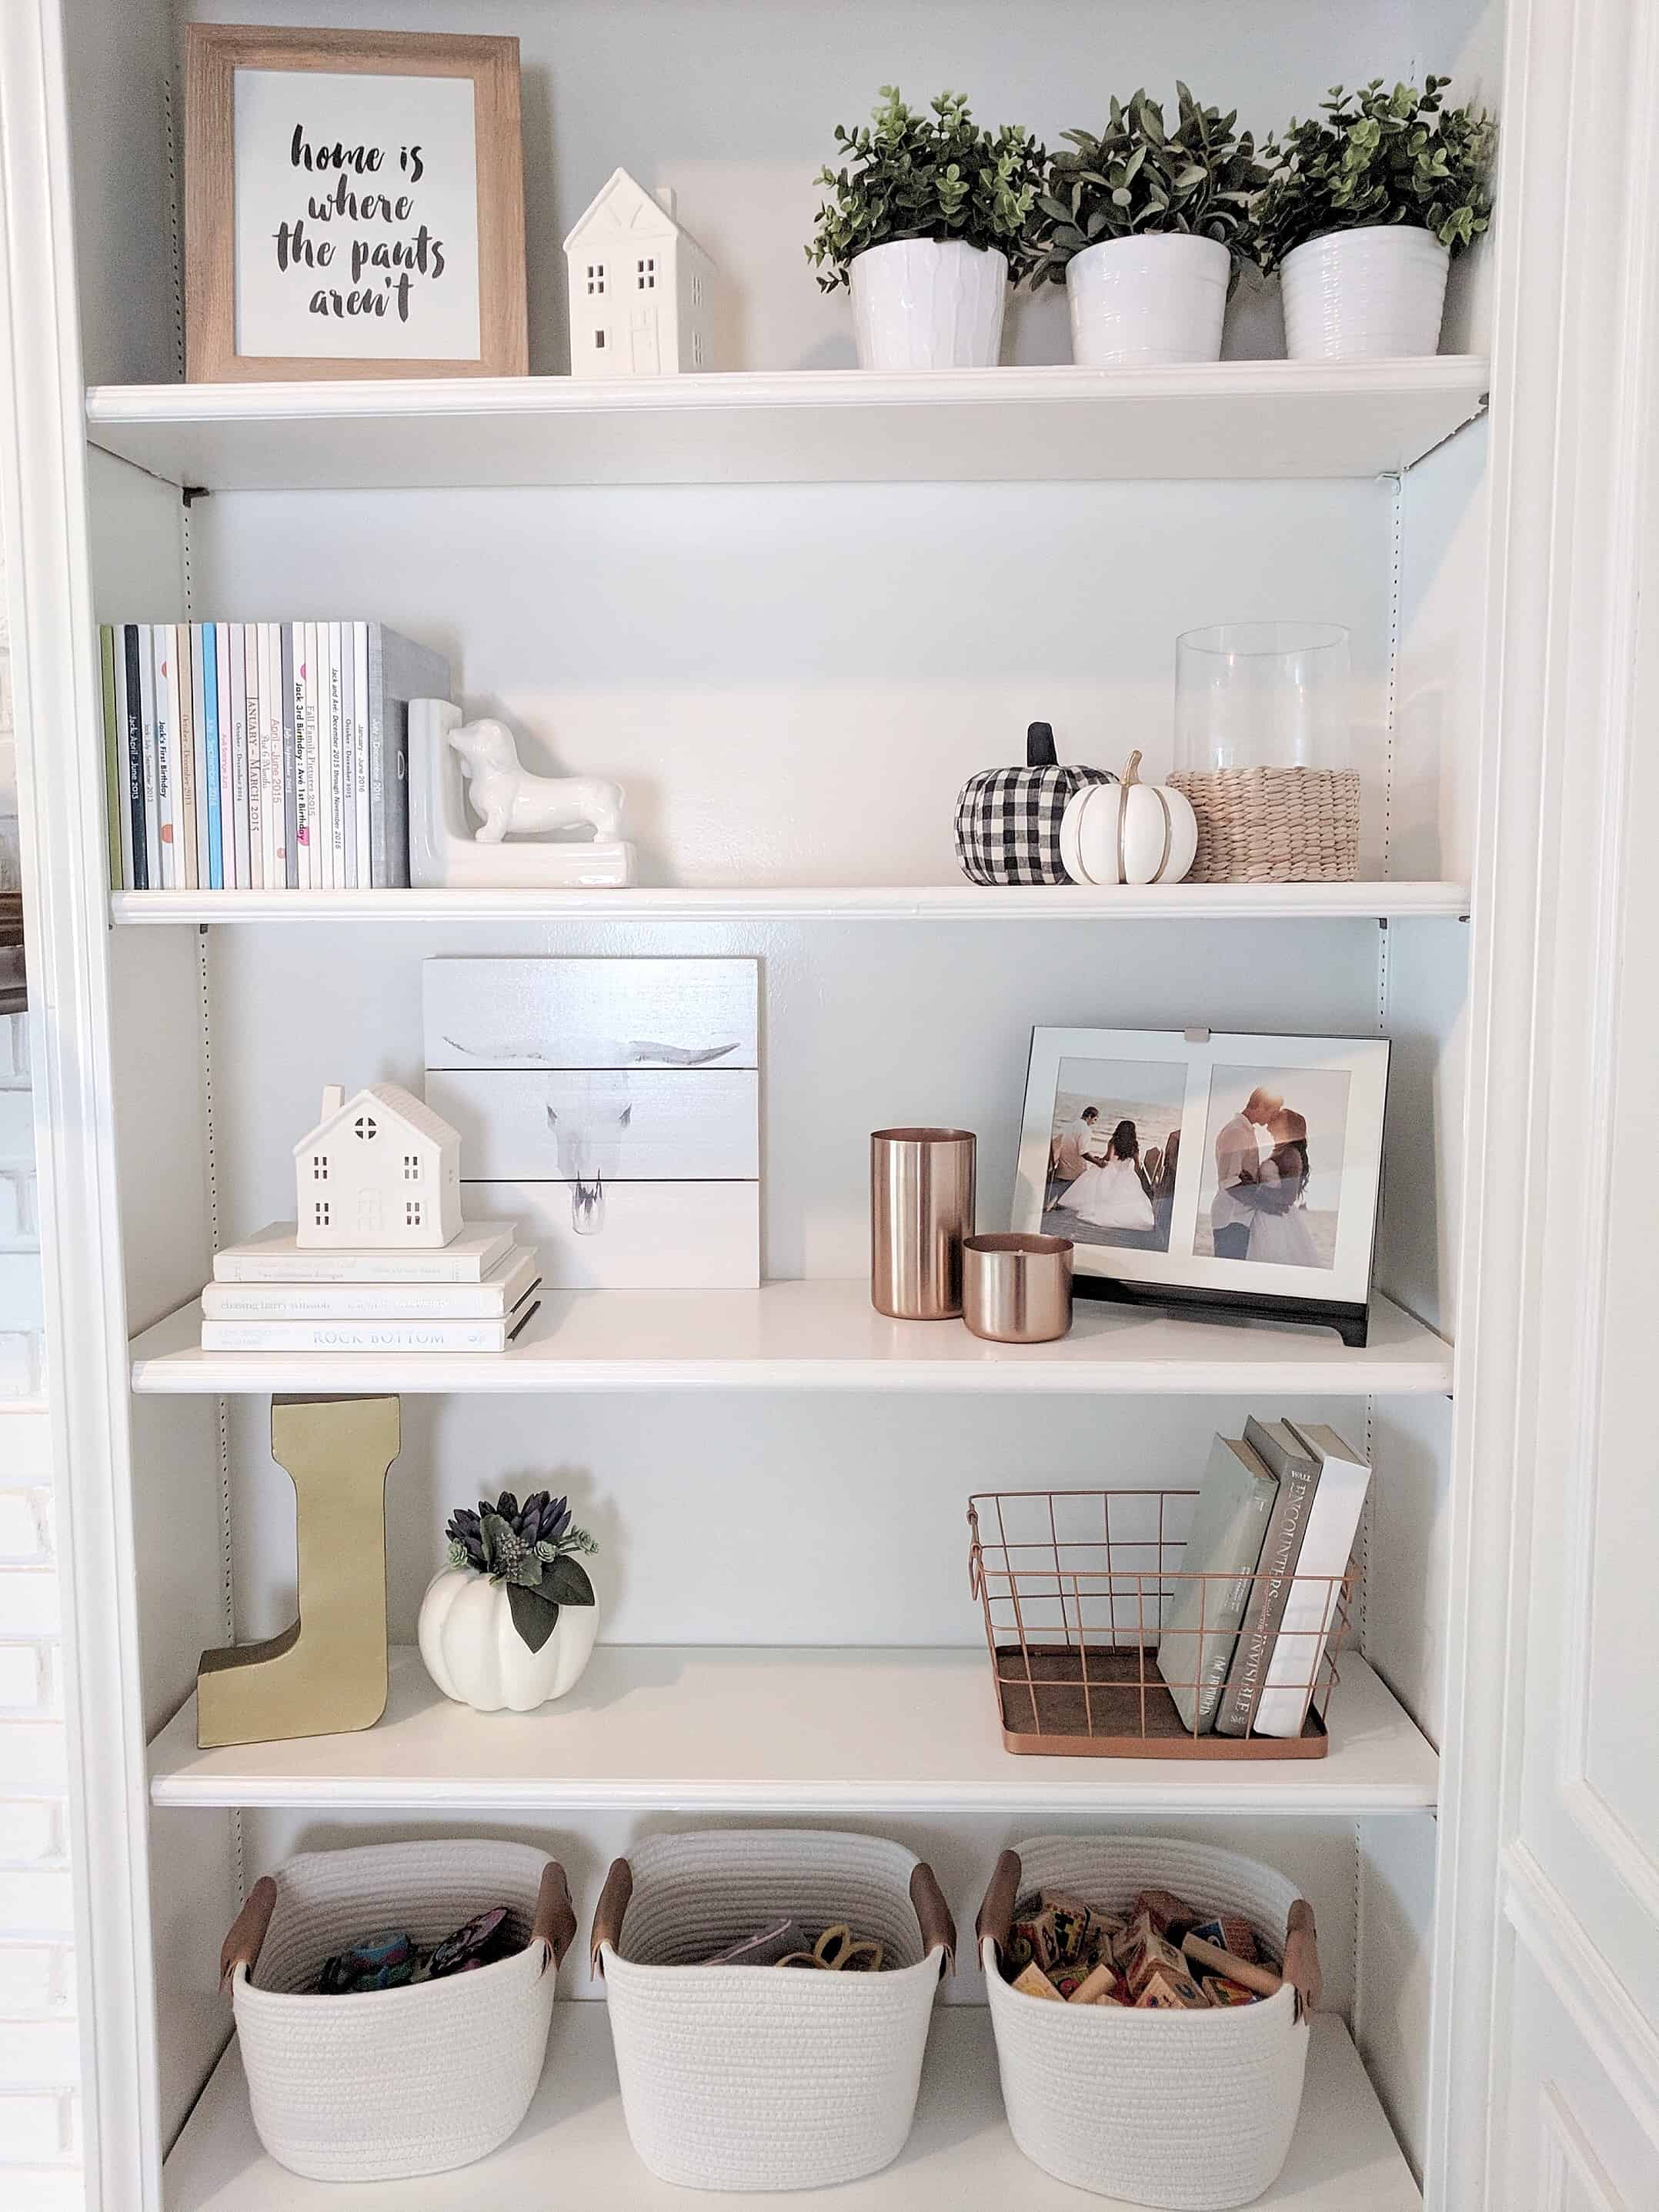
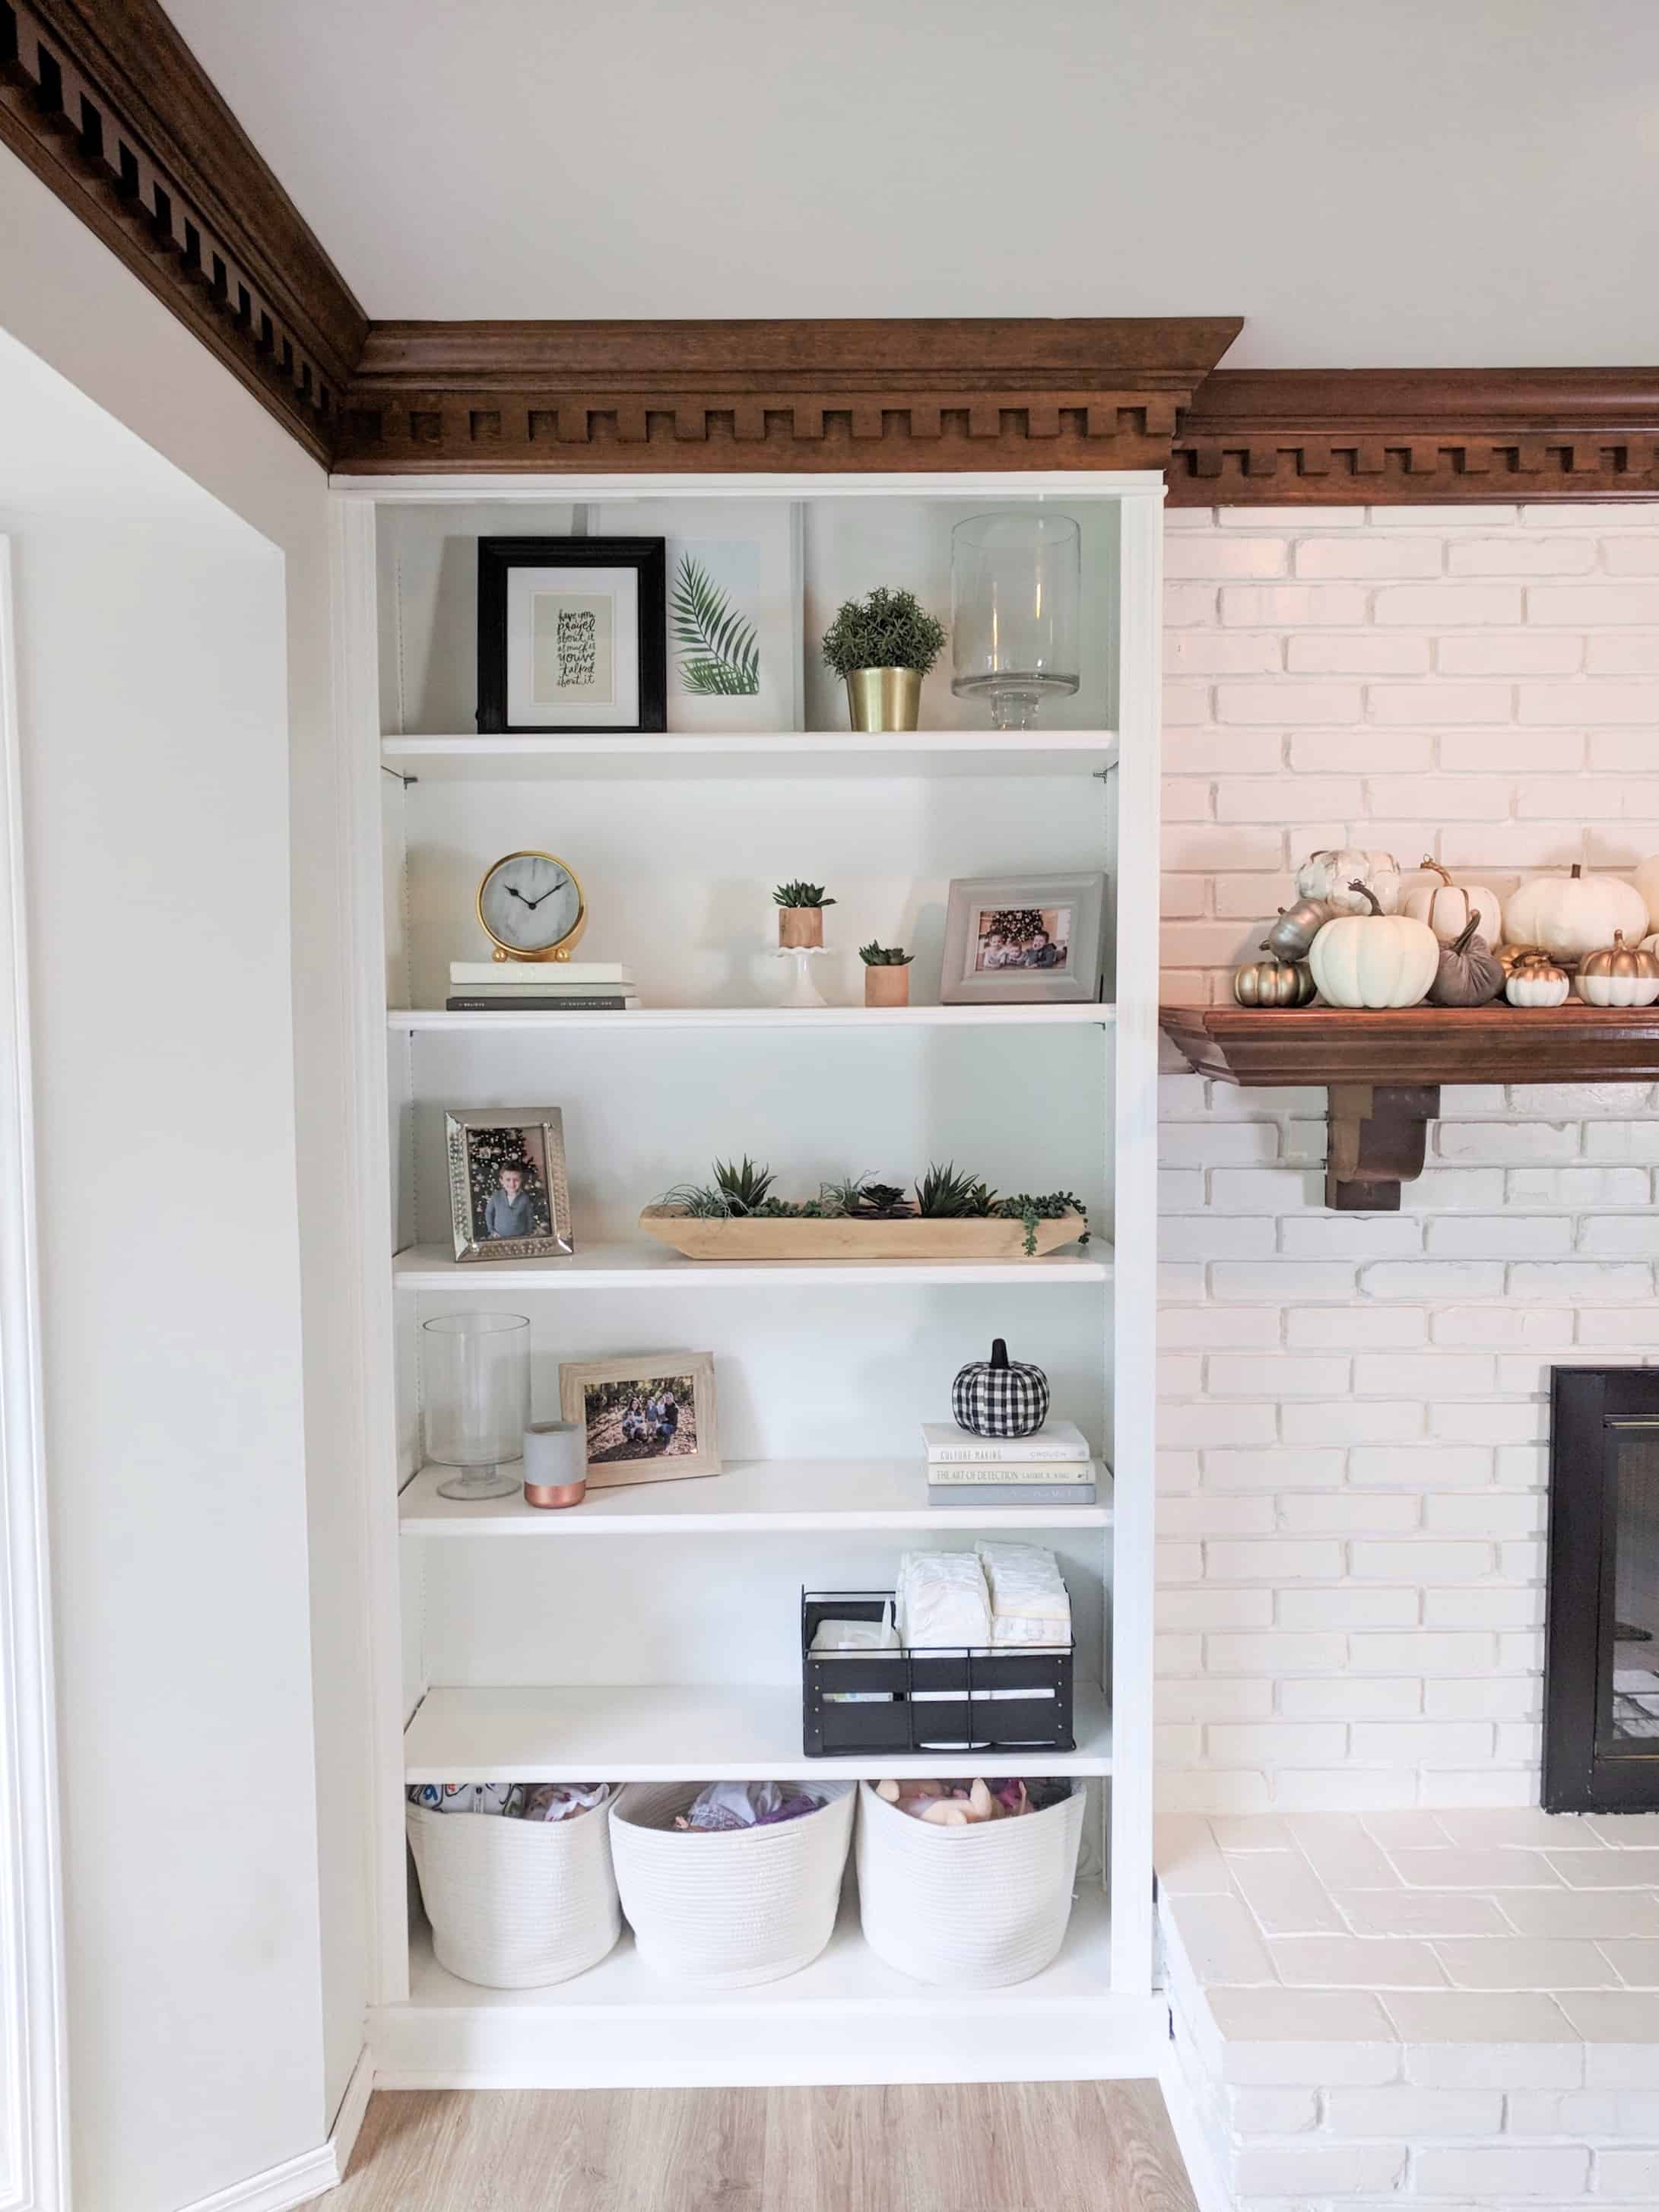
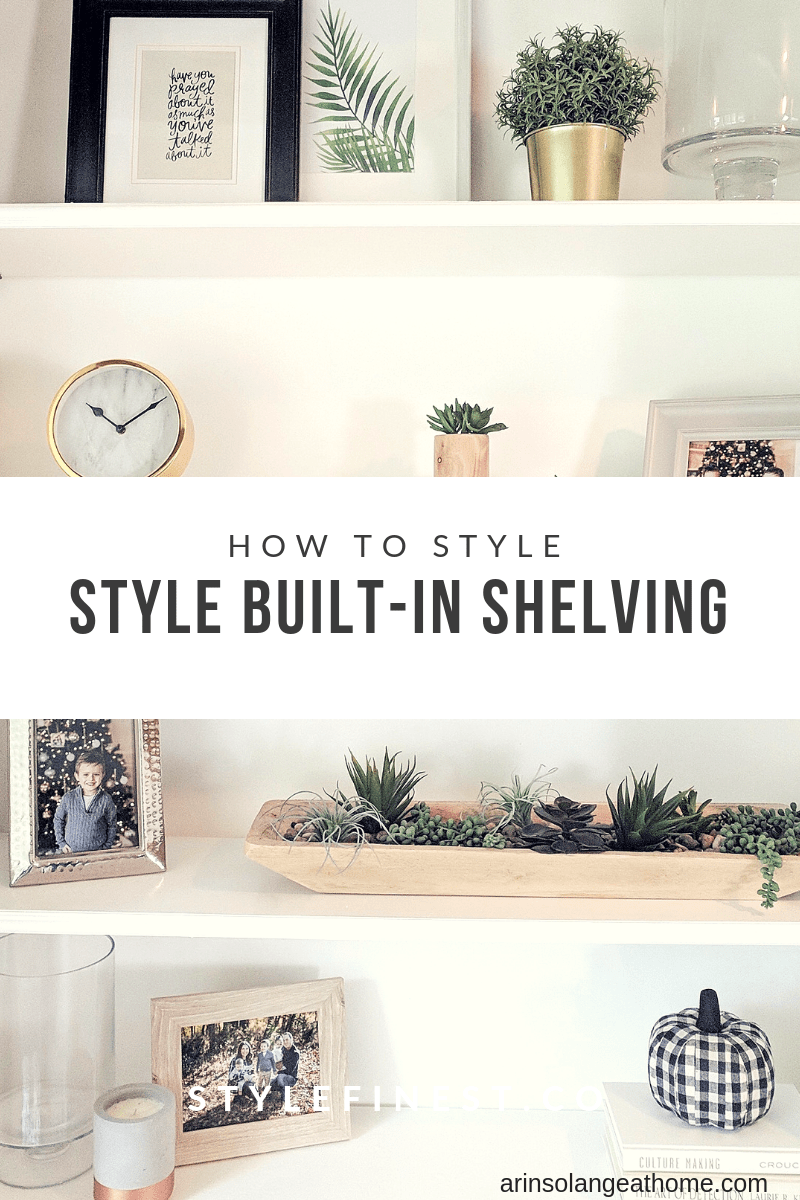
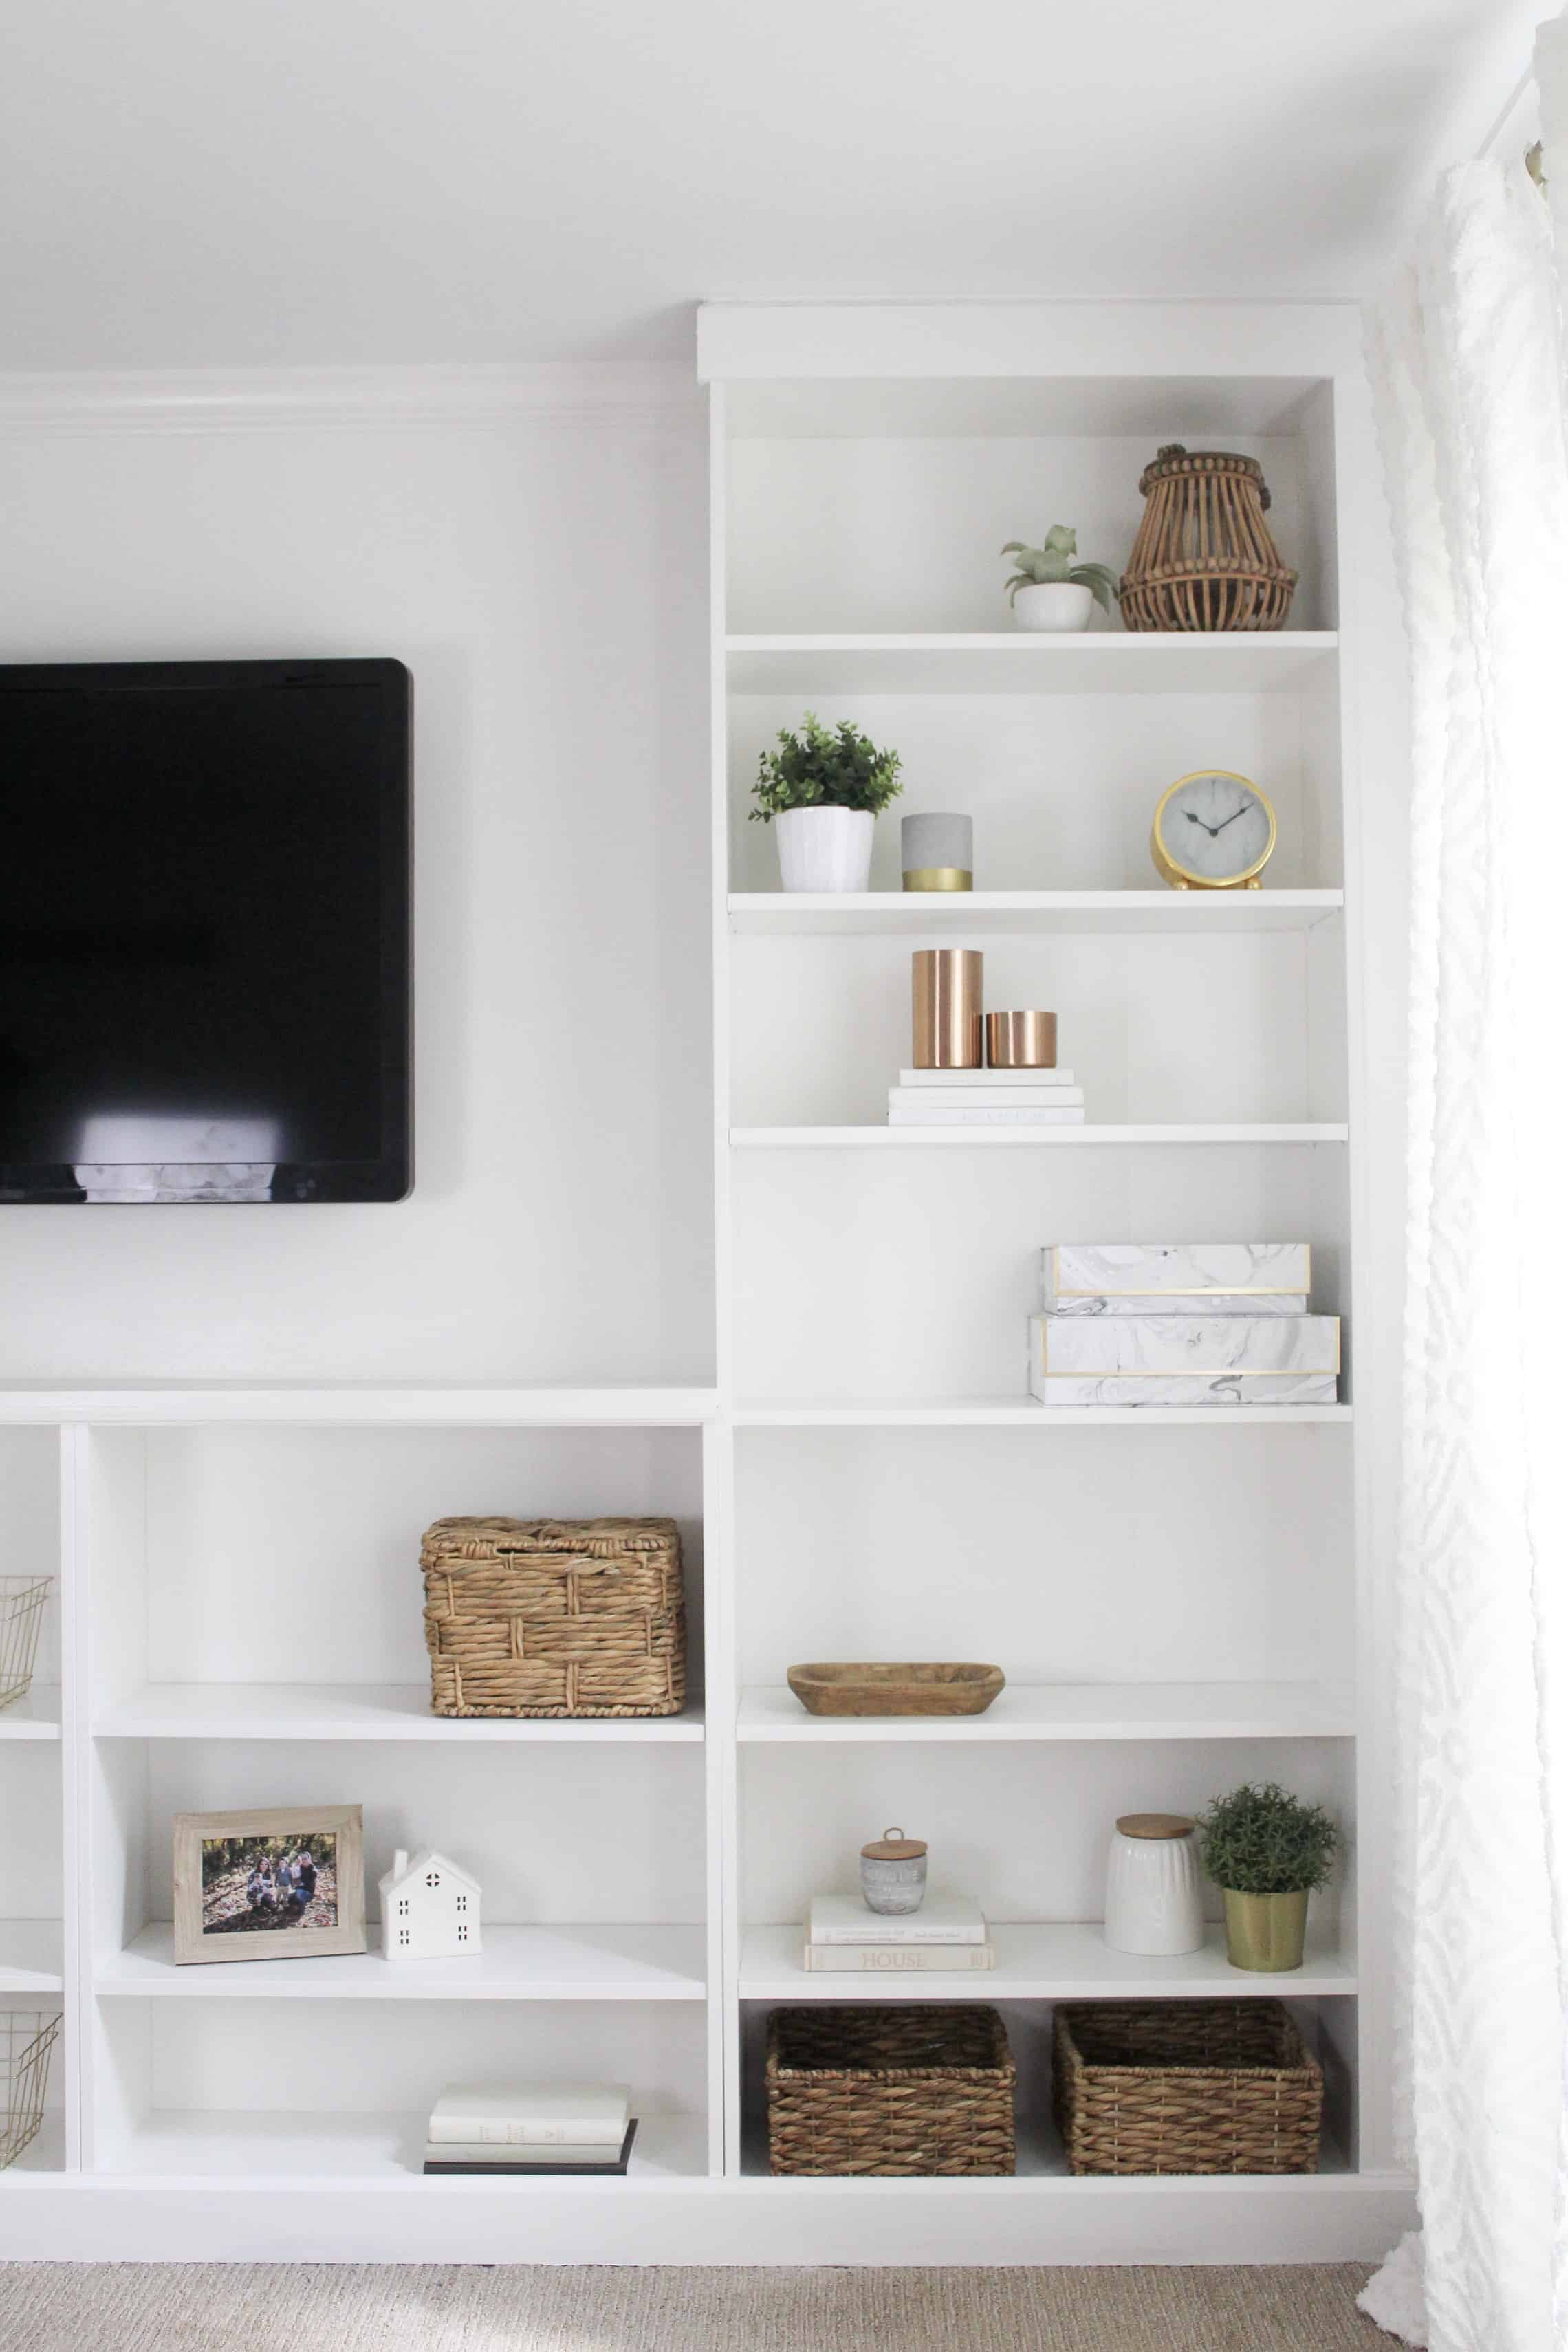
One thing I hear ALL the time on Instagram and here on my blog is how hard it is to decorate built ins and shelving. Incase you missed it, last week I showed a new DIY project where we created a wall of built-ins out of IKEA Billy Bookcases. This now means I have 2 rooms with wall to wall built in shelving, and LOTS of decorating to do. I wanted to do a quick blog post on how I decorate shelving in order to be functional, clean, yet look finished. Read my tips below, and if you have any questions feel free to leave me a comment!
this post contains affiliate links
How I Decorate Shelving – Tips and Tricks
Keep things cohesive with a narrow color scheme. I personally feel like keeping MOST items neutral makes for an easier time completing the shelves without them looking cluttered. Overall a mostly monochromatic color scheme tends to look best.
Use greenery throughout. The best part about greenery is that all the shapes and sizes automatically look cohesive with each other, so you can add as many as you want without it looking matchy matchy.
Mix metals. Metals are such a great neutral in decor, and there is nothing wrong with mixing them. I have copper, gold, and silver throughout my whole home.
Add functionality – this is a huge space in your room, and you don’t want it to go to waste. I have 2 shelves with neutral baskets for the kids toys, 1 Shelf for kids books, and a large basket to hold diapers and wipes. I love that those low shelves that kids hands can reach both look nice, and are fully functional for the family.
Mix textures and sizes. Glass and wood fill the space totally differently even if the item is the same size. Create balance by mixing them up.
I tend to decorate for the most part in a rule of odd numbers. I tend to think if there is an odd number of items on your shelf you will typically like the end outcome better.
Off center placement is your friend.
Add height. I personally love using old books on my bookshelves to add height and decor for a budget. I go to local thrift stores and look for books that are neutral under the dust cover with a natural title. Many times the books are 50c this way!
Remember that less is more. If things look off, start taking things away. There is nothing wrong with a little blank space.
TAKE YOUR TIME – Built in shelving takes quite a bit of ‘stuff’ to fill. Find the items slowly so that you love the pieces.
Hopefully these tips are helpful, and remember that although somewhat overwhelming, Shelving is a fun way to change up your decor from time to time with ought breaking the bank. I love to move stuff from shelves and dressers in different rooms to create a new look.
If you are looking for some great options for decorating all this shelving, check out this post full of affordable home decor from Amazon!
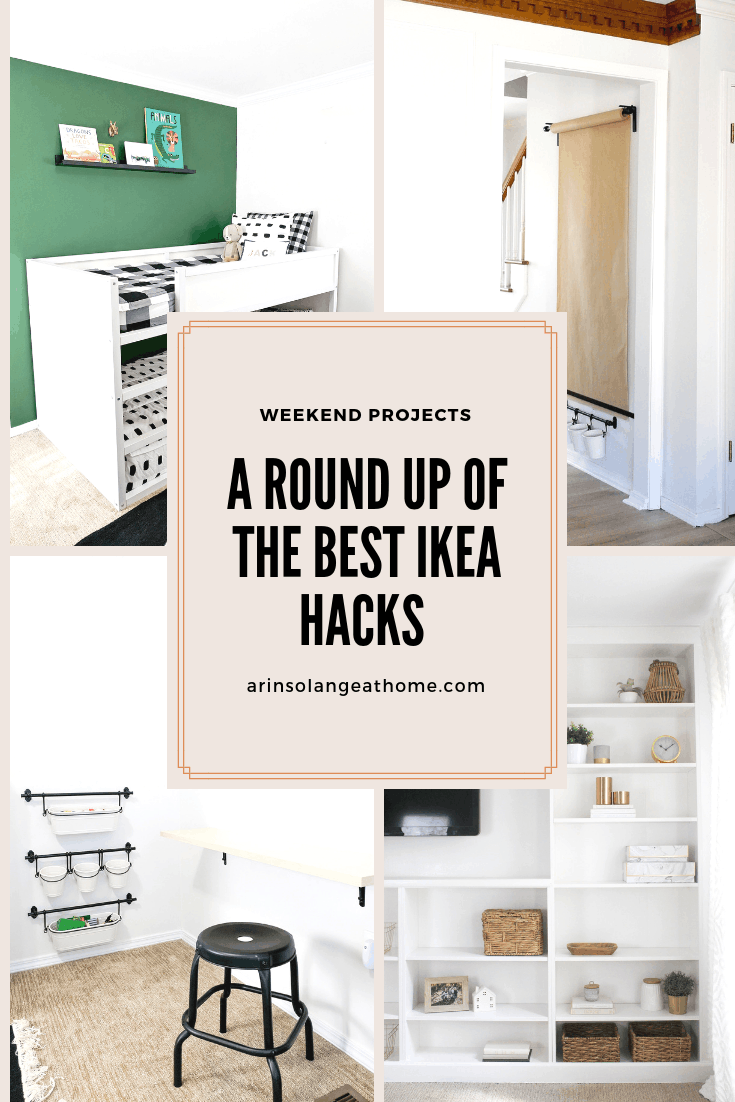
If there is one thing I love, its a good IKEA hack, and that has definitely contributed to some of my favorite blog posts that I have done. There is nothing quite like using inexpensive IKEA products for an awesome outcome. I decided to round up the best IKEA hacks that I have done in one place for you to check out.
Feel free to click the headings and head to that post to see the tutorial, or read more about it, and if you need more info, leave me a comment!
Head to the blog post above to see how I used about $10 worth of IKEA products to create this wall mounted easel. It has been 2 years since I put this up for my kids on Christmas Eve, and remains a favorite part of our home!
These built ins are in my home office and have been hands down my favorite DIY we have ever done. It has held up amazingly, and added SO MUCH to the room.
If you are intimidated by the idea of clicking over to see this one, know that my husband and I are not super handy, so know that it’s NOT HORRIBLY HARD!
I love these fun framed engineering prints – this post tells you how to get each print for about $5. These are visible as soon as you walk in my front door and truly make a great impact.
If you are looking for a fun way to add to a wall for a super low price, this is the way to do it!
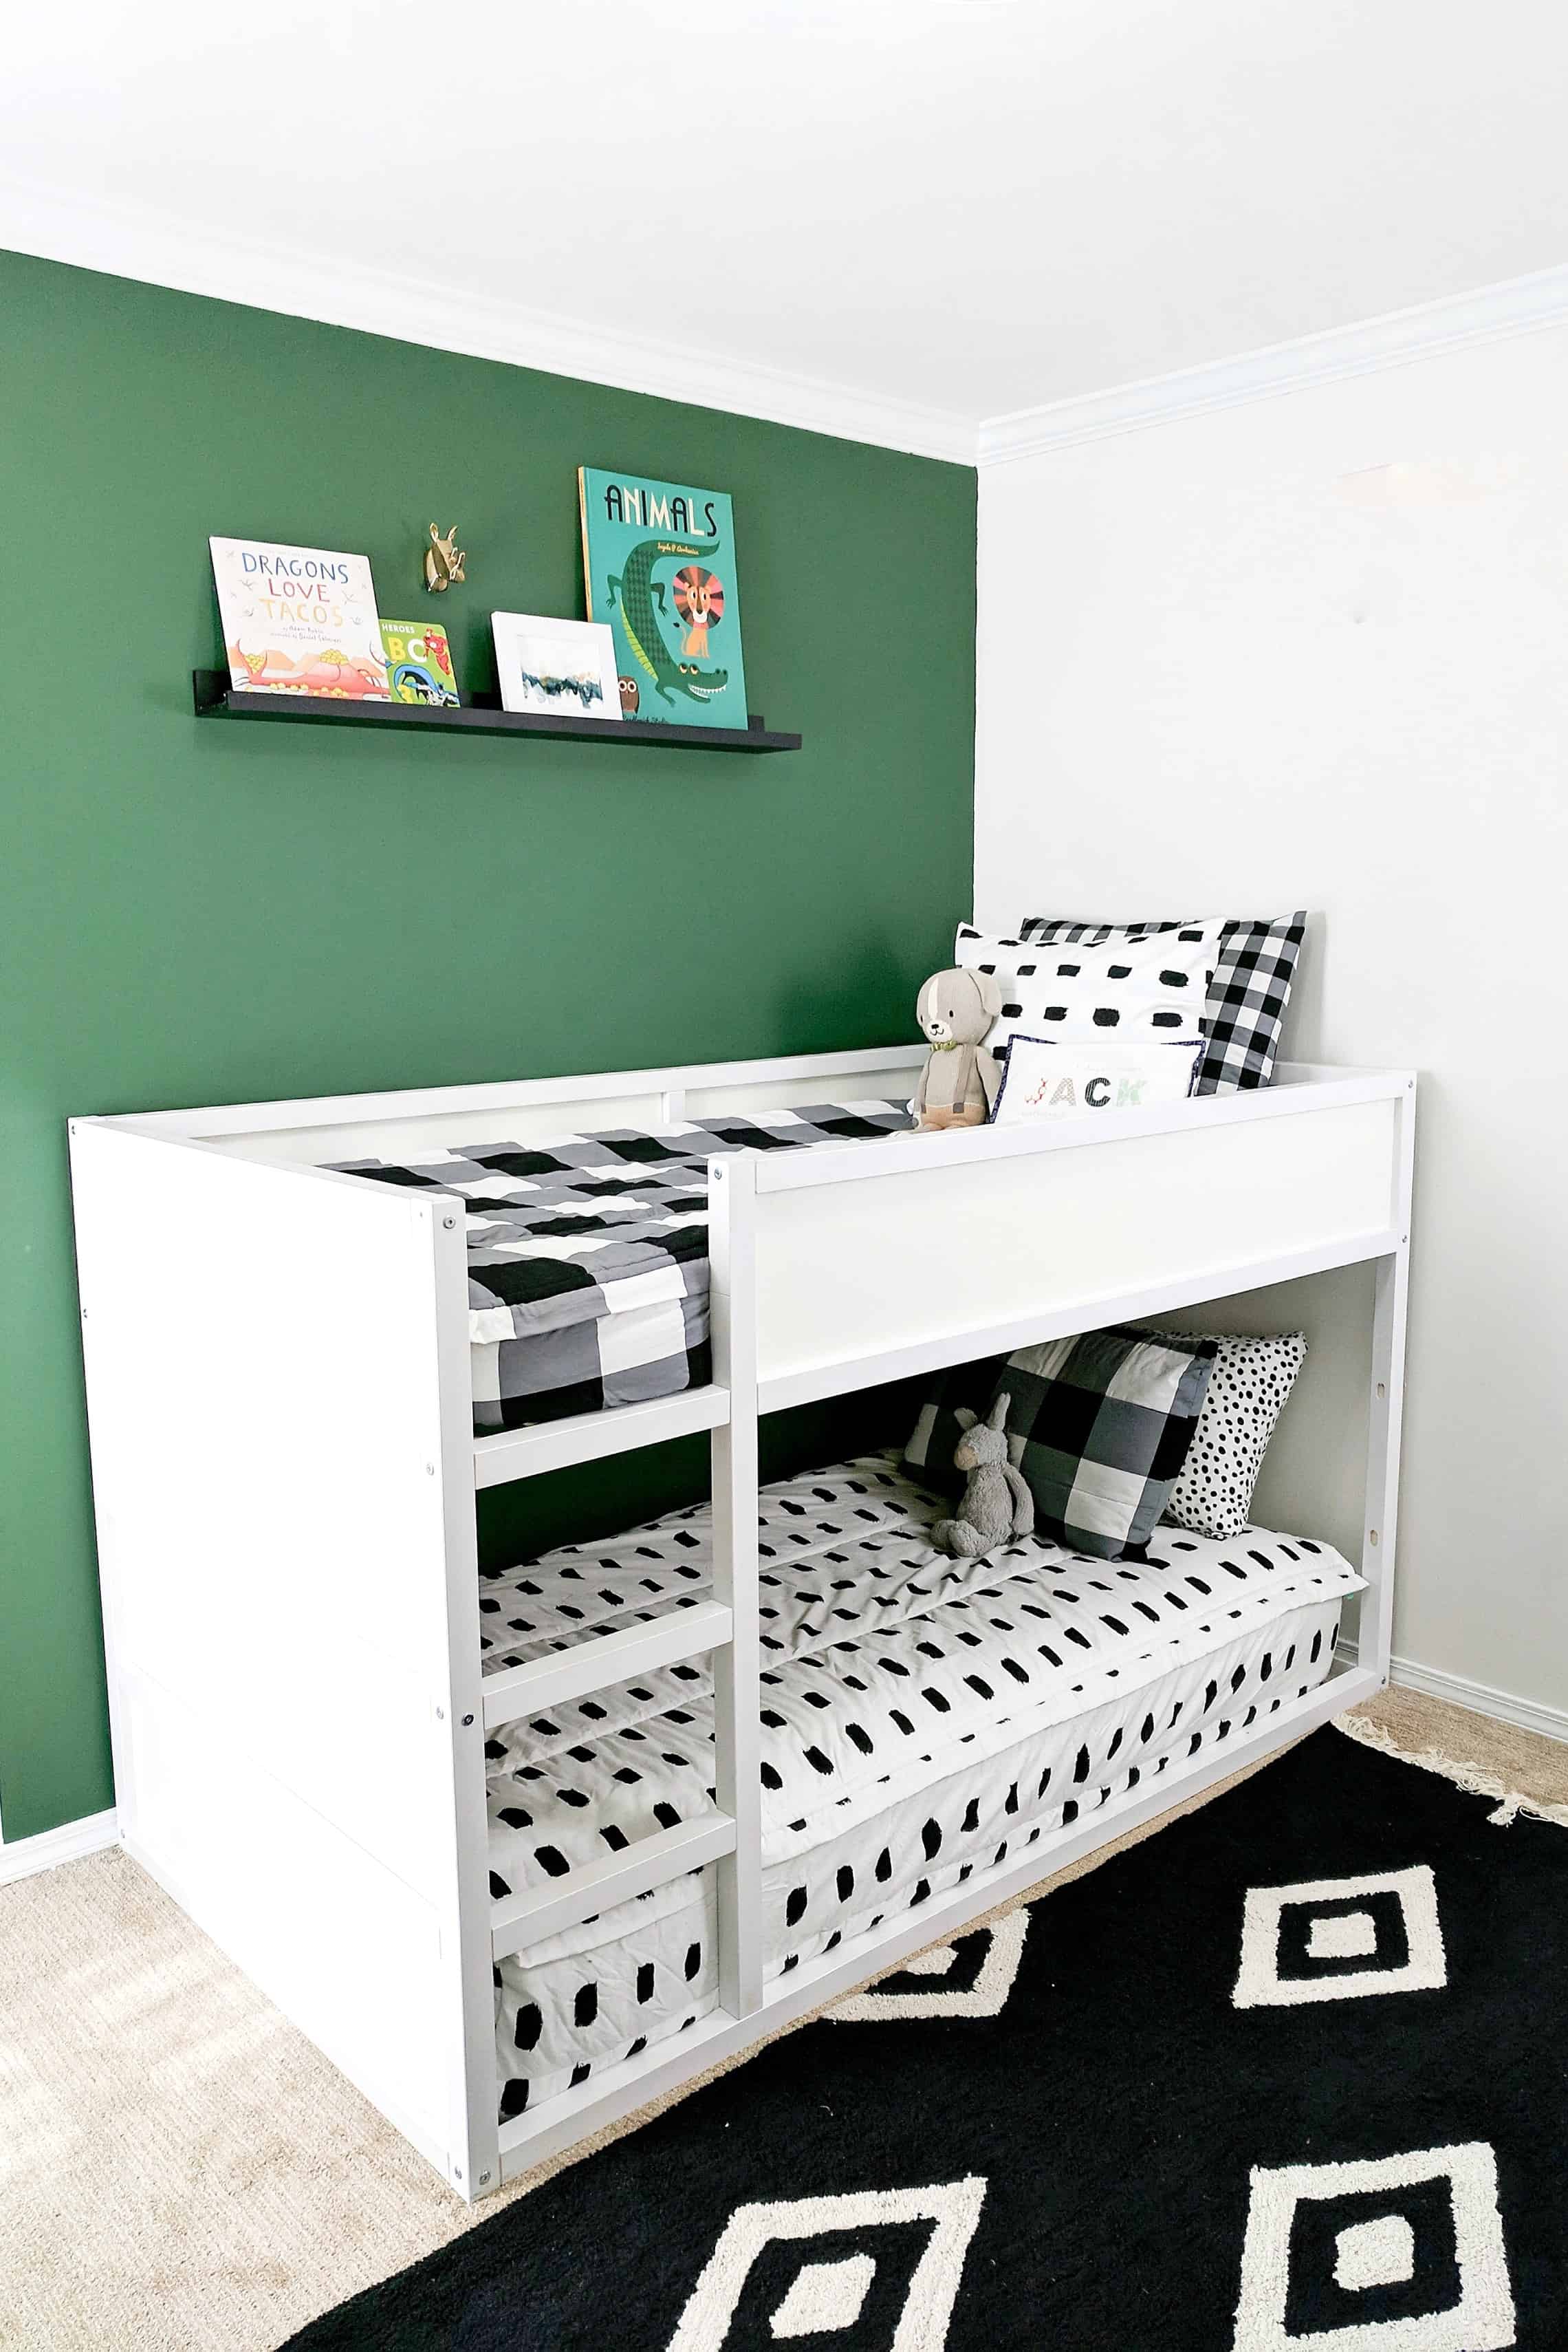
This is another serious favorite IKEA hack. Jack no longer has this room, which makes me a little sad, because it was a favorite. (this room is now Goldie’s nursery). The bunk beds looked so much more fun in white!
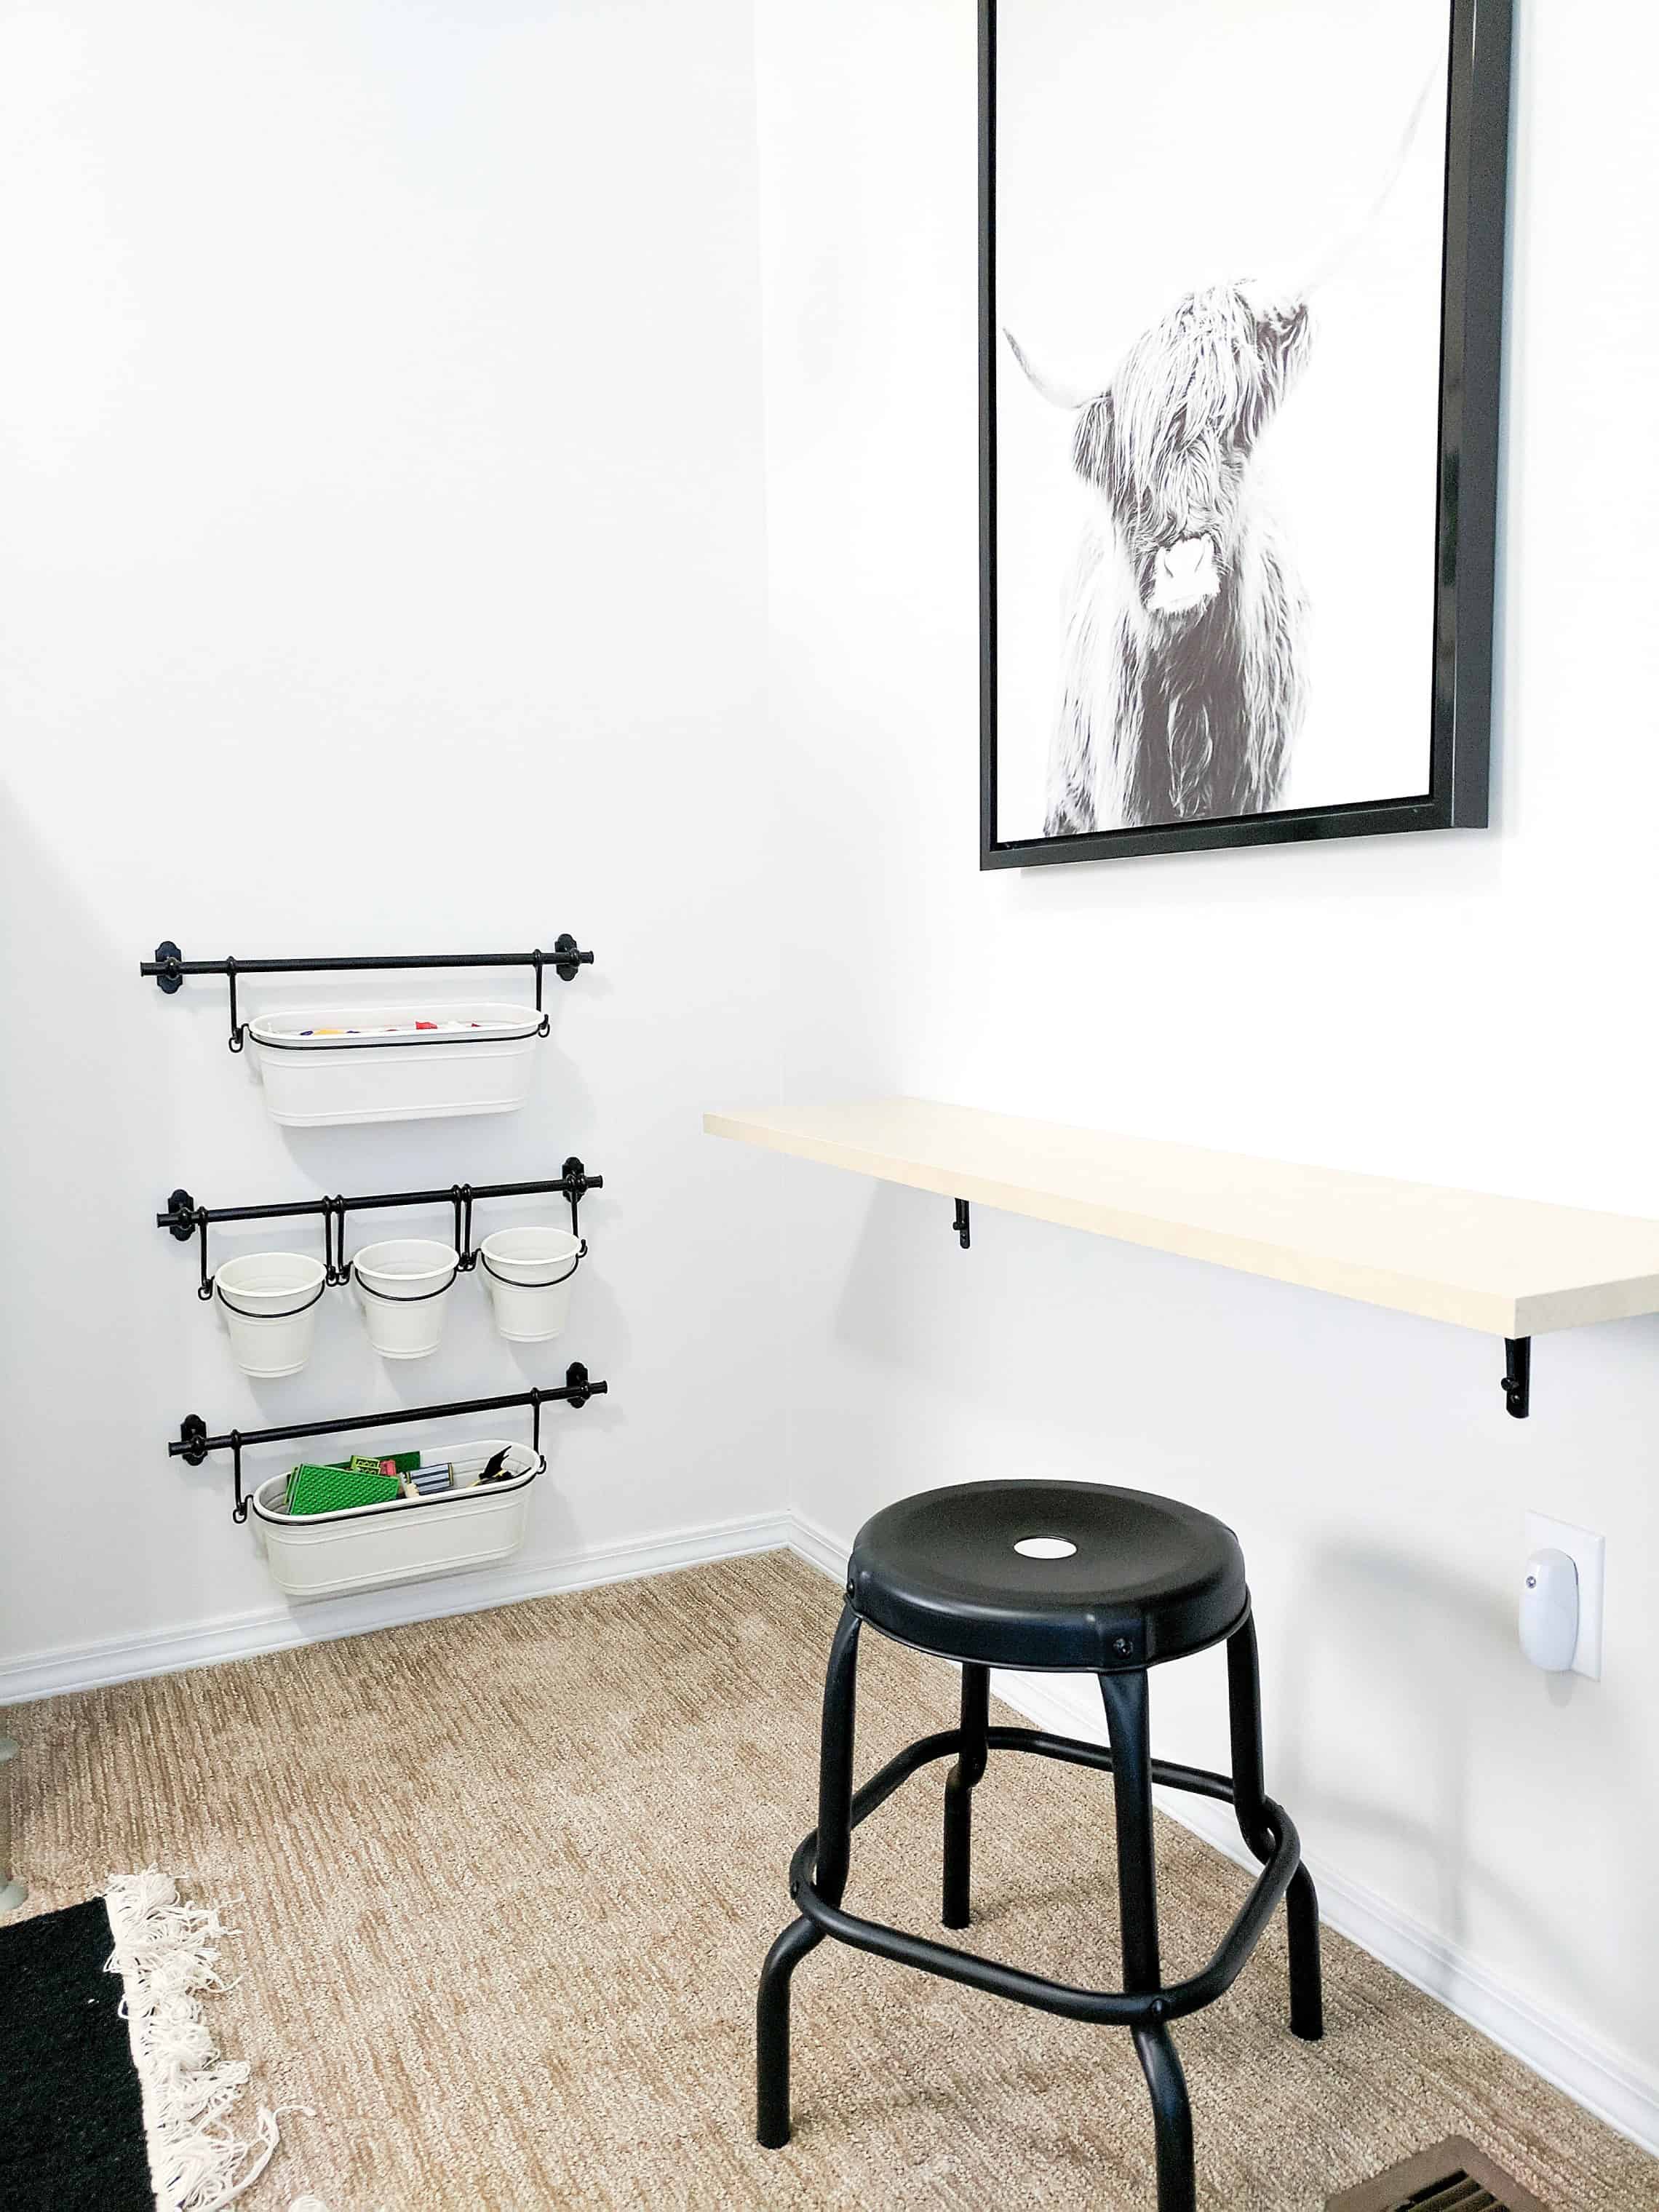
In the same room as the bunk beds I did this super fun IKEA hack for a small desk as well as this LEGO storage system. We are planning on moving this year and I will be using this system in the boys rooms again because of how much I loved it!
It would also work really well for LOL dolls or something of the sort!
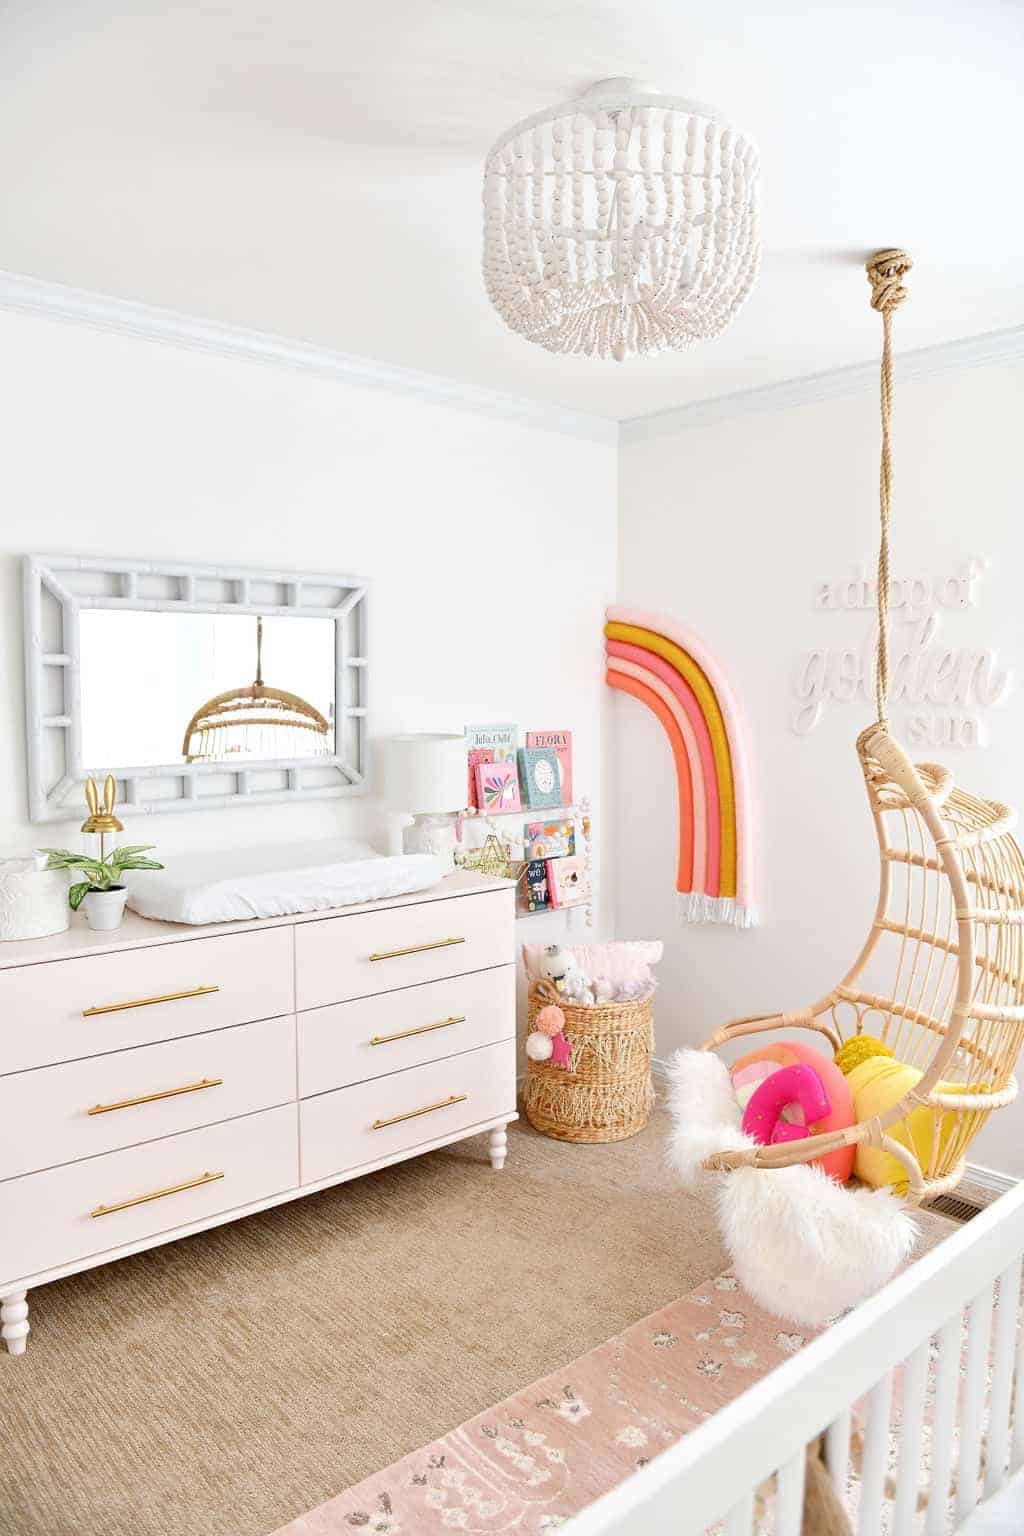
This IKEA dresser hack is one of my favorite items in my house. I was able to take a super inexpensive dresser and turn it into a gorgeous piece in Goldie’s nursery.
I turned the IKEA Tarva into this gorgeous pink dresser using paint, and a couple of added accessories that totally changed it!
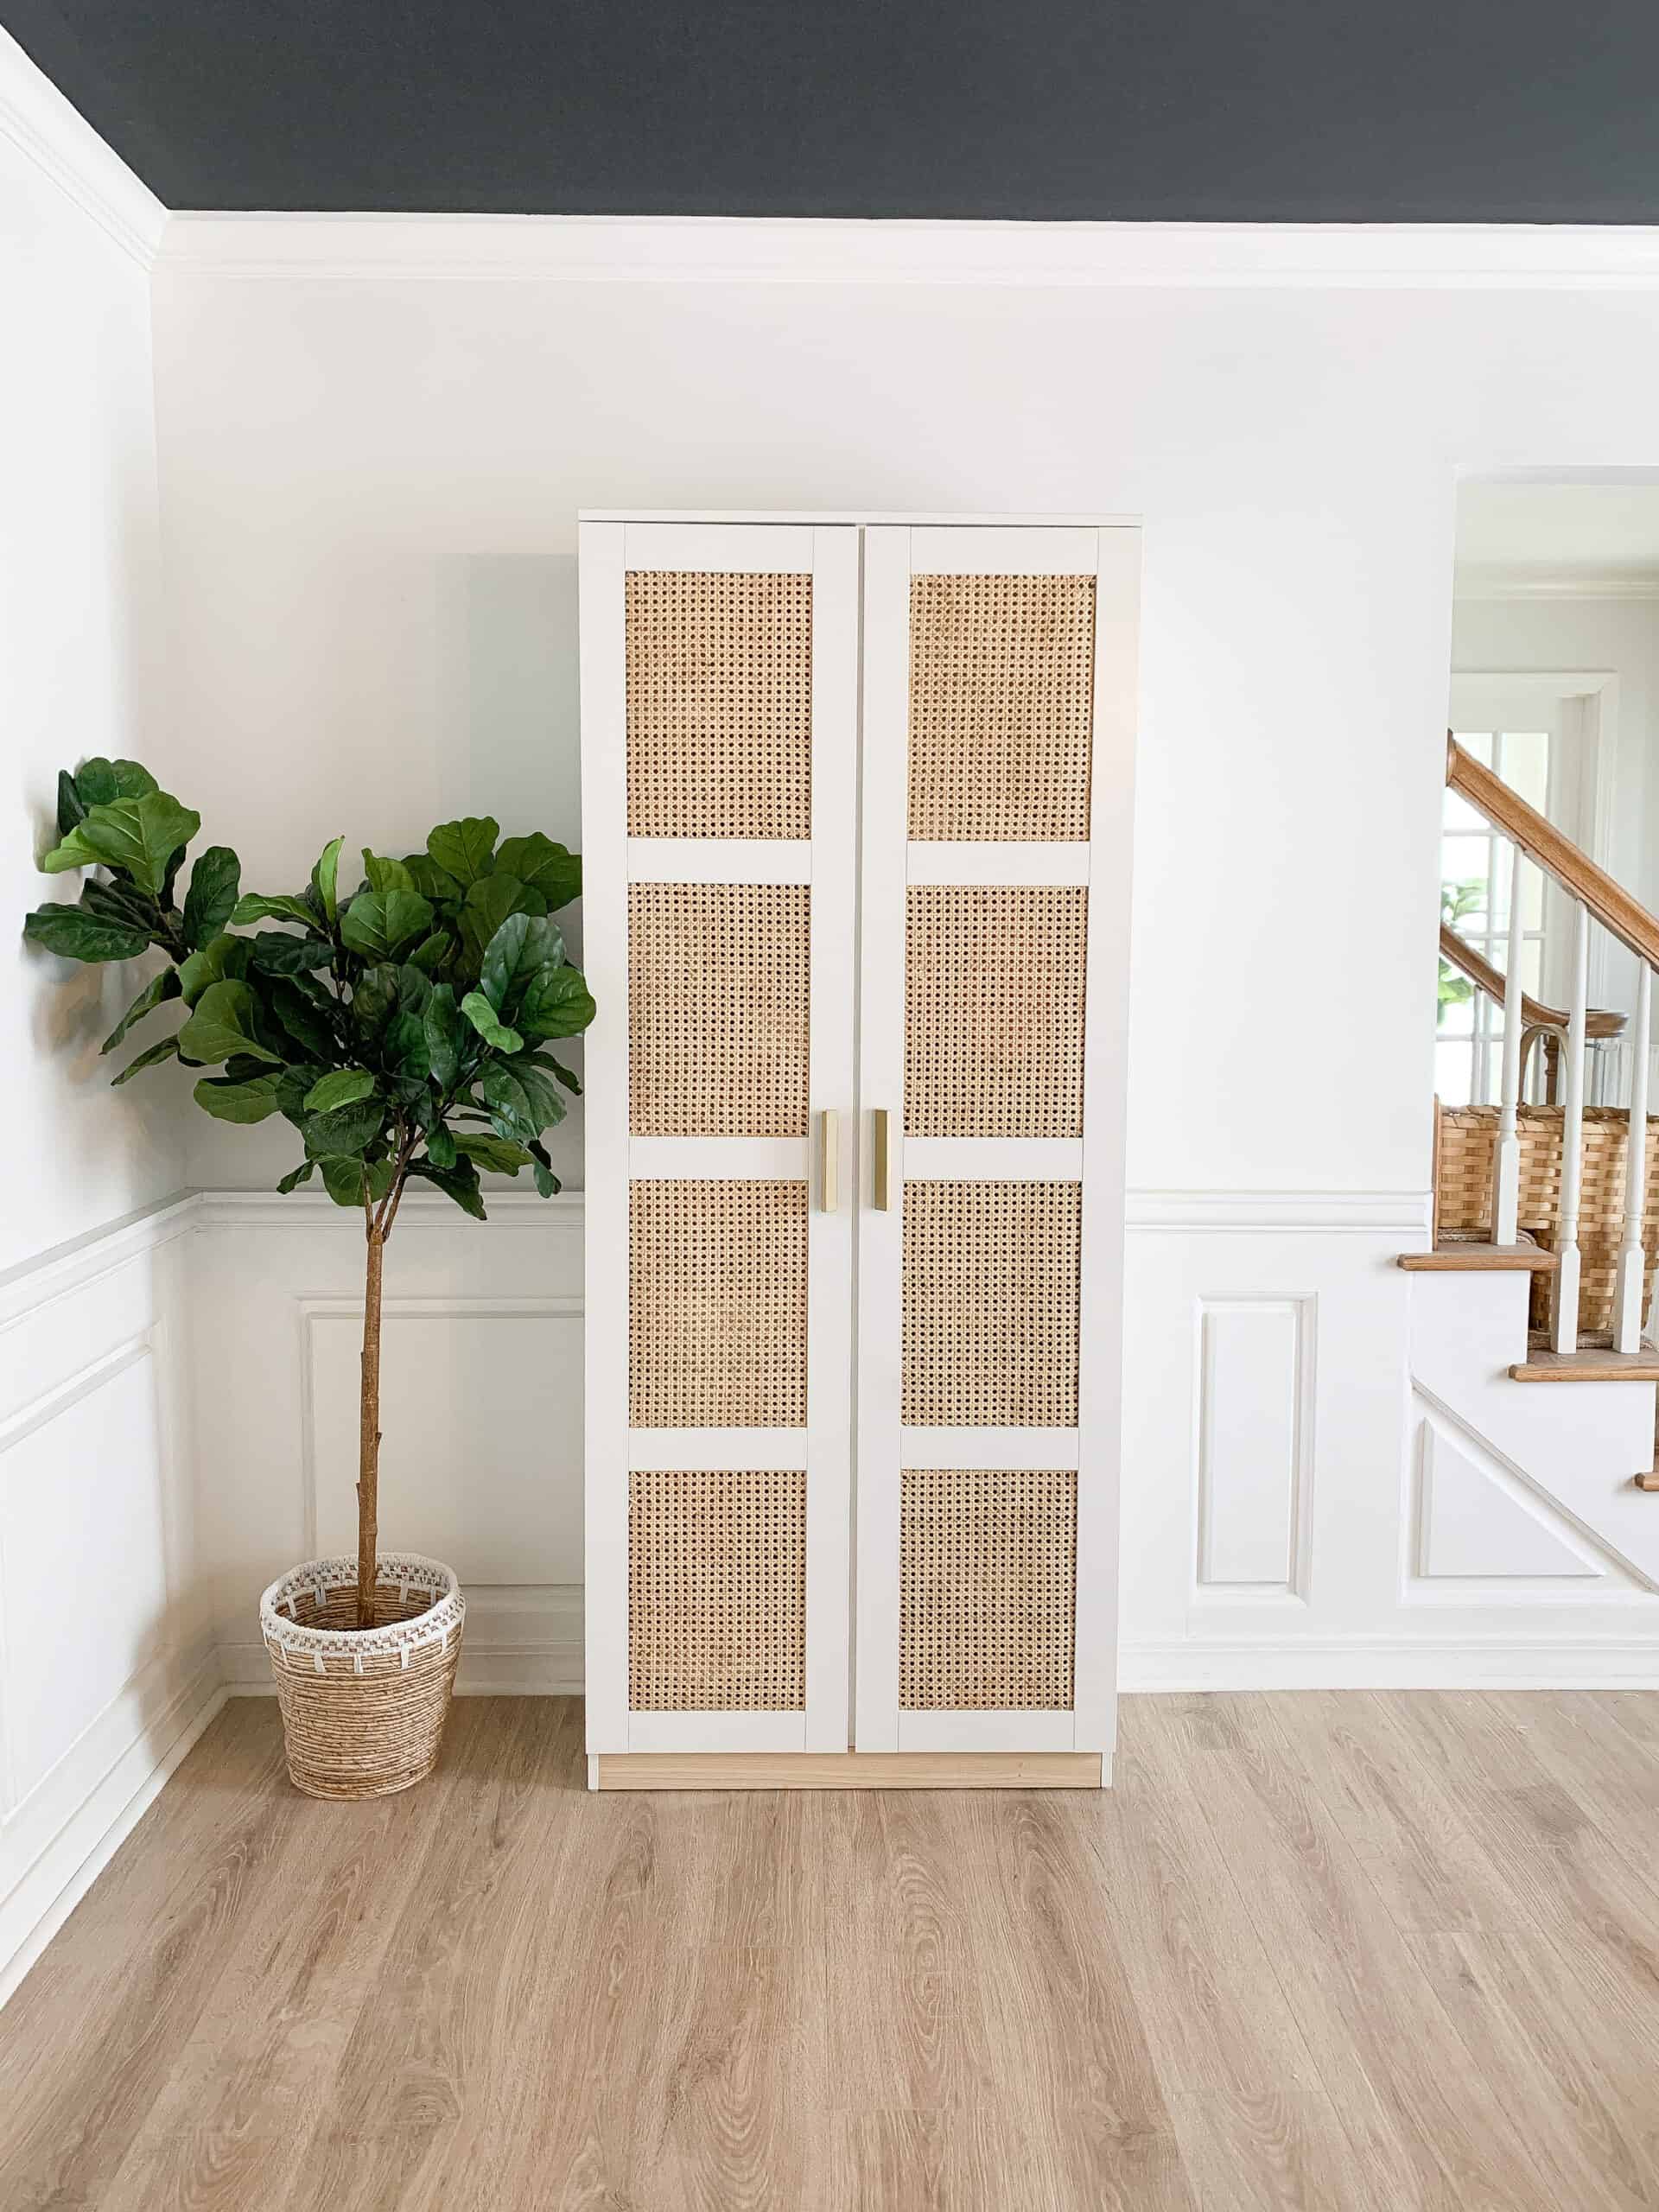
This post is the IKEA Brimnes cabinet that has been turned into this gorgeous cane piece. This hack was not hard, but had some hiccups along the way so be sure to watch the video in the post to get a full overview on how to create this gorgeous piece.
A reminder that you can turn inexpensive items into great pieces in your house! Check out all these posts, and be sure to watch for more hacks I have up my sleeve!
Again let me know if you have any questions on my best IKEA hacks, and make sure to let me know if you try any of them yourself.
Pin the post below to find my best IKEA hacks later
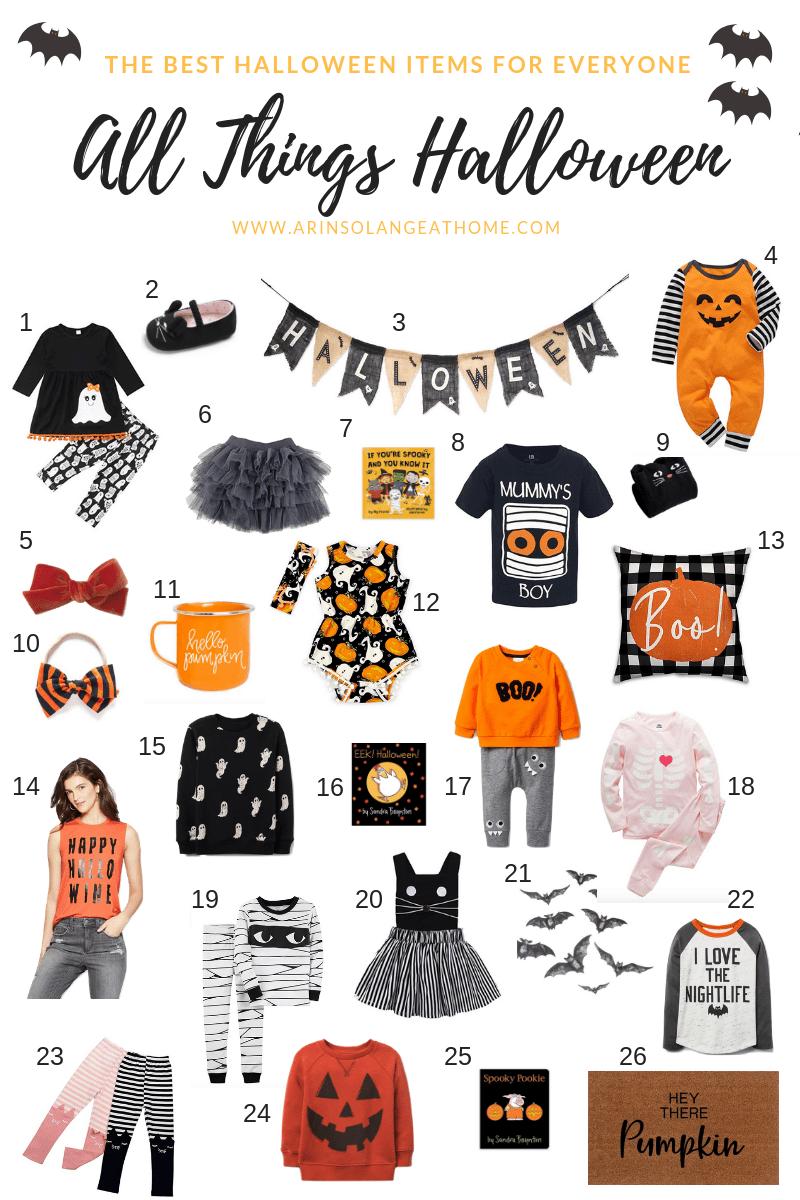
It’s that glorious time of year where things are getting cooler and we get to start getting excited for holidays for the rest of the year. I wanted to round up some of my favorite family Halloween outfits and home goods for you to get a head start on your Halloween. I normally don’t go too overboard on Halloween and do more for fall in general, but love these fun options for little ways to get in the mood for the holiday.
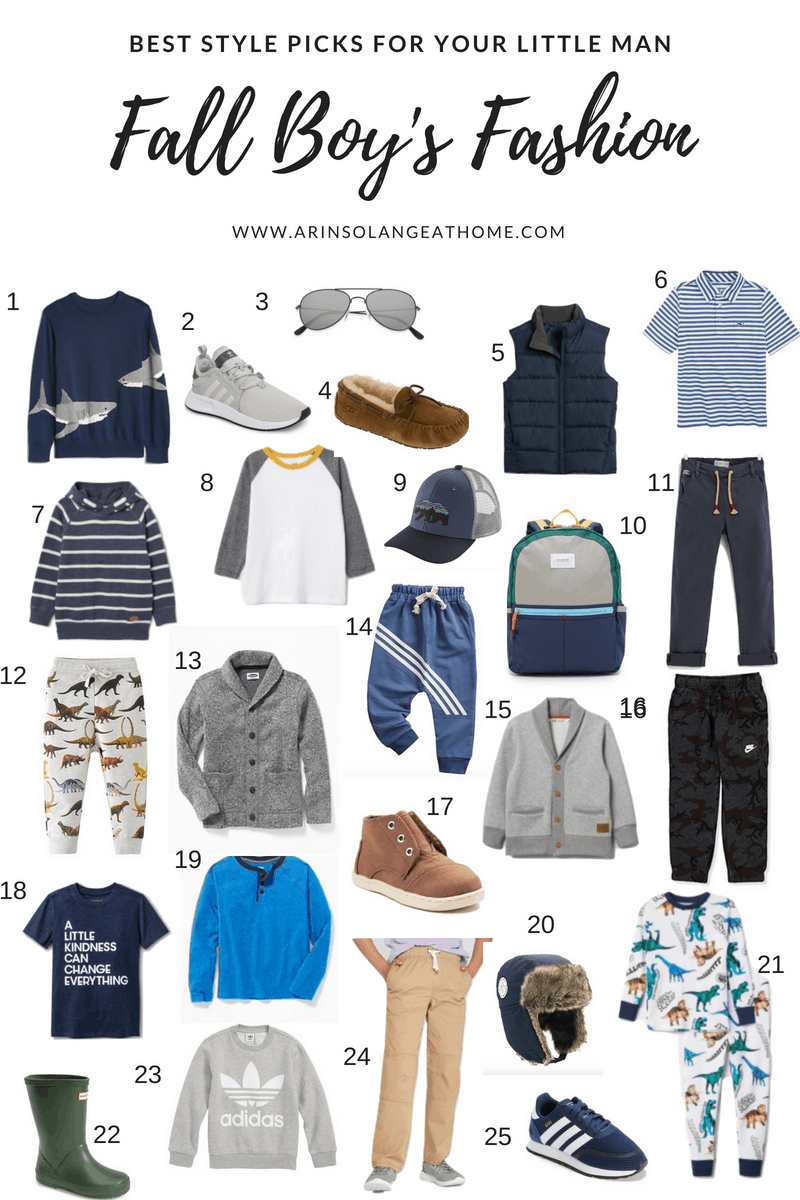
Incase you missed my fall baby boy fashion or my fall toddler girl fashion posts, I wanted to catch you up to speed. I have been working on compiling all my favorite fashion picks for our whole family this fall, and sharing them along with my girl Navy. Be sure to check out her picks for her little boy Jack at the end of this post. In the mean time here are my Boy’s Fall Fashion Favorites for the year!
This post contains affiliate links. Read more about that here.
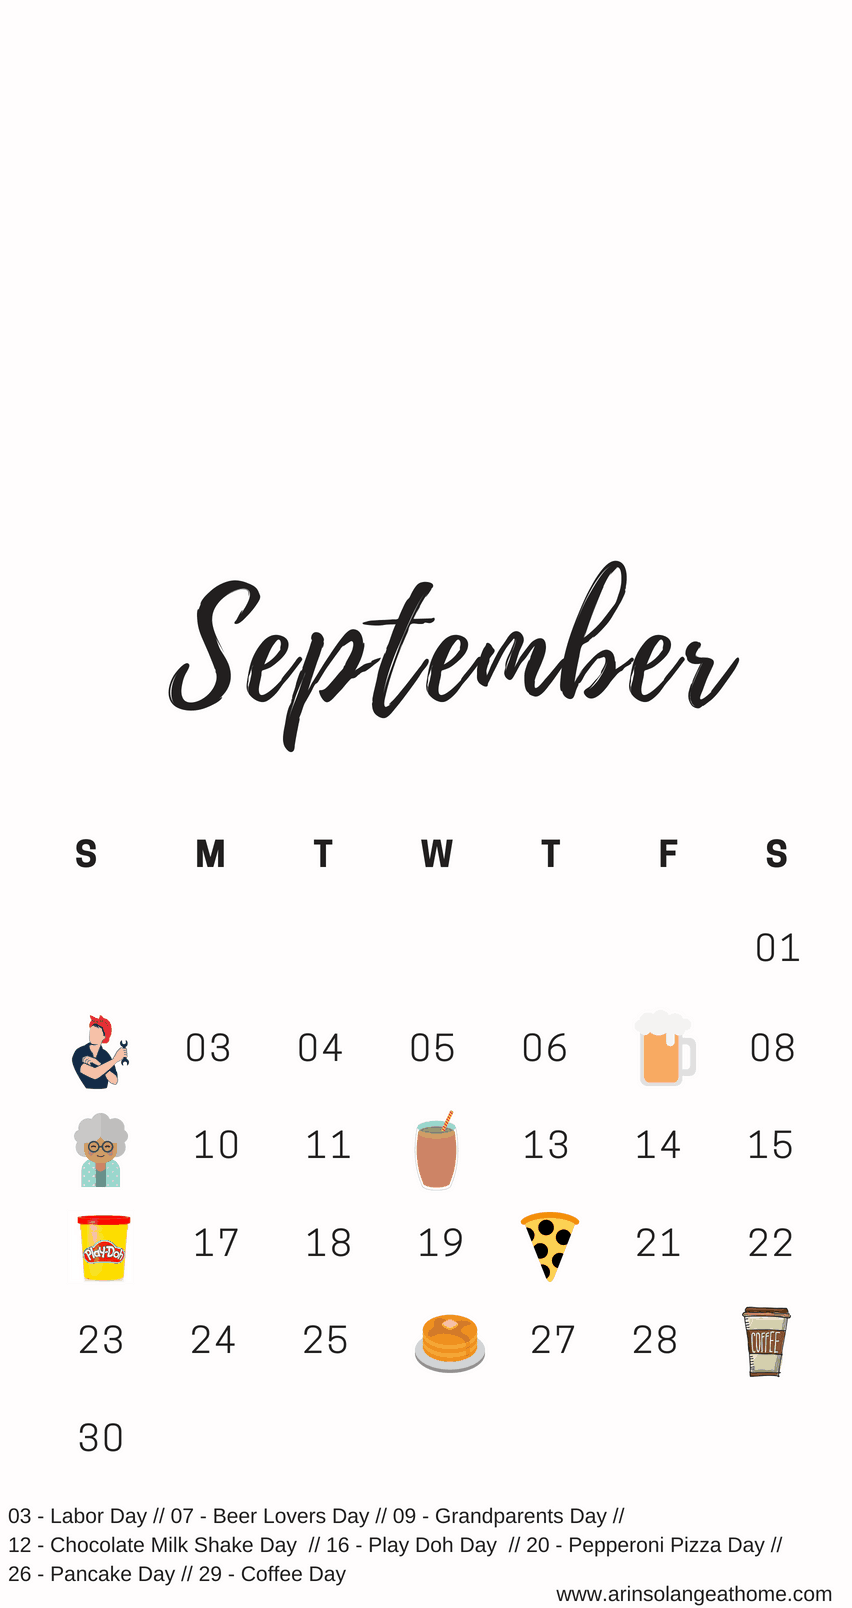
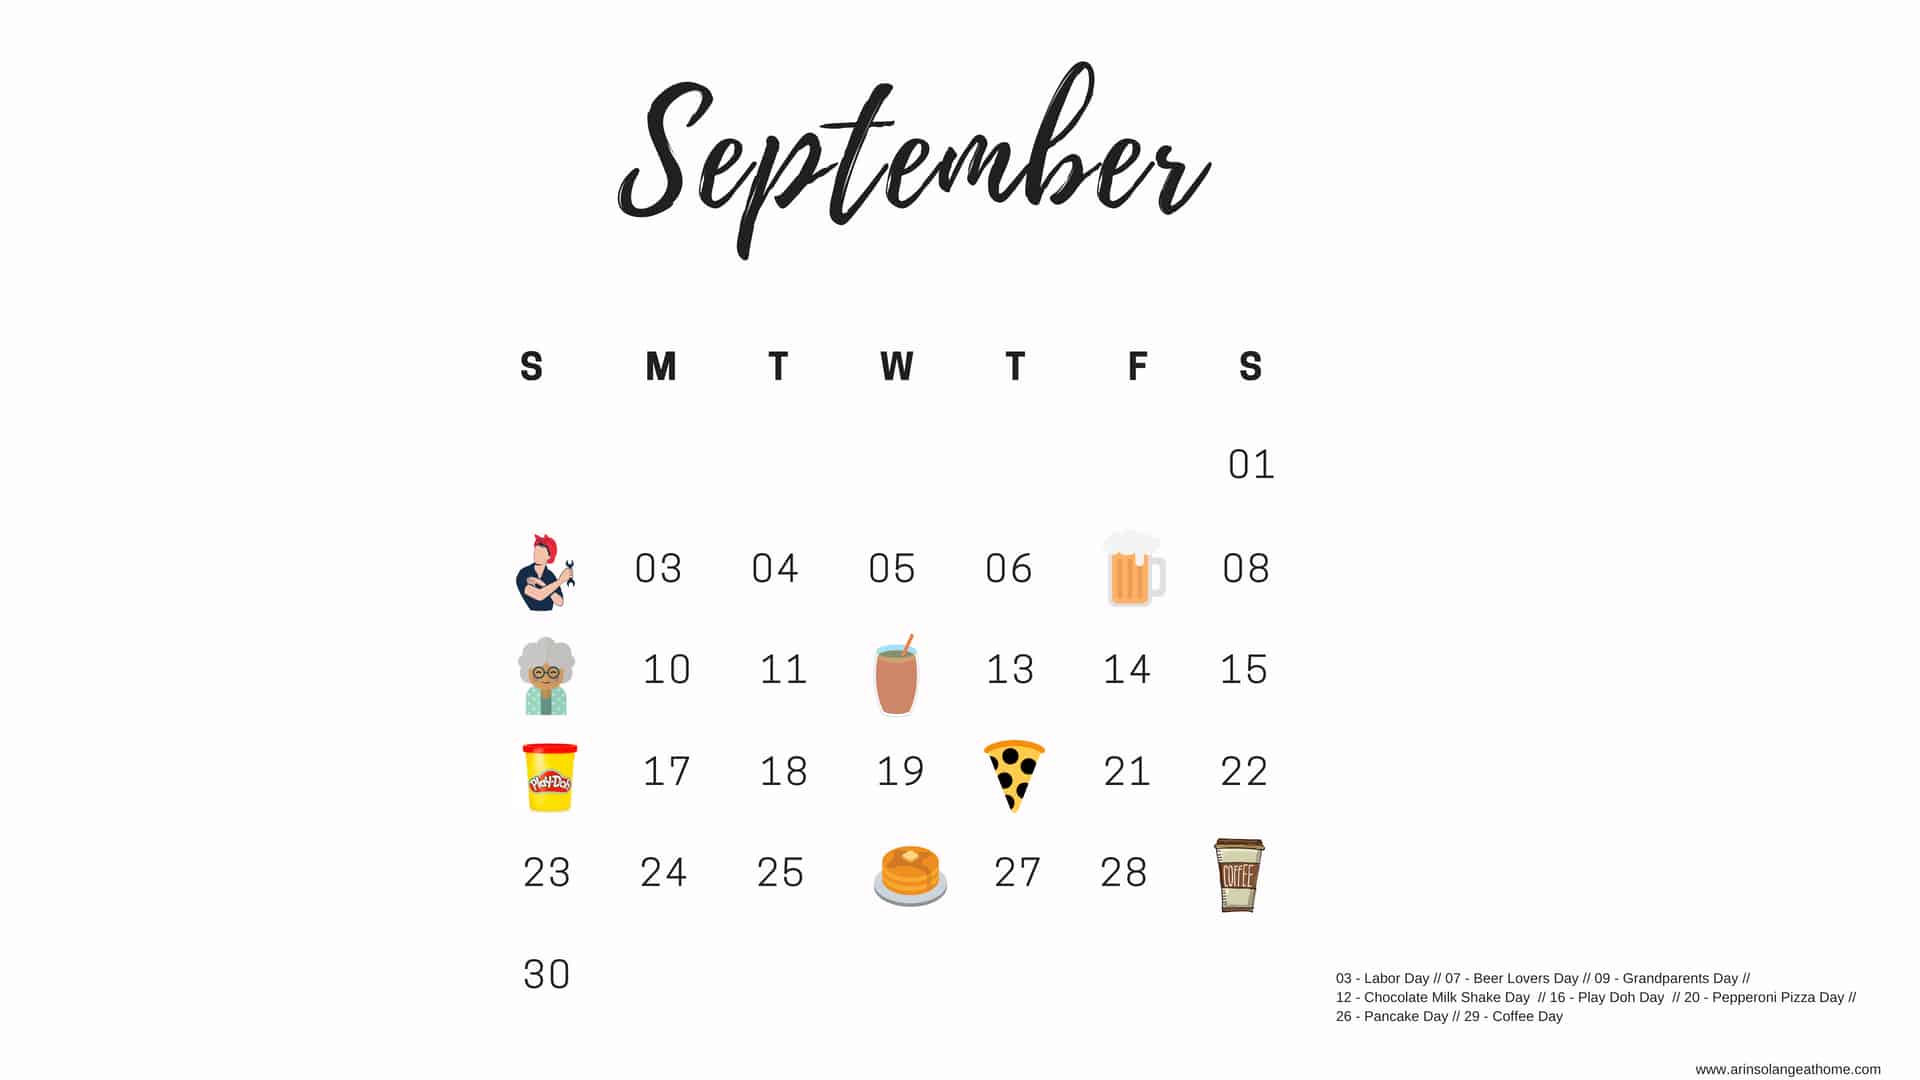
I could swear I just posted the August National Days Calendar, and here we are again with another month about to start. I wanted to get this up and posted a few days early with the holiday weekend upon us so you could get a head start on all your September plans! As I have stated previously in the last couple months calendars this will be a monthly post this year, and I will compile them all for next year into one. Below is your September National Days Calendar to save as your phone lock screen.
September National Days Calendar
Save the Above Calendar as your phone lock screen so you don’t miss anything, or download the below options!