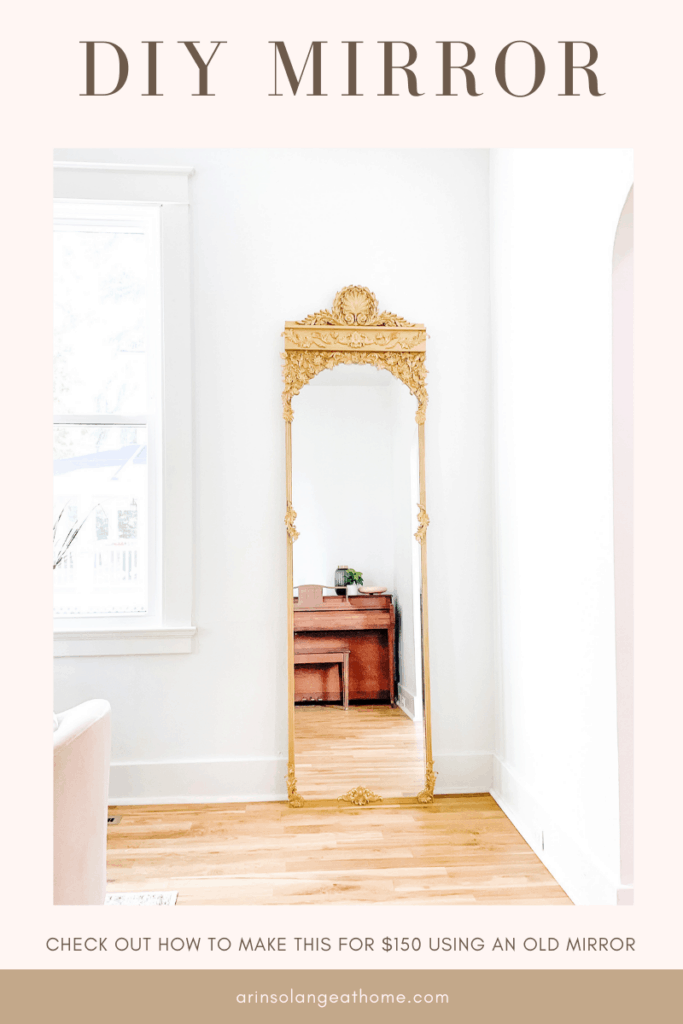
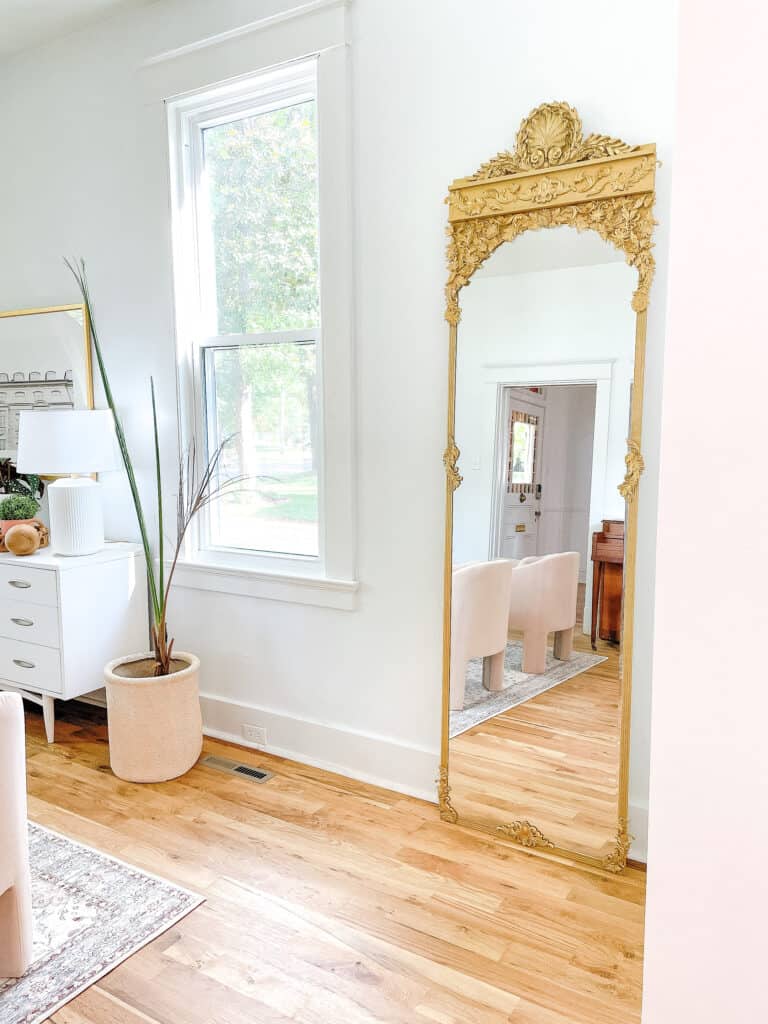
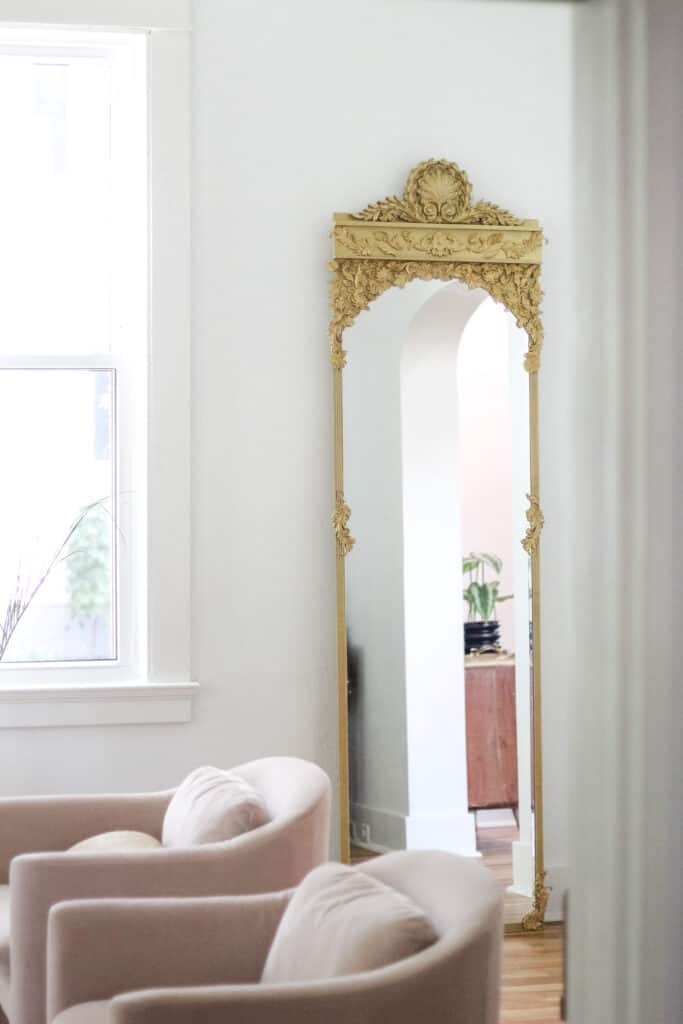
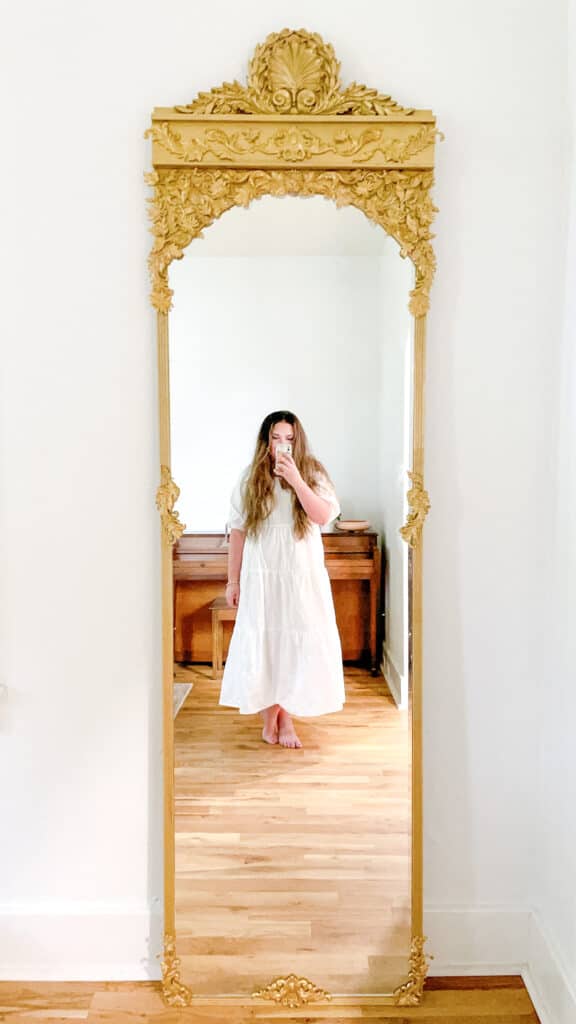
I have been wanting to do my own take on a DIY Mirror frame for YEARS, but honestly haven’t ever had the right Inso on what to create…until now. I am going to share with you all today how I created a DIY mirror frame for a marketplace find to look vintage and expensive!
This post may contain affiliate links
DIY Mirror Frame
Although I am going to walk you through my exact DIY and give you the details for how I made my mirror – I know some of you may want to do your own take on it, so before we get to the part where we make this ‘fancy’ lets talk about just plain old framing the mirror. Sometimes getting an inexpensive mirror and updating it t be exactly what you want is easier than spending hours on the internet searching for the perfect mirror.
You may also be looking for a way to give your bathroom mirror an updated look. This is a pretty simple DIY that won’t take much time, so hopefully this blog post has you updating your space in just a couple of hours.
Framing a Mirror:
There is more than one right way to do this, but for ours we chose to take thin plywood and mount the mirror on that first using liquid nails. We left a slight overhang on each side of the mirror so that we could glue the mirror to the wood instead of to the mirror, but you don’t have to do it that way.
You can also just use the liquid glue and go straight to the mirror with or without a wood back piece. If you are adding a frame to an existing hanging mirror in say a bathroom – just go ahead and glue your frame to the front of your mirror, or to the wall right to the outside of the mirror pending what looks better.
Building the DIY mirror Frame:
For the side pieces grab what ever kind of wood or trim you want to use for creating the frame. I used thin trim, but you might want something thicker. You will need enough for all 4 sides.
Your next step is to measure then cut your corners. You will cut the corners at a 45 degree angle which is most easily done with a miter saw like this one, but you can also use a simple miter box like this and saw.
Once all 4 pieces are cut, using your liquid nails glue them down.
You may have to wood filler your corners, that is IT! You can now use paint or wood stain the actual frame of the mirror.
Painting the Mirror:
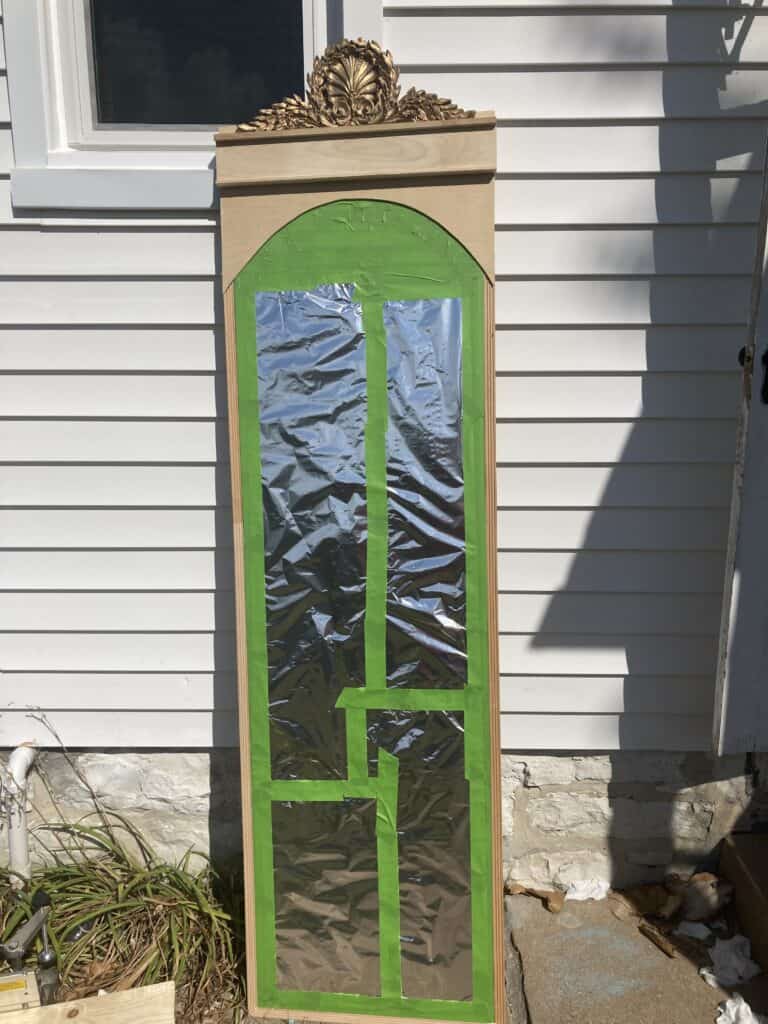
Once the glue is dry if painting or staining is your plan, your best method is to put down tin foil to cover as much of the mirror as you can then painter’s tape around the foil. If you get any paint on the mirror use a plastic scraper to get it off.
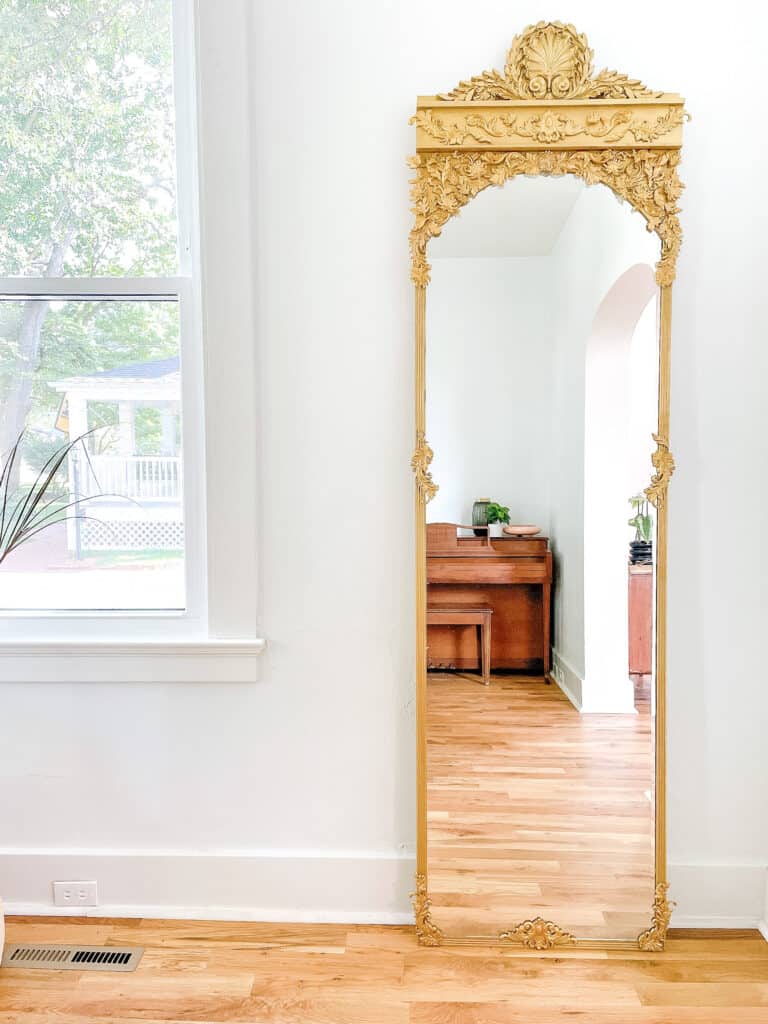
How to create my DIY Mirror Frame that looks Vintage
Now that you have a good general way to create a DIY framed mirror lets get to my actual DIY! I will telly you that one aspect of this DIY was an antique, but in my hunt I found several similar options that were so fun. In a few simple steps you will have exactly the mirror you wanted!
Supplies
- Plain Mirror – I got mine on Facebook Marketplace but you could get any builder-grade mirror
- liquid nails or other construction adhesive
- Trim for frame – we went really thin with ours, but you can go thicker
- Plywood for the back – you need just taller and wider than your mirror – you can have this cut at the hardware store for you. You need it just bigger than the width of the mirror and the height of the mirror.
- Fast Drying Resin
- Resin molds – I got these, these and these
- Top piece of wood
- Antique topper
- Painter’s Tape
- Hot glue
- Paint – I used this spray paint
- optional – rub and buff
- Optional – hanging bracket
- Optional but highly recommend a scrap piece of 1×2 or 1×3 so you can mount to the wall
- Extra thin plywood for creating the arch
Tools:
- Miter Saw or hand Saw with Miter block
- Hot Glue Gun
- Jigsaw
Full Tutorial for my Mirror:
First we wanted to make sure we had a way to hang or baby proof our mirror. We added a scrap piece of 1×3 wood to our plywood back. We this gave us a thick enough piece of wood to add baby proofing straps or this mounting bracket. (in the end we went with the baby proofing strap and left it on the ground due to how big and heavy ours was.)
We did all of this before gluing the mirror to the plywood so we wouldn’t have any mishaps with the drill and the mirror. If you plan to just lean your mirror you could skip that step.
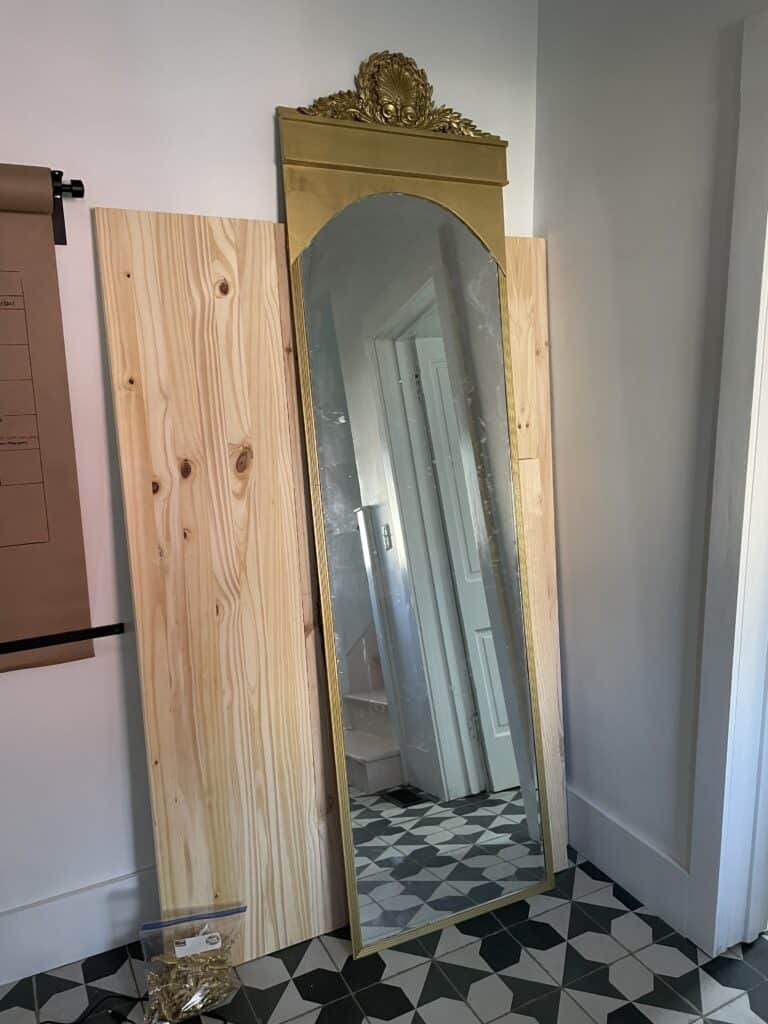
Now you can mount the mirror on the plywood. We used liquid nails and positioned the mirror to just barely have hangover on all 4 sides. Let that dry for a full 24 hours before you start moving it around to do more.
Framing and Adding the Large embellishments:
First you are going to frame your mirror. As stated above we used our miter saw and cut the trim pieces of wood at 45 degree angles for the corners. We glued those onto the small lip of plywood that was hanging out from the back of the mirror.
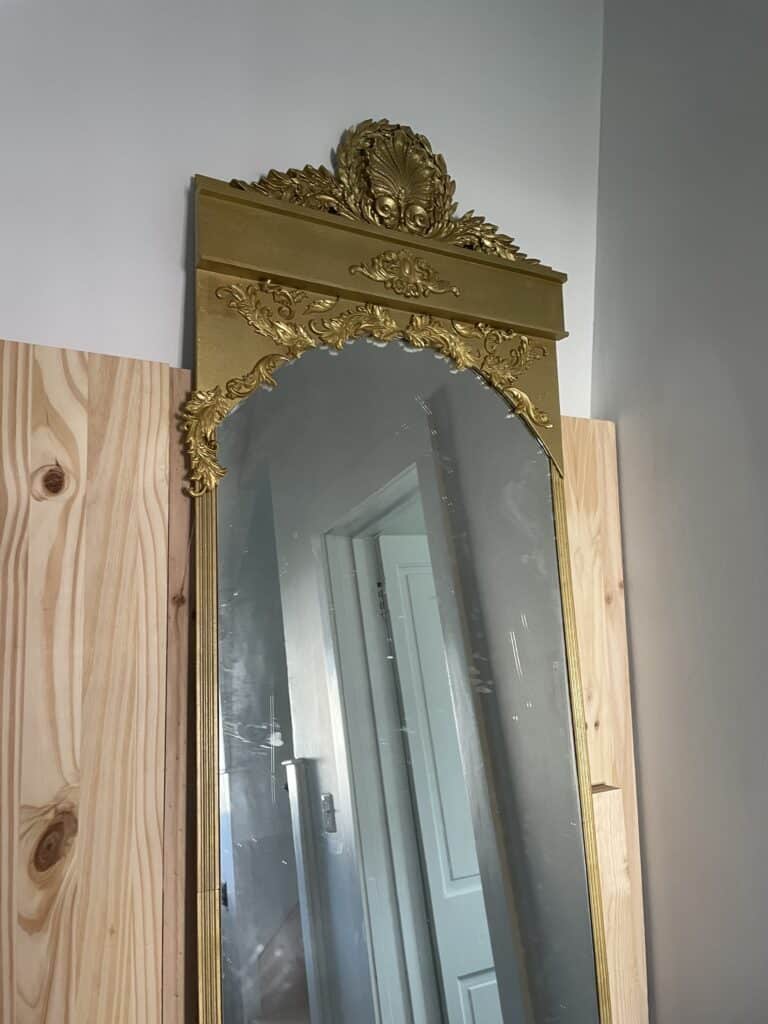
Once it is fully framed it is time to add your arch. This is fully optional, but I felt like it really updated the whole look of the mirror. I used a small piece of leftover plywood and drew an arch.
We then cut the arch with our jigsaw and glued it on the top of the mirror . I let it hang over the top, and didn’t worry about how the spot looked where it overlapped the frame because I knew that would be covered eventually.
Next we added a door frame piece (this one) and an embellishment from the antique store. Like I said earlier in the post – the embellishment from the antique store. When I was looking there were several great options, and you could just use the resin molds up there, but to me it really added to the mirror!
Once that is all done – paint your mirror!
Adding Resin Embellishments to DIY Mirror Frame
Now for the fun. You should have a fully painted mirror waiting for you to add your resin embellishments.
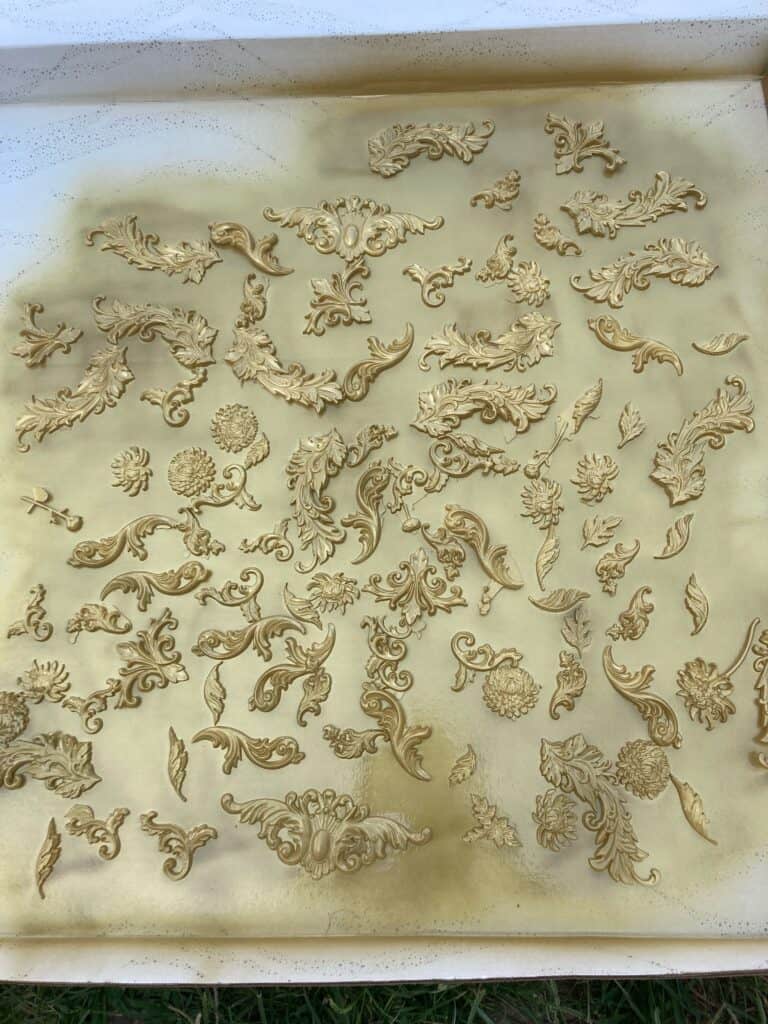
First – make LOTS of resin embellishments. I used a combination of the 3 molds I linked in supplies, and needed 2 boxes of the resin. This resin dries white and in 10 minutes. Be very careful where you make these because the resin will ruin things.
Once they are all done you will paint them as well. I would paint both sides for good measure. If they hang onto the mirror you will want them to be gold too.
Once you have painted them all it is time to glue them on. I used hot glue and started with sort of a symmetrical design. Once the symmetrical design had been created I went through and filled in the gaps and overlapped a bunch. I didn’t keep this EXACTLY symmetrical.
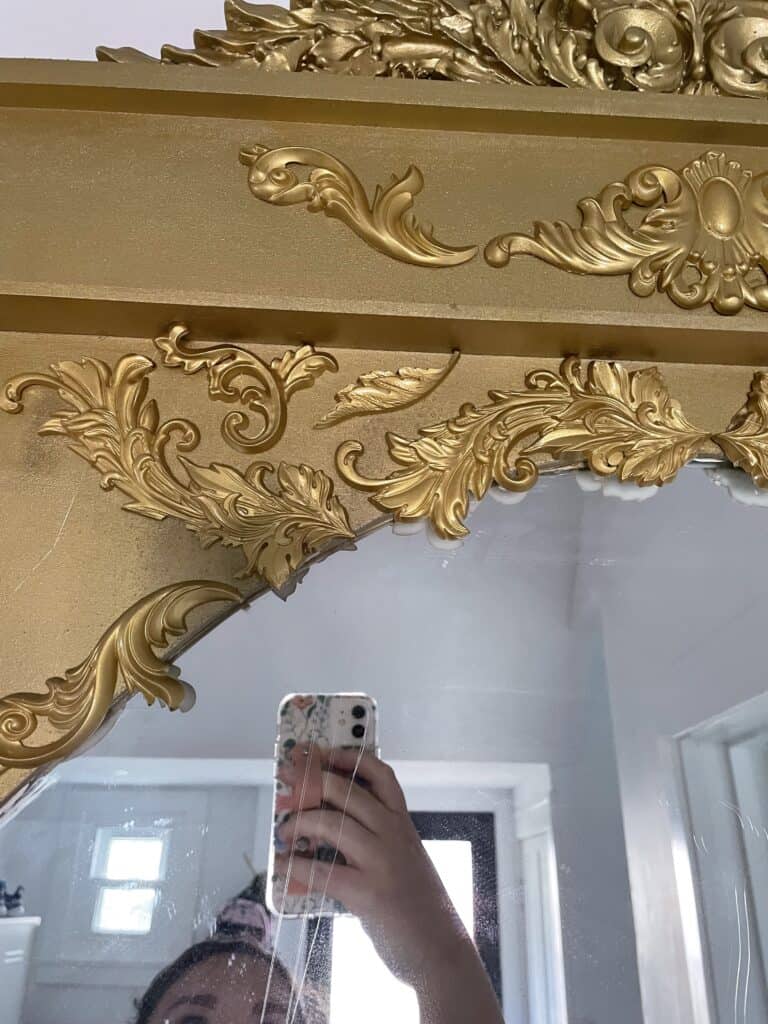
The last step was to add rub and buff to the mirror. This is a sort of strange paint that you can add lightly to the areas that are raised on the mirror. It added a bit of dimension and that antique look I was going for.
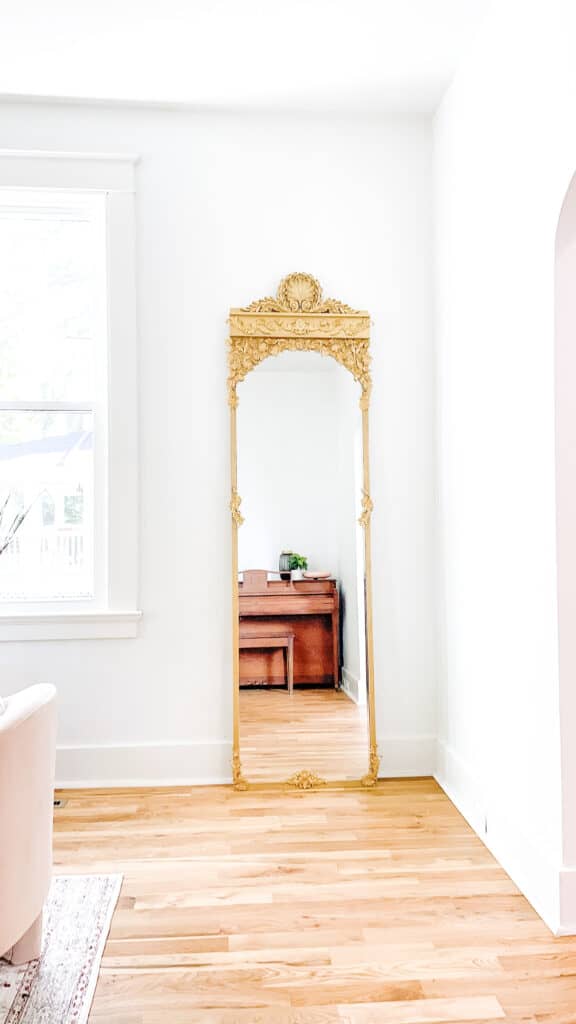
And that is it! My husband used a baby proofing kit to hold it to the wall (in the 1×3) and that was incredibly helpful because it is heavy!
Other Posts You’ll Love
If you liked this DIY check out these other posts below that you might love too.
DIY Light Fixture | DIY Wall Easel | Built ins from Stock Cabinets | DIY Dining Table
Pin the Photo Below for Later
Hopefully you feel ready to tackle a diy mirror frame, and if you try your hand at my DIY mirror I would love to see your end result! Tag me on Instagram (@arinsolange). If you have any questions be sure to leave them in the comments below.