Editing pictures for Instagram and my blog is a huge part of this business, and likewise, is something I am asked about very frequently. I decided to break down what apps I use, and what I use on a typical post. I haven’t jumped on the preset wagon yet, however I love some of them, and who knows, maybe i’ll report back in a month and say that I have added that to my list of apps. So read on to see how I edit my photos for Instagram.
this post contains affiliate links
Before we get started
The biggest thing I want to say before I lead anyone on with this post is that: A – most of my Instagram photos are taken on my Canon camera (I use the lens it comes with and this lens for most of my photos). and B – good lighting and a good photo has to be the starting point. You can’t turn a bad photo into a great one typically. If I am indoors I either wait for good lighting or I use these photo lights to brighten the space up.
Apps
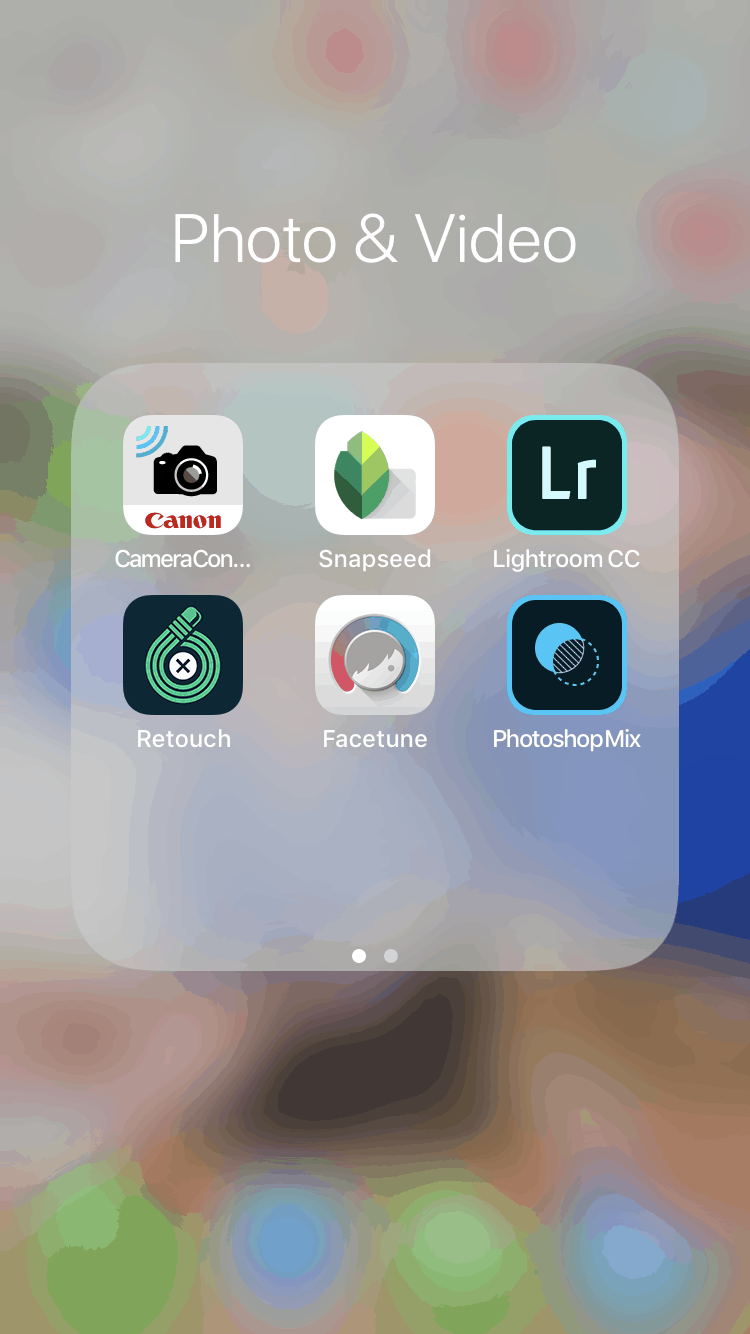
The above folder on my phone is a photo of the apps I personally have. I do not use all of them for every photo, but I will show you examples of when each one has come in handy.
Adobe Lightroom
Snapseed
Facetune
Retouch
PhotoShopMix
Canon Camera Connect
My Process in Editing Pictures for Instagram
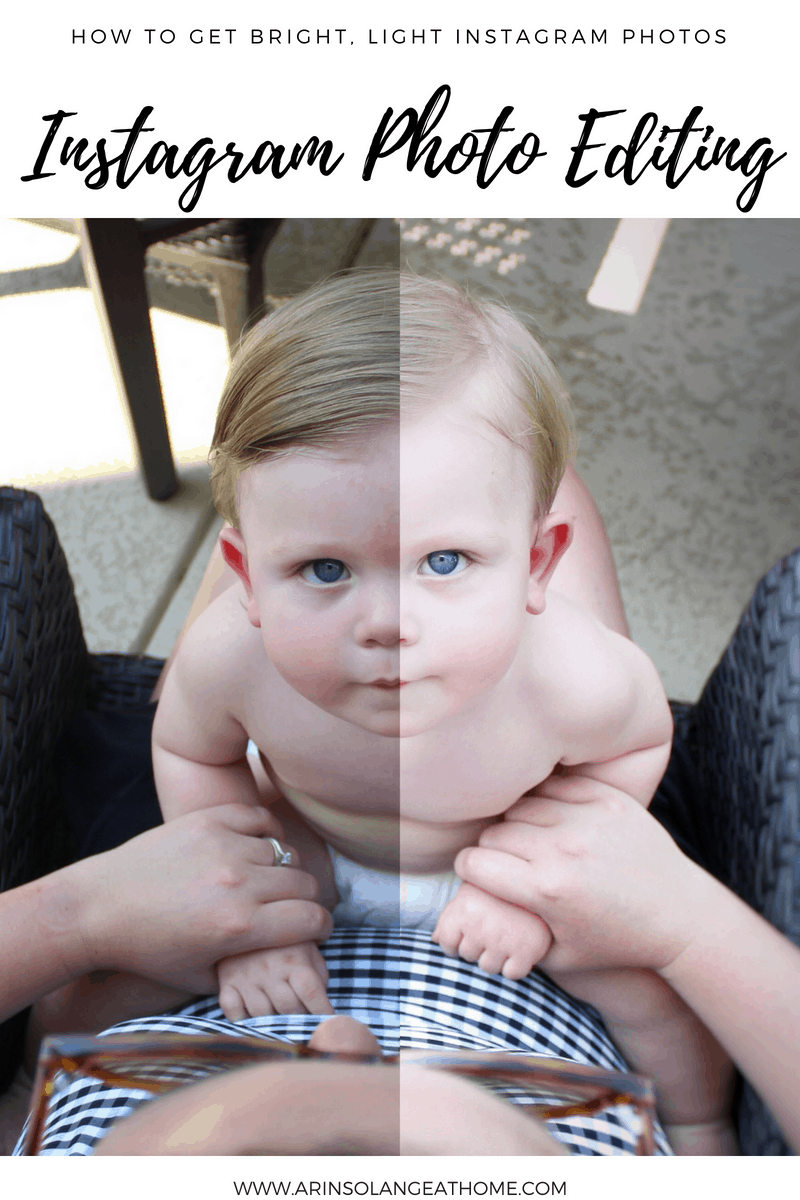
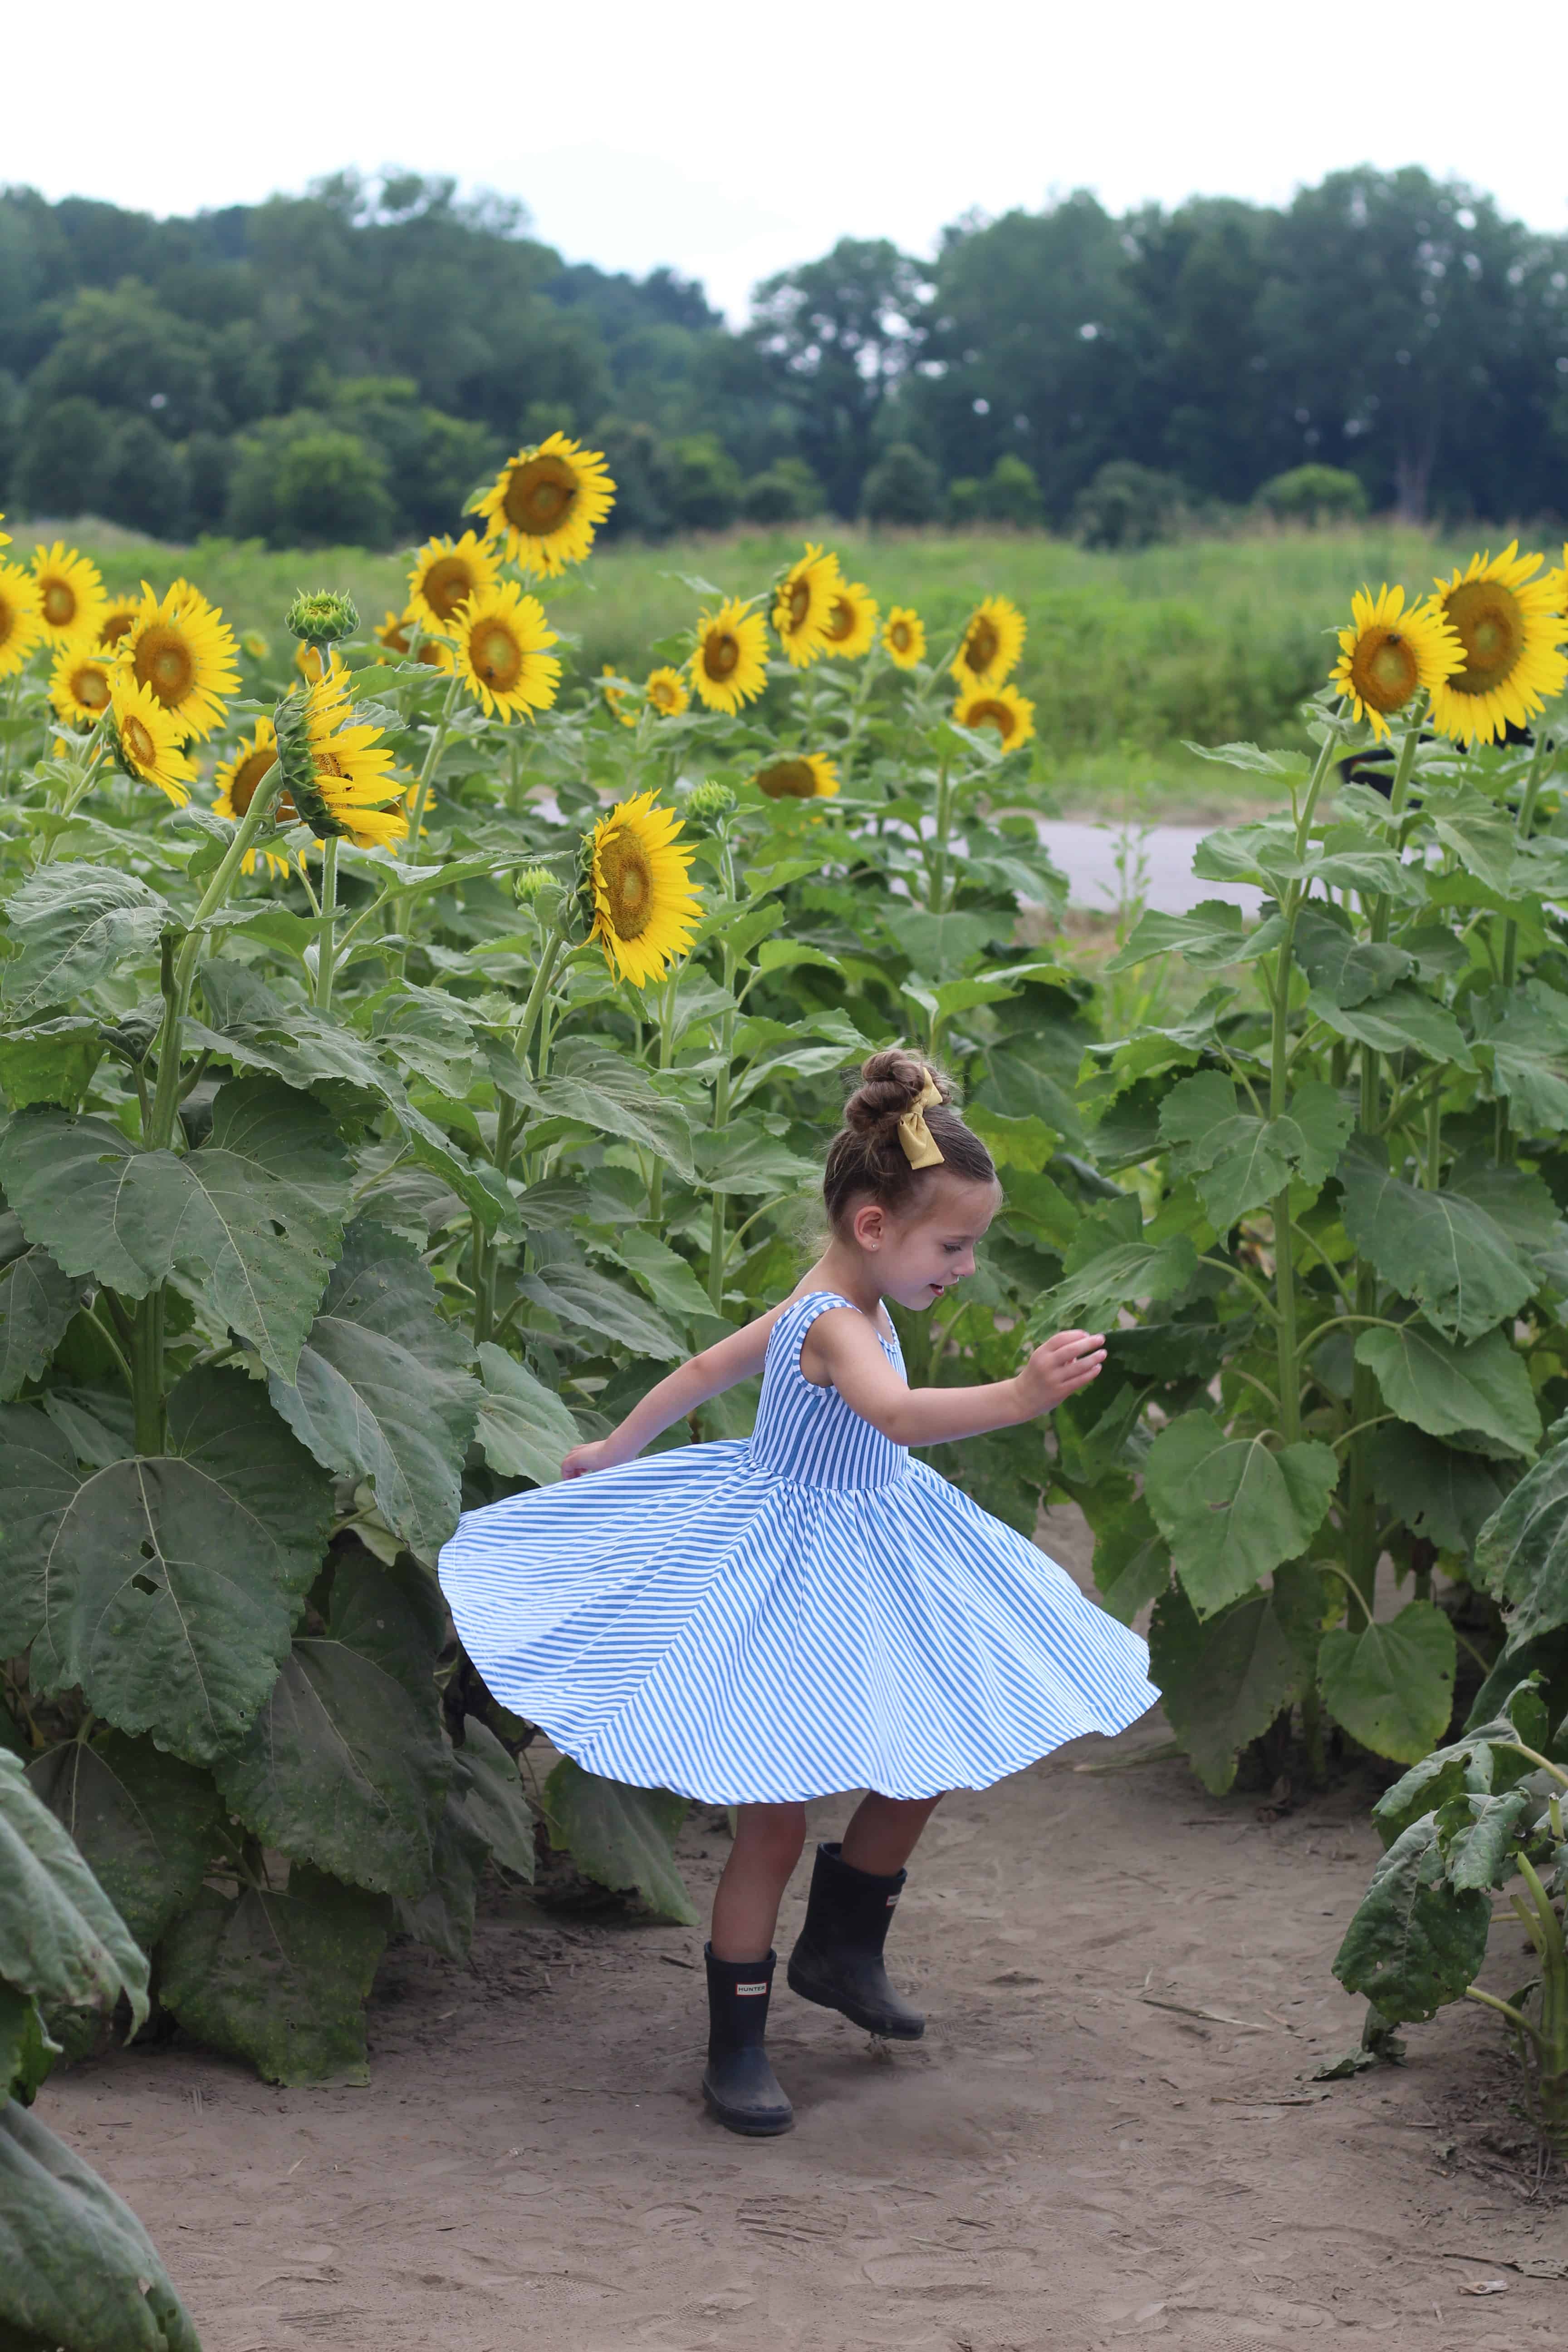
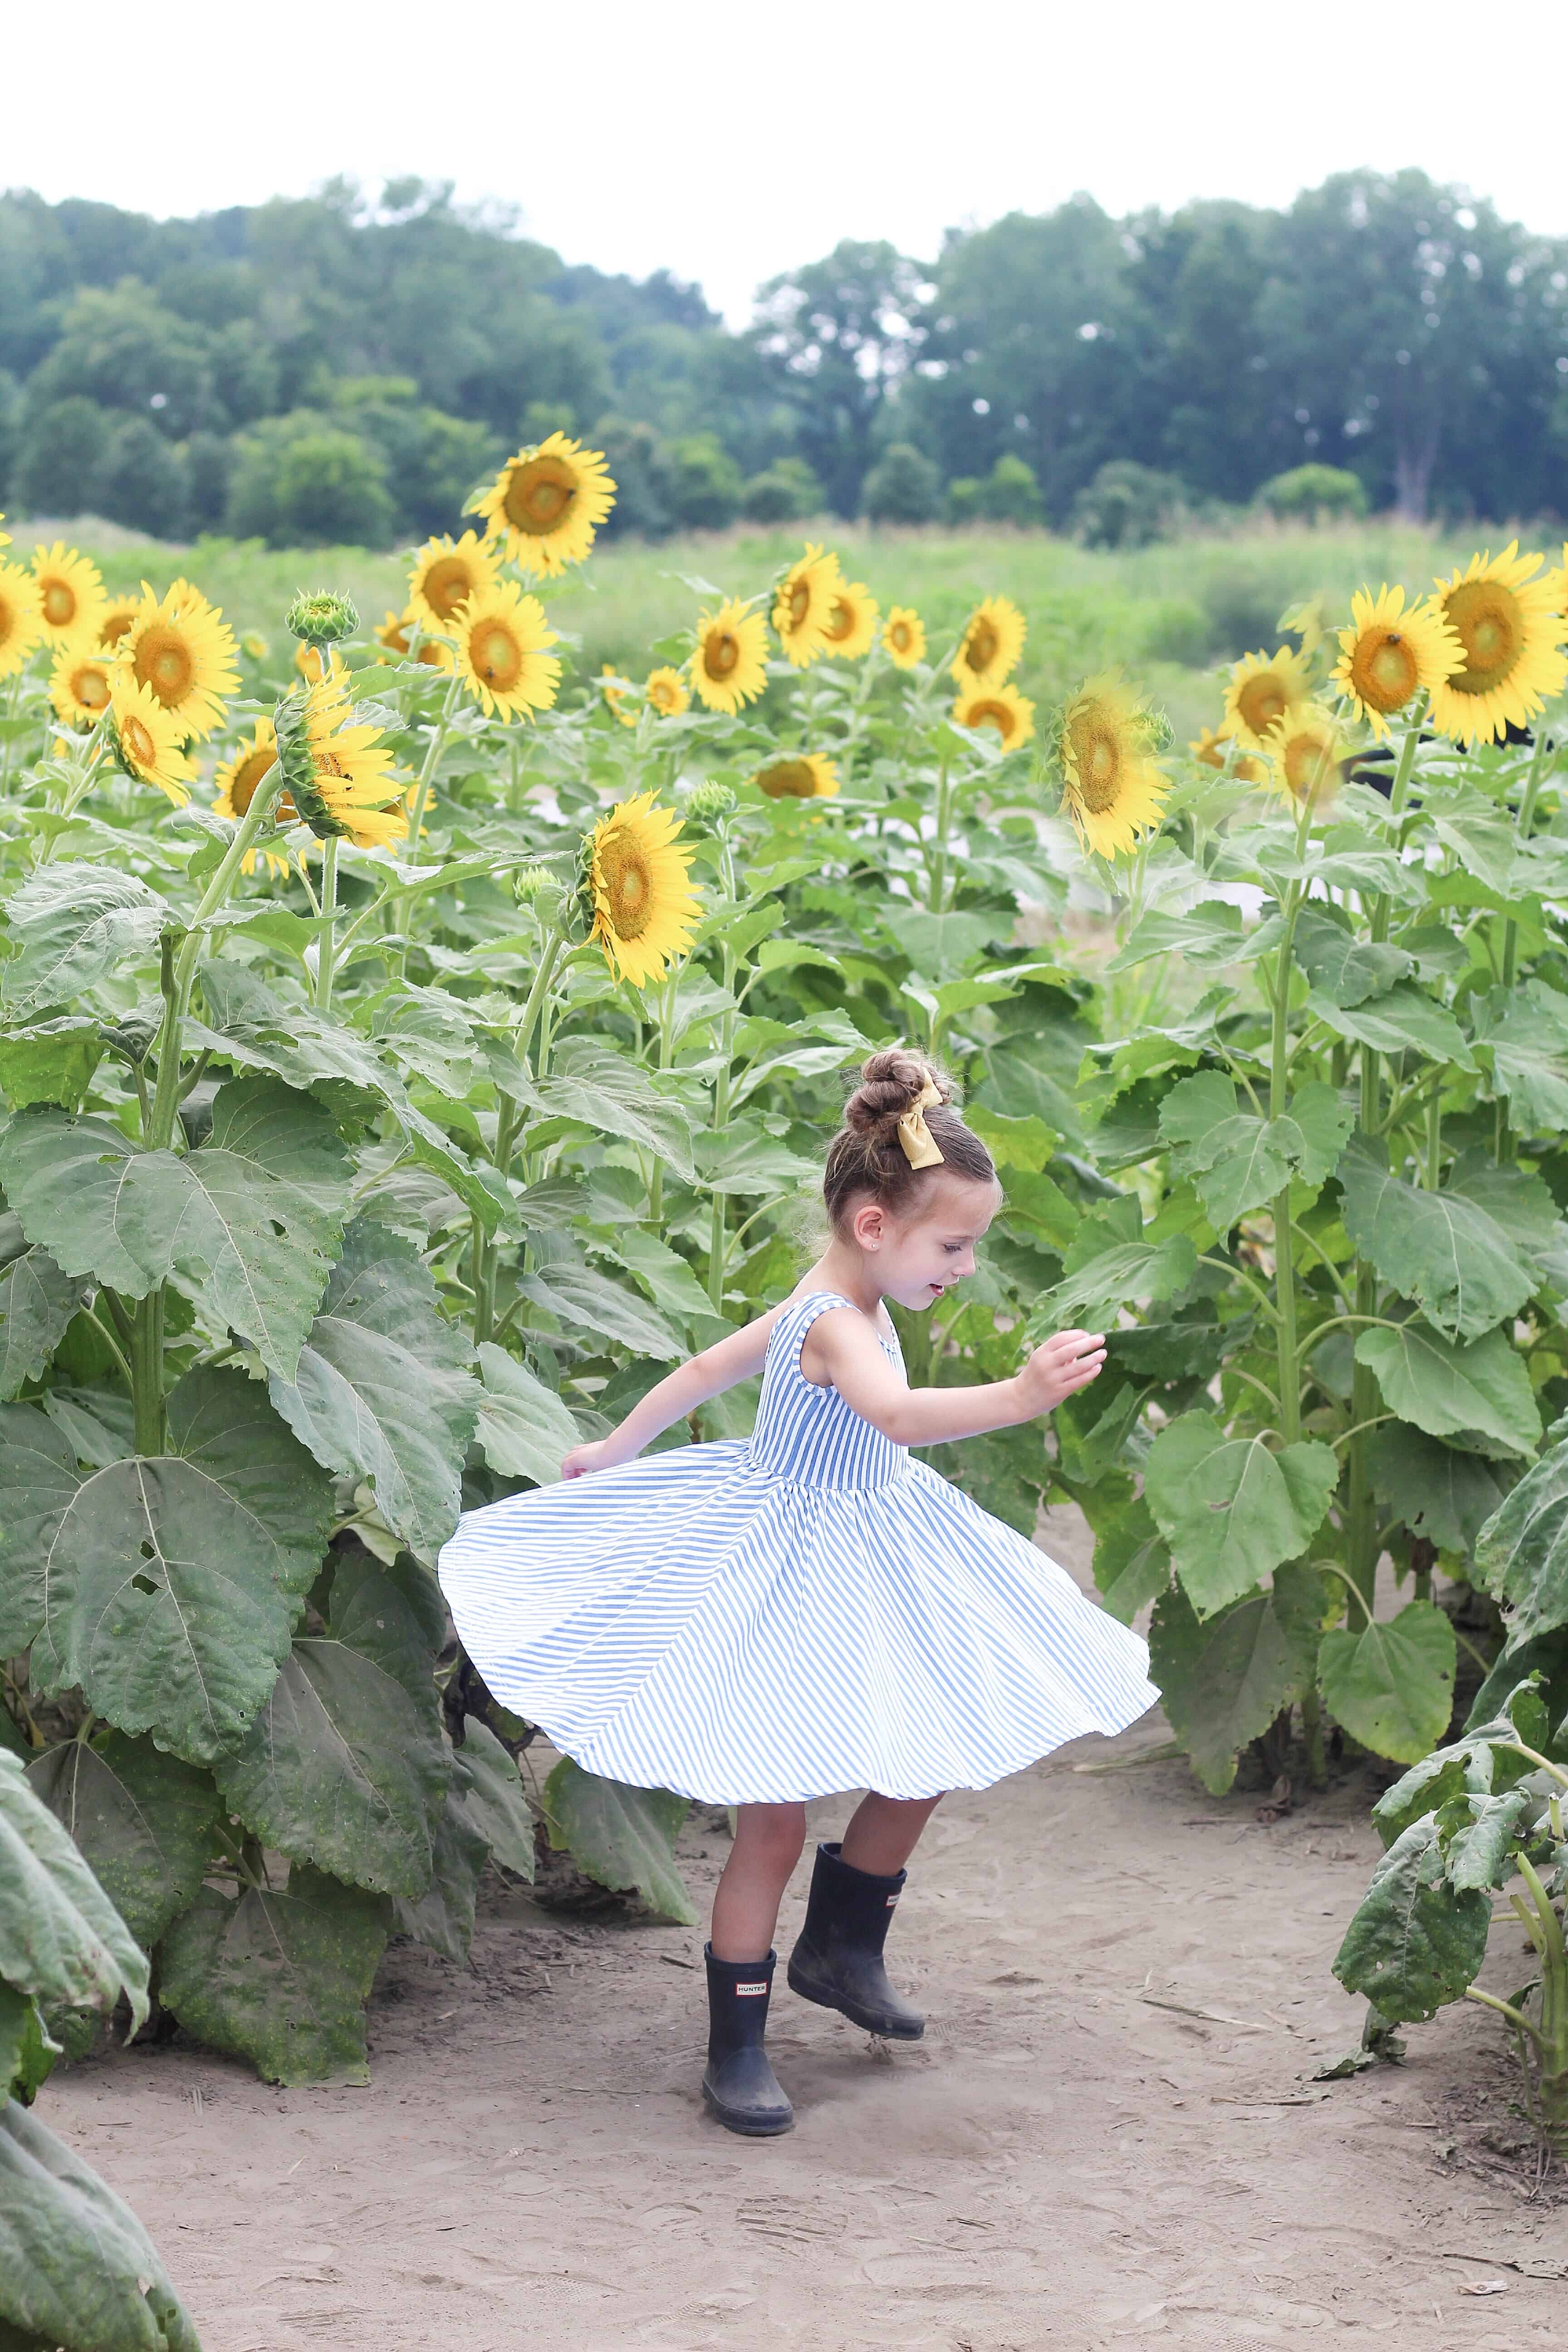
I am going to go through my INITIAL process on my photos first. Here are a couple before and afters of photos using the process I use on 99% of my photos.
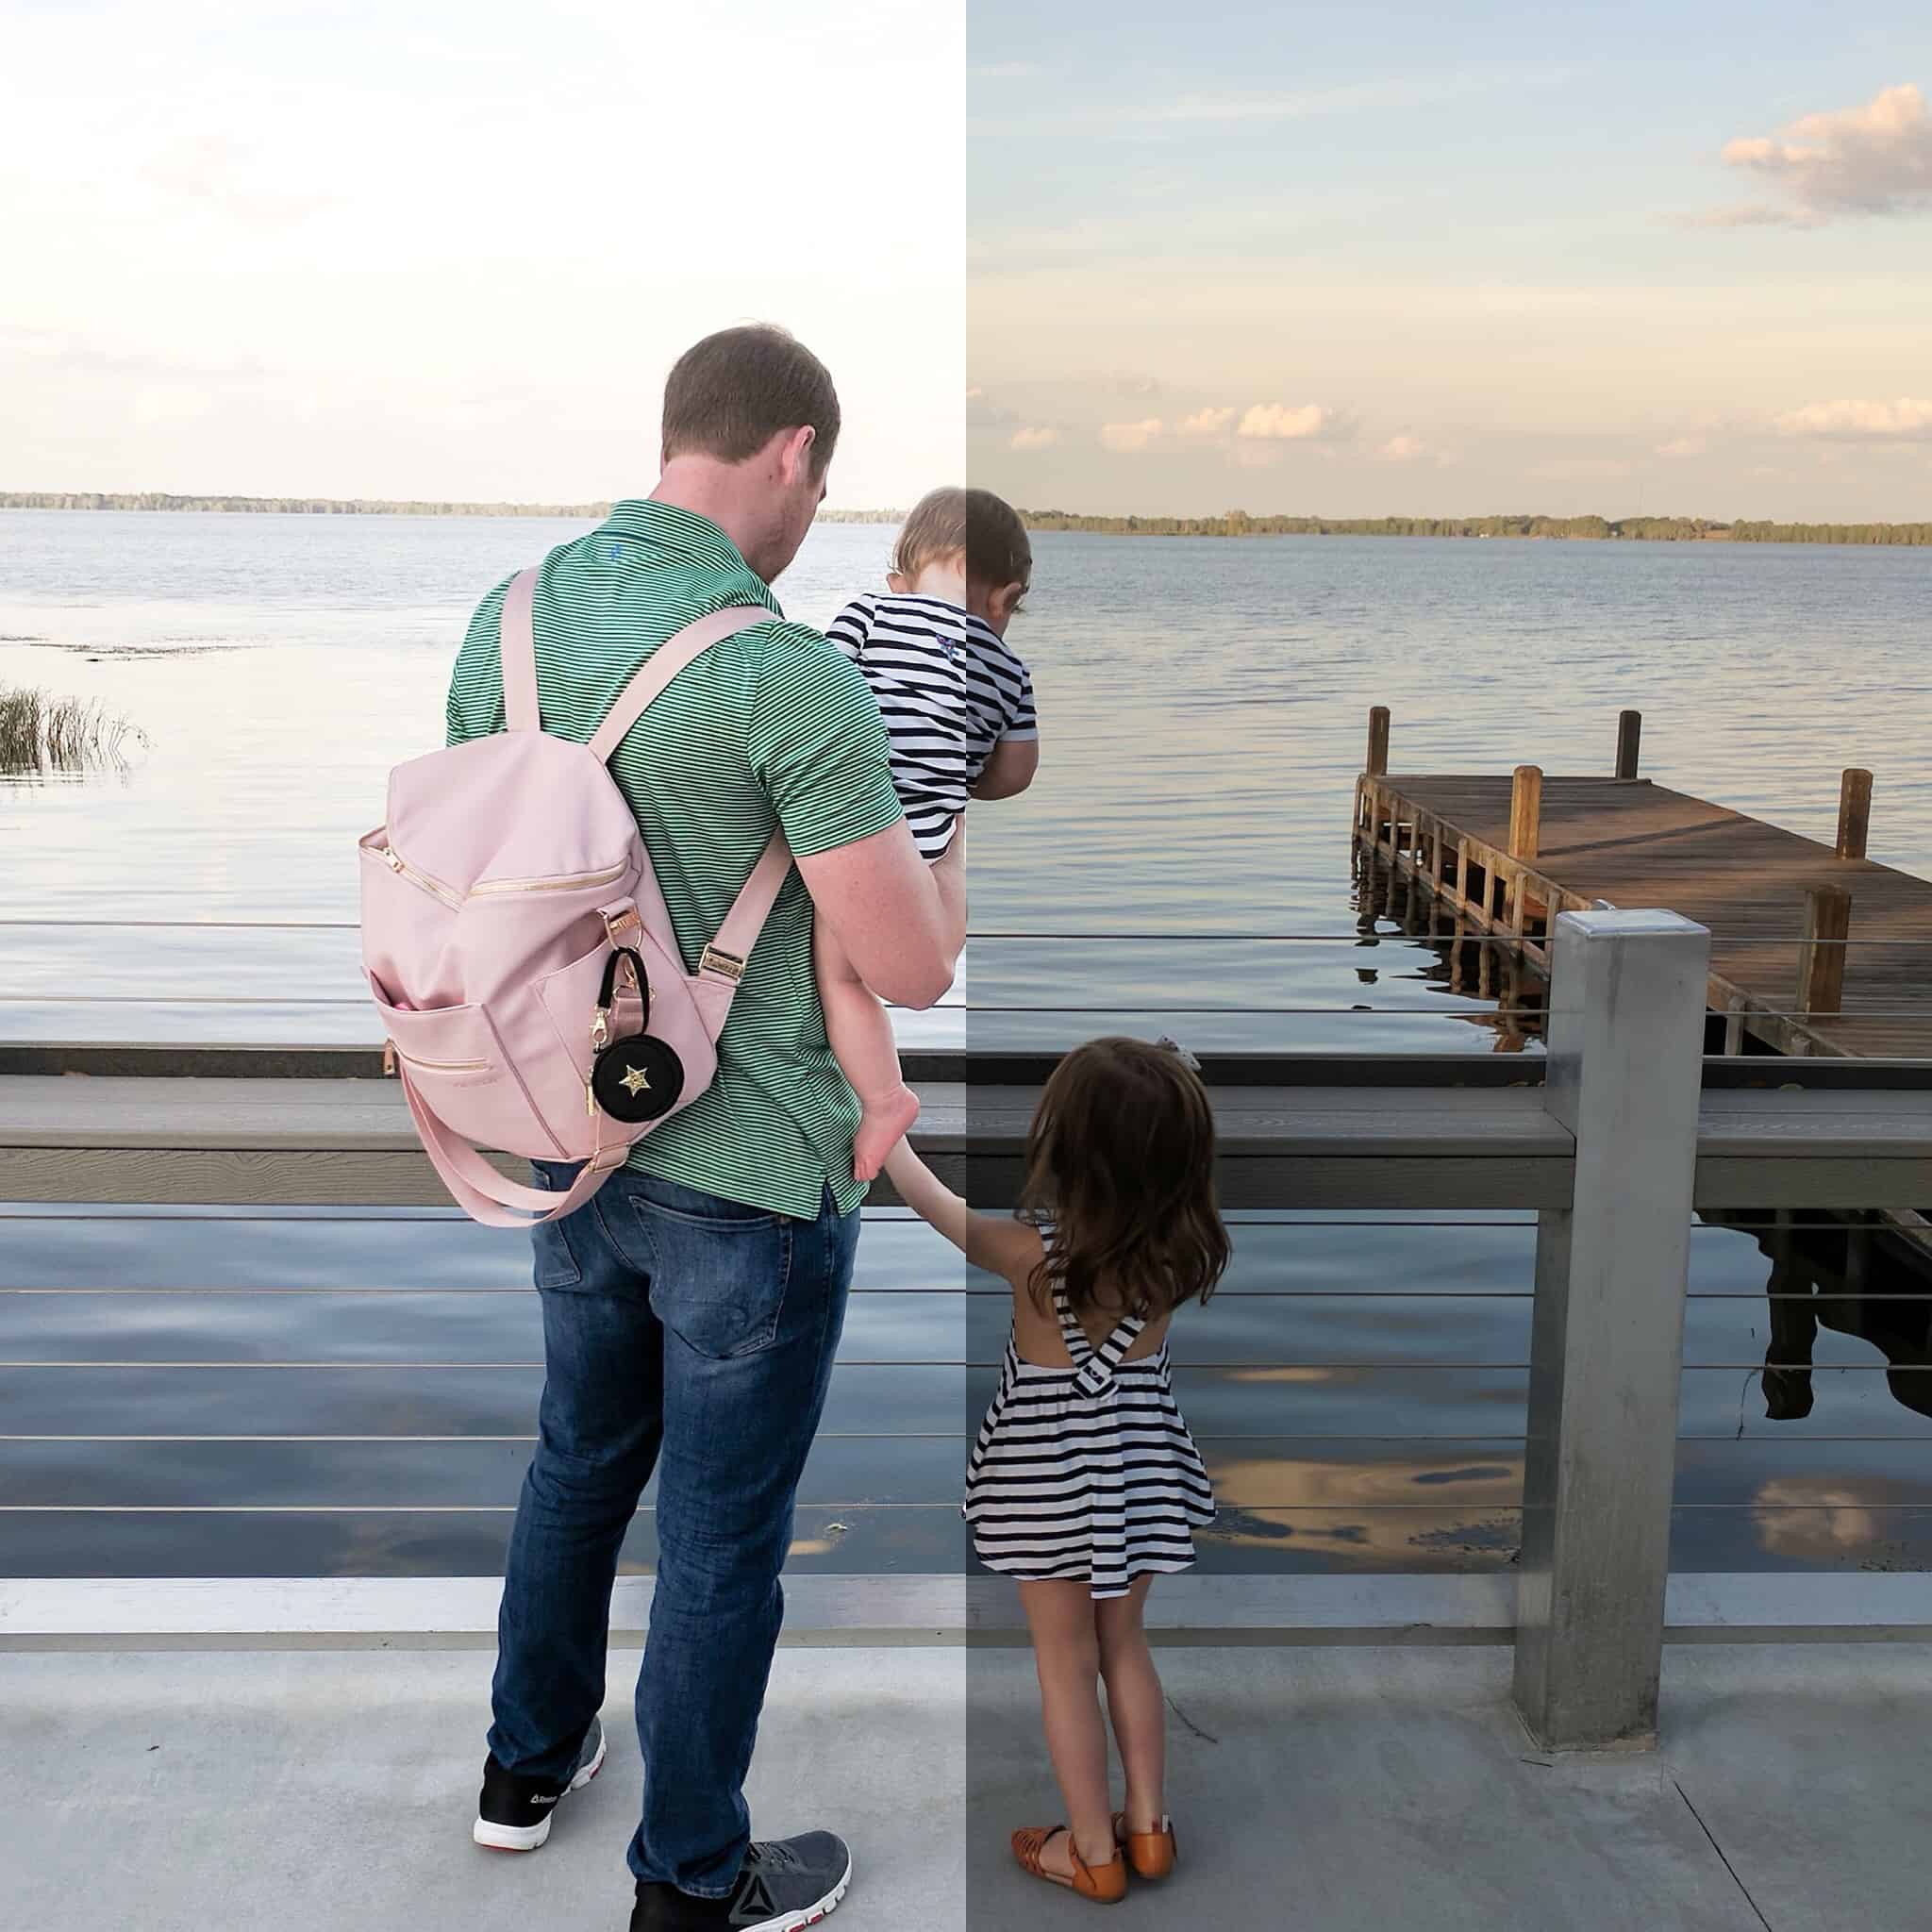

Step 1 (Lightroom) – Adjust light by increasing the exposure, increasing the highlights and increasing the whites. I also decrease the Black a bit in this so the black stays more crisp.
Step 2 (Lightroom) – Rotate and crop. I personally like to crop In Lightroom because you can rotate and crop in one setting so I can line things up.
Step 3 (Lightroom) – Save to Camera then open in Snapseed.
Step 4 (Snapseed) – Adjust light by increasing brightness and highlights a bit more.
Step 5 (Snapseed) – If your photo has a person use the portrait mode.
Step 6 (Snapseed) – Increase sharpness – I typically go pretty high but don’t over sharpen!
Optional
Lightroom – I sometimes will go into the individual colors and adjust them. If it is looking washed out, or too green, or something play around with the colors. You will be amazed at what you can do (shown in last step of my Lightroom Video!)
Snapseed – there is a selective tool ( that can brighten just areas of your photo. This has been especially helpful to me in flatly (Shown in last step of my Snapseed video)
Other Apps
Retouch – Retouch can do amazing things to photos. Erasing and using the clone stamp can really change a photo. Check out some of these before and afters.
Facetune – I love this for selfies if I want to make my skin a bit clearer or teeth whiter, or anything of that sort. I recently took a selfie and had one hair going across my forehead that looked like a horrible wrinkle, so I used it to remove that. I have also used it to remove fly away hairs. I know there is MUCH more you can do with Facetune, I just haven’t figured anything more out yet.
I hope this helps so many of you who have asked for how I go about editing pictures for Instagram, and please feel free to email, comment, or message me on Instagram if you have any questions on these steps!