Ice makers have become a common appliance in our homes, offices, and even our RVs. They are small, efficient, and can be a lifesaver during a hot summer day or at your next party. But like any other appliance, your countertop ice maker requires regular maintenance to keep it running smoothly and to ensure you’re enjoying fresh, pure ice. To keep your ice makers in tip top shape, I’ll share with you how to clean a countertop ice maker in 10 easy steps.
This post may contain affiliate links.
How To Clean A Countertop Ice Maker In 10 Easy Steps
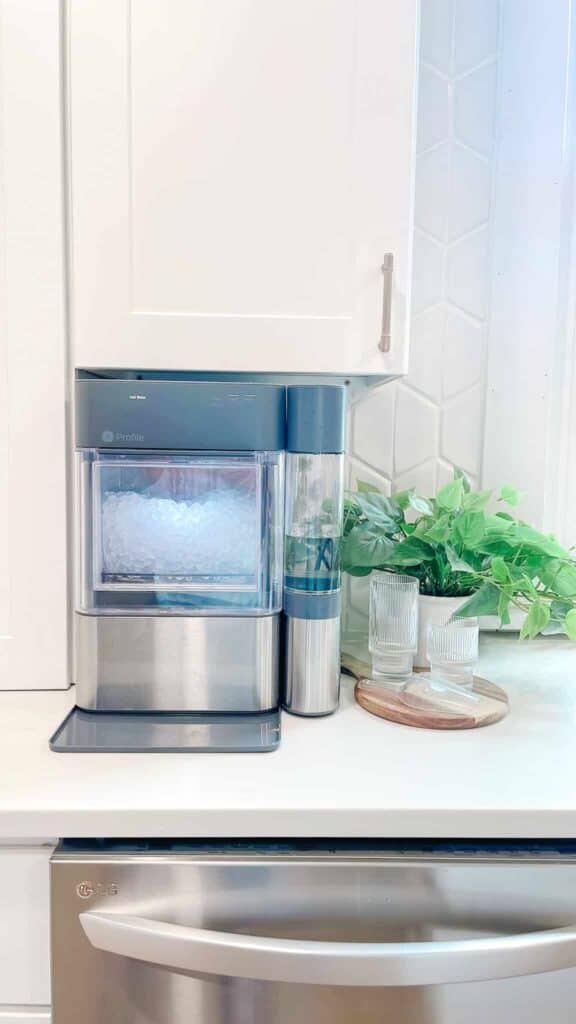
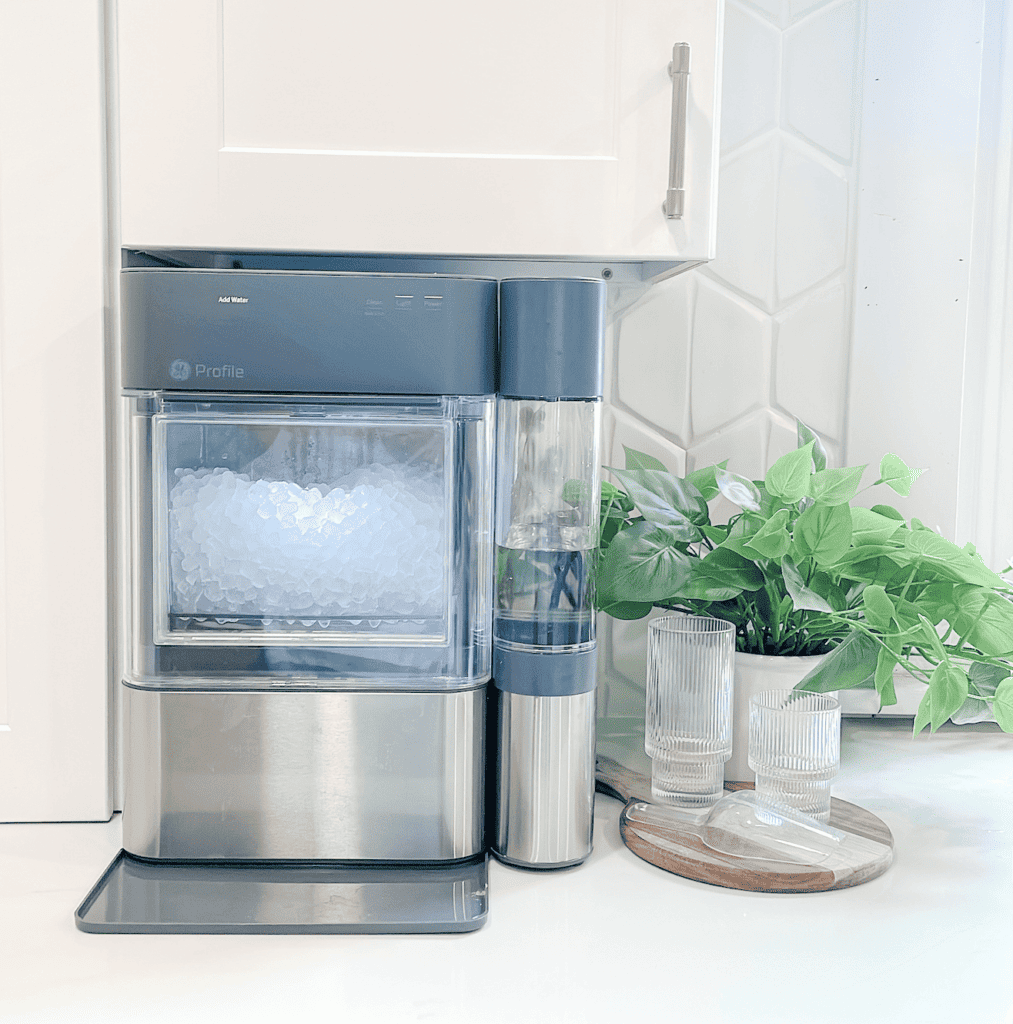
I have the GE Profile Opal Nugget Ice Maker and I LOVE it! It’s in my butler’s pantry and makes the best nugget ice in my opinion. It’s definitely a splurge but my family uses it daily, so I’ve found it to be worth the investment. Plus, you can often find it on sale on Amazon.
It can make up to twenty-four pounds of ice per day and store up to three pounds of ice at a time. That was important to me because there’s six of us who use the ice machine everyday. I love that this machine uses a special freezing process to create small, “chewable” nugget ice. I sometimes refer to it as Sonic ice because it’s similar to the ice found in commercial soft drink dispensers.
One of the coolest features about this ice maker is its Bluetooth connectivity that allows you to control the ice maker using a smartphone app. You can view the current amount of ice, schedule it to make more, and receive alerts when the bin is full or when it’s time to change the filter. The Opal machine has a sleek stainless steel design and is designed to work with a direct water line connection. It also has a self-cleaning cycle function to make it easier to clean and maintain. I highly recommend it!
Why Clean Your Countertop Ice Maker?
Regular cleaning of your ice maker machine is a good idea for a number of reasons. First, it helps to maintain the taste of the ice. Over time, the water reservoir can accumulate mineral deposits, especially in areas with hard water. This can affect the taste of the ice cubes and the efficiency of the ice-making process.
Secondly, cleaning helps to prolong the life of the ice maker. Left unaddressed for a long time, mineral buildup can damage the internal parts of the machine, reducing its ice production and overall performance.
Finally, regular cleaning helps to rid your ice maker of harmful bacteria. Ice storage bins can become a breeding ground for bacteria if not cleaned on a regular basis.
10 Easy Steps On How To Clean Your Countertop Ice Maker
Cleaning your ice maker doesn’t require professional help. With a few household items and this step-by-step guide, you can achieve great results. Here’s the best way to clean your ice maker:
1. Disconnect The Power Source
Before you begin the cleaning process, it is crucial to ensure safety. Always unplug your ice maker from the power source before starting the cleaning process. This prevents the risk of electric shock. This step also prevents any unintended operation of the machine while you’re cleaning it.
2. Remove Any Removable Parts
The next step is to remove all the removable parts, such as the ice bin, ice basket, ice tray, and ice scoop. Check your manufacturer’s instructions to know which parts are removable. Removing these parts allows for a more thorough cleaning of the machine.
3. Clean The Removable Parts
Once the parts are removed, they should be cleaned separately. Fill your sink or a large basin with warm soapy water. Add a few drops of mild soap or dishwashing detergent. Submerge the removable parts in the water and clean them using a cloth or a brush with soft bristles. After scrubbing the parts, rinse them thoroughly with clean water and set them aside to air dry.
4. Prepare Your Cleaning Solution
To clean the interior of the ice maker, you’ll need a suitable cleaning solution. A vinegar cleaning solution is a great way to deal with mineral deposits. Mix equal parts water and white vinegar. For the best results, use distilled or filtered water to avoid adding more minerals to your machine. This vinegar solution effectively dissolves mineral deposits without harming the interior parts of the machine. You can pour this solution into a spray bottle for easy application.
5. Clean The Interior Of The Ice Maker
Spray the vinegar solution liberally inside of your ice maker, focusing on areas with visible mineral buildup. Let it sit for a few minutes to dissolve the deposits. Then, using a soft cloth or a brush with soft bristles, scrub the interior of the machine. Hard to reach areas like the water line and water tank can be cleaned with a toothbrush.
After scrubbing, rinse the interior parts with warm water. If your machine has a drain plug, use it to remove the remaining water. If not, you can use paper towels or a soft cloth to absorb the remaining liquid.

6. Run A Cleaning Cycle
If your ice maker has a cleaning cycle, now is the time to use it. Fill the water reservoir with a mixture of vinegar and water, then run the cleaning cycle as per the manufacturer’s instructions. If your machine doesn’t have a cleaning cycle, you can run a normal ice-making cycle instead.
The vinegar in the water will help to clean and sanitize the internal workings of the machine without the use of harsh chemicals. Ensure to discard the ice cubes made during the cycle as they will contain vinegar and are not suitable for consumption.
7. Rinse Thoroughly
Once the cleaning cycle or ice-making cycle is complete, unplug the machine and drain the vinegar solution through the drain plug. Then, rinse the water reservoir thoroughly with clean water. This is crucial as it ensures all vinegar residue, which can affect the taste of the ice, is removed. Drain the vinegar solution, refill the reservoir with clean water, and run another cycle. Discard the ice produced during this cycle too.

8. Clean The Exterior Of Your Ice Maker
While the inside of the ice maker is important, don’t forget about the exterior of your ice maker. Use a soft cloth and a mild detergent mixed with warm water to clean the exterior. If your ice maker machine is made of stainless steel, use a cleaner specifically designed for stainless steel to avoid streaks or damage. After cleaning, rinse the exterior with clean water and wipe it dry.
9. Dry The Machine
Once you’ve rinsed the machine, leave the lid open and allow the interior to air dry completely before you reassemble the machine. This is a crucial step as it prevents the growth of mold and bacteria.
10. Reassemble & Run A Fresh Water Cycle
After all the components have dried, replace the removable parts and plug the machine back in. Fill the water reservoir with fresh water and run one or two ice-making cycles. Discard the ice produced in these cycles to ensure any residue from the cleaning procedure is completely removed.
Additional Cleaning Tips:
- Use of Commercial Cleaners: If mineral deposits are stubborn, you may opt for commercial ice machine cleaners. These are specially designed to remove mineral buildup and can be used as per the manufacturer’s instructions.
- Filter Replacement: If your ice maker has a water filter, remember to replace it regularly as regular cleaning won’t be enough. Over time, filters can become clogged with minerals and impurities, reducing the efficiency of the ice-making process. Make sure to replace old filters according to the manufacturer’s recommended schedule.
- Use of Filtered Water: Finally, if the taste of your ice still isn’t as fresh as you’d like, you could use filtered water instead of tap water in your ice maker. This can help reduce the amount of mineral buildup over time as filtered water contains fewer minerals, which could improve the taste of your ice and mean you need to clean your machine less frequently.

The Importance of Establishing A Cleaning Routine
Regular cleaning of your countertop ice maker is an essential part of its maintenance. A clean ice maker not only produces better tasting ice but also operates more efficiently and lasts longer.
It’s a good idea to establish a cleaning routine. For instance, if you use your ice maker daily, you might need to clean it monthly. If you use it less frequently, cleaning it every three to six months might be sufficient.
Regular cleaning of your countertop ice maker is not just about keeping it looking good. It’s a vital part of maintenance that keeps the machine running efficiently and ensures the ice it produces is clean and fresh. A clean ice maker is less likely to break down and will last longer, saving you money in the long run.
Regular maintenance also includes checking for any visible signs of wear and tear, ensuring the machine is level, and replacing any old or worn-out parts.
Shop Countertop Ice Makers & Products For Cleaning
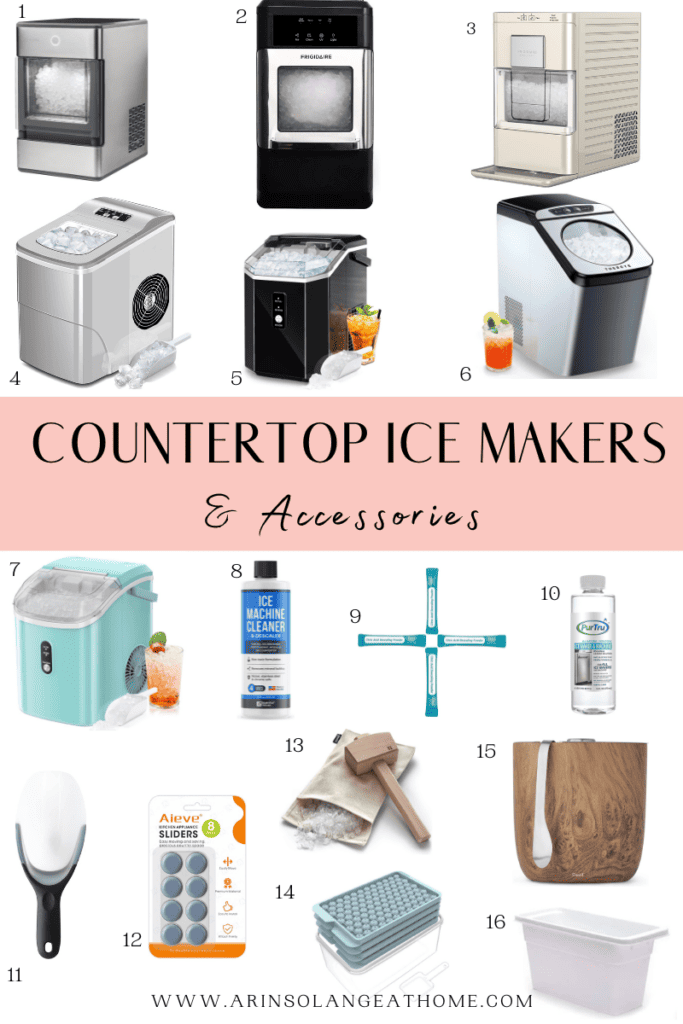
1 | 2 | 3 | 4 | 5 | 6 | 7 | 8 | 9 | 10 | 11 | 12 | 13 | 14 | 15 | 16
- GE Profile Opal Countertop Nugget Ice Maker
- Frigidaire EFIC235-AMZ Countertop
- FRIGIDAIRE Gallery EFIC255 Countertop
- AGLUCKY Countertop Ice Maker
- AGLUCKY Nugget Ice Maker Countertop
- Thereye Countertop Nugget Ice Maker
- Nugget Countertop Ice Maker
- Essentials Values Ice Machine Cleaner
- Gevi Household Ice Maker Cleaner & Descaler
- PurTru Ice Maker Cleaner & Descaler
- Spring Chef Magnetic Ice Scoop
- AIEVE Appliance Slider
- Glacio Ice Mallet and Lewis Bag
- DZHJKIO Mini Ice Cube Trays
- S’well Stainless Steel Ice Bucket with Tongs
- Rubbermaid Ice Bin
Other Posts You’ll Love
Best Ice Machine For Home Bar | Best Kids Ice Cream Maker | 10 Back To School Hacks
Follow Social For The Latest & Greatest


Pin The Photo Below For Later
There you have it: ten easy steps to clean your countertop ice maker. The process may seem a bit tedious, but the benefits of regular maintenance far outweigh the time commitment. You’ll not only extend the life of your ice maker but also ensure you’re serving fresh, clean ice at your next gathering. So, no more bags of ice or worrying about how much ice is left. With a clean ice maker, you can always enjoy clear ice any time.
Remember, it’s always a good idea to refer to your manufacturer’s instructions before starting the cleaning process. Happy cleaning!