Shop
Home

Simple Shared Boys Room

Finally this simple shared boys’ room is DONE!  Talk about a room that took way longer to complete than I wanted.  And for once it wasn’t because of design, but rather because we have been dragging our feet on Jack and Walker sharing a room.

 I wanted to put together a simple shared boys’ room for them before baby sister comes, but knew it needed to be affordable and without a lot of fuss for a couple of reasons.  One, we are hoping to move in the next year or two, and two, this room is not huge…so added fuss would be a cluttered space.

This post contains affiliate links
bedroom with two black beds and animal photos over bed

Simple Shared Boys’ Room

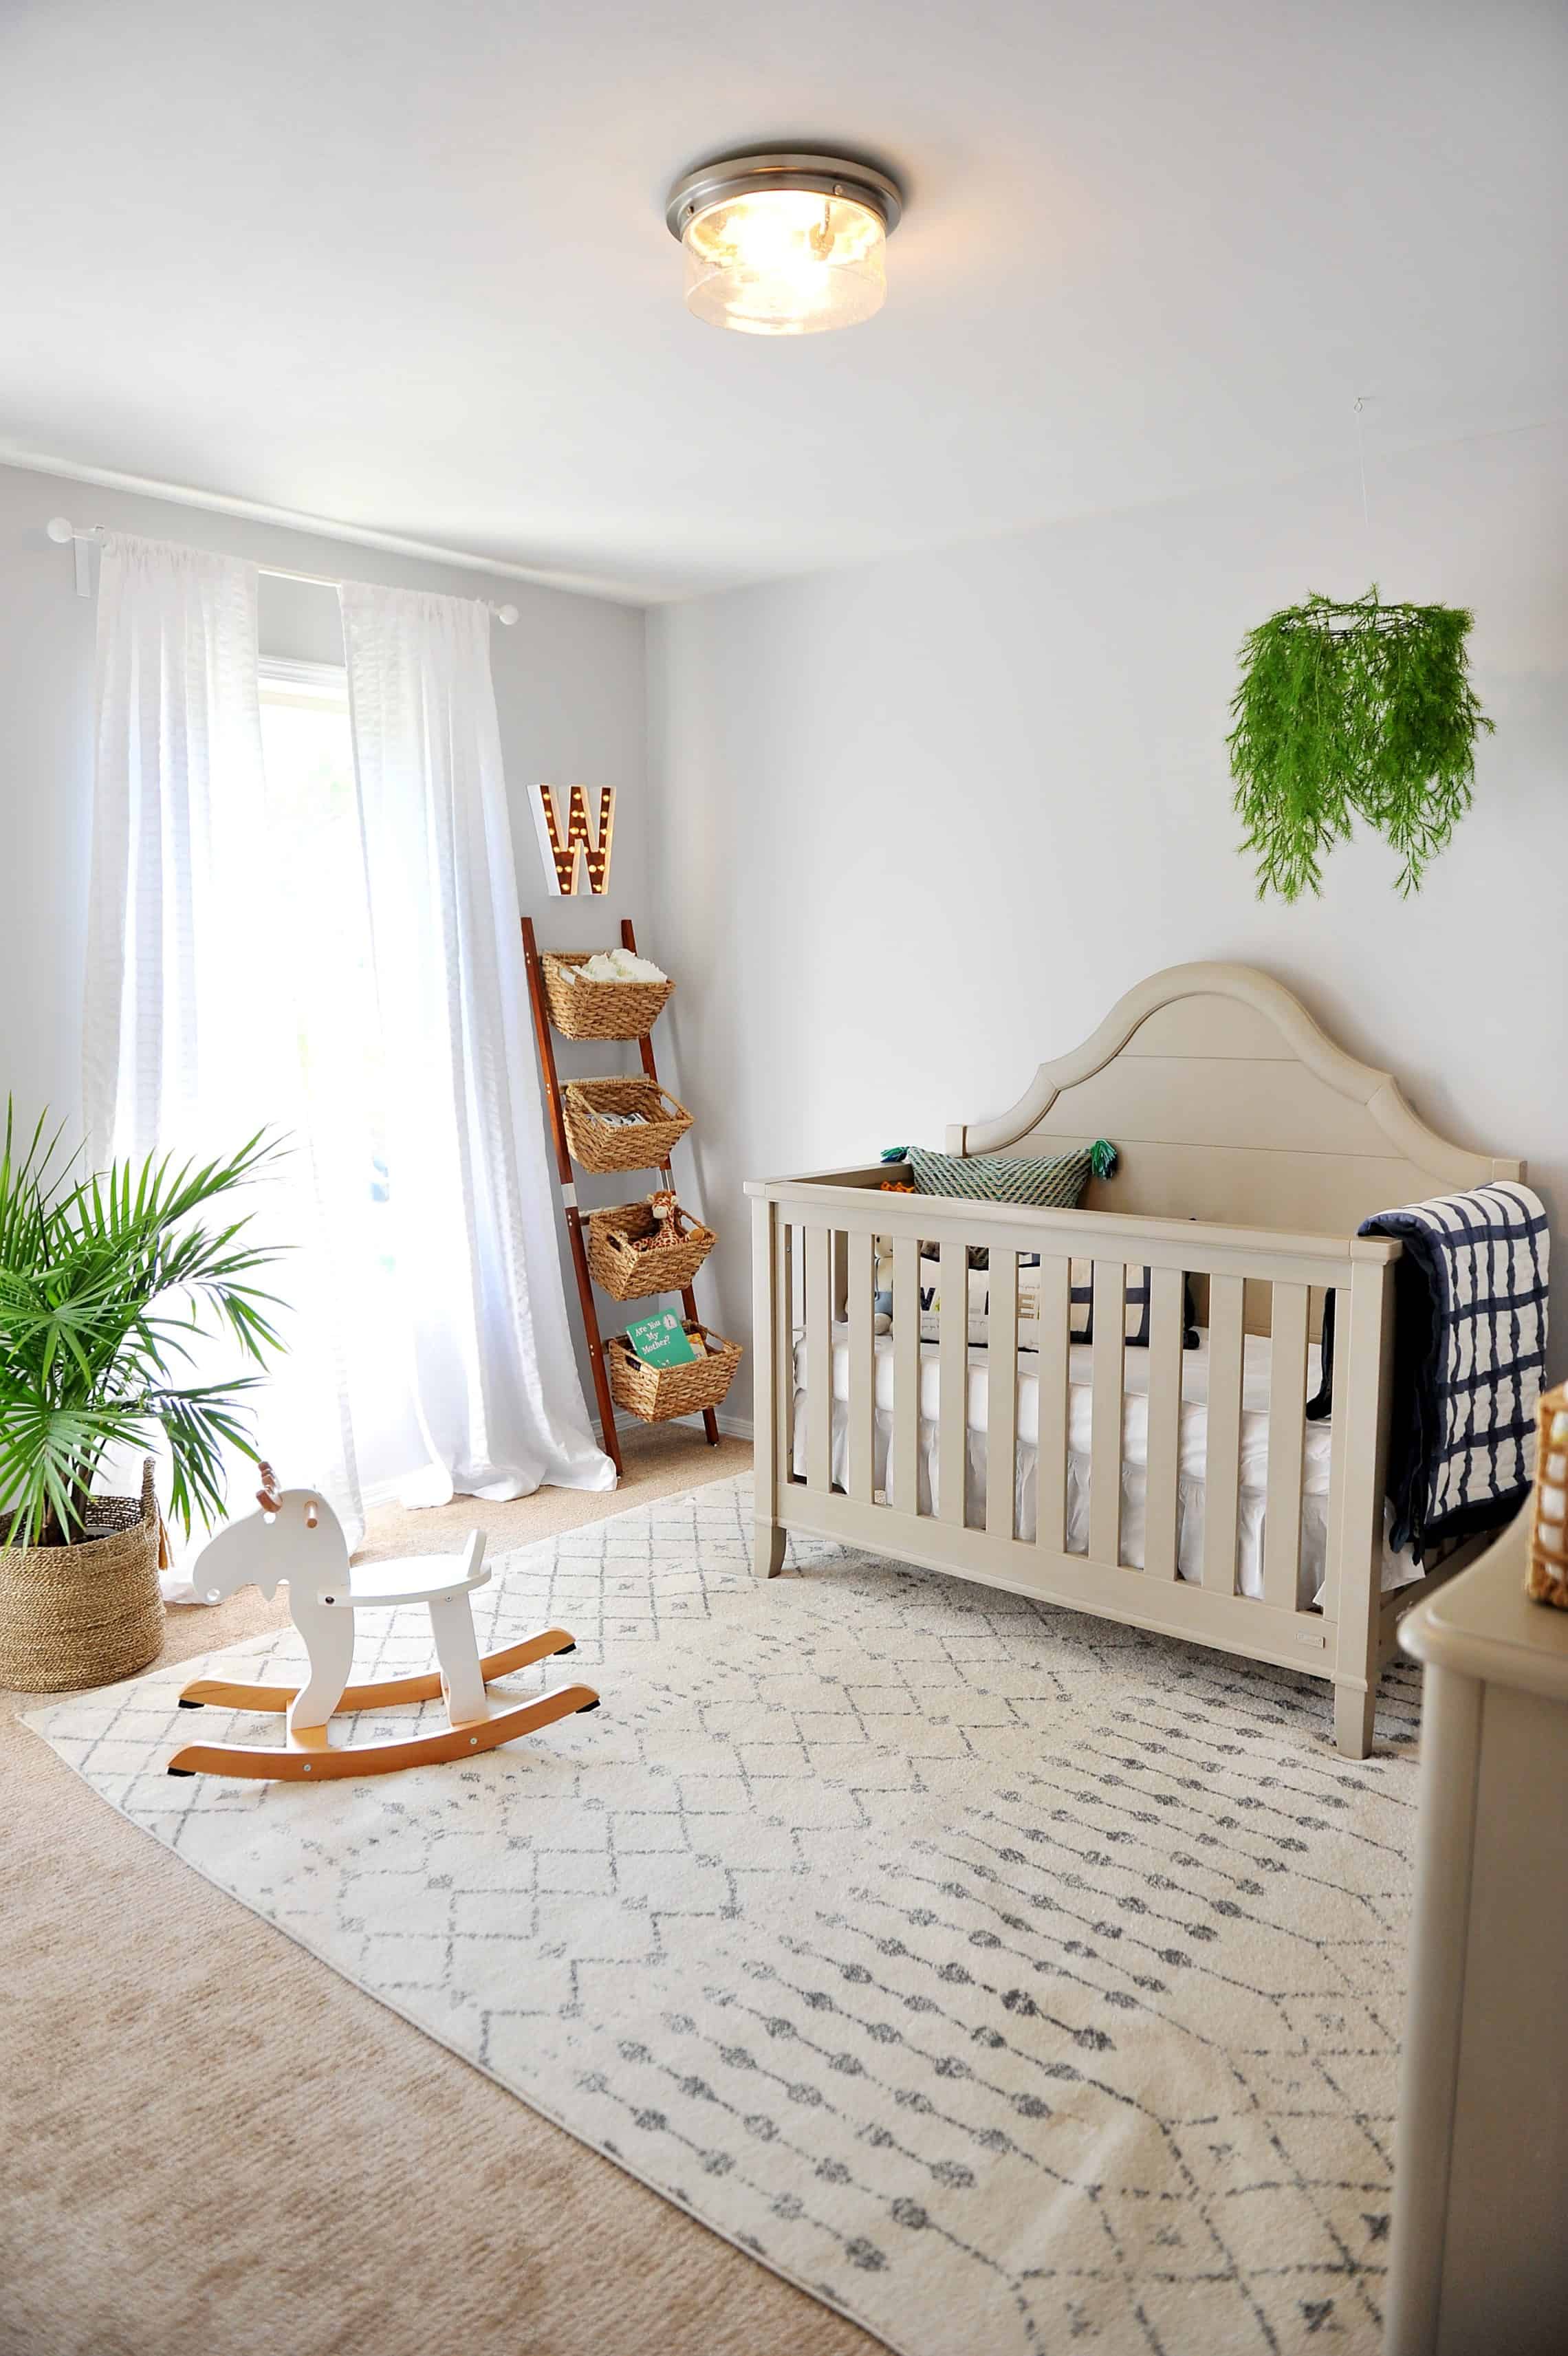
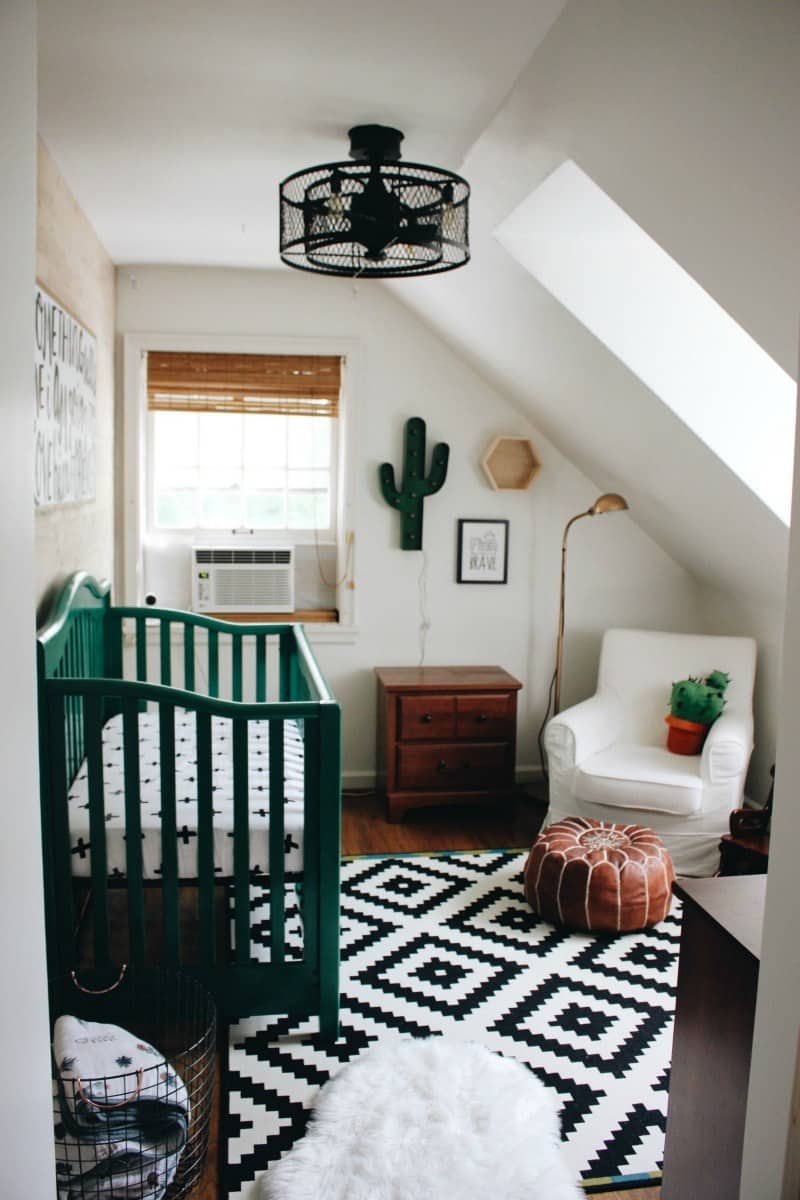
One thing about this room is that I really tried to re use as much as I could from Walker’s nursery that was in the same room – so if you are looking for a great example of a room that transitions well with age check out the photos of his nursery to see how well it transitions.  

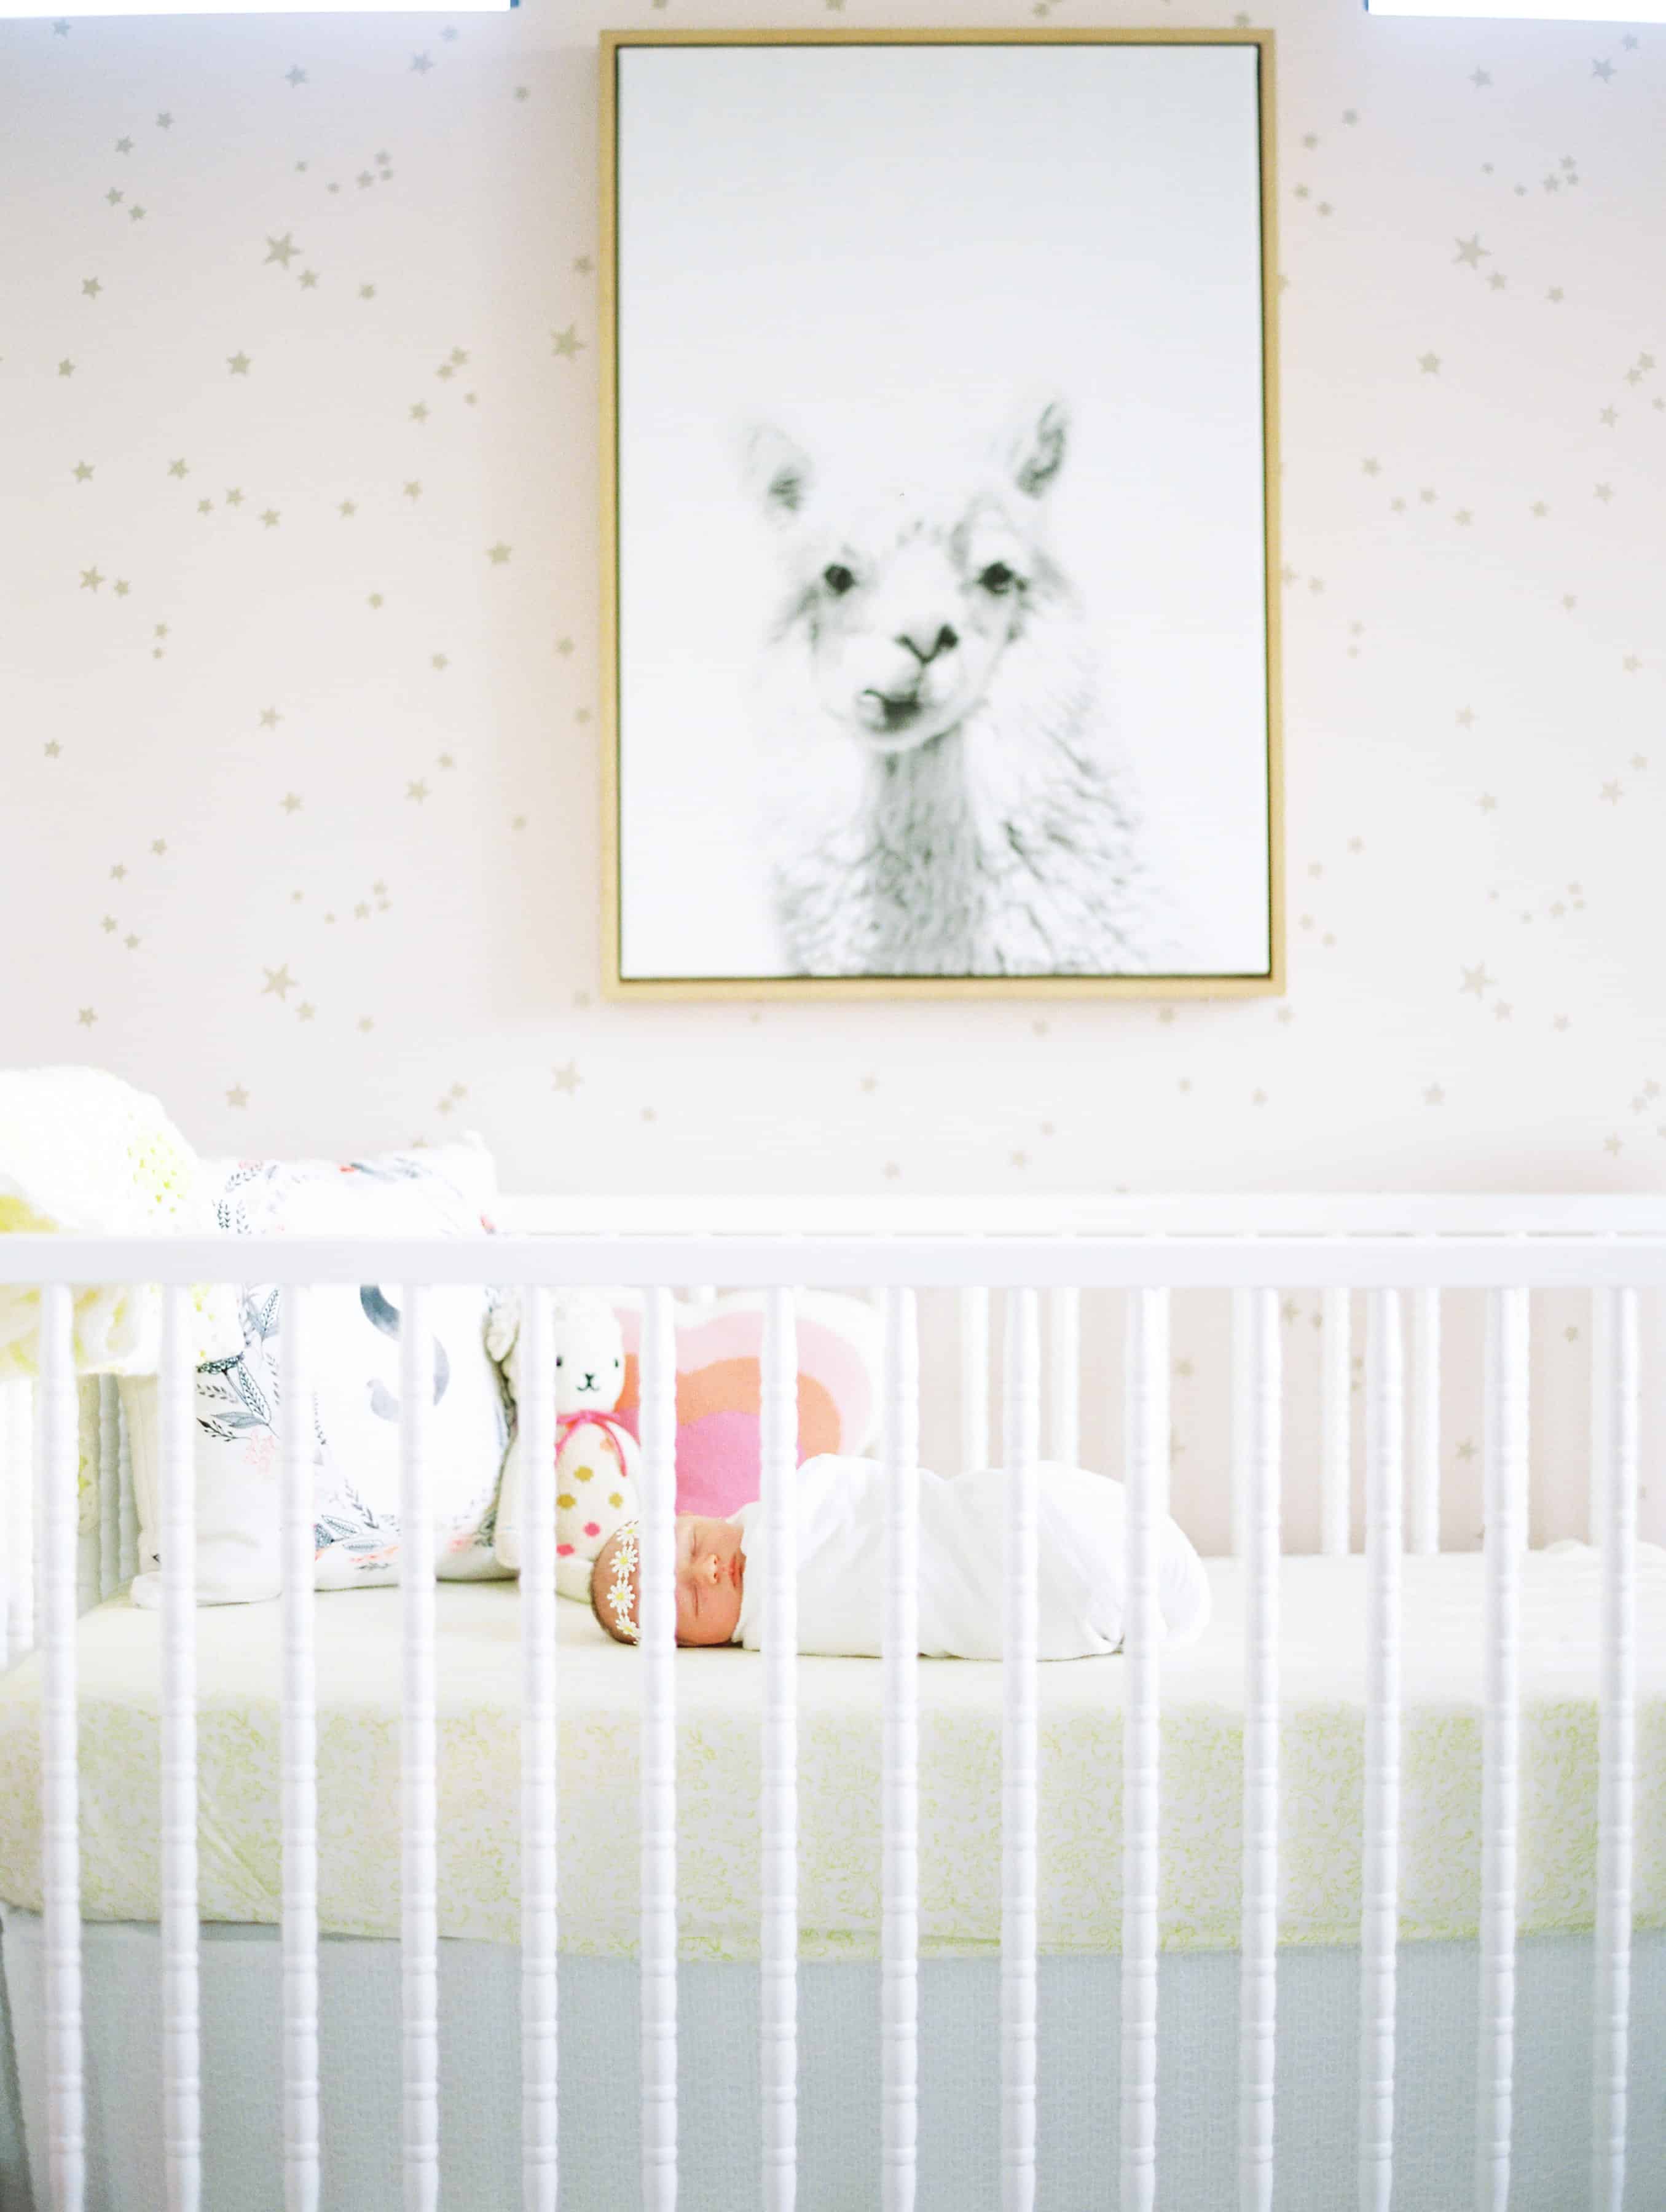
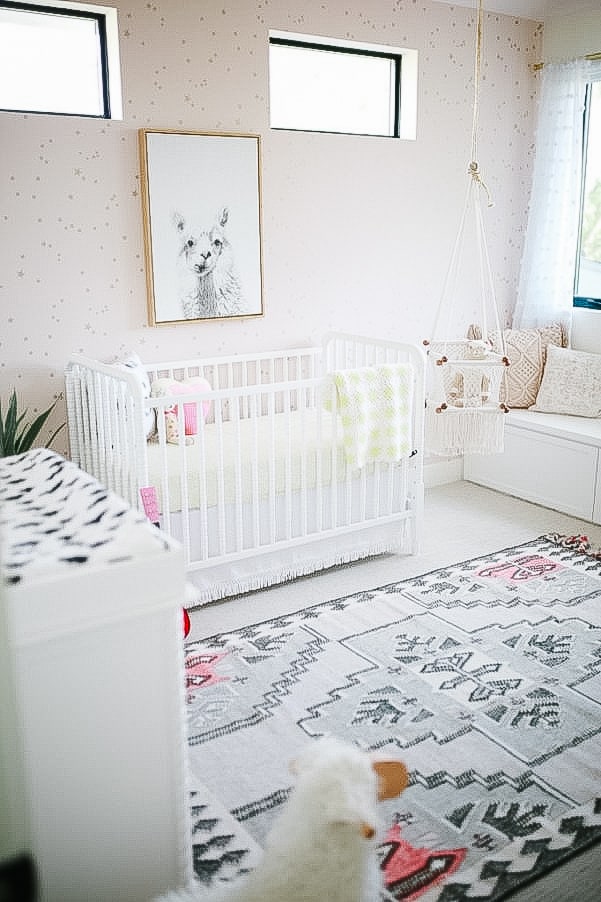
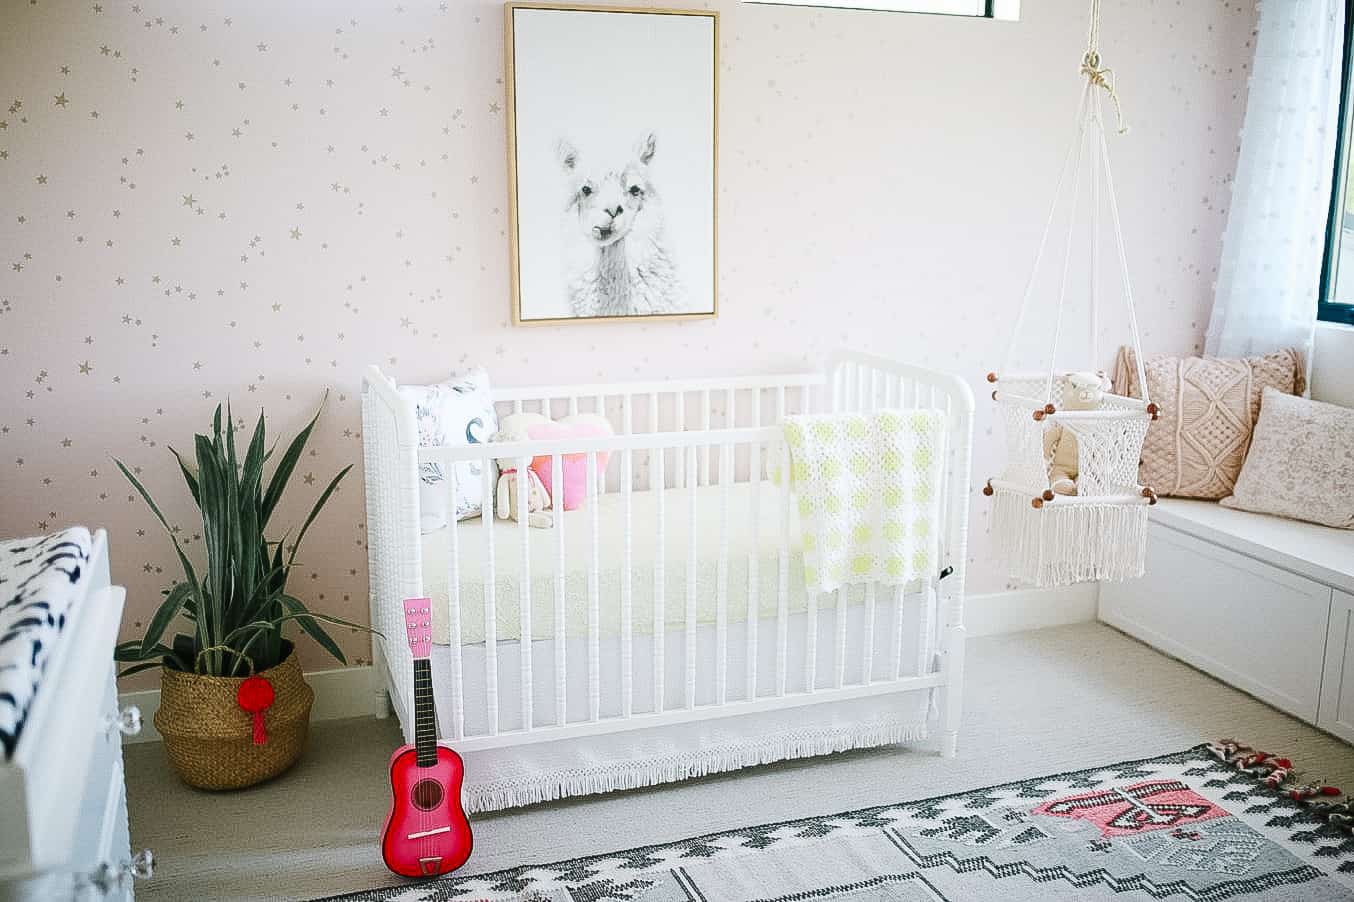
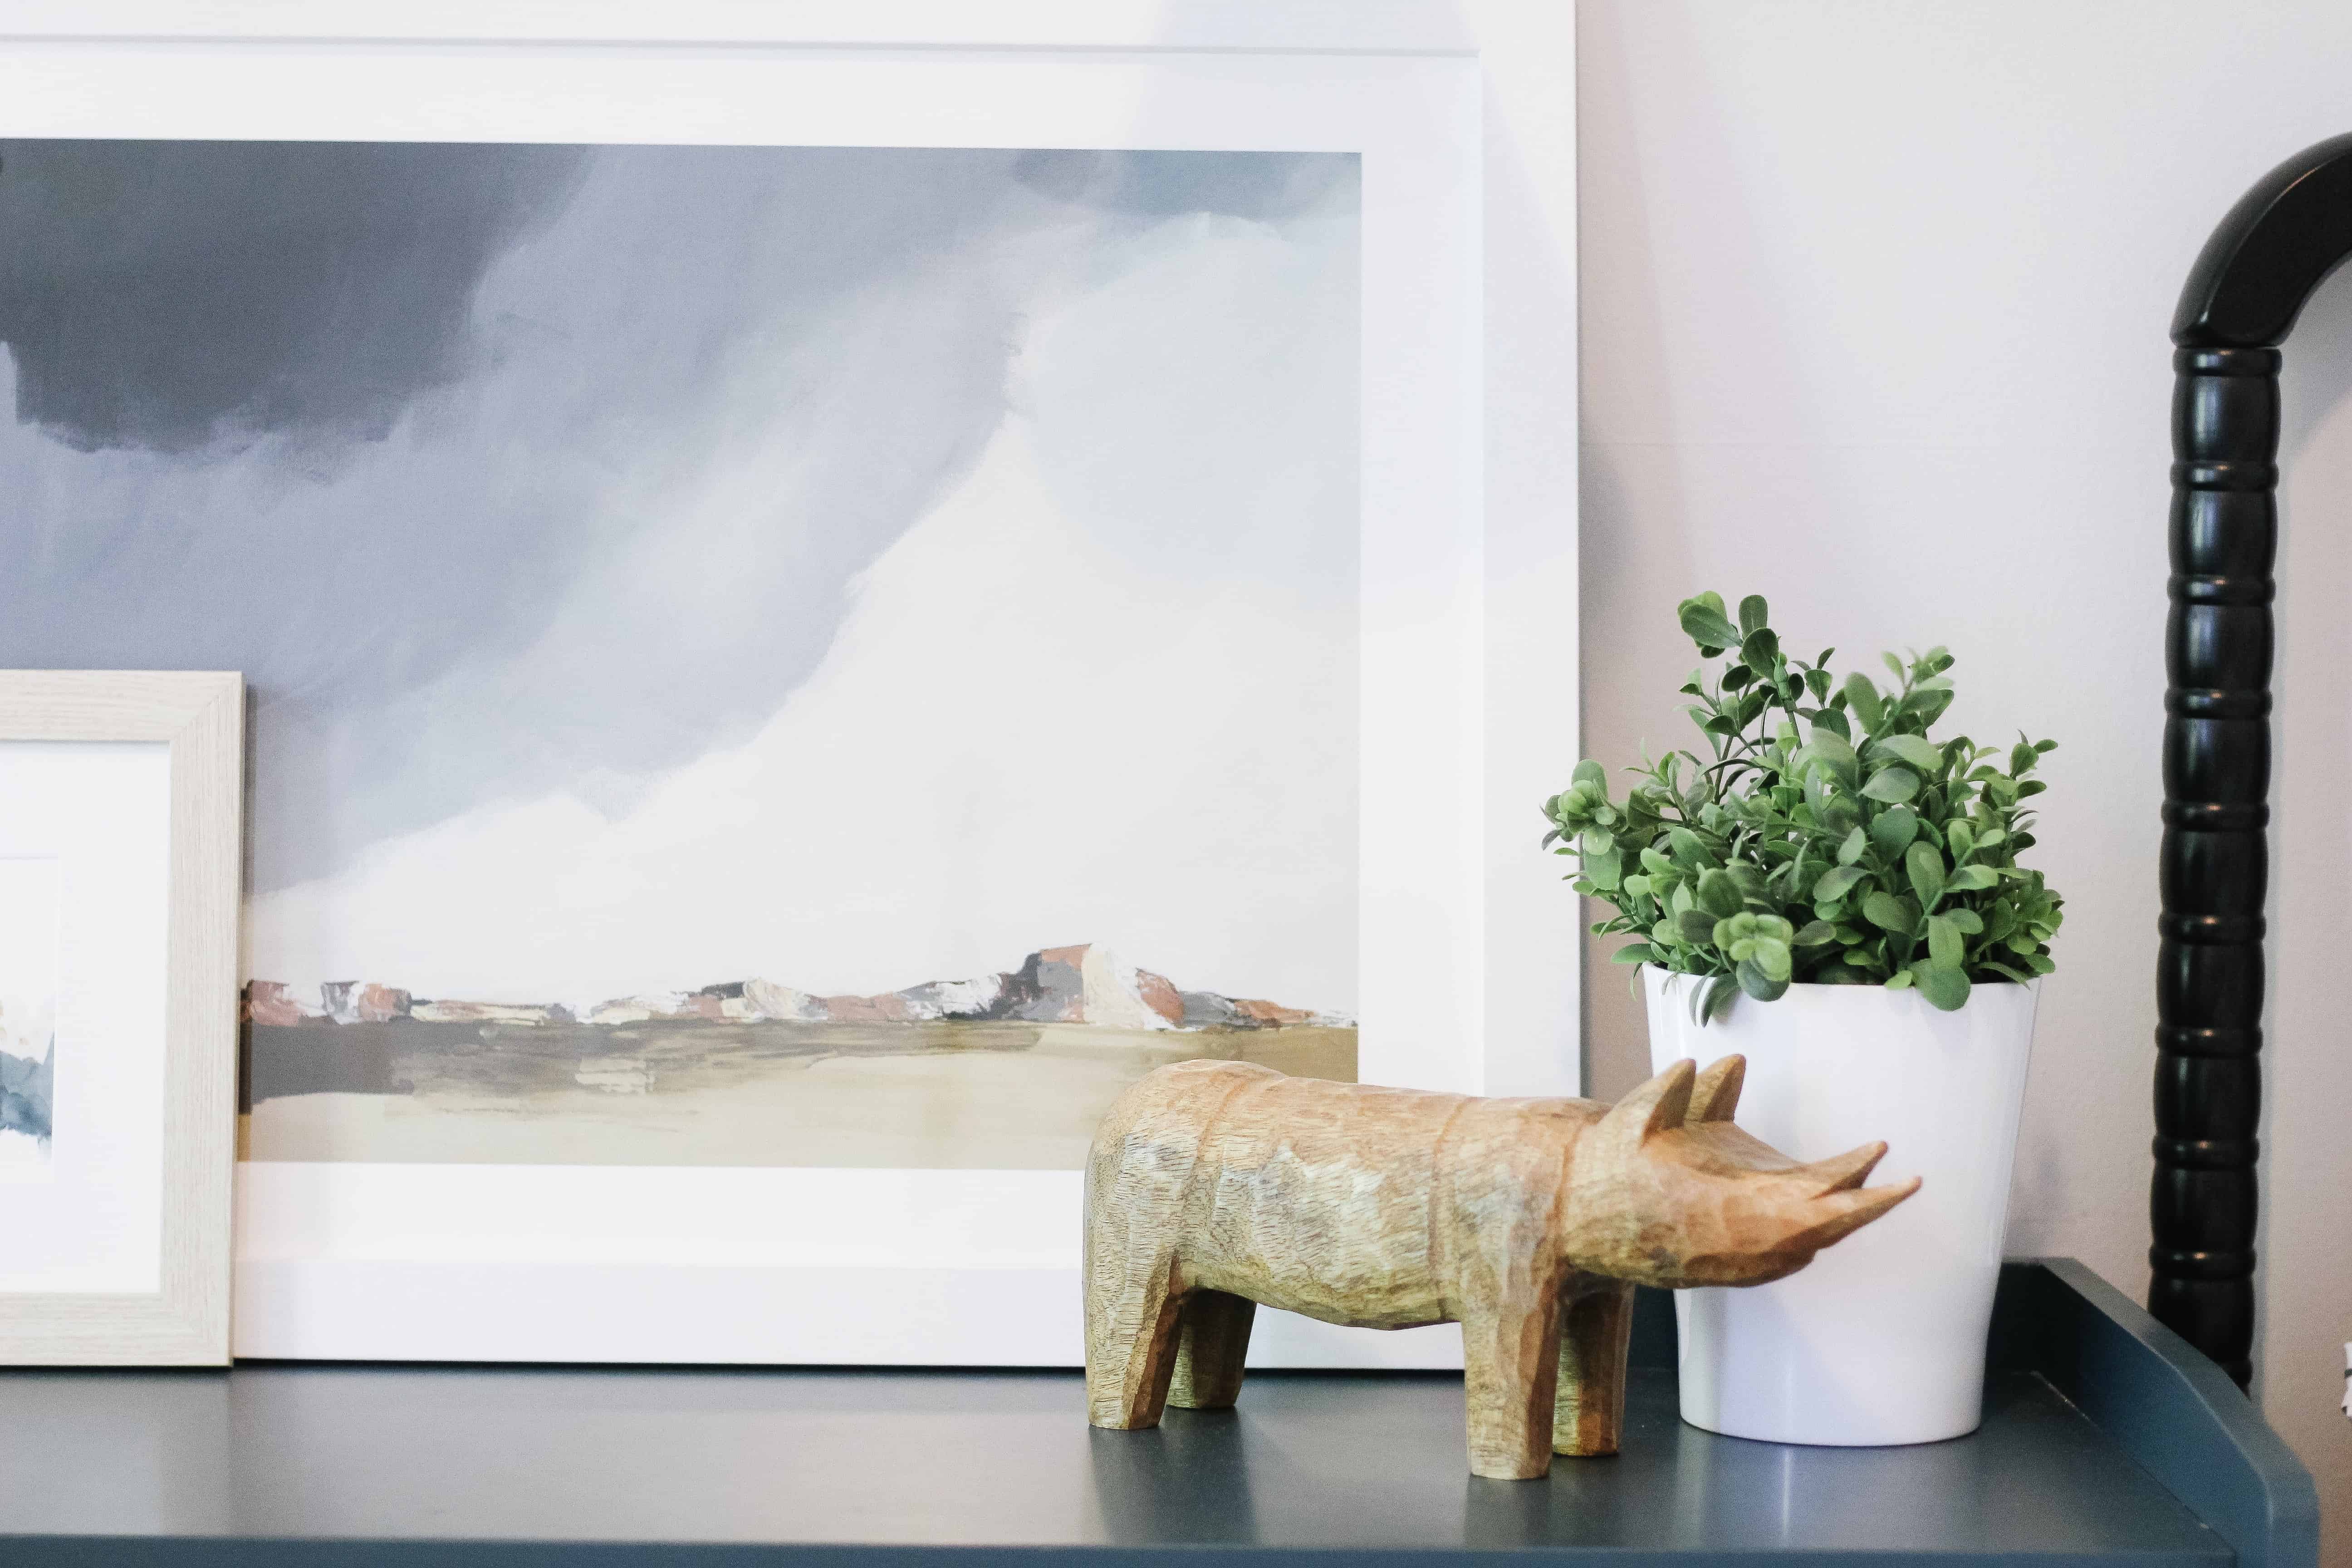
I knew I wanted to leave the walls the same color, and use some of the higher priced items for this room (like the rug), and also really wanted to use the baby buffalo print from his nursery, so I was really glad that all worked.

black twin Jenny Lind bed with baby buffalo print over it

When making choices for this room (especially when weighing my decisions on bunk beds vs not, I really took into account this post, and these mom’s opinions!)

Being Space Concious

There are a few specific design choices I made to be conscious of having 2 boys in one smaller room.  One was colors – I kept things MOSTLY neutral due to the smaller space to keep things feeling a bit more open and bright.  I also went with a lighter feeling bed than some others I had looked at.

 I felt if I went with heavy beds it would instantly make the room feel so much smaller.  So if you’re in the same boat as me and combining kids into one room, it might be best to do the same.

boys room with 2 black Jenny Lind beds

I also kept things simple and uniform.  The bedding is the same on both beds, and the art work is simple with one large print over each bed.  Less clutter!

baby buffalo print over bed

The Bedding

I was so lucky to receive the boys beddy’s bedding for this room in exchange for sharing with you all.  If you are new to my blog check out how I used Beddy’s bedding in Jacks last room.  I loved how it kept the room looking less messy, and allows for the boys (well Jack at this point) to make their own beds.

I now have a full review of Beddys Bedding HERE, and if you use code ARINSOLANGE you can save 20% off next time you purchase!

Boys shared room

Like I stated above I purposely also chose a very simple, light color, and did the same bedding on both beds because I knew that would make the room feel bigger.  

I also added blankets they both already had to the foot of their beds.  These are OUR FAVORITE blankets in the house, and everyone has one.  I have all the kids monogramed with their name so they can tell them apart!

Embroidered Saranoni Blanket
Boys Shared Room with 2 black Jenny Lind Beds

Furniture and Storage

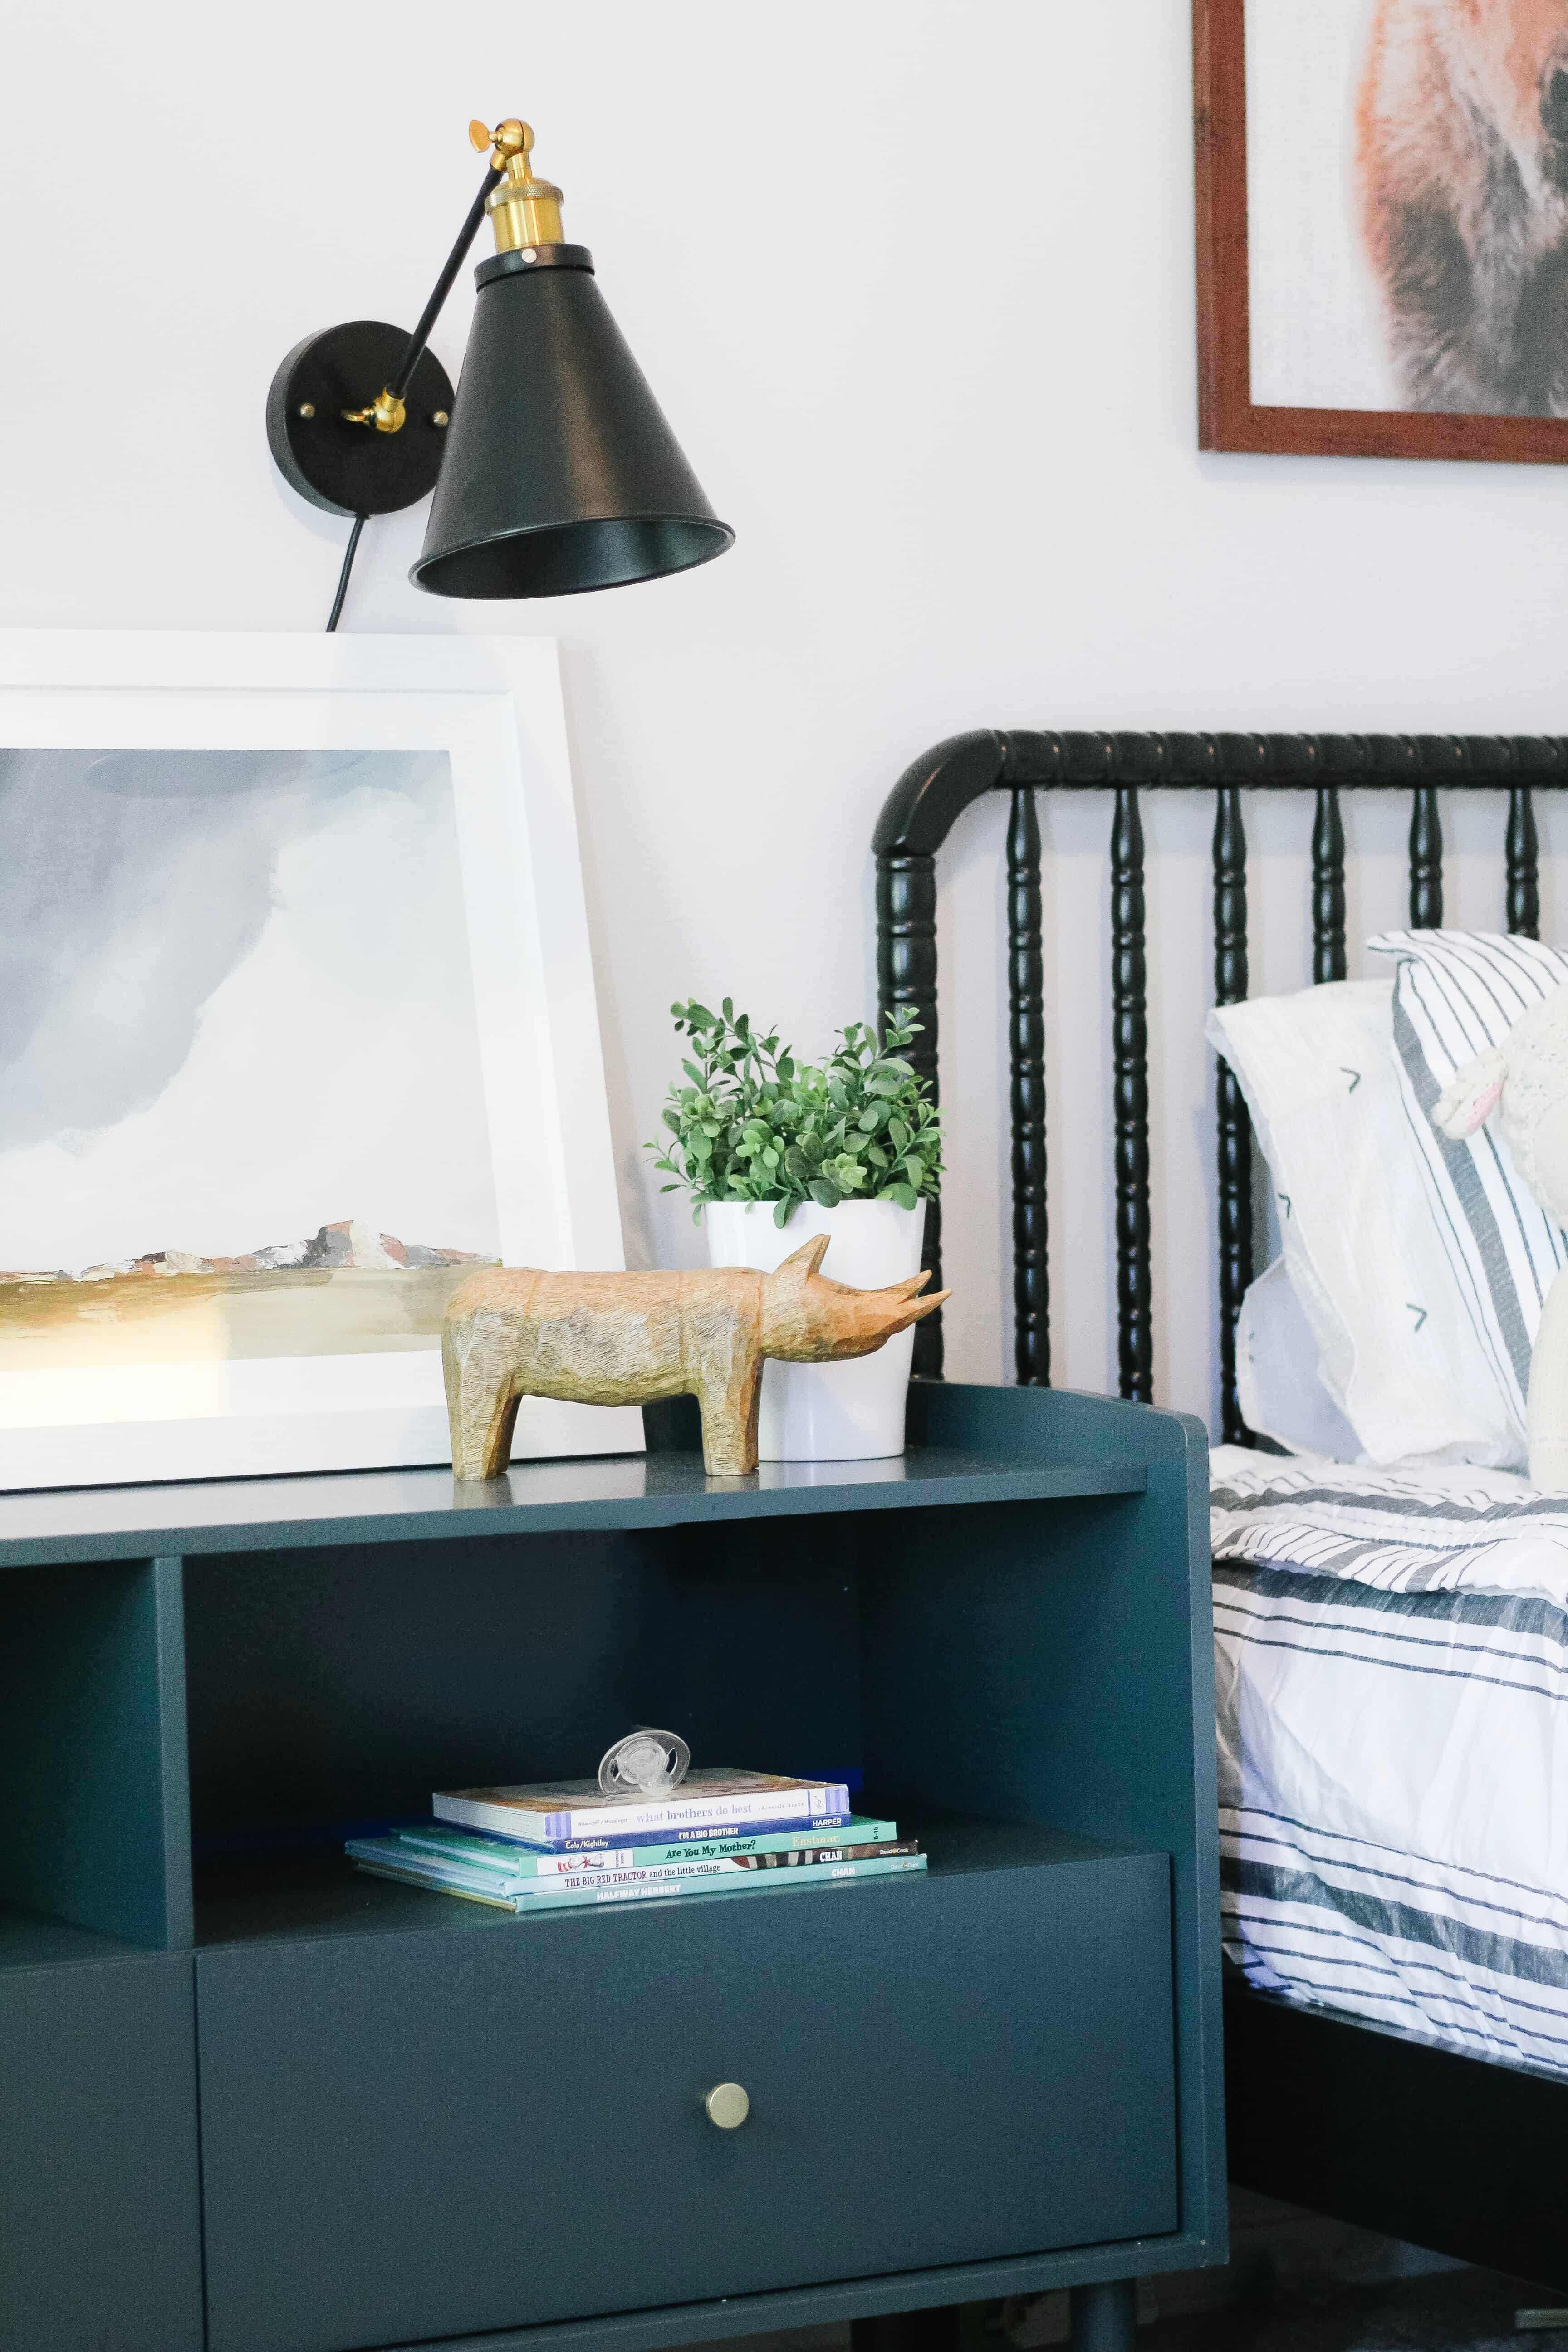
Storage was my biggest worry with the kids rooms.  I am planning on showing you in a week or so how I organized their closet super well to make the best of one space for 2 kids.  I also knew I needed some kind of dresser, but the beds are lower to the ground, and the only open for space on the dresser was between the beds, so I ended up going with this tv stand.  

It gives both boys one drawer for their underwear, then a shelf for books so they aren’t always laying on the top, which I love.  I loved that the color was a fun pop for the room as well.

For the beds we LOVED these black wood beds that were a great affordable option since we needed two.  I did a full review on the beds here, so check that out if you are in the market for some cute twin beds! 

Green Tv Stand as dresser between two beds
dresser decor on green dresser with wall mounted lights

Accessorizing

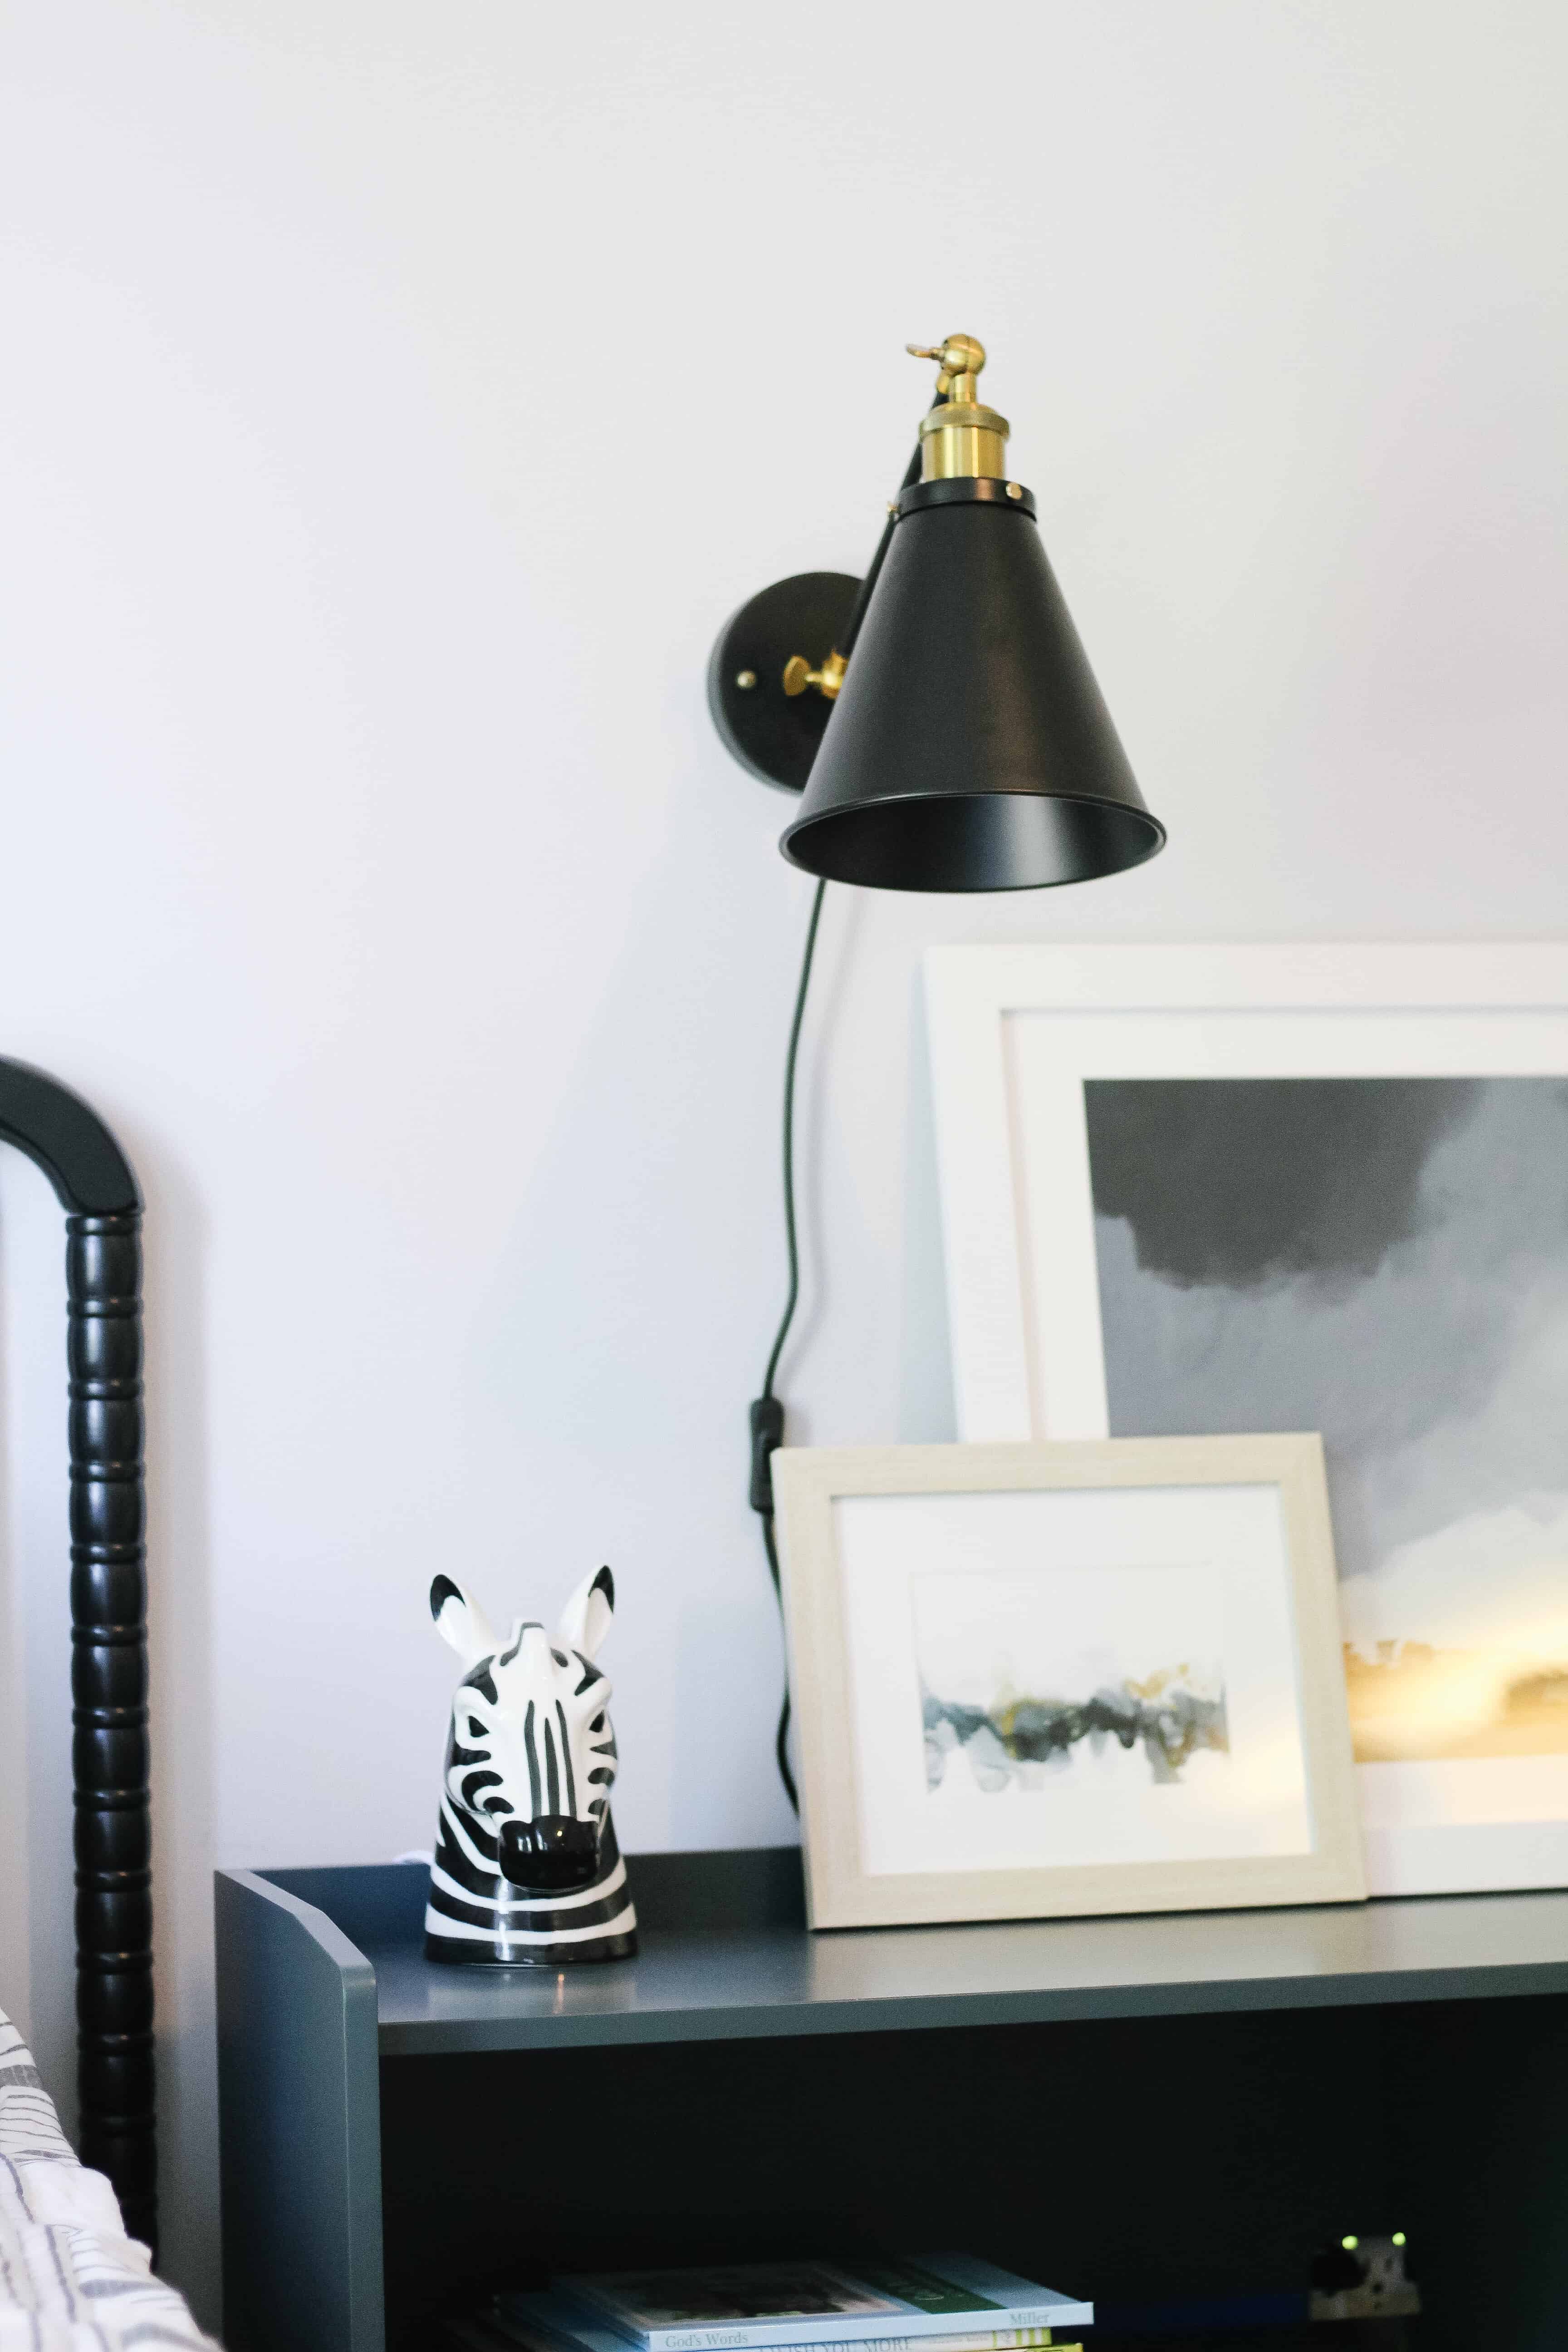
I didn’t do a lot on this front.  As mentioned before, I had the art from Walker’s Nursery, so the only large decor I had to buy was the print above Jack’s bed.

 I let him pick from a whole collection on ETSY, and he went with the Meerkat and it seriously makes me laugh so hard.  I had both boys prints printed from MPix and have been really happy with them.

modern dresser decor of print and wooden animal

(As a safety note – I love the frames over the boys beds, and specifically went for frames with plexiglass instead of traditional glass due to where they are hanging over sleeping little ones.)

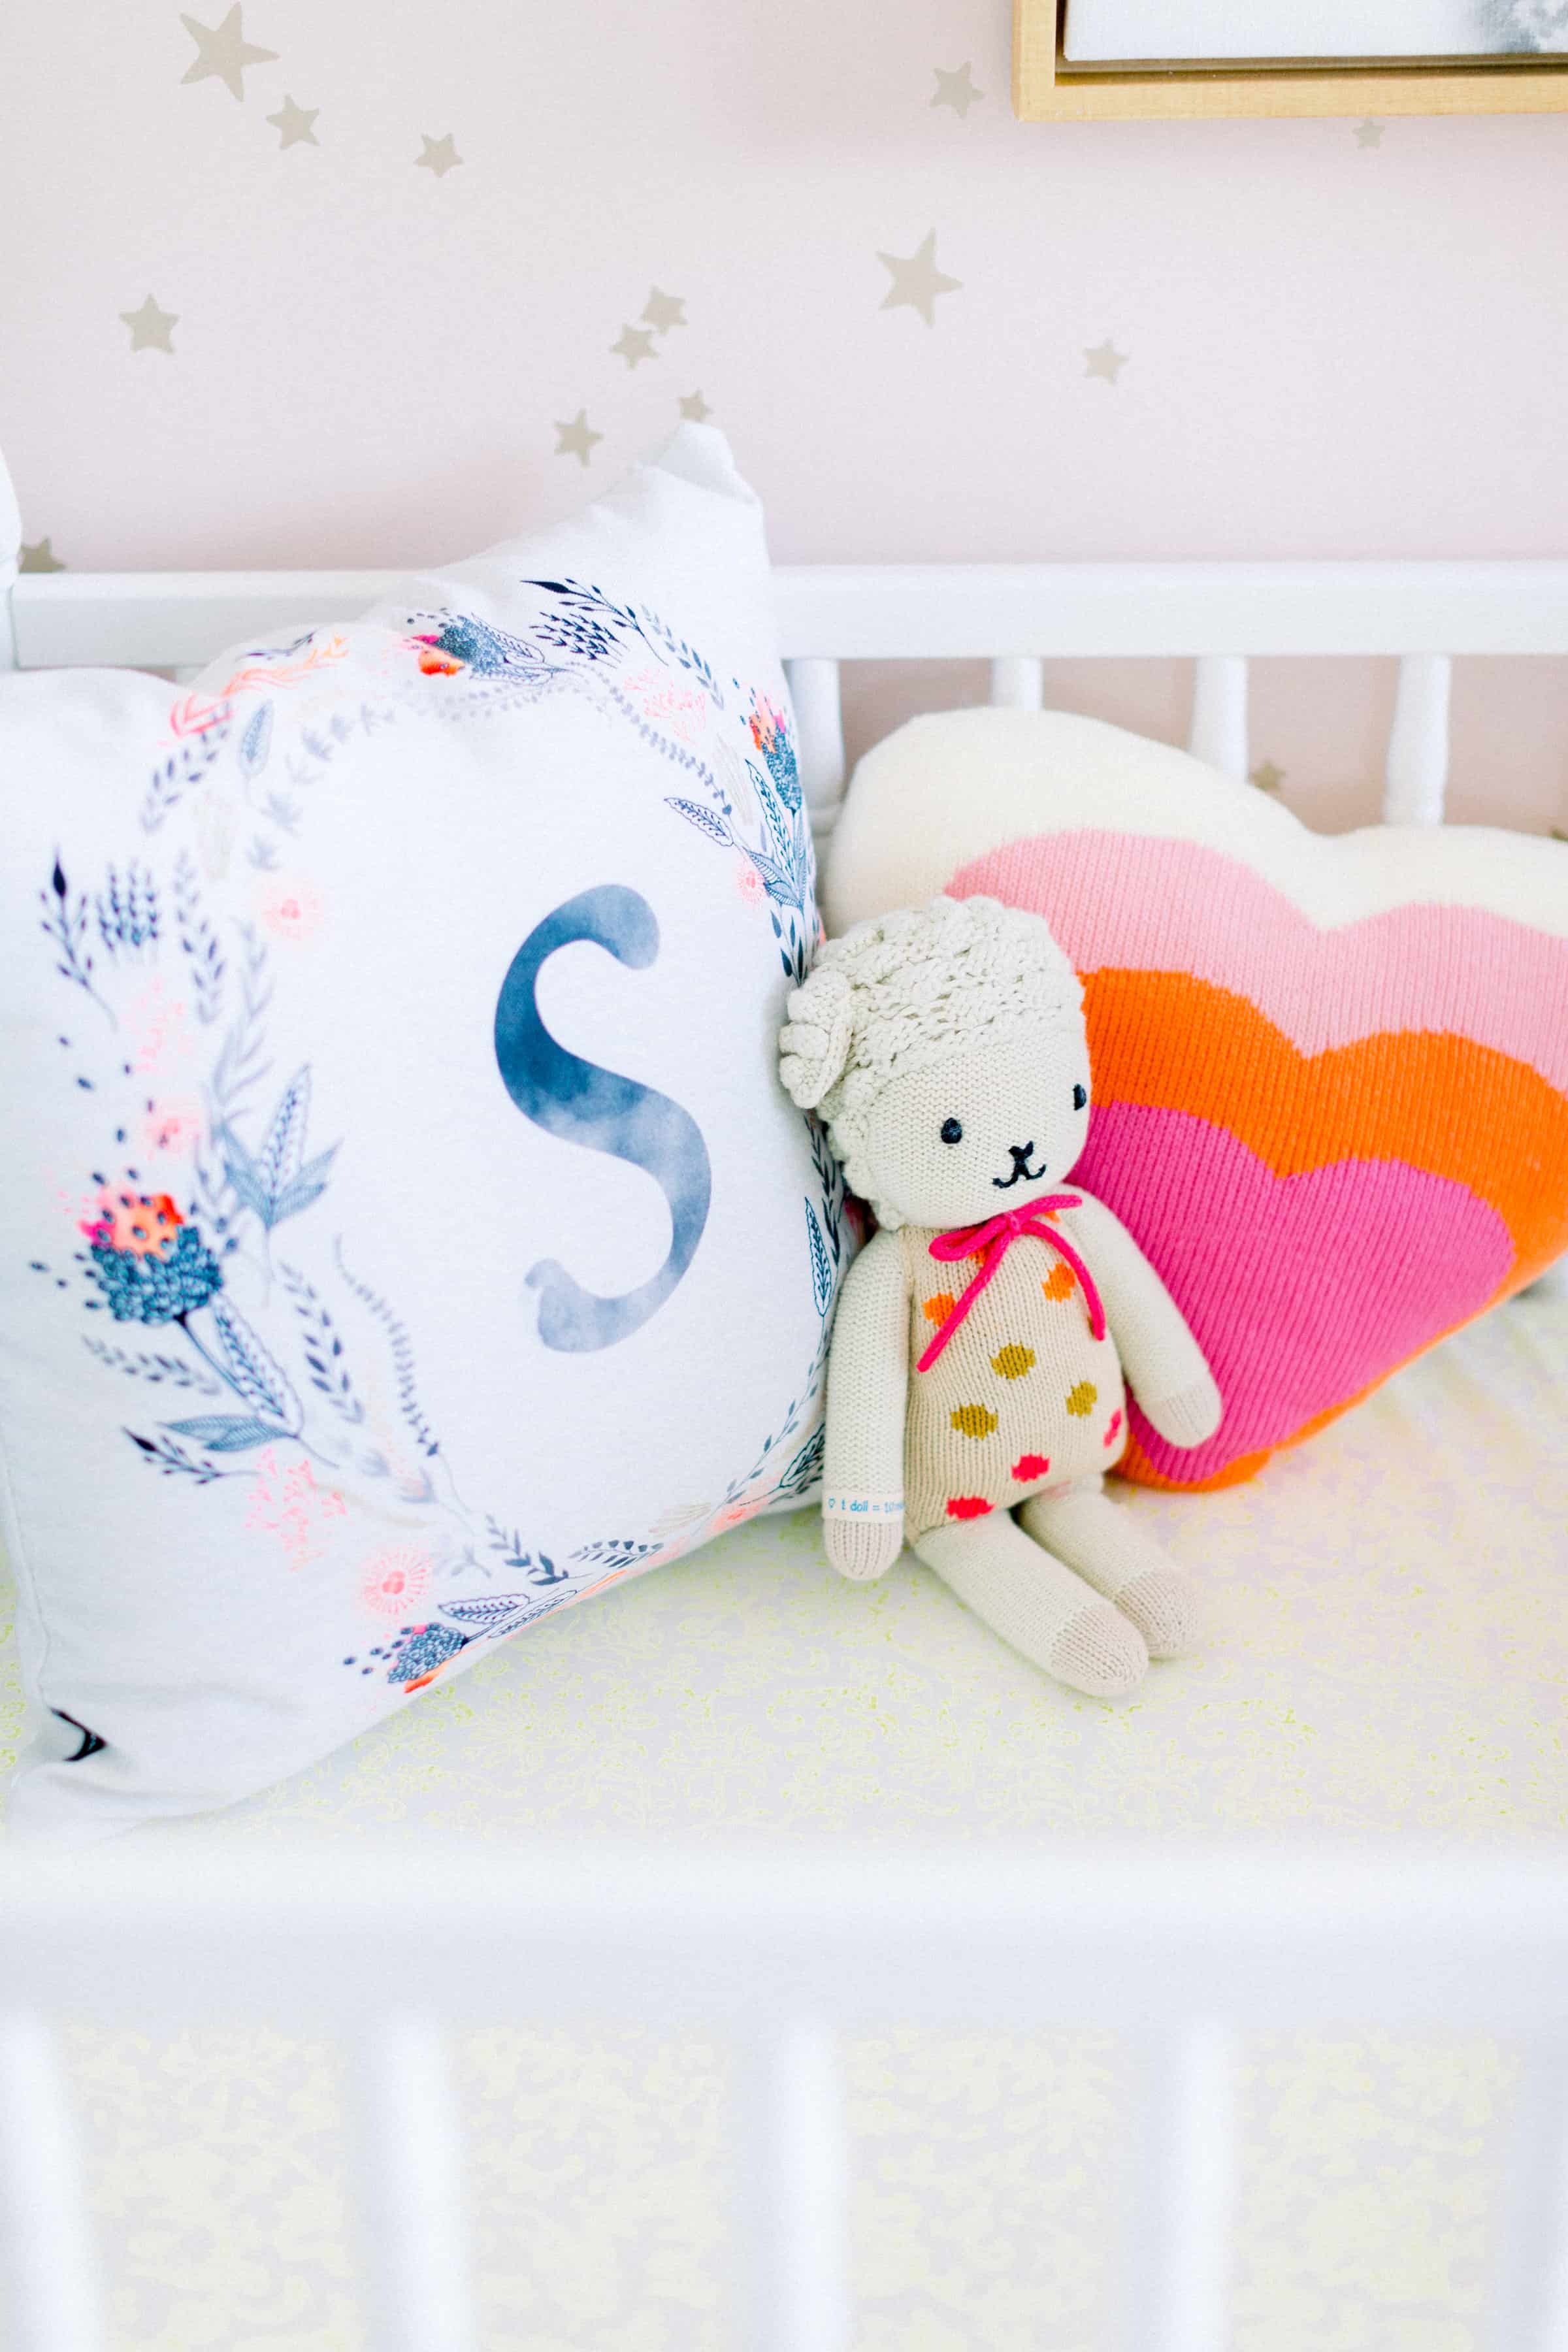
The pillows and animals on their beds are all accessories we already owned for both boys, and I love how they ended up working great for their little shared space.

Walker pillow with cuddle and kind dolls
Jack pillow cuddle and kind dolls

I also decided to do wall mounted lights instead of lamps due to Walker’s age.  These were SUPER affordable and really easy to hang.  They can be hardwired or hung like this and plugged into the wall.

modern boys bedroom

Overall we are loving this sweet simple shared boy’s room.  It has been working great for them, and they honestly have as much floor space as Avé does in her room!  For sources feel free to click the links below to shop anything you saw in their rooms!

Sources

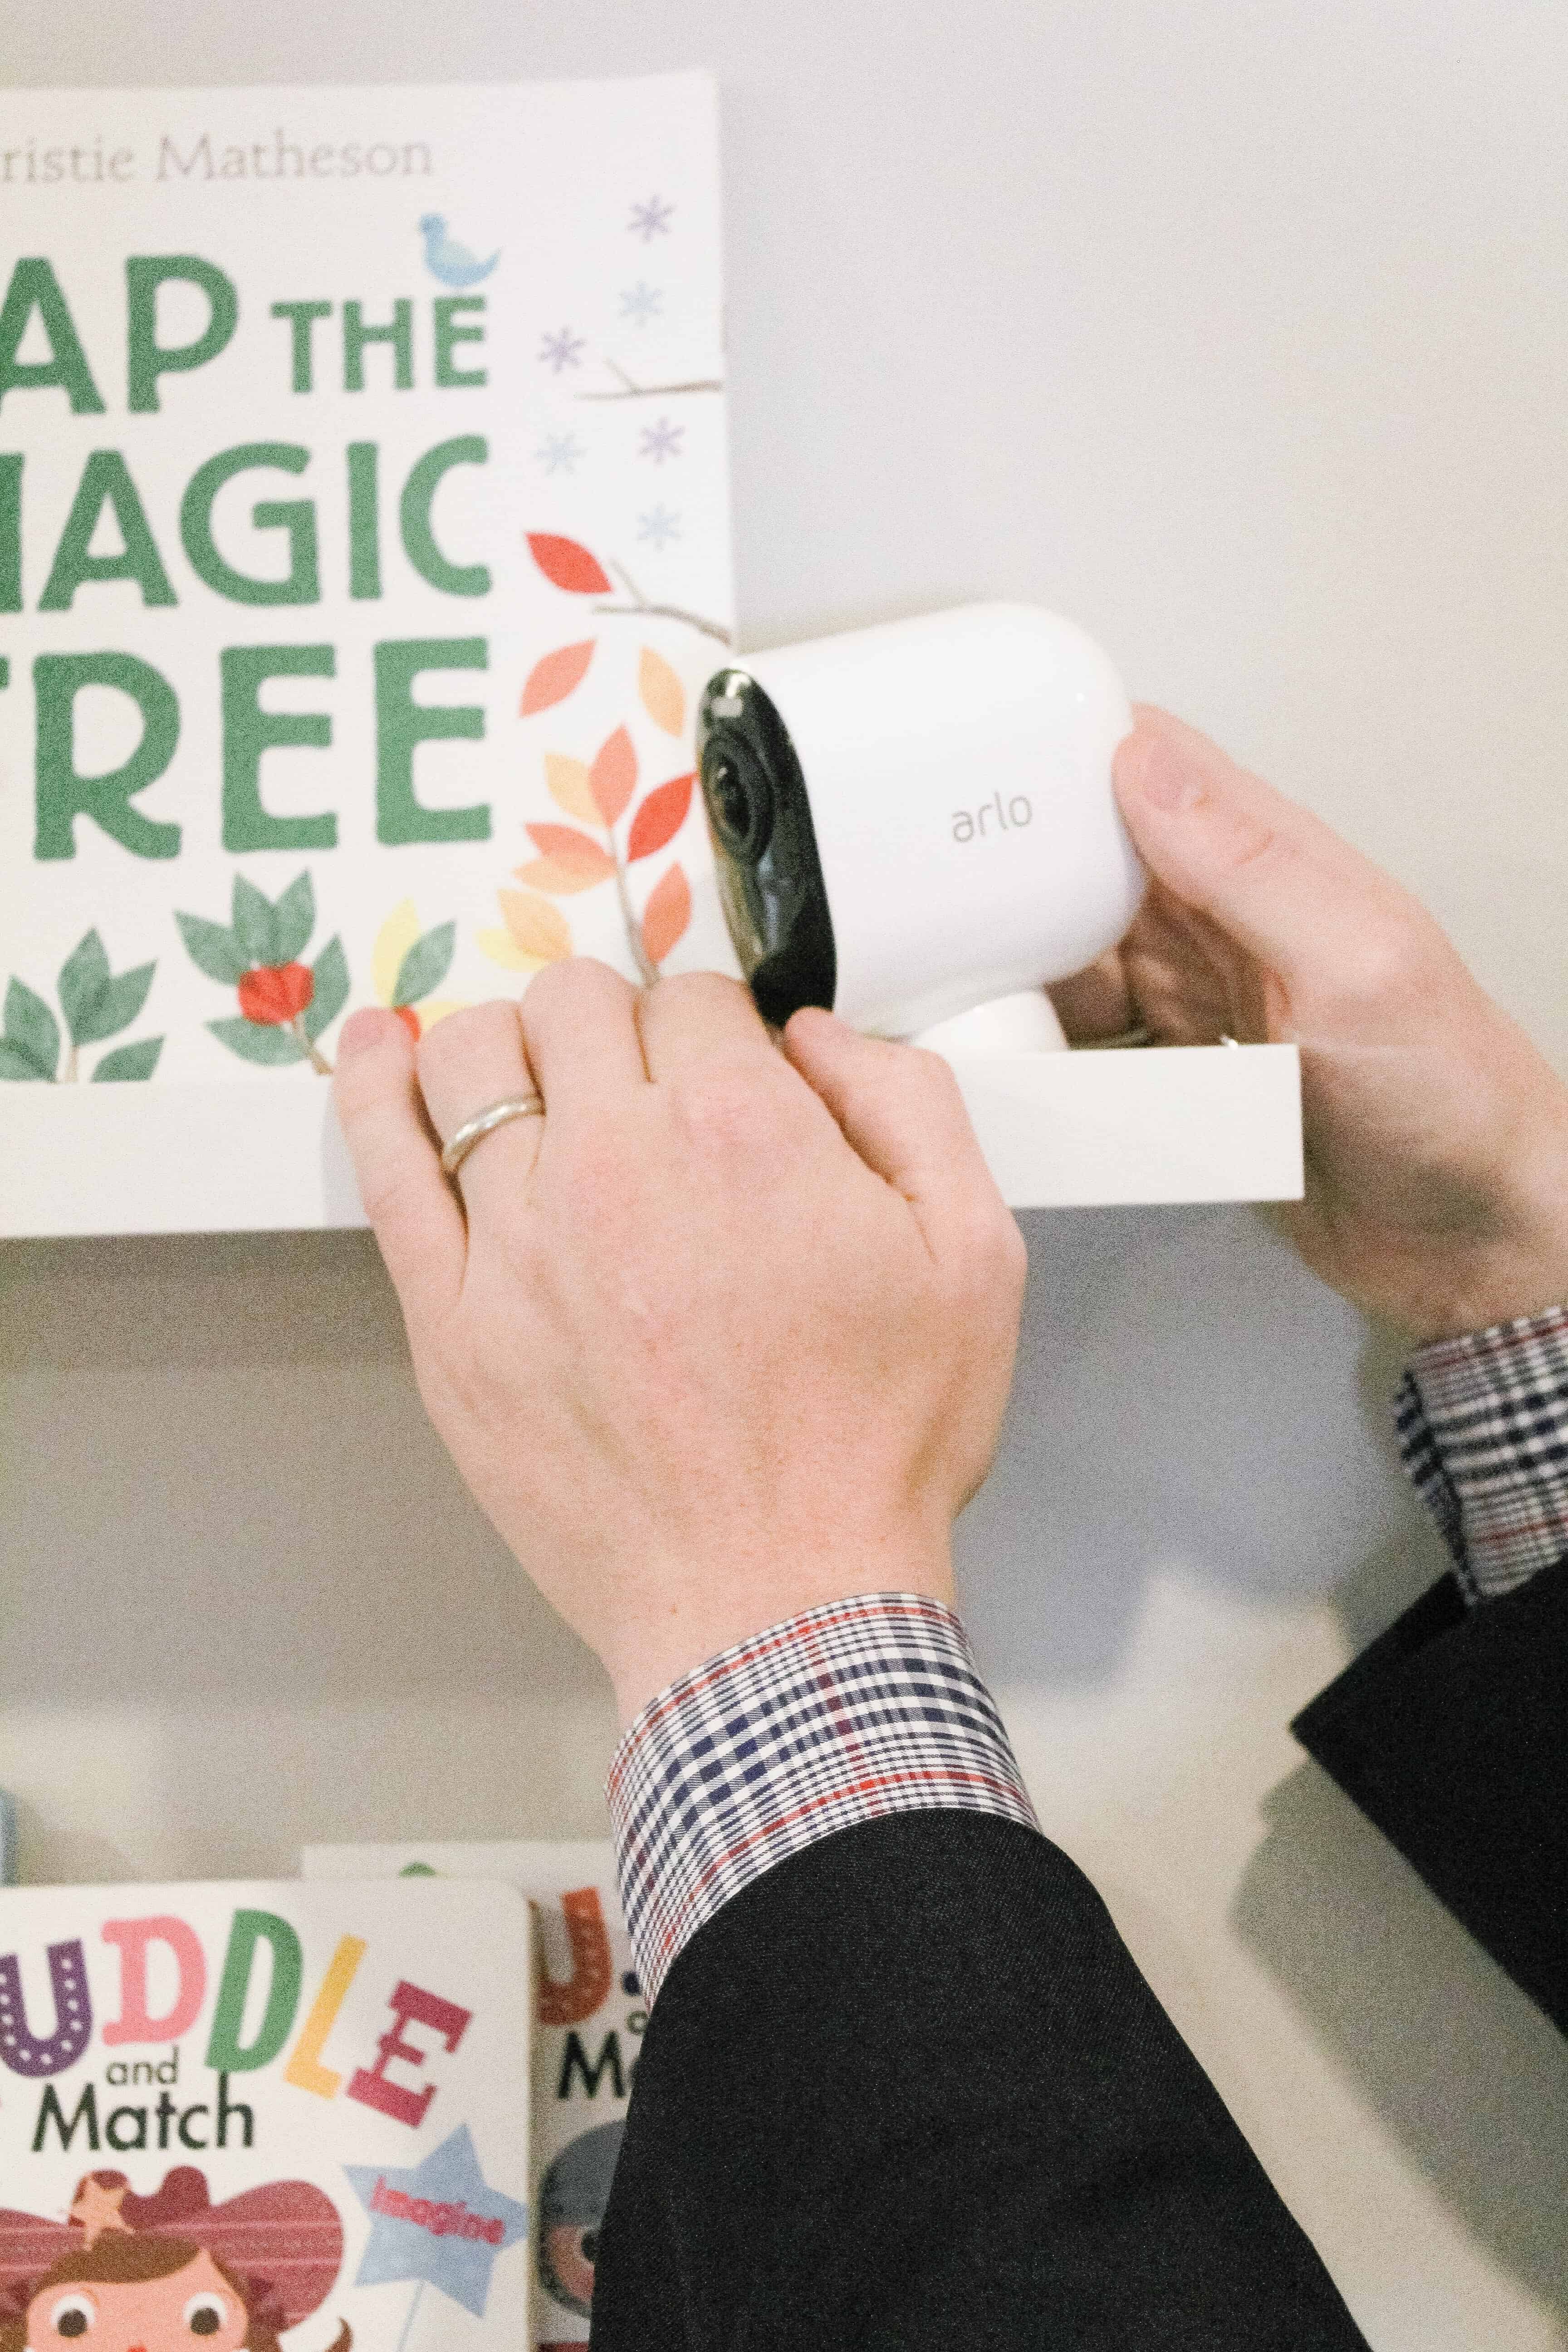
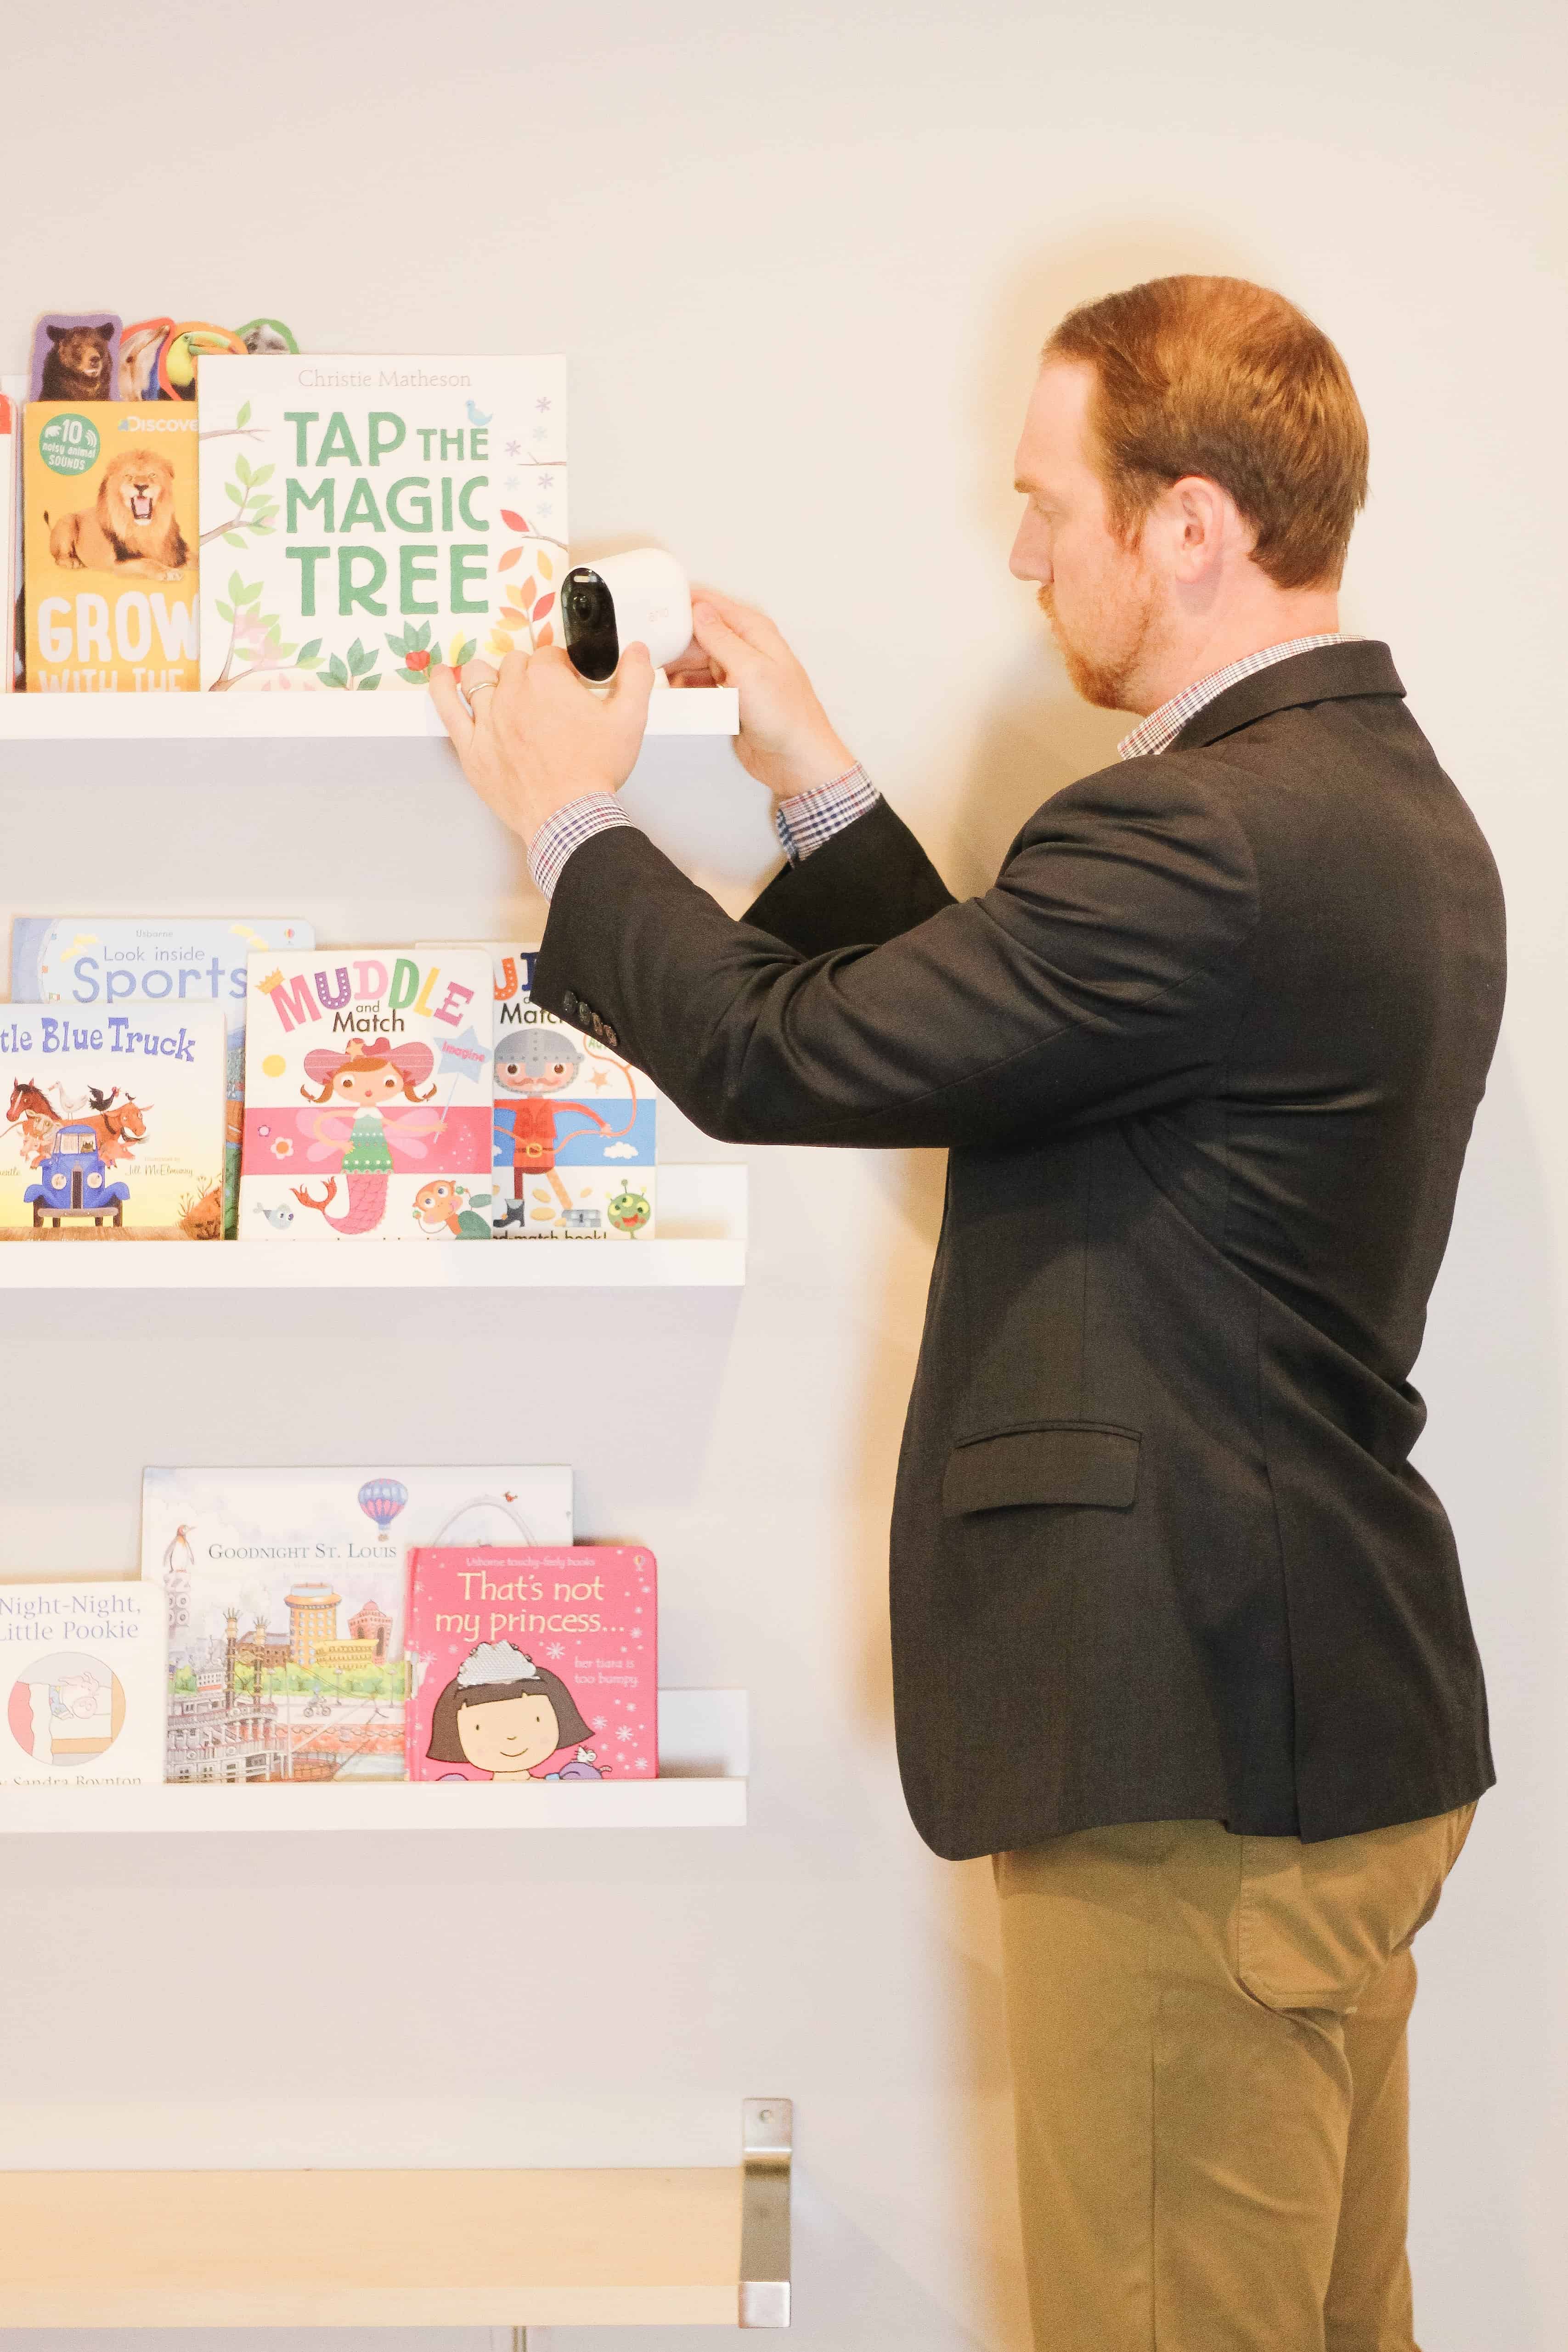
BEDS  |  RUG  |  WALL LIGHTS  | CEILING LIGHT  | DOLLS ON BEDS   |  MEERKAT PRINT  |  FRAMES FOR ANIMAL PRINTS  |  BEDDING  |  GREEN BLANKETS  |  DRESSER (similar – mine is no longer available but this has the same dimensions) |  LARGE PRINT ON DRESSER |  MONITOR  

All other items are currently not for sale due to being older or were from somewhere like Home Goods – I am happy to direct you to similar products however, so please leave me a comment with any questions!

boys night stand decor

For a decor round up you might like, be sure to check out this boys Amazon room decor roundup!

And for even more fun – I totally redid this room for Christmas this year, and it was such a hit! Go check out the post here.

boys shared room with 2 Jenny Lind beds
Products we Love

Favorite Items for a Day out with Kids

Heading out for a day with 3 (almost 4) kids is a lot of work.  There is nothing that makes it a bit easier than having the right gear and items on hand.  Check out my favorite items for a day out with kids in this post.  I share everything from the little stuff to the bigger items, and I will be sure to link to a couple of other favorite blog posts at the end incase your outing is the beach or other more specific places!

This post contains affiliate links

mom pushing uppa baby vista stroller with toddler

Favorite Items for a Day out with Kids

favorite items for a day out with kids


1  |  2  |  3  |  4  |  5  |  6  |  7  |  8  |  9  |  10  |  11  |  12  |  13  |  14  |  15  |  16


  1. Toppers for Squeeze pouches – these are amazing because you can close them back up if your little ones don’t finish the pouch at one sitting, and they help prevent messes and thus messy clothes!
  2. Sippy cup strap – my youngest loves to throw things out of the stroller.  This is one of my favorite things to keep in the stroller.
  3. Gathre pocket bibs – I love how small these are, so I fold one up and keep it in #12 at all times.
  4. UppaBaby Snack tray
  5. Straw Lid for my Swell Bottle – if you have a swell bottle this makes it so much more easily used, and for me my Swell is my go to in the summer since I can throw it in my bag.
  6. Stroller Fan – I LOVE this especially if you have a really little one.
  7. These snack top lids are awesome because you can use them on most any container to make a spill proof snack.
  8. Piggy Back Board for UPPAbaby Stroller – this is one of my number one must have items if you an UPPAbaby stroller and have more than one kid! (they have universal options too for other strollers!)
  9. Freshly Picked Diaper bag – this is my go to diaper bag.  Check out why in my full review here.
  10. Stroller Lock – I have always had a nicer stroller so I like to lock it if we have to leave it for something like riding the train or a ride at Disney.
  11. Swell Bottle
  12. Diaper Clutch – I keep this on me all the time.  Throw in 2/3 diapers, a bib, and some wipes and you are good to go.  Its water proof too so if there is a blow out or something then you have something on hand that you can use and throw in the wash.
  13. Swanoo Stroller Caddy – Finding a good stroller caddy is hard.  I find it especially hard in my Uppa Baby handle bars due to the shape.  I love that this one hangs and has so much room for lots of stuff at your hands!
  14. Kids Hydro Flask Water Bottles – these don’t sweat and keep their water cold!
  15. Mommy Hook
  16. UPPAbaby VISTA – this has been my favorite stroller of the MANY I have owned!


Little boy in uppa baby stroller with flowers

Make sure if you’re heading on a more specific outing you check out some of these posts below to find the perfect gear for your day, and be sure to leave me a comment if you have any questions.

Beach and Pool must haves with kids and babies

Favorites for a day at Disney

What you need for a day out with babies and kids photo

DIY

How to Paint Tile Floors

If you follow me on Instagram, then you DEFINITELY know that this ”how to paint tile floors  tutorial has been coming!  I have been painting the kids bathroom floors for the past couple of weeks, and you guys, the outcome was better than I expected!

This post contains affiliate links
photo of painted tile bathroom floor

 As we work our way through our house, I knew I wanted to set out to do a quick, inexpensive update for another room that I would share with my amazing followers. One of the projects on my list was to update the flooring in our kids bathroom that I didn’t love. So today, I am going to share with you all how to paint tile floors so you can also update your flooring in your home that you might not love but don’t want to replace entirely.

Check out the fully updated bathroom here!

How to Paint Tile Floors

For us, when we decided we wanted to update the kids bathroom, we knew that we didn’t want to put the amount of money into the room that new tile would take.

This is our kids bathroom that honestly is used for very little more than middle of the night pee breaks and brushing teeth.  With that being said, it is right at the top of our stairs, and I see it a million times a day so I wanted it to fit the house a bit better.

I saw AngelaRoseHome do painted floors on Instagram (amongst other people) but was so inspired I knew I had to try. 

 I am going to walk you through the process I used for painting the floors in this post.  

Bathroom with painted tile floors

As a few disclaimers:  

I set out to do this and have the bathroom done – start to finish – in 1 week.     Because I am about 28 weeks pregnant it took me slightly longer to paint the floors, so it was more of a 2 week start to finish project in our house.

Common questions I have gotten since I started this post that will be helpful..

These are grouted tile floors, not laminate.  

I did these floors 6 months ago and they are holding up great with so far no chips or issues.  As stated above,  they are not used heavily as far as showers/baths are concerned, but my kids do use the bathroom daily to brush their teeth and get ready for the day/night. 

The video on the post is from the 6 month mark, and thus showing you how they are holding up!

painted tile floors with small white metal stools

Step 1: Buy Supplies

First things first, you want to make sure you have all your supplies.  Below I have a list you can screen shot before you go to the hardware store, but I will also link to and list what I personally used here on this post, since lets face it – Amazon Prime makes everything easier.

For the stencil, I couldn’t find any I truly loved so I decided to make one. I used my Silhouette cameo to cut a stencil.  

I will have a full section on how to do that in this post, but if you don’t own a Silhouette, you can also very easily grab stencils on ETSY.  I will also talk about that option!

photo of supplies for painting tile floors

Supplies:

Stencils:

 The stencil is probably the hardest part of this whole process.  Finding a design you like, as well as a design that will work in your space can be tricky.  

If you decide to make your own, one thing to remember is that the design needs to be connected all the way through. The first design I chose and cut basically ended up being two pieces and that wouldn’t work.  

I will also add that after going through the entire process- the more simple you go, the easier it will be!

As stated before, I personally used my silhouette cameo for cutting my own stencil.  I used this material with the cutter, and I personally went with this stencil option from ETSY as the shape.  

They also sell this material at Hobby lobby – it is about $3.99 (before coupon) for 3 sheets, so this is a great deal on amazon!

You can also order stencils on ETSY – measure your tiles and just search it on easy for your perfect stencil.  Hopefully you can get 3 or 4 of them in a pack (that would be VERY helpful).  I personally wouldn’t try to do this with only one stencil. 

Prep the Floors:

Before photo of bathroom floors

This was my husbands job: clear the bathroom floors.  You will then need to sand down the floors lightly with either your sanding blocks or your electric sander.  Once you have done that you can clean them well with the degreaser.

Next give them a great final clean off with hot water.  Let the floors fully dry before you do any painting! You really REALLY need clean floors with no dust for a good finish. 

How to Paint Tile Floors:

Brown Tile floors being painted grey

First things first- paint the floors your base color.  For me I did grey first, so my husband did 2 coats of the grey paint, referenced above, on the floors.

For the first coat, we used a paint brush on the grout as well as a foam roller over the whole thing. The brush allowed us to get into the grout lines a bit better.

For the second coat, we just used the foam roller.  We then let coat two REALLY REALLY dry before we started in on stenciling! 

In progress picture of tile floors being painted grey

SOME TIPS FOR THE WHOLE REST OF THE PROCESS: wearing clean socks any time you walk in the bathroom will help keep the floors clean while you’re doing this.  Keep in mind this is paint.  IF you walked on your walls they would get really dirty, so before they are sealed, this is very helpful.  You should also wash your hands well before you head in to paint each time.  

Stenciling:

Grey Floors being painted white

A little tip I did not fully think of when doing this because I was too pregnant and tired, but I think it would have helped save me A LOT of time and effort on touch ups would be to place your stencil down then roll a coat of your base color (so for me the grey) first.  Once that dries then roll your first coat of the new color.

Now for the trickiest part of the process – stenciling!  Start near the back of your bathroom and pick a full square.  Tape it down on all sides and lightly roll it out in one direction with your new paint color!

Painted Tile Floors with stencil

Below are my BIG TIPS for stenciling:

  • LIGHT COATS ARE YOUR FRIEND. Do not do heavy coats.  If you do one super light coat first it will sort of tack down the stencil and allow you to do the heavier coats more easily too.
  • Roll in one direction if possible.
  • Don’t let the stencil get too dirty.  I noticed that the cleaner and fresher the stencil was the better, so I washed mine each night.  When the stencil is dirty, paint builds up on the under side. 
  • Pick a spot to line up the pattern for each.  For mine it was the middle little thing on the edges. It will look more like tile if you line those up. It is sort of hard to use your grout lines as your spots to line up. 
  • Let the paint fully dry before you lift the stencil.  Being in a hurry will do you no favors – you will just spend more time on touch ups later.
Painted Tile Floors with stencil

I completed all the full tiles first.  If you can, tape down several stencils in a row and do them all at once, so that you don’t have to jump around too much. But be aware that you will have to do some jumping so that you’re not taping onto freshly painted tiles.  

Because I had access to cutting my own stencils I trimmed mine once that was done.  SO FOR INSTANCE: I cut one stencil to use against the wall.

 I trimmed another to use on the whole row against the tub.  I saved 2 full sized stencils for around the toilet that I was able to trim.  

Take your time, and piece together what you have to.  There will be a few pieces that are tricky, but they aren’t as overwhelming as they seem.  

This is also a one reason I would recommend ordering more than 1 stencil.  The time but mostly the sanity it saved towards the end was very worth it to me.

Once all your floors are stenciled you will be ready to touch up.  AND BELIEVE ME WHEN I TELL YOU, THERE WILL BE LOTS. I started at the back of the bathroom and filled a cup with white paint and a cup with grey paint and just touched up little by little.

I found that having a foam brush and a tiny paint brush for each color was best because both options served different purposes.  It took me roughly 2 to 3 hours to touch up the whole bathroom, so it was not a fun process. However, knowing my personality, it was time well spent.

I do think if I had taken the time to do the coat of grey over the stencil, the time spent doing touch ups would have been majorly cut down. 

Painted and stenciled Tile floors

Sealing the Floors:

The last step is to seal your floors.  Make sure your floors are FULLY, FULLY, FULLY dry.  Then you will use a foam roller and roll on the sealer all over the floors.

Did I mention your floors should be really dry? The sealer needs to completely dry for 2+ hours between each coat of sealer, and a light sanding will make for a smoother final finish.

Basically between each coat of sealer, take a sanding block and LIGHTLY sand the floors and then give them a good wipe down, then repeat.  We did this for a total of 4 coats of sealer to be safe and make sure it really wouldn’t chip!

 Once your last coat is done, close the door and leave the bathroom alone for a couple of days.  We didn’t go on the floors for a full 48 hours after the final coat to allow for them to really seal and have a good outcome. 

Birds eye view of painted tile floors

Price Breakdown:

Overall this was not a super difficult process, and I totally think anyone can follow this tutorial on how to paint tile floors!  We personally owned a few of the supplies before starting, but over all my bathroom took me roughly 2 weeks from start to finish.  

The floors cost me roughly $70 in supplies.  I don’t think for a finished solution as pretty as this that I can complain a bit about that!  

Other Posts You’ll Love

If you want to see another great way paint can transform your bathroom, be sure to check out this blog post on how we painted our bathroom cabinets a couple of years ago.  They still look just this great over time.

Pin The Post Below For Later

Hopefully you feel confident and inspired to take on a tile painting project of your own. Be sure to pin the image below to find this later, and if you have any questions leave them in the comments below, or DM on Instagram (@arinsolange).  

how to paint tile floors blog graphic
Products we Love

Tricks for Flying with a Baby and Kids

I am fairly certain that one of the number one things I get asked about via Insta stories is what are the tips and tricks for flying with a baby and kids.  I totally get why too.  Setting out for your first plane ride with a little one is super overwhelming.  There are so many things that you may not know how to do, if you should do it, or if you should buy it.  Below I will share all the tips and tricks for your flights, and my must have items to take with you!

This post contains affiliate links

Flying with a baby and Kids image

Tricks for Flying with a BABY

First up…if you are flying with a baby there are a few extra tricks and tips needed.

  • You need their birth certificate if they don’t have a seat.  Toddlers and babies under the age of 2 can sit on your lap for free if you want, but you have to prove they are under the age of 2.  (please note, they asked me for proof when Walker was 2 months old…so ALWAYS TAKE IT.)
  • Plan your flight times well.  I can’t tell you exactly what times that means, but my suggestion is to plan the times well so you might get a nap out of the baby.
  • Sit towards the back or front of the plane on an isle.  It is so much less overwhelming feeling as tho you are only disrupting half the plane if baby gets fussy.  Take this from experience.
  • I know you think you will wear your baby, but take a stroller to the gate too.  If you get a flight delay, having a place to lay the baby down is so nice.
  • Have your bottles ready to go if you are formula feeding, and have pacifiers on hand if they take a Paci.  Many times babies nursing/drinking a bottle and or taking a Pacifier will help them from their ears popping.
  • Know that you have to carry your baby through security (they can’t be sleeping in the stroller).

Carseats/Strollers

Easily the most overwhelming part of flying is figuring out the carseat/stroller situation.  I have done this so many times and in different ways, so below is just my go to.   Take it or leave it!

  • Always bring a stroller for a baby if you can, and take it to the gate.  If baby is really little and you have the option click the carseat in as the stroller seat (like you probably do at home).  This will get your carseat and stroller to the gate without carrying a bunch of extra stuff.
  • If we are traveling with the infant carseat as a stroller seat I either A: put the base in the bottom of the stroller and fold it up with the stroller at the gate, or B: Put the base in our checked bag.
  • USE A STROLLER CHECK BAG like the one in the image below.
  • For convertible carseats use the gate check bags from the image below.  They can be checked for free at the ticket counter.
  • If you child is at a booster seat age, the Mifold is the most genius invention for travel, and is a must.
  • Remember that just because carseats and strollers and such are free to check, packing things that are space savers will make the to and from the airport and car situation much less stressful!

Other Tips and Tricks

  • Pack a separate bag inside your carry on, incase of emergency.  I have talked HERE about how we do bags for our kids, but if we are not at mass capacity for carry ons when we get to the airport I try to have this extra bag incase we need it. These are my FAVORITE and work great for the pool or beach once on vacation.
  • Over prepare when it comes to diapers/wipes.  Also know that wipes will come up as a liquid at security, so pull them out when you’re going through.
  • Pack a cup with a lid for you.  Its hard to drink anything with a squirming kid on your lap.  Or get a Starbucks and save the cup for on the plane.

Must have Items

Check out these mom travel favorites, with some other items I love, and read below for all the items we always have with us when we fly!

collage photo with favorite items for flying with babies and kids

1 |  2  |  3  |  4  | 5 |  6  |  7  |  8  | 9 |  10  |  11  |  1213 |  14  |  15  |  16  |  17  |  18

  1. Kids Headphones – Seriously a must have when flying with kids!
  2. A backpack Diaper Bag – this one is by far my favorite.  I did a full review on it here.
  3. Kids Backpack – Have each kid carry a backpack of their own with their carry on items!
  4. Window Clings – Such a great time waster for little ones!
  5. External Charger – this is the one I have and it can charge your device SO many times, and it is amazing. (pair with #7)
  6. Pencil Pouch – These are great because they have 2 pockets – give kids crayons and such in one pocket to color, and then small items in the other (a matchbox car or something).
  7. Short Charging cables to use with the extra charger
  8. Doodle Pad – my Kids are obsessed with these.
  9. Snack Stacks – I love to load these up in the morning and put them in one of the cup holder pockets on each kids backpack.  (for the littlest I put it in my diaper bag).  My kids can open them on their own and I don’t have tons of trash on the plane.
  10. Diaper Clutch – I always keep this in my diaper bag, but it is great in cases like this.  Grab only the diaper clutch for diaper changes so you’re not taking your big diaper bag into that tiny airplane bathroom.
  11. Gate Check bag for Carseat – this one is a few dollars more than the least expensive, but the backpack straps will save you.  One will last you for YEARS, so I keep one on hand.
  12. Suckers – for kids who don’t drink bottles or take a pacifier, these are a must have.  Sucking on a sucker keeps them from their ears popping, and this particular kind is my favorite because they aren’t sticky! (like a huge Smartie)
  13. Blanket – My kids like to each take a blanket on the plane.  These roll up really small but they are huge (like big enough for mom).
  14. Waterbottle – I have recently started loving these for my kids.  Fill it with water before you get on the plane.
  15. Stroller Gate Check bag – This is a HUGE must for me. Keep it under the stroller and put your stroller in the bag right before the plane!
  16. Mifold – pack this for any kiddos that are old enough for a booster.  My son keeps it in his backpack.
  17. Throw up bags – I know I know, you don’t want to think about these, but trust me…I have an incident from 2015 that will now forever have me carrying these!
  18. Logan and Lenora bag – I talk about how much I love these in this post, but I always roll this up in my carry on.  It allows for me to have an extra bag if needed.  It has a loop for carry on suitcase handles, and waterproof pockets for any accidents.

Hopefully this post full of Tricks for flying with a baby or kids is helpful for you! Be sure to check out these blog posts that you might like too while you are here!

Road Trip Favorites with Kids

Mom Travel Favorites


Home

Modern Stylish Nursery Round Up

This Modern Stylish Nursery round up contains affiliate links.  

The time has finally come.  Jack is moving out of his bedroom in the next week or two and that means I can fully dive in on the nursery.  I seriously can’t even explain my excitement to start giving this little lady a space of her own.  (We can ignore the fact that I am terrified about the fact that Jack and Walker may never sleep again once they are in the same room!).

I have gone back and forth on the final look I wanted for her room, but I think I finally have a great game plan.  In the mean time I thought it would be fun to share these fun rooms, some of which are past rooms I have done, as well as friends nurseries that have given me great inspiration, and I think you will all love them too!

Modern Stylish Nursery Round Up

Neutral Nursery with Pops of Navy and Green

modern neutral nursery with pops of green and navy

The first nursery is my son Walker’s nursery that we just disassembled.  I LOVED how bright, airy, and neutral his room was, and at no point did I get tired of it.  You can check out many more pictures of the room here, and get all the details and links needed to recreate this nursery in your own home!

Perfectly Bohemian Feminine Nursery

pink nursery with alpaca on the walll

Next up is this gorgeous nursery that Ashley created for her daughter Story.  I actually shared all the details to this room HERE in a guest post, but lie I said there, Ashley has flawless decorating style and her home is beyond gorgeous.  (Be sure to follow her on Instagram and check out her highlight with home tour…you will die!).   Again head to this page for more details on Story’s room.

Modern Cactus Nursery

nursery with cactus and green crib

My friend Courtney hit her son, Finn’s Nursery OUT OF THE PARK.  It is every bit of perfection. She has a full blog post here showing more photos, and talking all the details.  I can’t get over how much the gorgeous roof lines really added to the charm of his sweet room.  (see her daughters shared room in this blog post too!)

Floral Blush Baby Girl NurseryFloral wall in nursery with blush accents

My friend Chelsee knows how to do blush perfectly when it comes to decor.  She is a mom of 2 little girls, and perfectly sprinkles blush all over her home. Check out this blog post to see how she decorated her youngest daughters room with the perfect blush feminine touches, and a floral wall that you could just die over!

Woodland Creatures Nursery

Black gingham wall in nursery behind black crib

Stephanie, from First Thyme Mom, featured her friends Woodland Creatures nursery on her blog a couple of years ago, and seriously it is a room I still swoon over.  The walls, the subtle accents to add color, and basically everything else you see is perfection.  If you are expecting a baby boy, this is a room he could grow into for years.

Colorful and Playful Baby Girl Nursery

baby girl nursery with yellow rug

If you don’t follow my friend Jen on Instagram, then you may not realize that her entire home is BOLD and GORGEOUS.  She decorates every room to perfection, with splashes of Anthropologie everywhere you look…and if you ask me thats basically perfection.  Her daughter’s nursery is gorgeous, fun, and playful, and allows for so much change and growth as she gets older.

Pink and Gold Nursery

Girls Nursery with hanging ice-cream cone mobile

My daughter Avé’s room in our last house was definitely early in my decorating life, however there are so many aspects that I still love.  Her playful ice-cream cone mobile, and the gumball machine are aspects that I still love and have stood up to the test of time. Check out the whole post here. 

I hope you got some amazing inspiration from some amazing ladies in terms of a modern stylish nursery, and be sure you are following me on Instagram to see what I do in our next babies room! Leave me a comment if you have any questions!


Food

Learning to Love your Body Through Pregnancy

This post is sponsored by FAGE; however, all thoughts and opinions are my own.

I am officially nearing the end of my 4thand last pregnancy…which honestly is just a whole lot of bitter sweet. I feel done.  Like this chapter of life lasted long enough…but I also a bit sad knowing that it already feels like it’s going too fast.  There are SO many struggles that come along with being pregnant and a new mama, and one of them is learning to love your body through pregnancy all the changing seasons of this new phase of life.  I have had to learn to love, nourish, and appreciate a body that has changed so many times over the past 7 years, which is almost never easy.  I am excited to have teamed up with FAGE yogurt today to share some ways to love your body through pregnancy, both emotionally and physically!

pregnant woman drinking a smoothie

Love your body through pregnancy

 You hear the word love, and most likely your immediate thought is simply emotion, which is a huge part of love, but just like with relationships, loving something well also means taking actions to do so, so I am going to talk about both sides of that.

For me the first and most important part of learning to love your body through pregnancy is reflecting on the amount of appreciation you should have for your body.  We live in a day and age where it’s easy to focus on bouncing back (or heck even feel pressure to look better pregnant than before pregnancy), but it’s also important to be appreciative of what your body is doing for your baby, and for you to. The fact that its growing and changing to keep both of you healthy is such an important thing to remember.  I think when you remind yourself of that you will be less angry with the changes, and more grateful.

Eating Well

Fake yogurt and a smoothie


This is two sided…I think when you’re pregnant you should enjoy all the foods you sometimes avoid.  You are physically growing a human and going to gain weight, so you can totally indulge, however I really learned with my second two pregnancies that I felt so much better if I found healthy ways to indulge my sweet tooth from time to time.  In the first trimester, especially I ate TONS of yogurt.  It was a great way to get protein and calcium, and there is no smell, which is obviously a pregnant ladies dream. The FAGE Total Split Cup yogurts were my favorite because I could add as little or as much fruit pending my picky taste buds at that moment.

FAGE yogurt and all the other ingredients for a smoothie

Now that I am feeling 1000 percent less picky I have been drinking lots of smoothies to get a healthy meal in and trick my body into thinking I am having a sweet treat. I never make smoothies without yogurt, and love getting the FAGE Total Plain Greek Yogurt for my basebccause of it’s rich, creamy taste, and the added protein it gives.  I will post my favorite recipe below for you to follow, and as a little hack – sometimes I blend the yogurt and spinach and freeze it in muffin tins to pop into my smoothies pre-measured and save time.  This also really helps if the kids are watching me make them – they don’t see the greens actually going in!

Pregnant woman drinking a smoothie

smoothie with chia seeds on top 


Smoothie Recipe

  • ½ cup FAGE Total Greek Yogurt
  • Assorted Berries totaling around 1 cup
  • Ice to preference
  • ¾ cup water
  • 1 TBS honey
  • ½ banana
  • chia seeds as garnish when finished


Move your body to love your body

FAGE yogurt with smoothie and all the other ingredients

The last tip I have for loving your body through pregnancy is to keep moving.  Even if you think “this is pointless”, you will feel better just knowing that you are staying healthy on the inside.  Moving your body, even just by taking walks will make you mentally feel so much better, and nothing is better than how proud you will be of being able to do a hard workout when you’re growing a human!

Most importantly, just remember this is a phase!  As are all the phases that come after.  It is hard work growing a baby, and being a new mom. Give your body grace, and remember to love and appreciate your body both physically and mentally.  Making smoothies, and keeping healthy snacks on hand, like FAGE Total Split Cup yogurt will make eating during those newborn days much easier too.

If you have any questions leave them in the comments below, and be sure to pin the below image to find this post later!

Learning to Love your Body Through Pregnancy

Home

Story’s Boho Chic Girl’s Nursery

I am SO excited today to be sharing with you one of my absolute favorite Instagram friends sweet girl’s boho chic girl’s nursery.  I have been following Ashley for a couple of years on Instagram, became SO obsessed with her girls gorgeous rooms when they moved into their new home.  Ashley is a mom of 2 sweet girls, Ever and Story, and their rooms are literal perfection (as is the rest of her home!).  I reached out to Ashley to see if she would be open to me sharing the girl’s rooms here for you all to gain some serious inspiration from…and probably a whole lot of envy.

Feel free if you have any questions to drop them in the comments below and I will do my best to answer, or pass them along to Ashley, or you can always DM her via Instagram here!! And be sure to give her a follow to see more of her amazing taste.  My assumption is if you’re reading this post you have a little girl, or are expecting one, and her style for her girls is just as good as this room, so you won’t want to miss a thing.

All links are at the end of this post

This post contains affiliate links

white crib in front of pink and gold star wallpaper with llama photo over crib

picture of a boho chic girls nursery

Story’s Boho Chic Girl’s Nursery

Story’s rom is the perfect mix of modern, boho, and sweet nursery all mixed into one.  One of my favorite things about Ashley’s decor is that she allows for things to be switched up a lot, in my opinion, which to me makes for a perfect child’s room.  I think if you follow a theme too closely you box out any opportunity to change the room as their taste grows, and this room does not do that!

S pillow, cuddle and kind doll, and heart rainbow pillow in crib

pink and gold boho chic girls nursery

One thing I am BEYOND obsessed with is the wallpaper.  I actually had my eye on this wallpaper for our baby girls room, but think it works so well in Story’s room thanks to gorgeous black windows, and built ins with sharper edges, to kind of balance out the overly feminine nature of the wallpaper.

Boho Chic dresser decor in little girls nursery

Hanging Croched baby swing in nursery

Mixed Textures and Colors

I personally think one of the number one ways to make a room really feel boho is to mix lots of textures.  Something about the mixing and matching in that department really brings a room together and makes it feel warm and inviting with that modern undertone.  Ashley does this perfectly throughout her home, but in this room in particular really nailed it from the rug, to the pillows, to the sweet hanging swing.  There is so much texture brought in, but in a MOSTLY narrow color wheel that it adds character but doesn’t feel cluttered.

Modern little girls room with pink door

That being said, as I said above, I think that one of the key’s to really successfully decorating a child’s room is to allow for them to grow into it.  Take it from me when I say that means you want to allow for colors and items to be added without “ruining” the theme.  If you stick to a super narrow color pallet throughout the room with no room for growth, the first time they fall in love with a bright purple unicorn stuffed animal it will ruin the room.  I learned that the hard way, and really try to follow some of the same guidelines when I decorate my kids rooms ( see Avé’s toddler room for an example).  The yellow blanket, sweet bright and fun books, and other small accents really allow Story to grow into this room and make it her own when she’s ready!

alpaca picture over white crib with pink walls

Pineapple Book ends with little girl books


Overall I think when you truly follow your own style a room ends up coming together perfectly, just like baby Story’s room did!  Again make sure to check out Ashley on Instagram and let her know how much you love this room, and stay tuned for both an amazing nursery round up this weekend and Story’s big sisters room coming soon!

Alpaca picture in nursery

You are made of stars framed print

Room Details and Links

Rug  |  Changing Pad Cover  |  Crib Skirt  |  Crib Sheet  |  Wallpaper  |  Swing  |  Light Fixture  |  Unicorn Head  |  Heart Pillow  |  Crib  |  Changing Table Dresser  |  Dresser  |  Plant Basket (similar)  |  Mirror (similar)  |  Plant  |  Monogram Pillow  |  ‘You are Made of Stars’ Print  |  Heart Cushion  |  Alpaca Stuffed Toy  |  Acrylic Frame  |  ‘Un Deux Trois’ Print  |  Alpaca Art  |  Pineapple Bookends (similar)  |  Lamp  |  Guitar  |  Llama Basket  |  Curtains  |  Alpaca Vase  |  Photo Clip Frame (similar)  |  White decorative basket on dresser  |  Gold Frame  |  Ferris wheel Art Print  |  Headband Holder Hook (similar)  |  Wall Hook  |  Dresser Knobs (similar)  |  Hand Dyed Wall Tassel Hanging (same company but each one is custom) 

Paint colors:  White – Sherwin Williams Extra White |  Pink on closet door and ceiling – Benjamin Moore Gentle Butterfly


boho chic girls nursery


Home

2019 Serena and Lily Memorial Day Sale

Please tell me I am not alone in searching for all the best Memorial Day sales!!  I have had my eye on a few pieces from Serena and Lily recently, so had been waiting for their Memorial Day sale that started today.  I wanted to share the 2019 Serena and Lily Memorial Day Sale with you all and show you some of my favorites so you could get to shopping too.  If you haven’t ever purchased from Serena and Lily, know that the quality is TOP NOTCH, and above all other.

This post contains affiliate links

2019 Serena and Lily Memorial Day Sale

Below are some of my favorite items on sale in several categories to give you some inspiration, but its note worthy that almost everything is 20% off site wide. The sale runs from May 22-28, so you have a full week to do your shopping!

Casual Dining Choices

A collage of coastal modern dining room furniture and decor from Serena and Llily

1 | 2 | 3 | 4 | 5 | 6 | 7 | 8 | 9 | 10 | 11 | 12 | 13 | 14 | 15 | 16 | 17


Beach Day Choices

Beach Furniture from Serena and Lily

1 | 2 | 3 | 4 | 5 | 6 | 7 | 8


coastal modern bedroom decor from Serena and Lily

1 | 2 | 3 | 4 | 5 | 6 | 7 | 8 | 9 | 10 | 11 | 12 | 13 | 14 | 15


Outdoor Furniture and Decor Choices

collage of coastal modern patio furniture from Serena and Lily


1 | 2 | 3 | 4 | 5 | 6 | 7 | 8 | 9 | 10 | 11 | 12 | 13 | 14 | 15

Make sure you check out the rest of the site to see the rest of 2019 Serena and Lily Memorial Day Sale options because like I said before, this is only a sneak peek of the amazing things they have to offer, and if you get anything good I would love to hear what you picked in the comments below!


Food

Easy Fruit Pizza Cookies

I shared my go to super easy go to dessert recipe on my Instagram last week and got SO MANY questions, that I decided I would get the recipe here up on the blog for people to find a bit easier.  This is my Easy Fruit Pizza Cookies recipe, and I promise that it will knock everyone’s socks off.  (Just don’t tell anyone just HOW easy they are!).

My husband does not do cream cheese icing ever, but he is obsessed with these.  I think that the mix of icing makes it less strong so he loves them.  So if you’re worried about that aspect of the recipe, don’t be scared away.

fruit pizza cookies on copper rack

Easy Fruit Pizza Cookies

Ingredients

  • Break and Bake sugar cookies (or if you feel inclined you can make some from scratch0
  • 1 jar cream cheese icing
  • 1 tub Cool Whip
  • Fruit of choice

ingredients for easy fruit pizza cookies

ramequins of assorted berries

Directions

  • Bake cookies per instructions, and let cool
  • While they bake mix half container or Cool Whip with half the container of icing – you will know it is fully mixed when it resembles marshmallow fluff!
  • Top with fruit of choice  (see below for my tips)

** tips on fruit **  I have done SO MANY combinations of fruit and by far my favorites are berries.  Kiwi and clementines can also make a great choice.  Banana tastes great, but tends to get brown.  For the cookies shown I did – Strawberries (cut into pieces), Raspberries, Blueberries, and Blackberries that had been halved.

copper cooling rack with sugar cookies

bowl of icing

bowl of icing with a spoon in it

White tray with mini fruit pizza cookies

Tips and Tricks

So a few tips and tricks:  If you are serving these they are so easy to assemble right before and I definitely recommend that.  Many times I will make the cookies and icing for a couple social events in a week then assemble them at that time.

The half container of each will EASILY make 48 cookies (so 2 break and bake packs) so you could very easily make enough of these for a VERY large event with the single tub of icing and Cool Whip!

If you stick to the berries, these are the perfect patriotic dessert, and I will be making them next weekend for Memorial Day, and always throw them together for the 4th of July too!

fruit pizza cookies on cake stand


Enjoy your cookies, and if you have any questions let me know!! And most importantly – don’t tell anyone just how easy they are when you serve them.  Because trust me they will get gobbled down.

Pin it For Later

Easiest fruit pizza cookies


Products we Love

Arlo Camera as Monitor for Kids

How many of you have kids you let play in the playroom alone?  We personally let our older two down in the basement playroom alone often, but after hearing a bit of a horror story from a friend recently, decided that we really wanted a camera or device down there to check in on them.  We recently installed the Arlo Ultra Wire-Free 4k Smart Home Security System camera in the playroom, so I could roam the home, shower, and relax while the kids are playing without worry, and it has been the best decision we have made in a long time.  I wanted to give all the moms who follow along here a review of how the Arlo camera as a monitor for kids is working, and talk through why we went this route.

Arlo Ultra on bookshelves for kids

This post is sponsored by Arlo Home Security but the content and opinions expressed here are my own. This post contains affiliate links. 

About the Arlo Ultra Wire-Free 4k Smart Home Security System

So before I get into how its working in our home, and some of the reasons we went with a security system camera verses a traditional baby monitor for this space, I want to tell you a bit about the Arlo Ultra Wire-Free Smart Home Security System.   It is an easy to install home security system (KEY FOR US), and because of the wire-free design and  180 degree panoramic view, can be placed anywhere for a wider view, and easy installation.  Because with kids and the set up of the basement, I didn’t want wires hanging around, so that was really big for us.  I knew with it being great for a DIY homeowner, we could handle the install, which was great.

man installing Arlo Ultra monitor on bookshelves

The camera also has advanced night vision and an integrated spotlight, which will ward off unwanted visitors.  Although the primary use of this camera currently for us was to watch the kids, I also wanted the added protection of having security in the basement when Sam travels, and really looked for a camera that had great security features to be used as a security system only camera in a few short years.   The Rechargeable batteries provide months of service before needing to be charged which was also important to me, because as a busy mama I don’t need something on my to-do list weekly.  It also comes with the 1-year Arlo Smart Premier subscription which includes 30-day recordings for up to 10 cameras.

Arlo Ultra on pink couch

One of the last big reasons we went liked the Arlo Ultra home security system is the fact that we could link up to 4 cameras.  For us we knew this could now be a growing investment, which was important to us.  You can easily pull up the app on any android or iPhone, Apple Watch, google home hub, or Amazon Alexa – as well as your desktop.  I really wanted something I could pull up on my watch or the Google Home Hub, so this was such a great aspect of the system for me.

Arlo Ultra Monitor on playroom bookshelves

Using the Arlo Camera as a Monitor for Kids

So now to why we are loving this security system, and why its working well as a monitor for kids (and would likely work great for a baby monitor too).   As mentioned above the devices available for monitoring has been a huge perk for us, as well as the ease of use, but we have also been loving the amazing audio quality.  The Arlo Ultra Wire-Free 4k Camera has clear 2 way audio so I am easily able to communicate with the kids when they are downstairs playing, which if you’re a parent – you know is needed!

Basement playroom with Ikea bookshelves

For us this was such a great choice.  We knew we didn’t need a long term camera in the basement playroom, and aren’t sure where it will go after, so having a weather resistant option that could eventually go outside was needed, as well as the other aspects.  We went with a security system camera instead of the baby monitor also due to fact that I didn’t want to be carrying around a handheld item for nap time.  I knew that for this particular use it would only be myself or sam using it (I mean if I pay a sitter – they can be on the same floor as the kids haha), and we are typically cleaning and working and such so I didnt want to be fussing over a hand held device.

Screen shot of Arlo App


Be sure to grab your own Arlo Ultra at Best Buy – online or in store, or on Amazon!  You will be in company with Arlo being America’s number 1 internet connected brand, and will totally know why we all love it once you try it out yourself!

Arlo Ultra Monitor for Kids


Family

Toddler Sleep Schedule

I was recently asked when posting about Walker transitioning so easily to a twin bed, what schedule we have him on.  I have always run a tight ship when it comes to my kids and their sleep and keep a pretty rigid toddler sleep schedule.  For us that does sometime mean more babysitters, or missing out on fun, and I will admit that I think there are benefits to a less rigid schedule as well, but for us this is what works.  I will talk to you about our toddler sleep schedule, but always feel free to message me via Instagram/ comment, or email if you have questions. *and as a disclaimer – I’m not a professional, just a mom of 3 (and a half) who has kept her kids on a strict sleep schedule ha. 

this post may contain affiliate links

photo of toddler standing in bed

Toddler Sleep Schedule

Okay first off, because I assume I will get this question. What do I actually mean age wise when I say ‘toddler’?  This schedule is the same schedule I have followed for all of my kids once they have dropped to one nap a day ( 15 ash months) until Kindergarten.

mom holding two toddlers looking in gold round mirror

Naps

This is the big one that I get asked about on Instagram – because lets face it.  Nap time is the most sacred time of the day.  Once my kids drop to one nap a day nap time starts right after lunch.  Typically I try to make that around 12:30 because that works with us and our school pick up schedule for the older kids.  Something important to remember – Nap time needs to be consistent (starting within around 45 min most days) but pick a time that best works with your schedule.  When my oldest, Jack, was in his first mothers day out program it didn’t get out until 12:30 – they ate lunch and then we did pickup.  So when he was Walker’s age (22 months) his nap time started at roughly 1pm daily.  Now my older kids get out at 11:30 so nap time is between 12-12:30 normally.  I find that the consistency of feeding the then straight down to sleep sets a good schedule, so that even if time is slightly off they aren’t phased.

Something else about naps – unless my kiddo is crying, if they don’t take a long nap I have them rest in their beds.  If you get them up right away you will reinforce the shorter nap habit.  Leave a little book, and some stuffed animals and all of my kids have been able to entertain themselves for quite some time.  I find that they are less likely to let those little bouts of fighting naps turn long term if they don’t learn they will get to get up and play.

Bedtime/Night Sleep

Alright so as all moms know – naps don’t happen if kids don’t sleep well at night, and vice versa.  Good sleep promotes good sleep.  (i.e. – never tell a mom who says “my kid was up all night” – “oh well I bet they will nap great today!”  BECAUSE NO THEY WILL NOT.)   Bed time is important – you can have a long routine, or a short routine, but whatever it is, do it consistently and at the same time.  Kids typically are ready for bed much earlier than you would expect,  but I know all families need slightly different schedules.  So remember – this schedule is based on our families needs, and works well for us, but that doesn’t make it the only right way to do things!

All of my kids go to bed at 7pm sharp from the age the are fully sleeping through the night (roughly 3/4 months) and 6 years old.  We do a:  Dinner, bath/shower, quiet play upstairs/watch shows, then brush teeth and in bed routine.  For us this works great.  My kids have been early wakers by nature, and we like to get up and going in the morning (plus Jack and Avé now have to get to school, so early to rise is not an option).   They all sleep from roughly 7 – 6 am, sometimes closer to 7 am.  I know thats painful on the weekends, but for us it’s worth the time in the evenings on our own, and works best for us during the week.

Toddler boy standing in his crib


Sample Daily Schedule of my Toddler Sleep Schedule

I know that this question will be asked a lot, so instead of going into that heavily here I will do another blog post on that tomorrow.  But for the sake of sleep I will share that here, then share a bit more of a day in the life schedule with you in the next post!!

6/7 am – WAKE UP

12/12:30 – NAP

7 pm – BEDTIME

Bedtime is the one that I find you want to keep the most strict.  And just know that likely staying up later won’t mean sleeping in, so when you can you may as well put them down on time!

I hope thats helpful for those of you with toddlers.  My kids have all been really great sleepers, and I truly attribute it to following a structured schedule so they know what to expect, and what is expected of them daily!

Pin Image Below

toddler sleep schedule by arinsolangeathome.com


Home

Inexpensive Spring Home Updates

Can I get an amen for spring every year? If you live in the midwest..or well basically most places at least in the states you are probably like me, and breathing a sigh of relief every year as life comes back to the trees and grass, and we can leave the house in less than 7 layers.  I have been working on filming a home tour with some amazing other ladies on Instagram showing our homes for spring, and I thought it would be a good time to share some inexpensive spring home updates you can do each year to liven up the inside of your home while you’re seeing the outside come to life.

photo of living room with large white brick fireplace

Get links for all items seen here on this page

This Post contains affiliate Links 

Inexpensive Spring Home Updates

So this blog post is going to be a simple tour of pictures, but I want to talk about the SMALL things you can do that will make your house feel more ready for spring.  I don’t personally change up decor a lot because A – I like what I like, and B – I am a busy mama who doesn’t have time for that haha.  But there are little things that I just put out in the spring and summer months, and then change up for the cooler months.

a view of a living room with midcentury modern grey couches

Change up your fillers

 Whether you’re filling vases, glass jars, or bowls, spring is a great time to do a fresh green or faux fruit.  I love using lemons and limes in my decor in the warmer months for a pop of color that’s still somewhat natural.

lemons in wicker bowl

builtin shelving with gold J and wooden and greenery accents

lemons and greenery in white metal vase

Keep your Pillows light and bright

 Throw pillows are such an easy way to keep a space a bit brighter and change things up for the season.  I personally changed things earlier this year, but will likely lighten them up even more as summer goes on.

boho chic living room pillows

Fresh or Faux Flowers

Nothing to me says spring quite like bringing those spring florals inside.  I normally always have fresh flowers on my table, and will place some faux flowers throughout the house too sometimes.  (with little ones I can’t do too many fresh – they love to destroy them!).

picture of a dark brown kitchen

kitchen table with green vase on it and barn door

view of kitchen with table and pretty picture on wall

Make Small Decor Changes to be Light and Airy

Light and airy is the name of the game for spring.  One easy way to do this is with things like baskets.  Keep wicker light, and stick with things like light woven baskets.  One way I do that is changing out the coloring basket on the kids table to a wicker one in the warmer months.  During cool months its a black metal Hearth and Hand basket.  The white baskets from my living room stay year round and are a reader and personal favorite! ( Large //  Small )

View of living room with grey Jonathan Louis Couches


Really its all easy fixes.  My decor is bright, and I tend to decorate in a way that lends well to spring and summer, but there is no need to change out all the decor in the house.  One last tip is to make things feel bright and airy via scent.  Mrs. Meyers cleaners by my sink on a cake stand are one of my favorite things to changeout seasonally (the mint SMELLS SO GOOD). I also defuse oils that are more citrusy in the warmer months.  Over all the sun coming through your windows will probably add a pep in your step and the added freshness you need to your decor on its own.

View of living room with back of couch and wood beams

modern home office with wall of built ins and pink couch

See full home office tour here and how we did the DIY built in’s here!

Hallway bar area in home

Be sure to be following me on Instagram for the full home tour next week with some other amazing ladies, and leave any questions in the comments.  And remember all my home decor is linked on this page for sources, but leave me a comment if you don’t see something!


PIN FOR LATER

Spring Home tour full of inexpensive Spring Home updates from Arin Solange at Home