I am SUPER excited to finally share this post with you all. I have been talking this IKEA Billy Bookcase built-in hack using the IKEA Billy Bookcases on my Instagram stories for the past few weeks, and from the response on there, you guys are excited too!
Sam and I are in the middle of converting his old office to be my home office which will hopefully be revealed in the next couple of weeks, but until then I wanted to share hands down my favorite DIY to date for this IKEA built-in hack.
I will break down the steps and price in this post, but be sure to leave me any questions in the comments or send me an email! Once you’re done with this be sure to check out the rest of my IKEA hacks in one post here!
These were done in my home office – see that here!
This post contains affiliate links
IKEA Billy Bookcase Built-in Hack
Before you get started I want to be very clear to state that this will likely not look the exact same for any two houses. You want to measure your space first to see how many IKEA Billy Bookcase units will fit with some wiggle room and then start your math. My exact breakdown is for my space.
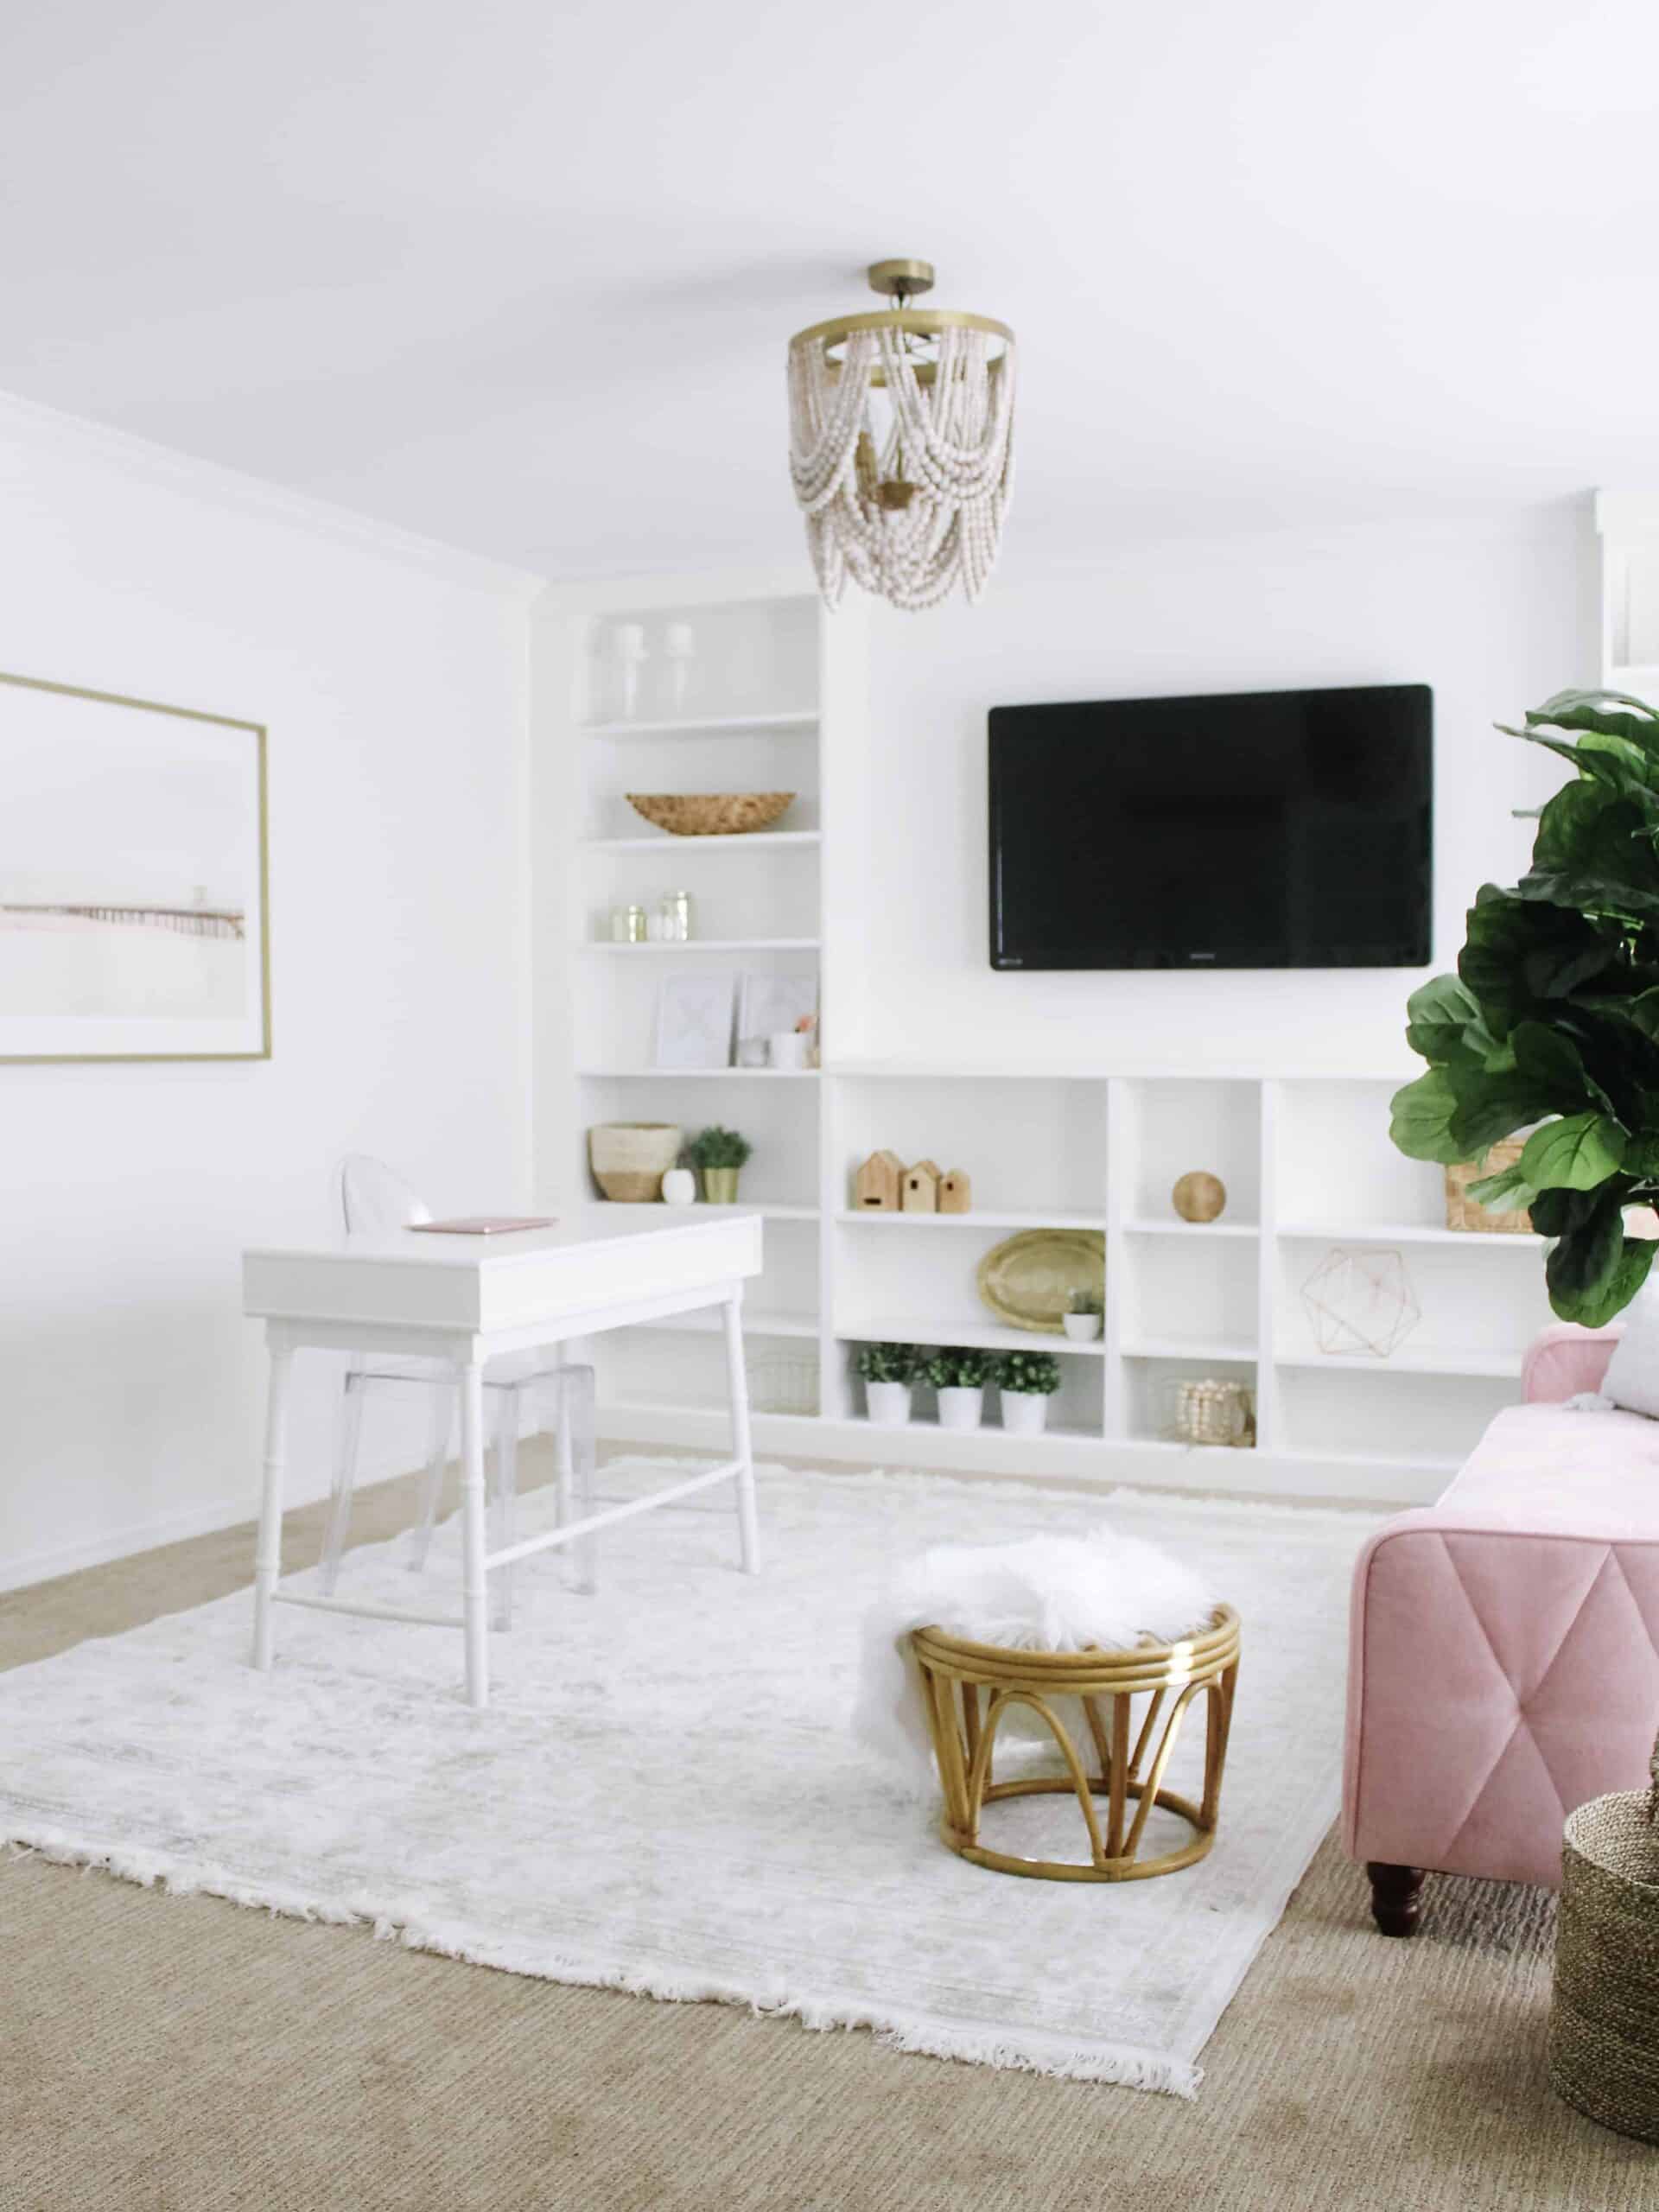
We knew based on where my office is (right off the front door) that we wanted it to really mesh with the rest of our house, and for us that means bright and clean. I had a vision for the office, but contracting out built ins is crazy expensive.
(incase any of you have similar 1980’s/90’s homes, our home office was once the formal living room. When we moved in we had French doors added to make it more of an official office, and it has gone on from there.)
I knew there had to be a way to do built-ins ourselves with our limited knowledge on DIY if we took our time. The end outcome was more than we could have asked for, and is something we will probably recreate slightly differently in another area of the house down the road.
Ikea Billy Bookcase Built-in Hack Materials
Again I will do my disclaimer here. Do your math on your wall. For us the best fit with some extra room was to do 4 full width billy bookcases and 1 skinny billy bookcase. That may not be the case for your space.
You also could definitely do this floor to ceiling all the wall through, but we chose to hang a tv!
(2) IKEA Billy Bookcase 31.5 x 79.5
(1) IKEA Billy Bookcase 15.75 x 41.75
(2) IKEA Bookcase 31.5 x 41.75
(2) IKEA Billy Height extension kit
1 board – 11.5 in x 78.5 in x 1 inch tall
1 inch trim – 78.5 in long
1 board – 9×2 (90 inches long)
Molding for the length of your wall and to wrap the top of your bookcases
Paint Sprayer ( i post about this so much because it is probably my favorite Amazon purchase yet!)
Paint
Spackel/Nails/Caulk
IKEA Billy Bookcase Built-in Hack
Bookcase Assembly
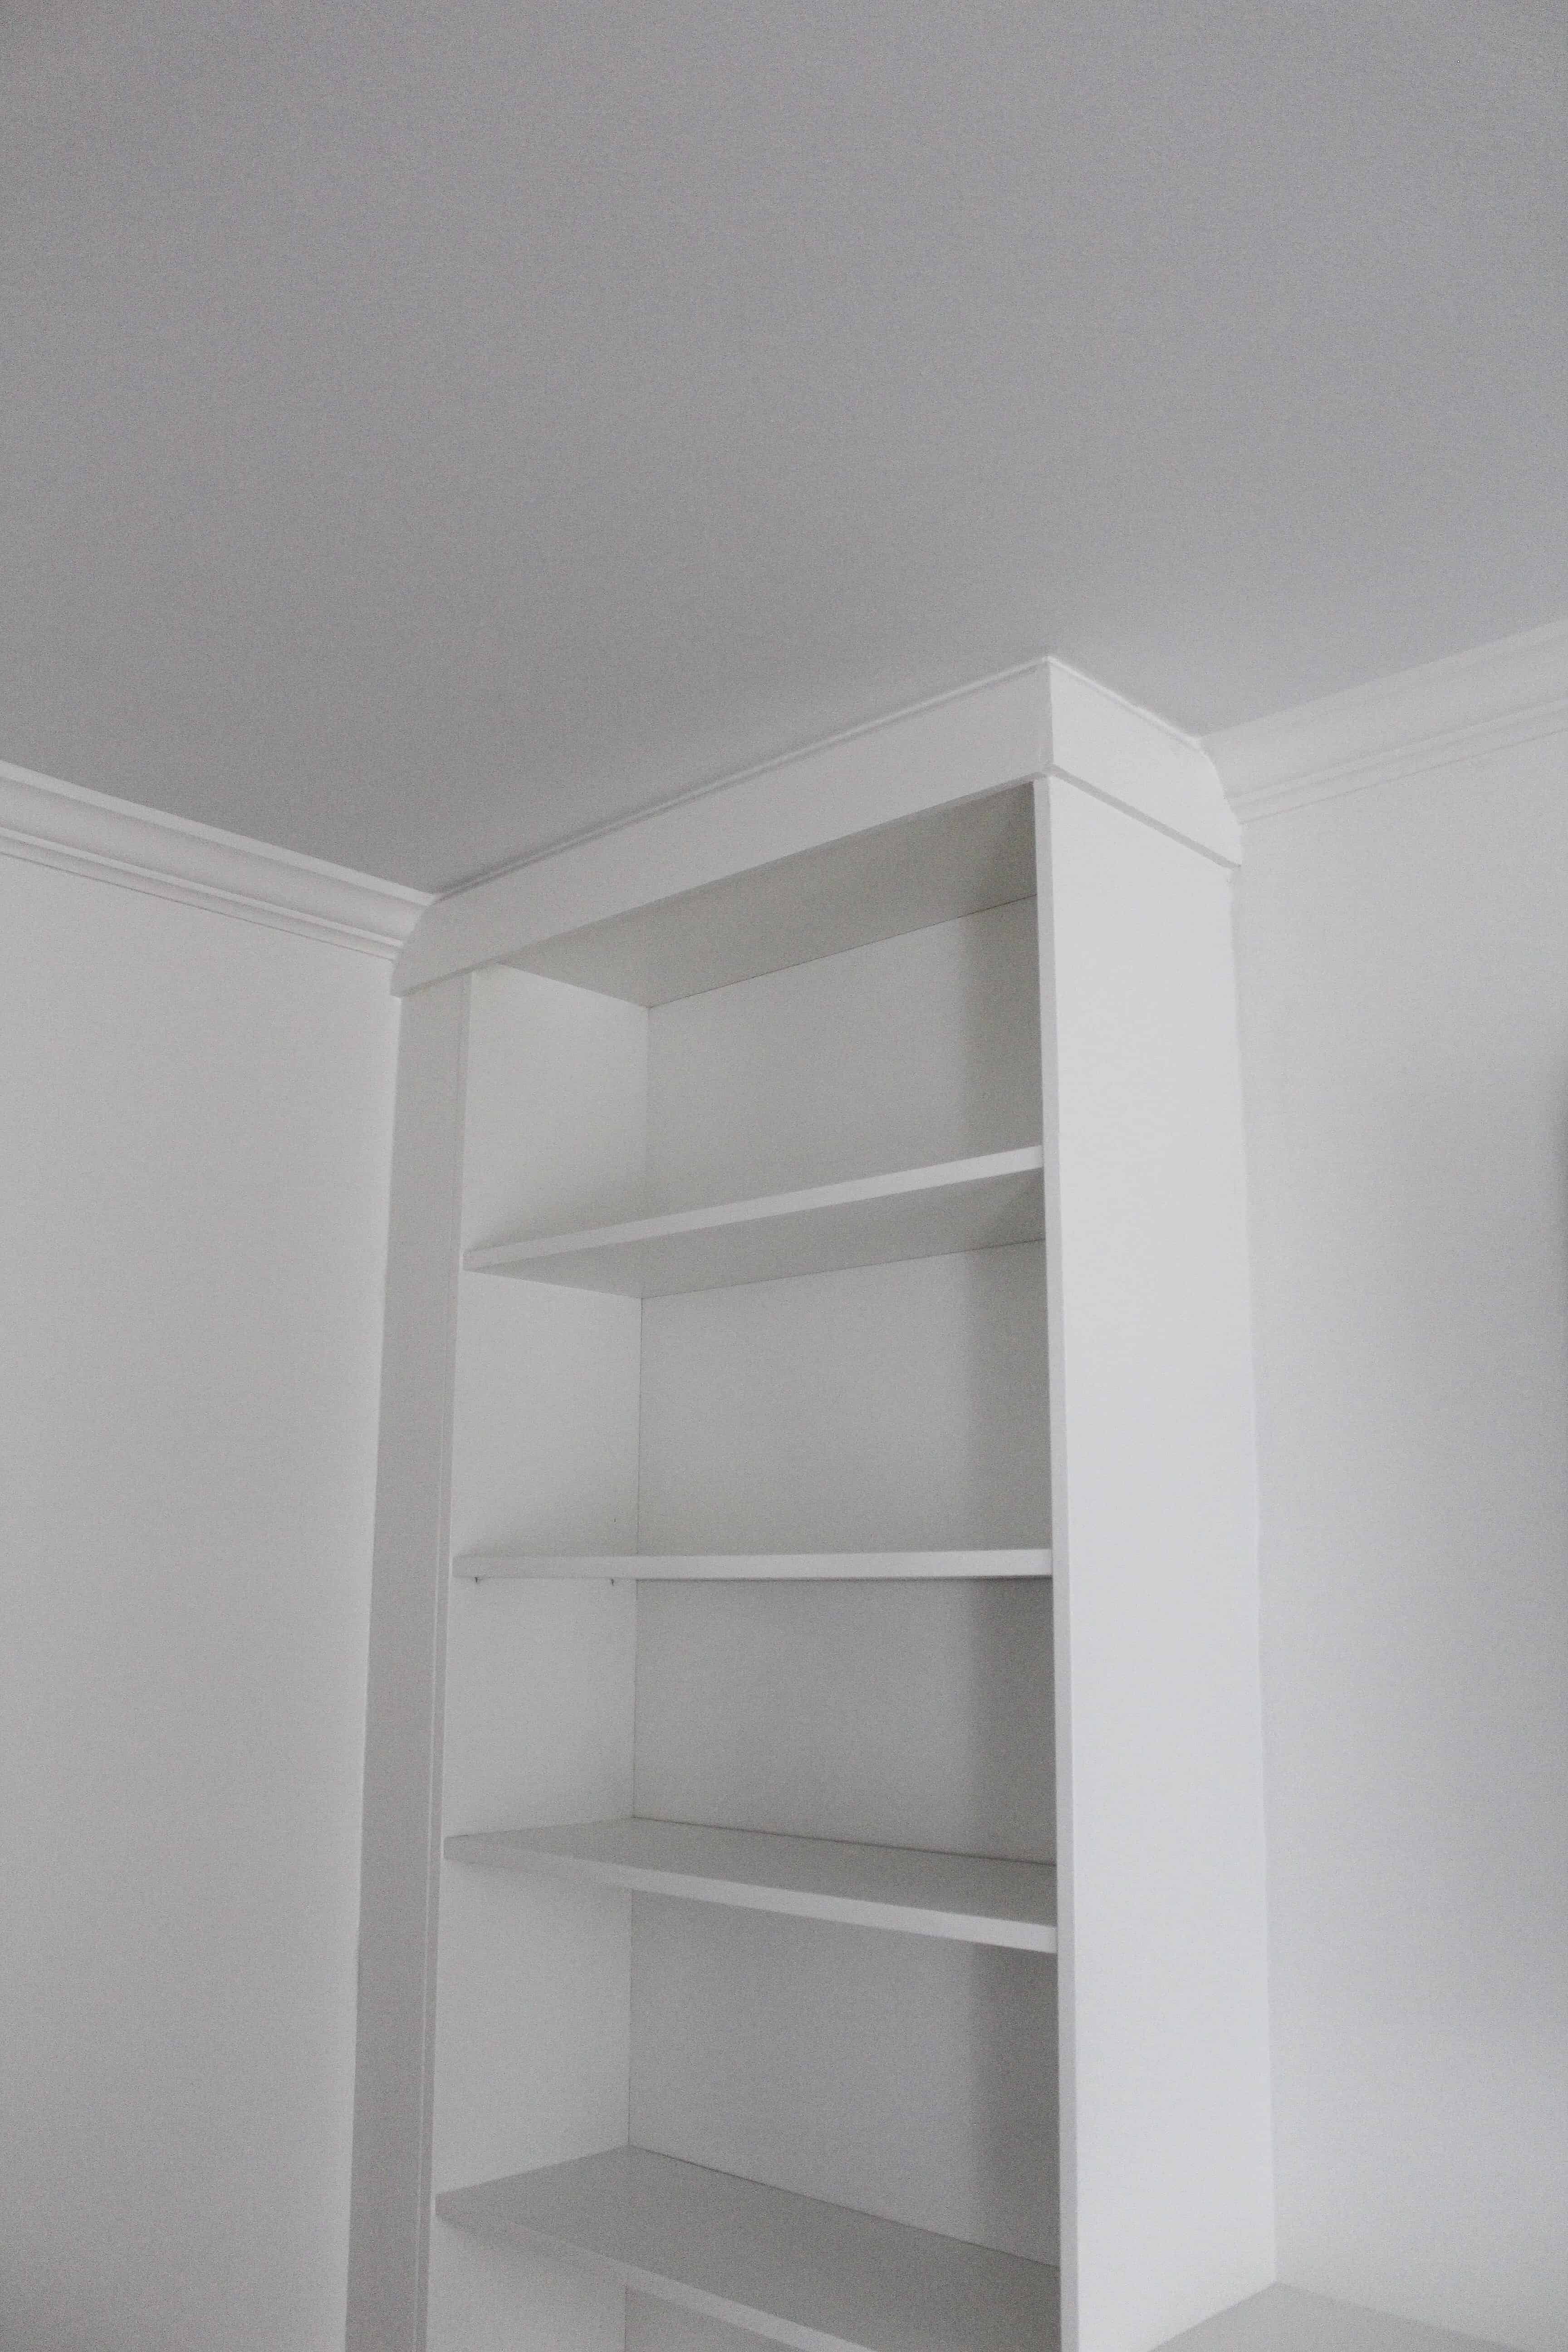
First things first – you need to assemble each of your Billy bookcase’s and add any height extenders. As you can see we purchased height extenders for both the taller ones to get them closer to the ceiling. (essentially, these are additional height you can order for the Billy Bookcase that adds 1 shelf).
Leave the backs off during assembly until the next step!
I would guess that for most homes if you are doing the taller sides or tall Billys through the full thing you will need the height extenders!
In the image below – the original billy goes to the top shelf. The Extender makes the original top a shelf and adds that top area!
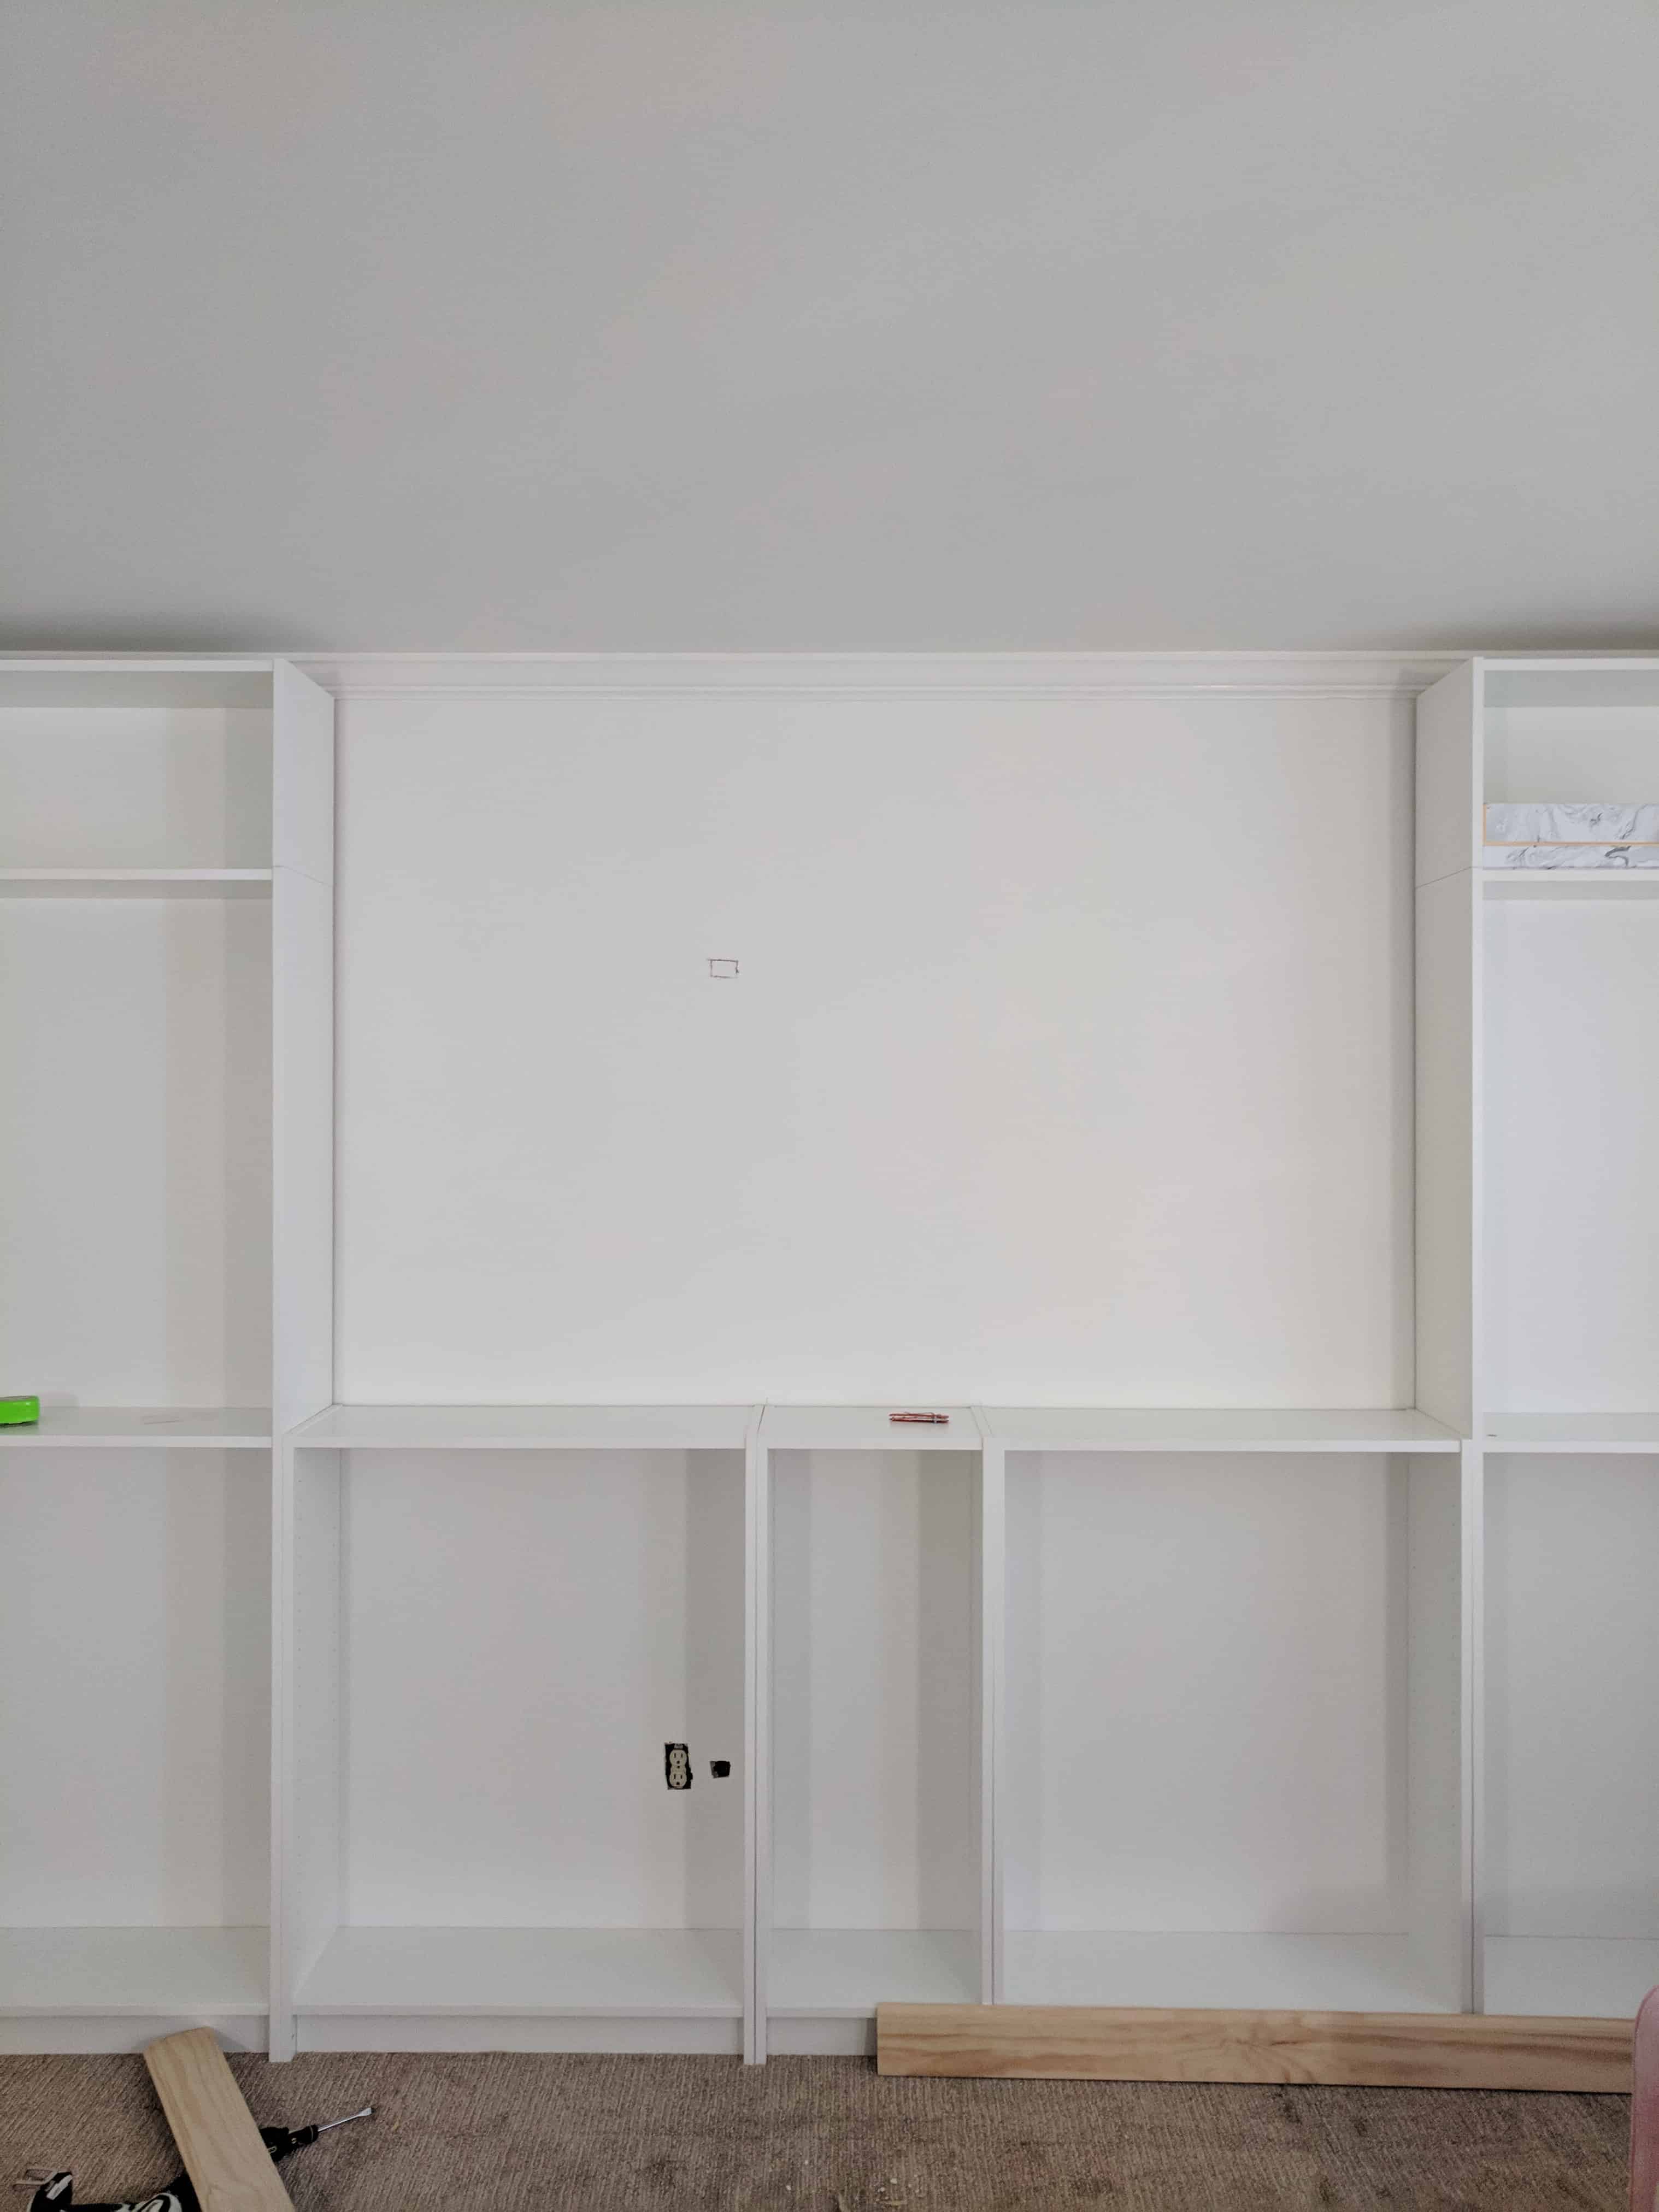
Next – Before you slide on your back pieces you need to measure where your outlets are going to be so you can cut holes for those. We had one outlet against that wall and knew it would be needed, so it could not be hidden!
THIS IS YOUR ONLY CHANCE TO DO THIS.
We didn’t have proper tools, so our final look was not perfect on these holes, but we we able to sort of fix the issue with a piece when the built ins were done.
The reason for the 2 holes was that we knew we were mounting a TV over our middle section, so we put an access hole to be able to cut a hole for the TV plug in to go through the wall, then pop out by the outlet. We actually do this when we mount any of our TV’s over a dresser, but again – if that is your plan, plan ahead so you can have your hole in the wall and the back of the built in before it is secured in place!
Securing The Bookcases
Now starts the assembly. Measure the center of your wall, and place your center built in against the wall exactly centered. You will then start adding built ins to the sides of that one.
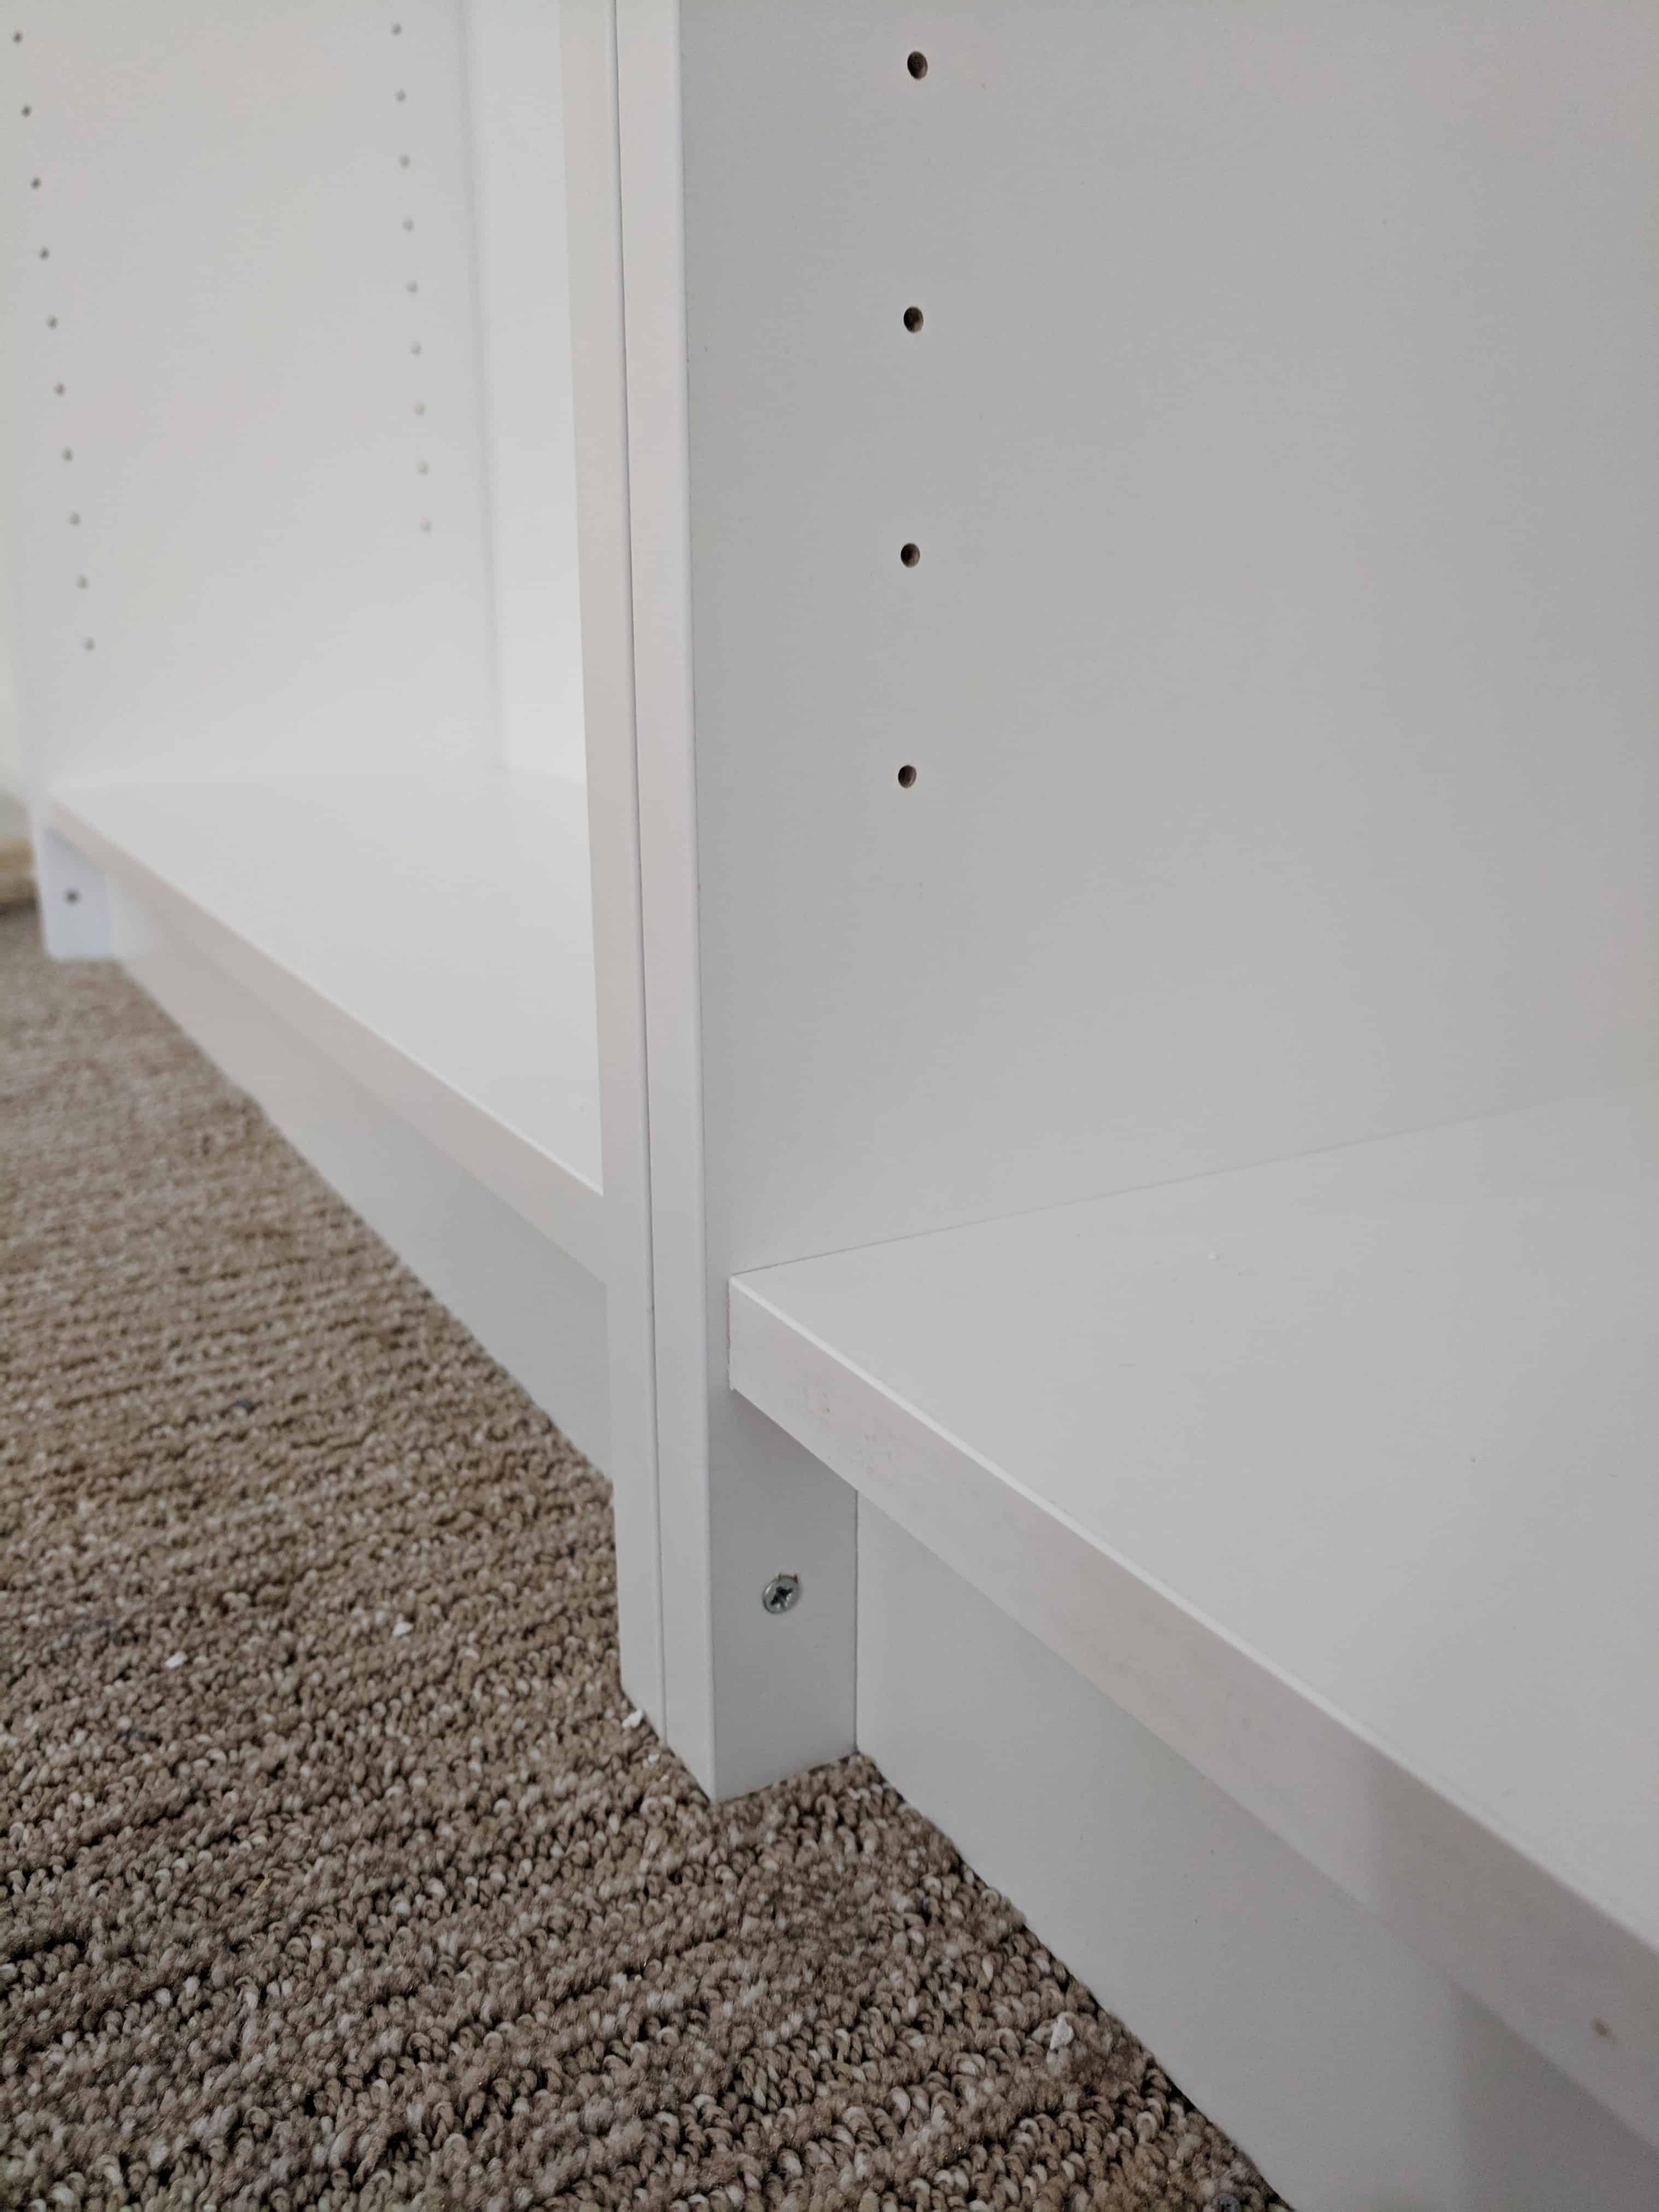
Once they are all slid into place and butted up against one another its time to attach them to each other.
You can see in the photo below – if you screw the built ins together via the bottom portion of the bookcases that will end up being hidden! Use substantial screws here, because as they will be hidden you want them well connected!
At the end of that step all of your built ins should be connected in one big long piece. They are at this point all connected length wise, but in no way connected to the wall, so we need to now make the happen.
Next it is time to attach them to the walls! You are going to use L brackets (like these) and attach your built ins to back walls. If you have a gap on each side of the built ins thats a perfect place to attach these L brackets, because again they will be covered when finishings start being added!
We added a total of 6 L brackets between the walls and the built ins to fully secure them to the back wall. One on top, one in the middle, and one at the bottom.
You bracket will get screwed into the side of the built in and the back wall.
We also added L brackets on the top of the built-ins going into the back wall. This was trickier for us due to the crown moulding, but if you don’t have that it will be just as easy as the sides, and again those brackets will be hidden with finish work.
So now your built ins are one long piece and bracketed to the wall. It’s time to start finishing them out to make them look built in. 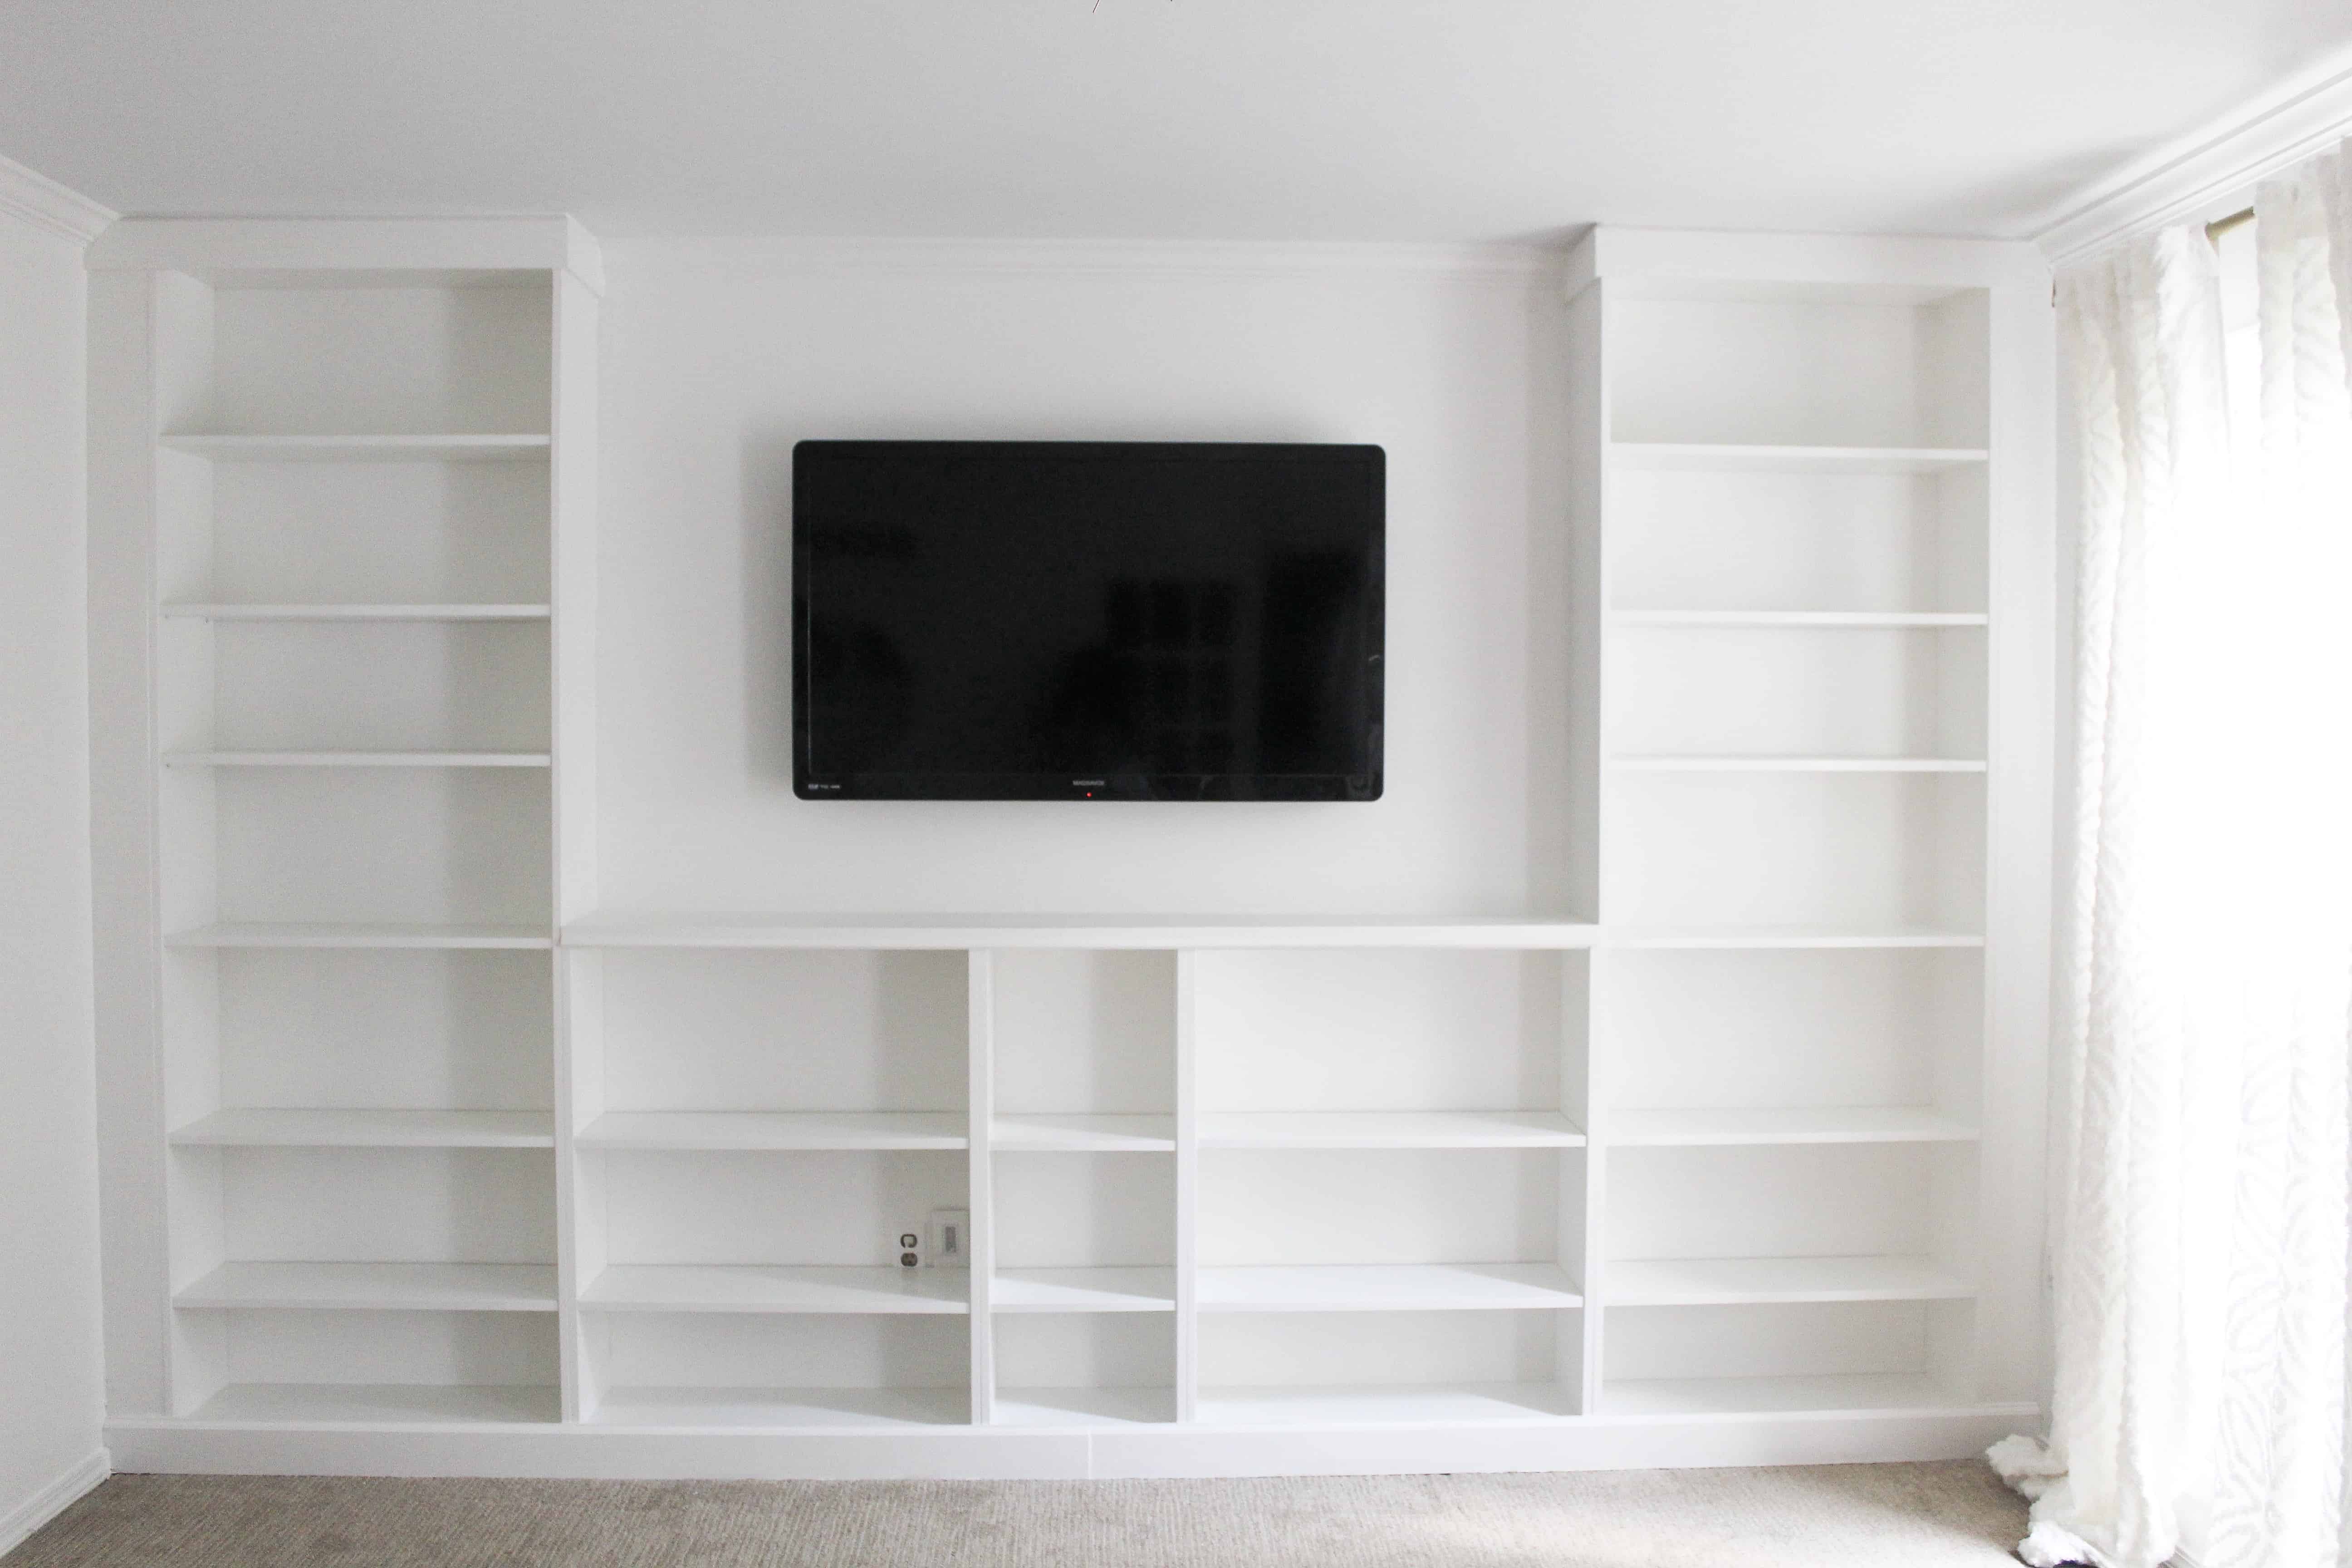
The finishings – making them look built in
So now that you need to start making these Billy Bookcases look built in. One thing to note is our measurements will almost certainly not be yours in this step, and that this will likely work slightly differently in each space. Be patient and flexible!!
This step is all about finding where you have gaps, and things showing that wouldn’t be on a typical built in, and hiding them with trim and lumber.
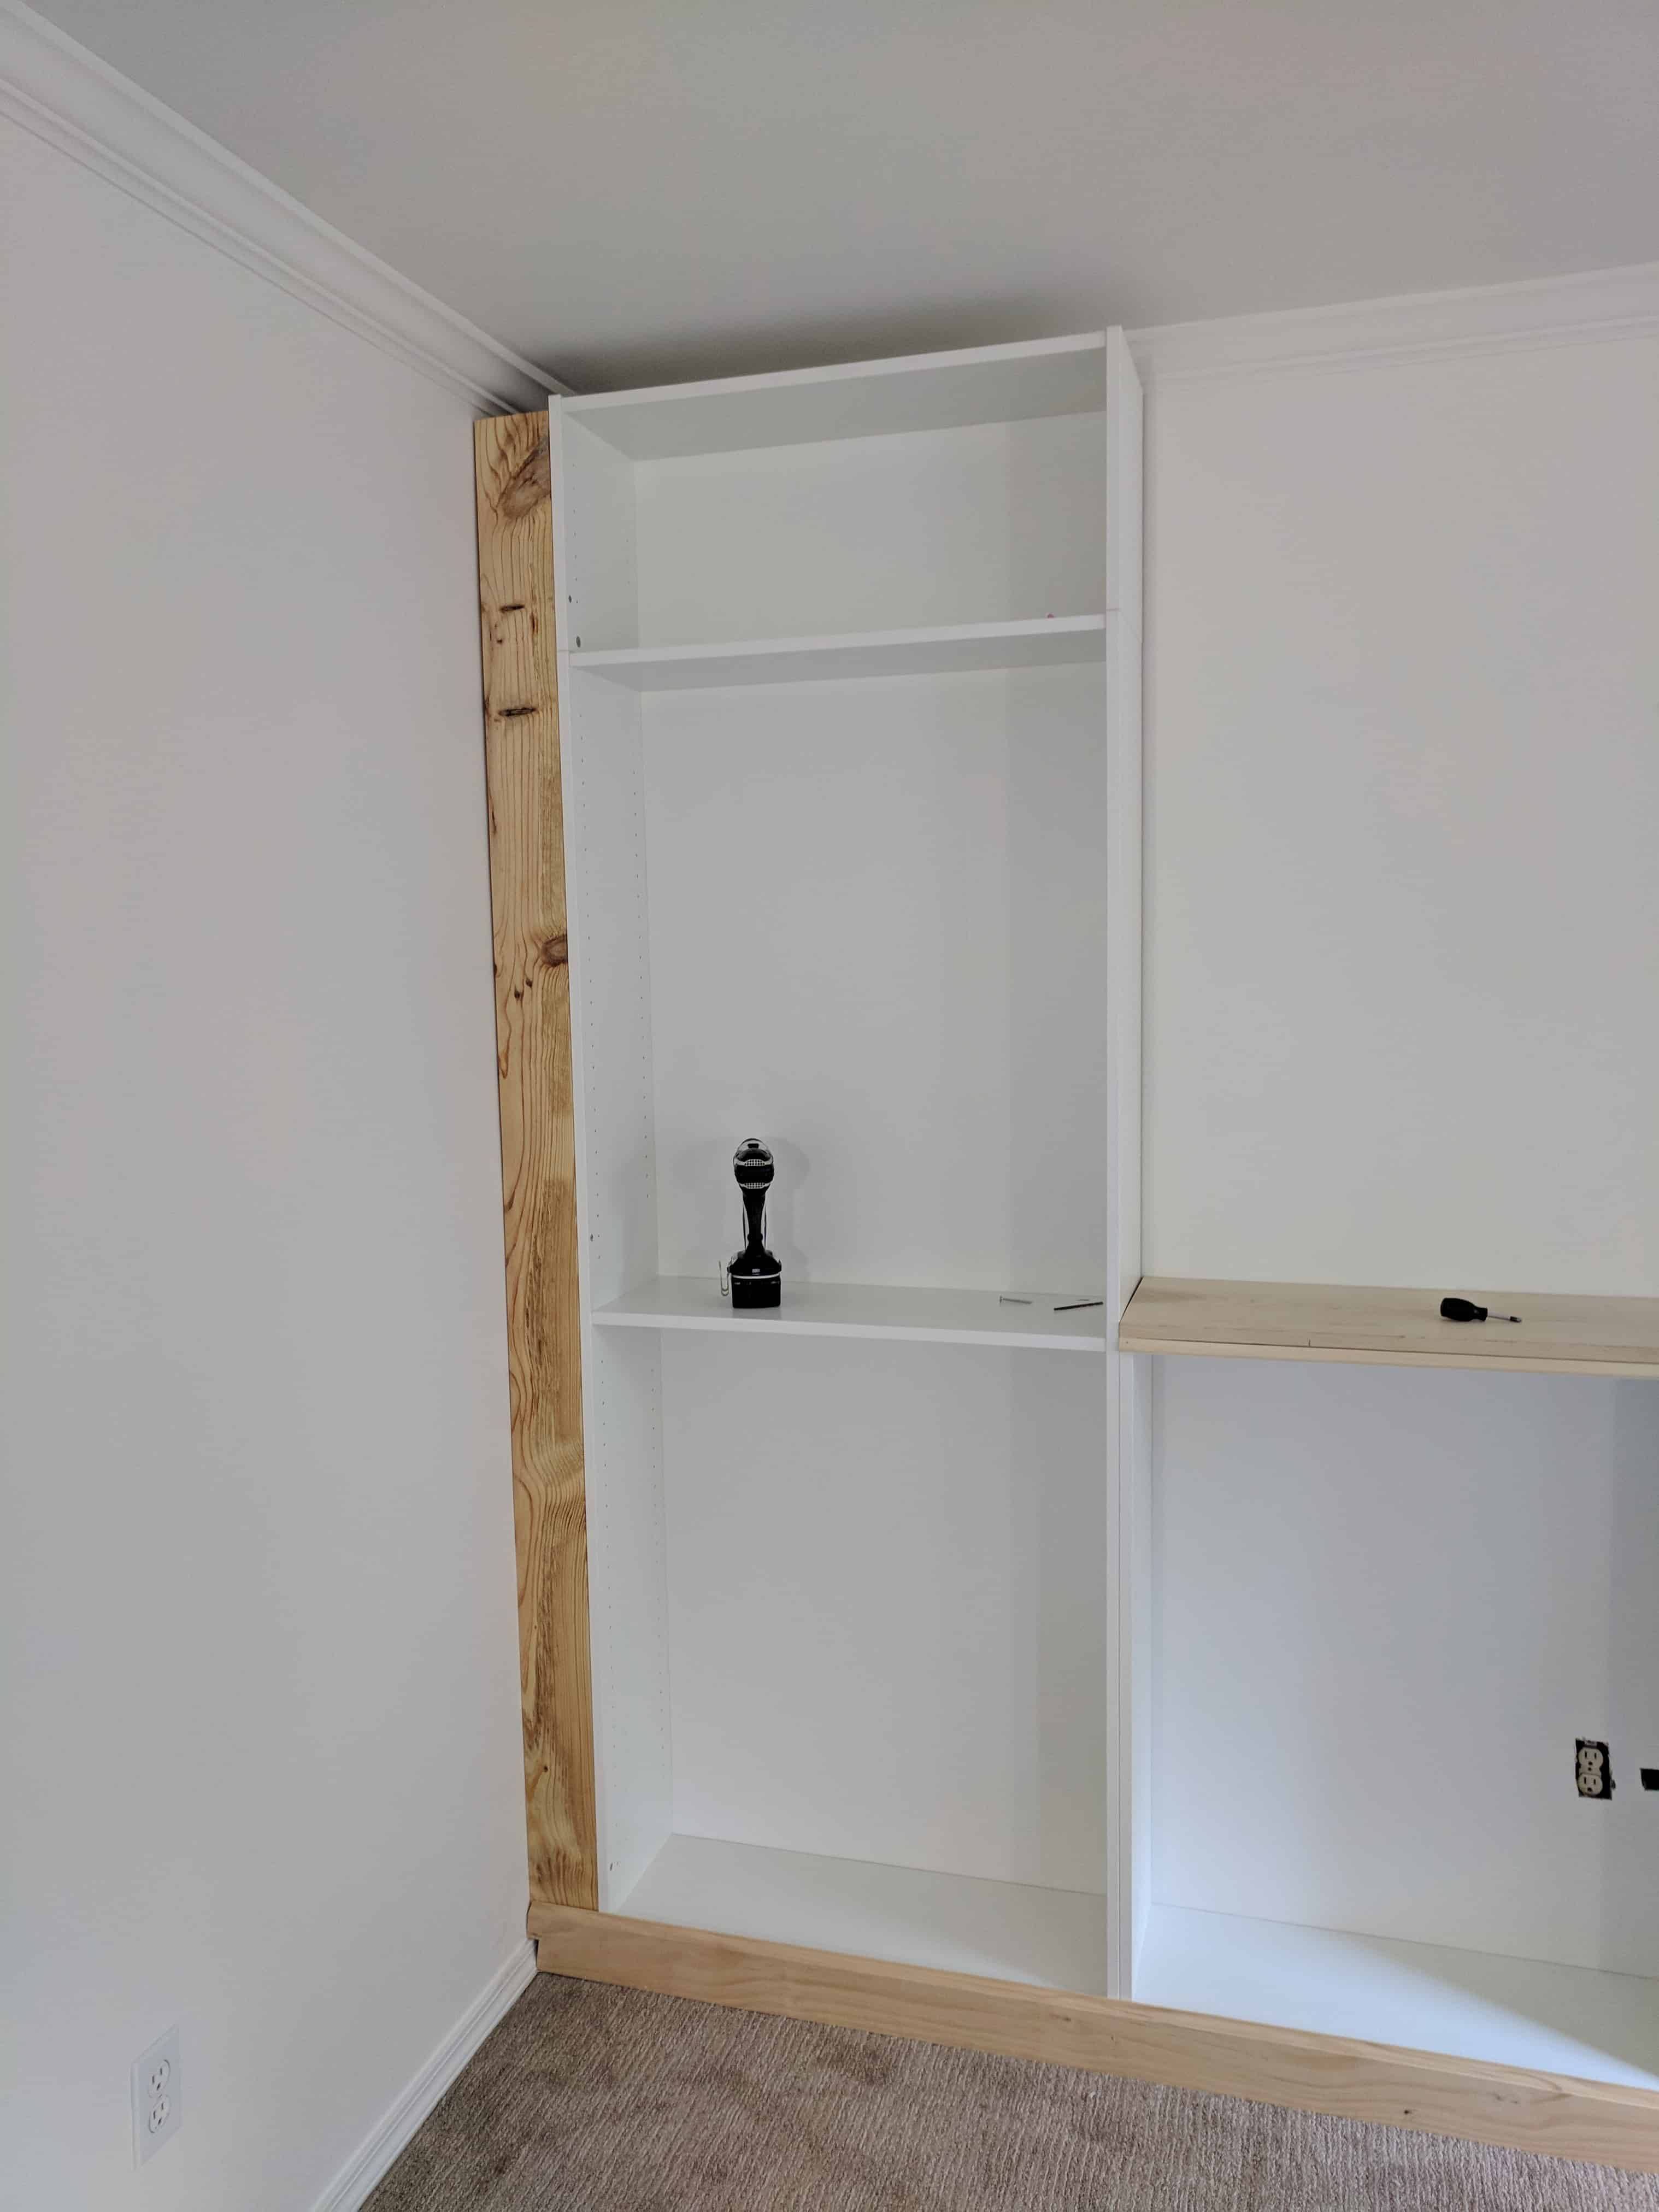
First you need to add your side boards. AKA – the boards that will go alongside your built in and fill the gap between them and the other walls. (ours were the 9×2 boards that were 90 inches long).
We had them halved at the store so each side was fit with a board that was 4.5 inches wide and 90 inches tall.
We basically wedged them in to fit along the sides of the bookcases and the wall. (notice your L brackets are now hidden!) They fit SNUG and we screwed them into the built ins (coming in from the side of the bookcase into the board)
A few extra screws wont matter due to all the filling you will do later.
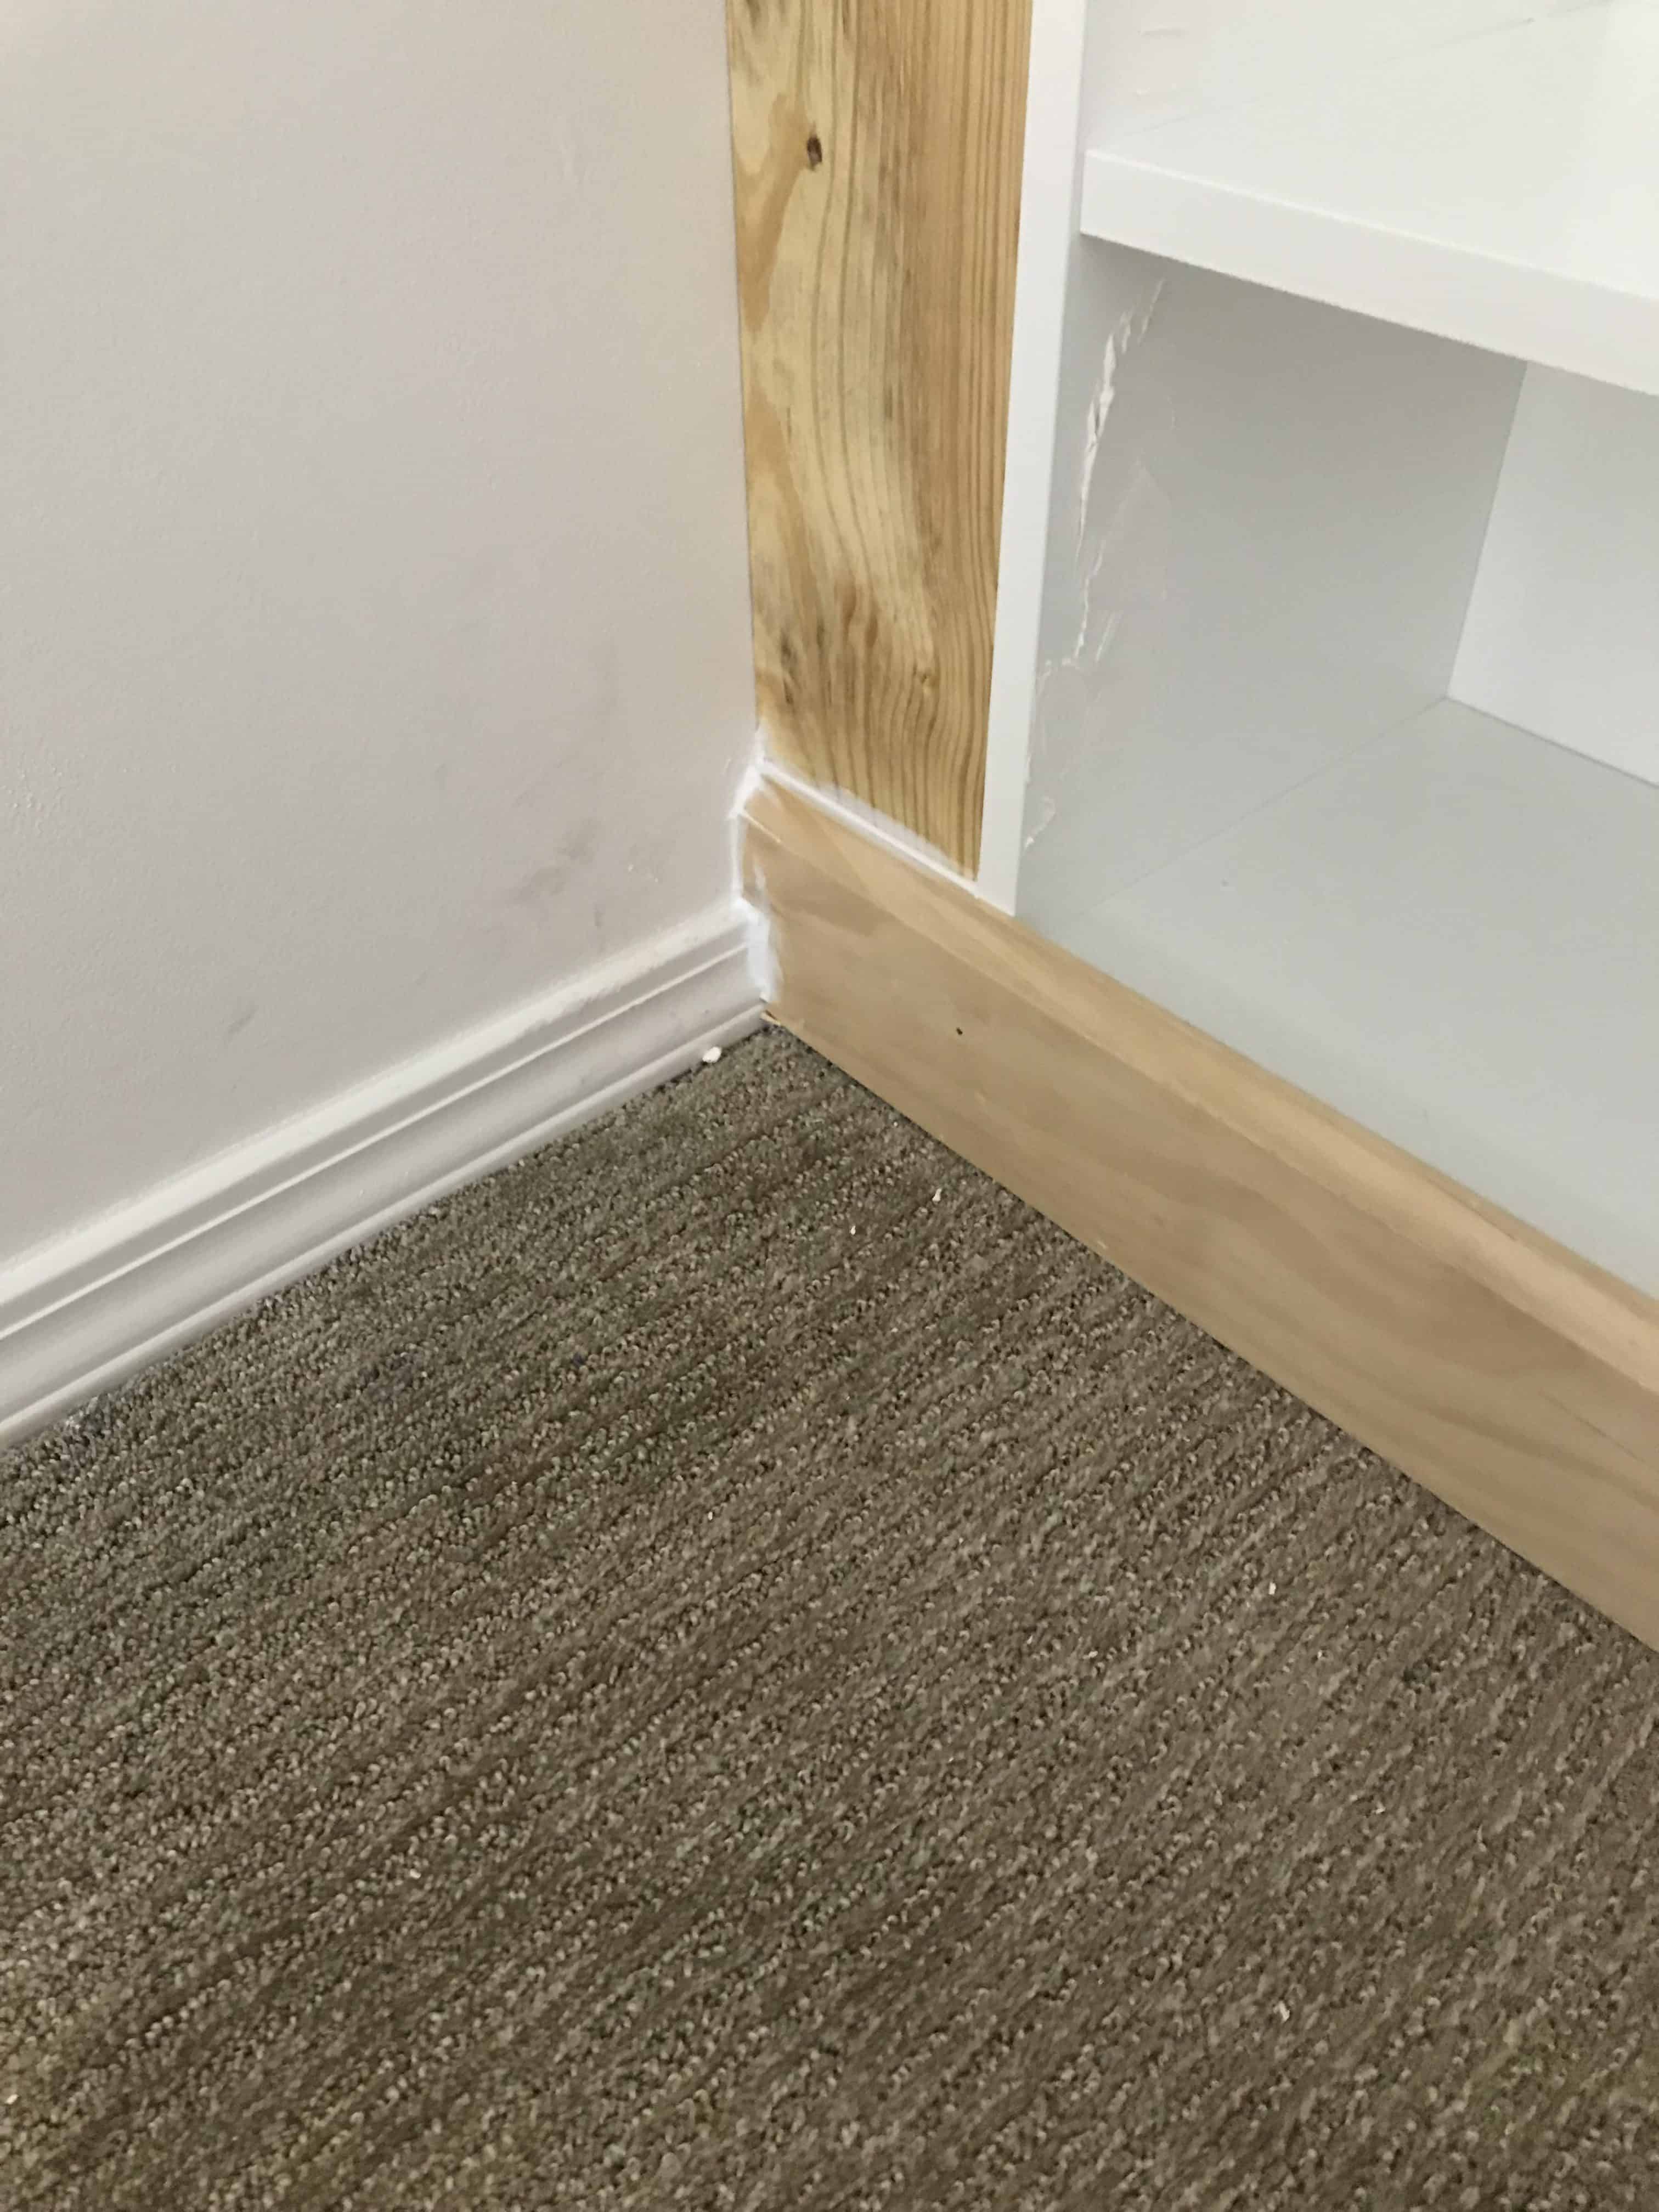
Next you will attach your bottom trim.
You need to cut it to fit around your baseboards like you see in our photo, but you will use caulk to perfect it when you’re done. Don’t worry that it isn’t a perfect fit – we are not professionals so ours was not great, but paintable caulk made it look like we have been doing this our whole lives.
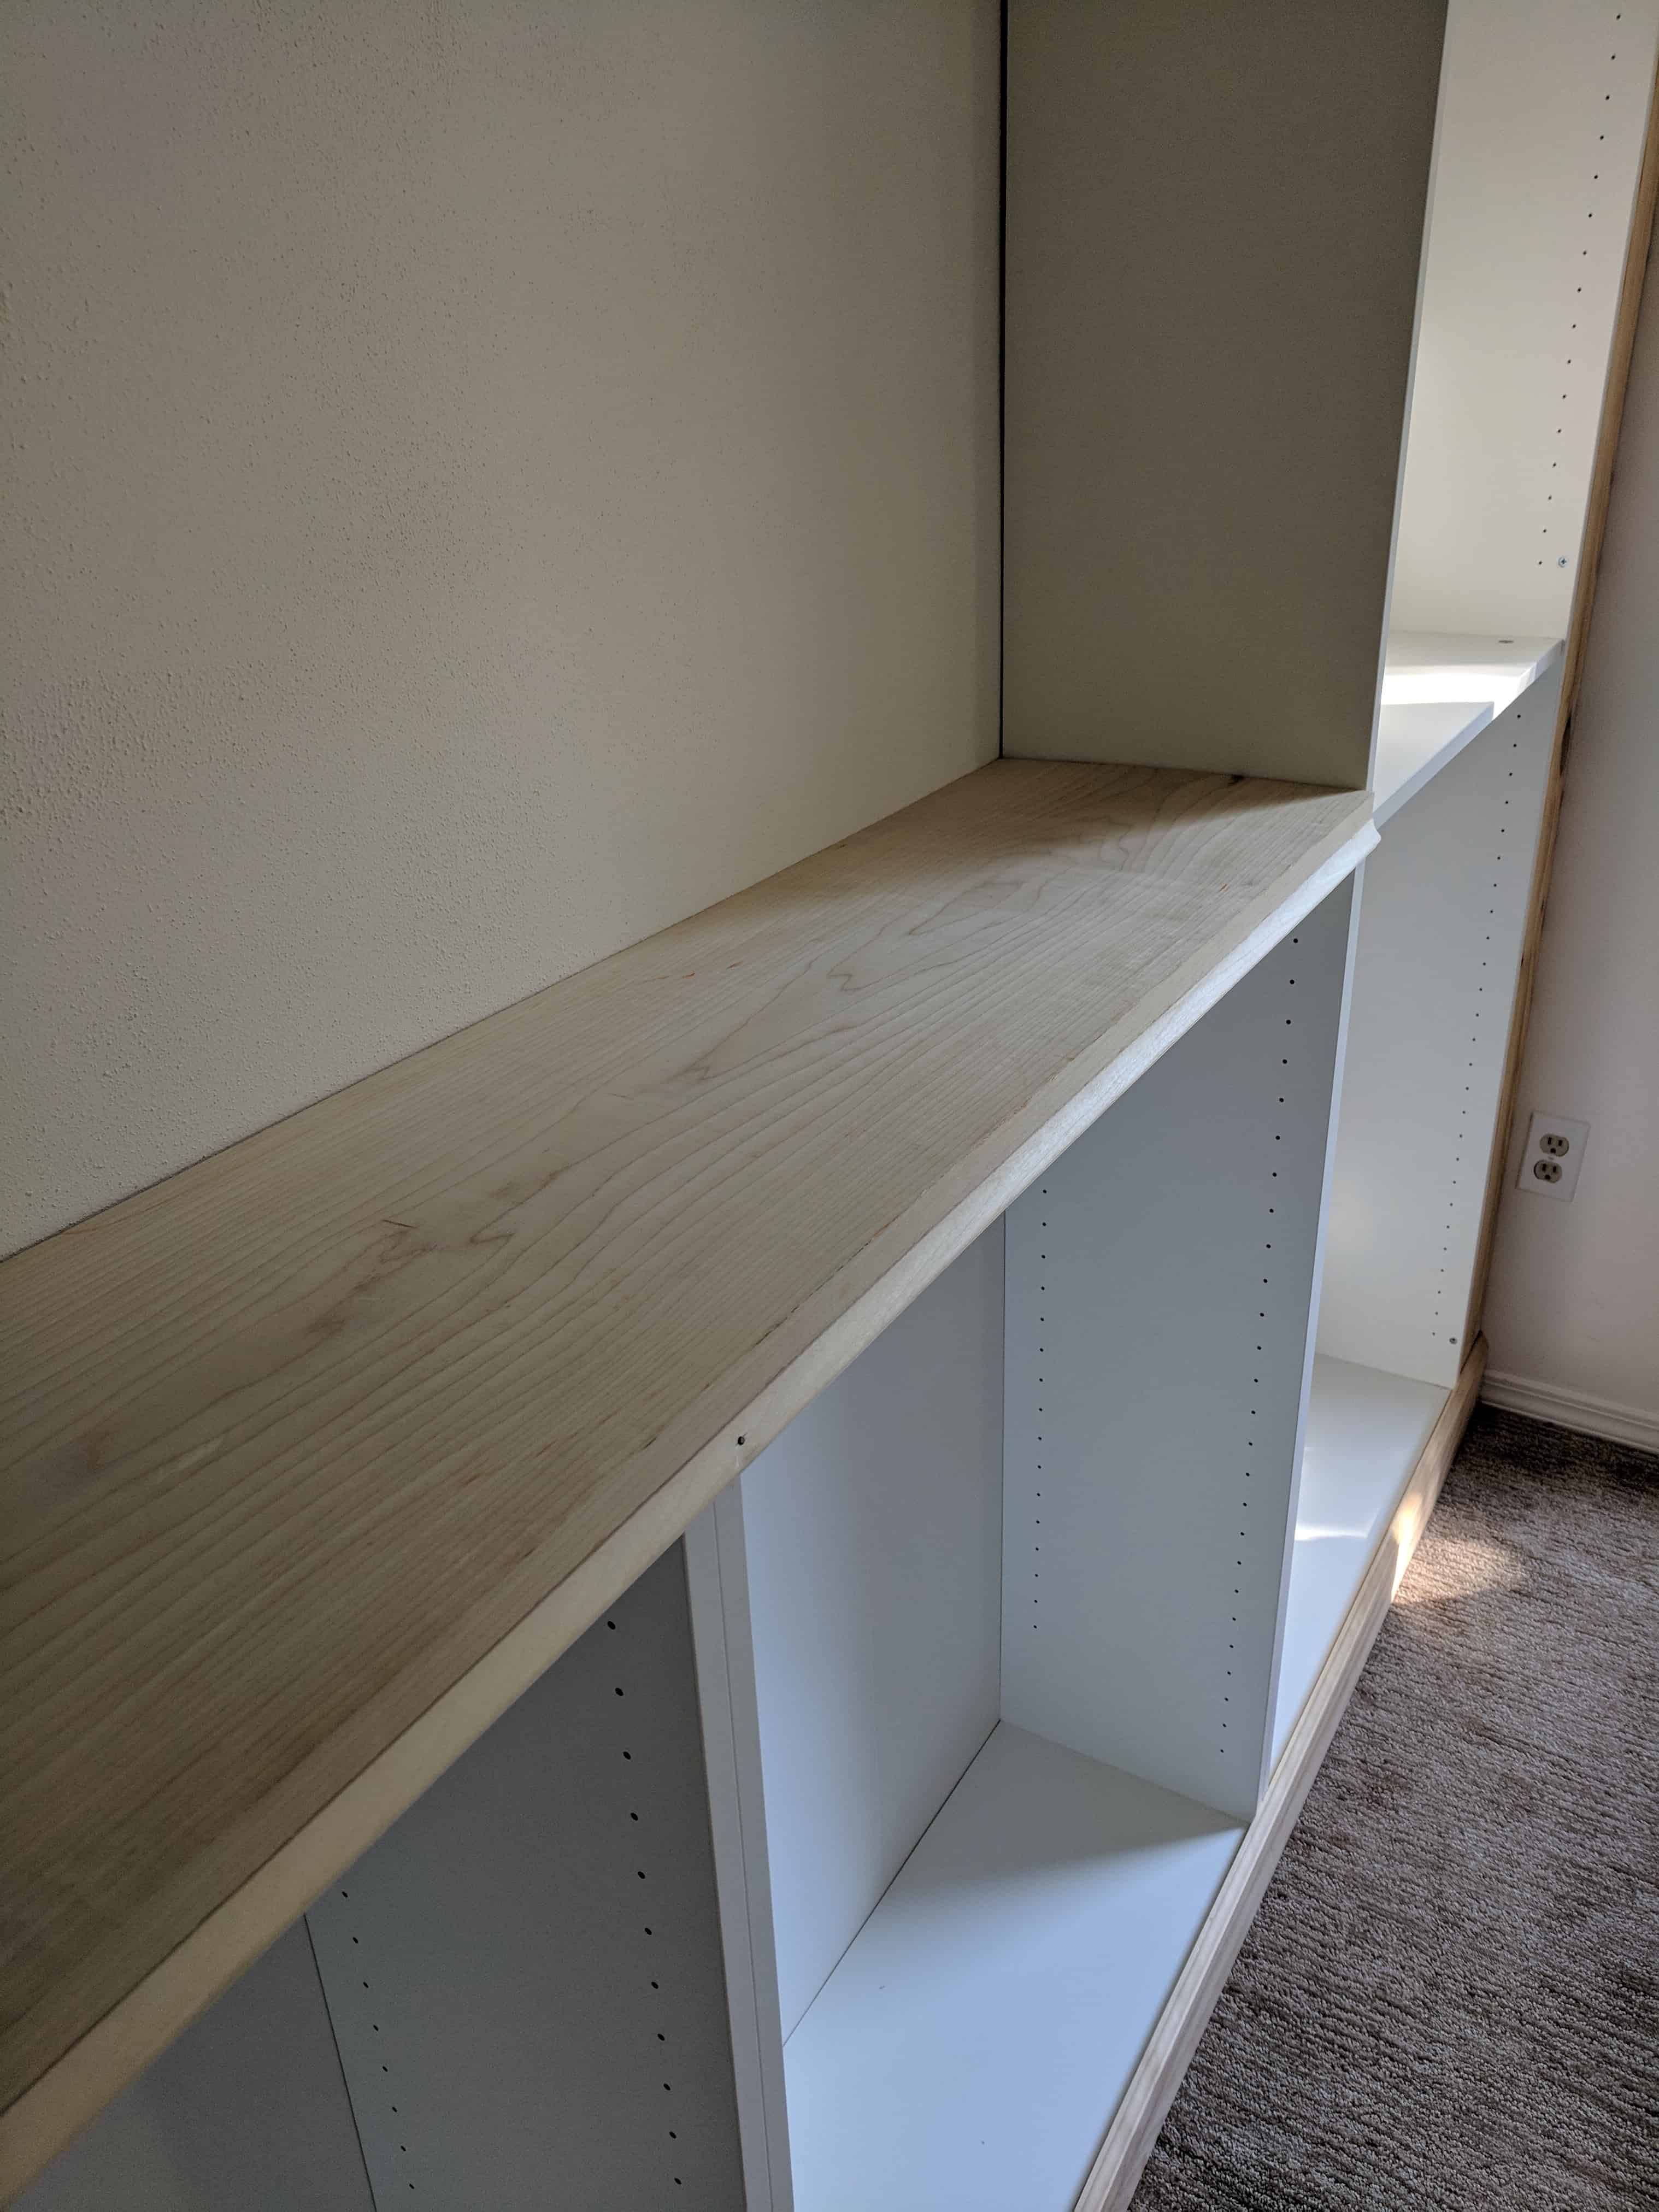
Now you can attach your table top board to the shorter, center Billy bookcases.
Simply lay your board on top (this was our 11.5 inch deep board). Screw in from the top of the Billy’s, going into the bottom of the new board. This now makes for 1 flat table top instead of the divided look with the multiple Billy Bookcases.
Attach the 1 inch trim to the front of that board, as seen in the photo using nails to hide the breaks between each bookcase. (if you have a nail gun this would be a perfect step for a nail gun to make things much more seamless.
We have since gotten THIS nailgun from Amazon and it makes things work so much smoother)
The last big piece is to attach trim to the top of the Billy in a similar fashion as you did on the bottom.
This will be more straight forward if you don’t have crown molding. We personally do in this room so we cut the edges in a similar way to how we cut the bottom trim for the baseboards.
Congratulations – the structural portion of this is done!
NOW onto the finish work
Place your shelves if you haven’t already. Due to the finish work, you need to make a placement decision and stick with it. – I say this because your built ins will look so much more finished if you don’t have small holes left to move the shelves around.
Once your shelves are in place, spackle all the other holes as well as over any nails or screws and nails you added. Take your time and get all of them so the finished product looks nice!
Caulk between wall and boards and at any seams between boards you added and billy bookcases. Use your best judgement on which spaces need to need Caulk. It is very important you are using paintable caulk for this step!
SAND all that spackle off
Clean the shelves very well
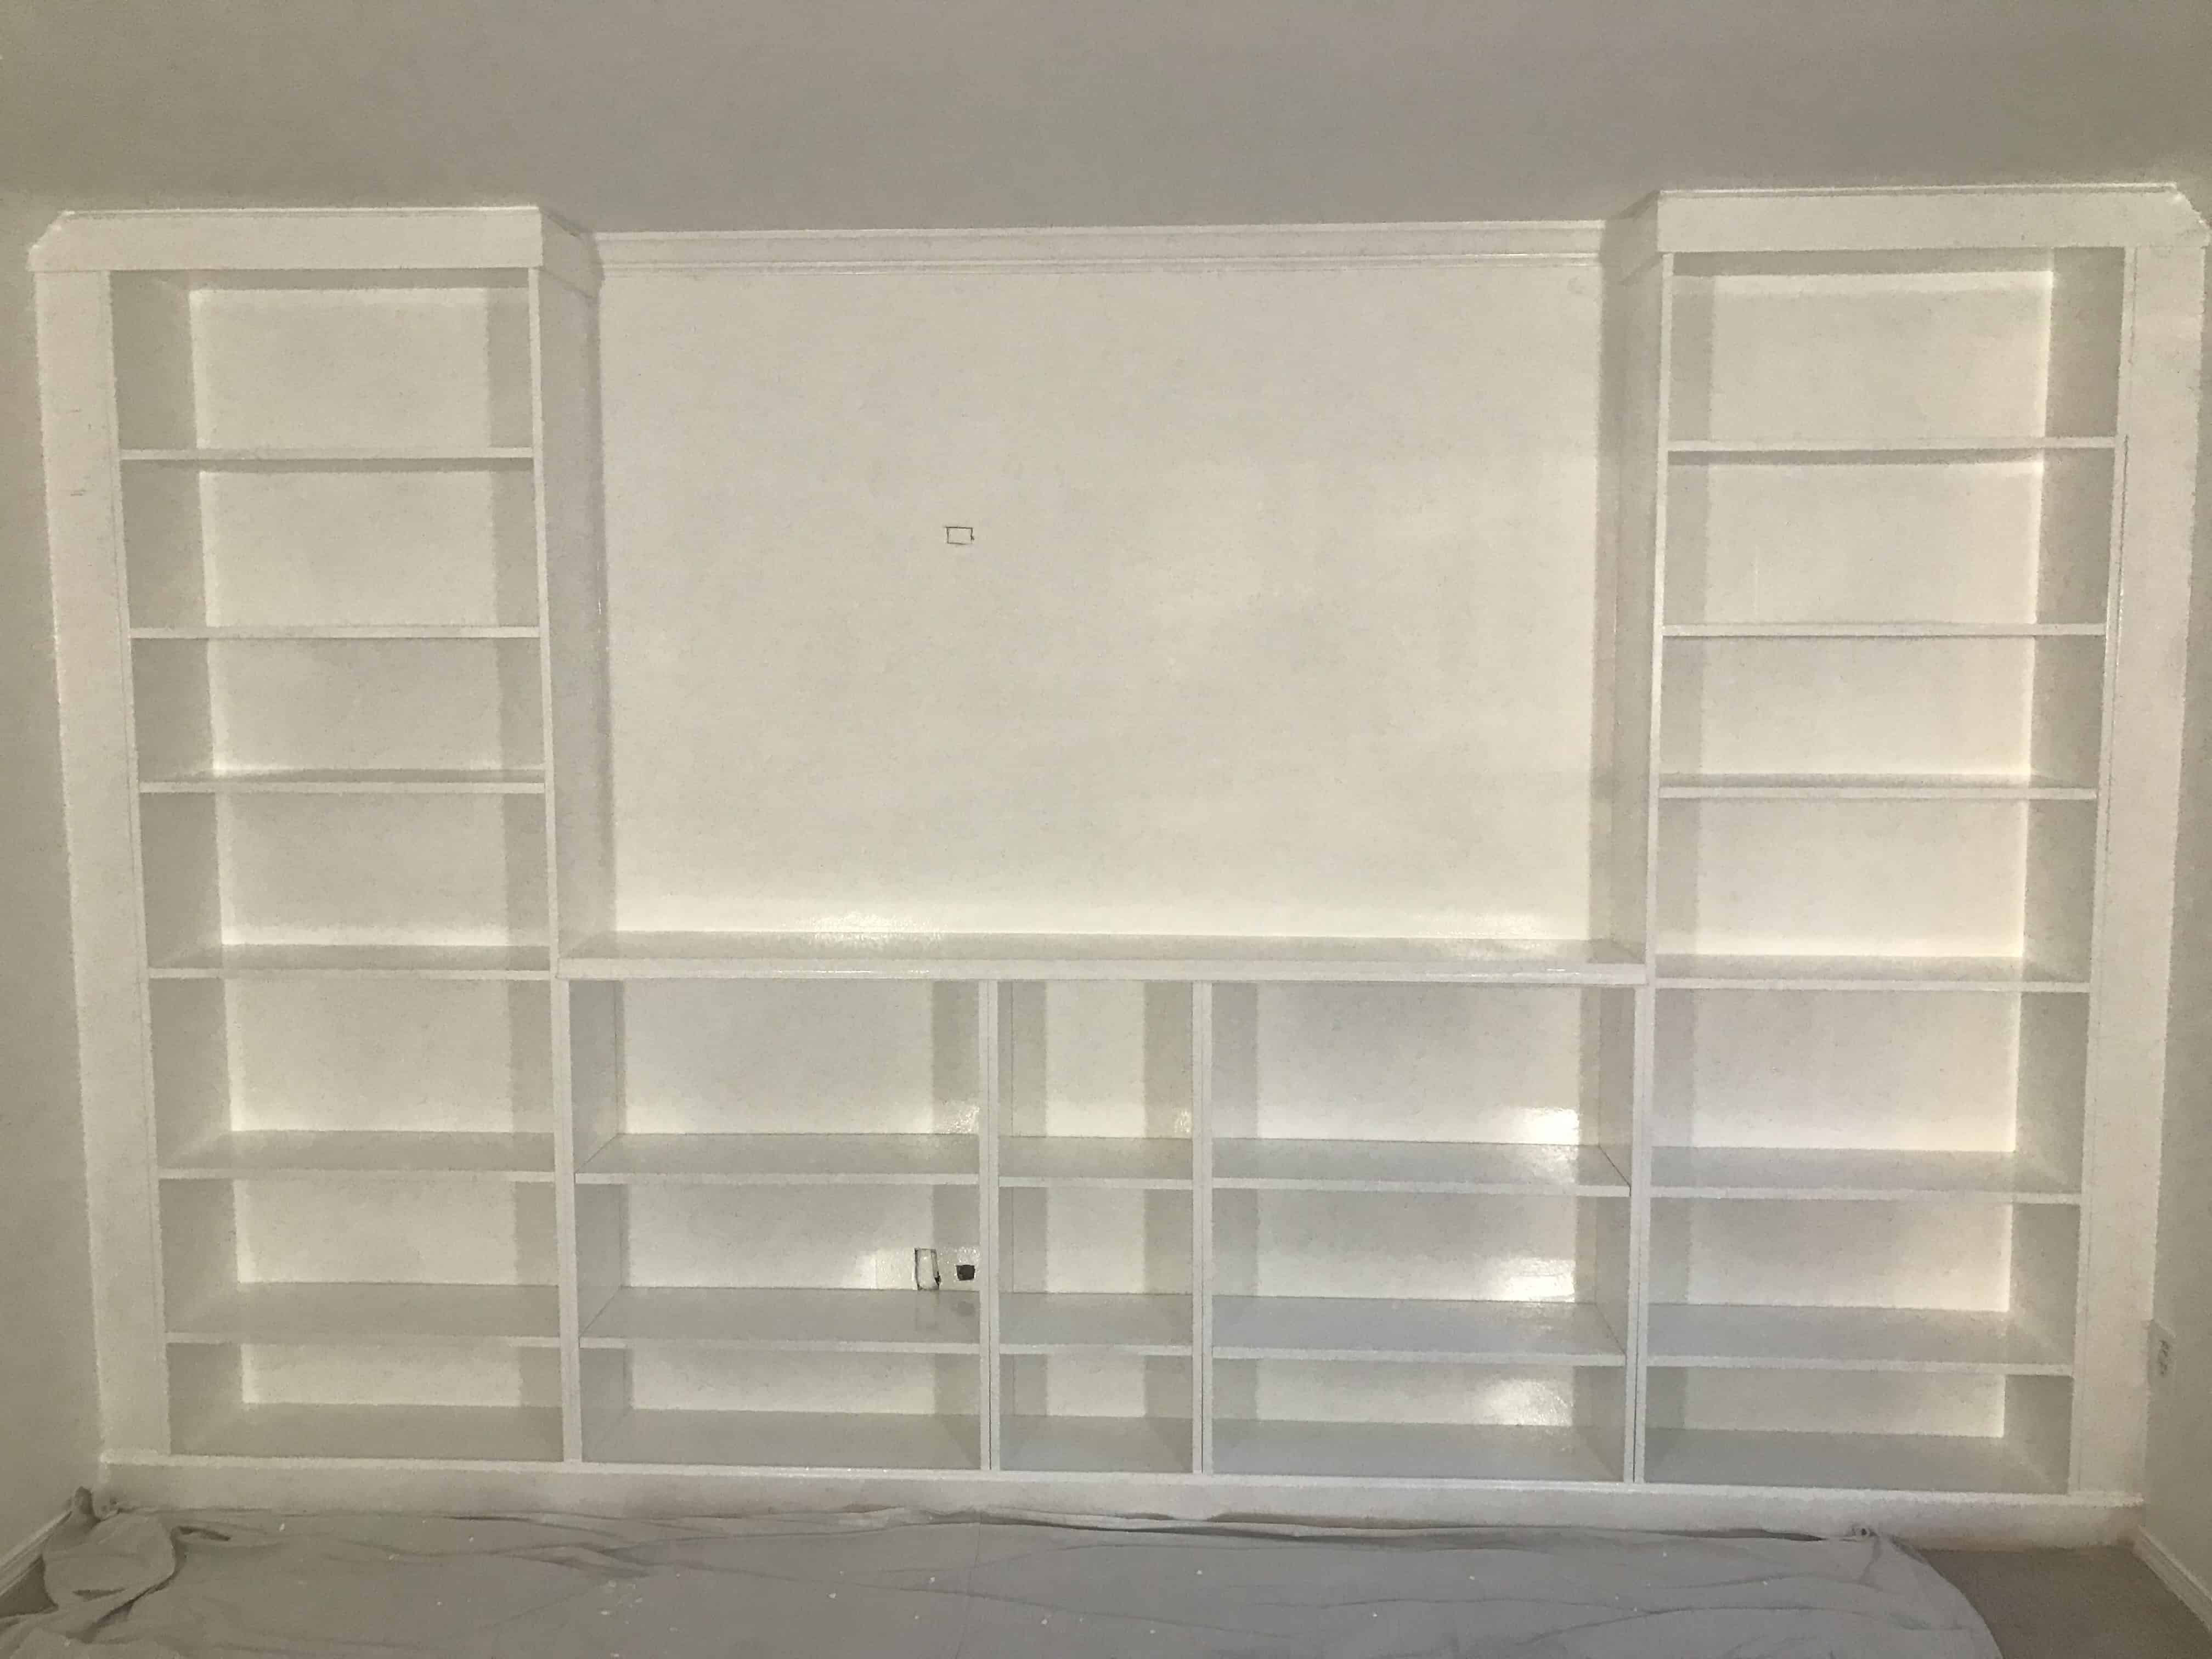
Now it’s time to paint! Use a paint Sprayer to paint (or hand paint if you choose) the whole built in set. This is one project where the end outcome might not be much different if you roll, but it will take A LOT LONGER. I would personally invest in the sprayer or rent one.
If you follow along on my projects then I will give you lots more reasons to own the paint sprayer we have.
Below is one quick coat with the paint sprayer. We painted ours in Valspar Du Jour because that is what our doors and trim are throughout our home, so it made the most sense to just stick with one color.
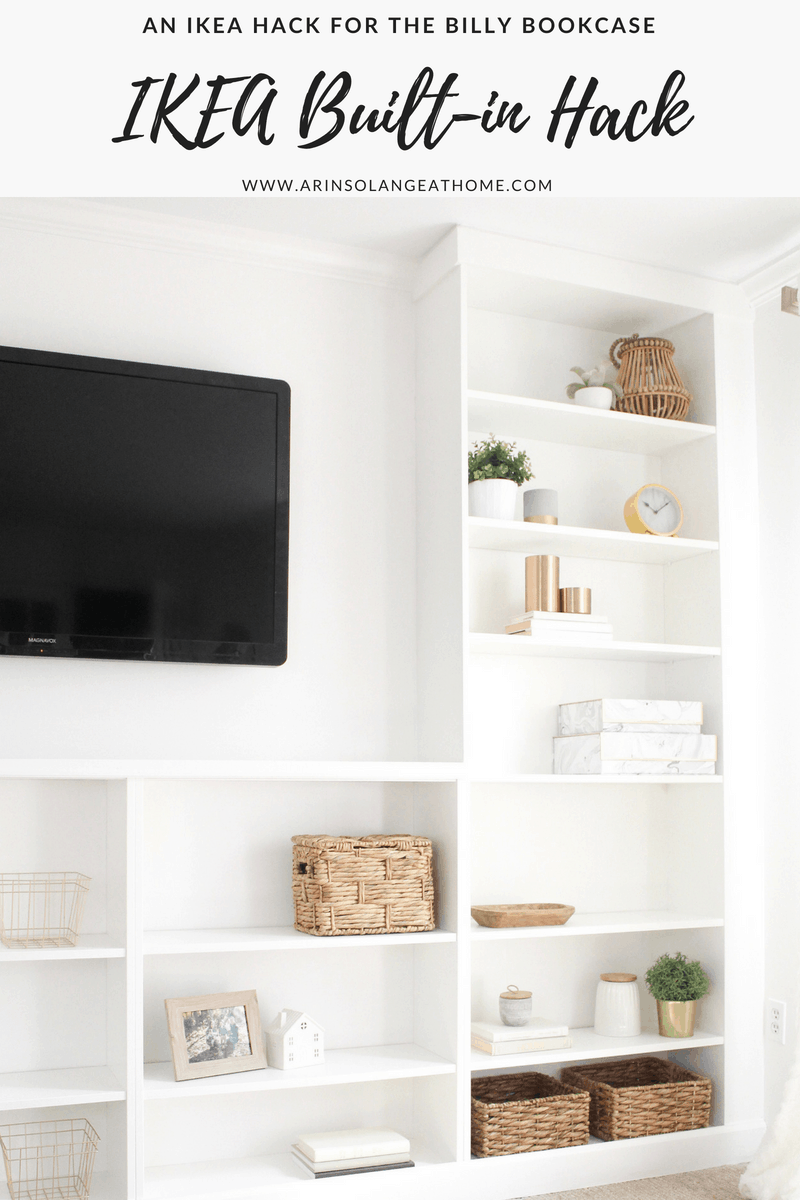
IKEA Billy Bookcase Built-in Hack Finished Photos
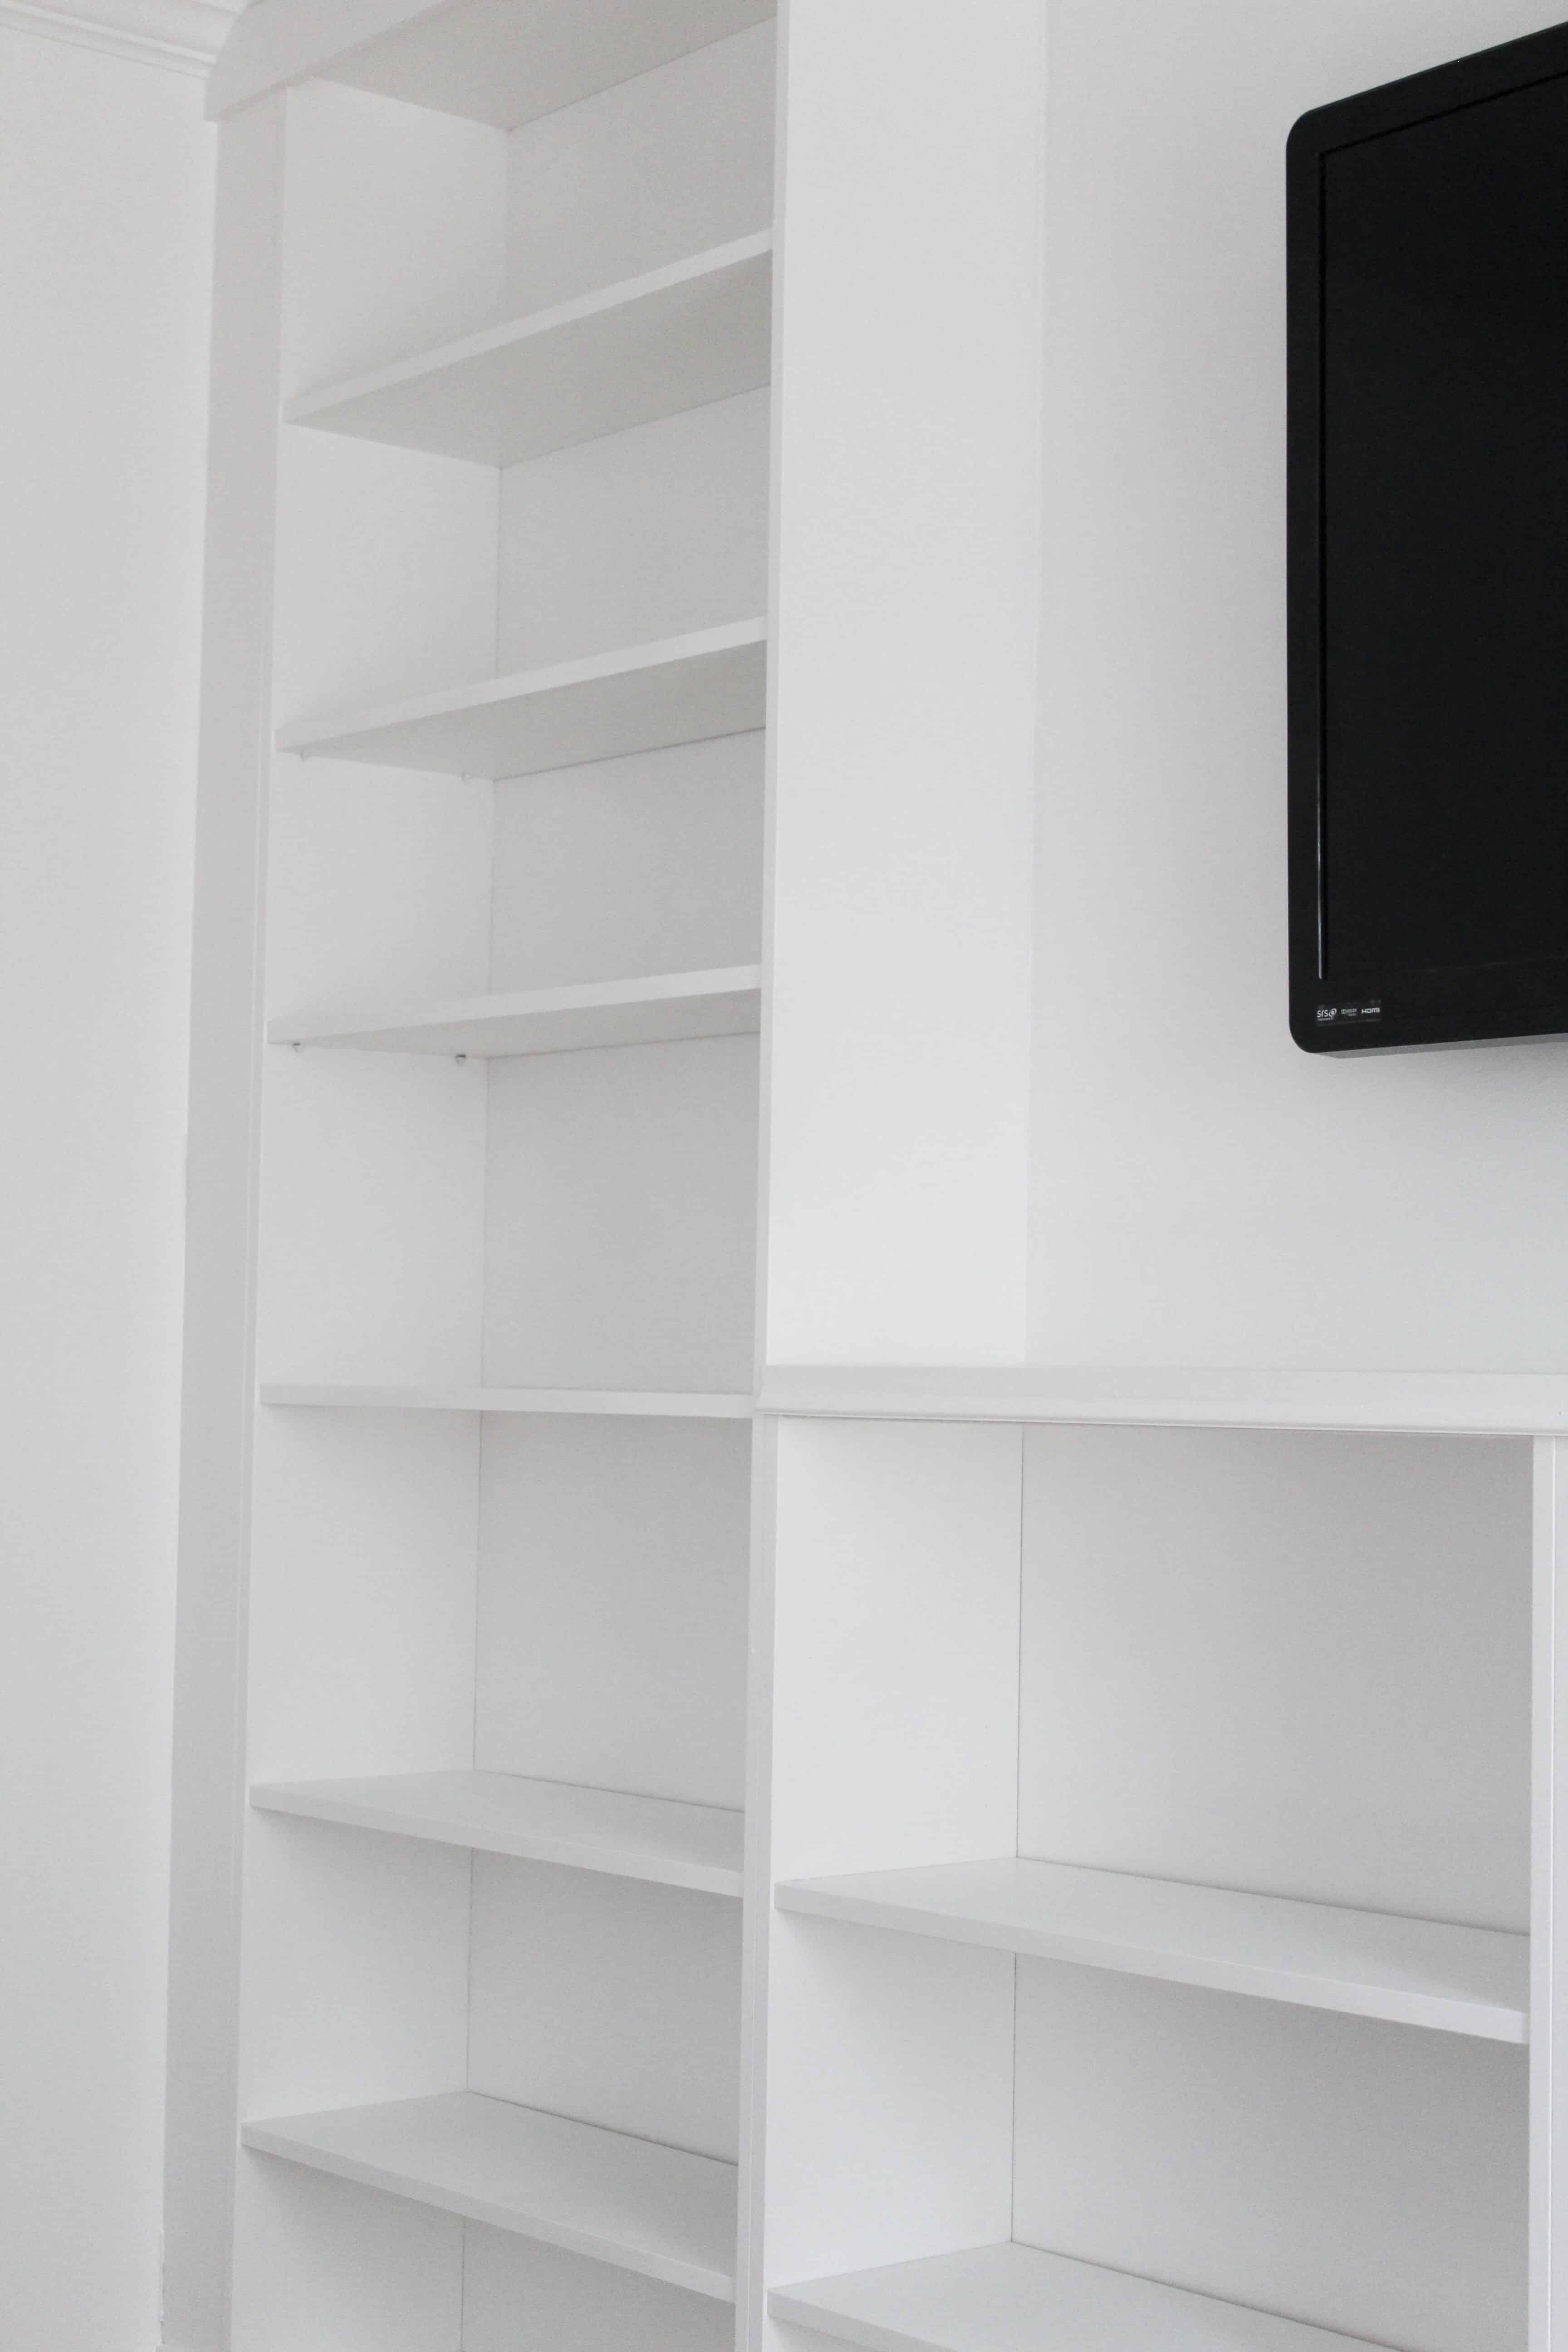

This remains a favorite project for us in our house. It was such a game changer in terms of esthetic and storage, and truly turns heads when people come in. No one would be any the wiser that it started out in IKEA boxes.
It has held up beautifully and the only thing we have had to do over time was add a bit of additional caulk between the end walls and the boards after the first winter, which is not uncommon for a home as old as ours!
I would love to see finished product if you try this IKEA Billy Bookcase built-in hack yourself, and again please feel free to leave me any questions or comments below!
Don’t forget tot see my full home office post here!!
Again be sure to check out the rest of my IKEA hacks on this post!
The Rest of My IKEA Hacks
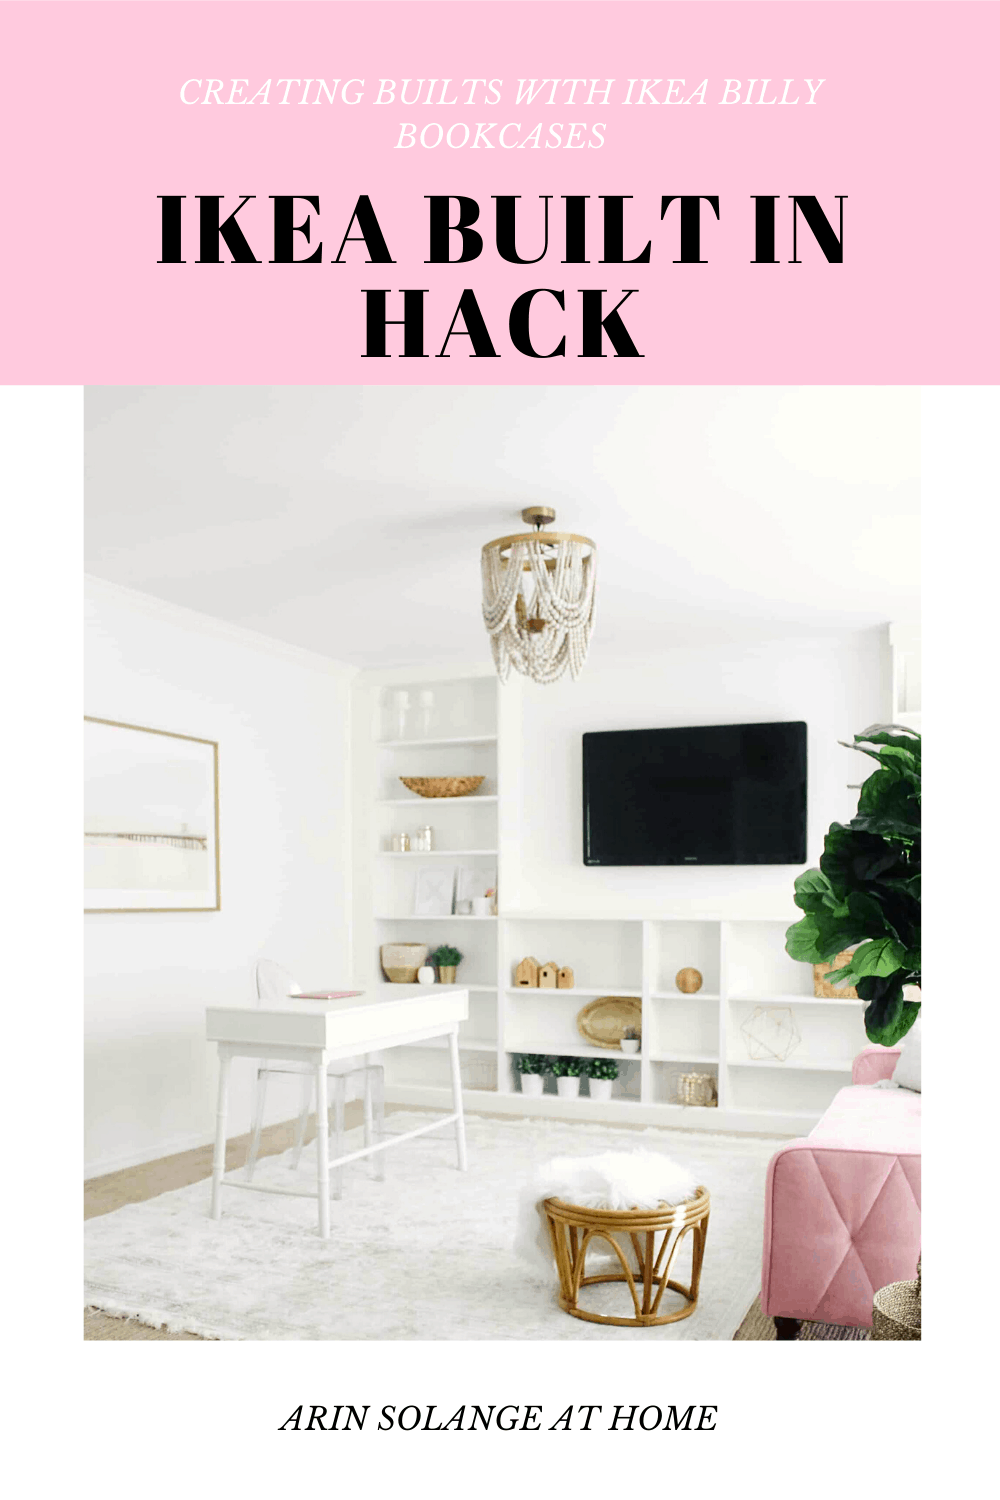
Pin the Photo Below for this IKEA Billy Bookcase Built-in Hack later
This is exactly what we’re doing in our playroom! How hard was it to use the sprayer to get the consistent finish for the paint? Also, do the billy cabinets come built, or do you have to assemble each one?
We have sprayed a few things before so it wasn’t too bad. Also white on white made it easier. The bookshelves aren’t assembled so that took one big chunk of time! We are planning on doing them in our playroom too I think, I just need to make sure they are deep enough to actually hold stuff in that way haha.
If you dont have a sprayer and are unsure you want to put out the expense of a sprayer, you can alternatively use a cabinet paint and either brush or roll it on. Home Depot Behr and Sherwin Williams both sell a fairly inexpensive paint made for painting cabinets and it can be tinted to practically any color. The paint is self leveling so you wont have brush or roller marks. The Sherwin Williams version IMO is better. I have redone all my bathroom cabinets using it as well as on Billy Bookshelves with fantastic results, they look as if they were made that way. Also, if your installing the bookcases so that they are secured to the walls you can leave off the backs completely.
Thank you!! Yes we have recently discovered this paint and I am obsessed with it.
I’m gonna have to save this one for later! So good!
Thank you so much, Kendra!!
This is so beautiful! I’ve been nervous about doing this in our new home (it’s our first) but you’ve given me the courage! ????
oh my gosh yay!! you will love it!
Did you install an outlet behind the tv mount?
so what we did is cut a small hole, then ran the wire down behind the built ins to the plug in that was there. We then cut a small hole next to the existing outlet to run the wire through. We had to cut a hole through the backing for the outlet too so it wasn’t. huge deal. We used this little thing to put over the hole, but honestly I also just keep a decoration in front of the outlet also.
It came out beautiful! I’m working on this same project right now just instead of a TV the Billy’s are flanking an electric fireplace. What did you do about the little inlet at the base when you added the baseboard? Is there a gap there? It looks like it’s a bit taller so there a lip?
Thank you so much! There is a small gap. I made the baseboard taller so you would only know the small gap exists when you look straight down. you could fill that gap with shims and caulk over it!
I’m curious how the paint has held up on the manufactured finish of the Billy’s? Have you had any problems with it chipping off?
We have had great luck and no chipping! The only issue we found was we had to recall against the wall once this winter due to the hot to cold temp changes where we live, but the paint has been great.
Hello! Thanks for sharing your project. When you painted…did you also cover the back wall at the same time?
Hi Amy – we painted this DuJour in semi gloss (I think that is the finish – it says in the post) the wall color in the room is Dujour in interior flat. So to answer yes, but simply because we painted the whole room that color.
How high are your ceilings? Would this work for 10ft?
Hi Denise,
we have 8 foot ceilings. I saw a couple of great options on Pinterest that were similar with taller ceilings where they either just boxed of the top, or they used an extra extender or two. I don’t see why in thinking about the process you couldn’t buy an extra one or two of the Billy Bookcase extenders to have it go even higher!
What is the paint you used? Also, how high are your ceilings?
Sorry, I just saw how high your ceilings were! Just wondering about the paint 🙂
We used a semi gloss Behr paint. (Same paint we use for all of our trim through the house).
Beautiful built ins!!! Can you please tell me the depth of the bookcases? Curious what size baskets will fit.
Hi Lisa! Thanks so much. They are roughly 11.5 deep.
Hey Arin!
I’m loving your blog!! I keep coming back to this and just purchased some Billys today! They are assembled and ready to go. My question is, is there literally no prep work in painting them (besides the sanding where you fill holes and screw locations)? I’m going to get the same brand of paint you used so results won’t be much off. I’ve literally NEVER done a DIY project like this, so it’s my first! This may be a dumb question, but what grade sand paper do you use? The finest? Also, our walls are grey and the shelves are white, so a roller will be the best application right? 🤔Thanks!! Can’t wait to see these finished!
Hi Charis! You have a couple of options – roller or taping things off and paining with the sprayer. We honestly didn’t prep the shelves in any other way! As far as sand paper we used a medium grit! If you get stumped feel free to text me!
They look great. How did you cut the the outet holes?
Thanks Debbie – you can either drill holes with your drill and use a tiny knife or saw in between them, or use a jigsaw.
These are gorgeous–do you know how high the lip at the back is? Was it high and deep enough to fit over your baseboards? Thank you so much for posting.
You’re so welcome! It was more than good for our baseboards – I can measure my baseboards if you are concerned when I get home to give you an idea of how tall ours are.
Hi, wonderful project and I have been planning a similar type of project for so long. I have measured my space and I need 7 billy’s with height extensions. I was so happy that the sizes with extension were a perfect match for the place I envisioned for built ins. Unfortunately the height extensions are all sold out in all the stores near me and the website didn’t say when they will be restocked. I live in Canada, Ontario and have searched in all the stores here and also in Quebec. No luck 🙁 Its like that for about couple months now. Without those extensions, the project will not be complete 🙁 Do you think of any work arounds?
Hi Abi! yes – I actually have a couple of ideas if you can shoot me an email or DM me on Instagram (@arinsolange) I will walk you through them!
So excited to give this a try! We’re doing this in our living room but one of the side walls will
be exposed since we have an open floor plan. What do you recommend doing to the side to still give it the built in look? Would I need one large board on the side of the bookshelf?
Hi Linsey – that is a great question. I would continue your top and bottom trim around the sides and if you have to add a side piece to the other side (like I did on each end to make it reach the wall) make sure you mirror that which would take more lumber but I think will matter for the end outcome. If not that trim work will make it look great – I would love to see your end outcome when you are done.
I am SO inspired by this project. What do you recommend in terms of tools before starting? What did you use to cut the base pieces to get around the baseboard on the sides?
If I had to recommend one tool I would get this miter saw – It will make cutting your pieces really easy and clean! Aside from that a nail gun would be helpful but not NEEDED, and a drill is needed.
Miter Saw – https://amzn.to/2JWhFcF
Nail Gun – https://amzn.to/3n9BFXu
This is GORGEOUS! My question is about the paint sprayer – I have been afraid to use one because I’m scared it will go everywhere LOL. Does the paint pretty much stay where you’re pointing it, or is there a danger of getting it on walls and flooring nearby? I think I’m worried mostly about paint mist that you can’t see landing on things and ruining them. How did you avoid this, or is it not even an issue? And thank you!
Hi! You will want to throw down drop cloths in the surrounding areas, but the sprayer that I linked does a pretty good job of not having too much extra spray.
We painted a wall blue with the idea of letting it show through built in shelves. Do you see any issue with assembling these Billy’s and not using the backs? Are they flush against the wall? Thank you!
Hi Alessia,
I cant remember 100% but I am almost positive the fit would be pretty close and look great. The accent color behind will be beautiful
Arin