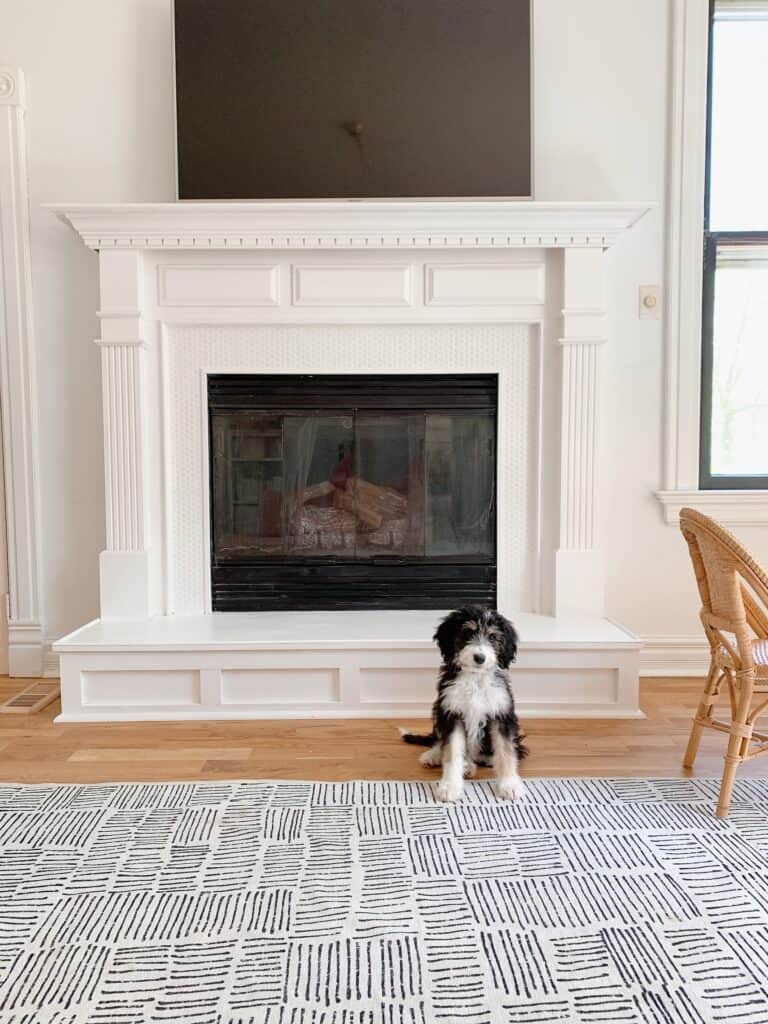
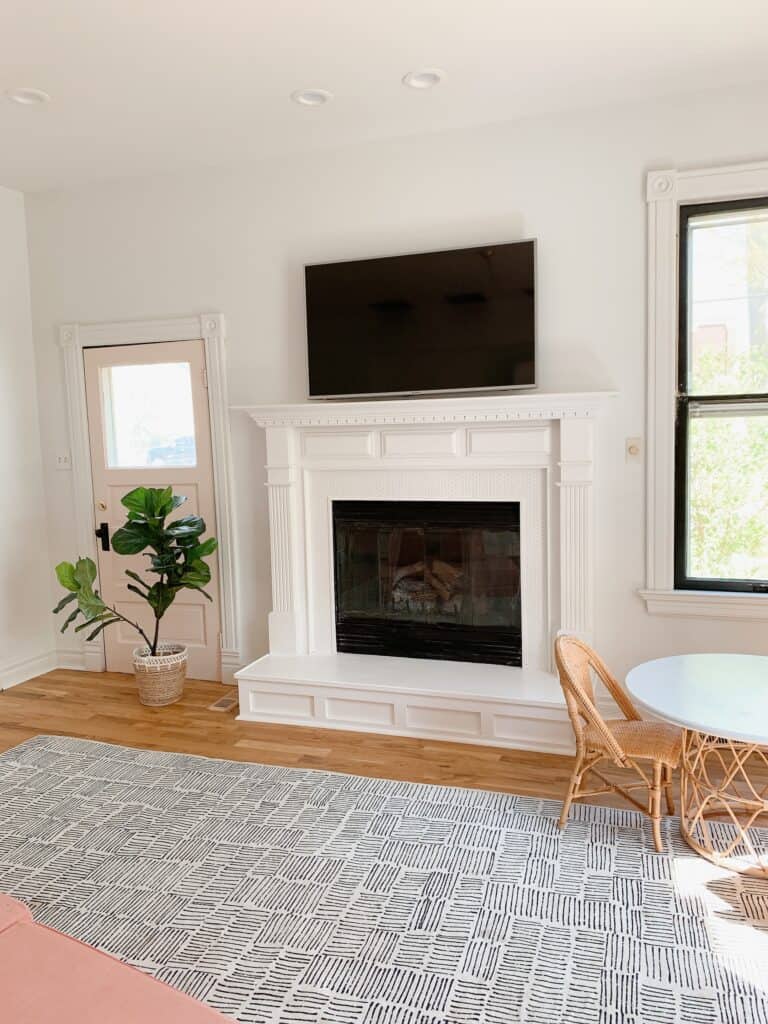
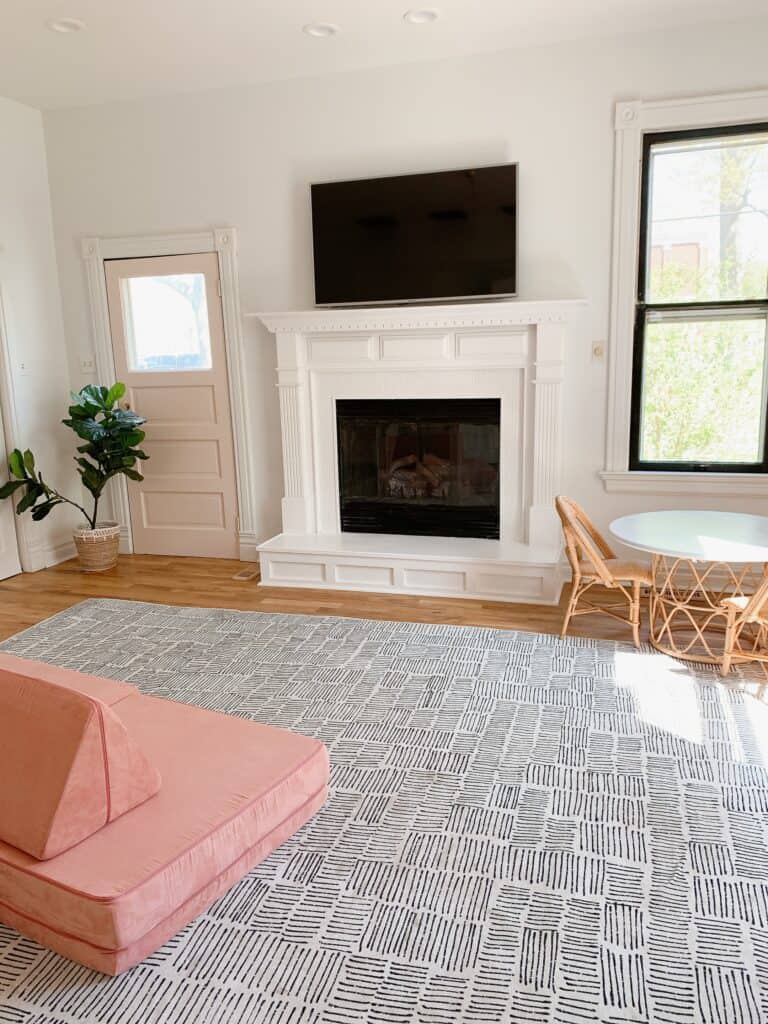
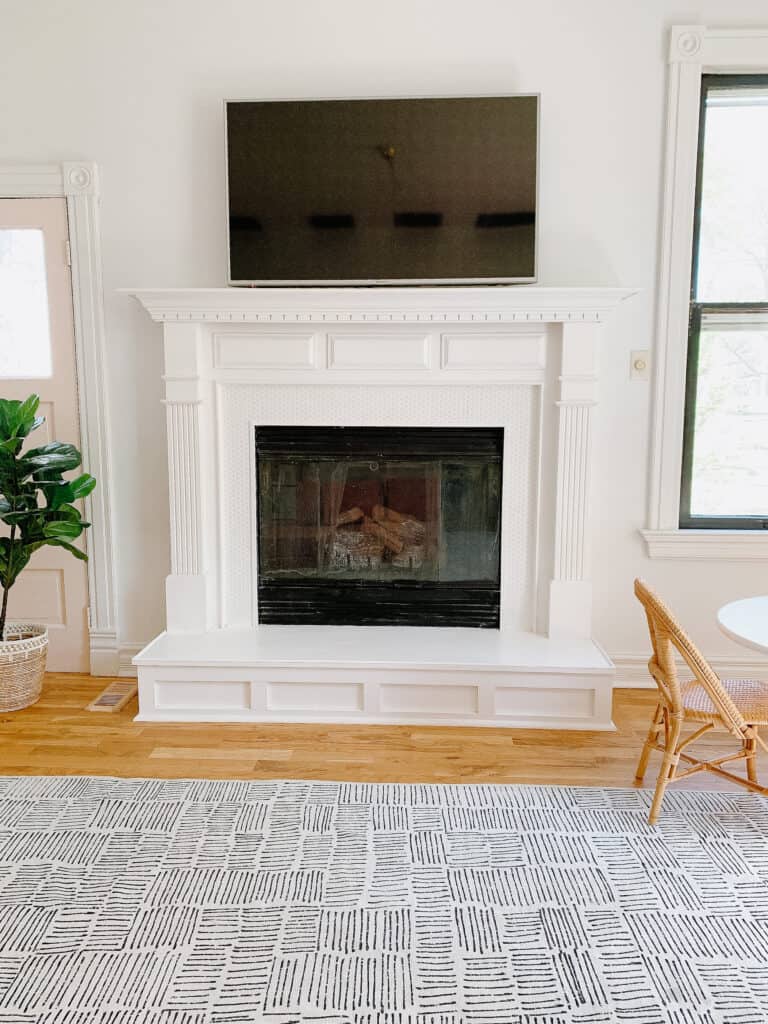
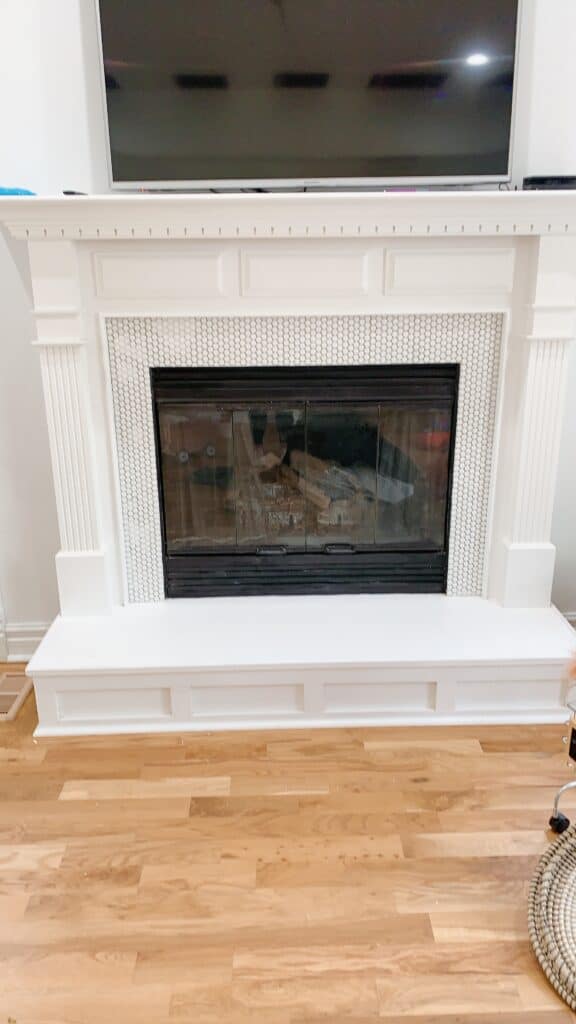
Finally the penny tile fireplace is DONE and I can share the how to on making this happen! I knew I needed to update our fireplace, after our first update wasn’t heat resistant (I’ll explain that more in the post) so decided to try to tackle penny tiles. It turns out they were a really easy DIY for even a beginner!
This post may contain affiliate links
Penny Tile
Before I get to this old fireplace and how to update it, lets talk Penny Tile. What is it? Why did I pick it? And a little more!
About Penny Tile
Penny tile is from the early 1900’s and has made a resurgence in the more recent years making it a great option of tying modern design in with older elements. When Penny tile was first used you only saw black and white patterns, but now you see them used in more subtle ways.
The tile can be used on floors, walls, backsplash and more. One thing to consider is the amount of grout when it comes to places like shower floors (more grout tends to mean more tedious cleaning), but overall is still a safe, and functional option for any space.
What is Penny Tile?
Penny tile can also be referred to as penny round is a small tile that is round or hexagon in shape. It comes in a variety of colors and styles and can be used to update a bathroom or space with a big visual impact.
How Expensive is Penny Tile?
Penny tile as with most tiles can vary in expense pending the color and style you go with. For my project I was able to find the tile as low as $3.50 per square foot.
How Hard is Penny Tile Installation?
Penny tile as with any other tile install takes some skill, but unlike other tiles you need fewer tools, and less ‘math’ due to the smaller size. When it comes to cutting and installing I would consider this on the easy end of projects, however there is a lot of grouting that goes into the project, so that leaned more towards intermediate.
Why Did I Pick Penny Tile?
Okay so now…why did I pick penny tile for our project? I will be honest – we have only tiled 2 other times and it was YEARS ago, and there were lessons learned haha. I knew with the fireplace I wantedsometing affordable and easy to work with, and I didn’t want to invest in tons of tools.
For penny tiles you can literally cut them with these little tile nippers which was a huge allure to me. I also knew they were light weight and I was working on a vertical surface so wanted something light.
How to Penny Tile a Marble Fireplace
So who has been around since last fall and saw my tutorial for using sticky tiles to update our fireplace? When we bought our home I wanted an easy, inexpensive update for our fireplace in the kids playroom so I went with sticky tiles.
I don’t regret the project – but I will tell you that the penny tiles were just as easy if not more easy, and cost us less – so if you aren’t afraid of trying the project I say go for it!
I really wasn’t sure if you could tile over marble and after a good amount of research it was pretty clear that I was good to go as long as the marble was in good condition. Flat/not cracking and shifting and so on, so if you are also updating a fireplace you will be good to go!
Supply List
Penny Tiles – I linked the exact ones we used. If you are doing a similar size project to us we needed 6 sheets of tile if that helps you gauge expense going into it.
Mastic Adhesive – I linked the one I used.
Tile Nippers – this is what you need for cutting the tiles
Grout in preferred color
Sponge
Caulk
Before you Start Be Sure to watch the Video in this post
Penny Tiling a Fireplace
As always sometimes this is a do as I say not as I do situation. I always learn so much when I take on these projects and try to share a really hands on and helpful tutorial that is done by normal people just like you. So sometimes that means I learned things in the process that I wish I would have done differently!
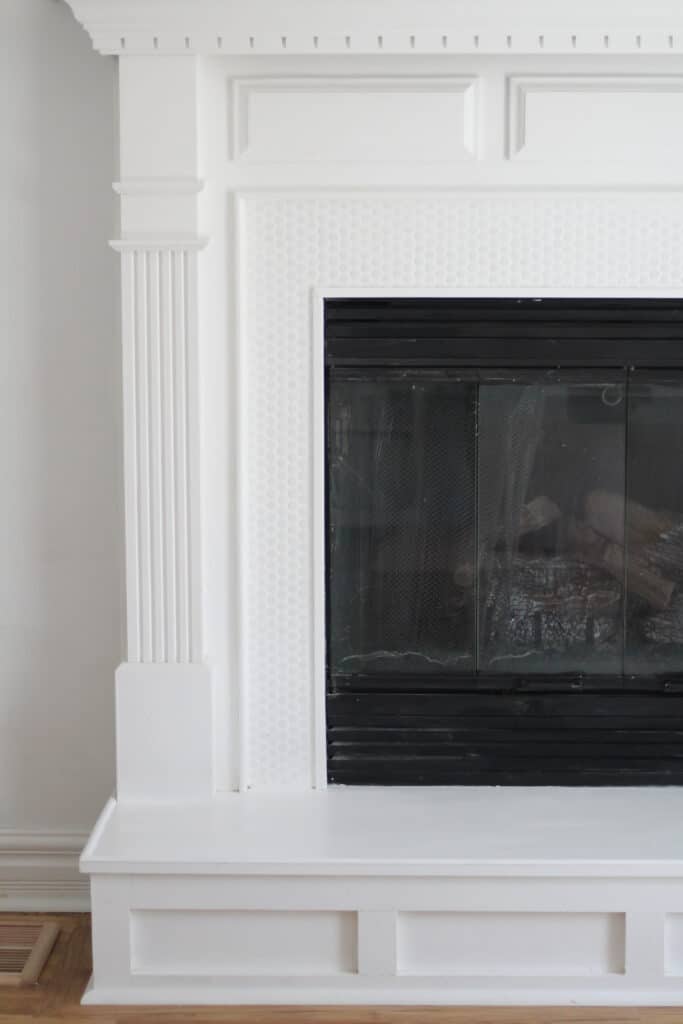
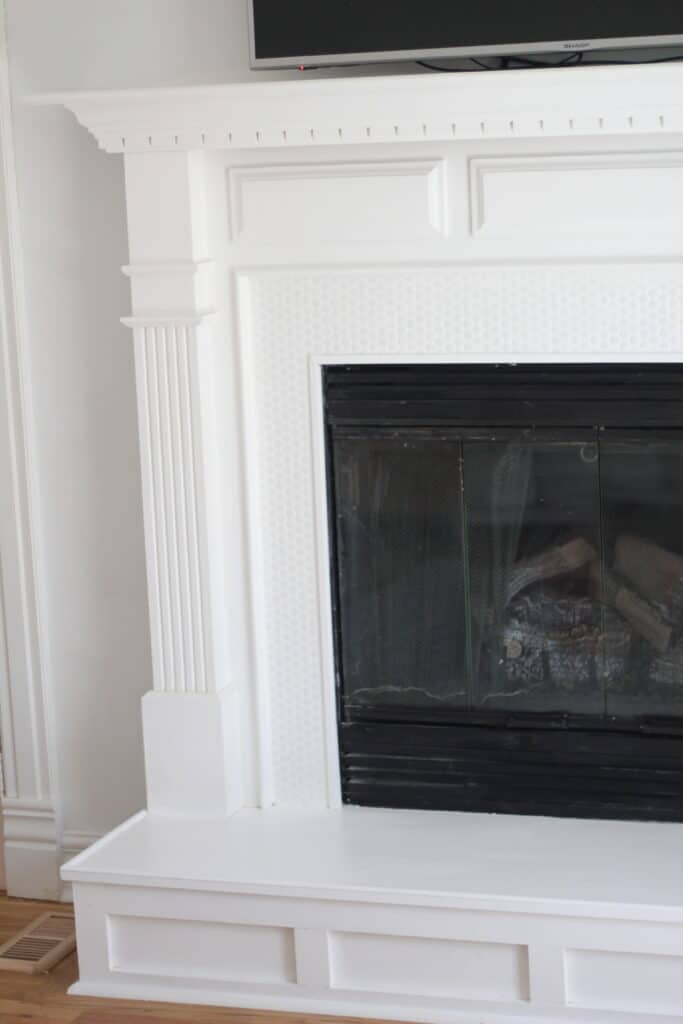
Step 1 – Add Edging of some sort
This was the step we sort of skipped and had to do last. Basically if your fireplace doesn’t have a lip you are working up to the edges will look bad and unfinished if you don’t give it a lip.
So you have two options – you can use this edge tile which is what I would recommend. OR you an use a piece of wood and adhere that with e600. We ended up doing the later due to having to do it secondary, but had I done things over I would have done the edge tile.
Step 2 – Installing the Penny Tile
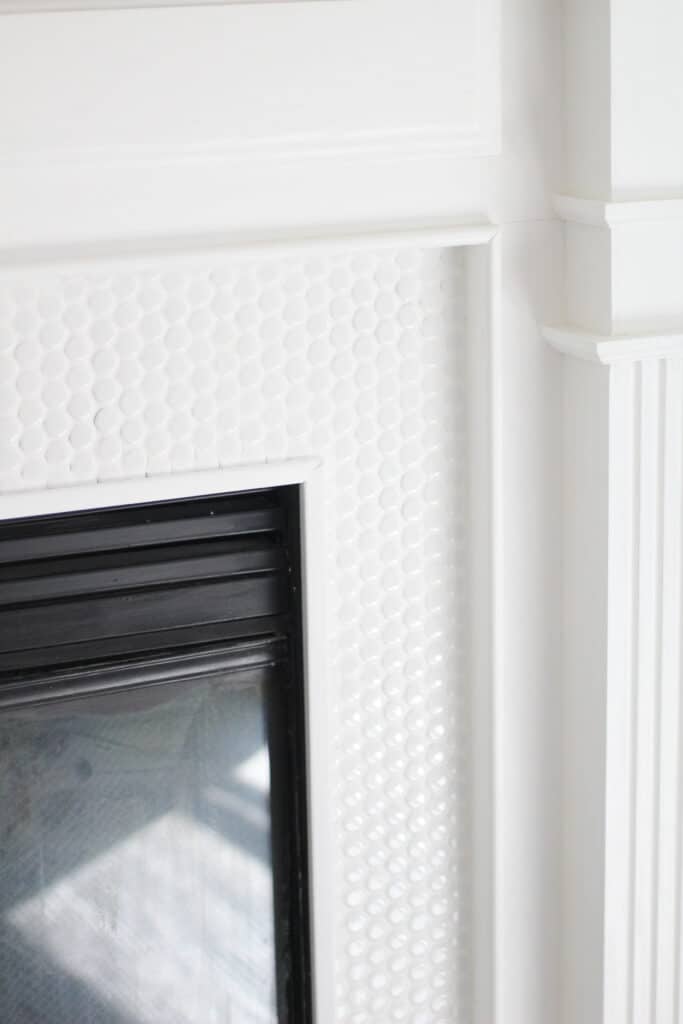
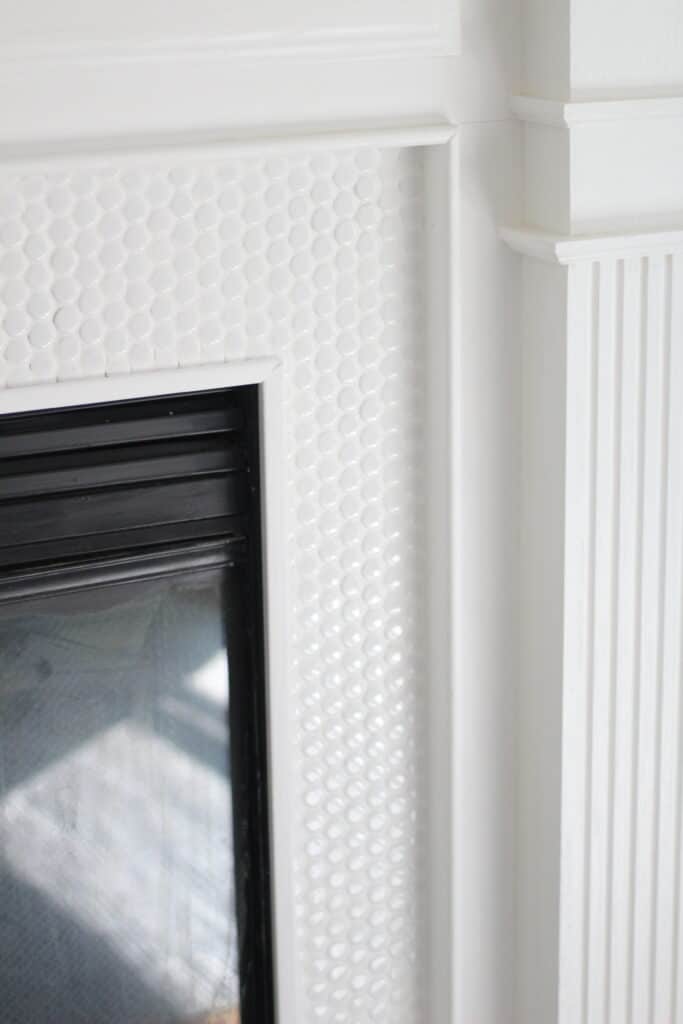
Now you are ready to add your penny tiles. Starting in the top corner of your choice sort of hold your tile sheet up to figure out sizing. I personally chose to have the straight edge of tiles on the sides going down vertically and the jagged edges at the top and bottom.
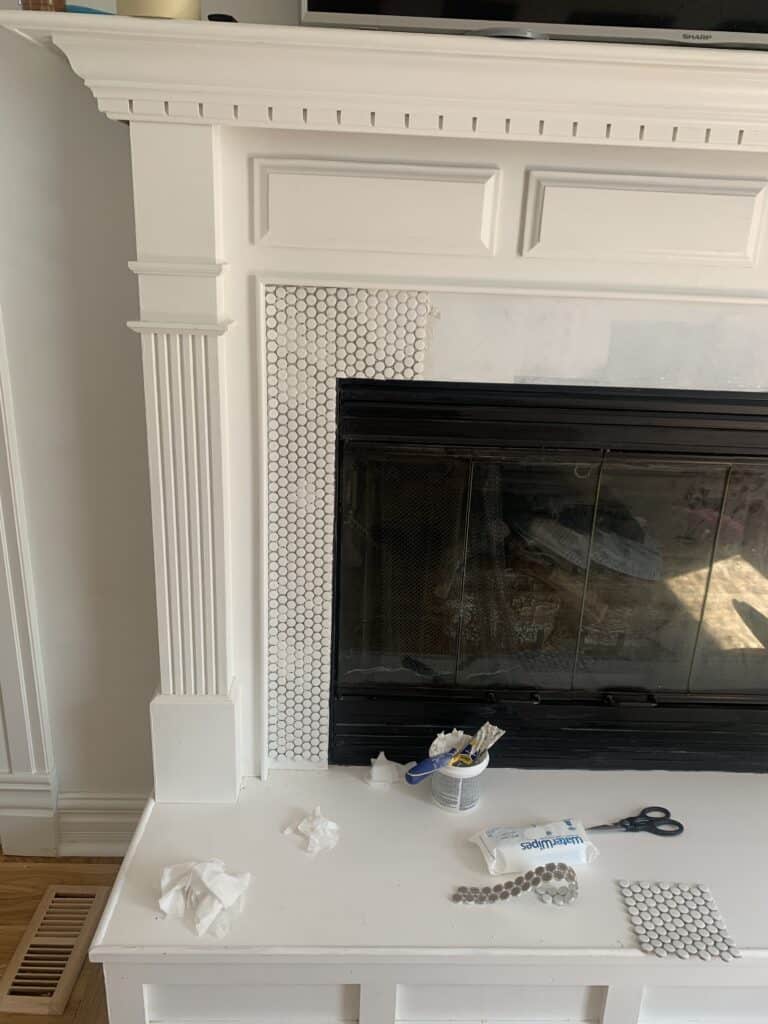
That means that for your first piece in the top corner you need to take your tile nippers to the tile and snip every other tile in half so you have a straight line.
Your first piece is a bit trickier because I chose to keep it as whole as I could which meant cutting out a big square from the bottom right hand corner to go around the corner, but if that is too hard for you, cut piece so you are only working with one direction.
In my case going down the verticals of the fireplace didn’t need any tile cutting (they fit perfect and I could have cried happy tears). If they hadn’t you would have needed to snip the edge closer to the fireplace going down.
I did have to nip the bottom line above the fireplace, so there was plenty of cutting. Keep the extra halves because if you mess one up, or crack it you can just use a stray.
When you go to lay the tile you are going to use a trowel and apply a thin layer of the adhesive. Carefully lay your tile sheet down and make sure it is well into the corner. Then push it down fully on all tiles.

Do the same thing with all the tile sheets. I personally went down the vertical first, then across the top, then down the other vertical.
One thing to note – because I knew that the tiles fit perfectly on the verticals I personally decided to add a tiny hair of extra space between the sheets across the top so I wouldn’t have to snip them on only one side. You couldn’t tell if you tried, and it made things look better in my opinion. So that is an option.
The adhesive doesn’t dry super fast so you have time to play with it a bit.
Now let that dry for a day!
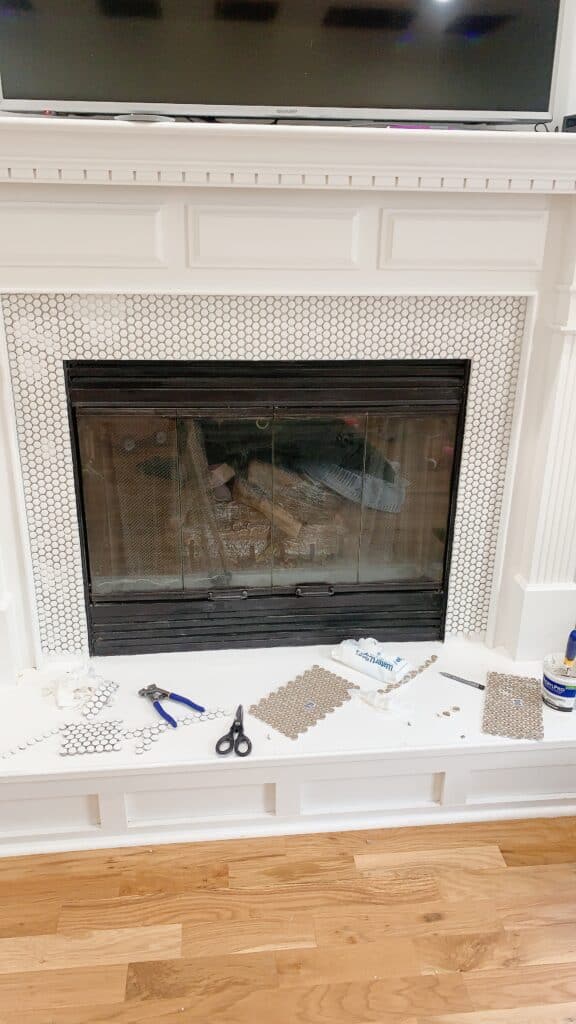
Step 3 – Grout
Next up is grouting. After your penny tiles have dried for 24 hours you can clean off any excess adhesive and start to grout.
Follow the instructions for grout on your container or bag, and apply using a trowel. I will be honest – I didn’t find this to be super easy because there are so many grout lines, so take your time!
After about 20 min you will wipe down the excess grout with a wet sponge and allow it to dry over night.
The next day you can take a microfiber cloth or cheesecloth and wipe down the tiles again to keep them looking shiny and get the last of the grout off!
Over all this project cost me less than $50 and can be done in a couple of hours over the course of 2 days. None of it fast drying so there is room to learn while you work, which makes for a great beginner project, and clearly I liked it enough to penny tile my whole bathroom wall the next day (reveal coming this week!).
Other Posts You Will Love
If you enjoyed this post be sure to check out these other posts that you will love as well!
Sticky Tile Fireplace makeover | Ikea Billy Built ins | Pink bathroom with tile wall | Painted Tile floor | DIY Outdoor Table
Pin the Photo Below for Later
Hopefully you found this post on installing penny tile to be helpful and are ready to start your own project. If you have any questions leave them in the comments below and be sure to follow me on Instagram (@arinsolange) for more fun and inspiration.

Good article, it can be tougher if old tile has to be removed which was my case.
Hi Greg – thank you so much – That definitely complicates the process!