FINALLY, I am getting around to blogging the update to our basement under stairs built in playhouse that got a major facelift over the past couple of months, as well as some other small updates we added to our basement. To see the original update to the basement you can check out this post, and check out our house at move in for the ORIGINAL blue basement we moved in to.
This post contains affiliate links. read more here.
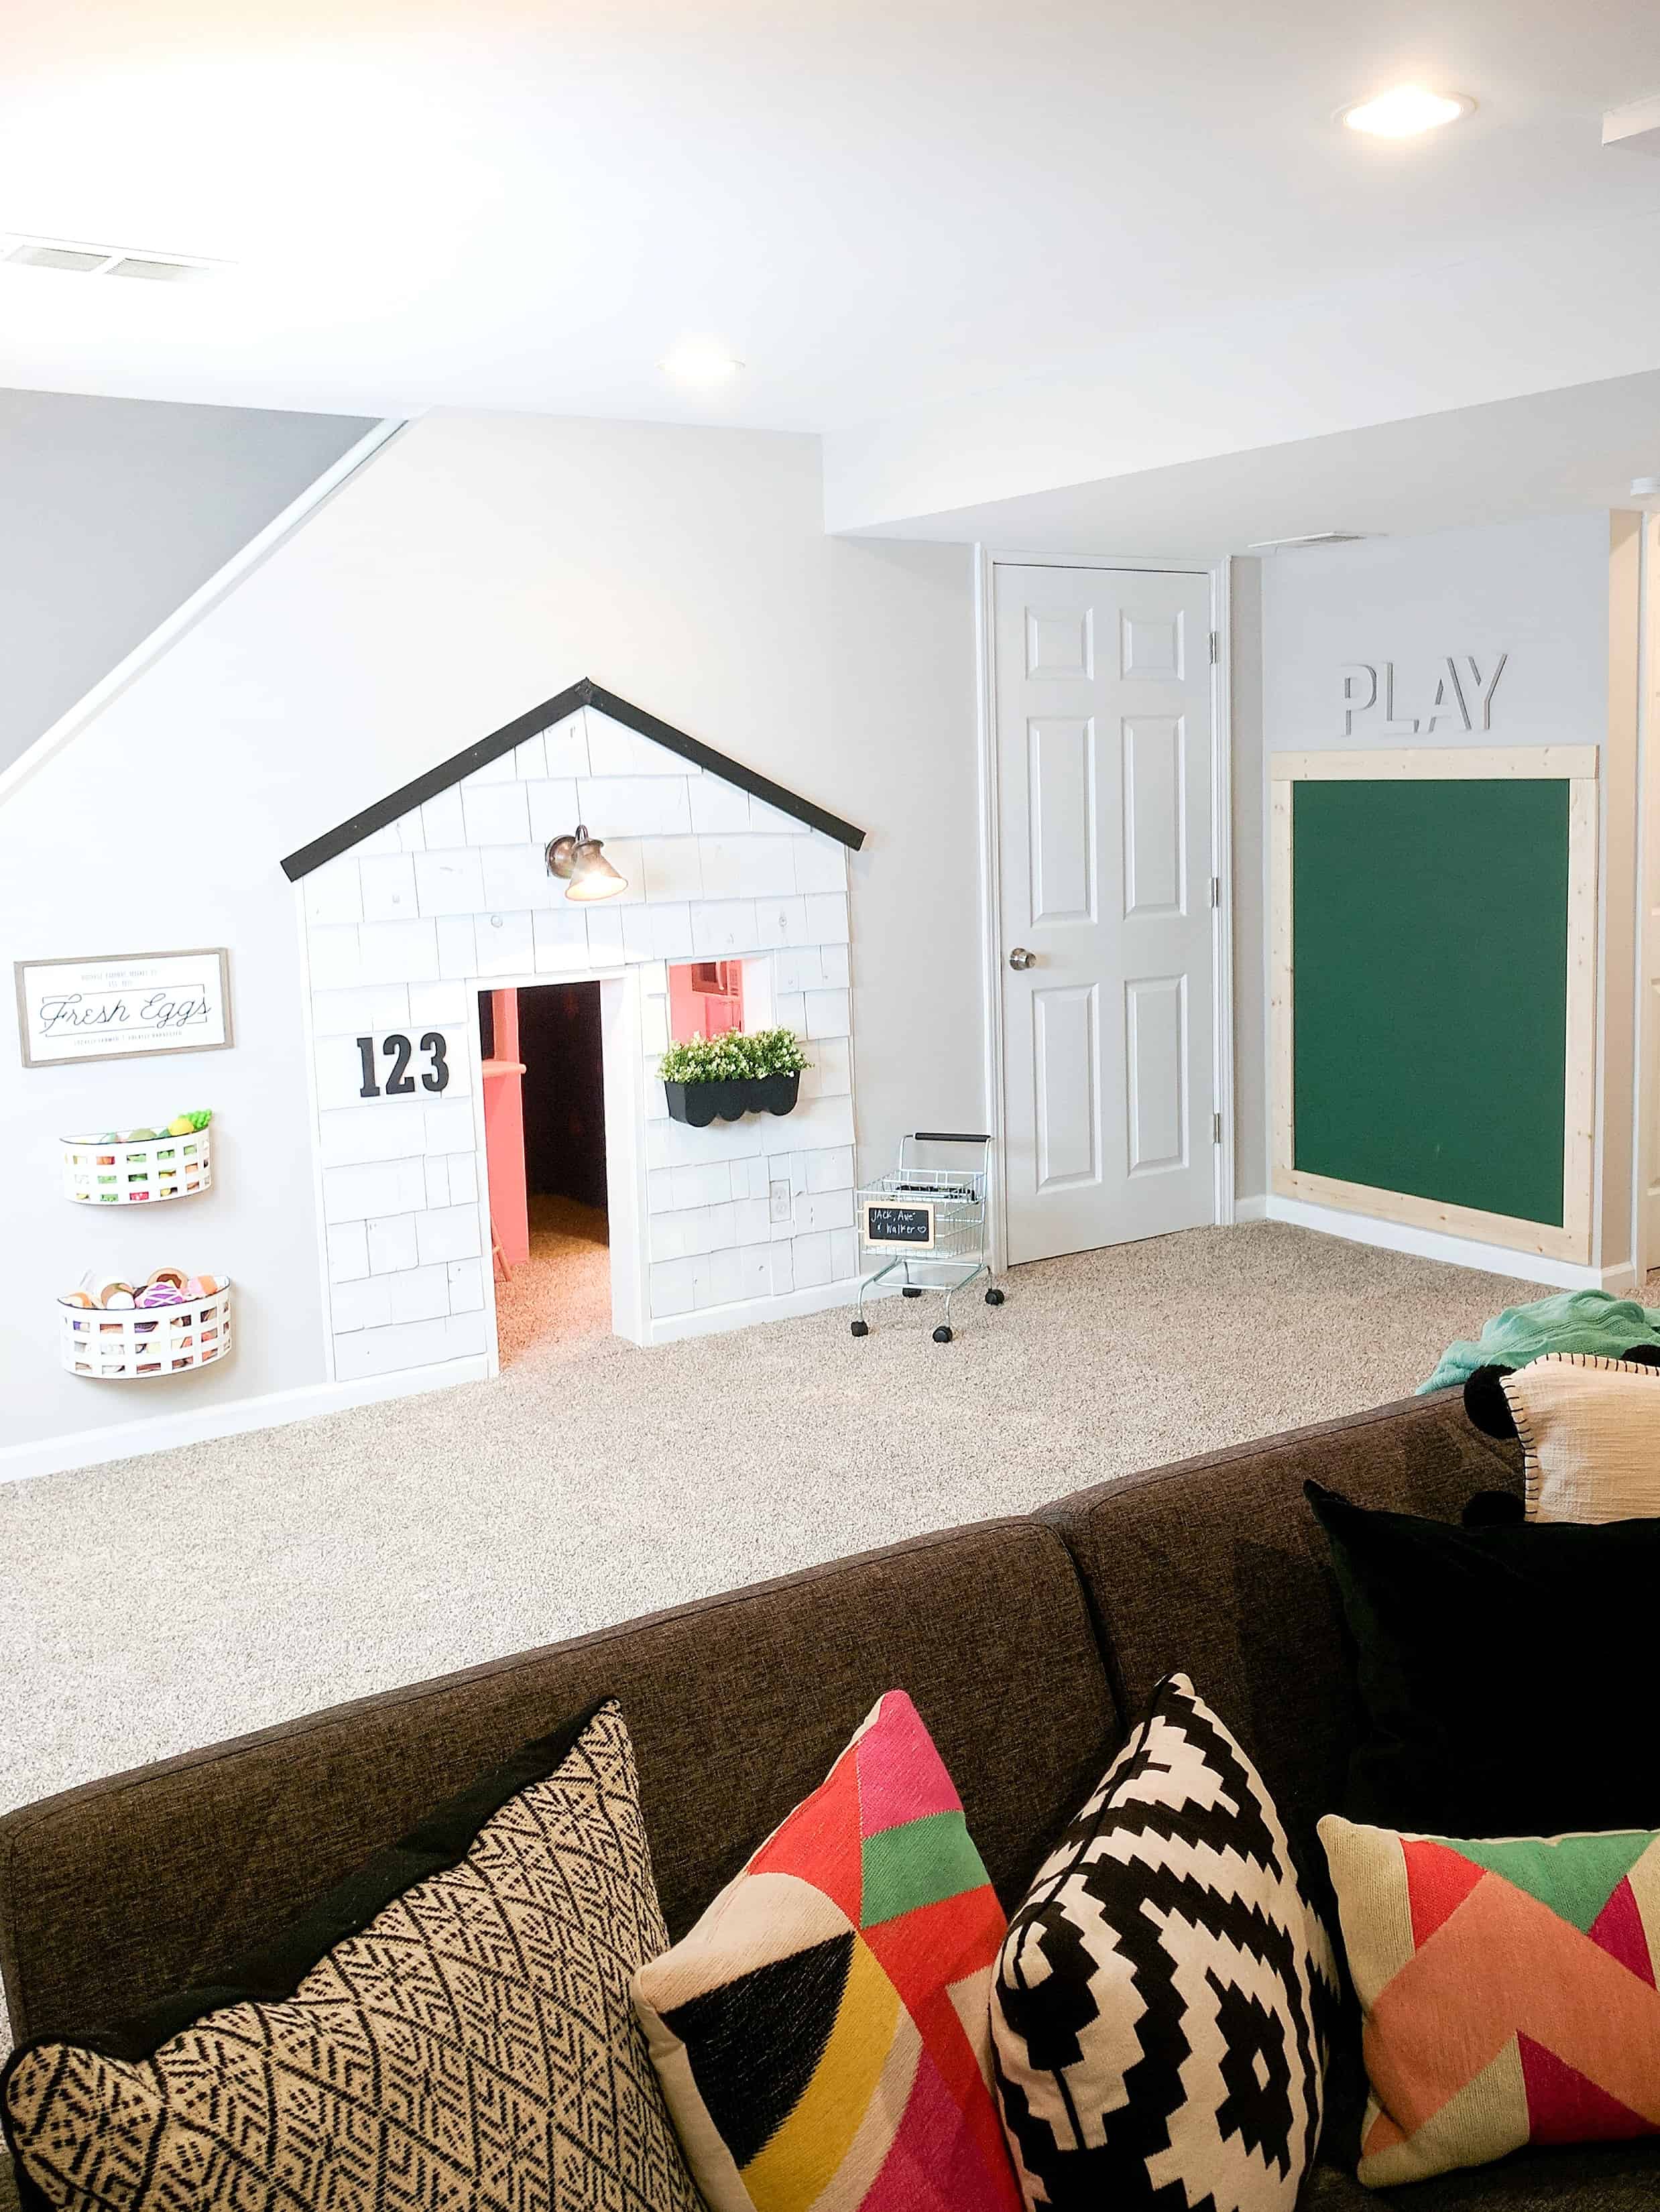
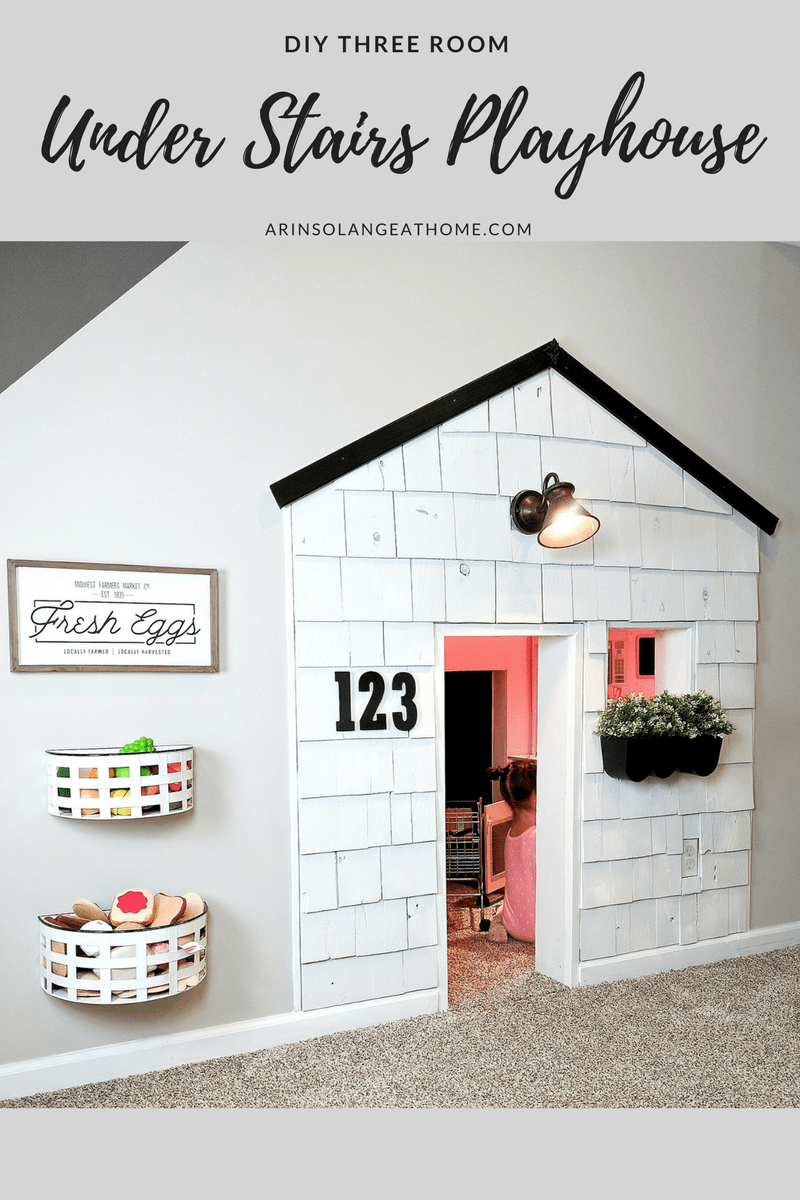
Under Stairs Built in Playhouse
When we moved in to our house there was already an existing under stairs playhouse, so I can not give you the step by step building process. But goodness knows I have dug around in every corner, so I am going to give you my best details as the proud recipients of this fixer upper!
Making it Deeper than the Stairwell
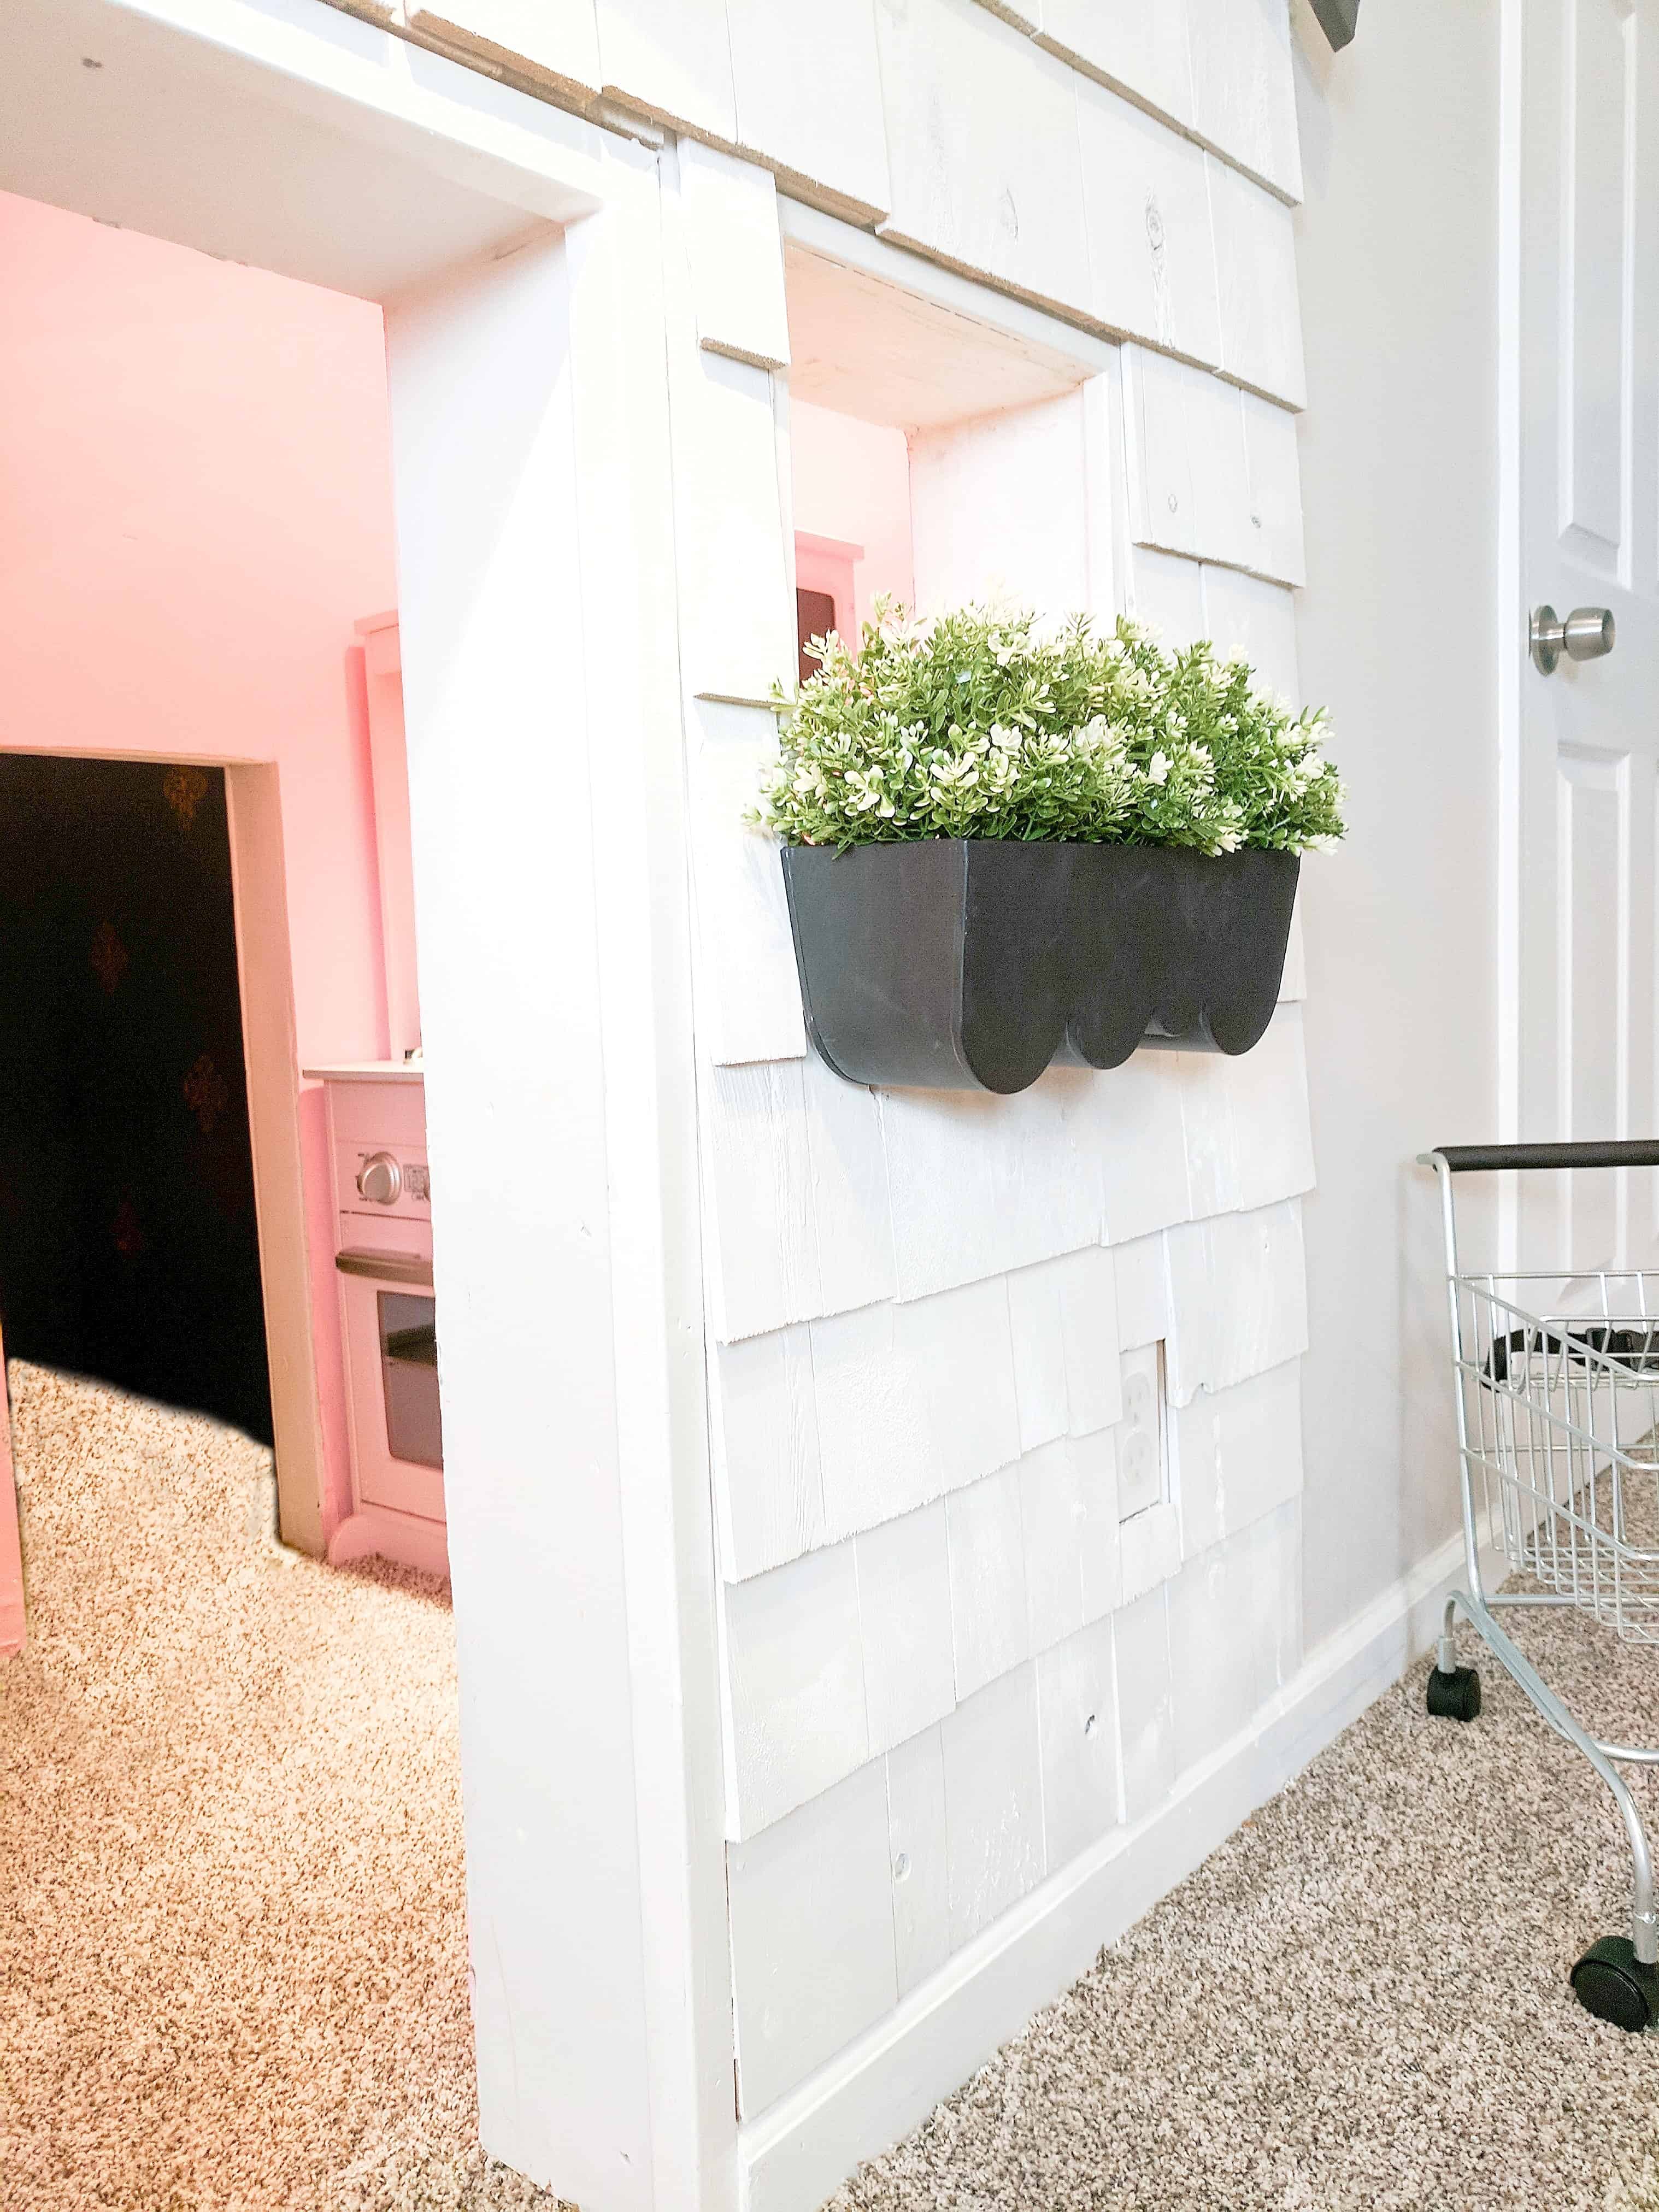
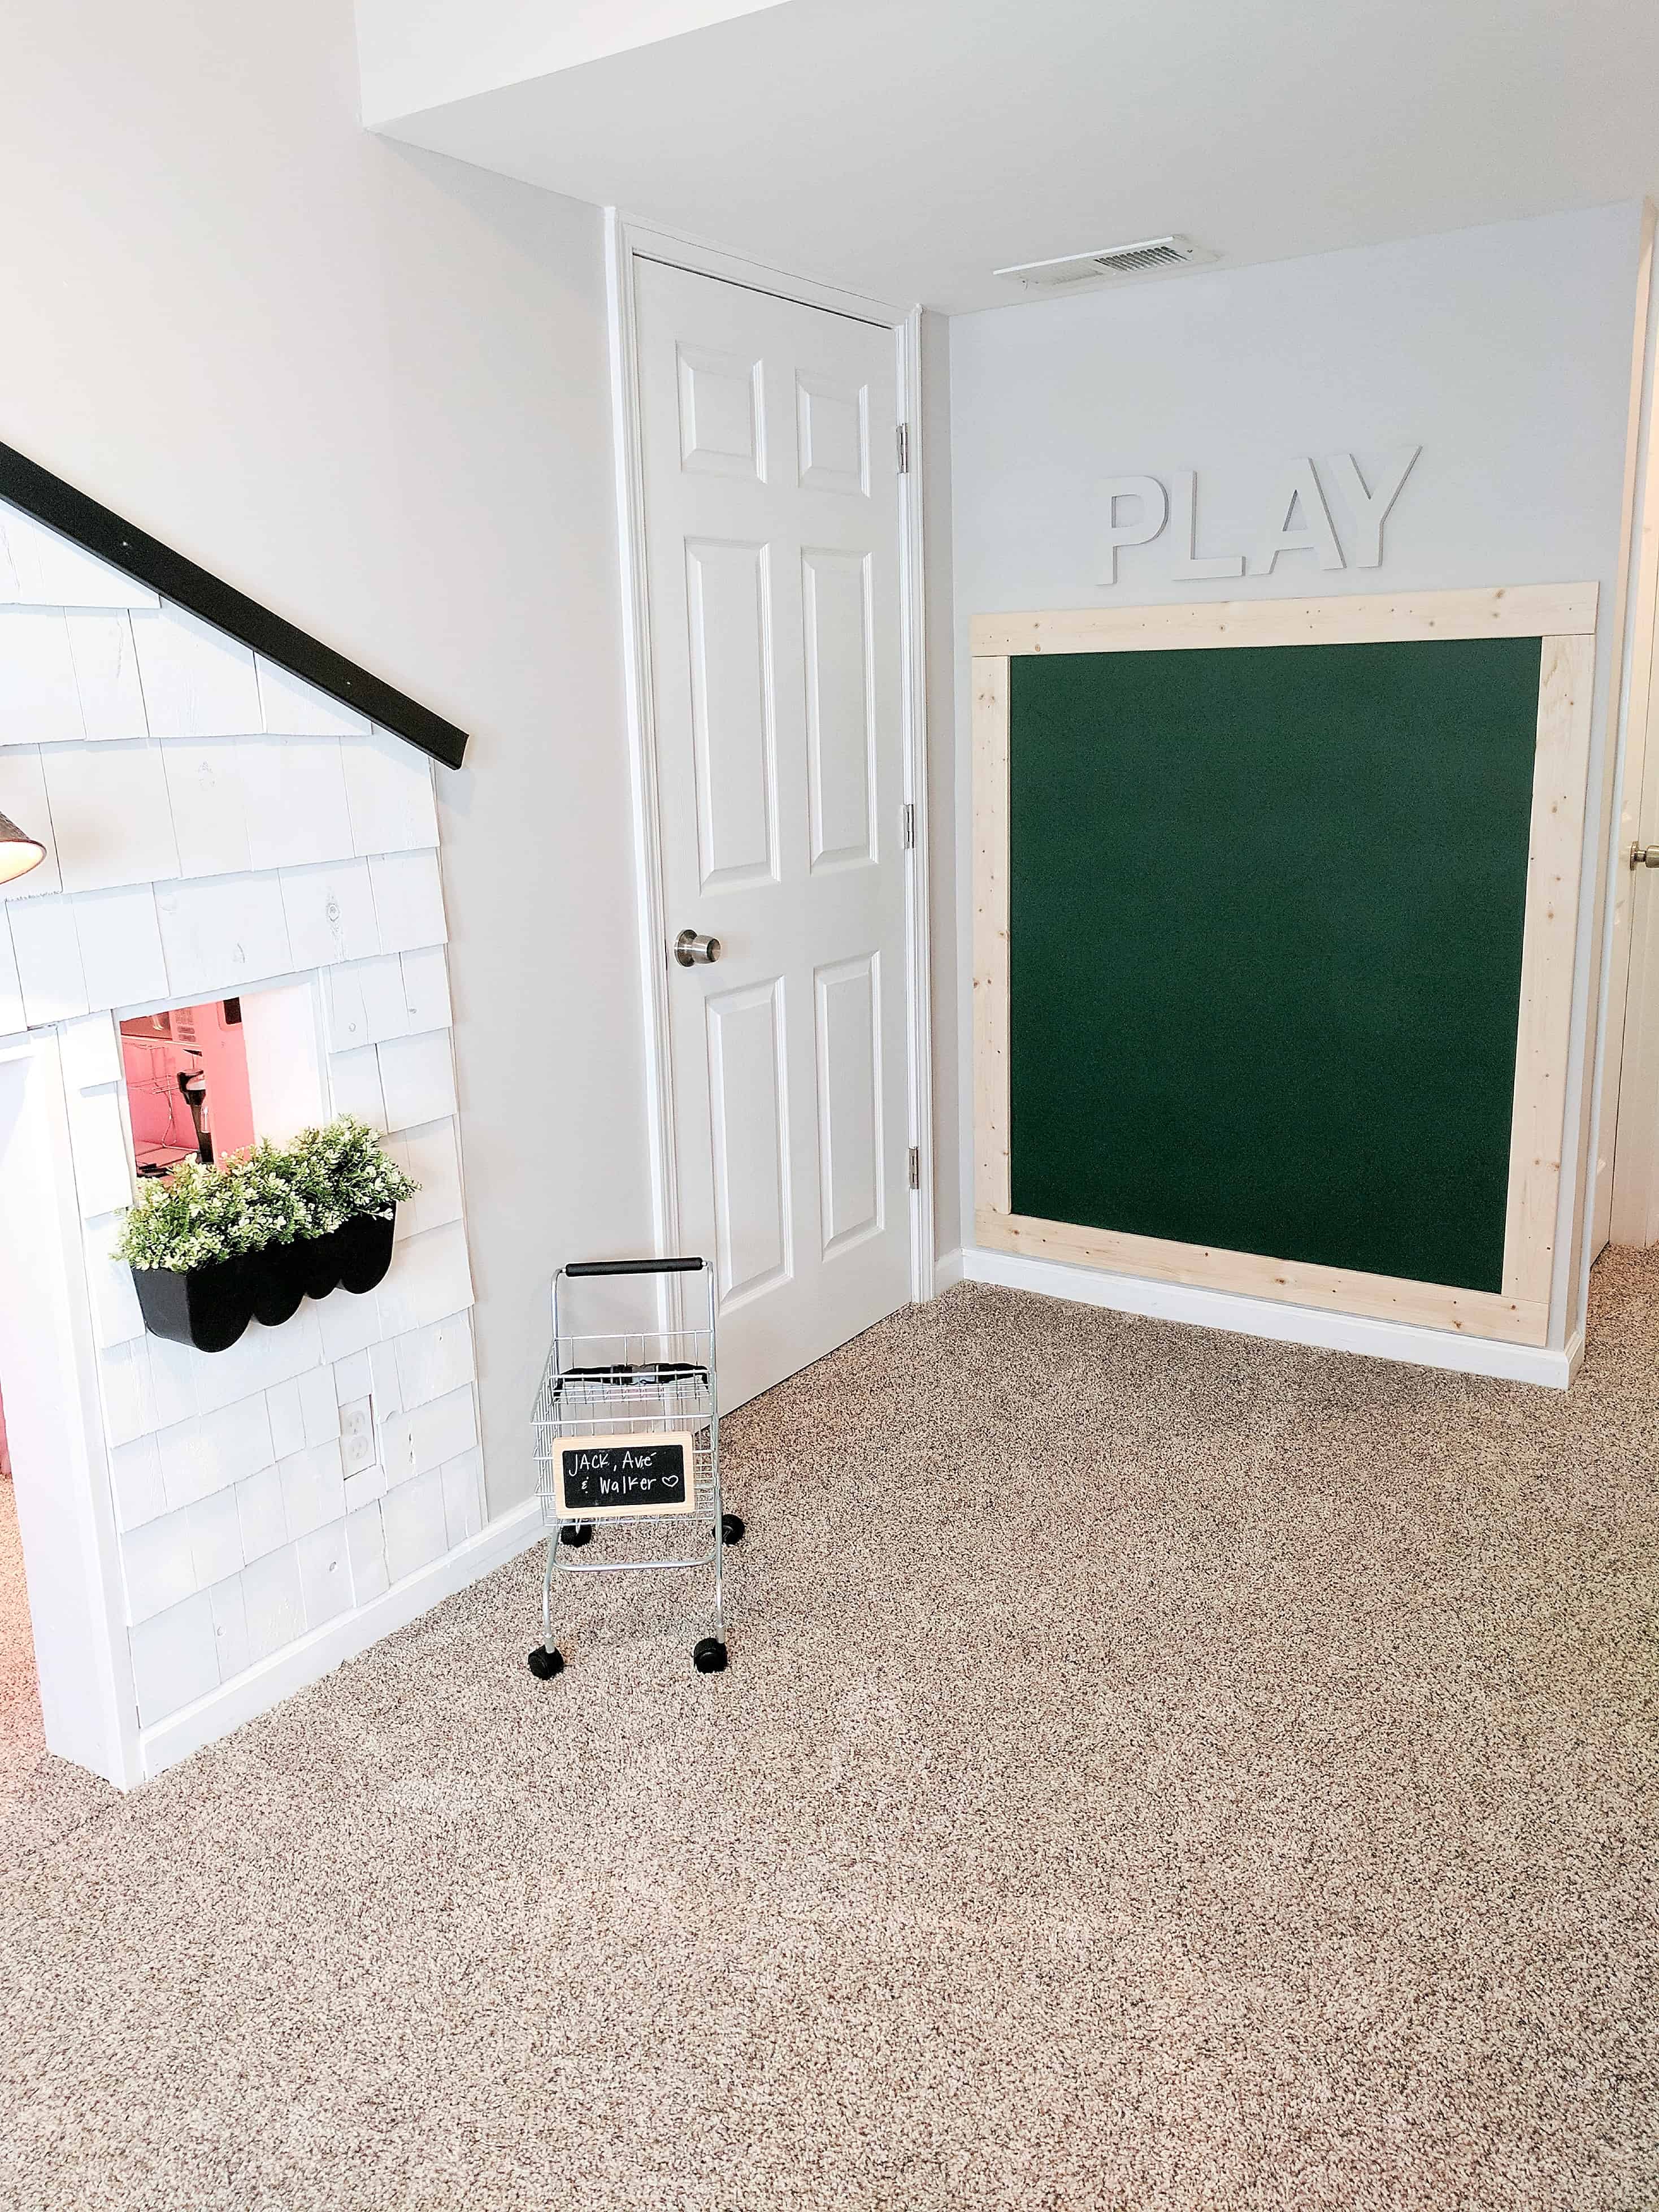
One thing that is SO IMPORTANT to know, is that there is a “box” built into the unfinished storage room of our basement behind the playhouse to make it deeper. This allowed it to not be confined by the depth of the stairwell. Basically knock out the drywall in the form of a doorway, then they go trough that into the built out box in the storage room.
See the video on this post to see what I mean by this BOX.
Adding Cedar Shake Shingles
This was actually a super simple update, but a HUGE upgrade to the outside of the house. I am super modern typically, but I felt like changing the shape and such was more hassle than it was worth, so I went with a fully cosmetic update.
Adding these shingles was SIMPLE, but also very time consuming.
You will start at the bottom of the playhouse and nail the shingles in one at a time. I started at the middle on each row trying to vary the widths of the pieces. When I got to the ends I used a small hand saw and cut a shingle to make them fit. (as a hint – use the thinner boards on the edges for easier sawing). Starting at the bottom of the house I nailed the shingles in one row at a time.
Overlap each row by however much you prefer, and continue to the top. There were a few small areas that were trickier for me – the outlet, and the diagonal. One thing to do before you fully encase the outlet if you have one, is to cover it in painters tape so it is ready for painting! Just get creative on the small areas. Remember that cedar shingles allow a lot of room for error because they are not perfect!
You will go through LOTS of nails, so have them handy. One the process was complete I decided I wanted it to be white. Do not attempt to paint this by hand. I painted it with a paint sprayer (grab it here on Amazon) and am so glad I did, because it was a quick process that filled the gaps and gave it a polished finish.
Lighting
We did not add any of the lighting to this playhouse ourselves. But the playhouse has a can light inside, as well as Christmas lights hung throughout, and a light on the front of the outside. They all are run by one light switch inside the “door” at perfect height for the kids.
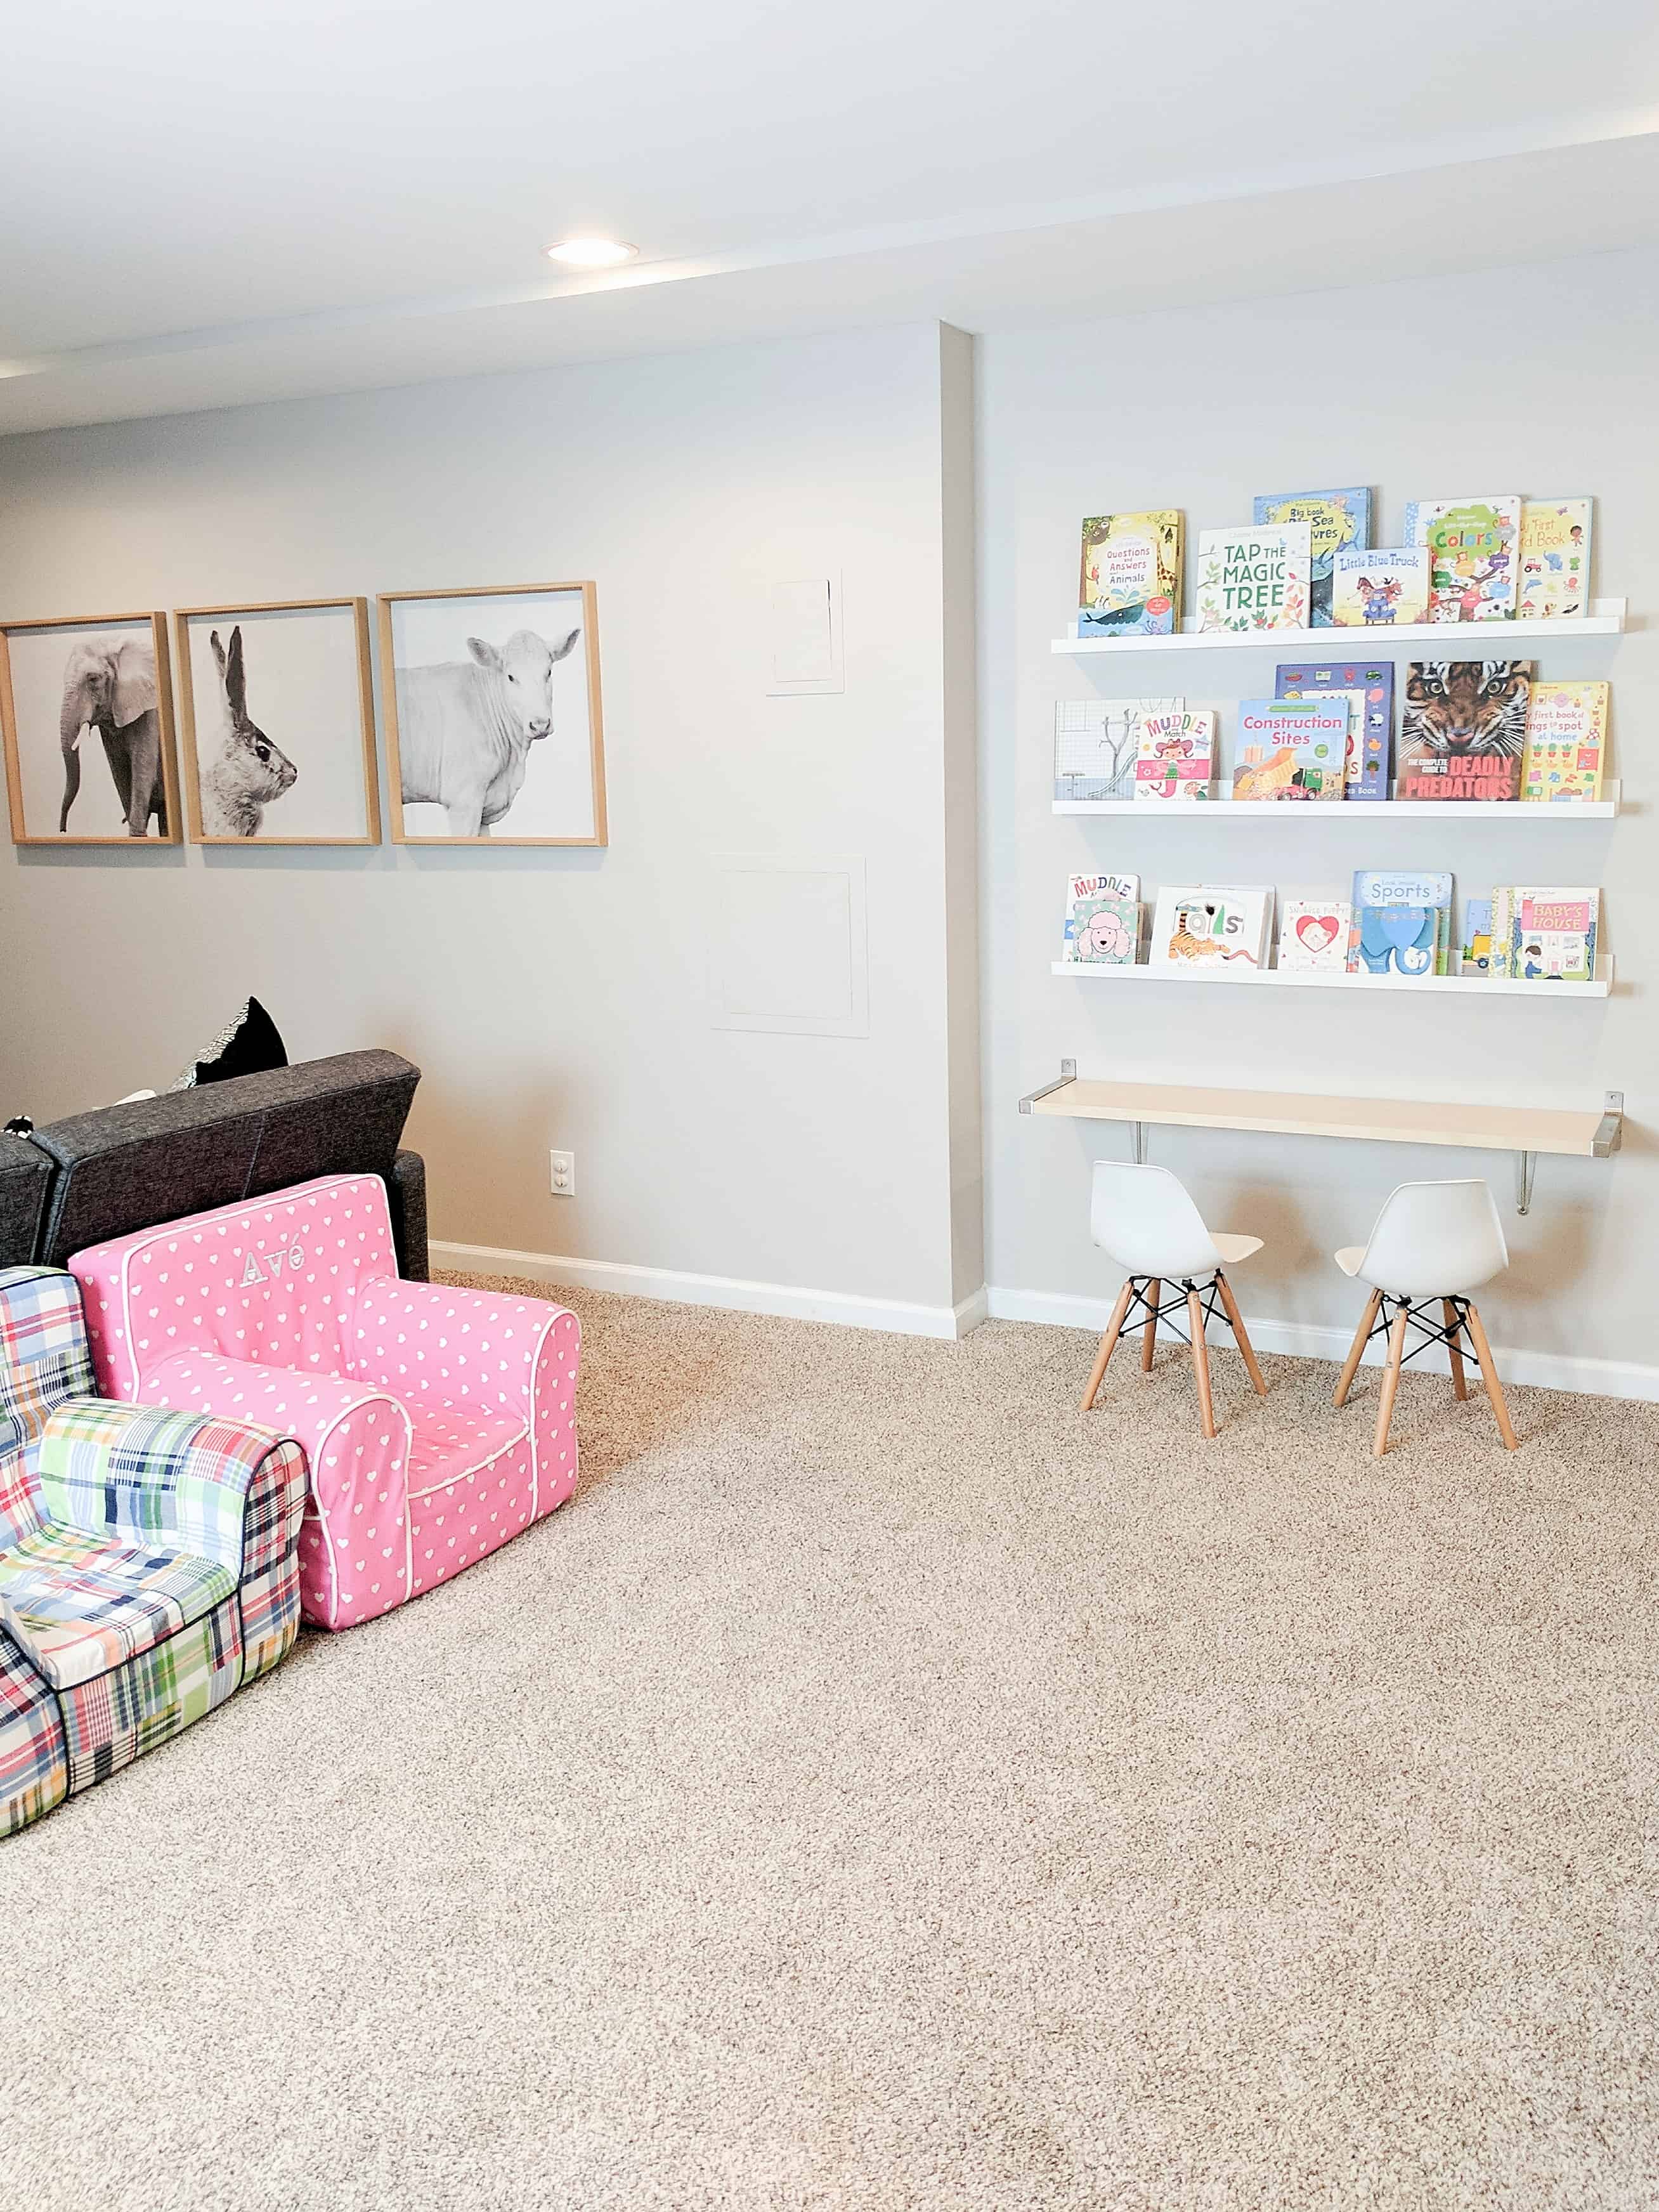
Overall Layout
So for those of you that don’t want to watch the video on this post (let it pop up if you’re a mobile viewer!), let me give you a walk through of sorts. You come in the front opening to room 1. To the left is a “doorway” to a small room that is not tall at all that continues to the bottom of the stairs. Honestly – if you are looking for an area to skip, this is the one!
Straight ahead is a small ‘bar top’ with a window into the back room. To the side of that is a doorway to the back room that is in the “box” I talked about at the start of this post. that is a good sized room that my kids love.
I use the front room for the play kitchen, because the kids love to pass food through the window opening, then the backroom is left open.

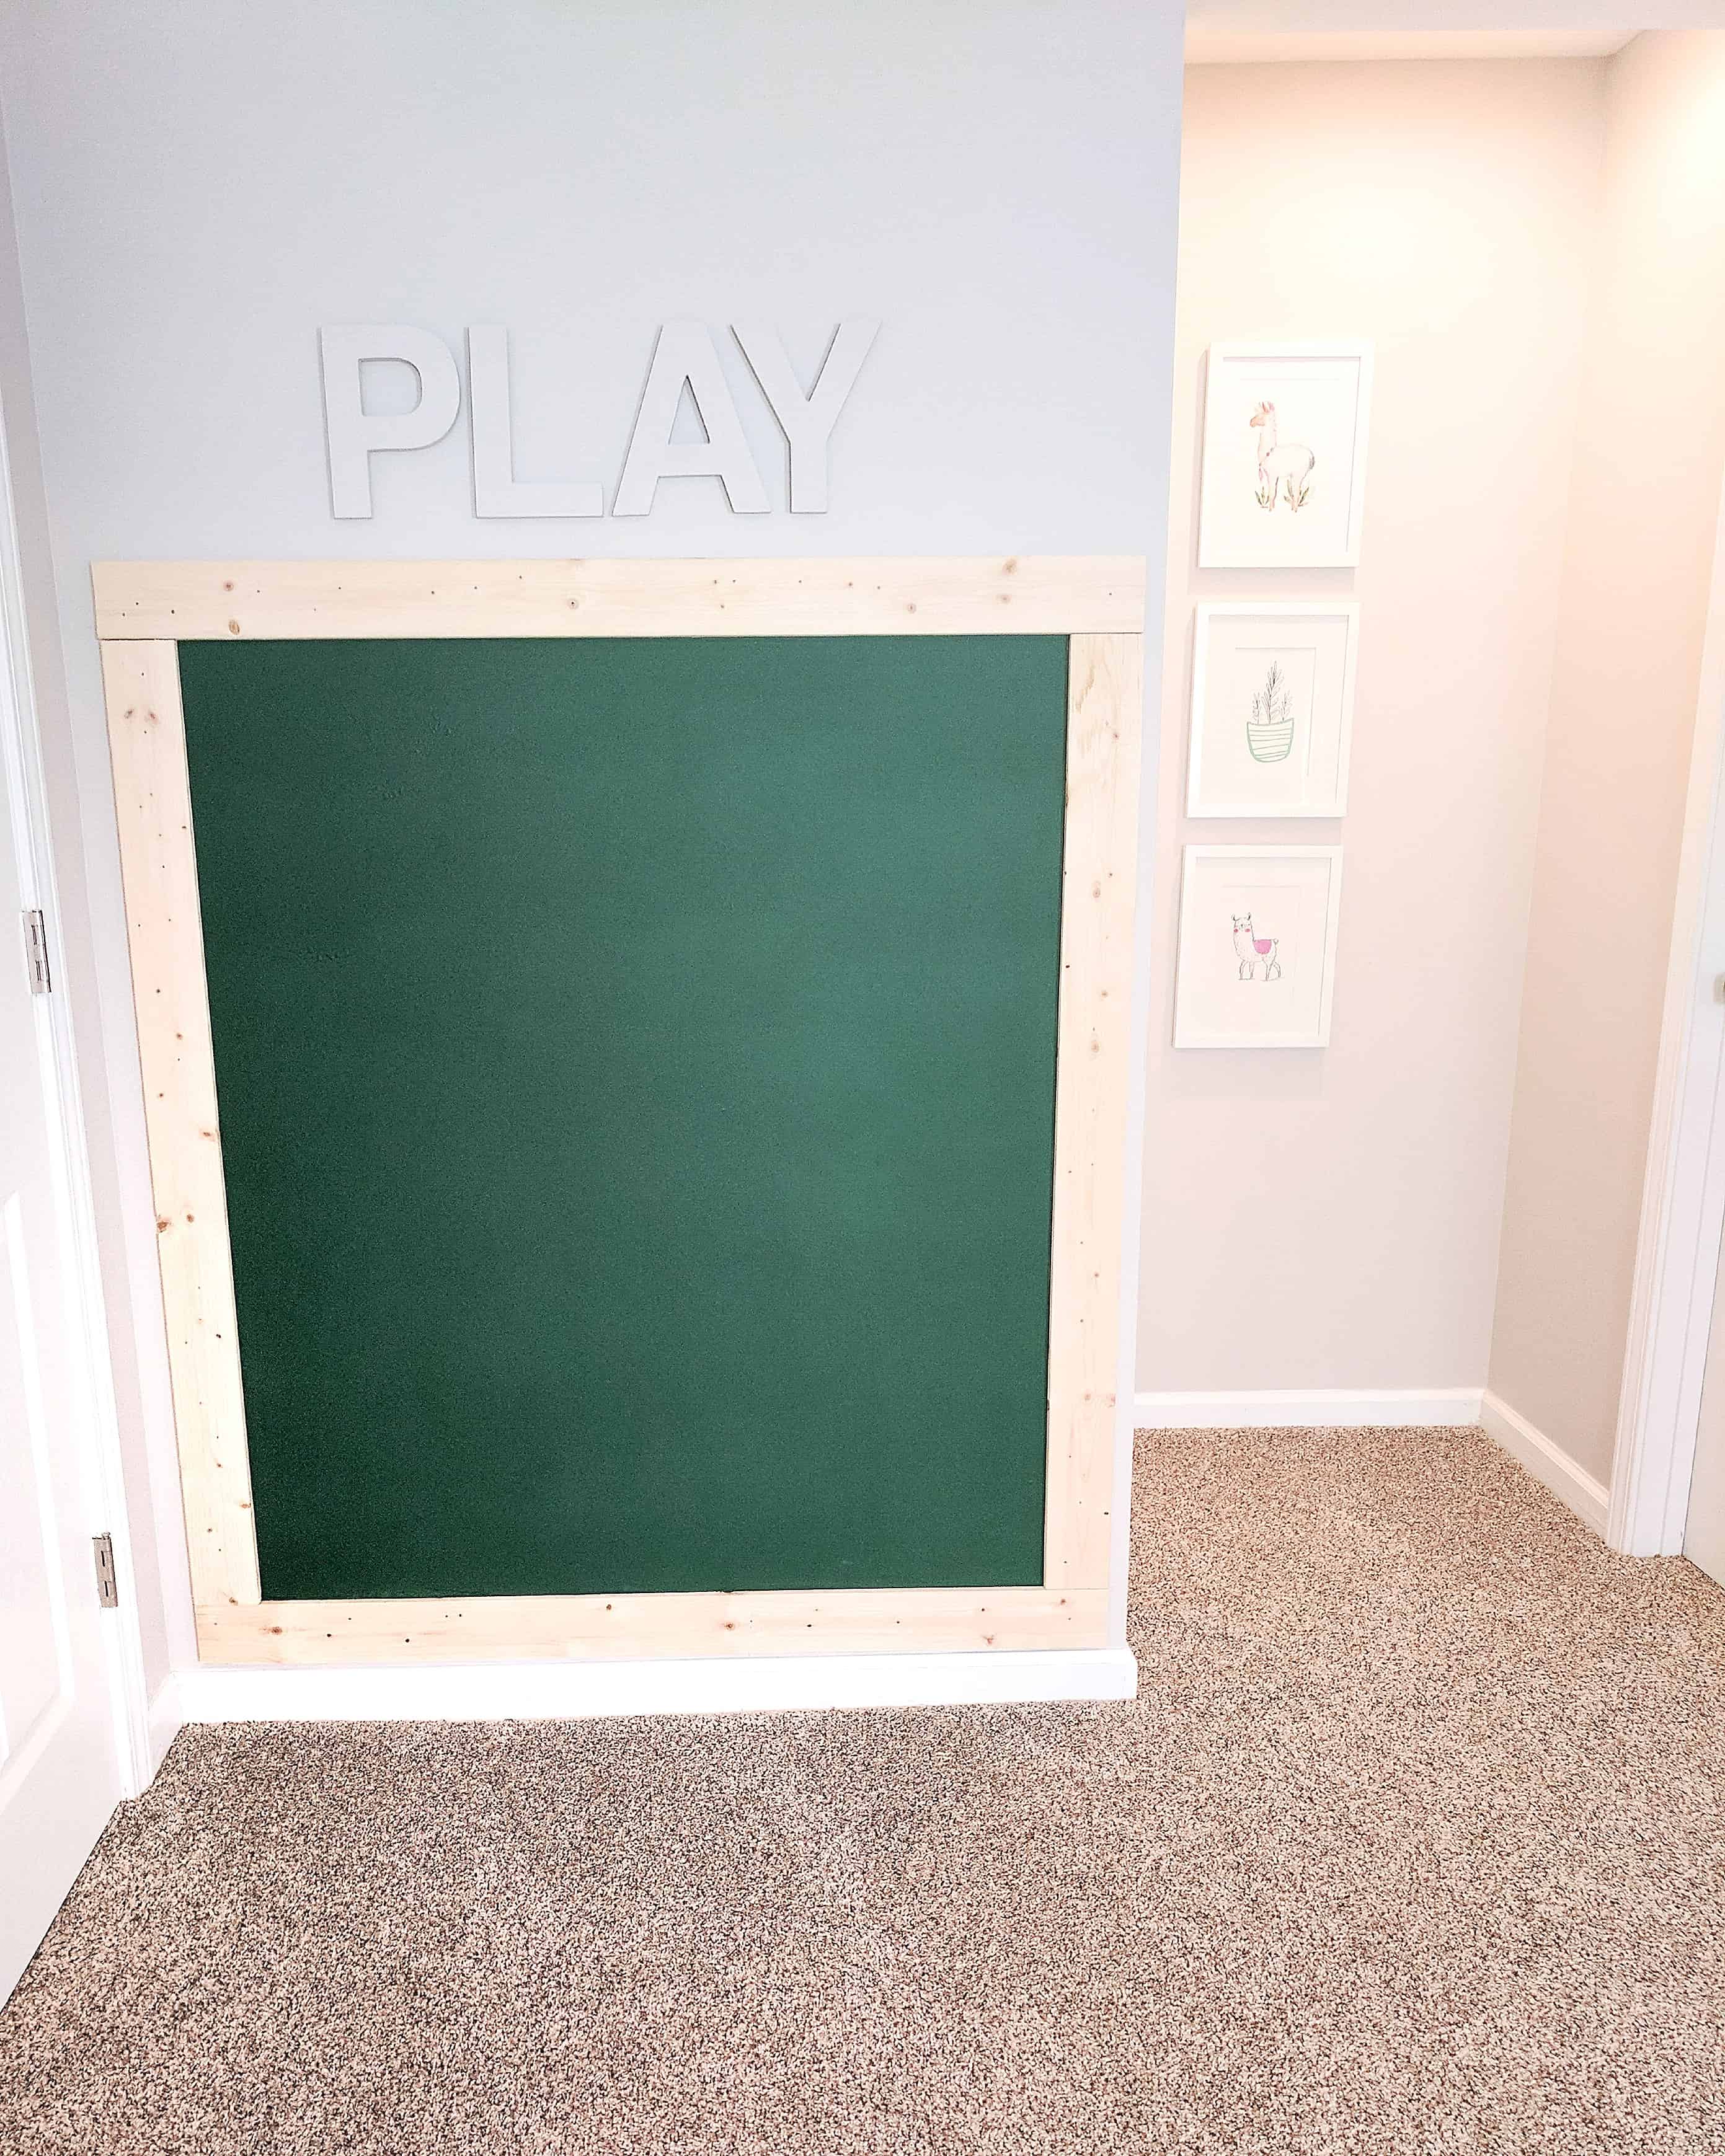
Framed Chalkboard Wall
The other major update I made to the basement was in adding a chalkboard wall.
This was a super simple addition. I painted the wall I was planning to Frame with green chalkboard paint. I then added 2 inch boards around its that I nailed into the wall. Mind blowing right? haha
This was VERY simple, and I planned for it to have a rustic look, and love the end product.
Over the top I painted the letters to spell ‘PLAY’ with the paint I used on the walls for a subtle fun addition to the walls.
Accessories in this Post:
Grocery Cart // Anywhere Chairs // Wall Decor
There are more fun changes to come to the basement this year, but as for now, that is where we are at! Although we didn’t fully build the under stairs playhouse I am more than happy to send more behind the scenes photos or answer any questions you might have.
Other Basement Photos


This is seriously so cool!! Best parents ever 😉
This is perfection!!! Love it
Omg I love everything about this!!
This is the cutest playroom ever! I wish we had a basement where we could do something like this!
Wow this is just too cute!! #goals
Vegas has zero basements! So jealous! Love the play house under the stairs it’s my favorite!!
This is literally the best playroom
I am absolutely OBSESSED with this concept and how you’ve executed it to perfection! I shared this with my BFF and she is asking her hubby to create a play space under their stairs as well! Thank you for the beautiful inspiration!!
I love love love how this turned out! Great photos friend!
Love the house under the stairs! I’d love to see what you did inside it!
Love everything about this! You know I need to up my understairs playhouse game now!!!
Do you have pictures of the inside? I’m curious to see how you made it work and what it looks like!
Hi Susie,
If you head over to my Instagram page I actually did a video tour (not the greatest quality, but a tour none the less) to help show how it was created. I will highlight it for easy finding!
https://www.instagram.com/arinsolange
Amazing Idea!I can use unused space under the stairs of my house and this playhouse will be more interesting for kids. Thanks for sharing such a lovely though for us.
Wow! Amazing idea. We did’t not use under stair. We can use this place in this way. We can make a space for kids. It will a great fun for kids. Thank for such a clever idea of under stairs playroom.
Amazing Idea !I can use unused space under the stairs of my house and this playhouse will be more interesting for kids. Thanks for sharing such a lovely though for us.
I love this room! My girls would be in heaven with a play house like that! Can you tell me what color is your basement carpet and where you got it? We are needing to replace ours and this looks very pretty and neutral.
This is so cute. My girls would be in heaven with this house! Can you tell me the color of your basement carpet and where you bought it? It’s very pretty.
I can try to track it down. We actually went through a small local guy here in STL..if you happen to be in the area, shoot me an email and I can get you his contact!
Hello! I ADORE this & I absolutely must know where you got the two little half sphere baskets to the left of the little house door. I NEED!
Julie,
Thank you so much! they are from Hobby lobby, but as far as I know they no longer have them. I however did see very similar ones at Michaels recently!
Arin
Yeah a basment would be great for this project!