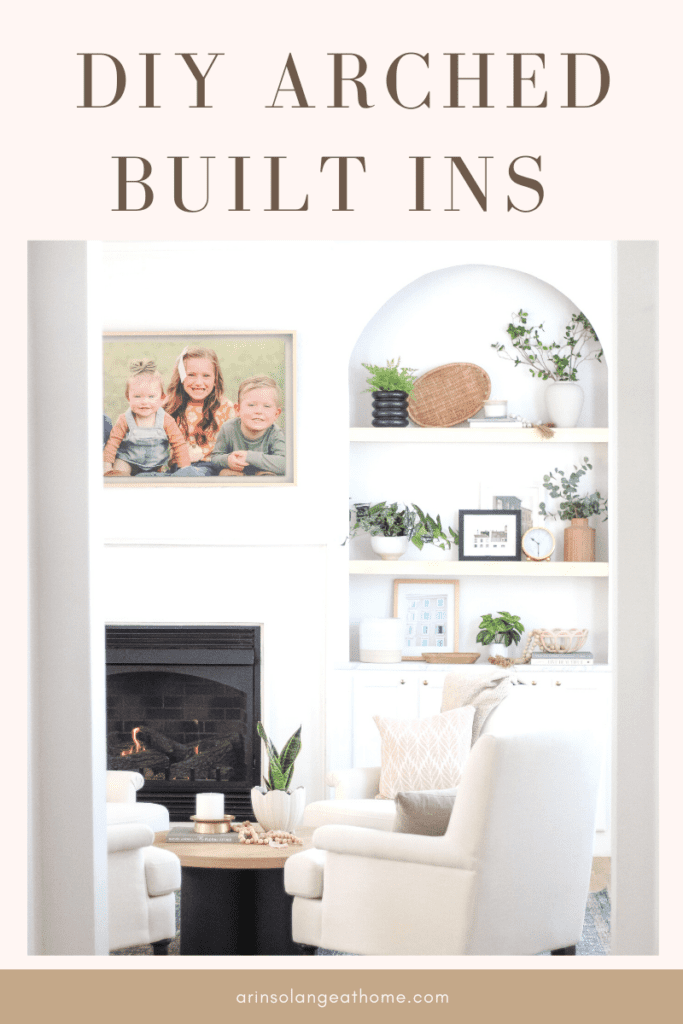
It has been quite a while since I revealed our DIY arched built-ins and it is time for a tutorial. This was hands down one of my favorite projects we have ever done, and the end outcome was exactly how I envisioned it, so I hope you are able to use parts of the tutorial in your own home.
This post may contain affiliate links
DIY Arched Built In
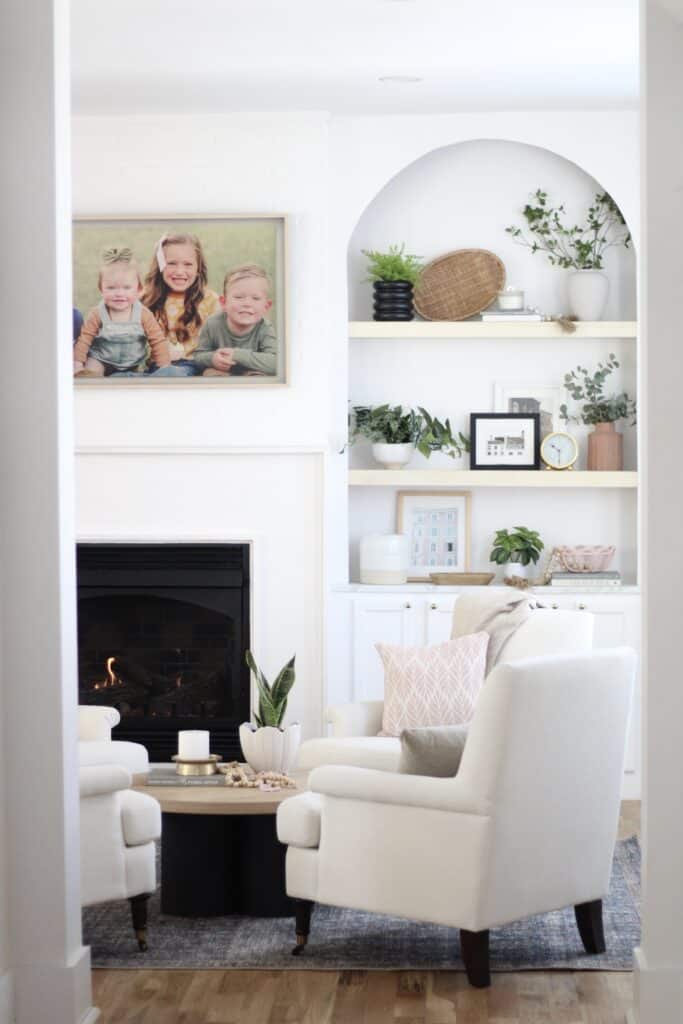
We are about 1.5 years into our new to us (old to the world) house, and this DIY was one I knew I wanted to do from day one. When we decided on a floor plan for the house there was a nook right next to the original chimney that was crying for a good set of built-ins.
If you have followed me for very long on social media then you may know that our last house had amazing built ins in the family room, and we also added DIY IKEA hack built ins in the office – so I was dying for a place to add some decor again in this house.
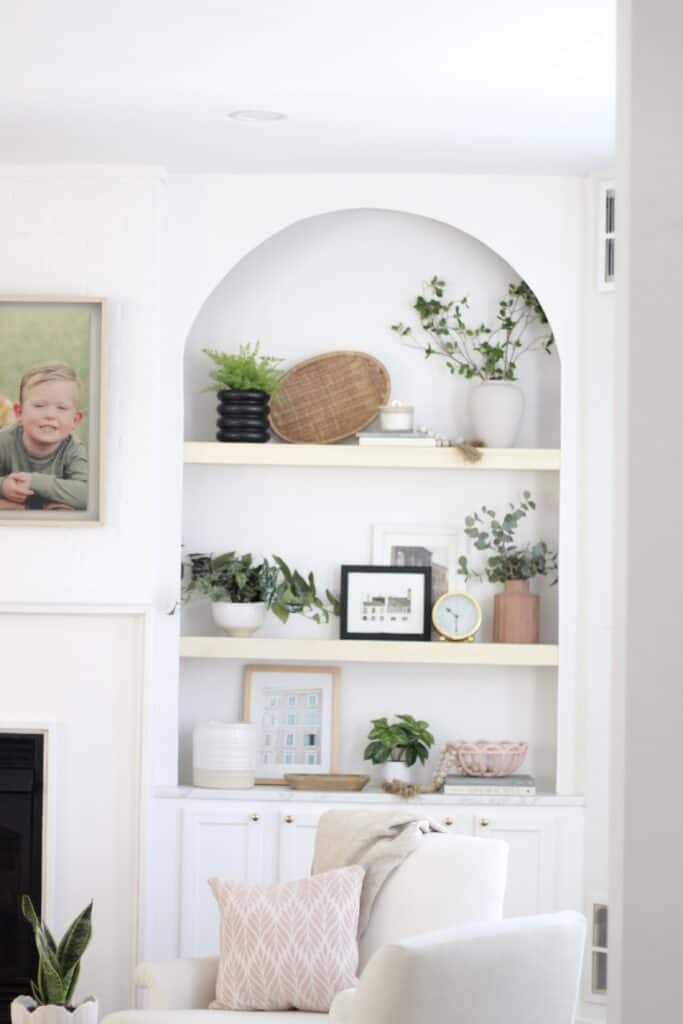
For this set of built-ins we knew we wouldn’t have a huge amount of shelves, so I wanted something that would really wow and make a big impact. I landed on the idea of adding an arch feature to break up a lot of the harsh lines in the area, and it was the perfect way to go.
The Arch vs The Built In
In actuality this whole set up was a series of 3 different DIY’s. The first two steps we had done in some capacity before, then we ended on the arch.
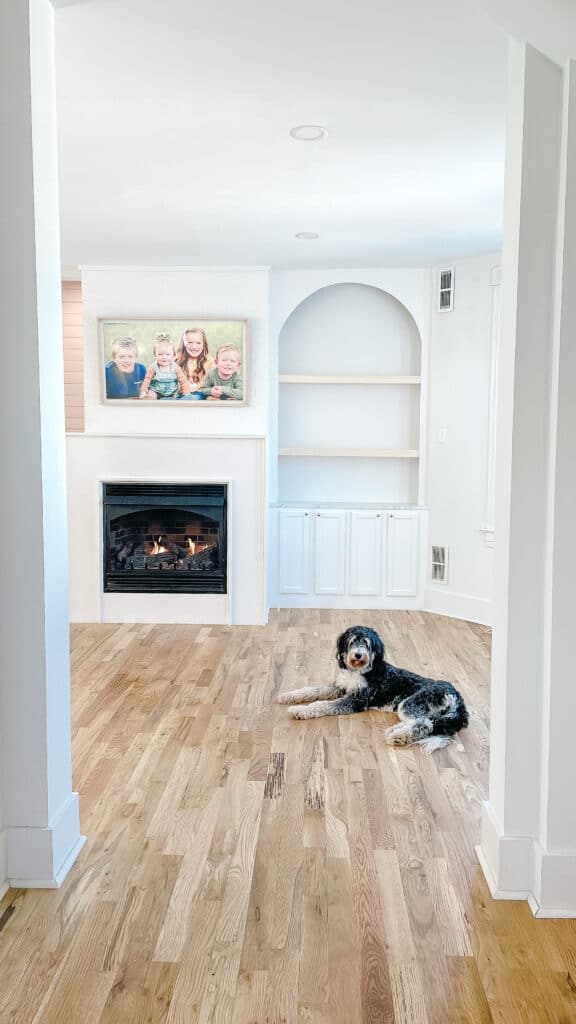
We started with – DIY built in cabinets using stock cabinets, Second were DIY floating shelves, and the last step was that DIY Arch.
I will walk you through the steps of each of these three aspects during this post, but if the arch is all you are interested in, you can scroll down to that.
What you need – DIY Arched Built In Supply List
Like I said before – this was multi step, but I am going to walk you through what you need in total. It is broken down in categories so if you are not doing the whole process you can skip some!
For the Cabinets:
- Stock Cabinets – we went with upper cabinets due to the depth of the space we were working with, but you can choose what works best for you. Measure your space and get the maximum number of cabinets you can fit.
- 1×4 x length of your space.
- Scrap 1x2s
- Counter Top – we went with a laminate counter top and LOVE how easy it was to work with.
- Drill and Screws
- Stud Finder
- Cabinet Hardware
- Paint/Paint supplies
- Sanding Block
- Wood filler
- Caulk
- Table Saw or Circular saw for cutting your counter top if you pick something you need to cut at home.
- Miter saw is helpful – but if you don’t own one don’t get it for this project.
For the Shelves:
- Nail gun
- 1×3 – this is your front piece, so you need enough length for each shelf
- 1/2 inch thick by 8 inch wide pine – this is your top and bottom so you need enough length for each shelf x2
- 1×2 – you need enough for each shelf length plus some.
- Wood filler
- Stain
- Poly Sealer
- Screws/Drill
- Stud Finder
- liquid nails
- circular or table saw
- Miter saw is helpful, but again if you don’t own one, don’t get one special for this project.
For the Arch:
- 1 sheet hardboard panel 4 feet by 8 feet
- Wood Filler
- Sander or Sanding Block
- Paint
- Nail Gun
- liquid nails
- string and pencil
- 1×2 – you need enough for the width of your arch, as well as the height on both sides.
- Saw of some sort for the 1×2 pieces – we used our miter saw
How to – DIY Arched Built in Tutorial
Okay now that you have your supplies, let’s get to the DIY tutorial. Just like the supplies – I will do this in order, but will label what step you are on incase you want to skip a step.
DIY Cabinets for Built Ins
For the built in cabinets this was not our first rodeo. I am going to give you some differences from our last set of these, but I am also linking a more in depth tutorial for DIY built ins using stock cabinets.
For this set of cabinets we went with 4 INDIVIDUAL upper cabinets. This was due to space and it just worked best for our space.
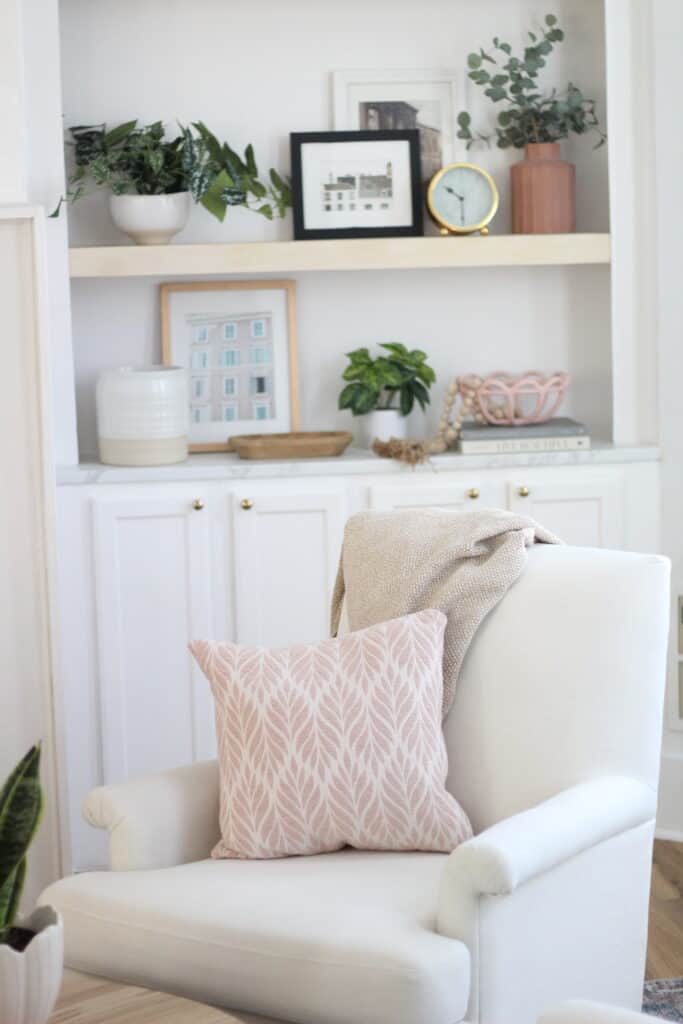
The other big difference we did was instead of using wood and painting the top we tried out some laminate faux marble. The end outcome is gorgeous for the small spot. We didn’t feel it was worth the cost to get real stone due to it never getting use that would require the durability.
When it comes to cutting your counter top if you also go with laminate make sure your blade on your circular or table saw is really sharp. Otherwise you can treat this fairly similar to any other piece of wood.
For the rest of the tutorial on putting in the cabinets for a built in look I am sending you to this DIY built in cabinets from stock cabinets tutorial.
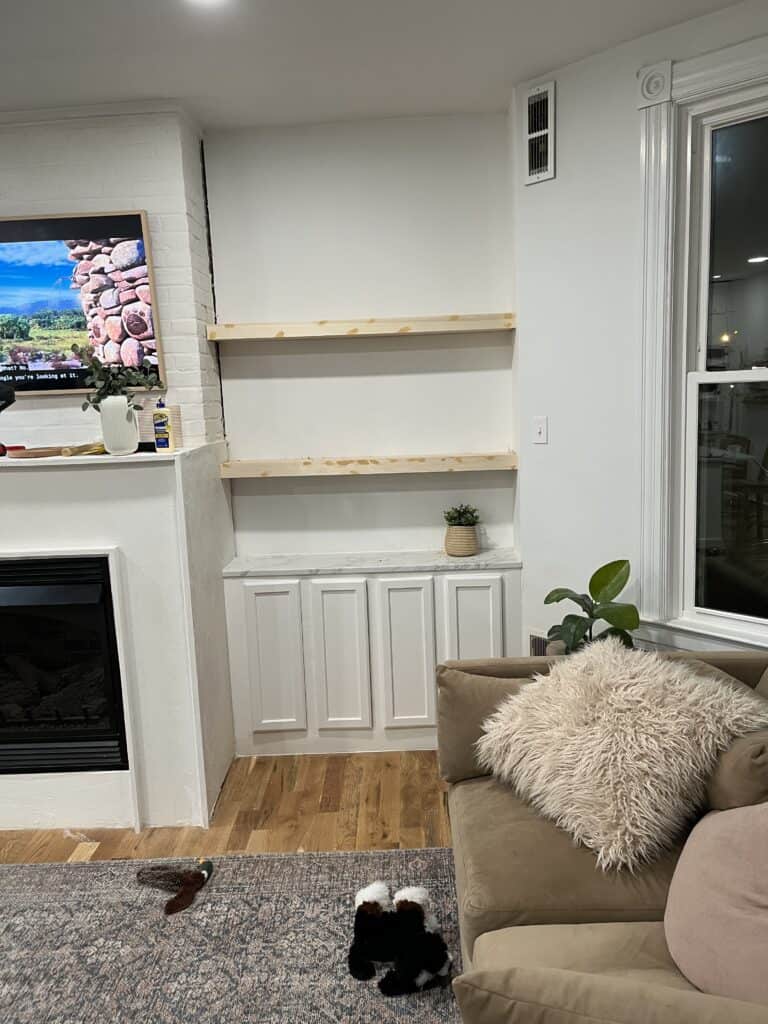
DIY Floating Shelves Tutorial
Once your cabinets are in – you need to decide on how many shelves you want, and what you want them to look like.
We went back and forth because I originally thought maybe we would just order these shelves, because we have used them twice in the past and they are GORGEOUS. To save money we decided to DIY, and i think the end outcome was great.
This is not our first time doing DIY shelves like this, and in fact we used a really similar tutorial that you can find here for our linen closets. Because this is exposed and we wanted a true floating shelf look however, we did tweak things, so below are the steps.
Steps
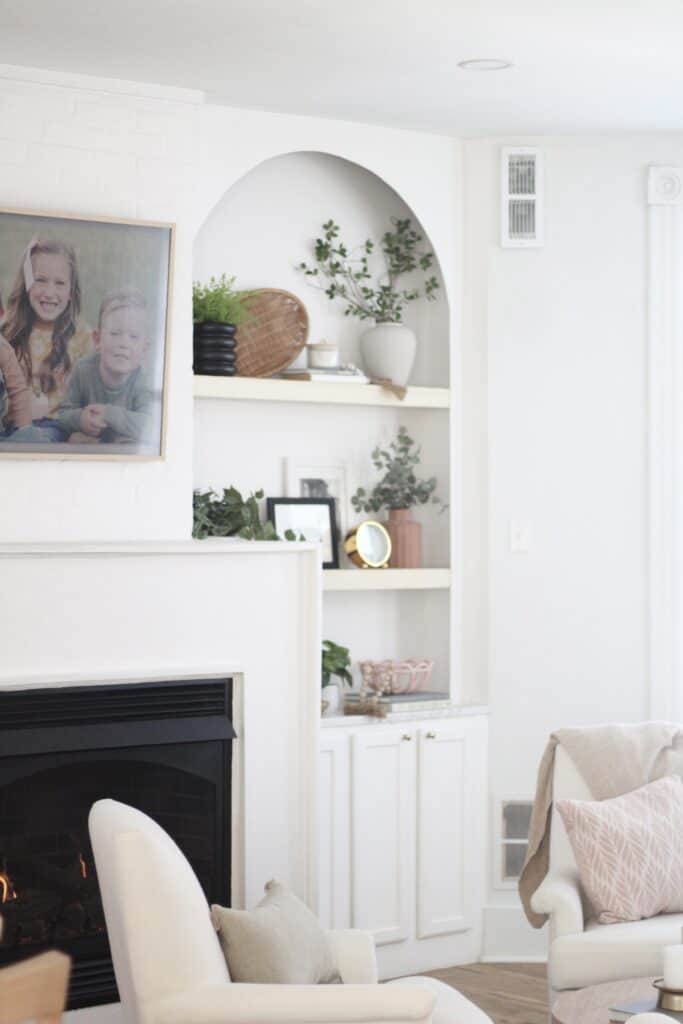
- First determine the number of shelves you want and how thick you are wanting them to be. Keep in mind that if you are adding an arch you will likely not want to have too many shelves. We decided on 2 shelves, because I like odd numbers, and with the counter top that technically gave me 3 spaces to decorate.
- First you are going to add your supports. Cut your 1×2 to the length of the shelf – this doesn’t have to be exact because it will be hidden. You also need to add supports to the side walls in the same manner. You will have a U. These should be put on the walls with both liquid nails and screws into the studs.
- Now using a saw cut your top and bottom boards to the length of your shelf. Using liqid nails and a nail gun nail the boards into the top and bottom of the support – at this point you will have a hollow looking shelf.
- Last you will cut your 1×3 to the length of your shelf using liquid nails and your nail gun, nail this in to the front of your shelves.
- Now you need to fill any holes, sand, stain, then add polyurethane sealer.
To see more up close details of that process check out out one of these two blog posts below.
Linen Shelf Tutorial | Craft Shelf Tutorial
Arch for DIY Arched Built Ins Tutorial
Now for the actual arch. There are A MILLION ways to build an arch, but we were looking for something simple/not bulky, and fairly inexpensive. This step only cost us about $15 so was money well spent. I am going to give you a step by step with some disclaimers before I start – because pending the width of your space you can save some work!
Steps
* If your width of your arch is 48 inches wide or less you can work with your sheet of wood without seams. This is ideal. Our opening was about 53 inches wide, so we had cut the sheet of wood – which is how I will explain things.
- For our vertical sides to the arch I wanted 3 inches wide, so the first thing we did was cut 2 3 inch long strips off piece of wood using our circular saw. put those aside for later.
- This left us with a piece of wood that was 8 feet long by 42 inches wide. I knew we didn’t need more than 42 inches for our height of our arch, so we cut length wise a piece off for the width of the arch. (After that cut we were working with a piece of wood 53 in long by 42 wide)
- Next we determined the height of the arch. This was the height from where the 3 inch sides started curving. We decided on 24 inches, so ultimately ended up with a 24 inch tall by 53 inch wide piece cut out to draw our arch on.
- Once you have your arch piece cut, it is time to draw your arch. I will be honest I am not amazing at this, but essentially you will tie a pencil to a string. You need to hold your pencil straight up and down and keep the string tight. Have someone hold the string in the middle of your width for your starting spot. For our arch I didn’t want it too curved so we held our string on the floor below the wood. Also keep in mind that you want your start and end of the arch to be 3 inches in on both sides. That is very important.
- Once your arch is drawn, cut it out with a jigsaw, and put it aside with your 2 3 inch long strips.
- Now you need to add some framework. Add a piece of 1×2 to your ceiling at the depth you want your arch to sit out. For us that meant the same depth as our shelves.
- We then added liquid nails to that piece and using our nail gun nailed the arch into the board.
- Once that is in, add some 1×2 supports behind the verticals and again nail your arch into that.
- Now you are ready to work with your 3 inch strips. You need to give these a sanding before you adhere them because you cant sand the spots in front of the shelves.
- Now measure your height for the sides and using a saw cut them. Ours were slightly different cause it is an old house with wonky walls and ceilings.
- Nail the 3 inch strips into the shelves, then again on the side walls, add 1×2 supports. Nail those into the walls, then nail your arch into the supports for more support.
- Now you need to fill your seam where the sides meet the arch as well as any nail holes with wood filler, let that dry and sand.
- You also will need to carefully sand the whole arch. Be careful because this sands down really easily and quickly.
- Last – paint your arch and you are ready to sit back and add decor!
I will share more on the decor and the styling of the room later this week, so if you have any questions on that look for the blog post and social shares this week!
Other Posts You’ll Love
IKEA Coffee Table Hack – as seen in this room | White Kitchen Backsplash | Cabinet Hardware from Amazon | Best Paint for Cabinets | 9 Modern Area Rug Ideas
Pin the Photo Below for Later
Hopefully you feel confident in creating a DIY arched built in with this tutorial. Comment below any questions you have on this project, and be sure to follow me on Instagram and TikTok (@arinsolange) to see the rest of my DIYs!