Floating shelves are all the rage right now, and for good reason! They are functional and pretty. So it seemed like it was time to give my readers and followers an easy DIY floating shelves tutorial. I will walk you through how to make your own shelves in this post, as well as considerations you should be making.
This post contains affiliate links
What are floating shelves?
Before I get to the DIY tutorial lets talk floating shelves. What are they exactly? A floating shelf is exactly as it sounds. A shelf with no bracket so it appears as though its floating on the wall.
There are several different kinds of floating shelves, and they can serve many different purposes pending your space and needs. I used these solid wood floating shelves with amazing brackets in our last kitchen and they were amazing!!
That said – to do the same style in our craft space would have been super expensive. We decided on DIY for both expense, and the ability to make them weight bearing enough for any and all storage.
Check out this video
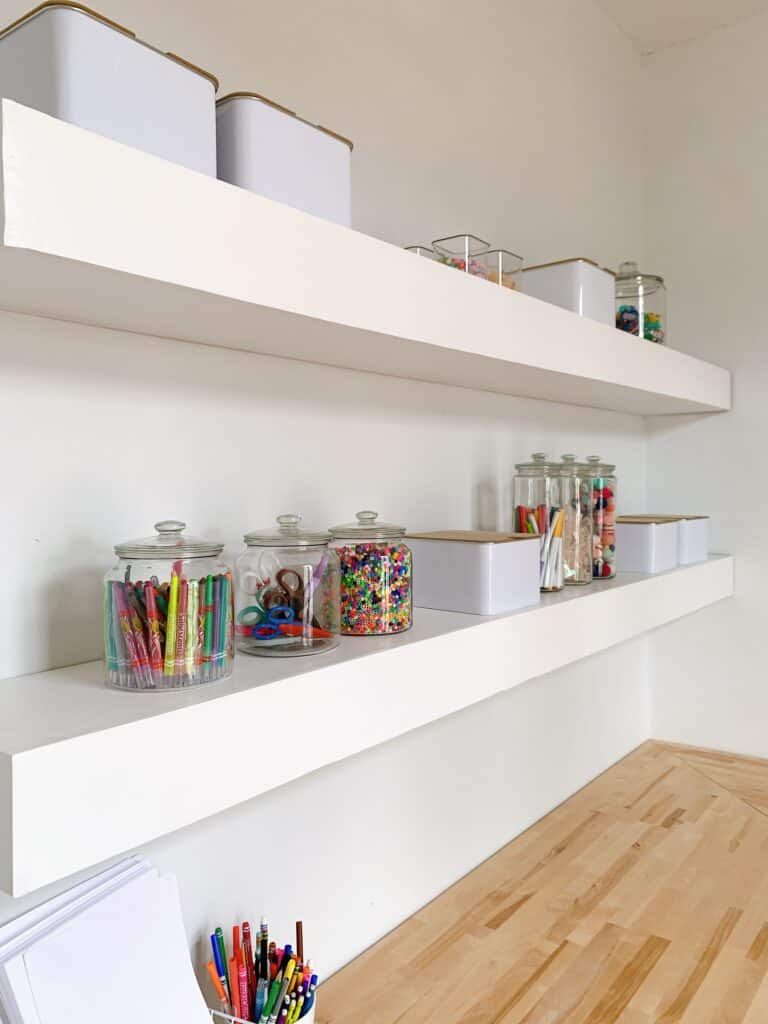
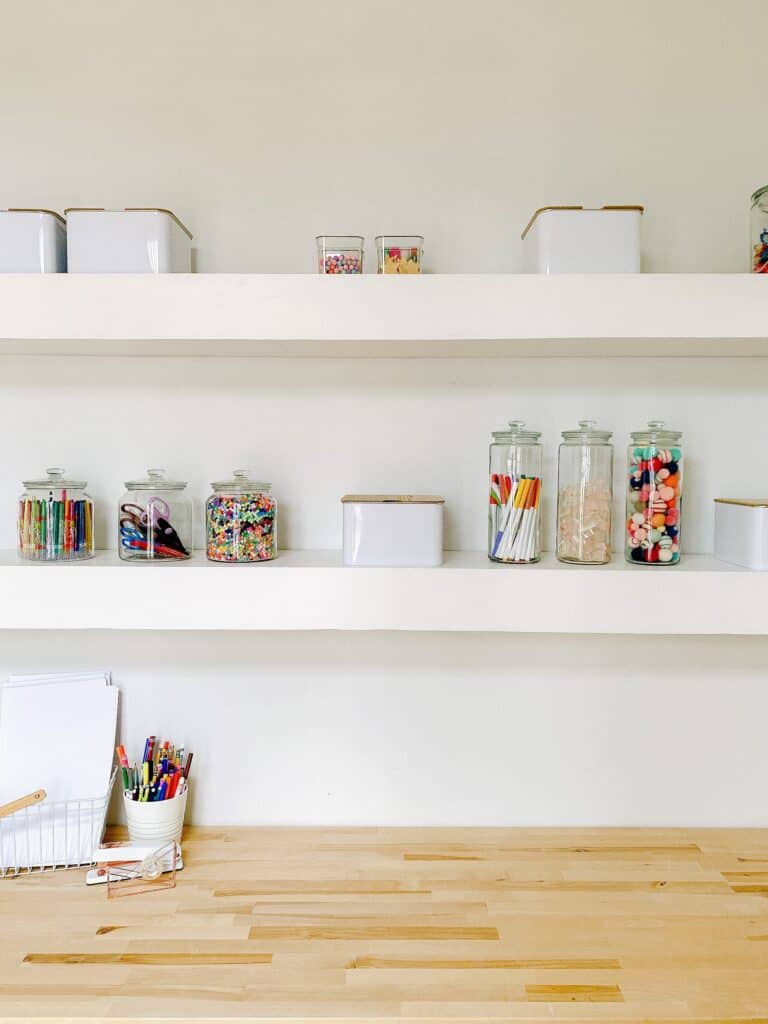
The video below shows the shelves up close and how I styled them in our craft room.
Easy DIY Floating Shelves Tutorial
Okay okay – so now you know what they are and you are ready to build! This tutorial is fairly beginner and something most anyone can do. Some tools are required, but you can also get the majority of your lumber cut at the store if you would prefer.
Selecting Lumber
I will walk you through what we personally selected for our project in terms of lumber, but want tot give some disclaimers and suggestions to consider when making your own choices.
The number one questions you need to decide before picking lumber are: How thick do I want these to be? and Do I want them stained/natural or painted?
The thickness of the shelves will make a difference on the board thickness you use, as well as the supports you select. And if you plan to stain or leave your shelves natural you will need to go with a solid wood not plywood like we did.
Lumber & Supplies:
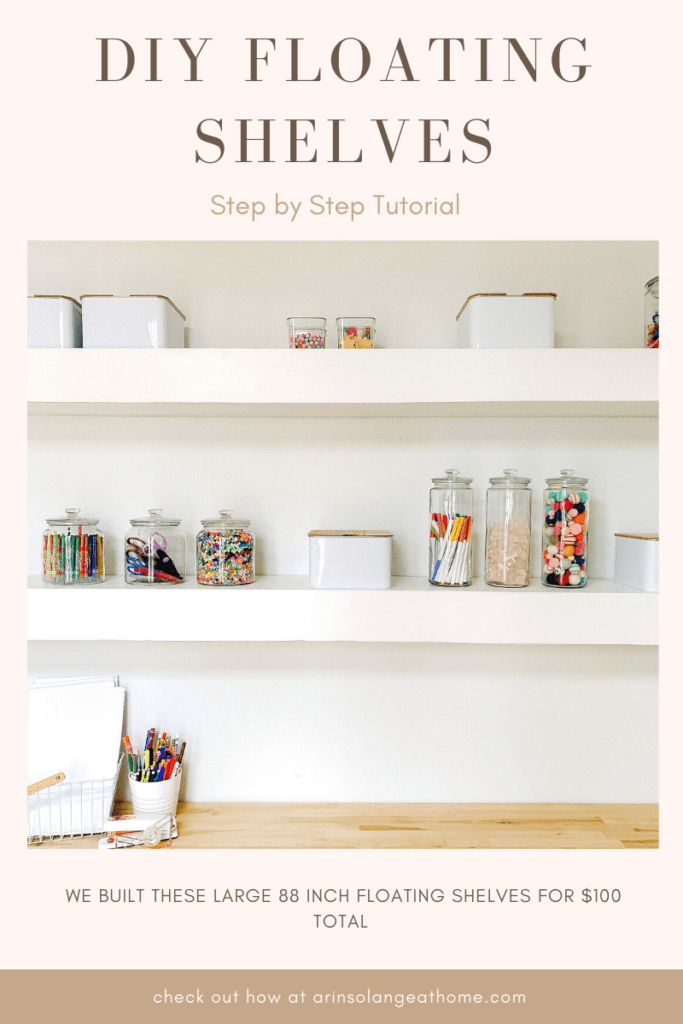
We went with 2 shelves both 88 inches long, 10 inches wide, and when finished they were 4.5 inches tall.
One thing to remember when you are reading below is this will take some math. And also know that when a piece of lumber has a name that does not mean that is actually its measurement. IE – 2×4 boards are not actually 2 inches by 4 inches.
Lumber
- Support Lumber – For us we used 2x4s, but a 2×2 would also be a great choice for a less deep shelf. You need 1 piece cut to the length of your shelf minus 2 inches. (for us that meant the supports were 86 inches long). You then need scraps for the ‘arms’ cut to the width of your shelves minus 3 inches.
- Top and bottom boards – This is where you need to decide on your finished product. Solid wood will leave for less work with wood filler. These 2 pieces will be cut to the width x length of your shelves. (ours were 88 inches x 10 inches)
- Front Piece – The height is something you need to do the math on baed on what you buy, and the length is the same as your top and bottom pieces. For the height it is the height of your support piece (for us that was the 2×4) + height of your bottom board + height of your top board. ( So for us – that meant 3.5 inches + .5 inches + .5 inches) giving us an end board that was 88 inches long by 4.5 inches tall.
- Side piece (or pieces) – We only needed 1 of these because were in the corner, but if yours doesn’t go to the corner do the same on both sides. the height will be the same as your front piece (for us that was 4.5 inches) and the length will be the length of your top + added length of the front piece. (for us that was 10.5 inches). This is a good cut to do at home and measure perfectly before cutting if you can.
Tools and Supplies
- Nail gun (preferred but you could use a hammer and nails)
- Wood filler
- Drill and Screws
- Stud Finder
- Level
- Miter Saw
Steps – Let’s Build your custom DIY Floating Shelves
- First things first is to get your lumber and have your larger cuts done in store. For us we had Lowes do the cuts for width so we didn’t have to mess with that when we got home.
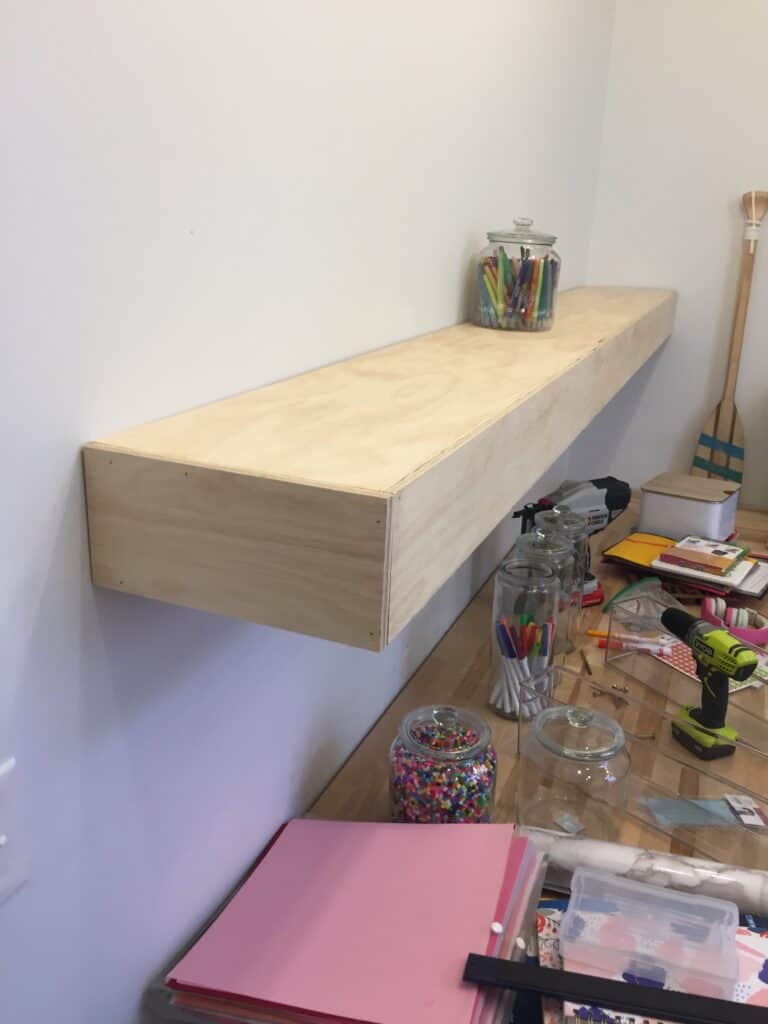
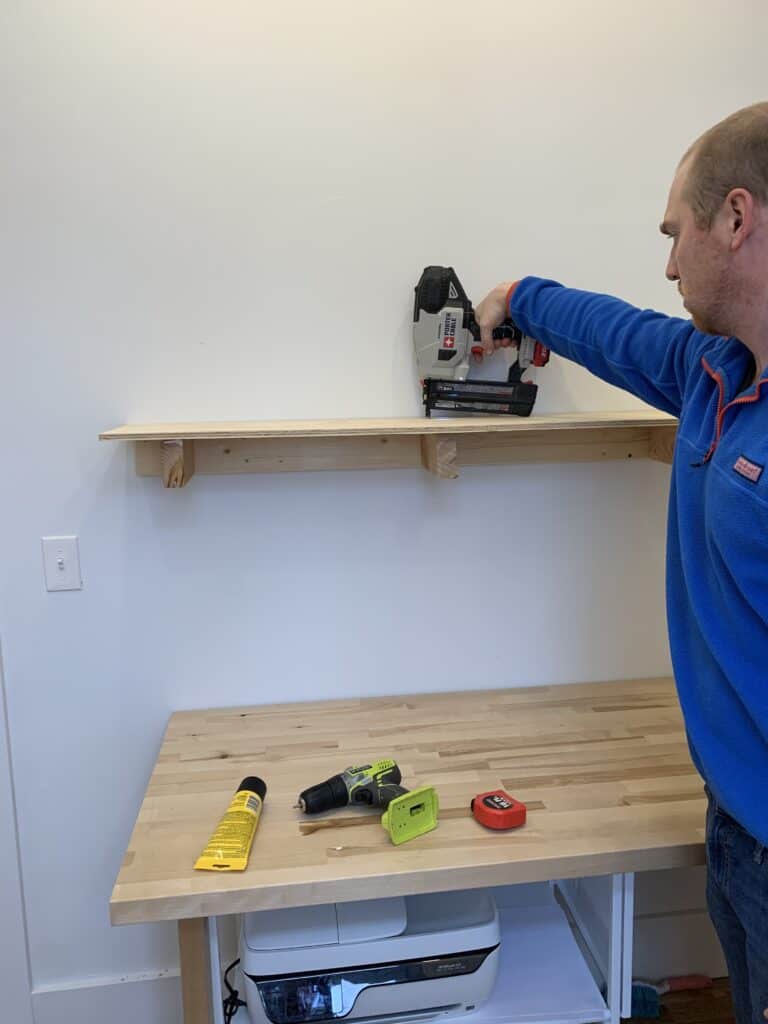
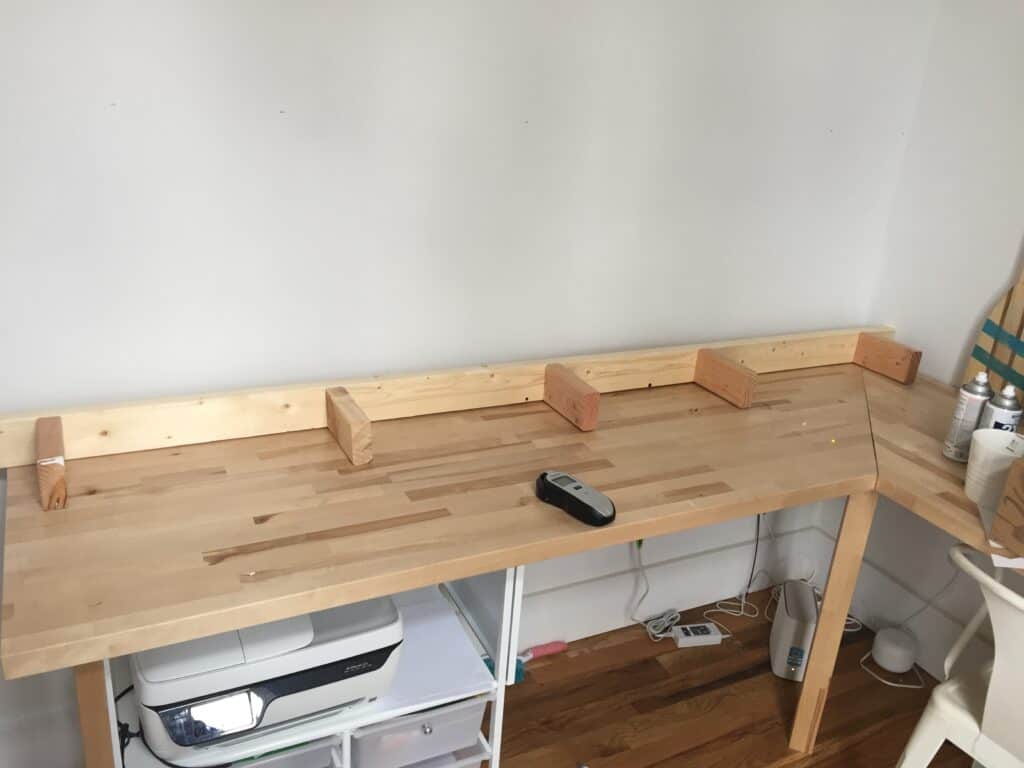
2. Now it is time to assemble your frame. Take your long frame piece (remember for us this was a 2×4) and attach the arms well spaced on it. Simply drill through the back of the 2×4 to attach them, and remember you aren’t ever going to see this portion, so perfection isn’t key.
3. Once you have your frame built it is time to hang it. Depending your length you may need 2 people to level the frame on the wall and hang it by drilling into your studs.
4. Now it is time to attach your top piece. We personally used screws to attach this, but if you are going to stain you an use a nail gun so you have less to wood filler. Use a nail gun or drill to attach the top piece to the frame.
5. Do the same thing and attach the bottom board to the frame. We attached both in front and towards the end of the frame ‘arms’.
6. Next is the front piece and sides. Using your nail gun nail the front piece in several places to attach it, then do the same on the sides.

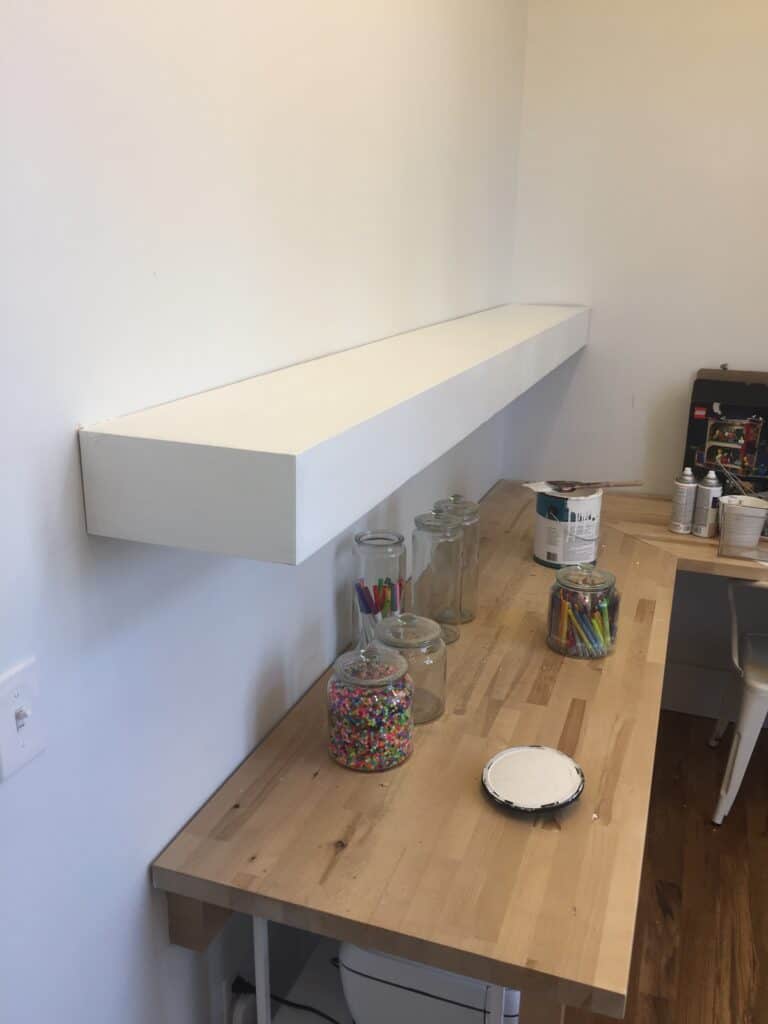
7. Use wood filler to fill any holes. For us because we used plywood we also had to use wood filler to make the seams more smooth. Once the wood filler is dry sand it down well and paint or stain.
I used Behr Bit of Sugar for my shelves, but you can also use any stain or just use a water based poly sealer.
And that is it. Our shelves are HEAVY duty – I have no worries about them holding up to massive amounts of weight, which was a huge part of my decision making in the choices we made.
I also really wanted something affordable, so both were accomplished. I think ours cost us roughly $100 total (however lumber prices change frequently).
Other Posts You’ll Love
If you loved this post on DIY floating shelves then the posts below will be perfect for you!
Painting Stone Fireplaces | DIY Built-ins – an IKEA hack | DIY Canopy Bed | DIY Built in Desk | DIY Kids Table
Pin the Photo Below for Later
Hopefully you feel ready to tackle your DIY floating shelves and if you have any questions be sure to leave them in the comments below. Don’t forget to pin the photo below before you leave and follow me on Instagram (@arinsolange) for DIYs.