I have been in love with the mid century modern dresser that we use in our living room as our media stand for 4 years. It remains a favorite piece of furniture that has loved hard and remained beautiful, but after this long I was itching for change, and did a gorgeous EASY update that you guys will love!
this may post contains affiliate links
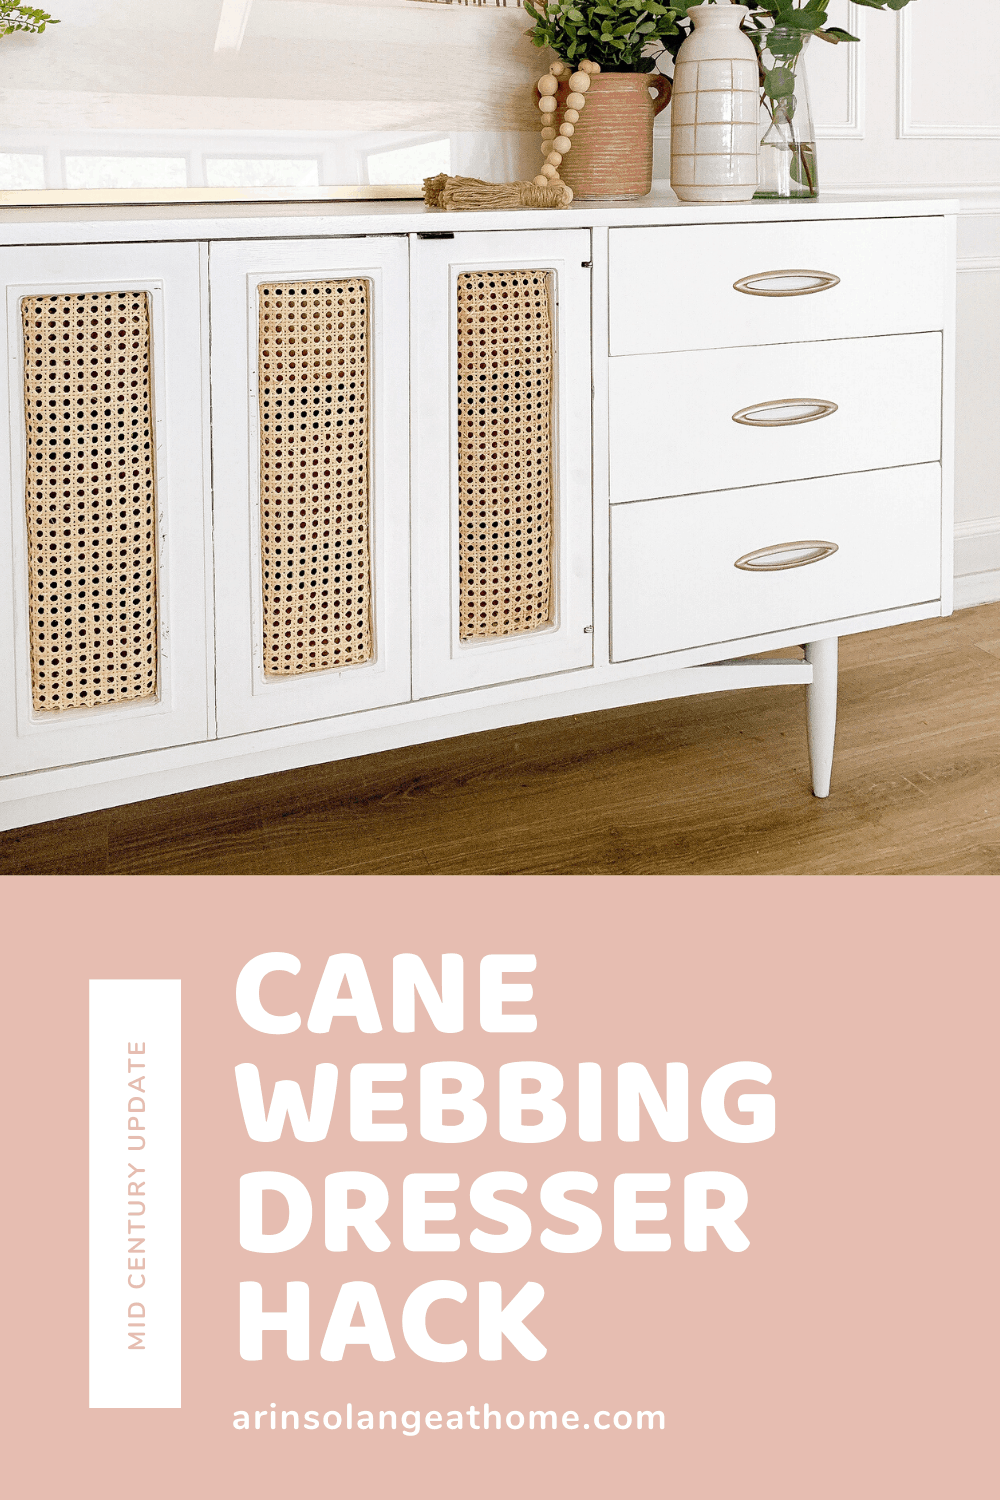
Mid Century Modern Dresser Update
When we moved into our current home it had this gorgeous traditional charm so I knew I wanted to balance that with midcentury modern furniture to keep things fun and more modern. We got our beloved couches and ottoman and I ended up falling in love with an old mid century modern dresser to work as the tv stand.
I knew I wanted something that had a lot of storage for toys and such, and this piece was just that. I didn’t want the walnut (beautiful as it was) so it went white, and I painted the very old handles black for contrast. it turned out beautifully and has honestly remained a favorite piece in our home for 4 years.
This spring as we were doing updates to our house I really wanted to give this a facelift to match our DIY IKEA Hack with cane that I did a few months back, so I came up with a plan that I LOVE!
The Inspiration
Like I said – the inspiration for this post was an IKEA hack I did a few months ago that seriously remains one of my favorite projects to date. We took an IKEA Brimnes cabinet and removed the glass and replaced it with cane mesh to create a modern coastal piece that you would NEVER know is from IKEA.
I had some leftover cane and knew I wanted to use it somewhere so decided to take my chances on updating our loved mid century modern dresser with it. (It was a risk…once we started we knew there was no going back!).
Gather your Supplies
Below is everything you need for this project
Dresser or piece of furniture
Cane webbing – This is the cane I got for both of my projects
Sander/sand paper/sanding block (one of these)
[Optional] Paint – I used this paint that I had leftover from painting our kitchen cabinets and can’t say enough good things about it.
How We Did It
Obviously you won’t have the same piece as me, but this is a fun diy you could do with so many different pieces. You might have to play around with the placement and how much cane you need based on your piece of furniture but the general idea should work across the board.
First – remove whatever area you want to add the cane to. Remember if it’s drawers you may have to add different handles such as these to make it work.
Figure out what you want to cut out for the cane. For us this was pretty easy – our piece had inlaid rectangles so we used that as a guide. Draw with pencil the line you will cut
Drill into each corner of the rectangle you are removing, then use that as your starting point with the jigsaw. Cut all the way around to remove your piece.
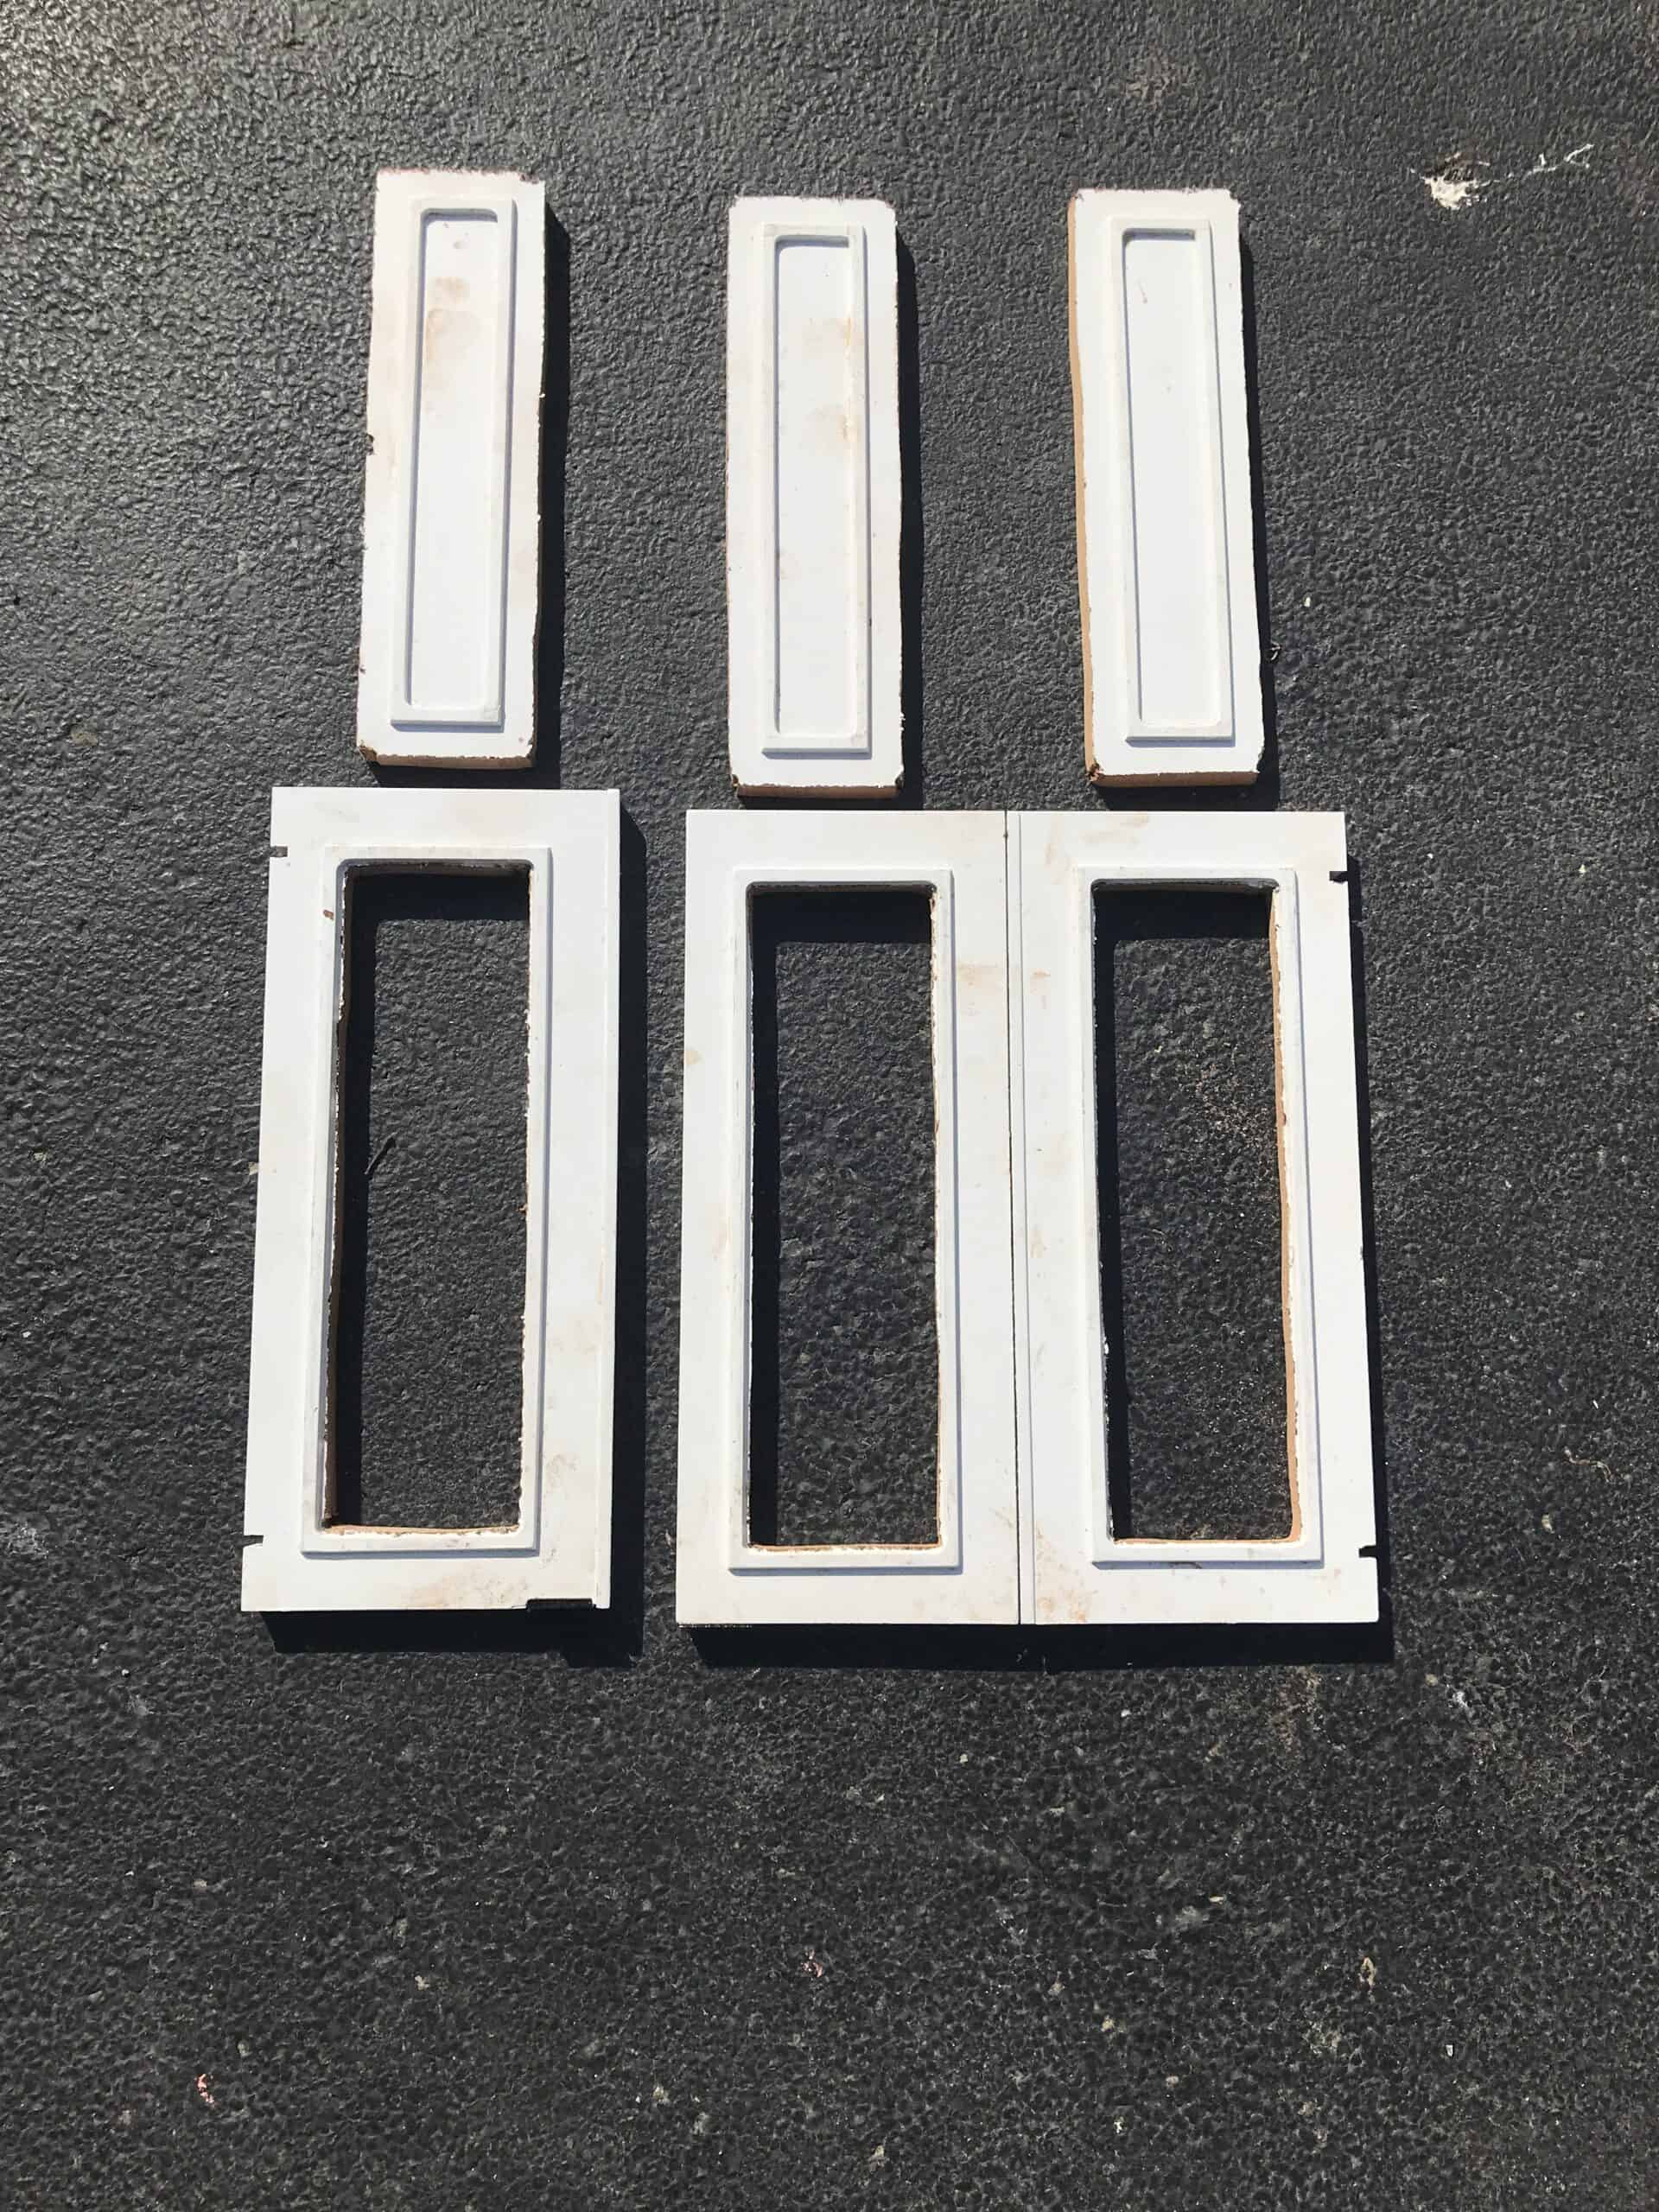
Sand with an electric sander or sandpaper/sanding block.
Now is when you would paint if you are looking to change or update the paint. For me my piece was already white but I really wanted to give it a fully new coat of paint so I repainted the piece and am so happy that I did.
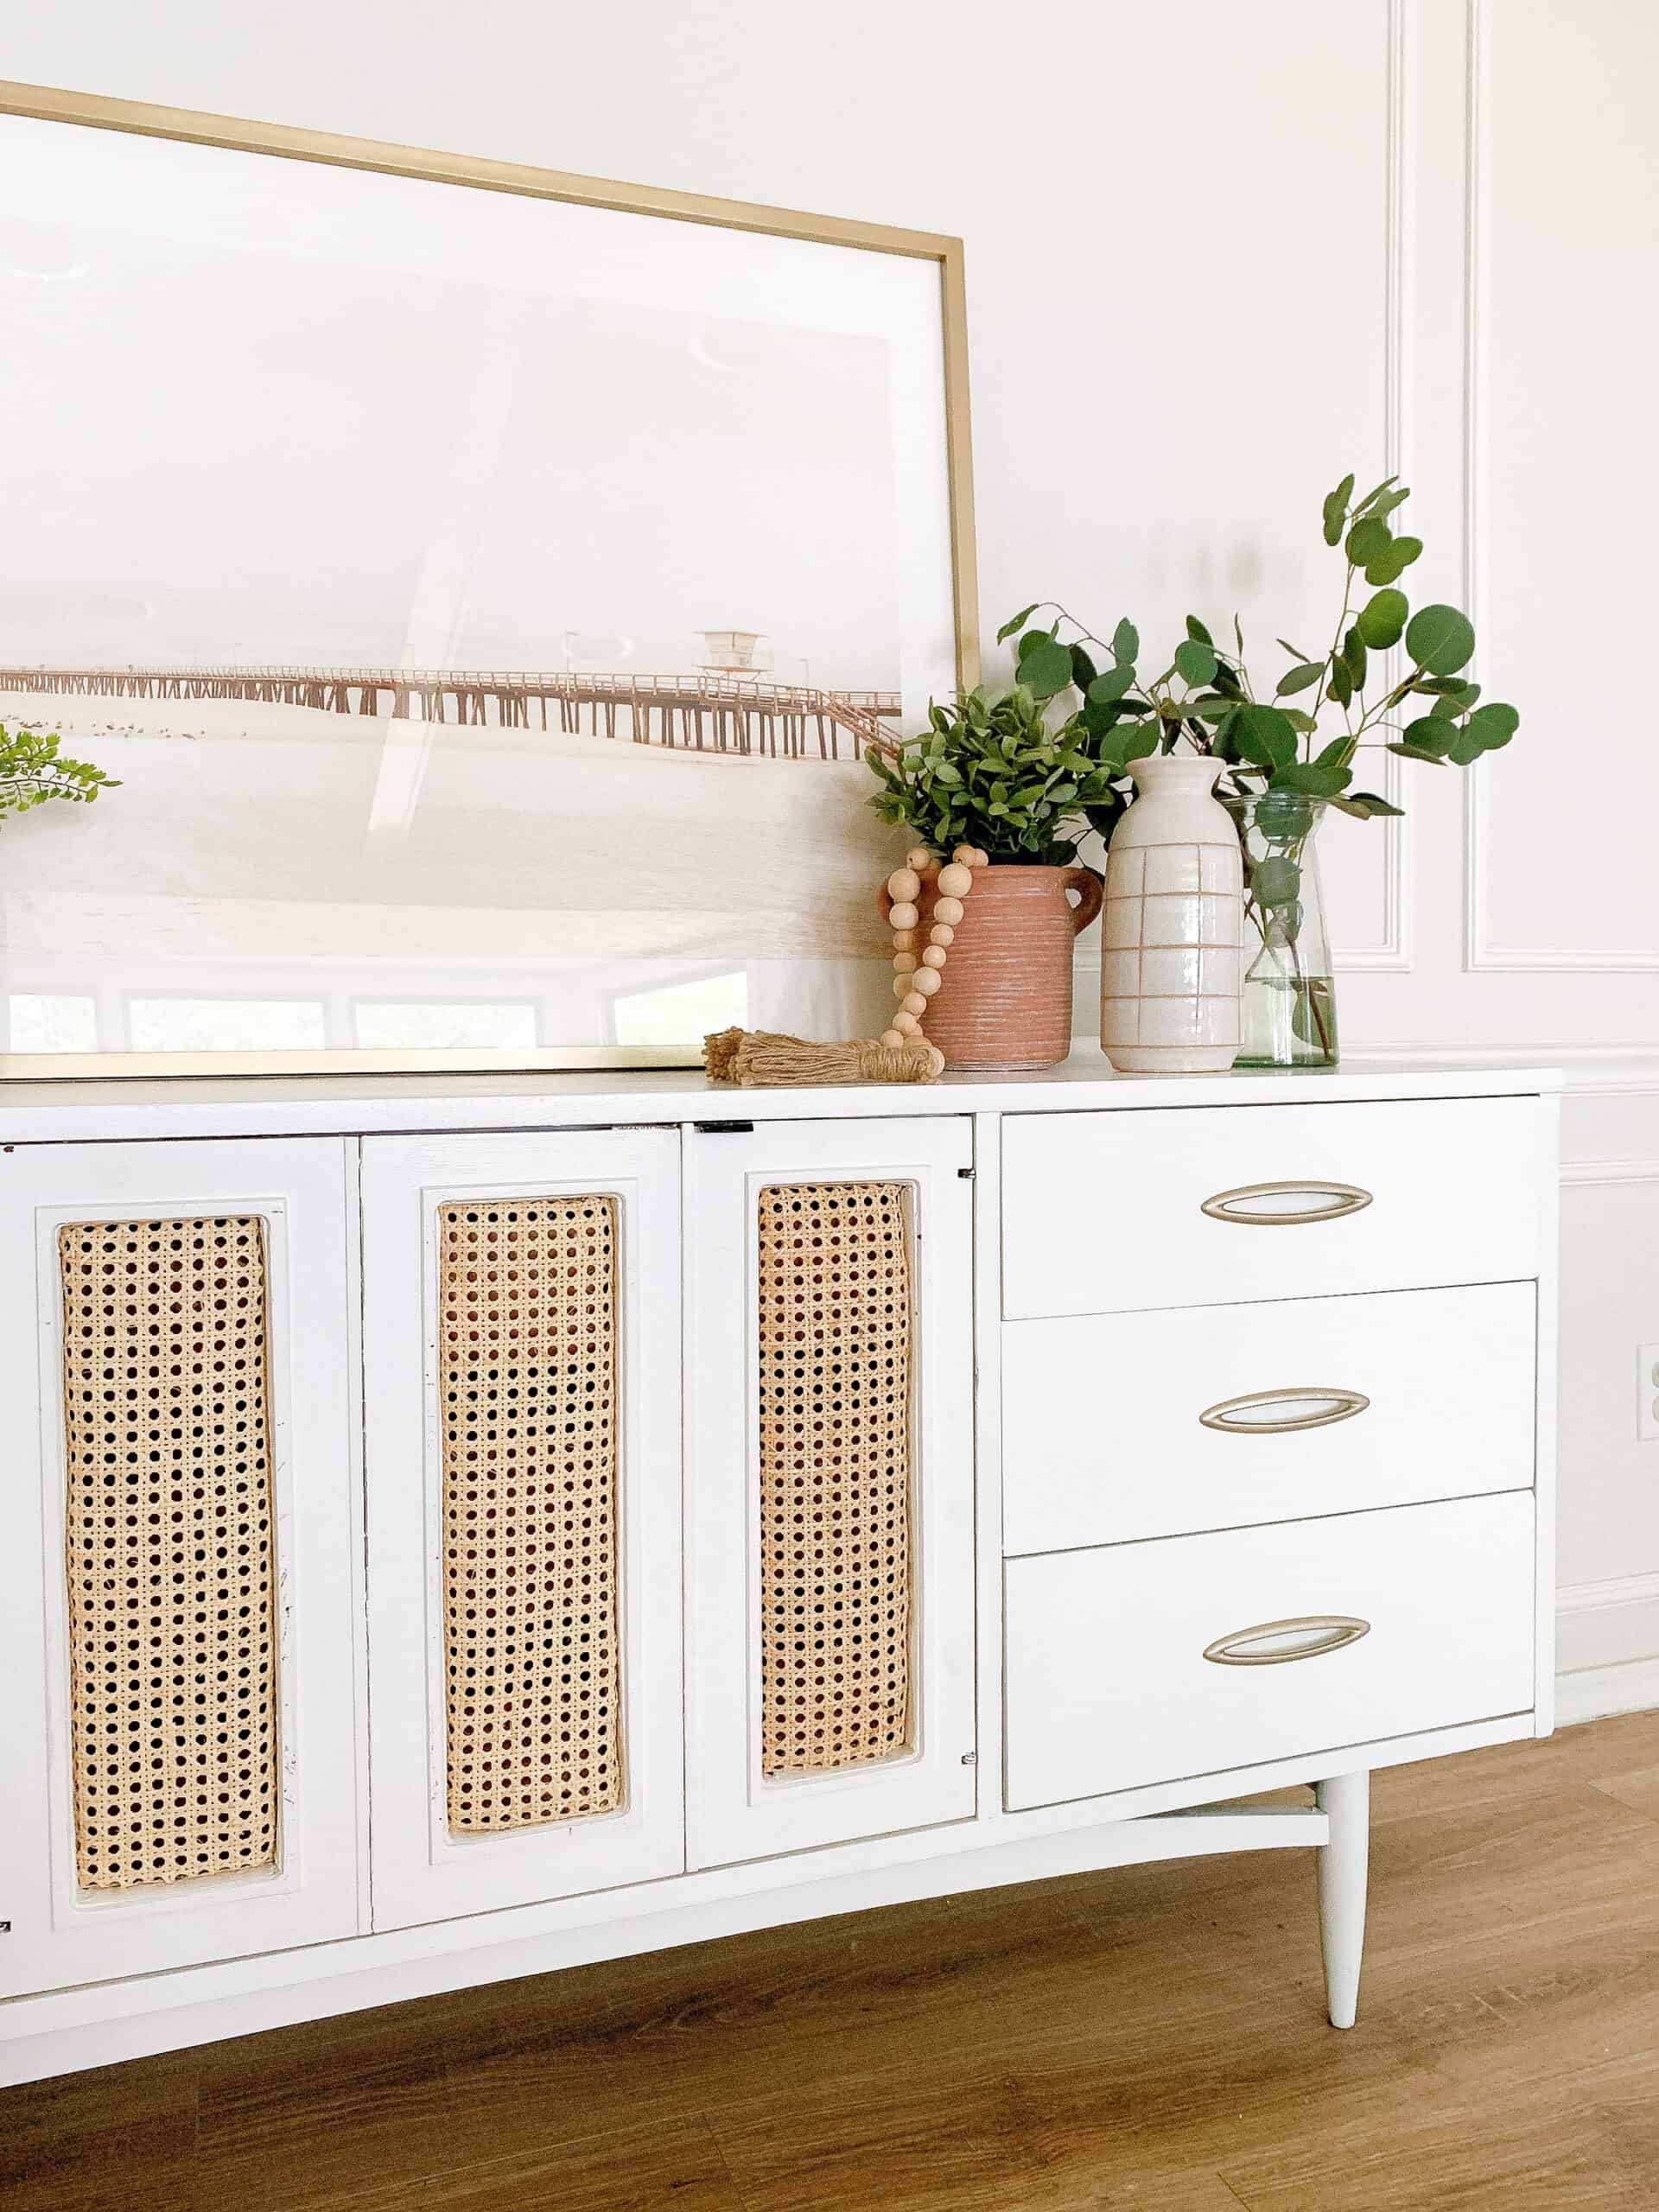
Once your paint is dry it is time to attach your cane. Cut your cane to be a couple inches longer and wider than your hole, then take that sheet and soak it in your sink with water for 5 min. Don’t wait too long or it can start to break it down.
Take the cane out of the water and dry it off, then get ready to staple gun it in place. Find a good starting spot on the middle of one of your long sides and staple your cane in. Use the picture below for a good example of how to do that. It is kind of tricky so take your time, and remove any staples or hammer in any that aren’t tight enough. You will do this all the way around each opening.
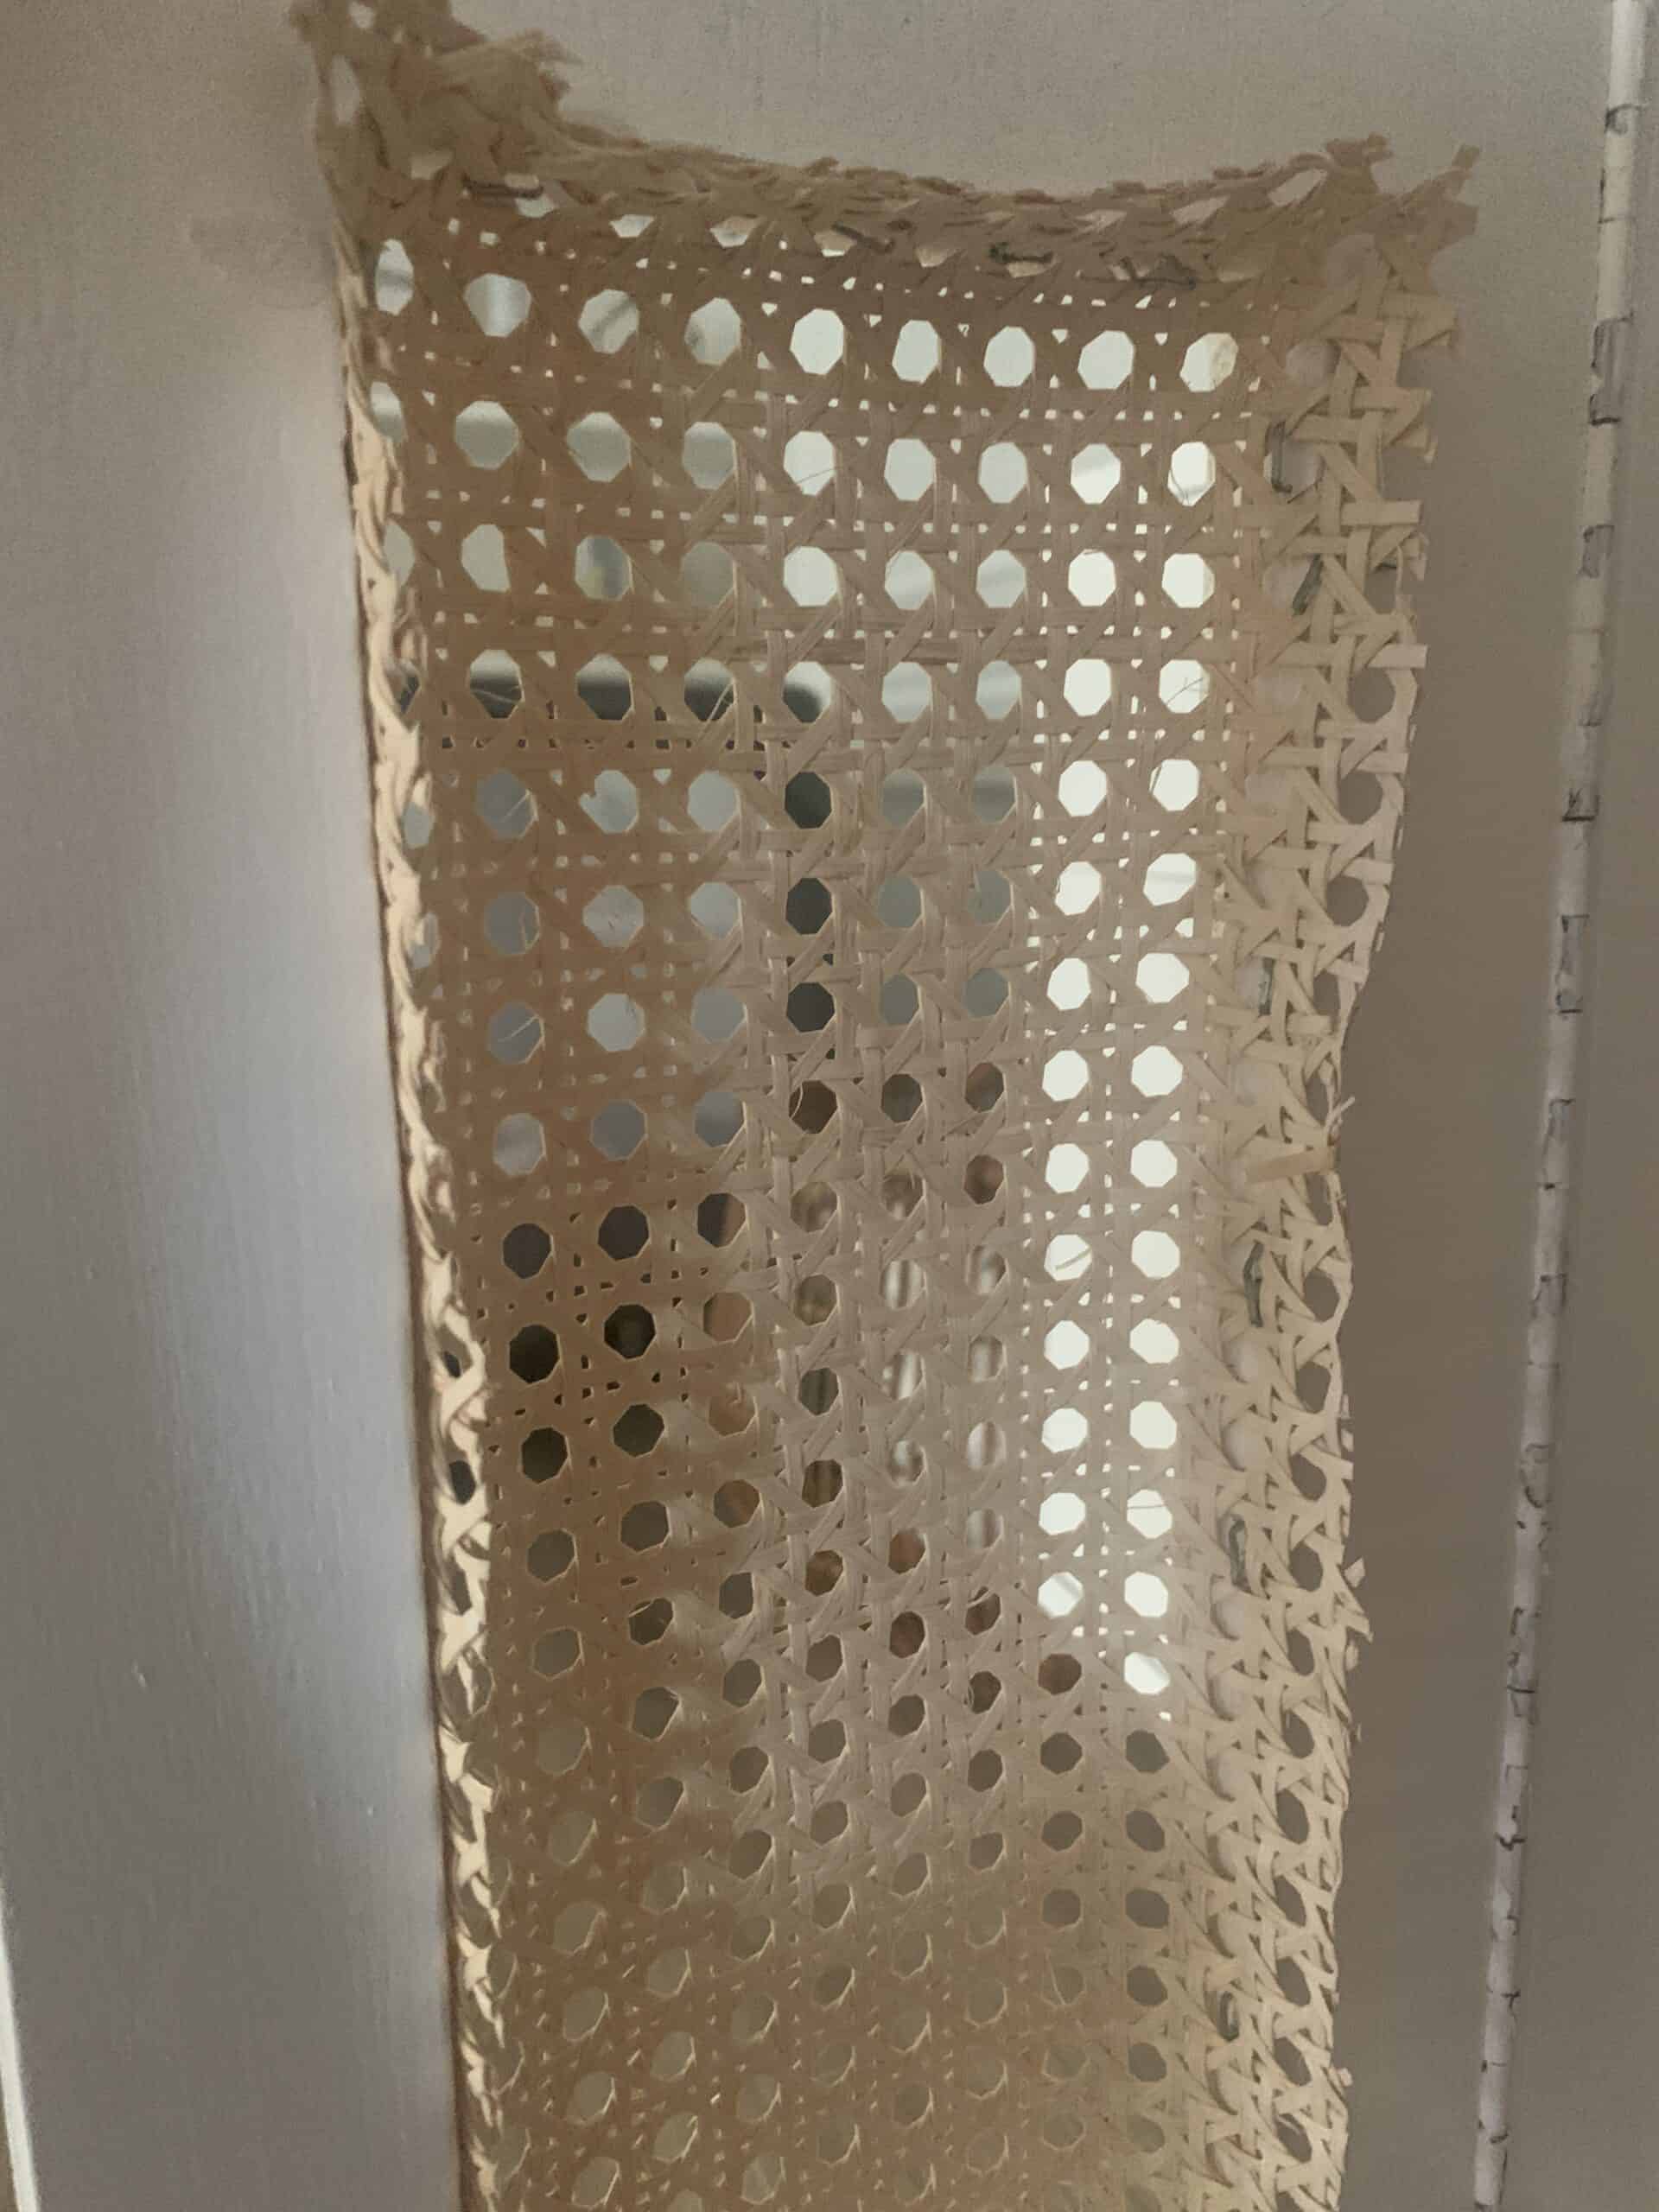
One thing to note is once you start one piece finish it – I stopped mid way through one and the cane dried and it was so much harder for me to work with. You will be able to get into the corners easier if you have it wet.
Once the cane is in place trim it down as far as you can and you should be ready to reassemble your piece.
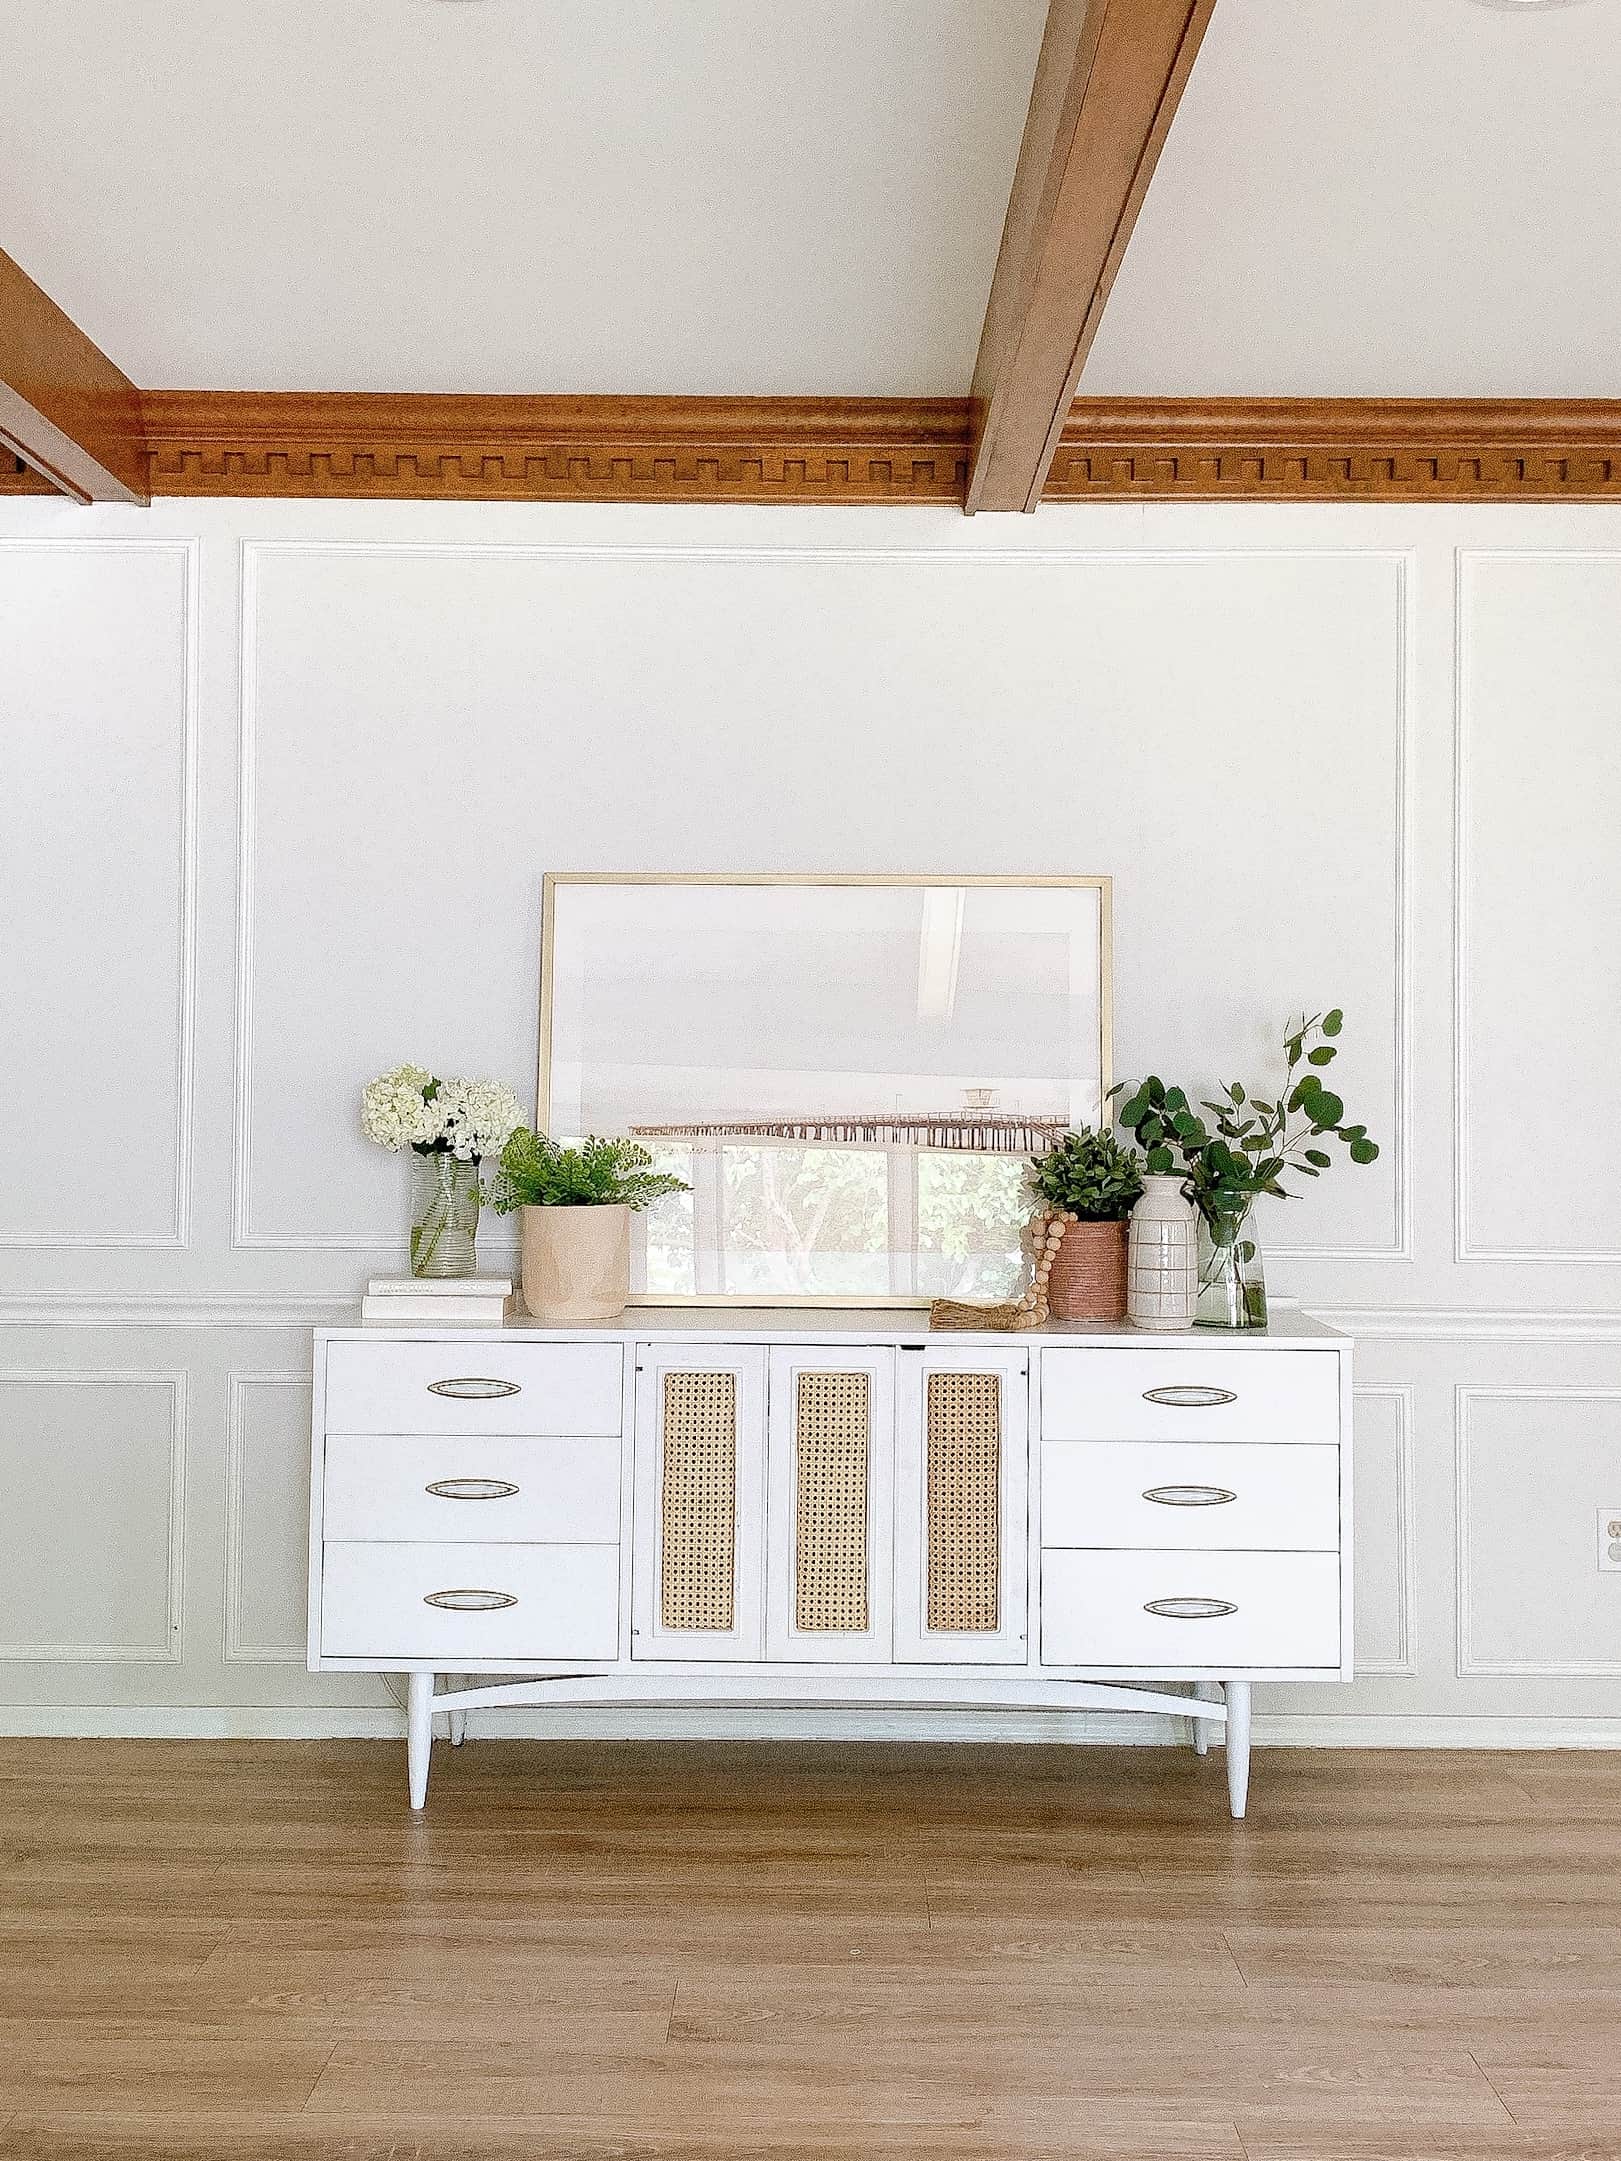
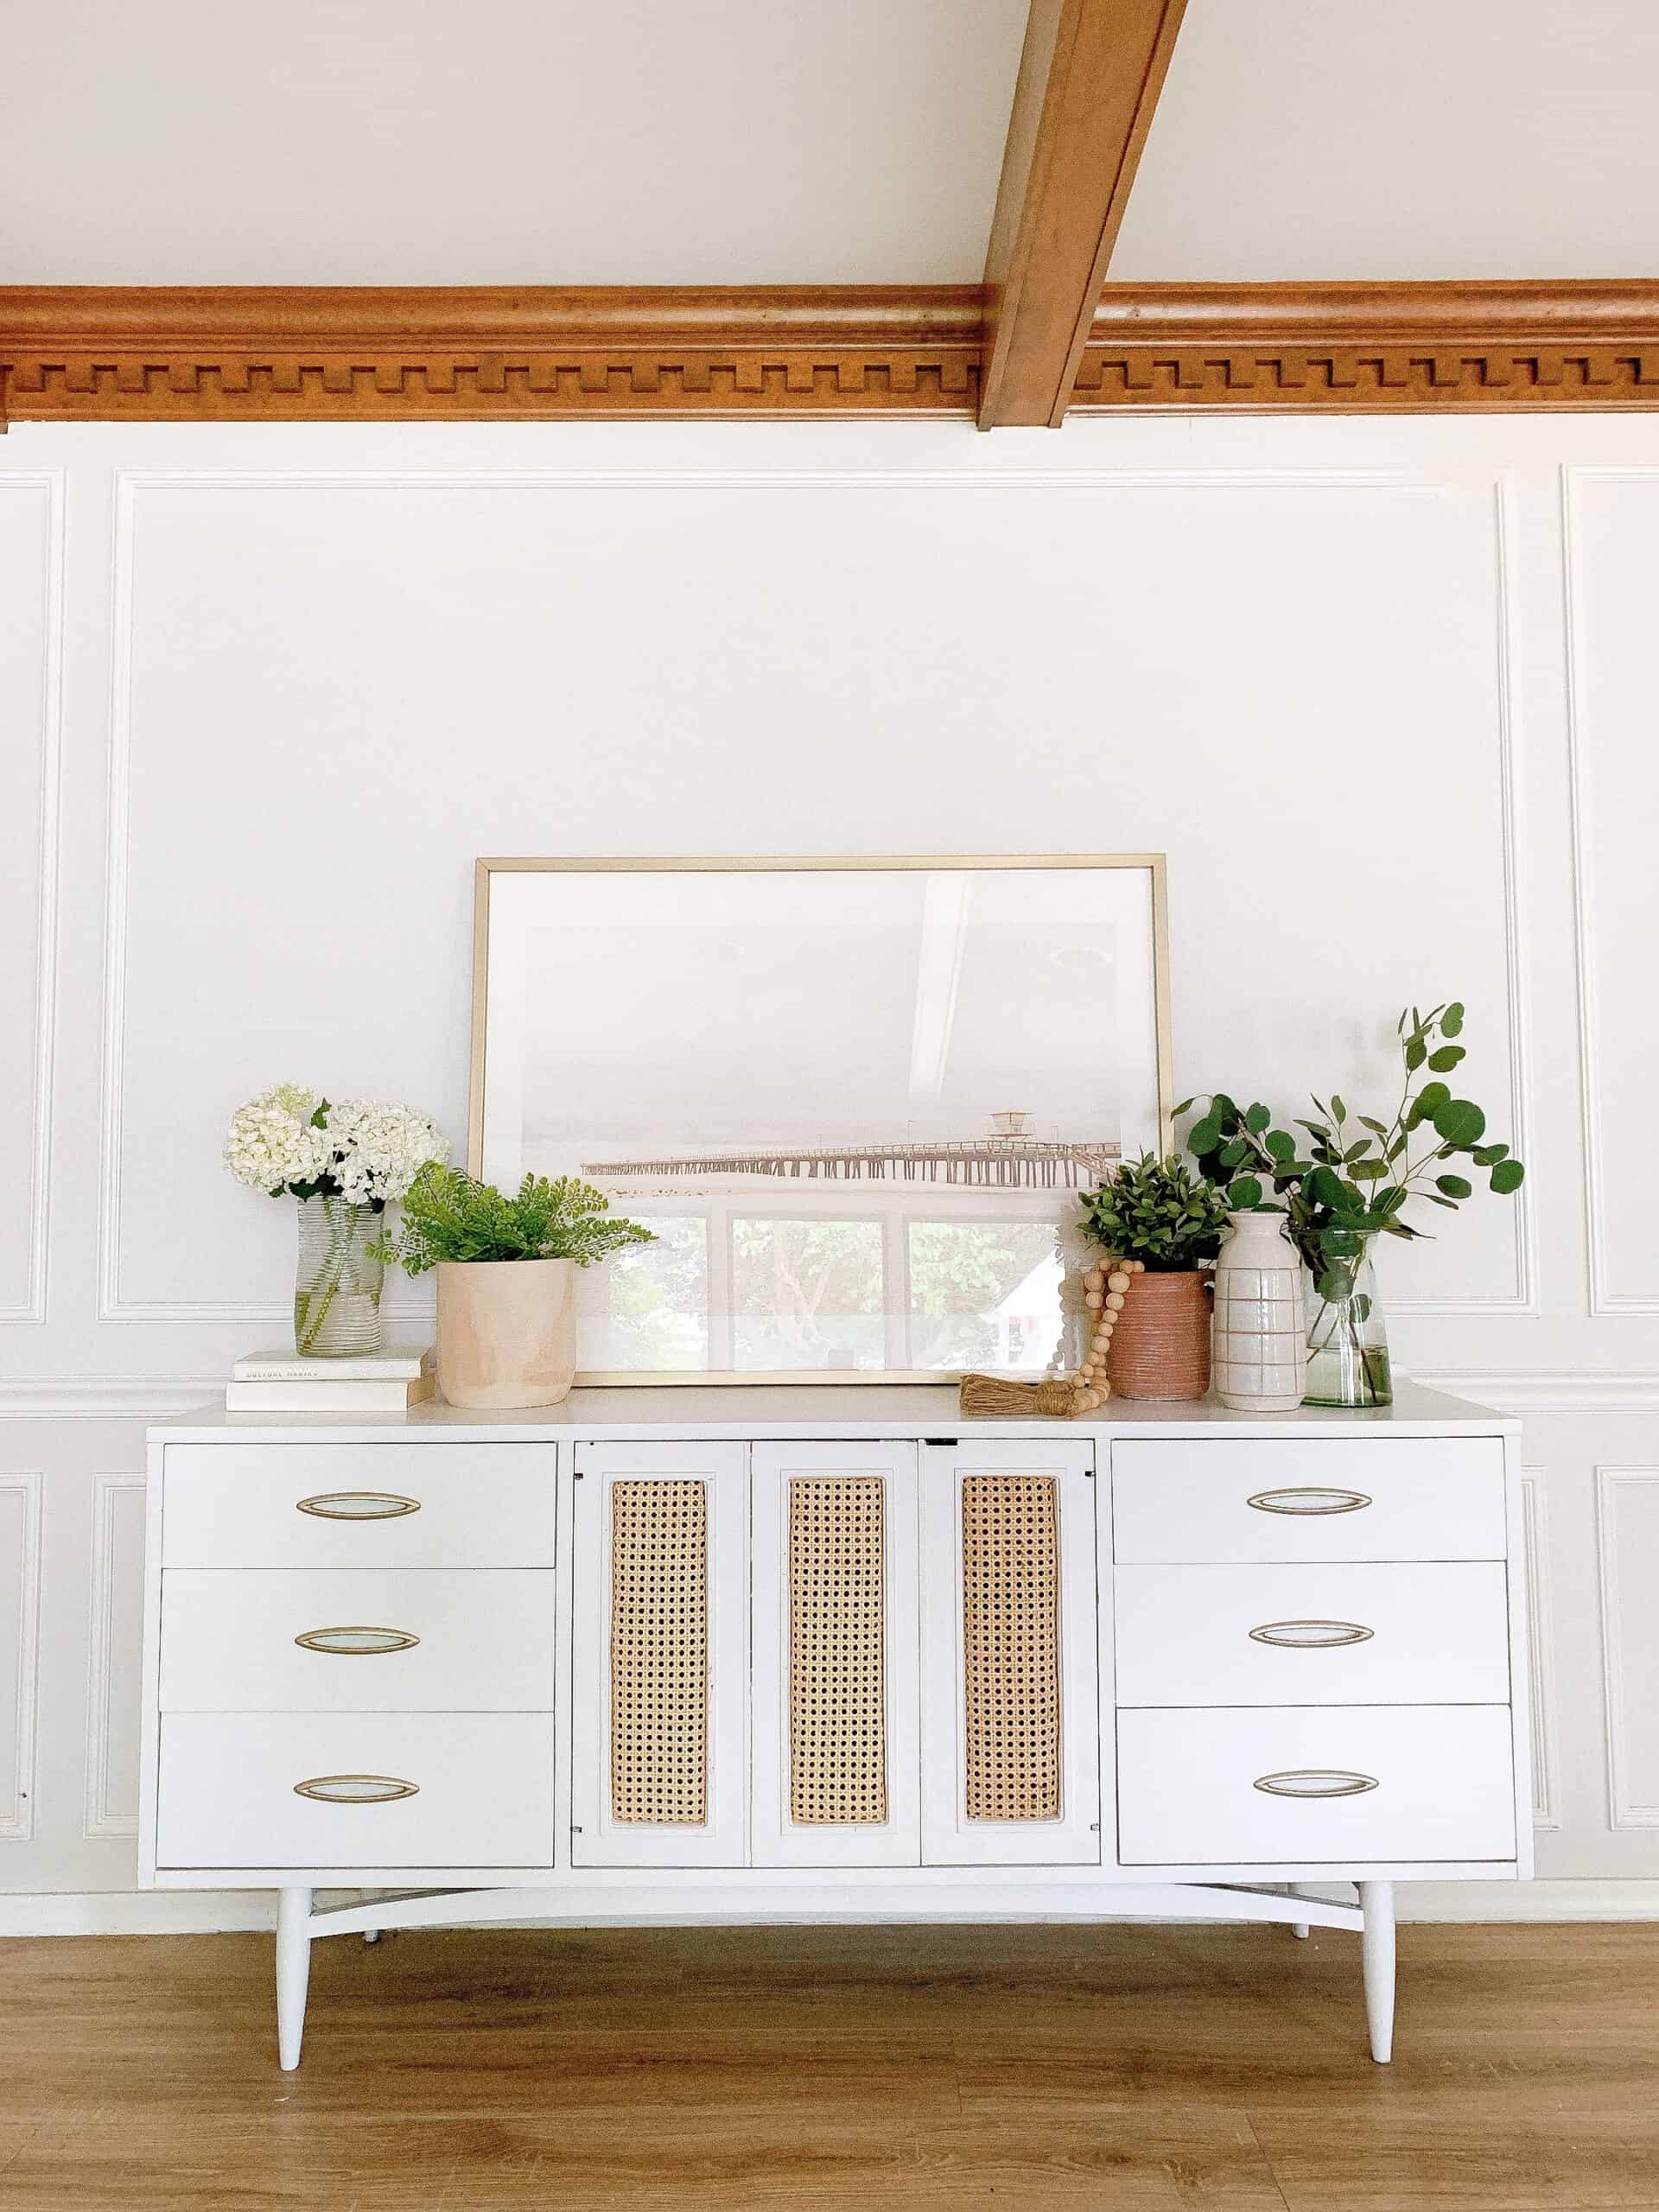
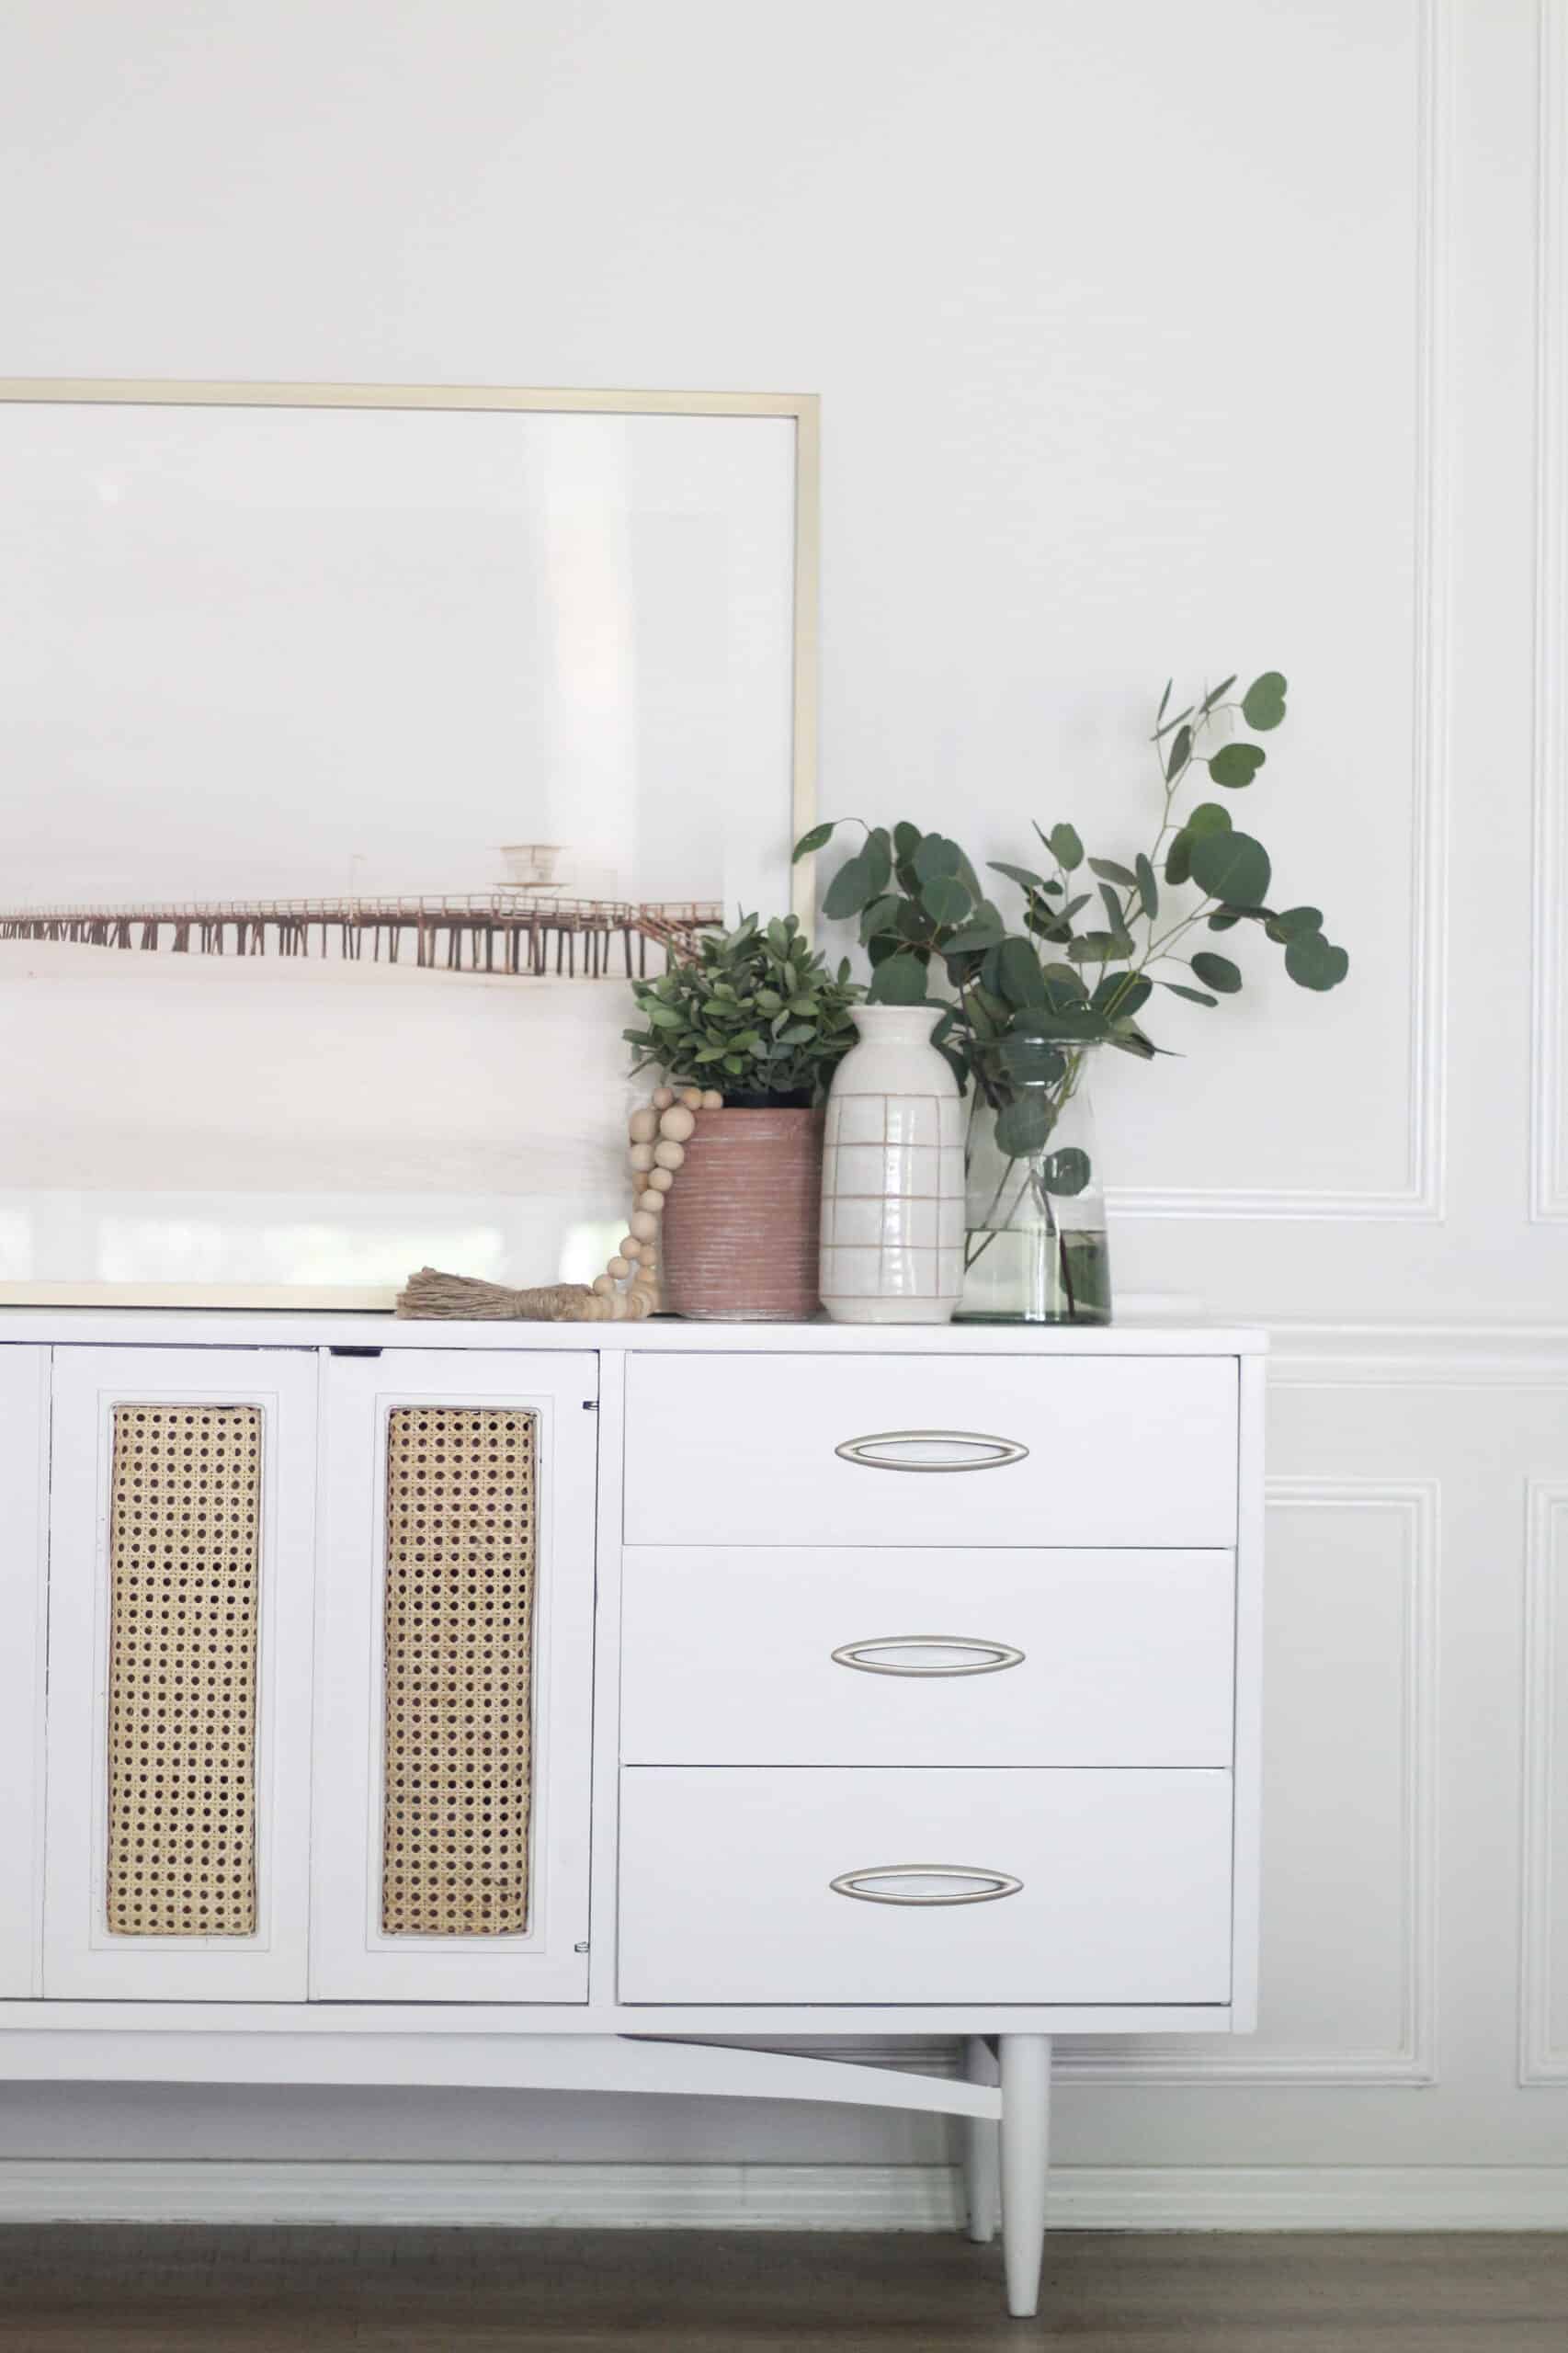
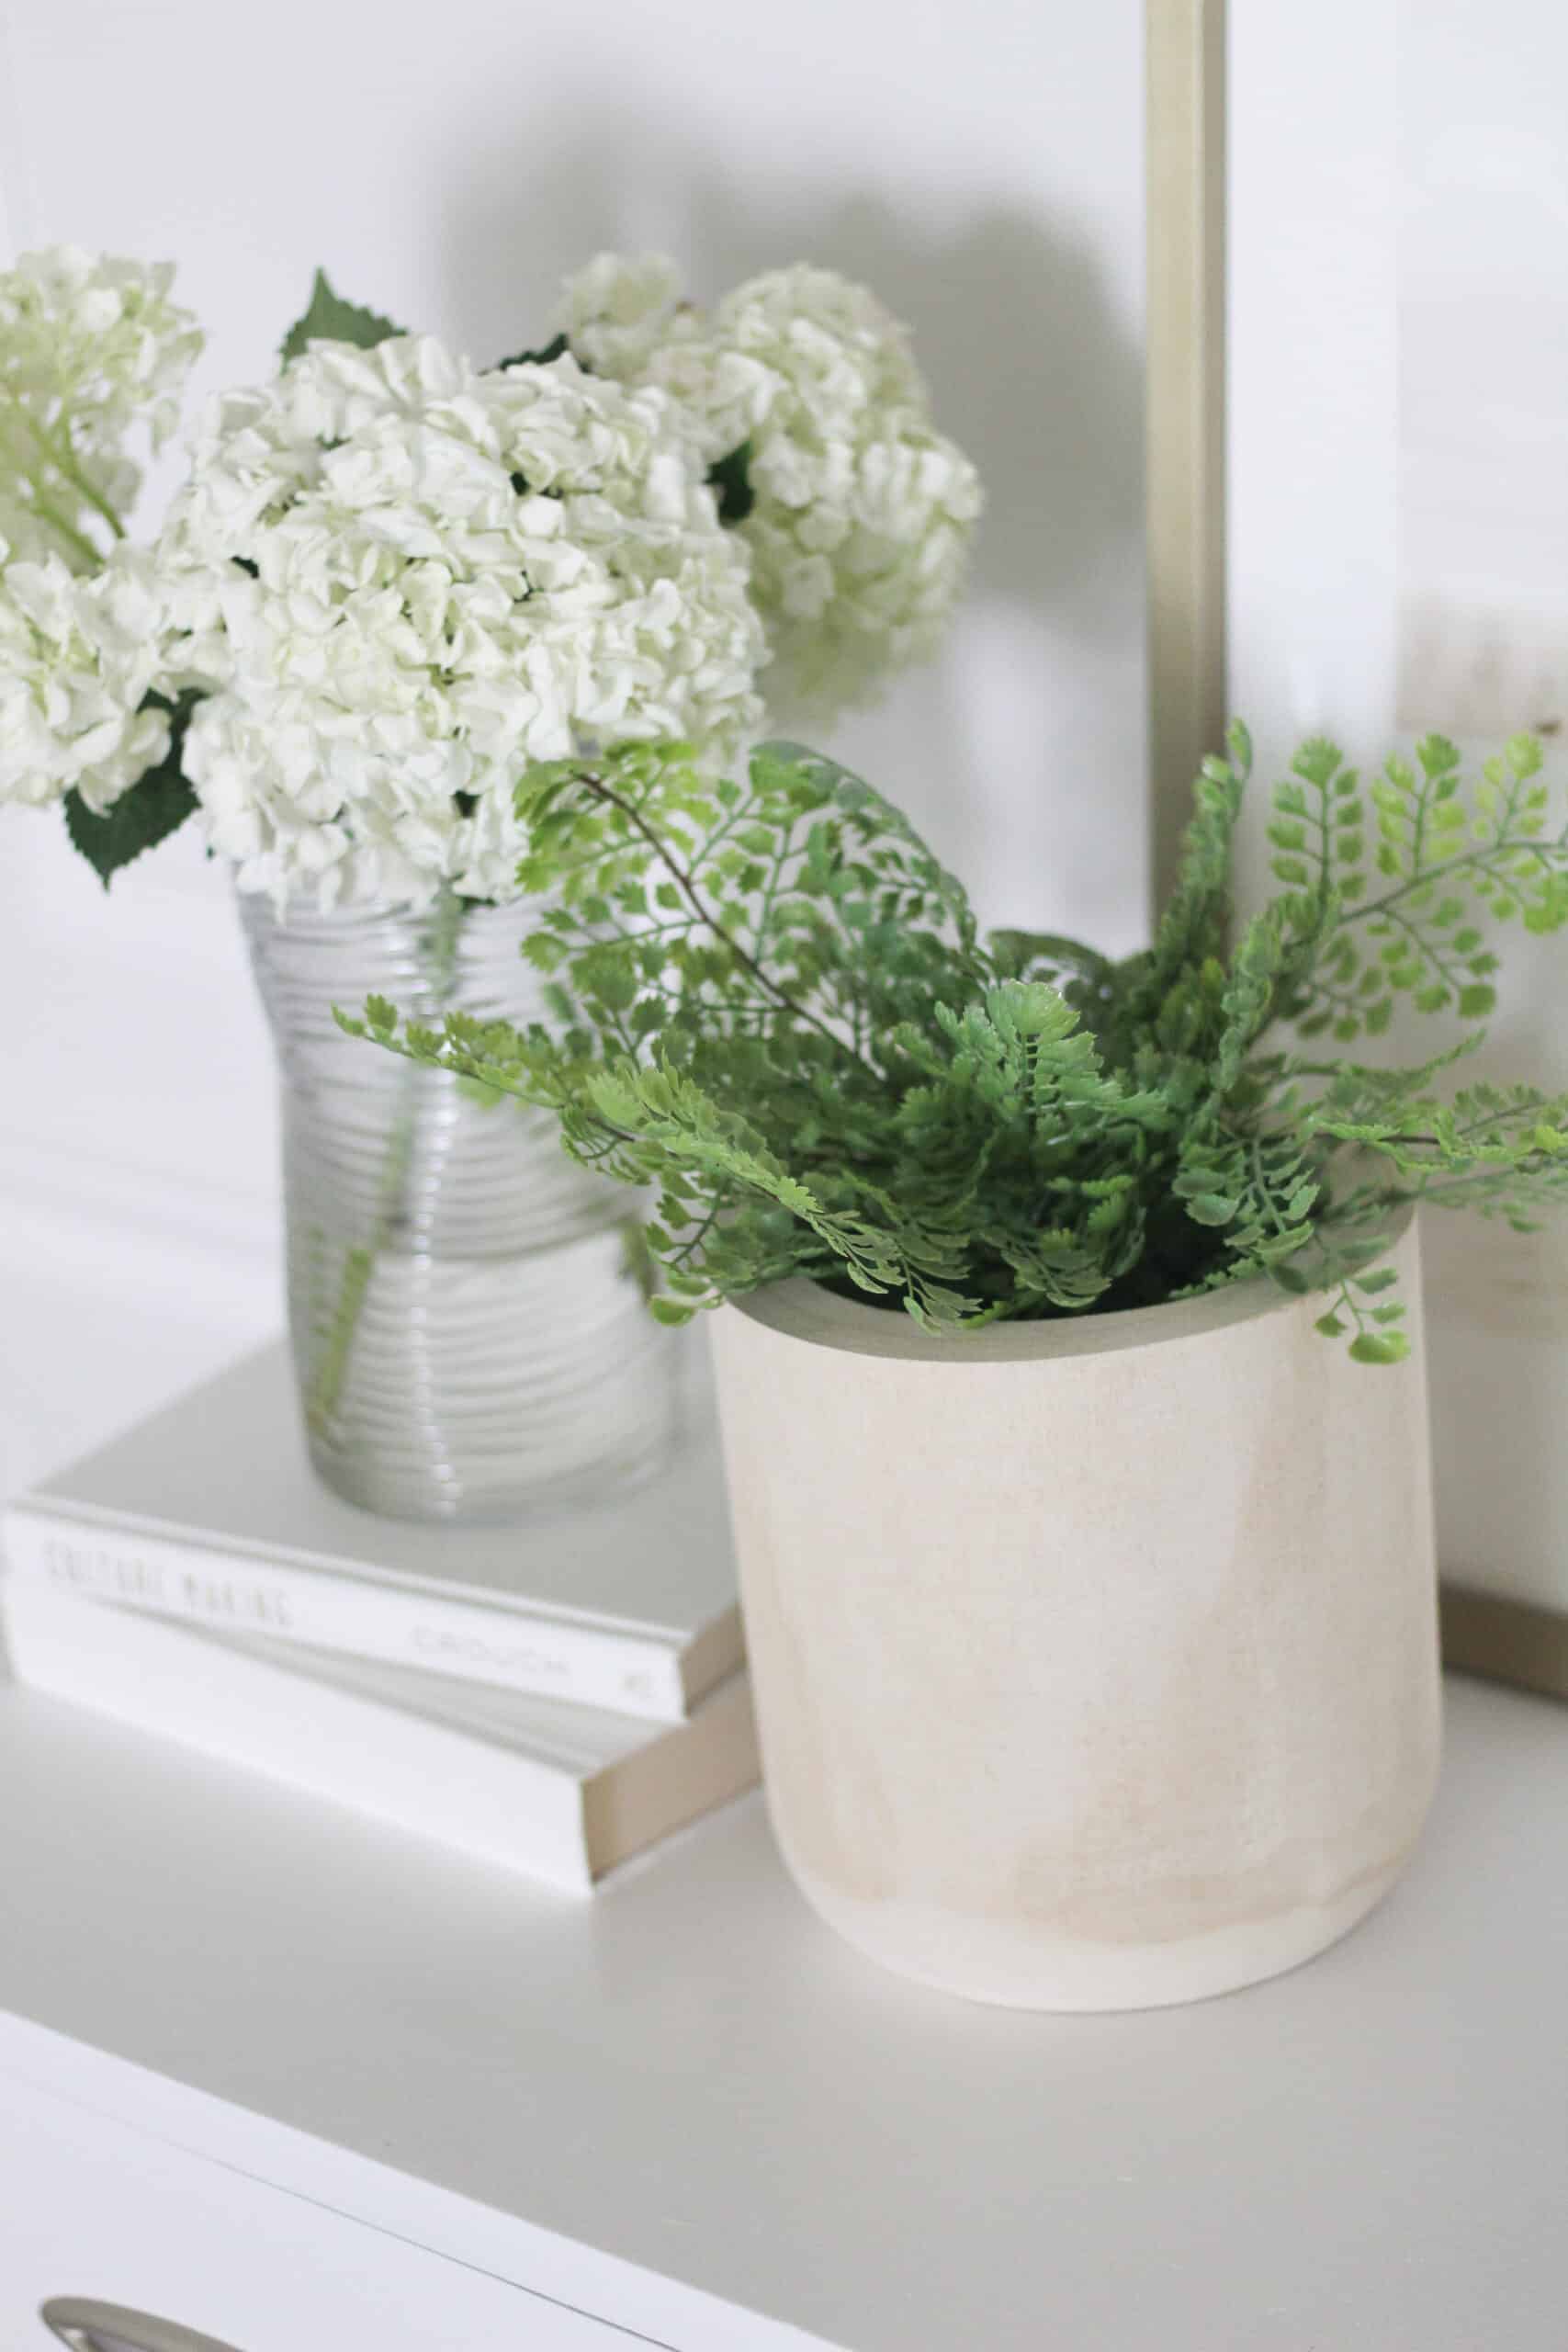
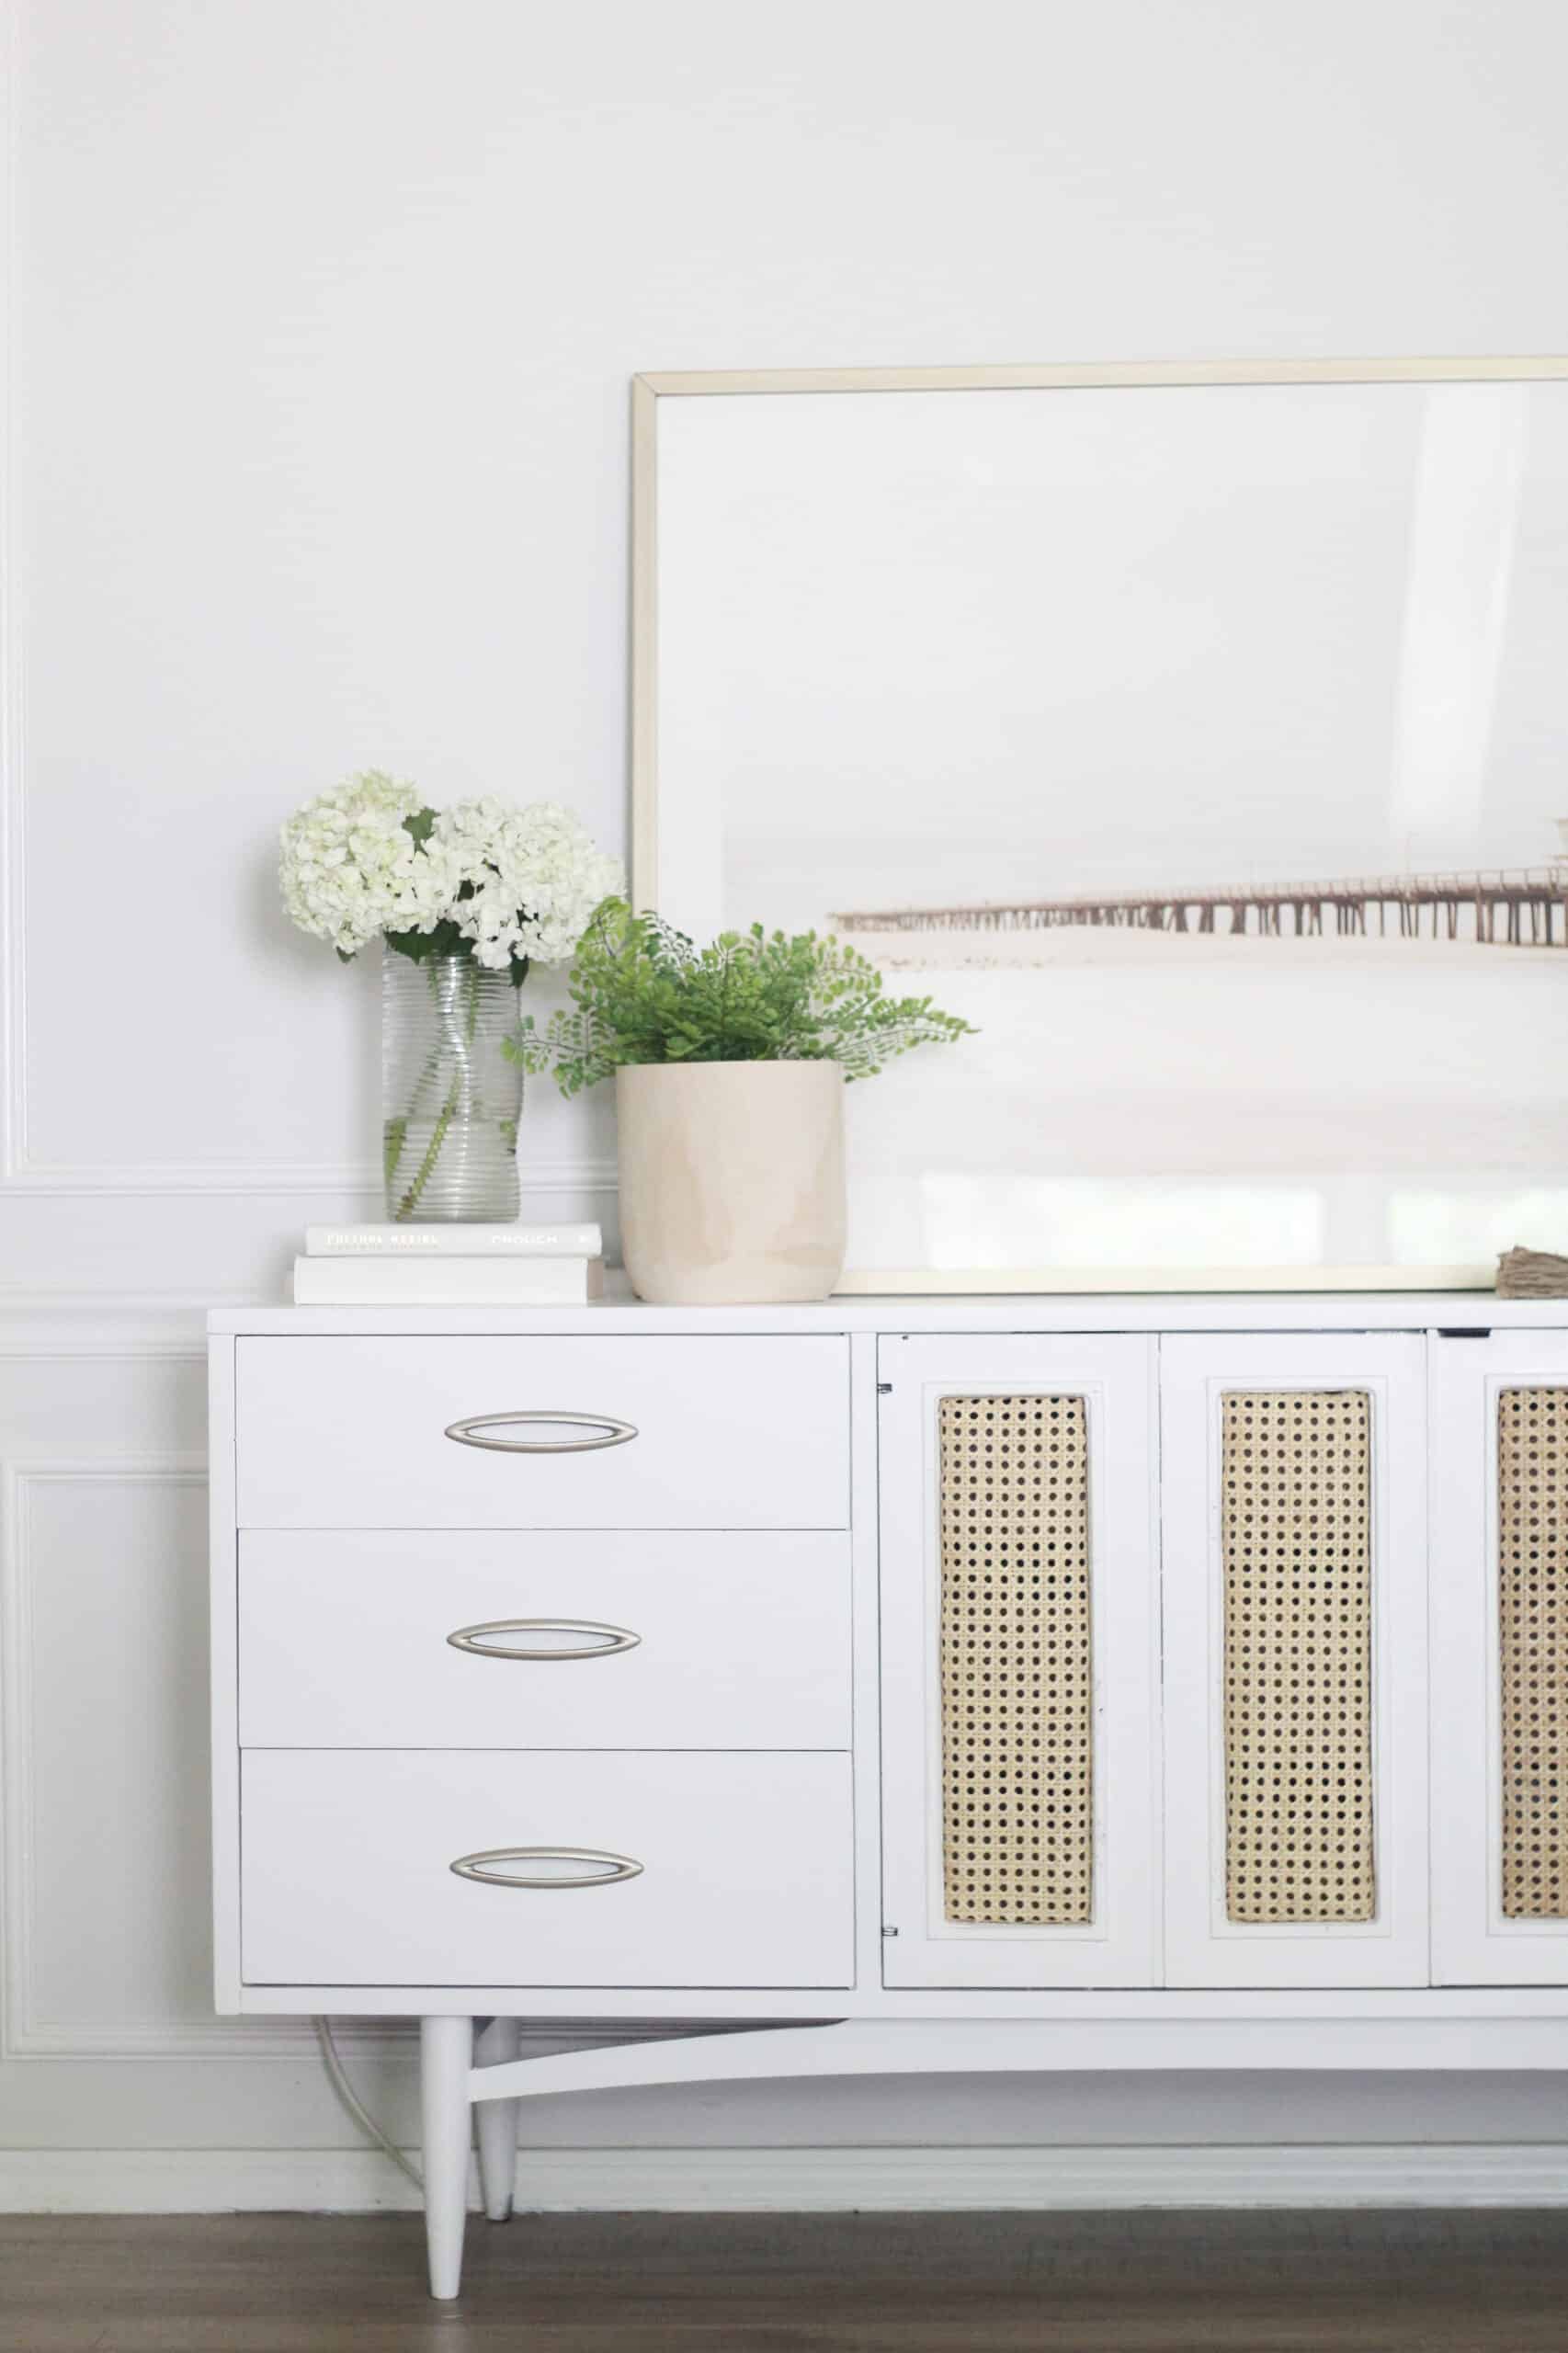
Styling it …
Okay okay, I only styled this for pictures. It actually houses the most expensive of decor – a big ol tv haha. Let’s be real – the Instagram houses you see and love do have TV’s hidden somewhere – but kind of like mirrors, they are tricky to photograph!
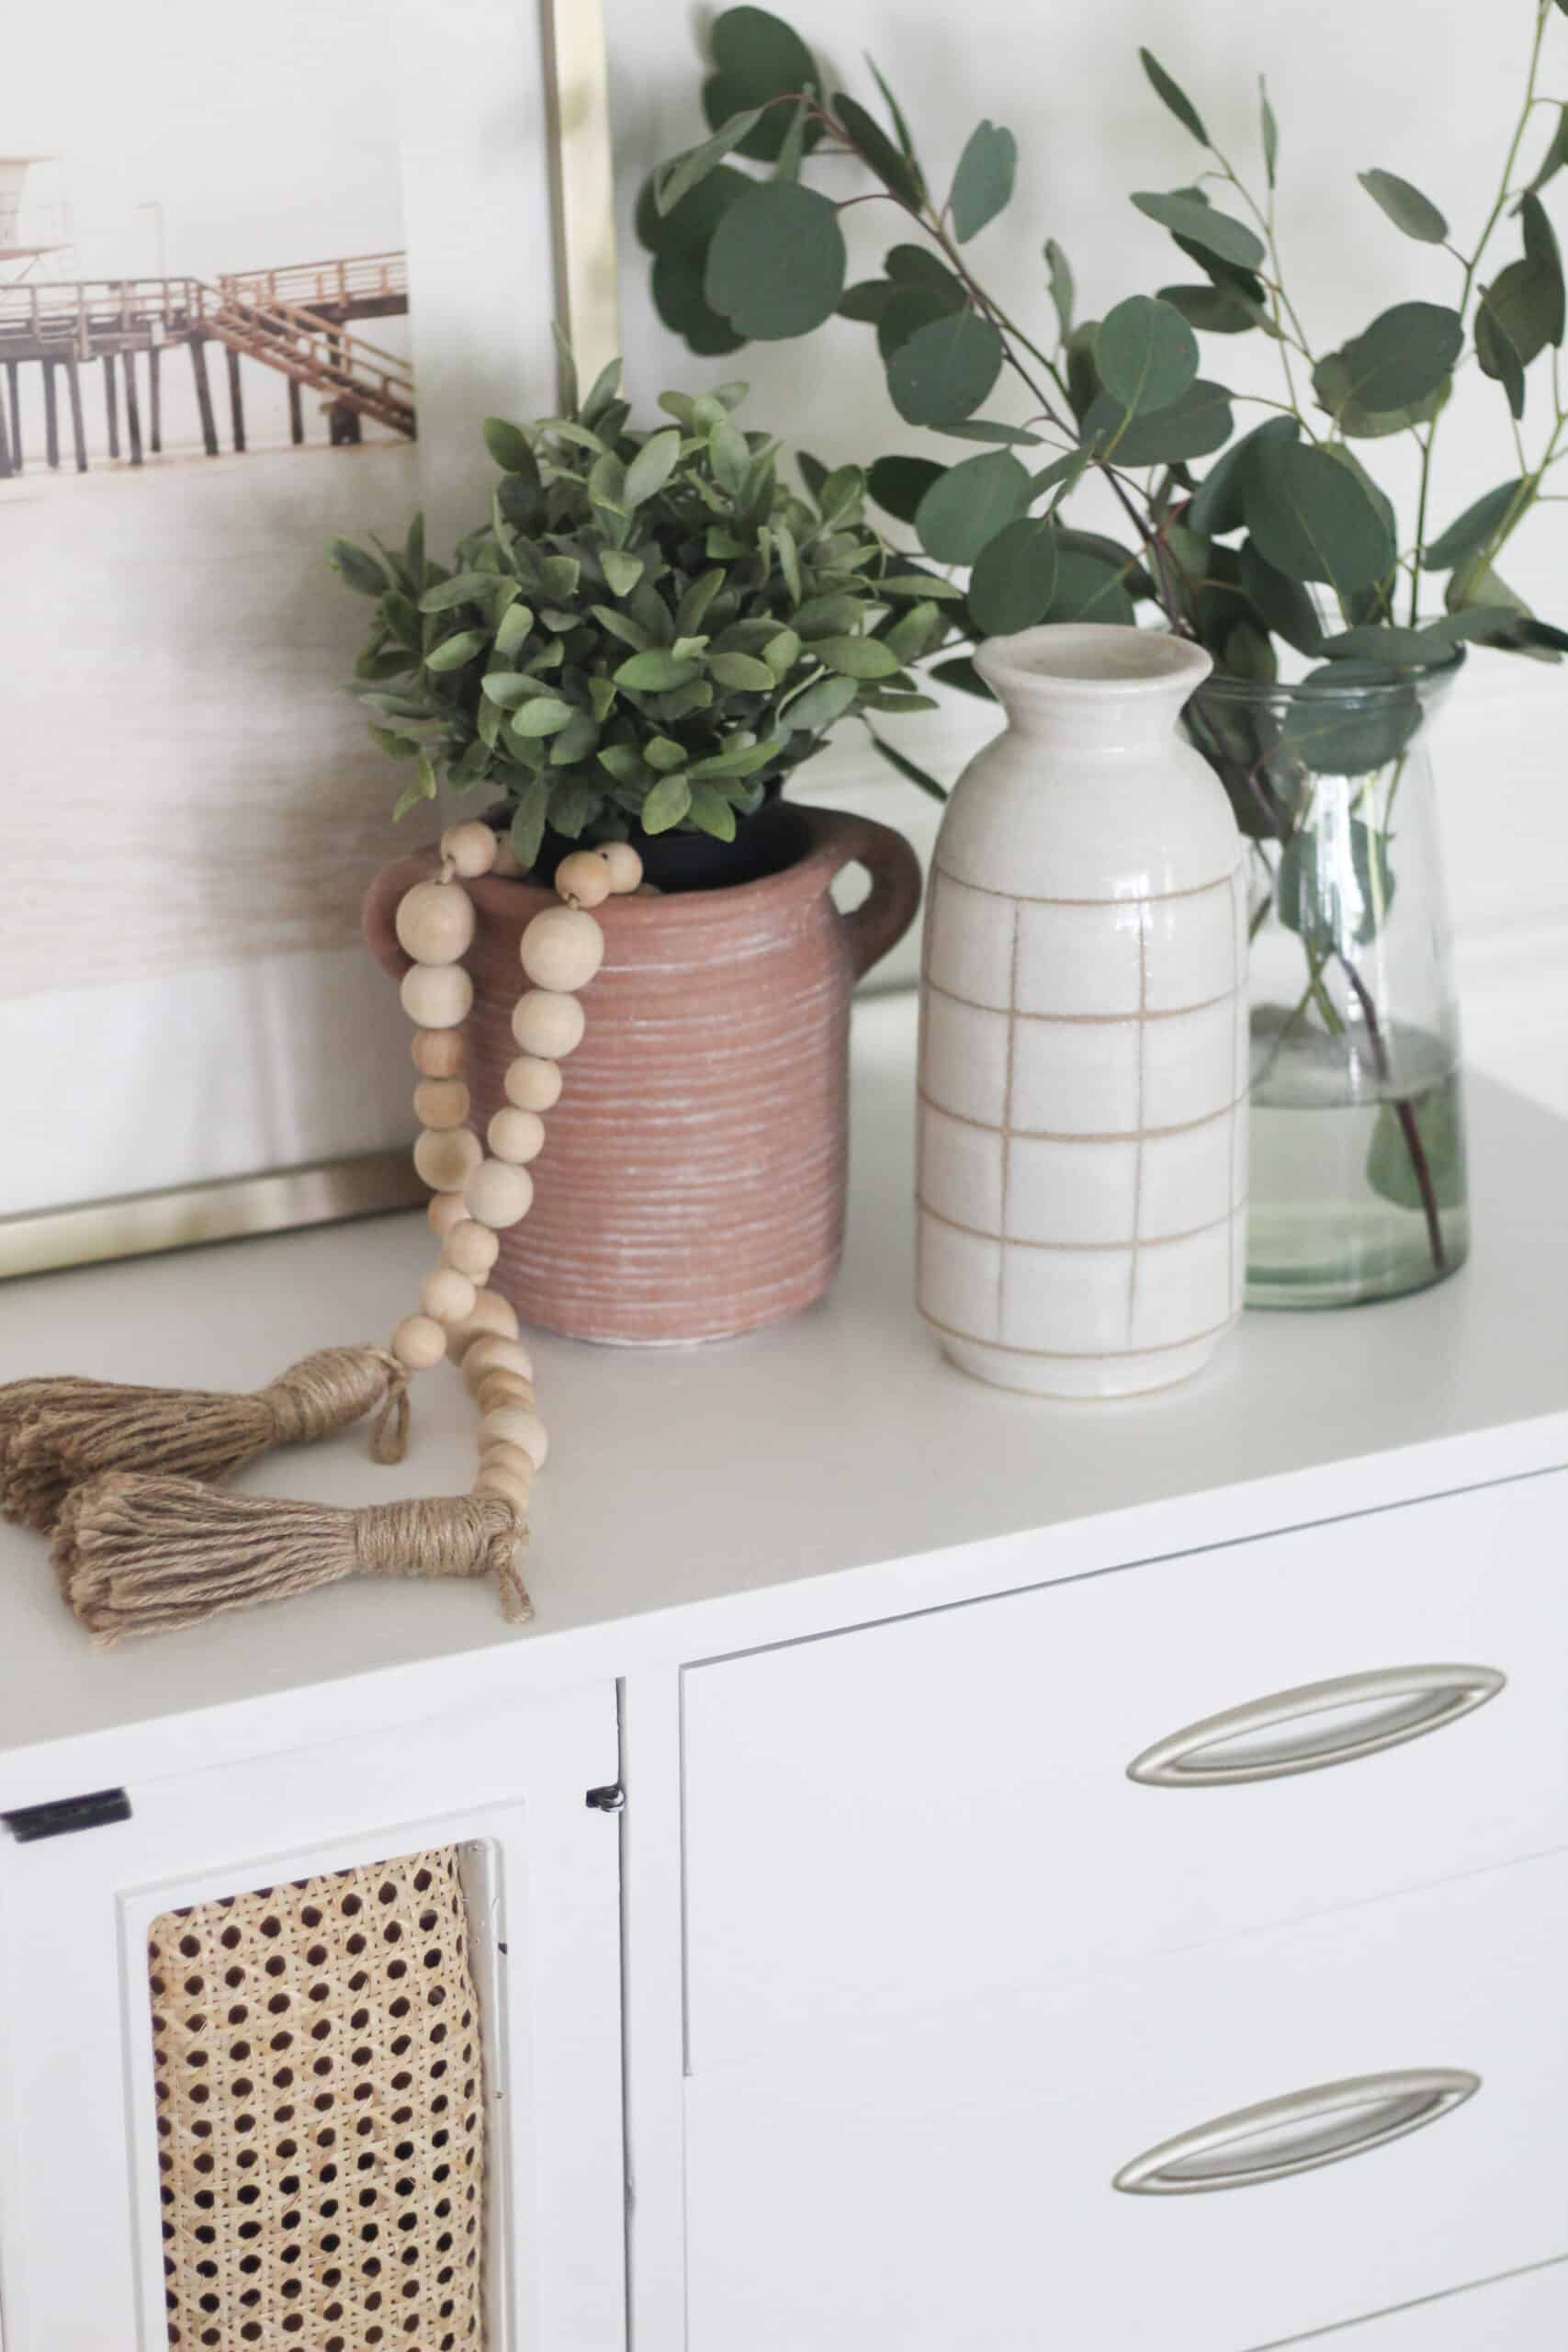
For the sake of showing you the piece, and to test it out for the next house I styled it with it with items we already had and I am SOLD on using it in our dining room as a buffet when we move.
I used this big framed picture that I LOVE – I usually have this in my office and it remains a favorite piece for sure. I then added some fun accessories from our built ins and ta-da!
Other Posts You’ll Love
CANE IKEA CABINETPAINTING KITCHEN CABINETS$50 DIY OUTDOOR TABLE
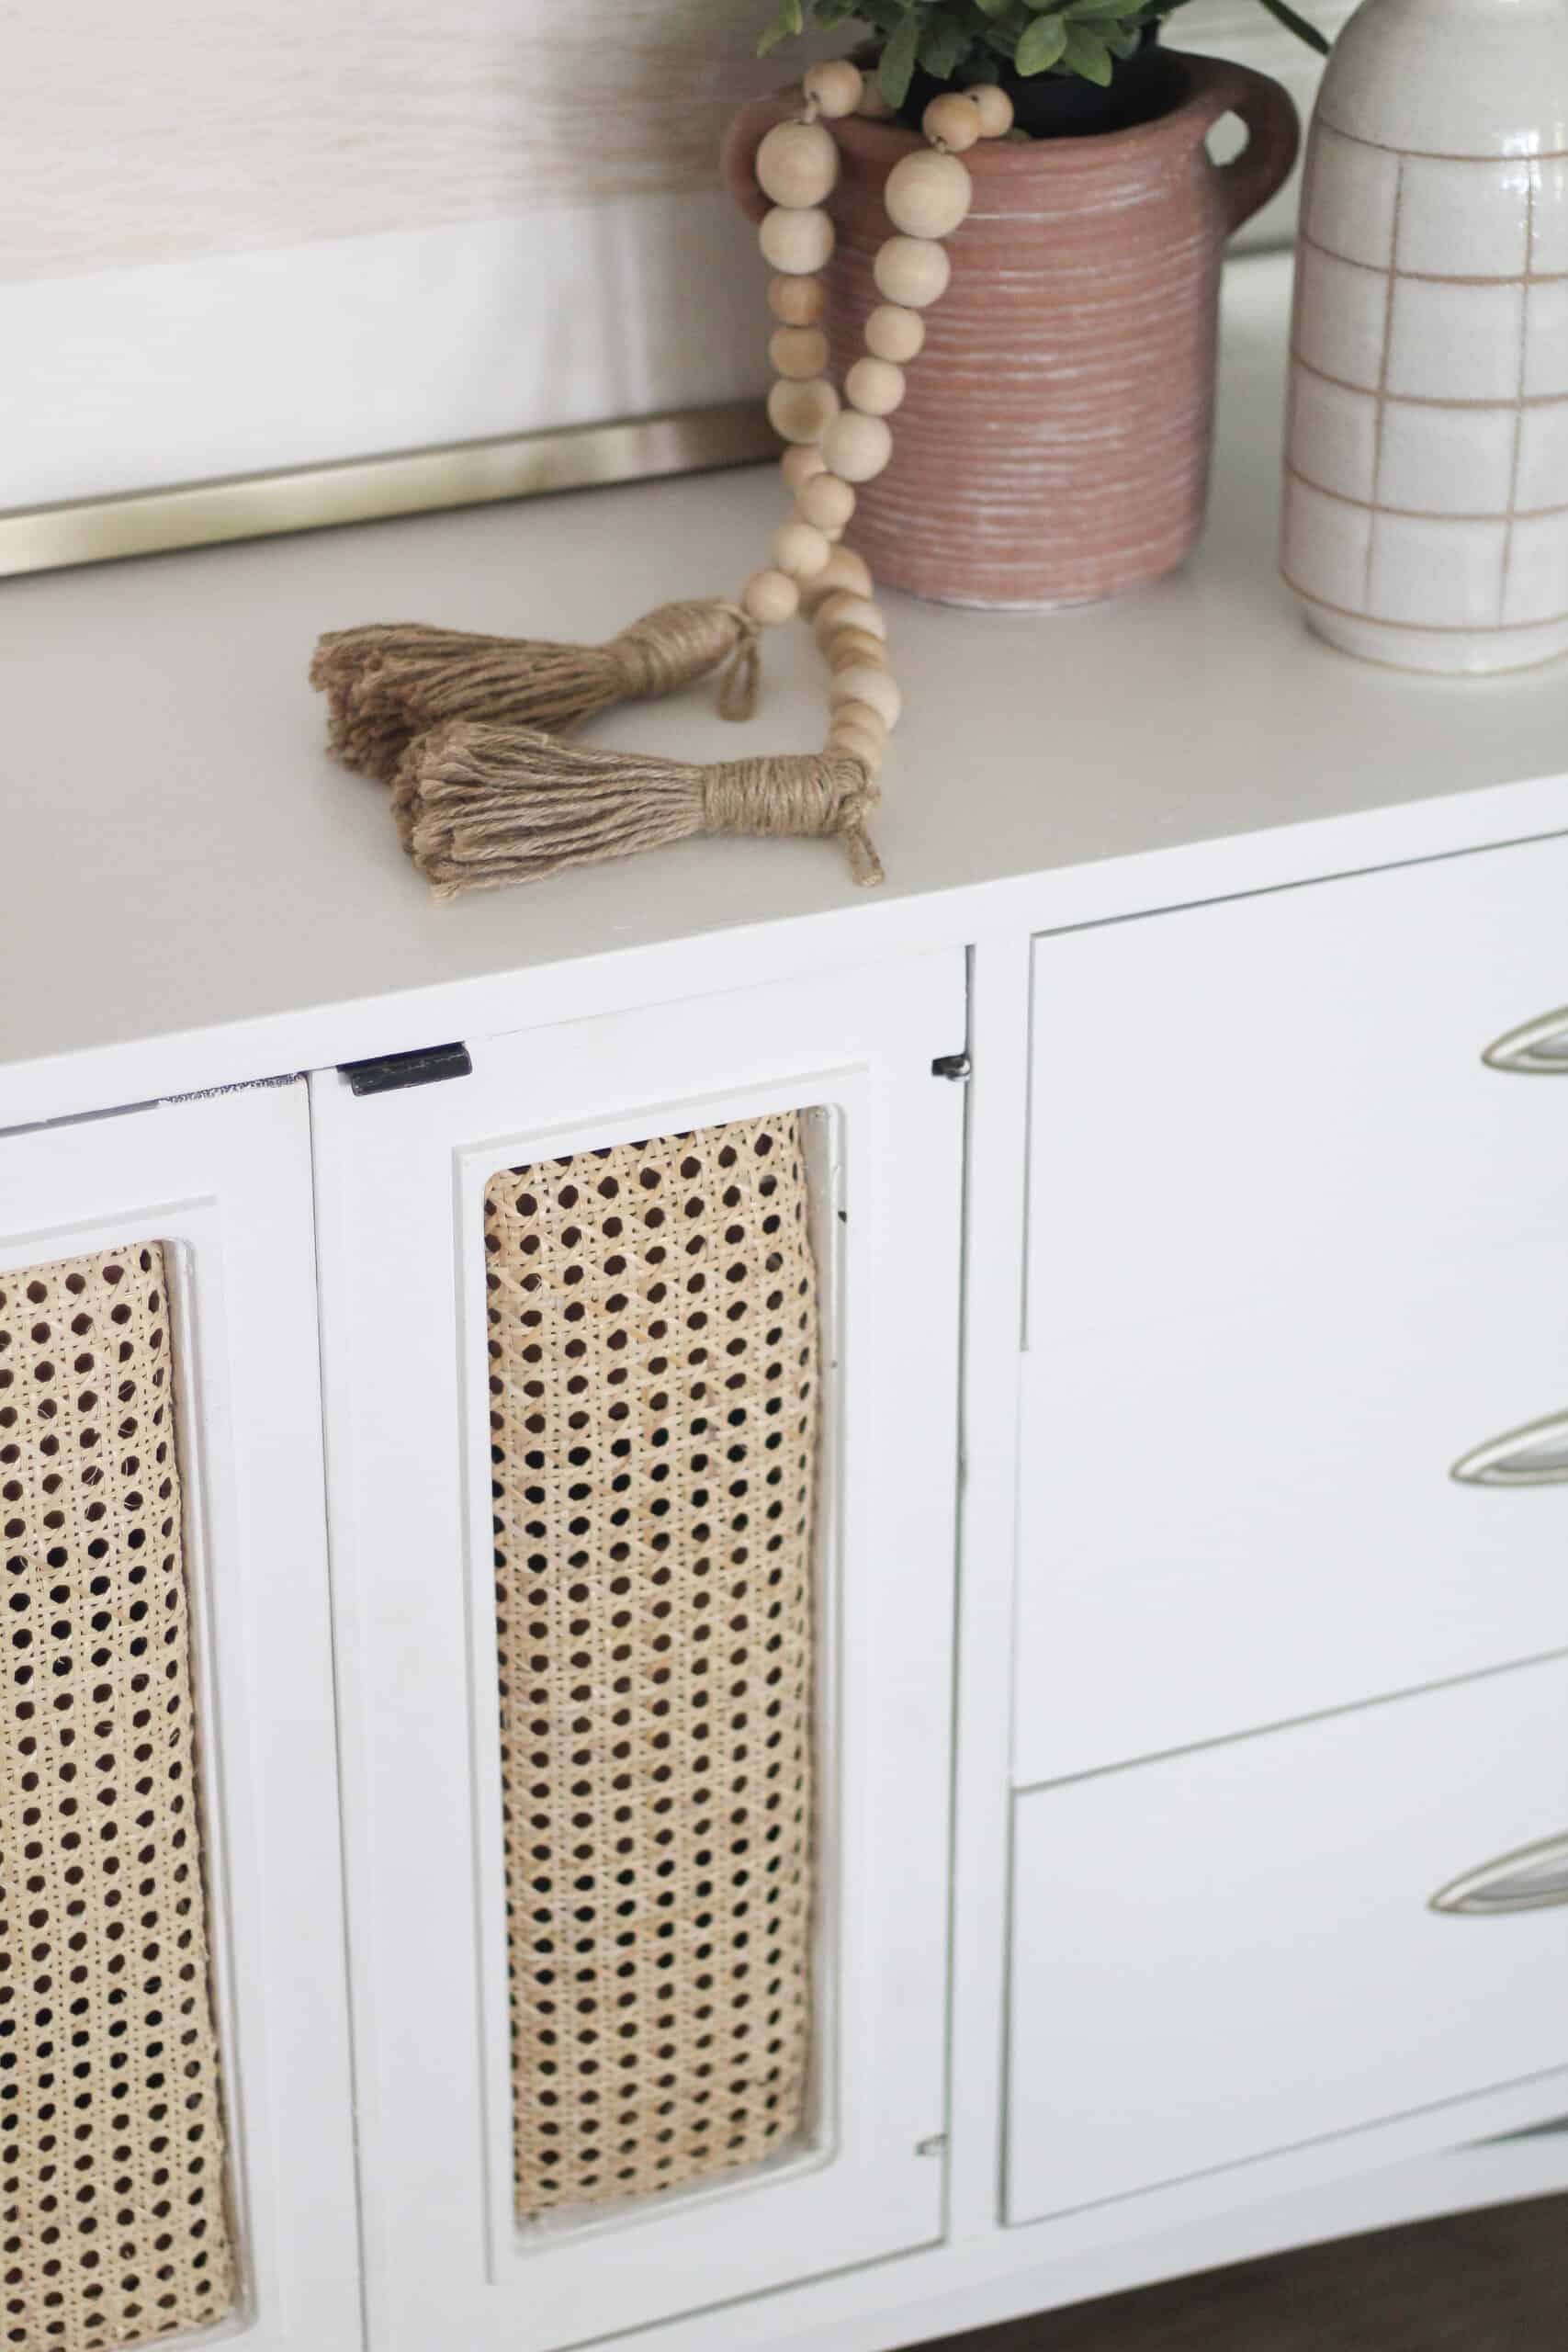
If you try to do this to one of your pieces, be sure to let me know if you have any questions. A little tip to consider – don’t go to pink on your outside pieces. Our piece is super thick nice wood so could easily withstand, but the stapling is hard on the piece so you don’t want a fragile frame.
If you check your local Facebook marketplace you will likely be able to find a great mid century modern dresser to update too if you’re looking for something really similar to this piece. If you have any questions while you’re updating your piece leave me a comment below or DM me on Instagram!
Pin the Photo Below for Later