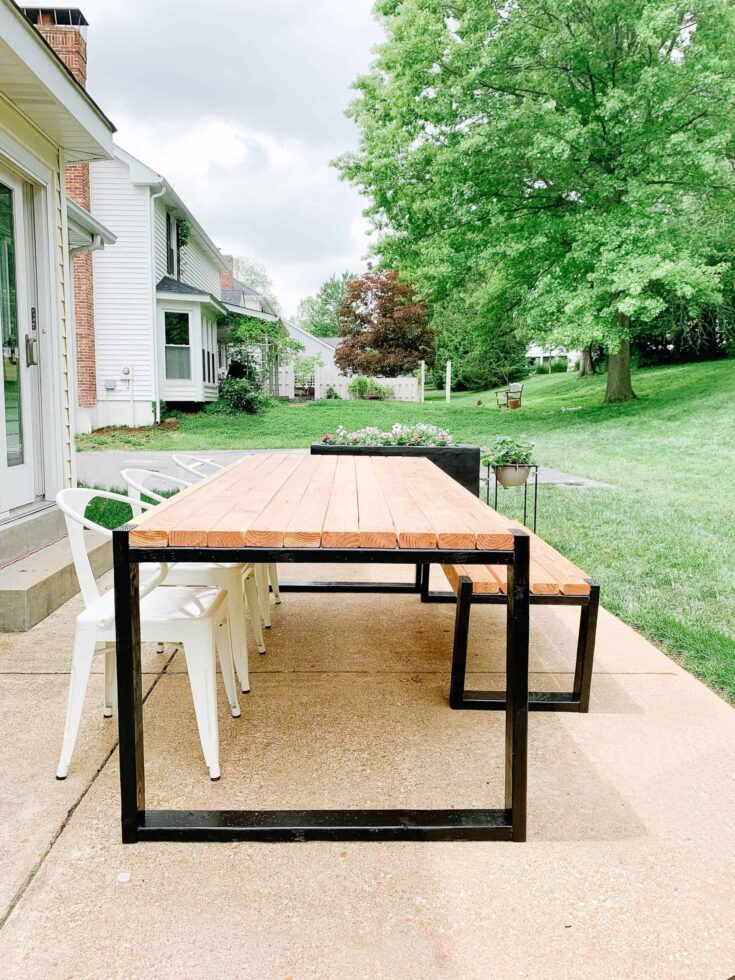
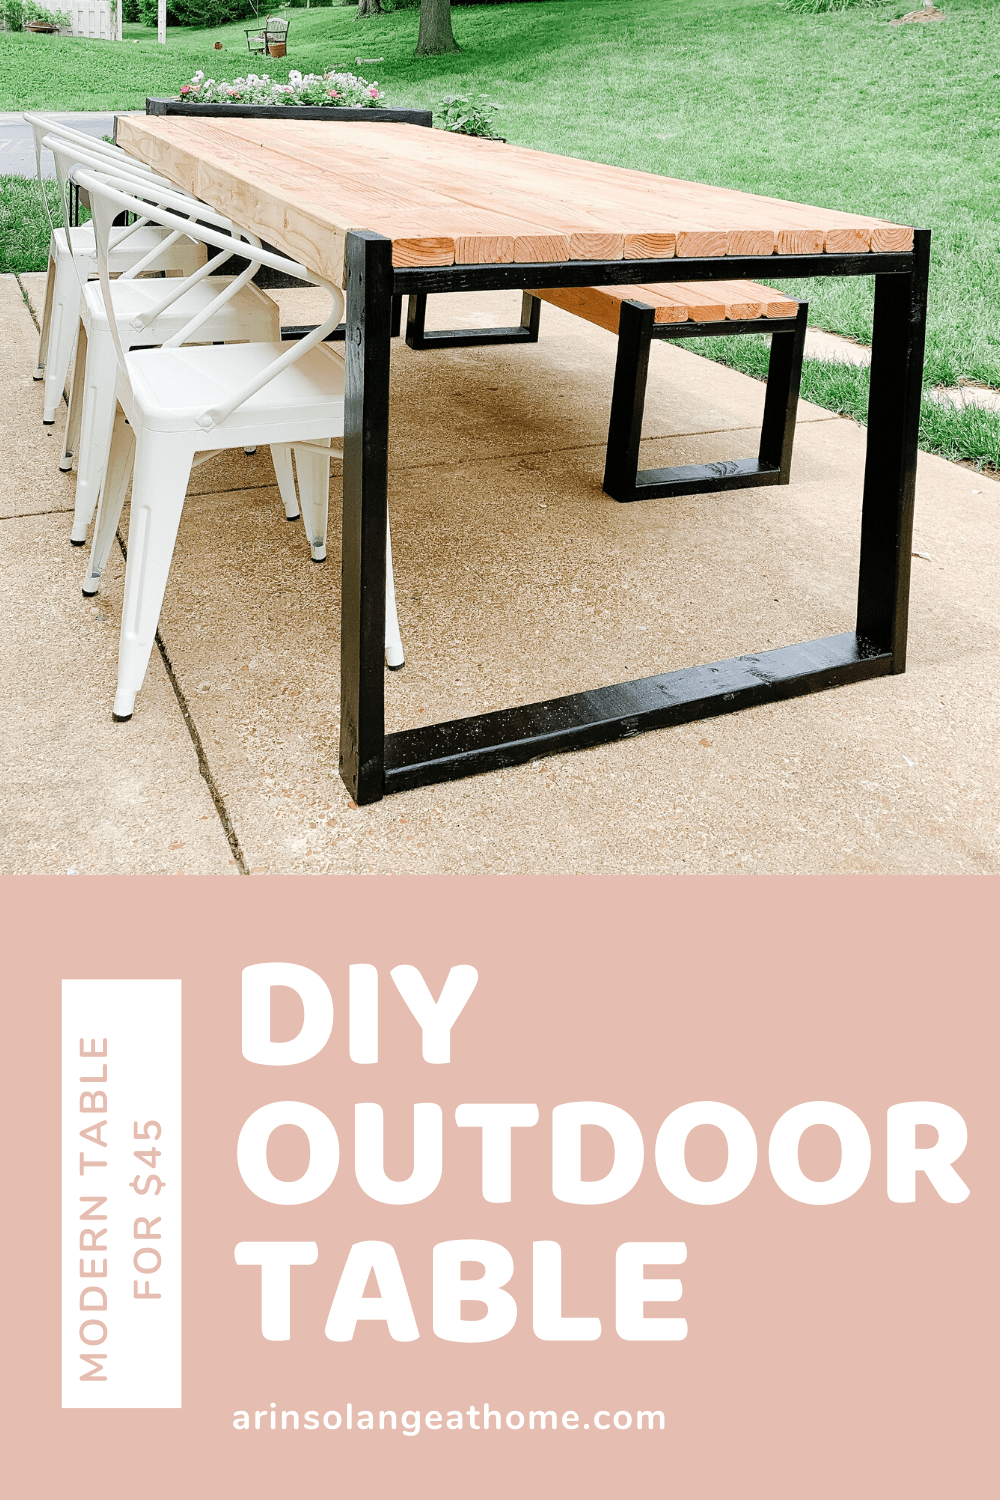
Keeping the projects rolling during our time at home – this week I am sharing an easy DIY outdoor table. Last week Sam built me a bench using a tutorial I will link below, and it was SO EASY, and turned out amazing. I will walk you through how I made a beauty of a table for $45 that we are already loving so much as a family.
This post contains affiliate links and was originally written in May 2020. It was updated March of 2024 – When we built this table the price of lumber was MUCH lower. It will likely cost you more to build this now.

Easy DIY Outdoor Table
This year going into summer feels so different. I know it is going to include so many meals at home instead of eating at the pool like we usually do all summer.
I am on a mission to make sure our outdoor space at home is ready for fun days and cool nights, because it doesn’t feel like we will be getting out as much as we normally would.
We have 4 little ones – ages 8 months – 7 years old, so we are always looking for items that allow us to enjoy our time with them more – and when it comes to meal time that also means a big table.
Finding The Right Furniture For Your Family
Previously I had done lounge seating outside, but the older the kids are getting the more we enjoy eating outside with them. We decided to sell the old lounge furniture and move a table we already had outside (an IKEA one) for some cheap outdoor dining space, but it was clear that we did need more seating.
Being the gem that he is, Sam set out to make me a bench about a week ago and it turned out SO CUTE that he decided to make me a table this week to go with it. Have I mentioned how much I love him?
Bench Tutorial
Before I give you the measurements and such, you should definitely check out this tutorial for the bench that I found on Pinterest. I was searching for ways to use up 2x4s that we had on hand and found her amazing bench that we loved so much that we decided to create the table too.
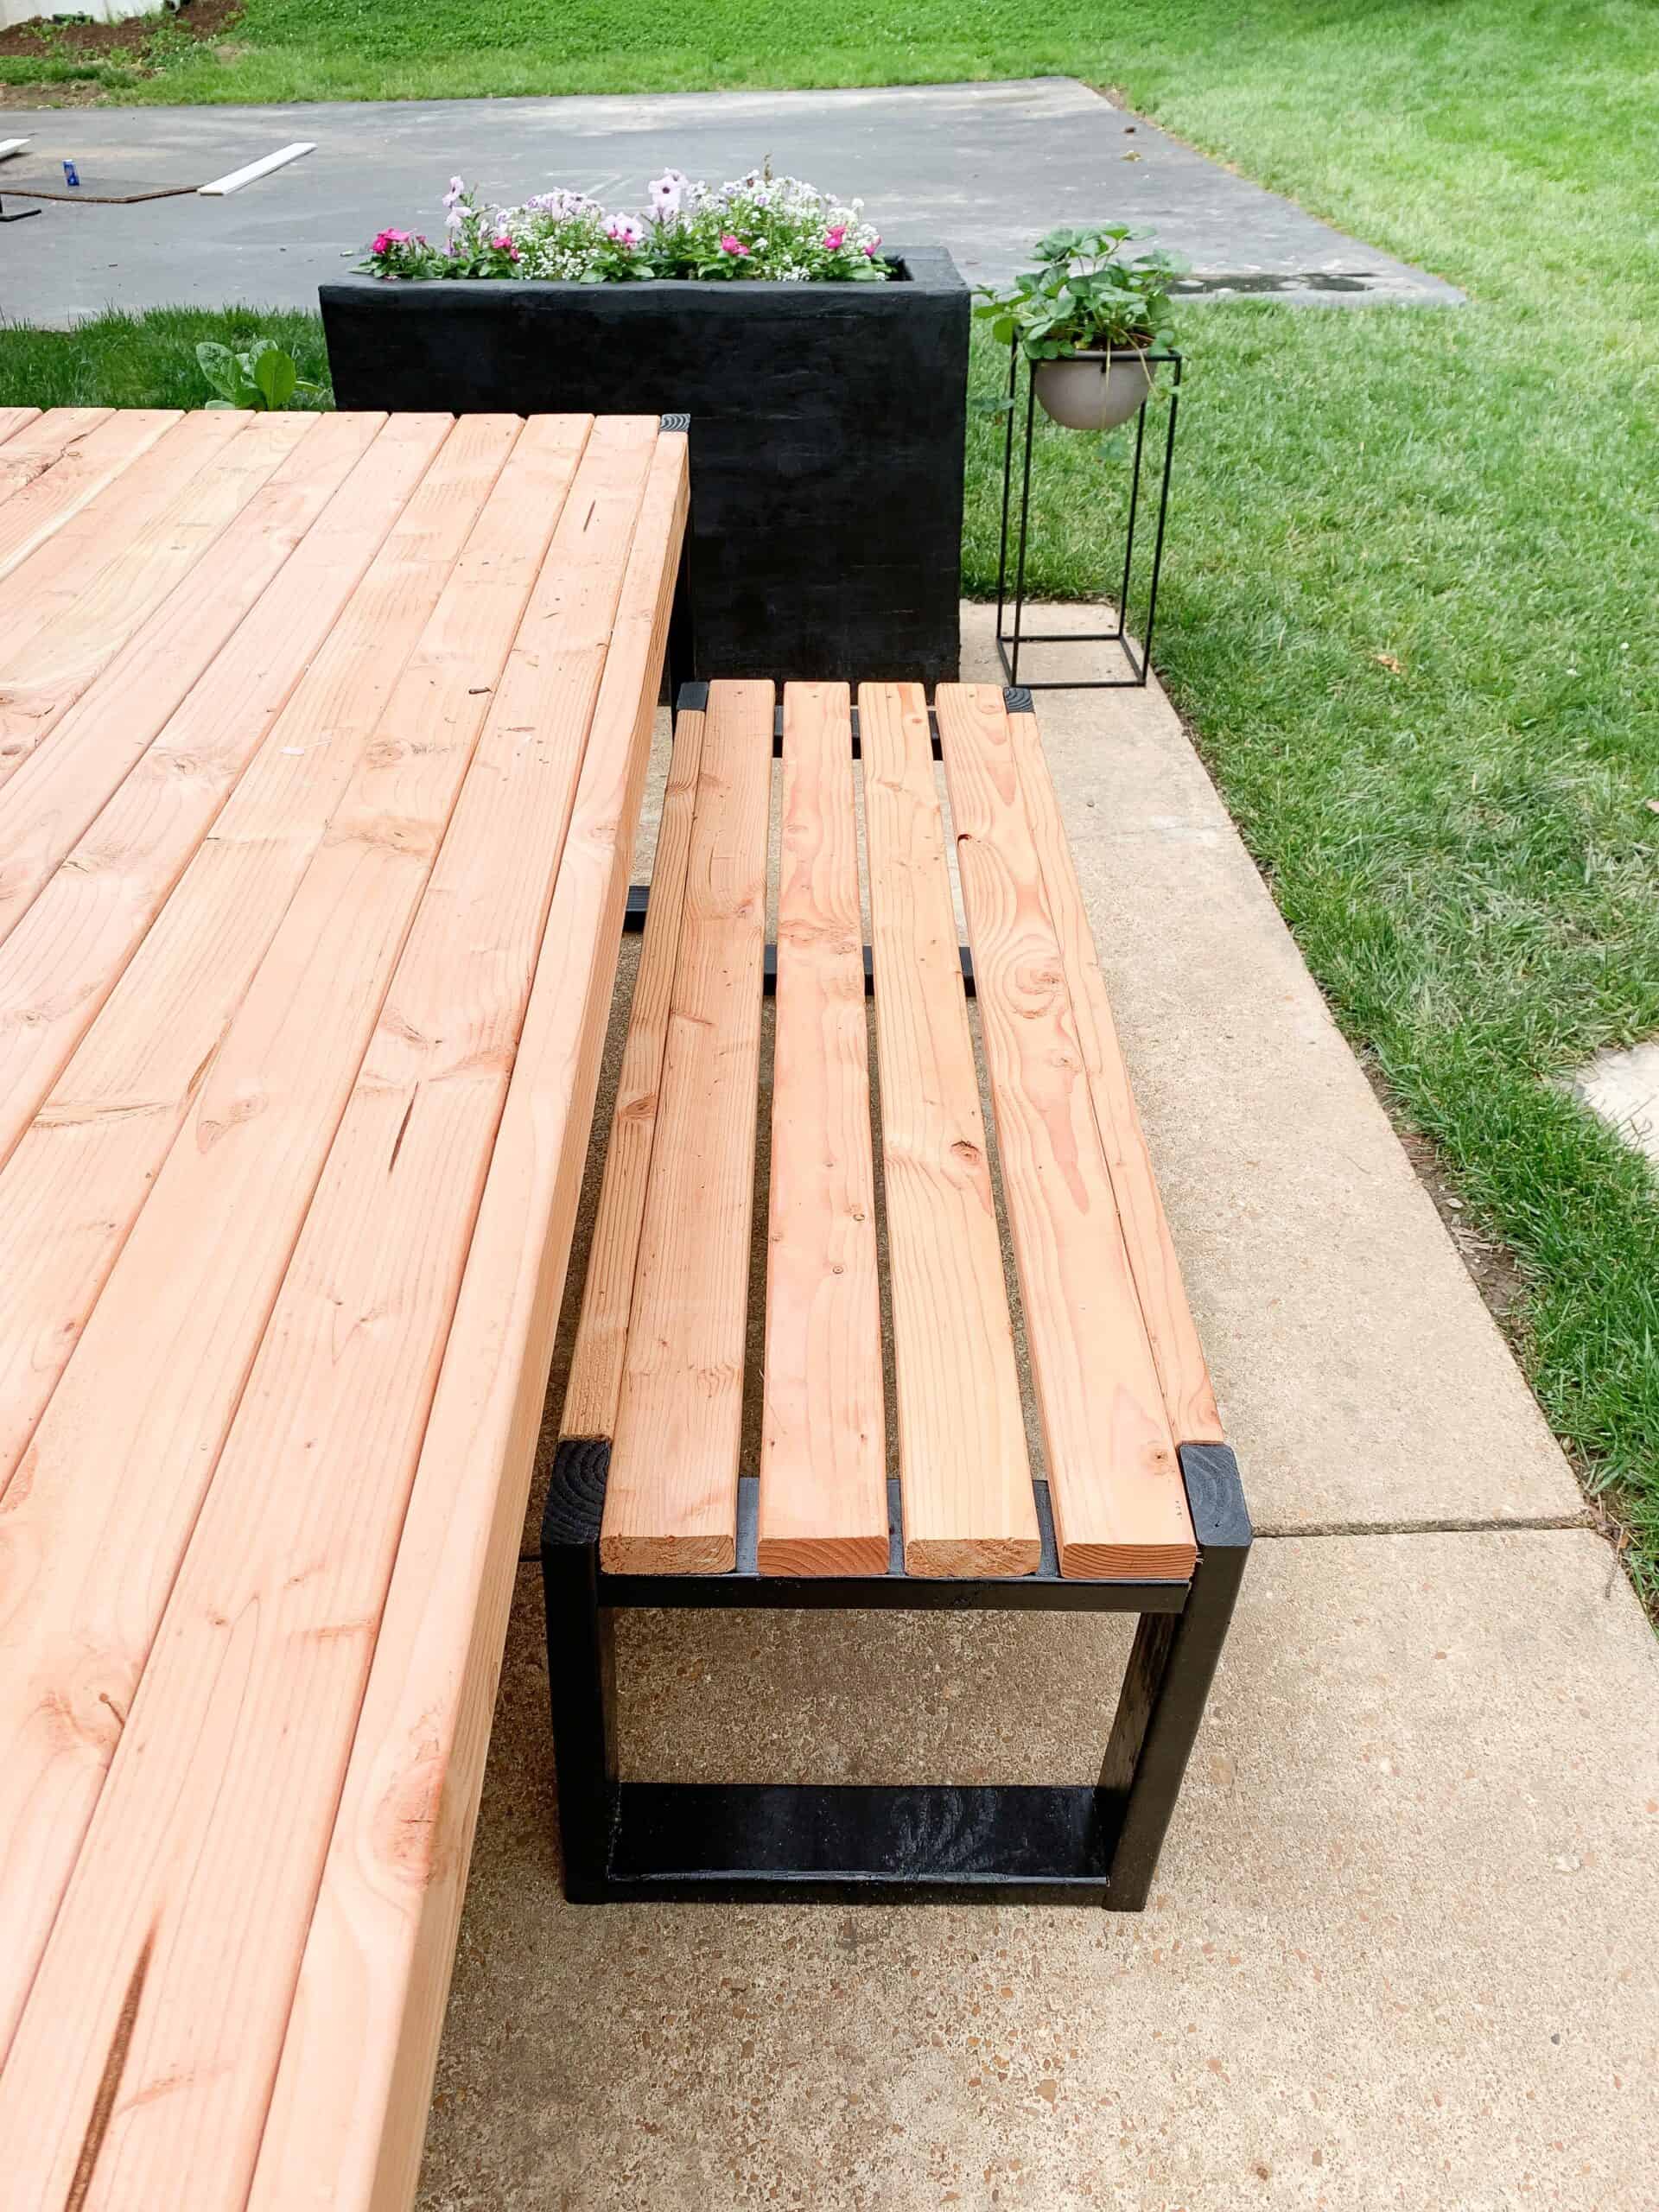
One thing I will note – if we were to do this over, and were making the two pieces at the same time I would have made the bench a bit longer than her tutorial just to have more seating on that side of the table.
I am linking to her bench tutorial, so be sure to check it out and show her some love for all her hard work and her amazing tutorial!!
Outdoor Table Supplies
- 16 2x4s – you can get them pretreated for outdoor or not
- Outdoor Screws
- Drill
- Table Saw Here
- Black Outdoor Paint
- Poly Sealer or weatherproof stain

Cutting Your Lumber
We personally wanted a huge table – we have 4 kids and family in town so when we eat outside we usually have company. It’s also worth mentioning that the way the legs are made, it’s not as easy to put chairs on the ends. With that being said, our table is 96 inches long.
First Make All Your Cuts:
- Leave 10 boards 96 inches long (or cut them to your specified length)
- Cut 2 boards 89 1/4 (this measurement will change if you shortened your table)
- 4 pieces, 30 inches long
- 4 pieces, 36 inches long
- 1 of your longest pieces of extra (as close to 36 inches)
Build The Legs
First things first, when everything is cut – build your legs. Lay down one of your 36 inch boards and drill into it so the 30 inch boards are coming up from the ends. You will then have a U.
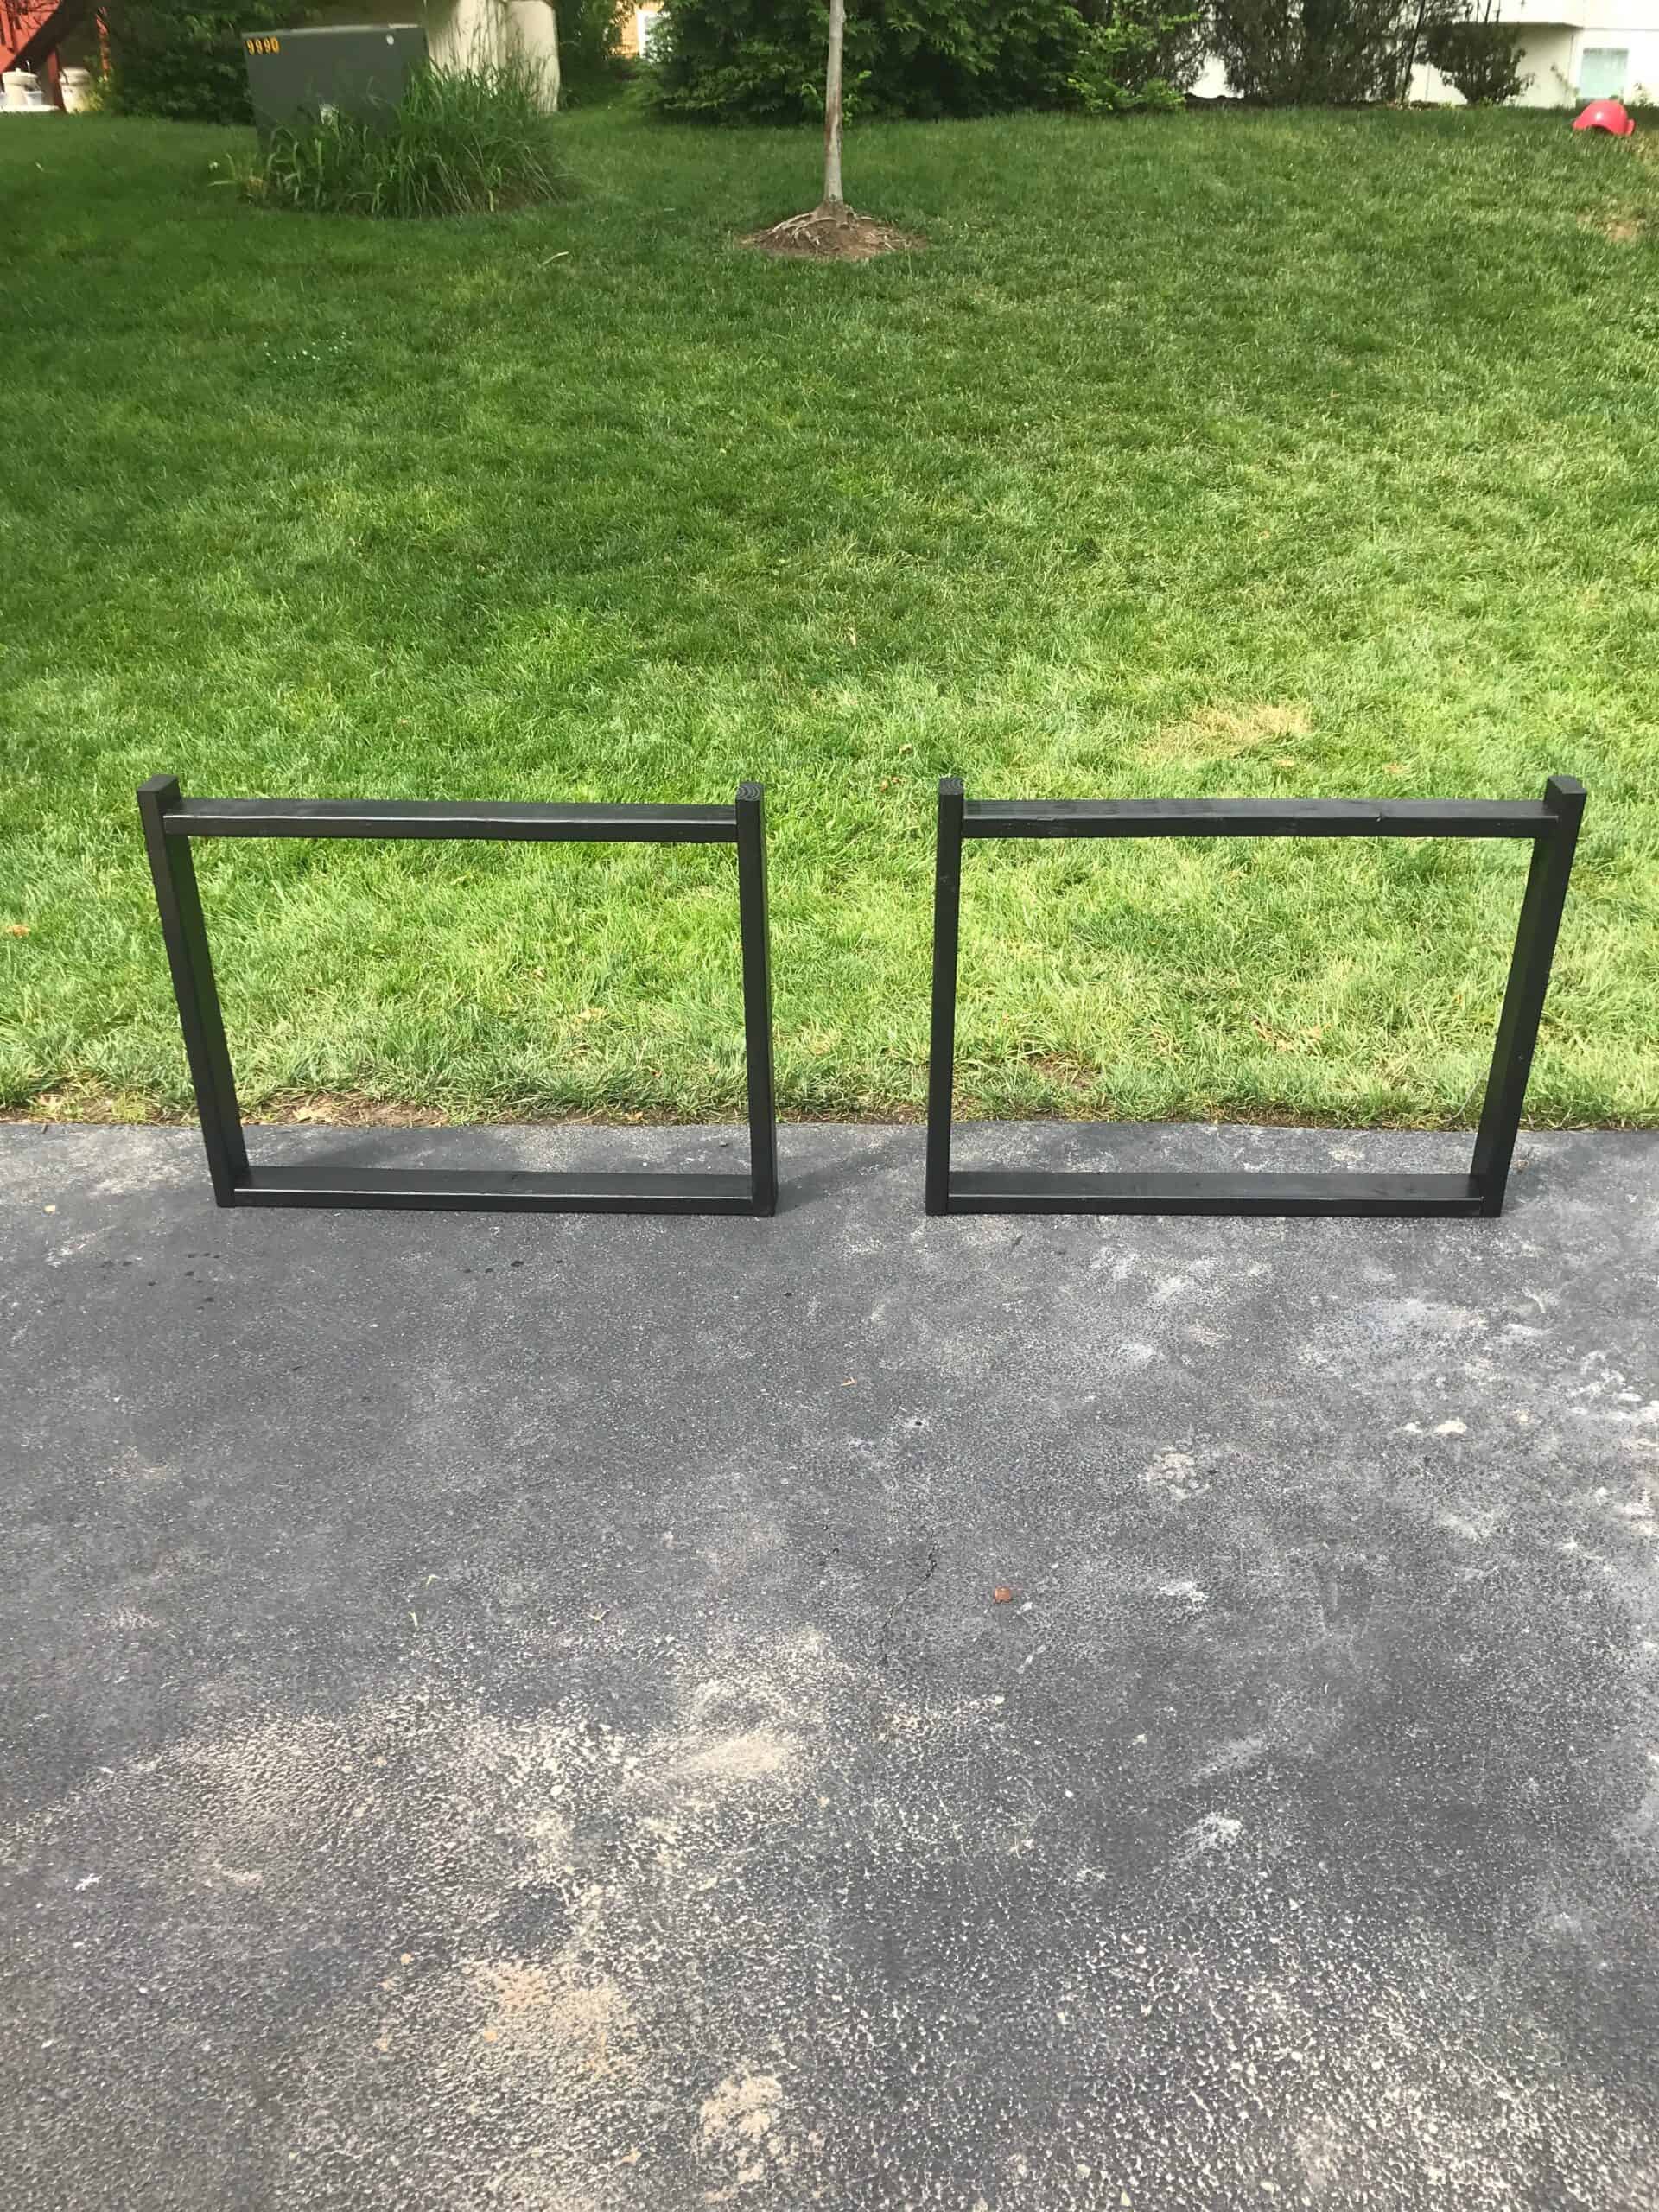
Then you need to drill your top cross beam in. We laid a scrap of 2×4 on top of the board to make sure we were giving it the perfect amount of clearance for the top.
Once you have built both of your legs you will paint those black with your outdoor paint.
Assembly
Now that your legs are built – once they have dried, you will attach the top.
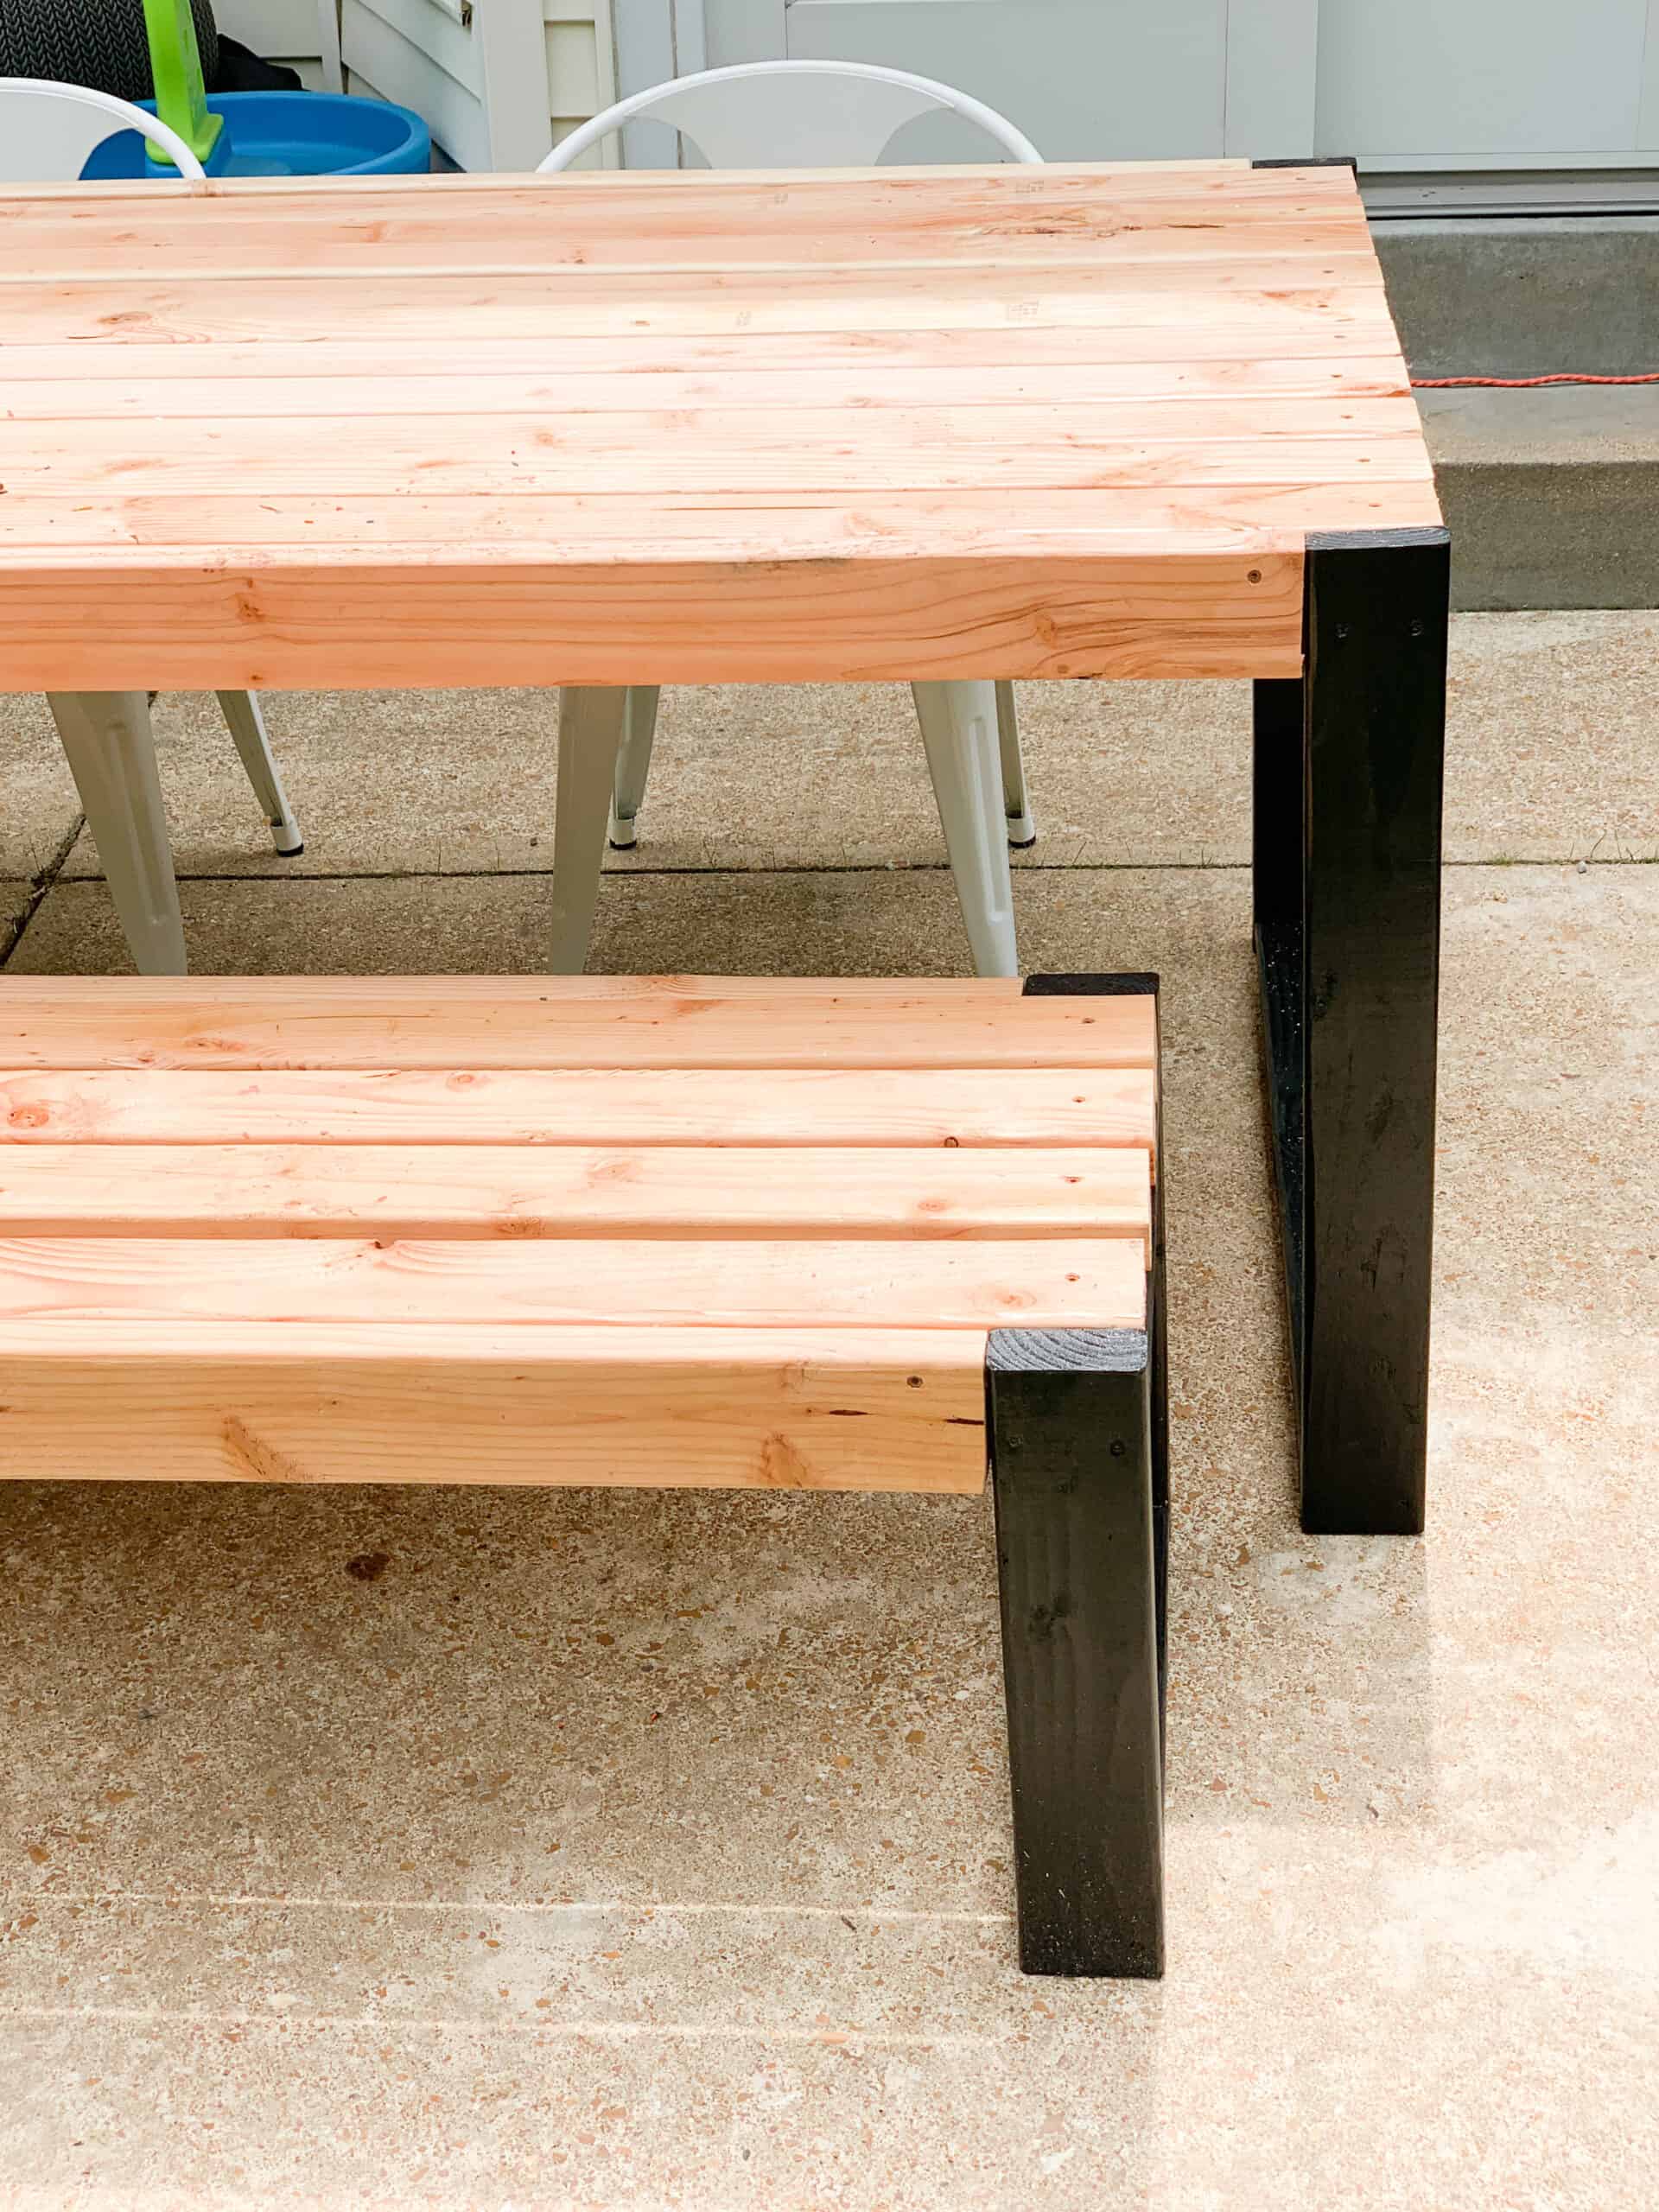
Stand your legs up, and lay your 2x4s on top. Screw the boards in – you want them to butt up the end of the black like you see in my picture.
After all 10 are on, check to be sure they fit in there nicely. Next, you will attach the last 36 inch board to the middle of the under side of the table.
We did this for added stability, because at any given time at least one of my children will be trying to climb across the table.
Last step is attaching your two 89 1/4 inch boards to the sides. Those two boards will be attached in the other direction (so skinnier side up) than your other 10 boards.
Finishing
Once you are done you can fill in the nail holes with wood filler if you want and sand those down. Then either stain the boards (we decided not to do that) or seal them with a poly sealer – The one I listed above is my favorite!
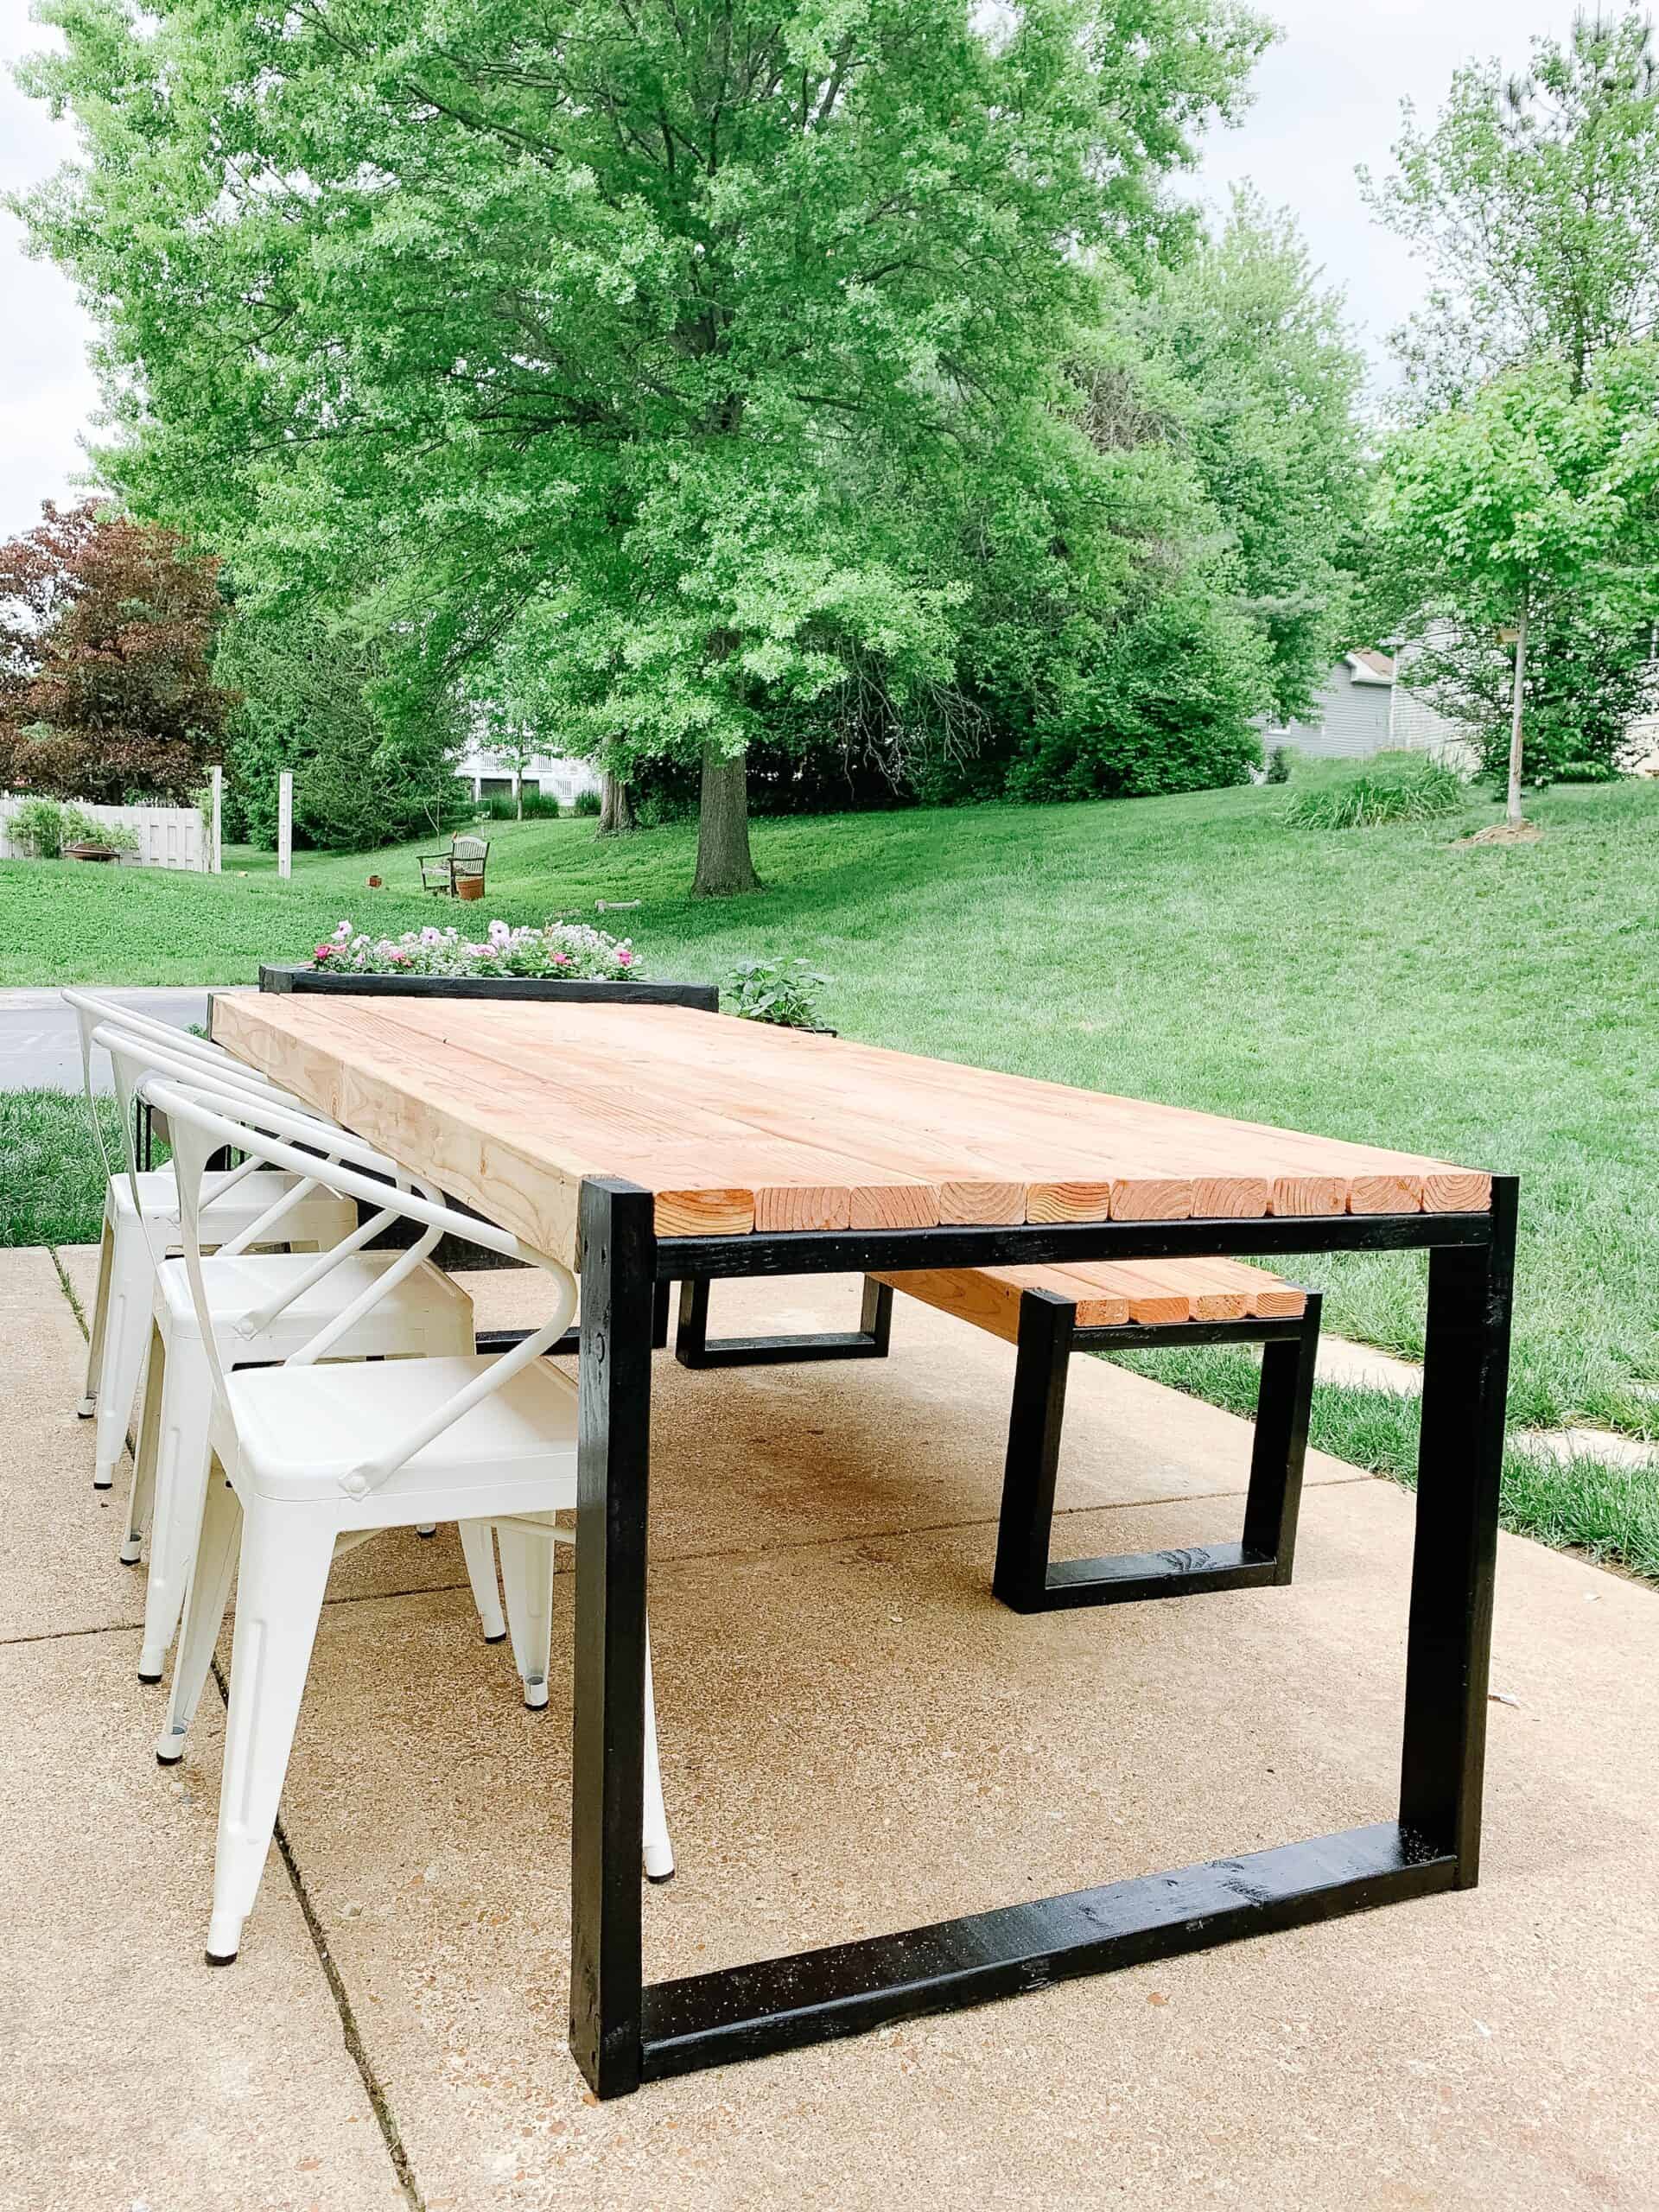
This table is meant to be simple and rustic – if you are looking for a table and bench that are going to look super finished and fancy this isn’t your tutorial haha.
But it was simple and I LOVE the way it looks. We will definitely spend many a night out here eating this summer, and may even drill a hole through the center for our umbrella.
I know this is a quick tutorial – I had so many people excited to try this that wanted to jump on it this weekend so I worked to get it up and live for them.
Be sure to check out these posts on my Amazon Storefront to set up your new DIY Outdoor Table
Garden Party Tablescape | Patio Refresh | Outdoor Living | Easter Hosting | Pink Patio Refresh
Printable Supplies and Directions
I have started to offer printable supplies and directions to my DIY posts to hopefully help you and make things a little easier as you are working through your own projects.
My suggestion is to always read through the entire blog post at least one time before using this feature so you can see any important tips, tricks, disclaimers, etc.
The printable version is meant to be more of a cheat sheet of sorts to help you while you’re working or shopping.
Easy DIY Outdoor Table
Create an easy outoor table in a couple of hours. It has a modern look, and is simple for your outdoor dining.
Materials
- 16 2x4 boards 96 inch length
- Outdoor Deck Screws
- Outdoor Black Paint
- Poly Sealer or Outdoor Stain
- Optional - wood filler
Instructions
1. Cut your lumber - all cuts are based on 96 inch long table
- 10 boards - dont need cut
- 2 boards- cut to 89 1/4 inches
- 4 boards - 30 inches
- 5 boards - 36 inches
2. Assemble Legs and Paint black
3. Attach Top 10
4. Attach middle under support
5. Attach two 89 1/4 inch boards to sides
6. Seal or stain
Notes
For exact insturctions head to the post!
Makita Drill Kit
RYOBI Compact Table Saw
Minwax Poly Sealer
Other Posts You’ll Love
Pink Stock Tank Pool Tutorial | DIY Dining Table | Amazon Outdoor Furniture and Decor | DIY Planter Box | DIY Terra-cotta Pots & Outdoor Rugs
Pin the Photo Below for Later
Hopefully you love this DIY outdoor table tutorial and are able to create your own with lots of dining and memories to be made at it this summer!
Our kids personally broke ours in while decorating and eating donuts outside this morning. So it was definitely a win win to have them enjoying their morning, and me knowing that an afternoon rain would clean up the mess instead of me – PRAISE BE.
Be sure to pin the photo below for later, and if you don’t already – follow me on Instagram (@arinsolange) and Tik Tok (@arinsolange) for more fun! Be sure to check my Amazon store front for all things best seller, home organization, and DIY.
As always if you have questions shoot me an email, comment below, or DM on Instagram (@arinsolange) and I am always happy to help.
Love this. My husband built something similar. I am curious how those white chairs hold up outside? Thanks!
Hi – they have been out for 2 months and have been great!
As many others aew asking, what arw the dimensions for the bench? specifically for the legs – length will be adjusted to nest under the table when not in use.
Hi Tamara – we used the tutorial linked in this post for the bench, and I want to make sure I am not taking from her creativity. You can head to her post for all exact measurements.
Hi! We just used your tutorial to make this take over the weekend! Love it! Can you possibly send me the dimensions you used for the bench?
[email protected]
Thank you and God Bless!
Danny
Hi Dan – we used the exact dimensions from the other tutorial. I do wish we had done it longer than that tho!
Arin
Curious on how 10 2x4s fit 36 inch across
Lumber dimensions are not actually 2×4 they are 1.5″ x 3.5″. Board sizes are based on prefinished lumber dimensions.
love the table made it last weekend. What are the deminsions of the bench
Hi! Can’t wait to do this! We’re creating our shopping list. What measurements for the bench do you suggest since the one for the tutorial is too short for the 96 inch table?
Hi Alesia – I think I would have probably made the bench about 6 inches shorter than the table if I had done it again!
Hello!
I love this idea for an outdoor wedding I have coming up instead of renting tables! I am just confused on the number of 2×4’s. With all the smaller cuts would you need more like 16 2×4’s to complete the project?
Hi! Thank you for share it’s going to be my weekend proyect
Hi the number of 2x4s is off for the cuts that you mentioned above. Have to make another trip to the lumbar store now! Please correct for future diy-ers. Thanks for the plans though!!
Thank you so much!! Just edited the post
Hello! I’m working on a shopping list and see each board is costing me about $5 thus doubling the table cost. Do you have a particular board that fits the $45 budget?
Hi Rain – Unfortunately Covid raised the cost of lumber SIGNIFICANTLY so the boards are just plain more expensive right now.
Love the look of this table, this is going to be my project for Spring. Can you please post a current picture of the table, so I can see how it looks now that it has weathered a bit?
Hi Kelly – we actually sold it with our last house. We didn’t move any large furniture with us. We are looking forward to tackling a fun new style this spring, so if you aren’t building right away I will share that in the next couple of months too so you can decide which you prefer.
I love this table. And thank you for this post because it’s a great & easy project. Just curious though, why didn’t you sand down all of the wood especially the ends? Having young children, I think I would have rounded the edges a little by sanding them just so they wouldn’t be so rough and sharp.
Hi Lori – we meant this to be a really easy quick DIY that is easily modified to be done ‘nicer’ with simple changes like that. We personally left this with the buyers of our last home, so will be doing something more ‘finished’ this year with a new tutorial.
Hi! I’m trying this next weekend! What size deck screws do you use? Woodworking novice
We used 4 inch deck screws! Good luck, If you do Instagram I would love to see your end result after (@arinsolange)
Hi! I’m halfway done and quick question- Can I screw the long boards in from the bottom (I e from the black top of the leg part) to avoid holes on the top part? New to woodworking. Thanks!
Hi Stephanie – I will have to ask my husband. And I am so sorry it was such a delay in response – I was having computer issues.
Are you not concerned all the down weight sitting on only screws? I wouldn’t let someone heavy sit on it. Yikes.
Its 4/2021 and 2×4 8 are 9- 10 a piece. So this becomes 160 for just lumber.
I could not find a date to know when this table could be built for 45.
Hi Tammy – we built this last spring and it came to $45 – as stated in the post the price of lumber has gone up EXPONENTIALLY since that time.
Hi, I just priced the lumber and found 2x4x6 to be $3.57 for pressure treated Southern Pine. So excited to make this this weekend! Thank you for sharing! Reading the comments I think I will be adding one more lengthwise to the bottom to sturdy the base. If that makes sense?
Hi Danielle!
I think that will be perfect. I hope you LOVE IT
I just made this and love it- quick question though, I feel like my base is a bit wobbly. Any ideas on how to remedy this?
Hi Christine, You could add a support between the legs that runs along the ground in the middle. I have had a few people who made it the full length that found that helpful.
What deck screw size you used for the project?
2.5 inch deck screws worked great for us. You could do up to 3.5 inch.
Just found your adorable blog! I’ve been searching for an easy/sturdy DIY outdoor table!! This is it! So, I was looking at the bench length, and realized it was a bit shorter that the table (this is before I read why), and I thought that you did this on purpose so that you would have room for the high chair for the baby. 🙂
Hi! – you are SO sweet. Thank you. So we made the bench first per the persons instructions, then the table was an after thought and I made it longer to fit our family.
I made this over the weekend, came out great, thanks for the idea and plans
Do you think you could extend the ends a bit over the legs so that you could have seating at the end? (Maybe kids on a bench?). Thanks. It looks great!
Hi I definitely think you could alter it a bit!
So, I am not a diy person but going to try. How did you screw this together? Did the screws go in straight or at an angle? Sorry, I’m new to all this and want to give it a go
Don’t apologize – they just go in straight. If you have other questions please don’t hesitate to let me know!
Hi! We made this this week and love it. The instructions were very easy to follow. We are just noticing it’s a little wobbly. Any ideas on how to support the legs other than the board on the ground between the legs you mentioned above? Would doing x’s of wood on the legs help?
I am not 100 percent sure? Possibly some hidden L brackets could help.
Very proud of this table although I need to do a lot of cleanup after with sanding, if only lumber was perfectly smooth 🤣 The size for cuts for mine was 35.25, we started with 36 and there was a decent gap so had to disassemble the legs and recut them ourselves. Also 3.5 inch screws are too long (depending how you’re attaching them I suppose, I attached the legs to the top from bottom up and they went right through the top. 3 is just barely cleared, I’d definitely recommend 2.5 inch screws for anyone else making this! Maybe I missed both of those somewhere in the directions, I was too excited to make it. Need to sand, repaint legs and seal, but I’m so excited to use this for summer!!
Thanks for posting this, the table looks great. I don’t see it mentioned, but did you use pressure treated or non-pressure treated wood in your build?
we didn’t use pressure treated – but I would say that will make it hold up even better!
Built the table, came out great. Added supports under the span at certain intervals to make it more stable. Also, built a matching bar top (42in tall)/counter (36in tall). Happy to share photos with you since we loved the initial design and just went with it for the beginning of our outdoor kitchen.