I have a quick easy DIY planter box tutorial for you guys today, and let me tell you – I AM EXCITED FOR THIS. My mission this week in blog land is to get some outdoor DIY’s and projects done so we can start enjoying our outdoor space, and keep the chaos and mess outside of the house.
this post may contain affiliate links – more about that here
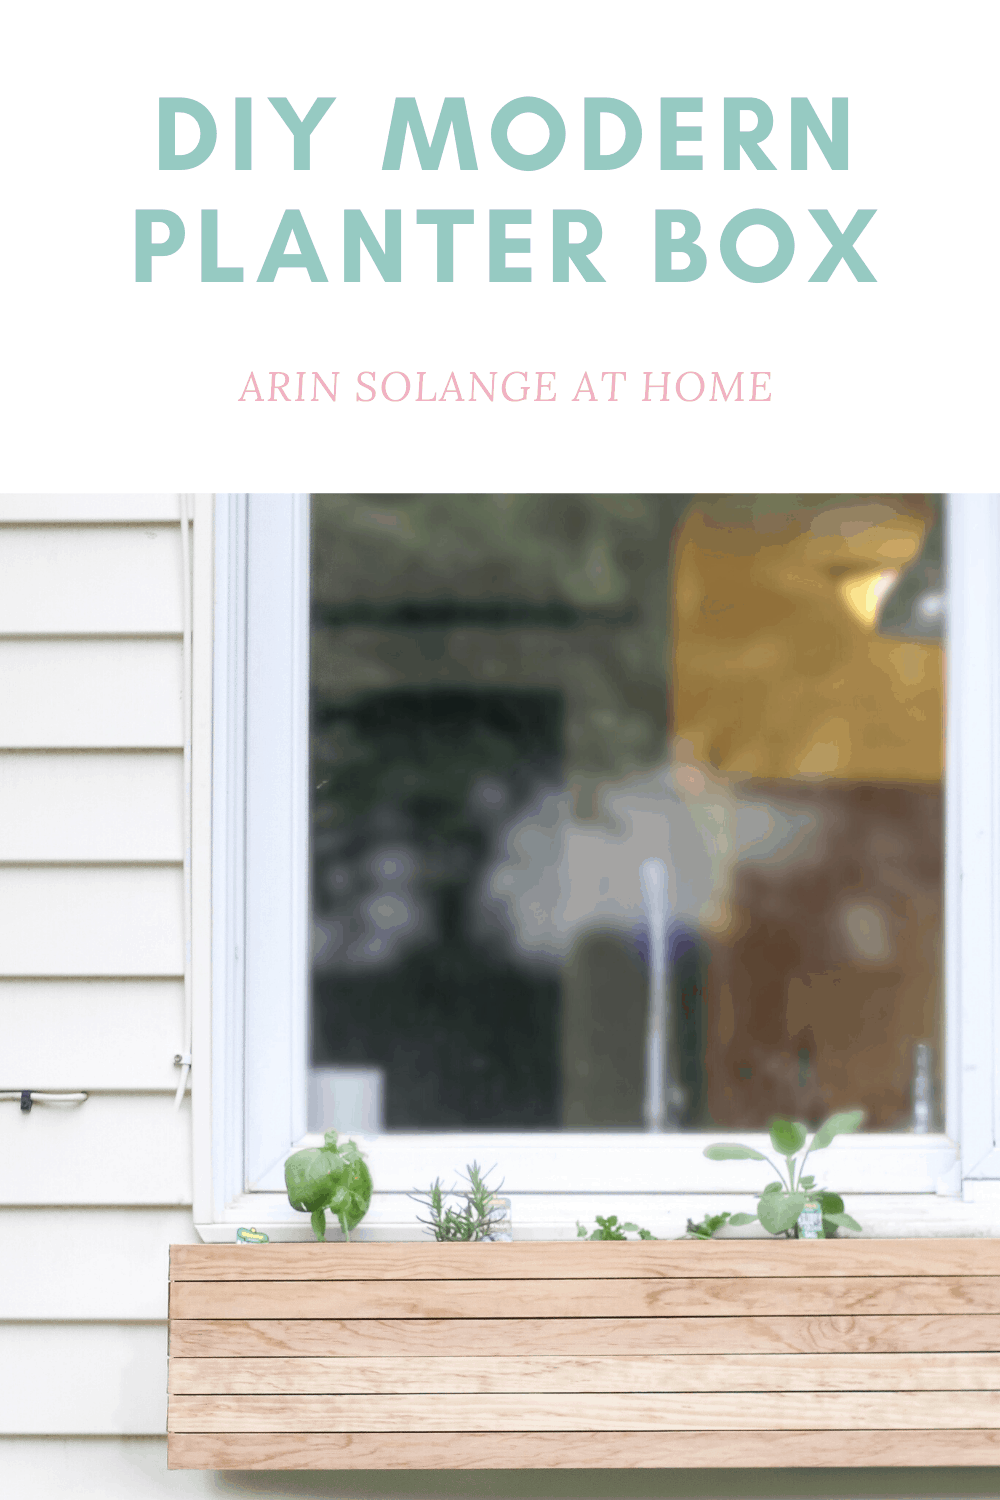
Easy DIY Planter Box
I have been trying to come up with a plan for a DIY planter box for weeks now, but knew wanted something different than what you normally see. I tend to like clean lines and modern, so really wanted to make this fit that look. I actually think these on the front of a white brick house would be INSANELY GORGEOUS.
I am going to walk you through how to make the planter boxes, how to hang them, and what I would have done differently…because that’s always the perk of using someone else tutorial…you get to learn from their mistakes.
Supplies
This project takes very few supplies. I will say – we used our nail gun, like we do for almost all our projects, and that was needed. If you have been on the fence about getting one, I say do it. My husband raves every time we work on a DIY about how our nail gun is his favorite tool!
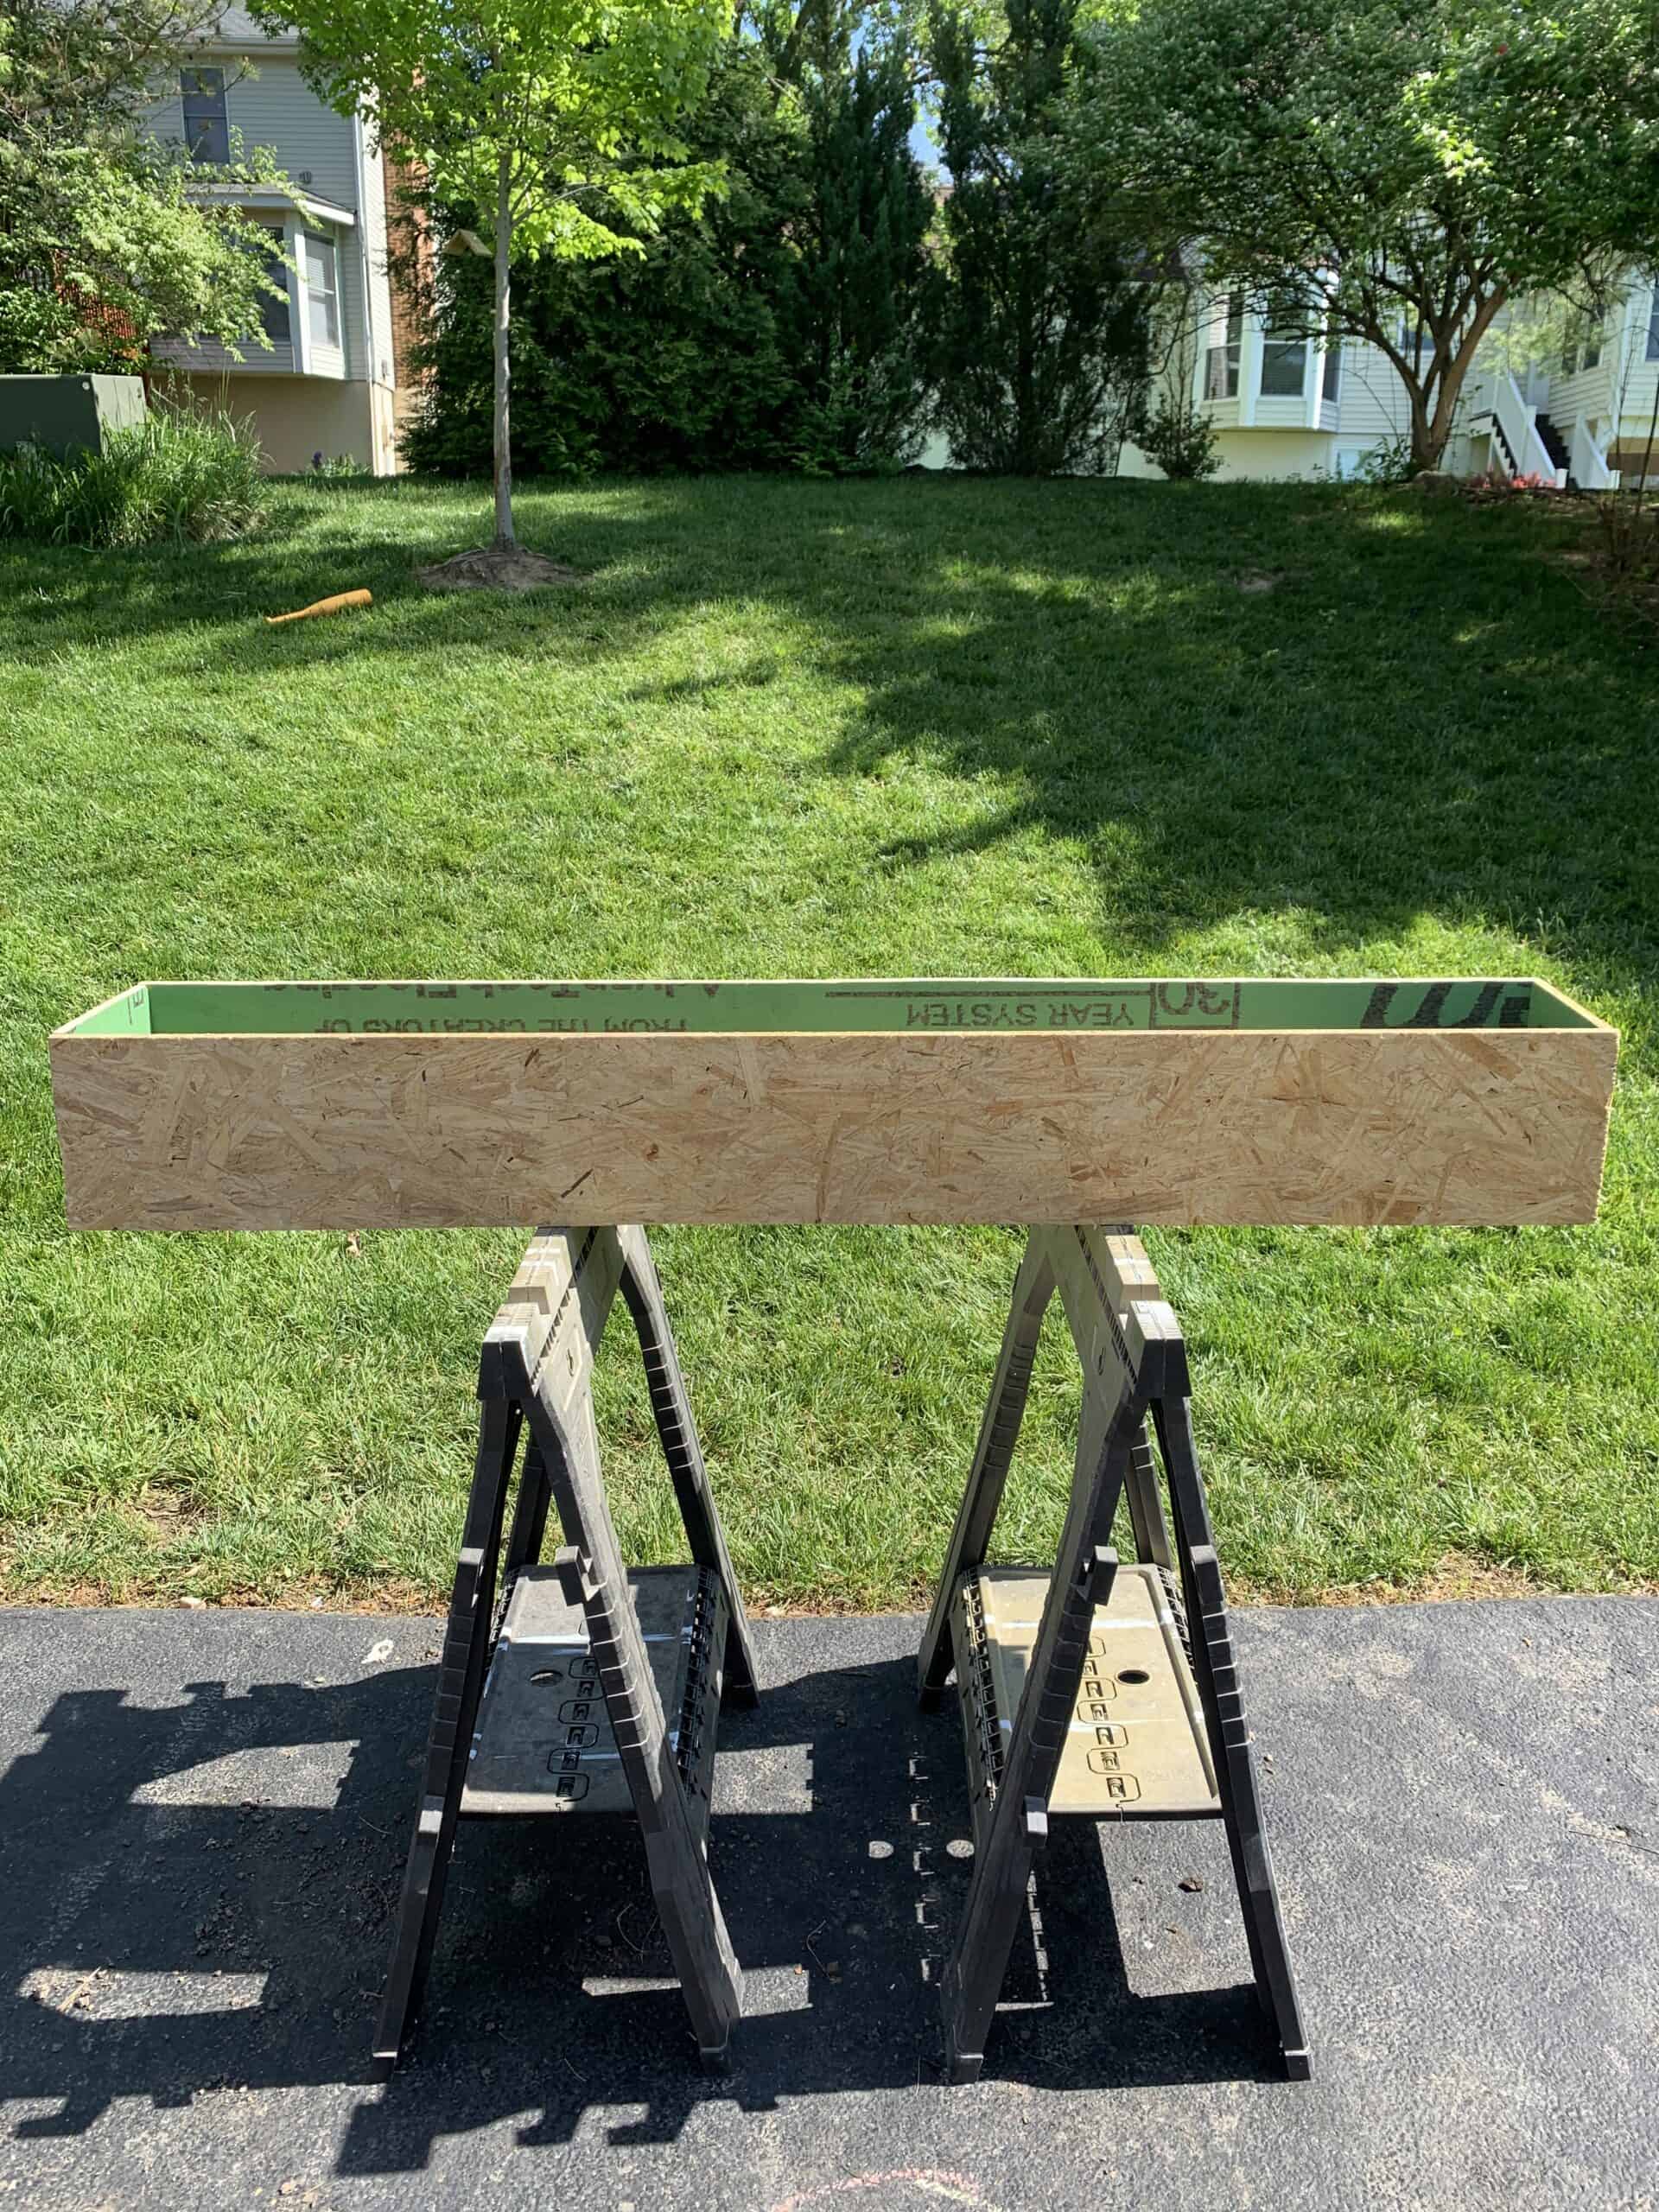
1 piece of plywood or other wood 1/2 inch thick – because it was nearly all covered we used simple plywood for the base box to save money.
lattice trim – as a side note – one thing I would have done differently is made sure that the trim piece matched as closely as possible in color
Stain
Hammer and Nails or Nail gun
Table Saw (or you will need your large pieces cut at Home Depot)
spacers (we used nickels)
wood filler and sand paper
Large drywall screws
How Much Lumber Do You Need?
Configuring lumber can be kind of tricky, and because it will totally differ based on your home and window, I can’t give you exact amounts, but I can explain how we figured up sizing!
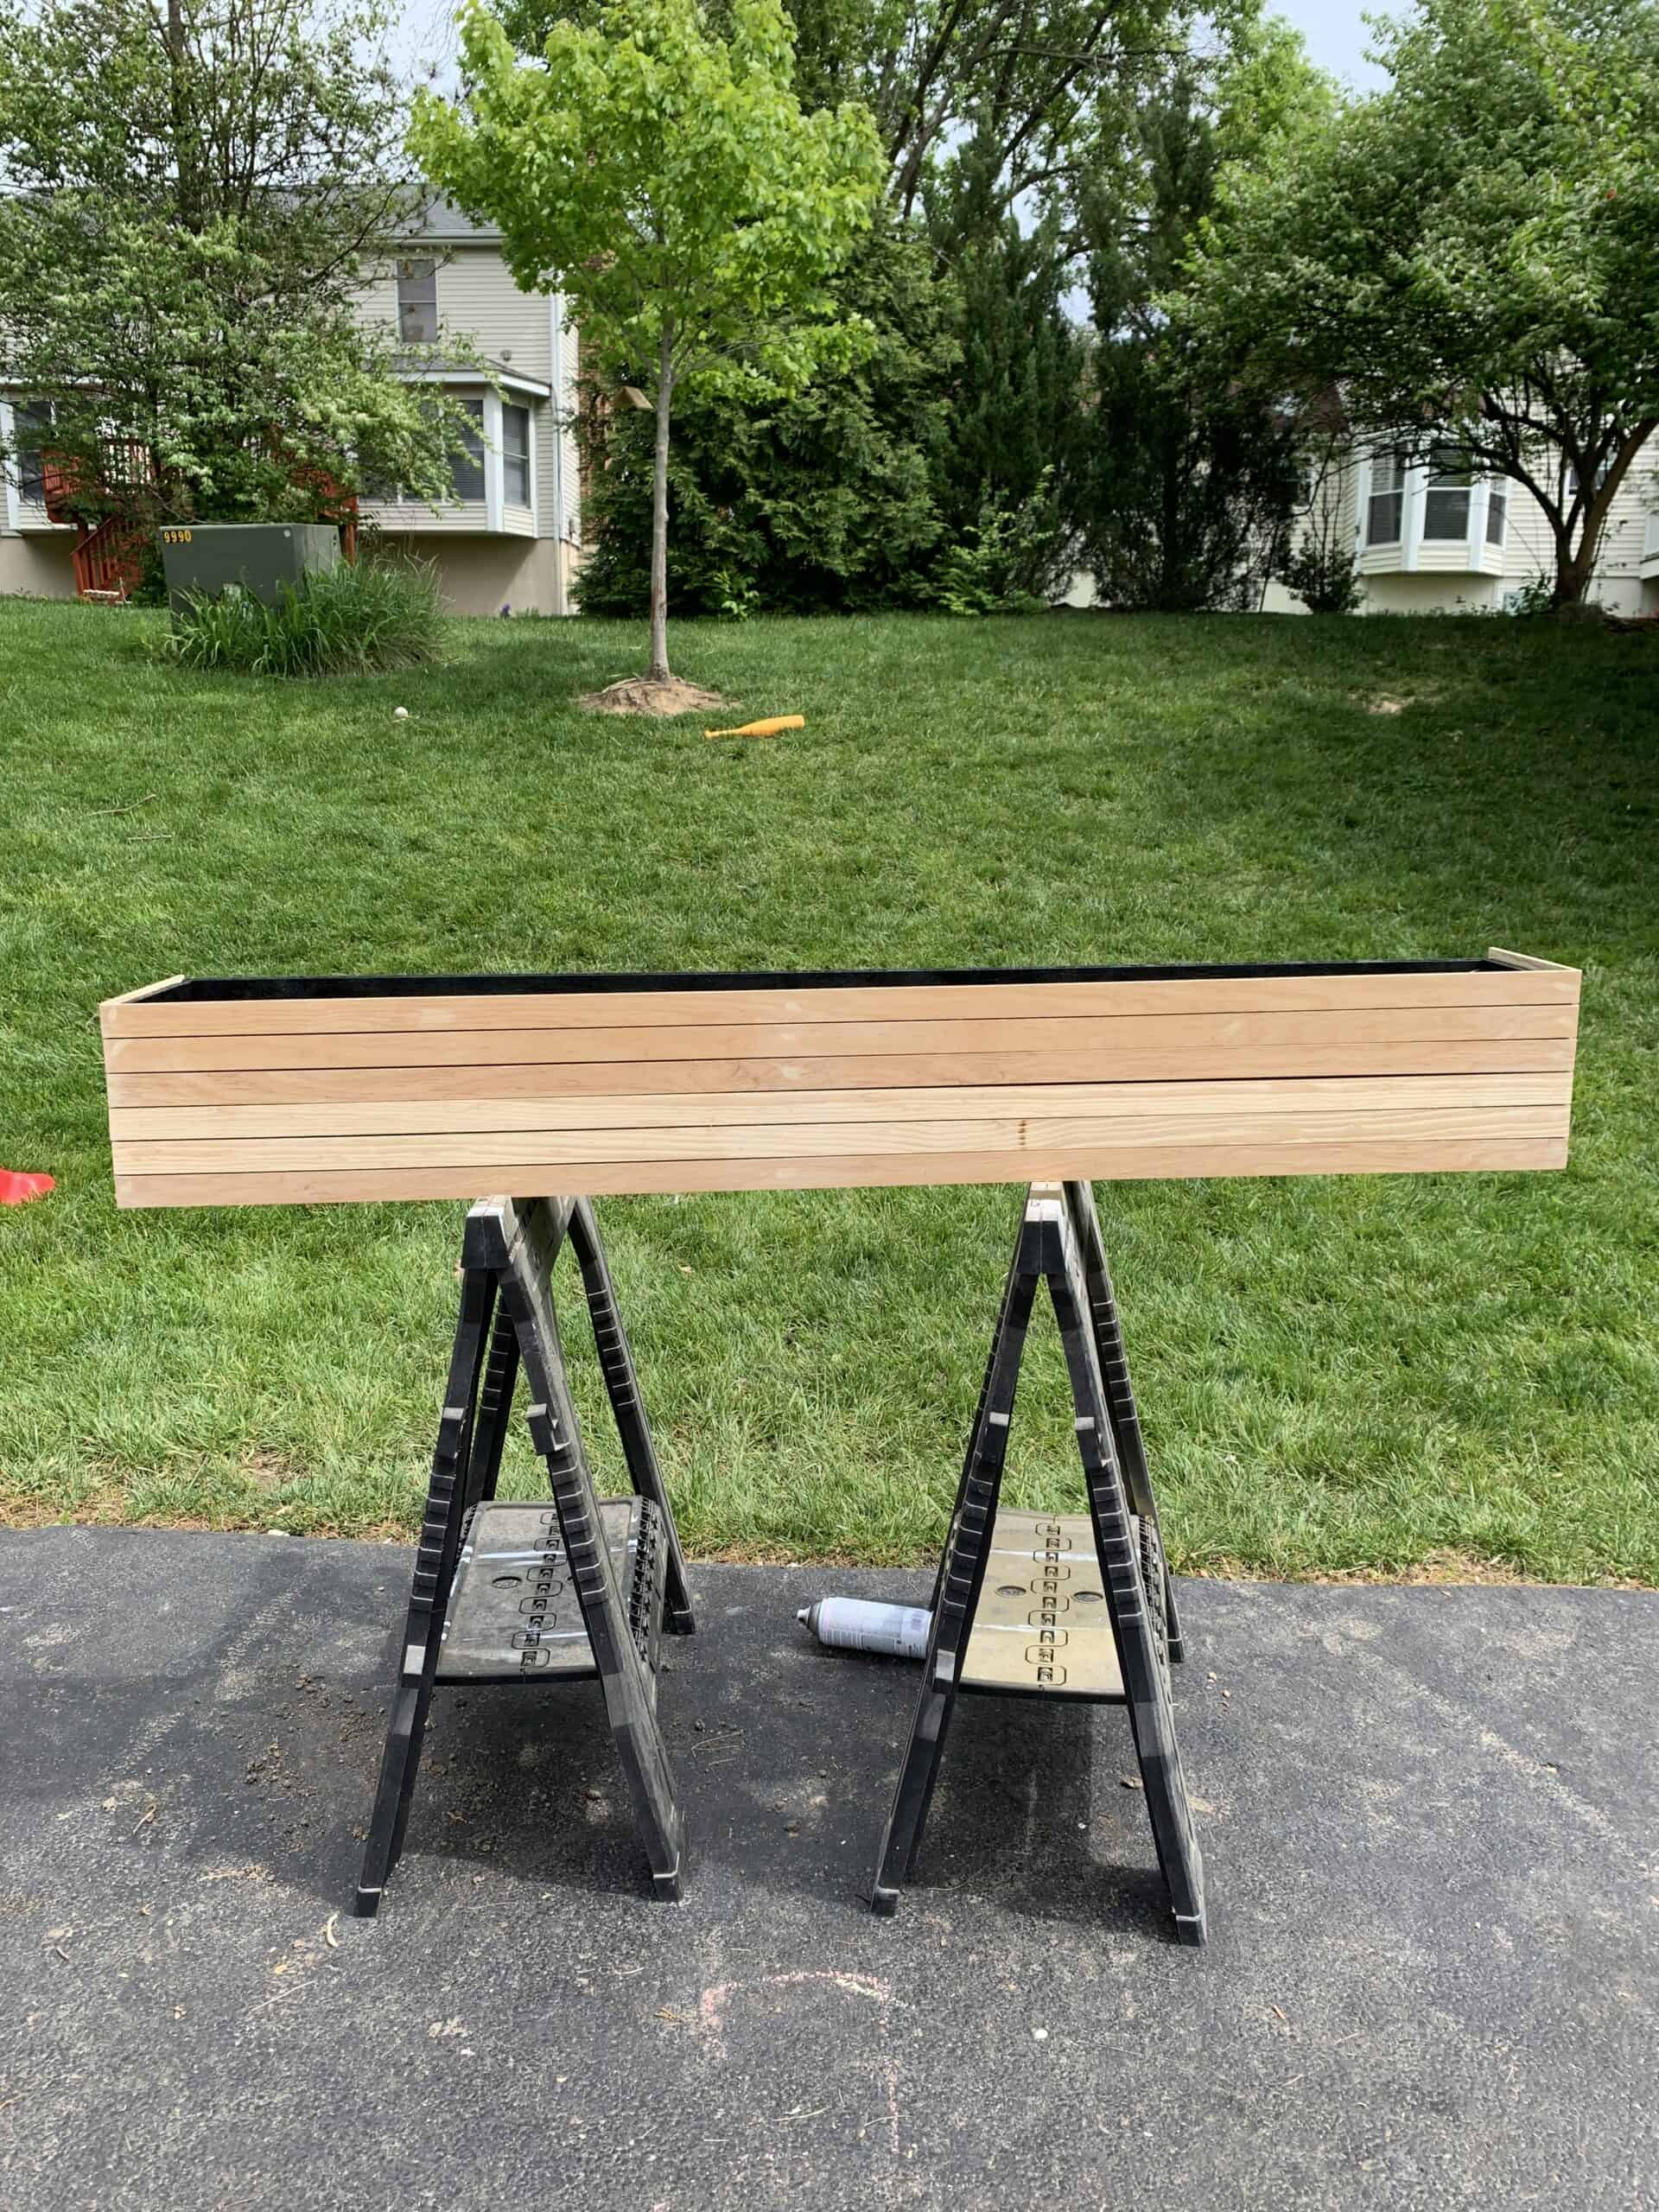
Our window is 5 feet long so we made our box 5 feet by 8 inches by 8 inches.
Essentially we needed enough lumber for 3 sheets of 5 ft by 8 inches and 2 8×8 squares
We then used 6 rows of lattice for our 8 inch tall box – but you need enough length to cover the front and 2 sides.
Assembling the DIY Planter Box
First things first you need to cut all your plywood (or whatever you went with) to make your planter box. We cut 2 boards to the length of the box (for us 5ft) and 1 board 1 inch shorter.
Our wood was 1 inch thick, so that made up for the addition of the end pieces. Start with your bottom piece of wood and attach small blocks of wood in the corners and middle along the side. You can do as much or as little of this as you want. Basically you are adding space to connect your sides initially before adding the more precise nails.
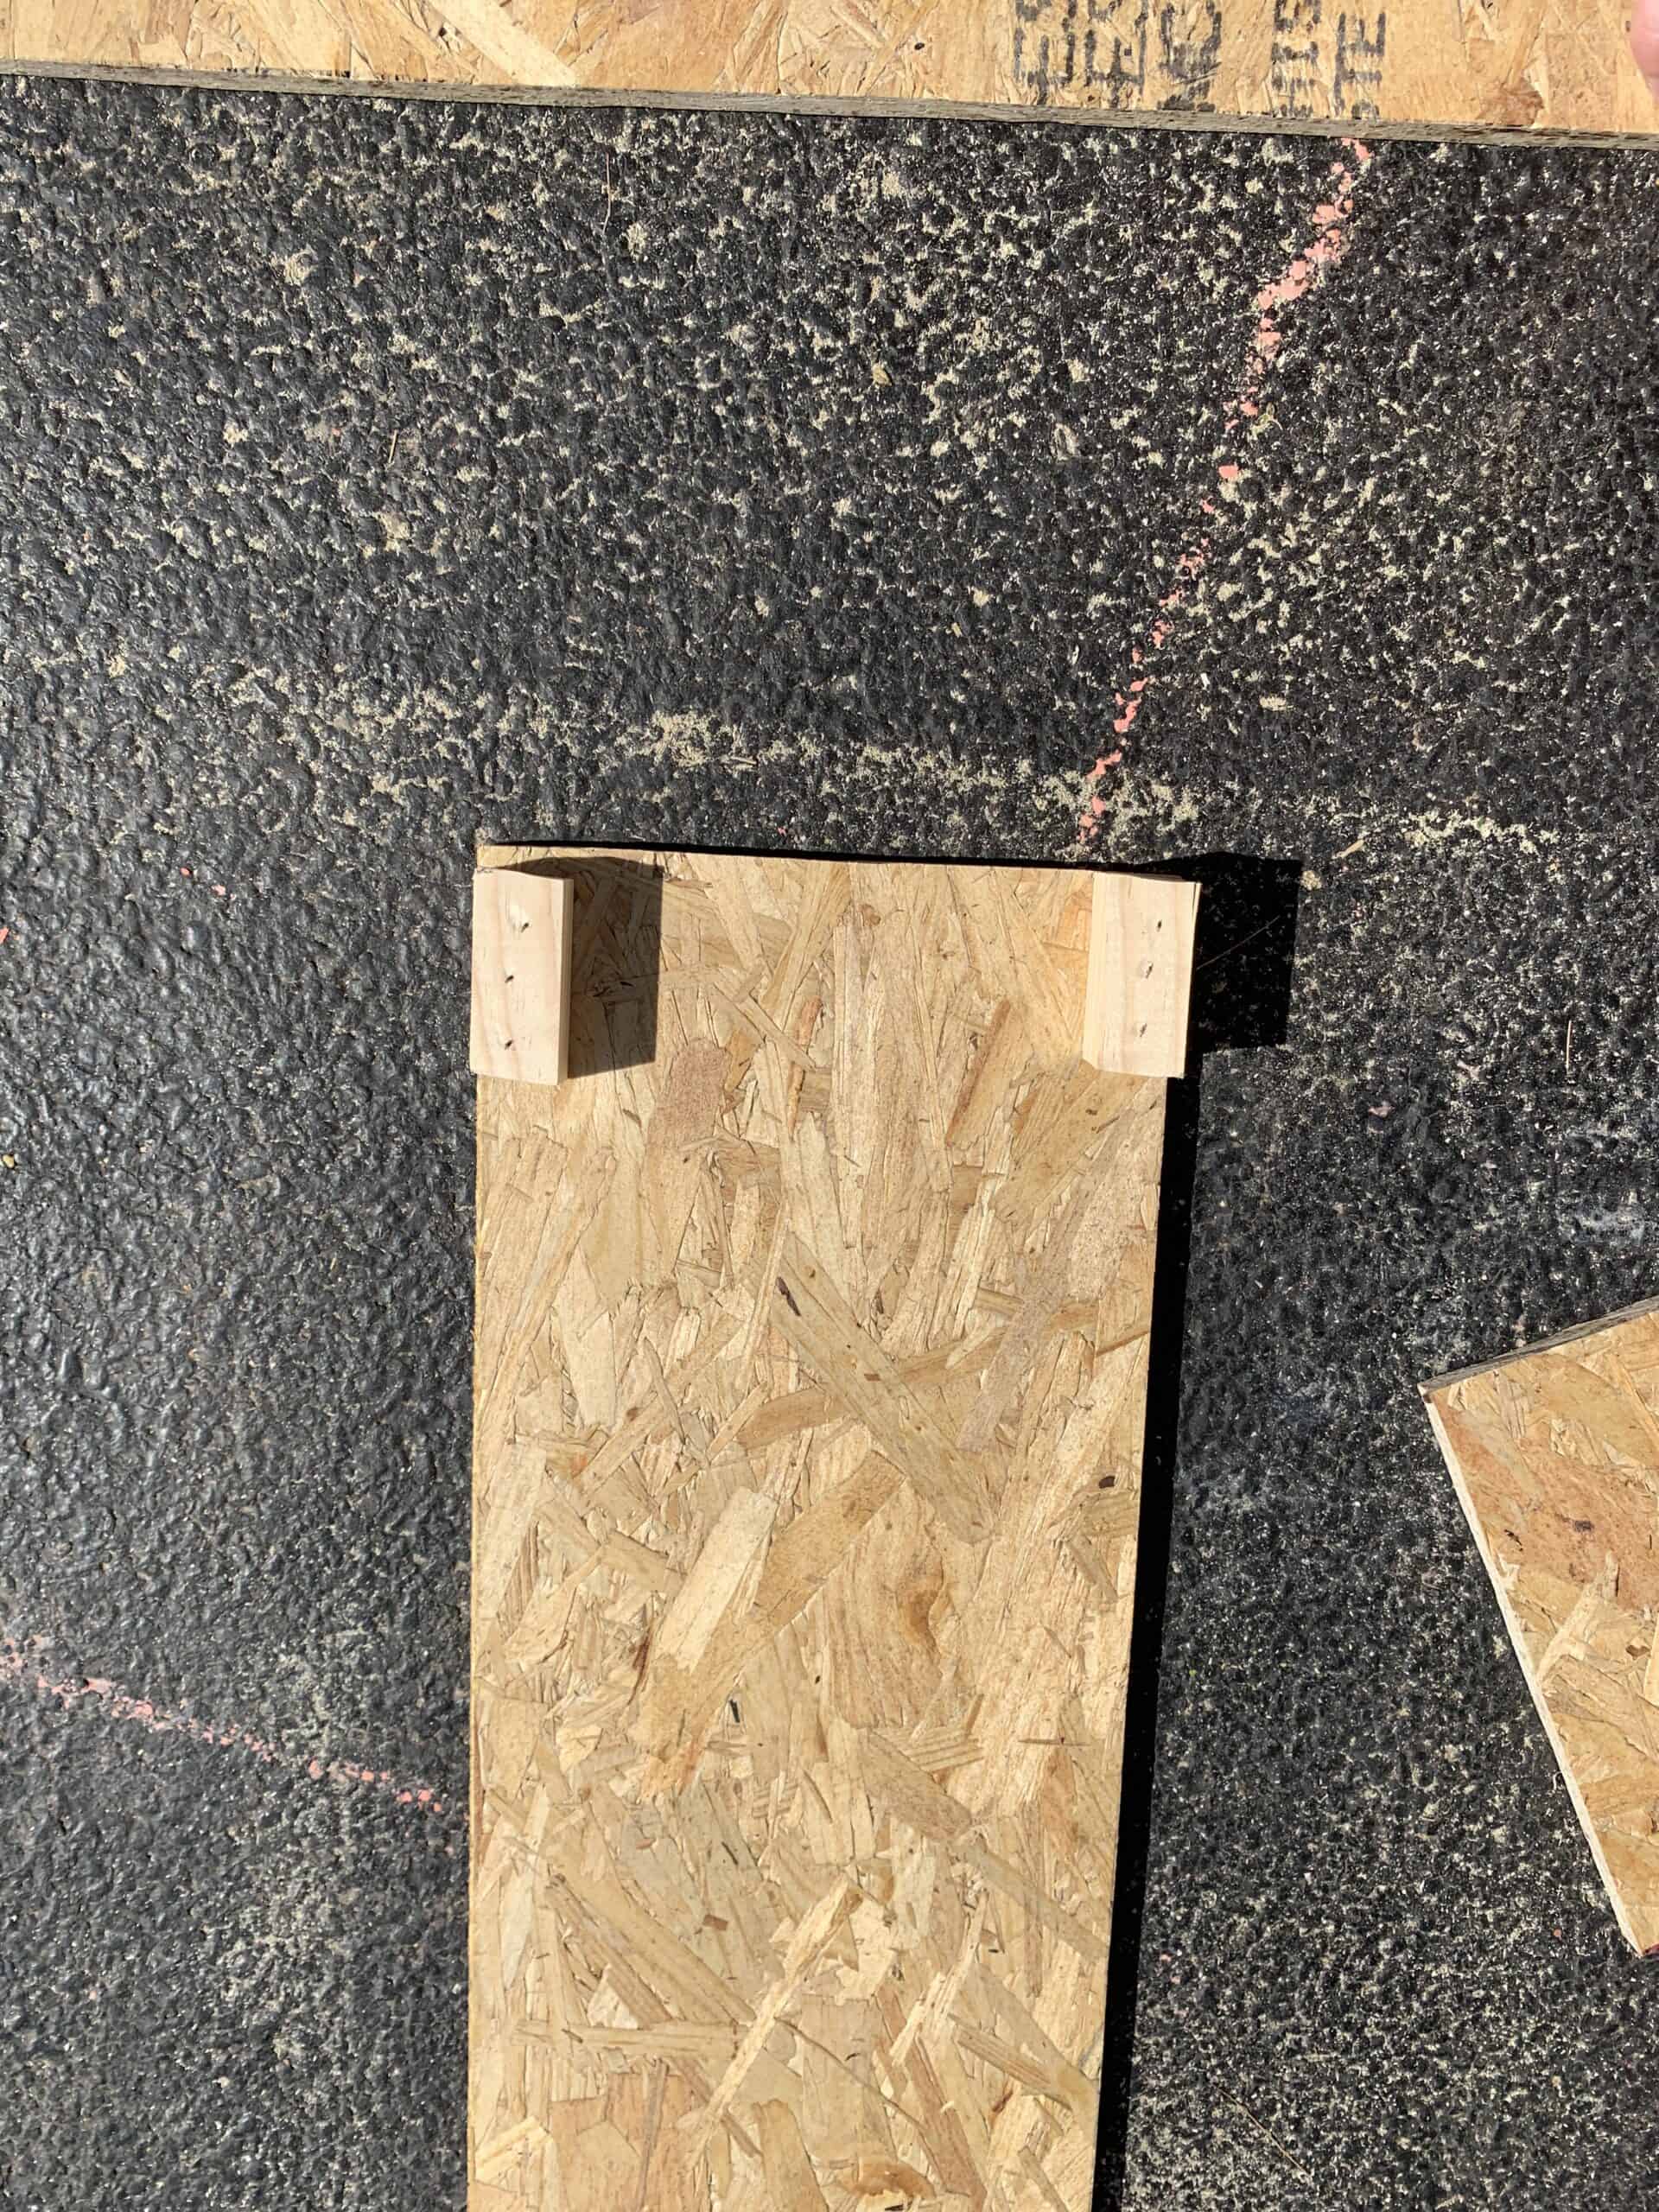
Once your little scrap blocks are in place nail your end pieces (these are our 8×8 squares) onto the bottom board. Once those are on you can add your side pieces. This is honestly not hard at all, just be careful and take your time with your nails.
If you want tighter seams you could add wood glue, but honestly due to this being covered, and being okay with the slight drainage the seams would offer we didn’t do that.
Now you should have what resembles a super simple (slightly trashy if you went with plywood) planter box.
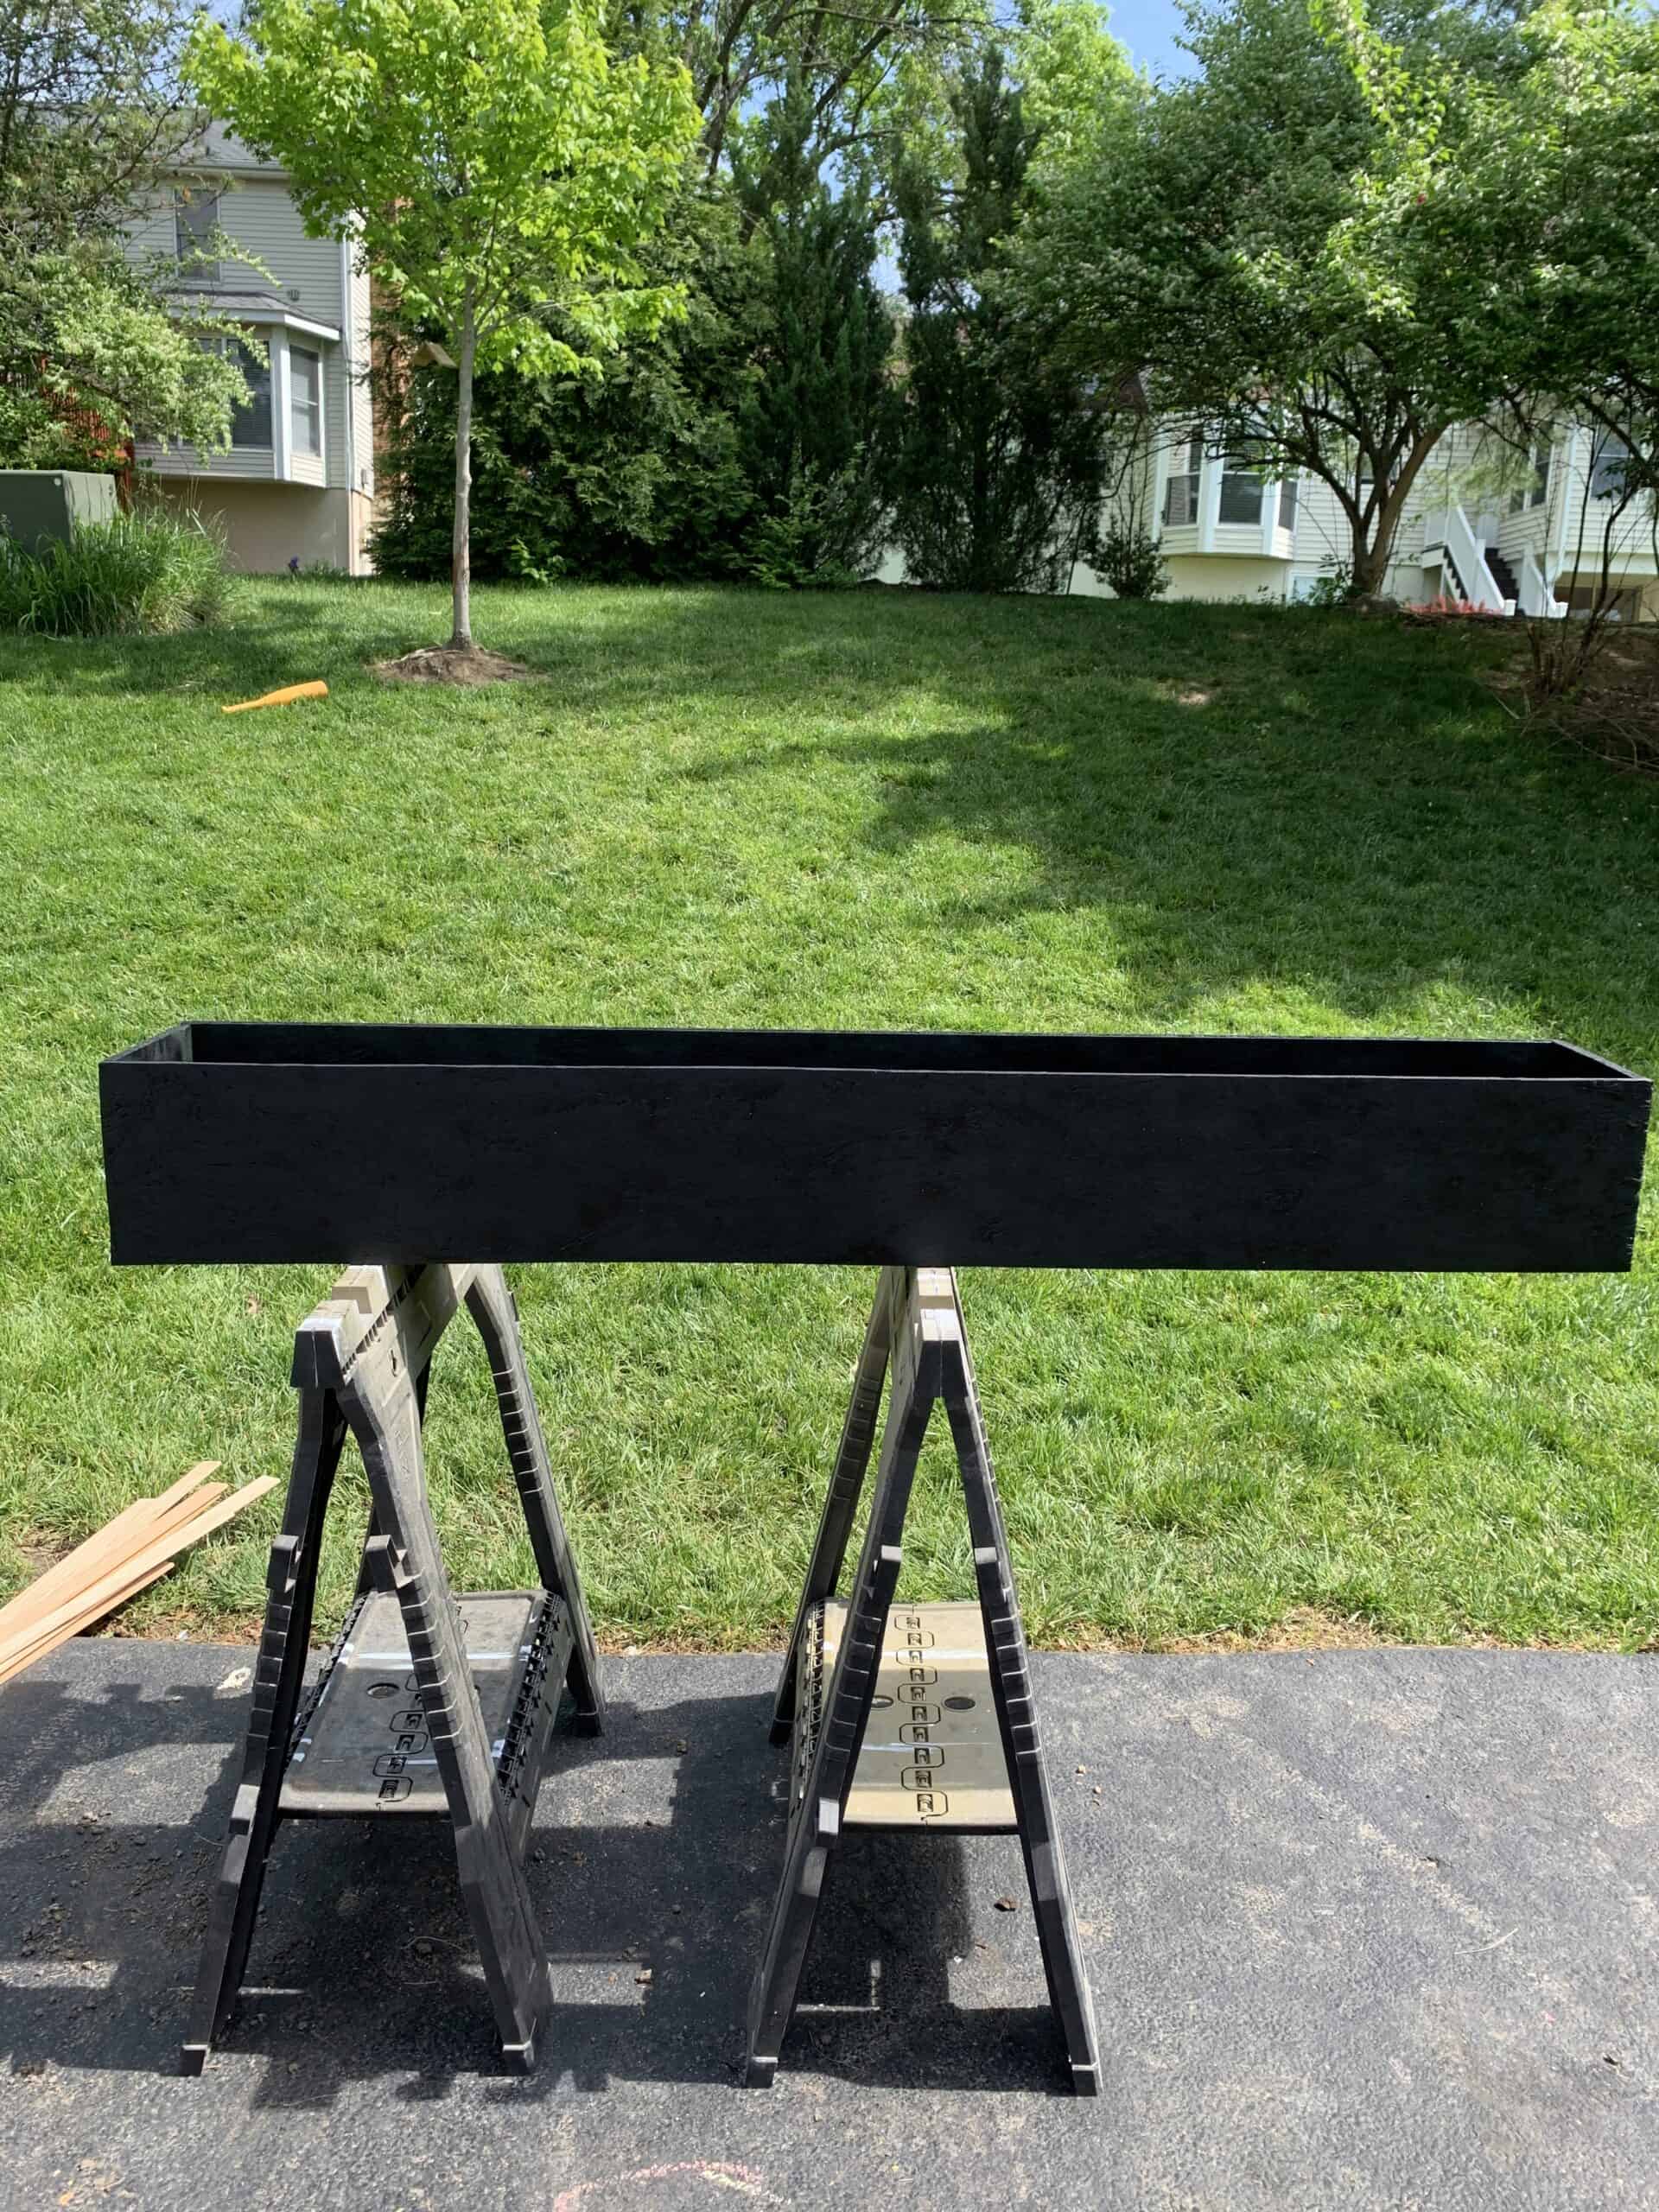
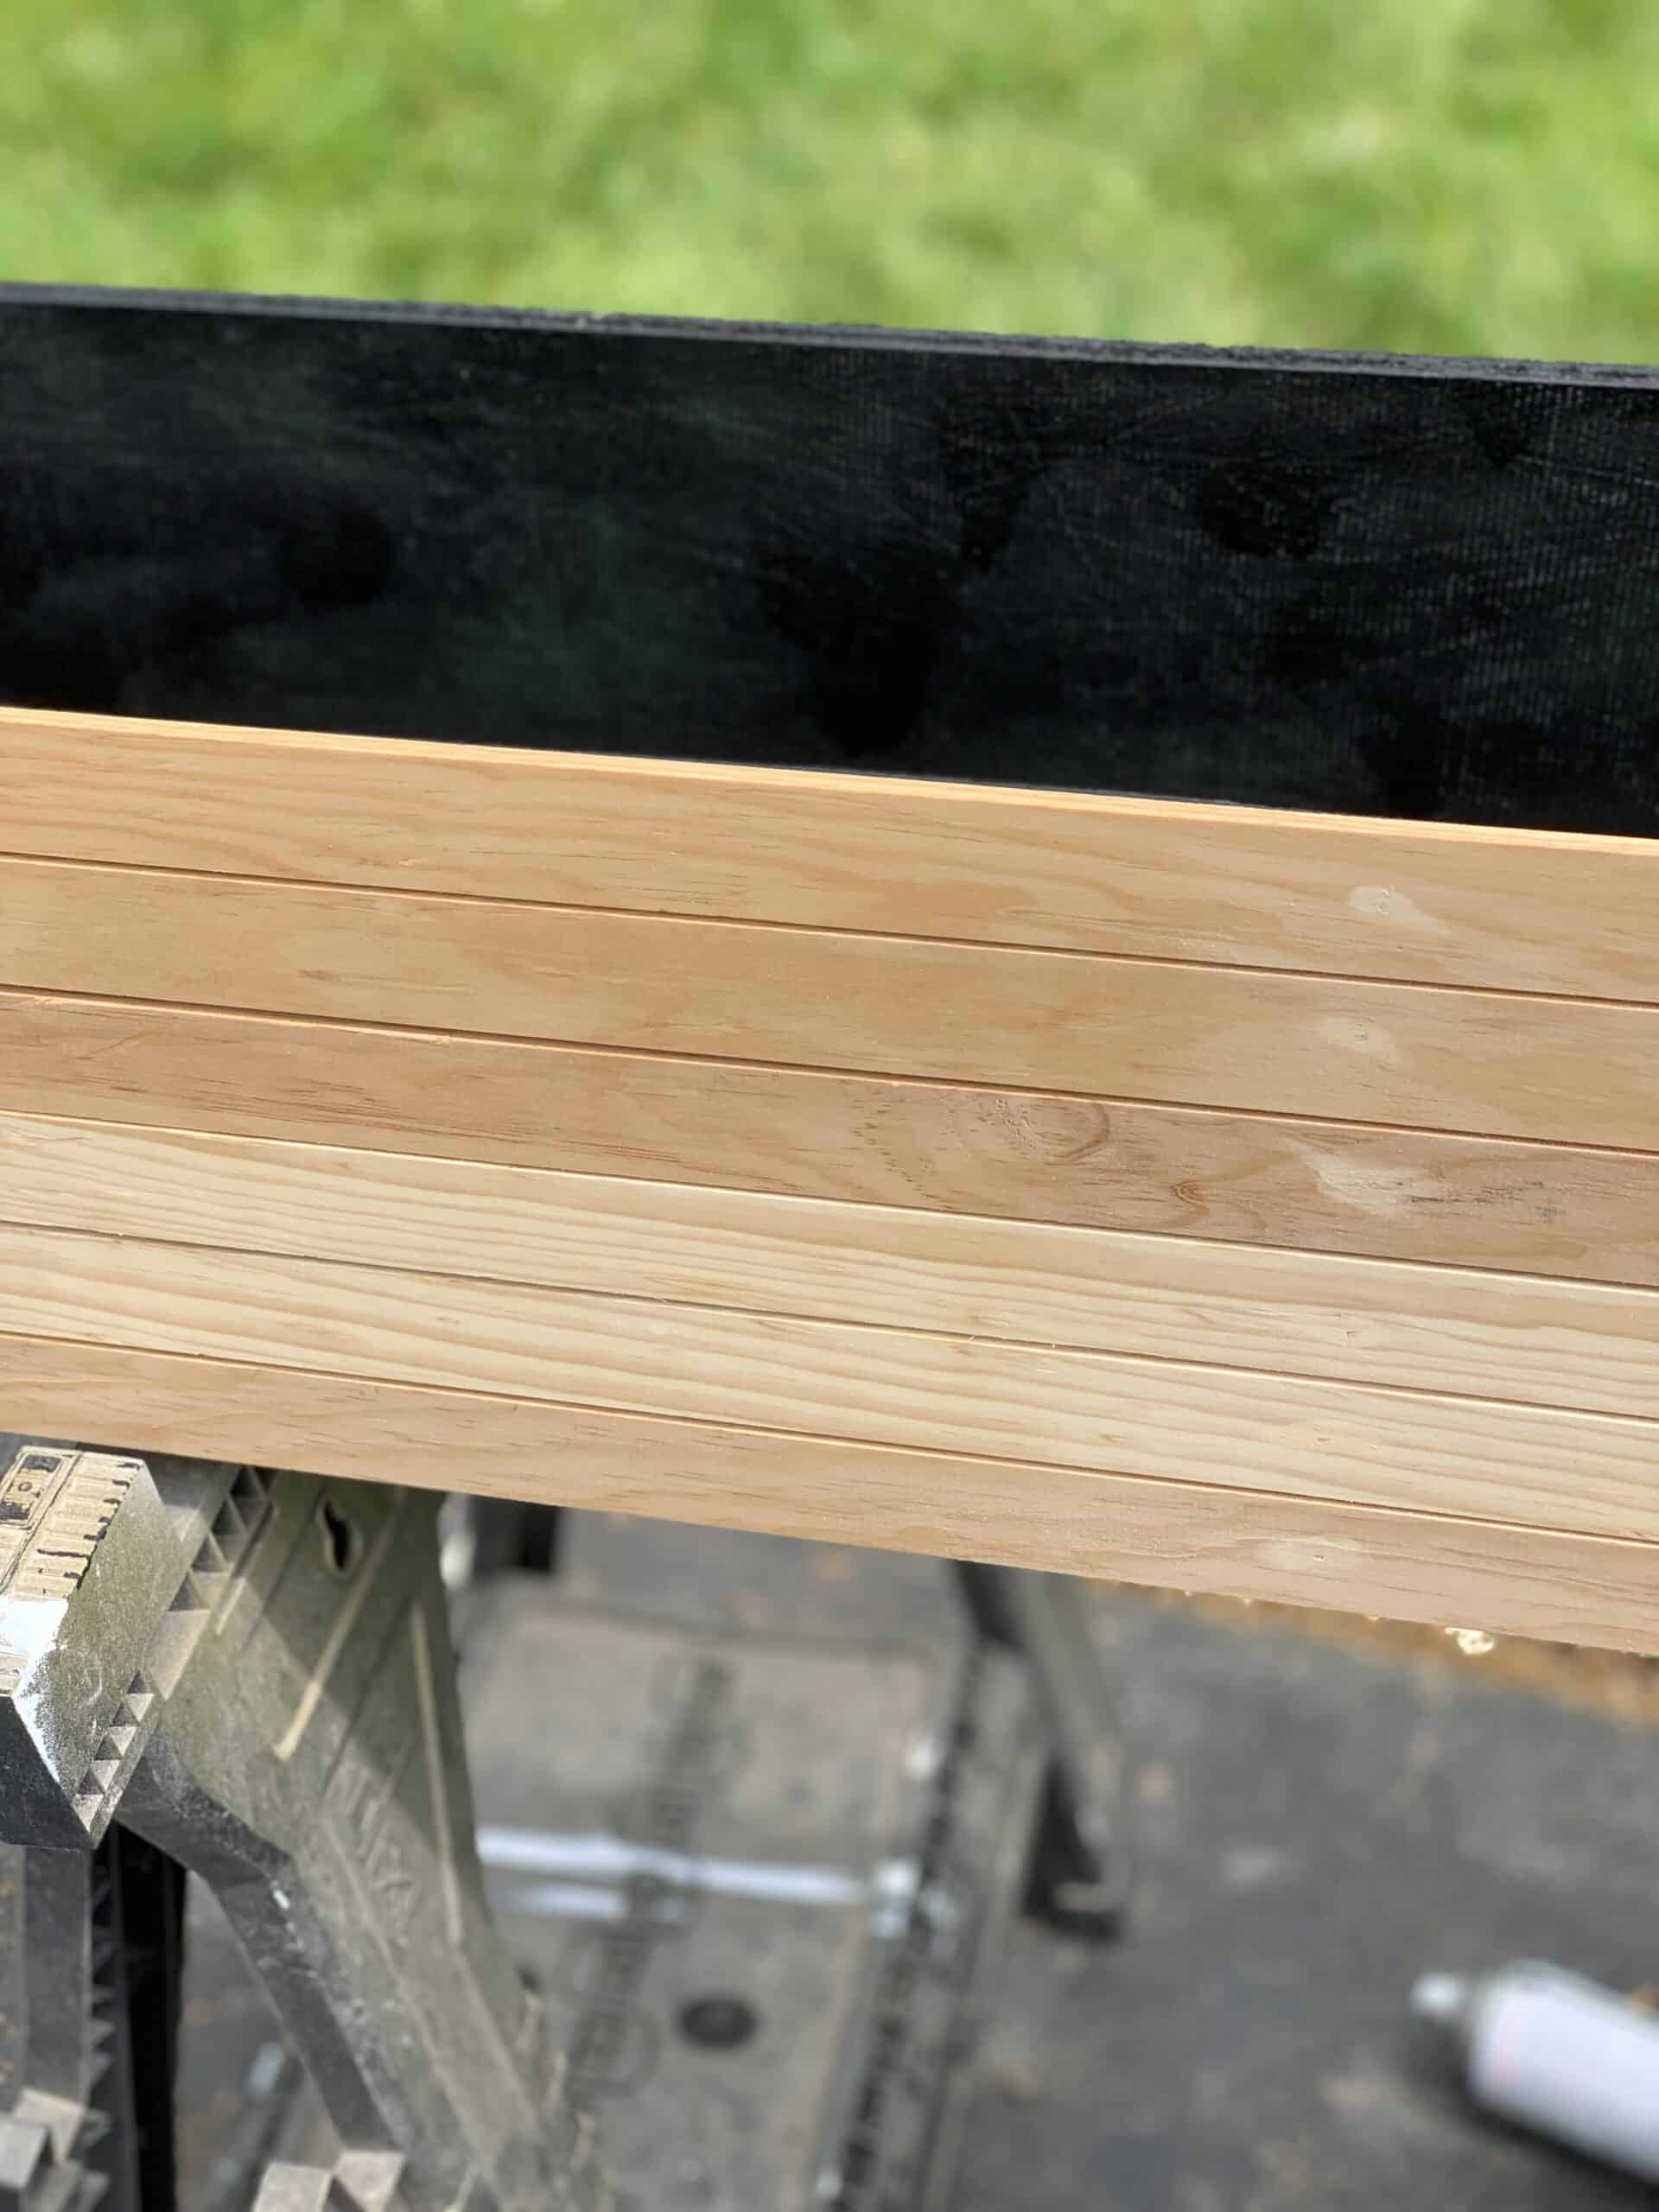
Once it is together give it a good coat of black spray paint on all sides! You are covering 3 of the four sides that will show but you still want it to be black for what will peak through.
Adding the Lattice Wood for a Modern Look
Like I said at the beginning – I wanted a modern planter box, so now you are going to start making that happen.
You need to cut long strips of lattice wood 1/2 inch longer than your box (for us that meant 5 ft + 1/2 inch). If you are doing yours 8 inches tall and go with the wood I linked you will need 6 strips.
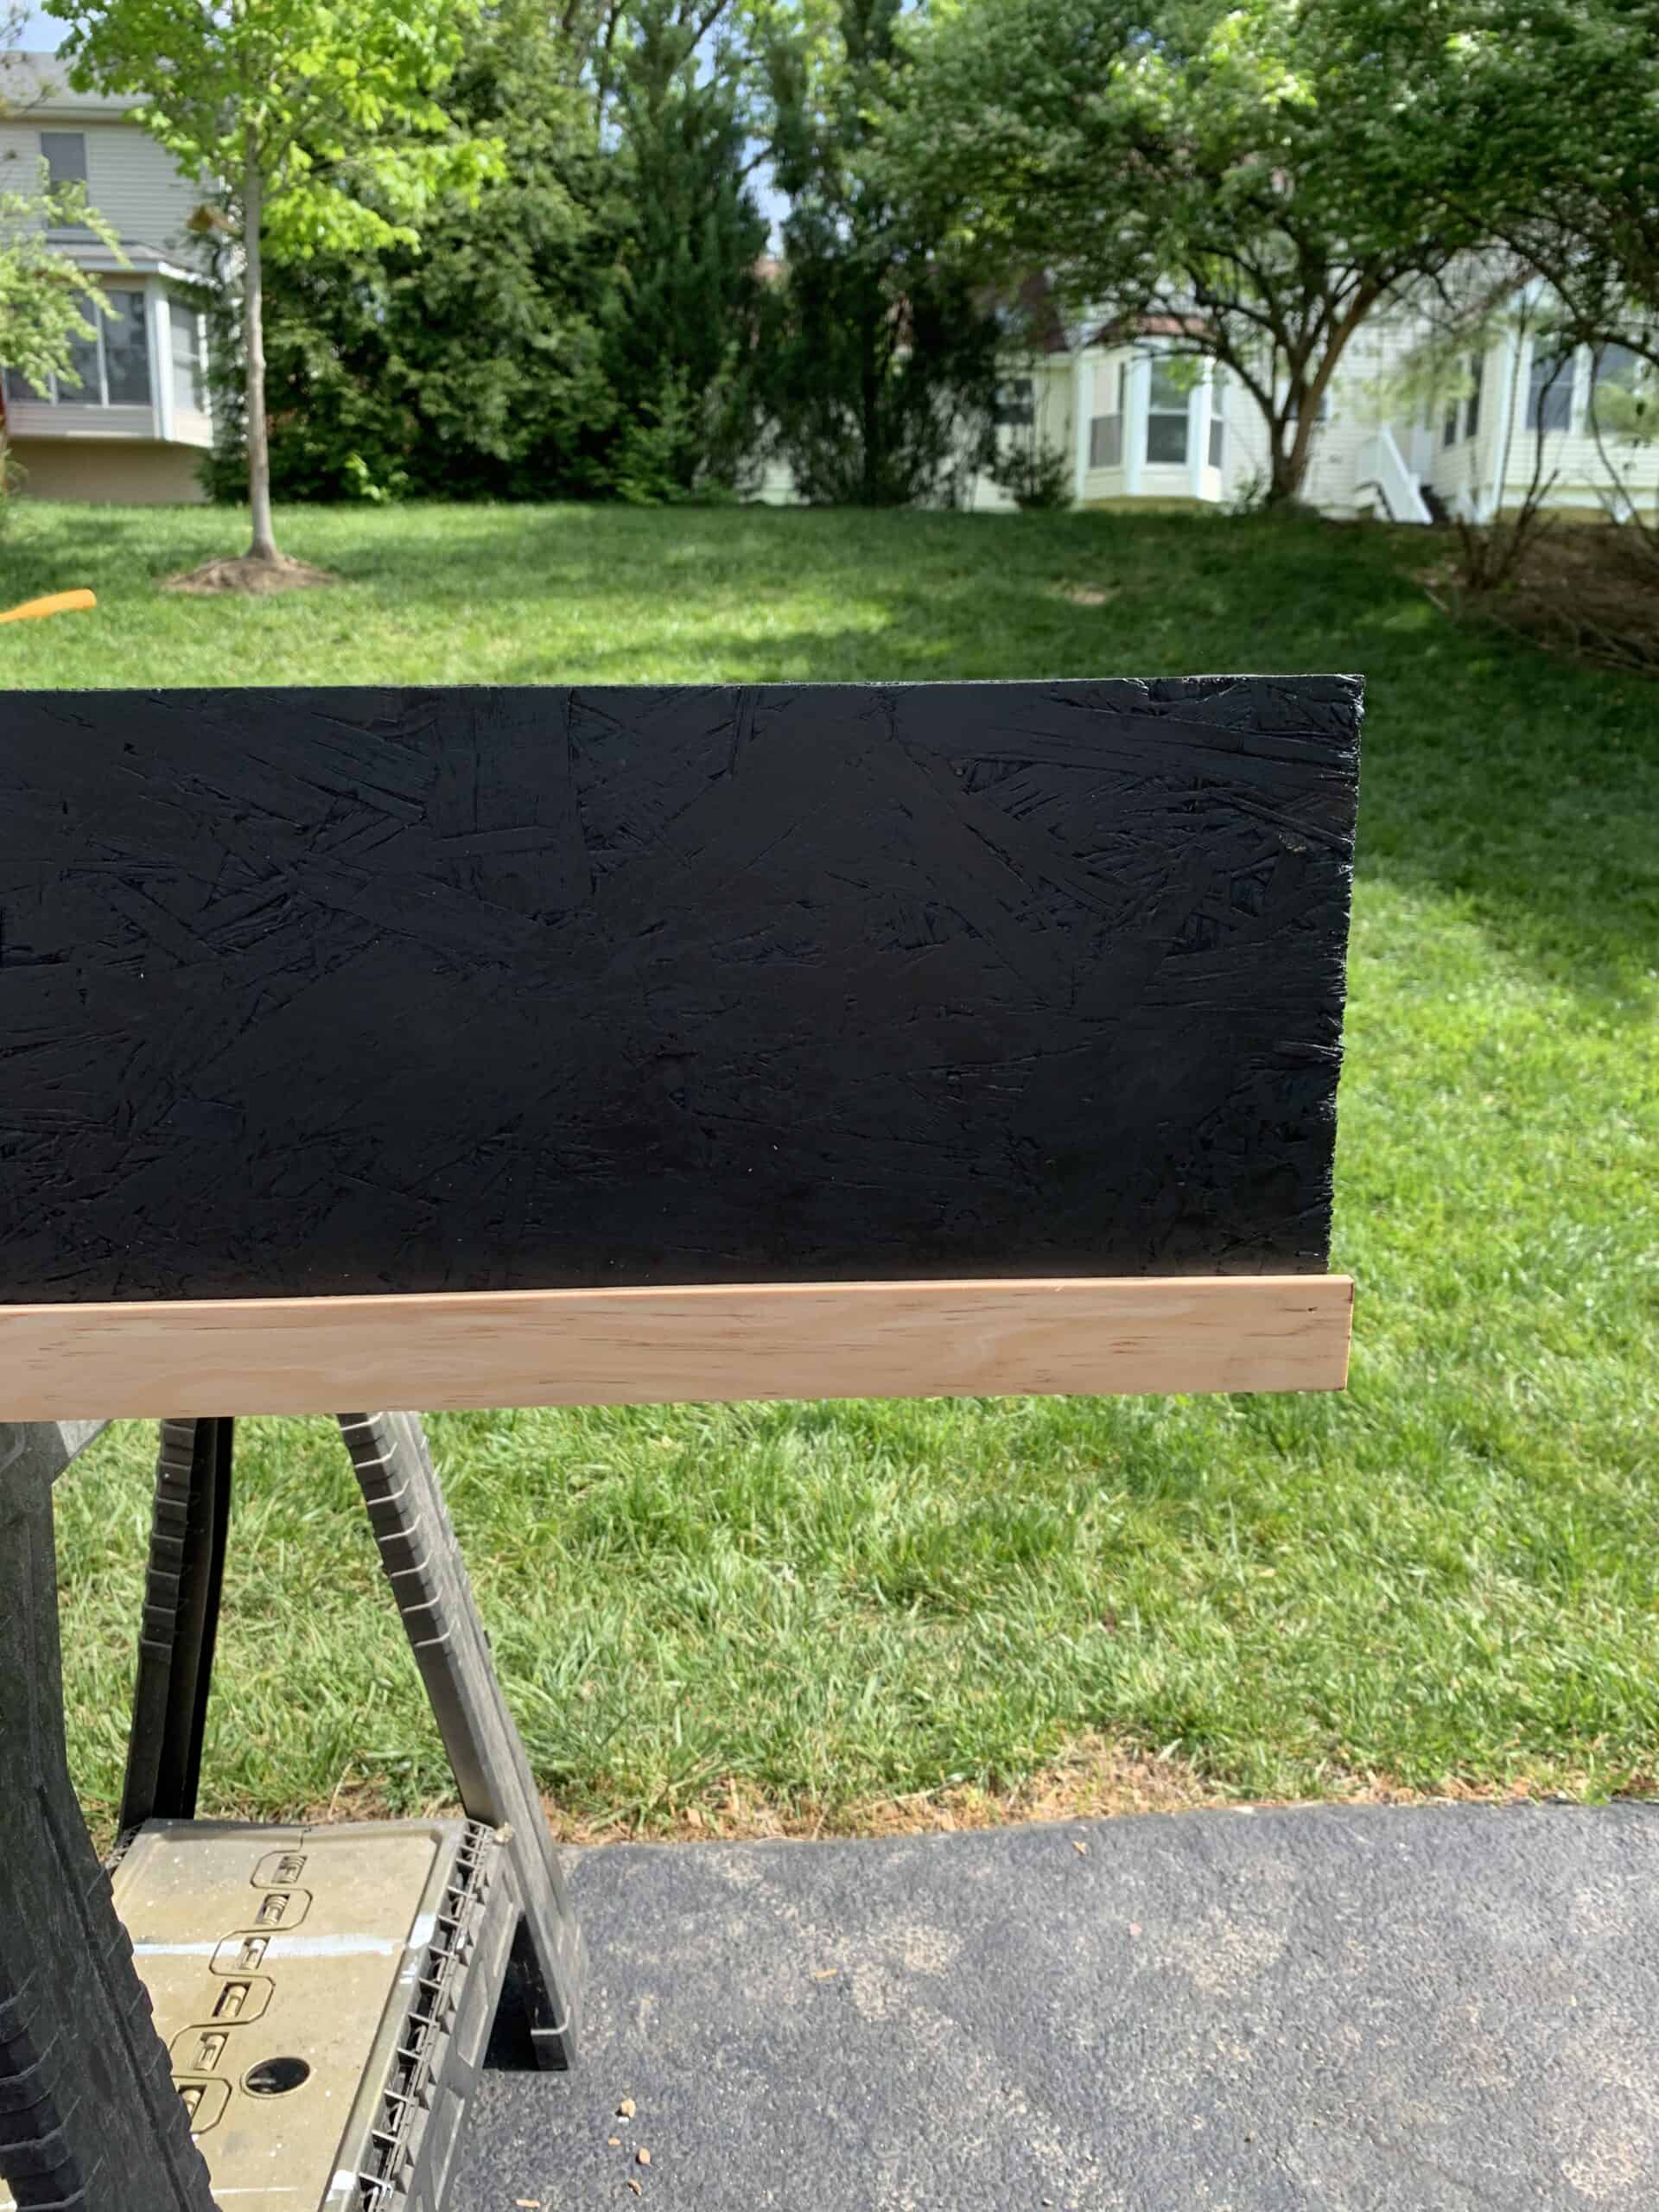
You also need 12 strips that are 8 inches long.
Before you start – one thing we wished we had done was add a block of scrap wood going all the way up the inside of front side of the planter. One in the center, and one half way between the center and the end on each side. Basically this piece of wood would have given us deeper wood to nail our lattice into instead of having to bend down each of those nails!
Now start at the bottom of the front and center your lattice so you have about 1/4 inch hanging off on both sides and the bottom of the planter. Making sure your first strip is level nail your strip on both sides and the center. You may have to add 2 other nails as well but that is up to you.
Next we grabbed our nickels we had for spacers and put a nickel between the bottom piece of lattice and the next piece and repeated. We did this all the way to the top. The top will hang over which is great! I loved that look.
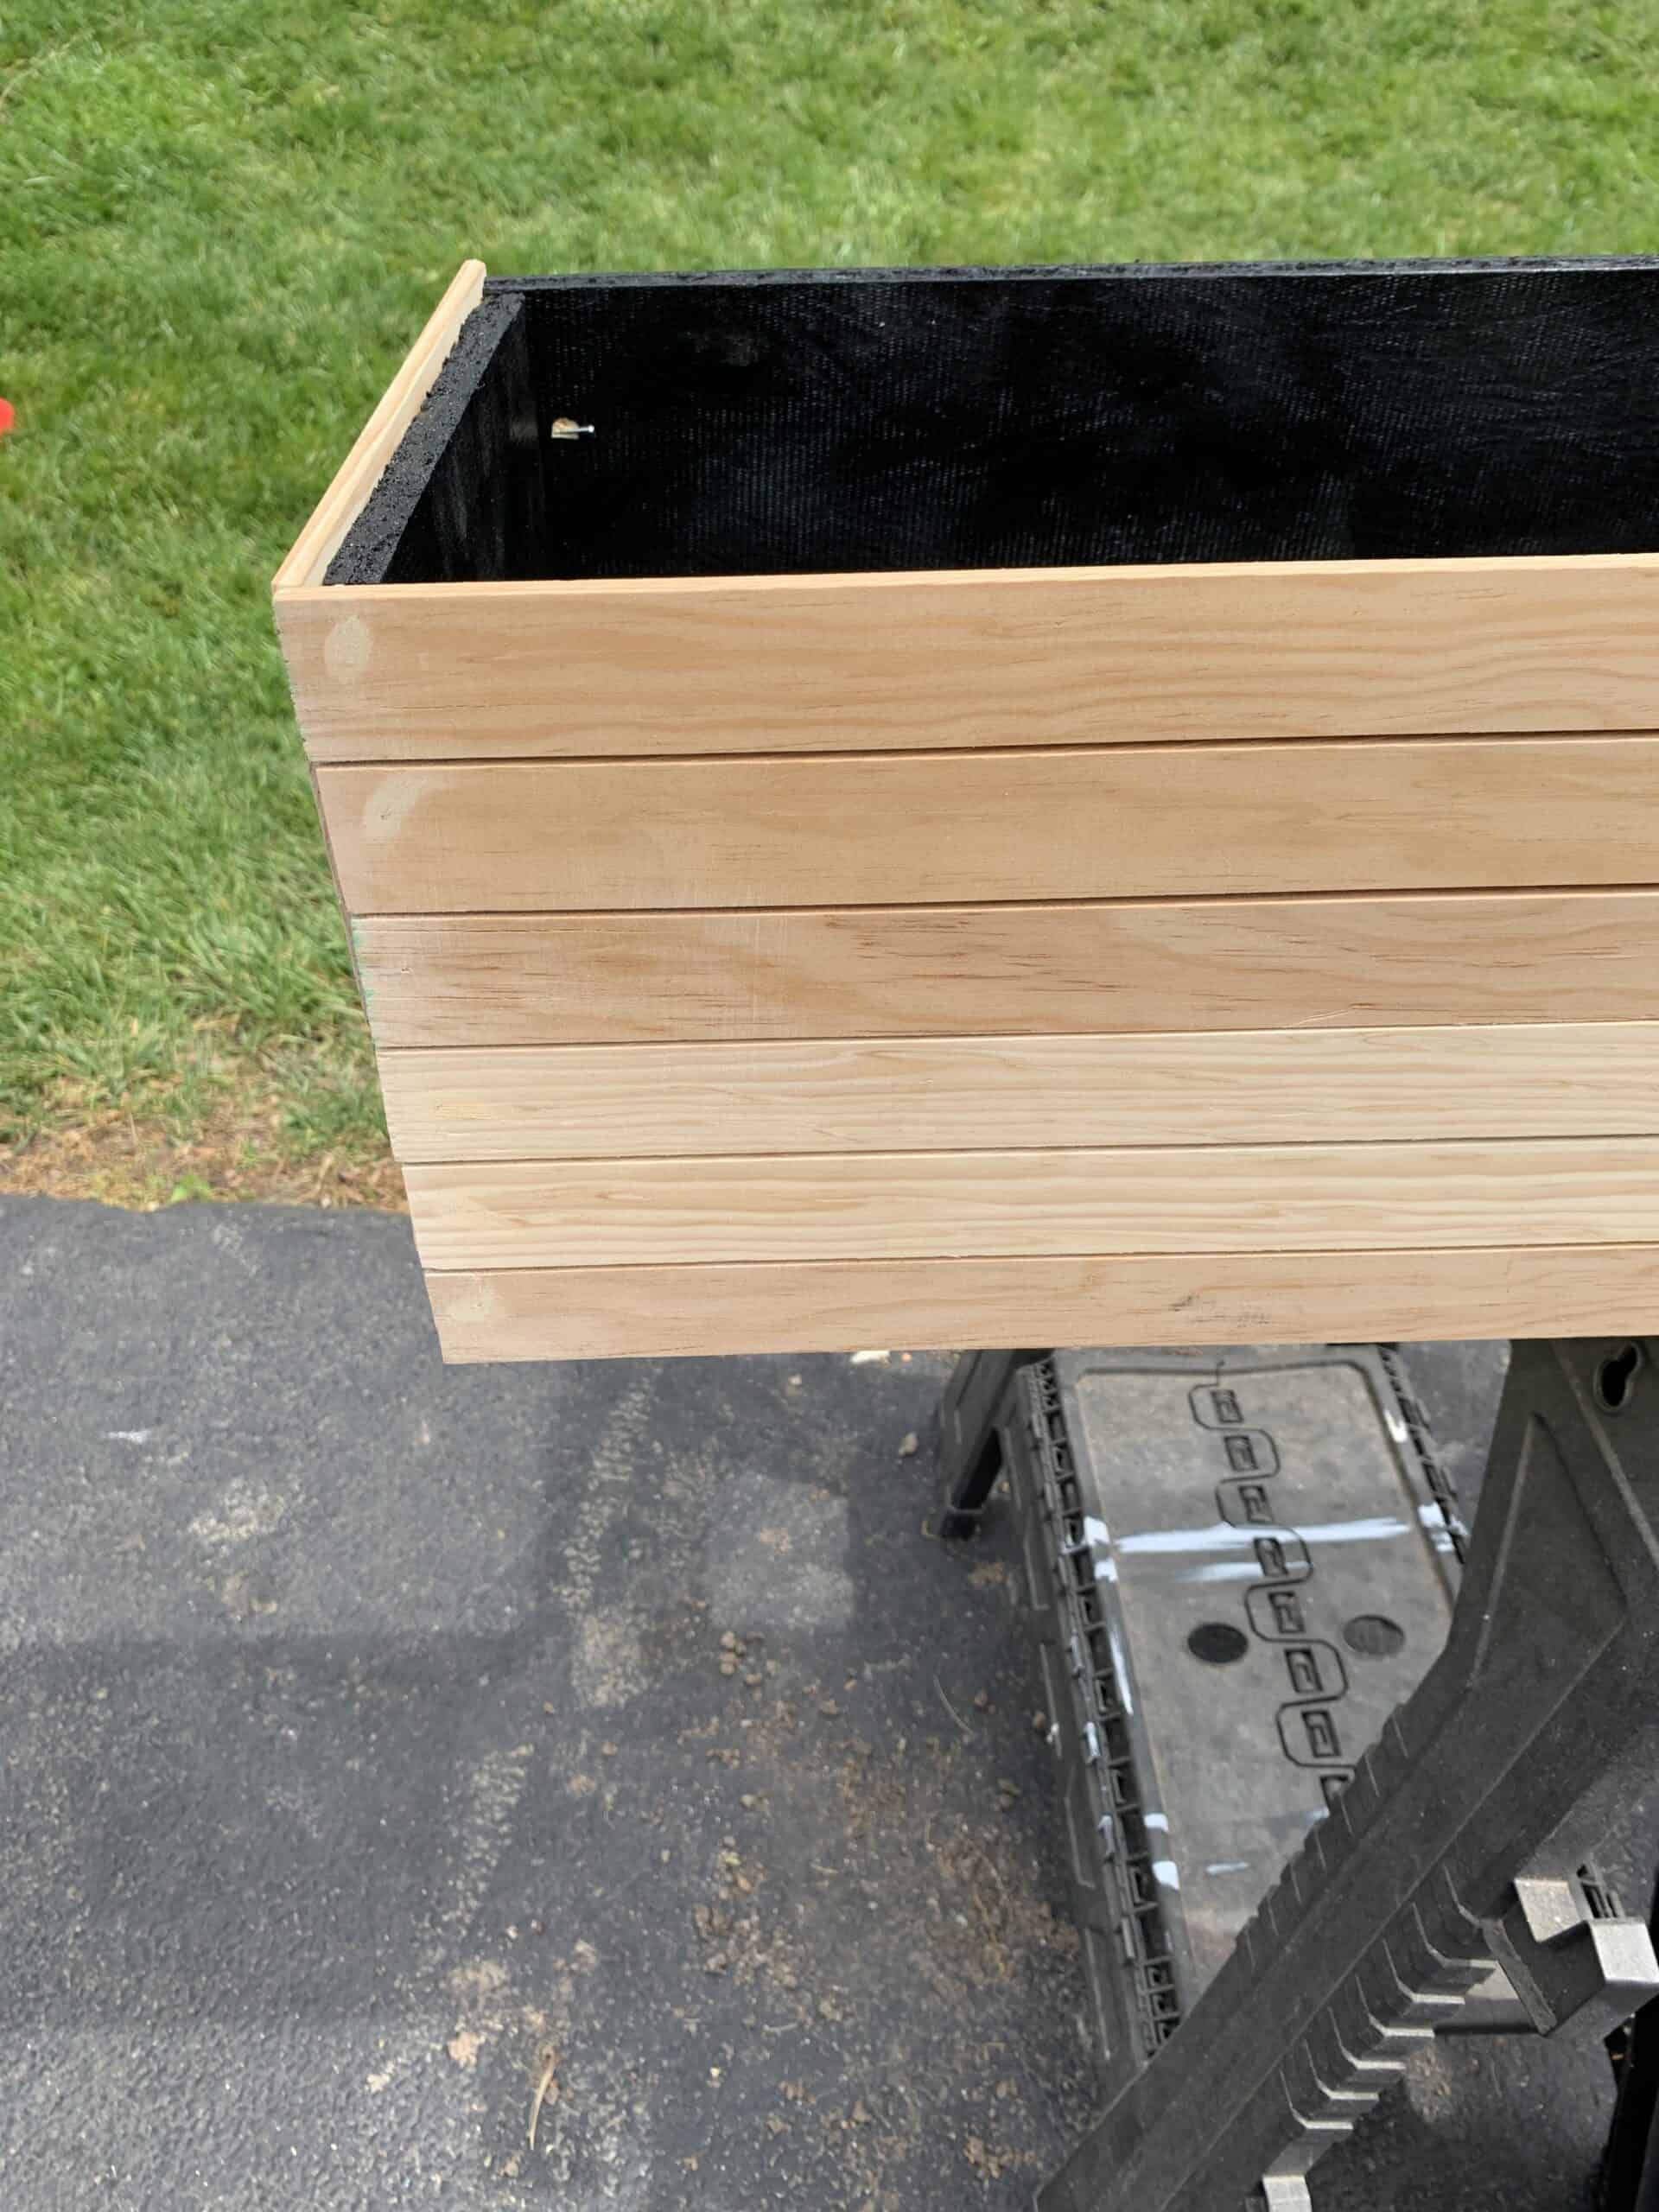
Next do the same thing to each side lining up your lattice with the pieces along the front.
Finishing and Hanging
Now that it is done – use a little wood filler and touch up your nail holes. Sand those down, and apply a coat of stain – I personally used some weathered oak we had on hand.
Now you want to spray it really well with your weather proofing spray. This will ensure that your planter box lasts much longer!
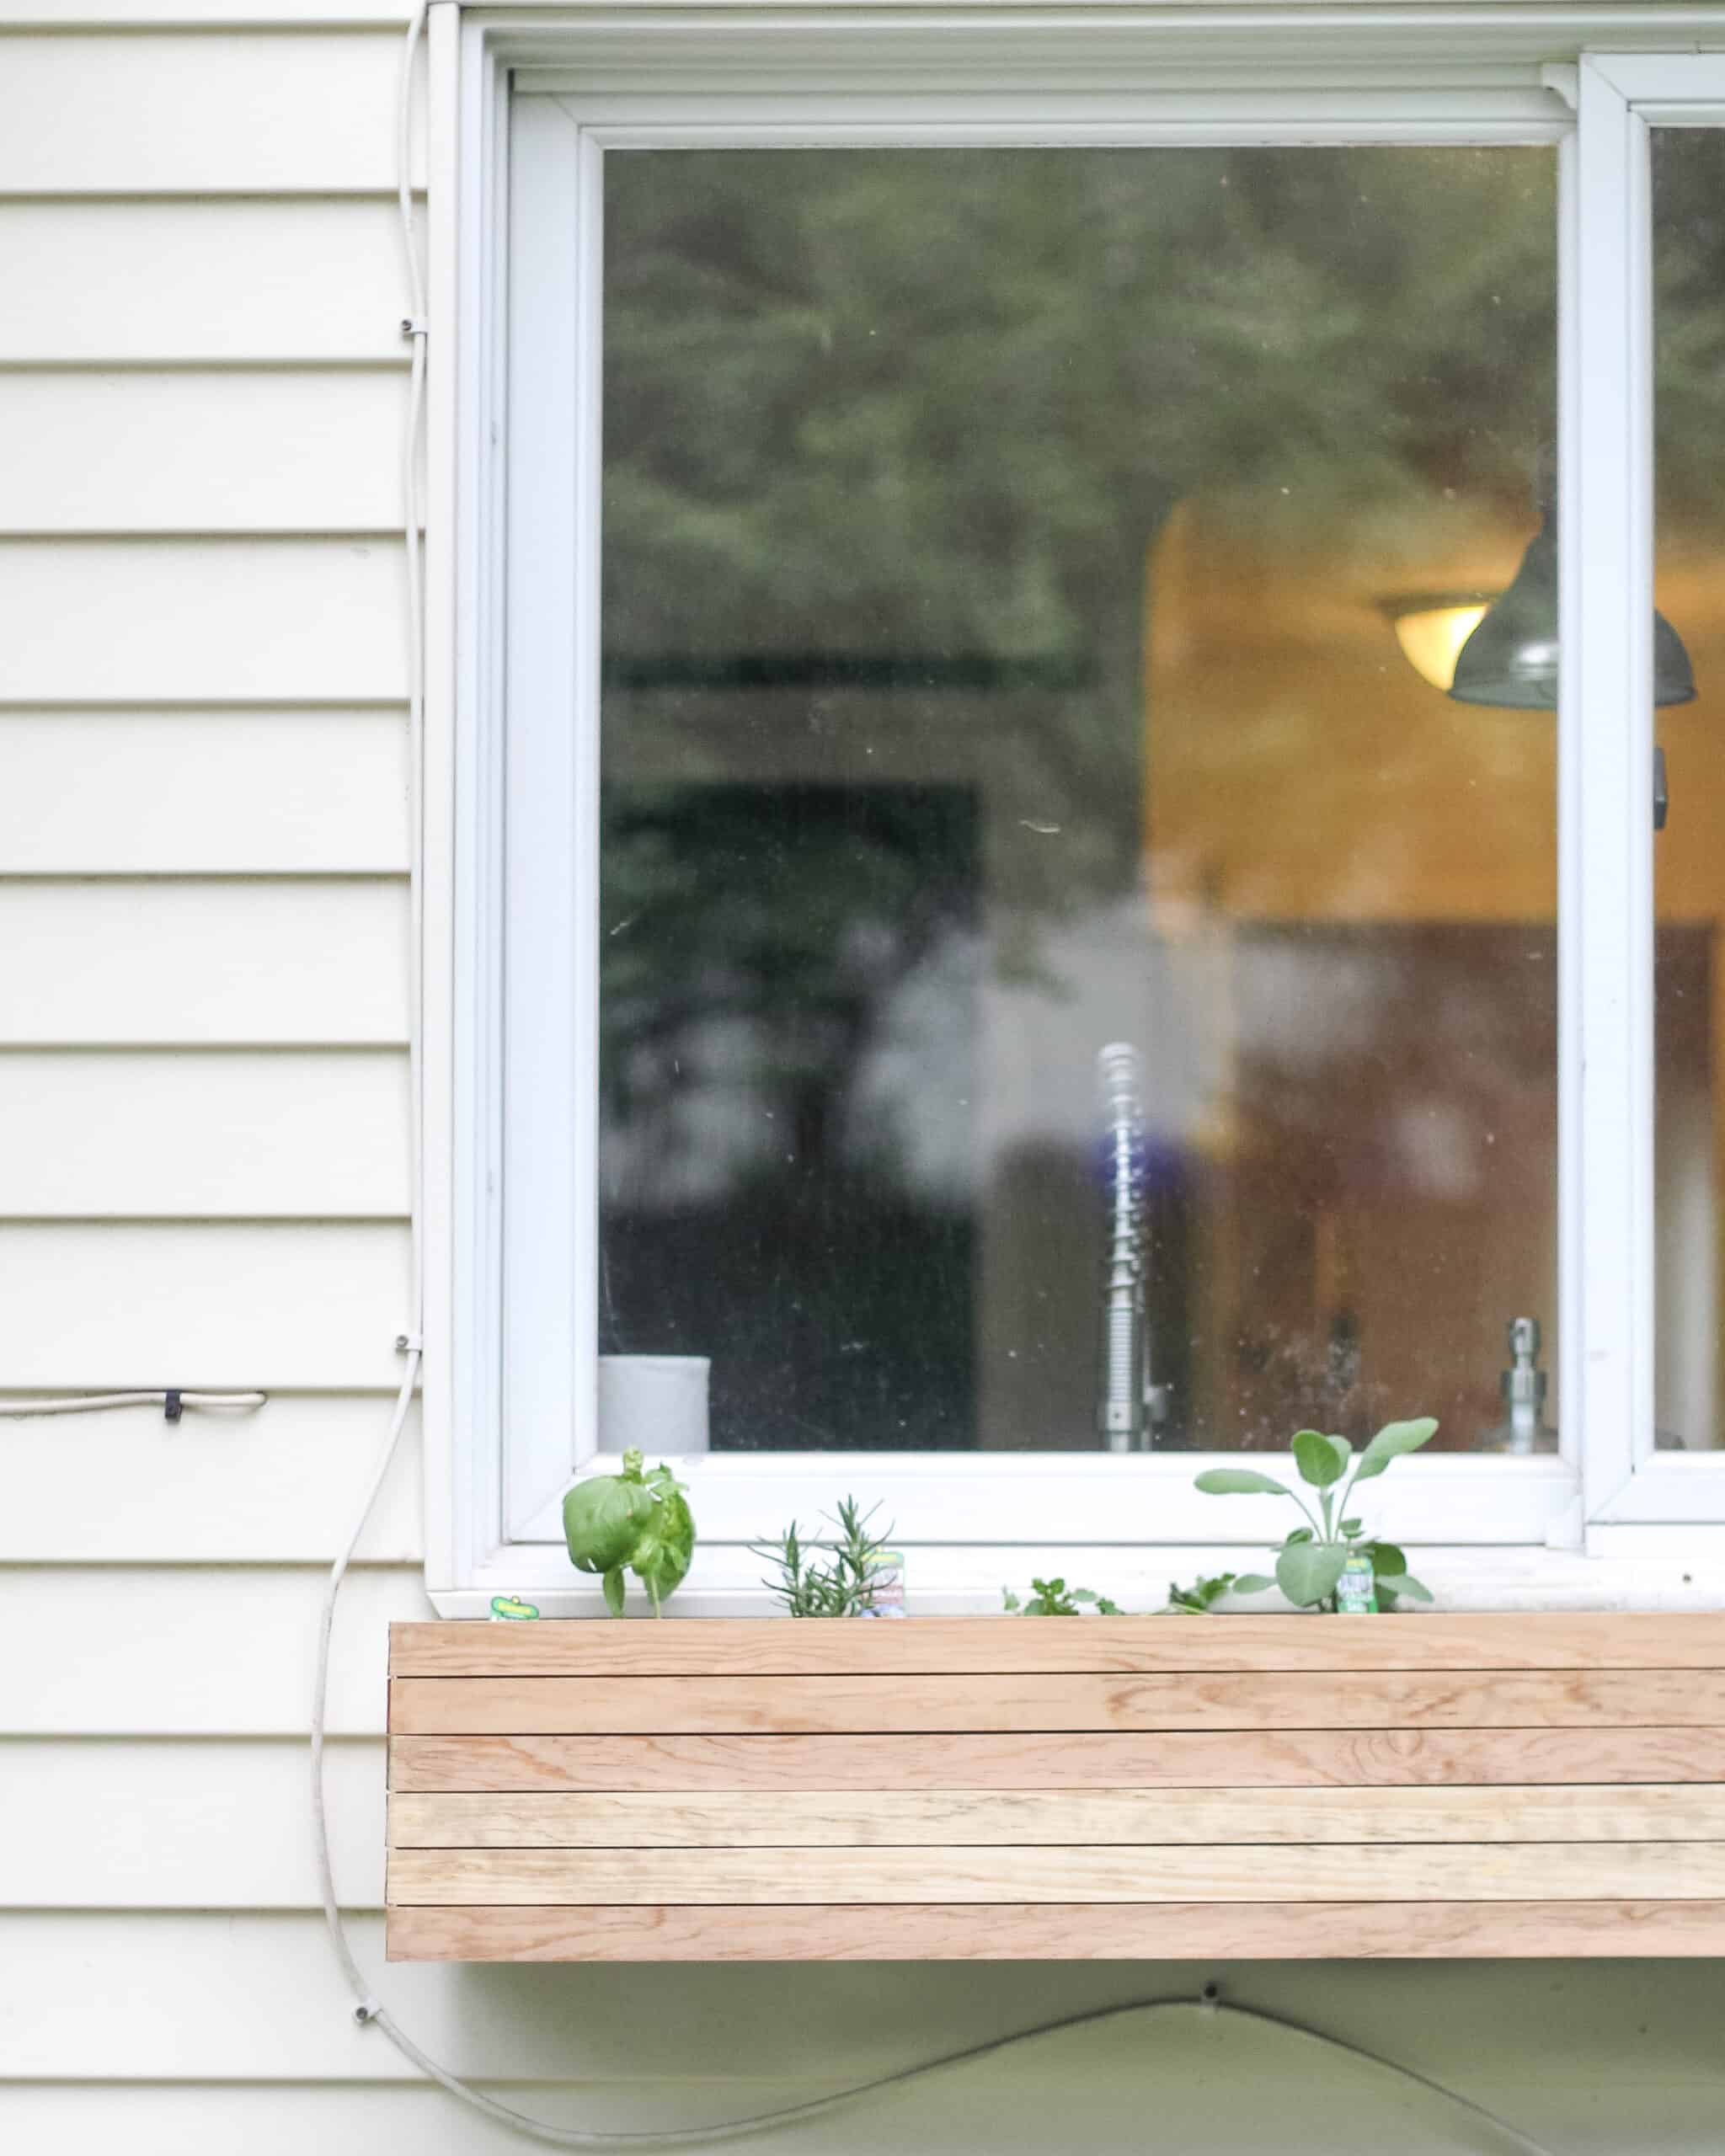
Once it is fully dry, we personally used 4 Large drywall screws to attach it to the siding. The hardest part about this step is getting it level and not tightening it too much so that it sits nicely and doesn’t tilt up.
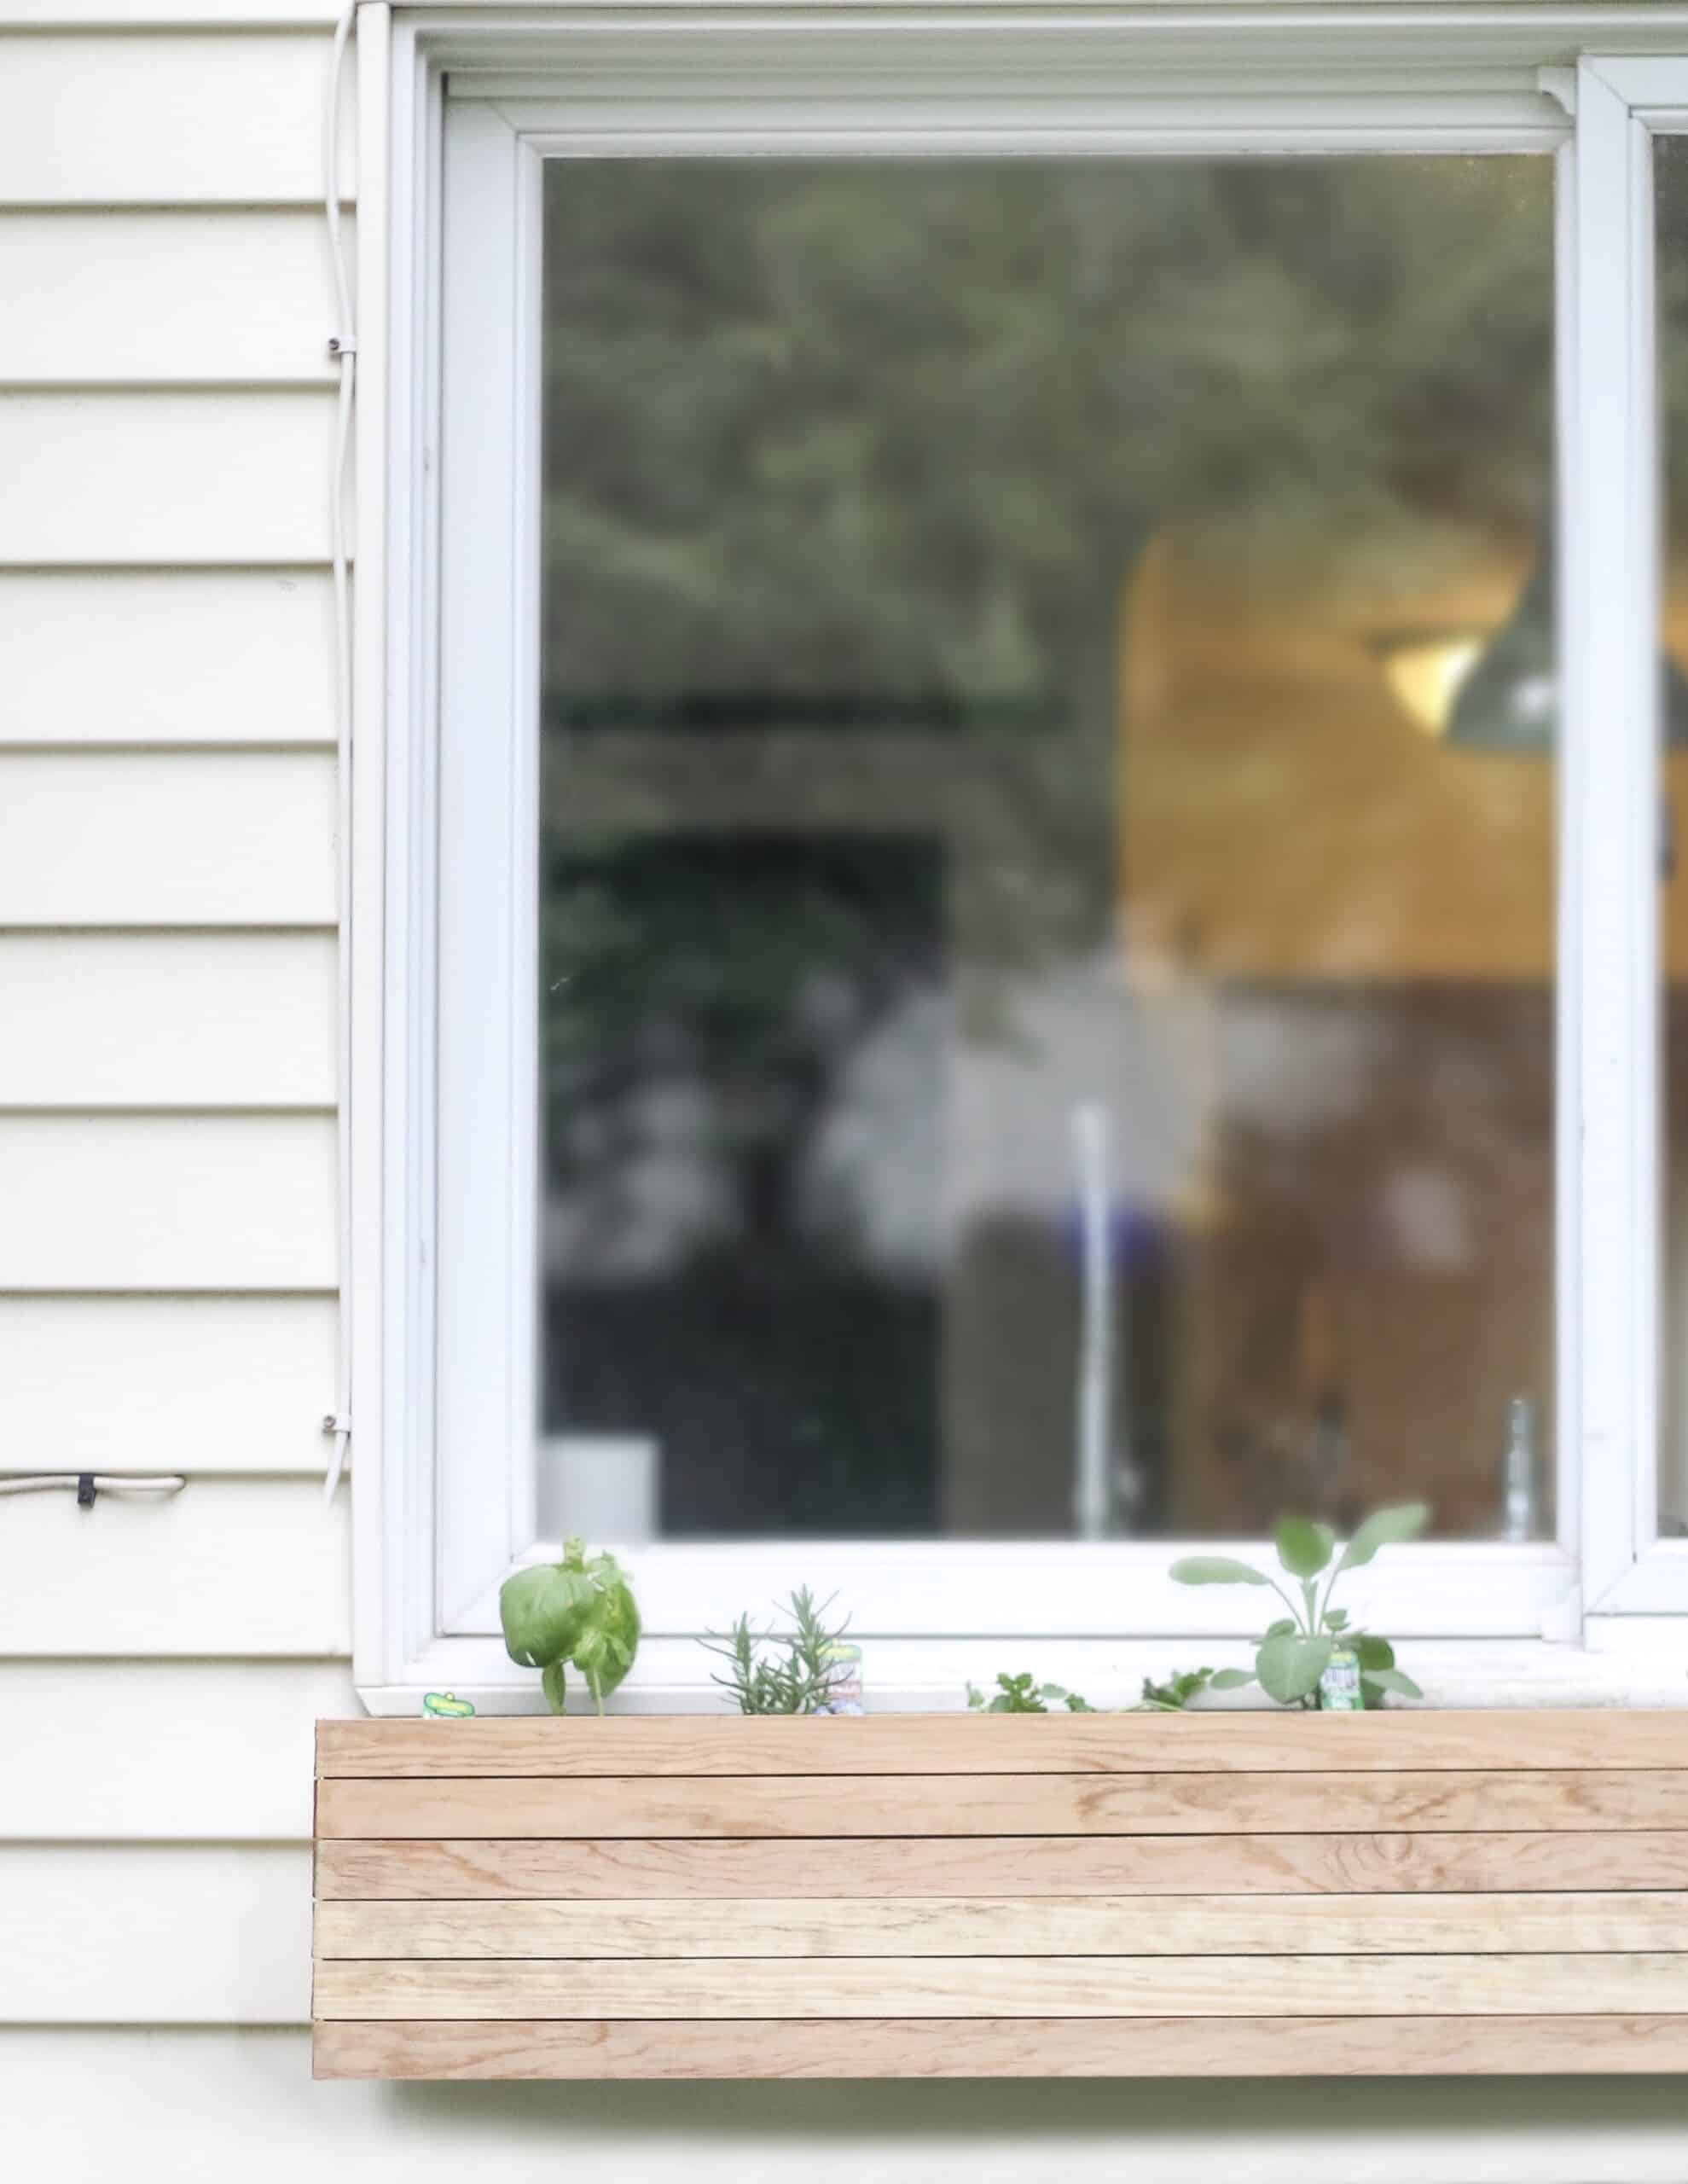
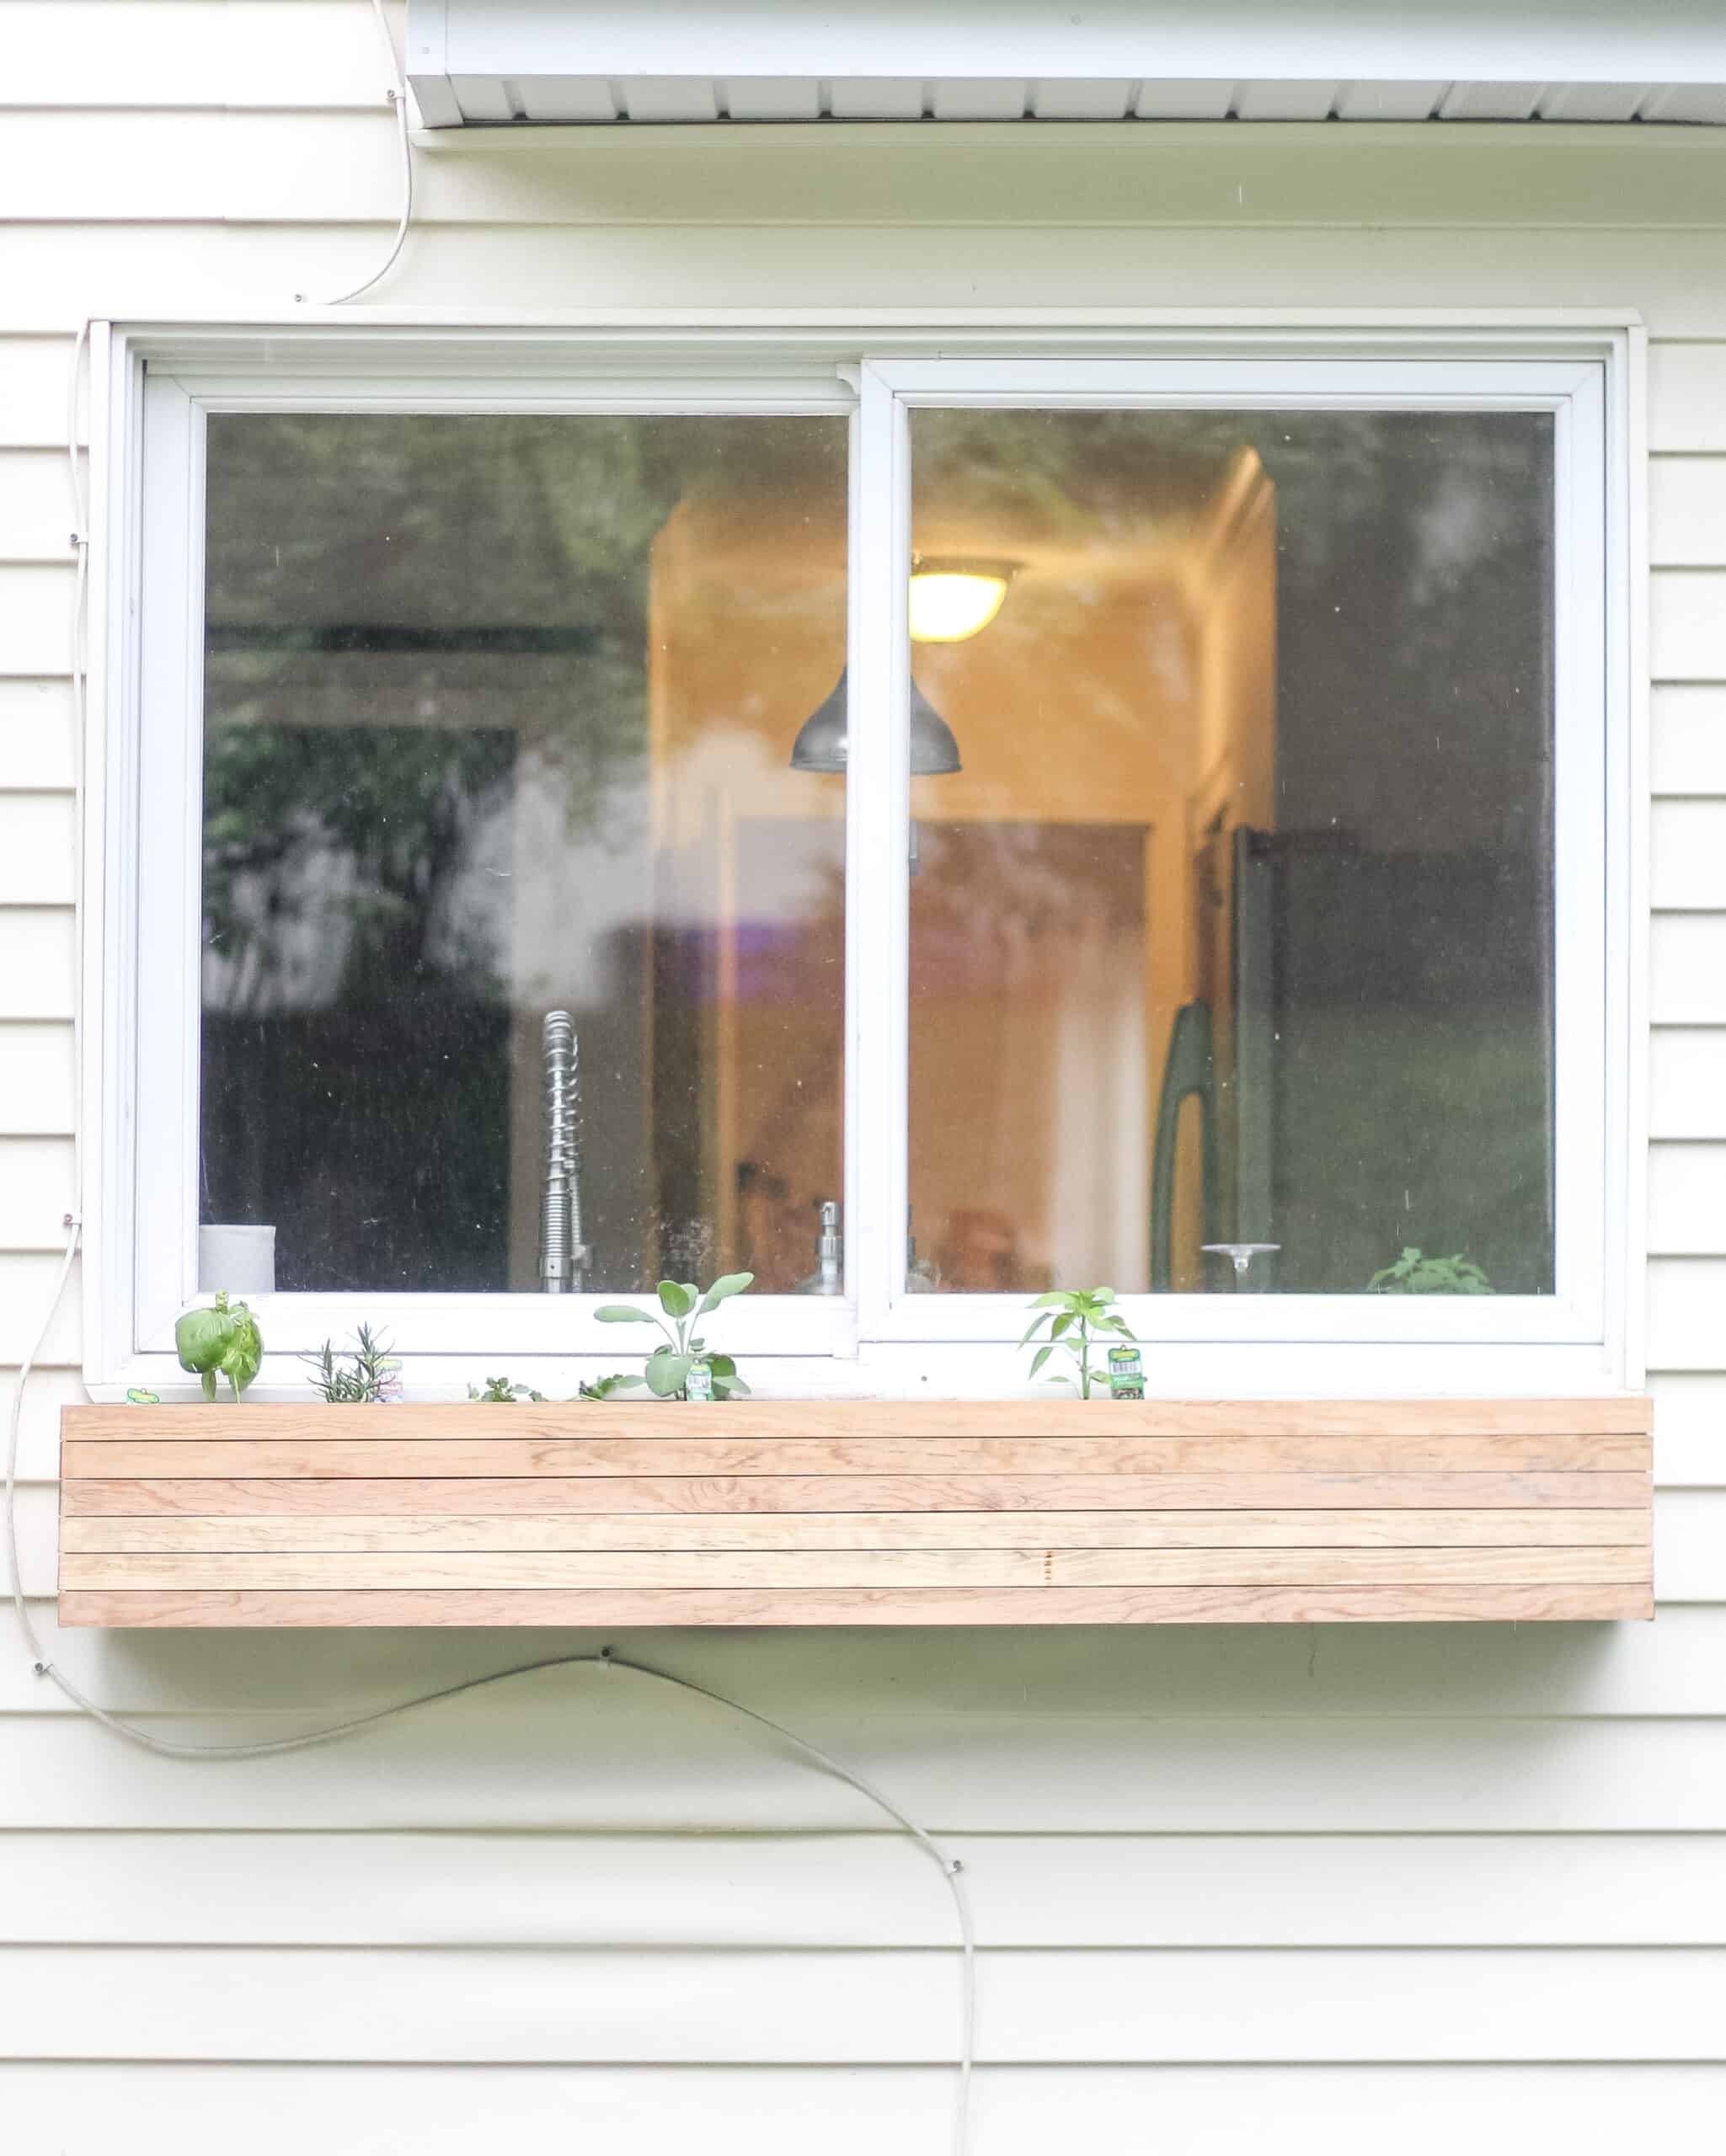
Once it’s up, fill your diy planter box with soil and whatever your heart desires. We personally are actually using ours for an herb garden. The window we built this for is over my kitchen sink, so the herbs that are on the side where the window opens will be able to be cut right there. We will do jalapeños and a couple of other smaller plants on the other side.
Cost and Time Breakdown
This is always a huge ask on all of my projects so I am going to try to add this every time I do one.
Total time for this project was: 2 hours working/ 1 hour dry time. (3 hours start to finish)
Cost: We owned all tools, stain, and so on, so our only cost for this project was lumber. $45 ($35 on lattice – $10 on plywood)
Overall this was one of my favorite projects we have done in a while. It turned out exactly how I pictured and was really simple to make happen. It is certainly nothing fancy, but was really fun and I think I will recreate it in a coming project!
Other Posts You’ll love
Trash Can Planter Hack | DIY Wood Closet Shelving
If you have any questions on this DIY planter box tutorial feel free to DM me on Instagram, or leave a comment below! I can’t wait to see your finished projects, and hope you love the end outcome as much as we do!
Pin the Photo Below for Later