This is a long overdue blog post but I hope you will find it worth the wait! A while back, Sam and I decided to give our bathroom and dining room a facelift. The plain white walls were screaming for a custom touch. We decided to create a feature wall in our bathroom that brought a level of subtle sophistication. We ended up loving the end result so much we recreated it in the entire room of our dining space. So what DIY did we ultimately do? I’ll go over the design plan and all the steps we took for our DIY picture frame molding batten walls that adds even more character to our historic home.
This post may contain affiliate links
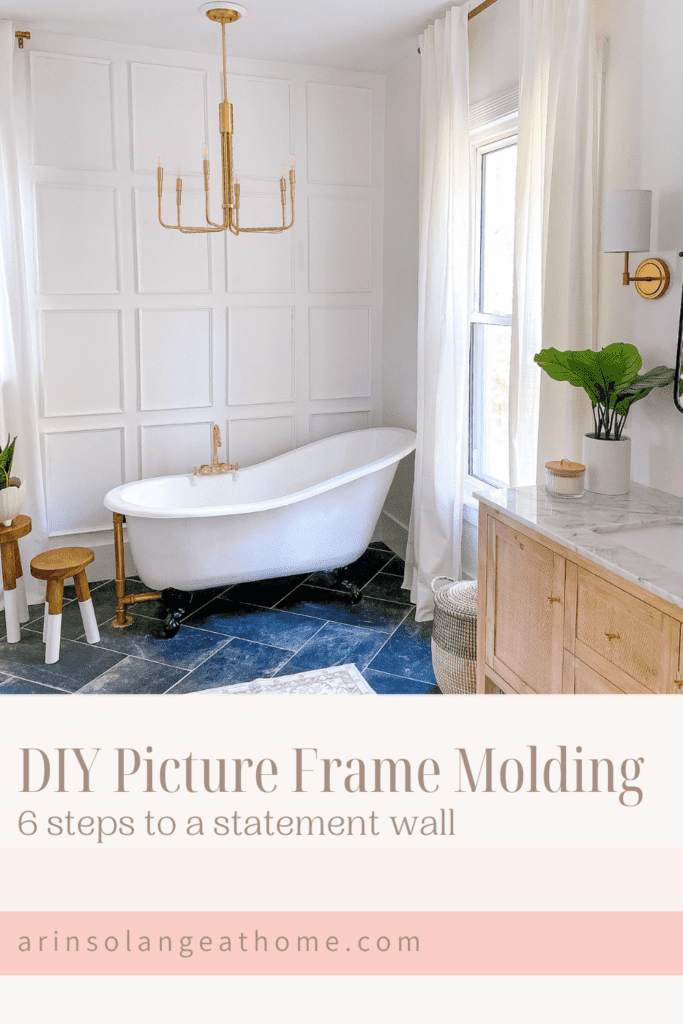
6 Steps To Add Picture Frame Molding To Any Room
One of my goals when creating our DIY picture frame moulding in our bathroom was to create a focal wall that would stand out among our claw foot tub. Since we have both modern and vintage design elements in our home, I wanted to pair our vintage tub with a more modern accent wall.
The Benefits Of Picture Frame Moulding
Rather than install popular wall treatments like board and batten or wainscotting, we opted to install this beautiful picture frame moulding. Here are a few of the benefits of adding these interior projects to our bathroom and dining room:
- Creates Texture To Walls
I love that the wall moulding adds texture to the walls and elongates the ceilings in our bathroom.
- Hides Imperfections
If you have an older home like we do, you may have walls that are uneven or have imperfections. Adding picture moulding is a great way to hide those imperfections. Now for full disclosures, if you have uneven walls, installing your picture moulding may be a bit more cumbersome. Otherwise, recreating this look is relatively user-friendly and fairly inexpensive.
- Custom Built Look For Less
If you have ever built a home, you’ll know that every single item adds up. That means that you pay for not only the materials you use, but also how you use those materials with labor charges. If you use a reputable contractor and quality materials, you’re looking at an expensive build.
You don’t have to have a custom built home to get that same look. Built-ins, crown moulding, and board and batten walls all add value to your home. You can create these traditional designs by DIYing them yourself without spending a fortune. By doing so, you are creating a classic look that gives a custom built appearance.
- Pairs Well With Historical Homes
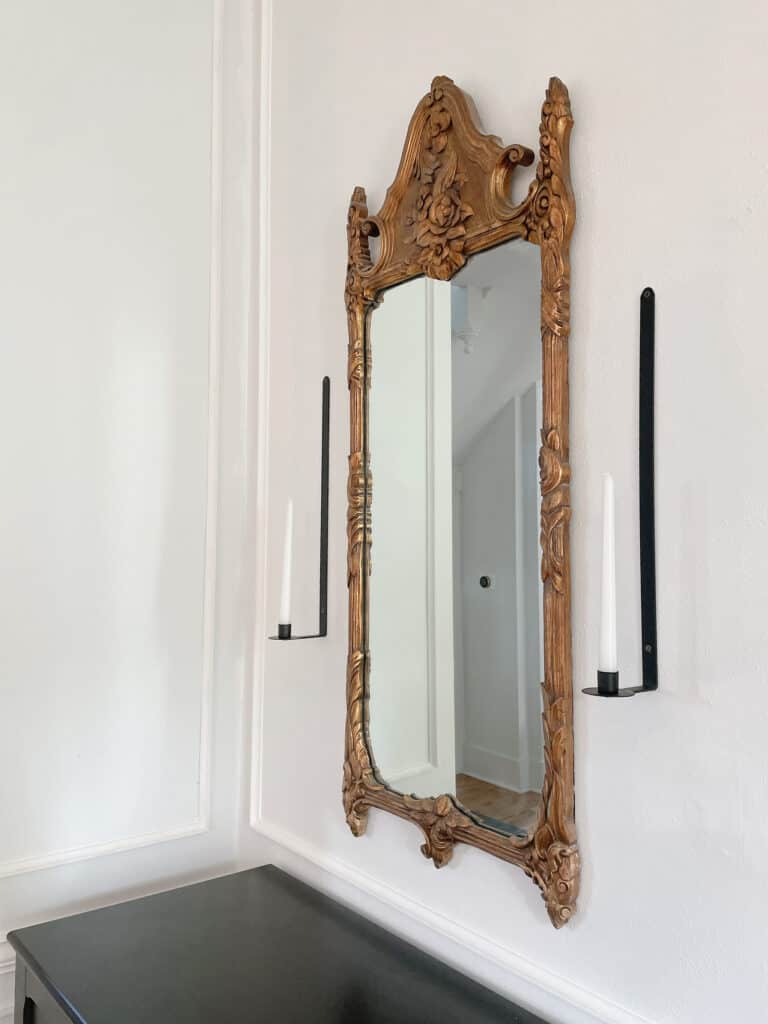
One of the biggest reasons we opted to install shadow box moulding in our home was simply because of its design properties. Crown moulding ties in perfectly with our historic home and vintage design. By creating our own gallery wall in our bathroom and extending it to the main walls in our dining room, we made our historic home even more charming.
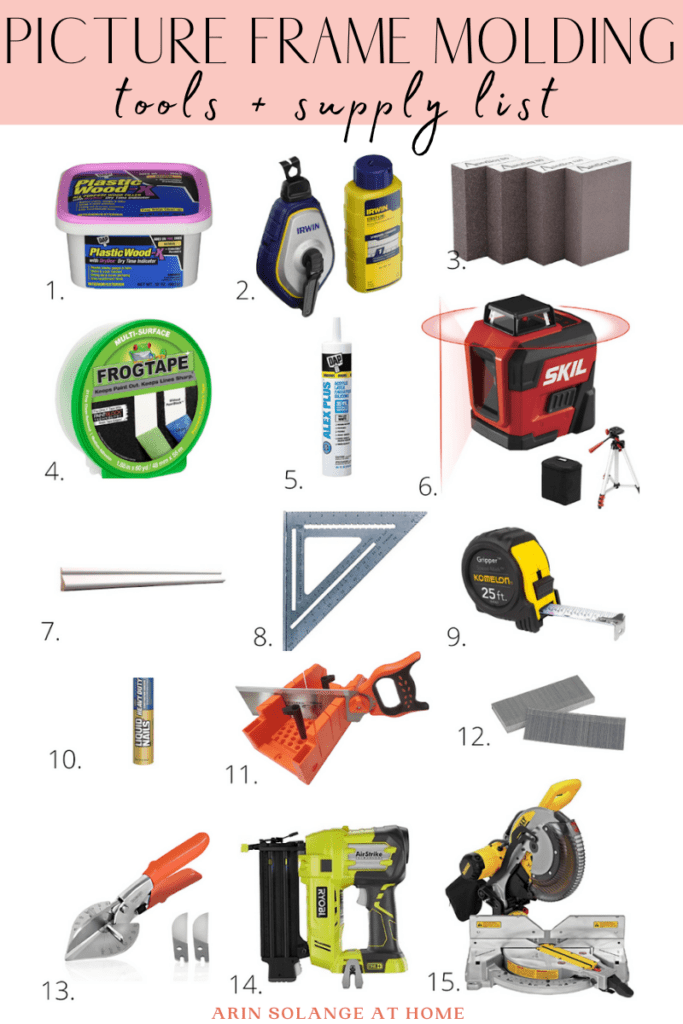
Tools & Supplies List For Wood Picture Frame Mouldings
For the most part, you should have the majority of the supplies laying around your garage or tool box. The biggest expense will be your base cap moulding due to the increase in wood prices. If you need to be conservative with your budget, it may be wise to scale back your plans and focus on one accent wall. You can always add more moulding at a later day.
Time wise, you can knock this project out in a single weekend. This is a great beginner project that you can complete with your best friend or partner.
Supplies Needed:
- Measure Tape
- Speed Square
- Laser Level or large level
- Paper
- Pencil or Chalk Reel
- Base Cap Molding
- Miter Saw
- Liquid Nails
- 18 Gauge Nail Gun
- 18 Gauge Brad Nails 2 inches
- Paintable Caulk & Caulk Gun
- Wood Filler
- Sanding Block
- Painter’s Tape
- Primer
- Paint
6 Steps To Build Your Own Picture Frame Moulding Accent Wall
Without further ado, here are the steps to create your very own DIY picture frame moulding accent wall!
Decide On A Plan
The first step you have to do before you can install picture frame boxes is to decide on a plan. A good starting point is to first decide if you want to do an entire wall as a focal point or create the look across the entire room for multiple focal points.
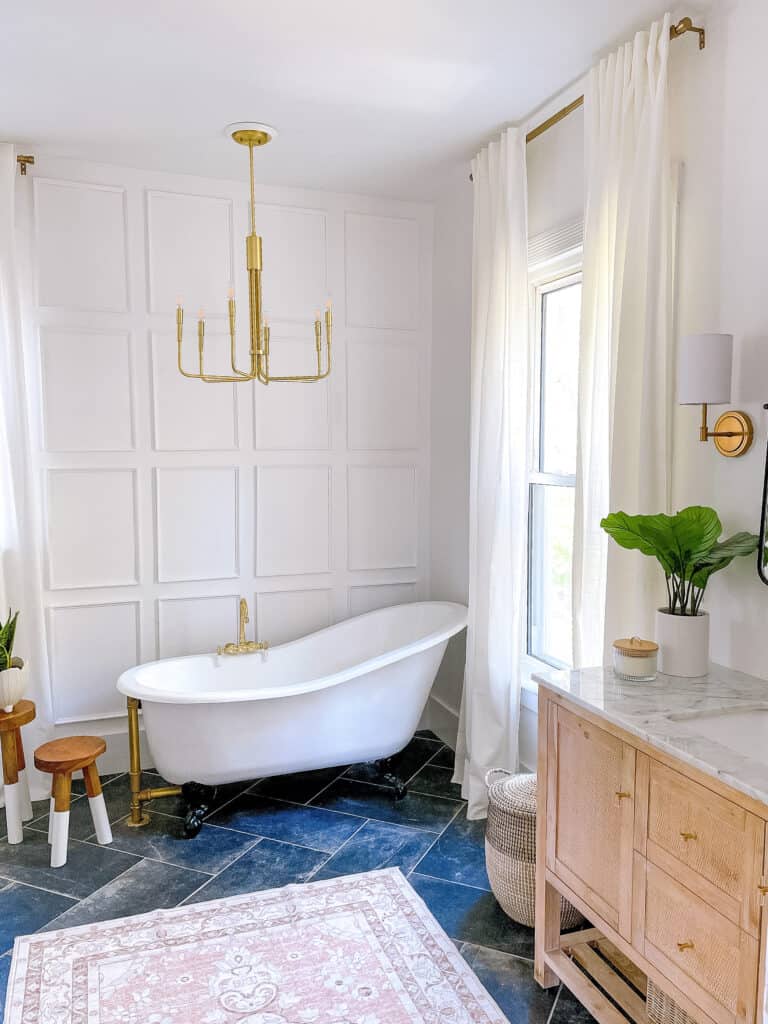
Because we were doing this project in our bathroom, we decided to only go for one accent wall. Our master bathroom has a glorious claw foot tub. I didn’t want the entire space to be outfitted with picture frame moulding and take anything away from the clawfoot tub. Instead, I think the gallery wall complements the tub and vice versa.
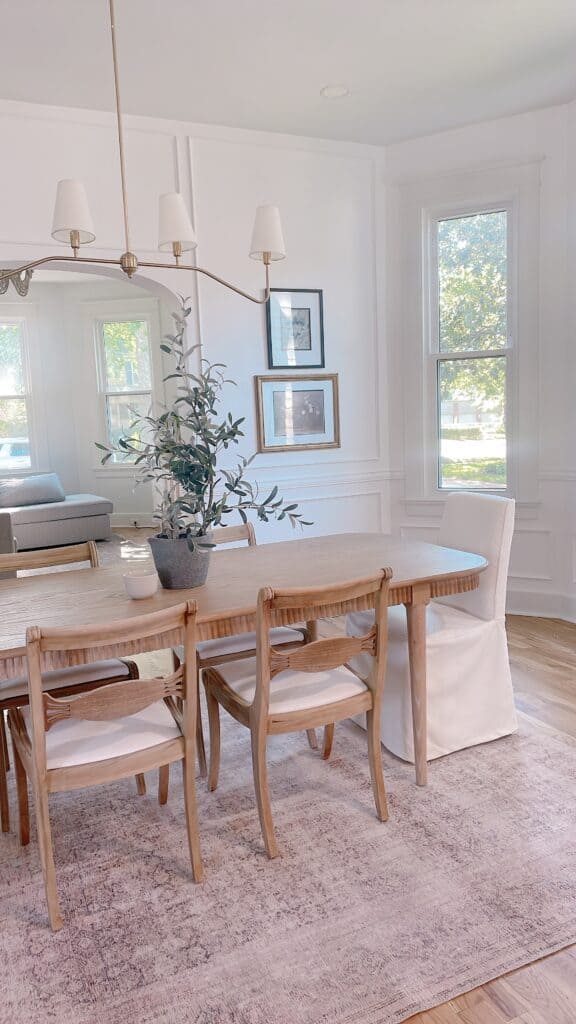
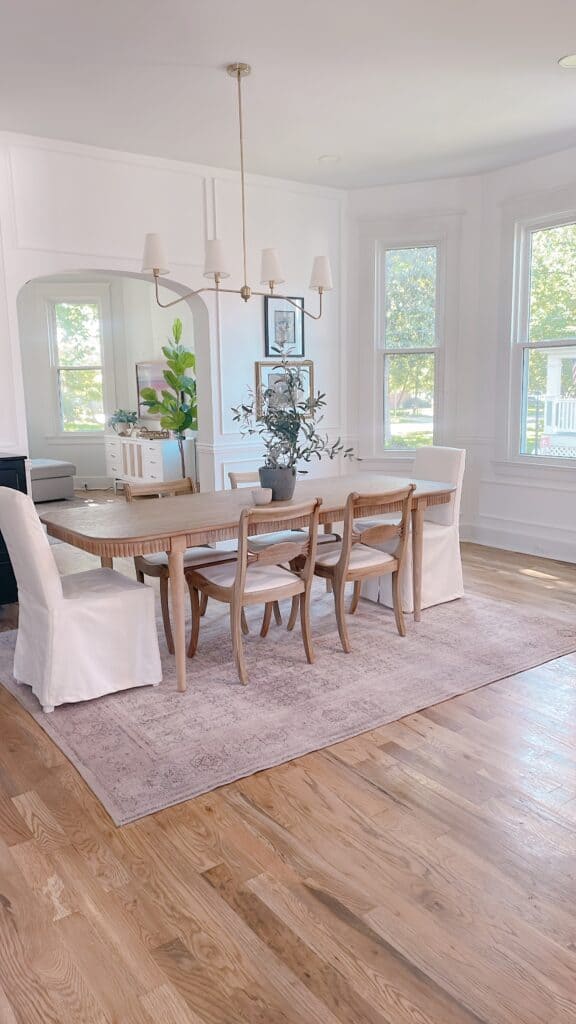
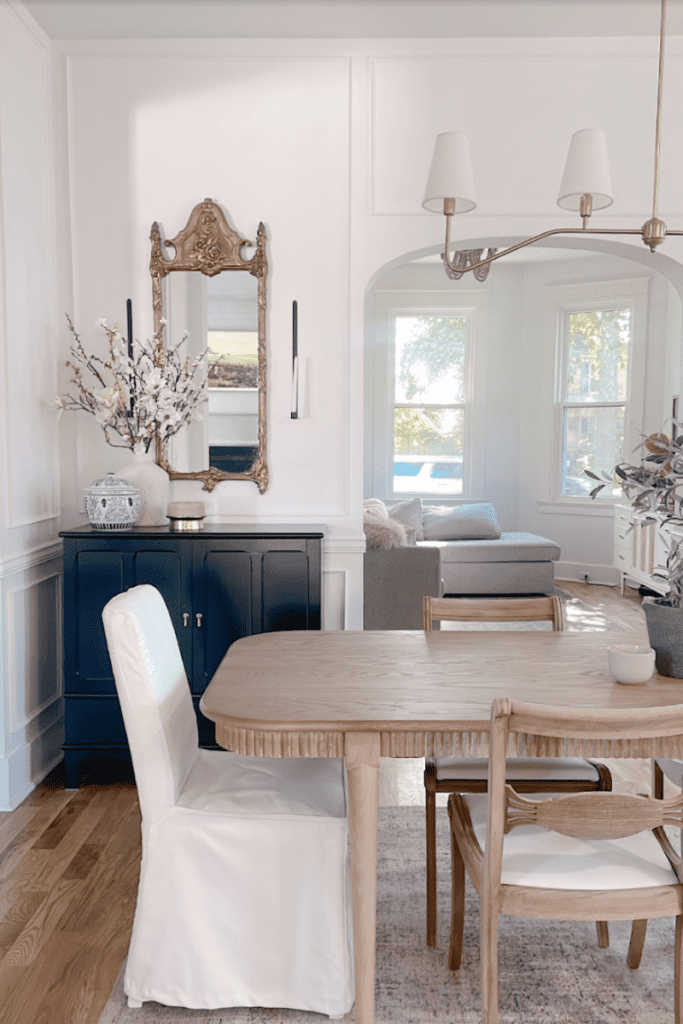
Once Sam and I realized how much we liked the look, we went ahead and applied the technique to our entire dining room. If you end up applying the look to an entire room, say a living room, feel free to add chair railing to break up the space and further enhance the architectural details of your room.
If you do decide to install chair railing, you’ll need to take this into account for height placement on your walls, and then plan your design accordingly around it.
For this blog post, I’ll be sticking to our picture frame moulding that was completed in our bathroom. We opted to not install any chair railing. I
I wanted something that would complement the height of our tall ceilings and have our bathroom feel larger and wider. For sake of symmetry, I chose to install four rows of frames both horizontally and vertically.
Map It Out
I’m a very visual person and tend to need to share my vision with Sam so we can both fully see it on paper in order to execute it in reality. I grabbed a piece of paper, my tape measure, and a pencil and got to work. The first thing I needed to do was measure the wall space where the picture frame moulding would be installed.
I measured our wall to be 148 inches high by 108 inches wide. Now that I have the height and length of the wall space, I can go ahead and map out how I want the design to look. I’ll need to take into account the fact that we have 3 inch baseboards. I also want each frame to be about 3 inches apart from one another and be 3 inches (so 6 inches with baseboards) from the floor and the ceiling.
Mapping out the design of four frames by four frames, I was able to calculate how tall and wide each frame would need to be taking into account my measurements and preferences. After a lot of work in my head and on paper, I came to the conclusion that the moulding boxes would need to measure 23.25 inches across and 32.5 inches tall.
These measurements would allow me to have an even distance between the width of the boxes, It also takes into account the moulding pieces being 3 inches from the ceiling and top of the baseboard.
Once I mapped it out on my paper, you can also map it out on your wall. This is more difficult if you have super tall ceilings like us. Be prepared to grab a large level. At this point, you’ll be feeling really grateful if you have a laser level.

Gather Materials & Supplies
You’ll need to do some math in order to know how much base cap moulding to purchase. Since wood prices have gone up the past few years, I try not to waste much and get just enough for what I need. At the same time, I like to have a tad extra in case of a measurement or cut mistake.
The base cap we opted to purchase is the Reliabilt 11/16 x 1 ⅜ x 8 ft primed pine base cap molding. These dimensions are perfect for creating box paneling on both small walls and larger walls.
Add up how much you’ll need by adding how much base cap you’ll need per frame. From there, simply multiply it by the number of frames you’ll install.
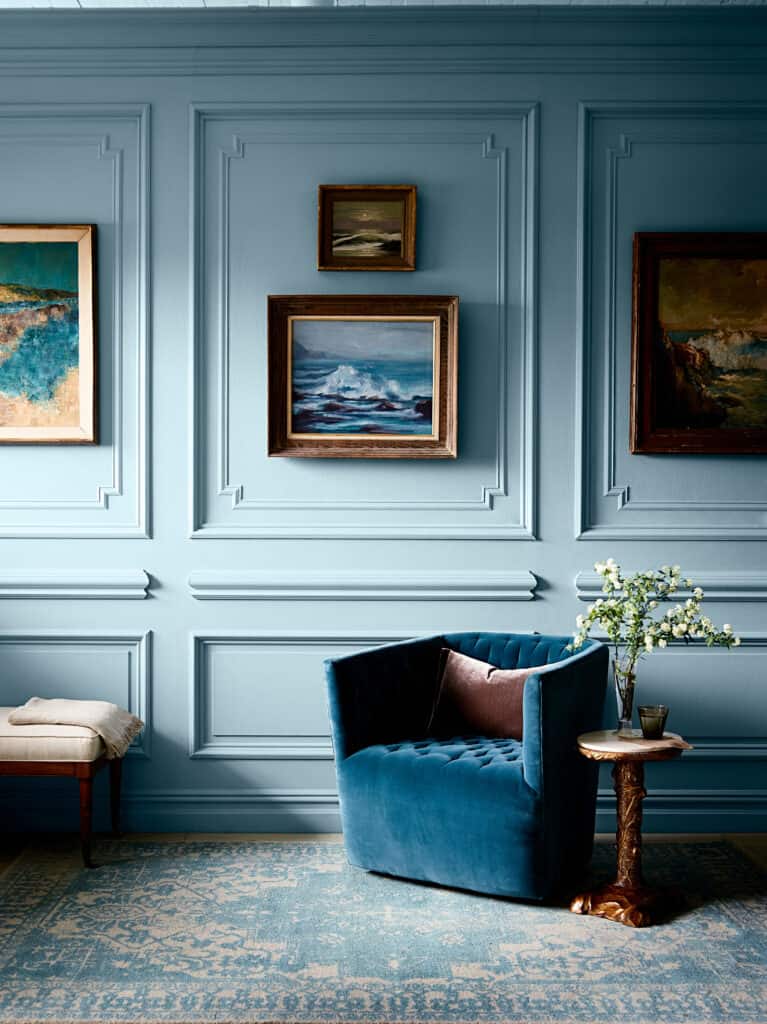
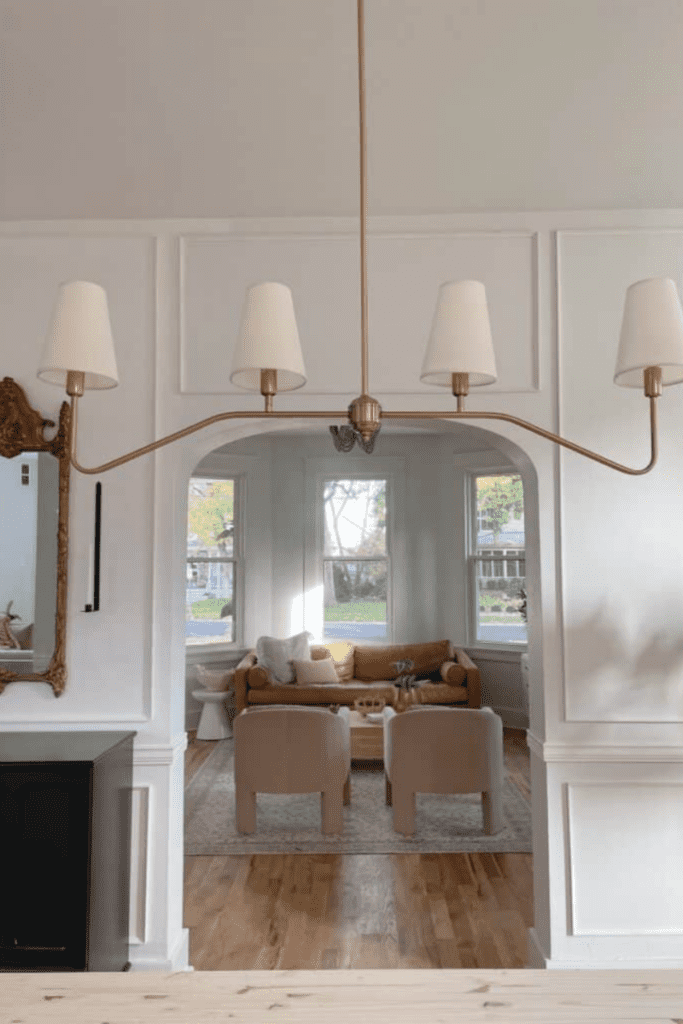
Johnny Miller captured this beautiful living room for Martha Stewart. The framed moulding complements this vintage modern living room perfectly.
Make Your Cuts
Now that you’ve purchased your base cap, you’ll need to grab your power tools and get to work. Without the right tools, this project can be difficult. I’d recommend using a double bevel compound sliding miter saw.
If you don’t have a miter saw or want to know what saw to buy, check out my quick guide to miter saws. If a miter saw isn’t in your budget, I highly recommend you check out either a miter box or miter shears.
Grab your tape measure, speed square, and pencil. Measure out your trim pieces per your own measurements. Keep in mind that you will be cutting these at 45-degree angles. You’ll want to measure, mark, and cut your trim work with the longer edge (or thicker side) of the trim piece facing outwards.
If you start with a left sided angle, you’ll cut your first piece at that 45-degree cut. Once you’ve made that cut, move your trim down and your blade 45 degrees to the right. Now, you’ll do your next cut on your next piece.
Repeat this for all of your vertical pieces and horizontal pieces. I prefer to do all of my cuts on my horizontal top and bottom boards at once and then begin on my vertical boards next.
I also like to keep these organized as I cut, so I know where they will go and each frame stays as a unit.
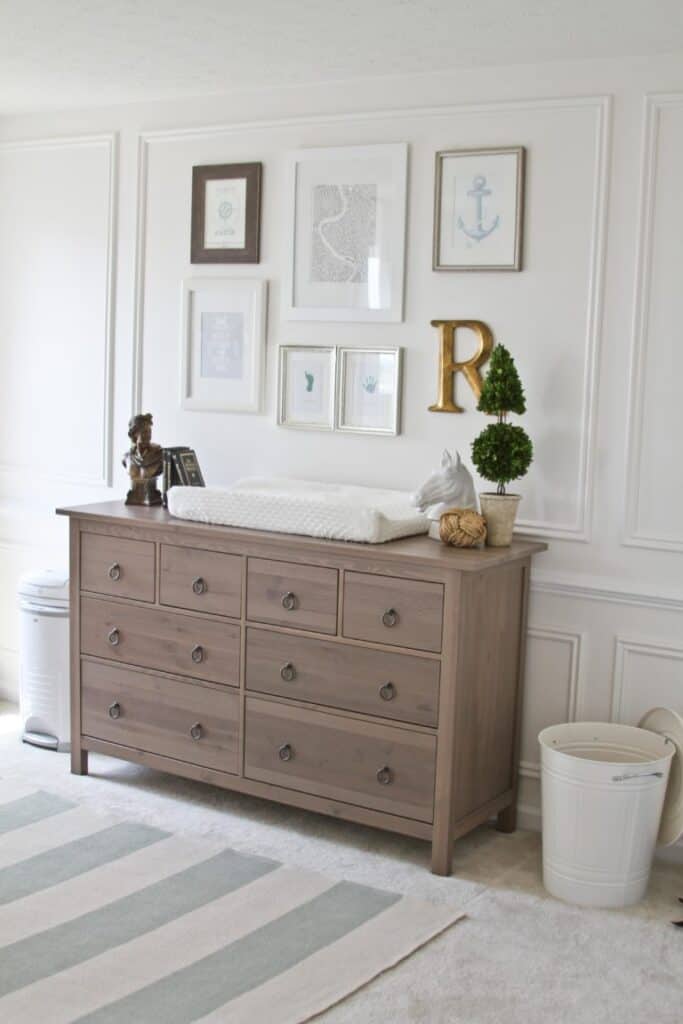
This sweet nursery with picture frame molding has a sophisticated feel.
Attach Picture Frame Molding To Wall
Now that you’ve measured and cut your frames, you can begin to assemble your picture frame molding on your walls.
Apply liquid nails or another adhesive to your moulding. Attach the top piece first, and then the bottom piece. Next, you can attach your right and left piece on either side to form your frame. If the length does not seem right, you still have time to correct it at this point.
If everything looks good, take your 18 gauge brad nailer and drive those nails into your trim work. You’ll notice there will be a very small hole from the nail gun. This is okay! We will pretty it up in a bit!
You’ll repeat these steps for each of your frames.
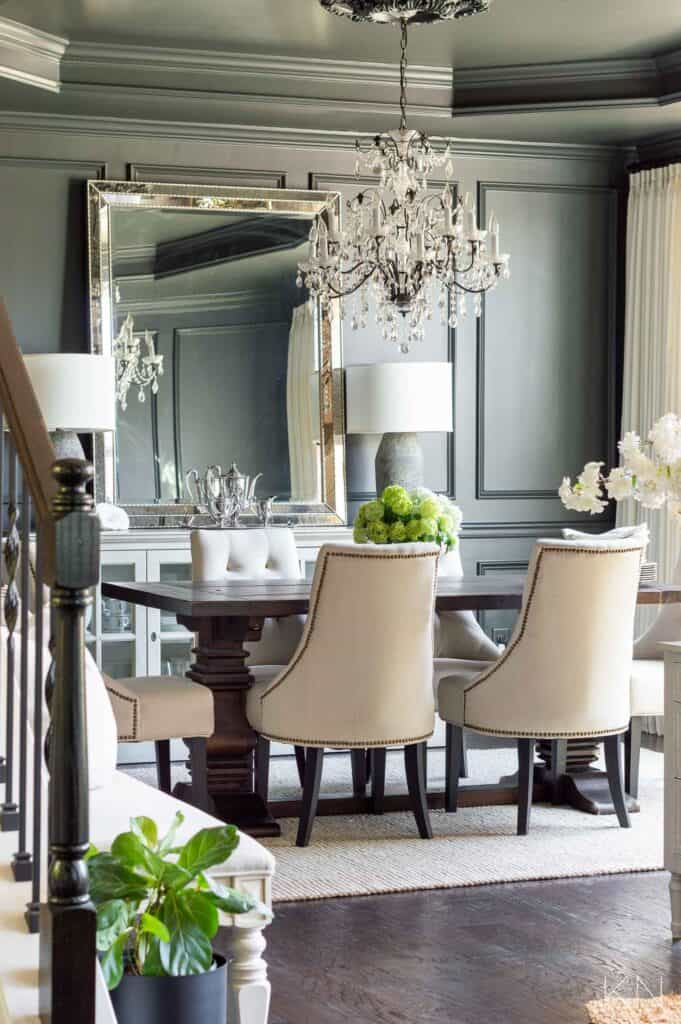
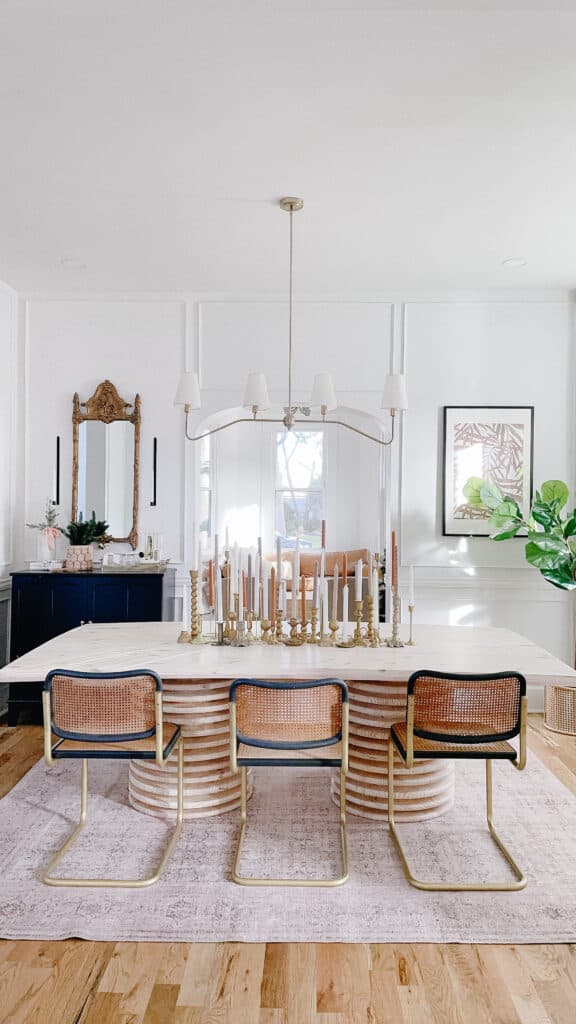
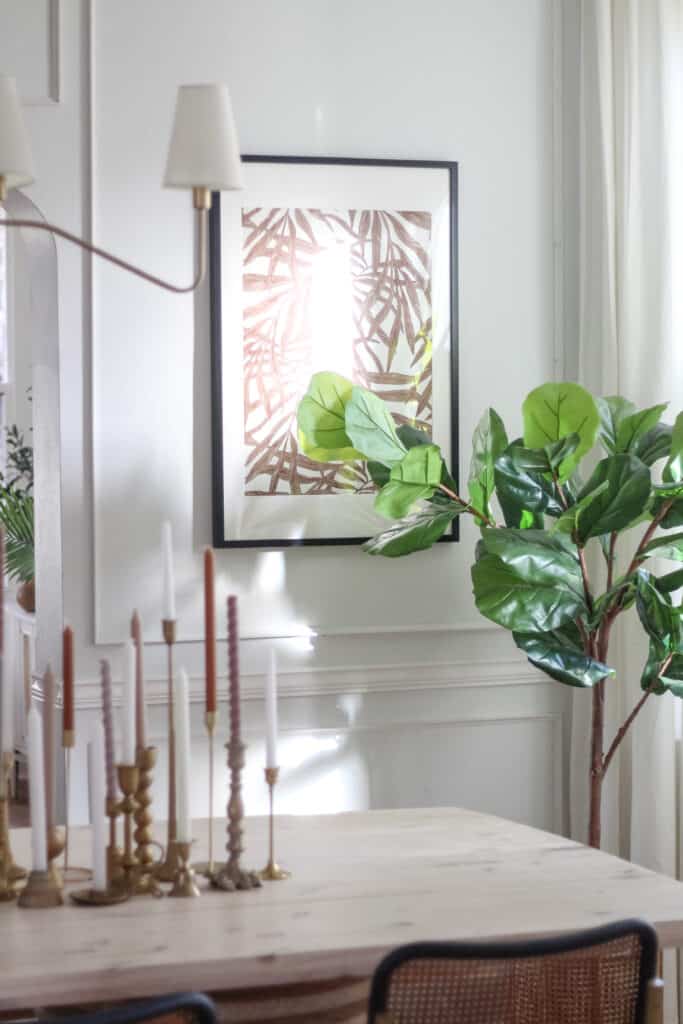
This gorgeous dining room has elegance written all over it.
Make It Pretty
If you’ve gotten to this point and have noticed that you have some boxes that aren’t quite flush, don’t fret. With older homes (and newer homes too) you likely won’t have perfectly straight walls. As a result, you may need to fake it. You can use extra nails to help bridge the gap between trim work and walls. If you need to, you can also use caulk to help fill in any gaps.
You’ll want to take a small bead of caulk and caulk around the edges and seams of your boxes. Next, use wood filler to cover those tiny nail holes. Once dried, you can lightly sand the areas where you wood filled. You’ll need to wipe away your dust particles after. Next, you can prime and paint your picture frame molding on your new feature wall.
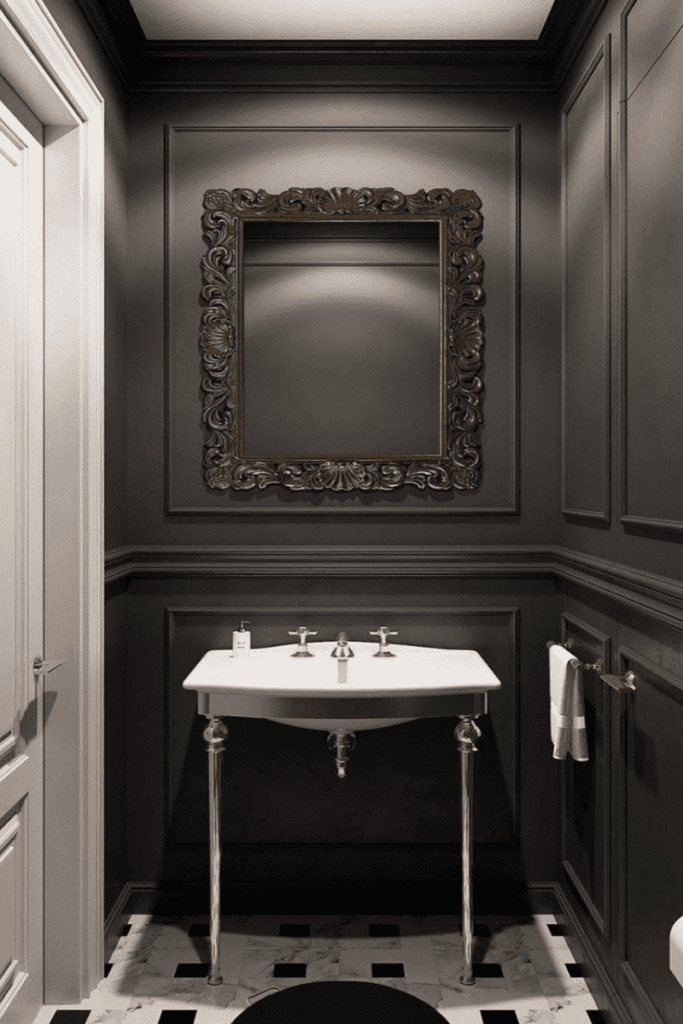
Talk about adding drama with picture molding!
Tools & Supplies To Make Your Own Picture Frame Molding Accent Walls
- Wood Putty Filler
- Chalk Reel
- Sander Set
- Painter’s Tape
- Caulk
- Laser Level
- Base Cap Molding
- Speed Square
- Measure Tape
- Liquid Nails
- Miter Box
- 18 Gauge Brad Nails 2 inches
- Miter Shears
- Brad Nailer
- Miter Saw
Other Posts You’ll Love
DIY King Canopy Bed Frame | DIY Cane Cabinet IKEA Hack | DIY Arched Built In
Pin The Photo Below For Later
I hope this tutorial was helpful for how to create your very own picture frame molding feature wall. I love how versatile this project is. You can easily apply it to any room in your home to add character or change it up and apply it throughout your living room for added elegance. Be sure to pin the photo below for later, and if you don’t already – follow me on Instagram (@arinsolange) and Tik Tok (@arinsolange) for more helpful hints. If you have any questions leave them in the comments below and I will get back to you!