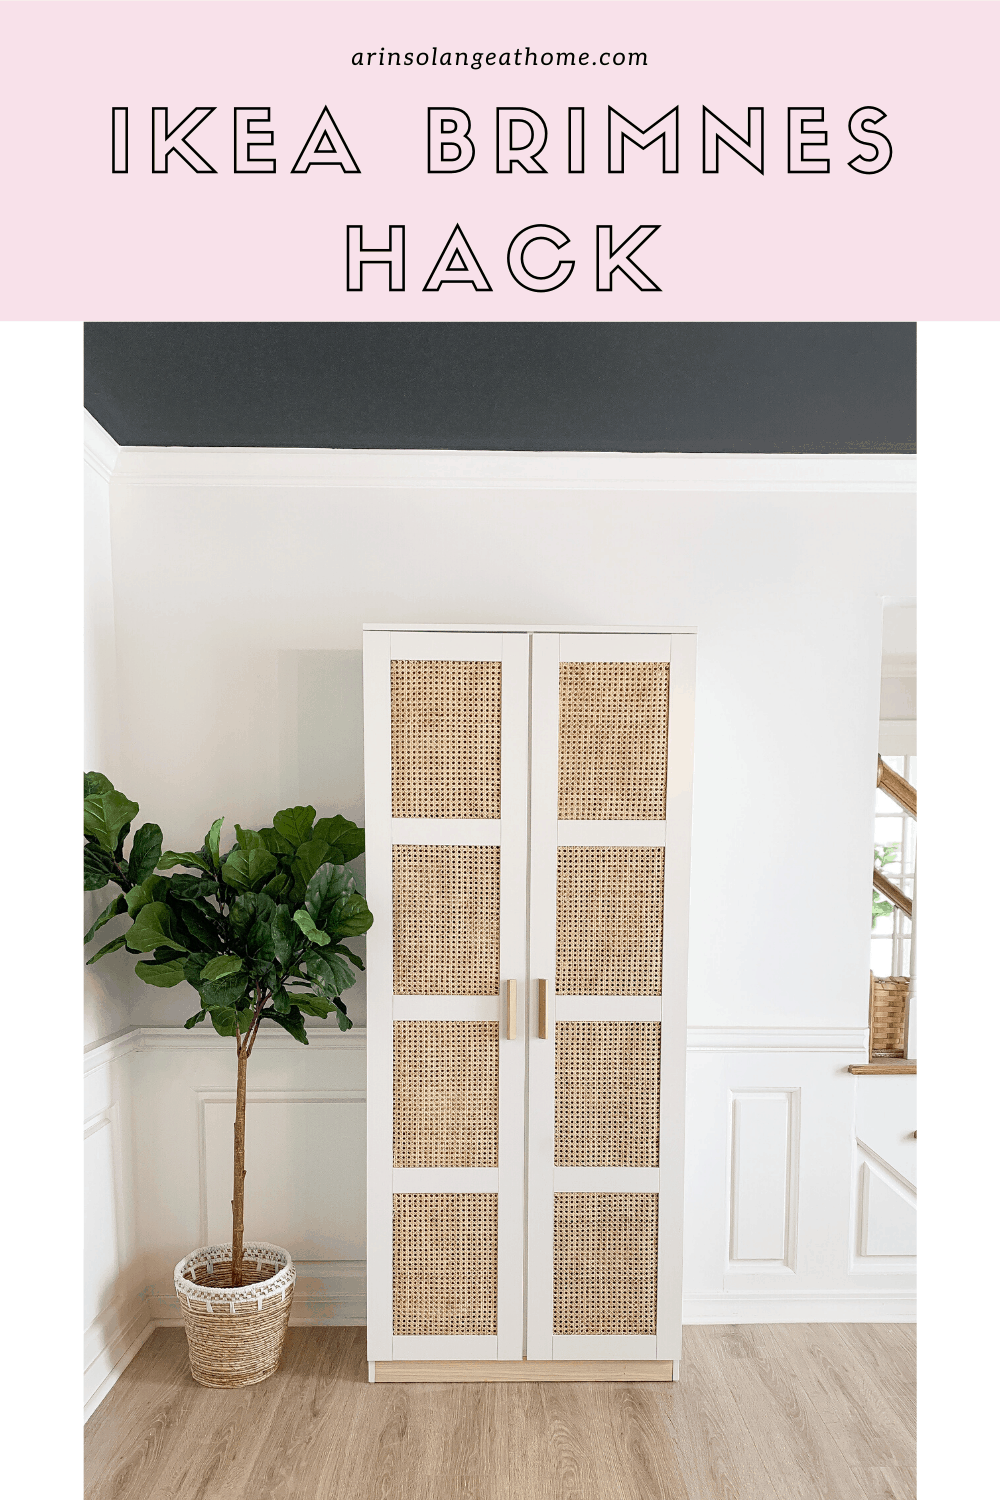
IKEA Hack-Brimnes Cabinet
I have been dying to do a hack on the IKEA Brimnes cabinet. If there is one thing I love to do in the world of DIY and decor it’s a good IKEA hack, and this one did not disappoint! Today I am going to finally share my DIY Cane IKEA Brimnes Cabinet.
I am walking you through all the ins and outs of the DIY, including some of the trickier aspects we didn’t expect, so make sure you read through the whole post before you dive in on yours!
This post may contain affiliate links
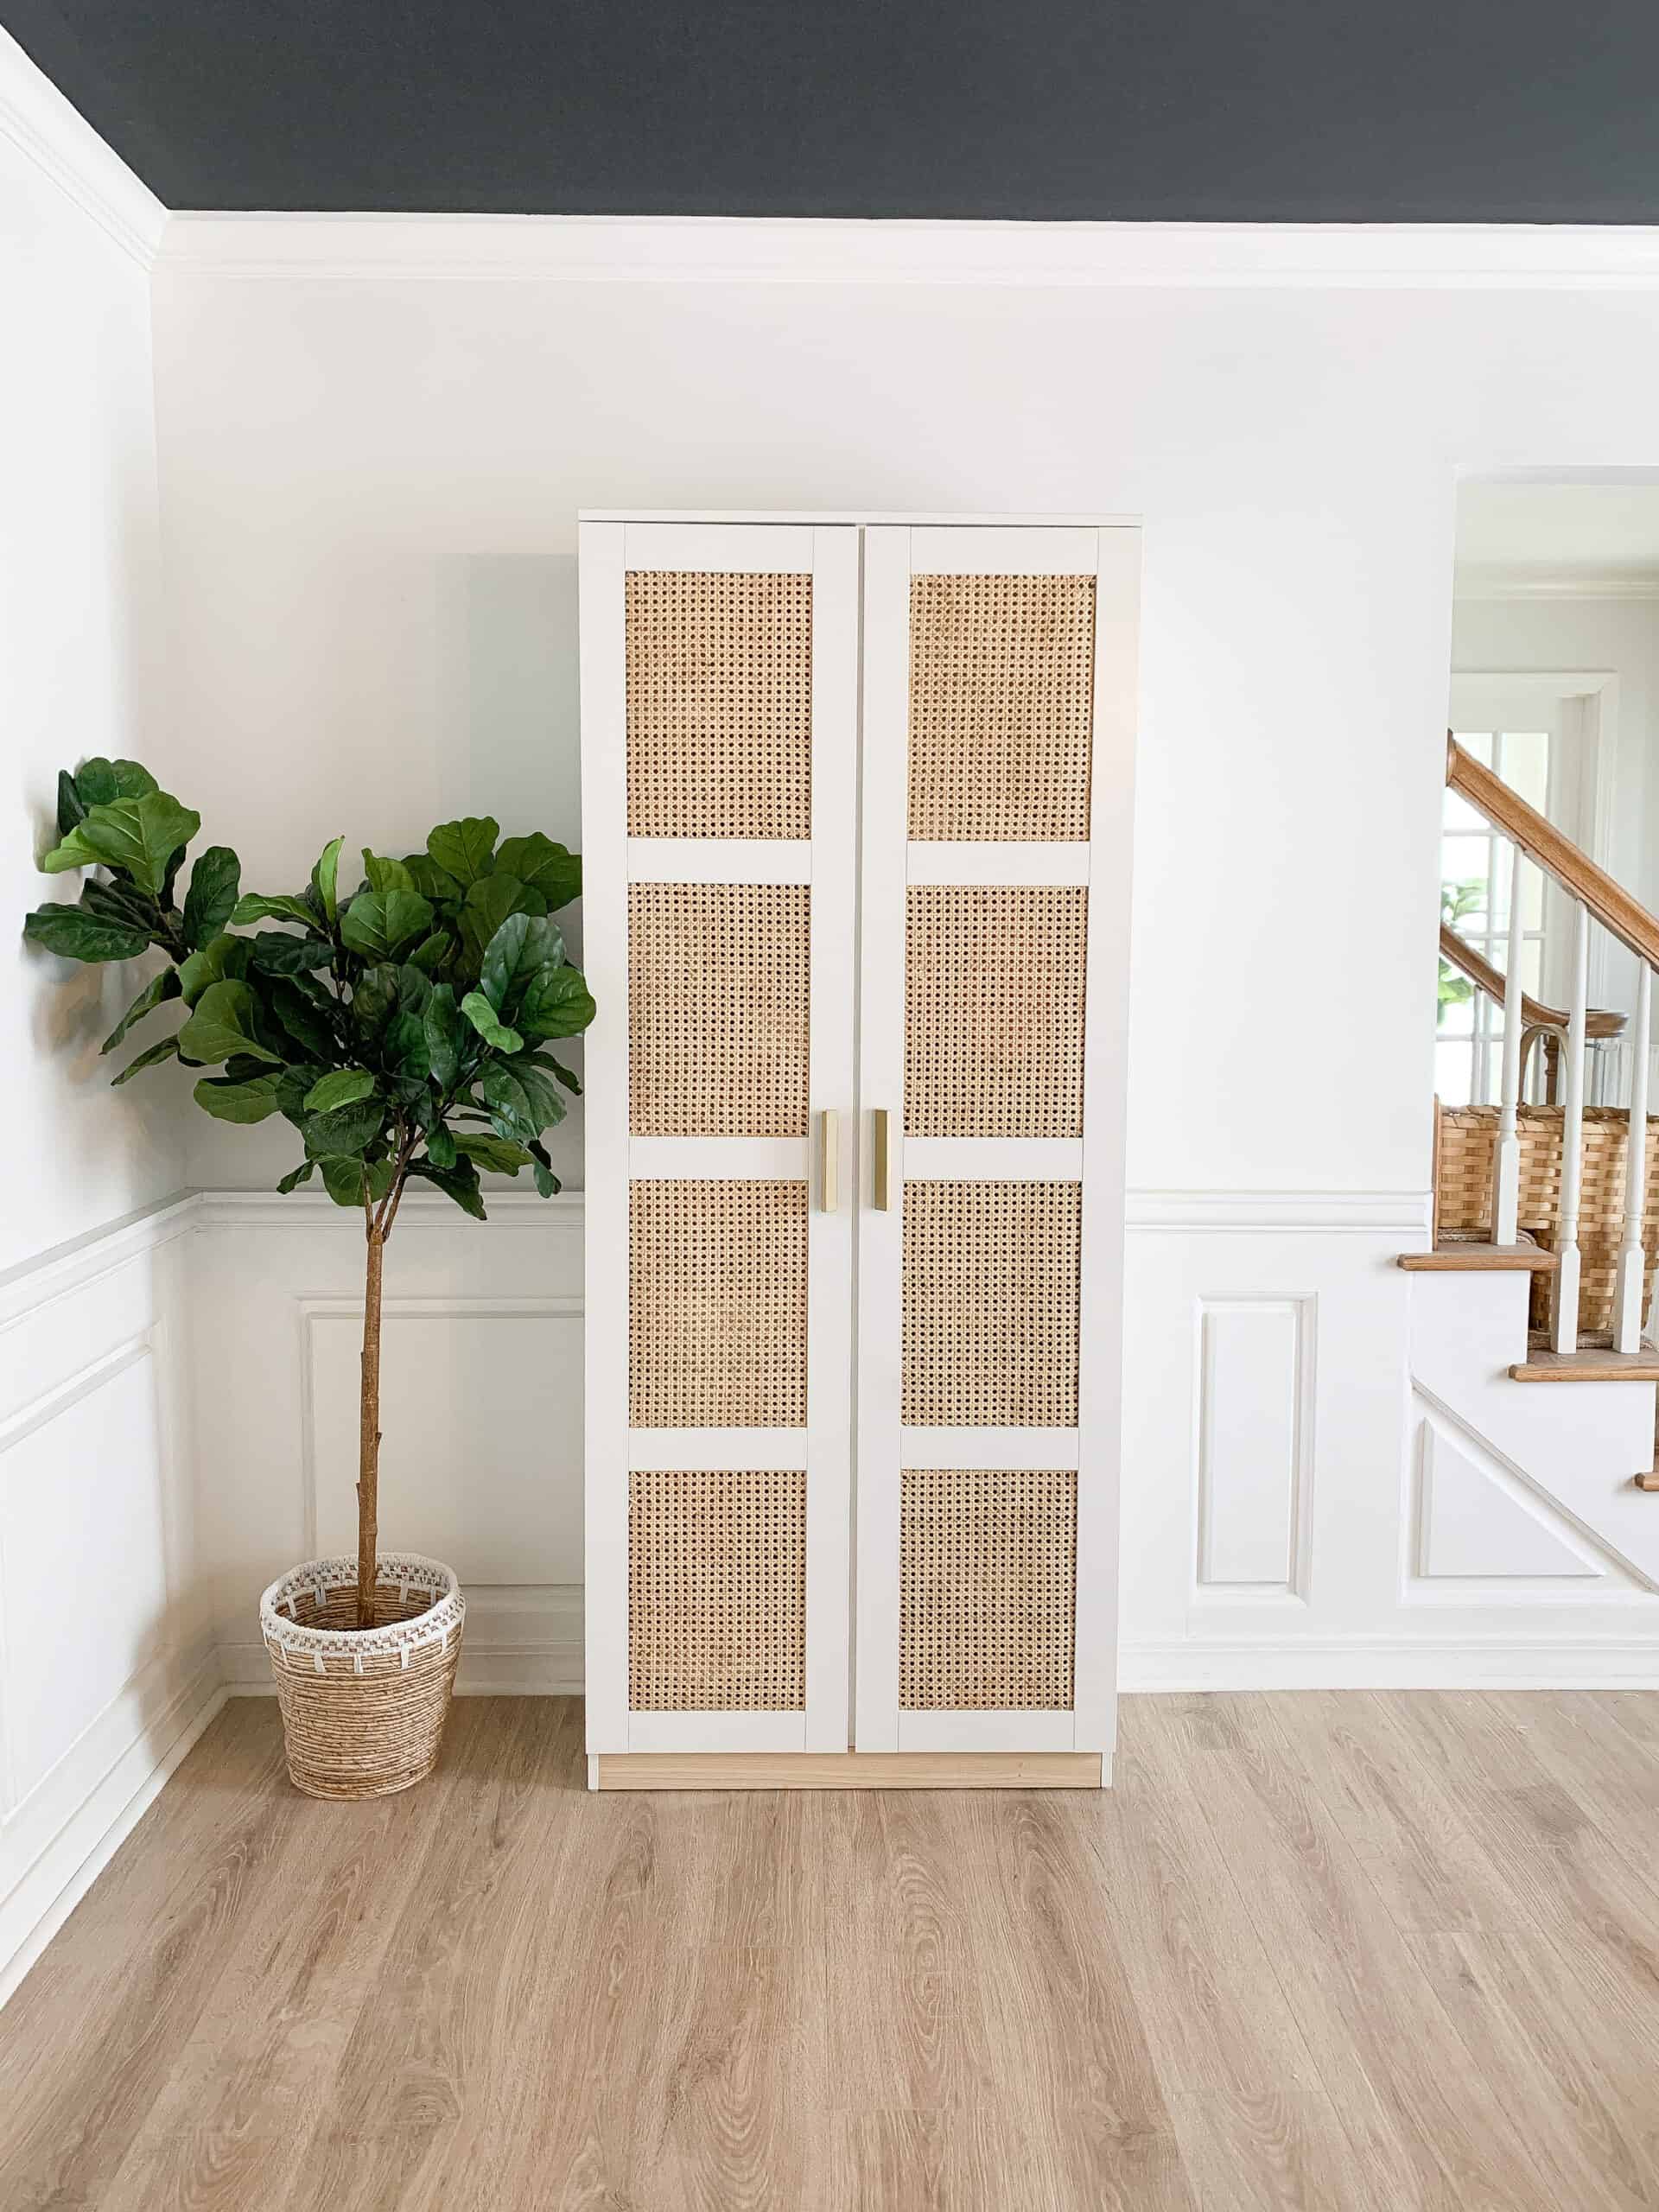
DIY Cane IKEA Brimnes Cabinet
Like I said before – I am no stranger to a good IKEA hack. I seriously love turning the inexpensive, but well thought out pieces from IKEA into something even better. This project was no exception to that.
I did this DIY as a part of my March Room Refresh, that I will touch on here in a few minutes, and might just be my favorite aspect of the room!
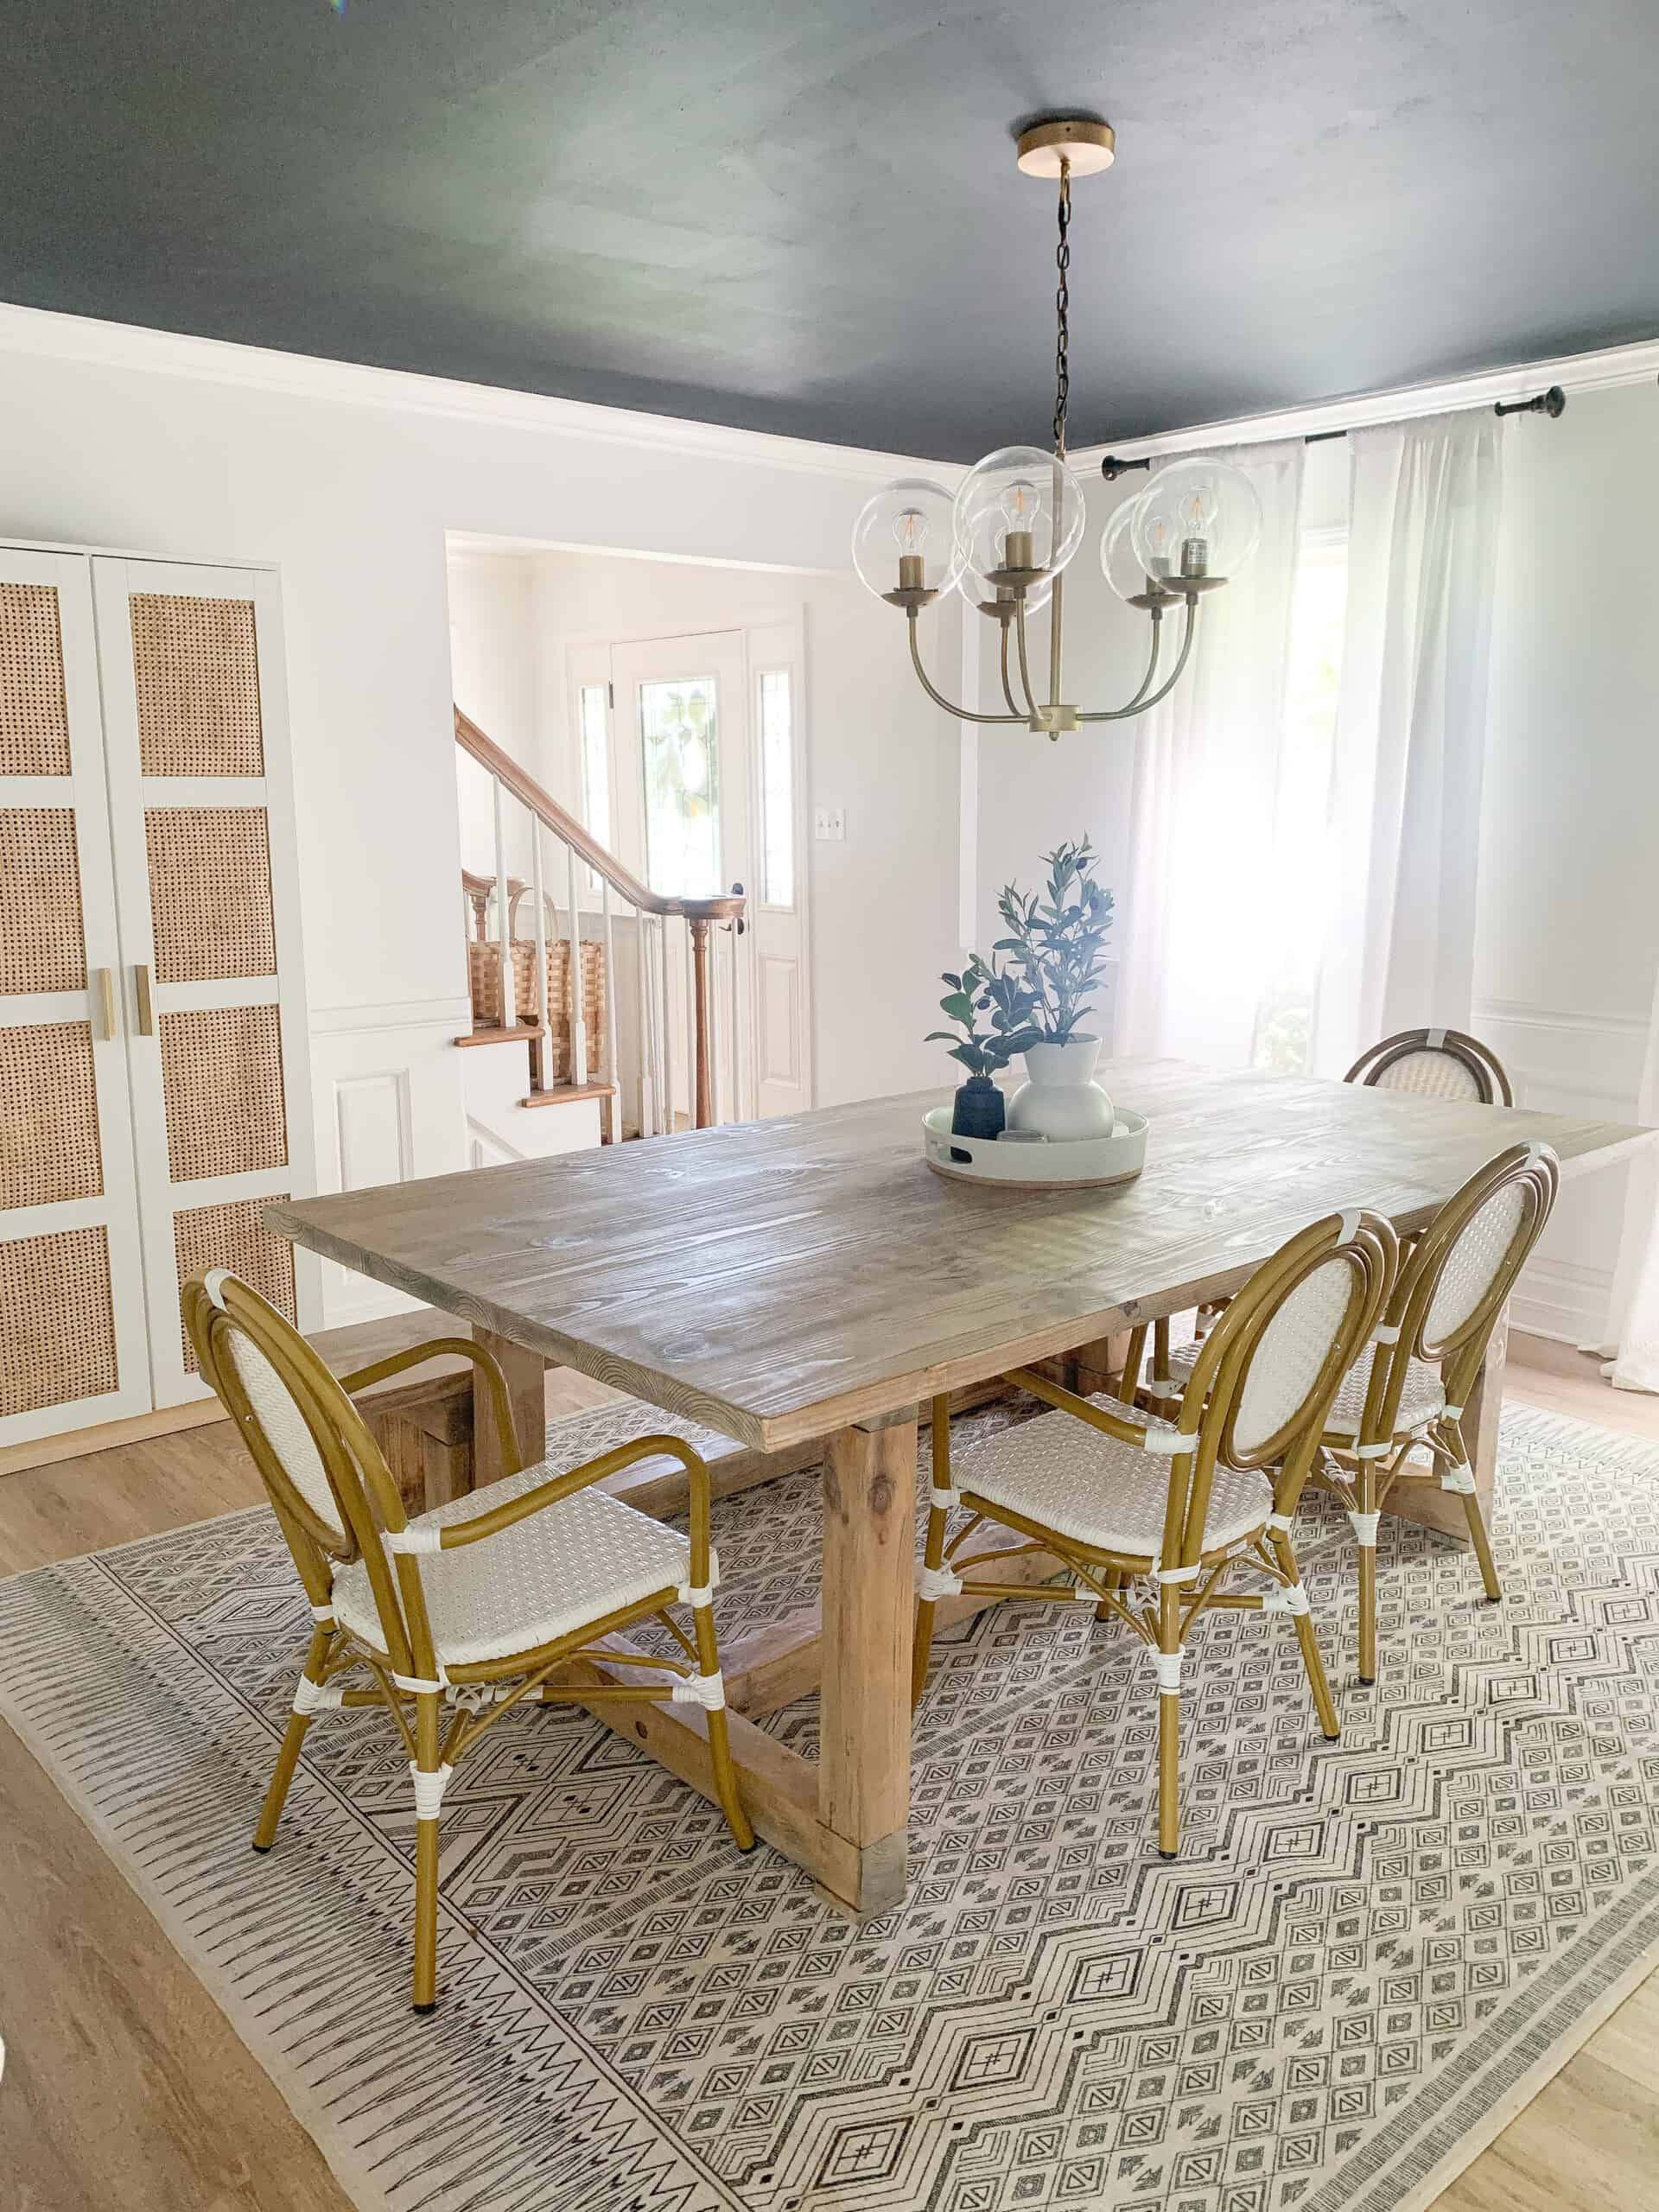
We had a need for a cabinet in our dining room to store lots of our serving dishes and such. I honestly didn’t want to do something like a buffet again, just because I wanted the simplicity of nothing on top of it.
We previously had a shorter cabinet with shelves over top and I think I just prefer the simplicity of everything hidden!
I also loved the idea of HOW much storage the IKEA Brimnes cabinet offered, and knew we would have the option to adding a second one if we wanted.
I am assuming the DIY I will walk you through will in some cases work for other options in the IKEA Brimnes line, however I can’t be fully sure.
A video with some behind the scenes
I filmed a few little things showing how I did this that will probably be super helpful when it comes to doing your project, so be sure to watch. I also am giving you a video version of the cabinet!
Other IKEA Hacks
While you are here, be sure to check out this post with the rest of my IKEA hacks. I LOVE using the inexpensive and simple pieces from IKEA to create something better, whether it just be an upgraded version of the original purpose like this, or a totally new one like I did with my wall mounted easel.
March Room Refresh
As mentioned above – I did this DIY as a part of my March Room refresh, which if that has you going ‘huh’? then head to this post to read more about what I am up to!
To give you the short version, my girls Chrissy and Jen have teamed up with me to do a 3 week room refresh challenge.
We are inviting all of you to join in with us and use the hashtag #MarchRoomRefresh, and those of you that compete your room will be entered to win $250.
The best part – we are going to let our readers and followers do the voting!! So again, if this sounds like something you want to jump in on, head to this blog post and read a bit more and get going on a room refresh – big or small!
Jen’s post this week – her basement makeover
Chrissy’s post this week – Some feminine desk ideas for her office
Why do an IKEA Hack?
One thing you will hear me preach over and over on my blog and Instagram is that you don’t always have to go expensive when you want your home to look great.
There are times to invest in what you are buying, but there are also lots of times that some hard work can make something budget friendly just as great.
Take into account the expense of the other suppliers when you are deciding on your project, and make sure you can truly accomplish a polished look. Remember it is only worth it if you can create something either beautiful or useful. Don’t do a hack that leaves you with something subpar.
Supplies You Need for IKEA Brimnes Hack:
To complete this DIY the first obvious is the IKEA Brimnes cabinet. We went with the white.
For us, we are local to an IKEA which makes these projects much more feasible for me, but if you aren’t local to an IKEA – I found this cabinet online that I think would make an amazing alternative. In fact – I almost used this one for my DIY.
8 feet of Cane Sheeting – I actually ordered 9 feet, so I had enough for a mess up, and am glad I did, but if you follow this closely you should be fine with 8 feet!
It arrived in a few days flat, and was jut what I ordered. I know that ordering from ETSY can be a little nerve wracking so hopefully that eases your worries if that’s the source you decide to use! this adhesive
You also need – some sort of adhesive (I used hot glue)
This tool – or something similar
A tarp
Spray paint for the handles or a new set of handles
1 piece of wood (we had a piece of poplar) – 1 x 3 x 31.25
Nails or Nail gun (we have this nail gun and love it!)
How to Upgrade your IKEA Brimnes Cabinet
Below is the steps for actually doing this hack. I will tell you that this hack is both easy, and tricky all at once. You need to be patient with a couple of the steps.
Firs you are going to assemble your cabinet as per the instructions. It is not a hard assembly in terms of IKEA, and aside from attaching the doors, you can do the entire thing per the instructions.
Once the cabinet itself is put together put it aside to work on the doors, where the true hack takes place.
Removing The Glass
Now that you’re ready to get started on the hack – you are going to notice that the glass doesn’t easily come out of this piece. You are going to have to break the glass.
DO THE DOORS ONE AT A TIME – I WILL SHARE WHY
We took the doors to the garage and laid them on a large tarp and folded the tarp over the cabinet. Take a hammer and break the glass. It isn’t super easy to break, so you will have to use some force.
Once you have done that you will see that all of the glass doesn’t just fall out.
Take the tarp off, but leave it UNDER the door. Take a small tool (like a screw driver) and slowly, and carefully remove the rest of the glass. You will have to be really careful – my husband did get a couple of small cuts in this process.
When we did this, on both doors one of the horizontal pieces fell out. I assume that it will happen with all of them, due to the fact that it happened on both doors for us. This is why you only want to do one door at a time.
We then took the door inside, laid it on top of the other door with a piece of Saran Wrap between them and glued the piece that fell out back in CAREFULLY using this glue.
We found that it was easier to know it was perfectly lined up to just lay them on top of one another.
Once your first door glue is drying move on to door 2 and follow the full process above!
Adding Cane to the Doors
Once your doors are both glass free and the glue is dried you are ready to do the exciting step and start to see how it comes together.
I have personally never worked with cane sheeting before, so this was all new for me, and the first try I made DID NOT work. Once I worked through the problems I made a plan and it worked really well, and before are the steps!
Step 1
Cut one piece of cane sheeting to – 11 1/4 x 15.5 Once you do this first piece and know that it works well for you, you can definitely cut them all, but I feel like it would be wise to try one piece in my method FIRST before you go cutting into all the cane!
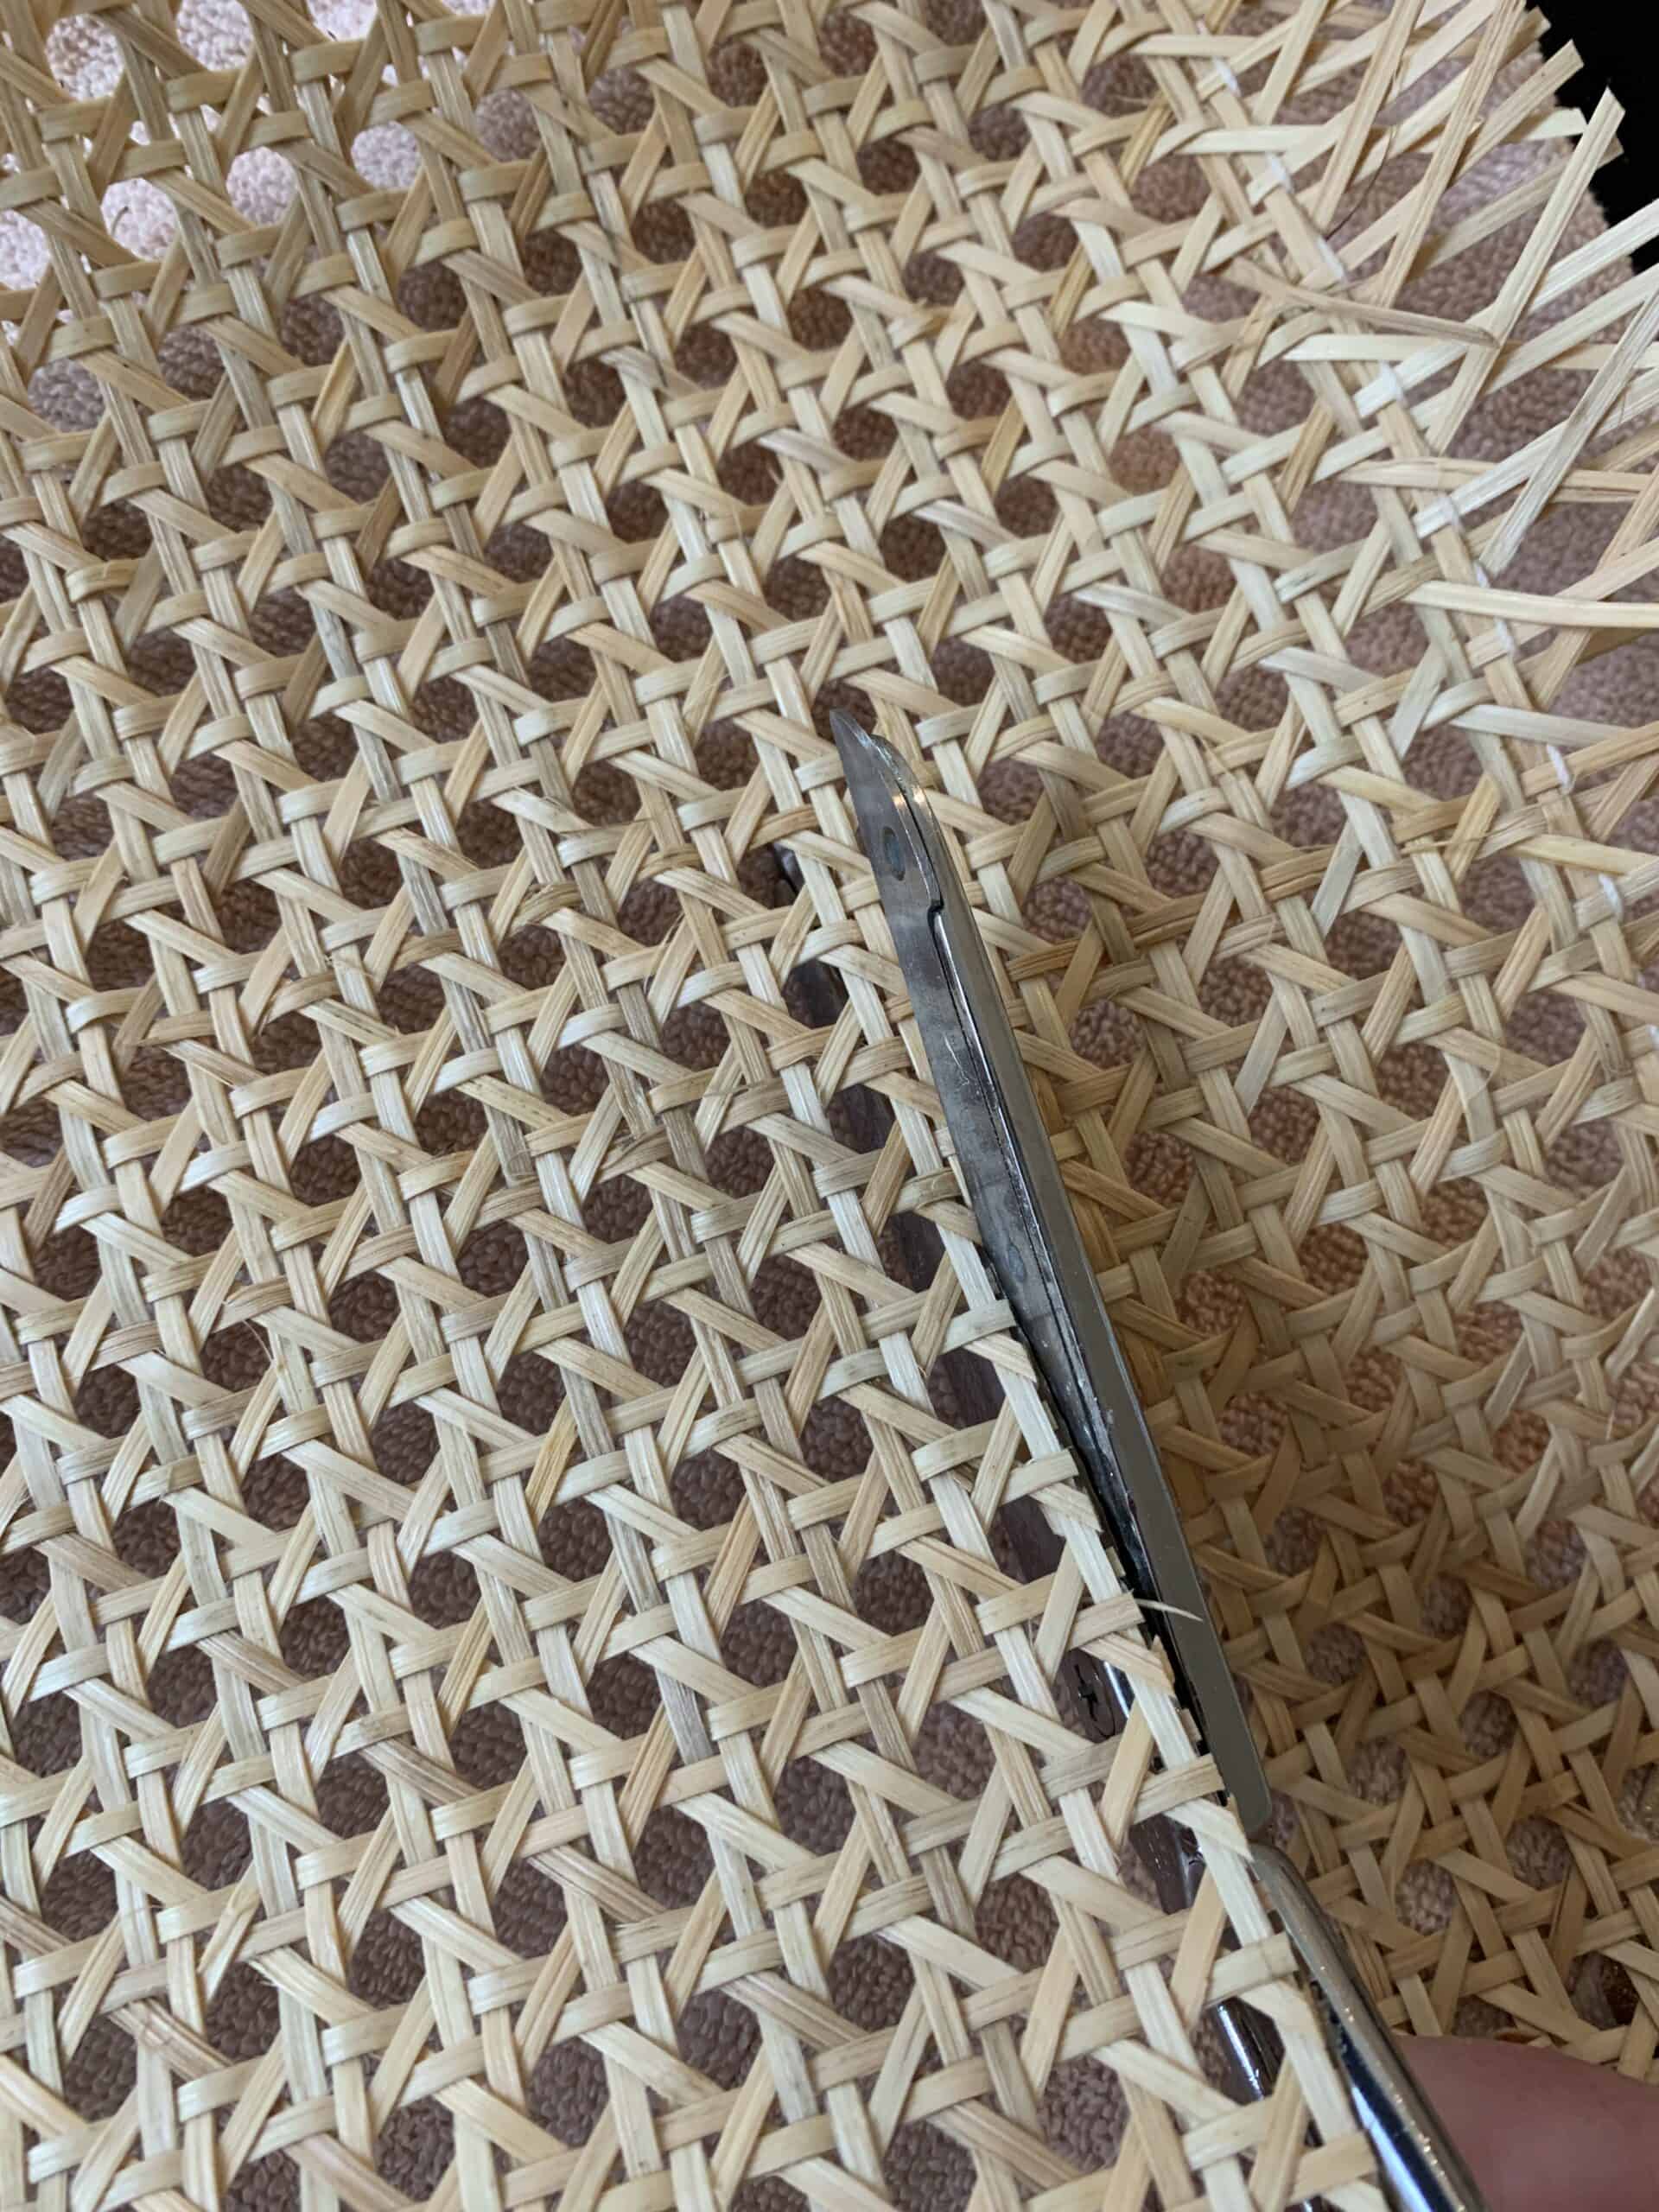
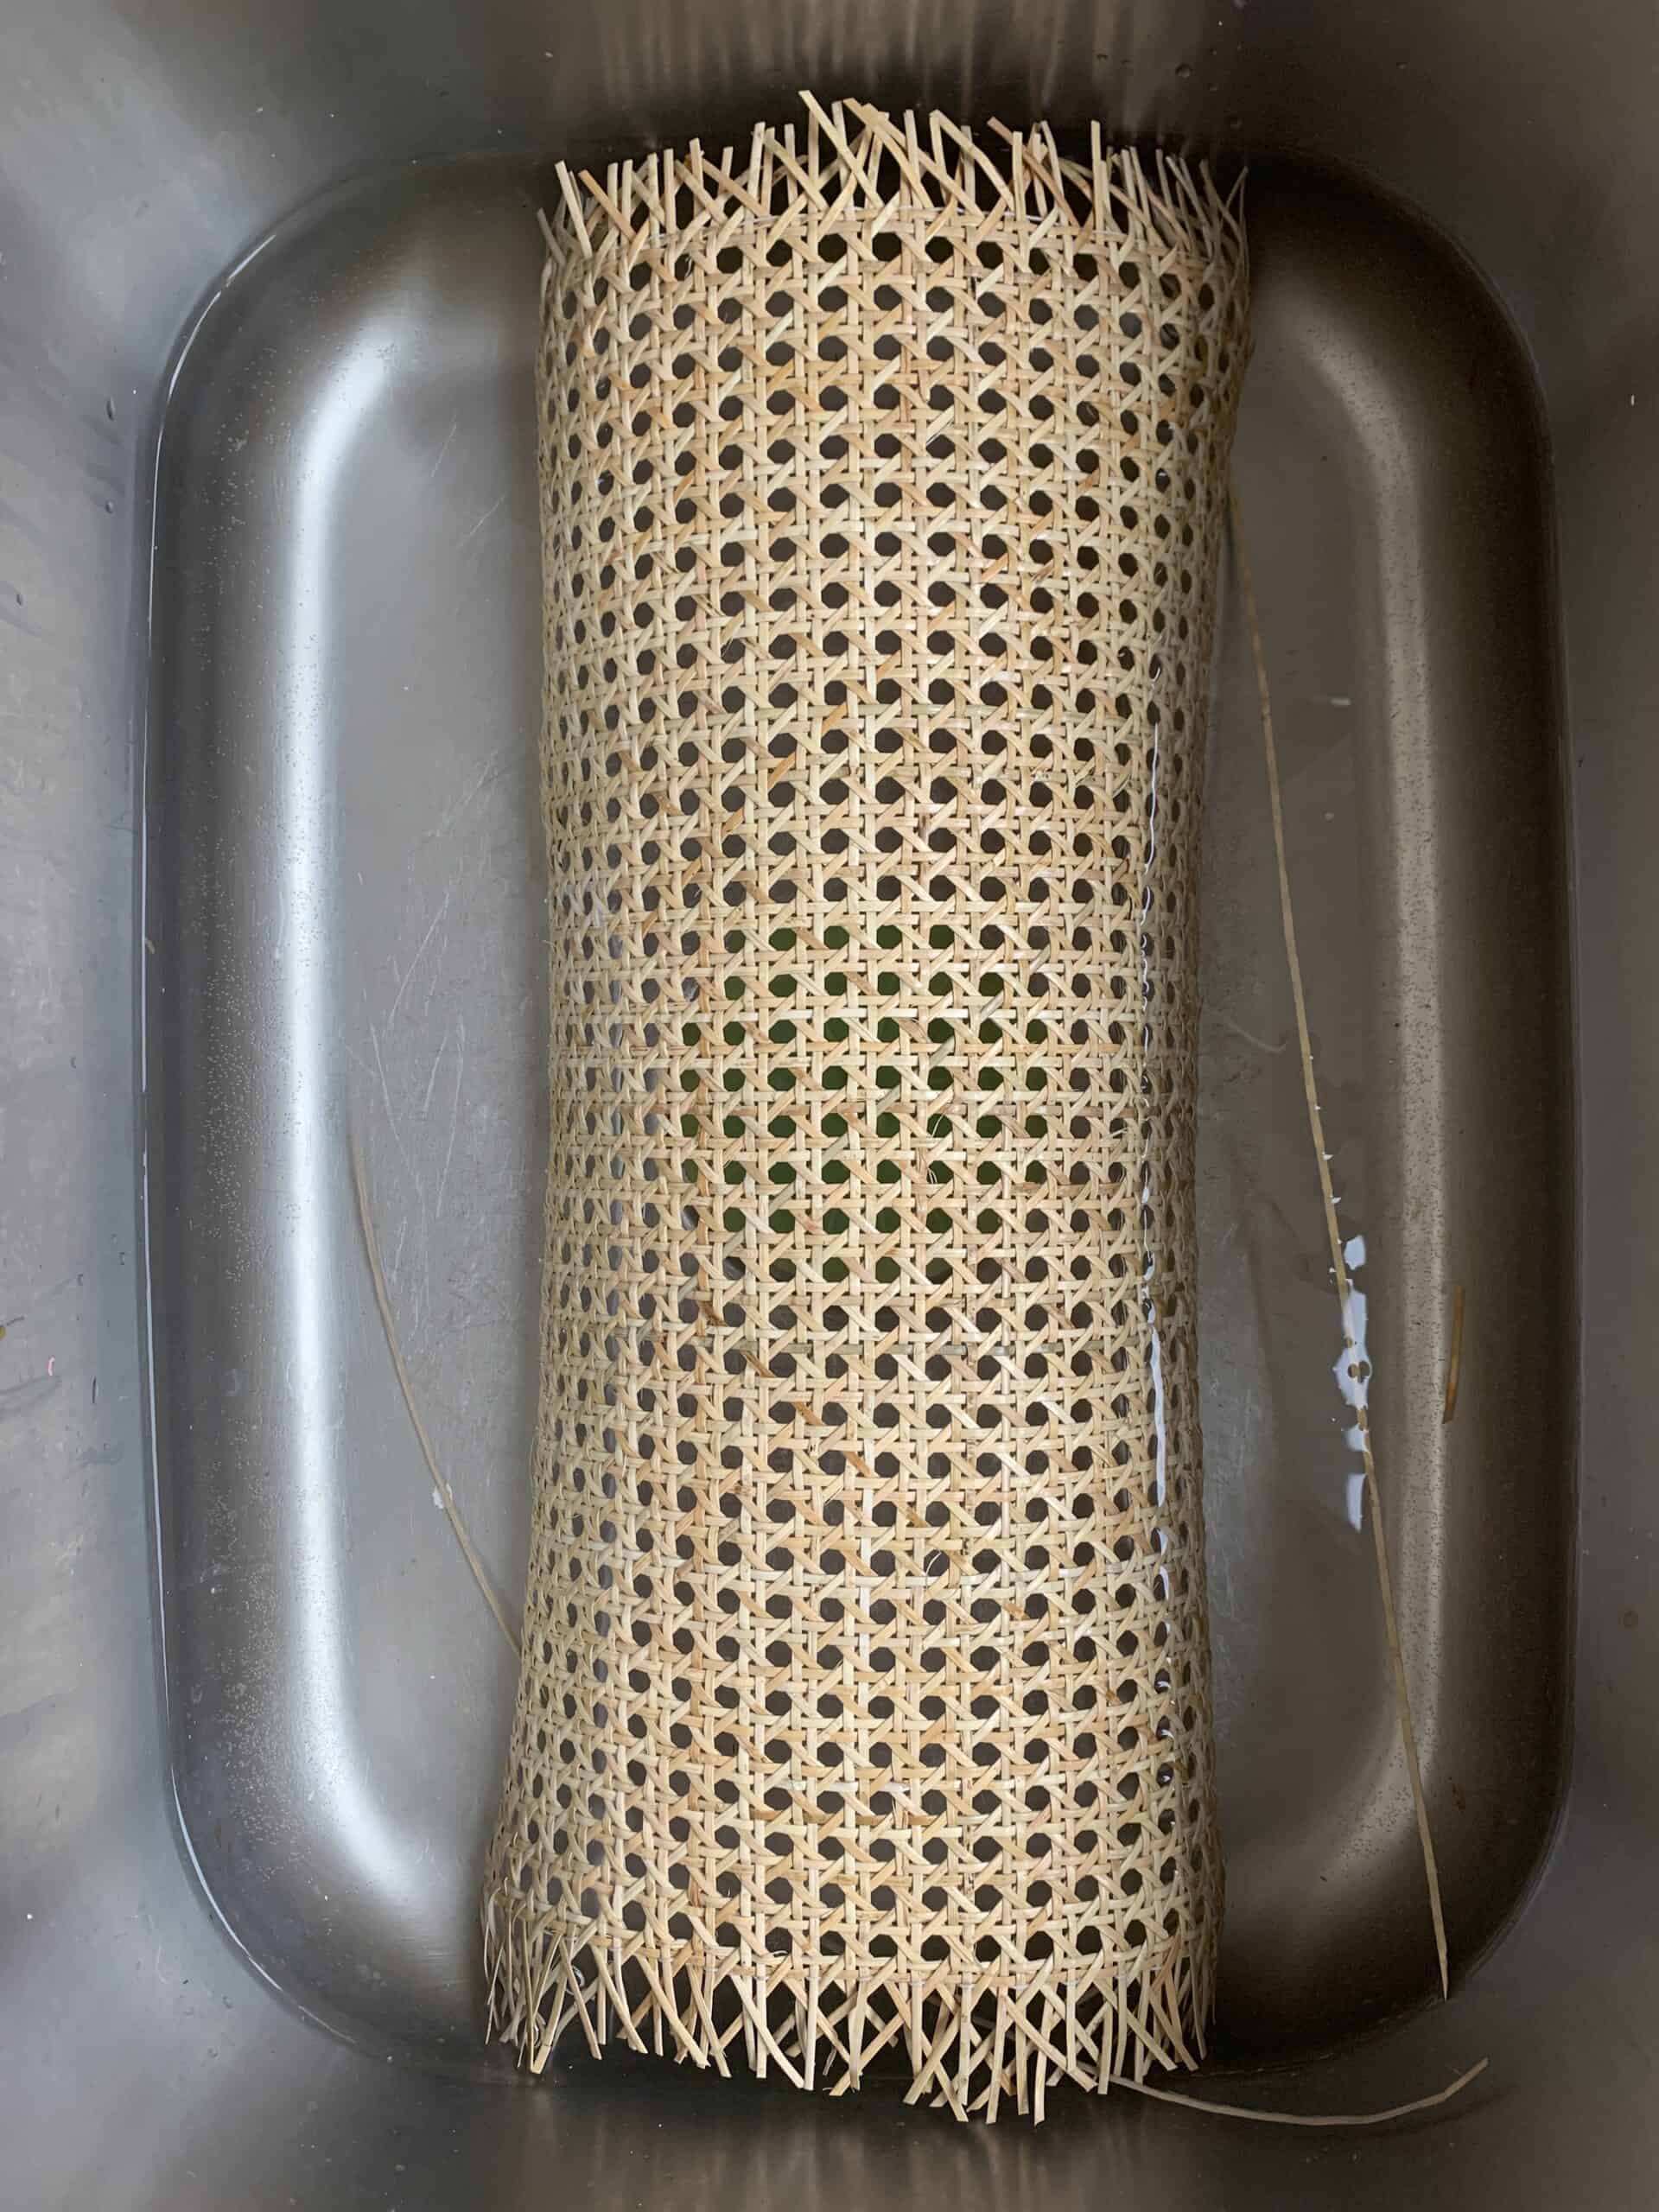
Step 2
Soak your sheet of cane in a sink of water for 5 or so minutes. It doesn’t take long, just allows it to be a bit more flexible for you. Once you remove it from the water, dry it off on a towel and take it to your door to get to work. Do this step one at a time, even if you cut them all in one step!
Step 3
Put your Cane sheeting into your first door opening. I am going to give you some major tips on this step, but know that it might seem confusing until you finish this first square.
In the video at the top of this post here are some short clips showing how I did this, and I highly suggest watching them – it will make it much more easy to understand!
Working from the INSIDE of the door (so the outside should be laying on your surface), take your piece of cane and carefully slide the sheet into ONE SIDE and THE BOTTOM.
You are going to find that you can sort of easily slide in one on each, but then you’re going to think I told you to cut it too big. YOU DIDN’T!
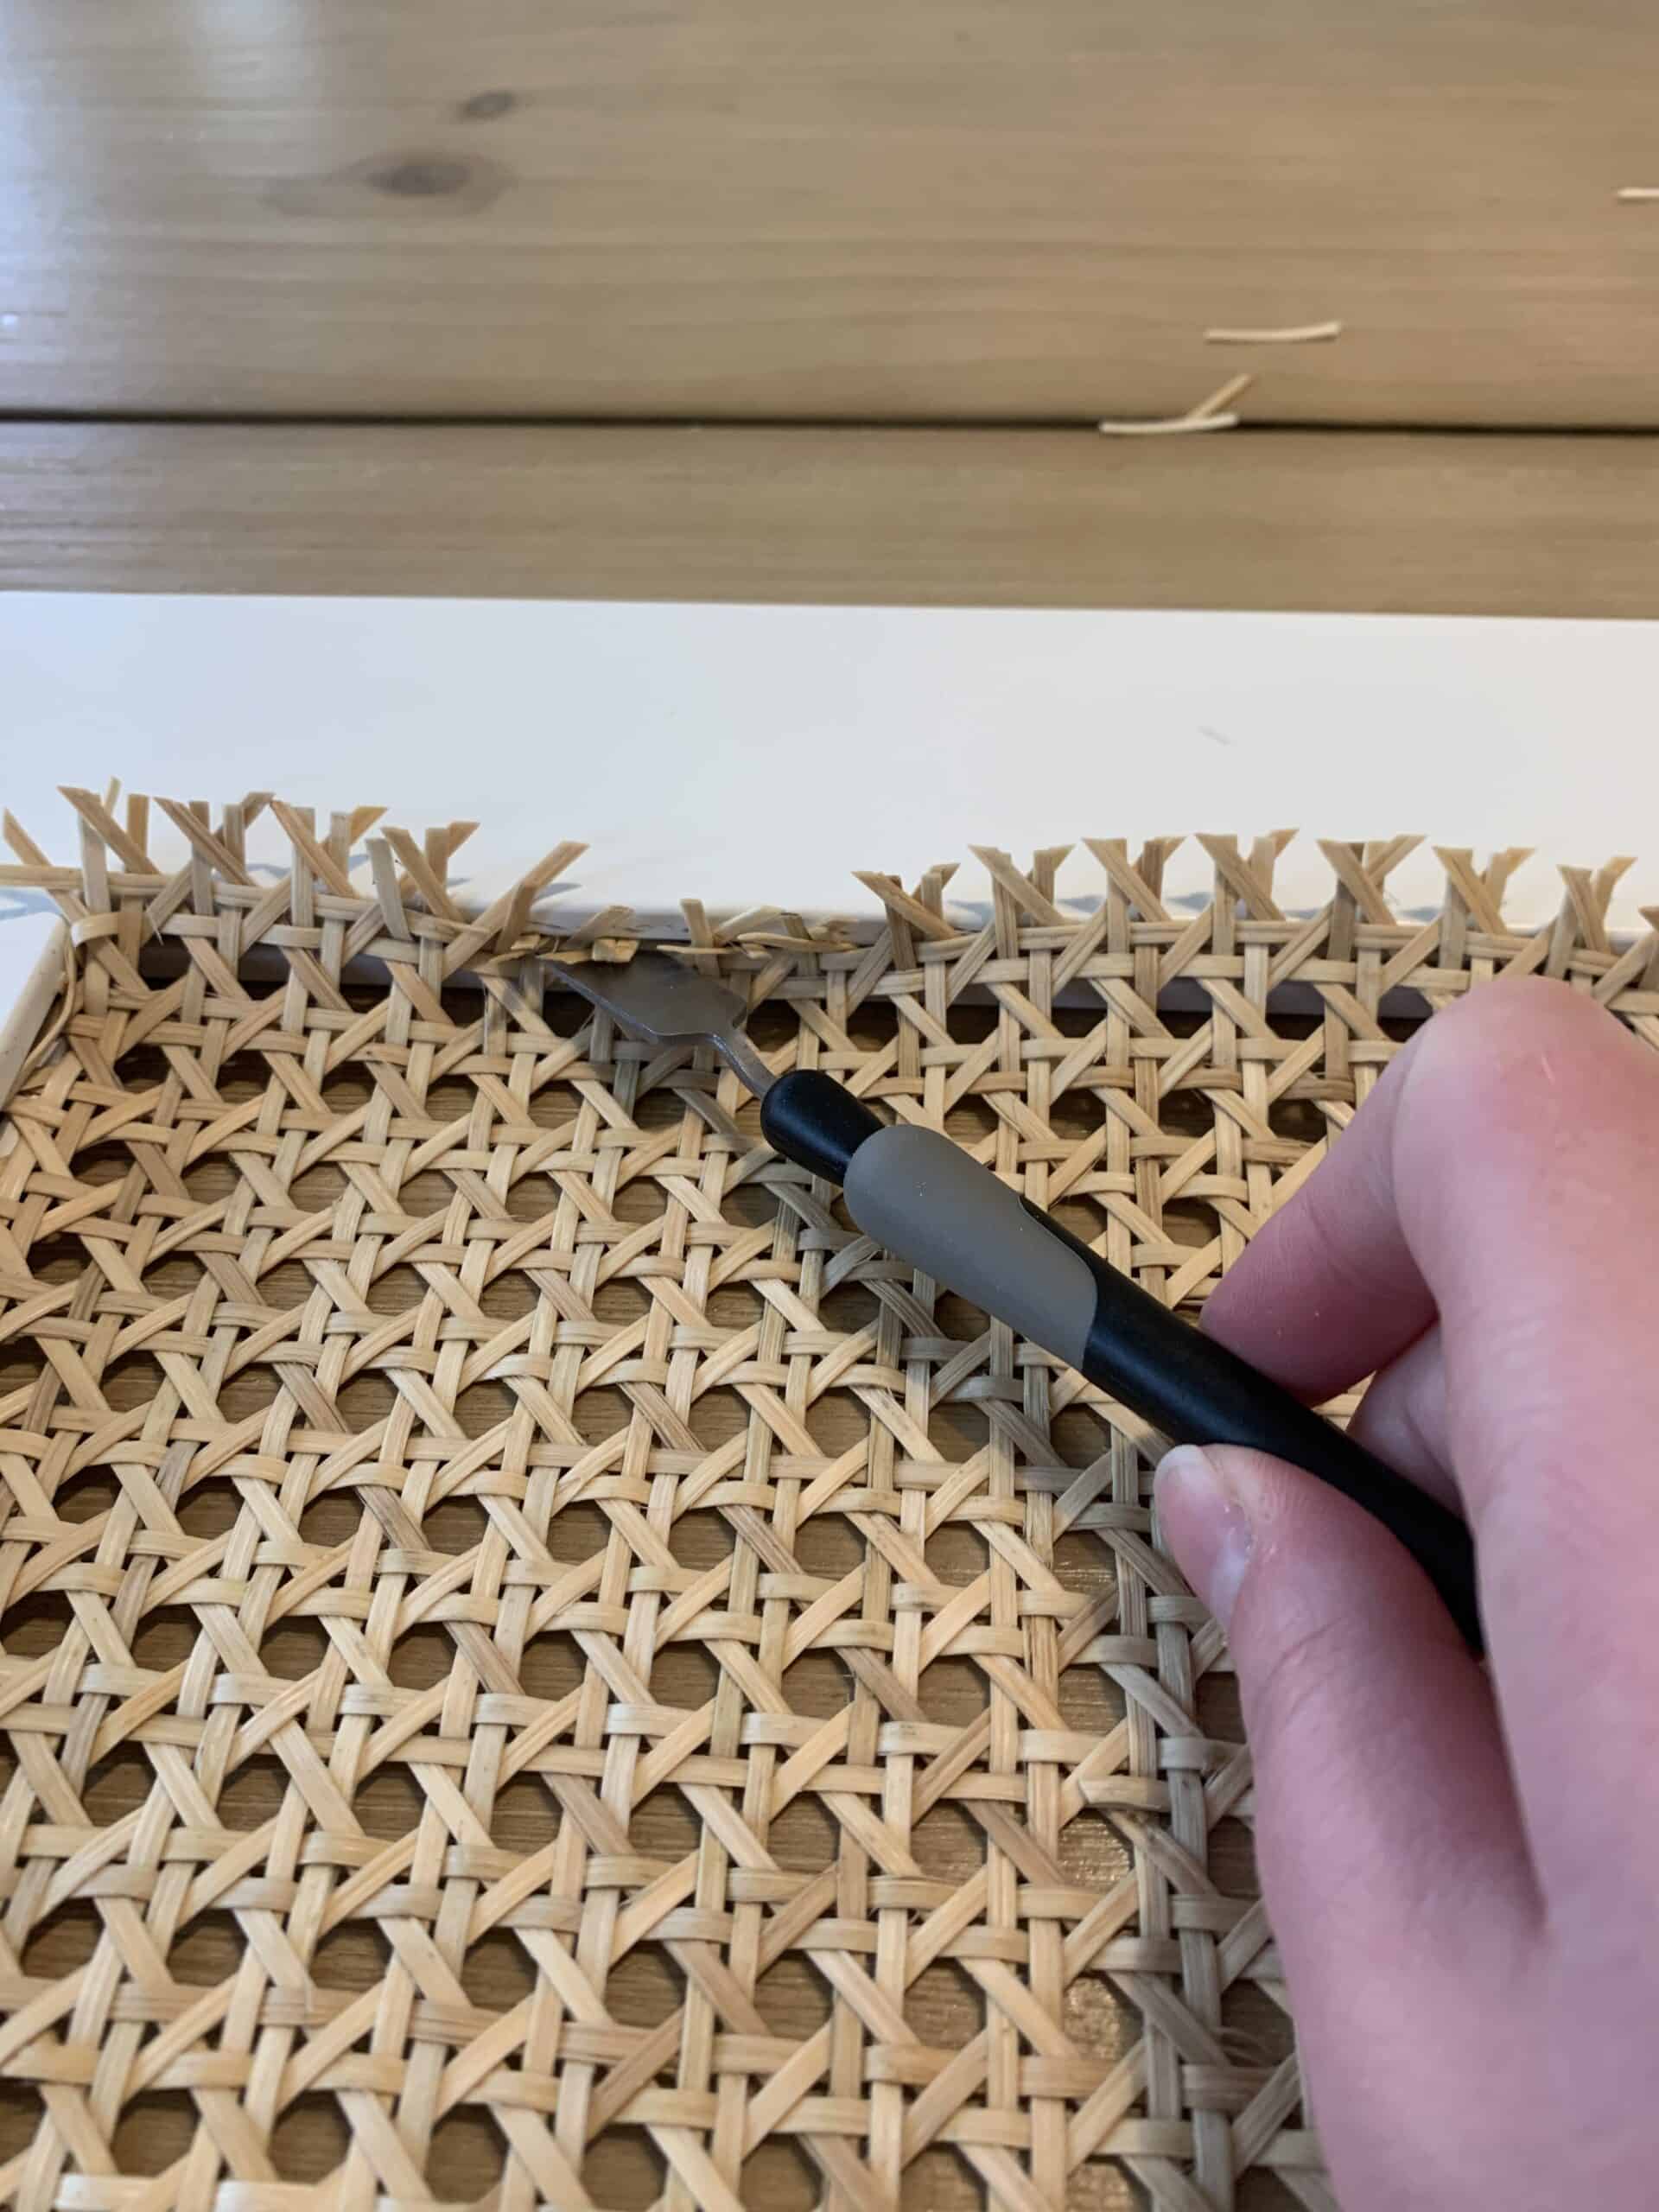
Once the sheet is fully in on those two sides make sure you push to get it AS FAR IN as it will go. Now you are going to take your tool and start to sort of shove in the cane on the other two sides. As per the video you will get the two sides In slowly, but there will be lots of whispies hanging out.
Once it is all in go back through and slowly shove those in with the tool. That helps to keep it really tight.
One huge thing to remember in this is that you want to make sure as you are pushing it in on those sides you’re holding it tight in the sides you already had slid in easily. Keeping those two sides as far in as possible is important.
Repeat for all the squares on each door, and then assemble your doors onto the cabinet!
Now you need to look to see if any areas need glue – I took my hot glue gun and shot some glue into the gaps from the inside of the door to keep things in place. I worked slowly so the glue was only down in the opening, but it kept things much more secure!
This is also why I told you to assemble with the top and bottom in mind. It is easier to shoot the glue DOWN into the door verses up. I didn’t think of that with door one so adjusted for door 2.
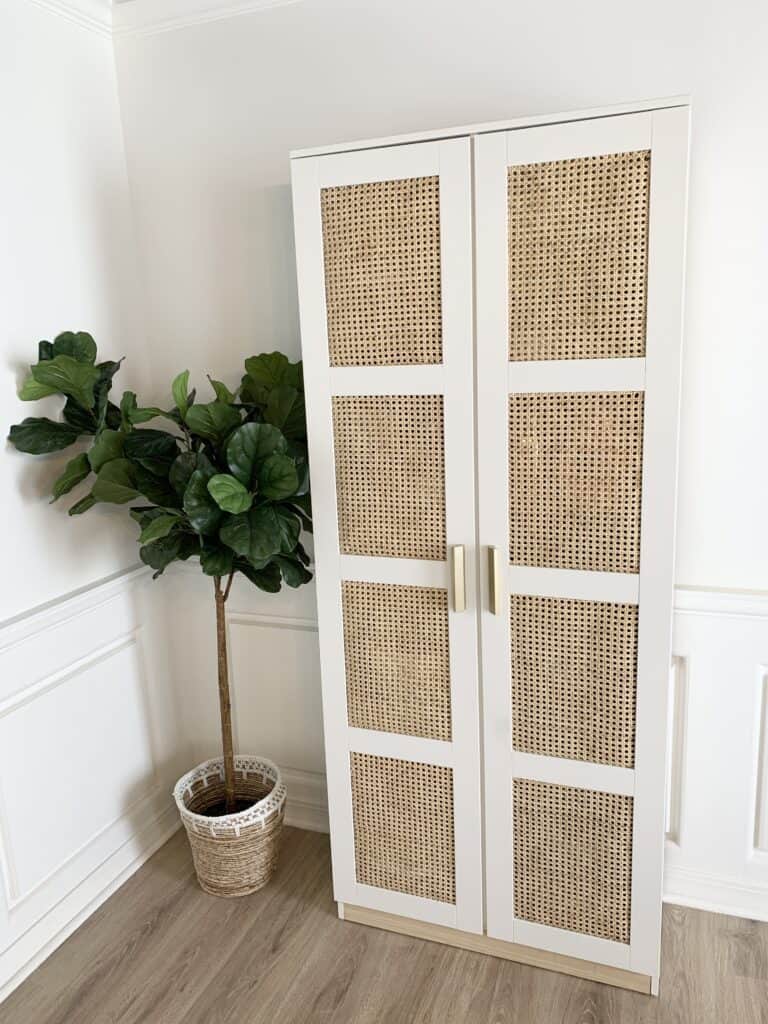
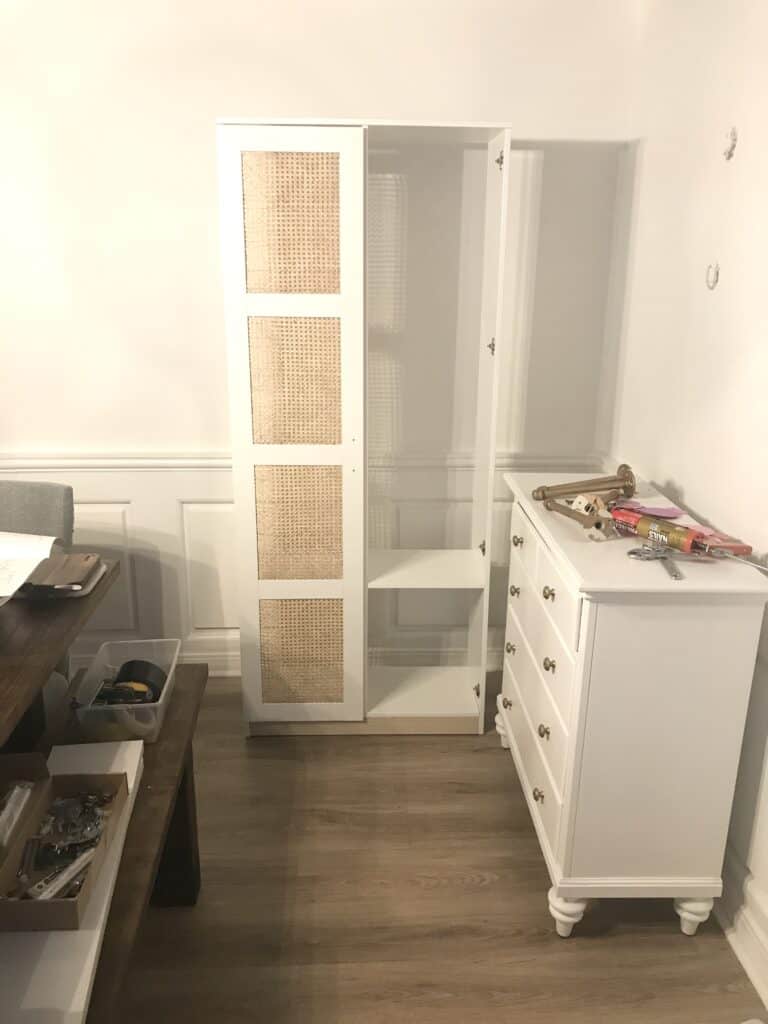
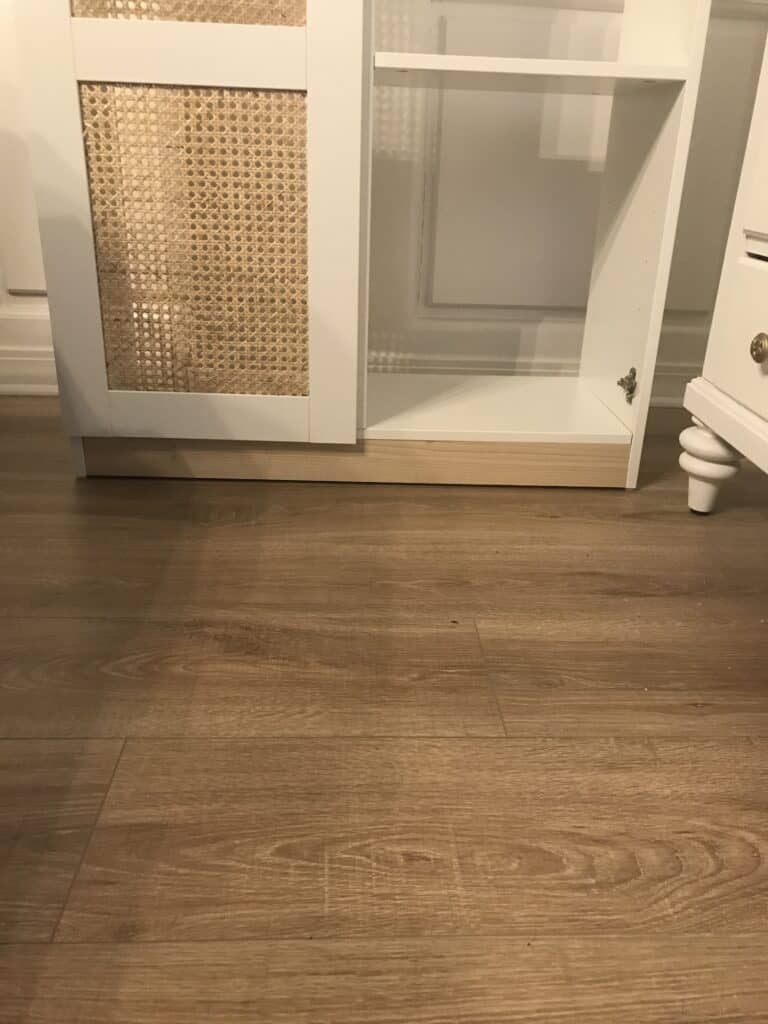
The Details
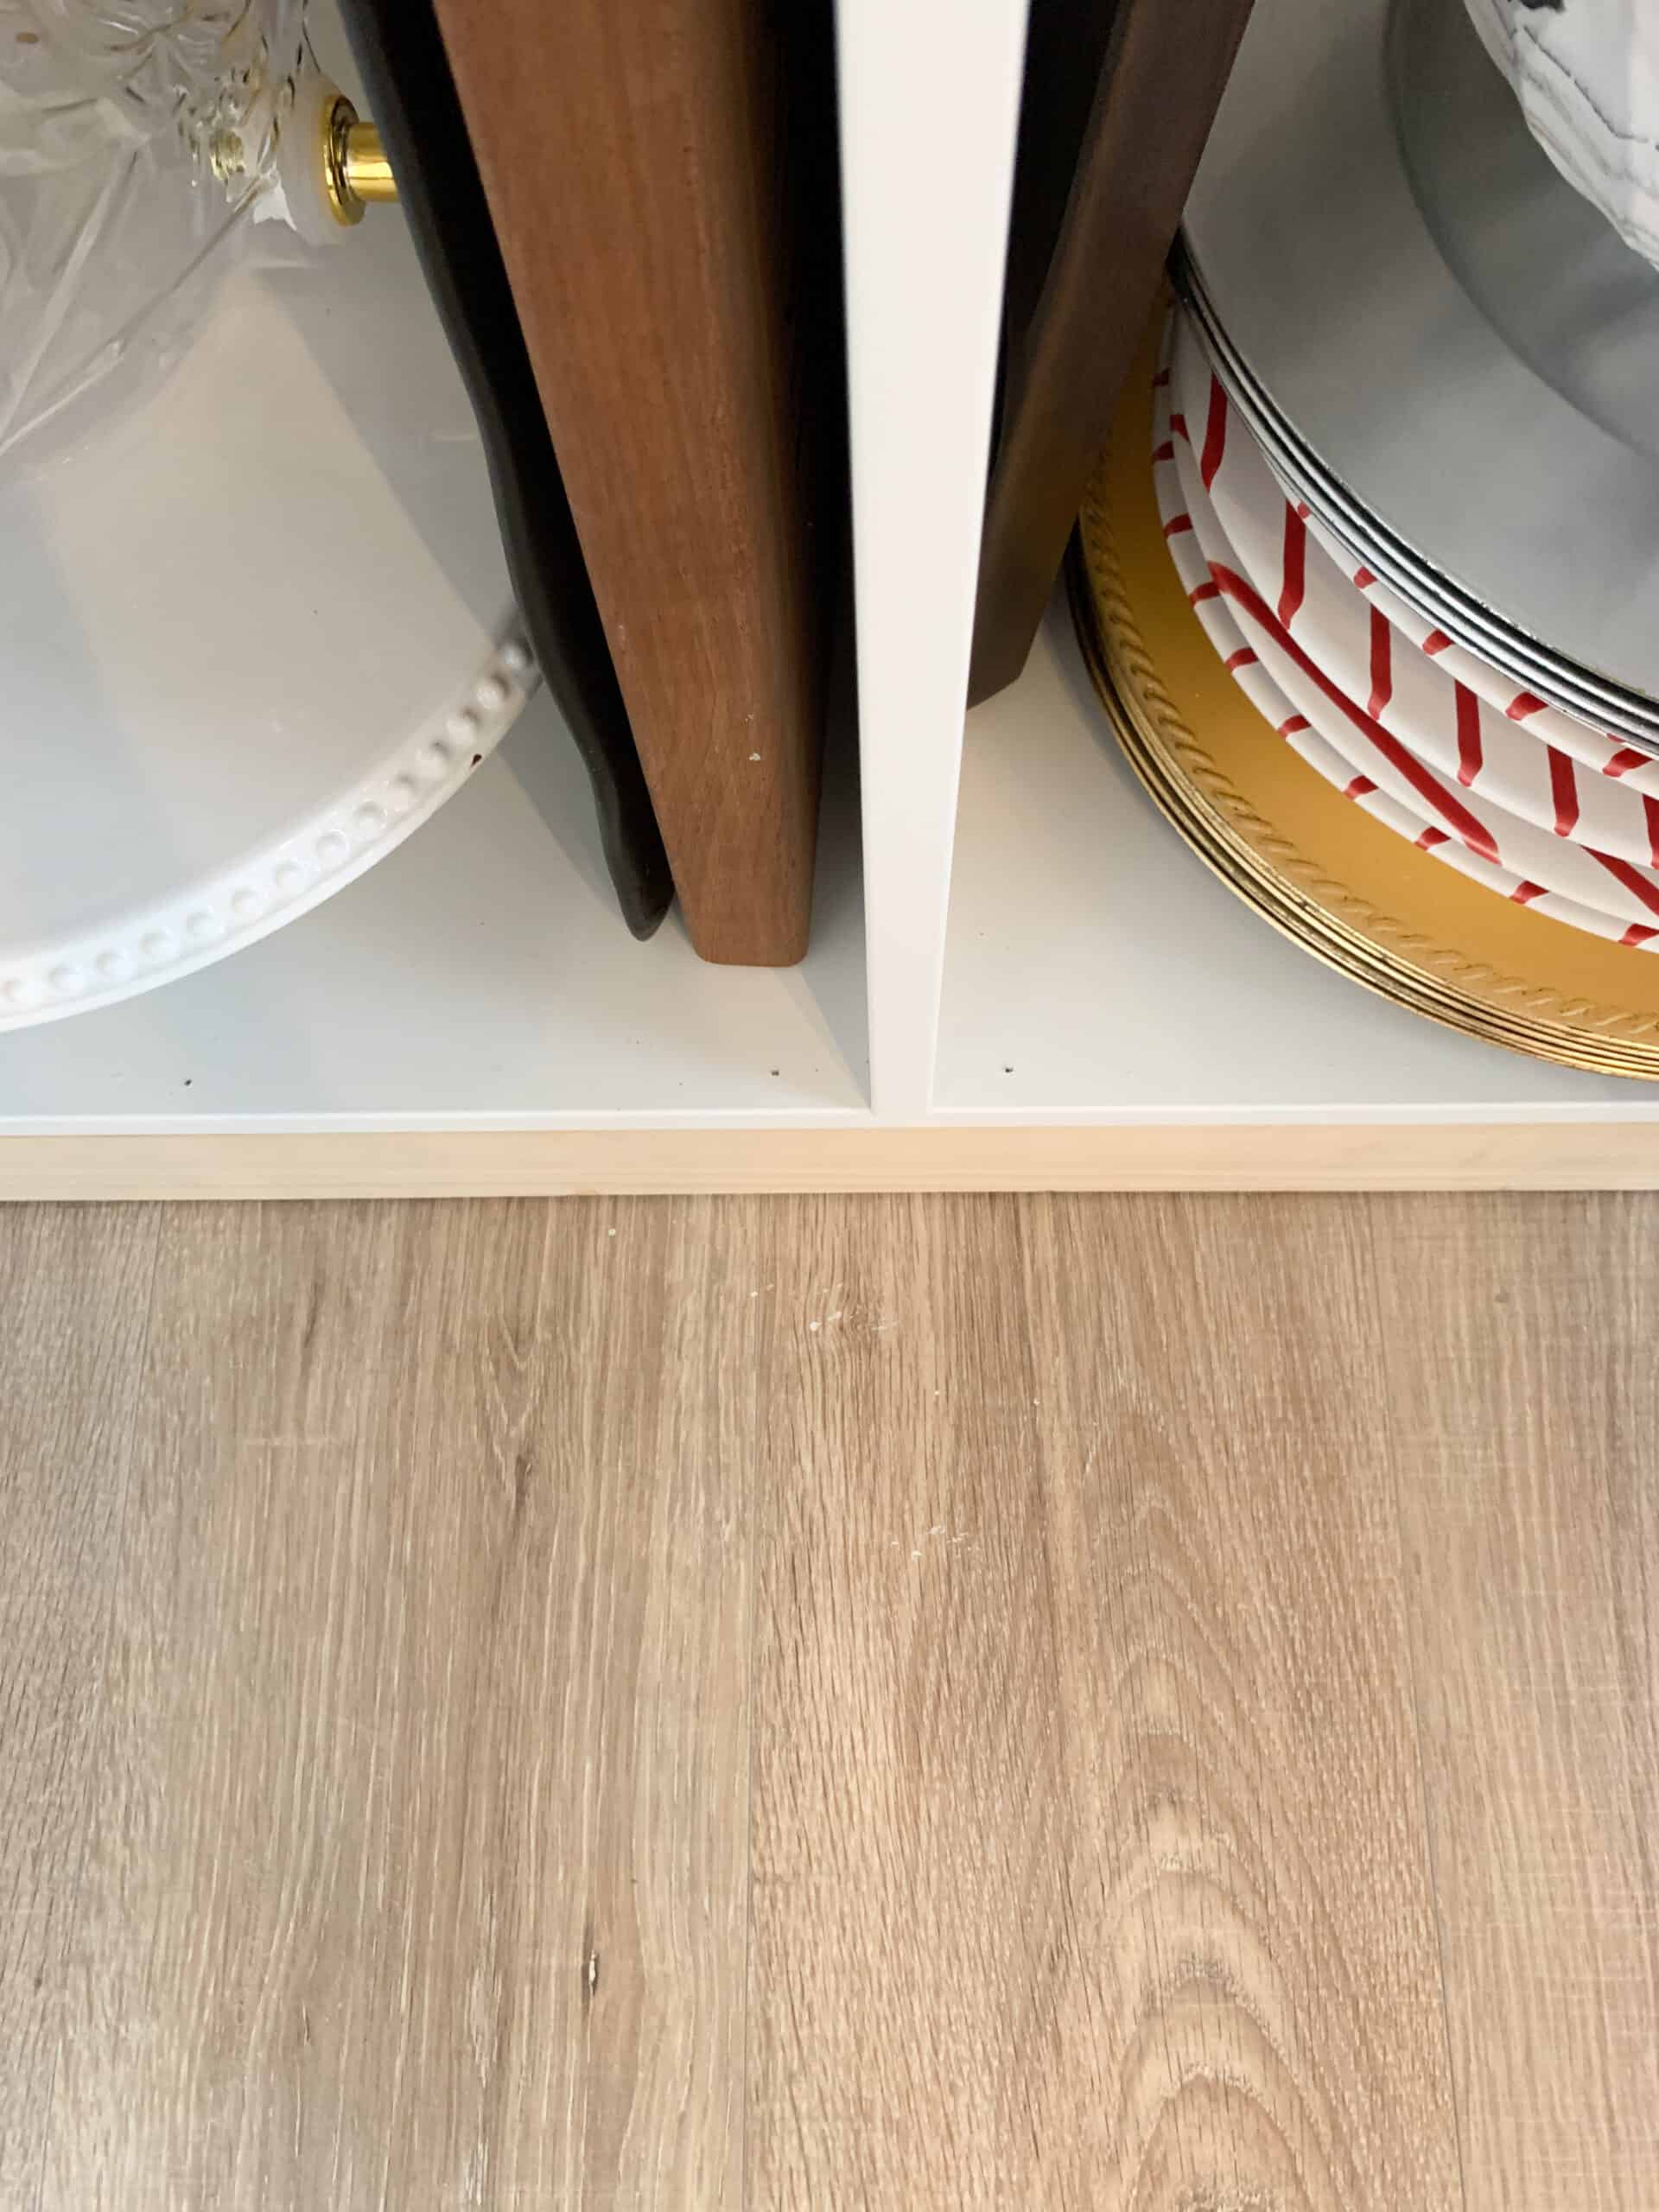
Now your IKEA Brimnes cabinet looks pretty well put together, but one thing I am not a huge fan of when it comes to IKEA pieces is that bottom piece. To me it has a slightly inexpensive look to it (because you know…it is), so I wanted to find a solution.
We took a board and nailed it in from inside the bottom of the cabinet. I left the board natural because that was actually a detail I loved about the alternative cabinet I mentioned above, so I thought it added interest.
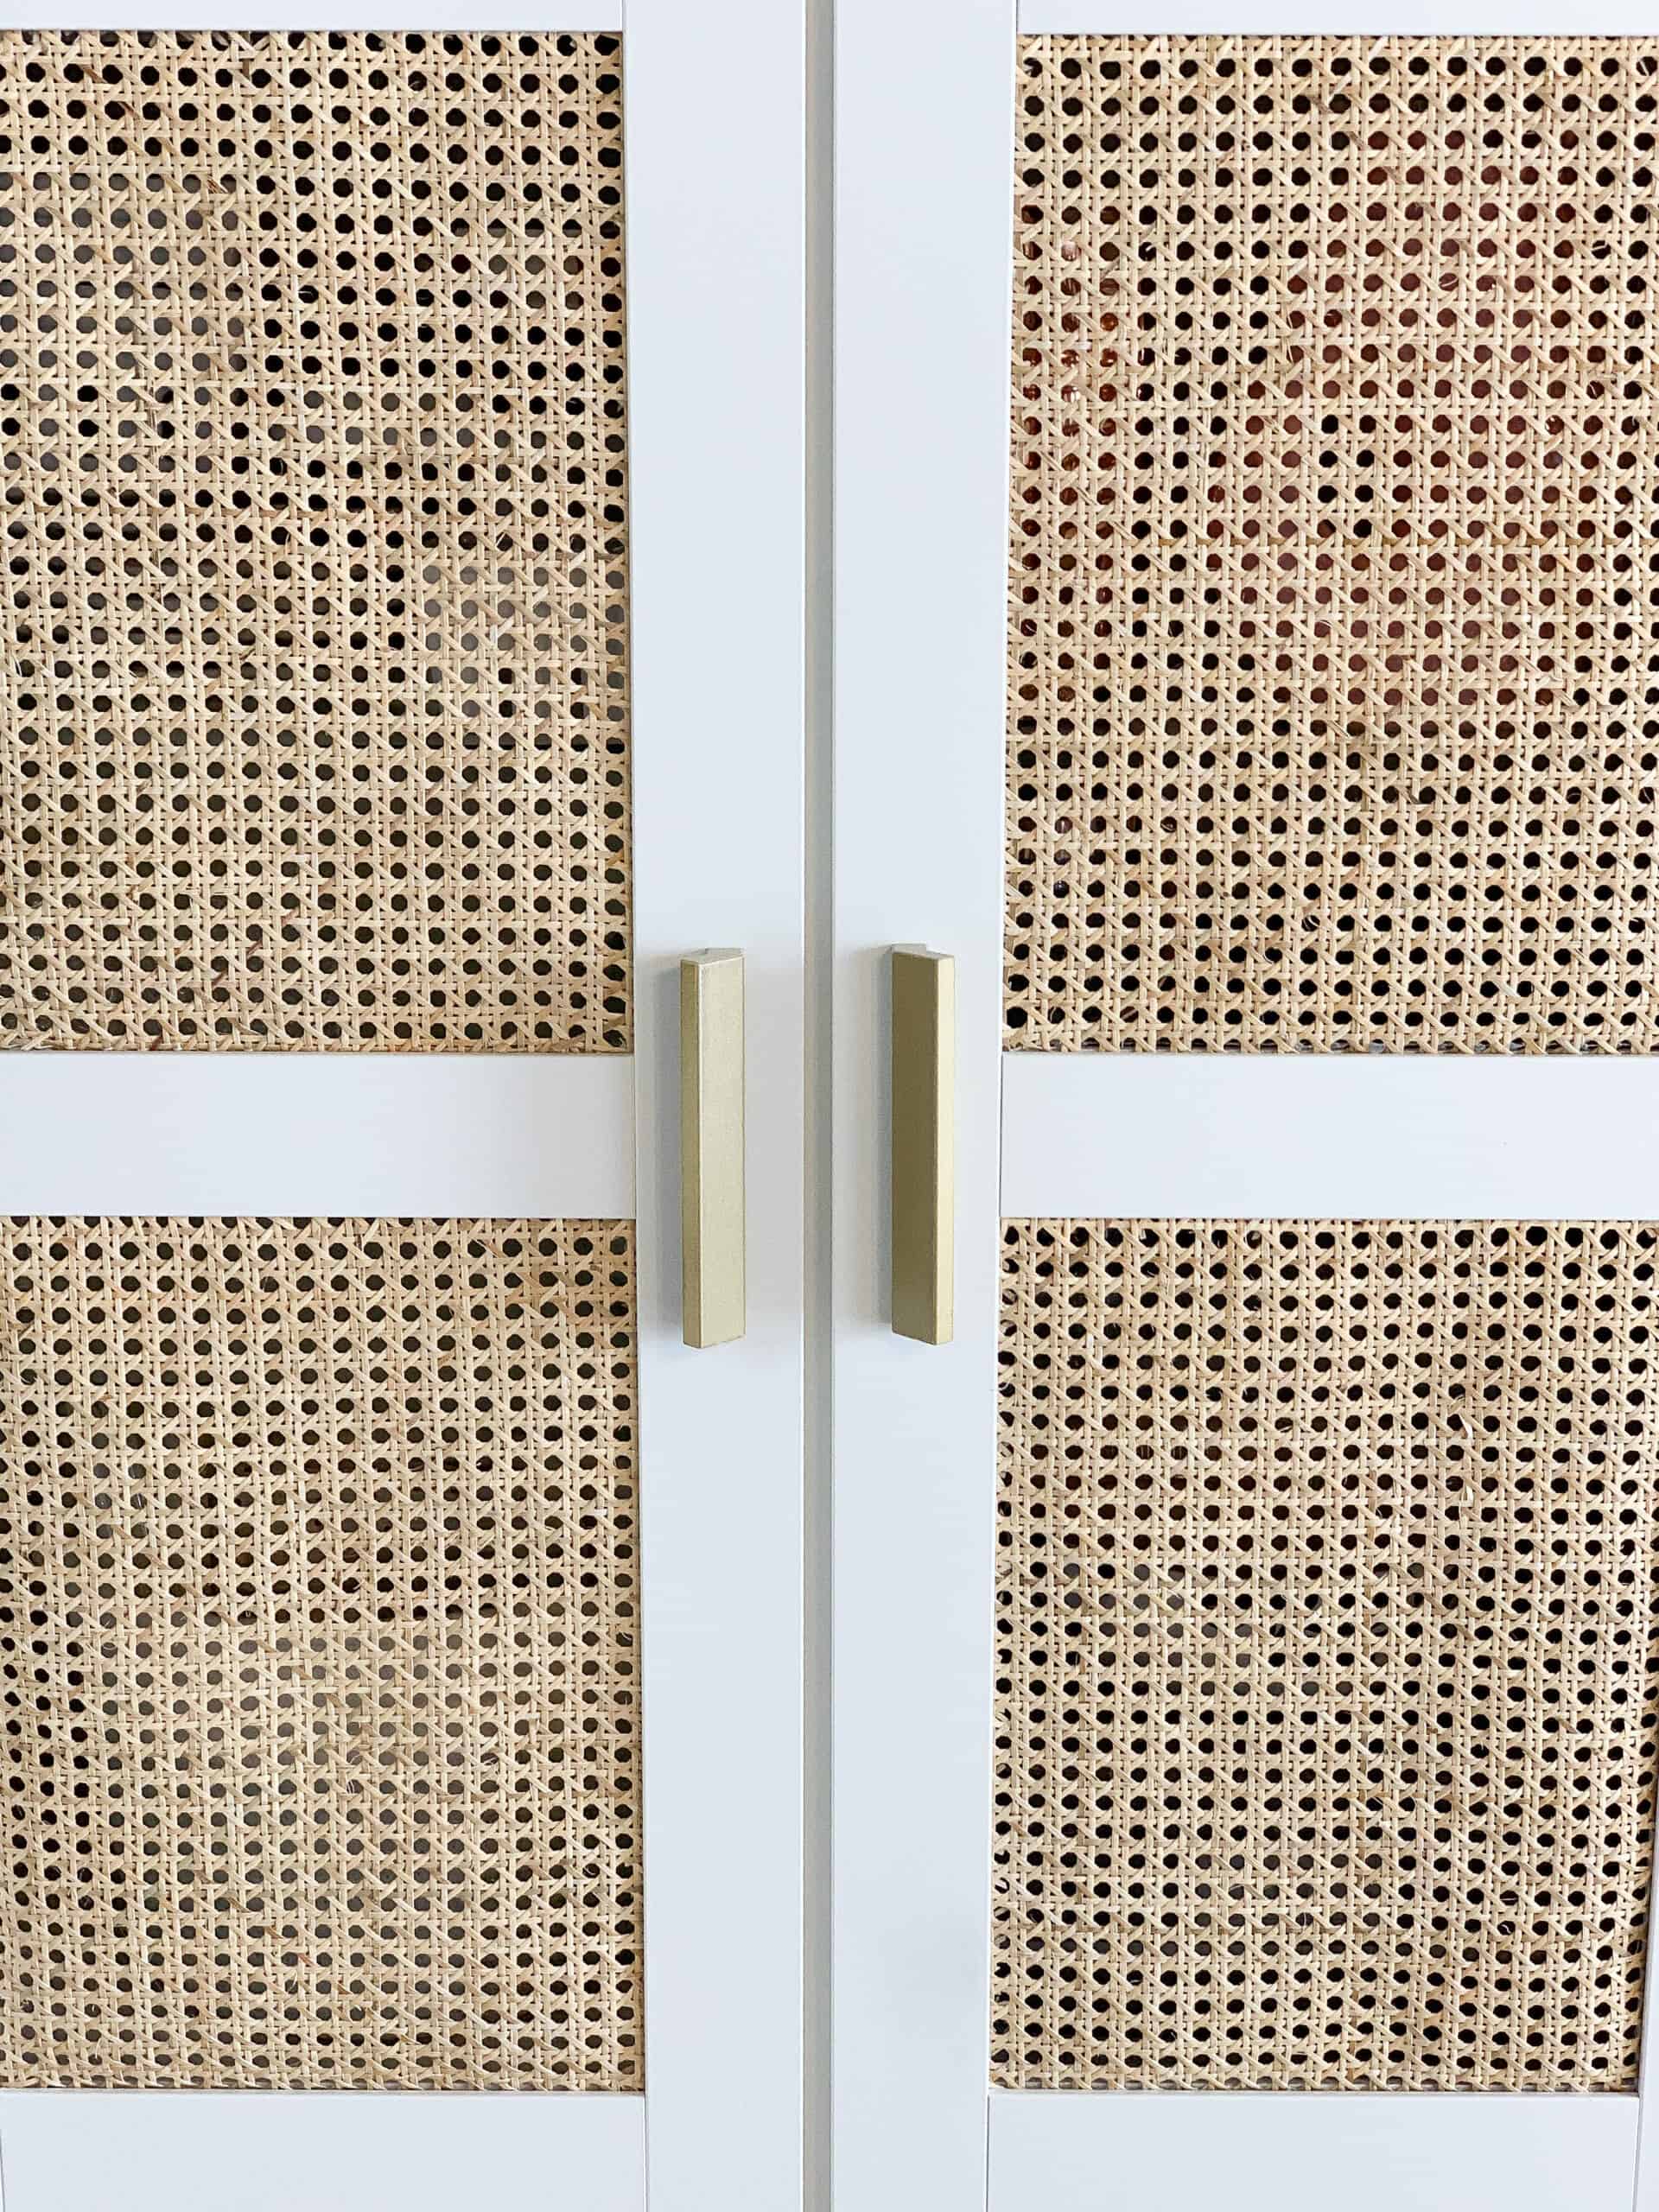
For the handles, I actually originally purchased pulls from a local store that I loved, but the measurements on these is not exact, and they didn’t fit.
We decided to try spray painting the ones that came with it gold and I figured if I didn’t love them, I would throw them out and buy another set. I LOVE the look of the handles that came with it painted, so it ended up being an affordable step!
Total Cost:
The total cost of this cabinet for me was $287. One thing to note – the cane is more expensive than the cabinet itself. It is definitely not a super affordable material, but made a huge impact and for me was worth it.
The gold spray paint and piece of wood were both items we already owned, so we were able to do this on a pretty small budget.
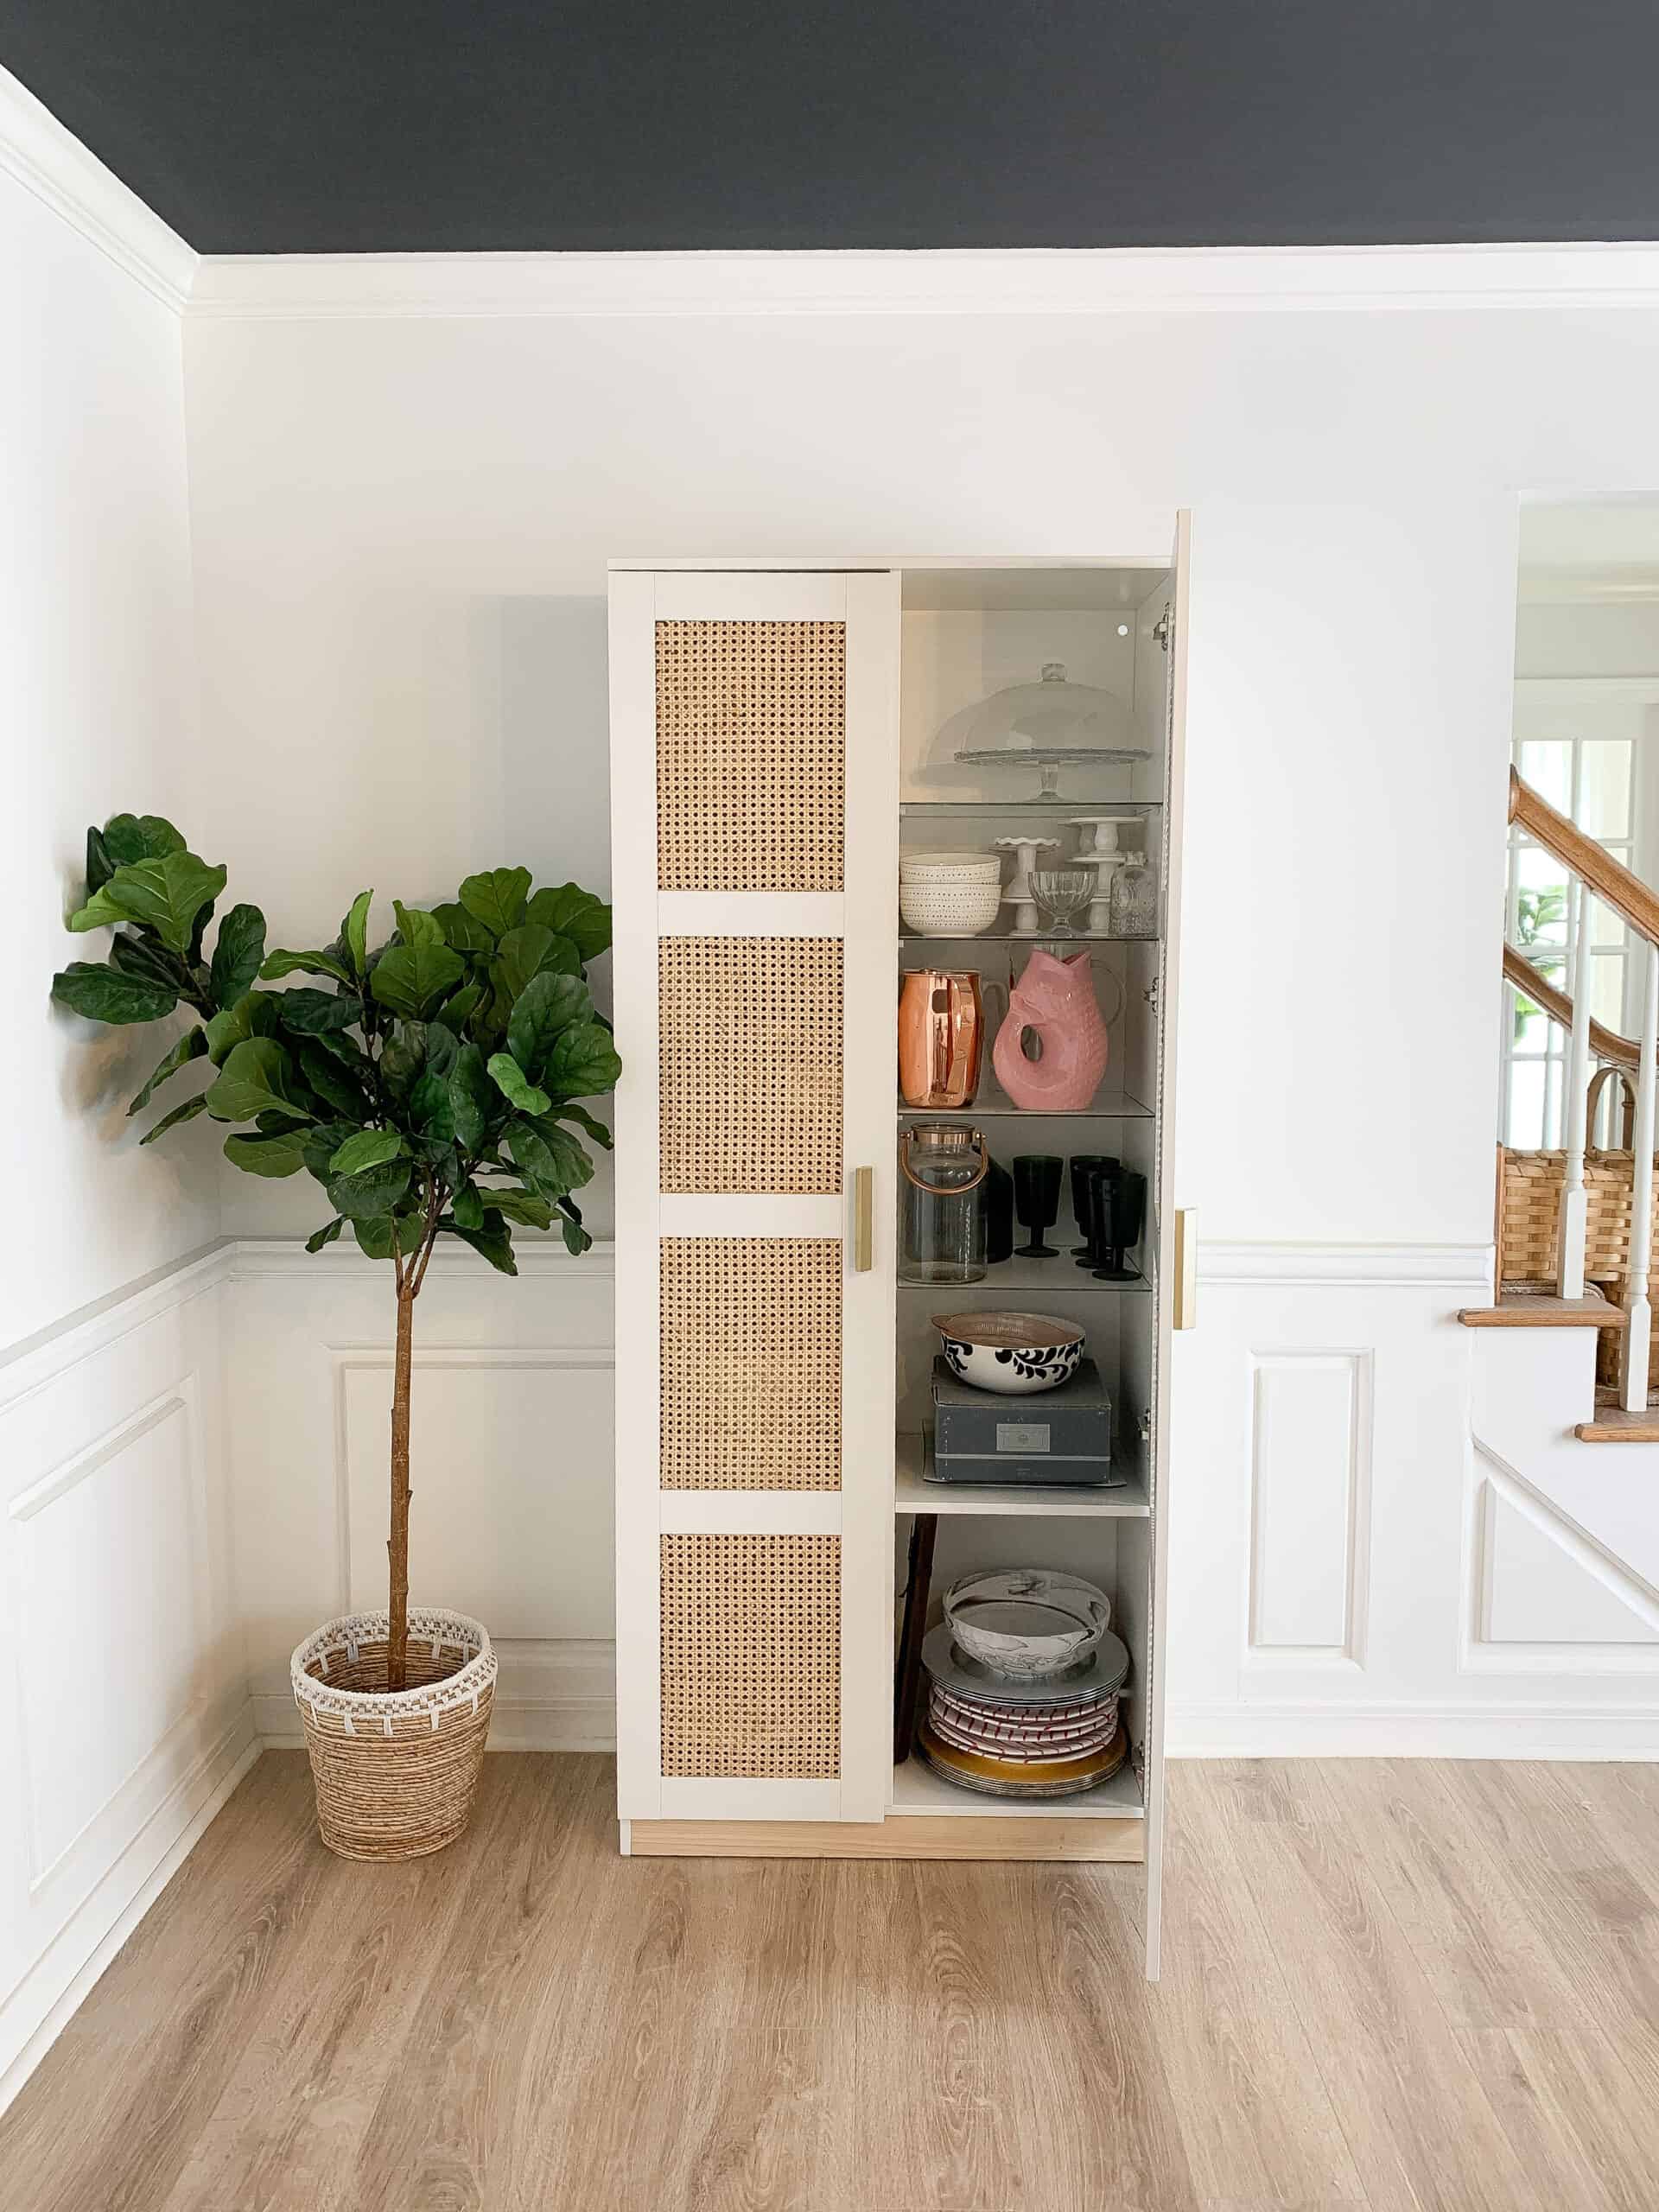
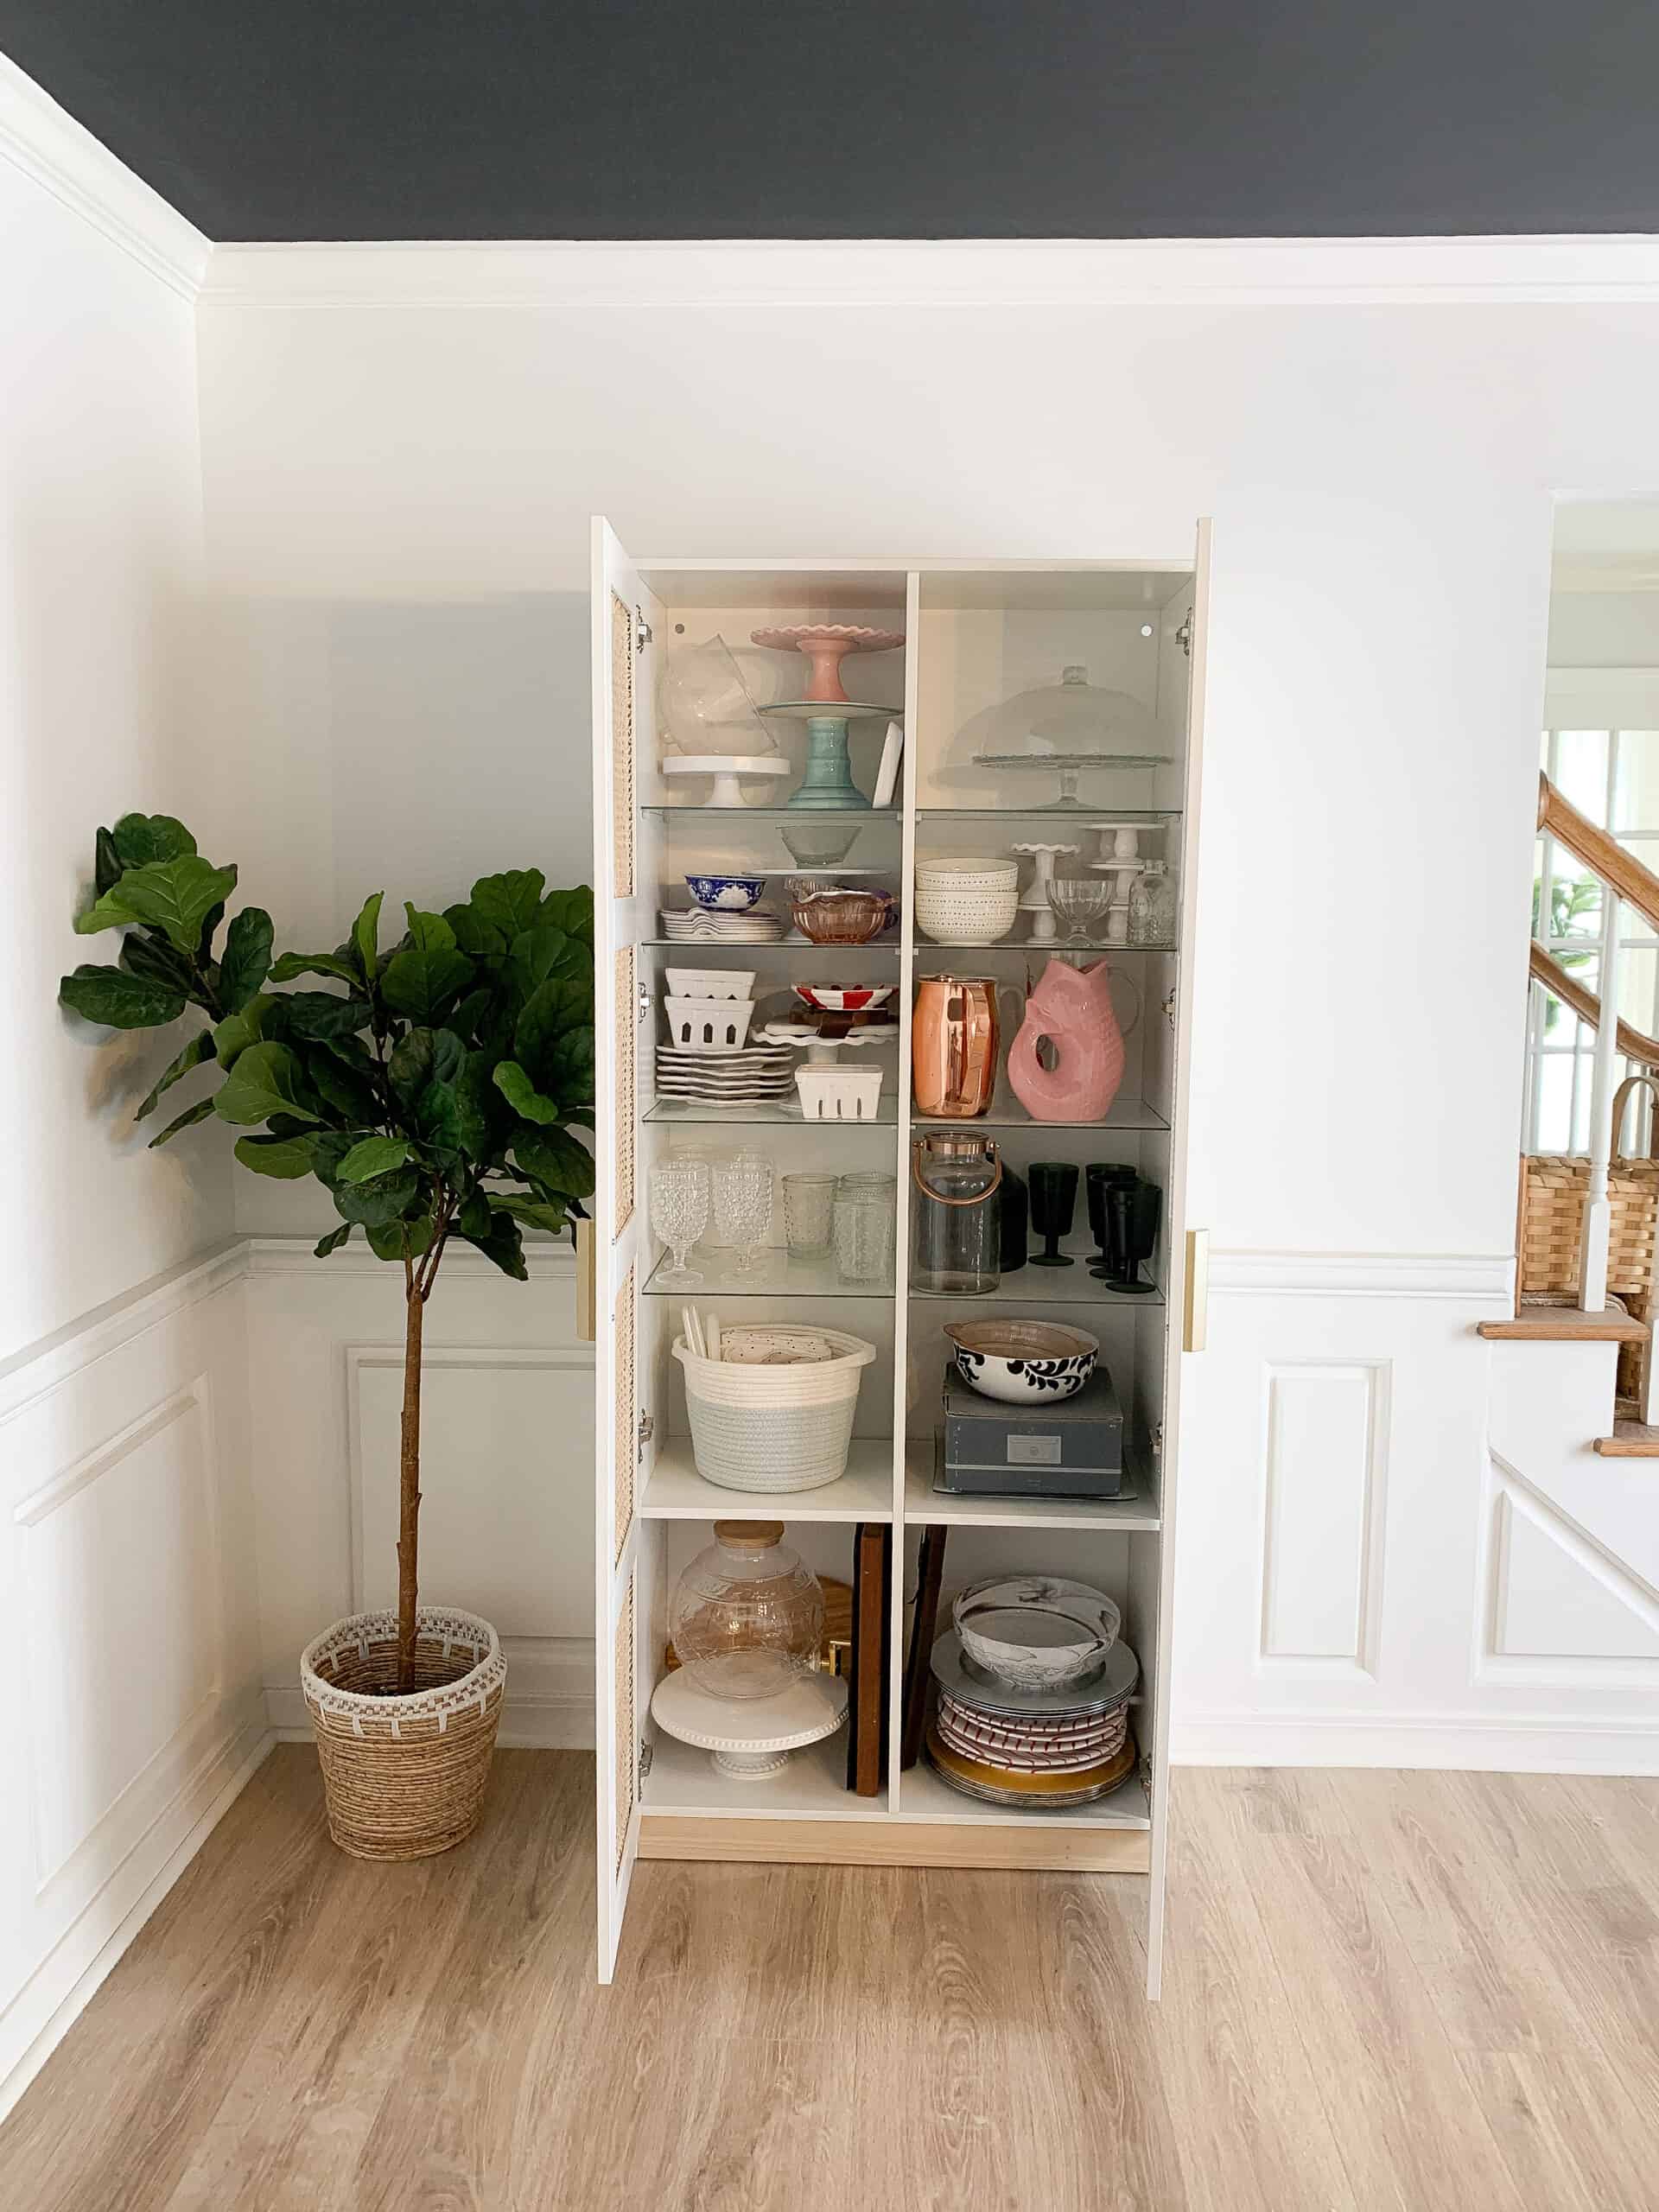
Overall I am super happy with the end outcome, and honestly am considering a second IKEA Brimnes down the road. Once we did the trouble shooting on the harder aspects of the project it really wasn’t too hard to put together.
I would say You will need about a week from start to finish, and be sure to order the cane right away so it is ready and waiting to be used.
Pin the Photo Below for Later
Pin the photo below for this cane IKEA Brimnes hack later, and if you have any questions leave me a comment below or dm me on Instagram!
This is so beautiful! Thinking about trying it for a some toy storage in our playroom. The gold handles pull it all together- do you mind sharing which spray paint you used for these?
Thanks!
Hi Julia!
I am excited to hear how it goes for you! Here is the gold paint I used!
https://amzn.to/30uSFPW
Do you think I could do it with the glass in the doors. Kind of just like cover the glass with it.
Hi!! I played around with this but I don’t know if there would be a good way to adhere it.
Hi! Fore the cane webbing did you order quantity of 9 from that Etsy shop? This is literally perfect and half the cost of all the others I’ve seen that are half the size.
Hi – thank you so much. We are seriously still so in love with it. I did order quantity 9!
Love these!! What color did you paint the cabinets?
Hi! Love this so much! Can you share the paint color you used for the cabinet itself? thanks!
Hi Lauren – the cabinet comes white so no painting is needed!
Love it!! I want to switch out the pulls- do you know what size I should purchase? Which size did you purchase that didn’t work? Thank you in advance!!!
Hi – I can try to measure. I measured and was clearly wrong haha!
The original Brimnes does only has two rows of storage and a clothing rod. How did you add all the shelving in this? I’ve been eyeing this to store my broom and vacuum but want to use the other side to store cleaning supplies.
Hi – let me look on the site to see if they changed it. I used the glass door Brimnes and all the shelves were included.
Oof we weren’t able to do this – it was a nightmare for us, honestly. We couldn’t get the glass to break, and my husband is SO strong. We ended up getting a tool that shattered glass, but then we couldn’t get the glass to come out of the edges. And we couldn’t get the pieces to fit because of it so cutting was a disaster. Felt like an awful Pinterest fail, and now we are $400 out of luck with a door with shattered glass. Wish it would have worked for us… we really needed the storage
Hi Michelle – I am so sorry you couldn’t get the glass to shatter – I have had so many people successfully make this DIY wonderfully. if you still have the cabinet – grab a putty knife or something similar to help get the glass out. Normally it is one piece sort of causing the others to stick in place. It is definitely a hard portion of the DIY, but very much doable – if you have any questions feel free to email me.
Is the glass in the door one piece that extends from top to bottom?
Hi Anne – it is 1 piece per square.
Awesome, thanks. A quick suggestion for those who are going to try this. Before breaking the glass, tape the front and back with either packing tape or duct tape or both. You can also use the mallot quite close to the edges which might help getting the glass out of the slots …. and makes clean up a breeze.
Any suggestions on what to fill in the slots (where the glass was) if you jut want an open space??
Thank you Anne! That is a great suggestion! I would say you could caulk the slot and get a small amount of paint matched and paint over it and have a really successful project with an open space.
Hi, can you please tell me where you got the plant? I have been looking for such a nice artificial plant like this
Hi Tracy – this was one from Hobby lobby but they no longer carry it. I also have some from Michaels that I love.
Hi,
Is this more of an off white cabinet or pure white ? This design is lovely !
Hi Sadie,
Thanks so much! It is a pure white!
Thank you so much for sharing this! I did after running across your post months ago!It was my first DIY project 😂. It was actually much easier than I expected. I also didn’t have to reattach any of the door pieces, it all stayed in place but I am in France so maybe they made it a bit differently here. We broke the glass without a problem. My husband did it because I was annoying scared to hit it that hard 😅. I realized that it is safety glass which is why it is hard to break but you really have to go for it and don’t let back and then it is pretty easy to break with a hammer. I used leather gloves and the silhouette tool to get the glass out. It took a bit of time but all came out. I also soaked my cane webbing for longer (probably too long as I was waiting for the rain to let up) and it was very easy to get it in, again just took some time. I actually think mine came out a bit flatter in appearance maybe because it was so pliable. Also I got the cane webbing from Ali Express and so it was pretty cheap. I just want to say for anyone wondering if they should do this, go for it!! It turns out very nicely and isn’t hard 🙂
Hi Zeni – thank you so much for the kind comment!! I love hearing this was a great project for you!
For starters, beautiful cabinet! You did an awesome job. Second, do you mind sharing where you got your dining table? I love it!!!
Hi Nicole,
You are so sweet – Thank you. I had it custom made in St. Louis.
If I covered a very thin piece of wood or pressed board with the cane adhered to it, would it fit in the slot that held the glass? I’m
trying to figure out how to make the cane as taunt as possible and the doors opaque so you can’t see the contents.
Hi you may be able to do that! the slot is pretty wide
Hi there – love the look of the cane with the cabinet. I am looking at doing the same for the brimnes tv stand and was looking to see if you overcut the cane.
The glass panels in the tv stand measure 18×6. Do I need to cut the cane with overlap or did you cut to the exact measurement of the visible glass panel?
the cane does need to be over cut a bit