Peel and Stick backsplash has been on my list to try and review for you guys for a while, but I really wanted the right project to try it on. When we bought our new house I knew just what to do and set out to do a budget fireplace update utilizing the tiles.
this post may contain affiliate links
Peel and Stick Backsplash
Before getting into the budget fireplace, I want to talk about peel and stick backsplash. Incase you’re wondering what that is, it is essentially sheets of a thicker sticker material (so it is textured some like a normal tile) that is made to look like backsplash or tile.
There are several prints and patterns you can go with, and they all pose some unique things to keep it mind when you are using it, so be sure to read the how to closely in order to not waste any of the tiles.
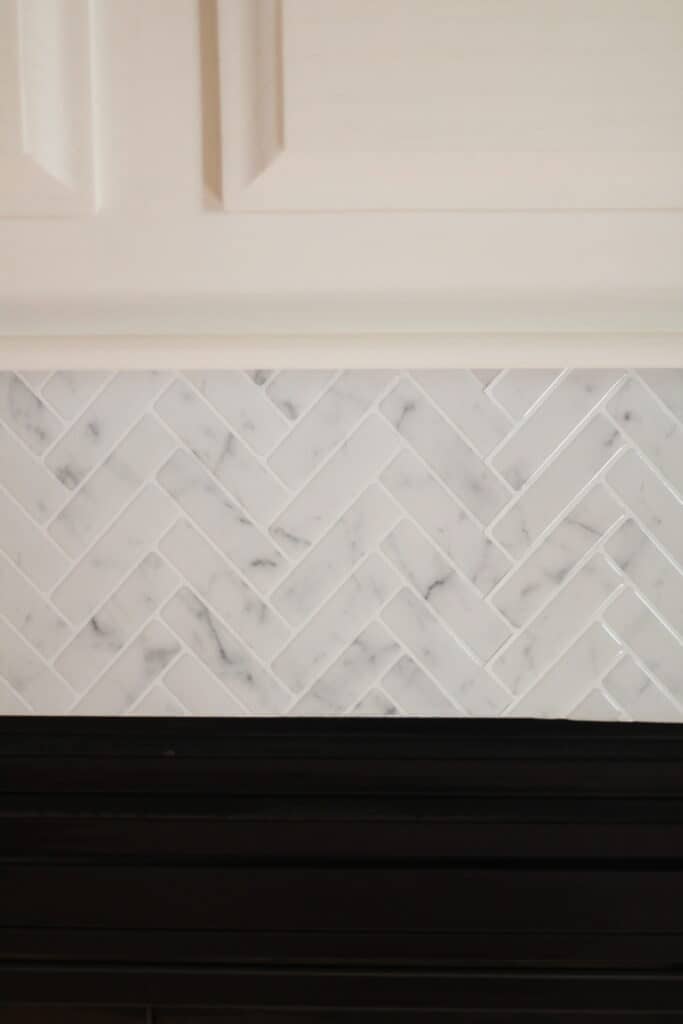
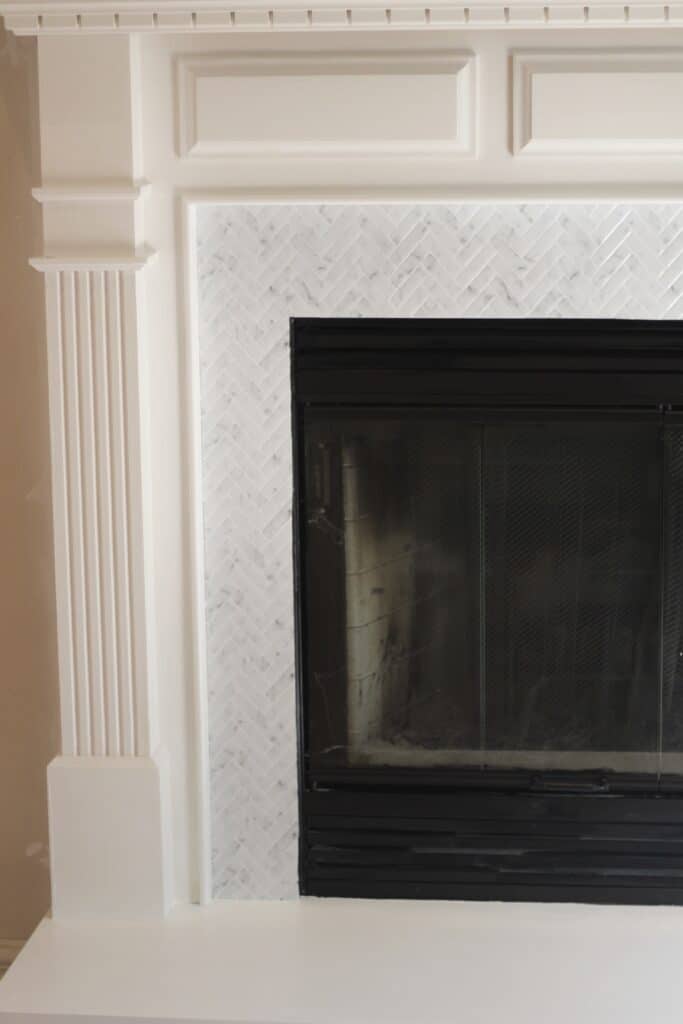
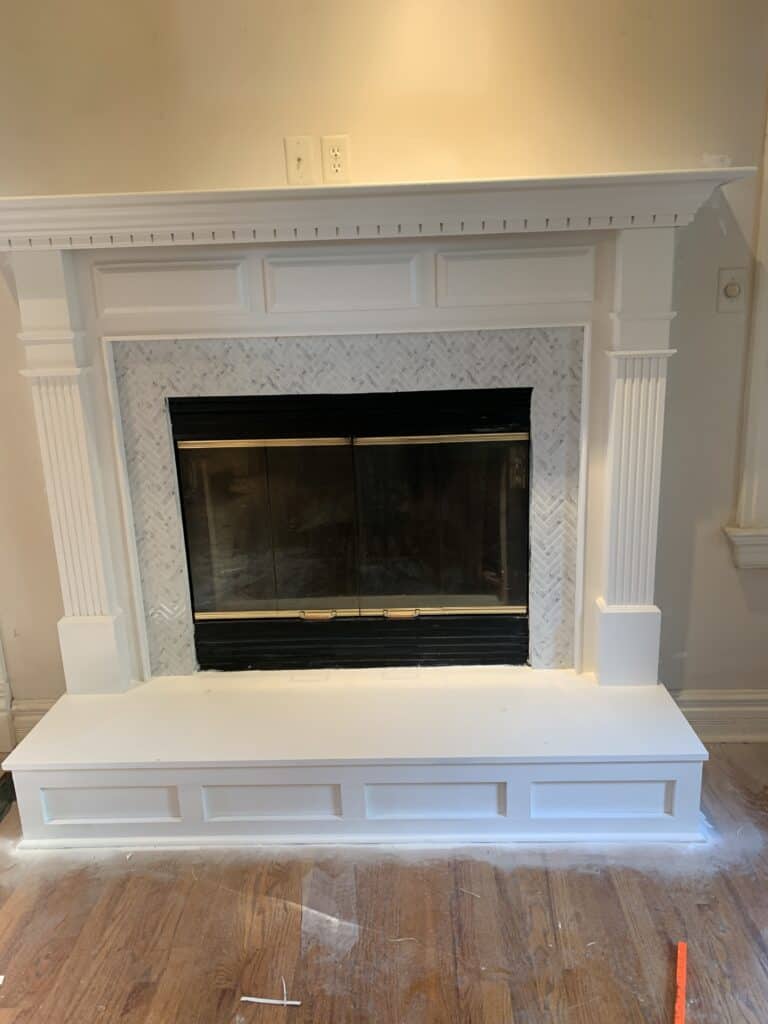
I personally went with a herringbone pattern peel and stick backsplash that was really muted in color, and from every review had REALLY great stick, and looked very realistic. I figured why not try?
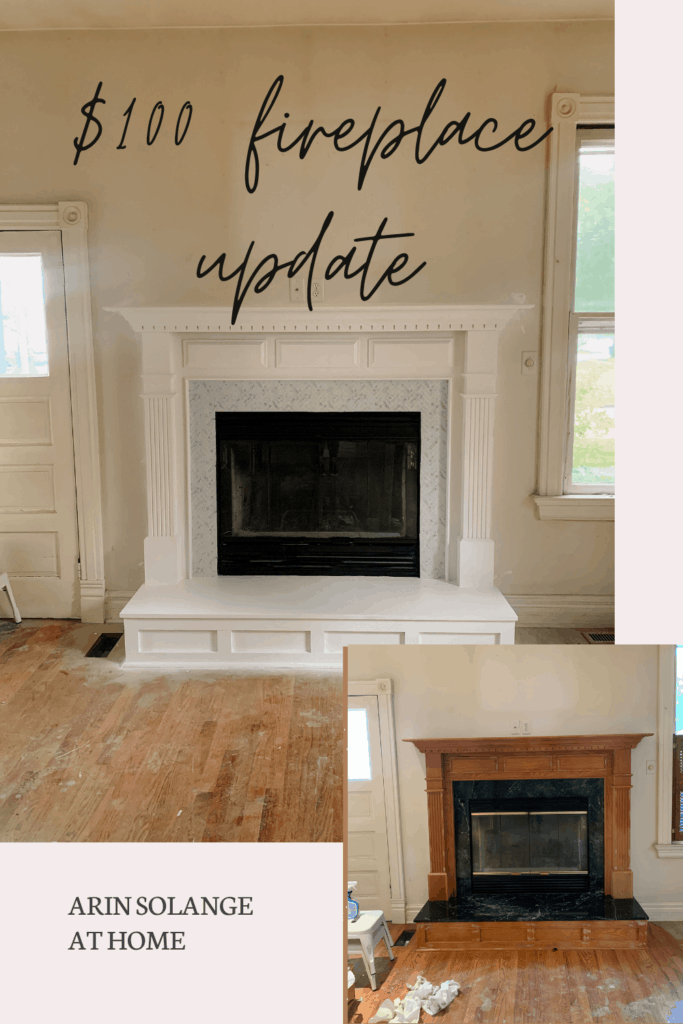
Budget Fireplace Update
So incase you are new to my Instagram or blog – my husband and I recently purchased an 1860’s home to renovate. We are doing the bulk of phase one with contractors because we needed to get the house livable before moving in.
That also means that we are throwing the majority of our finances at phase one, so we will be working hard to do the rest of the rehab on a tight budget! My goal with the fireplace was to update the space on as close to $100 as possible.
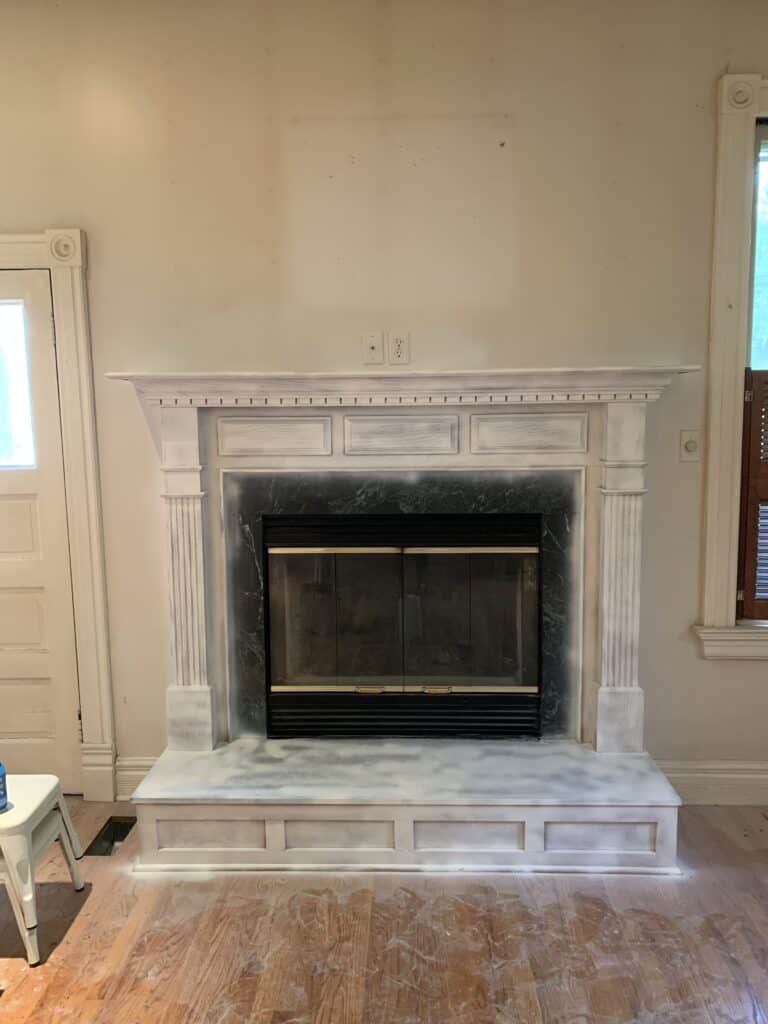
We did it before the floors and walls were painted so we could be a bit messier and the professionals would be the ones who had to be careful, so keep in mind the rest of the room is still in its original – nicotine covered state ha.
Shopping List
- Peel and Stick Tiles – I personally got 15
- Paint
- Primer – we did the spray version of this, but I wouldn’t rec that if you’re not starting fresh with floors and wall paint.
- Fireplace Paint
- Detail Knife
- Ruler
- Marker
- Sanding Block
- Painters Tape
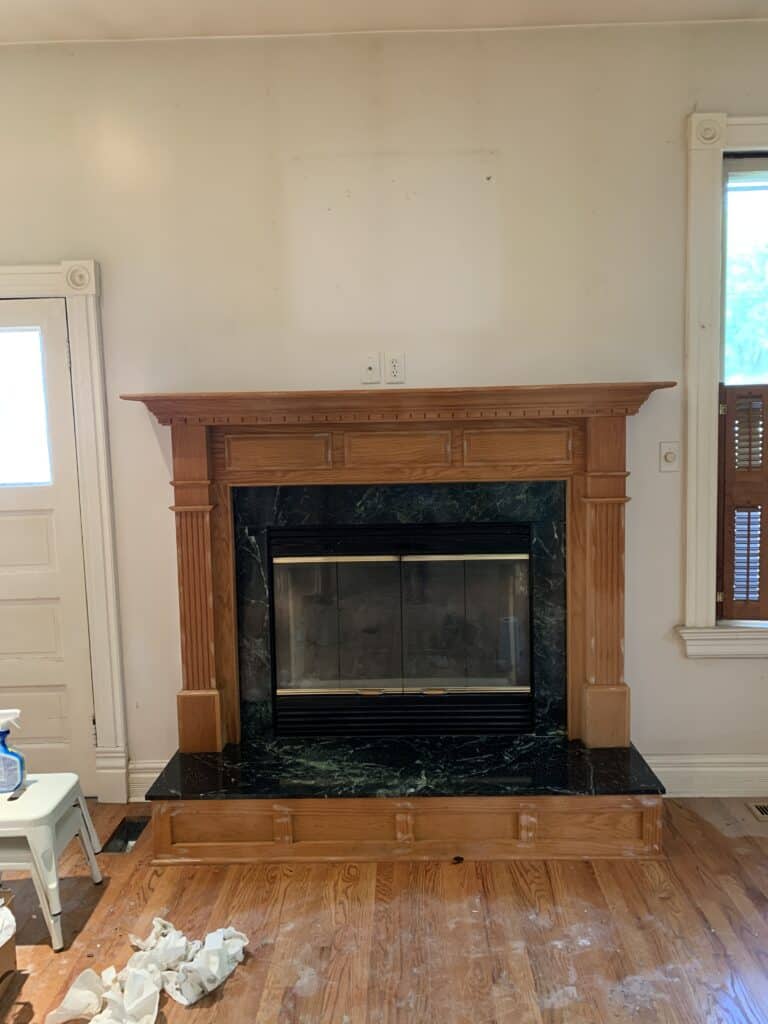
What was I updating on the Fireplace?
In order to update the fireplace 3 things needed to happen:
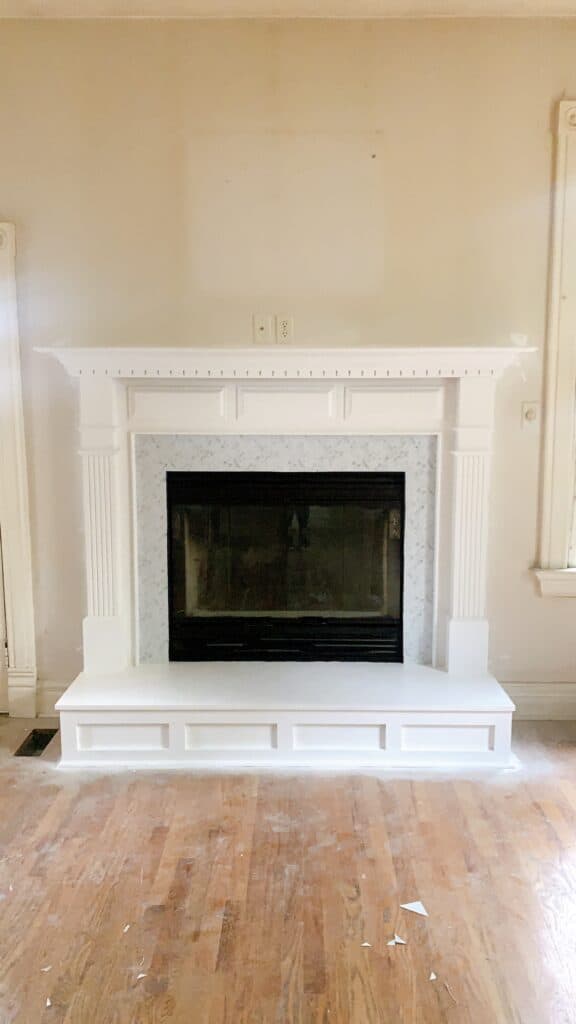
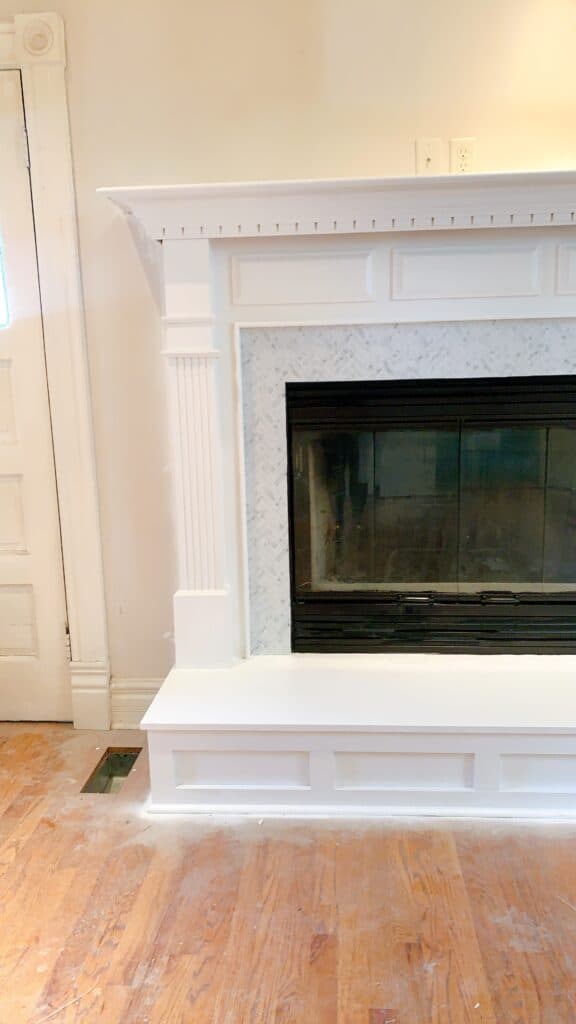
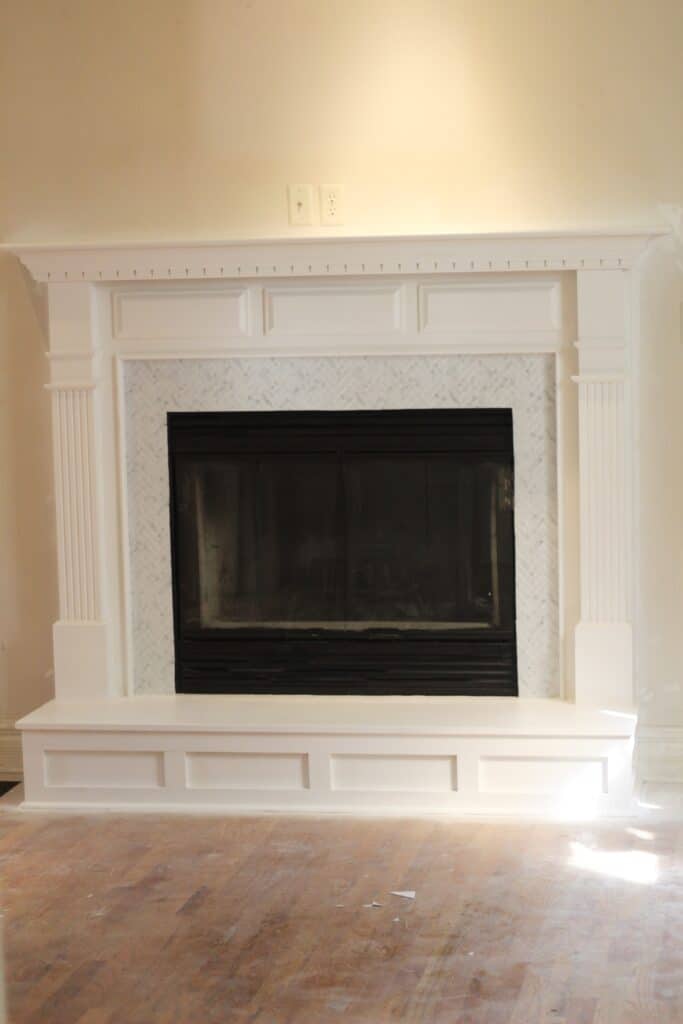
- The fireplace needed to be painted white. It was a very outdated wood color, and we opted to go white for a clean look.
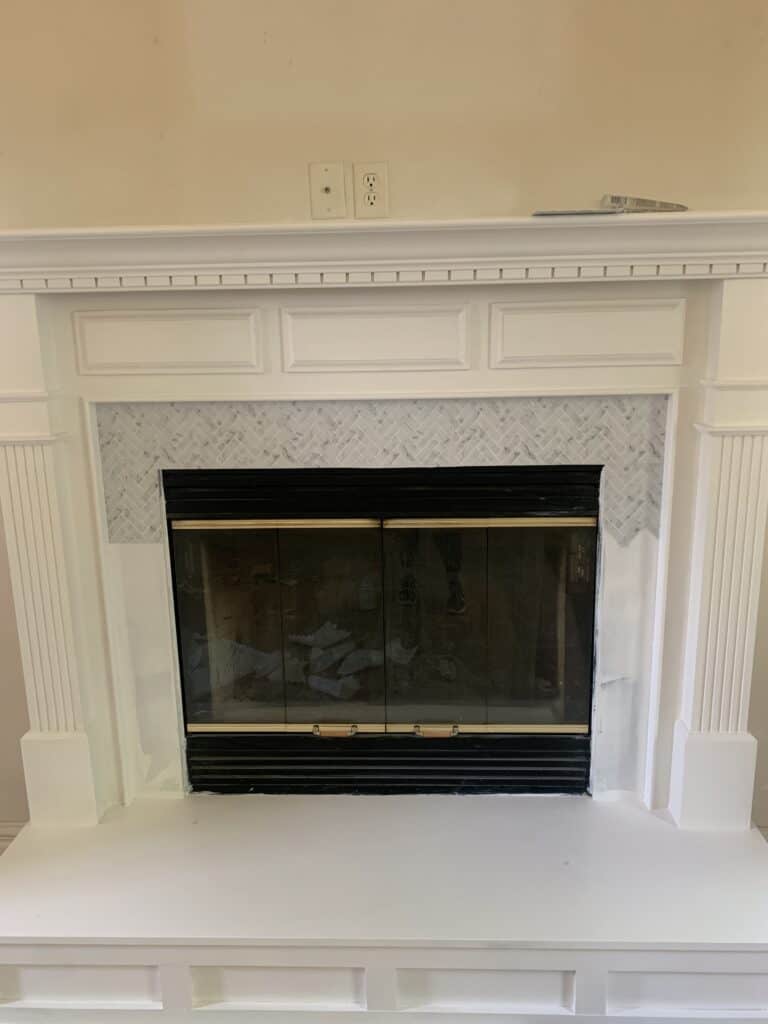
- The green marble, although pretty didn’t fit what I was going for in the room, so we opted to cover that – which is where the peel and stick backsplash tiles came in.
- And last but not least – the gold on the fireplace was making the space look dated, so that needed to be painted black.
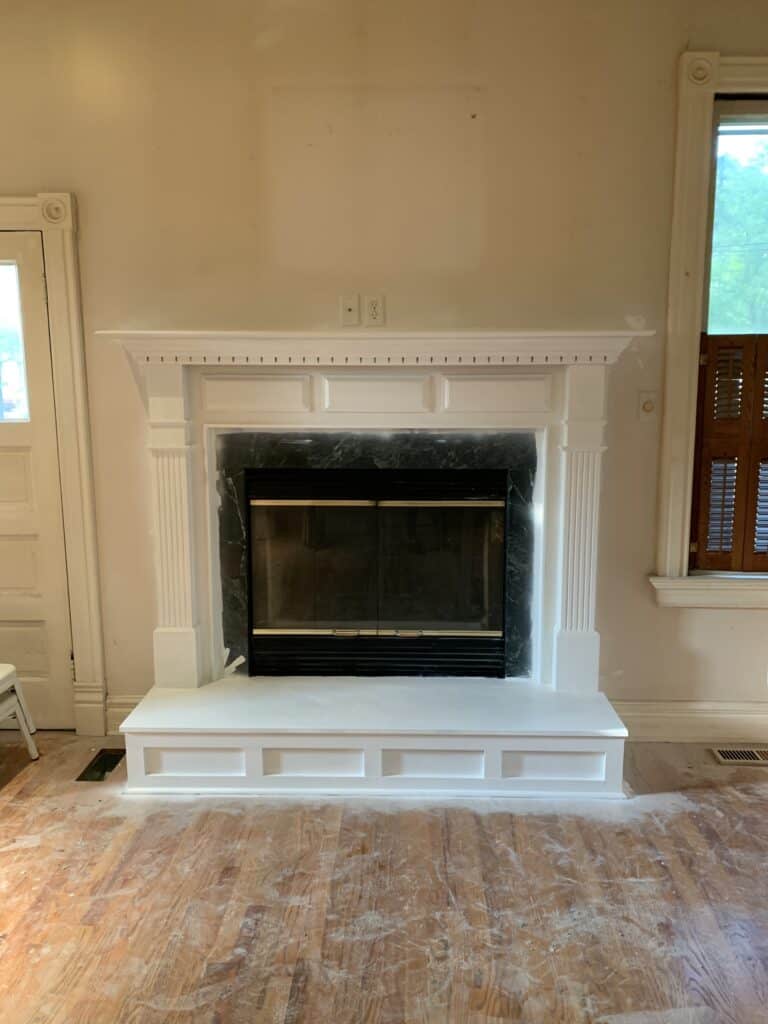
First Up – Painting the Fireplace
First up was painting the fireplace – we followed a very similar method to painting our kitchen cabinets (see that post here!), and actually used the same paint.
There were tons of holes from a nail gun that needed to be filled with wood filler first too, so that was an important step. After that we did a spray primer which saved a ton of time, and made for easier application of the paint.
I actually decided to paint the marble that was on the top of the step up as well for a couple of reasons. I felt as though getting the peel and stick backsplash to look as good in that area was going to be tricky, and I heard that its not super easy to clean, so didn’t want it where my kids would be sitting and standing.
Painting the tile was just was easy as the wood and you wouldn’t have the slightest idea it was a different material in person after it was painted. Once the paint was fully dry we set out to do the tile.
Installing Peel and Stick Backsplash
This was not hard – but there are some really big things to keep in mind. Some of these things are things you should keep in mind no matter the pattern, but I will be talking through the exact steps on the herringbone backsplash I worked with.
What Supplies Do you Need?
- Marker
- Box cutting knife or detail knife
- scissors
- ruler
Things to Know Before you Start
There are a few things to keep in mind before you get started. These are things to remember when it comes to ordering and or before you measure and cut each sheet.
- There is an up and down to the sheets – for the one I used I went with the top being the side where there was a ‘grout line’ as the first thing. On the other side the tile would have been first. I don’t think there is a right or wrong, but you need to stick to the same one each time.
- You will lose a lot of tile just to pattern line up. So don’t think you need just the exact amount of square feet your space is.
- It is easier to line up well if you don’t cut a straight bottom line, but are matching a point into a negative space.
How to Install Peel and Stick Backsplash
Now that you know those few little things – you should be ready to start installing your backsplash.
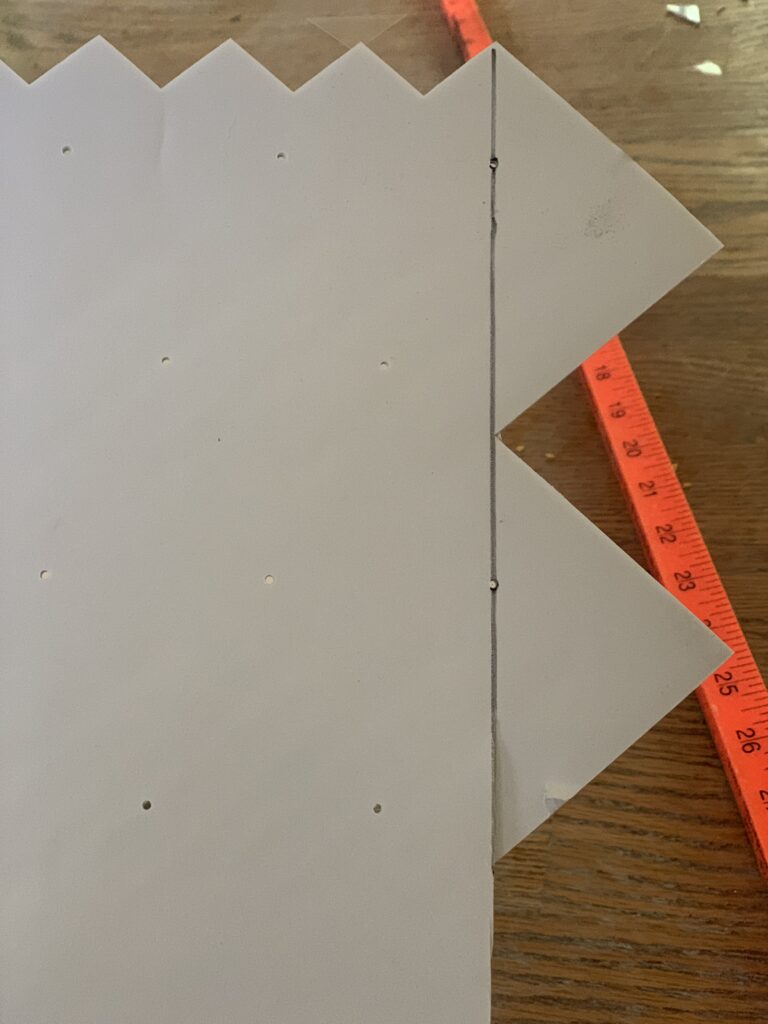
First things first pick a corner. For me I started in the top left. I took my first tile and I cut in a straight line to get the tile to squared off left side and top (when you get them they will be jagged with the lines of the tiles).
First things first pick a corner. For me I started in the top left. I took my first tile and I cut in a straight line to get the tile to squared off left side and top (when you get them they will be jagged with the lines of the tiles).
Remember where you cut them down to because you will do the same with the next tiles. IE for me I didn’t measure but rather cut down to exactly where a straight line could form.
Remember where you cut them down to because you will do the same with the next tiles. IE for me I didn’t measure but rather cut down to exactly where a straight line could form.
For me because the area I was tiling wasn’t huge I used a blank sheet of paper and traced my space to cut out the corner so I could utilize as much of that tile as I could. That was literally the only tile where had to cut the right and left side straight. LEAVE the bottom side in the triangular shape.
Measure your space and use a detail knife to cut the piece in a straight line. You can use scissors too, but I felt as though the tiles I did with the knife looked better.
For me I went across the top of the fireplace first, then down the right side, then came back and went down the left. The trickiest part of going down the right side is you will have to likely cut from the right and left of each tile to line up your pattern.
You will have to both cut from the sides but sometimes cut down into the top as well. It is sort of like a puzzle, and don’t be shocked if you mess up a piece or two.
Applying the tiles is pretty easy. They are VERY sticky. When I placed each tile I nearly overlapped them and pushed them to the side or up to make sure they were SO CLOSE that you couldn’t tell there was a difference in the tile.
One thing you can do when it is done – which we did, was then take a clear silicone caulk and go around your edges. BE CAREFUL. I read reviews that the caulk doesn’t wipe off easily, so if you are nervous and think it isn’t needed – just skip that step!
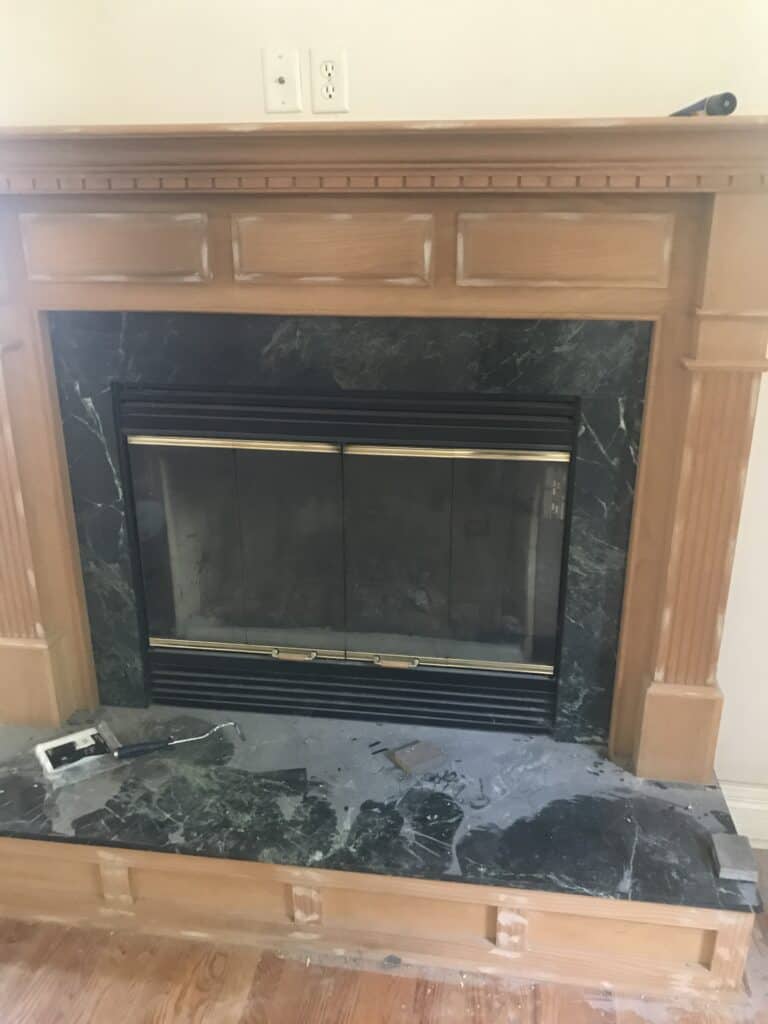
Painting The Fireplace Metal Black
Last but not least on this project was painting the fireplace metal all black. It was already mostly black with gold – which is pretty normal for an older fireplace, and it is a really easy inexpensive update.
All you need is THIS paint, a brush, and possibly some painters tape.
One thing to know is this is OIL BASED PAINT – so don’t get it on your skin – it is a pain to get off. I would also use a disposable brush if it’s just this project you will be doing.
You can either remove your doors and paint the gold – or in my case I simply opened the fireplace up and gave it a coat, let that dry and did a second coat. It was REALLY simple and updated the fireplace in a BIG way.
Overall this is easily a 2 full day project – for us it took longer because we don’t live in the house yet, but it is not super daunting.

Other Posts You’ll Love
Painted Tile Floors | IKEA built in Hack | DIY Cane Cabinet
Pin The Photo Below for Later
Hopefully you feel more confident in installing peel and stick backsplash and doing an easy, inexpensive fireplace update after reading this post. If you have any questions leave me a comment below or DM me on Instagram (@arinsolange), enjoy your DIY update.
What is the brand name of your peel and stick tiles you used in this project?
Hi Linda – these are the ones I used
https://amzn.to/2QsGS1m
I love what you did! We have the same green marble. How did you cover the inside lip of the green marble which buts up against the black? Mine is like an inch and not sure to cover it with the tile. And then we would have the same issue on the floor as it sits up from the carpet about an inch.
Hi Holly – am trying to fully understand where. for the base green marble and the wood it is all paint, then I also painted the lip on the sides of the vertical marble white so that the only thing that needed to be covered in tile was the flat front of the vertical marble.