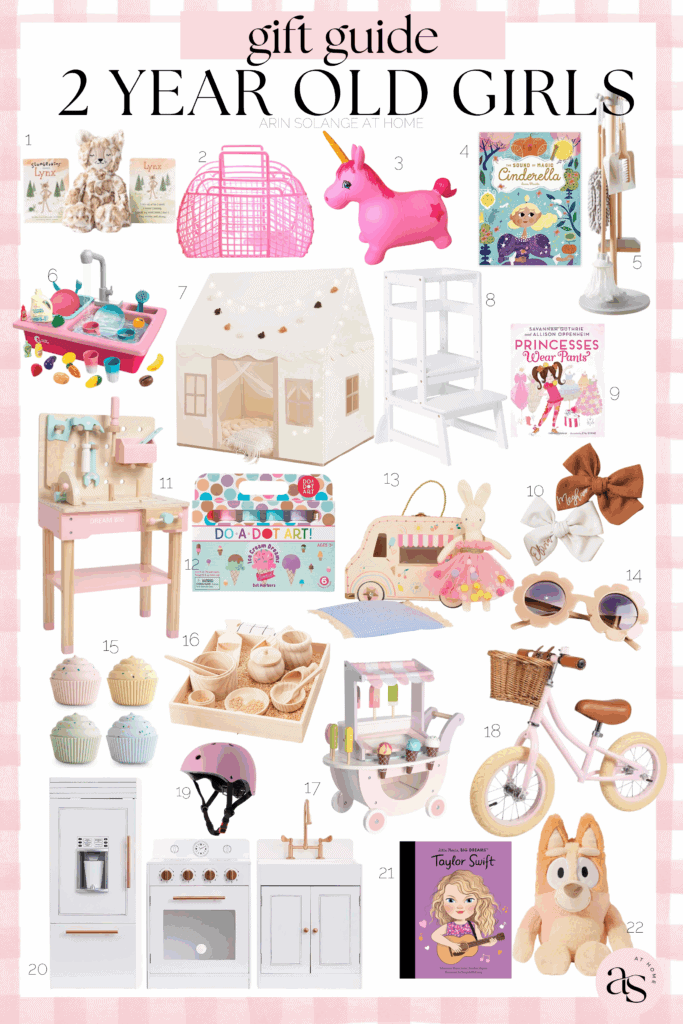
In the spirit of Walker turning 2 next week I have gone ahead and put together a two year old girl gift guide to follow up the boy guide from earlier this week. If last years guides told me anything it was that you guys wanted to see what to get everyone in your family!
This Post Contains Affiliate Links// Post Updated October 2025
Best Gifts for 2 Year Old Girls
When I do these gift guides I try my best to find more unique items that you won’t just happen upon on the Target shelves, but that I know my kids would love.
If you are new around here, I am a mom of 3 little ones (almost 4), so I try to add items I know my 3 would have enjoyed at this age!
*This post has been updated in 2025 for the latest links and products. Only current products will be linked. Please refer to the 2025 Gift Guide below.*
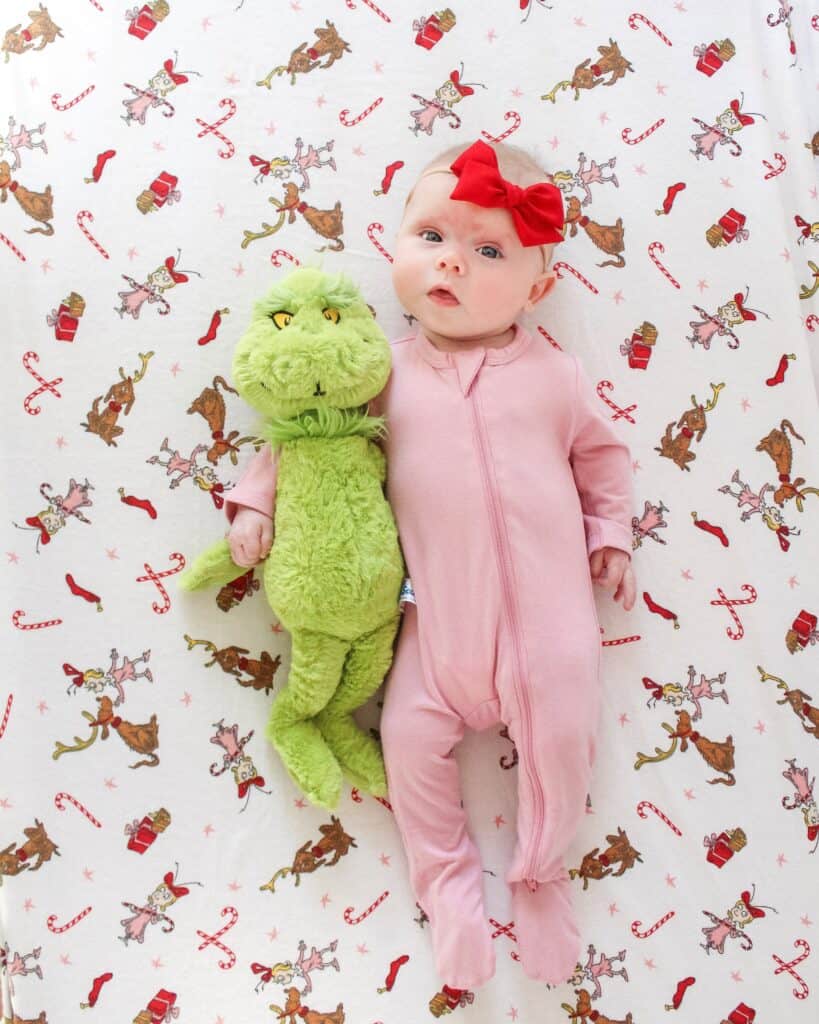
I have already done a baby girl gift guide. However, I know babies are so fun to shop for! Plus, I keep getting asked what to buy a baby girl for Christmas.
So, I thought I would round up some more finds that are geared more towards little babies!
This post contains affiliate links – post updated in October 2025
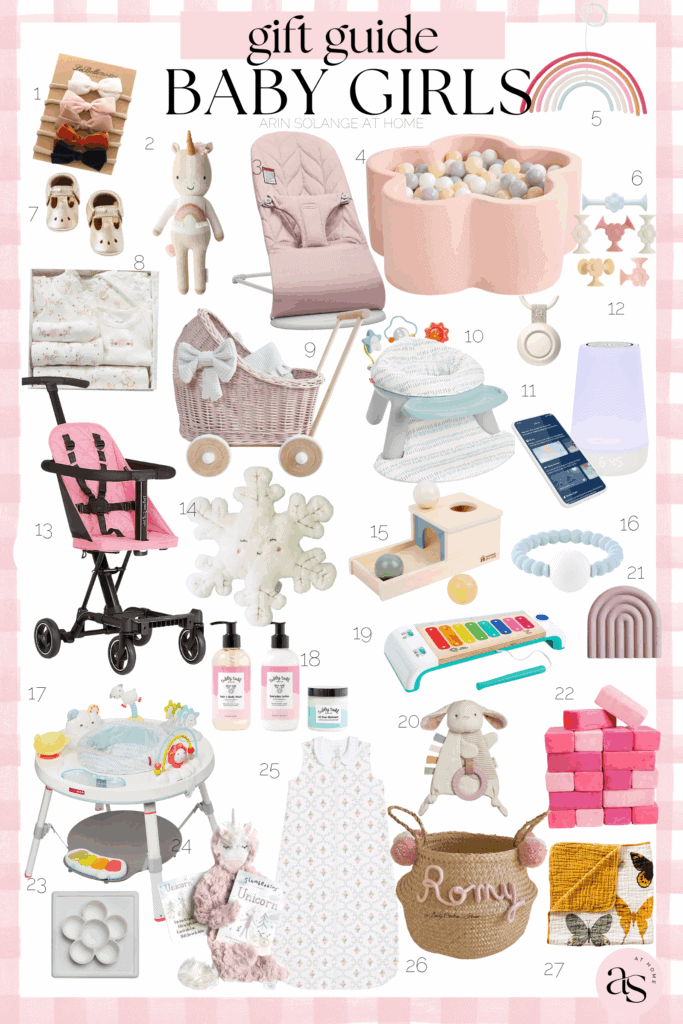
Baby Girl Gift Guide
When it comes to shopping for a baby the things I tend to go for are either: fun and whimsical (i.e. not as practical so mom and dad might not buy them, or you might not buy them if it weren’t. holiday) or higher end useful.
Useful is always the most important thing, but sometimes you can justify the 20 dollar fun, pretty shape sorter for Christmas, where if you were just grabbing it on your Target run you would likely grab the cheapest available!
I am a mom to 4 and two of those babies are girls, so I have had my fair share of baby girl gifts to buy – this post is updated frequently to find new fun items!
Gifts for the Rest of your Family
Gift guides have been something I have enjoyed doing for years, and to make things easier I have them all in one place for you to find.
If you are shopping for more of your family be sure to check out the link below for all gift guides!
Simple click the number for the item you are interested in and it will take you directly to that page.
I try my hardest to find the best items for you, that I would truly buy my kids, so some of them simply aren’t affiliates…for those (or any others) you can just find the number below to shop!
This post has been updated in 2025 for the latest links and products. Only current products will be linked. Please refer to the 2025 Gift Guide below.
Chugging right along on the gift guides for this year. Following up on yesterdays Baby boy guide here is this years gift guide for baby girls!
I can’t help but think the guides for the little girls are just so much fun, and I love finding little things that are great for now as well as great items they will use in the near future!
Make sure you are signed up for emails after you look at this, and when all guides are done this week I will send out a link to a post linking them all. Then you will have no problem finding gifts for the whole family!
This post contains affiliate links.
Gift Guide for Baby Girls
This post has been updated in 2025 for the latest links and products. Only current products will be linked. Please refer to the 2025 Gift Guide below.
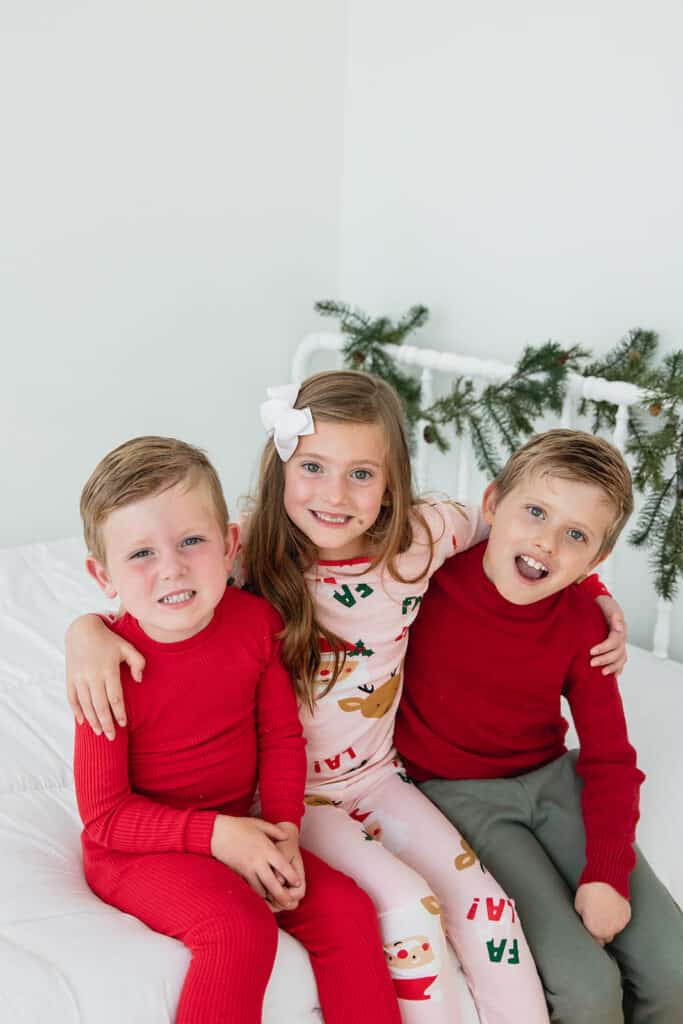
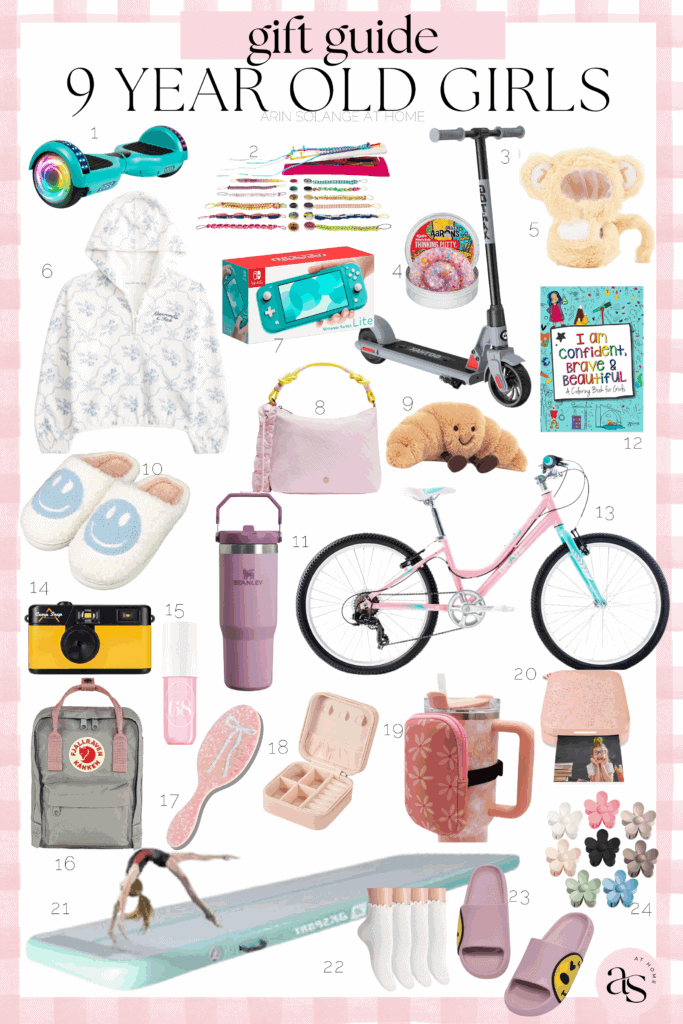
It is that time of year, where I round up gifts for gift guides for the whole family. I always stop at the age of my oldest….and I officially have a 9 year old, so this year I am rounding up the best gifts for 9 year old girls! Check them all out in this post for some fun, unique gift ideas.
This post may contain affiliate links – updated in 2025
Gifts for 9 year Old Girls
9 year olds are so much fun! I offically have a 9 year old boy, which means we are going to the 9 year old girl birthday parties, and I get to spend time with his friends, who are so spunky and funny. This age has been fun to see them come into their own, and really grow past some of the little girl toys and pass times for bigger girl things.
There are the standard items that so many young girls like that I don’t touch on as much in this post but instead tried to hit more unique options.
When I do my gift guides I work really hard on making sure there are items at all price points and for kids that love many different things. My kids all enjoy a wide variety of things so I try to think of items that all of them would love at age 9.
I also really like to find items they can use indoors and outdoors. Encouraging my kids to play outside is huge for me, so when we can I try to include items for outdoor use. In addition I added some useful items as well.
Other Gift Guides
If you are shopping for a 9 year old girl you may have other adults or kids to shop for. I have a whole gift guide page on my blog with 30+ gift guides separated by age and gender.
Hopefully you will be able to find great items that everyone in your life will love for birthdays, holidays, and other special occasions.
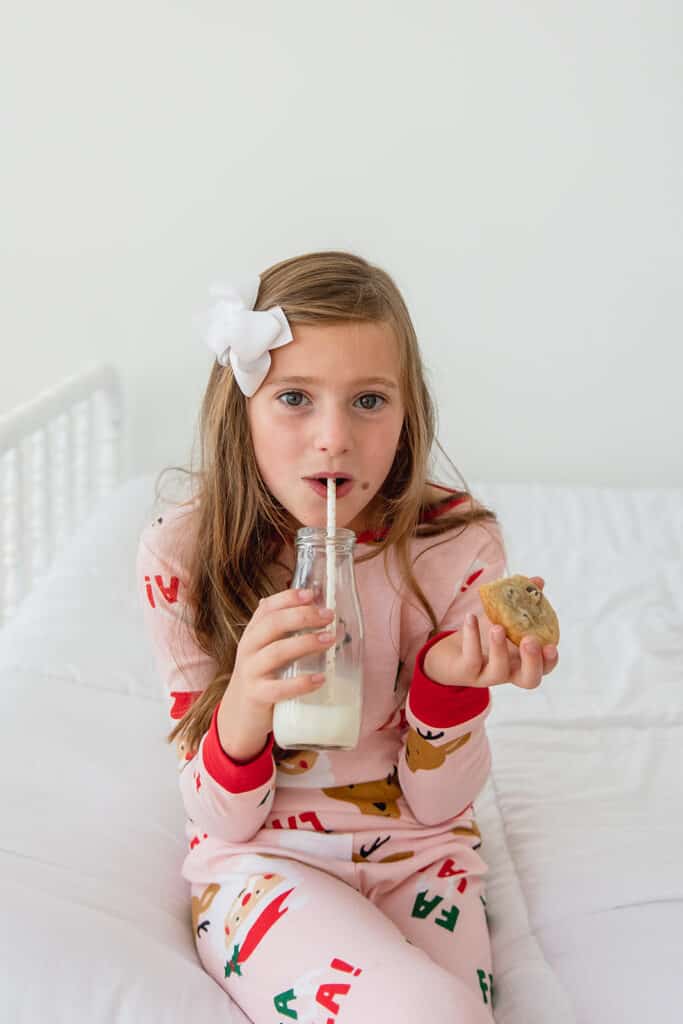
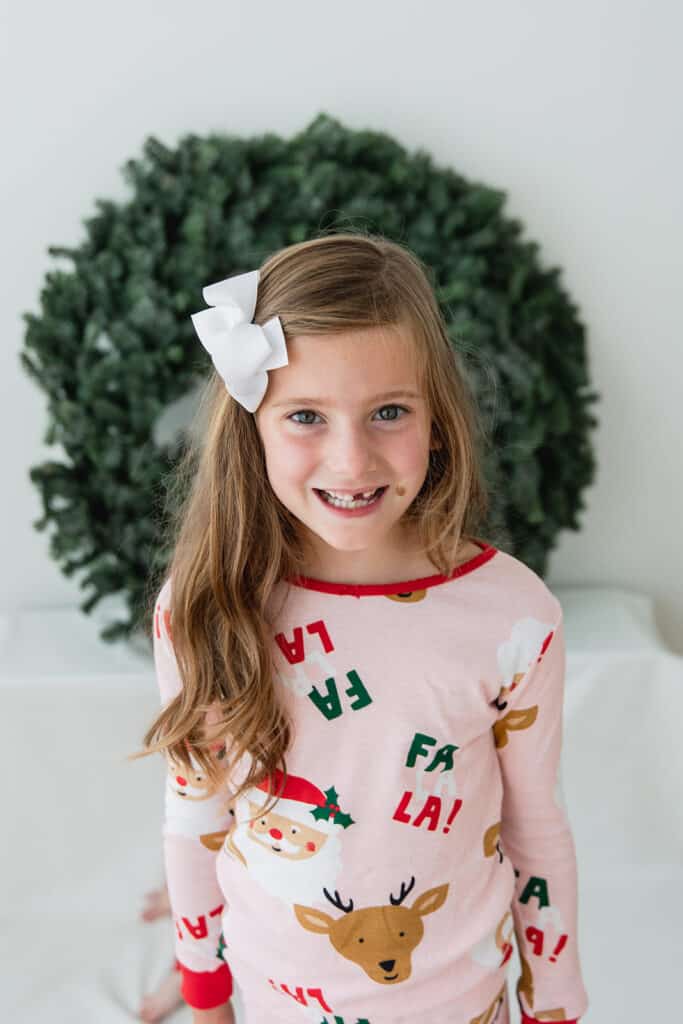
Now that my oldest daughter is 9 years old, I can confidently say that each of the items below are Avé approved.
Keep in mind that much of this comes in several different colors. My oldest daughter and I love pink so I tend to lean pink for the image.
*This post has been updated in 2025 for the latest links and products. Only current products will be linked. Please refer to the 2025 Gift Guide below.*
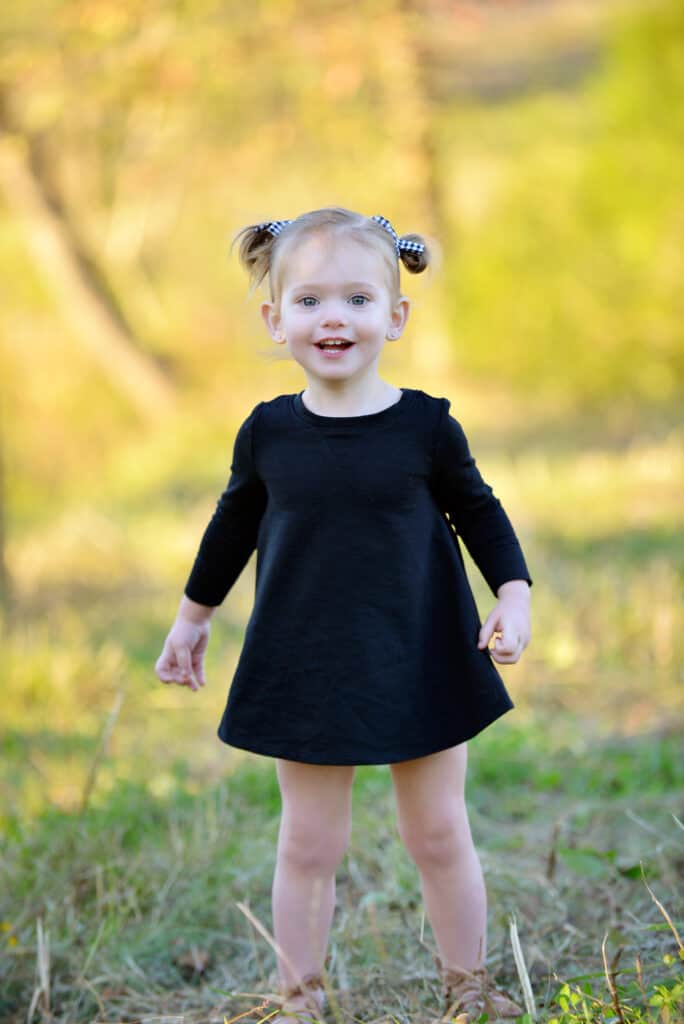
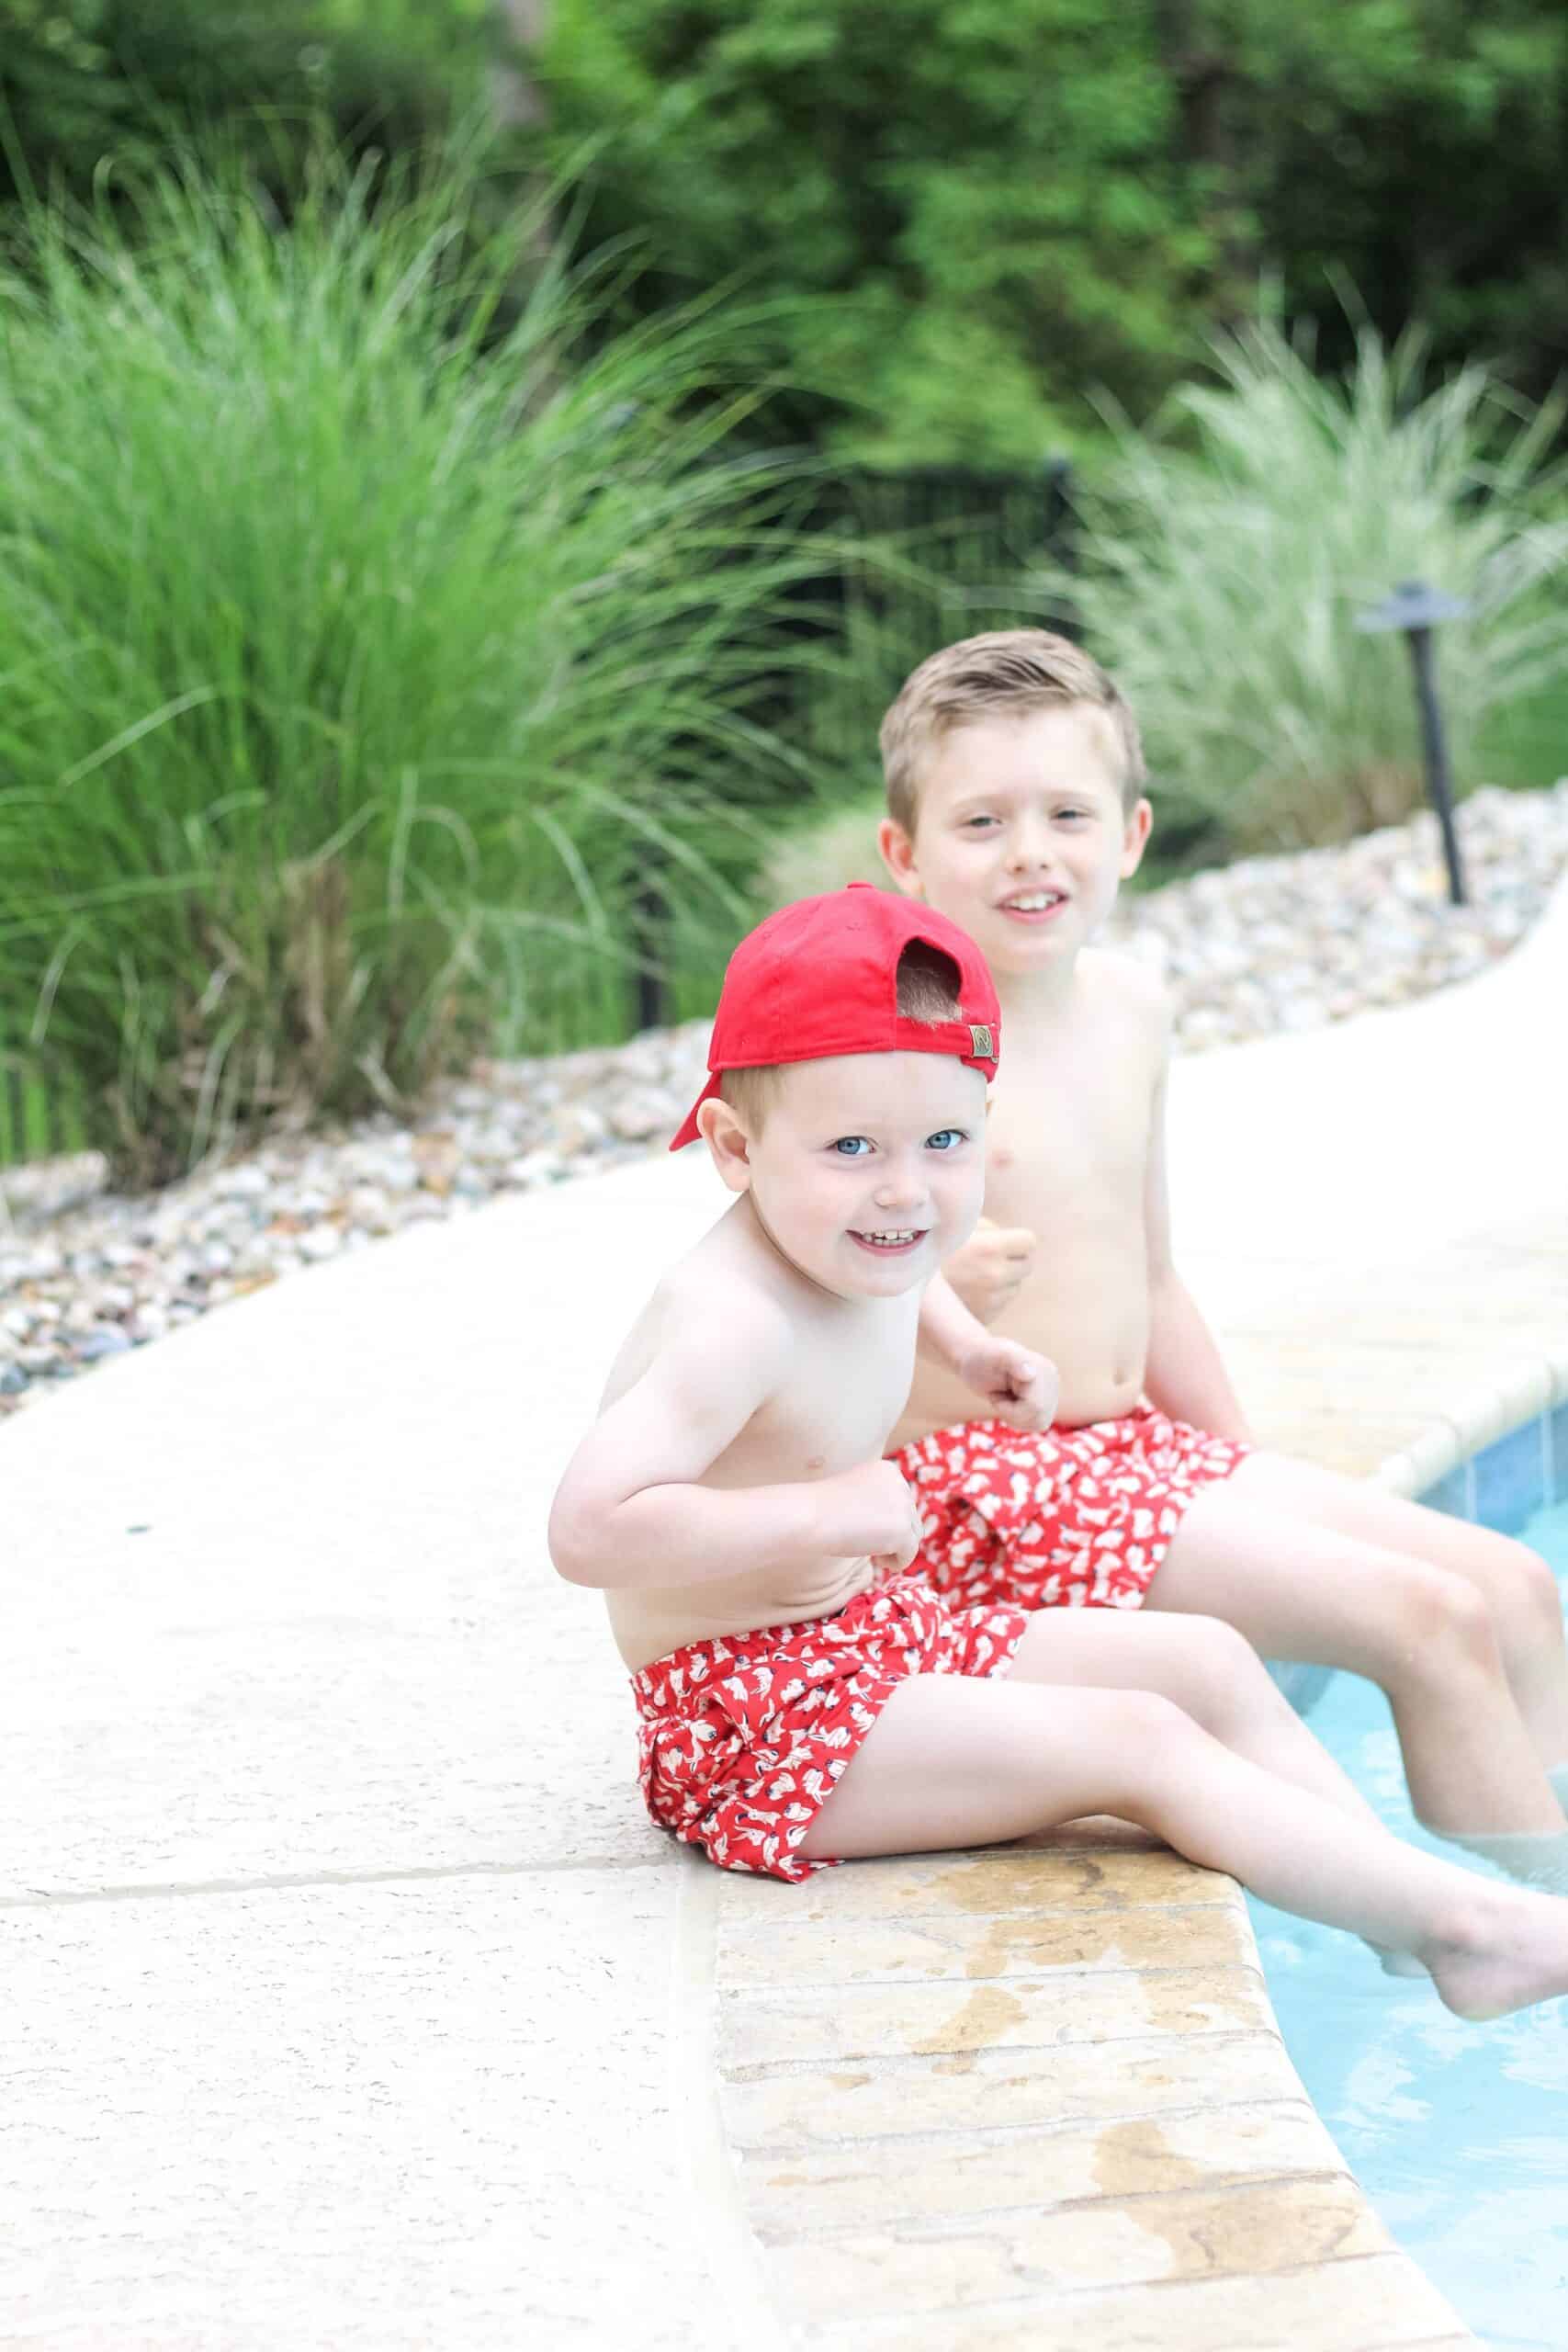
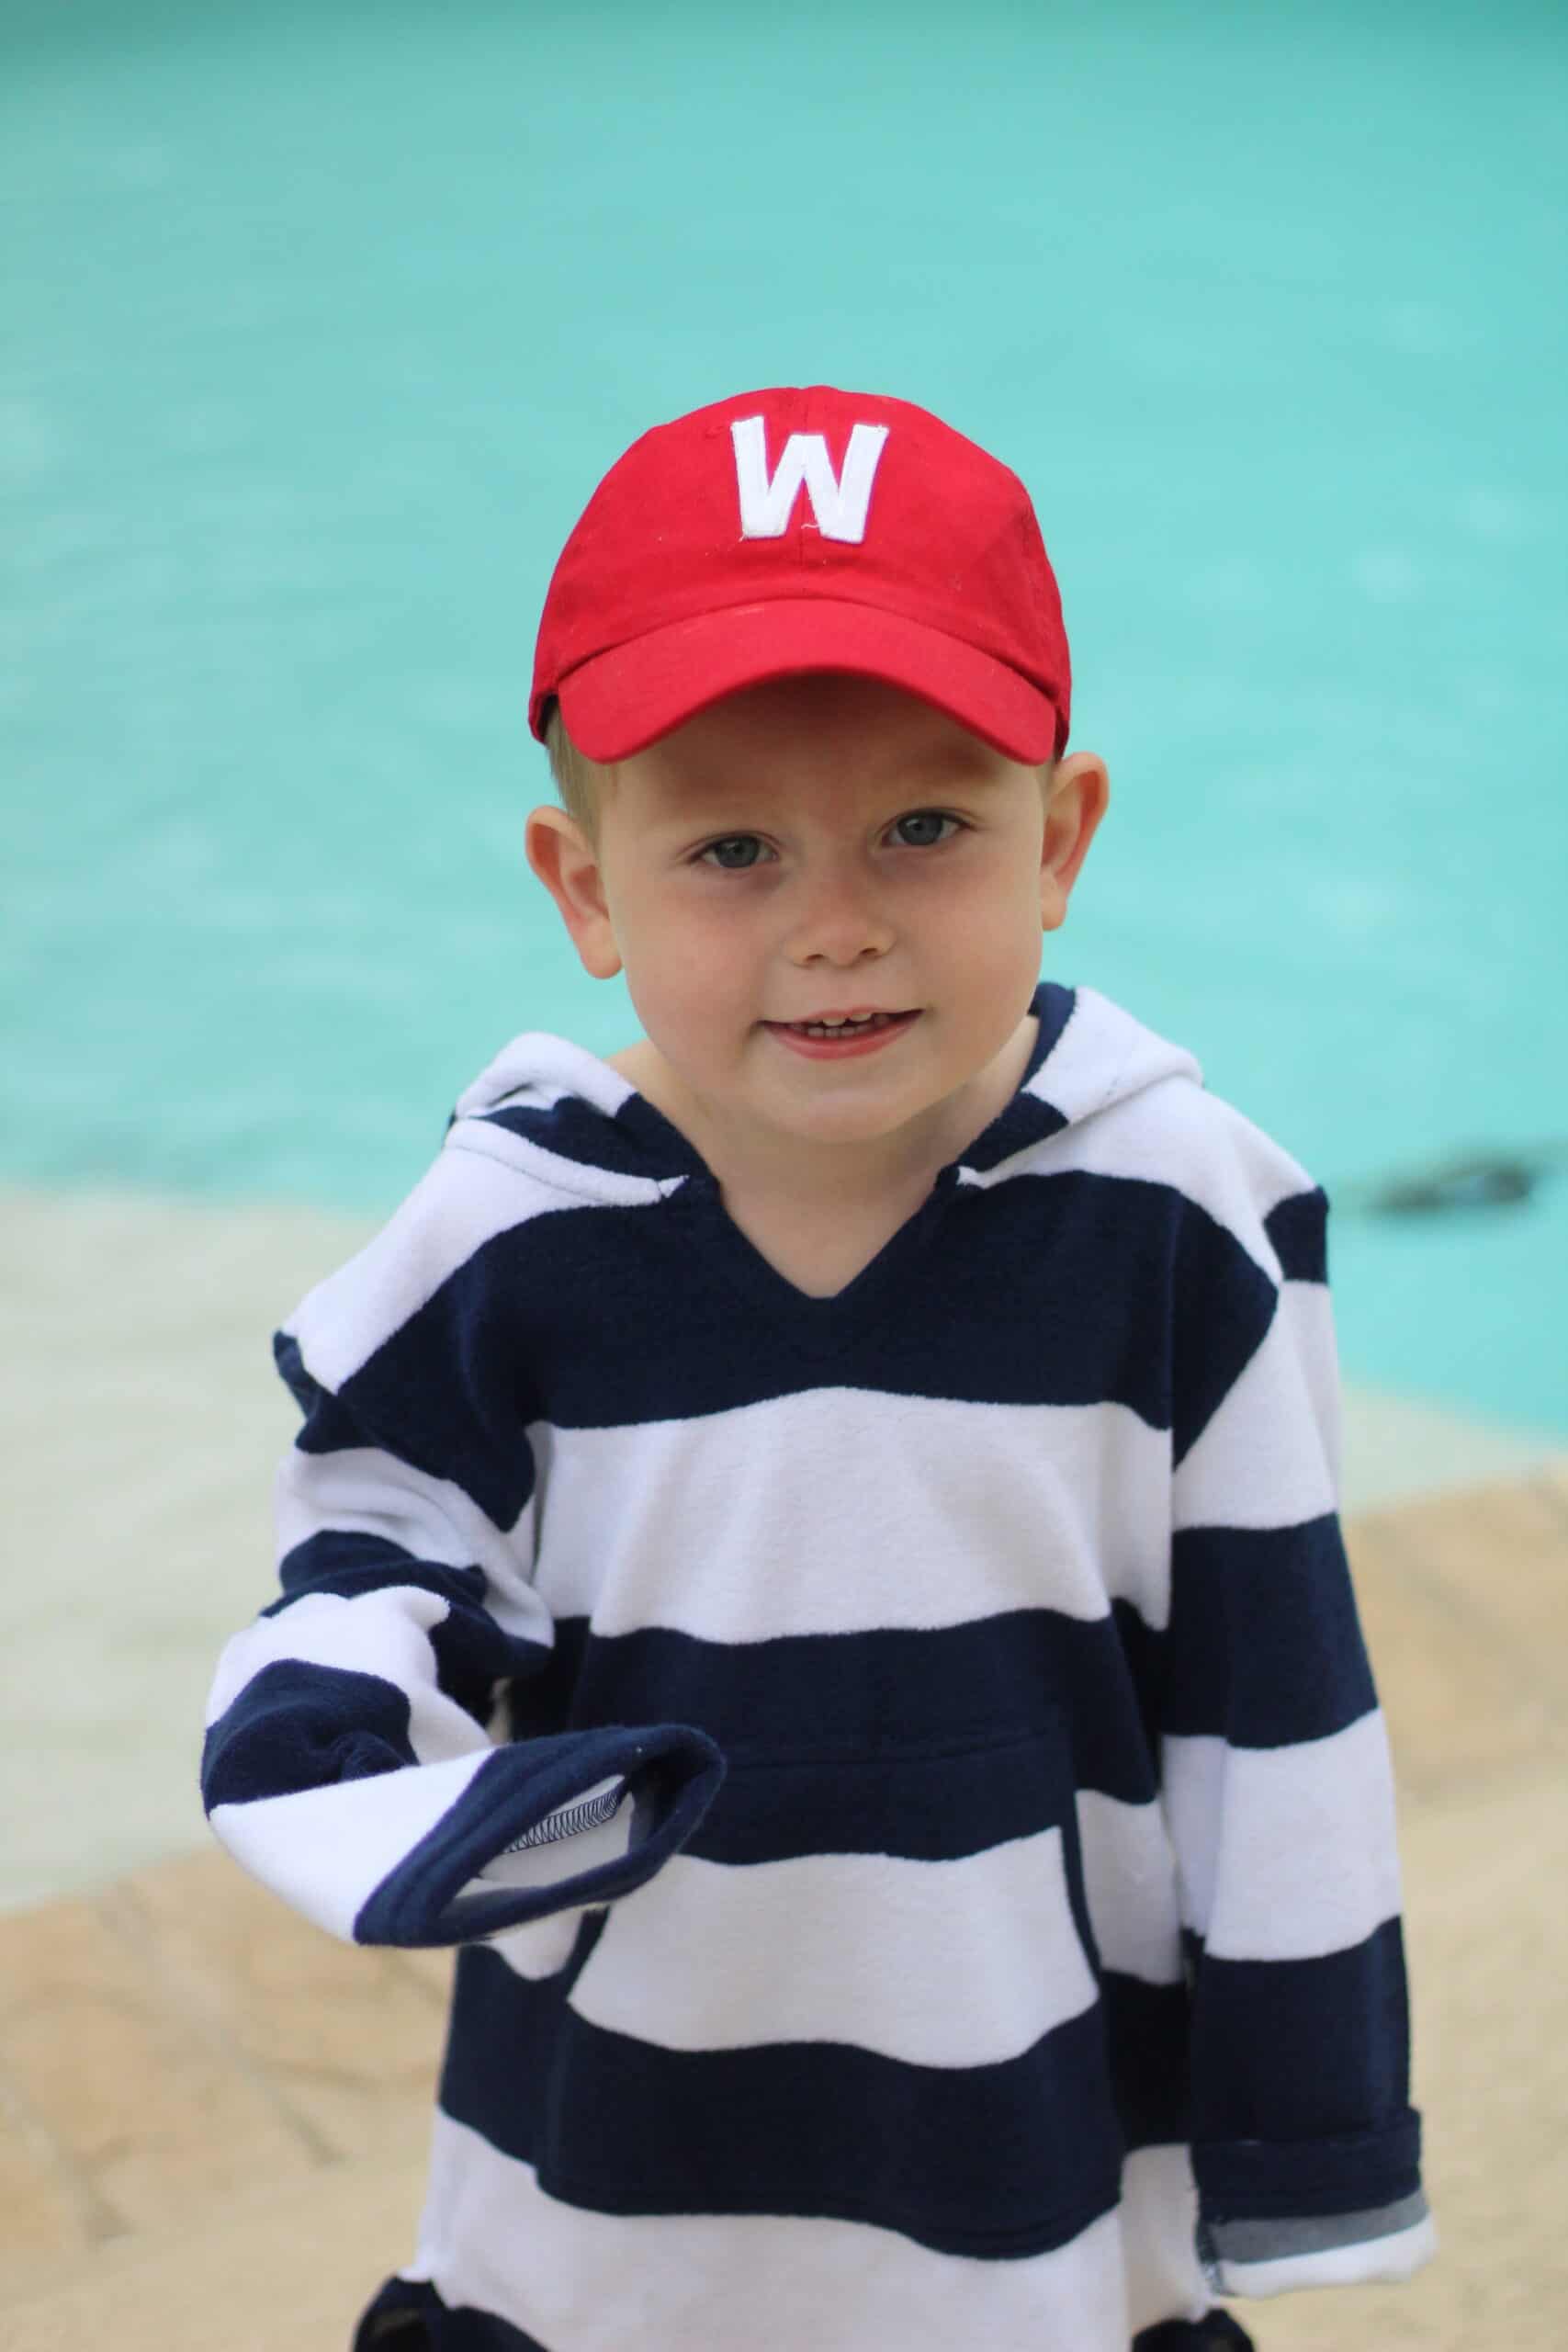
My sweet Walker will be 3 next week – so in true birthday fashion I have gift guides coming at you! I am always on a mission to find unique items for my kids – and with 2 boys and 2 girls that seems to be getting trickier and trickier, but I think I managed to find the best gifts for 3 year old boy.
This post may contain affiliate links and was updated in 2025
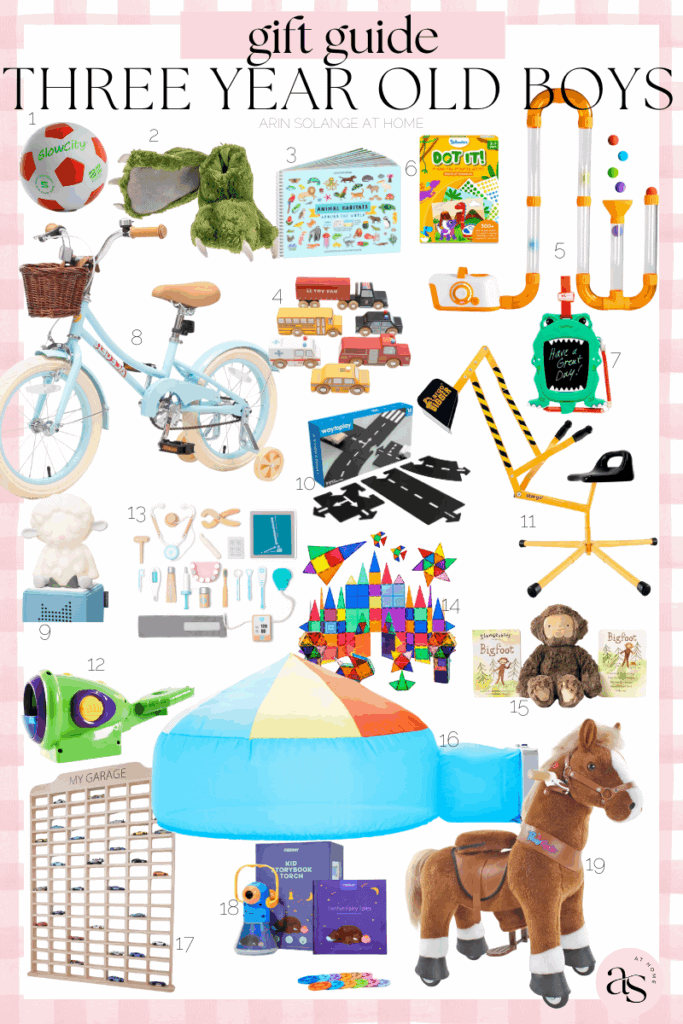
Best gifts for 3 year old Boy
Walker plays with a bit of everything, and with 2 older siblings it has been a bit tricky to find him things that he doesn’t already have. I was on a quest for both unique, but also useful in terms of some of the items!
My Rule of Thumb on The Best Gifts
When I am creating these gift guides I always try to incorporate a bit of the same items. Always a book or two, some inside toys, some outside toys, sometimes a bath toy, and some shoes or clothes.
I tend to think if you get your child a few items for different areas and places your home will feel less cluttered and they will be able to have fun at so many different spaces.
In this gift guide you will see everything from shoes to pool items so plenty to keep them busy!
Other Gift Guides
Creating these gift guides is something I LOVE to do and I am really passionate about. If you enjoy the items in this post be sure to check out the ret of my gift guides below.
So with all of that out of the way – below is a round up of the best gifts for 3 year old boys. Shop the items below.
*This post has been updated in 2025 for the latest links and products. Only current products will be linked. Please refer to the 2025 Gift Guide below.*
Soup and chili season is upon us, and I can’t wait to finally share my FAVORITE cold weather recipe. I have been making this crockpot white chicken chili for the past few years and have yet to find someone who doesn’t love it and ask for the recipe.
This post may contain affiliate links. This post was updated September 2023.
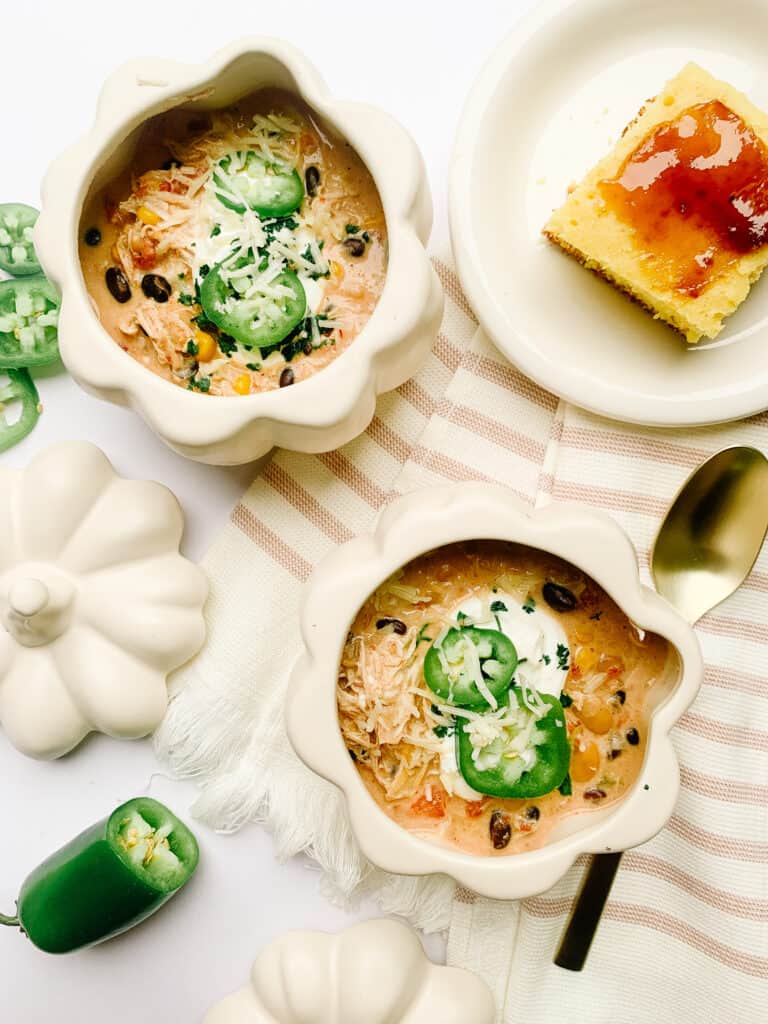
White Chicken Chili In The Crockpot
What is white chicken chili? I think everyone has a bit of a different definition for it, but it is essentially a chicken soup recipe with beans. The broth is comprised of chicken stock and cream cheese.
As with traditional chili I think everyone has their own special recipe and it is something that can be tweaked and never done ‘wrong’.
I started making this a few years ago when I needed an easy recipe for a bible study. My husband isn’t a huge fan of traditional chili so I thought I would try it and we were hooked.
Over the years I have taken that original recipe and tweaked and changed it to be ‘perfect’. I feel like it is finally time I write it out instead of trying to explain it each time.
Why I Love This Recipe
I am all about easy. Honestly, I tend to be an either ‘easy meals’ kind of cook or a baker. I don’t love to spend hours in the kitchen, and even more I don’t love making a million dishes.
This recipe takes ZERO dishes aside from the crockpot. I even use the crockpot the night before to bake the corn bread so it makes for the most mess free meal!
I also love that over time I have found a way to make this crockpot chili recipe please most of my family, and by using rotisserie chicken it is a crockpot recipe that can be added to the crockpot in the afternoon if you want.
Recommended Equipment
This recipe is super simple and straight forward. There is NO reason to go out and buy a new crockpot, but if you are looking for a new one, I am linking mine below.
I personally will be sharing several recipes you can make in that crockpot over the next few months, so if you own one be on the lookout for those.
I will be honest, I am not super technical when it comes to cooking. I will say that I think you can easily feed 4 adults and 2 kids with this single recipe.
If you had more people than that or wanted leftovers, you can easily double the recipe.
On that note, it does freeze very well. If you are looking for a good freezer meal for a friend or family member this would be a WONDERFUL option.
Enjoy this creamy white chicken chili that comes together in just 10 minutes and set to cook on low in your crockpot.
Author:Arin Solange At Home
Prep Time:10 minutes
Cook Time:4 hours
Total Time:4 hours and 10 minutes
Yield:4 servings 1x
Category:Crockpot Meals
Ingredients
Scale
3 cups of shredded rotisserie chicken or 1 lb. shredded cooked chicken breast
15 oz can of white Northern beans, drain and rinsed
15 oz can of black beans, drained and rinsed
10 oz can of Rotel
15 oz can of corn
16 oz jar of salsa
3 ¼ cups of chicken broth
8 oz block of cream cheese
1 packet ranch powder (2 tablespoons)
1 tsp of cumin
1 tbsp of chili powder
1 tsp of onion powder
1 tsp of garlic powder
Salt and pepper to taste
Optional garnishes: jalapeños, cilantro, sour cream, shredded cheese, pico de gallo, Fritos, or tortilla chips
Instructions
Cook your chicken breast and shred. If you buy a rotisserie chicken, shred 3 cups of chicken.
Drain and rinse your beans and add them in the crockpot.
Add your can of corn with liquid to the crockpot.
Pour a can of Rotel in the crockpot with liquid.
Add half a jar of salsa, about 1 cup. You can add more for your preference.
Add chicken broth to the crockpot.
Add chicken to the crockpot.
Add spices.
Stir it all together.
Add a block of cream cheese, cubed, on top of the mixture.
Put on the lid, set to low and cook for 8 hours. Alternatively, you can set it to high and cook for 3-4 hours
Stir before serving and add your garnishes to the bowls.
Notes
* You can increase the spiciness level by adding in a touch of cayenne pepper. Go slow and be mindful that it will add heat. We opt to omit this for our kids, but if you like spicy foods, you can add 1/4 tsp of Cayenne pepper.
* You can make this dairy free by substituting vegan cream cheese.
*You can easily cook chicken breast in an Instapot. Add your chicken with 1 cup of water to Instapot. Set to high pressure for 16 minutes. Allow a 5 minute natural pressure release. Shred chicken with a stand mixer.
* Be sure to check out my cornbread recipe. You can make it the night before and it pairs perfectly with this soup.
If this white chicken chili in the crockpot was a hit for you and your family be sure to pin the photo below to find it again later, and share it with your friends. Follow along on Instagram for more recipes, DIY’s, and home decor, and leave any comments you have below!
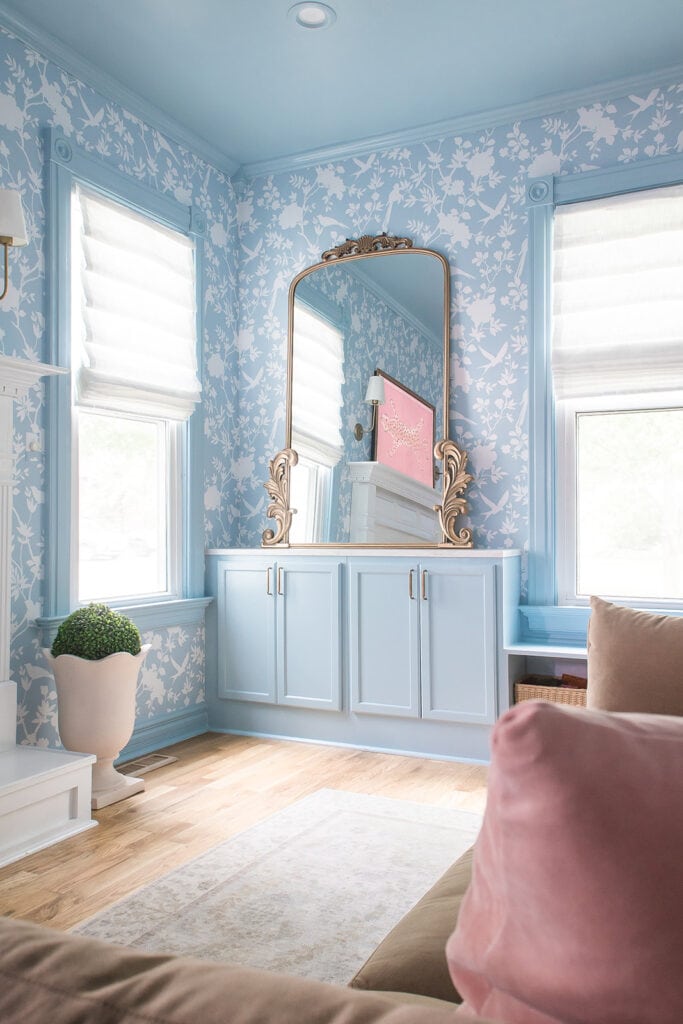
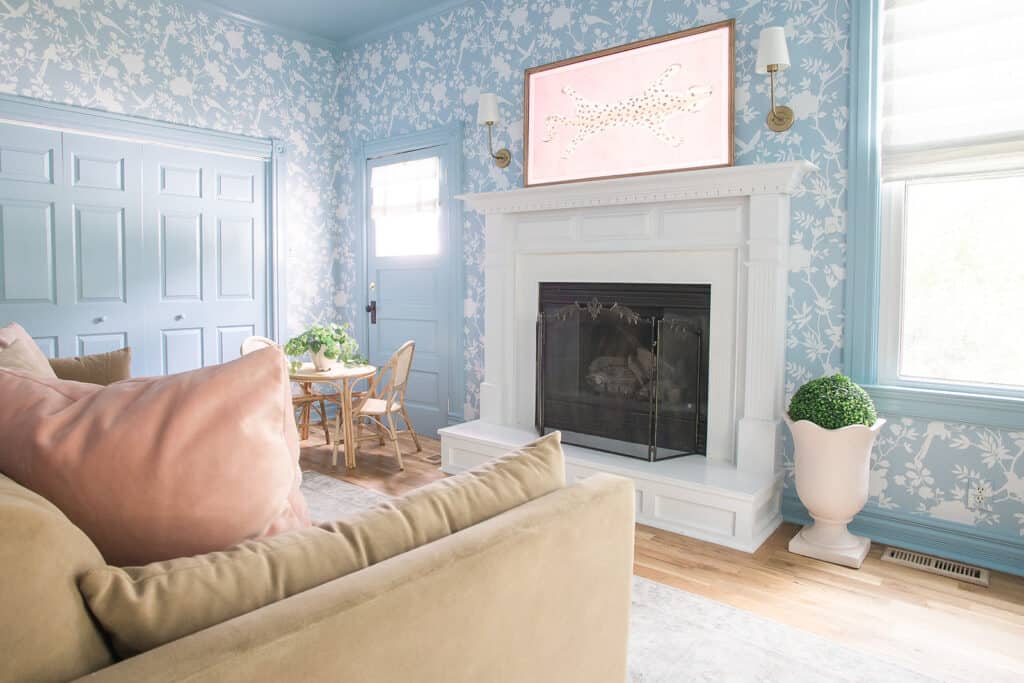
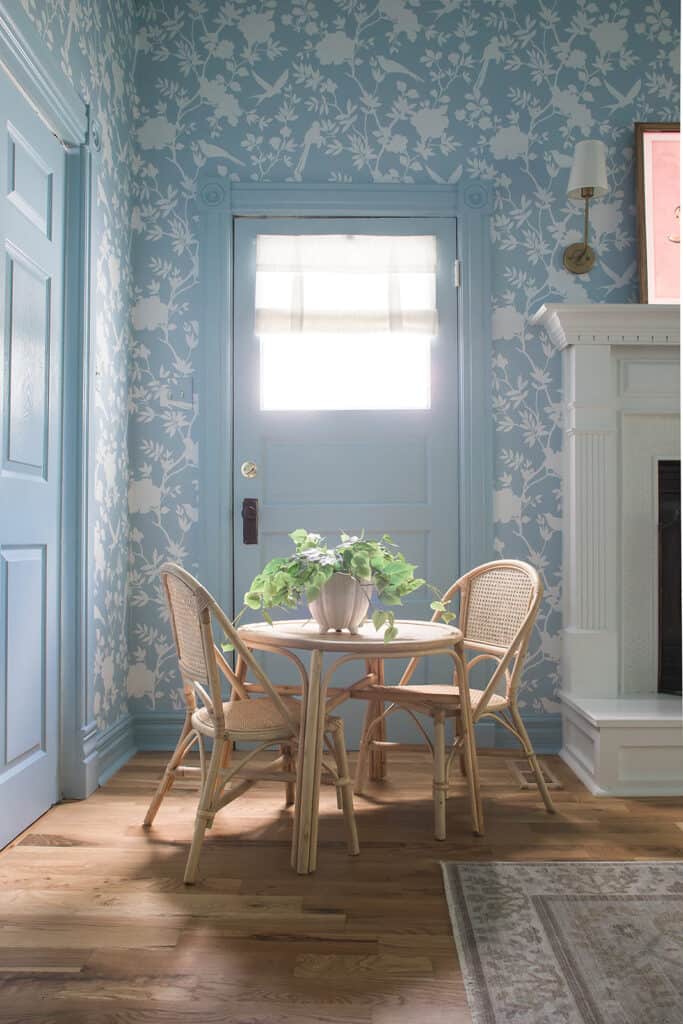
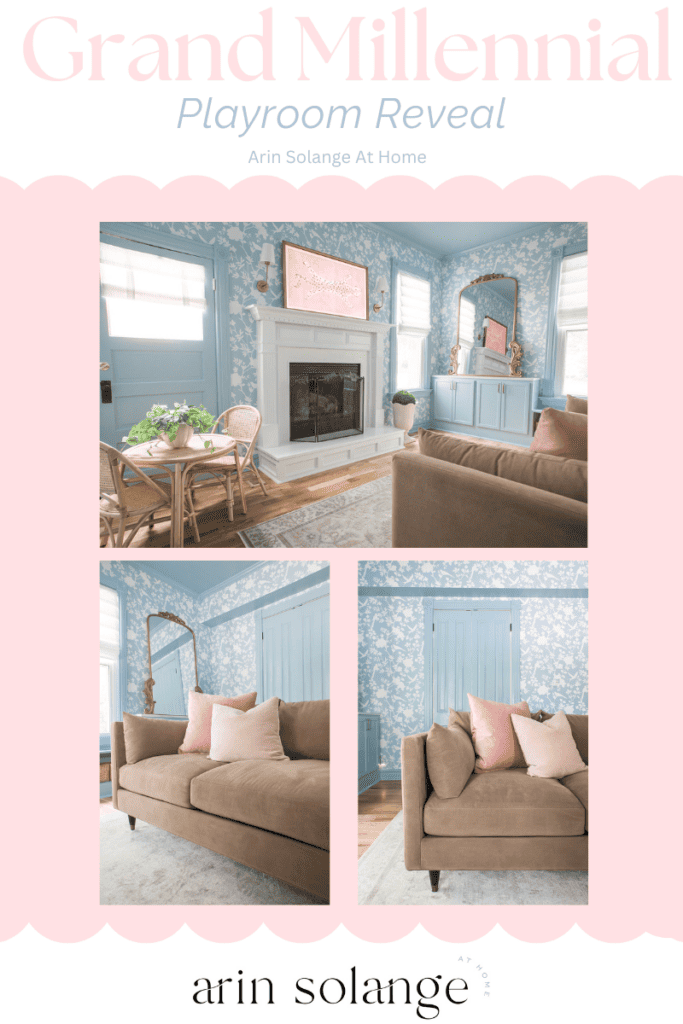
It is safe to say I just finished my favorite room in the house. The best part is it was REALLY simple. Our blue Grand Millennial playroom reveal this month is a result of a need to pivot on a room. It is pretty, perfectly moody, and simple perfection.
This post may contain affiliate links. The sofa in the room was graciously gifted to me as a part of the room makeover. Thank you for supporting the brands and companies that support my blog.
Grand Millennial Playroom Reveal
I am a mama to 4 kids with ages 10, 8, 6, and 3. Over the years I have had so many different playrooms and set ups. As my kids have grown our needs have changed. My youngest baby just started preschool which means there are less kids playing in our house on a daily basis.
Truthfully, Goldie is the only one who really plays with toys. So although, it is a play room we are in the in- between- stages of a playroom and a ‘hang out’ room.
Since it is a playroom I kept the home decor and furniture simple. I always aim for as much floor space as possible in a playroom. Someday I’ll probably have some horrible recliner for the kids, but for now I am keeping things simple. To tie my interior design vision together is a gorgeous sofa from Jonathan Louis.
Turning Things Blue
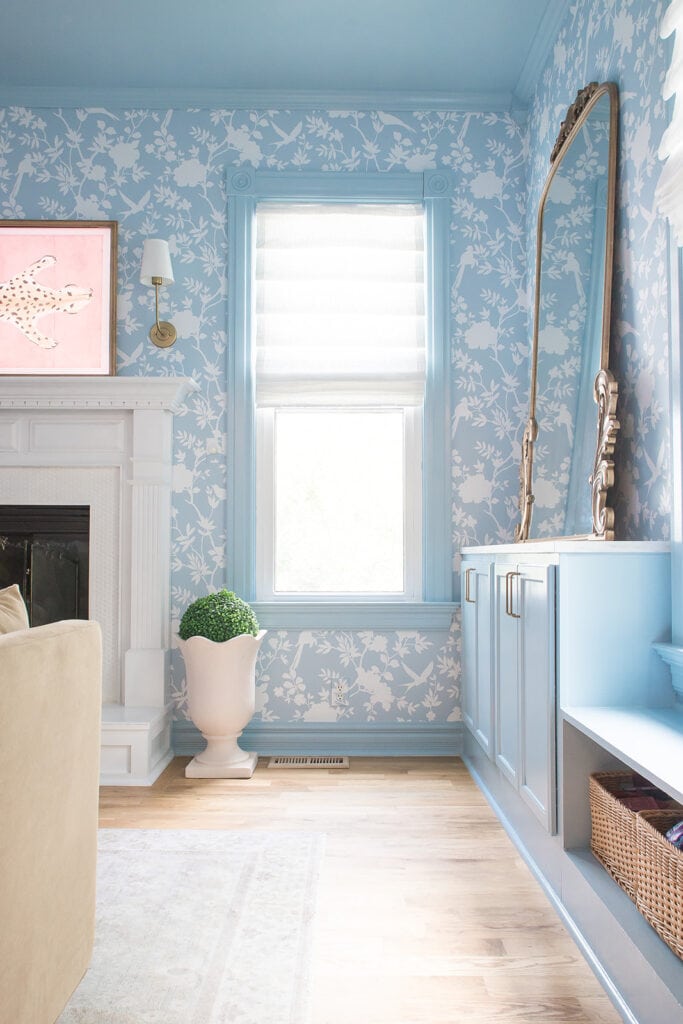
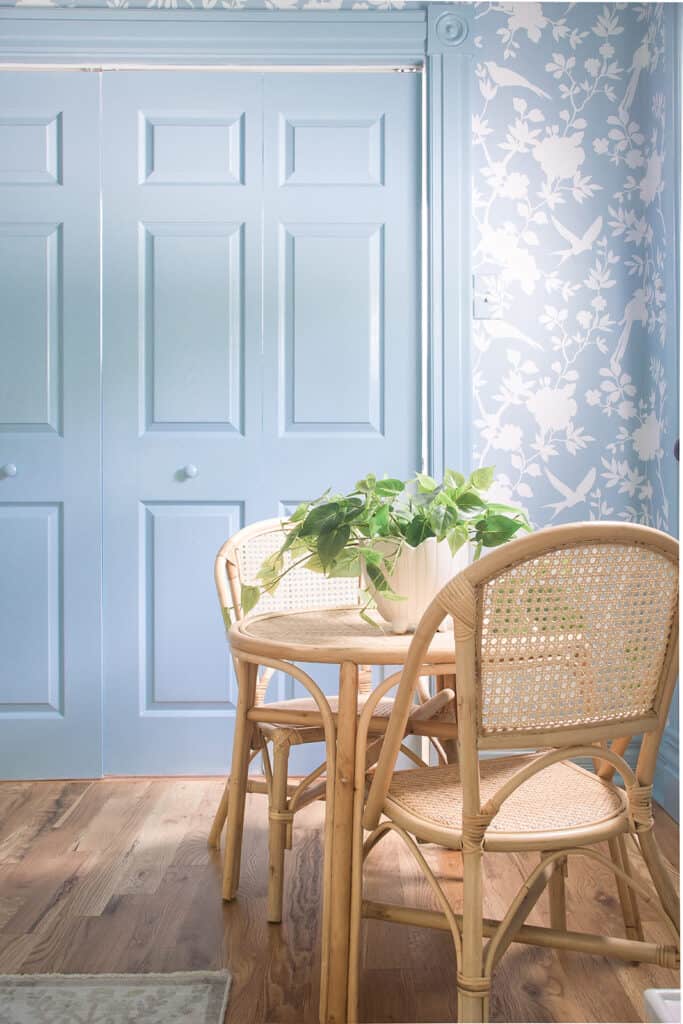
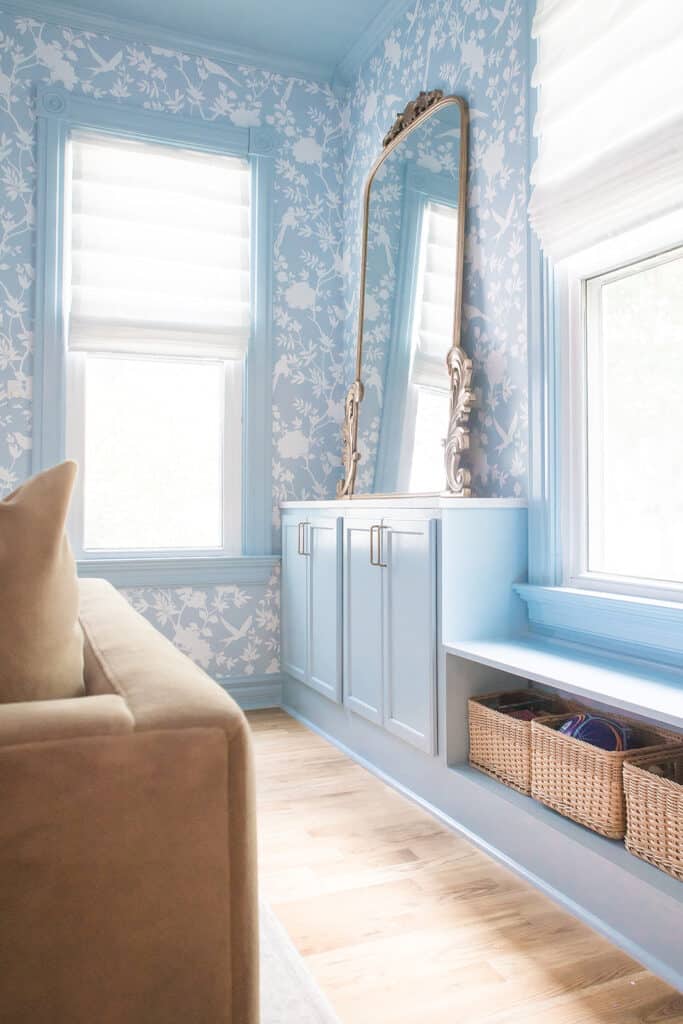
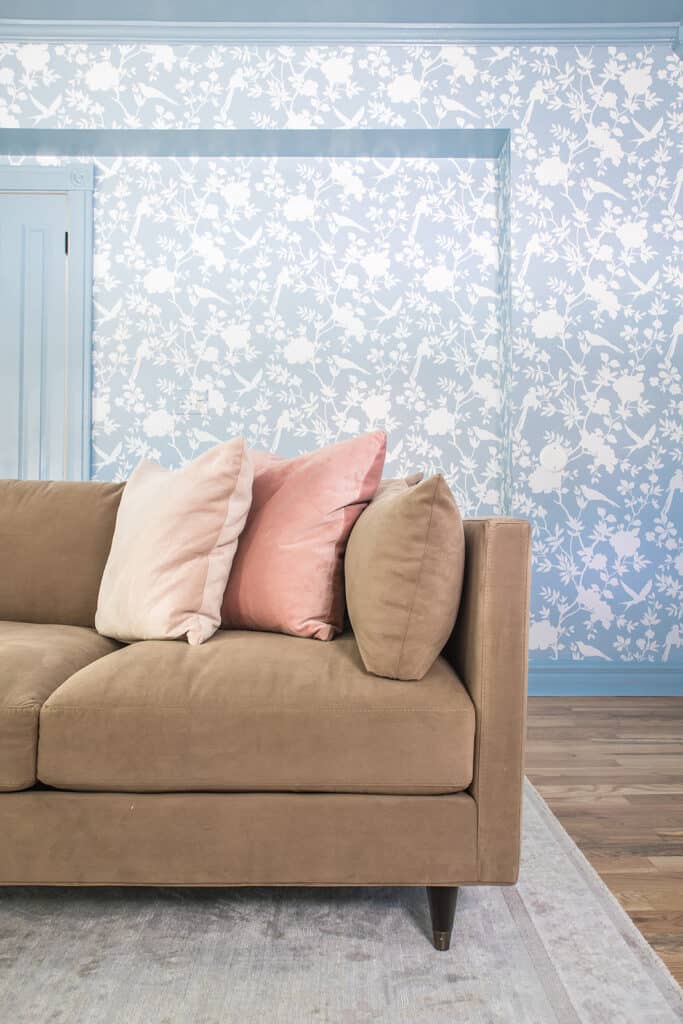
This room came together due to a need to pivot on wallpaper and design. The previous wallpaper we had hung didn’t work with our fireplace heat. So we took down the old wallpaper to start fresh.
I am a pink girl through and through. Picking blue wallpaper is not my normal. Adding blue paint with it is definitely NOT my normal. However, I am so glad I took a risk with this blue color palette because it is so pretty.
For the wallpaper we went with this one from Amazon. It’s very affordable in the world of wallpaper and the paper roll is peel and stick. In other words, it is really easy to manage on your own. The pattern is also really forgiving. So if you are looking for a place to start with wallpaper this would be a great spot.
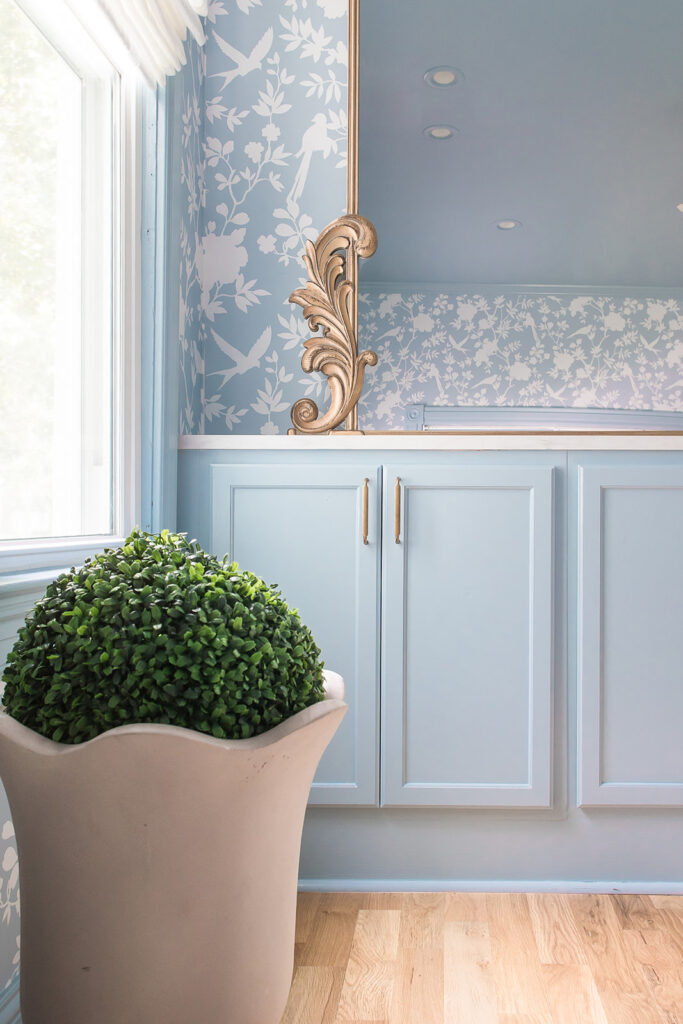
I decided to paint the built ins (DIY tutorial here) blue. Once I started all bets were off. The blue was so pretty that I decided to paint the trim and moldings all blue. Once that was done, we added blue to the ceiling too.
I have never gone this over the top with paint, bright colors, and wallpaper before. I am so glad I did it because it is such a good design decision and really tied together my grandmillennial style with the rest of our home.
I went with Behr Spring Storm for the paint color. All of the finishes are in a high gloss for a more elevated, grand millennial look.
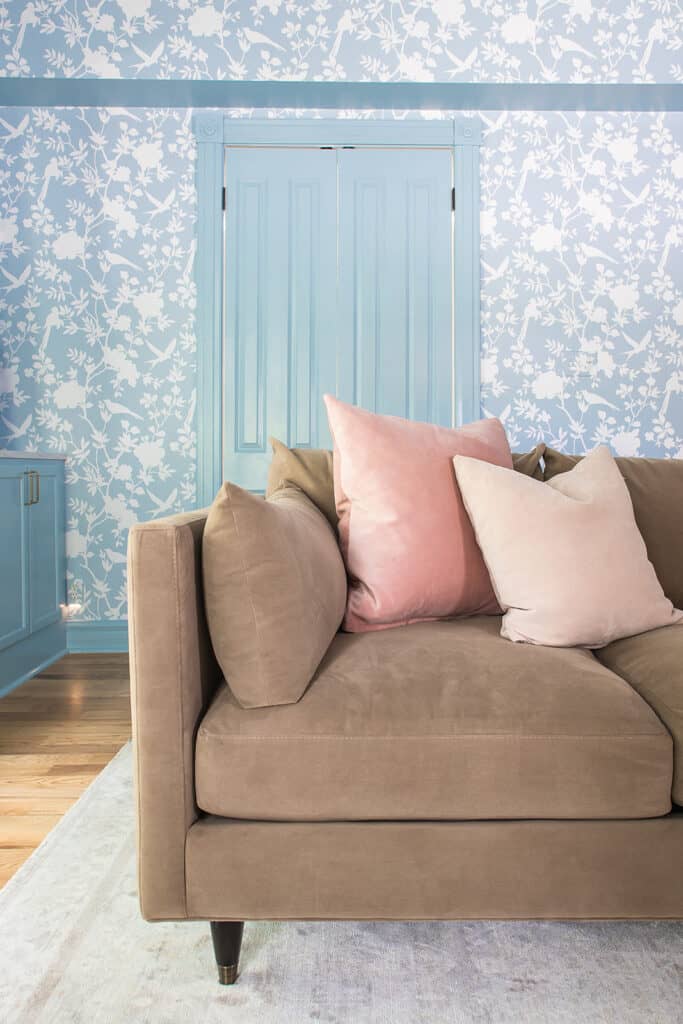
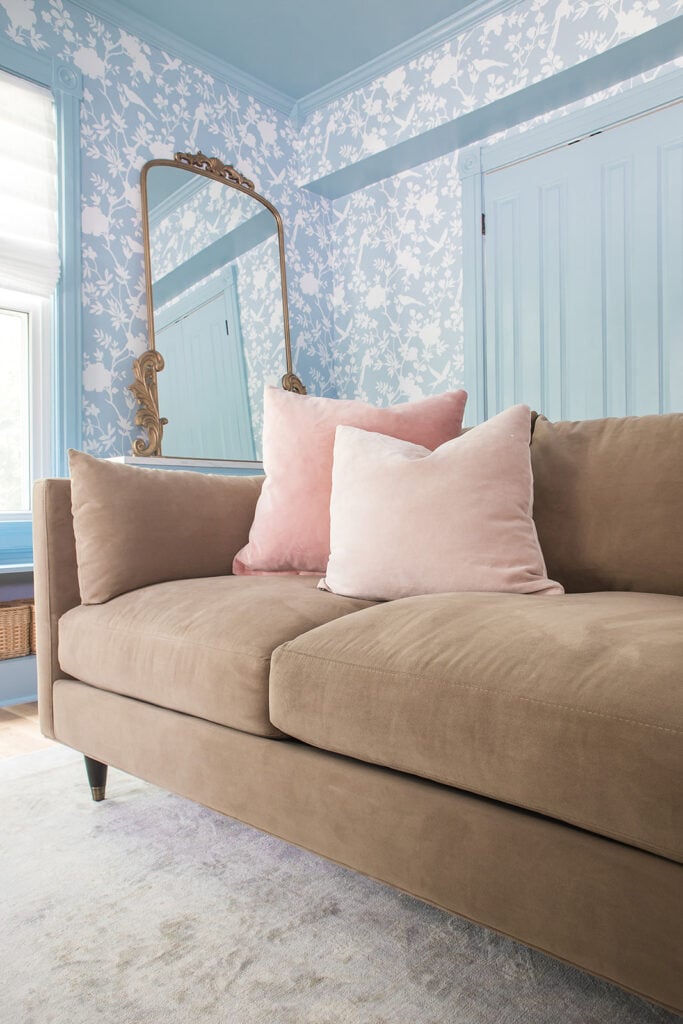
Jonathan Louis Sofa
I had three major requirements for our sofa: comfort, easy to clean, and pretty.
Playroom couches are tricky. While I want the space to be comfortable and aesthetically pleasing, I also need something that can stand up to kids being kids since it is their space.
It was a pretty quick decision for me when it came to the sofa. We had owned the Pia Sofa in Bella coffee in a love seat version before. Sam and I have stated for years that is the most comfortable sofa on the planet. I still stand behind that statement.
This time we went with the full sofa. Let me tell you that being able to fully lay on it is just heaven! The Bella coffee fabric is a performance fabric. It truly is the easiest color and material to keep clean, but it still has this elevated velvet look.
The throw pillows on the couch are also Jonathan Louis in both royal blush and gypsy blush. I loved the play on pink. I have the same two colors for pillows in another room. So, I knew it would tie the spaces together nicely.
With Jonathan Louis I can find both the right couch, as well as the right fabric for the space. It creates a totally custom feel to your bonus room.
The Finishing Details
I kept decor simple because this is a playroom. The last thing I need are extra items that will eventually be broken with a ball or flying Barbie.
We did two identical leaner mirrors over the built ins. The mirrors are much more affordable than you might think. If you have been looking consider checking them out, or you can see some other options here. I love how they add a mix of vintage as wall hangings.
The wallpaper helps make the space feel grand and open while also adding elegance. The wallpaper takes up all the wall space with texture and dimension. As a result, you don’t need to go overboard with wall decor.
I added this Rifle Paper Co rug on the floor. It has been in the room for over a year. It has held up great which is noteworthy with my kids. So my rug source gets my seal of approval.
The table and chairs are from Home Goods. Here is a similar set that we have also owned. I love the simple rattan look that adds natural texture to the home design.
We went with a Frame TV over the fireplace which I LOVE. We have 3 of them in our house. We also added a simple light pink planter (from Home Goods) and a faux boxwood for the added bit of natural.
For window treatments I went with Select Blinds roman shades in cloud white. This was my first time ordering from them. We have been really impressed. I wanted something affordable but high enough quality to keep a decent amount of light out because this doubles as our guest room.
Whether you are designing a grand playroom, living room or another space in your house, I hope this gave you inspiration.
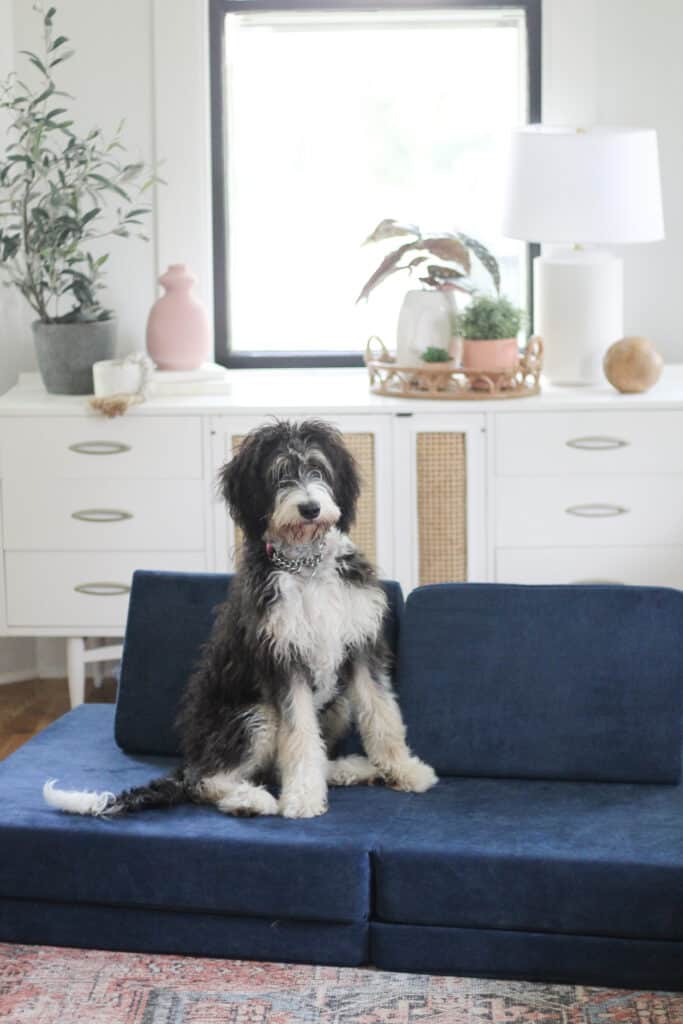
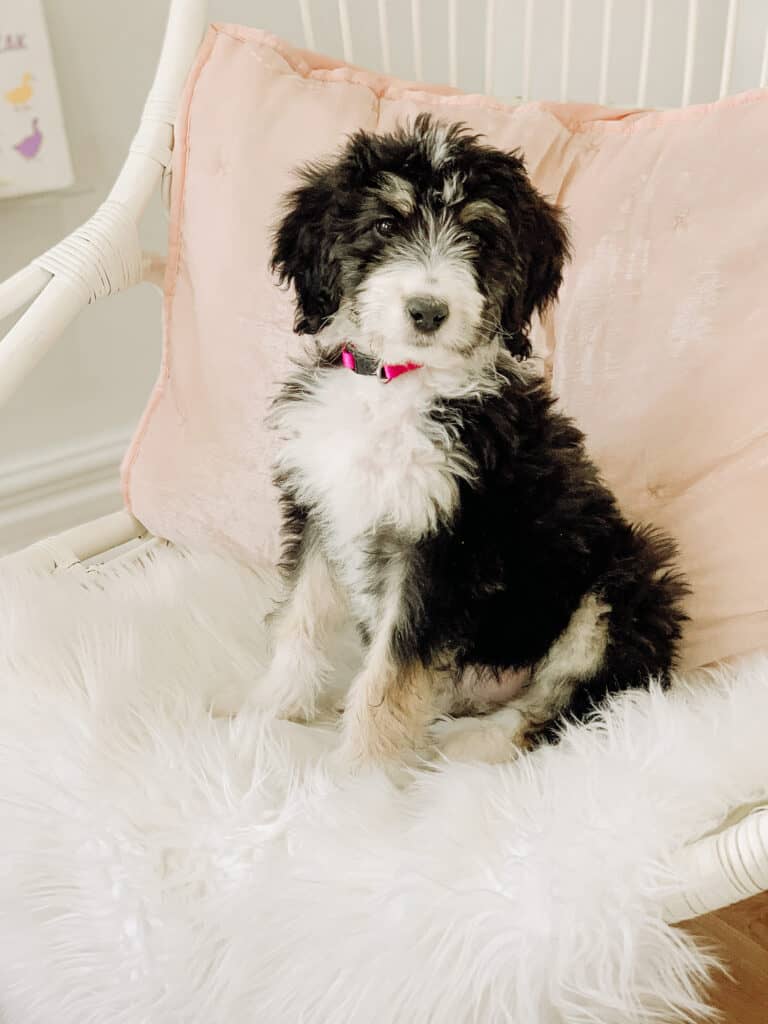
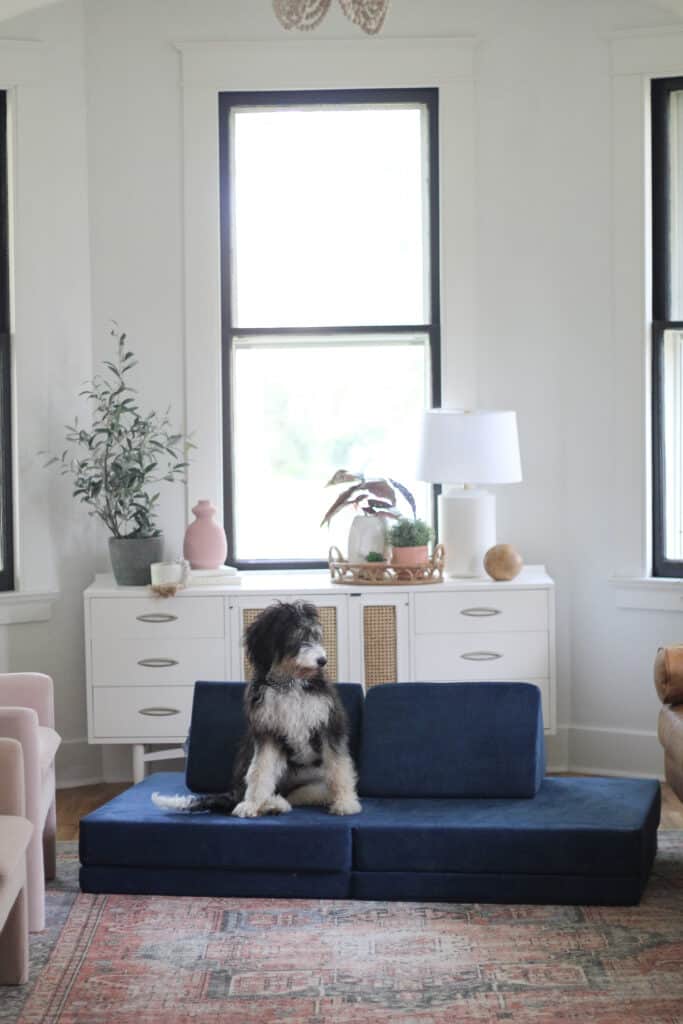
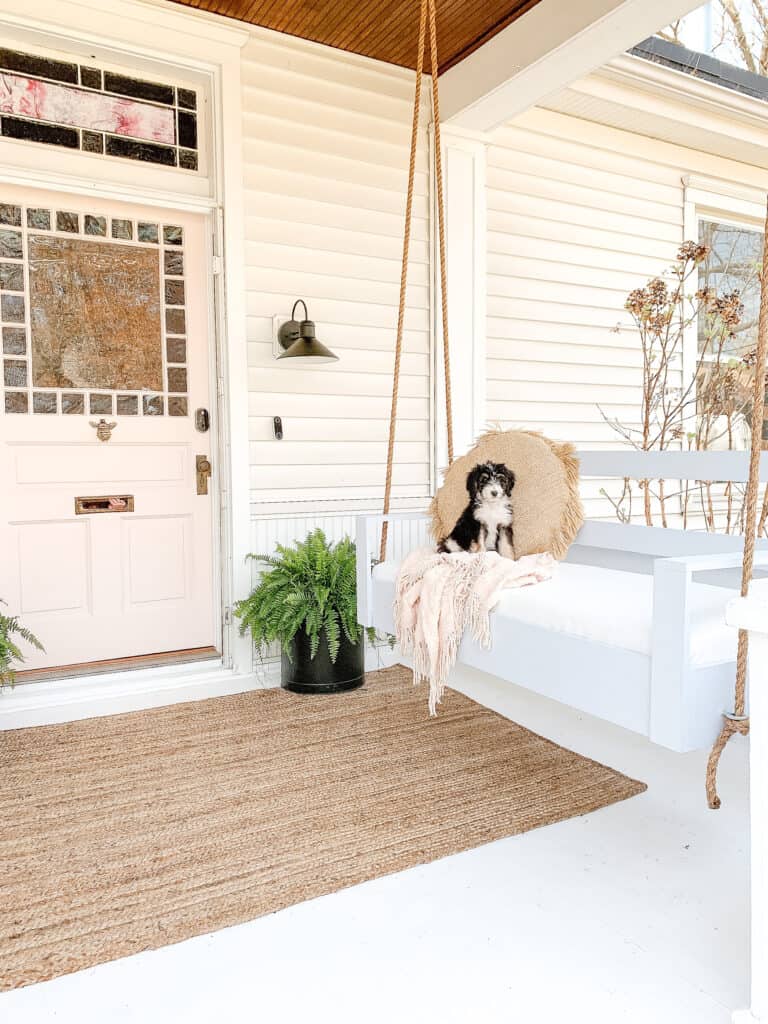
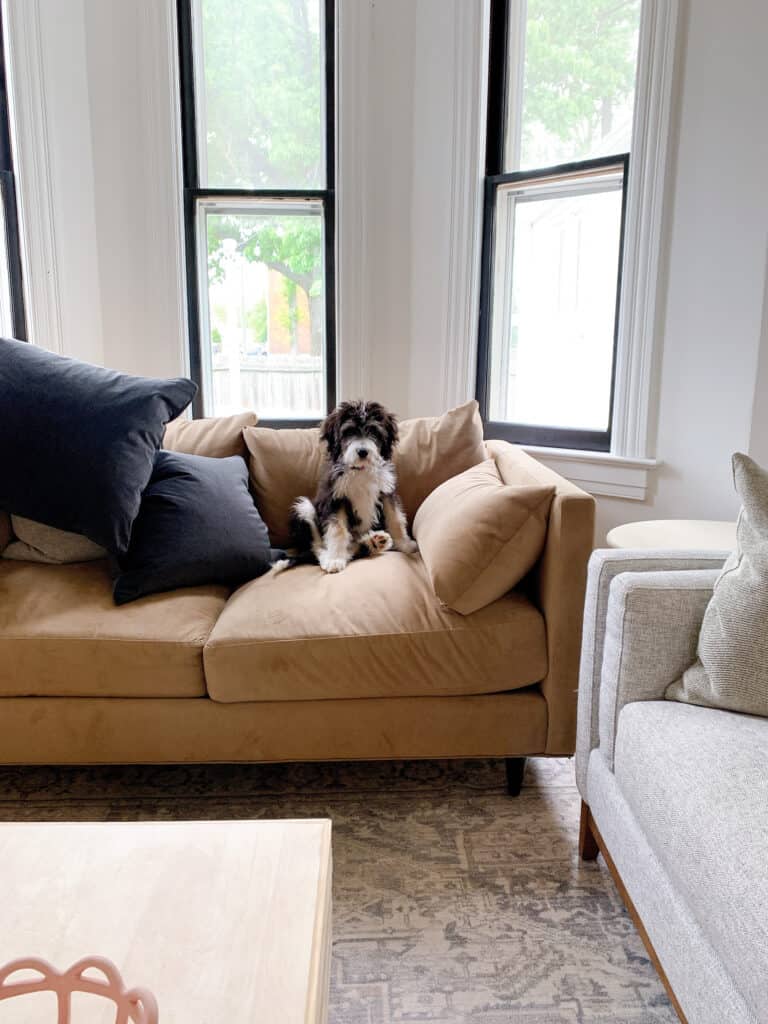
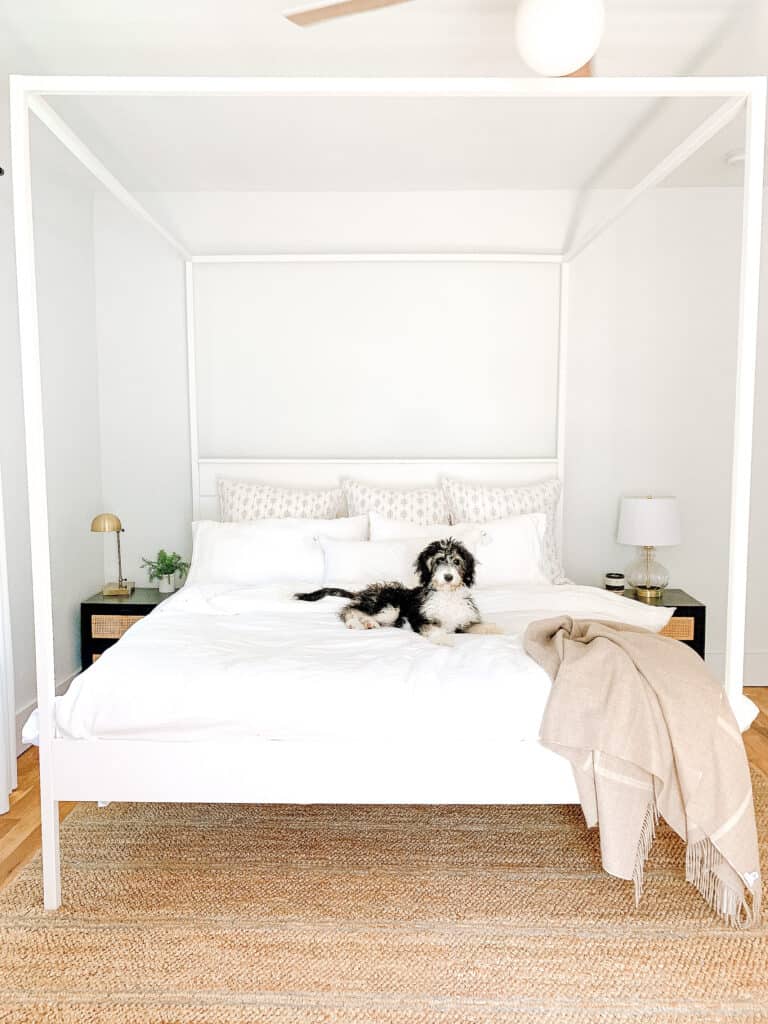
Our sweet Bernedoodle, Penny is quickly becoming the queen of my Instagram. She is has become my sweetest little photo drop in, and with all the questions I receive, I decided it was time to give Penny the spotlight she deserves. I’ll dive in on all the details on our Bernedoodle and what it’s like to own one.
I will talk about the good – and the bad – of owning a Berniedoodle, and will help you know exactly what you need to do to prepare adding a fur ball to your family.
This post may contain affiliate links – shopping those links is at no cost to you, and I am incredibly thankful for all the support it gives me family. This post has been updated as of September 2023.
Our Bernedoodle & What It Is Like To Own One?
I know what you are thinking. What the heck is a Berniedoodle exactly? Bernedoodles are a Bernes Mountain Dog Poodle mix. Bernedoodles are not a purebred dog breed, but rather a mix breed of 2 purebred dogs.
The parent breeds are Bernese Mountain Dog and Standard Poodle. Bernedoodles have many perks of both breeds which make them enticing to so many (including us) to own.
Berniedoodles boast non shedding hair, a loving temperament and the distinct coloring of a Bernese Mountain Dog all mixed into one!
Bernedoodle Temperament
I think most people know they are looking at a doodle for some of the perks that poodles offer. Shedding, for example is one such perk. But one thing you are probably curious about is the temperament of a Bernedoodle. Bernedoodles typically get much of the good from both breeds when it comes to their temperament.
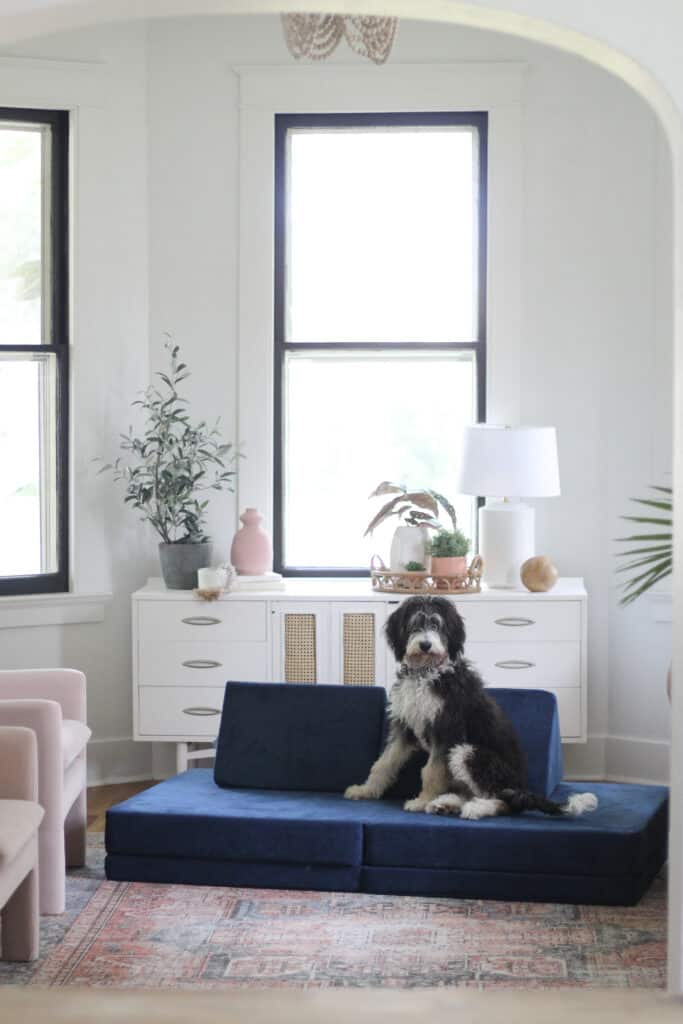
They tend to be affectionate and playful, yet highly intelligent and hard working, if trained correctly. All in all, Bernedoodles are wonderful family dogs who are great with children, and love to be around their owners. They are an incredibly loyal breed as well. We tend to say that Penny thinks she is a lapdog, although is not the size of one!
How Big Do Bernedoodle Puppies Get?
Another thing we are asked frequently when it comes to owning a Bernedoodle is, ‘How big will she get?’
Penny is 9 months old and full grown. She is roughly 45 lbs, which is very average for a full grown female Bernedoodle. Below is a good gauge of size for a Berniedoodle based on the size you get and the gender. Keep in mind that you can ask a breeder more about the anticipated size based on past litters or the size of the parents.
Bernedoodles come in 4 different sizes: Tiny, Miniature, Medium and Standard. This is based on the size of the poodle that is the parent. For all size ranges the males tend to be larger.
Standard Bernedoodle size (70 to 90 pounds)
Medium Bernedoodle size (50 to 70 pounds)
Miniature Bernedoodle size (25 to 49 pounds)
Tiny Bernedoodle size (10 to 24 pounds) – mixed with a toy poodle
One thing you will find when looking for Bernedoodles is discrepancies in the medium and standard sizes. Penny is standard, however she is only about 50 lbs.
Bernedoodle Appearance
When you are talking about a mix breed dog in general, you will typically get a bit of a range in terms of the appearance of the dog. Your breeder should have pictures of past litters from the parent dogs which will give you a good idea of the dogs coat. Some Bernedoodles have a more curly coat, while others are a bit more straight or wavy.
The wavier hair is coming from the Bernese Mountain Dog parent and the curly hair comes from the Poodle parent. A Bernedoodle coat can also come in a variety of colors. A tri-color Bernedoodle has 3 different colors in their coat. However it should be advised that many times as the Bernedoodle grows that brown coloring will fade and go away.
What It Is Really Like To Own A Bernedoodle
You are likely reading this post because you want to hear from a real dog owner about what it is like to own a Bernedoodle, instead of reading all the stats. Maybe you are already getting your Bernedoodle, or trying to decide if it is the right breed for you. Either way, I hope this post is helpful for you!
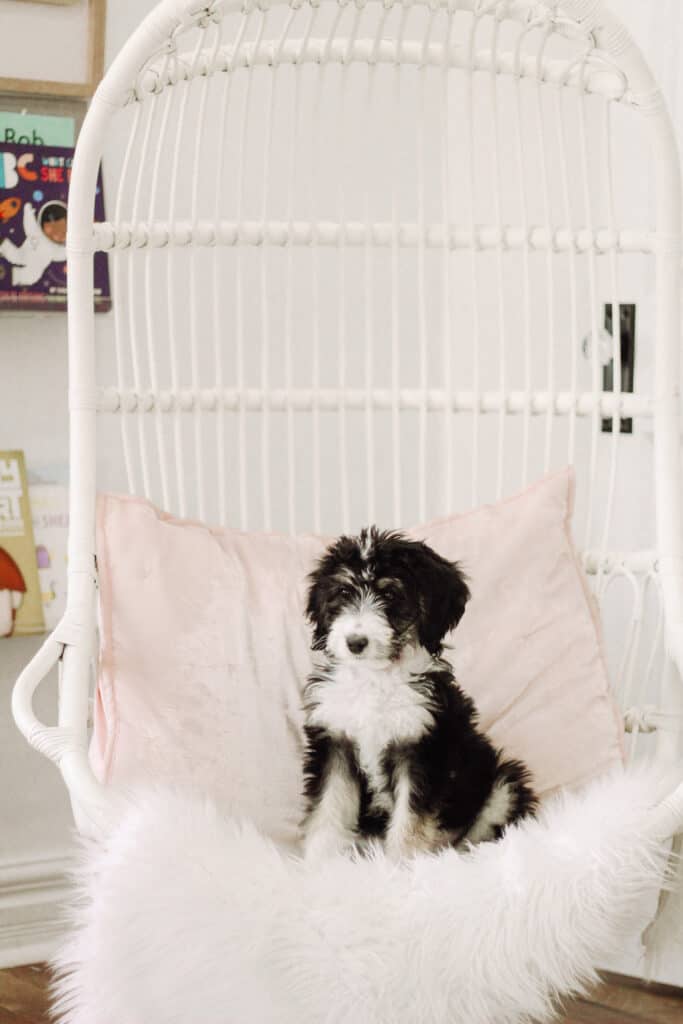
Penny is our 9 month old F1 Bernedoodle. Her mom was a purebred Bernese Mountain Dog and her dad was a purebred Standard Poodle. Penny is/was a tri-color Bernedoodle. This means that as a puppy she had three color markings that are seen on a Bernese Mountain Dog.
She is fluffy, with a wavy coat. She has the biggest paws I have ever seen, and has quickly learned to rule our house!
Penny is our first doodle. We knew we wanted a non shedding dog, and we will never go back after how much we love her! She is such a good dog even for her puppy age, and even with her down sides. Yes, they do exist! She has been a wonderful addition to our family.
FAQ On Bernedoodles
I get asked a lot of questions when people see Penny. Of course everyone wants to know what type of dog is Penny? Once they find out she is a Bernedoodle, it generally leads to even more questions regarding her breed. Some of those questions are the same questions I personally wondered about when we were looking at getting a Bernedoodle puppy.
What Makes A Bernedoodle Special?
Bernedoodles are a designer breed. With several designer breeds becoming increasingly popular over the past decades, Poodle mixes are hight on that list.
Poodle mixes are loved for their size, temperament, non-shedding abilities. Of course each mixed breed and dog is different, Penny boasts all of these qualities.
How Much Is A Bernedoodle Puppy?
People are willing to pay top dollar for doodles in general, and Bernedoodle puppies are no different. Bernedoodle puppies typically cost between $2500 and $6000 for a puppy depending on the breeder and the color markings. Most breeders charge a higher amount per color marking. In other words, a single color Bernedoodle puppy is less expensive than a tri-color Bernedoodle.
Bernedoodle puppies are one of the most expensive of the doodle breeds due to the highly coveted color markings. Tri-color coated Bernedoodles are the most coveted and typically the most expensive.
What To Look For In A Bernedoodle Breeder?
You need to be cautious and do your homework before you pick out a breeder. You’ll want to make sure that the breeder is reputable and has transparency in the health of their dogs.
The high cost of a Bernedoodle puppy can lead people open to schemes, which is why it is crucial you find a reputable breeder. Be cautious that you are not supporting a ‘puppy mill’ where they are mistreating the mother dogs, and keeping them pregnant too often.
I know that finding an experienced breeder isn’t always a super easy thing to figure out, but if you trust your gut you will be able to tell.
Tip #1 : Check Your Breeder’s Social Media
Check the breeder’s social media to be sure they aren’t sharing a litter from the same momma dog too often.
Tip 2: Check For Past Litters
Look at past litters on their site. If the breeder has a list of references, this is even better. You should be able to talk to other families who have bought from the breeder before to ask questions.
Tip 3: Meet The Parents
If possible always try to meet the parents and visit the breeder in person. This way you can see the conditions of where the pets are living and how they are being treated. This will also give you time to ask plenty of questions.
Tip 4: Ask For A Health Screening
You may also want to ask if the parents or past litters have had any genetic testing to check for health issues that you don’t want bred into your puppy. A common health problem known as hip dysplasia is a condition that is typically seen in Bernedoodles. While getting an F1 Bernedoodle lessens the risk of health problems, this is not a guarantee and you’ll want to ensure other diseases aren’t bred into the line.
I searched both online and Instagram. The wait times tend to be long, so you may have to get on a waitlist well before you are ready to bring a puppy home. We personally drove across several states to get our sweet Penny, and have friends that have traveled far as well. If you are interested in our breeder you can check them out here!
We decided that the long wait was more painful than the long drive and we wanted a breeder we felt good with, so we knew we would get a healthy puppy.
Training Bernedoodle Puppies
Can I be honest? I don’t know if training any breed of puppy was going to be easy for us with 4 kids at home, but Penny has done pretty well. Bernedoodles are intelligent dogs. However, I want to walk through the good and bad of her training so you can gauge your family’s needs.
When we brought home Penny at 8 weeks old my two biggest worries were: crate training/ sleeping well and potty training. Bringing her home actually reminded me of bringing home a baby. Super sleepy and well behaved for a minute, then they turn into the needy baby.
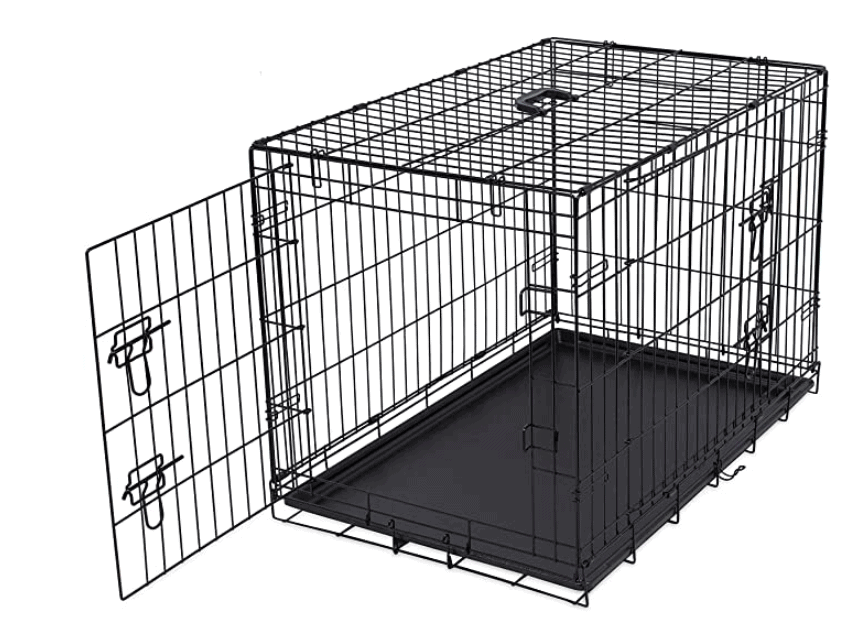
Crate Training A Bernedoodle
We opted to crate train Penny from the first night. That meant teaching her to sleep in her kennel at night, and go in her kennel when we are gone. I was convinced we would be up all night from the start, but she slept through the night well from day one!
When we first began, we opted to keep her crate farther away from the bedrooms so everyone would sleep well. She let us know when she was awake and did bark when she was first put to bed. We also opted to keep a sound machine in the room for white noise. This helped her not hear us in the even we had to get up with any kids.
Picking The Right Crate
Penny uses this crate, and has since being a puppy. As a new puppy we were able to put the divider in to make it feel smaller and more cozy. Now, she sleeps in it without the divider.
When she was small we put towels down for her to sleep on so they were easy to clean. She LOVES anything we keep in her kennel. She treats towels like a baby blanket and drags it out to lay on, so we ended up giving her a blanket at about 7 months old.
Now, she sleeps in our bed or her dog bed. Her dog bed is washable and is the perfect blend of cozy and stylish.
Buy her dog bed here – I love how this looks, but it also washes well in the machine.
Potty Training Bernedoodle Puppies
Because puppies typically do a great job at not having accidents in their crate, that is a good step in getting them house broken. After 2 or 3 weeks, Penny was 90% house broken. Then after another week or so, she became completely house broken.
We were VERY careful not to allow her to be in any room unattended. When puppies are unattended, you can expect accidents.
Following her cues was very helpful in establishing a schedule. Just like potty training a toddler, puppies too give off body signals to alert you that they need to go. Once we realized those cues and timing, potty training was set. Lastly, in the event of an accident, Penny is placed in her kennel instead of taking her outside once we knew she knew it was wrong.
Behavioral Training A Bernedoodle Puppy
In honestly, we haven’t done much behavioral training with Penny. We attempted a 2 week, all day, training session. This worked well, but it isn’t a great fit for all families. In all, you need to find classes or a program that works for your family’s needs and schedule.
No Dogs On The Furniture?
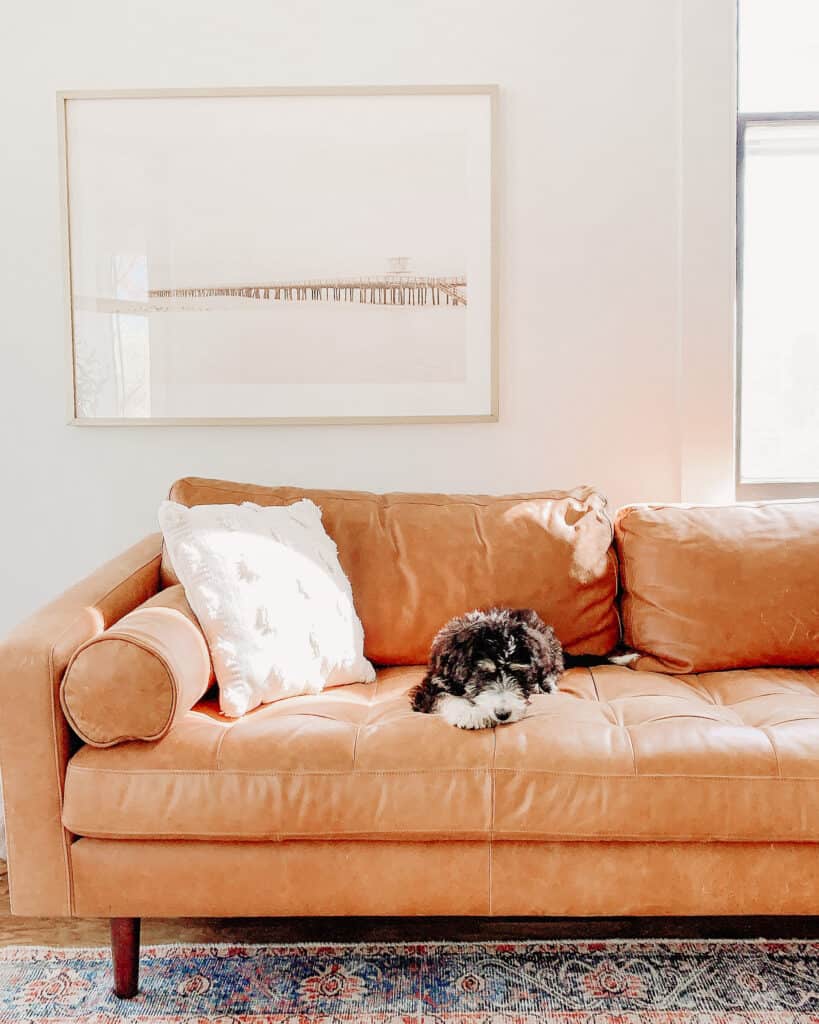
Penny is very well behaved, but she sure isn’t perfect. One thing I SWORE she wouldn’t do is lay on our furniture. However, I lost that fight, fast. She loves to be on furniture and sometimes even tries to be on my lap.
A Teething Bernedoodle Puppy
A teething puppy can be rough. Puppies tend to nip and chew on anything they can sink their teeth into- even if that means a finger or two. The kids quickly learned not to play near her mouth.
We keep these bully sticks on hand. Honestly, it is an investment because she goes through them really fast. It has been the best thing for keeping her from chewing on anything in our home or from nipping, which will lessen with time.
How To Curb Jumping?
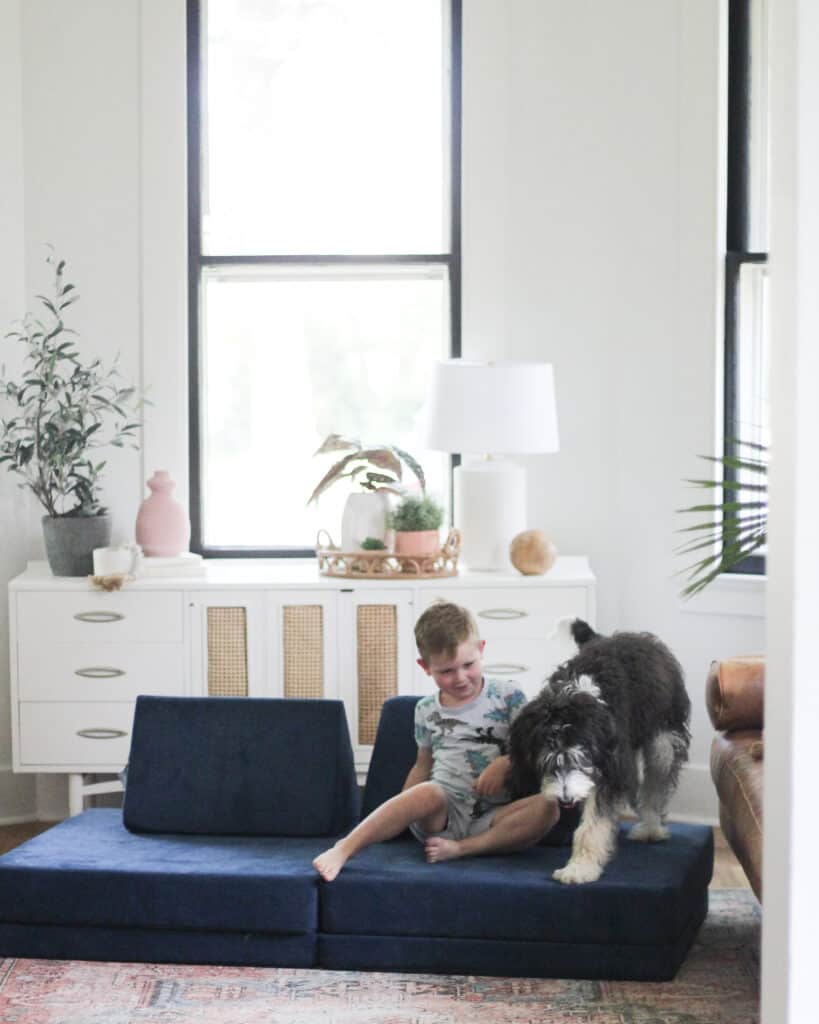
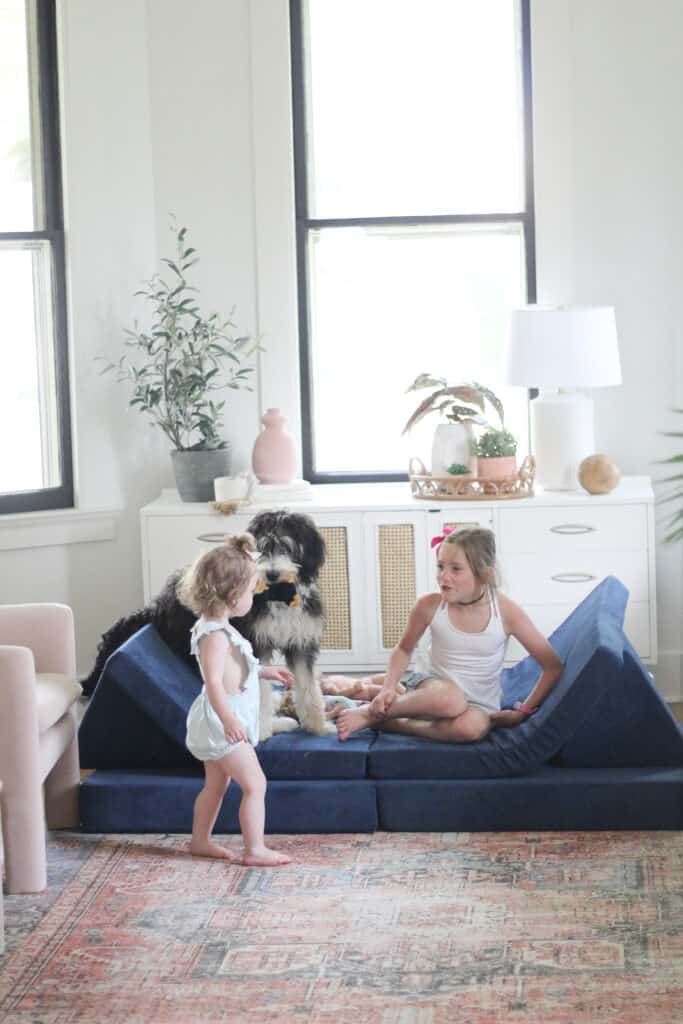
Jumping has been our hardest behavior to curb for Penny. She is a big dog and is very strong. Coupled with the fact that my youngest child just turned 2 has been rough from time to time because Penny doesn’t understand her size.
Jumping has been our biggest hurdle to work through and it is a continual work in progress. I think for most bigger dogs, this is a difficult behavior to address. Bernedoodles are especially prone to jumping due to their affectionate nature. They want to jump for love just to be in your space.
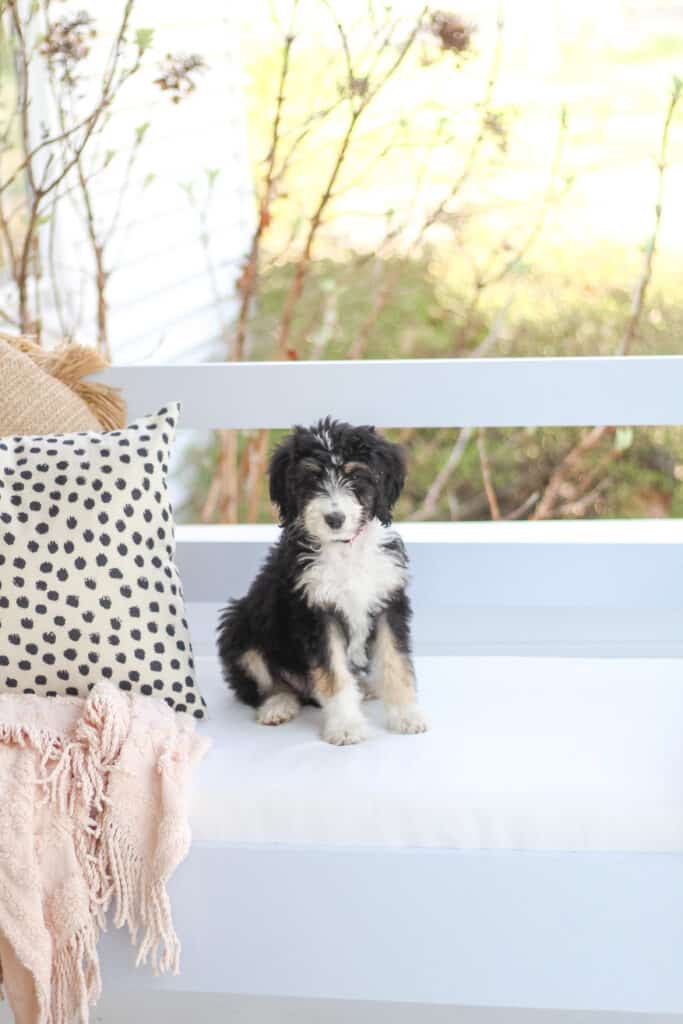
These photos were at roughly 6 months old and in dire need of a grooming
Barking Problems
I am often asked if Penny barks a lot. People are surprised to find out that Penny is not a barker
If she barks I know she REALLY needs to go outside or she is really mad to be in her kennel. From time to time, she will bark in her kennel for 10 seconds to remind us she wants out, but by no means is barking in excess.
We have heard that Bernedoodles do tend to bark more than Penny does – so I am not 100% sure that our experience with the minimal barking from Penny is accurate.
BernedoodleGrooming
Bernedoodles are considered a hypoallergenic breed of dog that does not shed. That said, they do shed SOME just like you do as a human. Penny by no means sheds on our clothes or our furniture. We from time to time do find a little fluff of hair against the baseboards, but for the most part have noticed no major shedding.
Our oldest son is also allergic to dogs, and has done very well with Penny. Shedding dogs give him hives and Penny has not done that for Jack.
Even with minimal shedding, Bernedoodles do have to be groomed.
We take Penny to be groomed where we have them do the whole nine yards, including cutting her hair. Between the grooming sessions we also do a few things to take care of her at home.
I don’t consider Penny high maintenance in terms of care. However, she still requires regular grooming appointments and brushing at home.
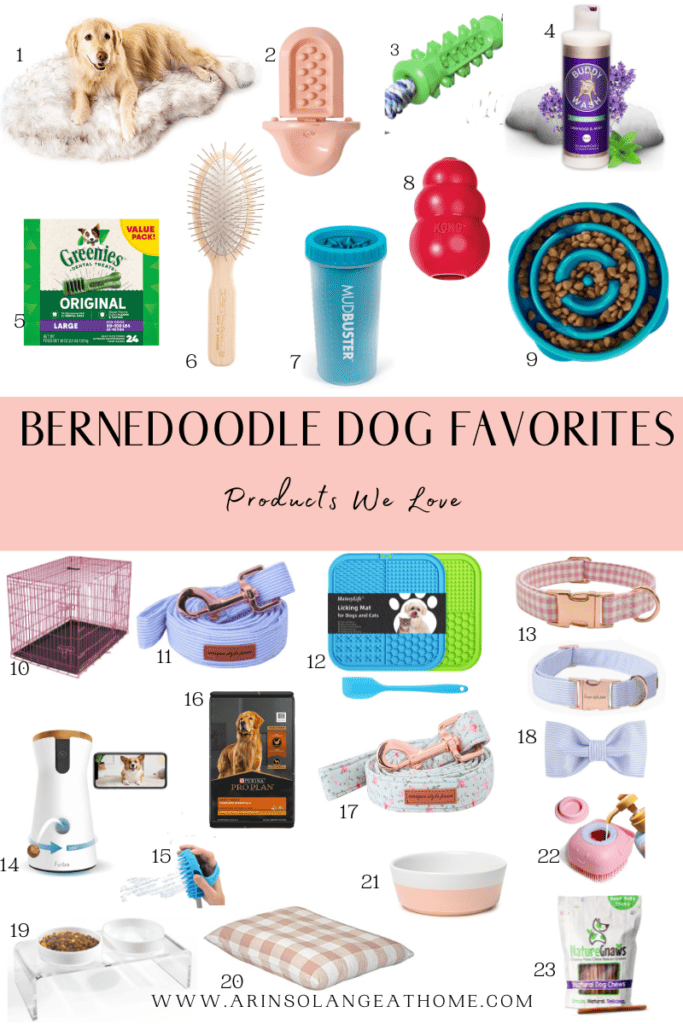
Favorite Grooming & Care Products For Bernedoodles
Brush – My friend Chrissy shared about this brush and I ended up ordering it and LOVING it. It is important that you brush their hair so they don’t get matted between groomings. The more often you brush your Bernedoodle, the more used to it they will get so they handle it better.
Toy for cleaning teeth – We try to brush Pennys teeth, but also have opted to use this toy with toothpaste.
Greenies Bones – We also give Penny Greenies bones every few days which helps keep her breath fresh and her teeth clean.
Paw Cleaner – This has been one of my favorite purchases with Penny. You fill it with water and clean their paws when they come in when it is muddy. We keep it by the back door for stormy days and it has been so helpful!
Bernedoodle Play and Socialization
So how much attention does a Bernedoodle really need? Puppies will always need socialization and attention. Penny, however, is easy to please.
Throwing a ball for her outside is a great way to entertain her. As with most big dog breeds one of the best ways to handle energy levels is to take them on a daily walk. Long walks take time for them to be ready for in terms of obedience, but overall we have found that slowly walking more has been the best way for her.
She is much more well behaved when slightly worn out. Of course, if you need assistance in getting energy out, a puppy daycare is a great option for socialization and to fill those exercise needs.
Penny loves other dogs and enjoys playing. She isn’t often near other puppies, but when friends have introduced their pets, Penny has been accepting and welcoming of meeting new friends.
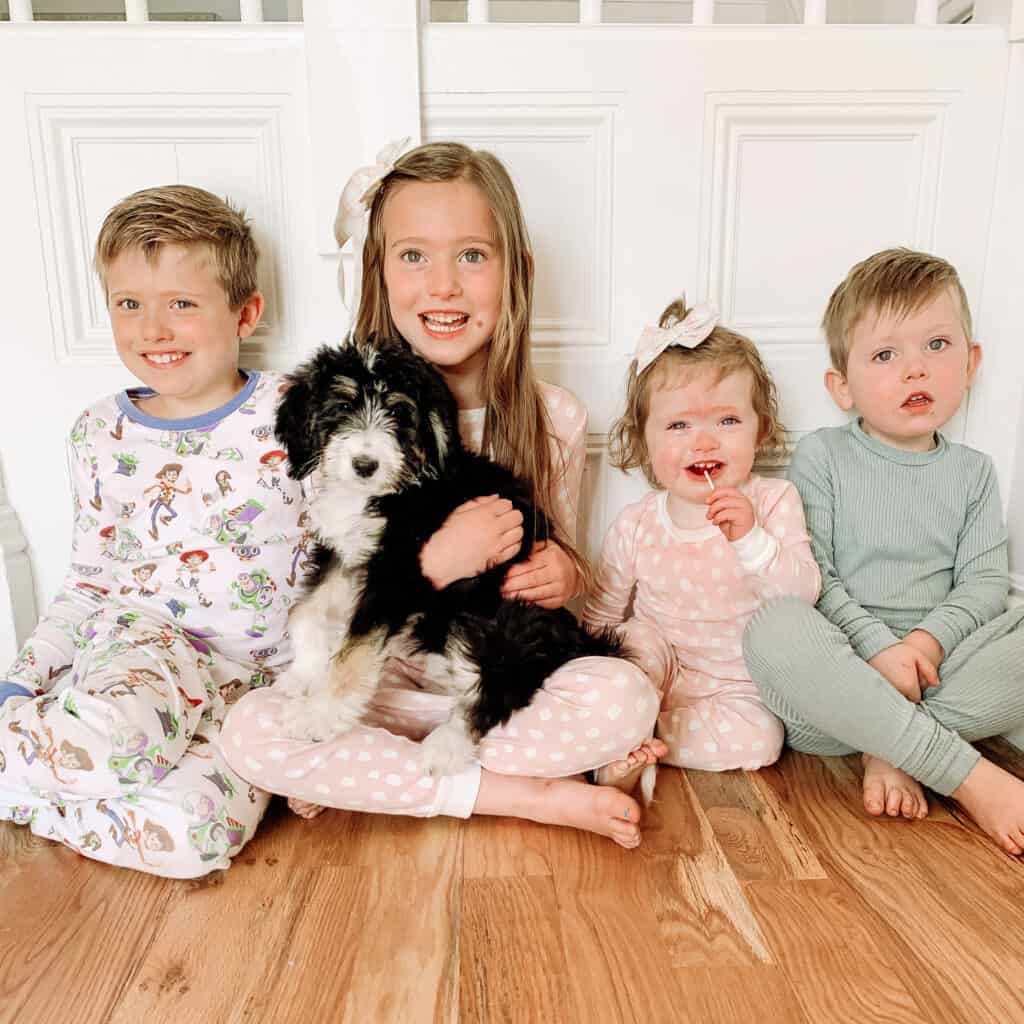
Bernedoodles & Kids
This was the NUMBER ONE THING for us. We have 4 little ones at home and their safety is our biggest concern. That said we also have taught them to respect Penny in return. We allow Penny to eat on her own and although sometimes the kids do interrupt, we try to encourage them to leave her be.
She is incredibly loving with the kids. While she can be somewhat rambunctious, overall, she is very sweet and gentle with our crew.
Bernedoodles lean to the side of wild and goofy with their highly affectionate personality. You can expect that they will be very playful with the kids and a great addition to your family.
Bernedoodle Pros & Cons
Pros
Easily trained in aspects we found most important (IE crate training and potty training)
Hypoallergenic and non-shedding. Bernedoodles are a great choice for allergy sufferers
Affectionate in nature
Longer lifespan with most Bernedoodles living from 12 -18 years old
Cons
At times overly affectionate and hyper
Tendency to jump
Chewing as a puppy that needs to be occupied with Bully sticks and toys
Can have some separation anxiety
High exercise needs – Bernedoodles are very active dogs that will be happier pets if you give them adequate excerise.
Overall Bernedoodles are a healthy breed that makes a great family pet. They are beautiful dogs with big personalities and are an excellent choice if you are looking for a loyal dog for your family.
We LOVE Penny and feel incredibly lucky that we chose a breed that has turned out to be such a great blessing for us. So if you are looking for a good choice of dog to be the perfect family dog then I think you will be beyond thrilled with a Bernedoodle.
Hopefully you found this post about Bernedoodles and what it is like to own our Bernedoodle Penny helpful. If you have any questions leave them in the comments below, and be sure to follow both myself (@arinsolange) and Penny (@pennysolangeathome) on Instagram to keep up with our lives.
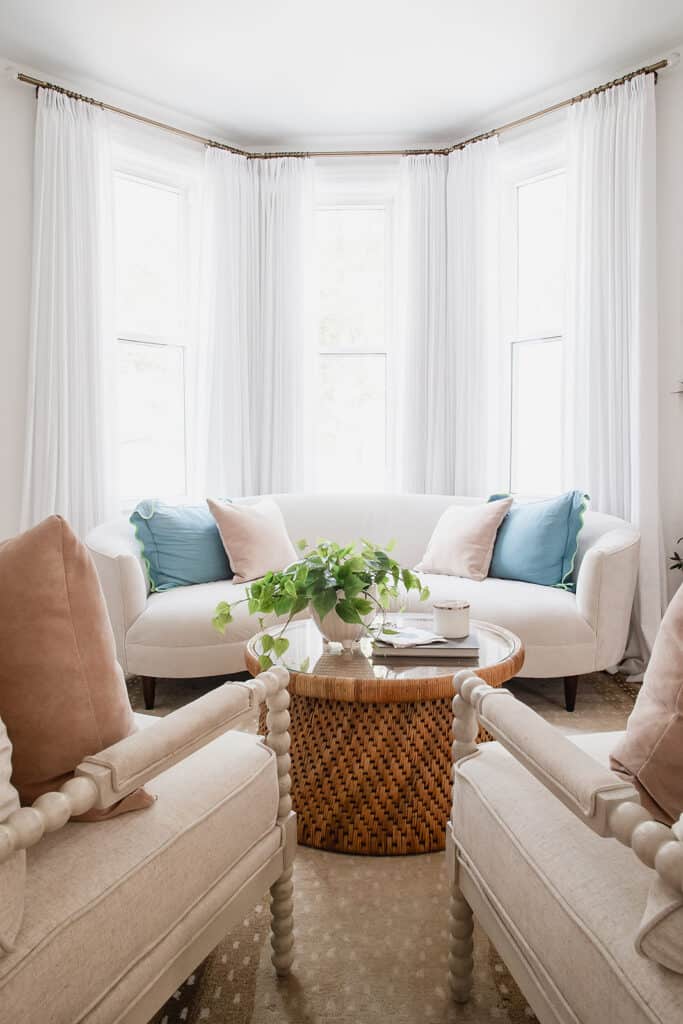
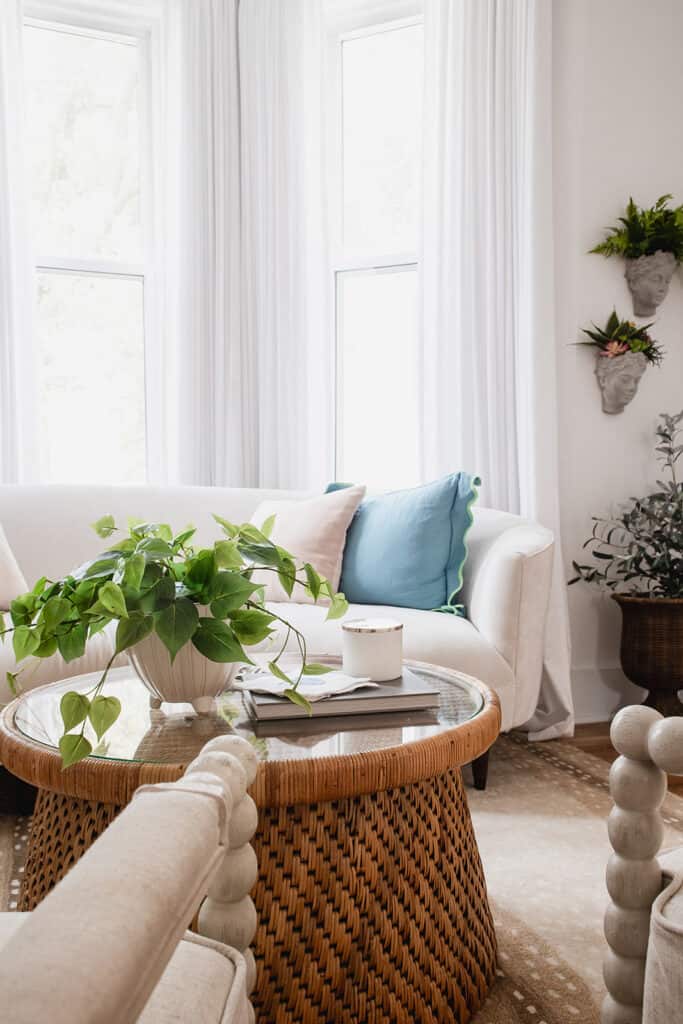
After no less than 5 renditions in 3 years our hearth room is finally done and I LOVE it. Living in a historic home means making it function for current lifestyles can be tricky. We are constantly trying to find ways to tweak and perfect the spaces so they both look good and function well, and finally the hearth room has arrived there.
This post may contain affiliate links. The Jonathan Louis sofa was gifted in exchange for this blog post. All opinions are my own and I appreciate you supporting the brands that support my blog.
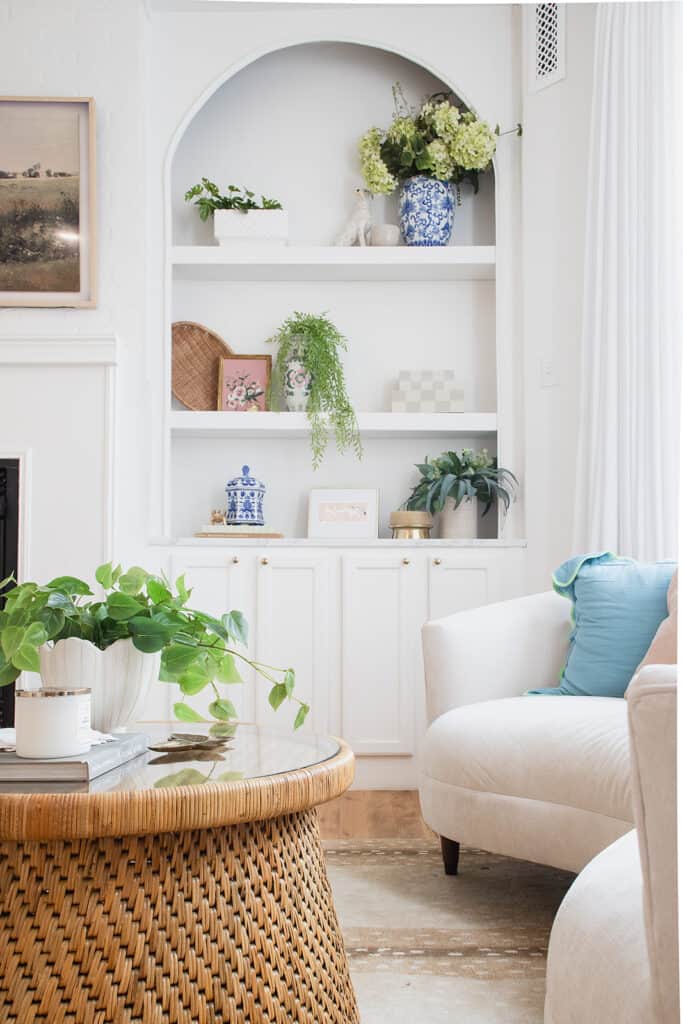
Bright and Airy Hearth Room
What is a hearth room? Honestly I had no idea before we moved to this house. By definition a hearth room is basic living room featuring a fireplace. However in current day terms most people consider it a smaller living room off your kitchen with fireplace.
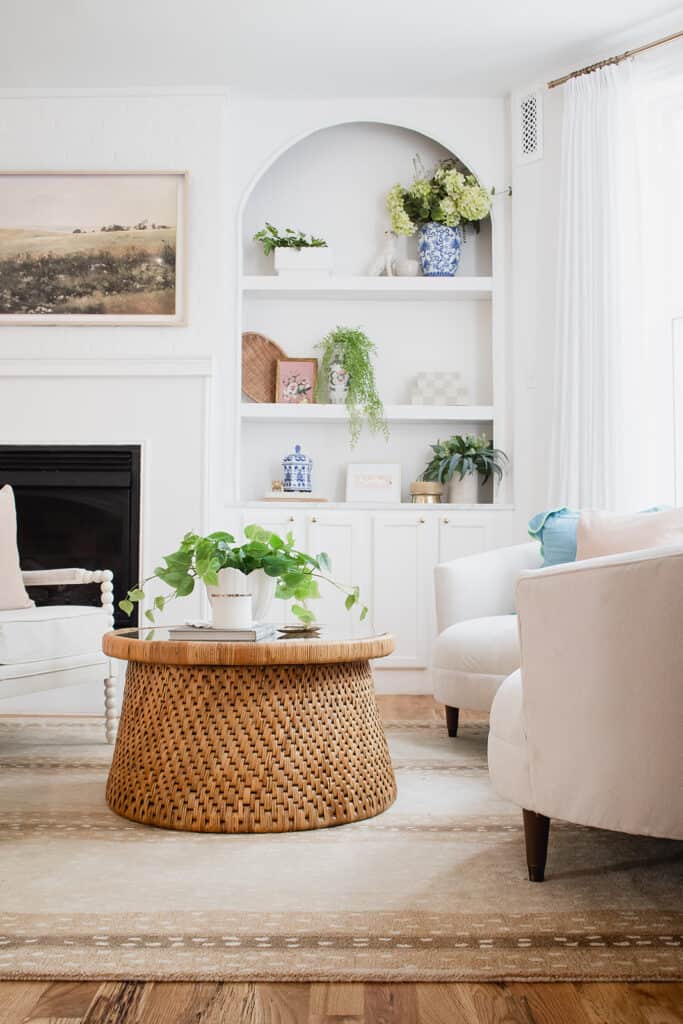
When we moved in this room had no fireplace – but did have a brick stack. (old houses are weird ha) We added a fireplace for heat which has been amazing. That piece will likely be redone at some point but that is not a today problem.
Because the room is small, the fireplace is off center, and it is open with support walls it has been hard to decorate at best.
Adding Furniture
Like I said – we have tried a few things in this room. Plan one was picked before we even renovated the house, and function and comfort wise It was my favorite (and also our first time adding Jonathan Louis furniture to the house), but because of the opening to the entry way it never looked quite right.
We then moved to 4 chairs and a table. This looked pretty good but I did feel like we wasted a lot of space, and comfort and function wise it was not my favorite. We have 4 kids and thus we couldn’t all enjoy the space, and the kids were constantly moving the chairs all over the place.
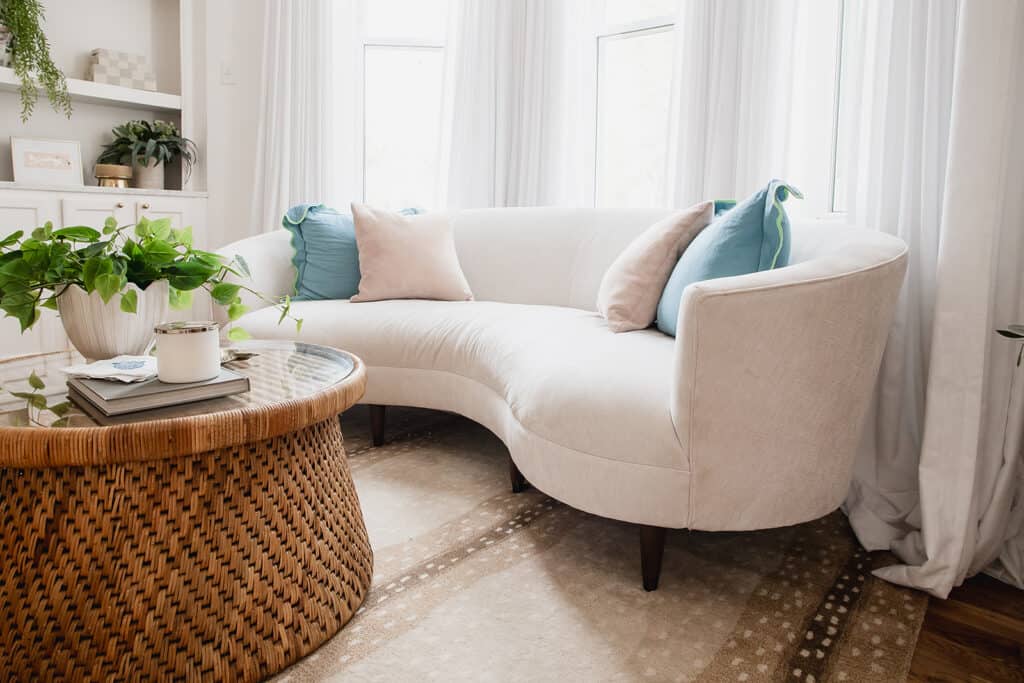
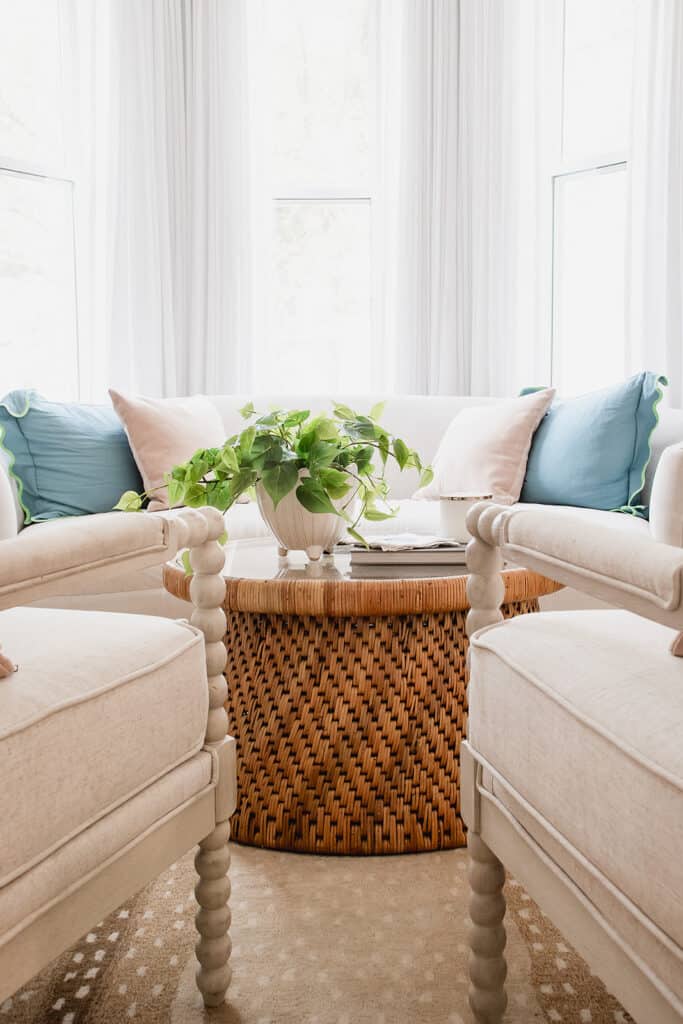
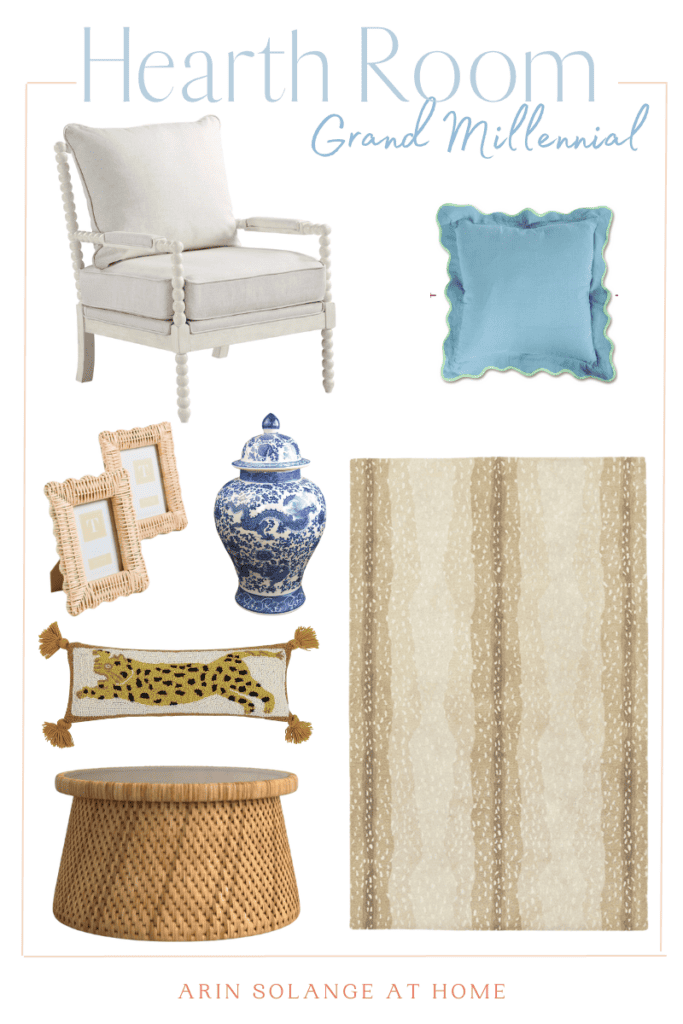
Enter todays rendition. We kept 2 chairs in the design but added a Jonathan Louis Cleo Sofa in Contessa Ivory. It is the most gorgeous rounded, firm sofa. It fits PERFECTLY in our bay window and has the perfect elegance that the room deserves while allowing for lounging that our family loves to do.
The Contessa Ivory fabric is easy to clean, soft to the touch, and is genuinely just beautiful in person. I love that it isn’t a stark white, the light colors retains the elegance.
Window treatments were a NEED not a want in this room but I had gone back and forth on what to do, and ultimately had to wait until the sofa was in to get them.
I decided to go with the raved about “viral” Amazon curtains. They are pricey but my goodness are they gorgeous. We hung them on these curtain rods with these clips and I love them! If you have curtains for bay windows I have found that these elbows are the best way to do it and they are super affordable.
Styling the Hearth Room
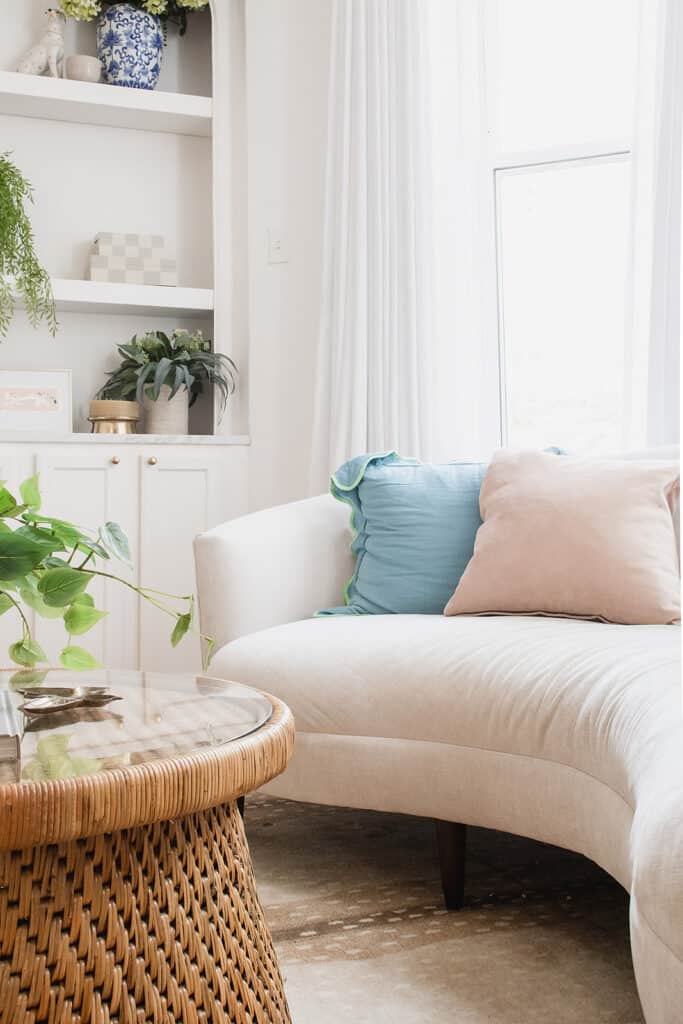
Once we got the gorgeous furniture in place things fell into place. I added the antelope rug that I am in love with. It is a perfect neutral yet adds something fun with the animal print. If you have wanted to add animal print I 10/10 recommend it.
We have wonderful DIY built ins In the room that also got a bit of a makeover. I added several items in the round up below that would make for gorgeous room additions if you are also decorating a similar space to this.
I leaned Grand Millennial with the pieces with just enough color and green to really pop against all the white.
That is really it – it is such a simple space that is truly just so gorgeous in person. If you have ever considered a rounded sofa – this is your sign to do it! A bright and airy hearth room is a space I never thought I would have, yet I love it. Be sure to follow me on social below and pin the photo below for inspiration later.
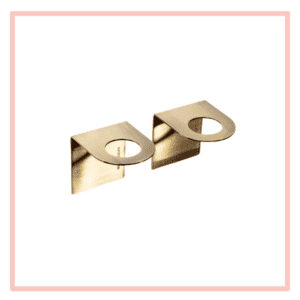
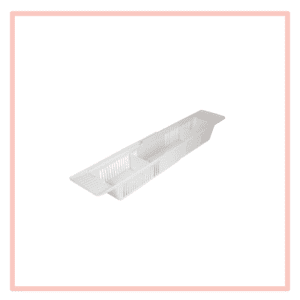
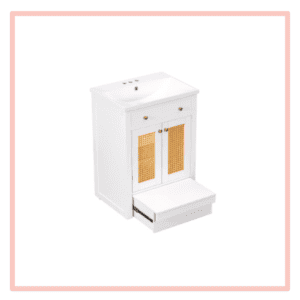
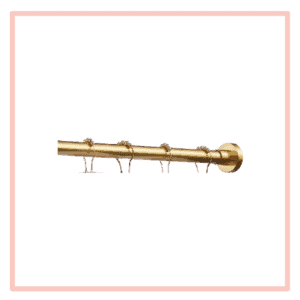
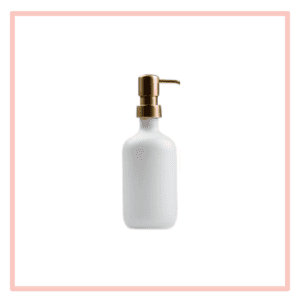
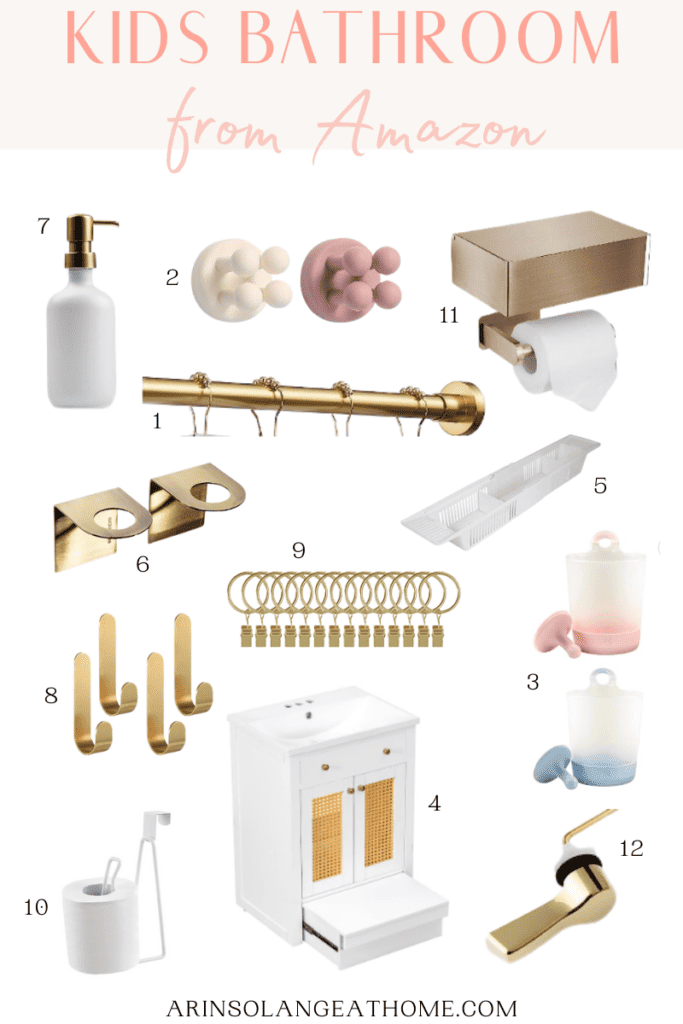
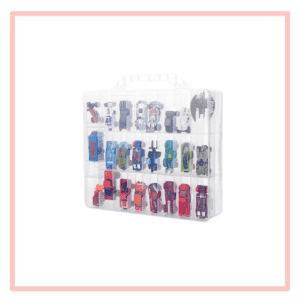
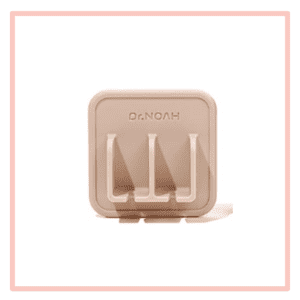
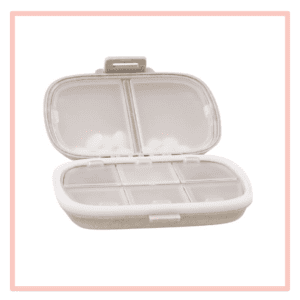
An organized bathroom contributes to a smoother functioning of daily life, as it enables easy access to necessities, reduces clutter, and promotes a sense of calm and cleanliness. When redoing the kids’ bathroom in our historic 1800s house, we focused on saving space and maintaining organization. All these space-saving and organizing products are from Amazon.
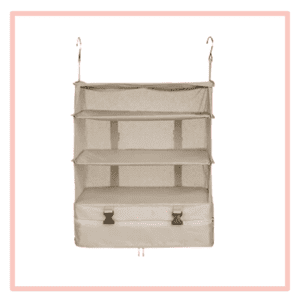
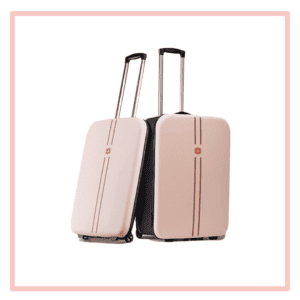
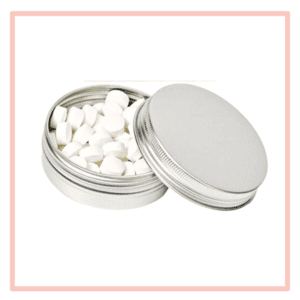
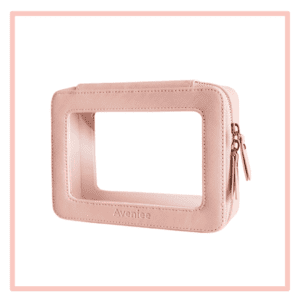
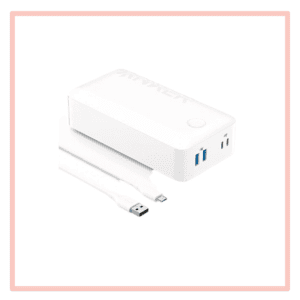
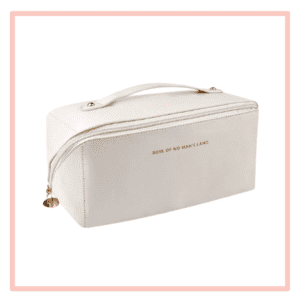
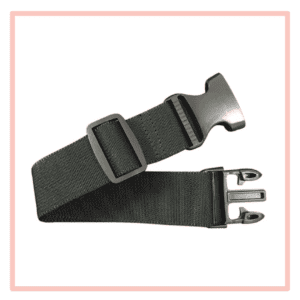
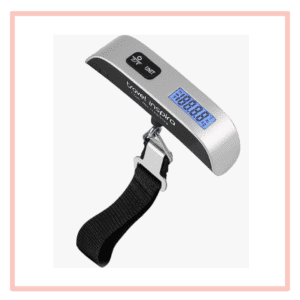
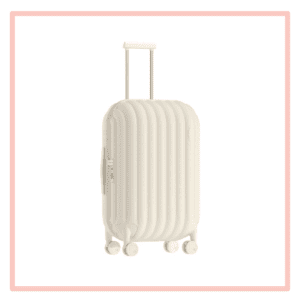
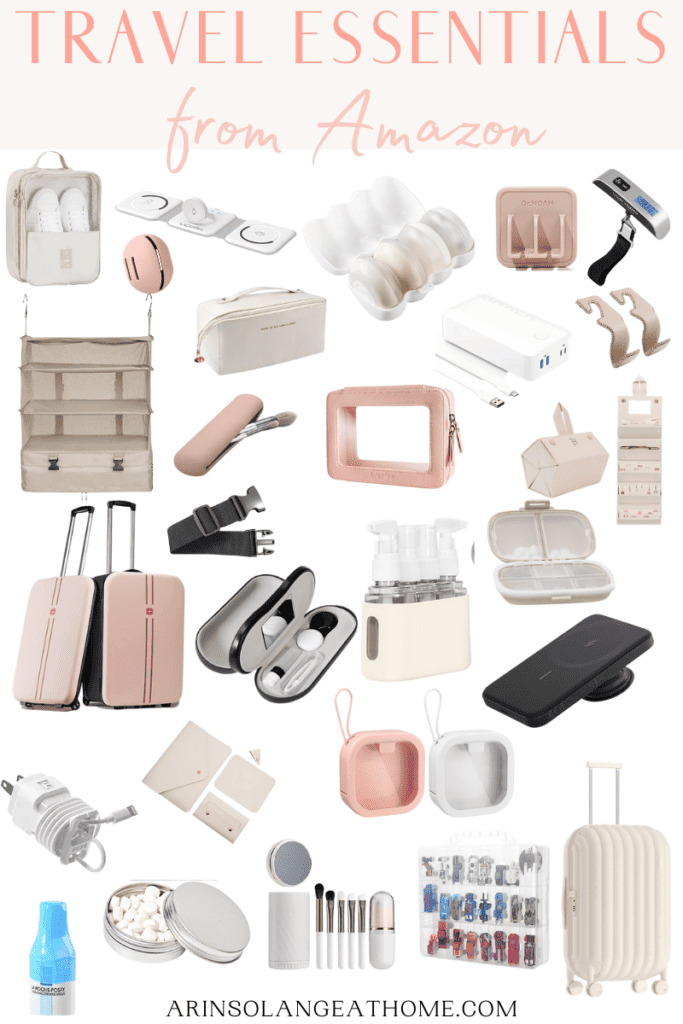
When it comes to travel, having the right essentials can make all the difference in ensuring a smooth and enjoyable experience. Amazon offers a plethora of travel items that can enhance your journey and make your adventures even more memorable. Here are a few must-have travel items from Amazon that you should consider adding to your packing list.
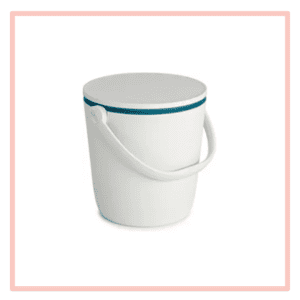
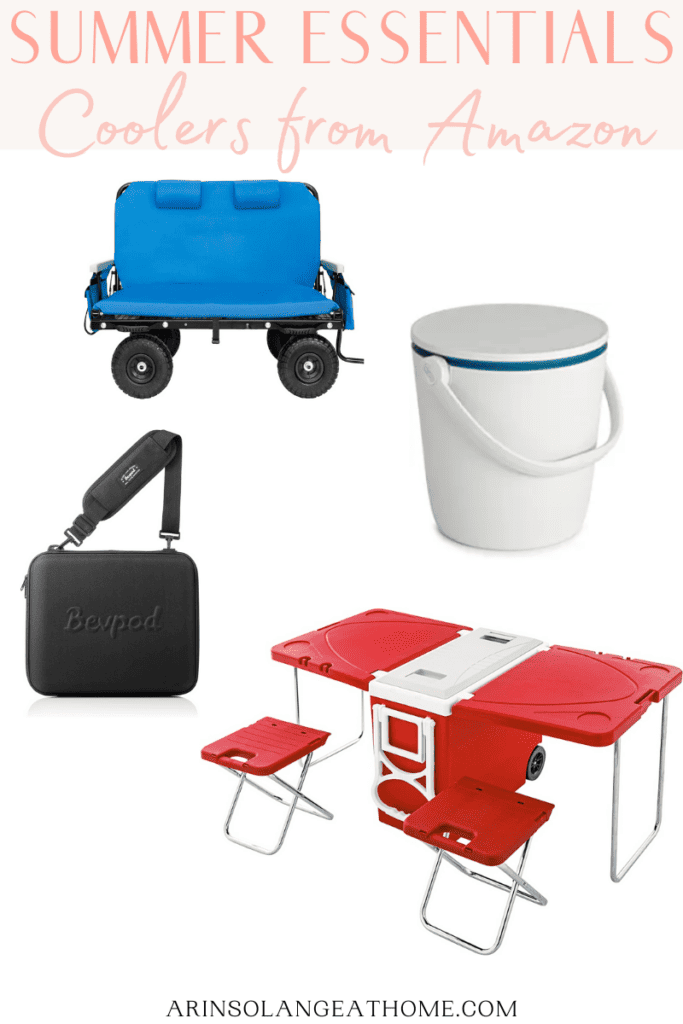
Whether you’re embarking on a family outing, basking in poolside bliss, or simply enjoying your backyard, these coolers are an absolute necessity. They ensure that all your delectable snacks and refreshing drinks stay perfectly chilled throughout the whole sun-soaked summer season.
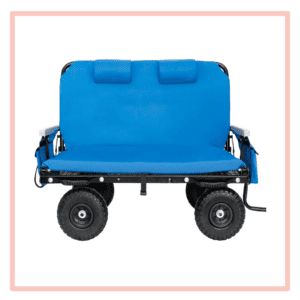
Lounge Wagon – This is an investment item, but it is such a lifesaver when we go out to a summer concert or a neighborhood event.
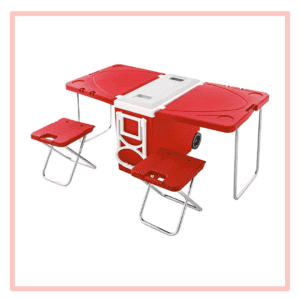
Table Cooler – I love a multi-use item and this one is great if you’re going out for the day with the kids.
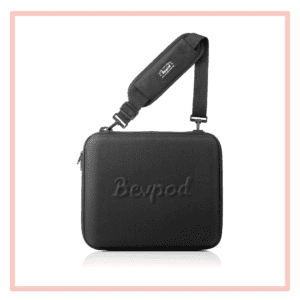
Bevpod – If you’re looking to keep just a few cans cool for the afternoon, this cooler is perfection.
Keter Cooler with Pop Up Lid – With the added bonus of a cleverly designed lid that doubles as a functional side table, this cooler elevates your outdoor experience by providing a convenient surface to place drinks, snacks, or even a decorative centerpiece while keeping everything refreshingly cool.