Shop
Home

DIY Kitchen Island: How To Build & Transform A Space

Shop the Post
Dewalt Miter Saw
Ryobi Circular Saw
Ryobi Cordless Drill
Avid Jig Saw
Galaxy Pro Multitool
Ryobi Nail Gun
1 x 2 Boards
Kreg Pocket Hole Jig

After 2.5 years in our historic home, I can finally say that our kitchen space is complete. If you are scratching your head and thinking, “Didn’t you already have a kitchen remodel?” you wouldn’t be wrong. There is a whole saga as to why it took this long. In full transparency, it has to do with being on a TV show. So if you like a good tutorial served with a side of tea this post is for you. I will share how we took our current kitchen island and transformed it using stock cabinets to create an entirely new island.  The good news is that the whole thing is a beginner level project that can be customized to your own kitchen. I’ll share with you my easy DIY kitchen island tutorial to create your own perfect kitchen island.

This post may contain affiliate links

White kitchen island.

DIY Kitchen Island: How To Build & Transform A Space

Before we get to the actual tutorial you know I have to give you the background on why we didn’t have a fully finished island for 2.5 years, and why we needed to finish the kitchen when it was “done”.  

In late 2020 while we were all locked in our houses Sam and I bought this old house and decided we should renovate this bad boy with four little ones at home and no experience…It’s possible we had lost our minds in quarantine.

I think back to that time frequently wondering how we thought that was in our abilities, but we did and I am grateful we took the leap. Only a short time after starting the contract for this house we applied to be on the pilot of a TV show for a popular home network.  To keep a long story short, we got the show and moved forward with a massive renovation.

White kitchen island with a vase of flowers.

Time To Spill That Tea

One of the major areas needing renovated was our small kitchen. Okay, who am I kidding, the whole entire house needed major renovating. There was not a DIY project that would make the space work, so an entirely new kitchen and new kitchen island was desperately needed.

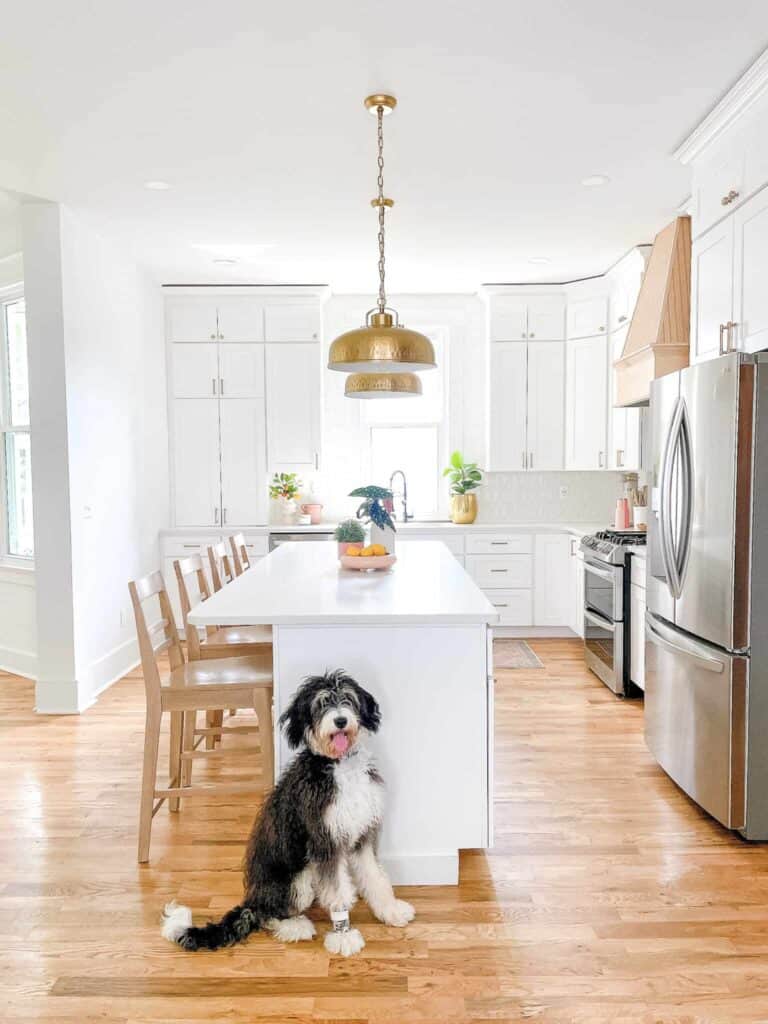
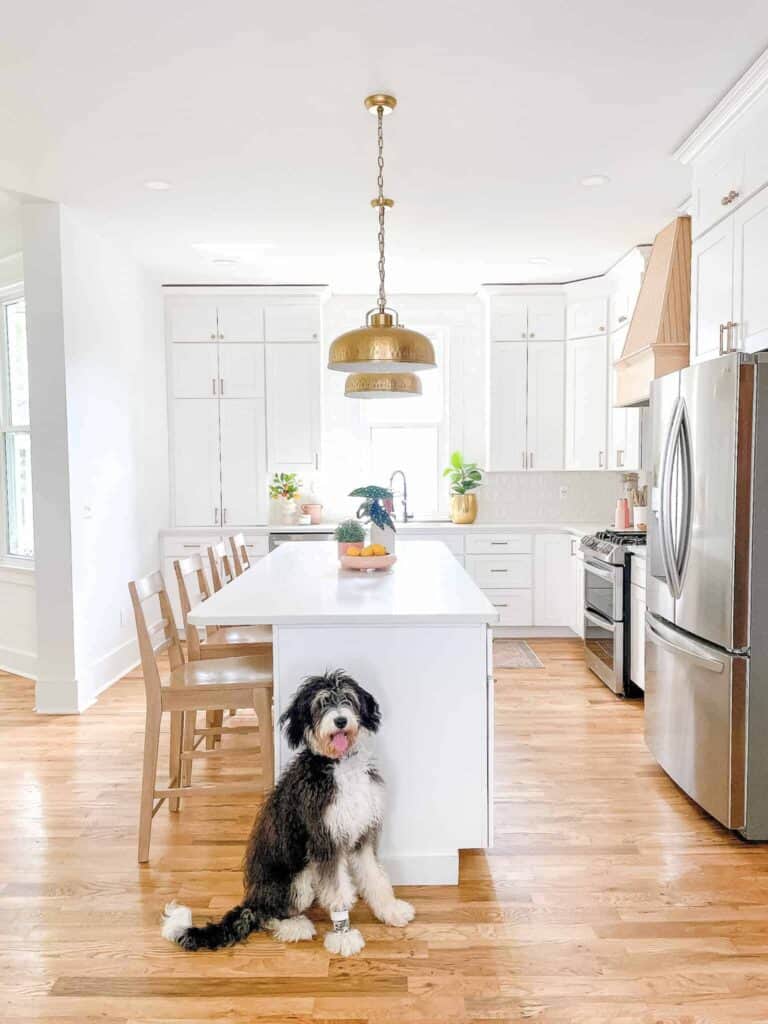
If you look back at before and after pictures of our home, you won’t even recognize the space. Not only did we completely move the kitchen, but we also added storage space, a custom kitchen island, and beautiful cabinetry. While I got to make design choices such as the color of cabinets, a large island, and quartz countertop, I still had to trust that the actual choices being put in would be of good quality.  I assumed it would work well and I would love our custom island and entire kitchen space.

One of the strategic design choices I made was to put our microwave in the island. Here’s the problem, it looked horrid and it quickly began to show signs of wear and tear. With four kids that microwave got a lot of use, which means I had to constantly stare at this eyesore as it brought down the rest of the kitchen.
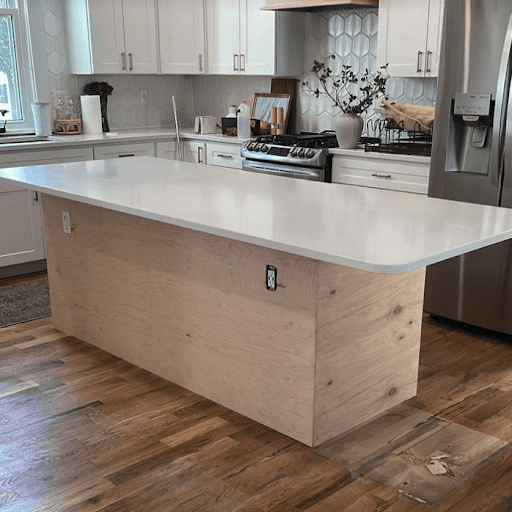
White kitchen with white cabinets and white backsplash with a black and white dog smiling.

A Giant Black Hole

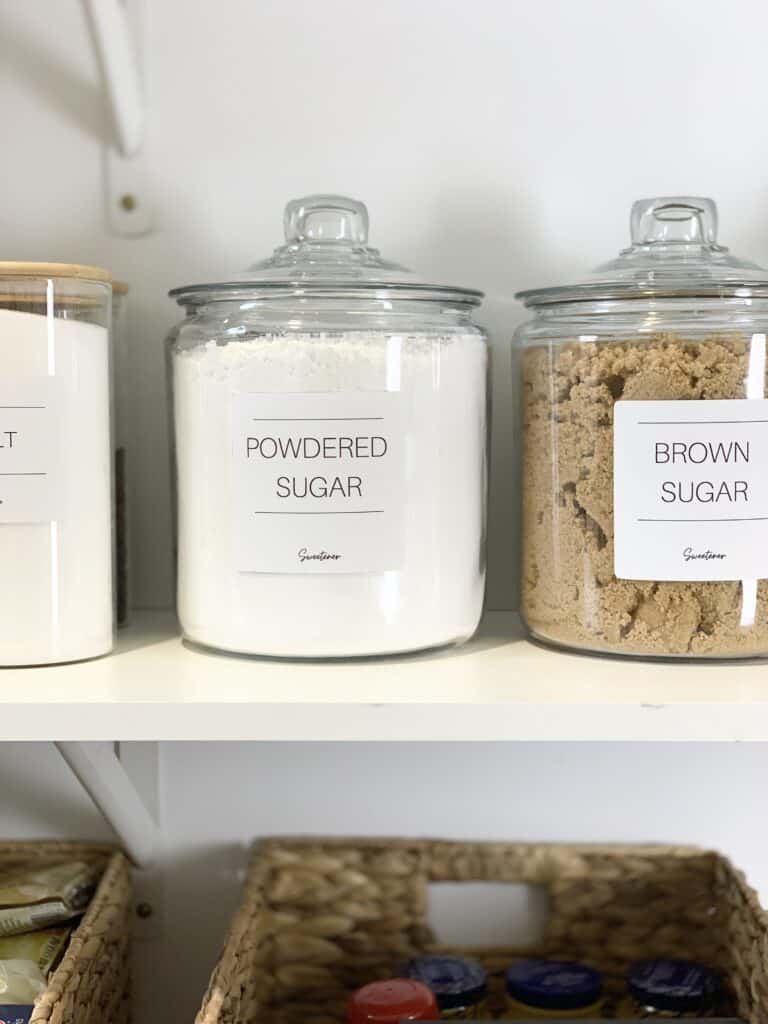
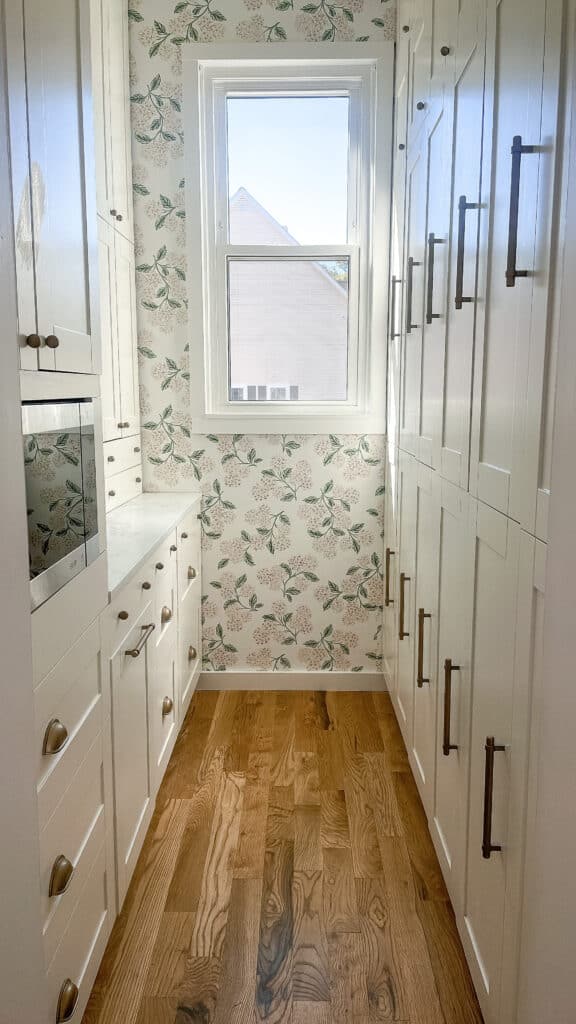
We ended up removing the microwave from our island and placed it in our newly finished butler’s pantry. The good news is that moving the microwave into our pantry works great. It doesn’t take up valuable counter top space, and isn’t too far out of the way so we still get good use out of it. The bad news? Well, when we moved the microwave from the island, it left a giant hole. Yes, that’s right a black hole of doom. There wasn’t an easy way to cover it up and no amount of wood filler could fix it. I really didn’t love the idea of buying an entirely new built-in kitchen island, but I also couldn’t stare at this giant hole much longer.

So after living with this black hole for months, I finally got the idea to have Sam build something new using what we have and adding a few extra materials and supplies. We love the result and I hope that this easy tutorial shows you that you can think outside the box to create your own kitchen island.

Butler pantry with floral wallpaper and floor to ceiling white cabinets.

Using Stock Cabinets

There are a few options and ways to create this same DIY kitchen island project. Although in this post I am working with cabinets that were already in my kitchen, you can also start over from scratch. A cost-effective solution would be to buy all new stock cabinets to start.  We did in fact have to add one new cabinet to make the island the size we wanted. So, we used both our current kitchen base cabinets and a stock cabinet.

Stock cabinets are a great way to create a space with a lot less work because building actual cabinet boxes and doors takes a much higher skill-set. Plus, it allows you to have the look of custom cabinetry without the price tag. Big box store cabinets are much more affordable than custom kitchen cabinetry.

Other Options For Base Cabinets

If you don’t feel comfortable working with standard base kitchen cabinets from your local hardware store, you can get creative. When it comes to creating a kitchen island there are so many options for the structural base.  

One of the reasons I love IKEA so much is that you can use their products in unconventional ways. I’ve done several IKEA hacks over the years and I think using IKEA Billy bookcases as a structural base would be a great way to achieve a modern kitchen island within an affordable price range. Check out my previous post on how you can transform your IKEA Billy Bookcase here.  

If you want to use something you already have on hand, you can also use old desks, an old bookshelf, an old cabinet, or anything else that would have the storage you need! 

Butler pantry with white cabinets and microwave.

Overall Island Plans

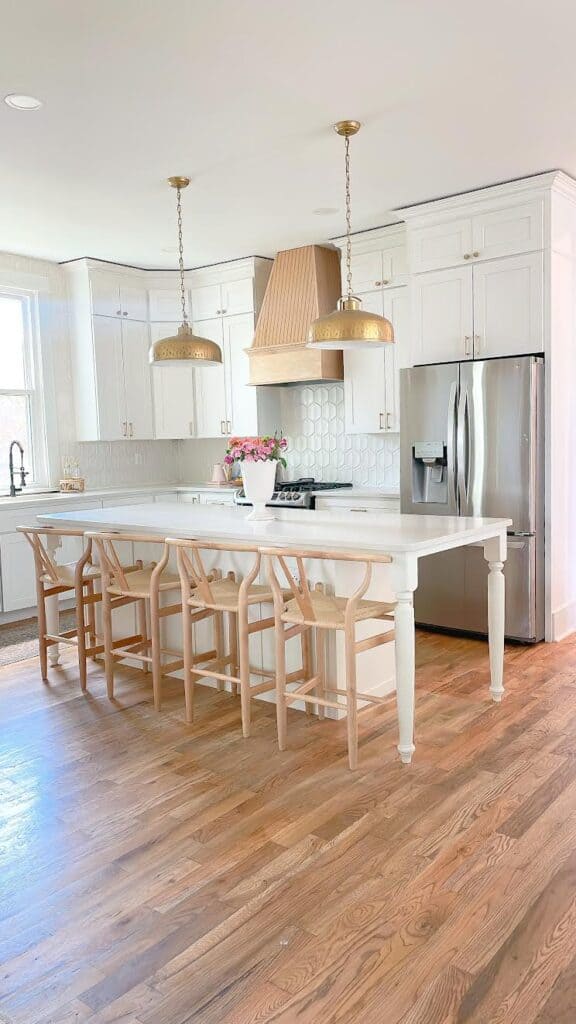
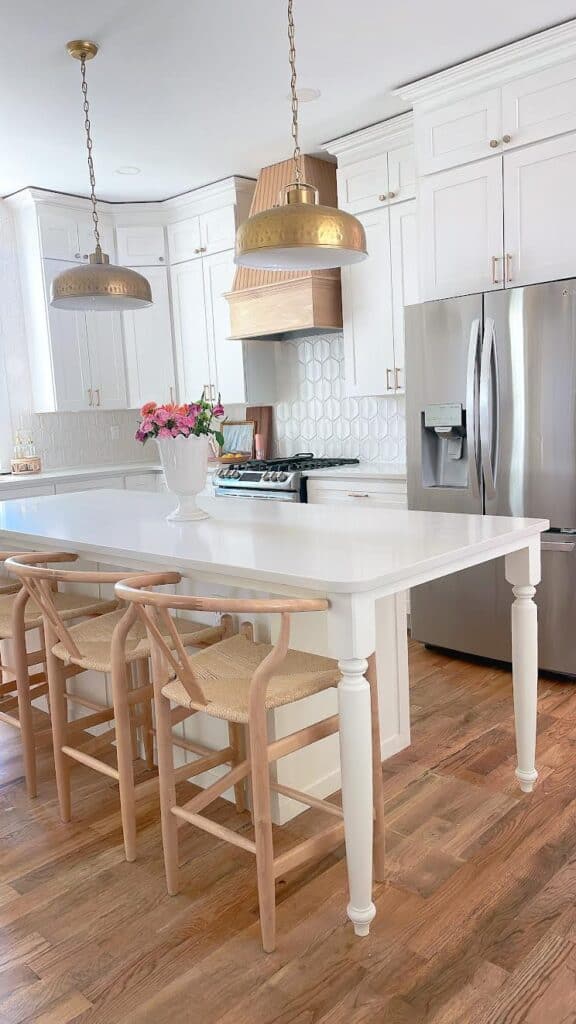
For us, our plan was to work with our existing island cabinets and add one additional base cabinet from the manufacturer in order to create the perfect size for extra seating.  We planned to add decorative trim pieces on both sides of the island. We also added trim pieces along the back of the island to give it a more custom and finished look. 

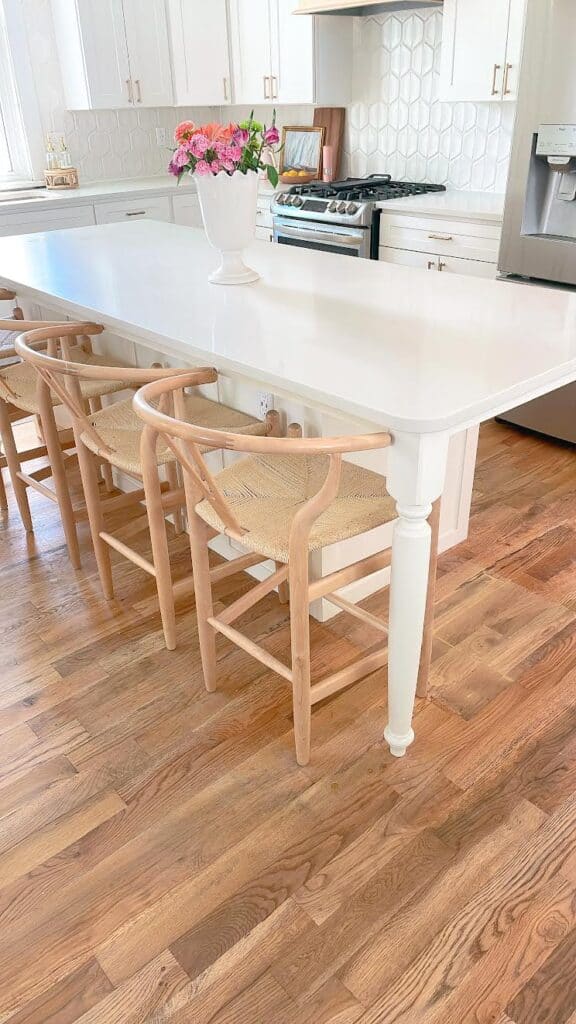
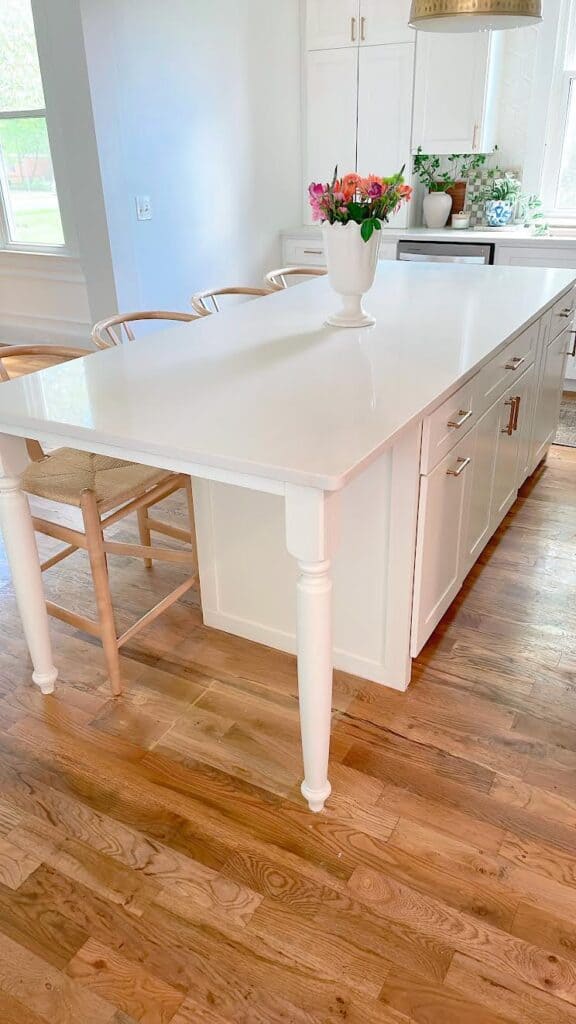
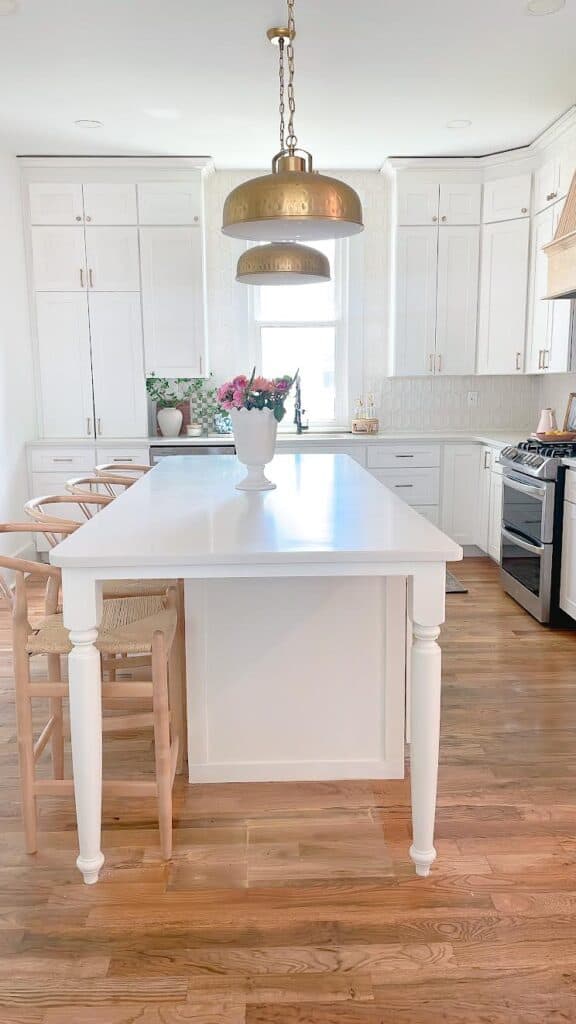
I wanted to create an L overhang for our island. This meant I needed to add island legs for support. To make the island feel complete, an apron on the front side was also added. Lastly, a fresh coat of paint finalized the look.

White kitchen with flowers and cane chairs.

Supply List for DIY Kitchen Island

I will break up this supply list with the legs and apron separately because that part is very optional. I will not give you a cut list or measurements on wood for this tutorial because that will be based on your current island.

For The Island 

  • Stock lower kitchen cabinets – You only need to account for about 1/2 inch on each side with trim work as far as your space allows.  If you want to learn more about what you need in terms of space around a kitchen island I have this post
  • Cabinet paint in the color of your choice.  If you are using stock cabinets that are already painted take one door in to have it color matched for the rest of the project. Or, you can add an entirely new paint color.
  • 2x4s for framing the back side of the island – This is not a MUST but does help add depth to make things look more high end, and also needs to be done if you have any electrical you want added.  They will add the electoral boxes to the 2x4s.
  • 1/4 inch MDF board – You will need enough to cover all 3 sides of the island.  
  • 1/4 inch thick trim work – We used 1/4 inch x 3 inch pieces from Menards for all of our trim.  If you can not find that you could do 1/2 inch x 3 inch trim as well. 
  • Small piece of 1×2 (if adding legs and an apron you will have leftovers from that)
  • Wood glue
  • Caulk
  • Wood filler 

Power Tools Needed:

​If you have your MDF cut at the store you won’t need as much in terms of power tools.  For us we needed:

Additional Supplies If Adding Legs

  • Stock legs – Make sure to ALWAYS measure your space!
  • 1×2 boards – Enough to apron from the cabinets to the legs on all sides where it is needed.  
  • Kreg jig/ pocket hole jig – This is not a must but it is certainly very helpful.
White kitchen island with apron front and tailored legs.

DIY Kitchen Island Tutorial

Step 1 Position Your Cabinets

The first thing you need to do is place your cabinets where you want them. This step will take some time as you need make sure things are level and just where you want them. If you are using stock cabinets, your current cabinets, or a Billy bookcase, make sure you place the bases in the exact position of where you want your island.

If you are framing out the back with 2×4’s that is what you will use to adhere the cabinets in place. If you don’t plan on using 2x4s, you must attach the cabinet box itself to the floor so it will not move.

Step 2 Frame Your Cabinets Using 2x4s

Once your cabinets are in place, you’ll need to frame out the back of the island using 2×4’s.  This is a fairly simple step and you can see how it was done in the photos below.  Keep in mind that if you are adding outlets you will need to have vertical 2x4s in place where you would want to add the outlet, but also were you won’t want trim.  So for us we had to make sure our vertical pieces were far enough in to place our 1×3 trim along the edges of the back side of the cabinets. 

Screw the 2×4 framing into the floor, then attach your cabinets to the 2×4 frame using cabinet screws to make them secure. At this point you should have a structurally sound island. 

Kitchen island in the process of renovation with white countertop and MDF board.

Step 3 Cover Your Island Using MDF

Now is when you start to make it pretty.   Cover all three sides of the island using the 1/4 inch MDF board. Be sure to do the 2 sides first. Then make the back side long enough to overlap the extra width of the MDF board.  (Ie add the extra 1/2 inch)

We personally chose to have our MDF cut for us at Lowes. Most hardware stores (Home Depot/Lowes/Menards) will do simple cuts for you in house. We ended up needing two pieces for the back side of the island. This wasn’t a big deal because the line where the two pieces met are covered with trim work in the end.

​Attach the pieces of MDF with nails and wood glue.

Step 4 Add Your Decorative Trim

Now, you can add your decorative trim. We chose to add 3 inch decorative trim.  We went around the sides of the island in a simple box. Then on the back of the island created 4 sections with vertical boards.  We attached each of these again with wood glue and our nail gun.

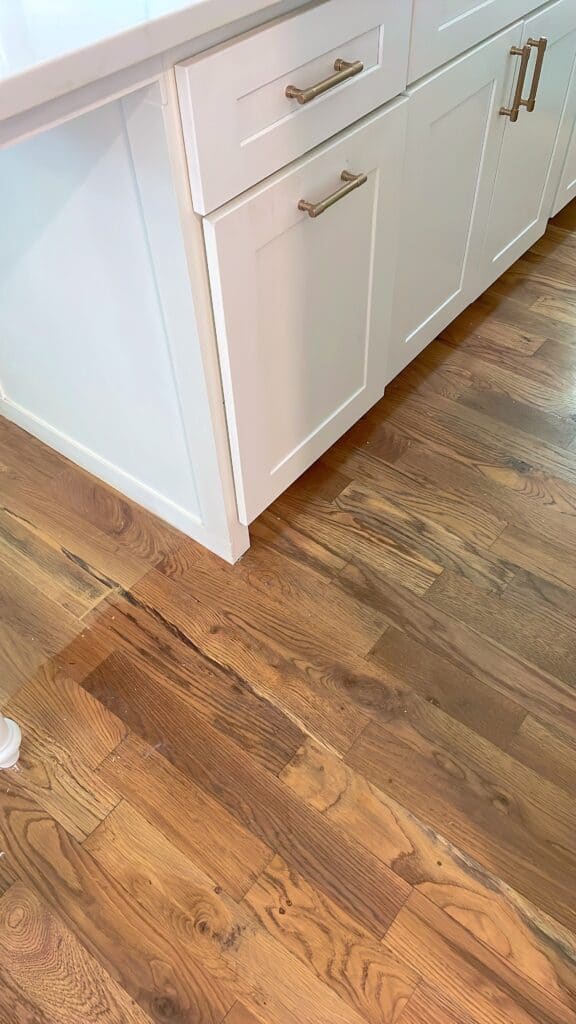
You also need to use that small amount of 1/2 to make your wrapped MDF look ‘thicker’ from the front. Cut a small piece and attach with nails and wood glue. This goes where the toe kick is seen in the lower image.

toe kick area of diy kitchen island

Optional Step 5 Add Apron & Table Legs

For our kitchen island, I really wanted to have an L overhang complete with table legs and a counter top apron. For those who don’t know, an apron refers to the piece of wood under and surrounding the countertop overhang of your island. It adds a decorative touch and creates that custom appearance.

This is purely optional and a personal design decisions. You are welcome to skip this step.

To begin, you’ll need to have your stock legs and 1x2s measured and cut to your own sizing. Next, position each stock leg in the corner of your countertop. You’ll be attaching your legs with construction adhesive (Liquid Nails) to your countertop.

On the end of your 1x2s, use your Kreg Jig to make pocket holes. You’ll be attaching your aprons to the legs via these pocket holes. Before you attach your 1x2s, add more construction adhesive to the ends for some extra hold. Now you can attach the 1x2s to your legs via your pocket holes.

Step 6 Wood Fill & Caulk

Next, we filled all the seams with wood filler.  Once the wood filler is dry, do a light sanding. Now, you are ready to caulk!

Caulk all the seams once everything in place.  This is very important to prevent your paint leaving behind a dark empty line. Allow your caulk to dry completely.

White kitchen island with tailored legs.

Step 7 Paint

Your final step is to paint your kitchen island. You can match your cabinet paint and paint your island all one color. Or, you can pick out an accent color and have your island stand out apart from your upper cabinets.

If you need help on how to paint cabinets, here is a tutorial to give you a general idea.

Home

10 Steps to Prepping your Home for Spring

Spring is here and boy am I ready!  If I could I would keep spring weather year-round, and after that bitter cold that St. Louis gave us in February this year, spring feels even better.  I think as the sun starts to shine and the days get longer we all get a pep in our step to get stuff done around our house, so I wanted to talk to you about 10 steps to prepping your home for spring so you can enjoy this summer.

This post was sponsored by Hoffmann Brothers.  Thank you for supporting the brands that support me and my page!

prepping your home for spring

10 Ways to Prep your Home for Spring

Every year spring hits, and we all think of ‘spring cleaning’, but it really is an important time of year to do much more than that to keep our homes ready for the warmer months.  I wanted to give you a checklist of 10 things to do this spring to better enjoy your home this summer!

1 – Get your AC Checked

This one is sort of a ‘no brainer’, but honestly it goes undone – even by me.  The last thing you want is to find out in the middle of a hot summer that your AC has gone out – trust me it happened to us a few years ago on the 4thof July and I still have PTSD from it. 

Hoffmann Brothers in St. Louis and Nashville has Home Protection plans where they will come out and check your air conditioning units, change tour filters and make sure everything is working well for the summer months.  (They will also do this in the fall for your heating unit).

We have been on Hoffmann Brothers Home Protection Plan for 2 years now and NEVER once have been pressured to buy or fix things that aren’t needed (most of the time it is a quick in and out). 

Finding a company where you feel comfortable with knowledgeable reps where you know they just truly want your home to serve you well for the season is important and they truly are that. 

2– Get Sprayed for Bugs

Whether you have a method you use on your own, or you use a company I suggest as thing warm up to get your home sprayed for bugs.  It is so worth the comfort it gives you as year goes on.  

Prepping your home for spring

3- Clean Out your Gutters

Spring showers are a real thing.  Make sure you get your gutters cleared from the leaves that dropped last fall.  Full gutters can cause the rain to run down your foundation causing erosion and leaks.  Most people don’t know how serious that little chore is, and how important it can be!

4 – Trim your Trees 

This is REALLY important for safety if your trees are really big.  Our last two homes had very large trees and having them professionally trimmed and checked on can save homes and lives as those big rains start to fall.

When the rain gets the ground really wet the roots loosen, so unsafe trees are more apt to fall in a spring storm.  We had professionals out to trim our trees a month ago and they let us know that this big trimming would keep the home safe for about 3 years. 

4 – Prep your Basement for Storm Shelter

This may not be the same everywhere you live – but in the Midwest this is big.  We personally put together a small basket like the one pictured below for storms.

storm prep basket

Keep it in the basement or where you can grab it quickly to go down in case of a storm.  Include things like water, breakfast bars, CHARGED external chargers, medicine, and anything else that would be super important for 24+ hours downstairs.  

That sounds dramatic but as a mom I find it to be really important.  For us we are just leaving the baby age, but we in past years always had diapers, wipes (still will this year) and formula because the only thing that could make being trapped in a space worse would be a really mad hungry baby!

5 – Pressure Wash

If you live where you had snow that could mean cleaning your street, clean your sidewalks and driveway from salt and the gunk snow leaves (if you get snow you know what I mean). It is also a great time of the year to power wash that siding so when you are outside you can enjoy your house more fully.

It tends to be easier to do this before all the leaves come back to the trees and bushes if you have any that block your home. 

6 – Get Your Ducts Cleaned

After a season stuck indoors (and in this case a full year) spring is great time to get your air ducts cleaned. You can leave your windows open during the process during the nice spring weather and it will make your home air quality so much higher.

If you are in St. Louis or Nashville call Hoffmann brothers to schedule your duct cleaning.  I know that is on our list this spring after a fall full of renovations. 

faux fiddle in house

7 – Clean your Car Out

I know I am not alone in that fact that in the winter when I get out of my car I am as quick as can be getting in the house.  That means more trash and mess gets left in my car.  I always like to take my car and get it cleaned both inside and out in the spring to start the season off better.

If you live in an area where salt is used on the roads in the winter this is especially important so that your car gets all that salt cleaned off and it doesn’t sit on their longer than needed. 

8 – Spring Clean your house

Okay so like I said this wasn’t JUST a spring-cleaning list but that is something on the list.  There is nothing better than taking a weekend to REALLY clean after the long winter.  I have a spring-cleaning checklist here on this post that might be helpful if you ready to take hat chore on. 

Clean your blankets and such that you were using more during the winter, and power wash the rugs that can be cleaned.  Get your house feeling spick and span!

prepping your home for spring

9 – Re-stain Wood Decks or Fences 

If you have a wood deck or fence this is the time of year to re-stain and get them cleaned up for spring. The cold winter months are hard on wood so assess where yours is and be ready to tackle the project to protect your wood from the hot sun!

10 – Get Organized 

This is a good time of year to declutter and organize.  Get rid of excess paperwork (great to do after taxes) and such.  If you have kids, they are likely playing outside more so you can get some peace and quiet and get rid of all of that Clutter. 

Other Posts You May Love:

How to Make a DIY Outdoor Table  |  Trash Can Planter Hack

Pin the Photo Below for Later

Hopefully you found these tips on prepping your home for spring to be helpful and are ready to tackle those home projects to keep your home and family safe this coming season.  If you have any questions, as always, reach out to me on Instagram (@arinsolange) and be sure to pin the photo below so you can find this post later!

prepping your home for spring
Family

Hacks for Traveling with Toddlers

Shop the Post
Floral Rolling Backpack
Navy Dino Rolling Backpack
Hanging Toiletry Bag
Snack Stackers – large
Silicone Lids for Cups
Car Seat Travel Bag
Travel Potty – orange
Anker Power Bank
Race Car Scooter Suitcase
Blue Scooter Suitcase
Pink Scooter Suitcase
Divided Case – 8 compartments
Snack Stackers – small
Large Snack Spinner
Small Snack Spinner
Pink Silicone Ipad Case
Wireless Kids Headphones
Kids Stanley Quencher
Name Stickers
Collapsible Straws
Toddler Travel Bed
Emesis bags
Toddler Training Underwear

Spring break is just around the corner, and we will be flying to Florida, as per usual with our crew.  I have done a few travel related blog posts on here before, but thought I would share all hacks for traveling with toddlers (or kid travel hacks) in one place. 

This post contains affiliate links and was updated March 2024.
family on the beach

Many of these hacks will be amazing for flying or driving, and I can’t claim I’m the 100% originator on some of them – I am sure I have picked up tips and tricks along the way, but I will give you all my best tricks for making travel with toddlers and kids so much less stressful!

As an added bonus – I added a huge round up of favorite travel items from Amazon to this post at the bottom, so grab them on Prime and get to traveling! 

Hack 1 – Suitcases for Kids

This isn’t as much of a hack as it is a huge tip- get suitcases on wheels! I have gone through quite a few rounds of suitcases on wheels in our years of travel, and I feel like each of these suitcases have their own unique benefits.

For older kids, I love scooter suitcases. When the kids were younger, I loved these character scooter suitcases. If you’ve got younger big kids (6-7 years old), these are a good option. The downside here is that the scooter does eat into the storage space the bag offers. If you’ve got a kid that travels light, this will be great.

Kids with suitcases

If you’re looking for more space, these scooter suitcases are the solution. The scooter does not take up any of the suitcase space so there is ample room to pack! Another benefit of these particular bags is that the scooter completely disconnects from the bag so you can use them at your destination – I love it!

Also, a quick tip if you choose to buy scooter suitcases, make sure you put rules in place. My kids know that the scooter does not come out until we are past security.

If you’re looking for luggage ideas for toddlers, buy them the rolling backpacks from Pottery Barn Kids.  You can get them for a steal if you watch for sales, and they will make your life so much easier.

Pottery Barn rolling backpack with stuffed animal

The backpacks fit under the seat in front of you, so you don’t have to stress about overhead space if you don’t want to, and due to the shape they also fit under our stroller if needed.  

The backpack straps are a LIFE SAVER because if you have a tight layover, or are in a rush/have tired kids an adult can throw on the backpack if needed.  And the reason I also recommend the PBK version is the outside straps.  

My kids are always allowed to bring a stuffed animal and it can be strapped to the outside – like in the picture!

Hack 2 – Snack Bins for Car Travel

I purchased several of these a few years ago and they are amazing when we are taking road trips with the kids for all of their snacks.  

We have a 3 row SUV, so the older kids are in the very back, and it is hard for me to pass back snacks or open things for them.  

Sterilite container with snacks for car travel

Basically I fill each little container with one snack for their car ride.  I remind them when we leave that THAT IS IT.  They are looking at their snacks for the whole car ride, so eat them all in 10 min or let them last 5 hours, you pick! 

Plastic container with compartments for snacks

They do really well with it, and it is easily closed up and set to the side or on the floor when they are done for the time being.

BUY CONTAINERS HERE

Again, that hack works great for older kids in the way back of the car. If you’re dealing with younger kids, I’ve got an alternative. This snack spinner is the solution!

Kids with suitcases

This is the same concept as the other container, but you can only open one section at a time. So if you go over a big bump, your kids aren’t going to toss ALL their snacks on the floor. All you do is push the button in the center to rotate to a new snack.

Hack 3 – Bag of Essentials

This hack is a huge game changer, especially when flying, but works great for car rides too.  We honestly don’t have the kids take too much when we travel.  They love to watch their iPads, so if its 4 hours and under we don’t take too many small things for entertainment.  

Toddler Travel bag

I purchased these travel toiletry bags on Amazon and they go in their backpack with all of their essentials for the trip.  I load them up with some crayons and paper, some snacks and suckers, and their iPads and headphones.  

Toddler Travel bag

Those are always the items they are digging for in their bags, and they fall to the bottom, so this keeps them in one spot.  Essentially once they are in their seat and buckled in grab the toiletry bag out and they will hopefully need nothing more from their backpacks the entire flight. 

Toddler Travel bag for iPad

** this easily holds my kids iPad minis with this case on them, as well as these headphones.  Check the measurements for other tablets!

BUY TOILETRY BAG HERE

Hack 4 – Cups and Containers

This is another hack when it comes to flying more so than driving.  We always bring our kids an empty water bottle with a personalized name sticker for the flight and fill it in the airport for water.  (Be aware – with any cup, leave the spout up. We have sprayed full planes with camelbacks before because of the pressure building in them!!!)

water bottle with personalized sticker

For snacks, I love these snack stacks because they fit perfectly in the water bottle pouch of a backpack. Sometime the snack stackers are full of snacks, but they are also great to have for small bowls incase the kids need them for snacks handed out on the plane or purchased in the airport.

Travel bag for toddlers

When my kids are younger and need more snacks to keep them quiet I do the snack stackers stacked 3 high filled with snacks in addition to what is in the toiletry bag from hack #3.

 I know that sounds excessive, but I am a firm believer that you’re not trying to win any mom of the year awards when you’re flying…you’re just surviving and doing your best to keep your kids happy and quiet!

For the bigger kids who might want to order a drink on the plane, I also always have these silicone lids that fit over any cup and reusable, retractable straws. I am speaking from experience – we spilled an entire drink on a seatmate once. I never travel without them now.

Hack 5 – Sleeping Arrangements

With a family of 6 and kids getting older, it can be hard to find the exact right number of beds or pullouts in our hotels or AirBnB. This year, we discovered this compact inflatable toddler bed for our youngest.

little kid on inflatable mattress

It has a built in air pump that you can use to inflate the bed in 3 minutes with your feet – genius! The outside is also super soft so you don’t have to think about packing or requesting extra sheets. Where was this ten years ago!?

Okay not a Hack but a few tips

This one isn’t a hack, but it is tips on tips on tips.  

  • BUY THESE. Keep them in your glove box, and if you have a three row vehicle keep some in the third row.  Nothing is worse than hearing a kid say they are going to throw up.  This has saved our car and sanity way too many times. They aren’t a glamorous buy, but I have had so many people tell me how thankful they are they got them!  I also throw one in my diaper bag when we travel by plane!
  • If you are traveling with a car seat, spend the extra few dollars for this bag to hold your carseat.  It has backpack straps and will change your life.  I was a little sad we went a good 6 years of travel with kids before we knew about that!
  • Moms – pair your stuff down to a tiny travel wallet so you don’t have as much to carry, and if you have a baby or lap child, using hack #3 for your own stuff/stuff you will need to get out mid flight for baby is super helpful in your own bag too!
  • Last – have an external charger with you!! This one is great! You don’t want an iPad dying midflight.

Favorite Hack 6 – Buy on Prime

Below is a bunch of my favorite items from Amazon prime that I use for travel.  


hacks for traveling with kids

1 | 2 |  3| 4 | 5 | 6 | 7 | 8 | 9 | 10 | 11 | 12 | 13 | 14 | 15 | 16 | 17

  1. Toddler scooter suitcase – These are great for younger kids, but there’s not enough space to pack a bigger kid.
  2. Training underwear – These are my favorite and comfortable for the kids.
  3. Snack spinner – Only one section opens at a time to avoid major spills.
  4. Car Seat back pack – This really comes in handy and you will be sad you ever travelled without it.
  5. Hanging toiletry case  – Great for containing their activities and everything they’ll need.
  6. Compact inflatable air mattress – This is new for us, and I wish I had it 10 years ago!
  7. Snack stacker – This holds a cup of snacks in the two larger containers.
  8. Ipad case – We’ve had this one for years.
  9. Headphones – These are wireless, comfortable, and durable. Plus they limit the volume to protect those little ears.
  10. Water bottle – Make sure you empty it before security and keep the spout open a little to allow for air pressure!
  11. Kids scooter suitcase – These are great for the kids! The scooter comes completely off once you’ve reached your destination too.
  12. Name sticker – We absolutely love these name stickers for our water bottles. 
  13. Portable charger – Just say no to dead iPads.
  14. Reusable straw – These come in clutch time and time again.
  15. Silicone lids – Perfect for in flight drinks.
  16. Travel potty– We keep this in our car and is so helpful when you’re potty training.
  17. Emesis bags– IYKYK!


Home

Toy Storage for Living Room

Who struggles with living room toy storage.  Trucking ahead on 6 Bags for 6 Weeks – we are headed into our living spaces! I can’t be the only mom is also now in the position to start talking toys.  For this weeks 6 Bags for 6 weeks I will link to several other blog posts on organizing spaces, but I want to talk about some toy storage for your living room. 

This toy storage for living room post contains affiliate links

Living Room Toy Storage

This week is week 4 of 6 bags for 6 weeks, and so far we have tackled our kitchens, all our clothing, and bathrooms and linen closets.  If you are anything like me you are likely starting to really see the changes.  

The whole idea behind 6 Bags for 6 Weeks is to help you all declutter your home in 6 weeks, ridding it of roughly 6 bags per week.  Hopefully by the end you have a minimum of 36 bags to donate, and are feeling so much less cluttered and stressed!

30 day Declutter Documents

This week we are focusing on living spaces as well as your garage and storage room.  These are some bigger ticket areas, so I am assuming it will be a daunting week for some of you!  I have several blog posts already written to help with some of the areas, and will link to those, but I am going to focus this post on toy storage for the living room.  

I am VERY passionate about helping your kids to love the house they are growing up in, and embracing them and their “stuff”, while still keeping your home beautiful.  When you stop fighting all the clutter that comes with the little people in your home and learn to embrace it, life gets so much easier.

While you are organizing make sure you check out Jen’s post on organizing your living room!!

built ins with white baskets and natural decor

Toys in your Living room 

Before I talk to you about toy storage for your living room, lets talk about what toys and items are present in the area.  First off, I am well aware that not everyone has a playroom, so there is only so much that can be done if you don’t have one.  

If you have a playroom – keep 99% of your toys there.  Encourage your kids to play in the playroom, and don’t feel the need to have nearly as many in your living area.  For us once our kids are roughly 3 we move most of their toys to the playroom.  

Before that some do remain upstairs because they aren’t ready for as much alone time.

Also on that note – try to keep the bigger toys in the playroom.  If you don’t have a playroom, a toy rotation, or just having fewer toys is also likely a great choice, BUT I am also going to give you lots of tips and tricks on ways to conceal the items you have without forfeiting a beautifully designed space. 

Toy Storage for Living Room

When it comes to toy storage for the living room, the biggest thing is to realize you are mostly looking for functional furniture and adult pieces, NOT pieces made for toys.  I am going to round up some items in a graphic below that I think would look amazing in your living room while also functioning well for toys, but also want to give some tips!

pink playroom

Use Your Coat Closet

 If you have a coat closet, keep a few bins on the shelves and any larger toys in the coat closet.  It’s an easy way to conceal things when they aren’t in use. 

Purchase purposefully

Only you fully know your space, but think hard before you purchase any piece of furniture.  For us, our living room is set up where we have to have a media cabinet of some sort.  Instead of a typical media cabinet I went with an antique mid century dresser for tons of storage. 

Another place to really consider storage when purchasing is your ottoman or coffee table.  There are great coffee table options where you can put a couple of pretty baskets under the table (on the bottom piece) to store concealed toys while still adding texture to the space. 

black and white plaid wallpaper

This side table in Jack’s room doubles as storage and could definitely work in a living room too!

Similar linked here

If an ottoman is more your thing you might consider one that opens to store either toys or blankets in.  Sometimes it isn’t about finding something to store toys in as much as finding a piece to store other items in to make room for the toys. 

For instance – if you buy an ottoman to store blankets in, but previously stored those in a basket in your living room, you now can fill a basket with toys without adding any clutter!

Mid century tv stand and blanket basket

 Decorative Areas

We have built in shelving in our living room that I love, and have truly loved finding ways to use the shelving as places for storage of toys.  I will link my favorite baskets in the graphic, but also remember that unlikely pieces, like the cane troth in the image below can also hold toys with no one knowing. 

built ins with white baskets

We also used to store the books we kept on the main floor on our built ins with a nice set of book ends.  We now have a book nook in our front entry way that I love, but in both cases I loved finding books that were pretty for display as well as great reads for my kids. 

Favorite Living Room Toy Storage Ideas

toy storage favorites

1 | 2 | 3 | 4 | 5 | 6 | 7 | 8 | 9 | 10 | 11 | 12 | 13 | 14 | 15 | 16 (pink // gray)

  1. Storage end table – we have an end table that opens and although we don’t open it often, we store an extra blanket in there for when guests are over!
  2. White rope baskets – I have had these baskets for years on my built ins and I love them.  I love a good wicker basket, but on some surfaces you want something that blends better and won’t tear up paint!
  3. White rope baskets with leather accents – I also have these in a smaller size than the ones above and LOVE THEM.
  4. Wicker baskets – The perfect way to hide toys, store blankets and so much more. 
  5. Tv stand with lots of storage
  6. 3 tier stand – how cute would this be to store baby items like I did here, or for all your kids arts and crafts!
  7. Basket with lid – this would be amazing for toys, and its a great deal for a gorgeous basket!
  8. Storage Coffee table
  9. Storage Ottoman
  10. Set of 3 baskets with lids
  11. another gorgeous Tv Stand or sideboard idea with tons of storage!
  12. Hyacinth baskets – perfect if you have a cube organizer. I used the mesh bags in #15 to put small toys in mine.
  13. Gold hooks – if you have to hang something on the wall, use beautiful hooks to match other fixtures in adjacent rooms
  14. Tilt out storage – this is technically a trash can (although I use mine as a hamper), but it could also double as storage for kids blankets or stuffed animals.
  15. Mesh Zipper bags – you didn’t think I could go an entire post about kids organization without menitioning this VIP, did you?
  16. Stylish Board Games – Candyland + Scrabble – seriously, how fun are these?!

Over all – my biggest advice to parents is to EMBRACE TOYS and kid items.  If you are fighting them fully they will constantly be a sore spot.  IF you can find ways to incorporate your kids items into your decor you will all be so much happier! 

Other Posts You Will Love

Garage Organization items | Decorative Storage from Amazon | More info on organizing toys in living spaces

Pin The Photo Below for Later

Hopefully now you know exactly how to organize toys in your living room. If you have any questions be sure to let me know in the comments or on Instagram (@arinsolange) and I hope this helps you get that living room in tip-top shape! If you’re looking for more items, check out my Amazon Storefront and follow me on Tik Tok for my latest finds!

toy storage favorites

Organization

Best Items for Organizing a Closet

Shop the Post
Collapsible Basket
Fluted Catchall
Hanging Bar
6 Shelf Over the Door Organizer
Stacking Drawers
Stackable Pullout Drawers
Honeycomb Drawer Organizer
Adjustable Drawer Dividers
Storage Mirror
Acrylic Shelf Dividers
Hanging Jewelry Organizer
Hanger Hooks
Acrylic Drawers
Double Closet Bar
Towel Organizers
Adhesive Storage Hanging Bags
Rotating Seasoning Spice Rack

Here we are kicking off week 2 of 6 Bags for 6 Weeks.  Somehow I am accomplished enough that I am DONE purging, but this week I’m on a mission to organize.  I have been thinking how to organize a closet, and the best items to use!

This post was originally written in 2020 and updated in January 2024.

This post contains affiliate links

How to Organize a Closet

We have small, older closets in our home (aside from the master – that is good sized, so I have to get creative.  I know there is no way I am alone in this, right?  Not everyone has the dream closet, so hopefully some of these tips, and items will help you out.  I will talk more about each item to explain how I use them.

Shared sibling closet with organizational items

Home Declutter Challenge

If you are new here – this is my week two post on a 6 week declutter challenge that my friend Jen and I are putting on.  If you are just finding the post, we both have lots of content and would be happy to talk with you on Instagram (@arinsolange).

It is a great program to do WHENEVER, and at your own time.  Just download the free printables and get to organizing. 

The overall goal is to purge 6 bags of items from your home each week for 6 weeks.  I can’t wait to see how much better I feel with nearly 40 bags less stuff in my house, and to see all your houses after!  

Closet Organizing Ideas

closet organization ideas

The simplest, most impactful way to make a closet appear more organized is keeping all surfaces free of clutter. In my Ikea closet hack, you can see that I have plenty of items on my countertop, but every item has a place.

If you are working with a small space, make sure that you make proper use of all the vertical space. The inside of any cabinet is a great place to store makeup brushes, accessories, etc. I love these adhesive bins for this purpose.

In addition to keeping items off of surfaces, keeping the floor clear of unnecessary clutter is impactful. Consider using shoe organizers to give shoes a proper place instead of in a pile on the floor. The back of a closet is great for a hanging hamper or an over the door organizer.

Best Items for Organizing a Closet

closet organization items

1 | 2 | 3 | 4 | 5 | 6 | 7 | 8 | 9 | 10 | 11 | 12 | 13 | 14 | 15 | 16 | 17

  1. Collapsible Basket – If you’re just using laundry baskets to transport laundry from a hamper to the laundry room, these are great! Since you can flatten them, they store easily!
  2. Fluted Catchall – great to have on hand for anything that could clutter the countertop
  3. Hanging Bar – I use this to hold my hair ties so I don’t lose them!
  4. Over the Door Organizer – this one can hold so many different types of items and use that neglected back of door space
  5. Glasses Organizer
  6. Double Wide Glasses Organizer – these are also great for jewelry, accessories, etc.
  7. Honeycomb Organizer – great for small items and intimates
  8. Drawer Dividers – these are made for closet/dresser drawers vs kitchen or bathroom.
  9. Storage Mirror
  10. Shelf Dividers – SO helpful if storing shirts, sweater, jeans, etc. on open shelves
  11. Jewelry organizer – jewelry is one of the hardest things to keep organized – these small pouches keep everything separate and visible hanging in the closet
  12. Hanger Hooks – these let you hang an extra hanger on each hanger, doubling your space!
  13. Shoe Drawers – easiest way to keep shoes out of a pile on the floor. Plus, great for under cabinets if you ever change up your closet!
  14. Double Hang Bar – if your closet only has single hang, you can add this bar for another level of hanging storage
  15. Off Season Organizer – if you’ve got sweaters or bathing suits to store in the off season, these organizers are great to load and put on the top shelf until they’re needed again
  16. Hanging Baskets – perfect for small items; they can hang on the back of the door or on a small wall
  17. Spice Organizer – this is great for surplus makeup storage or nail polish organization!

Amazon Finds

Decorative Storage from Amazon

Amazon prime has become the number one way to shop, right?  If I can find something on Amazon I would rather shop there than anywhere else, and based on other favorite blog posts by my readers, I assume you all feel the same.  I have been looking for some decorative storage this spring and decided to round up my favorites for you all.  In this post you will find some great decorative storage from Amazon that you will love.  Be sure to check out the other great Amazon round ups at the end of this post too ( the kids room round ups are always a favorite!).

decorative storage from amazon

Decorative Storage from Amazon

1  |  2  |  3  |  4  |  5  |  6  |  7  |  8  |  9  |  10  |  11  |  12  |  13  |  14  |  15  |  16  |  17 | 18

  1. Entryway organizer
  2. TP holder w/ storage – this is such a great find! I store tampons in the lidded section for easy access.
  3. First Aid container
  4. Pink Stool – this would be perfect for a small bathroom
  5. Ziploc storage – in addition to being beautiful in a drawer, these are so helpful in keeping me on track when I need to restock baggies!
  6. Acrylic shelves – these are the perfect blank slate if you want to store something colorful (like books, LEGO creations, etc.)
  7. Hanging basket – I have 4 of these on the walls of our back stairs. The kids know to take everything in them up to their rooms.
  8. Pink lidded box
  9. Woven lidded baskets – these would be great in a living space for toys
  10. Cable box – I use these in the office to store unsightly cables/cords
  11. Cabinet – I actually use this in the hallway as a hamper for the kids, but it could be used for linens, toys, etc. in a narrow space.
  12. Leather Pouf – this is so useful. It comes empty so you can store items inside to shape the pouf. We have used it mostly for toys and blankets so it is nice and soft.
  13. White Marble countertop organizer
  14. Striped linen storage basket
  15. Leather bean bag style chair – similar to the pouf, this comes empty and you fill it up!
  16. Colorful pom pom basket
  17. Pink ottoman
  18. Wire fruit baskets

Other Posts You’ll Love

I hope you loved all the decorative storage from Amazon, and be sure to check out the posts below for more Amazon decor!!

Amazon Boys Room Finds  |  Amazon Girls Room Finds  |  Amazon Decor finds  |  Amazon Lighting

Pin the Photo Below for Later

Hopefully this post helped you find the best organization items and you feel confident in decluttering and organizing your home and your life! Make sure you are following me on Instagram (@arinsolange) and Tik Tok for more organization and DIY fun, and leave any questions you have in the comments below.

decorative storage from amazon


Amazon Finds

Kitchen Organization Items I love

It’s January – so we are collectively organizing, right? I know I am organizing to get my house off to the right foot this year. Today I want to share a full overview of my kitchen organization items I love so that if you are trying to organize any area of your kitchen you can grab what you need too!

This post may contain affiliate links

Shaker Style Kitchens

Kitchen Organization

The kitchen is the heart of the home. And whether you have 6 people in your home like I do or you live alone, your kitchen is a space that serves you daily, and thus needs organization methods in place.

I am a firm believer of a couple of things: 1 – you can not be organized with more than your space can hold. So if your kitchen is on teh smaller side, pick wise items so you are not overflowing.

2 – Although organization takes some work, if you have a place for everything you own it will be easier to keep it organized long term.

Declutter Before you Organize

Okay so before you organize your space – you probably have some donating to do! I have a 30 day declutter ‘challenge’ that you can get for free below. This is simply a document that will help you go through every area of your house in 30 days and help you get rid of 30 bags full of stuff!

Free 30 Day Declutter Documents Here

30 day Declutter Documents

Kitchen Organization Items I love

So now that you know a few things going into organizing your kitchen – I am going to share my favorite items. This is a round up of items that will allow you to enjoy your kitchen daily and easily put things away where they belong.

When it comes to organization – find items that fit your space. Likely not everything I list will be great in your space, but hopefully a combination of them will allow for you to feel better in your kitchen this year.

amazon kitchen organization

1 | 2 | 3 | 4 | 5 | 6 | 7 | 8 | 9 | 10 | 11 | 12 | 13 | 14 | 15 | 16 | 17 | 18 | 19 | 20

All of the items are linked above – but because I feel like some of them are much better explained below, scroll down to see how to use these items best in your home. And before you leave this post make sure you watch my Kitchen tour video for a closer look.

A Closer Look at the Kitchen Organization Items I love

1 – Plastic Bag storage – these are amazing for keeping your plastic bags organized – you can also grab this for your foil and plastic wrap.

2 – Pot Lid Holders – These are adhesive and your lids sit down in them. I have had these for about a year, and they work great for small and medium lids (but admittedly not for large!).

3 – Labels for baskets – these make it easier to know what goes where for anyone in your home. They are seen on my wicker baskets in this post.

4 – Lazy Susan Organization bins – these are awesome especially if you use your lazy susan for food! Having bins for the shape of the shelf will help keep you from lost space.

5 – Adhesive Paper Towel holder – we have this inside our under sink cabinet on the door. This is a great option for that or under your upper cabinets. A great way to keep them off your counter.

6 – Small adhesive cups – Seen in the photo below. These are great for small items in a cabinet. They would also work great in a cup cabinet for straws.

Kitchen Organization

7 – Spray bottle hooks – seen in the photos in this post, these are a great option for inside your cabinet door. ( I have them – and shockingly everything stays in place!)

8 – Label Maker – this label maker comes in several colors and is easy to use.

9 – Baskets – perfect for food!

10 – Spice Jars – these small spice jars are inexpensive but make your spices organized and pretty. If you want super inexpensive labels to keep them uniform grab this set for $10.

Spice Jars

11 – Egg Drawer – This egg drawer is one of my favorite items I own. I got this about 18 months ago and have never looked back.

12 – Mason Jar Lids – I use mason jars to store all of our produce and a lot of my leftover storage (instead of tupperware) and love these mason jar lids.

13 – Clear storage bins – You can use as many or few of these as you want, but I love using them for things like kids juices and such to keep them all in one spot.

14 – Canisters – these are the smaller size in my photos. I use these for my baking essentials that aren’t as bulk (cocoa powder, salt, etc.)

15 – Inside cabinet storage – I got this for inside my under sink cabinet for holding items I use daily. I have been trying to make that cabinet more useful for myself, and this was another item towards that happening.

16 – Lazy Susan – we have two lazy susans in our kitchen storage. 1 stores items in our upper corner cabinet. I find that otherwise things just get hidden in the back. I also use one under my sink for all our cleaning supplies!

lazy susan Kitchen organization

17 – Bamboo Drawer dividers – These drawer dividers are great because they fit most all drawers and allow you to use the whole space.

18 – Large Glass Canisters – These large canisters are amazing for storing baking essentials on your counter or in your pantry. They obviously take up more room than stackable ones, so you do have to weigh that.

19 – Powder Coated Glass Soap and Spray Bottles – I like keeping 1 spray, dish soap, and hand soap on my counter. I love these black powder coated bottles for that. They come with extra soap, flat, or spray lids so each bottle can be whatever style you prefer.

20 – Clear bins for under sink – these have been the biggest game changer for under my kitchen sink. If you are struggling with under sink storage I highly recommend these!

Under sink kitchen organization ideas

I truly believe if you grab even some of these great items you will end up with a cleaner, more organized kitchen this year. All of these kitchen organization items help to give everything in your kitchen a spot to go which will help you keep from cluttering the space, and will make keeping it easier for everyone.

Other Posts You’ll Love

This is not the only blog post I have to help you organize your kitchen. I have several other great posts and resources listed below that will help you get organized and stay organized this year.

Butler’s Pantry Reveal | How to Organize a Garage on a Budget | Fridge and Pantry Favorites (you will see some overlap here, and some additional great items for those spaces!) | Pedestal Sink Storage | Outdoor Toy Storage | DIY floating Shelves for storage

Pantry Organization

Pin the Photo Below for Later

Hopefully this post helped you find the best kitchen organization items and you feel confident in decluttering and organizing your kitchen and your life! Make sure you are following me on Instagram (@arinsolange) and Tik Tok for more organization and DIY fun, and leave any questions you have in the comments below.

Organization

Fridge Organization & Pantry Favorites: The Key To Organizing Your Home

When it comes to decluttering and organizing the kitchen is a top priority. Today I am sharing fridge organization and pantry favorites to get areas of your home that are used daily in tip top shape!

This past year I added a full Butler’s Pantry in our home, so I will show multiple ways to organize a pantry based on what you have: shelves, cabinets, drawers, etc.

This post contains affiliate links

super organized pantry

Fridge Organization & Pantry Favorites: The Key To Organizing Your Home

Organizing your kitchen, pantry and fridge are of huge importance in your home. I can’t think of many other areas that are more heavily used, and thus easily become cluttered. With the constant use and clutter, a well functioning organized system for your refrigerator and pantry are key.

In this post I will be sharing my favorite products for getting those spaces in order, as well as tips on decluttering the space to get it ready.

30 Day Declutter Challenge For Your Home

Are you looking to get you whole home decluttered and ready for the year? This blog post is the first of a series of posts in a 30 day declutter challenge run by my friend Jen and myself.

30 day declutter your home challenge worksheets

Grab your free documents below and join me as I tackle our post Christmas chaos!

And to read more on the challenge in general – check out this blog post!

Decluttering Food in your Pantry and Fridge

Before you run out to the Container Store, you’ll need to do a few housekeeping items to make room for food storage. First, it is important to clear out what you don’t need, and clean the space. Below I will discuss what to declutter and what considerations to make. With food it is slightly easier than other spaces, but still important, so don’t skip this step.

organized pantry with baskets and canisters

Where to Get Rid of the Food

When it comes to decluttering food it can feel very wasteful. To help counter that waste, be sure to make two piles. One for expired goods that need to be thrown out, and another for food you simply know you won’t eat. Once you’ve cleared your fridge and pantry, you can take your donations to local pantries that are very much in need right now.

organized appliance garage

What to Purge

When it comes to food, you really need to take EVERYTHING out of your fridge in order to declutter properly. Yes, you will have a big mess before it gets better, but I promise it is worth it.

When the fridge and pantry are completely empty, now is the time to give each shelf, door, cabinet, and containers a thorough cleaning. The last thing you want is to have a nicely organized fridge with sticky syrup on your new containers.

Throw out any expired goods now. If you come across food that you know you won’t eat, set it aside for the donate pile. Chances are if you have had that food item in your pantry or refrigerator for more than a few weeks you aren’t going to actually use it. I know I’m guilty of leaving food in my fridge and pantry that my kids have all of a sudden decided that they no longer can possibly eat.

For all the supplies you end up keeping, you’ll want to make sure you sort them into categories. You’ll need to be thinking about the best way to visually see your supplies in a neat and orderly manner. My favorite way to do this is by using bins and baskets, while my friend loves using acrylic or glass jars with labels. Check out this post with free printable pantry labels for goods that you choose to keep!

Pantry Shelves with canisters labeled

Get Organized

When it comes to organizing your pantry specifically there are two ways to do things – baskets and containers or a clean line up.

I am a basket person. I like to combine like items into baskets and bins, where as some people like to line things up well. My friend Jen shows in her post how she does the clean line up – which can help to see what you have. It is a matter of preference on which method to go with. Personally, I think using bins creates more breathing room for more food storage containers. However, glass jars are definitely more visually appealing.

Canisters for snacks and baking supplies keep things looking tidy and functioning well on shelves. I personally used the baskets below in our old pantry.

kids snacks in pantry

You can see in this post that my last pantry was much smaller and allowed for much less picture perfect storage, but I still worked hard at having a well functioning and pretty pantry.

Regardless of the vessel that you choose to use for your pantry, be sure to measure the dimensions to confirm that they fit on your shelves while allowing any nearby doors or drawers to close.

Keeping mason jars on hand make for keeping items in your pantry and refrigerator both organized and orderly. I personally put all fruit and veggies in mason jars for a clean and easy refrigerator storage.

Pantry Organization Tips

Butler's Pantry

As I mentioned, this year we revamped our pantry for a cleaner look with doors and drawers. I personally am a fan of this crisp look, and it provided a new space to organize and work through!

I decided to keep a drawer dedicated to snacks that all the kids can easily access on their own, within reason of course. I went with these large containers with scoops attached to the lids. I have virtually indestructible bowls nearby so it is a one stop shop for the kids! This allows them to be as independent as possible, while also making healthy choices.

Another way to create more functional storage is to use that vertical space on the side of your doors. This is a great spot to attach measuring spoons, pot lids, spray bottles, etc. so that you aren’t taking up valuable real estate inside the cabinet. Many of these options are adhesive based too so damage to the door is a low concern and as a bonus, it is easily accessible.

Fridge Organization Tips

white and gold kitchen

This past year I also overhauled my fridge and freezer, and you all loved it! Refrigerator organization can be tricky. You’ll want to pick bins and containers that make sense for the type of products you typically house in your fridge. I am a big fan of over the shelf drawers so small items like pouches, cans, and especially eggs. With 4 kids, we have a ton of smaller items that really benefit from this system.

I will also never be without at least one lazy Susan in my fridge. I love this lazy Susan because you can easily remove the items still in their container to the countertop for serving and cooking. Plus, what a great and easy way to view those goodies in the back of your fridge.

Freezer organization bins have been a game changer. It is so much easier to see what is in there and there is honestly so much more space! Just be sure to freeze items in an upright position to maximize that space. I use these blocks to achieve the upright freeze.

My Favorite Bins, Food Storage Containers, & Supplies

When it comes to fridge organization and pantry organization favorites , I am linking many of my favorites below. All of these are items I have owned and love, and hope you will find them helpful in organizing your own home.

You can also shop all these items in my AMAZON STOREFRONT and see many items in action on my Tik Tok.

kitchen pantry and fridge organization

Shop Fridge Organization and Pantry Organization

1 | 2 | 3 | 4 | 5 | 6 | 7 | 8 | 9 | 10 | 11 | 12 | 13 | 14 | 15 | 16 | 17 | 18

  1. OXO Pop Containers w/ scoop – I have these in our pantry next to bowls and our paper plate dispenser so that the kids can easily grab snacks
  2. Plastic carafes – streamlines the look of your fridge door. Plus you can see when you’re about to run out of something
  3. White baskets – perfect pantry essential
  4. Oui Jar lids – I love to reuse the beautiful oui yogurt jars for small items or spices
  5. Command Spray bottle holders – these are magic. They hold our glass bottles and I don’t worry about them falling
  6. Ziploc bag organizers – definitely a luxury, but the joy I get from this organizer is worth it for me!
  7. Spice jars
  8. Water bottle organizer – this exceeded expectations tenfold. I have so much more room with this!
  9. Egg drawer
  10. Pots and Pans organizer
  11. Tiered spice organizer
  12. Glass canisters – super versatile
  13. Appliance casters – These are perfect for heavy items to just roll them around vs lifting them
  14. Cord wrapper
  15. Lazy Susan – this one is a two for one item and I love the scallop detail
  16. Stackable open baskets – great for fruits or pre packaged snacks
  17. Expandable Flatware organizer – one of my all time favorites. Expands to fit your drawer and is such a clean look
  18. Freezer bin organizers – this is the best way to maximize your space in the freezer! Perfect for those of you who like to meal prep and freeze!
pantry that is organized

Other Posts You’ll Love

If you loved this post, be sure to check out these other posts you will love.

Butler’s Pantry Reveal | Planning a Butler’s Pantry | Easy DIY Shelves | Organizing kids kitchen items | Pictures of my pantry organized in my last house

Follow Social For The Latest & Greatest

Pin The Photo Below for Later

Hopefully you feel like you learned more about fridge organization and pantry organization and feel ready to tackle the first few days of our declutter challenge. Be sure to pin the photo below for later, and follow me on Instagram (@arinsolange) and Tik Tok for more tips and tricks.

kitchen pantry and fridge organization

Home

Cold Weather Tips for your Home

Are you team cold weather, or summer forever?  If you live in St. Louis like me, you have no choice but to embrace the cold – because like it or not it is HERE! We live in a 150 year old house, so I am constantly researching ways to battle the cold. Over the years as a mom I have found some tips that work well for us, and through some trial and error have some tips for old homes too!

This post was graciously sponsored by Hoffmann Brothers – Thank you for supporting the companies that support my blog! This post may contain affiliate links.

Best kitchen cabinet handles white shaker kitchen

Cold Weather Tips for your Home

As moms we have to juggle a lot.  A home, kids wardrobes, school, work, basically some days it feels like we are in charge of keeping the world spinning, doesn’t it?

For me I think that only gets harder when fall hits.  There is more clothes, more laundry, and just in general more PREP for the week.  To help I want to talk about a few tips that I do each fall to help keep our home and lives running a bit more smoothly.

mom with 2 little ones

Cold Weather Tips for the Home

Your home is your safe haven and the biggest place to tackle when it comes to prepping for the cold, so lets go over making that a safe and great environment first!

little girl on ottoman at house

Checking your Furnace

If you have been around for a while then you know that one thing I talk about is getting your AC and furnace checked annually.  This is the time to schedule your annual furnace maintenance  with Hoffmann Brothers if you are in St. Louis or Nashville – and if you aren’t already on a plan to make sure that is done yearly, it is a good time to sign up.

They will come out and make sure everything is working smoothly so you can sleep well at night knowing your heater will get you through the winter – because although the AC is also important in that regard – a cold home is not a safe place for kids this winter.

Hoffmann brothers truck

Steps to Take when It gets REALLY cold

Nothing scares you for cold quite like a really old house. Since moving into this house we have had to broken/ frozen pipe situations and it just is not fun! Below are a few things you should do when it is really cold.

  • You want to run all faucets when it is really cold. A slow steady stream – not just a tiny drip. This is especially important for pipes exposed to the outside of the house.
  • Open sink cabinets to allow the warmer air from the house to get to the pipes
  • Run space heaters by areas of concern to keep the pipes warmer.
  • Keep draft stoppers by your doors.

If your pipes still freeze DON’T PANIC. Typically things become an issue when they thaw, so as things start to warm up, if you can not be home 24/7 turn your water off. If you will be home you can watch the area like a hawk. If you detect a leak turn off your water until Hoffmann Brothers can get to your home.

Call Hoffmann Brothers if you have a leak of any kind of leak, but while they are there discuss ways to prevent this next time. Hoffmann Brothers is very big on giving long term solutions not bandaids, so they will be helpful in what you may want to do – even if that is not something in their wheel house. (this past time for us this meant reaching out to insulation experts).

One last important thing! I tell every mom they should test and make sure they have a carbon monoxide detector on every floor of their home especially during these months.

I know for me I sleep SO much better at night knowing we have them working and running – accidents happen, and machines malfunction, and a simple inexpensive detector like this one can keep your family safe!

Cold Weather Tips for the Car

Another place to prep your lives in the fall is your car! As a mom there is a LOT that goes along with cold weather and the car.  For me that means grabbing a plastic basket and loading it up with the things below – because honestly when it is cold you want to be safe, but you also don’t want to be inconvenienced!

Cold Weather Car Kit:

  • Plastic basket like this one to store it all
  • 1 pack of kid’s gloves 
  • 1 pack of kid’s mittens
  • 1 hat for each member of the family
  • A pair of gloves or mittens for each adult
  • 1 or 2 blankets
  • A pack of warm socks (I can’t tell you how many times my kids step in a puddle or something this time of year and their shoes are soaked and their feet are cold!)
  • Large Gallon sized baggies for wet clothes or gear that comes in the car
little boy washing hands

Prepping your Life for Cooler Weather

Now having your home and your car prepped will have you SO MUCH less flustered this fall, but that doesn’t cover everything – on top of that I have a few mom hacks that will make life a little less stressful this fall.

Keep in mind – these are tips coming from me, a mom of 4 kids aged 8 – 1. Some will probably not apply to your family, but adopt them as you wish to make this fall much less stressful. 

kids cold weather kits

Cold Weather Mom Hacks

  • In each backpack for your kids use a small pouch like this one with 2 or 3 extra pairs of gloves or mittens.  (worth noting that this year that pouch also contains several back up masks for each child).
  • By November first I make sure I have checked to see if each child has a pair of snow boots, snow pants, and thick winter hat that is ready to be worn. 
  • Make sure you have hats and ear warmers for each kid – this is something to have several of as well.
  • Shoes – this is dependent on your child’s school or life, but one thing I make sure of is that my kids have a couple of options that they can wear daily.  This time of year shoes get wet and cold so one pair of shoes for school won’t cut it. 
  • If your child loses their mittens or gloves a lot you can take a long piece of yarn and a needle, use the needle to poke through the glove or mitten on the underside and on the inside tie a knot. Do this on both ends of the yarn then string that yarn through the arms of their jacket this will help keep their mittens safely where they need to be.
spooky room with pink couch

Other Posts You Will Love

Favorite Organization Items from Amazon | Cutting down on morning chaos

Pin The Photo Below for Later

Hopefully you found these cold weather hacks helpful and you feel ready to tackle the cooler temps both at home and with your family.  If you need any assistance or have more questions on Hoffmann Brothers and their annual maintanance plan be sure to shoot me an email or dm on Instagram (@arinsolange) and I will get you in touch with the right person!

cold weather Home Tips
Organization

How to Declutter your Home – A 30 Day Declutter Challenge

We are entering into year 4 of our 30 day Declutter Challenge. Who has been around this blog for long enough to remember the first year? I am asked all the time about how to declutter your home, so this challenge will walk you through every room in your house and help you do just that!

This post may contain affiliate links – post updated for 2023

organized white office space

How to Declutter your Home

Especially after the holidays, we have all acquired more – but with things slowly creeping back to ‘normal’ I am sure I am not alone wanting to clean things up and get rid of so much of the extra stuff.

Last year my friend Jen and I did a declutter your home challenge called ‘6 bags for 6 weeks’. 6 weeks was a bit long and overwhelming for everyone involved, so we have reinvented the challenge!

This year, Jen and I will be leading a declutter your home in 30 day challenge. This blog post will serve as my hub post for information on the challenge, as well as a way to find all my additional resources.

I will walk you through this challenge as well as some general guidelines when it comes to decluttering your home.

A Bit About Me and My Organizing and Decluttering

Like I said above – this is year three for me walking through a declutter challenge with my readers and followers. As a mom of 4, one thing I have been very passionate about is finding ways to embrace my kids’ toys and passions in a way that doesn’t make my home feel like a cluttered mess.

bright clean living room

Sometimes for me that means a DIY to allow for a functional and beautiful way to keep things accessbile. Sometimes it means a creative way to store things, and sometimes it just means knowing what to declutter and minimize to lessen the ‘stuff’.

This next month will be a combination of those skills and posts to help give you unique tips that hopefully change your mindset a bit when it comes to kids’ stuff.

30 Day Declutter Your Home Challenge

This 30 day Declutter Challenge will be run with my friend Jen – you can check out her declutter hub here. On that page you will find all of her blog posts and resources to help you as well.

30 day declutter your home challenge worksheets

The Important Details on How to Declutter your Home

Alright – so here is what you need to know and do for this challenge!

First things first – Grab your documents and officially sign up! You will get all of the documents immediately to declutter your home, but will also get weekly emails going forward with a packet of additional information, helpful posts, and my favorite products! As always – you can unsubscribe at any point.

When does it start? – This session we will be walking through the 30 day declutter challenge right along side you here on our blogs and Instagram starting Jan 2, 2023.

However, if you are reading this at any other time in the year – start when you are ready! Feel free to chat with me on Instagram (@arinsolange) if you need help or motivation!

What do you need? – The documents that you get to your email for free when you sign up, time, and motivation. Everything else is optional. We will walk you through products and techniques to help in the declutter process, while also helping you to organize what is left – but that doesn’t mean you have to do it the way we do – let us serve as inspiration for a strategy that works in your home with your family!

Prizes – I know that is highly motivating, right? We have done this differently over the years, but this year – I will be giving prizes out to those who participate. Simply tag us in Instagram posts/stories so we know you are joining in!

Organized kids toys in baskets

So How do You Declutter your Home?

Getting your house down to what you need, and ridding it of the clutter will make you feel so much better.  I have worked with my followers on some ways I do this over the years, and I am always so excited to hear how much they love joining in.  

Taking one space at a time, but really committing time to getting your house and life organized is the only way to do this process. We will be walking you through one space a day to make this feel more feasible and less daunting.

organized linen closet

What is the Declutter Goal?

You will have 2 goals in this challenge:

  1. To check off every section of the 30 Day Declutter Your Home document.
  2. To rid your home of at least 30 bags of ‘stuff’ and track that on your document.

Where does everything go?

30 bags of stuff to get rid of can sound kind of daunting. But I can tell you that last year I decluttered more than 60. Some spaces of your home will not have much, but other areas will have bags and bags!

For me personally I considered a trash bag a ‘bag’. But don’t get caught up in the details. The goal is to just push yourself to let go of things you don’t need. You will have some choices on where those items go:

  • keep – items that bring you joy, or you truly use in your life!
  • donate/sell – if you are going to donate and live in St. Louis check out this post for some great places to donate.
  • fix – but you have a time limit!
  • throw away – One thing that you will find is we have lots of trash. I know it can feel daunting with the trash aspect because no one wants to just throw tons of stuff away, but trash is trash.

With selling or fixing there needs to be a time line of sorts, so one week after this challenge ends you need to have committed to having everything dropped off at a donation site, or picked up.  If you haven’t fixed it or sold it at that time then it likely won’t happen and it’s probably time to part ways! 

organized basket ladder for baby items

Why Do This Declutter Challenge?

There are probably other declutter challenges out there, but both Jen and I have loved doing this challenge with our readers and followers, and we think you will too.

We will be helping along the way with new blog and social posts that will help you find the best products, and walk you through the best tactics. Both Jen and myself have a strong passion for this – but we are also both so unique in our tactics.

Between the 2 of us we have 7 kids 10 and under. We recognize and know the difficulty of committing to something like this, but also know that if you do you will be so glad you did.

baskets with baby toy giraffes

Along with blog posts, we both follow our progress on Instagram via posts and stories, so you will have plenty to follow along on there too. So just know that this is very much something we are doing with you!

Follow Arin on Instagram | Follow Arin on Tik Tok | Follow Jen on Instagram

We will also have some guests jumping in with great skills and tips along the way, so our hope is to really truly help you kick this year off well and feel decluttered in your mind and home.

Declutter and Organization Posts

Below is a list of some amazing posts and resources I have already written to help you in this process. I will continue to add to this resource list as the challenge goes on.

organized baby dresser

Kitchen:

Organizing your Kitchen with Kids stuff – free pantry basket labels in this post

Pantry and Fridge Organization

Closets:

Best Closet Organization Items

DIY Wood Closet ( or linen closet) shelves

Kids Closet Organization

Bathrooms:

How to organize a bathroom with a pedestal sink

Toy Storage:

Living Room Toy Storage

Toy Organizer Favorites and Playroom Organization

Outdoor Toy Organization

Crafts:

Craft Room Organization

General Organization:

Maintaining your Organized and decluttered life

Where to donate Items in St. Louis

Save This Page and Post

In order to easily find this hub page full of all your resources on how to declutter your home be sure to bookmark this post, and pin the photo below. Like I said – we will continue to add to this post as the month goes on. Hopefully you love doing this 30 day declutter your home challenge and we can’t wait to get to know you all during this process on Instagram (@arinsolange) and Tik Tok.


how to declutter your home
Holidays

Christmas Books for Kids

Christmas books for kids are so fun to add to every year!  I have been loving sharing our favorite books with you all the last few months, and love how much you all seem to love them too.  One of my favorite things about putting in our little coat closet book nook was that it allowed for me to have a place to put cute kids books on display for each holiday.   

a hallway book nook with Christmas Books for kids
This post contains affiliate links – Originally posted 12/19 – updated 9/20

Best Children’s Christmas Books for Display

I rounded up the best children’s Christmas books for display all in one post, as well as have a free printable piece of art work you can add to you space in the post.

To make life easier, and because I know this time of year is filled with so many errands, I thought it might be easier to find you books that could all be purchased on Amazon.  I know for me the holiday season just gets so crazy hectic, so Amazon is my go to – and finding these great books all on Amazon makes me so happy. 

Free Printable

reindeer names in pink and red

In our book nook this year, I wanted some holiday decor on a budget, so I decided to try out hanging a poster.  I am going to offer this in a few different sizes below, so just download and print the size you prefer.

For my poster I printed it in size 36×48 (so really big). I had it printed online at Staples in a colored  blueprint for about $8.  

I then used two sticks from the craft store (I got mine at Michaels) and simple hot glued QUICKLY them to the front side of the poster at the top and bottom.  I love how it turned out as a simple way to add holiday decor, and I can easily re use the sticks holiday after holiday. 

Reindeer 8×10   Reindeer 20×30   Reindeer 36×48

Christmas book nook

Now onto those great Christmas books for kids – the first round up is all books we own and I recently grabbed several of the books from round up two.

There are board books and paper books both to allow you to find something great for any of your kids.  Add a few each year and you will have a gorgeous collection of Christmas books in no time!

A round up of the best children's Christmas books for display

Christmas Books for Kids  Round Up 1

1  |  2  |  3  |  4  |  5  |  6  |  7  |  8  |  9  |  10  | 11  |  12  |  13  |  14  |  15  |  16  |  17  |  18  |  19  |  20  |  21  |  22  |  23  |  24 

  1. Home Alone
  2. Christmas Stories and Songs
  3. How The Grinch Stole Christmas
  4. Olivia Helps with Christmas
  5. Little Blue Truck’s Christmas
  6. I am Max
  7. Duck and Goose – It’s Time for Christmas
  8. That’s not my Snowman
  9. The Nutcracker
  10. The Gingerbread Man Loose at Christmas
  11. The Tree Thats Meant to Be
  12. Silent Night
  13. The Little Reindeer
  14. The Polar Express
  15. Snow Globe Wishes
  16. The Reindeer Express
  17. How Winston Delivered Christmas
  18. Little Robin’s Christmas
  19. Pick a Pine Tree
  20. Christmas Wish
  21. The Gingerbread Man
  22. When Santa was a Baby
  23. Nativity Flap Book
  24. A Christmas Carol
Christmas books for kids

Christmas Books for Kids Round Up 2

1  |  2  |  3  |  4  |  5  |  6  |  7  |  8  |  9  |  10  | 11  |  12  |  13  |  14  |  15  |  16  

  1. The Story Orchestra – The Nutcracker
  2. Maple and Willows Christmas Tree
  3. The Story of Holly and Ivy
  4. Colors of Christmas
  5. Hurry Santa
  6. The ABC’s of Christmas
  7. Oh Christmas Tree
  8. Santa Mouse
  9. The Night Before Christmas
  10. Sparkles first Christmas
  11. A Children’s Literary Christmas
  12. A Gift to Remember
  13. The Crayons‘ Christmas
  14. Little Red Sleigh
  15. A Silly Milly Christmas
  16. Christmas Cheer
Christmas books for kids in a book nook

Hopefully these gave you some fun new ideas on books for your kids to read this season.  If you do the elf on the shelf – I always think it’s really fun to have your elf bring back your holiday books each year, or even bring a new book or two too add to your collection.  

Last year my elf on the shelf breakfast was so fun – see here, and it is something I look forward to every year with my kids!

And if you are shopping for Christmas gifts – check out this page with all my gift guides.  I update this page often so you are sure to find great, up to date gifts for everyone you love!

Gift Guides

Pin the Photo Below for Later

Hopefully you found some Christmas books for kids that you love and they will love too.  Be sure you subscribe to my blog for more holiday fun, and if you have any questions be sure to leave a comment below or shoot me a DM on Instagram (@arinsolange).  And don’t forget to follow along on Tik Tok.

Christmas books for kids
Holidays

Christmas Boys’ Room

My living room may be a mess of Christmas Decor not yet in place, but Jack and Walker’s room is festive as can be!  I knew when we added the fun green dresser to their space that it would be the perfect room to add Christmas Decor this year, and sure enough it tuned out SO CUTE, on a tight budget.  Ill share all about how I did this Christmas boys’ room, but be sure to let me know if you have any questions.

This post contains affiliate links. It was written in 2019 and updated in 2022.

For a more another kids’ room update, check out how I updated Jack’s room in our new home!

Christmas Boys' room

I won’t be sharing some of the year round details in this post, so be sure to check out their room blog post to find all those details!

Christmas Boys’ Room

I knew when doing their room that I wanted it to be easy simple changes, and I wasn’t about to spend a fortune on their space for Christmas.  That said I also knew there was a chance that this could be the only room with double the fun in one room, so I had to do it!

Felt Deer head on wall with Christmas Banner
Boys bed with wreath over it and Santa pillow for Christmas

The Details

Over the boys beds I did a super easy printable over each of their beds.  I will add them as free downloads below.  I had them printed at Fedex for about $5 each.  Fedex only prints in certain sizes on their blueprint paper, so you will have to cut out the printable!

FREE DOWNLOADS FOR FRAMED PRINTS

Framed HOHOHO Print with wreath

kids bed with Christmas bedding

Over the beds I also added wreaths.  These are SUPER inexpensive wreaths from Walmart.  I added a fun ribbon to make it more festive!

Christmas Tree in Boys Room

I added this AMAZING felt deer head to the wall between the boys beds with a fun garland and I am obsessed with the detail.  The Deer head is from Heartfelt Creations (c/o) and she has so many other amazing options!

Wall in Boys room decorated with felt deer head and Christmas Garland

Aside from that I added a fun tree, some little decor I had on hand and a garland to their dresser!

Santa and Wreath in Christmas Boys' Room by closet

The Bedding

So my boys don’t really sleep with comforters, so for this I went with a nice knit blanket on each bed.  I also got some festive sheets, but because I am probably overly frugal on some of this, i didn’t do technical Christmas Sheets.  I love that the ones I went with are festive and fun but could be used all year! I also got each boy a Santa Pillow and they are both so obsessed.  I will have a hard time getting HOHO back from Walker.

Boys room for Christmas with tree and Christmas Bedding
Red Christmas truck throw

When I set this room up my husband instantly was in love, and told me I have to do it every year for our kids rooms.  it made the upstairs feel so festive for the holidays, and a Christmas boys’ room certainly brought the cheer to our upper level….now just to figure out how to do something in Avé’s room, since she is upset theirs was all out haha!

Beddys Bedding Discount Code: ARINSOLANGE

Shop all the Details in the Post

Tree (similar)  |  Pillow (alternative)  |  Wreath (similar)  |  Garland (similar)  |  Felt Animal Head  |  Chalk signs in wreath  |  Sheets


Pin This Christmas Boys’ Room Post for Later

Christmas Boys' Room