Painting kitchen cabinets white…basically the most popular thing ever right now, right? When we moved into our house 4 years ago the kitchen was okay – fairly updated, but definitely not my taste.
We have wavered back and forth on the idea of painting the cabinets white since then, but knew it would be a huge project…so nothing a little stay at home order couldn’t kick us in gear to get done!
this post contains affiliate links
Painting Kitchen Cabinets White
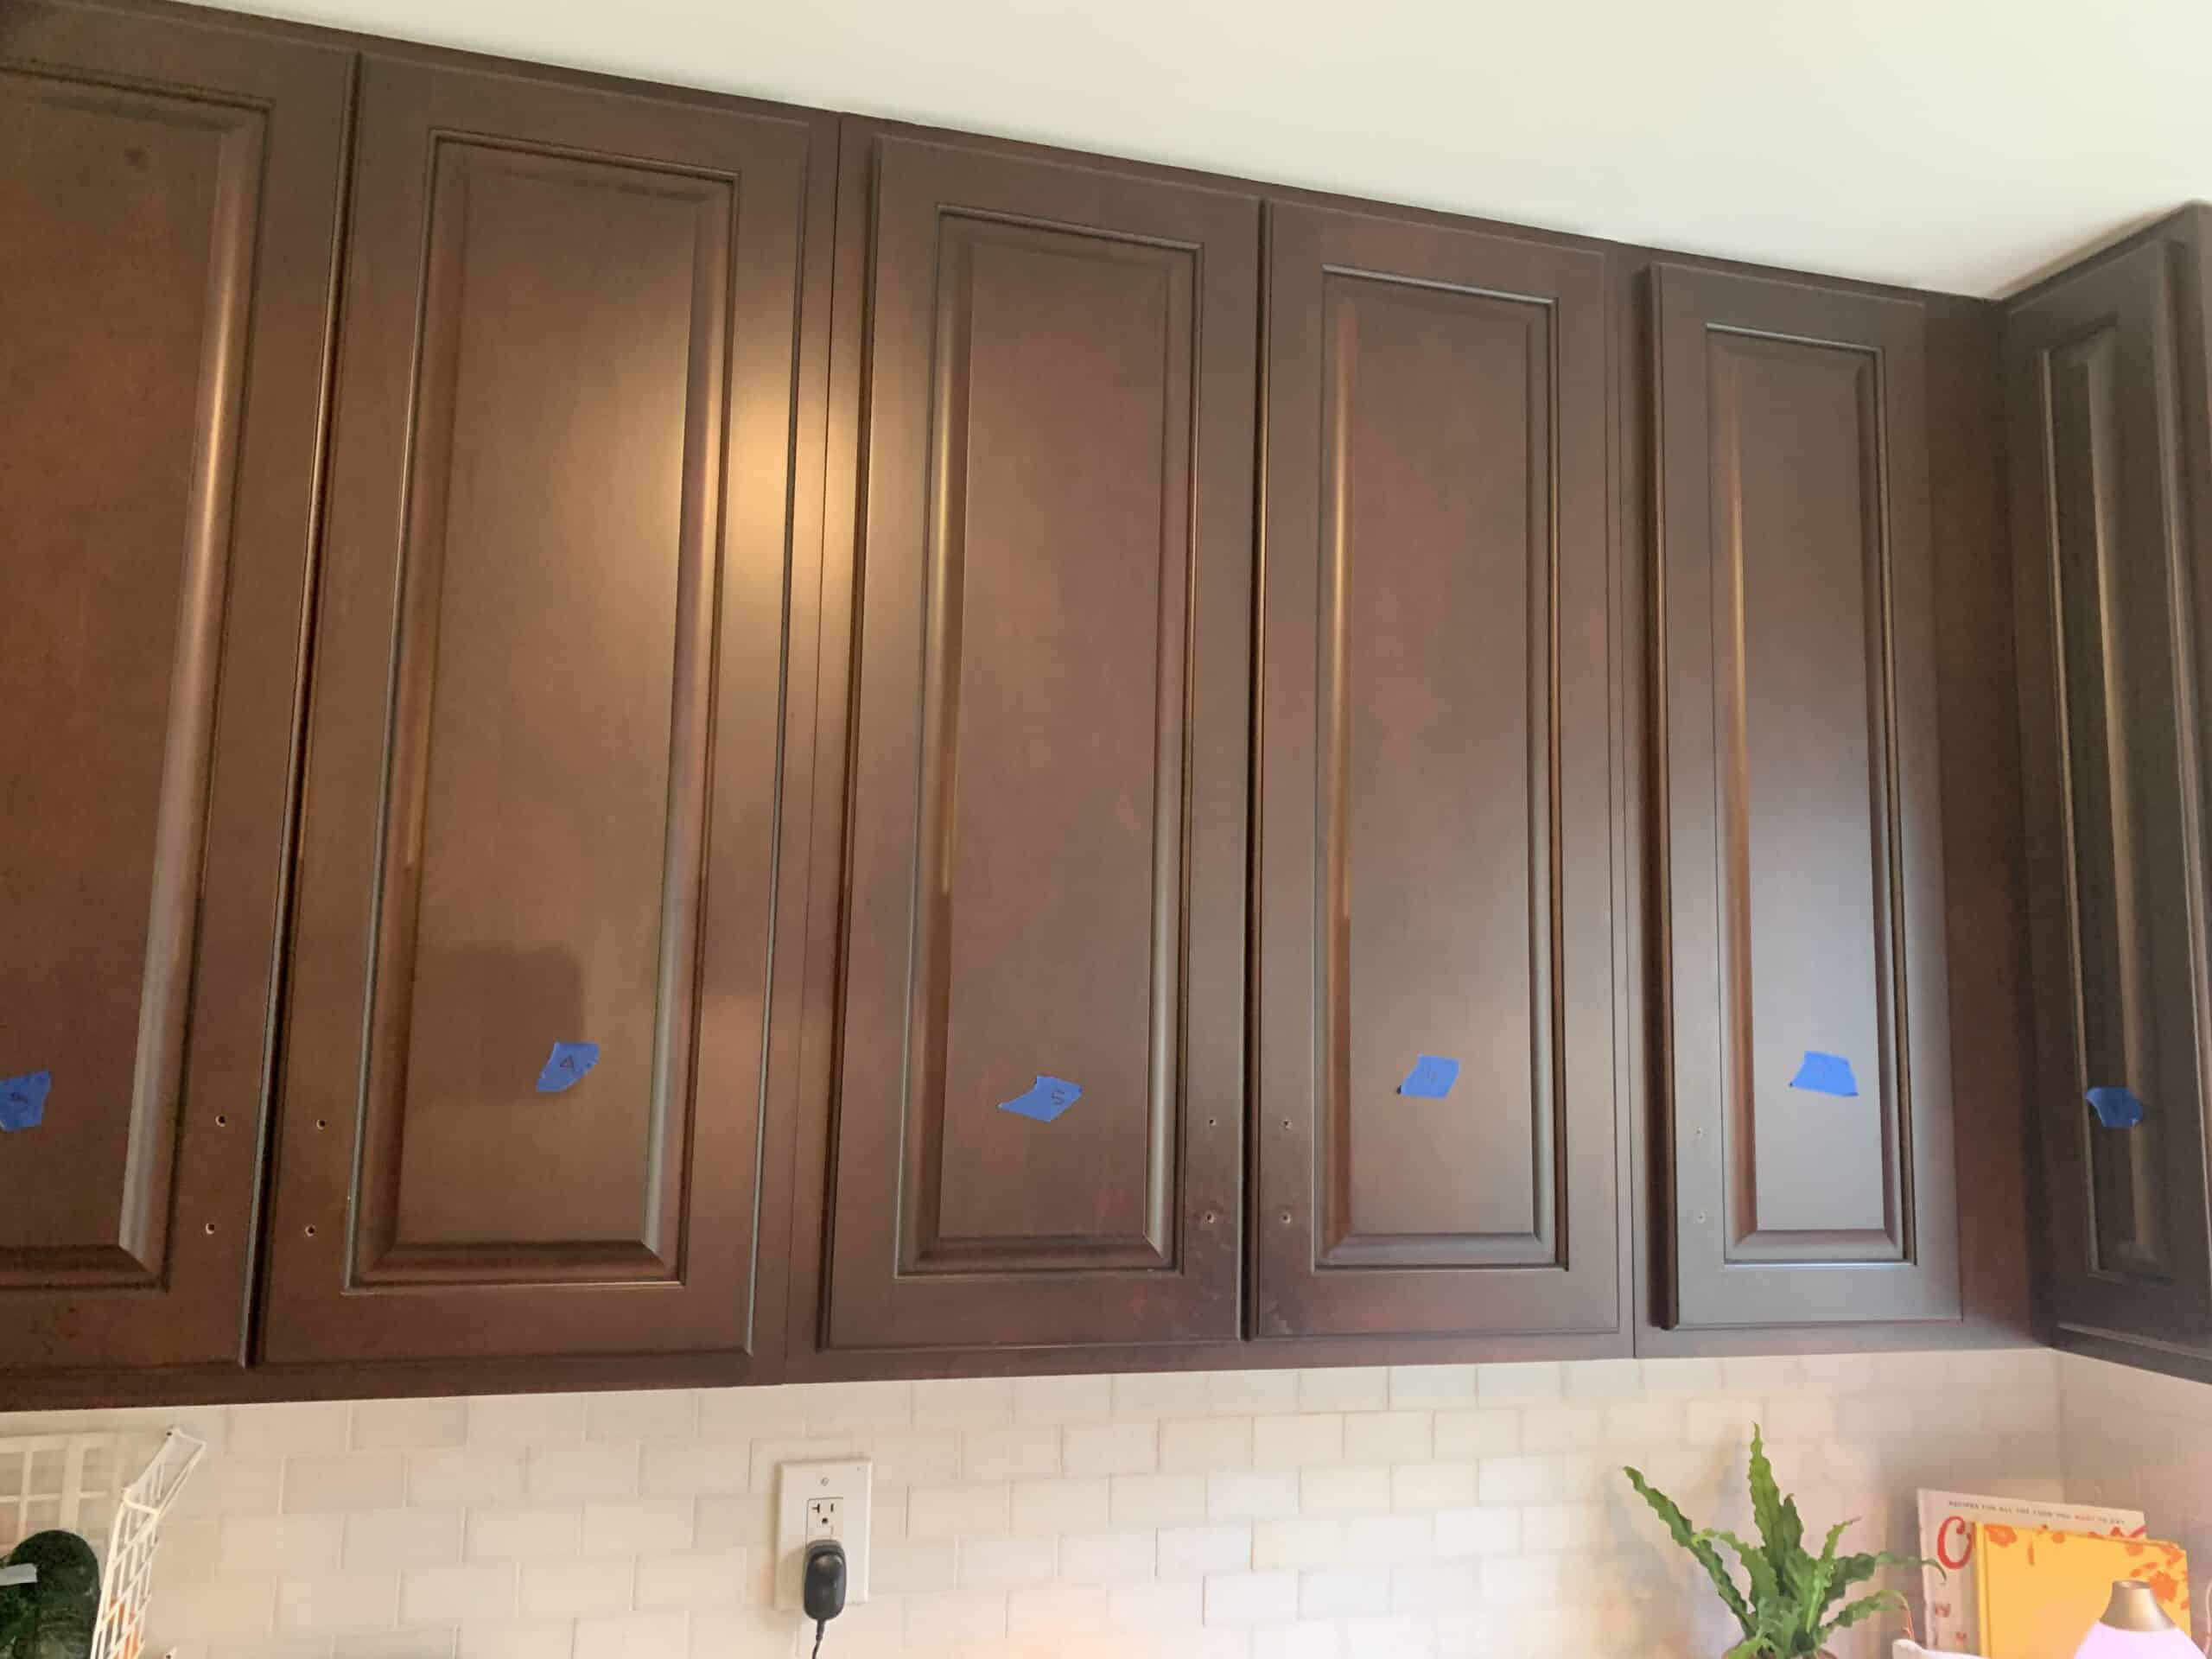
Like I said – we have lived with our dark brown (pretty, but not our taste – see the before here!) cabinets for 4 years. The previous owners to our home did an update while they lived here, so I want to say they are probably no more than 10 years old all together.
In this post I will talk about how I painted them, the choices we made when it came to lighting and hardware. Steps, tools, disclaimers – ALL OF IT.

I have done so many DIY projects over the years, and I will say that hands down this one probably made the biggest impact. It was a 1 week project start to finish and honestly it was a lot of work, but also not as bad as I expected.
The fact that the kitchen was torn apart while 6 people were home 24/7 was by far worse than the actual work.
Total Time for Project: 7 days ( could be done in 4 – we spread steps out)
Total Money Spent: $200 ish – this included lumber for the option addition we did.
Printable Supplies and Steps
Below is a shortened version of your steps and supplies to make things easier – I elaborate in the post, so I suggest you read the post once through then use this card if needed while you’re working! I am hoping adding these to my posts makes creating easier for you!
Painting Kitchen Cabinets White
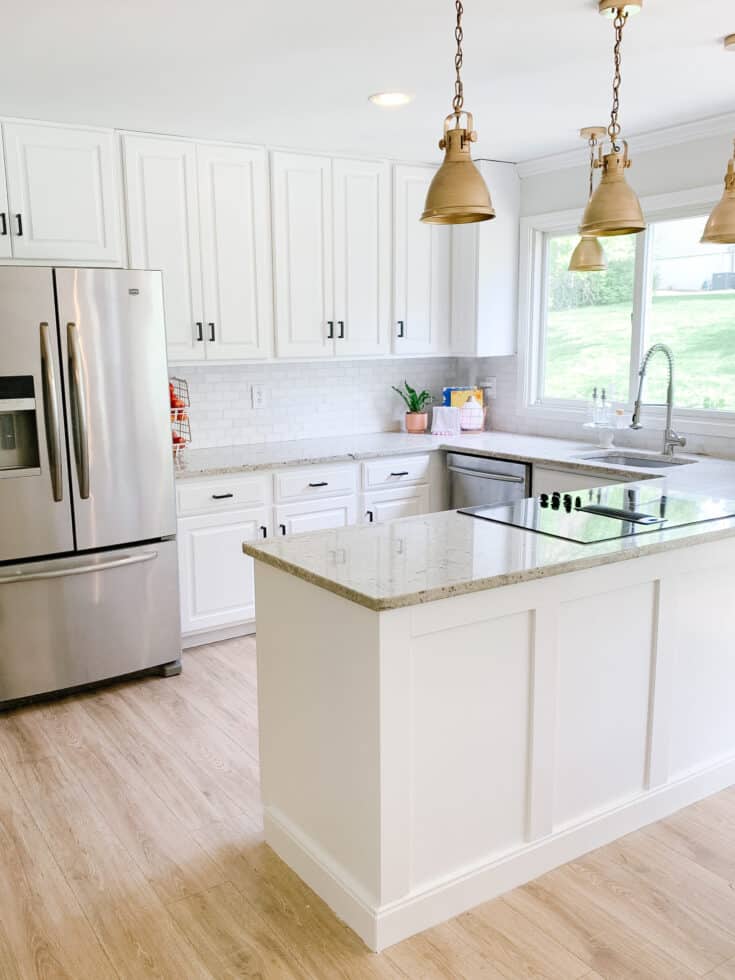
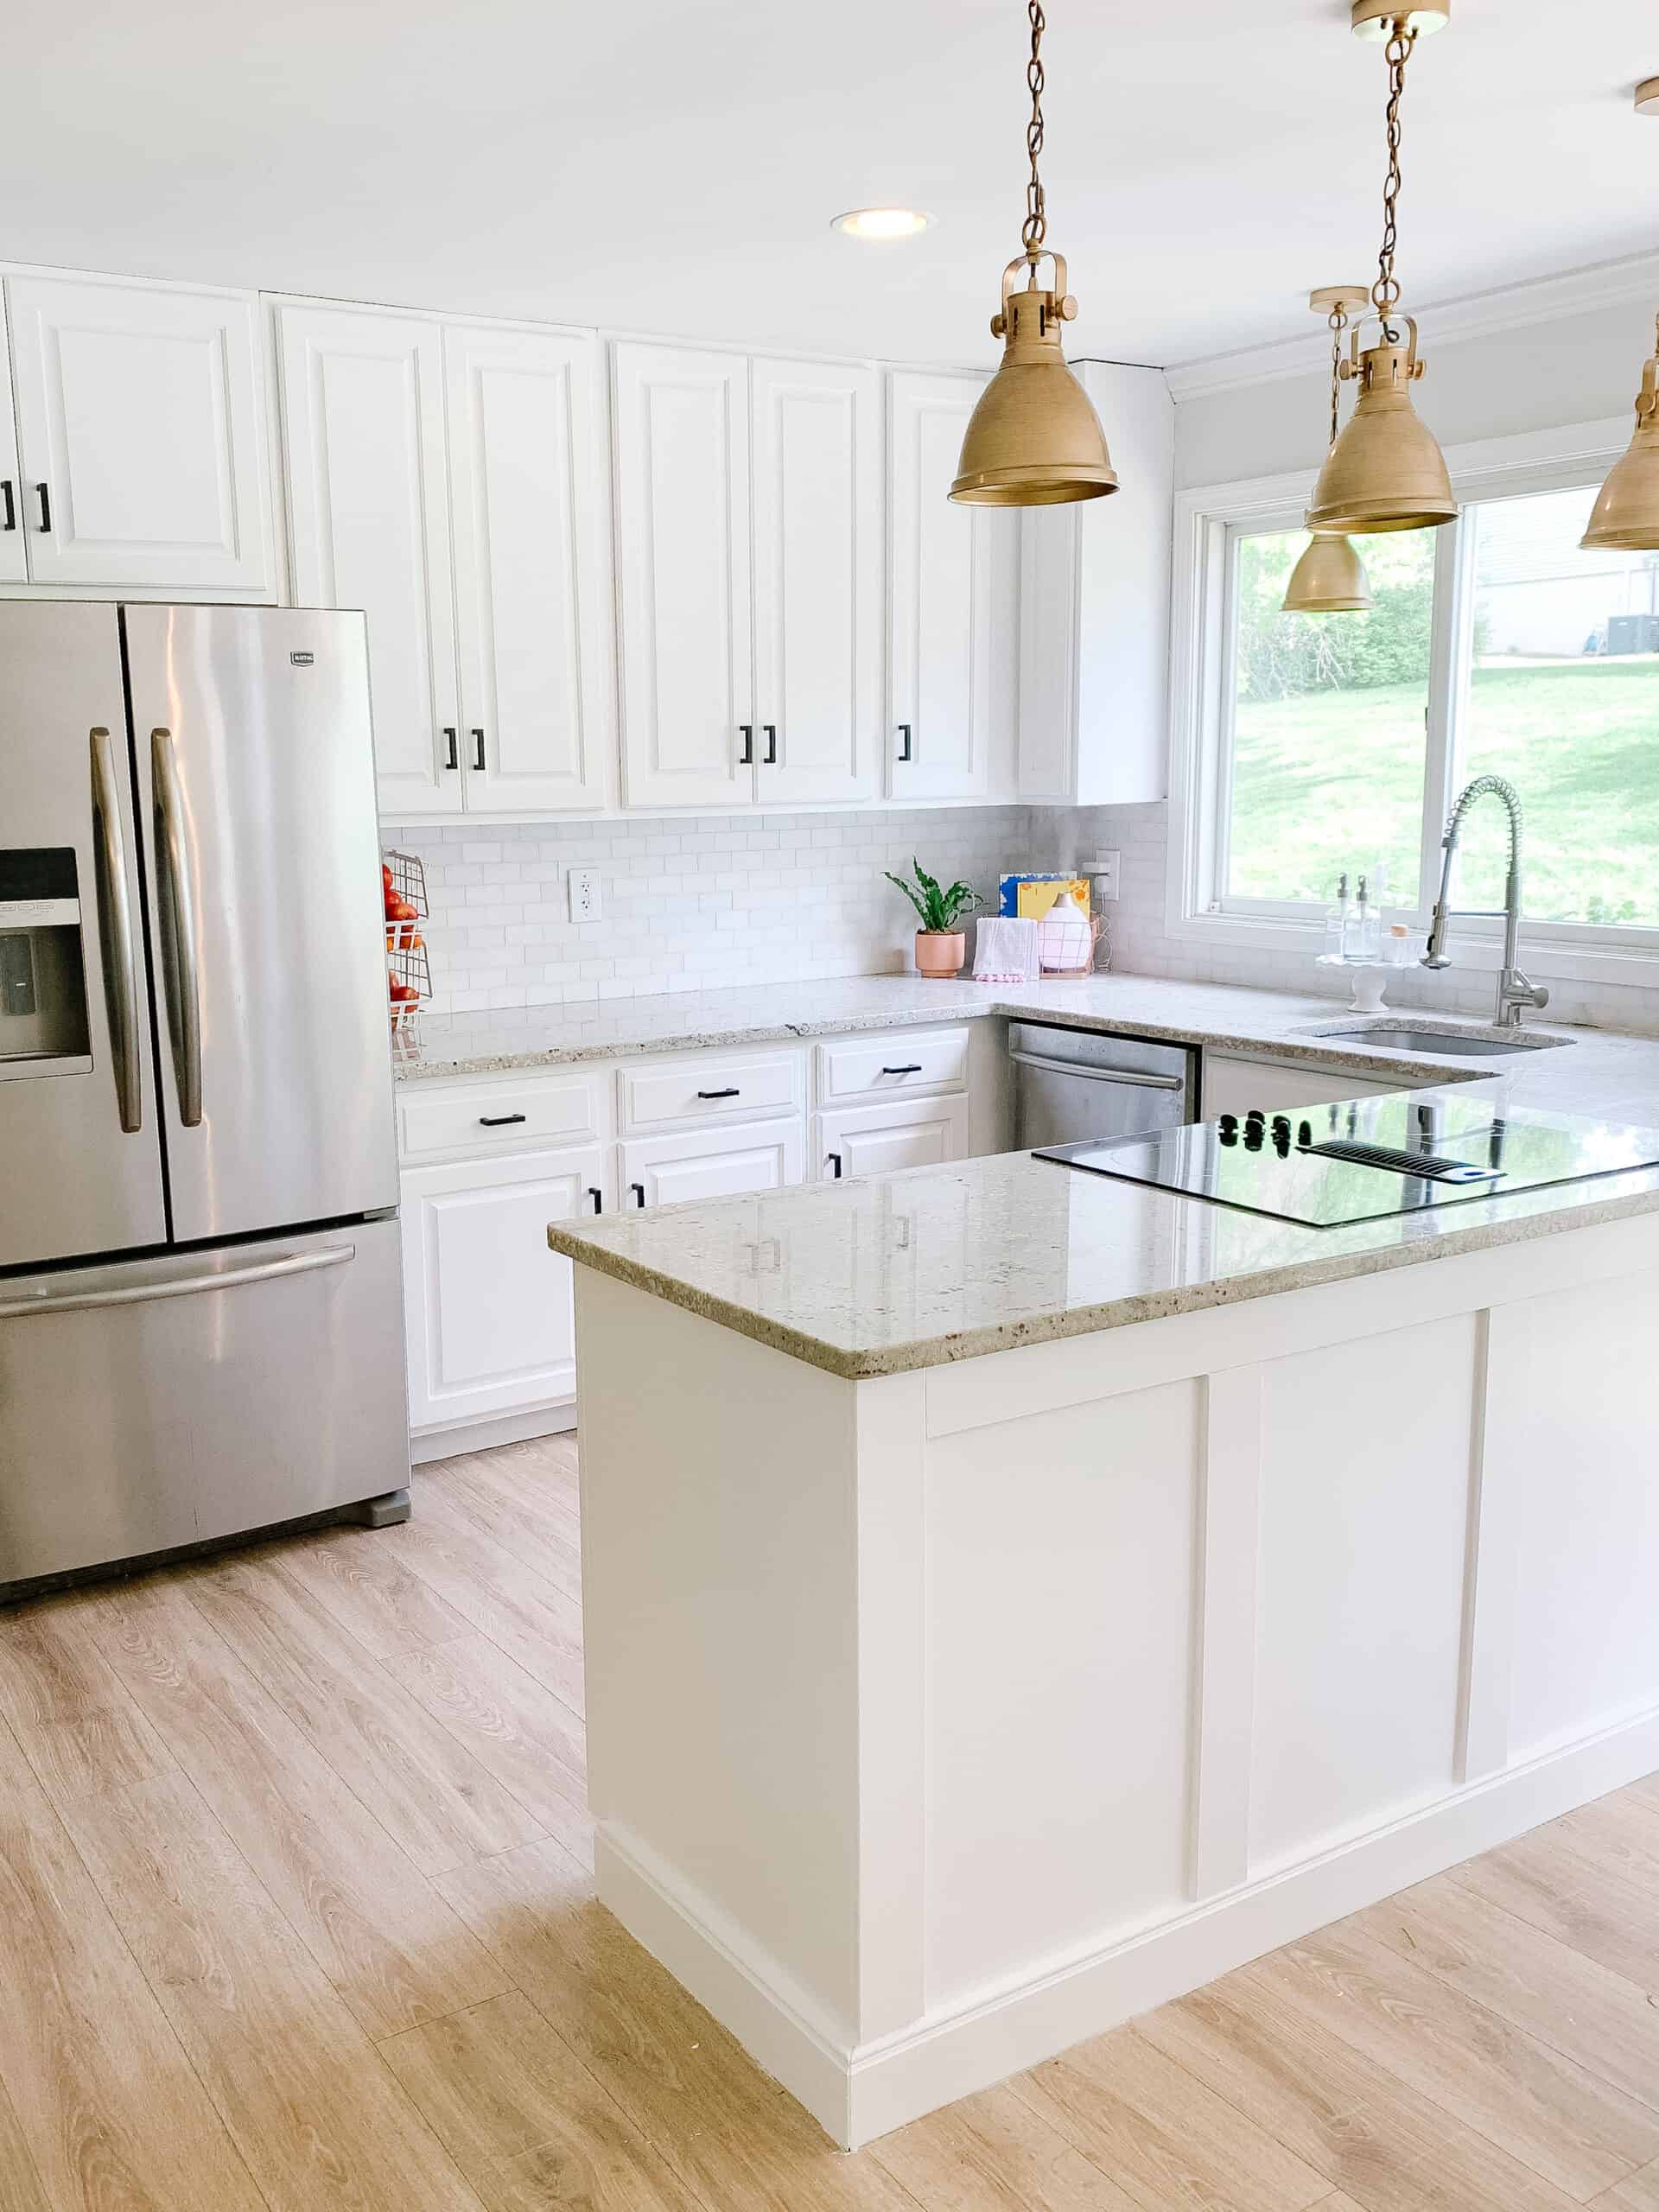
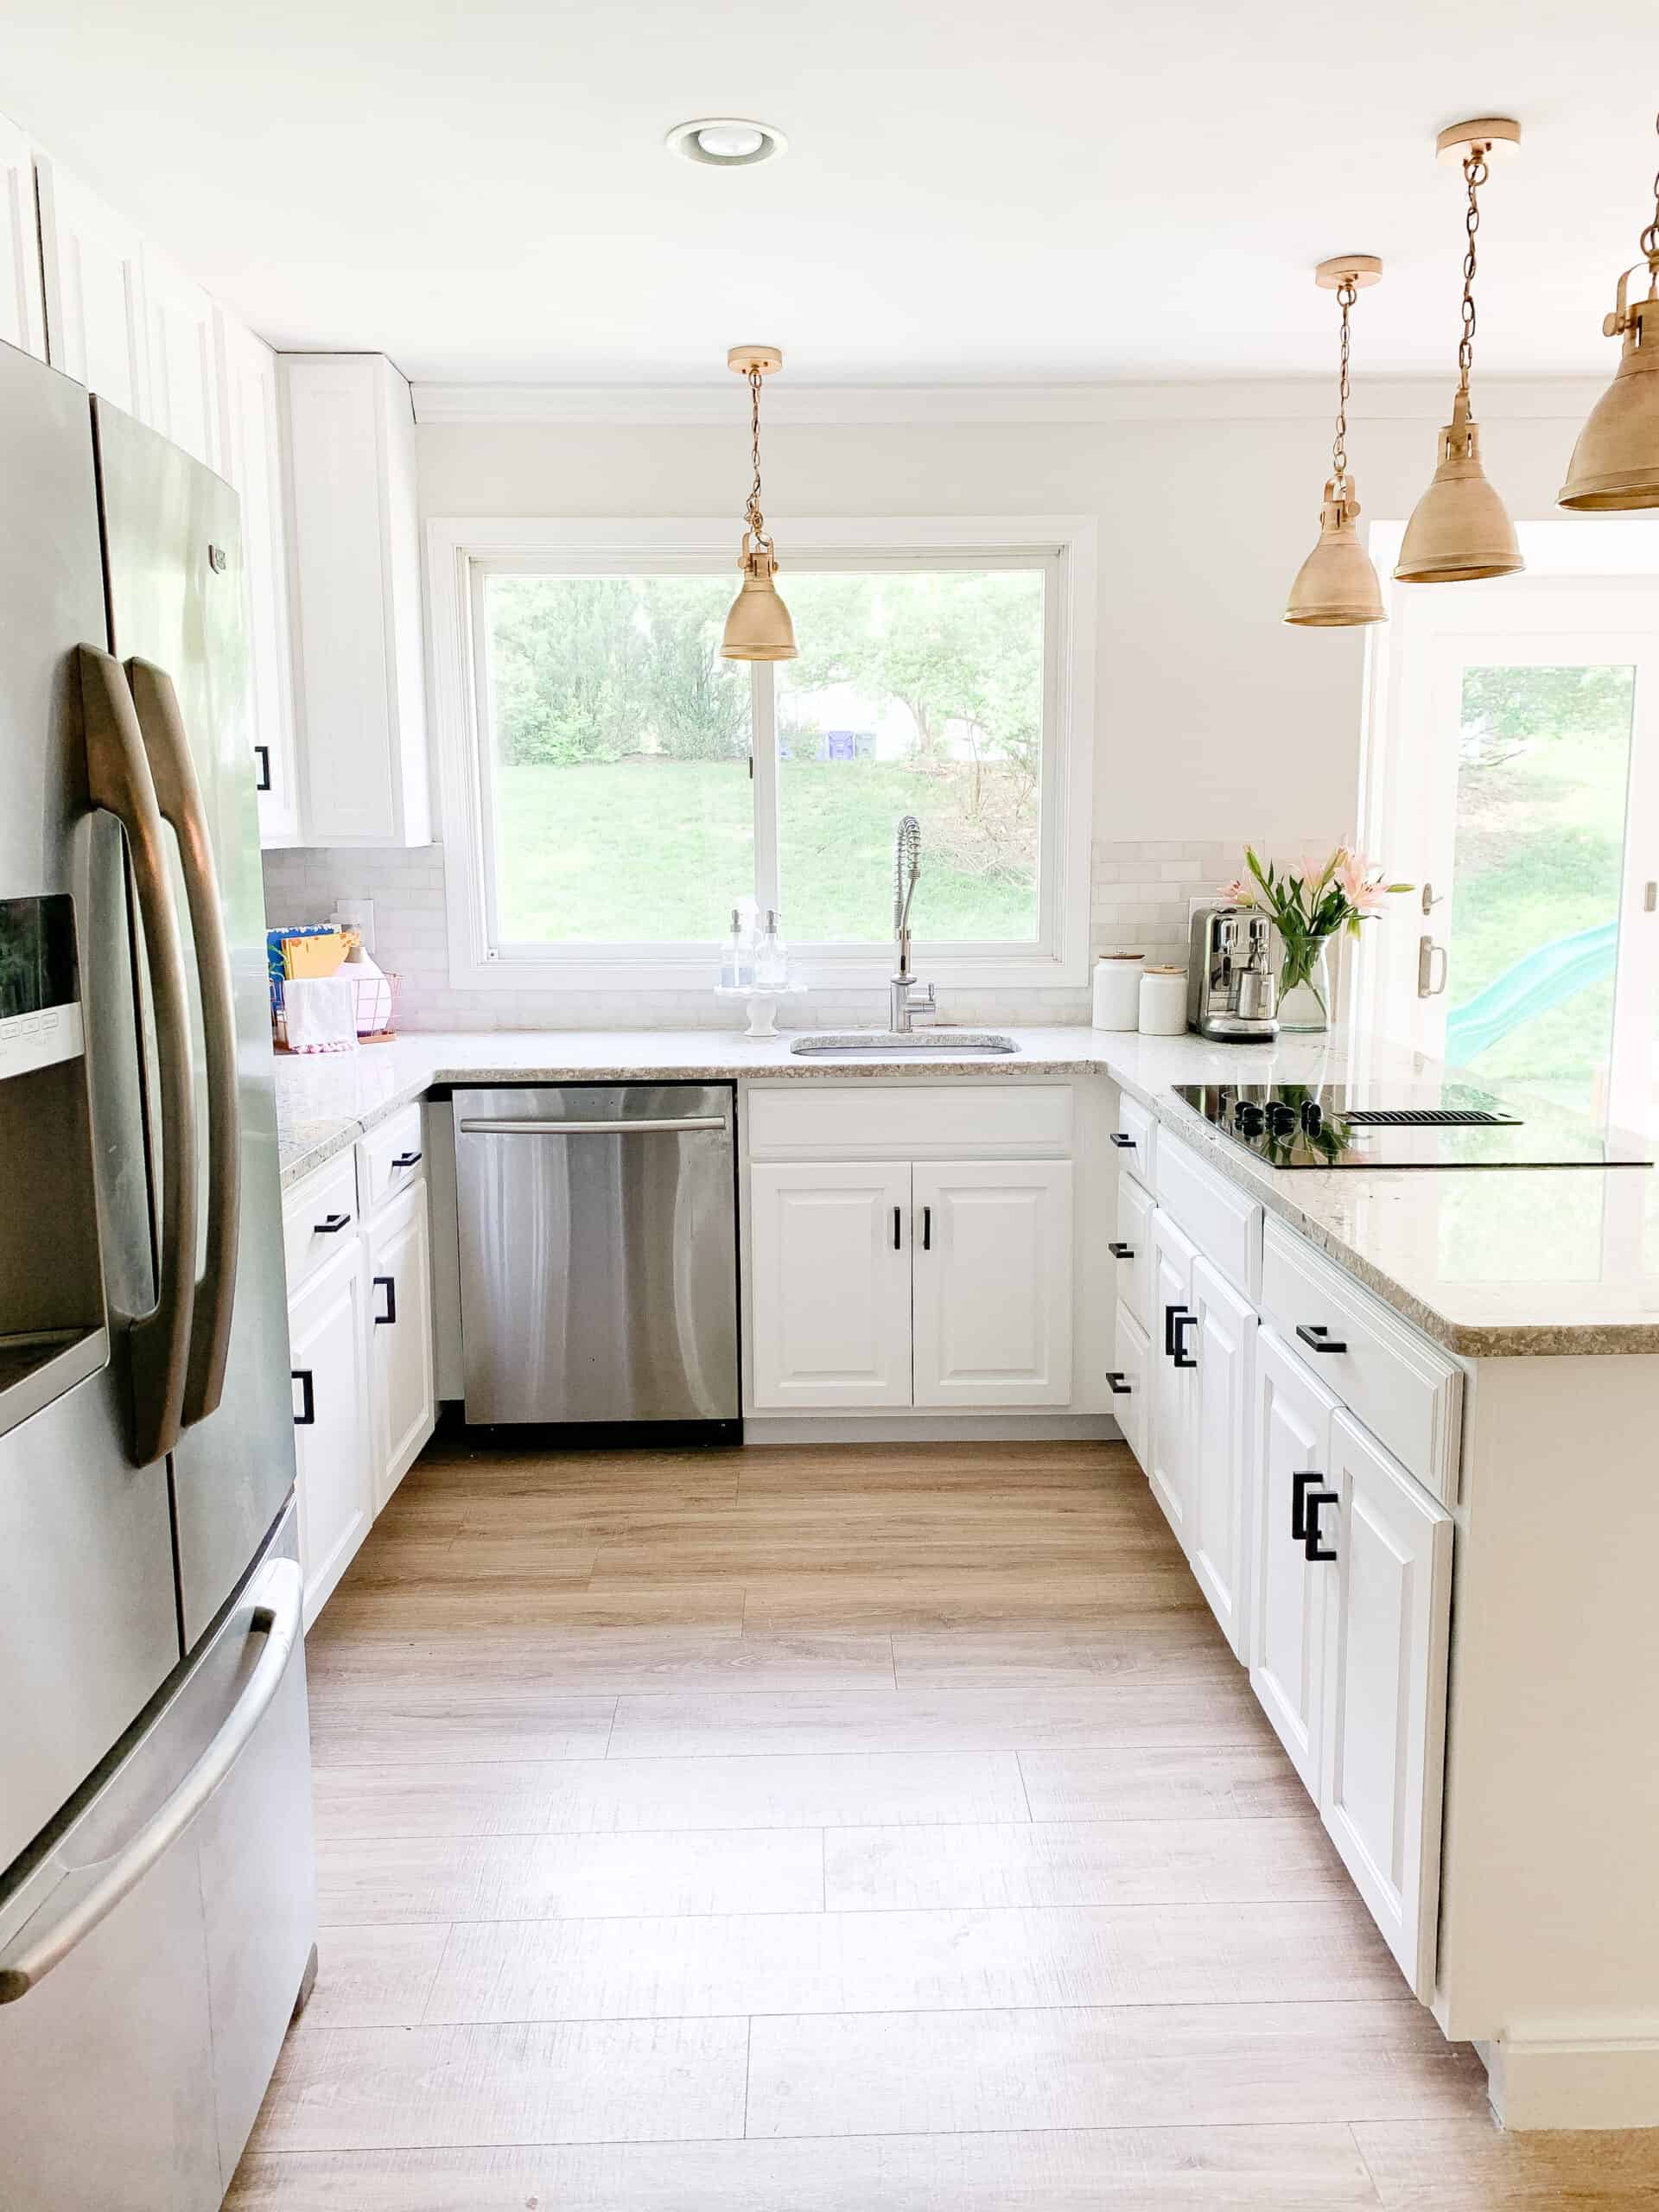
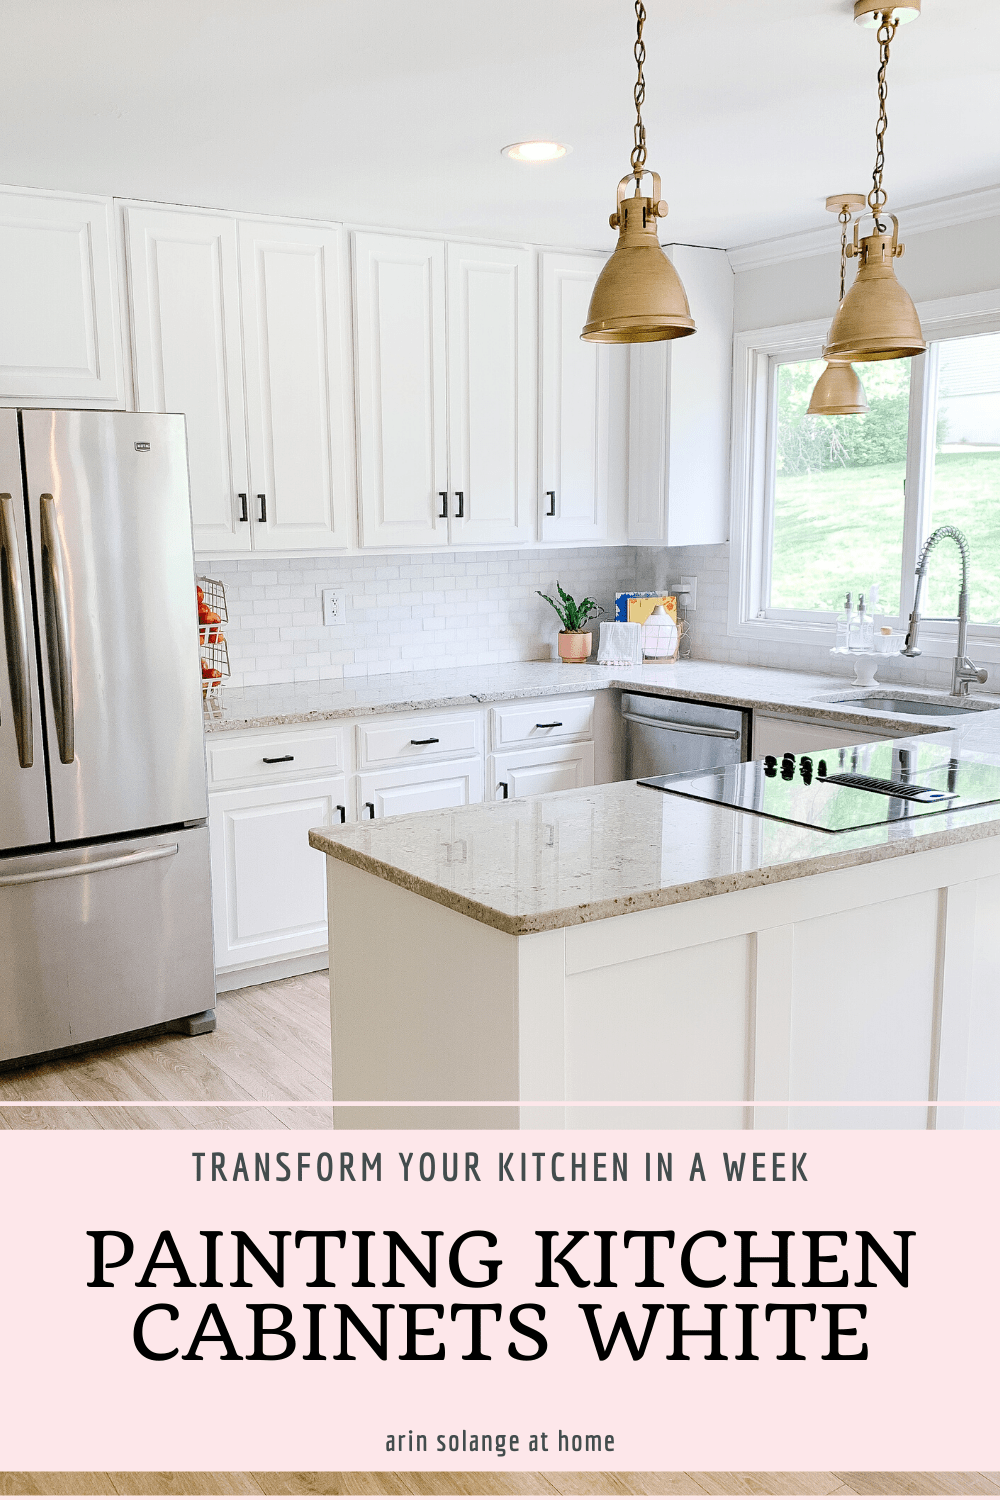
In 1 week we transformed our cabinets from dark brown to white, with a well researched painting technique and some small steps to make the space more modern. Check out the steps and tools we used heer!
Materials
- Cabinet Paint (Ours are in the color 'Bit of Sugar'
- Primer
- Optional 3 inch trim - for detail on Cabinet Back
- Optional Paintable Caulk
- Sanding Blocks
- Painters triangles - Optional but Recommended
- Painters Tape
- Plastic drop cloths
Tools
- Optional - Paint Sprayer
- High Density Foam Rollers
- Paint Brush
Sander
- Optional Higher price - less mess
- Affordable Sander
- Sanding Disks
Instructions
- Prep your kitchen - remove everything from inside the cabinets and all items from counter tops.
- Clear Tape off the room for sanding unless you got the higher priced dustles sander (recommended).
- Label all drawers and cabinets with painters tape and a number.
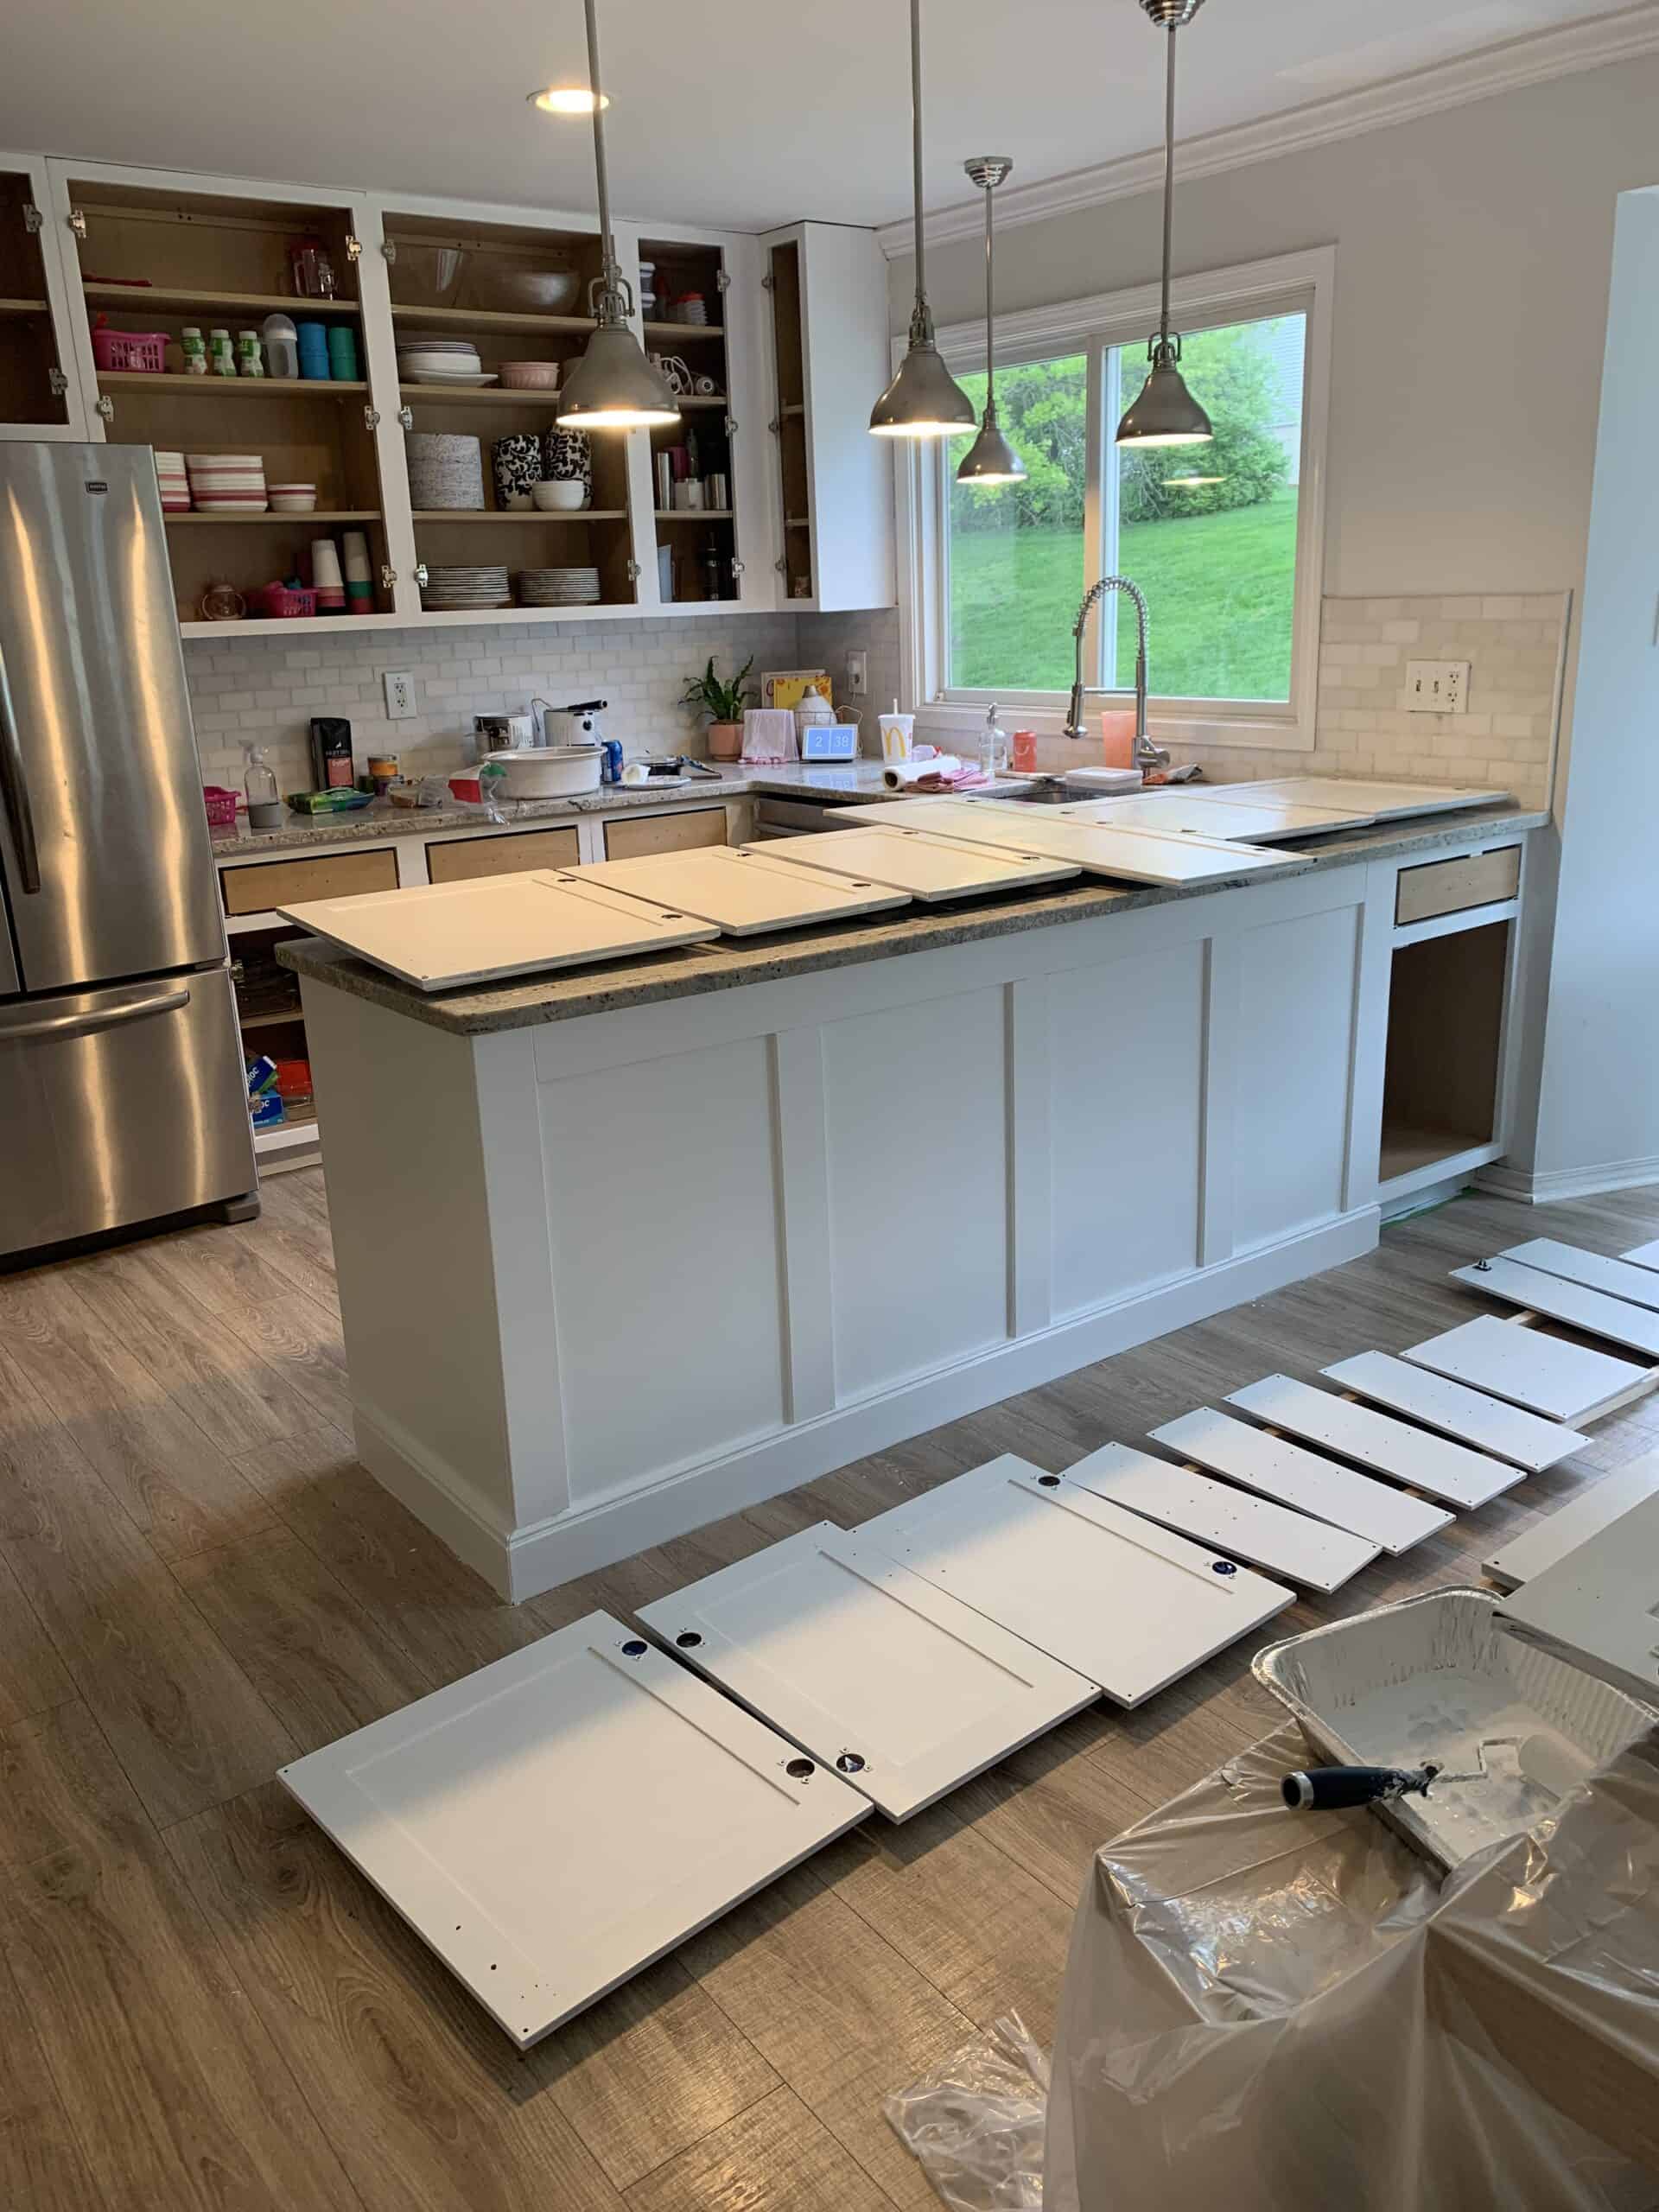
- Remove all Cabinet doors and Drawer fronts. Leave Hardware right next to where it came off inside the cabinet (you want the same hinges in the same spots).
- Sand all Cabinets doors and drawers.
- If you are adding the detail to your counters like we did this is where you will then insert that step.
- Clean all cabinets WELL
- Sand all Cabinet doors and drawer fronts.
- Prime - 1 or 2 coats of primer using a paint brush and a foam roller. Sand lightly between the 2 coats (if you do 2). I personally did all the cabinets first leaving doors and drawers. This allowed me to reload my cabinets. For the doors do the BACK first and use your painters triangles so you can flip sooner.
- Lightly Sand and clean WELL. (using FINE grit sanding block)
- Apply first coat of Paint
- Lightly sand and clean WELL. (using FINE grit sanding block)
- Apply second coat - you may have to sand lightly and do a third coat, or you might be fine with the 2.
- Reassemble.
Notes
This is not overly hard, but it a long few days with work and your home torn up. There is more detail in this post if you need more clarificiation.
Supplies
Before you get started you need to get all of your supplies. I will list exactly what we got and WHY.
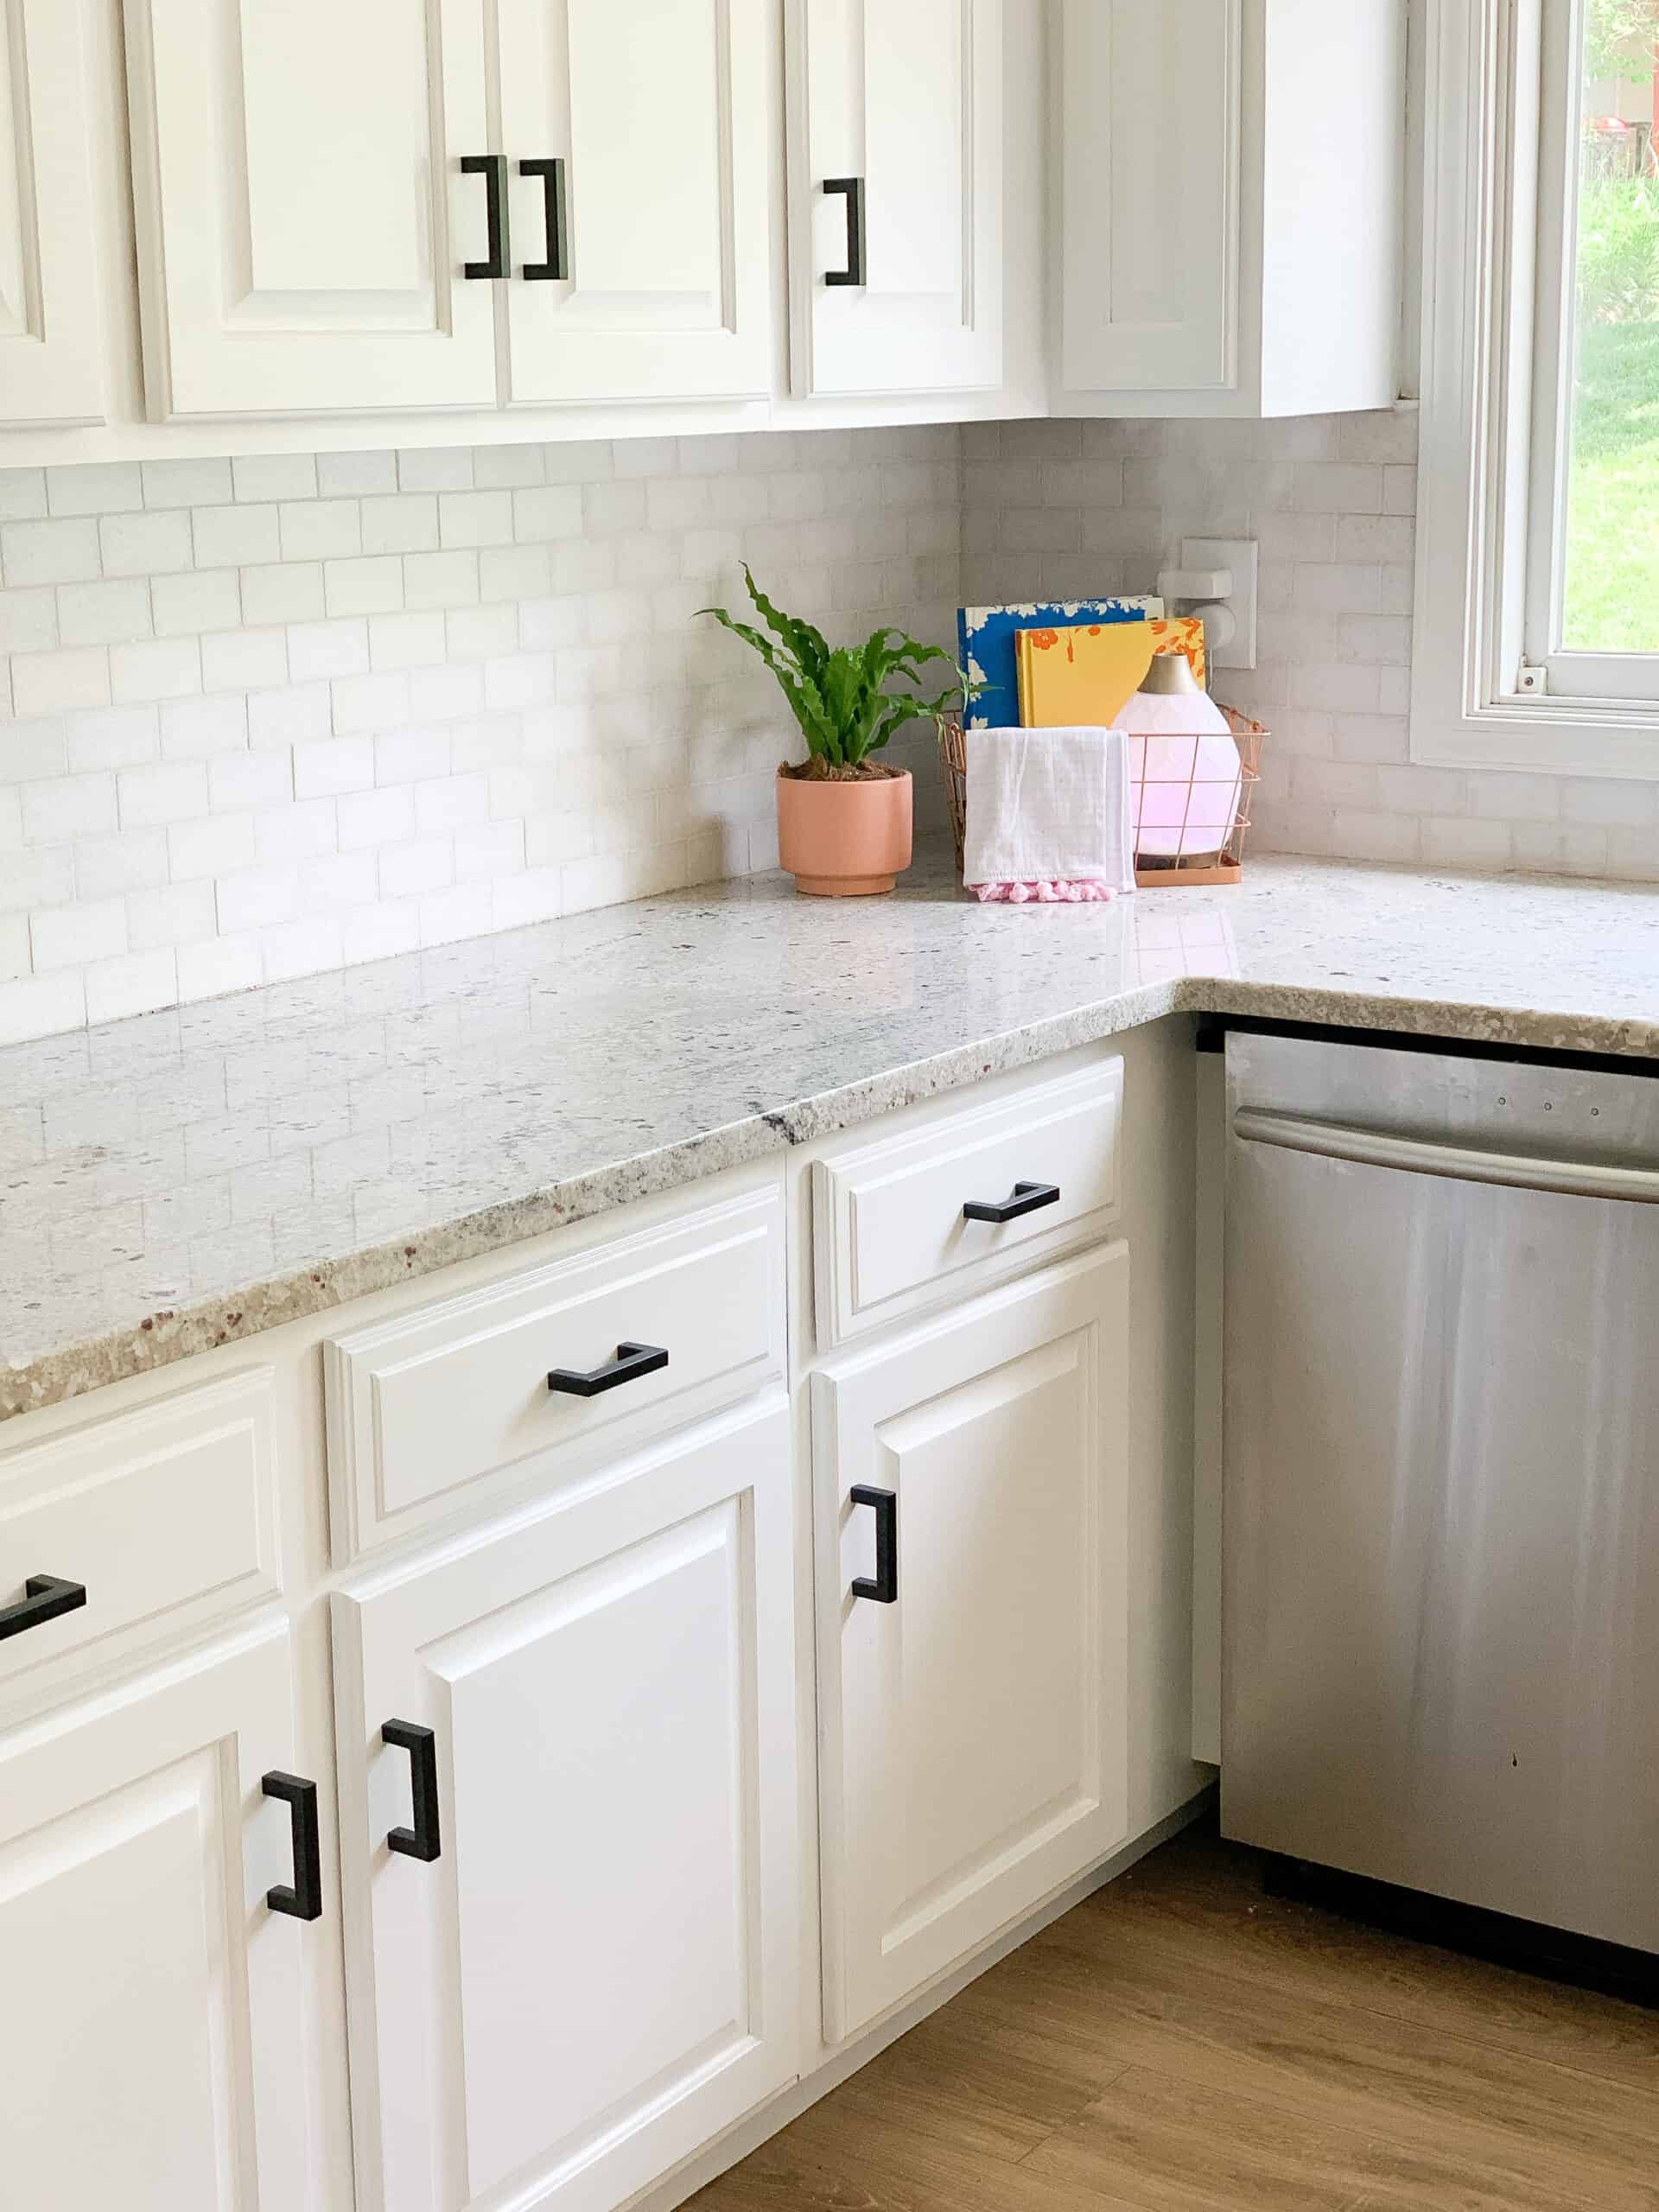
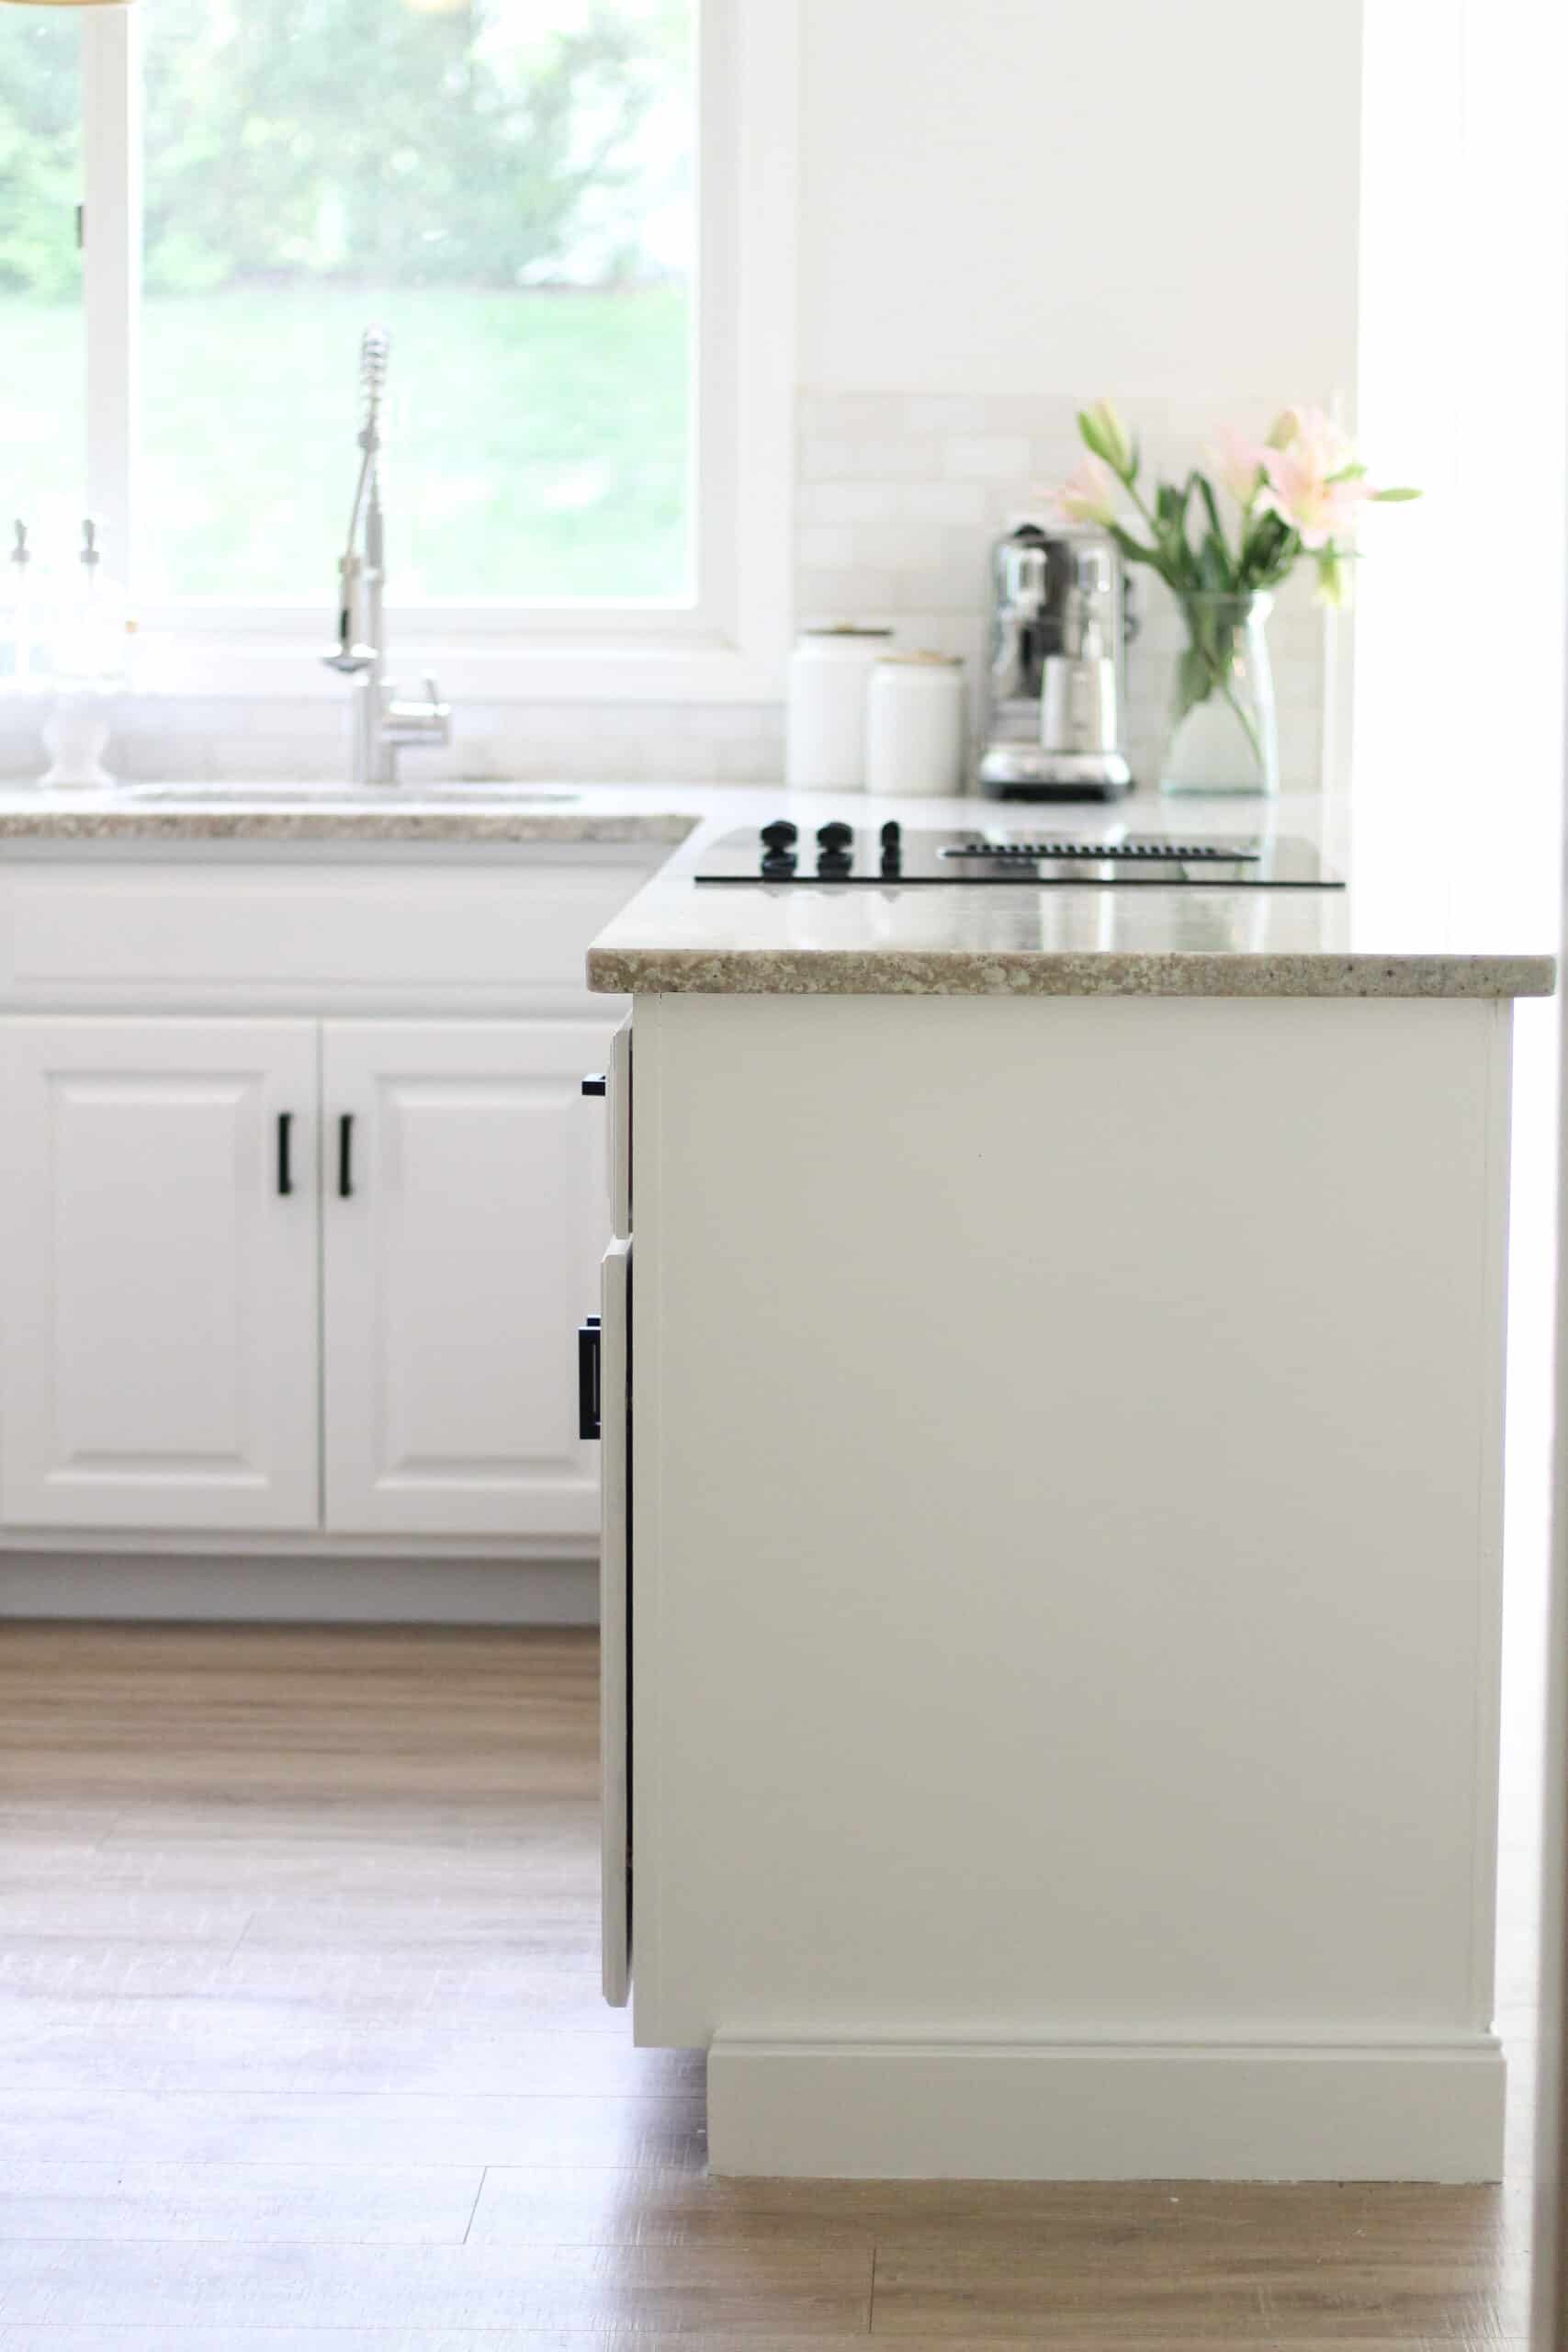
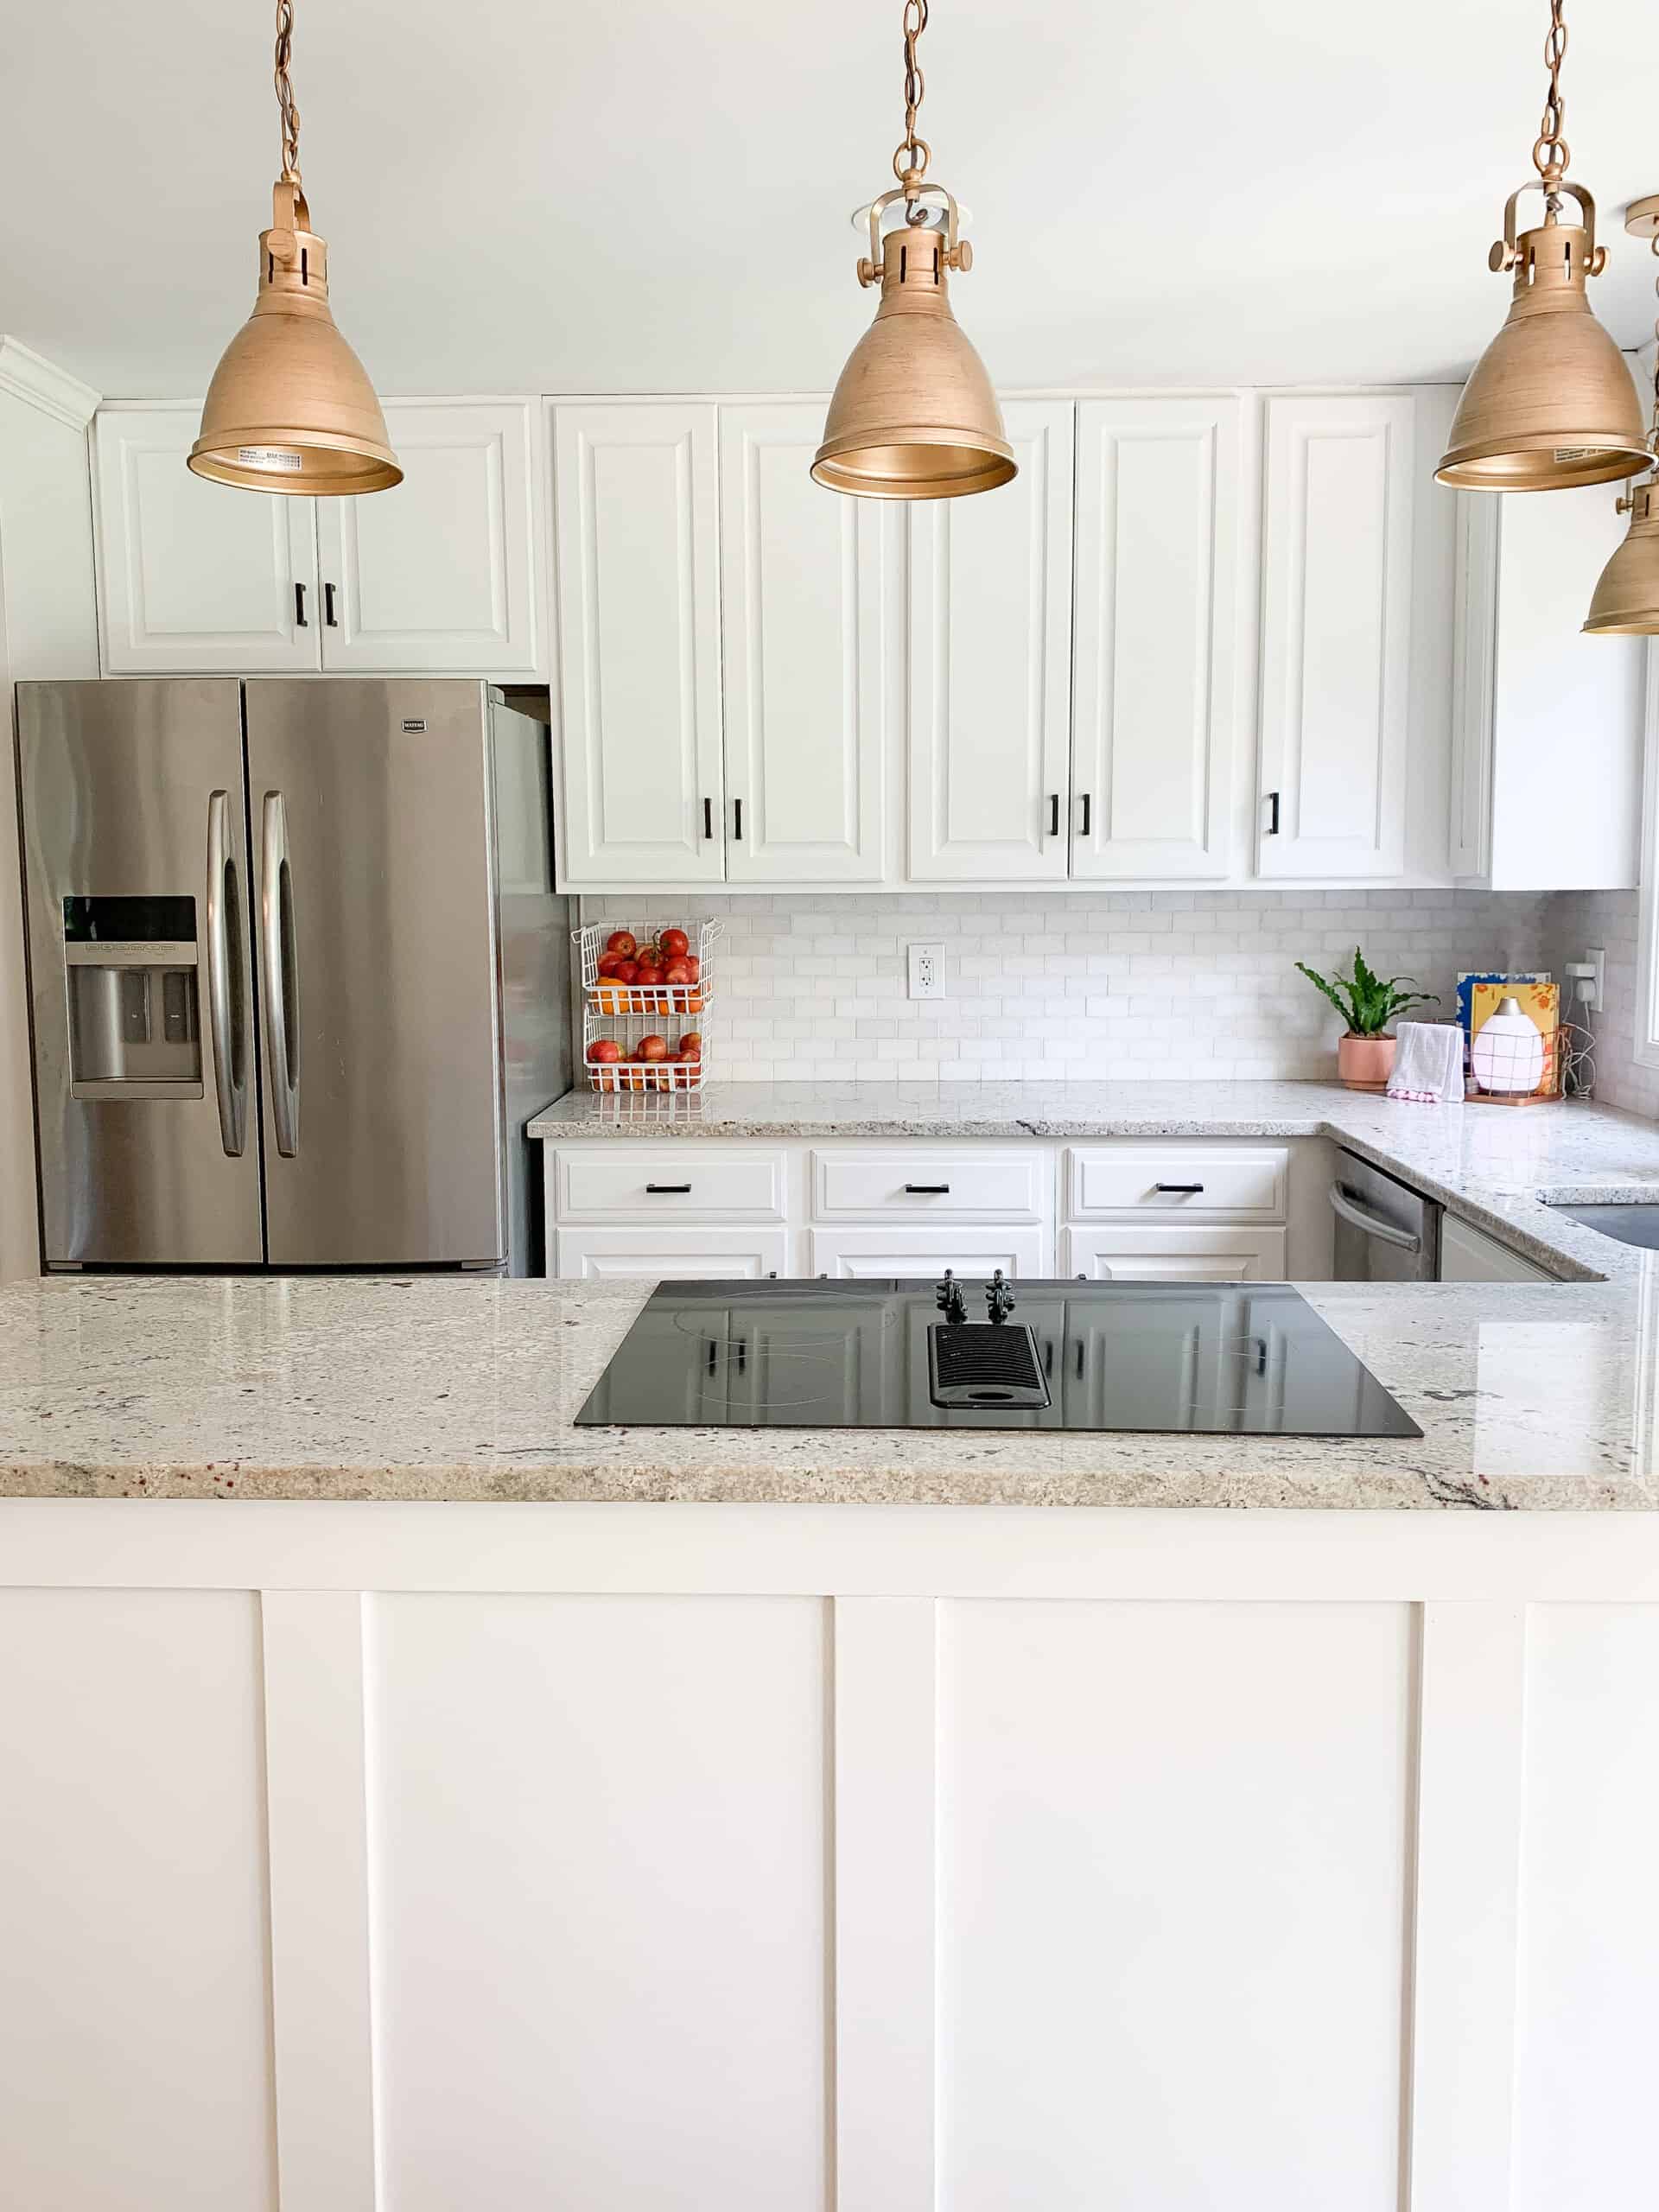
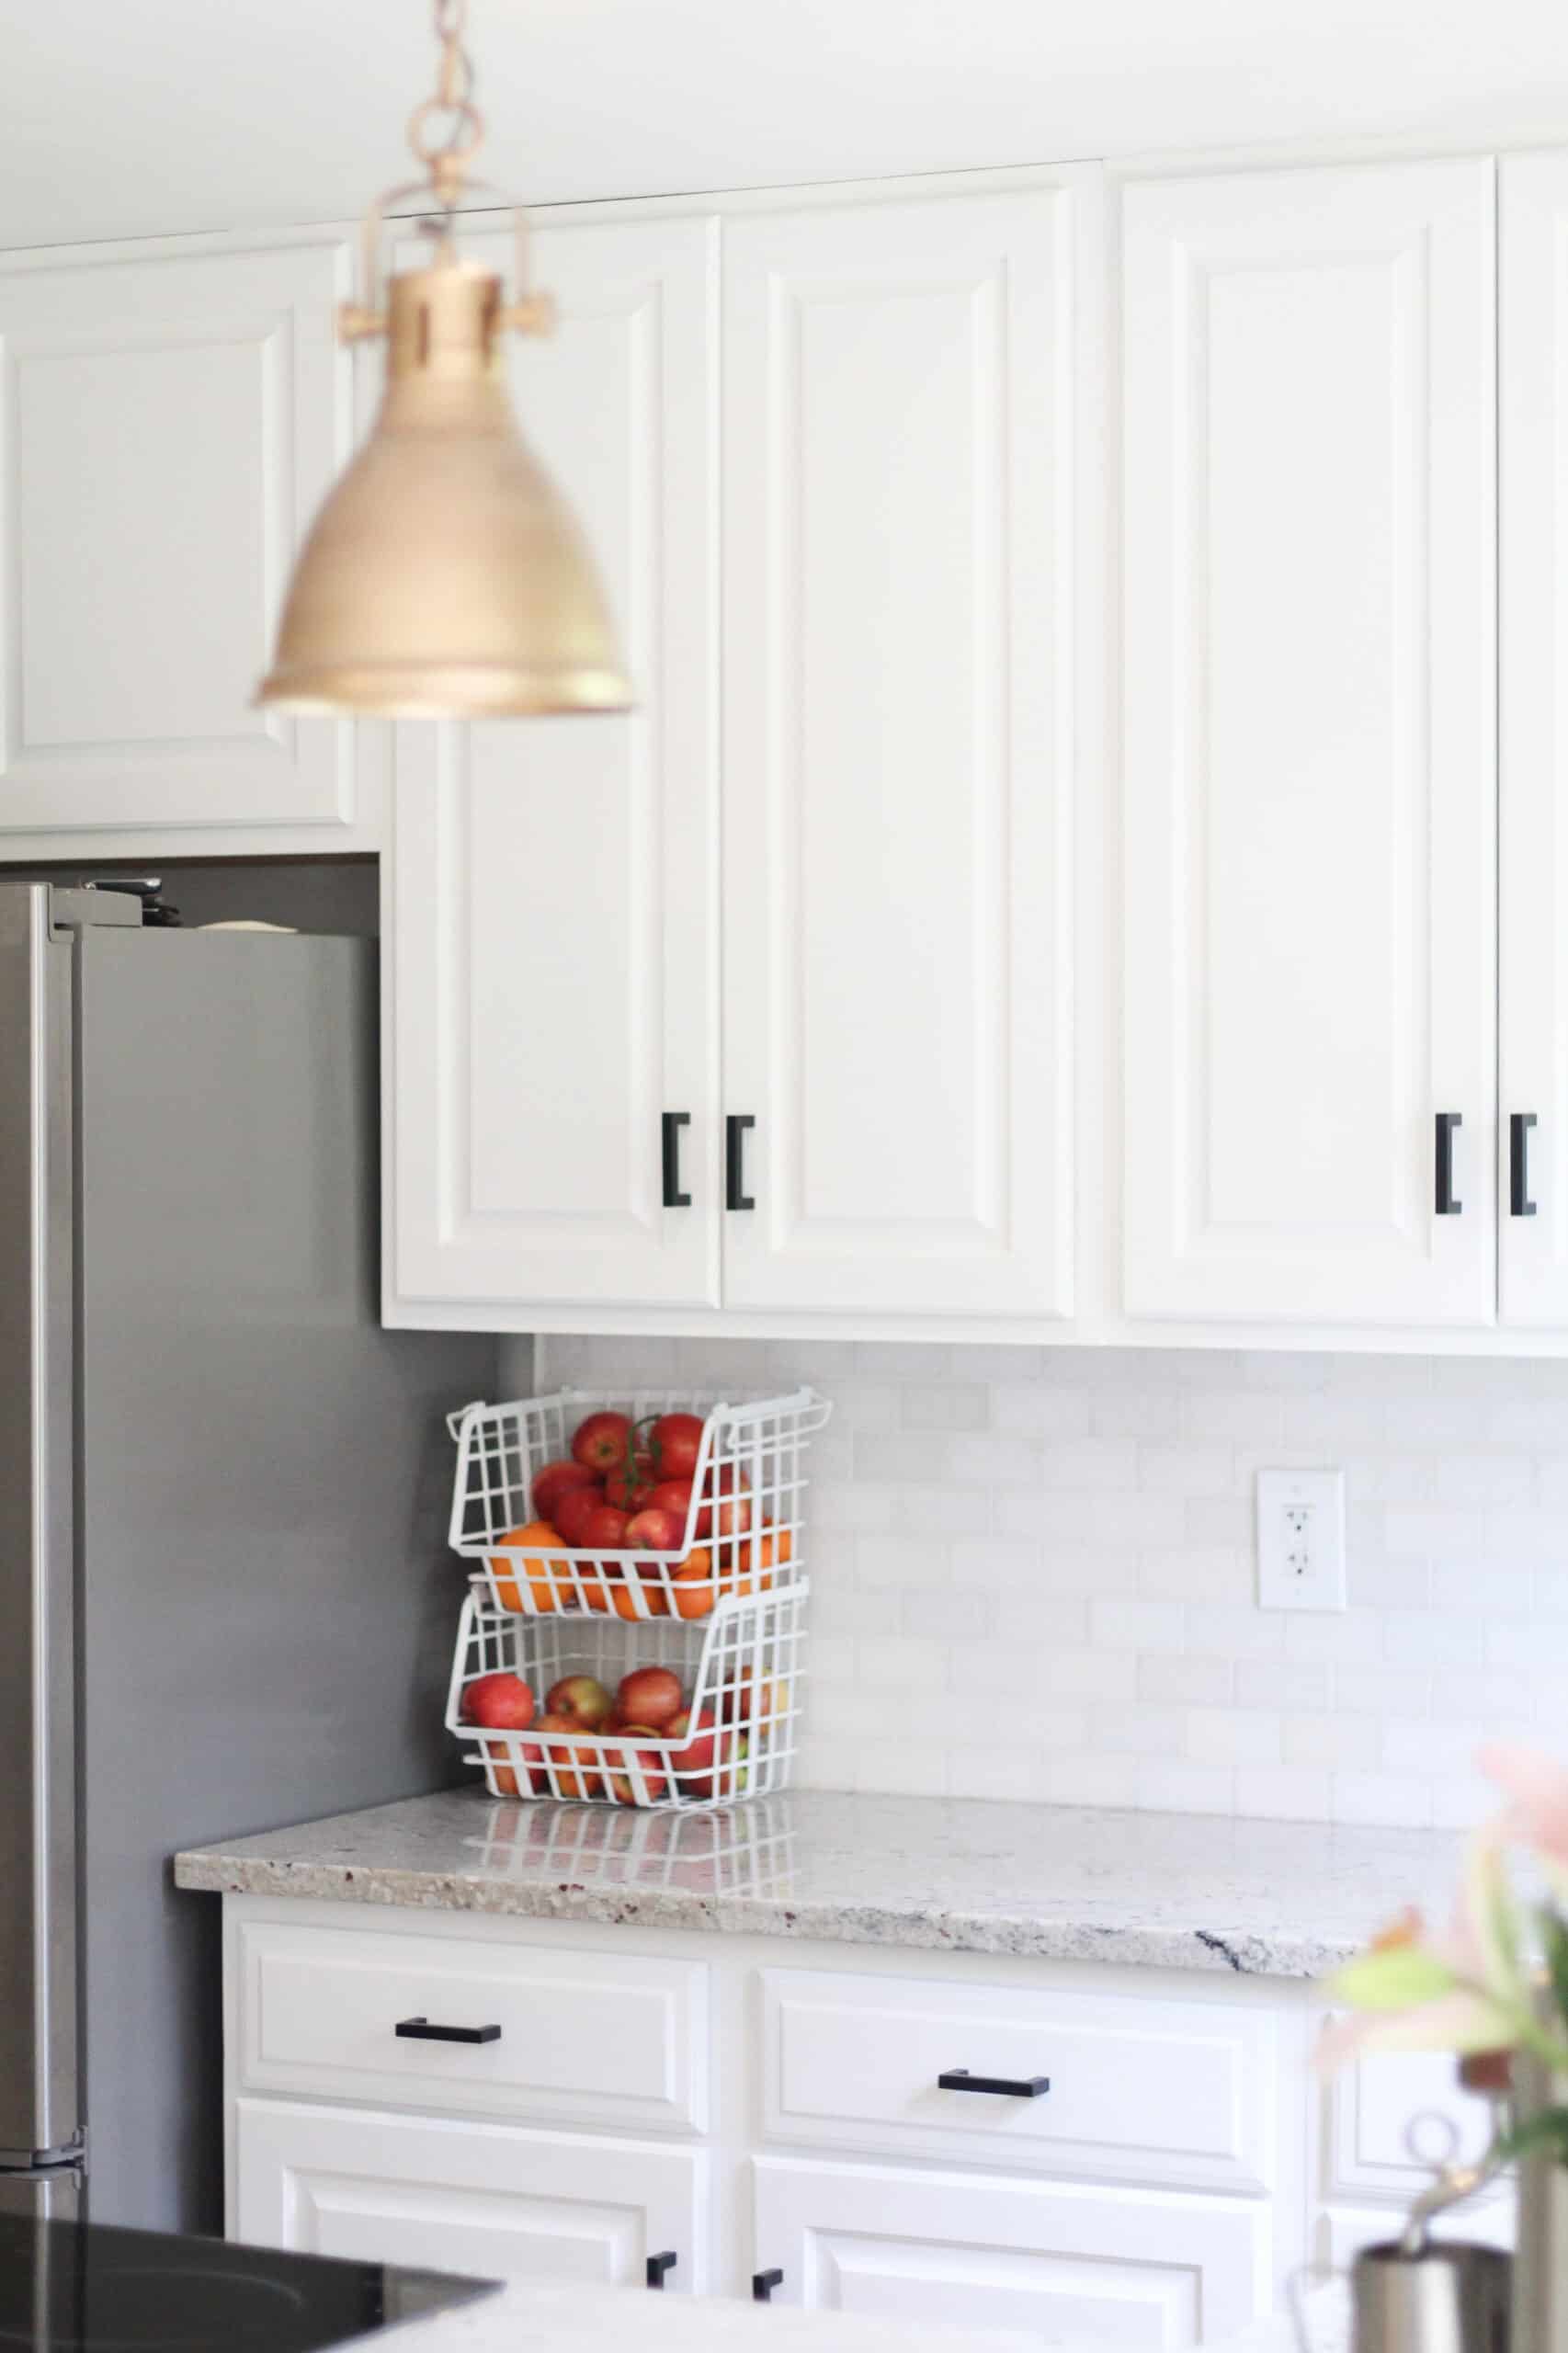
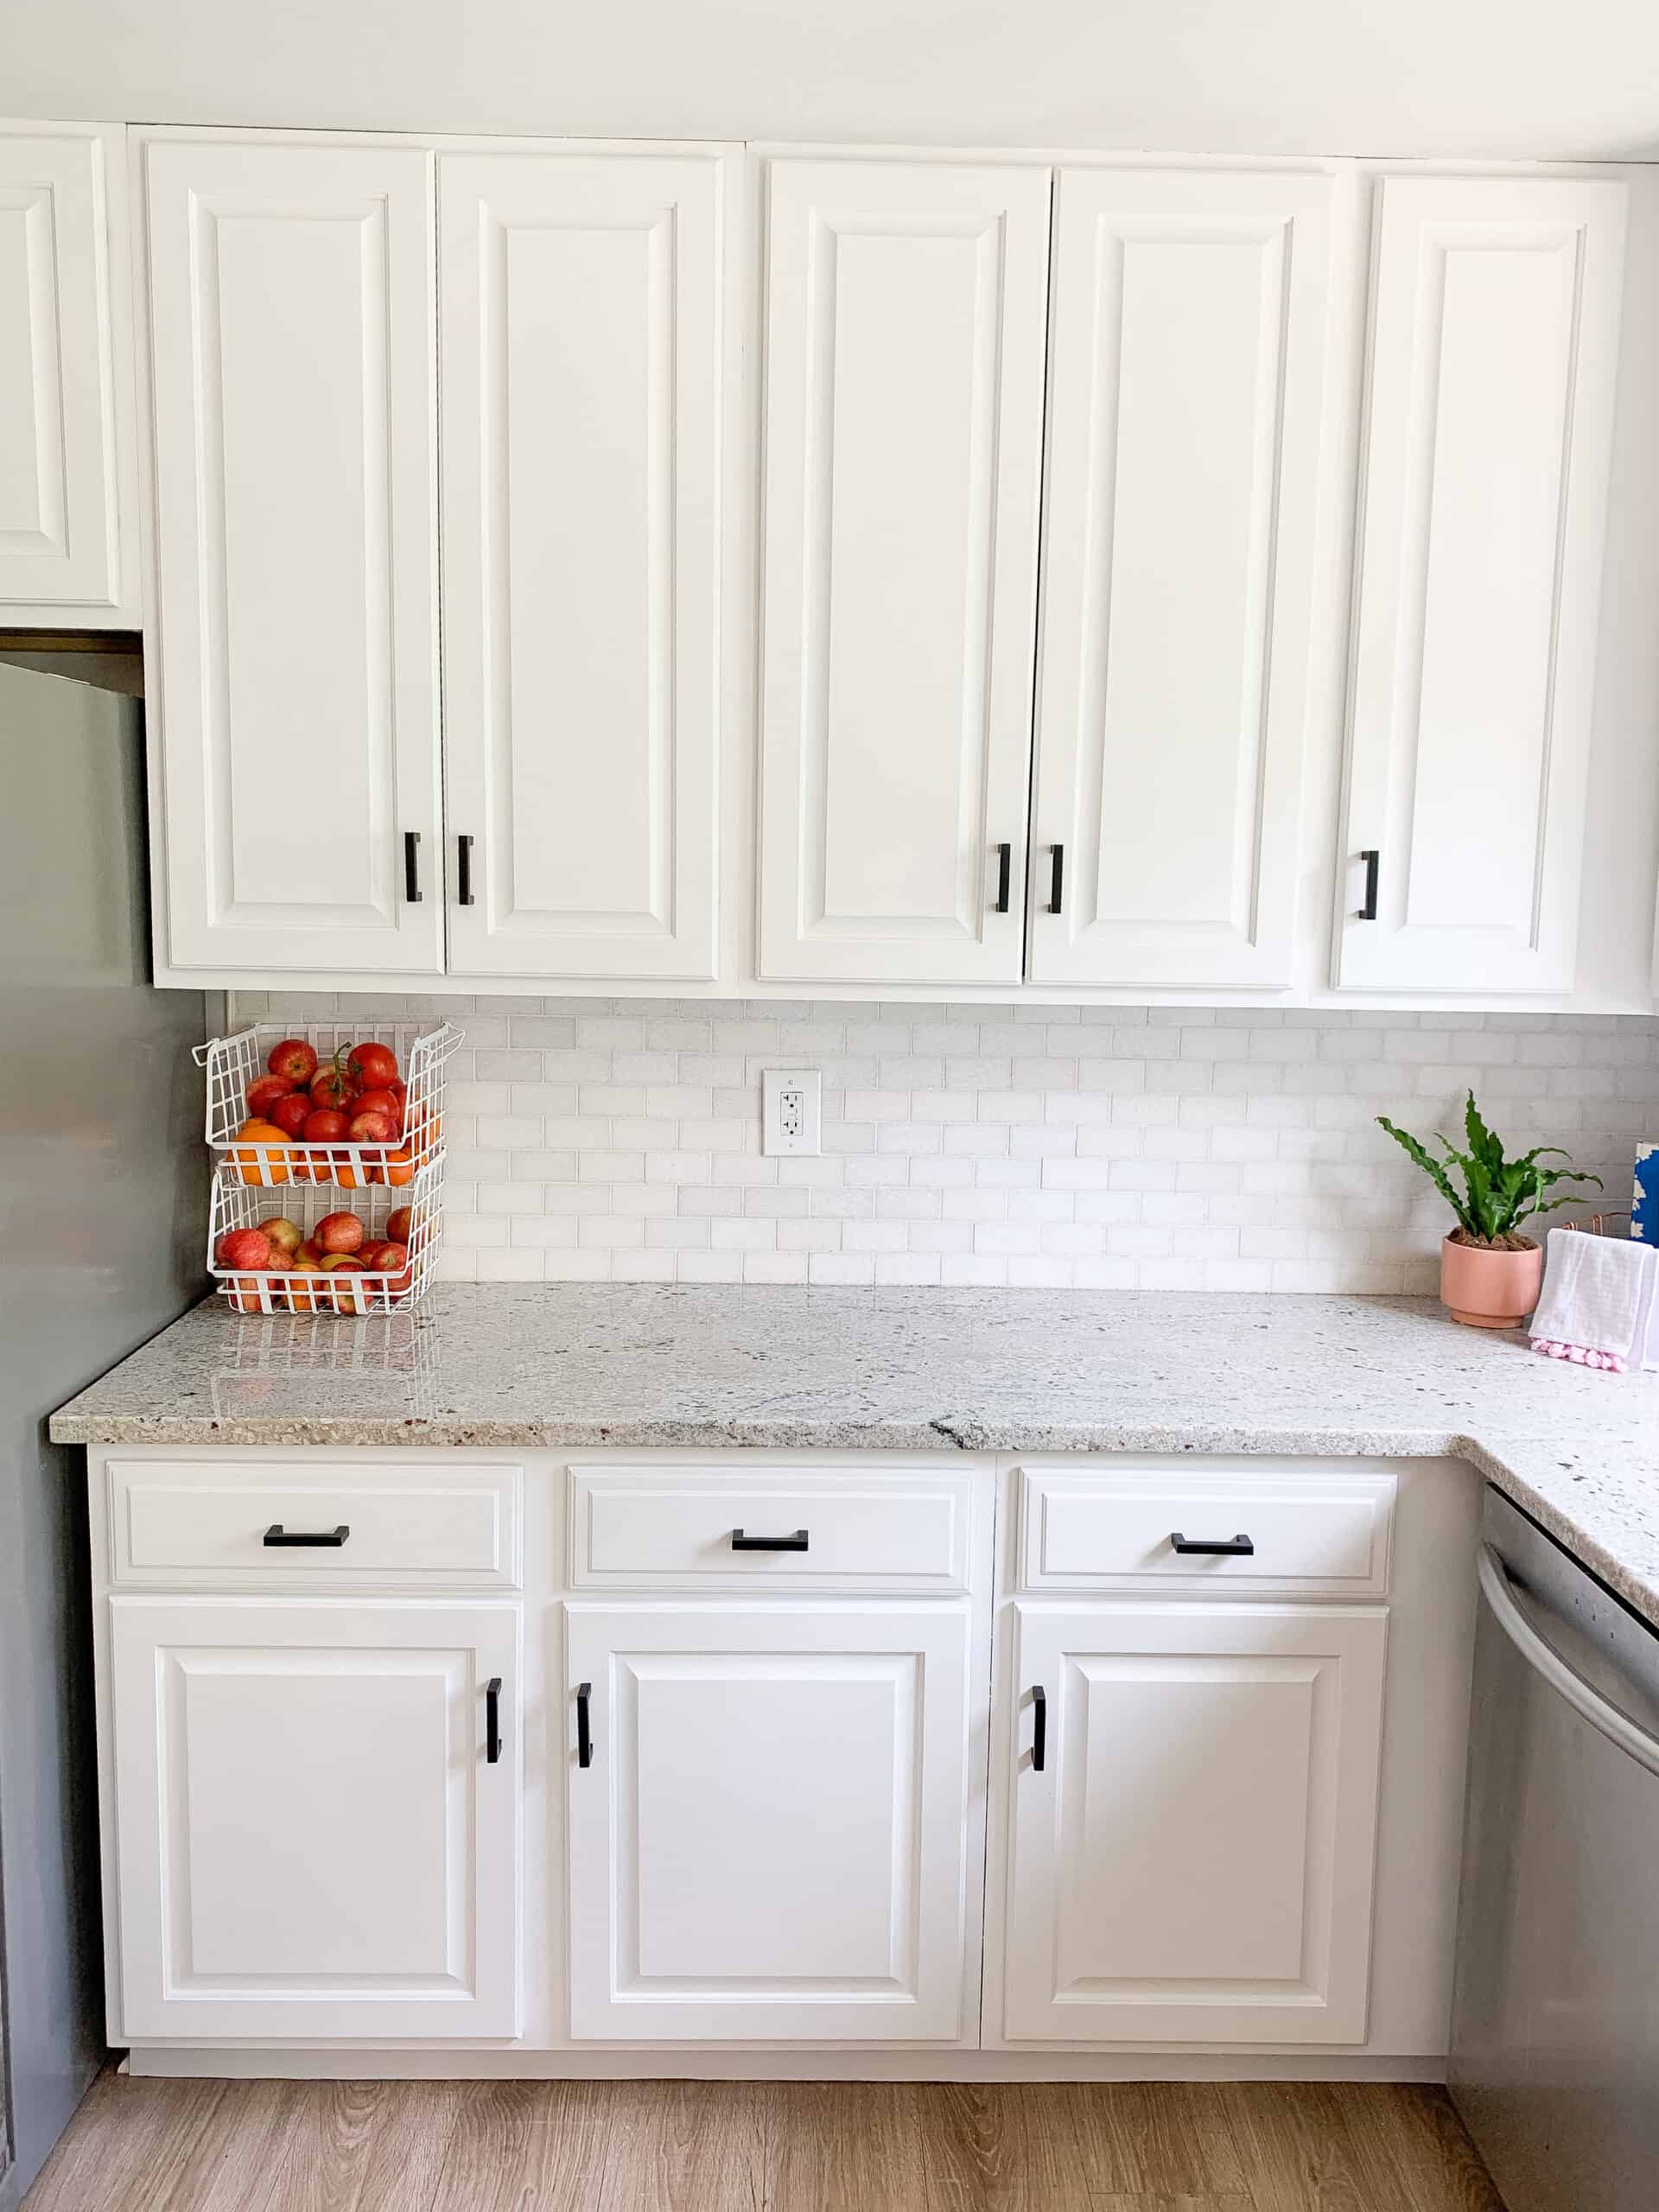
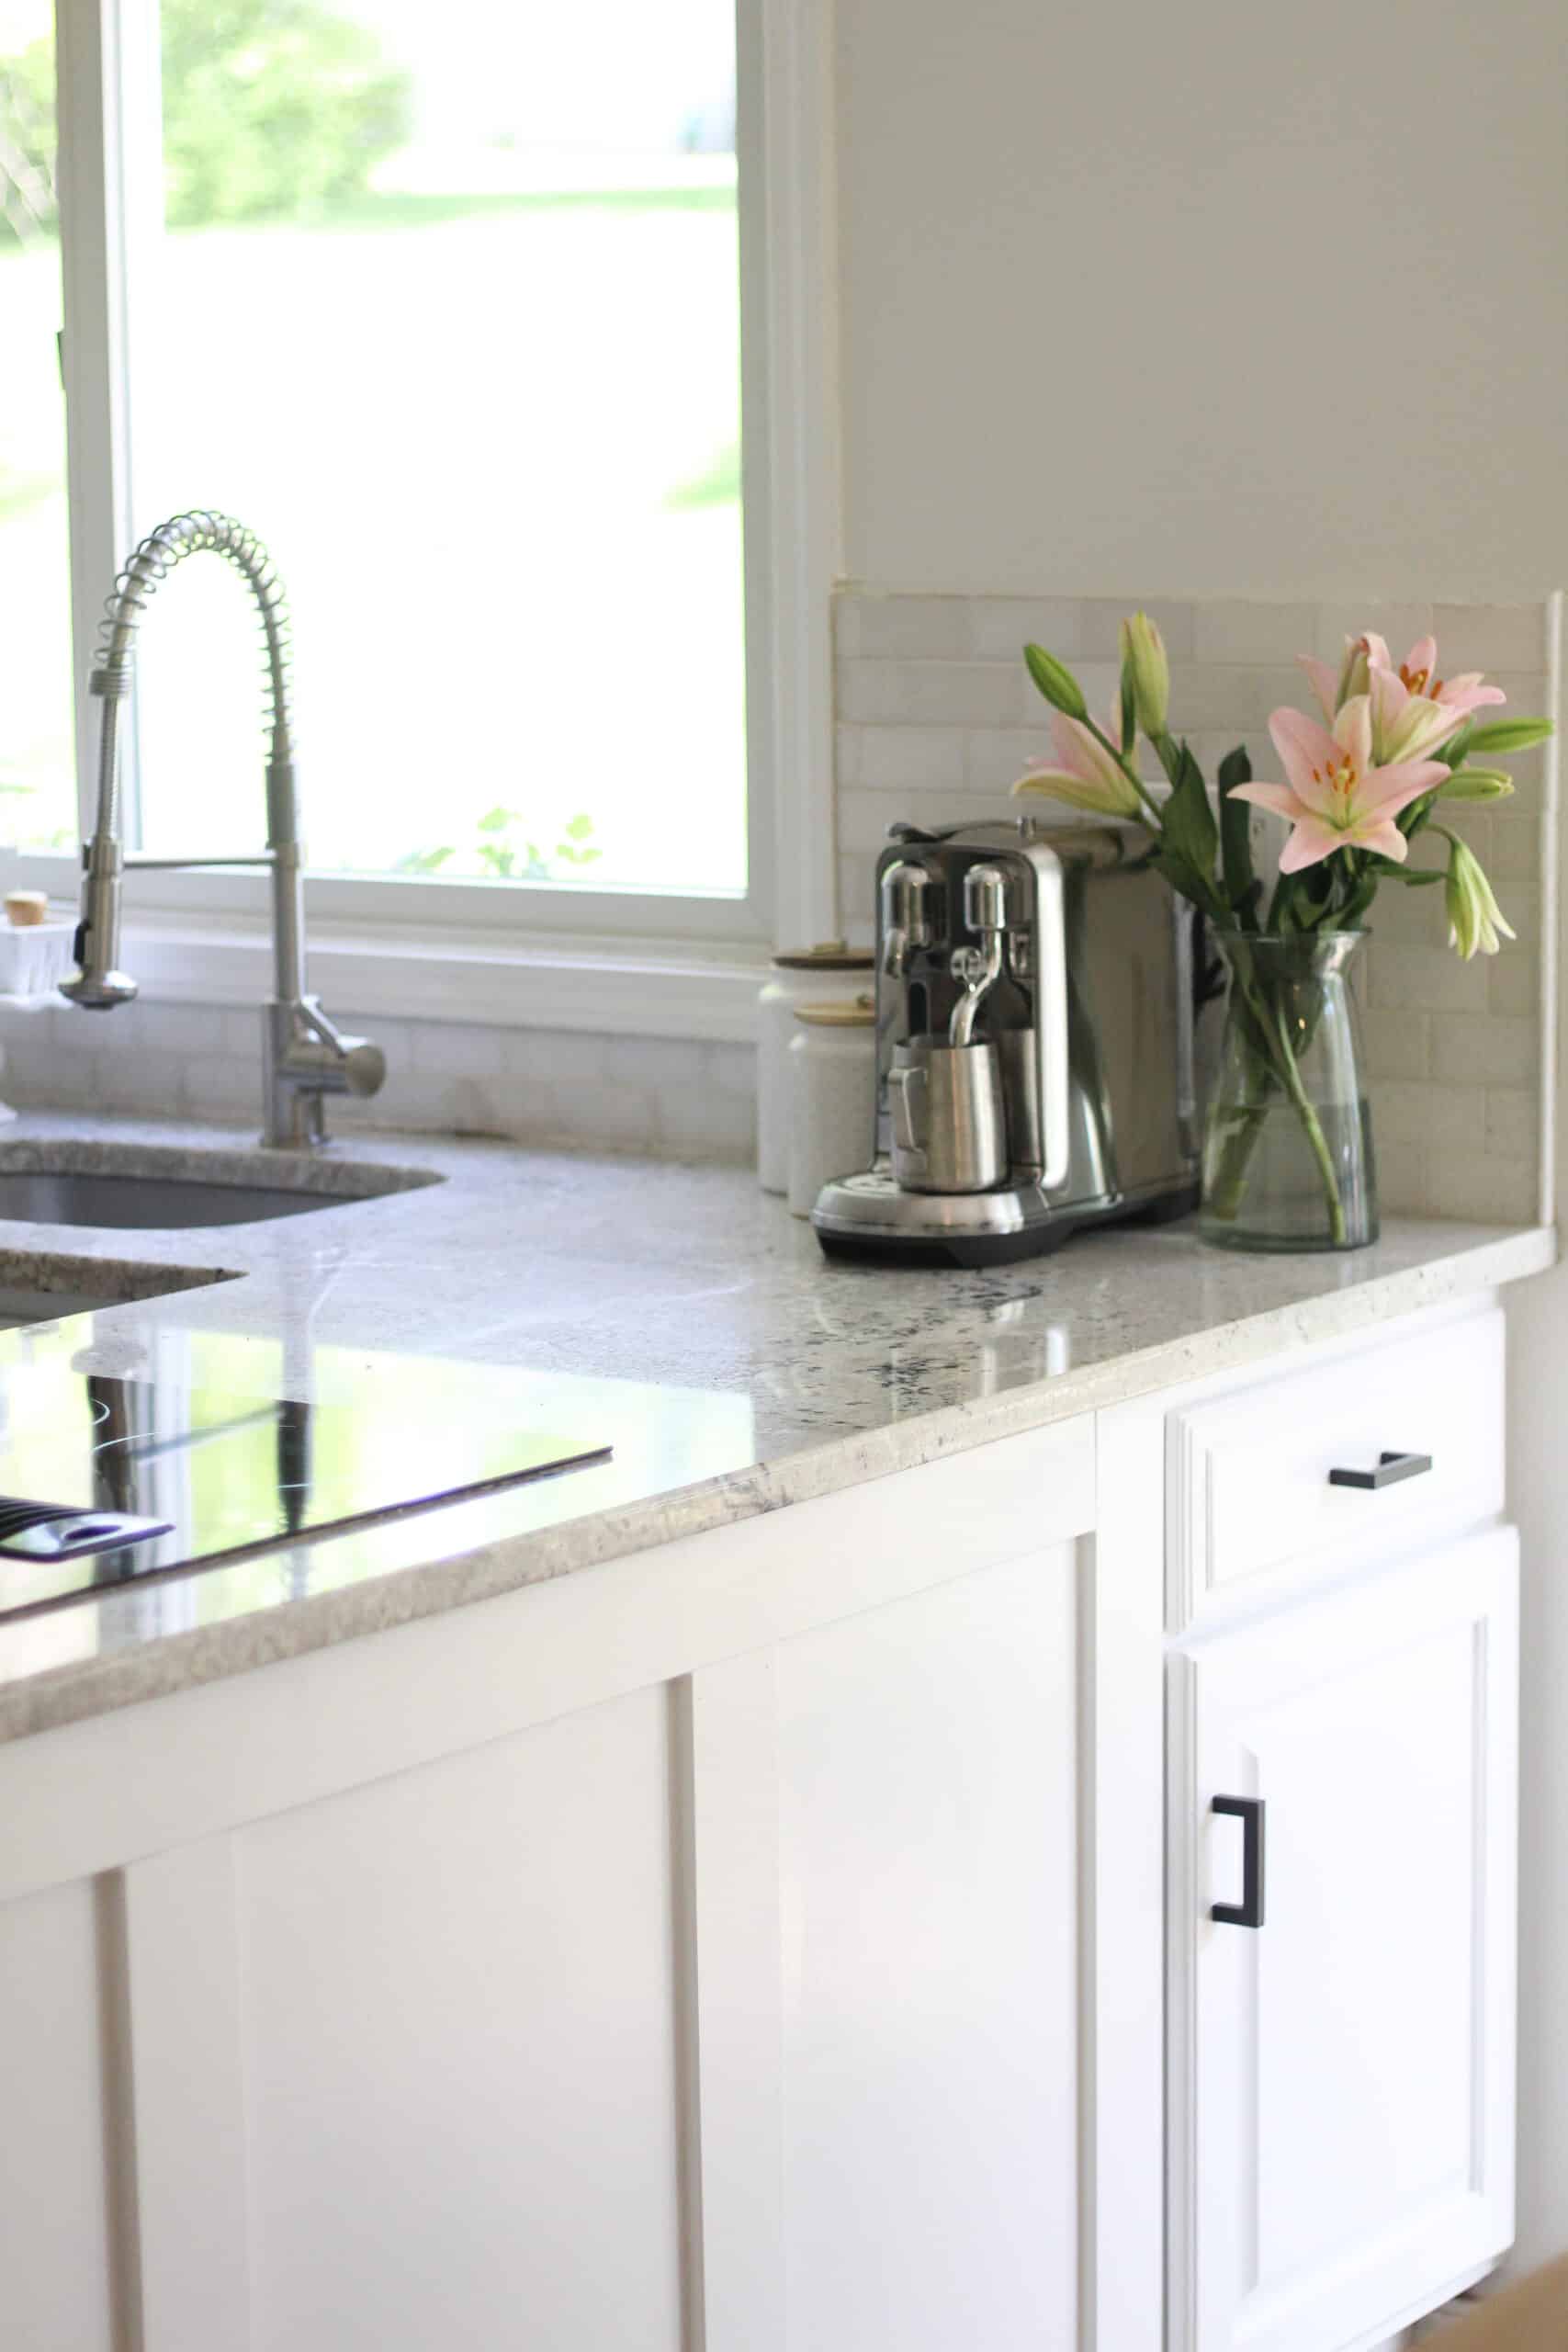
PAINT – I went with Behr Cabinet paint from Home Depot. We chose the color Bit of Sugar, and in my opinion it is a perfect color. We personally purchased 3 gallons but ONLY NEEDED 1!!!
PRIMER – we got 1 gallon of this primer and it was amazing – we went with a higher quality primer and it was worth the price in my opinion.
SANDER – I recommend a disk sander for this project. The amount of time that will save you is priceless. We have had this one for years and it is great! However – If I did this again I would have invested in this one for less mess.
SANDING BLOCKS – Also grab a pack of these – you will need them several times during the project!
FOAM ROLLERS – HIGH DENSITY is key – get a good sized pack of these
PAINT BRUSH– I recommend a good quality brush
OPTIONAL – PAINT SPRAYER. I have done cabinets both ways. for this project I didn’t spray, but I have before, and it does save a lot of headache. The sprayer we owned at the time was THIS ONE. We got a new one that I hate, so I highly recommend that one, and will walk you through either method when it comes to painting.
PAINTERS TAPE – I recommend this one
OPTIONAL (BUT HIGHLY RECOMMEND) PAINTERS TRIANGLES
OPTIONAL PAINTABLE CAULK
Supplies if Adding Detail to Island/Peninsula
NAIL GUN (HIGHLY RECOMMEND) – I talk about ours all the time because we love it!
TABLE SAW (or circular saw would work!)
Things to think about BEFORE starting
There are a couple of things you need to think about before getting started – one of those things is what hardware are you going to use? The same, or are you changing it?
If you are sticking with the same no big deal. If you are changing them you either need the exact same size or to fill your holes before you get started!
Are there any other changes you want to make? We personally decided to get rid of one cabinet, so we took that down before we got started – I figured now was the time to make that change because I didn’t want to paint the cabinet then decide to do that later!
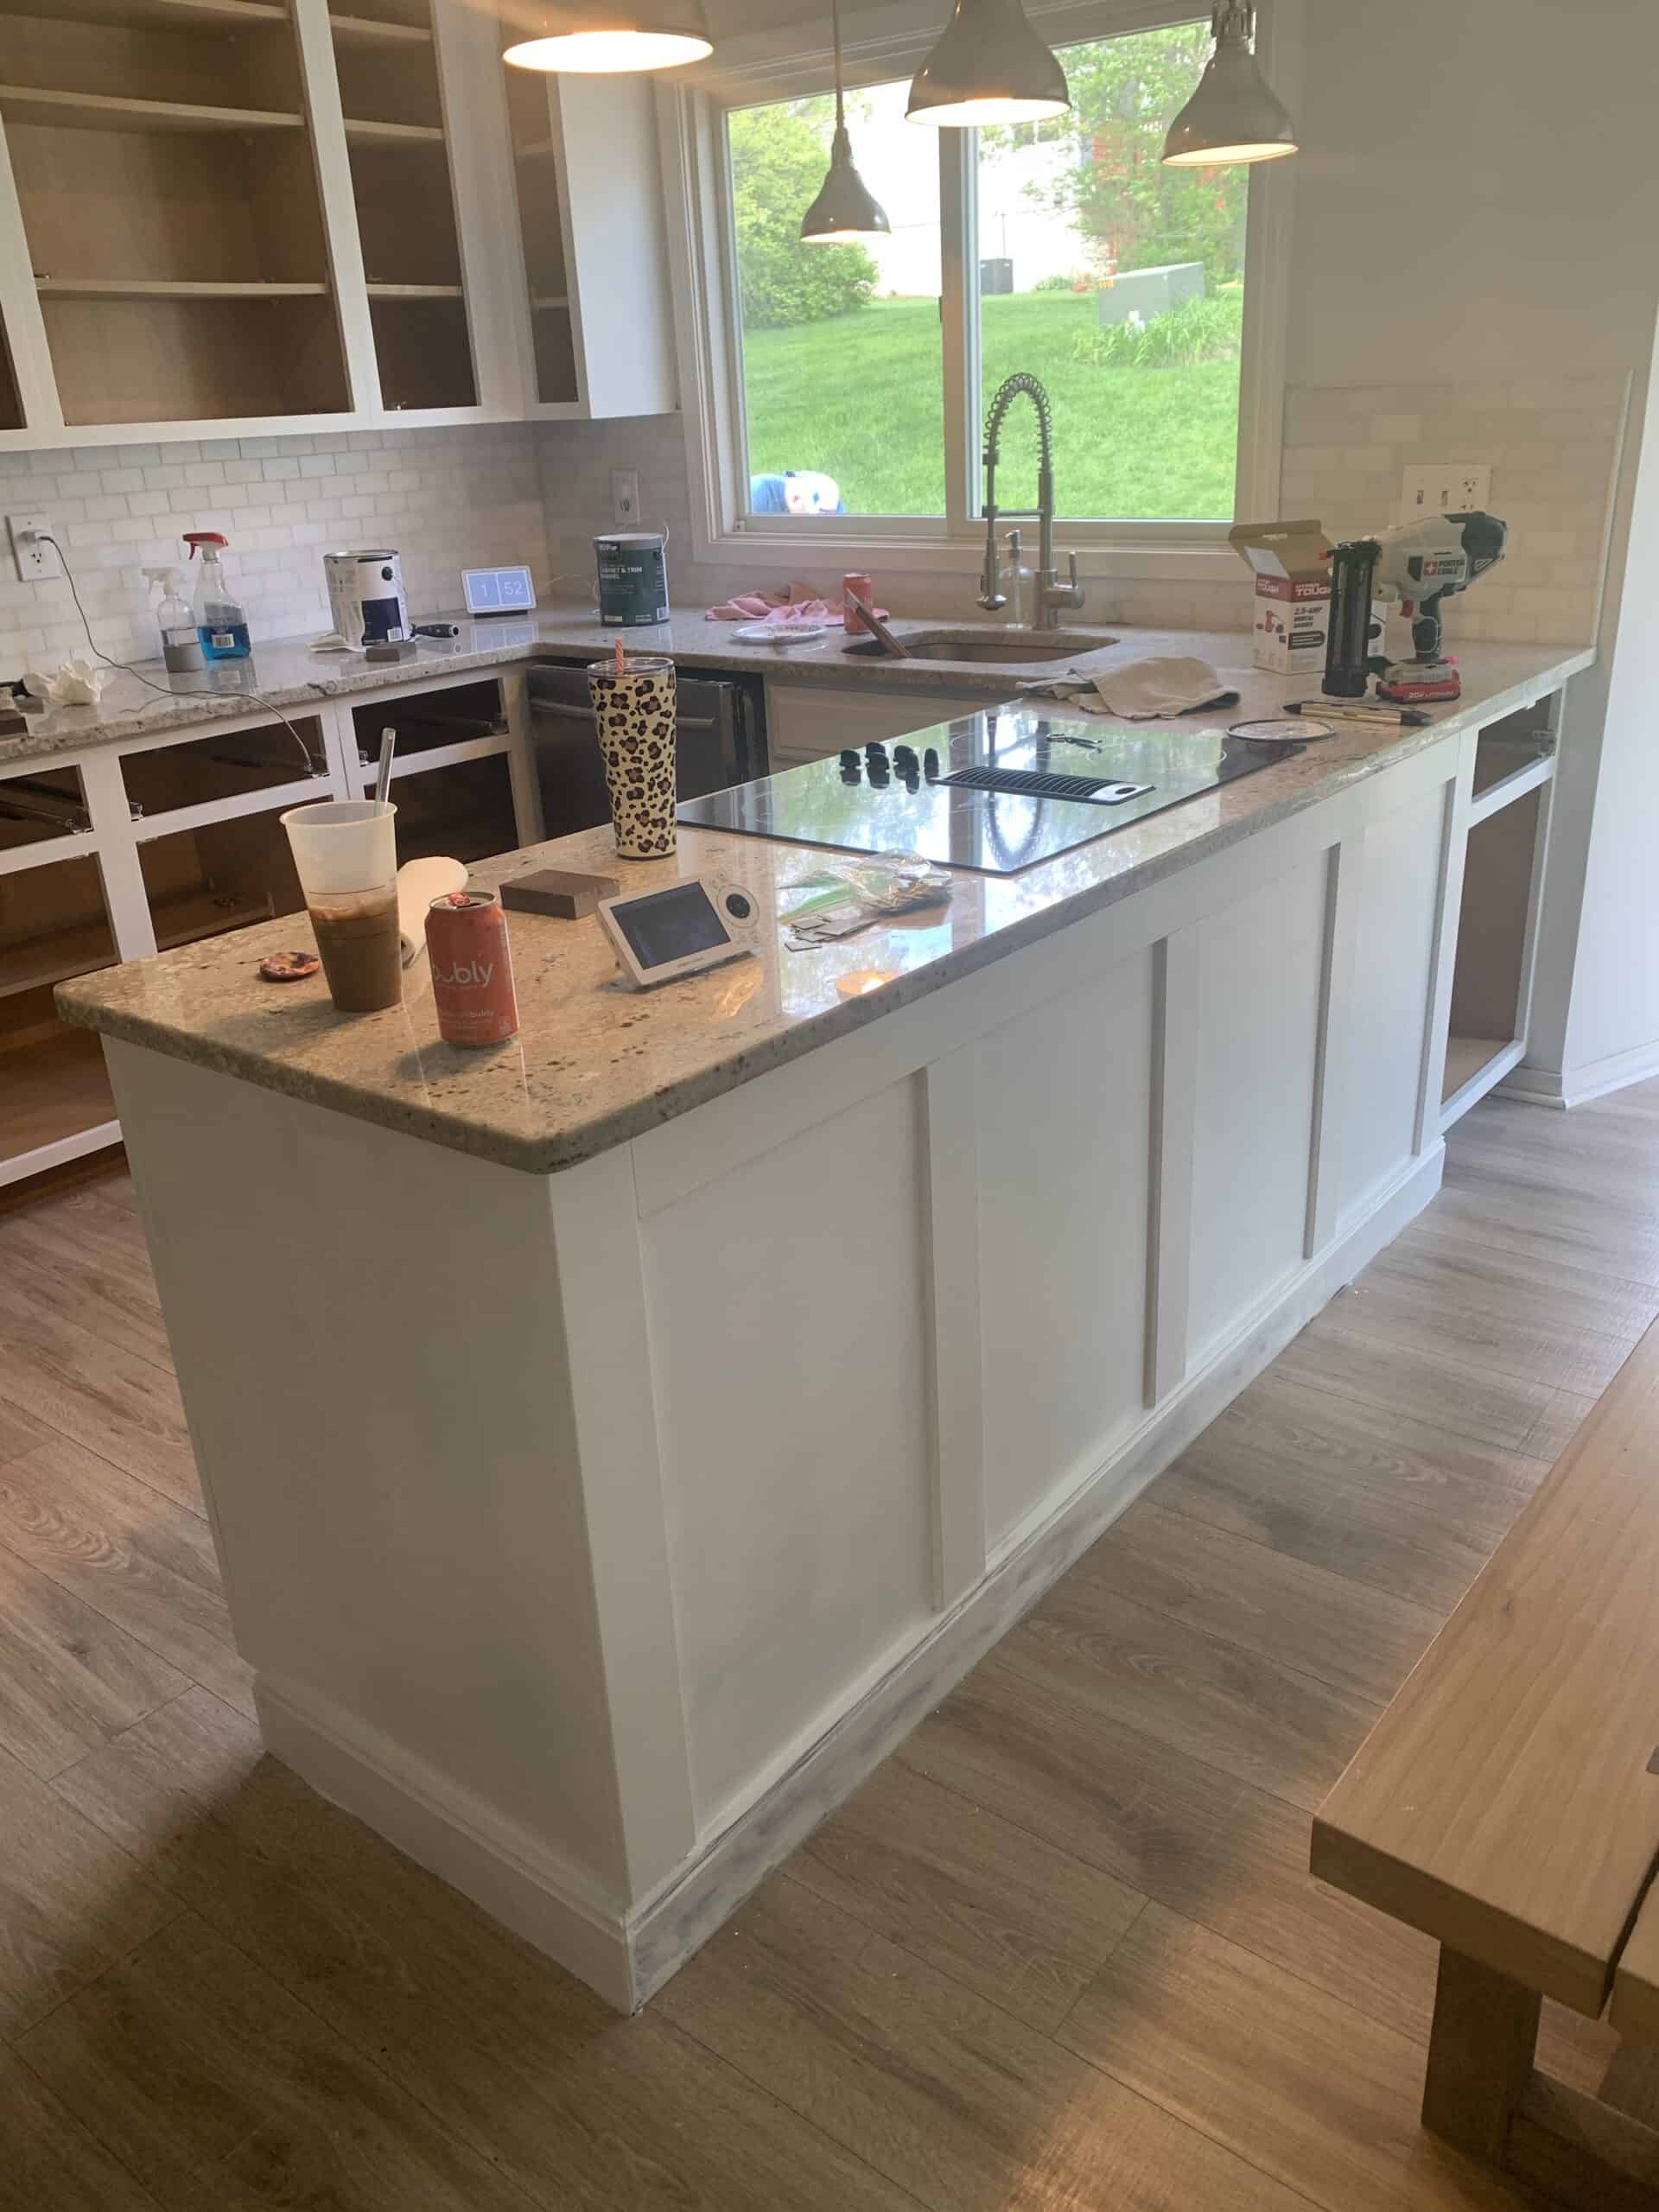
In our kitchen we also added detail to the front side of our peninsula. That honestly was maybe the biggest and best change we made in the space – but it was far easier to do pre-thought.

The last thing to consider – budget. There are ways to make this easier, but they cost a little extra money. Make a budget for this project and decide what you want to spend on it. If you pay to have your cabinets painted it will cost thousands, so you will save money no matter what. There are just ways to make it less awful with a little extra money in the budget.

Getting Started
Now that you have a plan it is time to get going on your kitchen. There are a few really important steps that need to happen during the dismantling of the cabinets.
First – take a piece of painters tape and label each door and drawer with a sharpie on the tape. Then take a picture of your cabinets so you remember the order you went with. This is important.
The other thing is that you need to keep your hardware in the right place so it can go back in its original spot. For us that meant when we started taking doors off we laid the hinges down on the shelves inside the cabinets right in line with where they came off (IE – top hinge went on top shelf, middle went on middle, and bottom went on the bottom).
So now that you know to do all of this – it’s time to start taking off all your cabinet doors and drawer fronts.
Once all cabinet doors are off and drawers are out, it is time to prep for sanding. You have a few options on how you prep for this.
now is when we added the detailing on our peninsula – I will talk about how towards the end of the post, but this is when we did it!
Sanding
How it is time to sand. I am going to warn you this is A PROJECT. But I have some tips and tricks to make it less awful.
ALSO – this step is important. Don’t skip it. Do it well, and thoroughly. ( i’ll tell you later how I learned how important this is!)
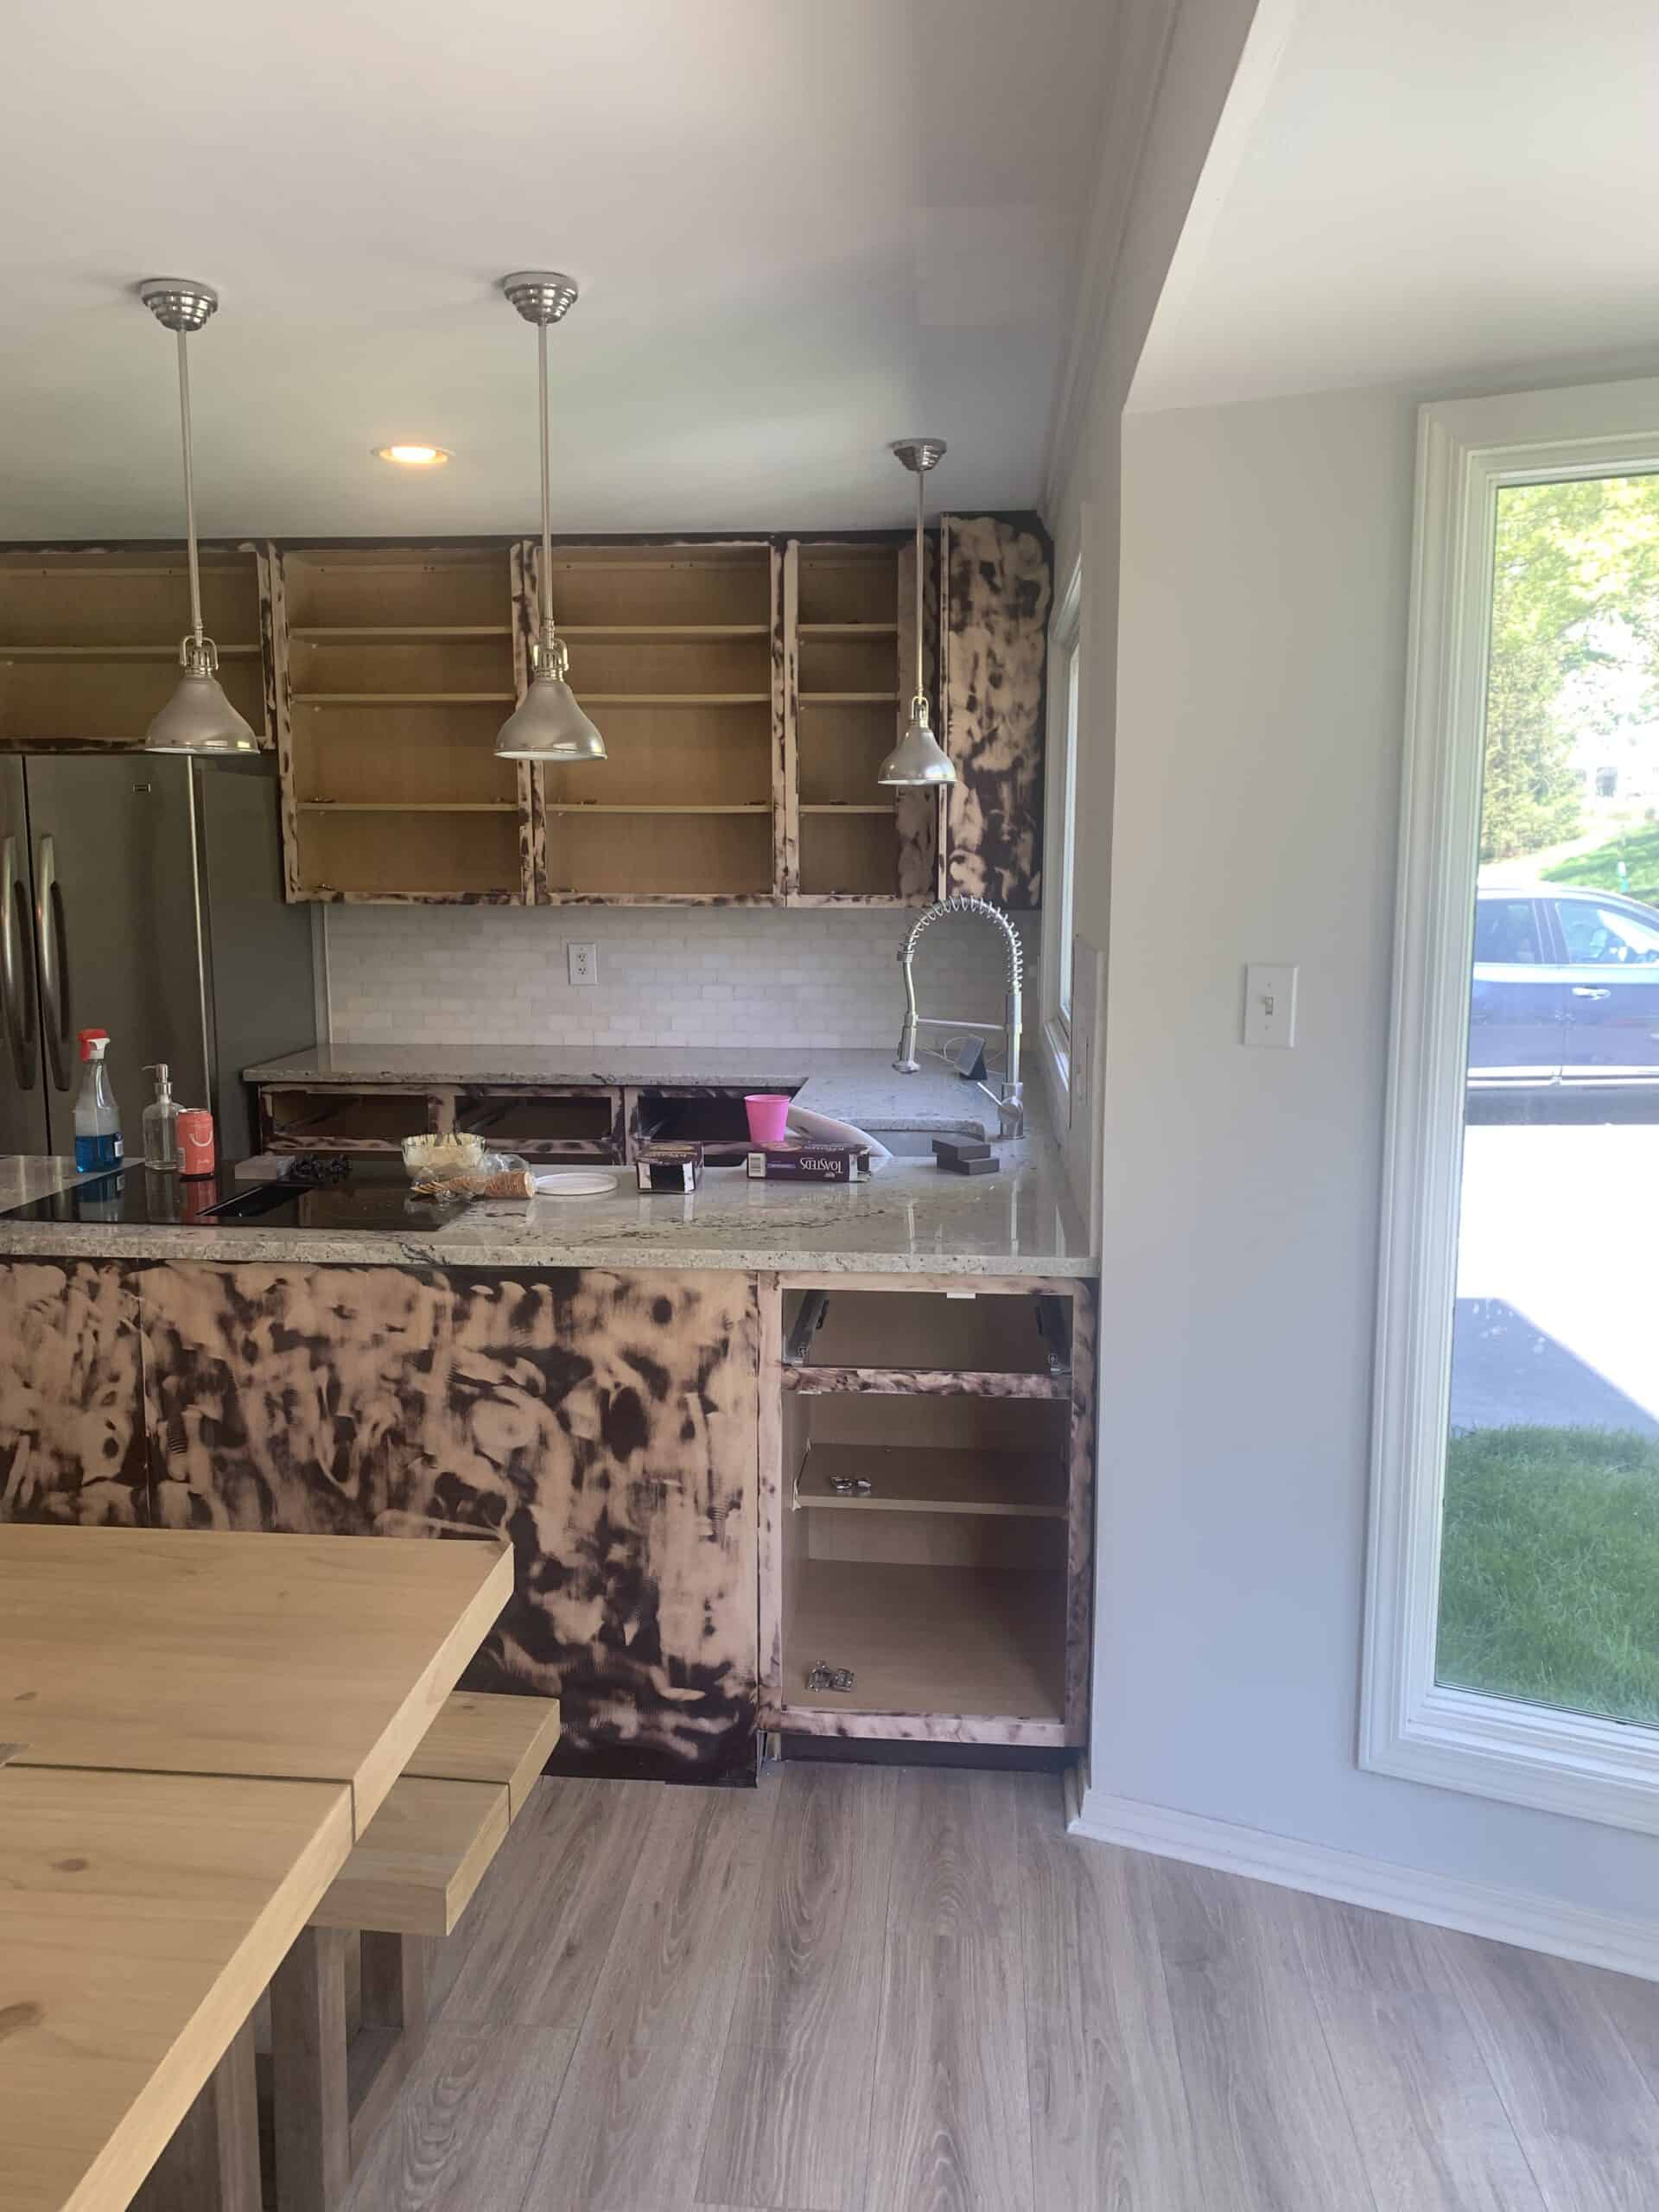
To prep for sanding inside your house you will want tape off and block off the kitchen area with plastic sheets as best you can. You also want to either empty all cabinets and be prepped to clean them well, or tape off the cabinets inside with plastic. Or both haha.
For the inside we personally used this sander, however someone told me about THIS sander, ($200 on AMAZON) that I think if I were to do it again I would have rented or purchased for the simple aspect of the lack of mess. Use this with 220 Grit Sandpaper.
You need to sand down everything inside and all doors and drawer fronts front and back. For areas you can’t get to with the sander or don’t feel comfortable using it, use your sanding block!
Once everything is sanded well you want to clean them well with water. Then wipe them again with a microfiber cloth. Just make sure everything is very very clean and has no sand on it.
Priming
Next up is priming – make sure you have some windows open – the primer is pretty strong smelling, but it works well. use a paint brush and foam roller to prime all of your cabinets and doors.
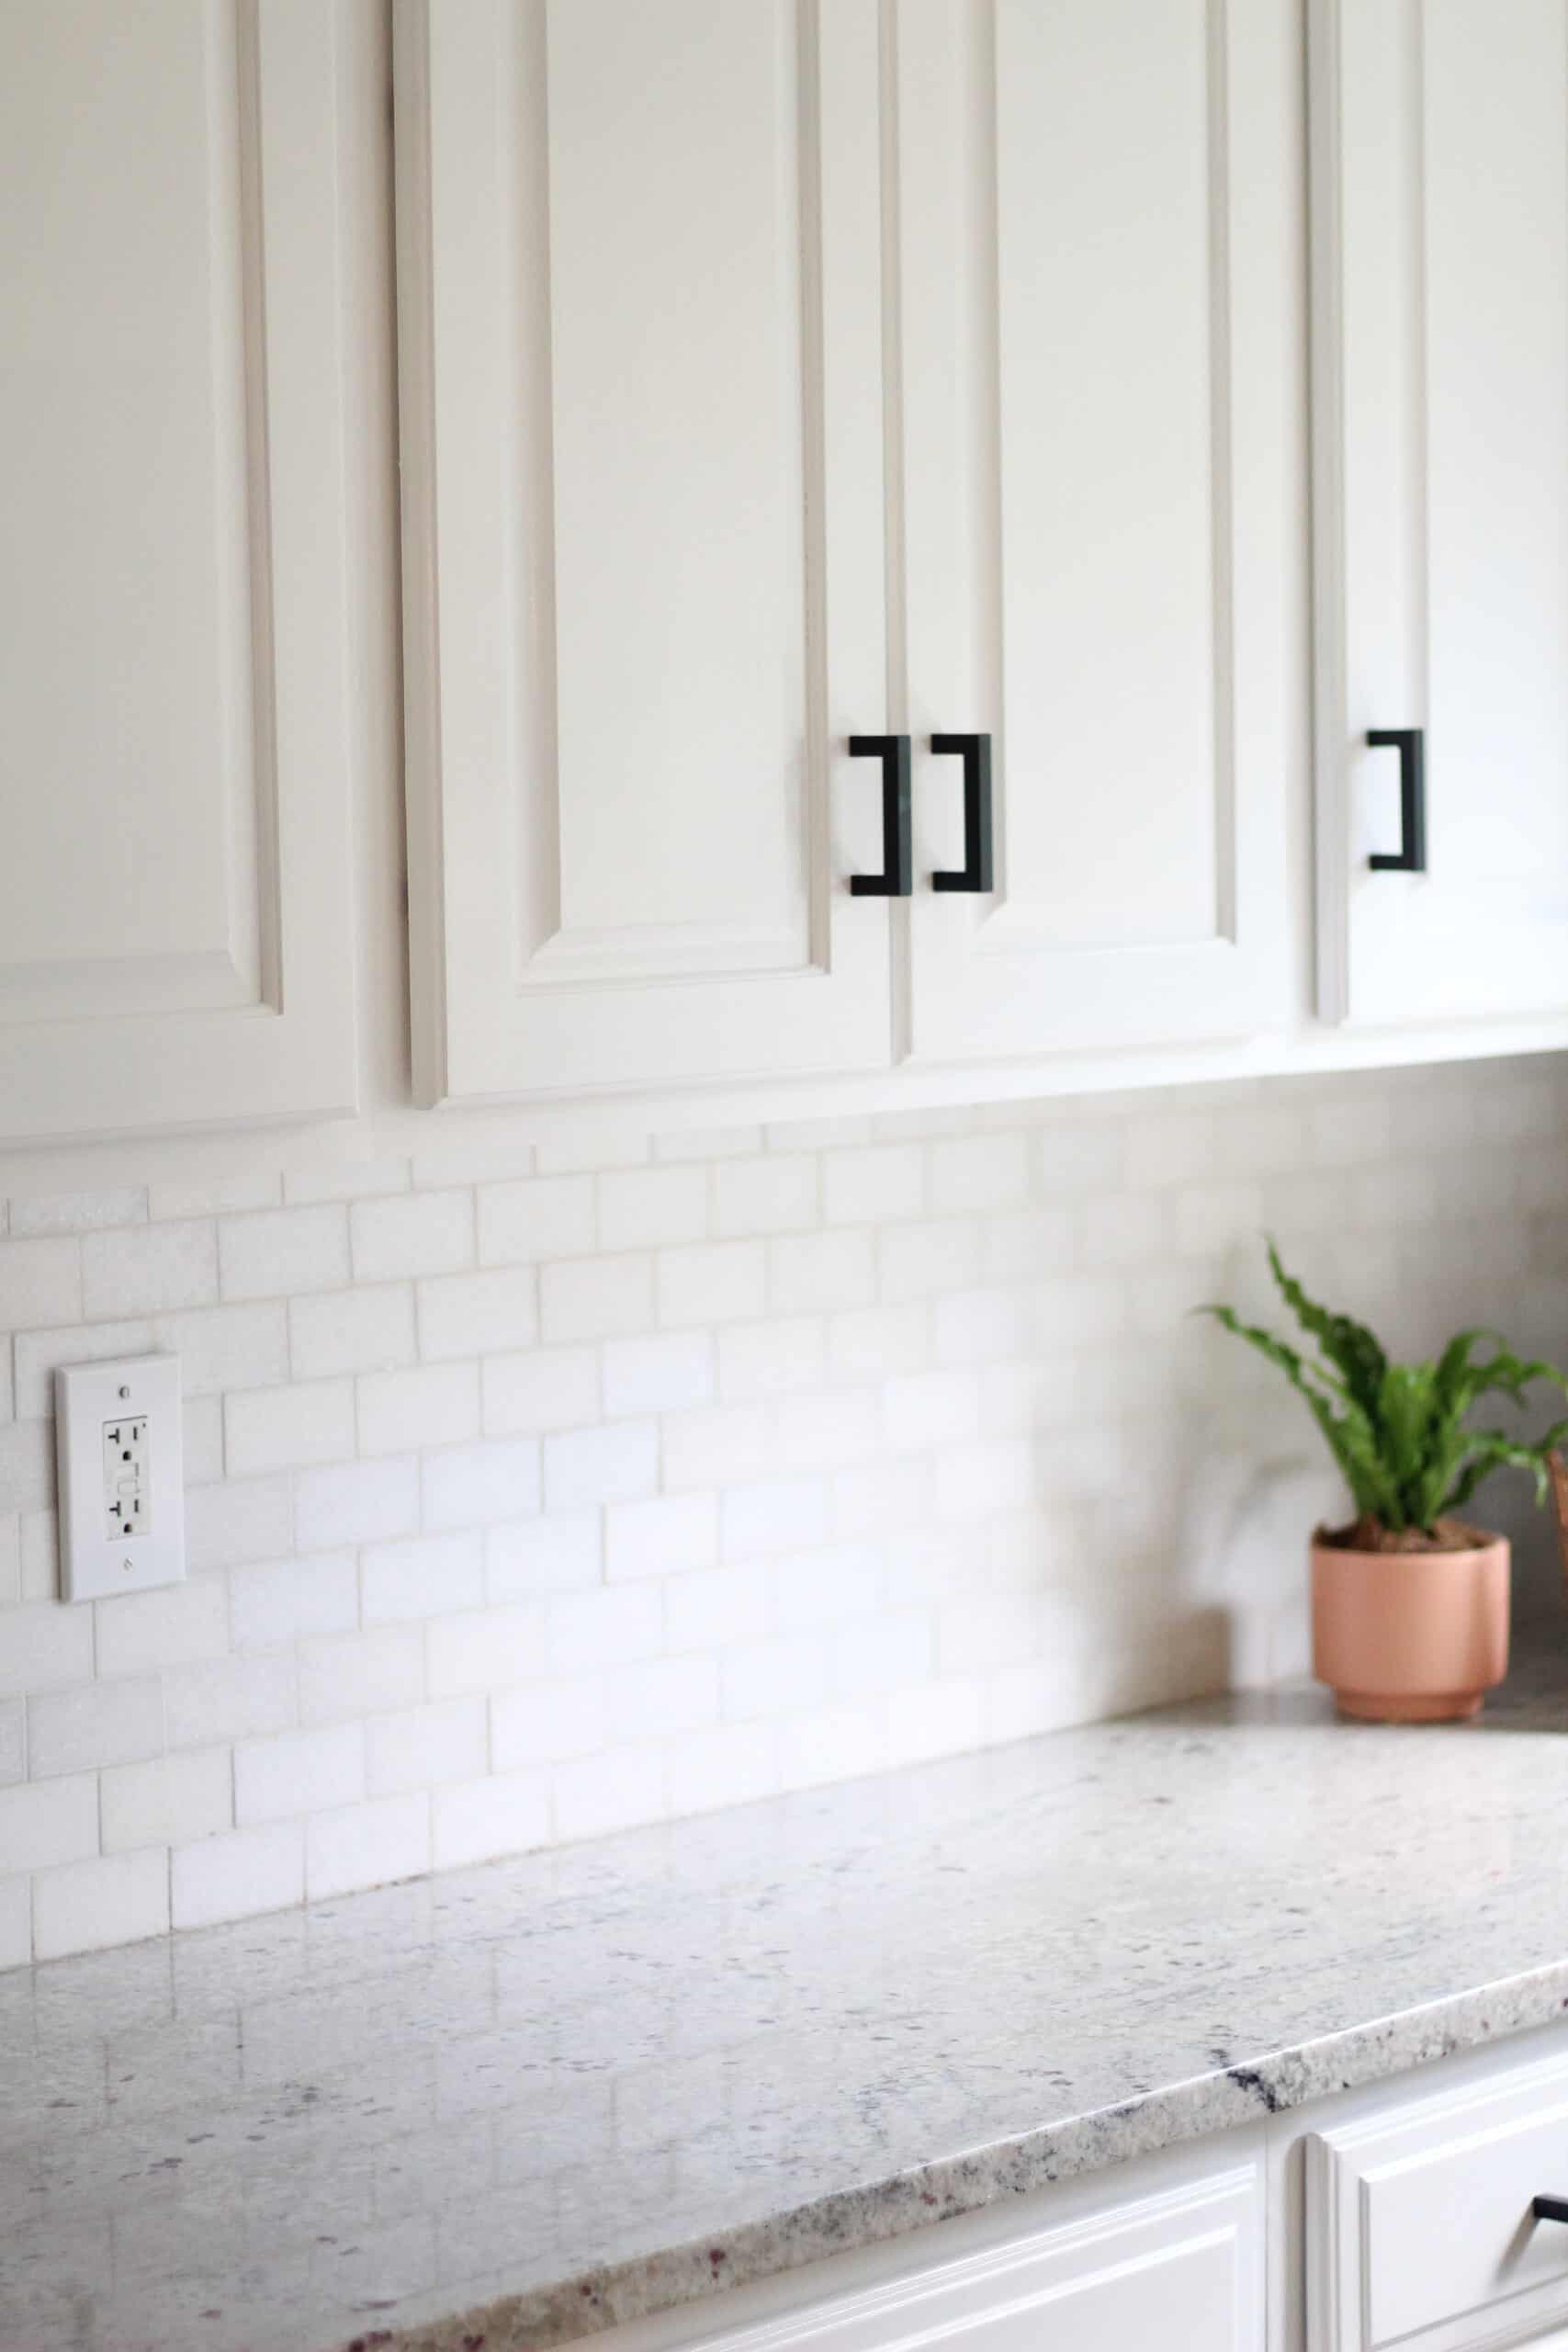
to keep track of our cabinets we took that small piece of painters tape with the number and put it where the hinge goes. For us that part of the cabinet is lower and worked great (seee photo). Another option is to write the number on a small piece of paper and put it in the hole for the hardware. You could also place the number on the counter or ground under where you’re working on that one and leave them all in one spot. Doesn’t matter how you do it – but make sure YOU DO IT

For your doors – do the BACK SIDE FIRST. I would personally set them on THESE so you don’t have to wait as long to flip. Then once you have done the back and it has dried for a few hours flip to do the fronts. Pay attention not to get any globs – we really took our time on this step. I also Will say -pending how dark your wood is I would consider doing a second coat of primer.
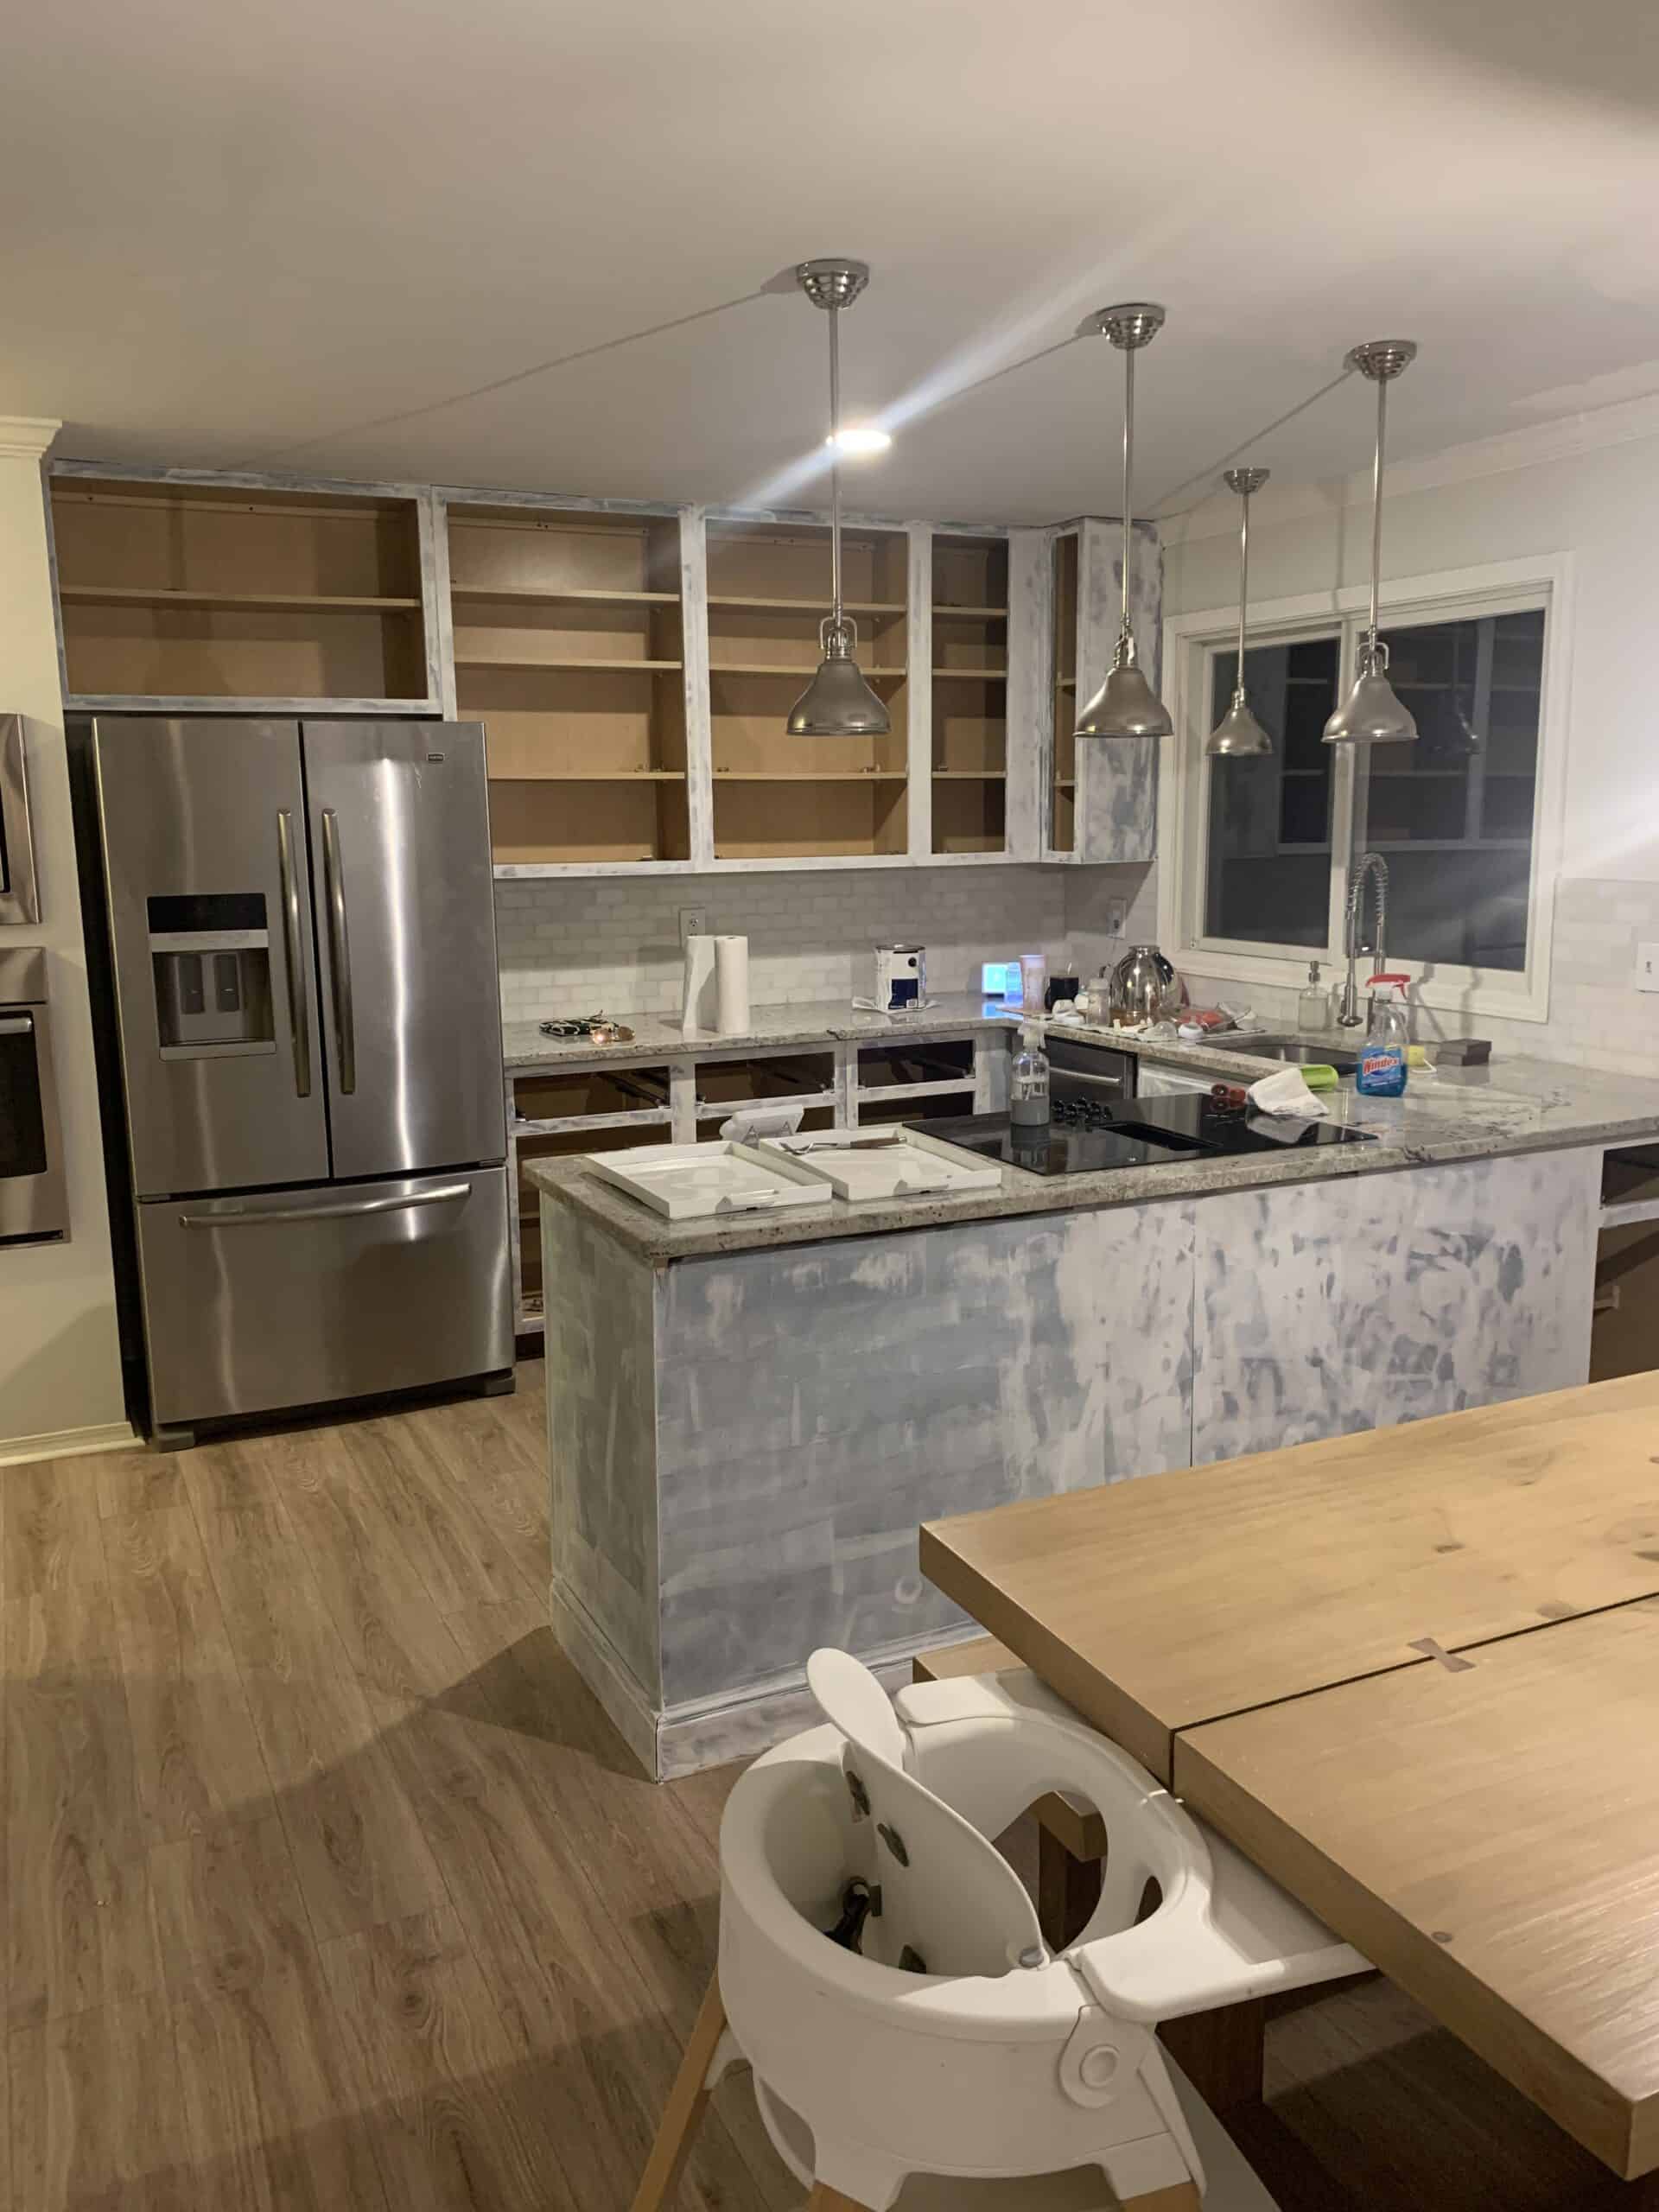
1 gallon is MORE than enough for 2 coats and the primer dries much faster than the actual paint so you will be thankful you did. I wish I had done 2 coats of primer personally.
Once your primer is fully dry use a very fine grit sanding block to lightly sand everything you painted. This step will help make your end result so much smoother, so don’t skip it. Then wipe down everything again with a wet cloth, then a dry microfiber cloth to keep it very clean.
NOW YOU’RE READY TO PAINT!
Painting Kitchen Cabinets White
Once your cabinets are sanded, and primed it is time for the fun part! PAINTING. As with all the steps – this step needs to be taken SLOW.
What we did personally was start with the cabinets themselves (no doors) first, then followed the same steps for the doors.
First apply one coat of paint using a brush and foam roller. Once that fully dried for 24 hours we lightly sanded using the same method as the primer.
We then did a second coat of paint after – and after that one dried for a few hours did a light third coat. For the second and third coats we didn’t sand and follow that full process between.
I followed the same method with the doors. For the doors – START WITH THE BACKS, and for the last coat try to do all foam roller. If you have detail like mine do any brush work first then foam rollers for a smooth finish!
as a side note – we didn’t do this and I wish we had. If you take paintable caulk and caulk in the seams on doors where they connect you will get a better finished product. I was going to do it and decided I didn’t need to. It isn’t a huge difference, but I do wish I had just gone ahead and done that step!
If you are using your sprayer follow these same steps. I would probably use the foam roller and brush for the cabinets themselves but the paint sprayer for the doors. Be sure to get a paint tent or have a good area to spray them where debris won’t get on them!
Details and Reassembly
Make sure you wait until your cabinets are fully dry to reassemble. Your hinges should all still be in the spot near where they go, and your cabinets and drawers are numbered.
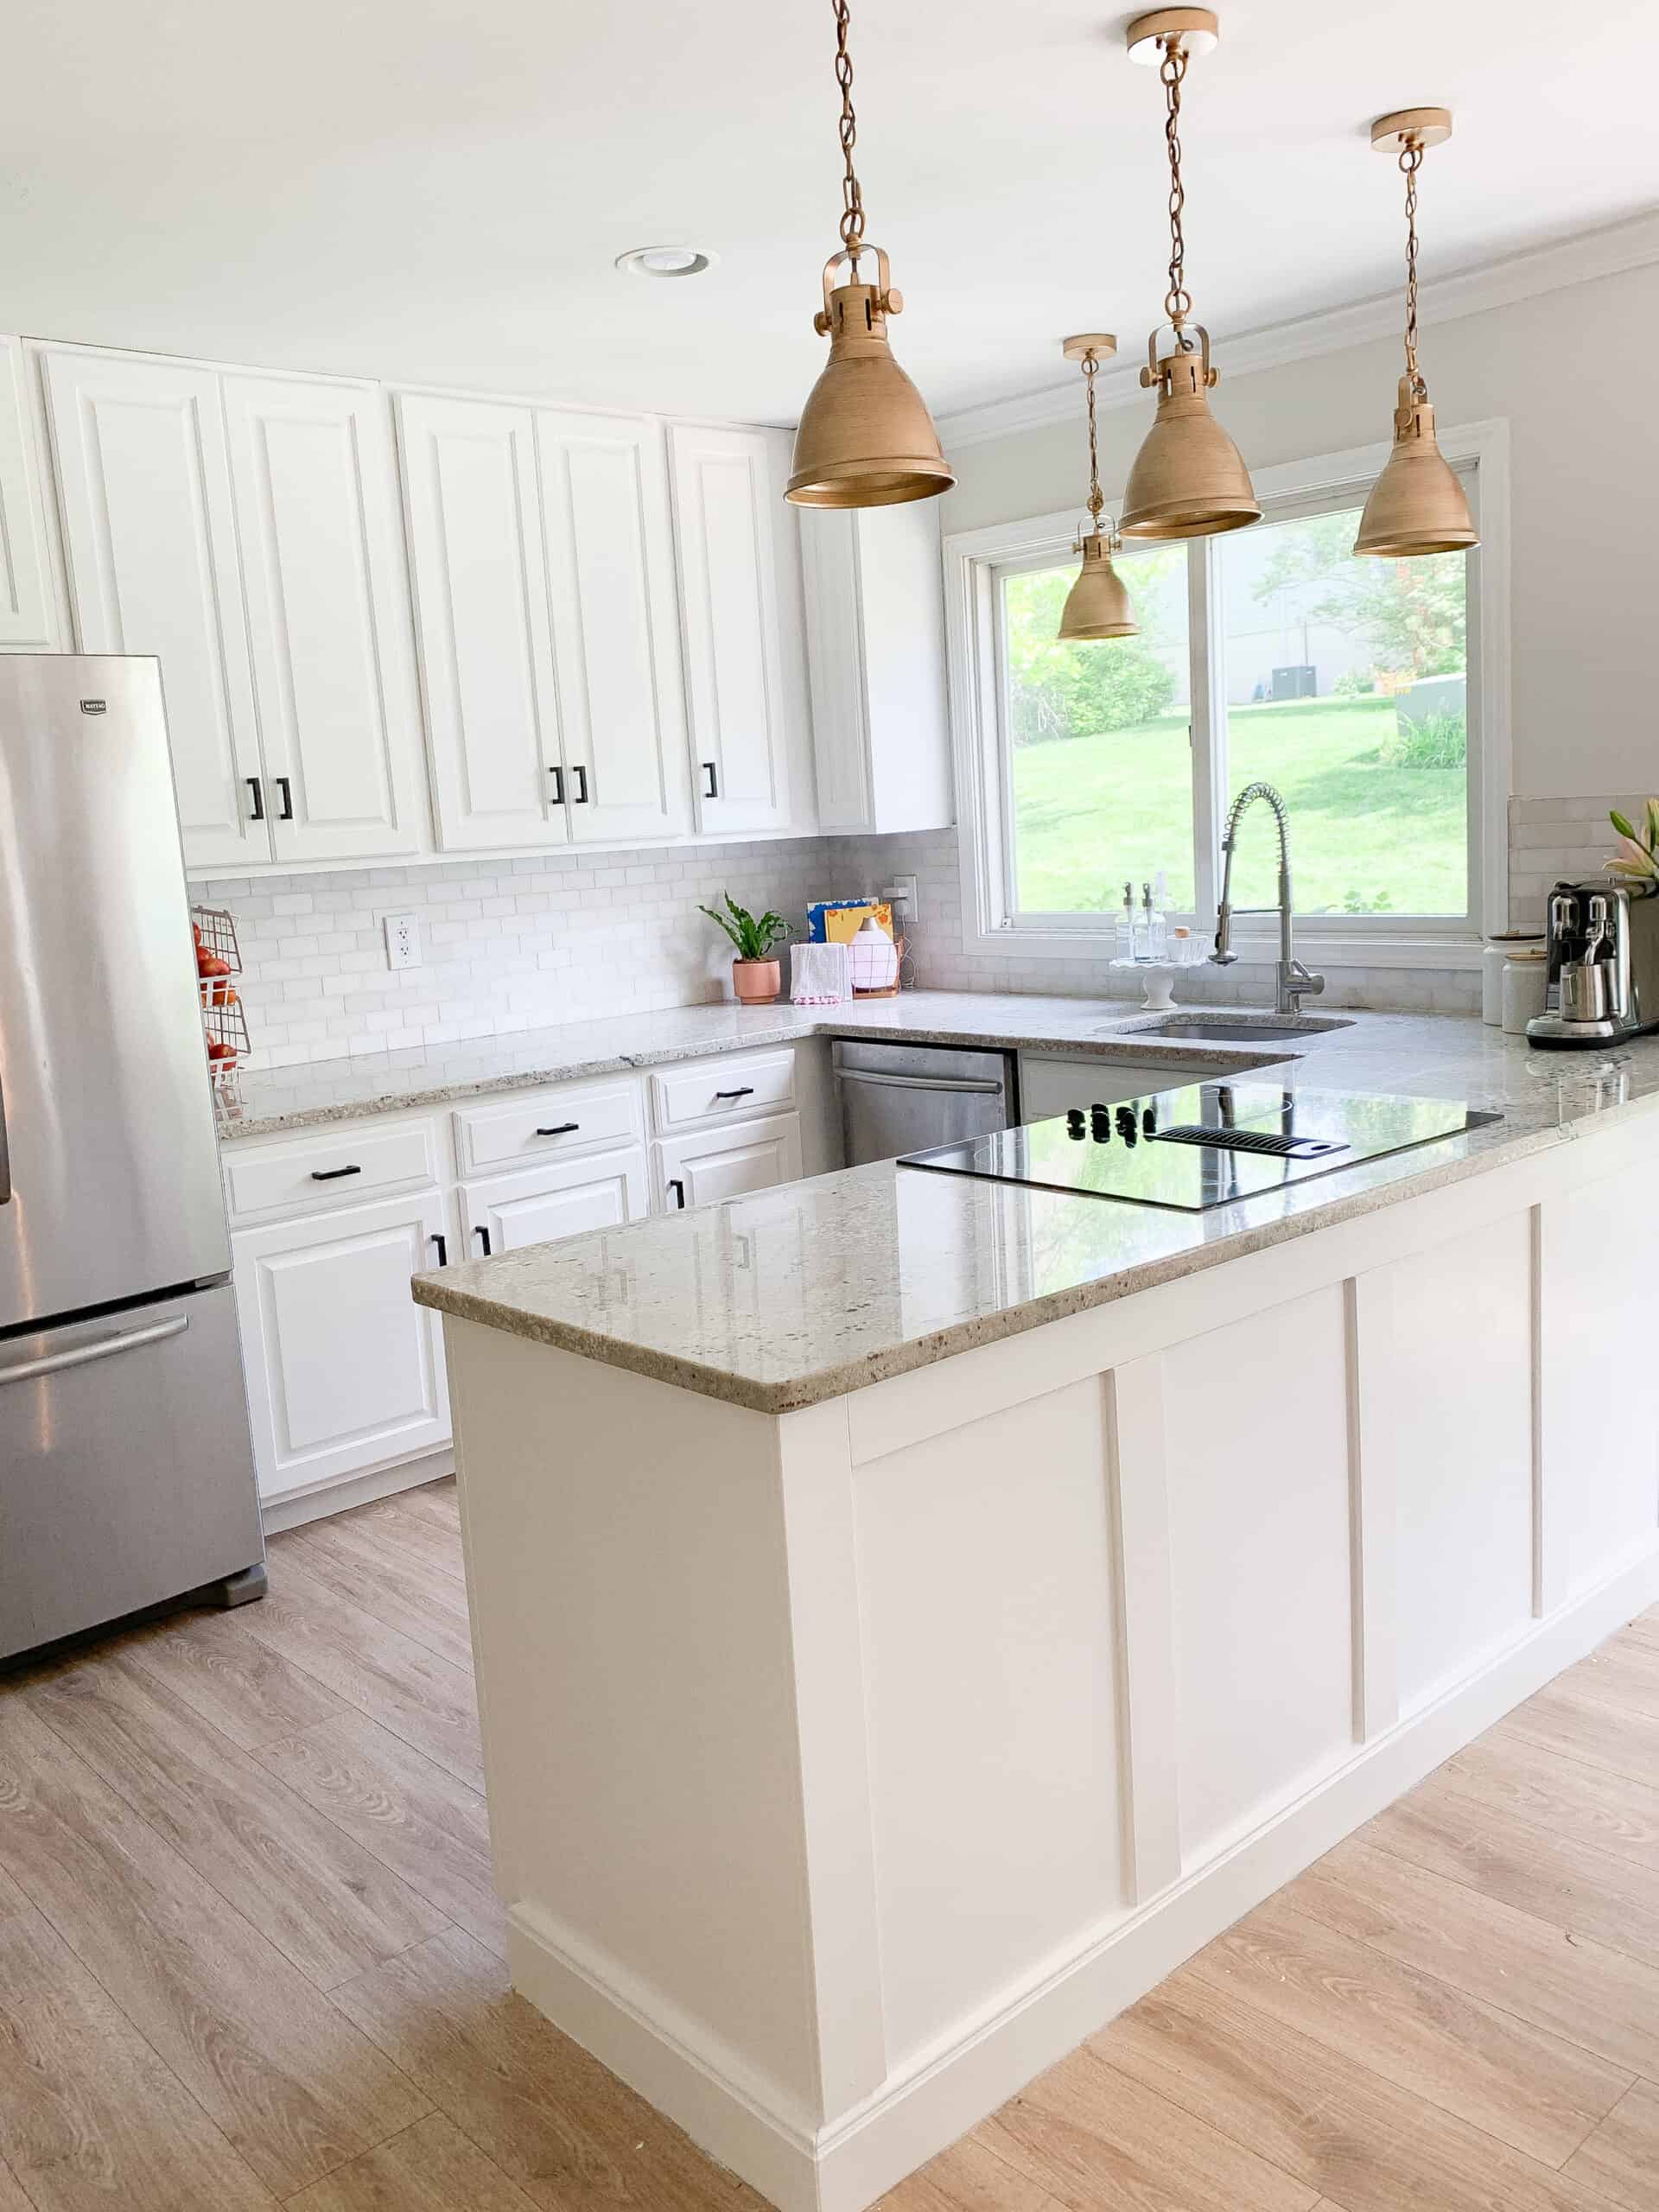
Detail on Peninsula
Like I said above – we did this step BEFORE priming but after sanding. For the details we added 3 inch tall trim – our cabinets already had nice piece along the bottom, so we added only to the top and the vertical pieces.
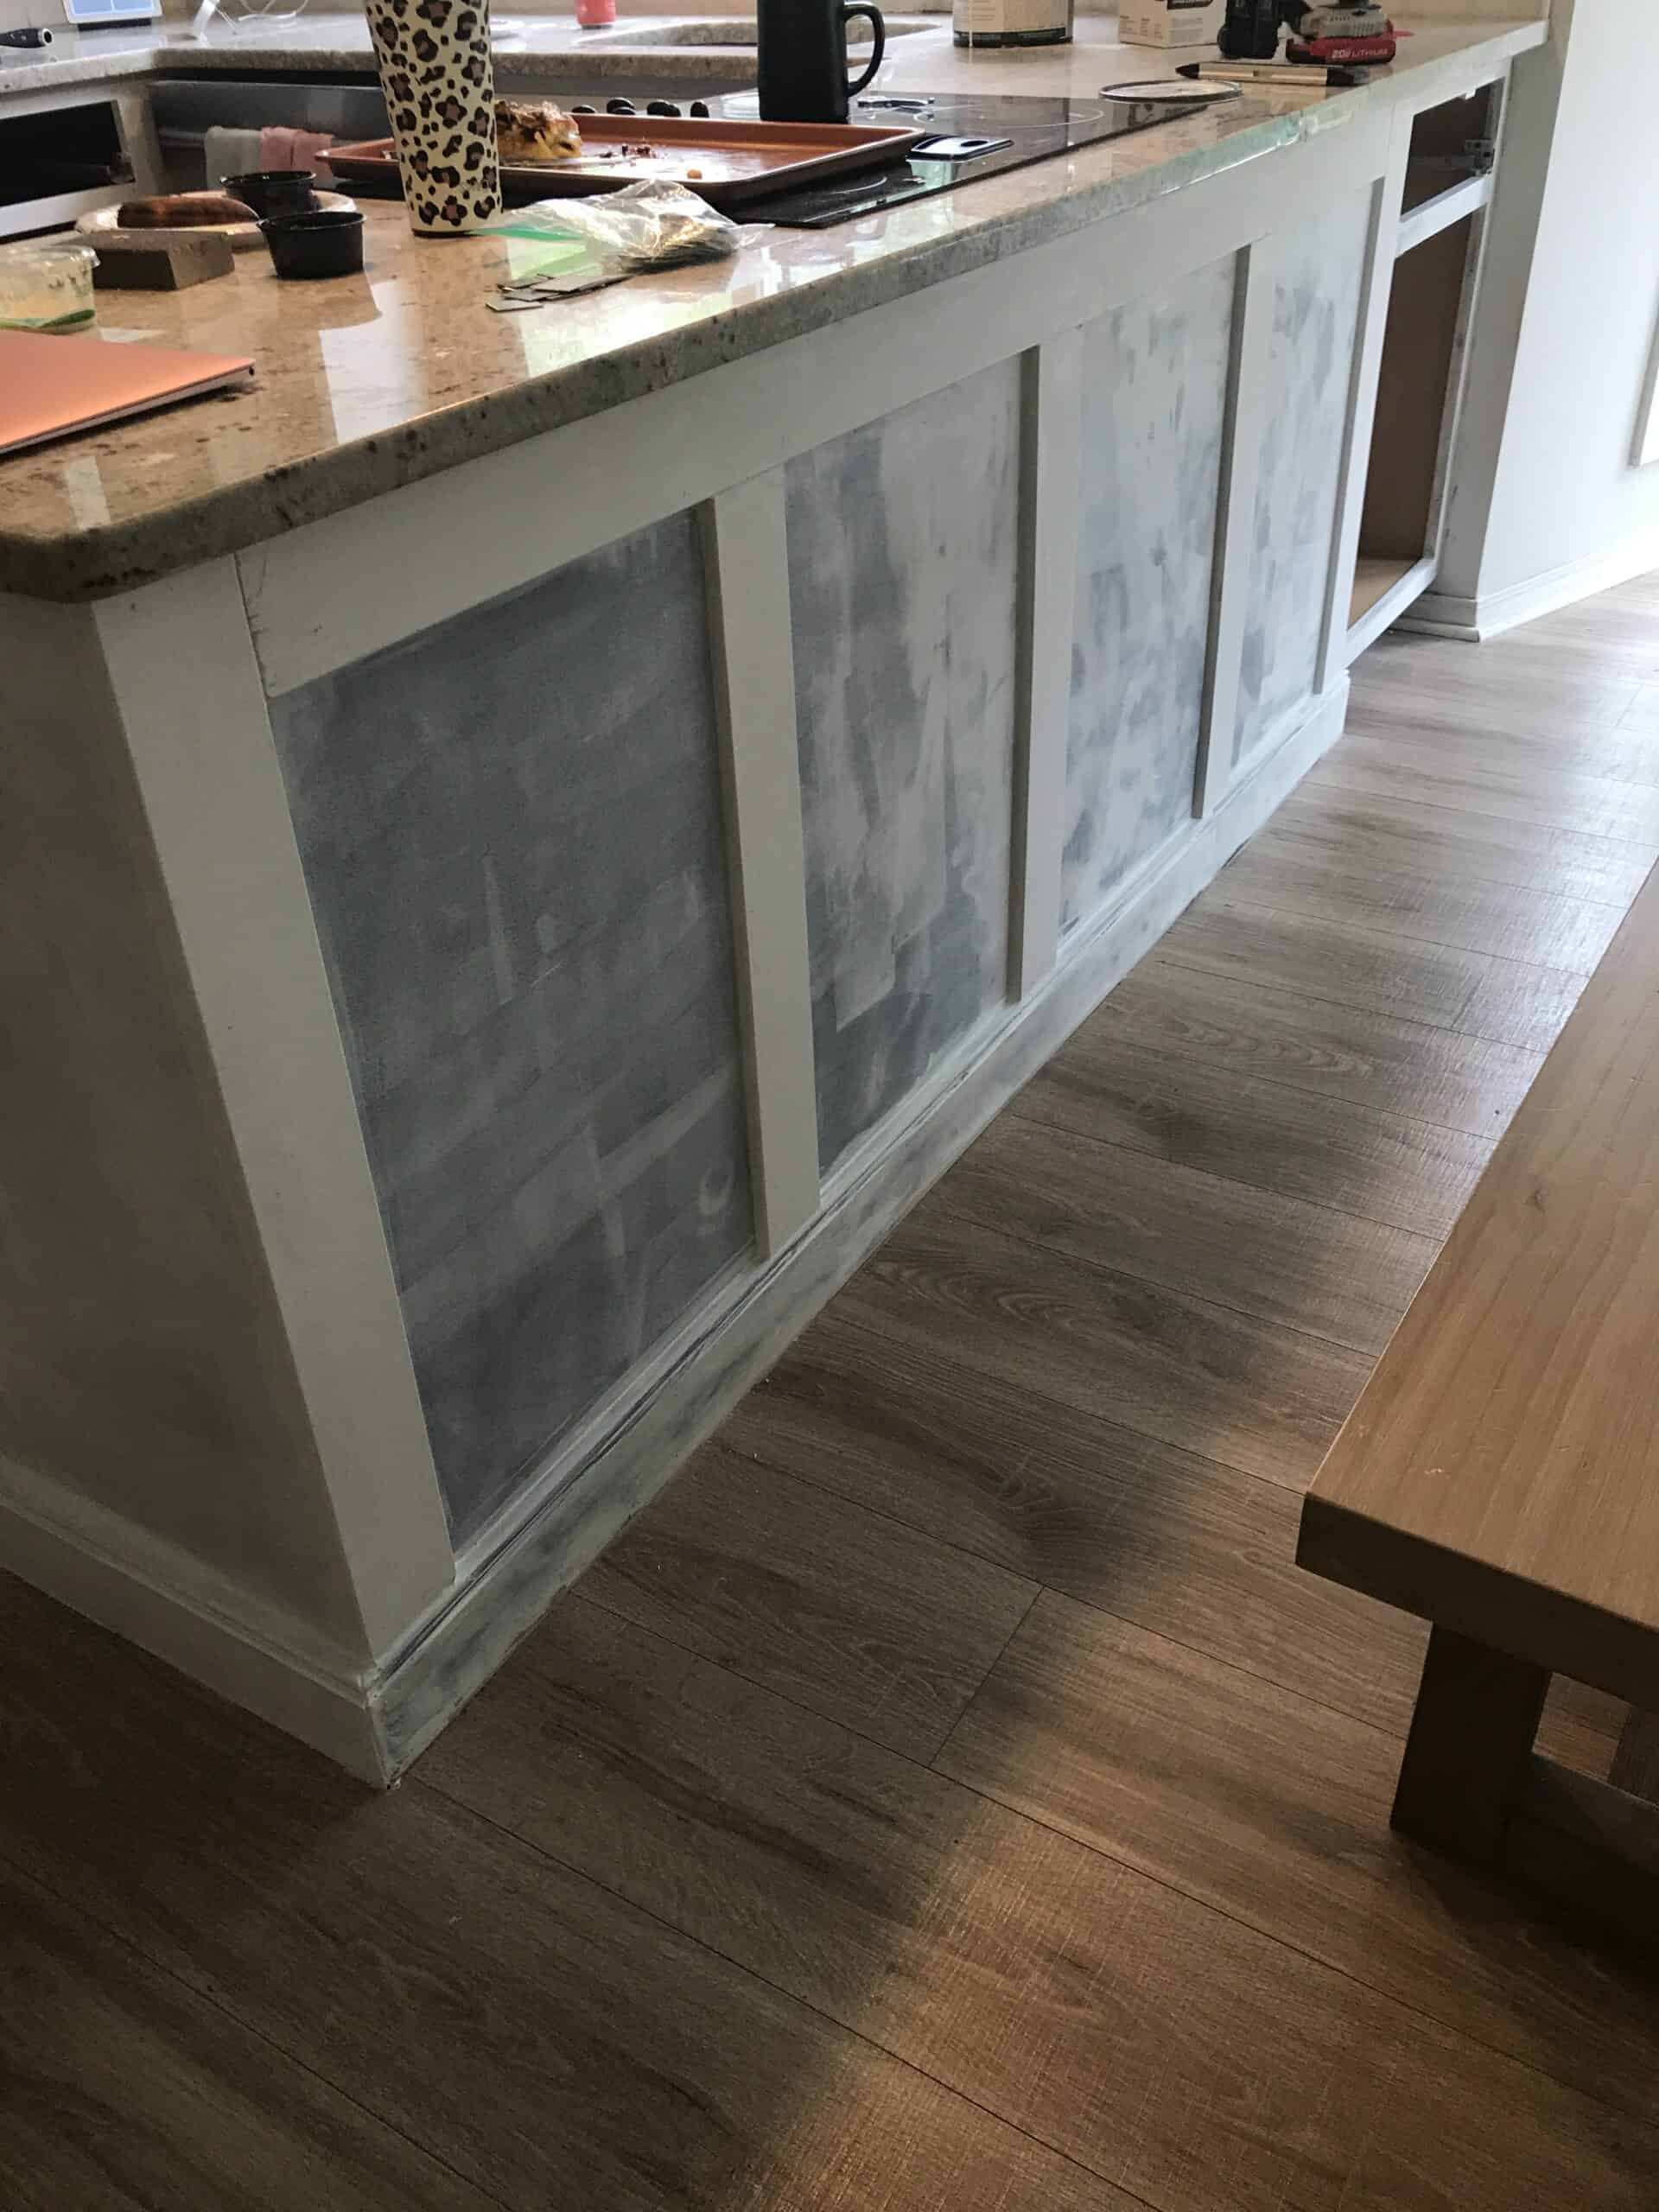
(If you don’t have bottom trim in place already add that first). We first cut the vertical boards for the corner and the end (near the cupboard). Ours was a bit different than some due to having the cupboard at the end of the space. Measure up from the bottom trim to the top (base of the counter tops) and cut a piece. Nail that in – on on each side.
Now measure a piece to hang horizontally between those two boards. Now you should have one big rectangle out of trim.
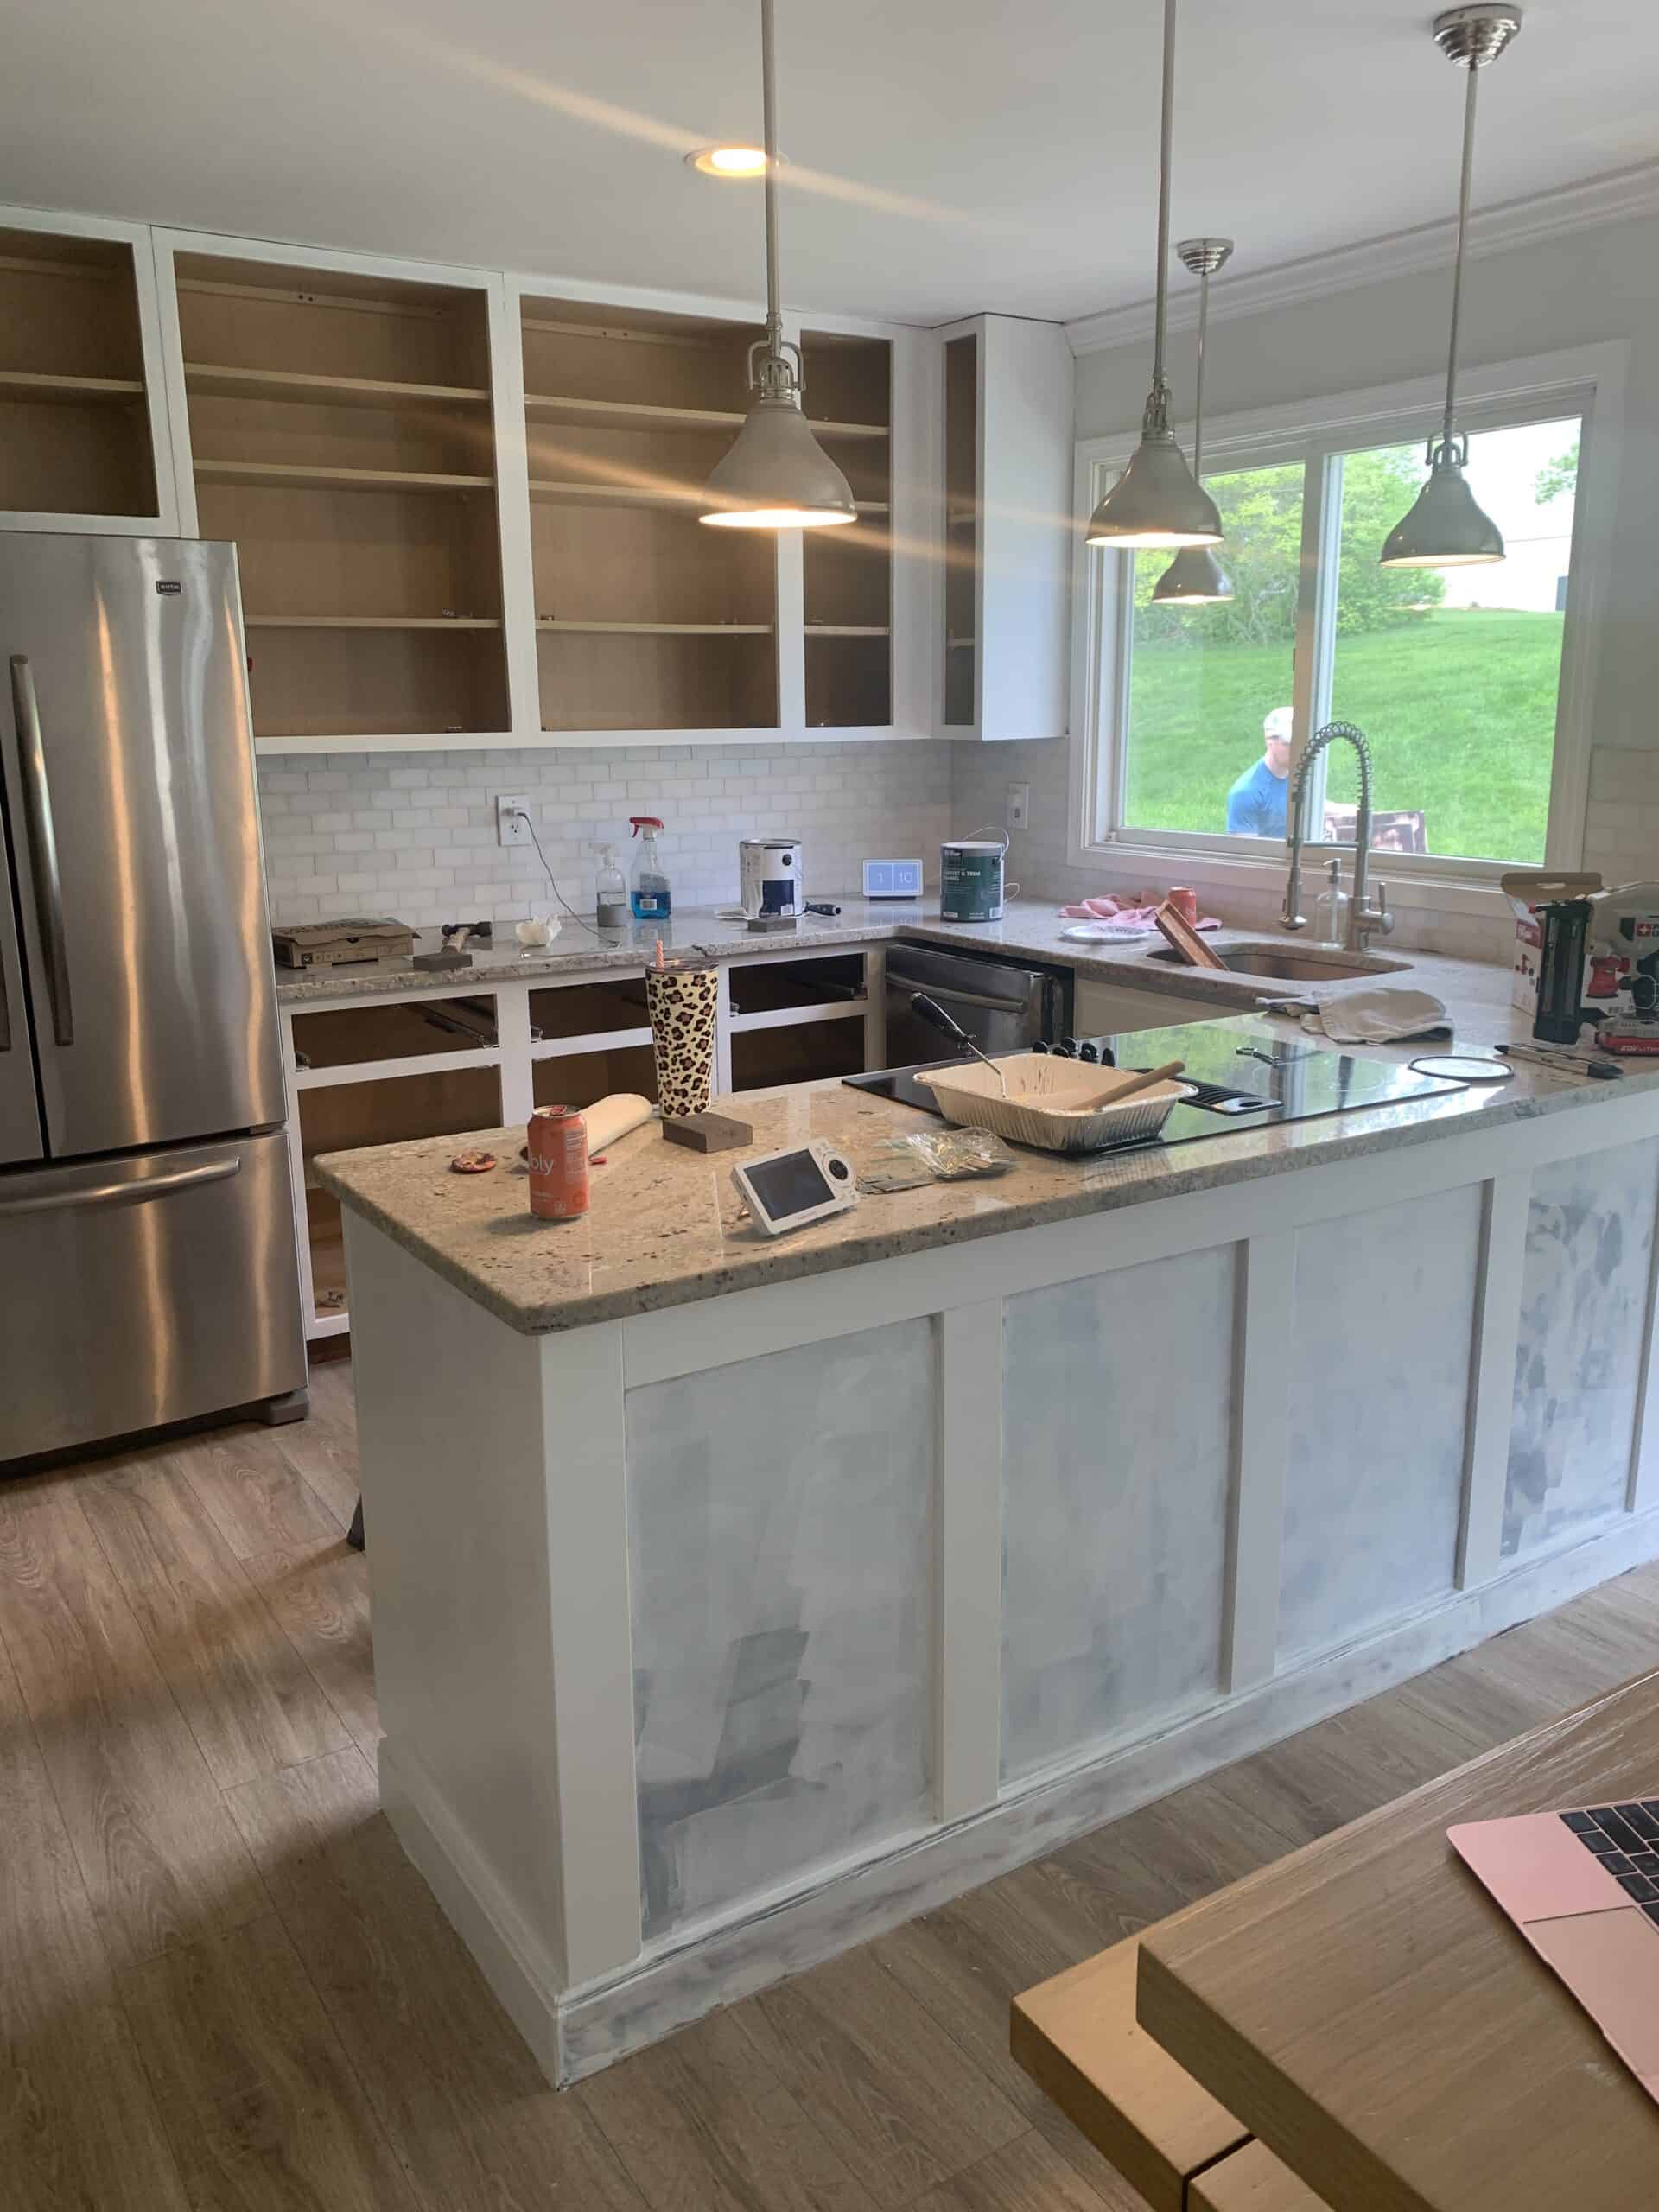
Now pending the size of your space you can decide how many boards you want to add vertically between those two. We personally did 3 to split the space evenly. I liked the overall look of that. You will cut 3 (or how ever many you need) boards in the length to fit between the top and bottom trim.
Now that this is done you will caulk every seam with paintable caulk – which is not a fun process but will make things look so much more seamless. Once that is done treat the space like the rest of the cabinets and start priming!
Hardware, Lighting, and Details
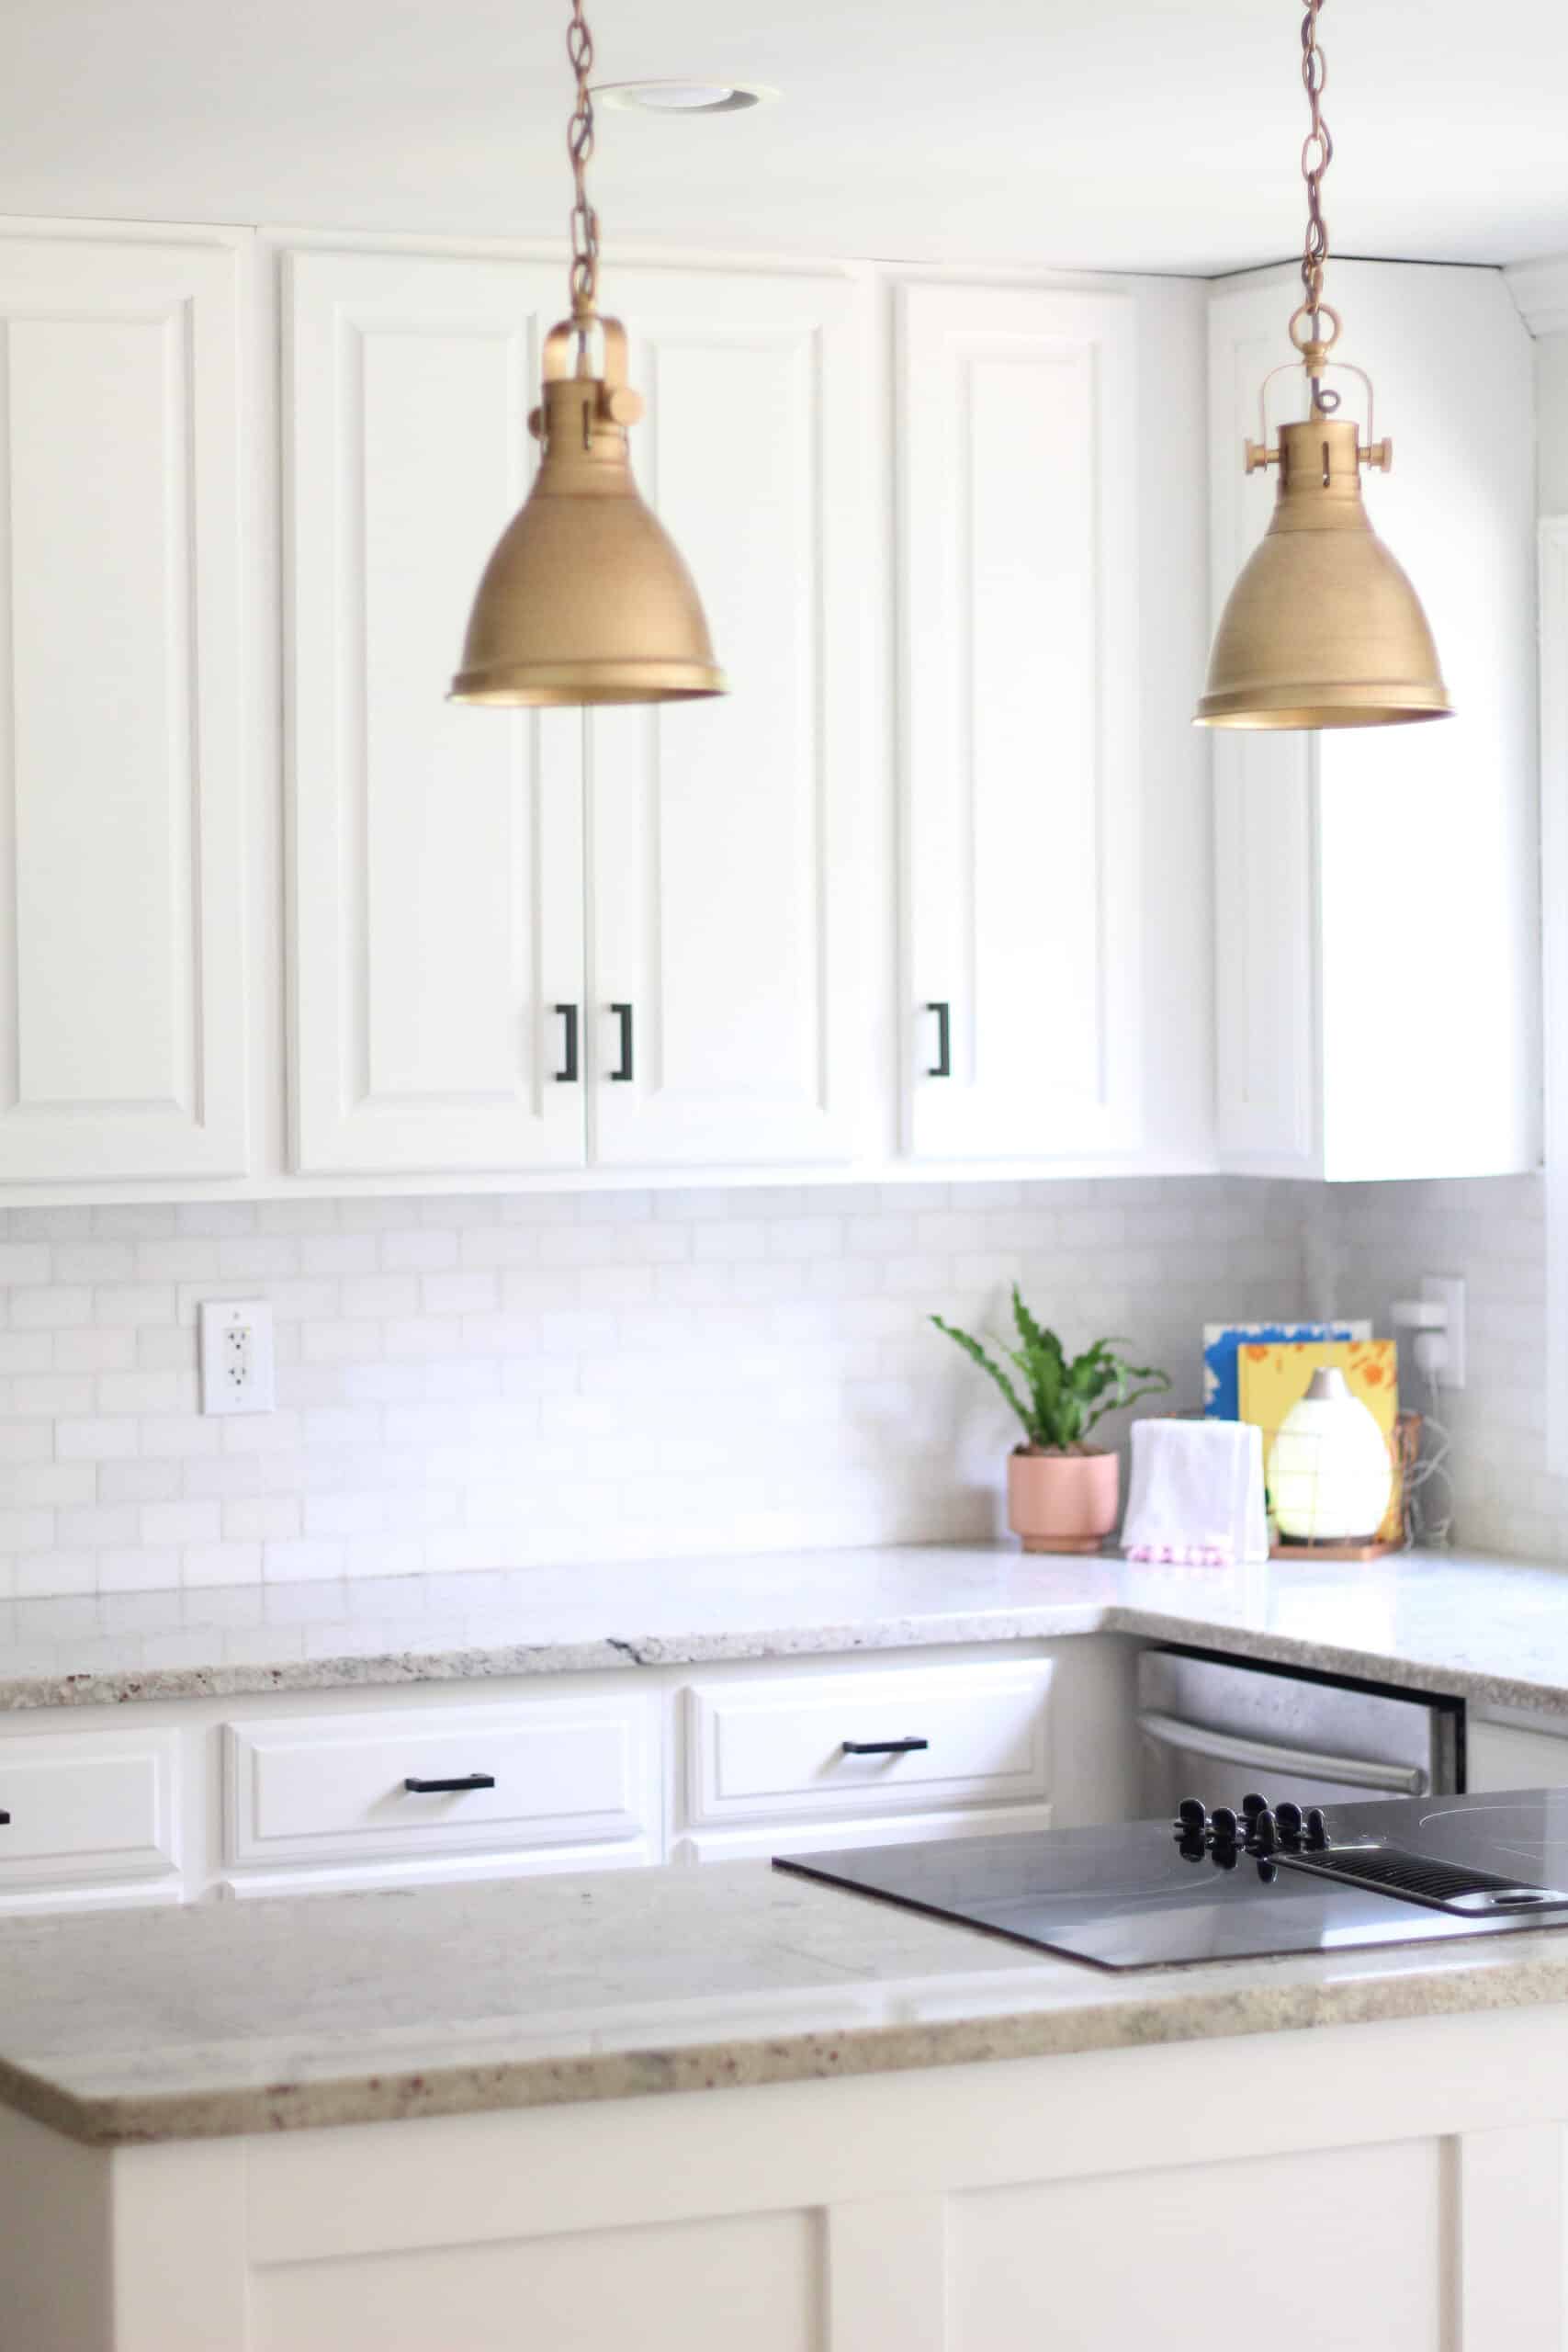
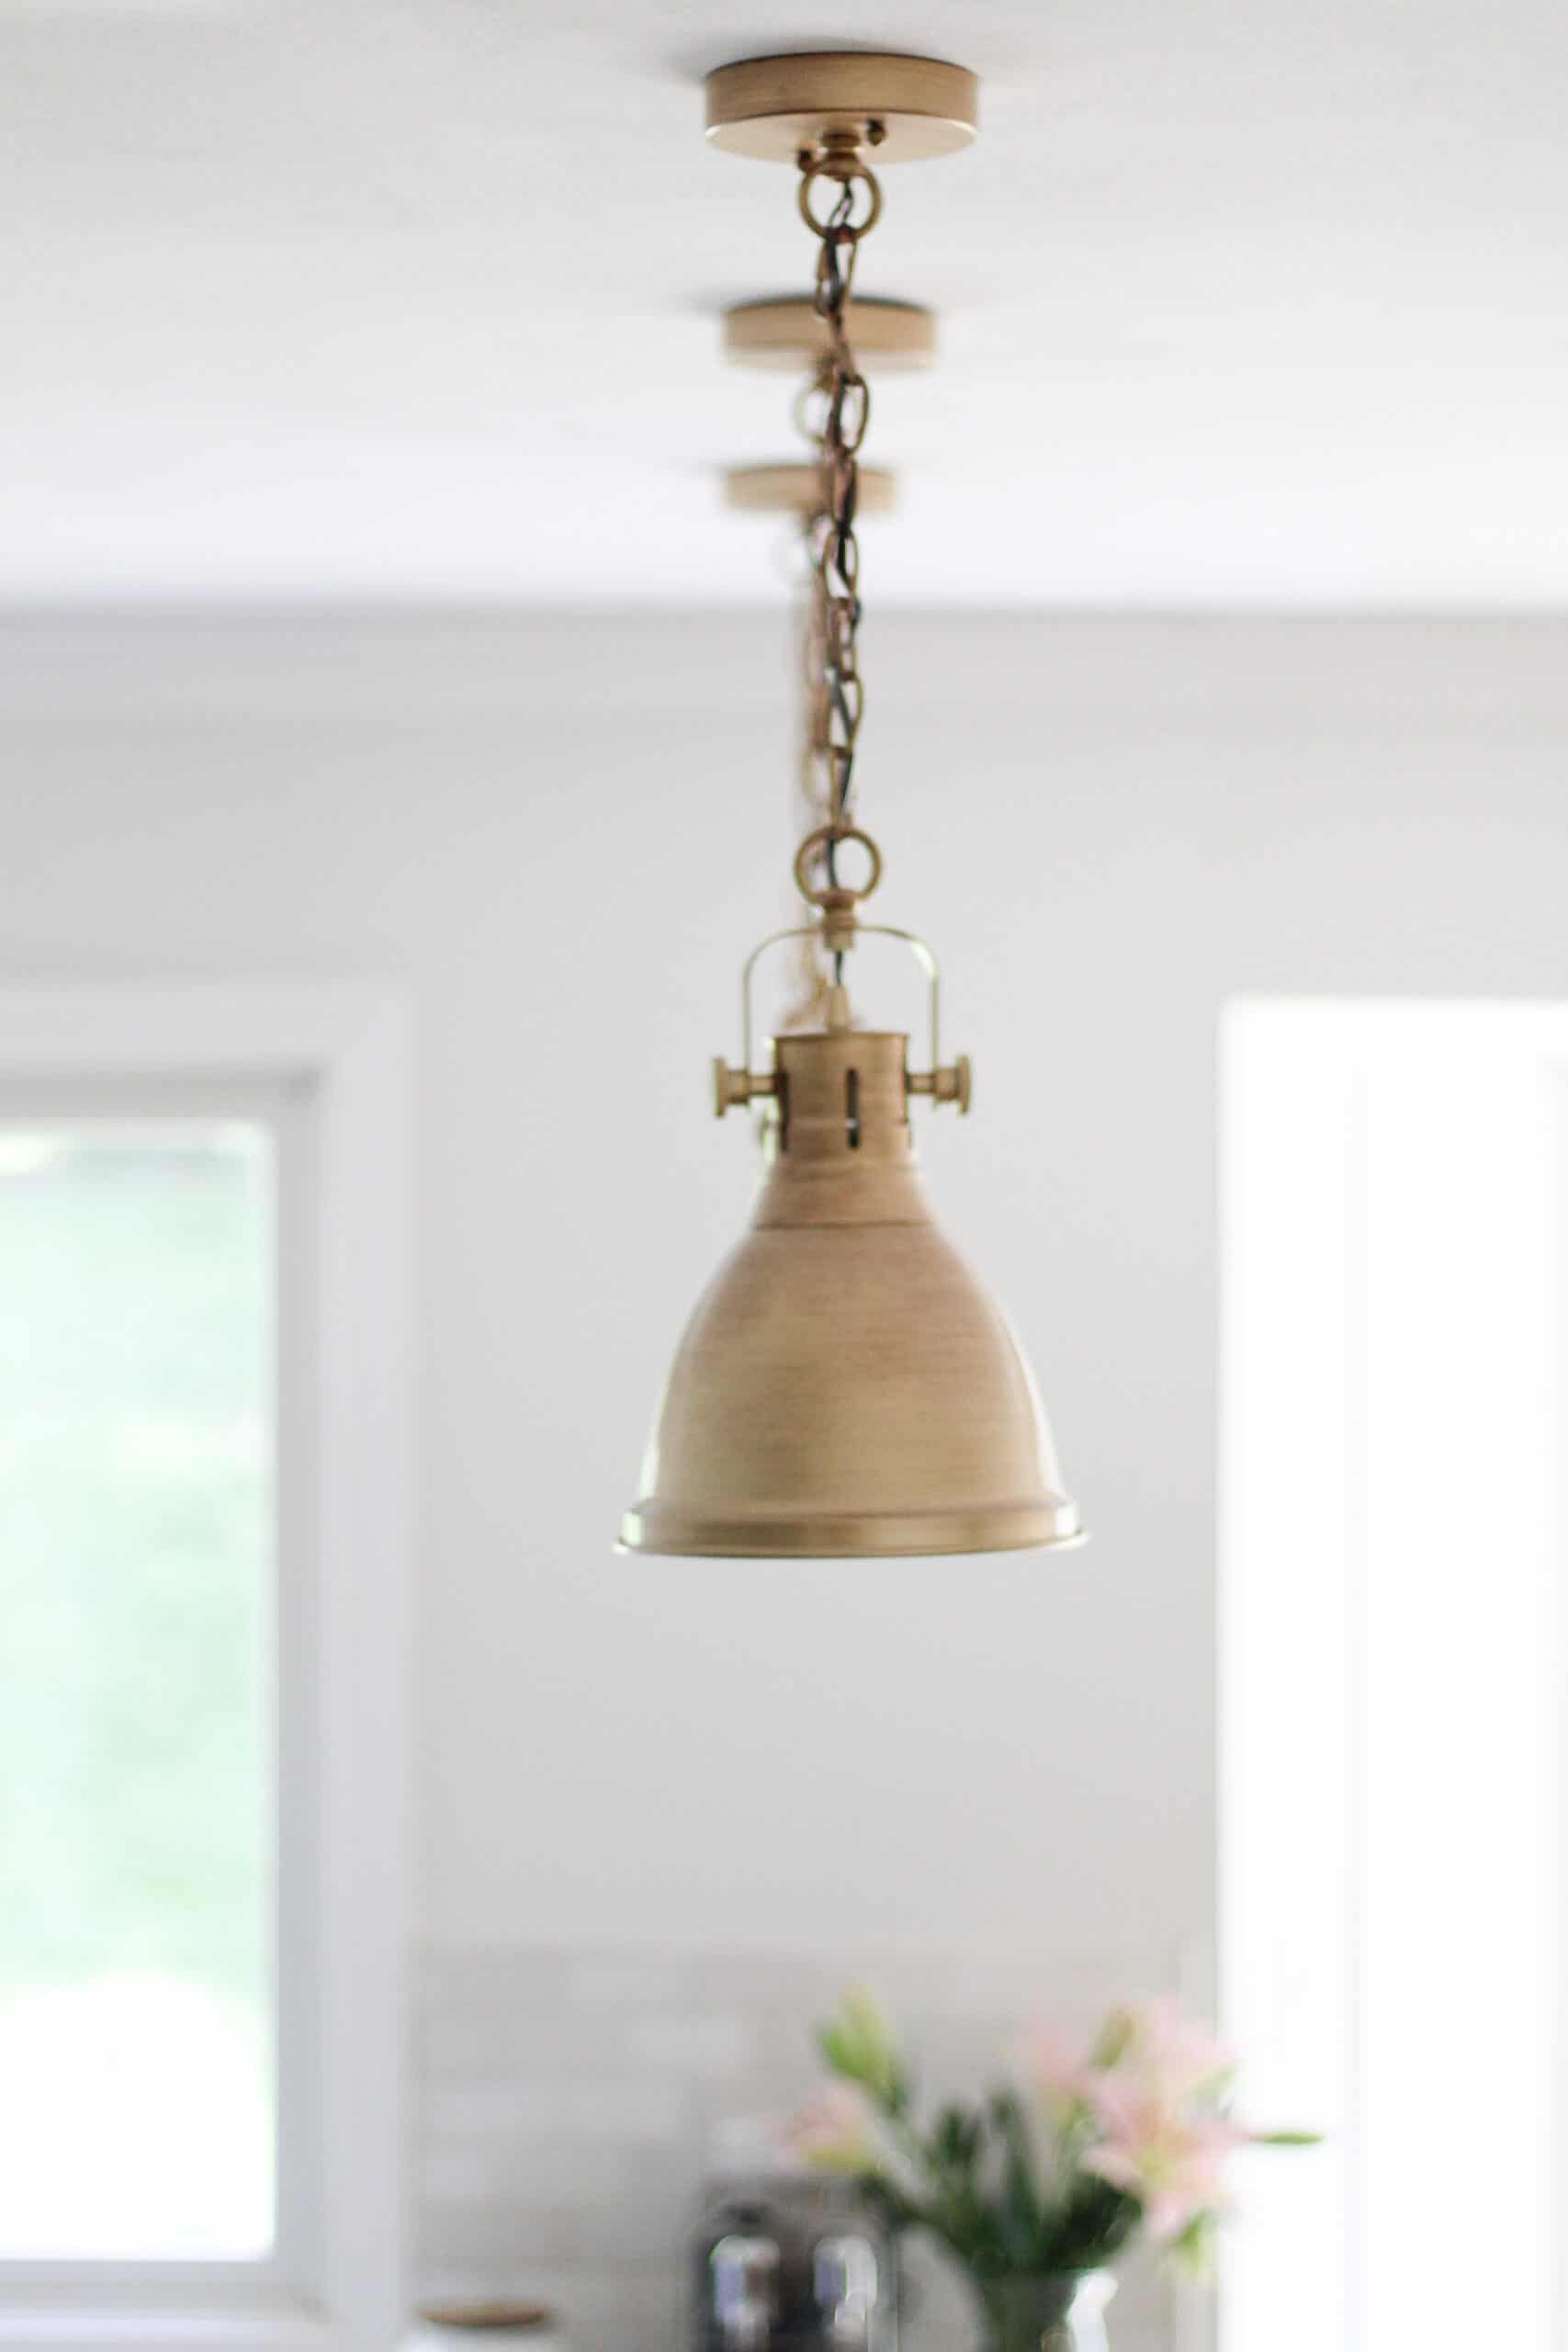
We personally got our lighting from Amazon – this is the option we went with (check out more Lighting from Amazon here). I LOVE them – they were affordable I liked that I could hang them higher. I personally do a lot of Instagram campaign photos in my kitchen, and I am on the taller side, so I wanted higher hanging lights.

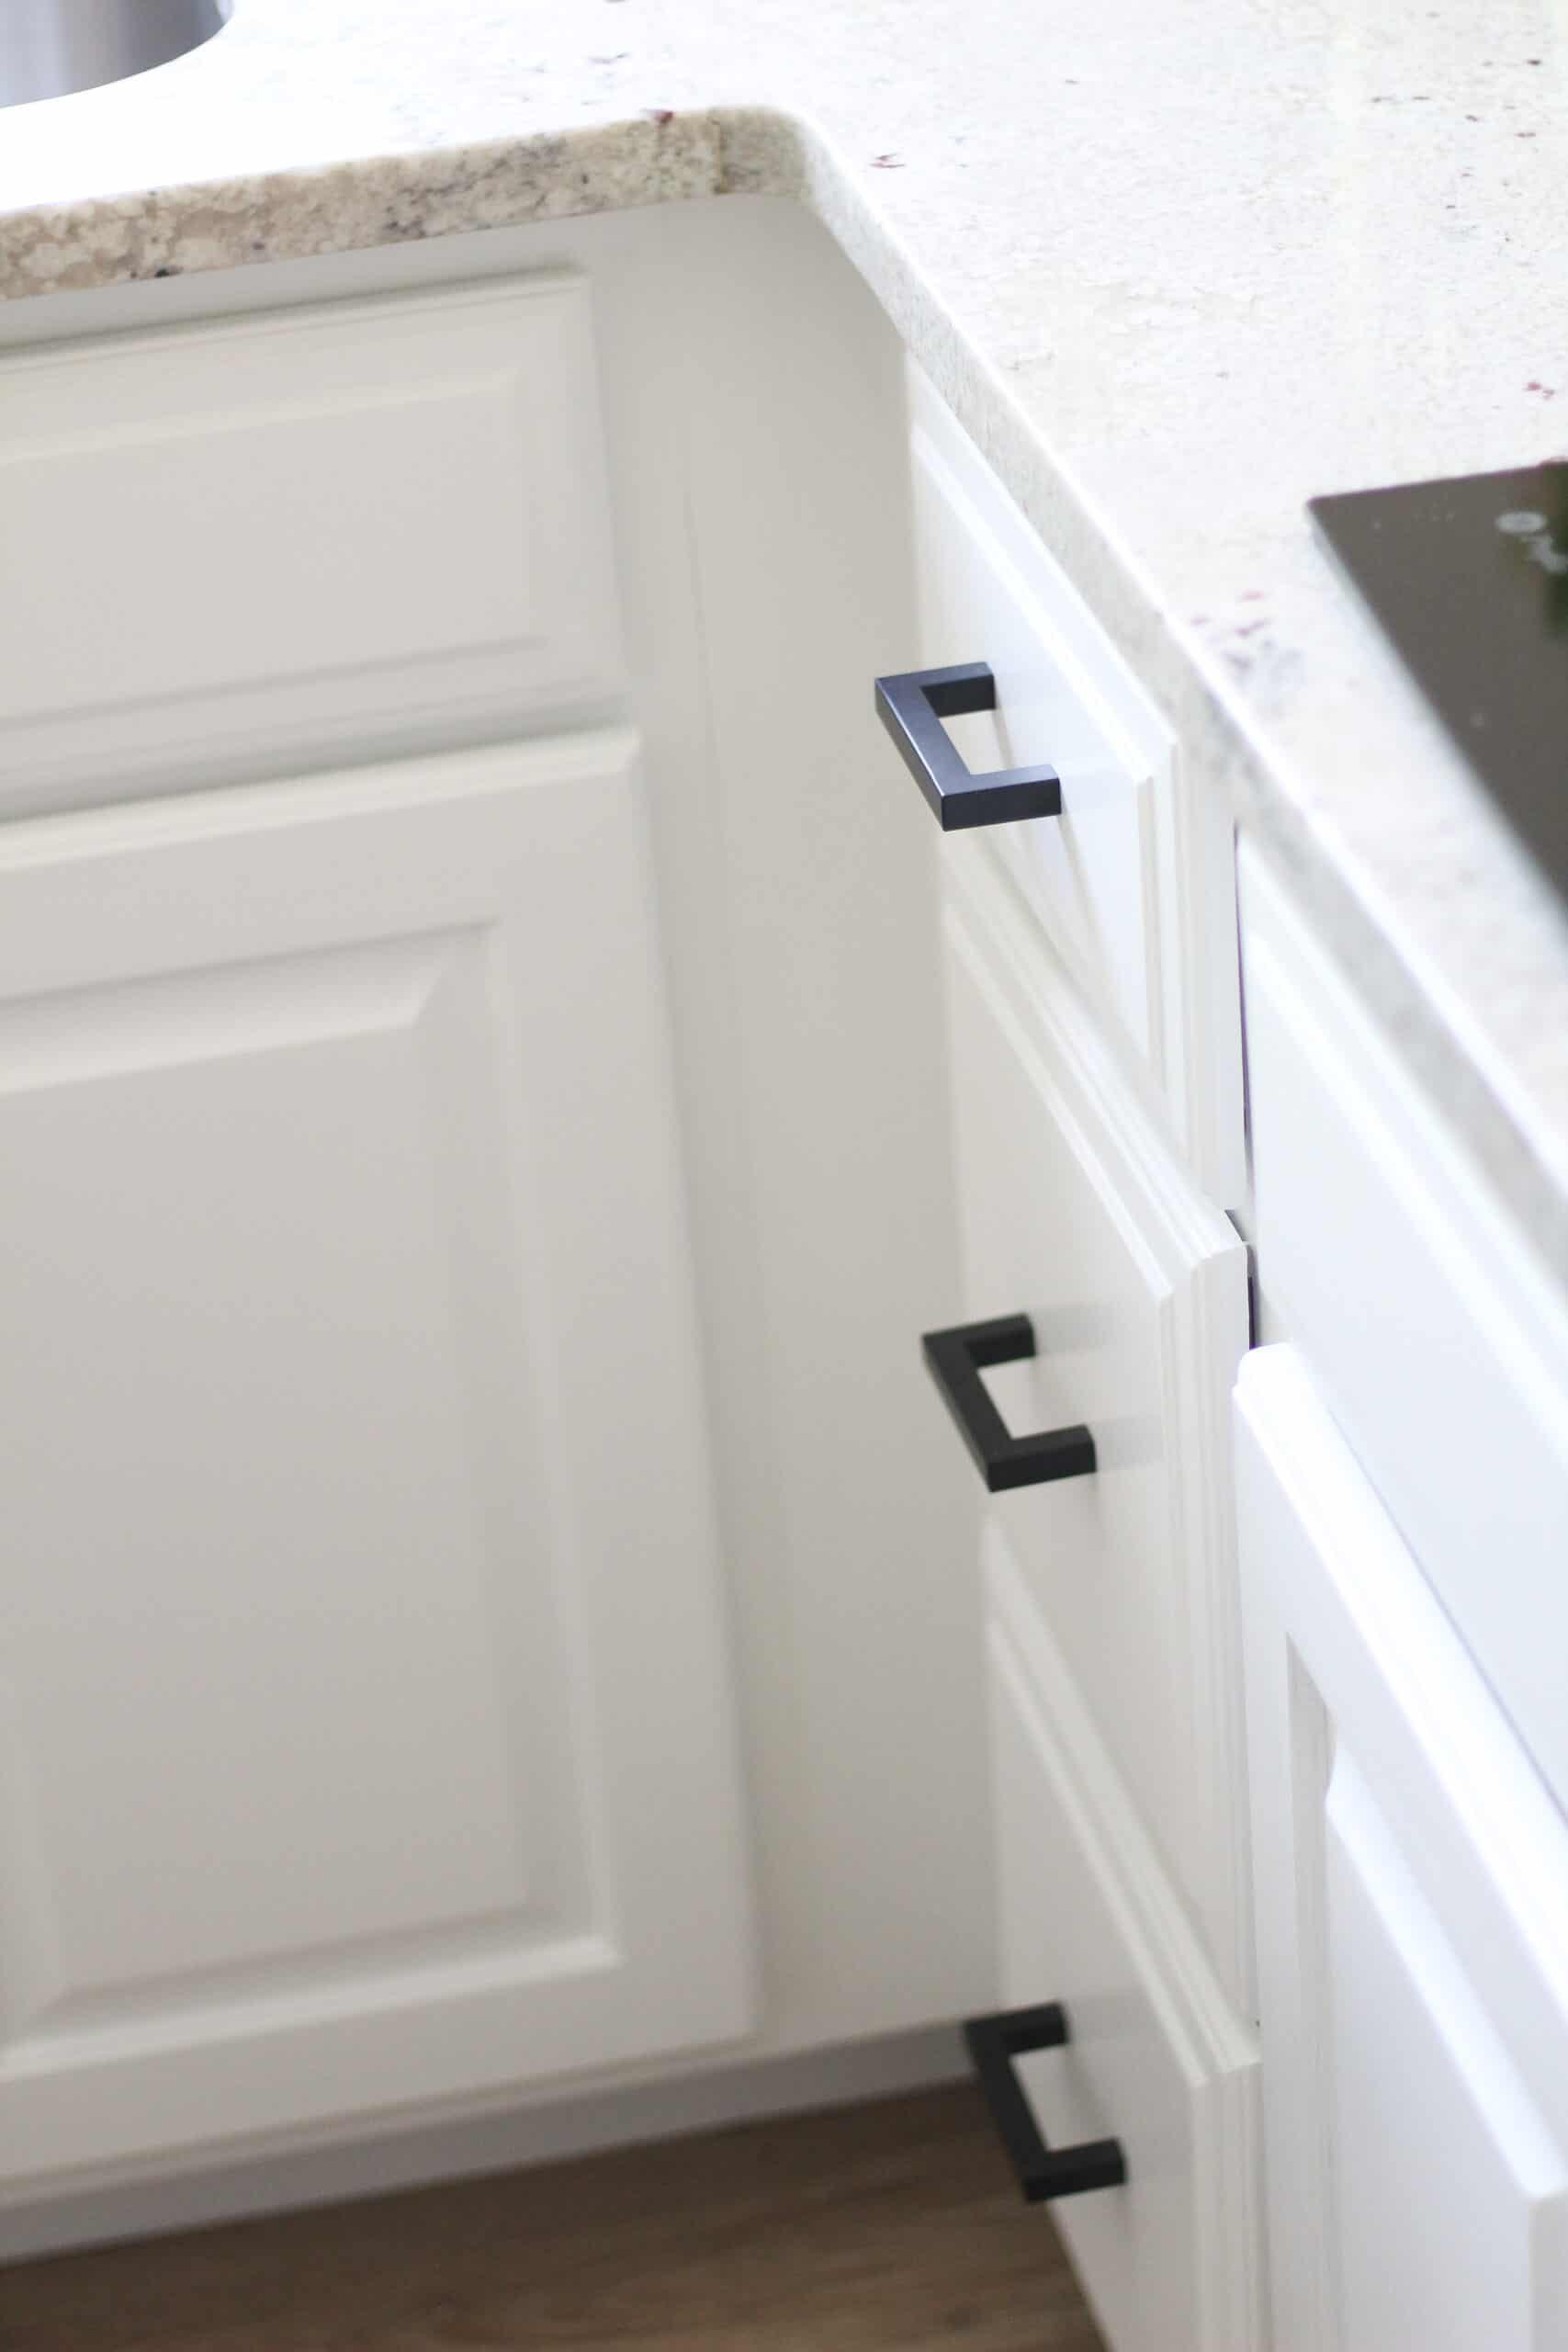
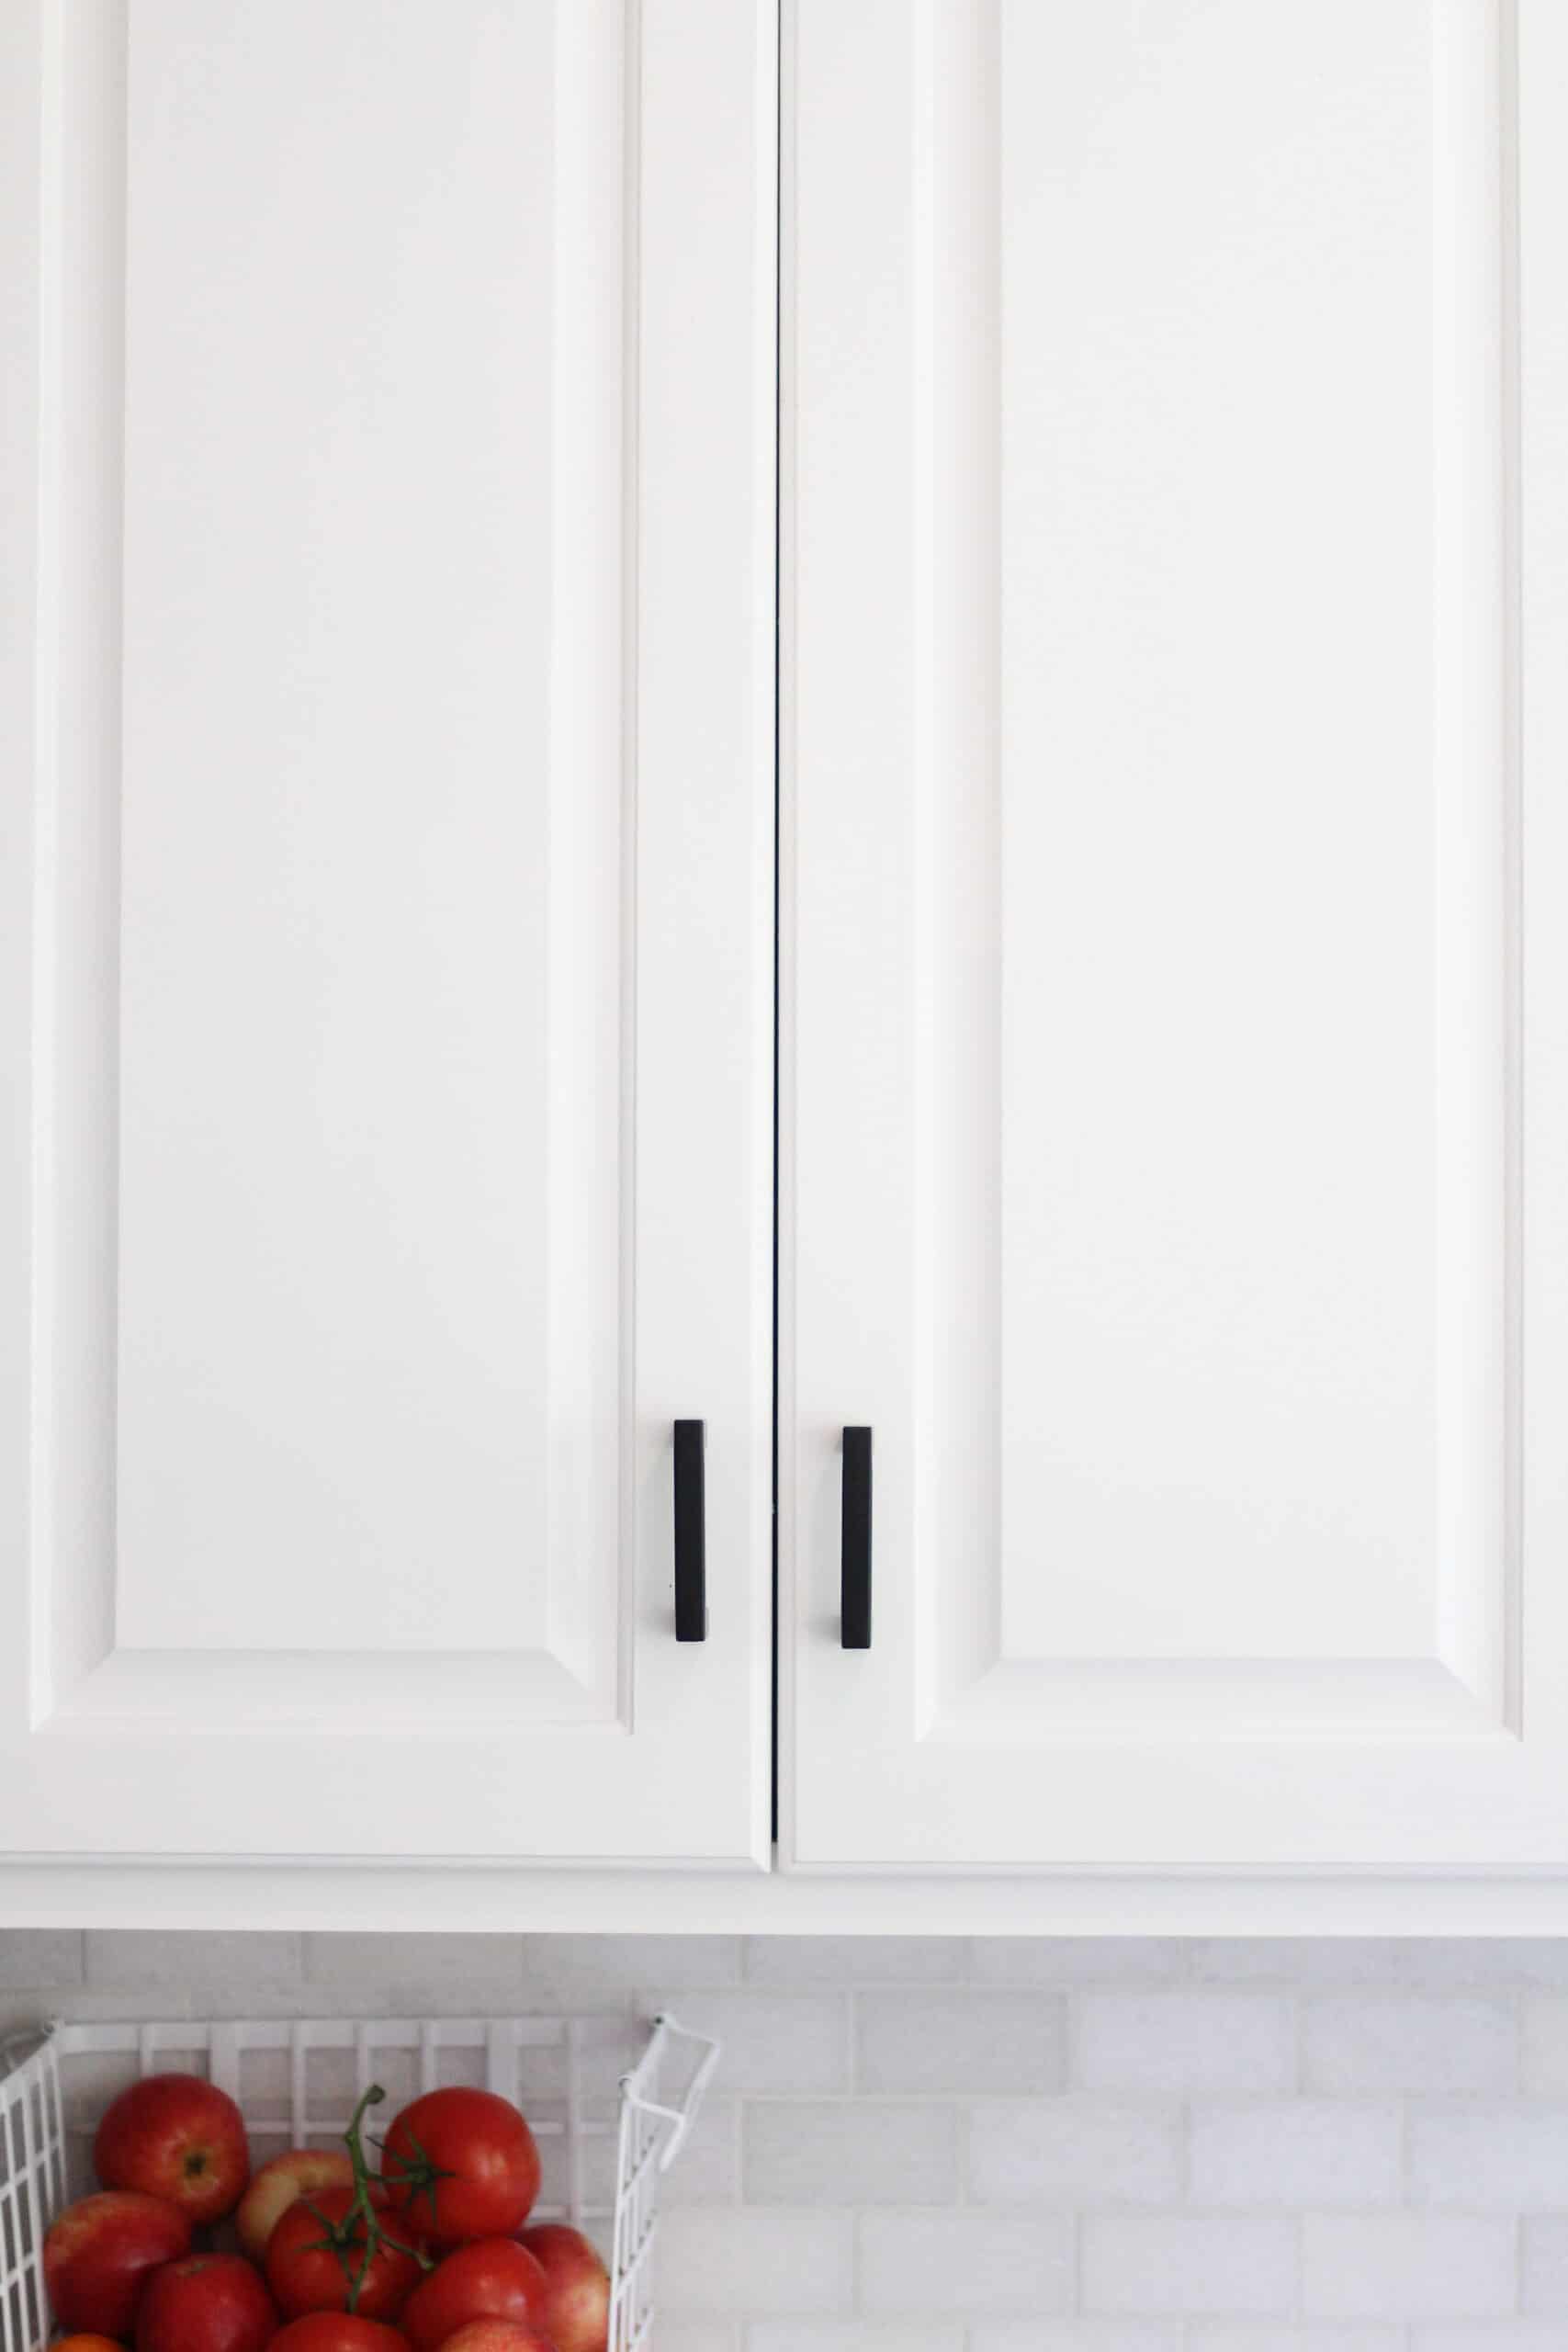
The cabinet hardware we chose was also super affordable and from Amazon!
We also have 2 open shelves coming in the next couple of weeks and I can’t wait to share all the details on those when they come! They will go in the place of the cabinet we removed and hold our glasses.
I have had great luck getting hardware and lighting from Amazon and you can check out this blog post here for more options!
If you have any questions on painting your kitchen cabinets white be sure to DM on Instagram or leave me a comment below. Overall – its been about a week and a half and I grow more in love with them daily. This project was well with the time and effort it took, and I can’t wait to see yours when do do them!
When you’re done painting your kitchen cabinets white you might want to do another DIY – check out the rest of my DIY’s here, or these projects you may love!
Kitchen Rug Ideas | White Kitchen Backsplash| How to install a shiplap wall | Powder Room Update | Hardware and Lighting from Amazon
Pin the Photo Below for Later
This is so amazing!!! Thanks so much for sharing
Were your cabinets solid wood? I would
Love to do this, as mine are too dark, but they are only 2 years old and it’s not in the budget to redo the kitchen. However, they aren’t solid wood, but more a laminate.
Ours are more of a laminate as well – so newer cabinets! You can definitely still tackle it!
This is amazing article. Thanks for sharing.
Love the finished look! So clean and timeless!
I’m curious about your backsplash…did you redo that as well? I love the matte look of the tile.
Thank you so much! We actually didn’t redo that – it’s a really pretty slightly more natural subway tile.