Shop
Products we Love

Best Vacuum For Dorms: 10 College Approved Cleaners

College dorm rooms are often crammed with belongings, including textbooks, clothes, and food. Keeping your dorm room clean can be a hassle, and it’s especially challenging when you don’t have a reliable vacuum cleaner. Having a good vacuum cleaner in your dorm room can make cleaning easier and quicker. As dorm rooms don’t tend to be very spacious, you should look for vacuums that are both compact and efficient. With spring in full swing, now is the perfect time to clean up your college dorm room. The end of the semester is in sight, and you’ll need to pack up and vacuum the entire dorm to avoid paying a fine. The best vacuum for dorms is one that is both compact, yet powerful, and can easily be found among one of these top 10 picks.

This post may contain affiliate links.
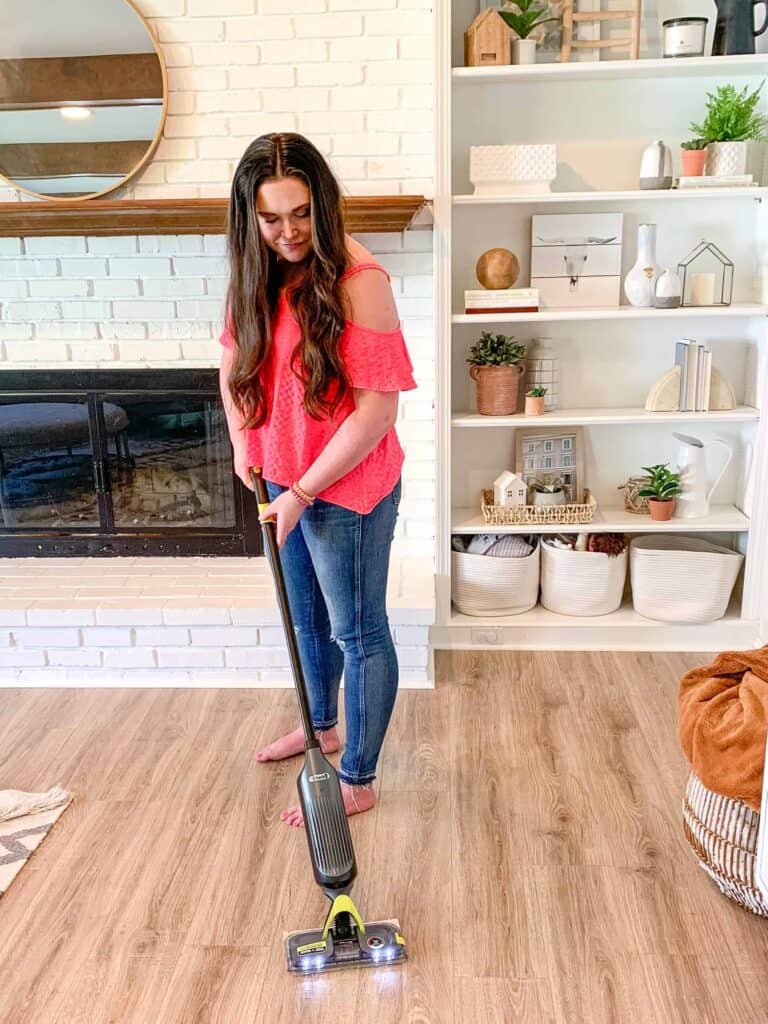
Best Vacuum For Dorms are lightweight, powerful, and easy to store.

Best Vacuum For Dorms: 10 College Approved Cleaners

Let’s dive into how to pick the perfect vacuum for your needs and the best vacuum for dorms. What floor type does your dorm room have? Bare floors and low pile carpets are common in dorm rooms. It’s a good idea to consider the traffic level as busy rooms will require vacuums with strong suction.

If there will be any pets in your room, that’s a good reason to look for a vacuum with additional pet tools. A vacuum with a compact design is a good idea as dorm rooms don’t often have much space for storage. We’ll dive into more things to consider on your hunt for the best dorm vacuum below and several options we think you might like as well.
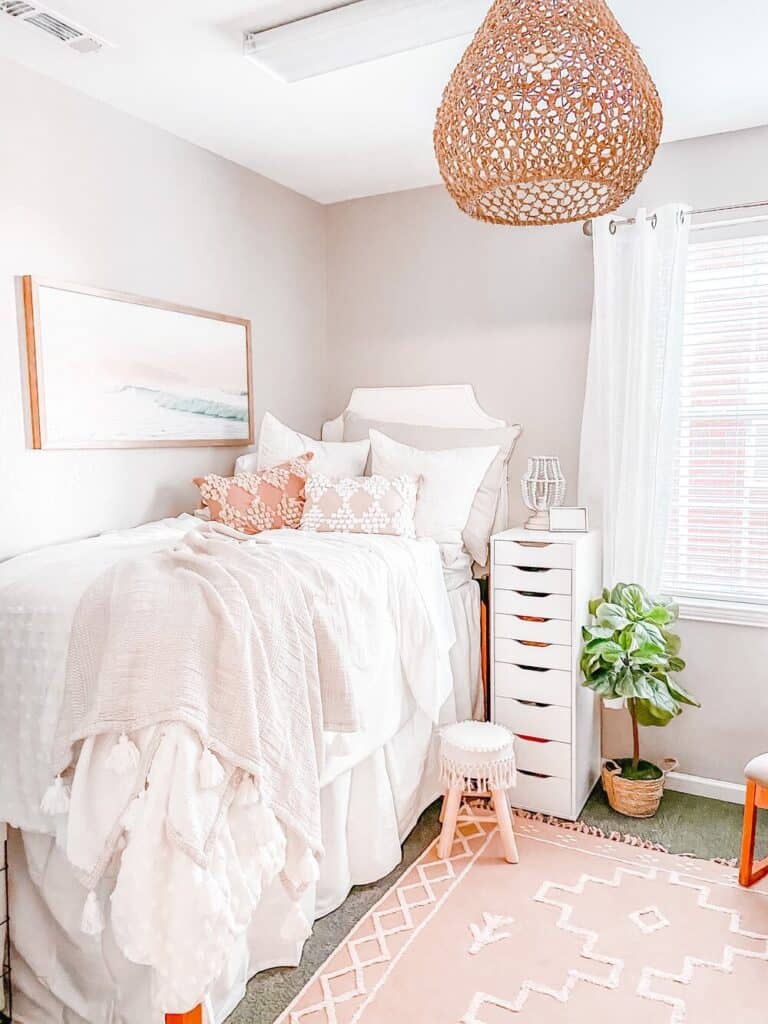
Boho inspired dorm room with neutral tones.
What a gorgeous boho chic college dorm room.

What To Look For In A Vacuum?

When searching for the perfect vacuum cleaner for your dorm room, it’s important to consider a few key factors:

Type of Flooring

When choosing a vacuum for your college dorm room, it is important to consider the type of flooring you have. Different vacuums are designed to work best on different types of flooring, so it is important to find the best vacuum for dorms that will work best with your specific type of flooring. Whether you have carpet, tile, hardwood, or vinyl floors, there is a vacuum out there that can help make cleaning up after yourself in your dorm room much easier.

Traffic Level

Choosing a college dorm room vacuum requires you to take into consideration the traffic level of the dorm room. Depending on the size of your room and how many people are living in it, the best vacuum for dorms may have more suction power needed.
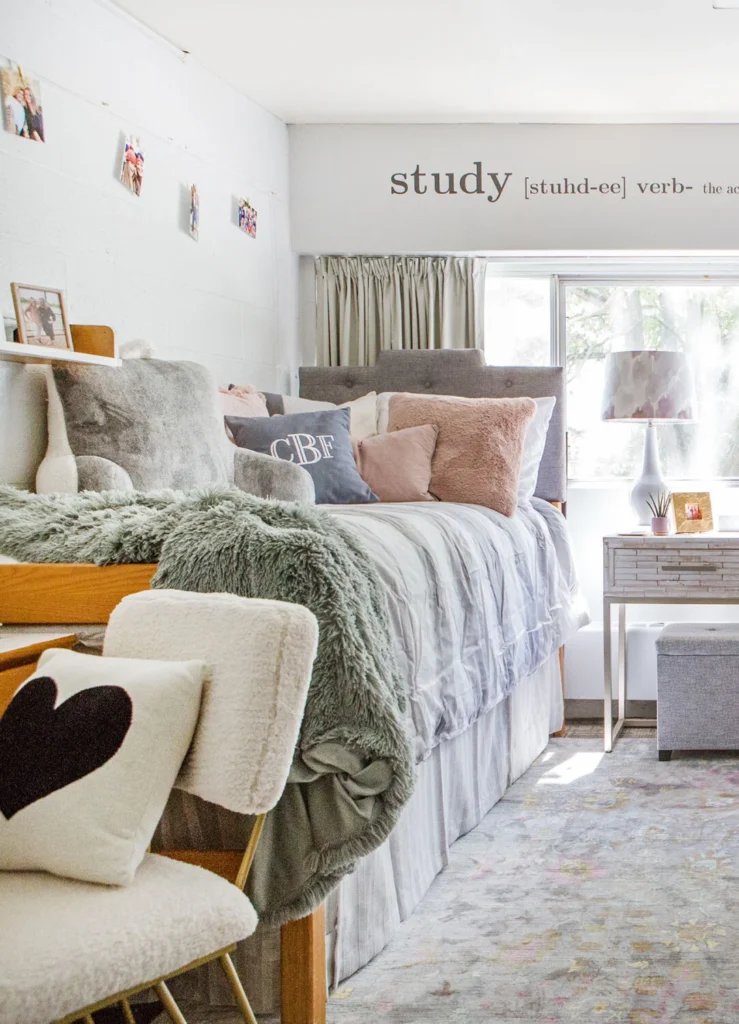
College dorm room with muted colors of grey, pink, and navy.
This is a gorgeous college dorm room that feels like a home away from home.

Type Of Carpet Fibers

If you’re looking for a vacuum to clean your college dorm room, then one of the most important things to consider is the type of carpet fibers in the room. Different types of vacuums are better suited to different types of carpets, so it’s important to know what kind of fibers you’re dealing with before you make a purchase. The right vacuum should be able to easily pick up dirt and debris from any type of carpet fiber and should also be lightweight enough for easy maneuverability.

Performance Of Vacuum Cleaner

When shopping for the best vacuum cleaner, you should look for one that offers powerful suction. This will be crucial in capturing dirt, dust, and pet hair from carpets and hard floors.

Filtration

Filtration is another important factor to consider for the best vacuum for dorms. It’s essential that you find a vacuum that can effectively remove dust and dirt from your living space. A good filtration system will help reduce allergens in the air, making it easier for you to breathe and stay healthy. Additionally, a quality filtration system will help keep your dorm room clean and free of dust mites and other microscopic particles. 
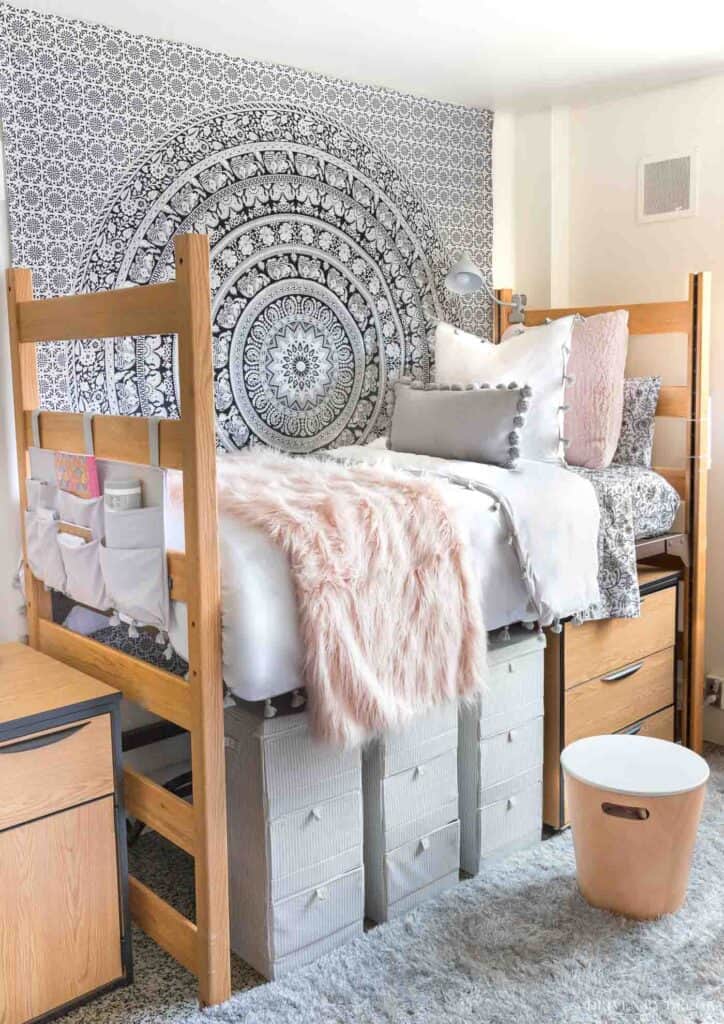
College dorm room with a large medallion wall hanging.
This dorm room utilizes a beautiful wall tapestry to create a focal point.

Size & Storage

Dorm rooms will never be known for having too much storage space. As dorm rooms are often small, bulky vacuums might not fit in your room or be difficult to store. Choose a vacuum cleaner that is lightweight and easy to store, so it doesn’t take up valuable space or become an obstacle in your dorm room.

Durability & Maintenance

Durability and maintenance are two of the most important factors when choosing a new vacuum. The vacuum should be able to withstand regular use and not require too much maintenance. It should also be lightweight and easy to maneuver, so that it can be used in tight spaces like dorm rooms. Additionally, you want to make sure that it has enough power to pick up dirt and debris without any issues. 

Capacity

A good vacuum cleaner should have a large capacity so that it can easily handle the messes that come with living in a small space. While living space may be small, you also don’t want to find yourself emptying a canister every few minutes. Find a vacuum that has a capacity that will fit your needs.
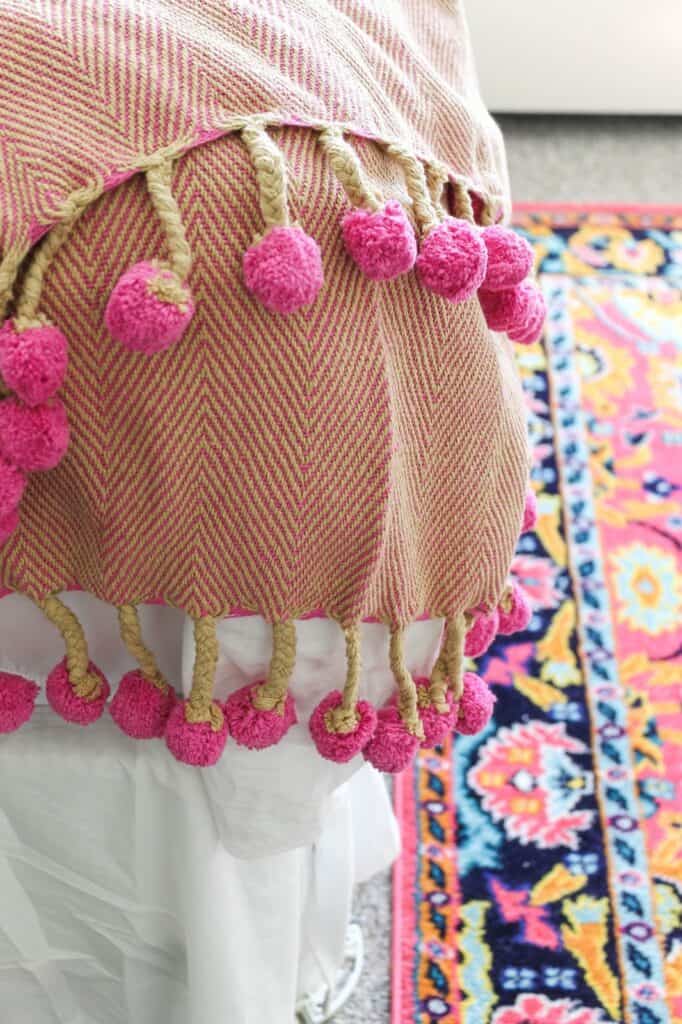
College dorm room with bright colors and bright pink throw blanket.
This dorm room has such fun colors and is complete with a bright rug.

Specialized Attachments & Accessories

Attachments and integrated accessories can make cleaning in tight spaces easy, making sure every nook and cranny of your room is dust-free. Consider looking for a vacuum cleaner with different accessories, such as a crevice tool, dusting brush or air-driven tool for upholstery. If you have any pets, you’ll want to look for a model that offers attachments that cater to pet fur and dander.

Noise Level

Noise level is another important factor to consider. Vacuums can quickly become a source of noise pollution in small spaces like dorm rooms, so it’s important to find one that won’t disrupt your study time or your roommate’s sleep. Fortunately, there are many options available that offer quiet operation and powerful suction, so you can keep your dorm room clean without disturbing anyone.

Cost

Affordability is often a defining factor in any purchase. When shopping for a new vacuum cleaner, it’s important to look at your budget, and consider the benefits of the various vacuum cleaners before selecting the right vacuum cleaner for you.
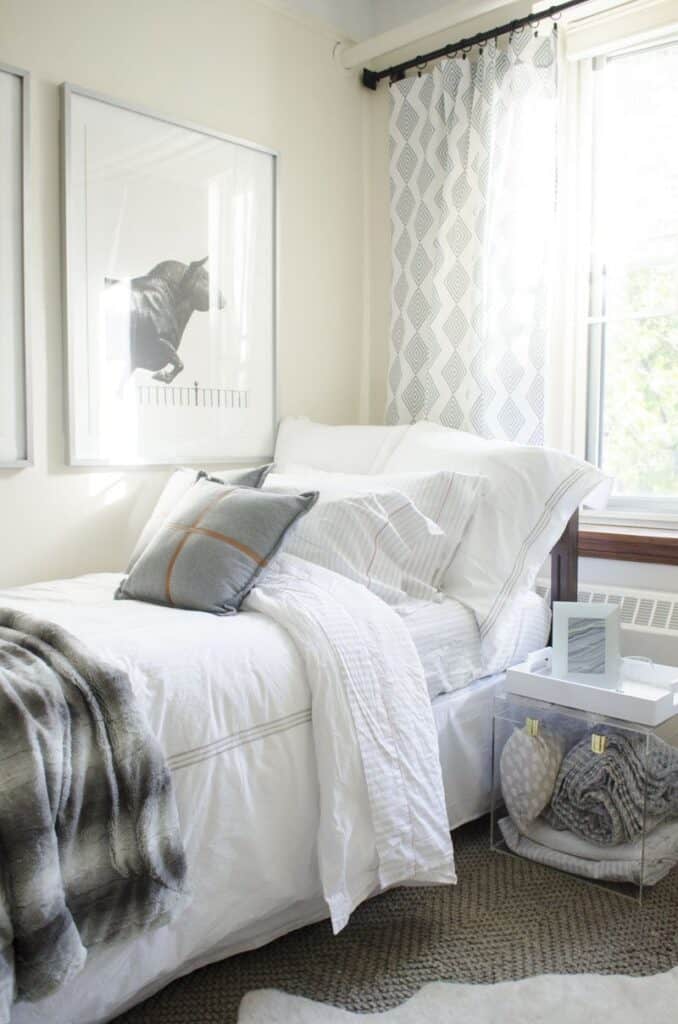
Gender neutral college dorm room with unique storage and bedside table.
This dorm room is a great example of a timeless look.

10 Best Vacuum For Dorms: College Approved Cleaners

Here are some of the best vacuum for dorms that are perfect for any size room. Please note that items may come in and out of stock. Prices may also drop and rise. So, if you have your hearts set on a particular vacuum, make sure you buy it when you see it in stock at a good price!

Shark Rocket Corded Hand Vac – HV292

The Shark Rocket Corded Hand Vac is a small and compact vacuum cleaner that is perfect for cleaning dorm rooms. It is equipped with a powerful motor that ensures efficient suction, making it perfect for picking up pet hair, small particles, and debris. With a dirt cup that is easy to empty and clean, this corded hand vac is an excellent choice for dorm rooms. The Shark Rocket Corded Hand Vac also comes with a crevice tool and a dusting brush, which makes it ideal for cleaning in tight spaces.

Price: $199.99

Bissell Featherweight Stick Lightweight Bagless Vacuum – 2033M

The Bissell Featherweight Stick Lightweight Bagless Vacuum cleaner is another great vacuum cleaner to consider for dorm rooms. Weighing only 2.6 pounds, this featherweight vacuum is easy to maneuver and can be used on both hardwood floors and carpets. Its bagless design makes it simple to empty and clean, and it comes with a crevice tool and a floor nozzle to make cleaning easy in tight spaces. This budget pick also includes a removable handheld vacuum for convenient spot cleaning.

Price: $33.95
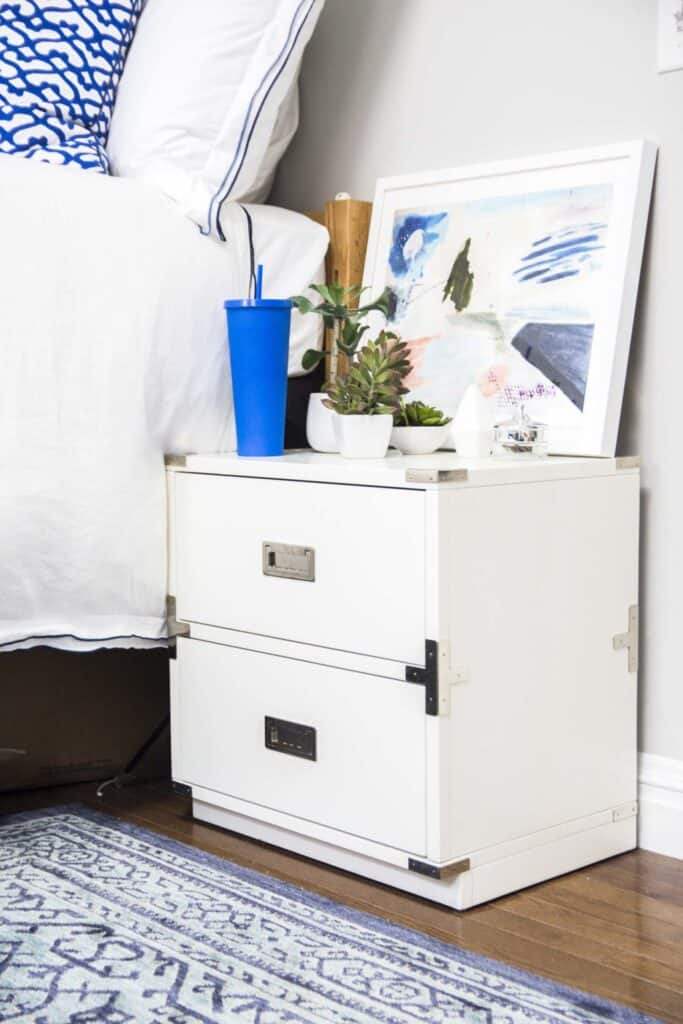
College dorm room with blue and white accent pieces.
Dorm rooms don’t need to be dark and gloomy. This bright dorm looks incredible.

Eureka NEU181A PowerSpeed Bagless Upright Vacuum Cleaner, Pet Turbo

This vacuum cleaner is a powerful tool for cleaning pet hair and smaller debris from carpets and floors in dorm rooms. The Eureka NEU181A has a lightweight design and includes a crevice tool and dusting brush for versatile cleaning options. It’s a great choice for pet owners, as it is specifically designed to pick up pet hair and allergens, and the filter is washable and reusable.

Price: $99

Dirt Devil Vibe 3-in-1 Vacuum Cleaner, Lightweight Corded Bagless Stick Vac with Handheld, SD20020

The Dirt Devil Vibe 3-in-1 Vacuum Cleaner, Lightweight Corded Bagless Stick Vac with Handheld, is another good option for small dorm rooms. It’s a lightweight machine that weighs just under three and a half pounds, and it comes with a crevice tool for added versatility. This affordable vacuum is also great for cleaning stairs and has a corded design for consistent suction power during use. You can detach the hand vacuum for small messes and use it on counters, furniture, and more.

Price: $49

BLACK+DECKER Cordless Stick Vacuum – HSVB420J

The BLACK+DECKER Cordless Stick Vacuum is a perfect choice for college students who want to move around without being plugged in. It’s light and easy to maneuver, making it an excellent choice for cleaning small to medium-sized dorm rooms. It also includes a crevice tool, dusting brush, washable filter, and a low profile nozzle to clean hard-to-reach areas in your dorm room.

Price: $129
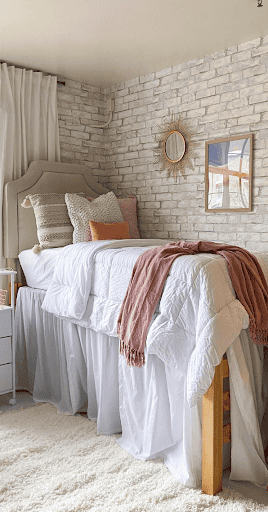
Dorm room with brick wallpaper and white bedding.
Frills_and_Drills creates a dorm room that is pure perfection.

Dyson V15 Detect Cordless Vacuum Cleaner

Dyson vacuums are known for being some of the most powerful vacuums on the market. While the Dyson V15 Detect Cordless Vacuum Cleaner’s price point is more expensive than the previously listed options, it offers cutting-edge technology that makes dorm room cleaning a breeze.

This vacuum cleaner offers the most powerful suction of any cordless vacuum, making it an excellent choice for picking up dirt, dust, and pet hair from carpets and hard floors. Its LCD screen offers real-time information about the machine’s performance, and it includes a crevice tool and combination tool for versatile cleaning options. This vacuum may be the best splurge you make when it comes to cleaning your dorm and it will even transition seamlessly to an apartment or home you get after graduation.

Price: $646
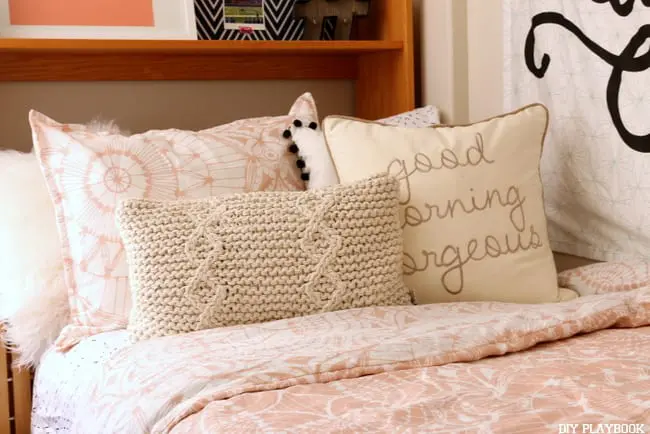
Cozy and girly college dorm room with pink bedding.
Such a sweet and cozy bed for this girly dorm room.

Tineco A10 Essentials Cordless Stick Vacuum Cleaner

The Tineco A10 Essentials Cordless Stick Vacuum Cleaner is the perfect solution for busy households. This cordless vacuum cleaner offers a variety of features that make it easy to use and efficient in cleaning. It has a powerful motor, a dustbin capacity of 0.6 liters, and multiple attachments for different tasks. Its lightweight design makes it easy to maneuver around furniture and other obstacles while its detachable battery allows you to use it anywhere without having to worry about a power cord getting tangled up. With its long-lasting battery life, adjustable suction power, and LED headlights that help you see under furniture and in dark corners, the Tineco A10 Essentials Cordless Stick Vacuum Cleaner is a great option for any dorm. It also has a wall-mounted dock for easy storage.

Price: $159

Shark NV360 Navigator Lift-Away Deluxe Upright Vacuum

The Shark NV360 Navigator Lift-Away Deluxe Upright Vacuum is a powerful and versatile vacuum cleaner that makes cleaning your home easier. With its multiple features, it can effectively tackle all kinds of messes, from pet hair to dirt and dust. It comes with a lift-away feature which allows you to easily maneuver the vacuum around furniture and tight spaces.

It also has HEPA filtration for superior air filtration and an anti-allergen complete seal technology to trap dust and allergens inside the vacuum cleaner. Its swivel steering provides excellent control while its brush roll shutoff allows you to switch between carpets and hard surfaces with ease. The Shark NV360 Navigator Lift-Away Deluxe Upright Vacuum is the perfect choice for those who want an efficient, powerful, and versatile cleaning solution for their space.

Price: $159.99
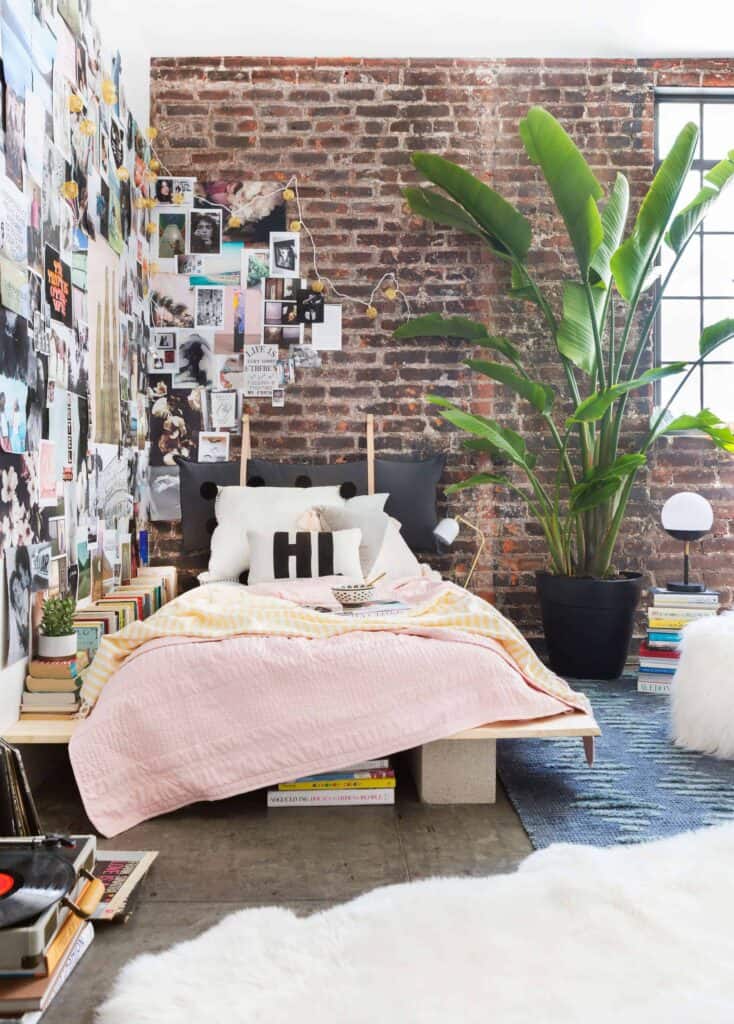
College dorm room with an urban chic style of brick walls, large green plant, and photos on the walls.
Emily Henderson styled this faux dorm room to give the perfect amount of edge and style.

Hoover Linx Cordless Stick Vacuum Cleaner – BH50010

The Hoover Linx Cordless Stick Vacuum Cleaner – BH50010 is a powerful and easy-to-use cleaning device that is perfect for everyday use. It offers great features such as its cordless design, multi-floor cleaning capabilities, and WindTunnel technology.

At the time of publication, the BH50010 model is being replaced by the BH53801V model. The newer model has 50% more suction power. It still offers a cordless design, multi-floor cleaning capabilities, and has a tangle guard to avoid hair knots. Both models are great options and offer powerful cleaning capabilities.

Price: $279

iRobot Roomba 694 Robot Vacuum

Amazon’s No. 1 best seller in robotic vacuums is a powerful cleaning machine that can help make your life easier. It has a range of features that make it an ideal choice for those who want to enjoy a worry-free, hands-free cleaning experience. With an advanced 3-Stage Cleaning System it can deep clean carpets and hard floors. It also comes with dual multi-surface brushes that can pick up pet hair and debris from hard floors and carpets. 

The iRobot Roomba 694 Robot Vacuum has sensors to detect dirt, debris, and other obstacles in its path. Additionally, it is equipped with Wi-Fi connectivity so you can control it remotely from your smartphone or tablet. With the iRobot Roomba 694 Robot Vacuum, you can enjoy hassle-free cleaning without any effort on your part! If you want to spend more time studying and less time cleaning this is the best vacuum for dorms!

Price: $249
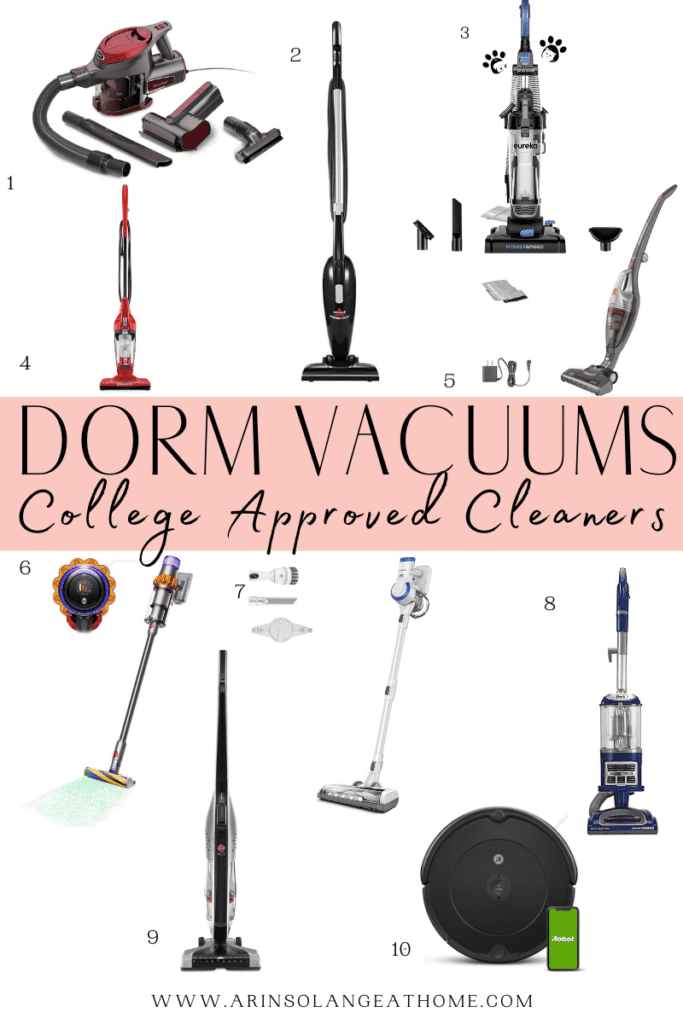
Best Vacuum For Dorms Shop Round Up

1 | 2 | 3 | 4 | 5 | 6 | 7 | 8 | 9 | 10

  1. Shark Rocket Corded Hand Vac – HV292
  2. Bissell Featherweight Stick Lightweight Bagless Vacuum – 2033M
  3. Eureka NEU181A PowerSpeed Bagless Upright Vacuum Cleaner, Pet Turbo
  4. Dirt Devil Vibe 3-in-1 Vacuum Cleaner, Lightweight Corded Bagless Stick Vac with Handheld, SD20020
  5. BLACK+DECKER Cordless Stick Vacuum – HSVB420J
  6. Dyson V15 Detect Cordless Vacuum Cleaner
  7. Tineco A10 Essentials Cordless Stick Vacuum Cleaner
  8. Shark NV360 Navigator Lift-Away Deluxe Upright Vacuum
  9. Hoover Linx Cordless Stick Vacuum Cleaner – BH53801V
  10. iRobot Roomba 694 Robot Vacuum

Other Posts You’ll Love

Best Steam Mop For Tile Floors | Best Gifts For College Girls | Top Gifts For College Guys

Follow Social For The Latest & Greatest

Pin This Photo Below For Later

Keeping your dorm room clean is an essential part of living in a college or university campus. Vacuums play a crucial role in ensuring your dorm room stays sanitary and well-organized. Choosing the best vacuum for dorms is a matter of striking a balance between performance, versatility, and size. Consider any of the above options that meet your preference when it comes to size, suction power, attachments, and price. Be sure to pin the photo below for later, and if you don’t already – follow me on Instagram (@arinsolange) and Tik Tok (@arinsolange) for more fun!

Best Vacuum For Dorms Shop Round Up
Organization

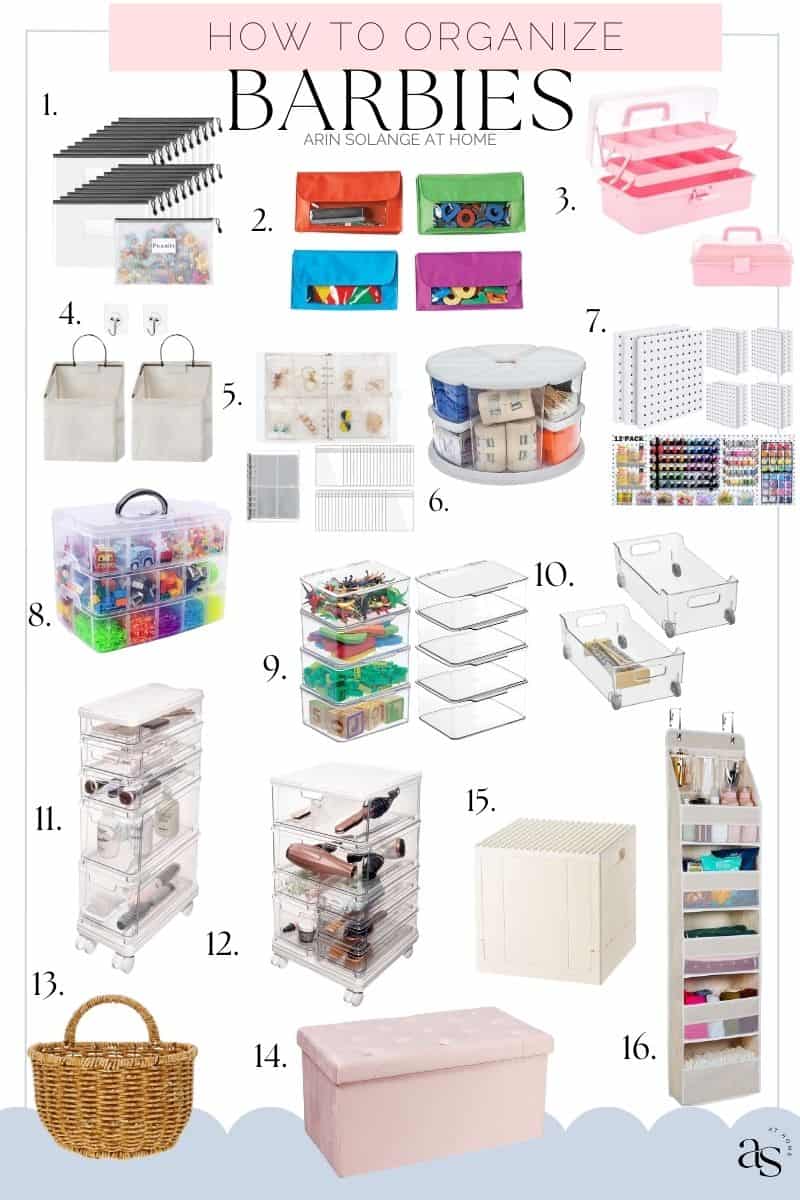
How To Organize Barbies: Easy Storage Ideas For Kids

Shop the Post
20 Pack Mesh Zipper Pouch Document Bag
Magnetic Storage Pockets
Dividing Storage Box
Adhesive Storage Hanging Bags
Clear Storage Book
Rotating Organizational Caddy
12 pk Pegboard
3 Tier Stackable Storage Container
Stackable Hinged Storage Containers 
Plastic Storage Bin On Wheels
5-Drawer Stacking Cart
7-drawer Stacking Cart
Rattan Hanging Basket
Pink Storage Ottoman
Duplo Bricks Foldable Bin
6 Shelf Over the Door Organizer

Barbie dolls have been a beloved toy for generations of children. These iconic dolls are a staple of many childhoods and continue to be a popular toy today. However, with their popularity comes the challenge of organizing and storing them. With so many different outfits, accessories, and dolls, it can be difficult to keep everything in order. In this blog post, we will explore some great ideas to help declutter and organize your Barbies in the best way for your home.

This post may contain affiliate links and was updated in May of 2024.

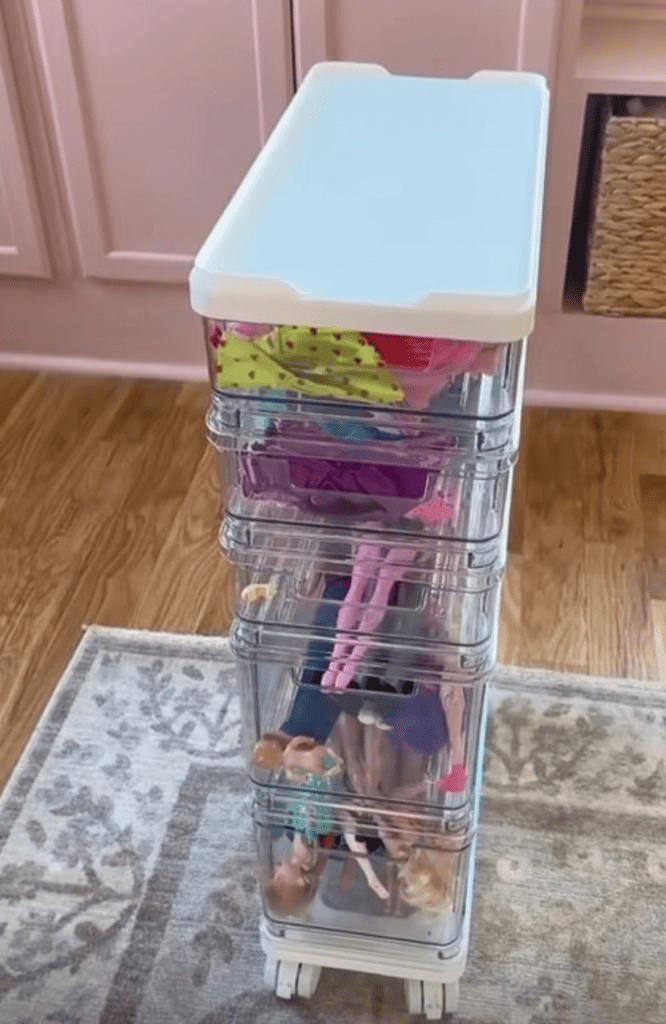
Barbies can be organized easily in a rolling cart.

How To Organize Barbies: Easy Storage Ideas For Kids

If your daughter’s room is filled with lots of Barbie stuff, then we’re in this particular situation together. I want to help you organize like The Home Edit team gurus Clea Shearer and Joanna Teplin. With some paring down of Barbie items you already have and some organizational systems, your kids’ favorite dolls will be easier and more enjoyable to play with than ever before.

Both of my daughters love Barbies. I recently purged a bunch of toys, but the Barbies got to stay. When putting all the kids’ toys back, I wanted to find a solution for them that the girls would be able to keep organized. Ave is older, but Goldie is only three so she needs some simple solutions. I thought of a few options and you can do whatever works best for you.

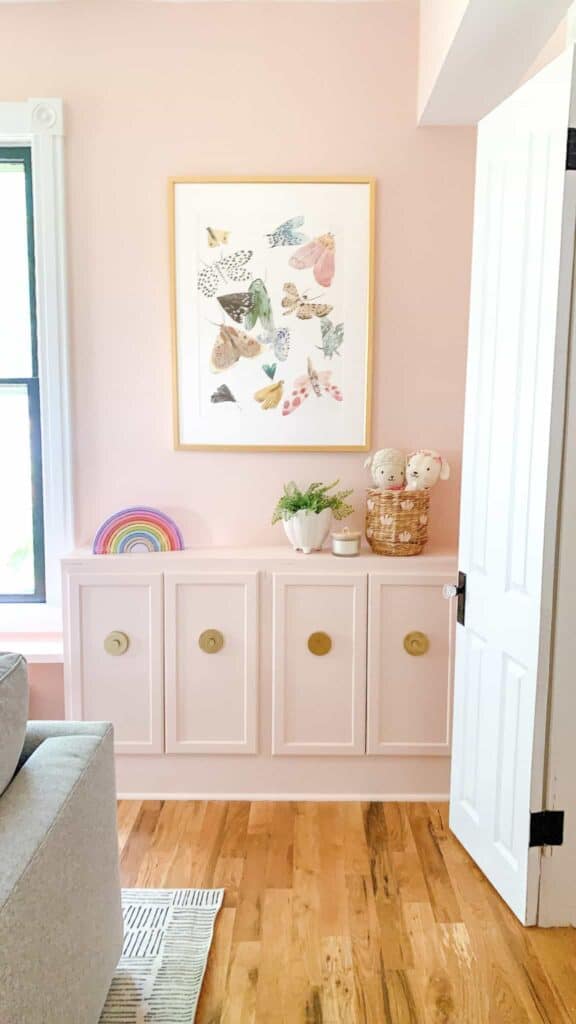
Pink playroom with butterfly poster.

Take Time To Plan How To Organize Your Barbies

 For Goldie, I knew sorting by roygbiv rainbow colors would work well for her, so that is what we did with the iconic doll’s belongings. We have a set of zipper bags with different color zippers on each one, so for example, pink tops, bottoms, and shoes go in the bag with the pink zipper.

Barbies come with so many accessories and they’re all little pieces that can easily be misplaced so I’ll walk you through some more clever Barbie ideas and show you some products that will help your kids keep track of them.

It’s also important to keep your Barbies and their accessories organized within the storage solution. You can use dividers, labels, or color-coding to separate different types of Barbies or accessories. This will make it easier to find what you’re looking for and prevent items from getting lost or misplaced.

Pink playroom with pink cabinets, wicker chairs, and butterfly poster.

In addition to storage solutions, there are also some decluttering tips that can help you keep your Barbie collection under control. One good idea is to periodically go through your collection and remove any Barbies or accessories that are no longer being used or are in poor condition. You can donate these items or sell them to make room for more valuable or meaningful Barbies.

Another simple tip is to limit the number of Barbies and accessories you purchase. It can be tempting to buy every new Barbie that comes out, but this can quickly lead to a cluttered collection. Instead, focus on buying Barbies and accessories that hold personal meaning or value to you or your child.

Overall, organizing and decluttering your Barbie collection can be a fun and rewarding task. With the right storage solutions and decluttering tips, you can keep your Barbies and their accessories organized and easily accessible.

Butterfly poster in pink playroom with pink cabinets

Prepare By Decluttering Your Barbies

First thing’s first. Step one to Barbie organization is to declutter first. Toss anything that is broken or damaged. If it has missing pieces or your kids just won’t play with certain items, now is the time to purge them. To take a lesson from one of the greats, Marie Kondo, if it doesn’t spark joy, let it go.

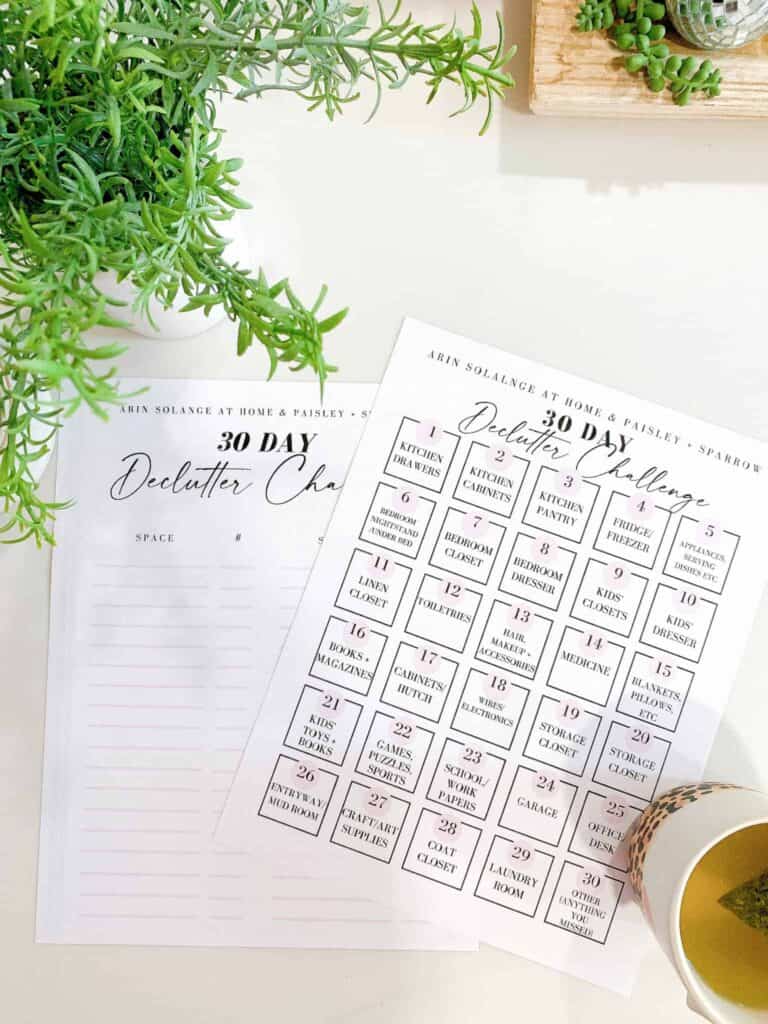
Decluttering is a practice that we utilize in our home quite frequently. Anytime I’m reorganizing an area of my home, I always start by decluttering. Every season change also requires decluttering. I offer some great advice on how to declutter in my 30 Day Declutter Challenge that I put on at the beginning of each year. Check out my tips in my 30 Day Declutter Challenge post!

Take Inventory Of Your Barbie Stash

The next thing to do is to take inventory of your current Barbie stash. This will help you determine how much storage space you’ll need. While taking inventory, group like items together into broad categories. This will make the process easier moving forward. You can get rid of some items if you have an excess amount or just keep them all together for transitioning them to storage areas.

This will also help you narrow down the perfect storage solution. If you have a small stash that doesn’t take up much room, you can find something that is compact but still allows your stash to grow. Those with a large stash will need to be intentional on what storage system you use to maximize your space.

30 Day Declutter Challenge paper with greenery.

Practical Solutions To Organize Your Barbies

When choosing a storage solution for your Barbies, it’s important to consider the size of your collection, the amount of space you have available, and your personal preferences. Think about what type of storage solution will work best for you and your needs. Here are a few of my favorite solutions to help

1. Zipper Bags

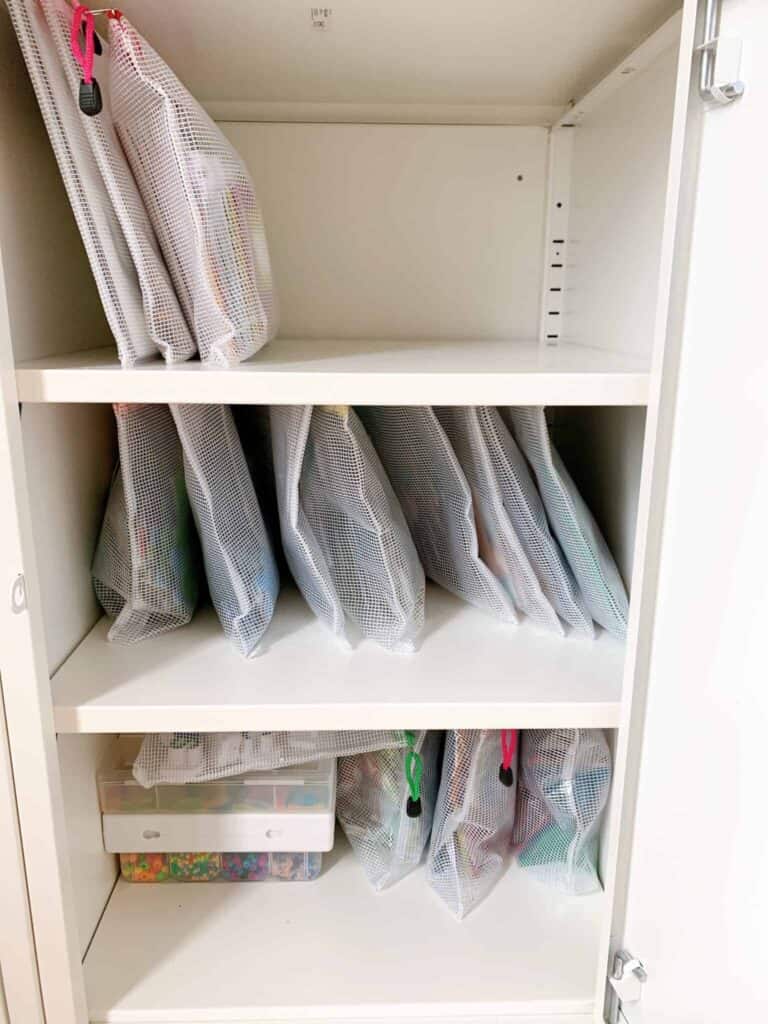
These zipper bags are great for organizing small items, like Barbie accessories. They come in black zippers only or a variety of colors. The bags are clear so your kids can quickly see what’s inside, but they also have labels so you can separate them by tops, bottoms, Barbie shoes, etc. You can put different items in the different color pouches. They can travel from kids’ bedrooms to the living room play area and back again, stored out of plain sight.

2.  Magnetic Storage Pockets

Another unique way to store Barbies is to use magnetic storage pockets. These organizers are typically made of fabric and have pockets that are perfect for storing Barbies and their accessories. You can hang the organizer on anything magnetic, like a white board, to save space. The pockets can be labeled with the type of Barbie or accessory stored in them to make it easy to find what you’re looking for. This is a great option for those who have limited space or want a portable storage solution.

3. Stack &  Carry Organizer

This storage box is a great one to organize Barbies. The clear plastic top makes it easy to see what’s inside. You can also customize the removeable dividers to fit you and your Barbies’ needs 🙂 This would be great to organize different types of Barbies accessories. Label each section with what goes where to make it easy to put them away and stay organized.  I love that this opens a full 180 degrees for easy access and you won’t have to worry about it toppling backwards. This is a great option for those who want an affordable, portable, and easy-to-find storage solution.

Barbie Clothes can be organized as seen in this ziplock organizer bag.

4. Hanging Organizer

A hanging organizer is another great storage solution for Barbies. These organizers typically have multiple compartments, great for storing different sizes of items, and can be hung on a closet rod or a hook. You can use the compartments to store items like different types of Barbies, action figures, or accessories. This is a great option for those who want a portable storage solution or have limited space.

5. Earring Organizer

Much like the hanging organizer, this earring organizer has multiple compartments and is great for storing accessories. This type of storage unit is also portable, easy to grab and go, and good for those who need a tidy and compact storage solution. Clear storage makes it easy to see what pieces you want and where they are.

6. Rotating Carousel

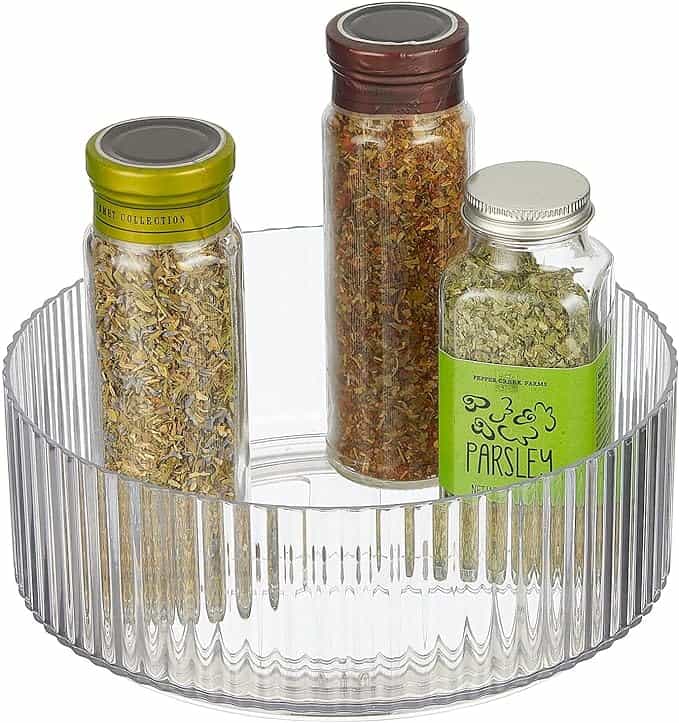
This craft organizer is a versatile storage solution for Barbies, not just craft supplies. You can use this modular storage system to store Barbie accessories and move it around as needed. You can also use the different compartments on the cart to separate different types of Barbies or accessories. Label each compartment with what’s inside to make it easy to find what you’re looking for.

Ziplock organizer bags can be easily stored in cabinets.

7. Pegboard

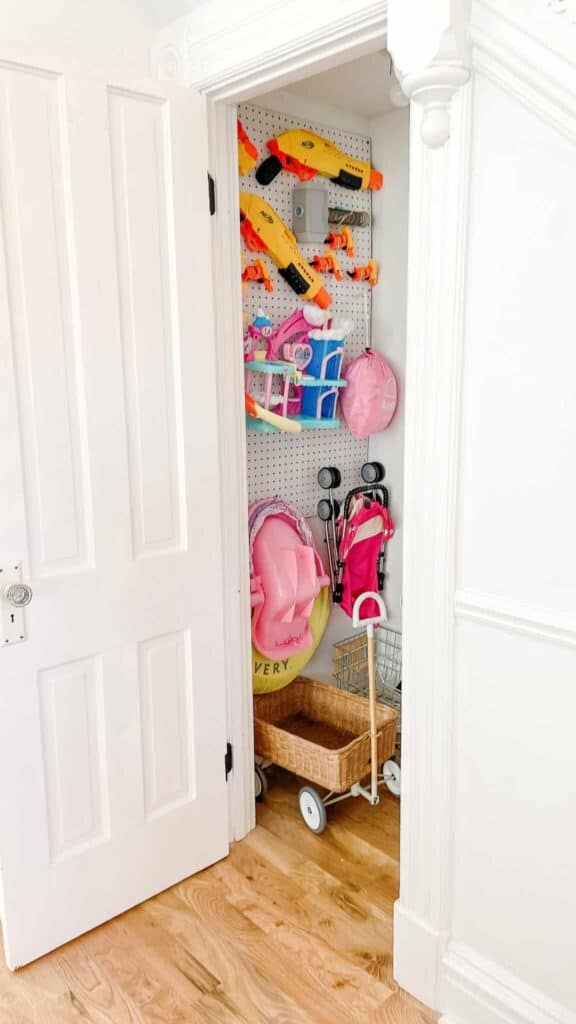
A pegboard is a unique storage solution for Barbies. You can hang the pegboard on a wall and use hooks to store Barbies and their accessories. You can arrange the hooks in any way that you like to create a custom Barbie play station. You can also use the pegboard to display your favorite Barbies and outfits. Label each hook or section of the pegboard with what’s stored there to make it easy to find what you’re looking for. This is a great option for those who want a unique and customizable storage solution.

8. Stackable Storage Container

If you have quite a few Barbie accessories, the key to keeping them all intact is organization. I love this stackable container because there are many compartments. You can customize the size of each compartment for your needs with the removable dividers.

9. Stackable Hinged Storage Containers 

By now you should all know that I love clear organizers. If you need to easily find something for your child, clear organizers are a must have. I hate having to search multiple bins to find something. These stackable hinged containers are perfect for storing Barbies and you’ll be able to easily find what you need in a cinch.

A peg board is a great option to store toys like these strollers, nerf guns, and doll accessories.

10. Plastic Storage Bin On Wheels

If you want a larger open bin to store your little girl’s large collection, these bins are great. You can roll them away in a closet or park them under a console table. If you have a huge collection, the roll out action makes it easy for littles to help themselves to their stash.

11. 5 Drawer Rolling  Cart

I’m a big fan of rolling toys out in the open during playtime.  But then I’m ready for them to be rolled away at the end. This 5 drawer cart allows us to do that. We have this cart for just one collection of ours. It fits nicely in our closet without taking up too much space. If you want to see our rolling cart in action, check out how we organize our Barbies using this cart.

12. 7 Drawer Rolling  Cart

Of course our collection won’t be contained to just one rolling cart. We also have this 7 drawer rolling cart. Both girls can easily roll it out of the closet for play and can roll it back in at the end. It is clear so you can easily see what Barbies are stored and can easily access whatever you need.

Barbies stored in a rolling cart.

13. Hanging Rattan Basket

If you want to have some organizers that are a bit more stylish, this basket is perfect. We have these baskets hanging in our mudroom. For us, we use them to collect smaller items the kids may need or leave behind at the end of the day. Barbies would work great in these baskets if you wanted to display them in your little girl’s room.

14. Storage Ottoman

If you need to both contain a massive collection and add seating this ottoman is great. As a bonus, you’ll also have a space where Barbie play can happen as well. This ottoman can hold a lot of items, so you may want to invest in some smaller bins, zipper bags, or organizers to keep it tidy. Or, you can just chuck all your Barbies in and hope you find her little red shoe eventually. Whatever you decide, I love the ottoman as a dual purpose piece. Seating, storage, and play table are 3 products in one.

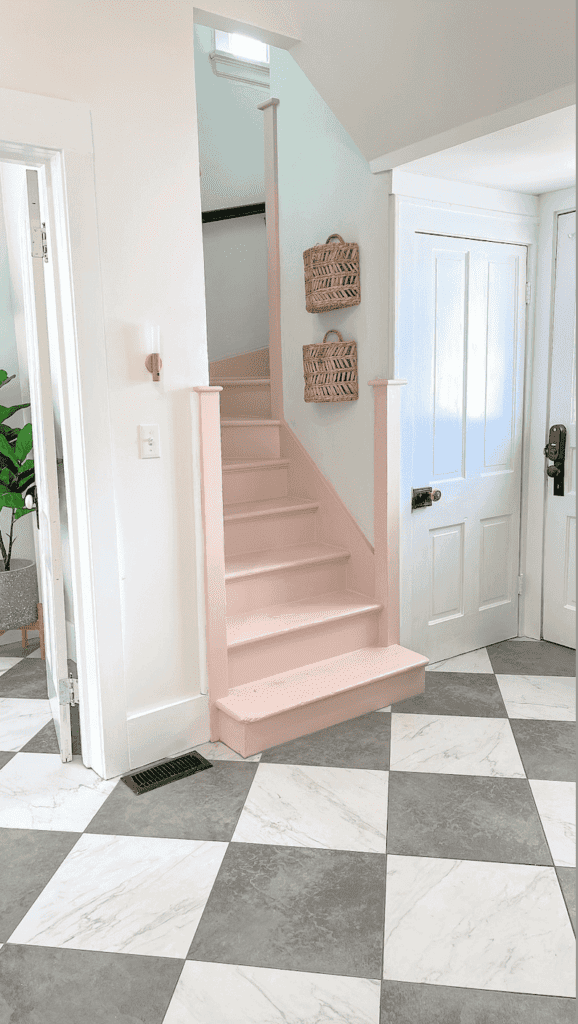
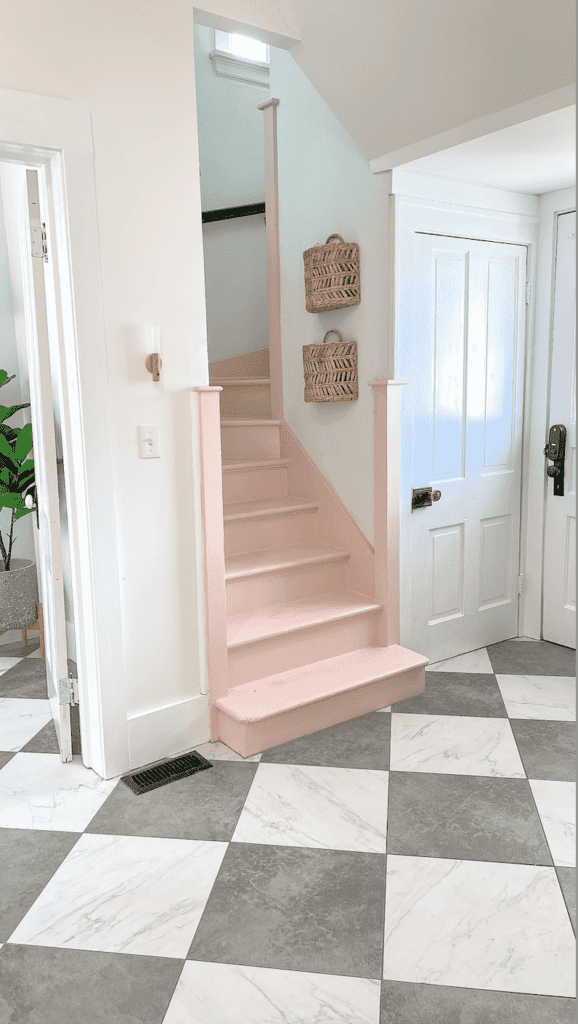
Hanging wicker baskets on wall of pink steps.

15. Duplo Bricks Foldable Bin

While these are more for Duplo bricks, you can still use this as a Barbie organizer. You’ll have fold up bins that can easily stack or break down when not in use. Again, you can have a table that can be used for playtime as well as extra storage. If you are using a shared space, this would work well for both Barbies on one side and Duplos on the other. You can get as many bins as you’d like and still have space for both toys.

16. 6 Shelf Over The Door Organizer

If you are limited on space, using your vertical space is the best option. I love using over the door organizers to hold toys and smaller items in our closets. Because we live in a historic home, closet space is hard to come by. So, we have to get creative. This over the door organizer is a great option for smaller spaces.

How To Organize Barbies: Easy Storage Ideas For Kids

How To Organize Barbies Pinned Round Up Shop My Look

1 | 2 | 3 | 4 | 5 | 6 | 7 | 8 | 9 | 10 | 11 | 12 | 13 | 14 | 15 | 16

  1. Zipper Bags – I love how versatile these bags are. You can easily see what’s inside and this 20 pack also comes with labels.
  2.  Magnetic Storage Pockets – The magnets make these such a great space saving option.
  3. Dividing Storage Box – This reminds me of the caboodles we had growing up!  I love the customizable dividers to fit everyone’s needs.
  4. Hanging Organizer – Hang these inside of a closet or on the wall up off of the floor.  
  5. Earring Organizer – All of the compartments inside are great for tiny accessories.  This is perfect for travel or on the go.
  6. Rotating Carousel – I absolutely love all of the different containers in this and that they are lidded!
  7. Pegboard – I love that you can use this pegboard not only to store your barbies, but also to display favorites and their outfits.
  8. Stackable Storage Container – The removeable dividers make this so easy to customize.  
  9. Stackable Hinged Storage Containers – The hinged lids mean no more losing them!
  10. Plastic Storage Bin On Wheels – The wheels makes this bin easy for little ones to use.  Roll them away in a closet or under a bed.
  11. 5 Drawer Rolling  Cart – Roll this out for playtime and right back away when all done.
  12. 7 Drawer Rolling  Cart –  This option gives you more drawers if the Barbie collection has grown.
  13. Hanging Rattan Basket – These baskets also serve as a pretty decor piece when left hanging on the wall.
  14. Storage Ottoman – There’s nothing I love more than a piece of furniture that is both functional and beautiful!
  15. Duplo Bricks Foldable Bin – I love that this bin can later be repurposed for younger siblings or folded down when not in use.
  16. 6 Shelf Over The Door Organizer – When space is hard to come by, this works wonders!
Monthly Best Sellers

Amazon Best Sellers List- April 2023

 I am so happy to bring you my monthly best sellers list so that you can easily see all the items in one place. All the items in this round up are from Amazon and can be found in my Amazon storefront. And if you find yourself wondering how to use any of these items in unique ways, make sure you head over to my Tik Tok where I am able to share more detailed reviews of items in video format.

This post contains affiliate links.

Family of 6 smiling in a house with a dog.

Amazon Best Sellers List- April 2023

Do you feel that? With sunshine in the forecast, temperatures warming up, and winter officially over, I am SO excited! I absolutely hate the winter months and thrive off of warmer weather. I am so ready to be outside in the sunshine and to enjoy all of the fun activities that come with Spring!

Life Updates For April

I’ve decided to do things a bit different for our monthly best sellers. I love being able to share all of my Amazon finds that help make our lives function efficiently but are also fun! Hopefully, you are able to find a mix of fun and function in this list too.

I didn’t want to just give you the monthly best sellers though! I thought this would be a great place to also give you a quick little recap of what our family has been up to for the past month.

2 smaller kids smiling as they balance on a couch.

Projects Galore

Projects. ALL THE PROJECTS.

We have been in full renovation and project mode over in our house the past month. If you have been looking for inspiration for a mudroom, kitchen island, or bathrooms, you’ll find plenty of that here.

Fortunately, we are wrapping up all of the renovations and I’m finally going to have our house back.

We did a mix of DIY projects with some projects that we ended up hiring out. I will say that laying tile and in general plumbing is not something that Sam and I love to DIY. Since we planned on redoing three of our bathrooms we knew this would be hired out.

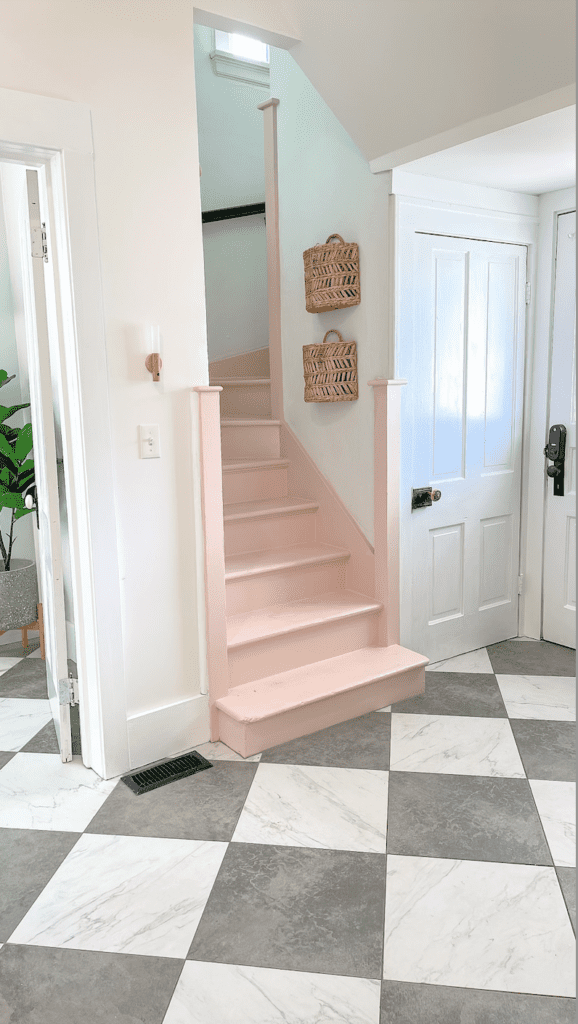
Pink staircase leading upstairs with grey and white marbled tile is seen in a mudroom.

We have finished bathroom renovation 1 out of 3. All of the bathroom renovations needed a complete redo. We had to do tile, plumbing, lighting, and of course decor and organization. Of the three bathroom renovations, I’d say all of them are smaller in terms of size. Because of their size, I had to be extremely intentional with the layout and products to ensure it functions efficiently for everyone.

The first bathroom is complete and I love it! This bathroom is off our playroom and will also serve as a guest bathroom for any overnight guests we may have. If you want to see it in all of its glory, check it out here with some of my favorite organization finds for this small space.

Our other 2 bathrooms are still in the process of being completed. I will say that we are so close to being done in both our boys’ bathroom and girls’ bathroom. Tile has been laid out, plumbing is getting completed, and I’ll start on the decor and organizing soon. Hopefully, I can share that reveal with all of you soon!

Mom and daughter at a soccer game.

DIY Projects

While the bathrooms were hired out, I also ended up replacing our mudroom floor tiles. Since we were replacing the tiles, this was the perfect opportunity to give the entire room a facelift. I knew I wanted to put lockers in the mudroom for each family member to have a space for their belongings. Once the tiles were in, Sam and I got started on creating our dream mudroom. Make sure you check out this post if you are looking for mudroom tile inspiration .

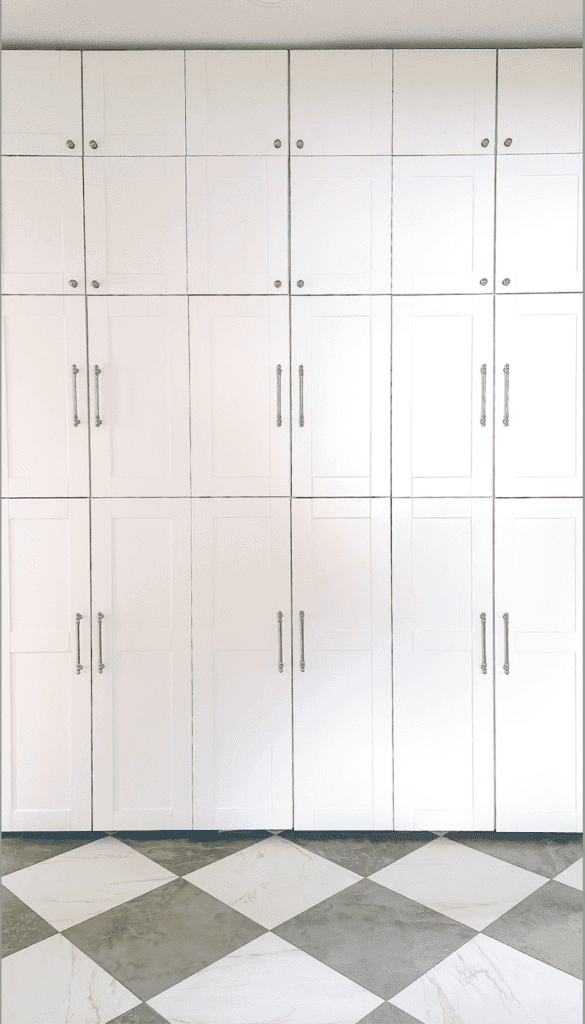
We used Klearvue cabinetry, exclusively available at Menards, to create a wall to ceiling size locker system. This has been one of the best DIYs we have ever done in our home. I love that we each have a space to store all our belongings and it is easily accessible as we are on our way out the door.

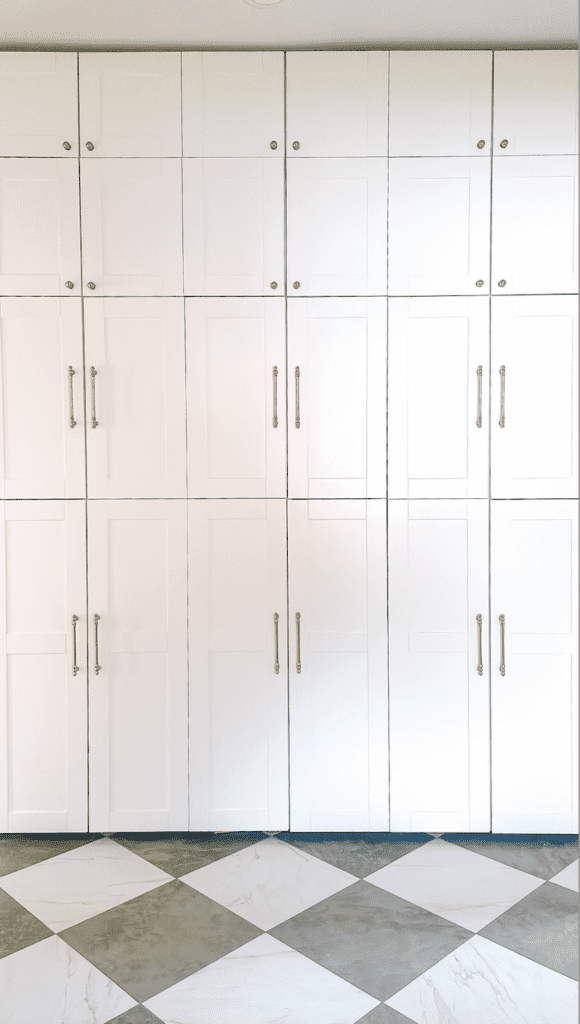
Mudroom lockers from floor to ceiling.

Of course I didn’t stop at just mudroom lockers for our mudroom. I went back and forth with whether I should include a designated seating area for our kids. In the end, I decided against this. Our mudroom is right off our back door. We have a backstair case where all the kids sit to put their shoes on and to get ready in the morning. So instead of fixing something that isn’t broke, I decide to create something.

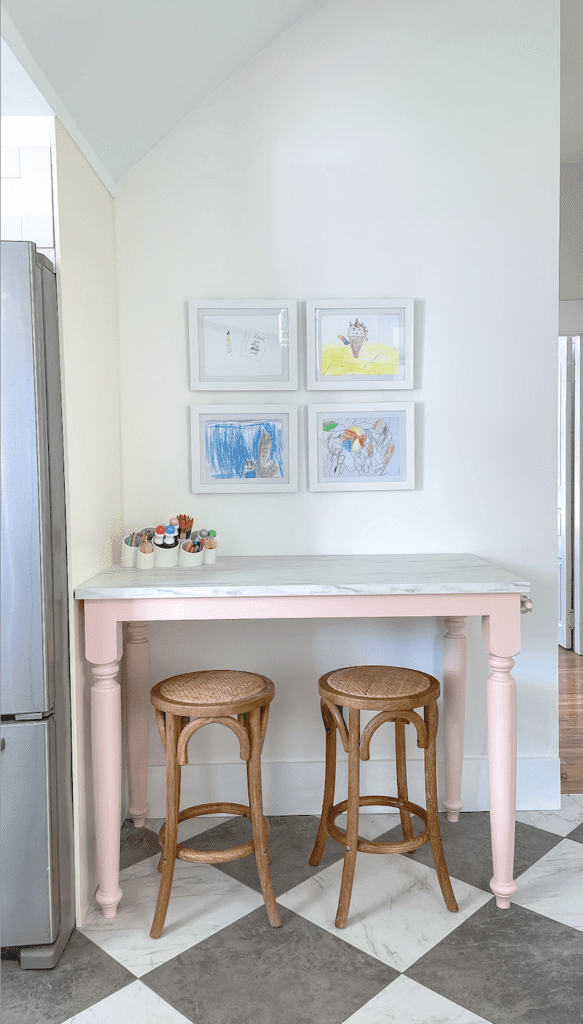
One of my goals for the mudroom was to also have a space where my kids could create without having to clean it up right away. With our DIY art easel table, I was able to give my kids an area where they could make artwork or build Legos without using my kitchen counter. Walker has loved creating Lego builds here each morning. As a bonus, I got my countertops back. I’ll share that DIY with all of you soon. Until then, you can check out all things mudroom here.

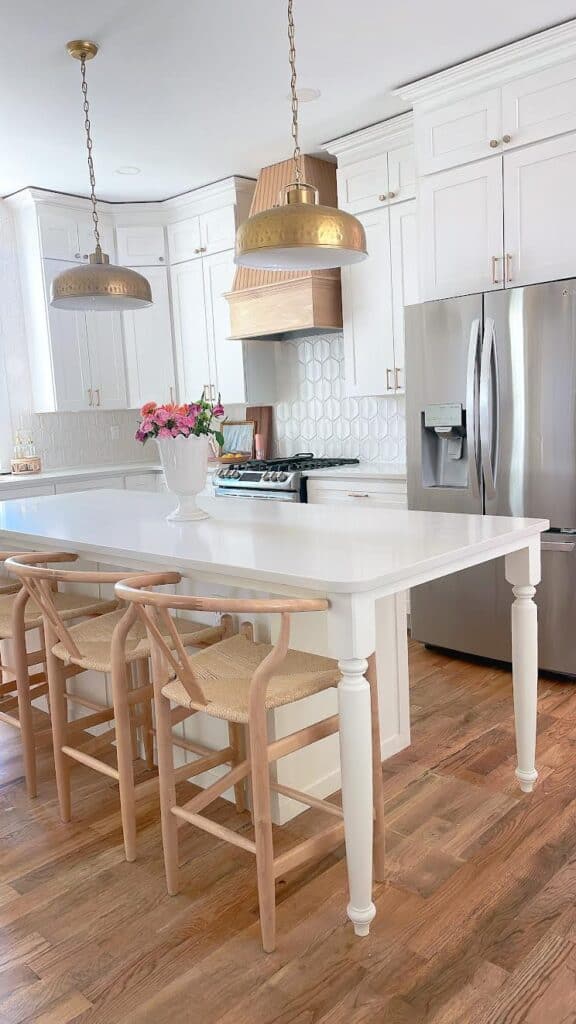
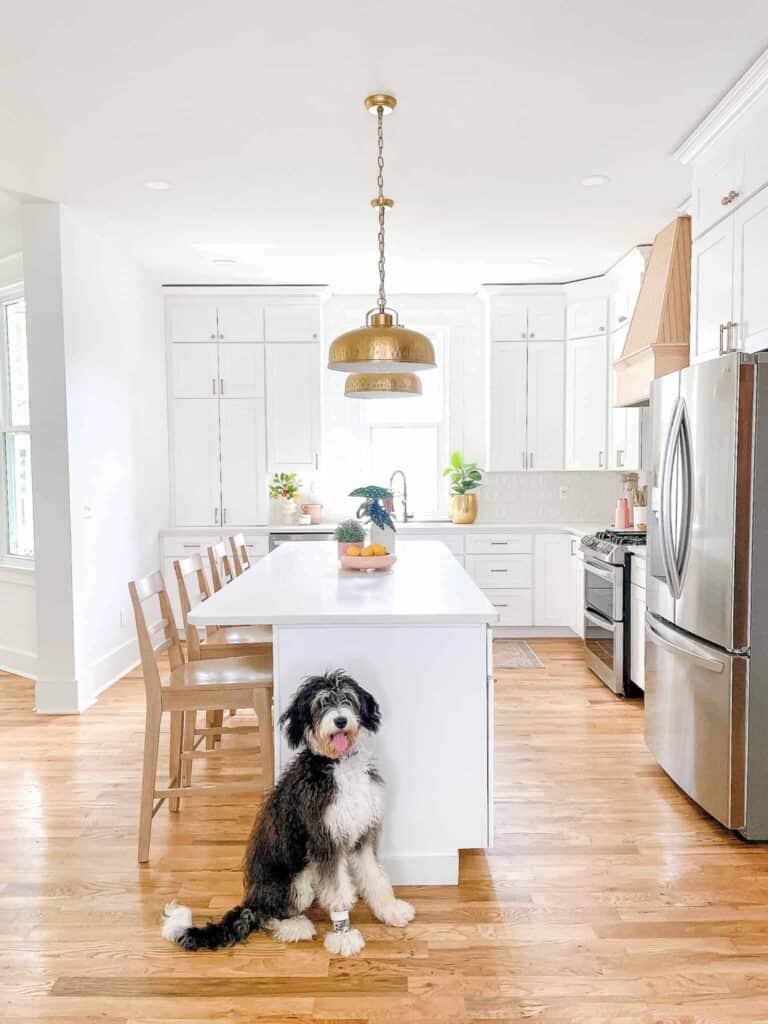
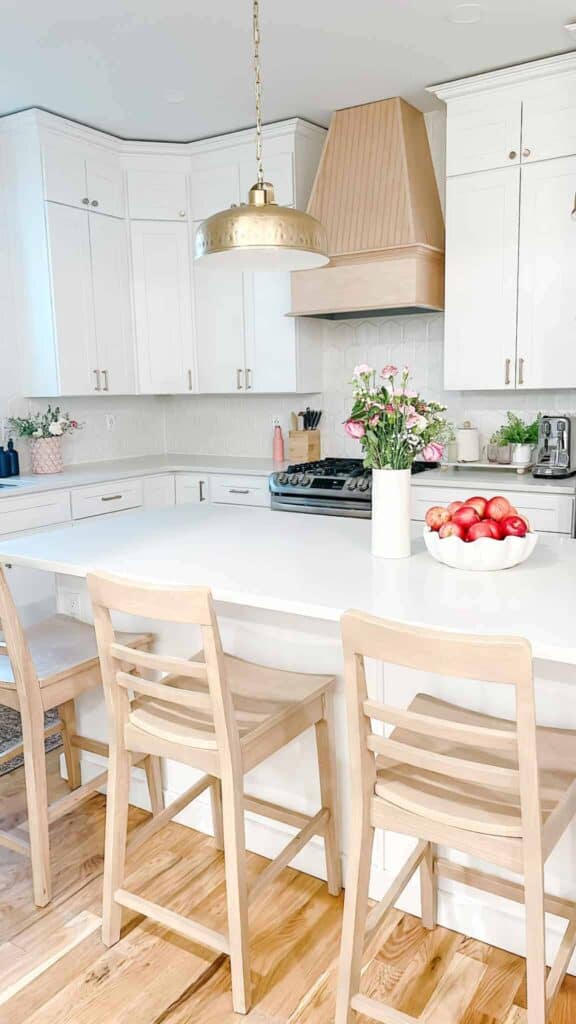
If bathrooms and mudrooms weren’t enough, I also convinced Sam to rebuild our kitchen island. There is a long story as to why our island needed to be rebuilt. So if you are curious and want to spill some tea, check out my post all about the kitchen island. You can also catch the whole progress of how to build a kitchen island and more details.

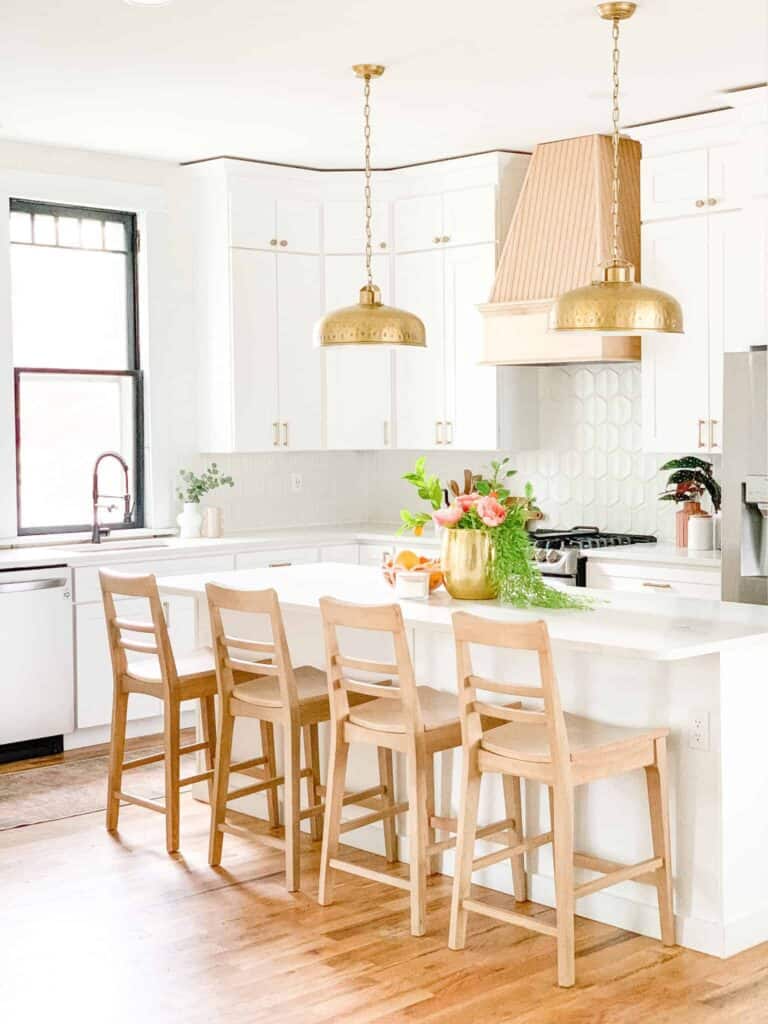
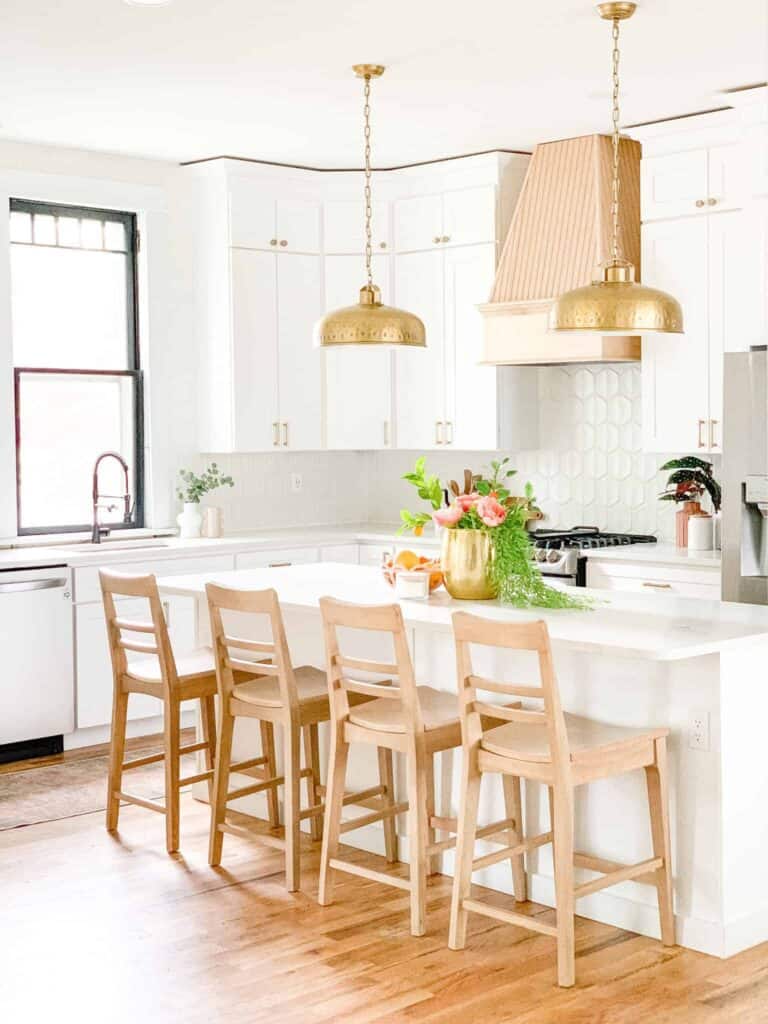
Kitchen with white backsplash and white contertop.

Family Updates

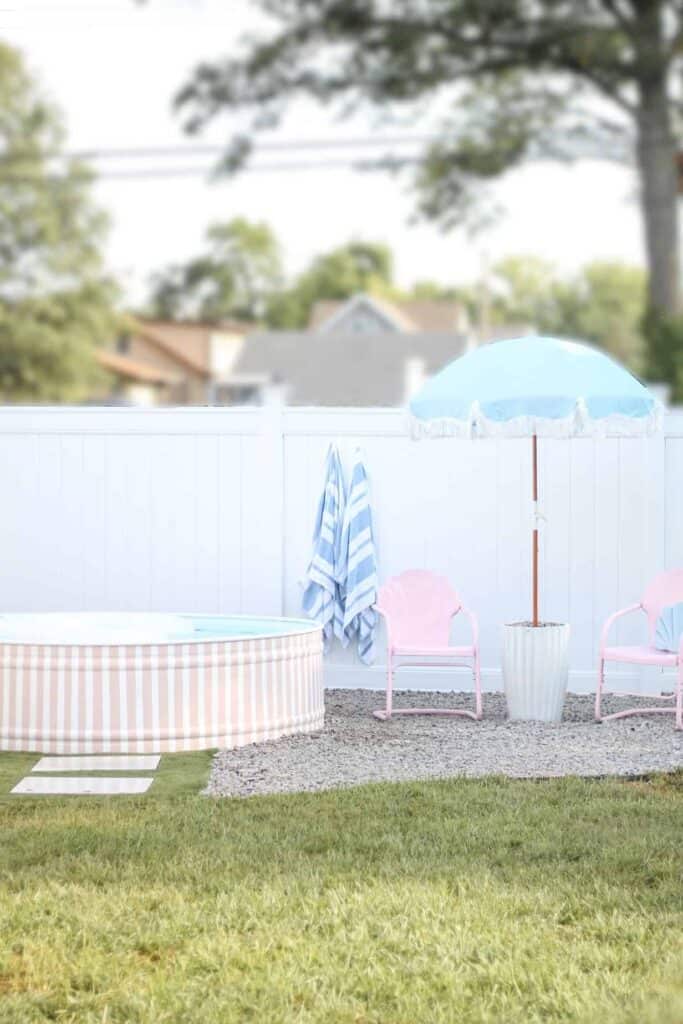
Life in our household has been pretty hectic now that warmer weather has arrived. Sam and I have stayed busy with all of our projects, but let’s be honest, having 4 kids keeps our household in a constant state of “busy.” If we aren’t shuffling our kids back and forth, you can find us dreaming up more projects. I will say that this summer we have some super exciting additions happening around our house. One of those additions is a backyard pool! I can’t wait to beat the heat all summer long.

If you remember last summer the high temperatures had me dreaming of a pool. So, I got created and made our own DIY stock tank pool! It was a fun project that the whole family enjoyed.

Pink and white stock tank pool with blue umbrella and pink chairs.

With the arrival of Spring, a new baseball season has begun. Jack and Walker are both playing this year and due to their different ages, Sam and I have to tag team, split, and conquer games. For now, it is enjoyable spending time together as a family outside, but I know warmer temperatures are coming soon. If you are a sport’s parent too, you’ll love my list of favorites to help you beat the heat and keep you comfortable all season long.

When we aren’t on the baseball field, you’ll catch Walker riding his bike up and down the neighborhood. He recently learned how to ride a bike without training wheels and is so proud of himself. He worked so hard and just took off one day.

Speaking of working hard, Jack just completed a Shakespearean play for school. Yes, you read that correctly! My 10 year old performed Shakespear. He worked so hard for this part and spent countless hours practicing and memorizing lines. Not only did he have a huge speaking part, but he also sang a solo too. I love watching his hard work pay off and his personality shine on stage.

Family of 6 smiling.

My dress is old Target, but here is similar one on Amazon.

Avé has been working hard for her turn at the stage too. Spring dance recitals are coming up and my girl couldn’t be happier. Goldie will also be participating in the show too. I love watching Avé’s age as they take it so seriously and work so incredibly hard. Goldie is more there for the tutu!

After watching Walker learn how to ride his bike, Goldie decided it was her turn to learn too. She isn’t ready for a big girl bike quite yet, but she has mastered her balance bike. I know it is only a matter of time before she is speeding after her older siblings. For now, she loves being the only child at home for a few more months before she joins the big three at school.

Overall, our entire crew has been enjoying the weather and having lots of fun playing outdoors. If you need some great ideas to get your kids outside this season, check out my favorite outdoor toys to keep them playing all day long.

I hope these updates give you a little insight into our life at home and the craziness of our crew! We love sharing these updates with all of you.

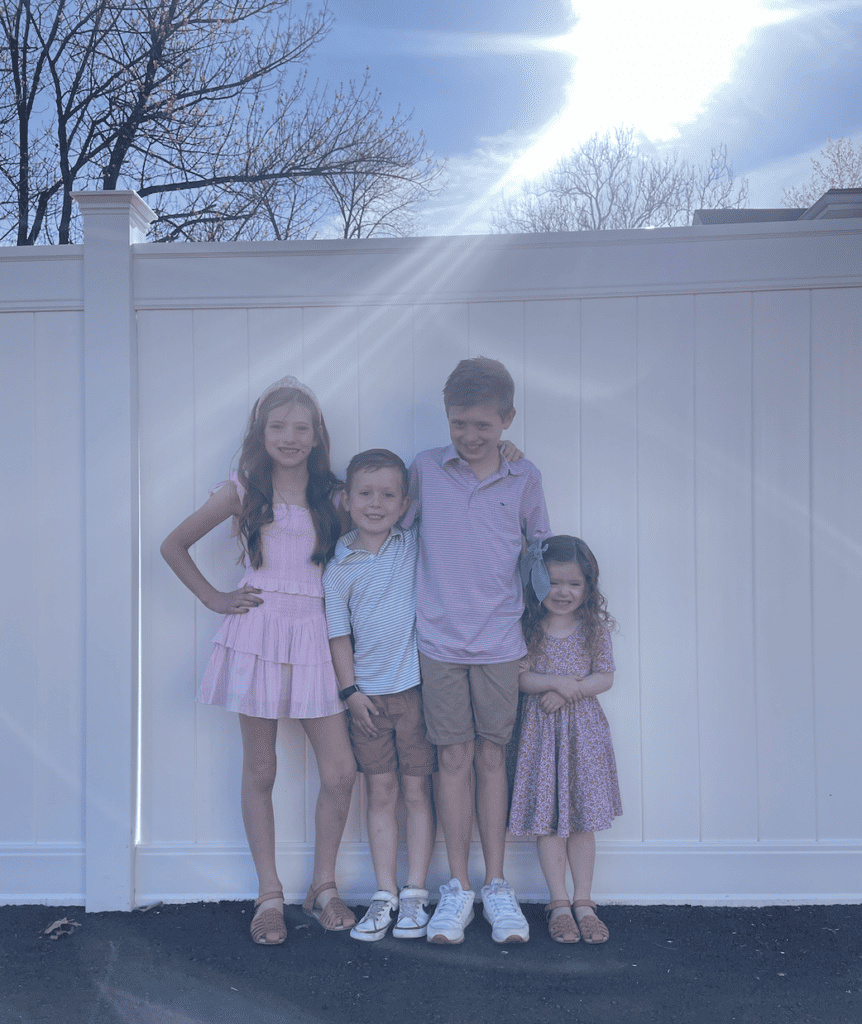
4 kids are smiling while leaning on a white fence.

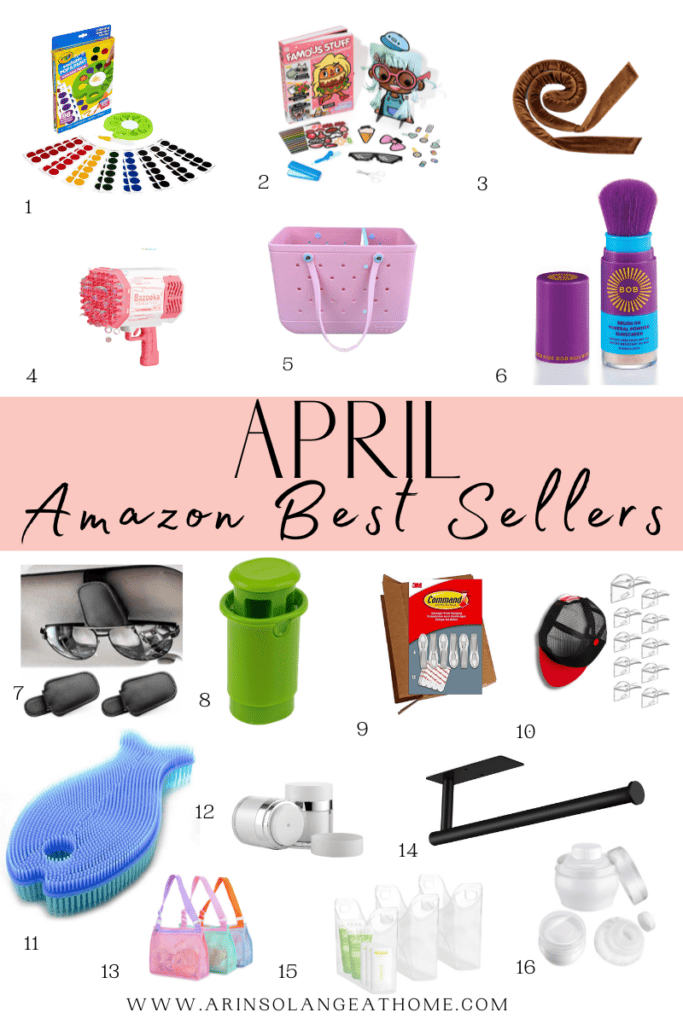
Amazon Best Sellers For April 2023

I’m so excited to share with you our Best Sellers List from Amazon for April 2023. There are a ton of great products that have been well loved by all of you too! Some have even been a best seller going on five straight months!

There is a great mix of organizational finds, kid’s activities, and products that will make your life easier. As a busy mom, I’m always grateful when I can find something that keeps my kids entertained or helps make my life easier. Hopefully, you’ll find these products do just that!

As always, I have much more in my Amazon storefront for all of your organizational needs too! Make sure you don’t miss out.

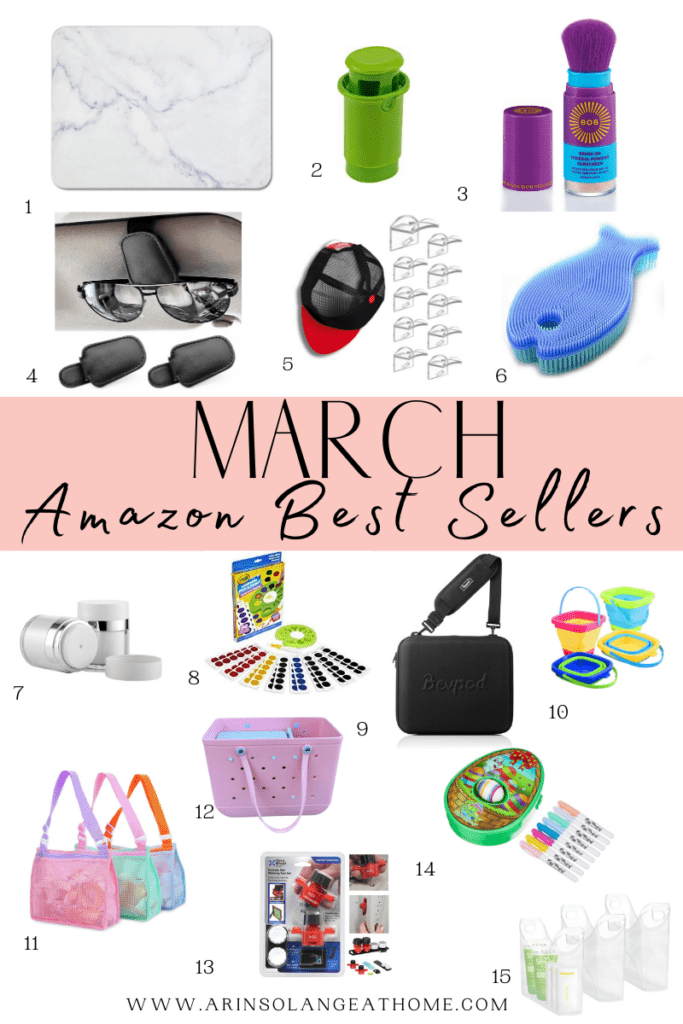
Amazon Best Sellers List- April 2023 Pinned Round Up

1 | 2 | 3 | 4 | 5 | 6 | 7 | 8 | 9 | 10 | 11 | 12 | 13 | 14 | 15 | 16

  1. Crayola Watercolor Paint Set – This is a 5x best seller for a reason!
  2. TOCA Life Hair Salon DIY Activity Kit – I originally got this for Goldie, but my big kids had a blast using this too! Such a great tool to work with fine motor strength.
  3. Heatless Hair Curler – Avé has been absolutely loving this heatless curler! Simple wear to bed and wake up with fabulous hair.
  4. Bubble Gun Machine – If you have small kids, this bubble machine is a must have for the summer.
  5. Bogg Bag Dividers
  6. Bob Kids Brush On Sunscreen – This works great for sensitive hair!
  7. Leather Car Visor Sunglass Holder – Yet another product that is a third time best seller!
  8. Fruit & Veggie Divider – This is another repeat best seller item and a must need for small kids.
  9. Damage Free Hanging Cord Organizer
  10. Adhesive Hat Hooks – We have these in our mudroom lockers and our boys’ closets.
  11. Fish Silicone Dish Brush – If you have a beach trip planned this helps get the sand off easily.
  12. 2 Pack Airless Cosmetic Container – These containers are perfect for sunscreen on the go.
  13. Mesh Beach Bag For Kids – Whether you need a bag for pool toys or seashells these colorful bags are great.
  14. Adhesive Paper Towel Holder
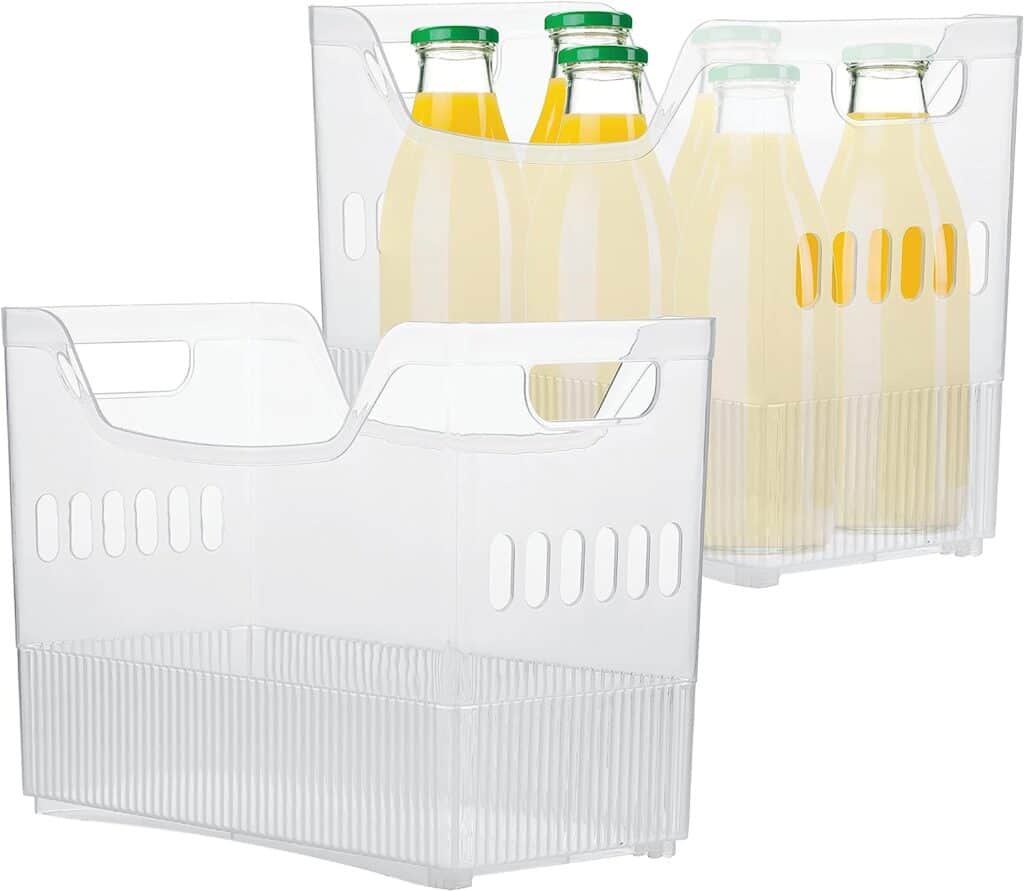
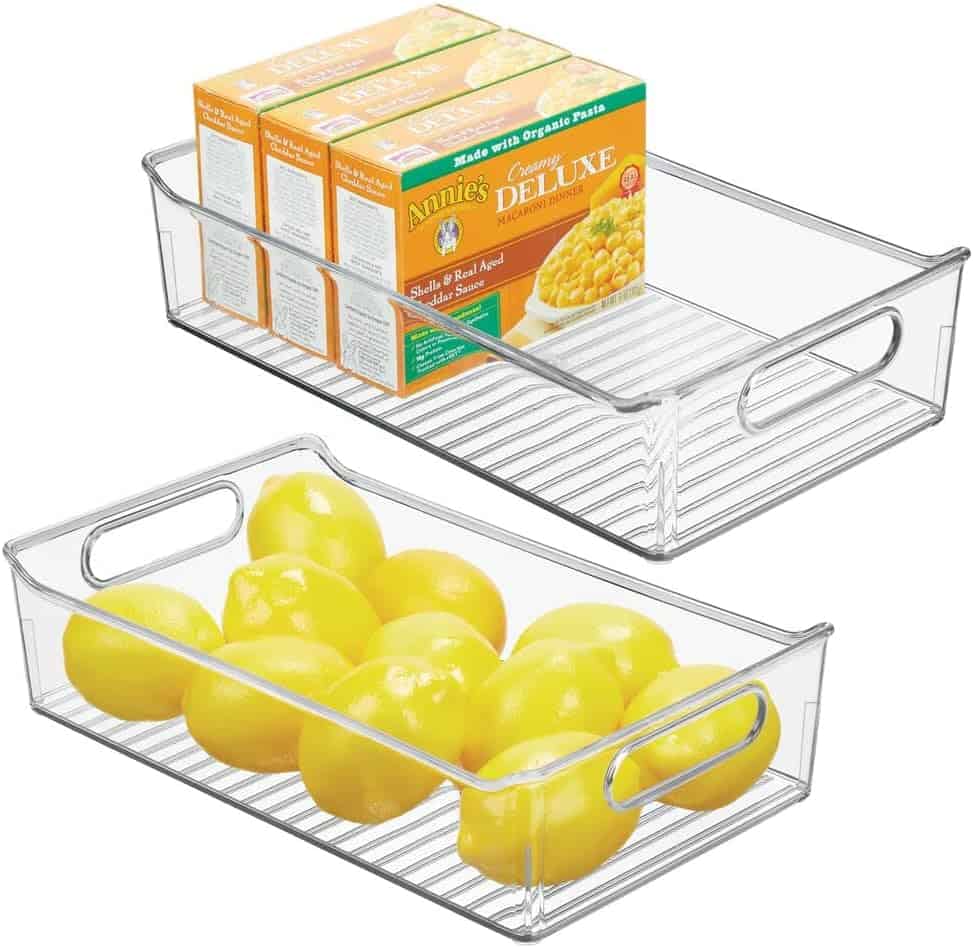
  15. Pantry Storage Organizers – We use these for our freezer. They sell out quickly so make sure you grab them while you can!
  16. 2 Pieces Body Powder Container – This is another great beach item. You can fill it with baby powder and have an easy way to knock sand off hands for snacks.

To be the first to see Best Sellers + enjoy a sneak peek at my end of year ‘Best of’ series, subscribe to my email list below!

Other Posts You’ll Love

DIY Mudroom Lockers | Home Office Wallpaper Ideas | Mudroom Tile Ideas | How To Organize Water Bottles

Follow Social For The Latest & Greatest

Pin This Photo Below For Later

Be sure to pin the photo below for later, and if you don’t already – follow me on Instagram (@arinsolange) and Tik Tok (@arinsolange) for more fun! Be sure to check my Amazon store front for all things best seller, home organization, and DIY.

Amazon Best Sellers List- April 2023 Pinned Round Up
DIY

DIY Mudroom Lockers: How To Build Storage In 4 Steps

Shop the Post
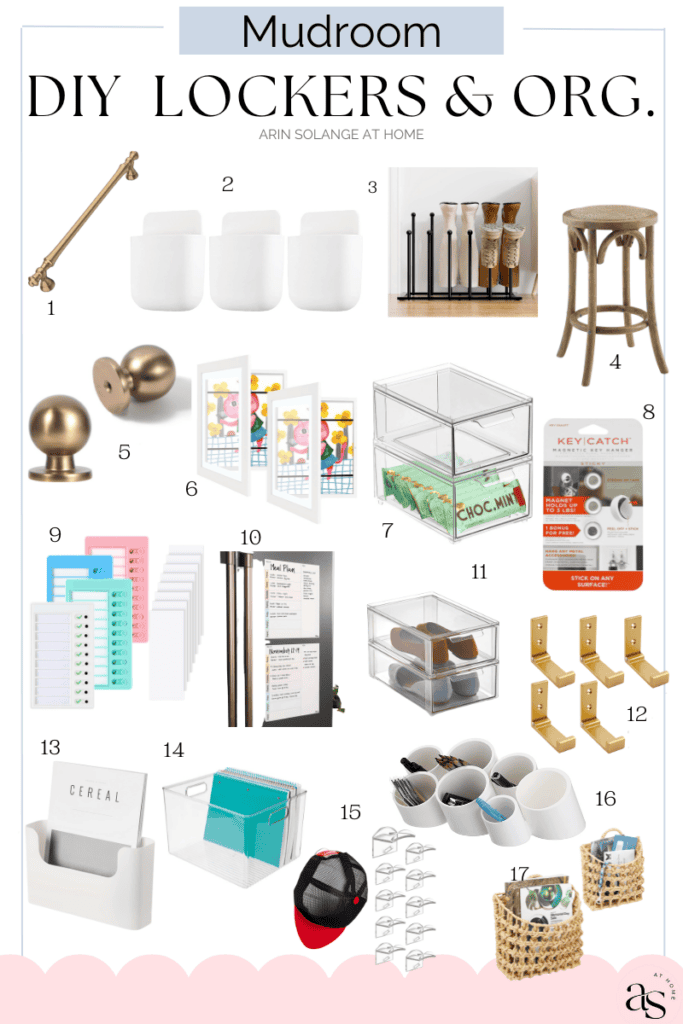
Champagne Bronze Cabinet Pulls
Wall Mounted Adhesive Holders
Free Standing Metal Boot Rack
Natural Rattan Stool
Champagne Bronze Cabinet Knobs
Kids Art Frames
Stackable Storage Containers
Key Catch Adhesive Mount
Chore Charts
Dry Erase Weekly Planning Kit
Front Pull Storage Container
Folding Wall Hooks
Adhesive Wall Mount File Holder
Plastic Bin Container
Cylinder Table Organizer
Hanging Wicker Baskets

Mudrooms are the ultimate mom hack when it comes to storing and organizing all of your kids’ belongings. The first thing my kids do when we come through the door is throw all of their stuff all over the house. It’s important to find a space in your home as an organized drop zone for all of those backpacks, jackets and shoes. Whether you have a designated mudroom or a spot by your front door, investing in some extra storage in a convenient place will make a difference. Recently, we installed our own mudroom lockers by our back door for all of our belongings. I love how all of my kids know exactly where to look now for all of their school and sports equipment. If you are in need of creating some extra storage space, this is the post for you. I’ll go over our DIY mudroom lockers and how we use them to stay organized.

This post may contain affiliate links.

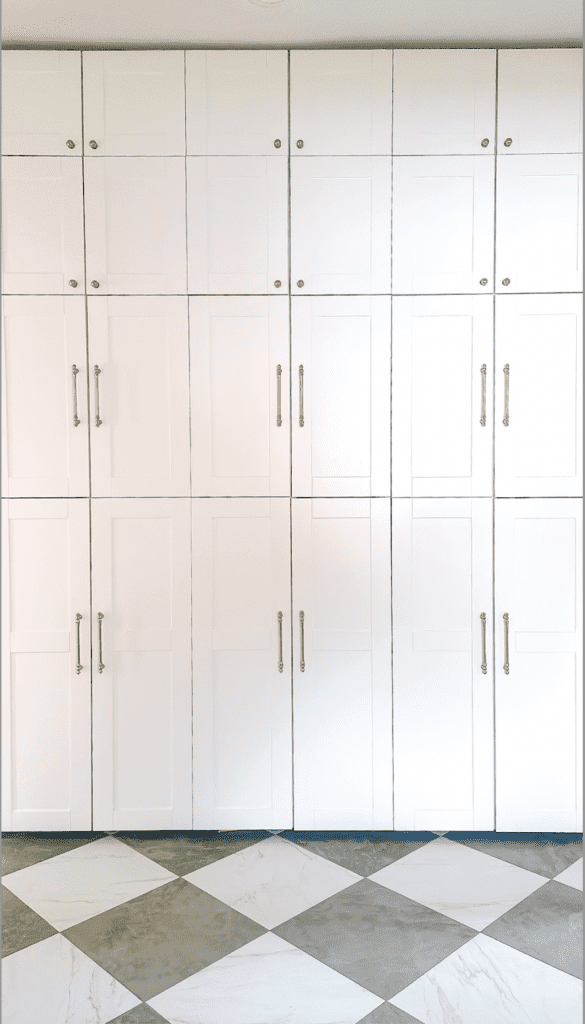
Floor to ceiling white mudroom lockers.

DIY Mudroom Lockers: How To Build Storage In 4 Steps

As the queen of organization, I was going a bit crazy with my kids throwing their school backpacks and extracurricular bags all over our house. With four kids in our home stuff adds up and seems to multiply. I knew I needed to find a solution that would work well for our whole family. I also had to be extremely intentional in using what little available space we have left in our home.

Our Blank Canvas

Our backdoor area has been a blank canvas for some time. I knew it would be a great place to install some entryway lockers. Of course I also wanted these DIY lockers to have that built-in look, but without the price tag that comes with custom mudroom lockers.

Fortunately, our back entryway was in need of a major facelift. The floor tiles that were installed when we initially renovated our home was not something I picked. If you are new to my blog, we renovated our historic home with a major home network show. Unfortunately, not all of the design choices were mine to make. So, I’m in the process of making our home really our home that is both stylish and functional for our family.

Since we planned on replacing all of the floor tiles, it ended up being the perfect opportunity to install our own built-in lockers for our designated mudroom. I’m so pleased with how everything turned out and love that every kid has their own lockers to store all of their belongings. One of my favorite things is that it has also helped foster more independence in my kids. They pack for their school and extracurricular activities each day and know exactly where to look for everything they need.

Pink stairs leading upstairs with wicker baskets hanging on the wall leading up the stairs.

Step 1 Plan Mudroom Locker Designs

There are several different ways you can go about creating your own mudroom locker cabinets. You may be limited on what you can build based on the space you have available and your room dimensions. For us, we were fortunate and had a fairly small room that was a blank canvas.

Consider Your Priorities For Your Mudroom

I had several priorities when it came to looking at that back room and how I wanted to use it. I knew I needed to house our second refrigerator for easy access directly off our kitchen. At the same, I also wanted a space where my kids could create art and have messy play- not on my kitchen counter. Lastly, I needed a place to organize all of their items. I also wanted that space to include closed storage so I wouldn’t be plagued by keeping the space organized looking.

After brainstorming several mudroom design ideas, I knew I had the perfect solution for our space. We have used Klearvue cabinetry in several projects throughout our home. Klearvue cabinetry is exclusively available at Menards and allows you to customize your space via their online design tool. Once you are happy with the design and layout, you can order directly online via Menards. We have used Klearvue cabinetry in both our butler’s pantry and my small home office. It has been a great system to work with and allows you to create a custom look for a fraction of the price.

Another great option would be to use my IKEA Billy Bookcase hack to install your own built in mudroom shelving unit. This hack is a good idea if you are looking for DIY mudroom bench as well.

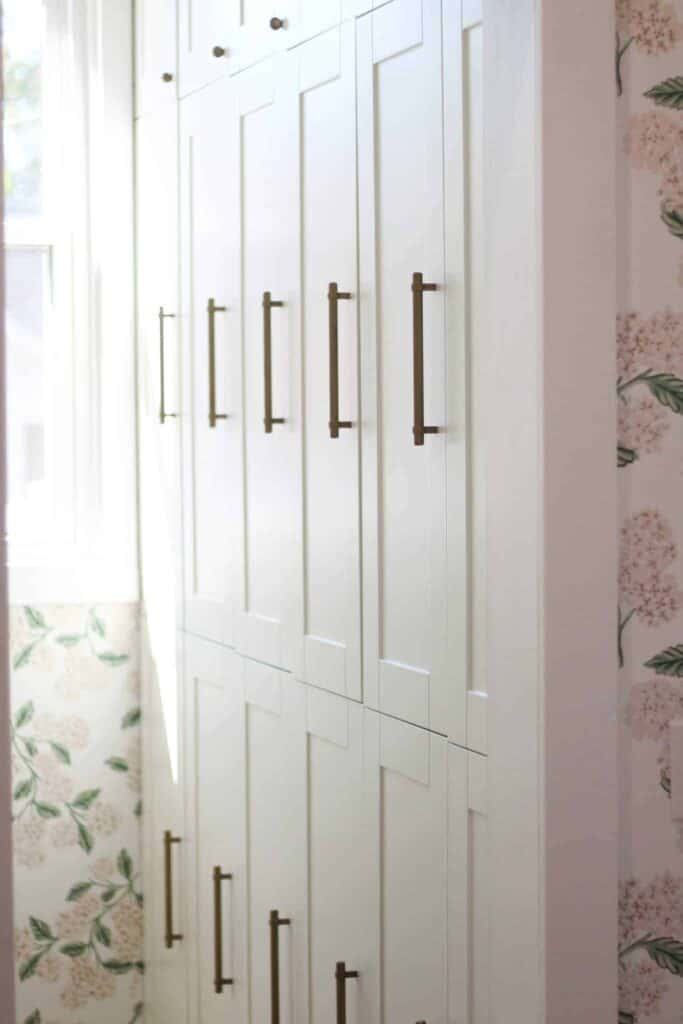
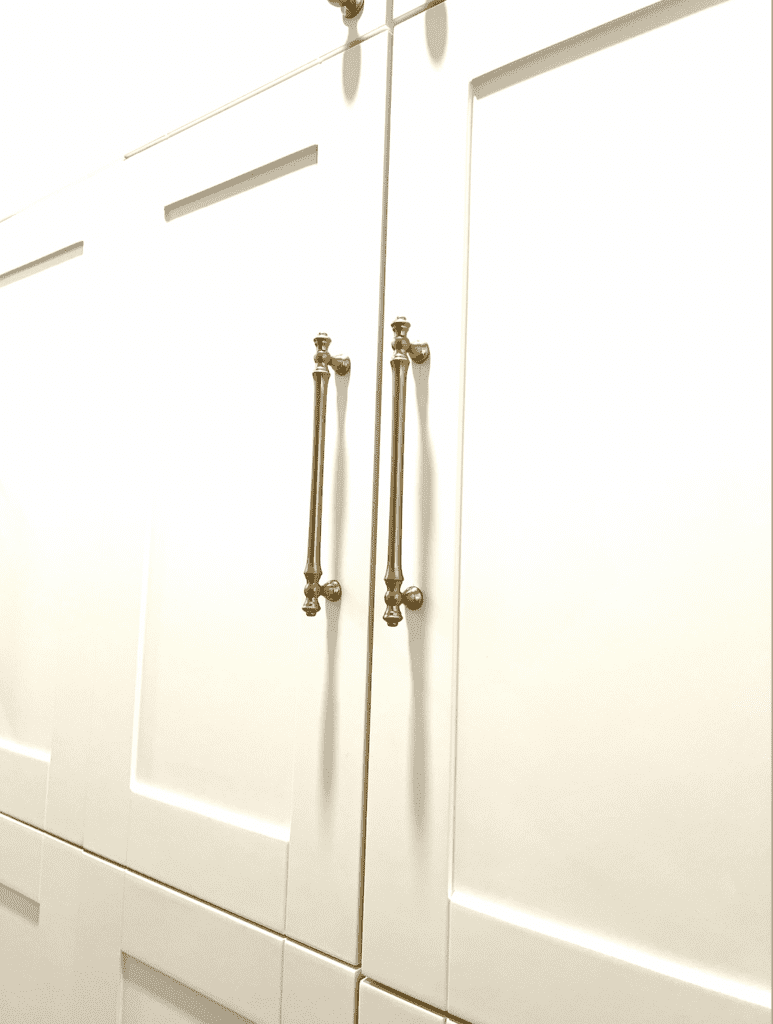
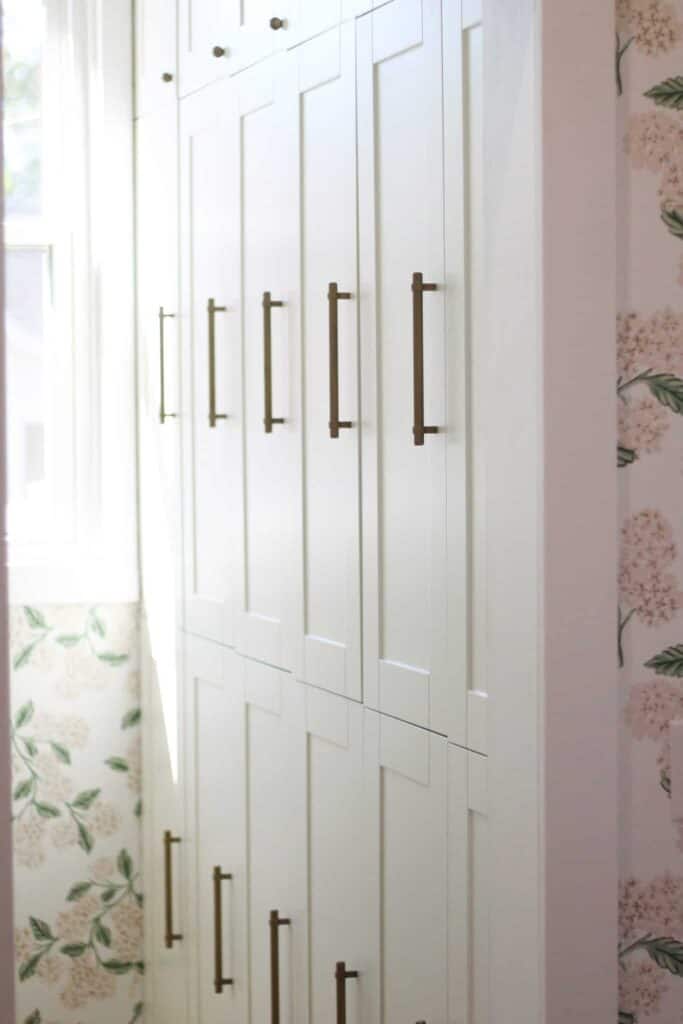
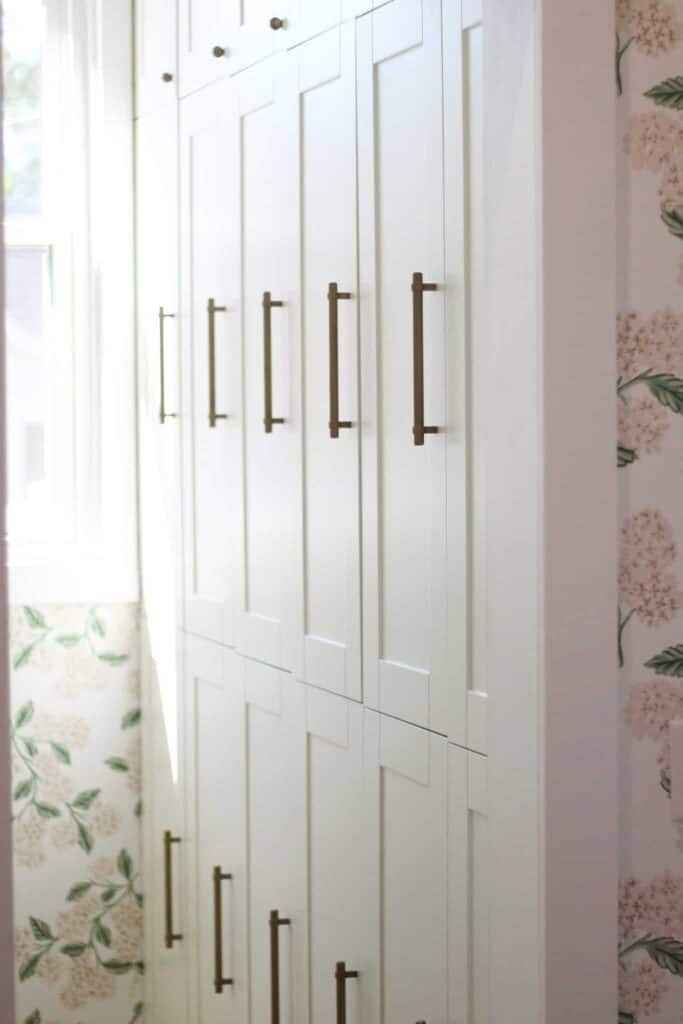
Close up of white cabinets and hardware pulls.

Step 2 Determine Your Dimensions

Once you have an idea of where and what you want your mudroom locker cabinets to look like, you’ll need to take a few measurements. It was important for our family to have locker dividers for each family member so that we could all have our own space without sharing. At the same time, we had to somehow fit a large piece of cabinetry into a smaller space.

The back wall of our soon to be mudroom was the perfect location to house the lockers. It was a blank wall that could comfortably fit enough lockers to give each of us plenty of room. I also needed to make sure that the width and depth of the lockers would work within the room.

If you aren’t able to open a locker door without cramming it into the bathroom door, then it really won’t function well. So make sure that when you are planning your design you have enough open space for your doors to open and close.

Take the time to sketch out your design with measurements. This is a simple step that shouldn’t be skipped. If you plan on using stock cabinets like Klearvue cabinetry, be mindful of the fact that they come in standard sizes. You won’t be custom ordering your cabinets to your room, but you can get creative to make those standard sizes fit in a design built for small spaces.

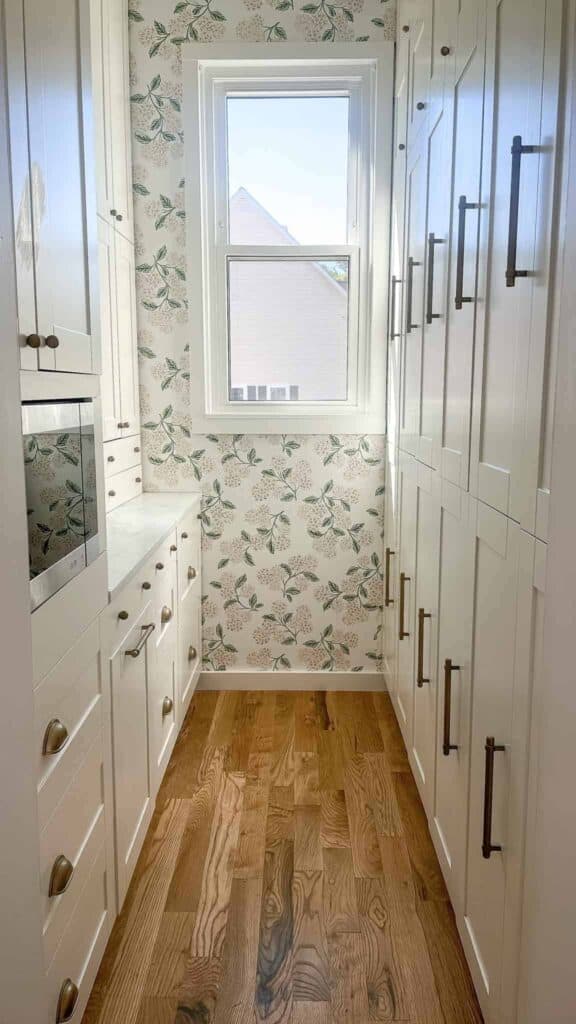
White cabinets in a butler pantry with cabinet pulls and knobs.

Step 3 Order & Assemble Your DIY Mudroom Lockers

Once you’ve taken the time to sketch out and plan your design, you can order your cabinets directly from Menards. They make it super simple to order and pick up is a breeze. There are directions and you’ll only need a few basic power tools to put the cabinets together. Since we aren’t creating these cabinets from scratch, I won’t be sharing a cut list or measurements as it will be fully dependent on your space.

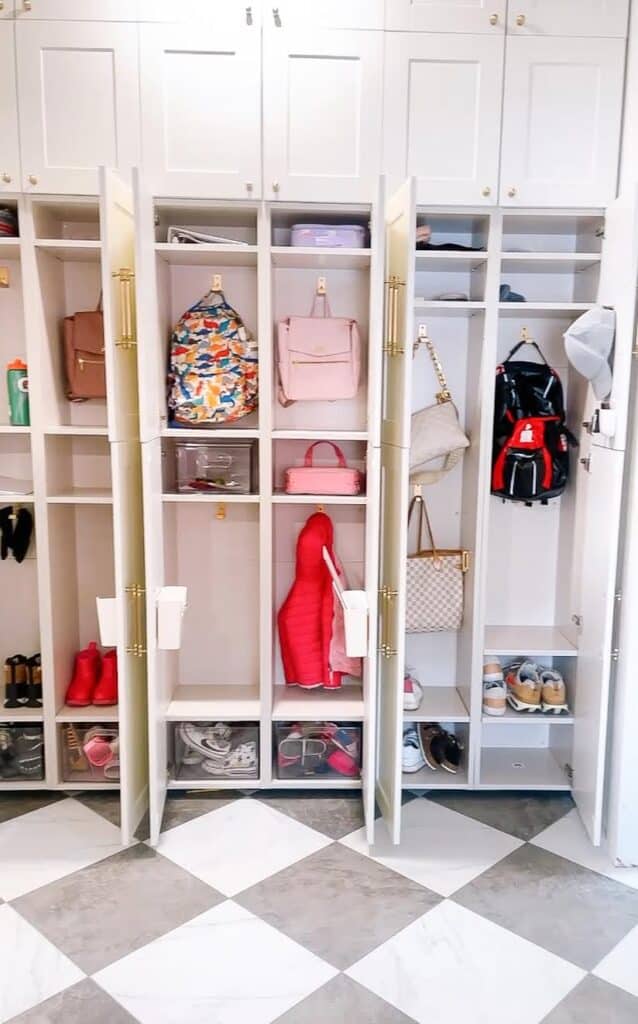
Our lockers extend all the way from floor to ceiling. We have 6 main lockers for each member of the family to store their belongings. The larger lockers have enough space for book bags and longer coats.

In addition to our 6 main larger lockers across, we also have small cabinets on top of the lockers. In total, we have 18 total spaces. Our larger lockers are spaced near the bottom and they get smaller the higher up they go. Because the cabinets get smaller the higher to the ceiling, we store out of season items up higher since they won’t be used as much. Items we use everyday are stored within reach.

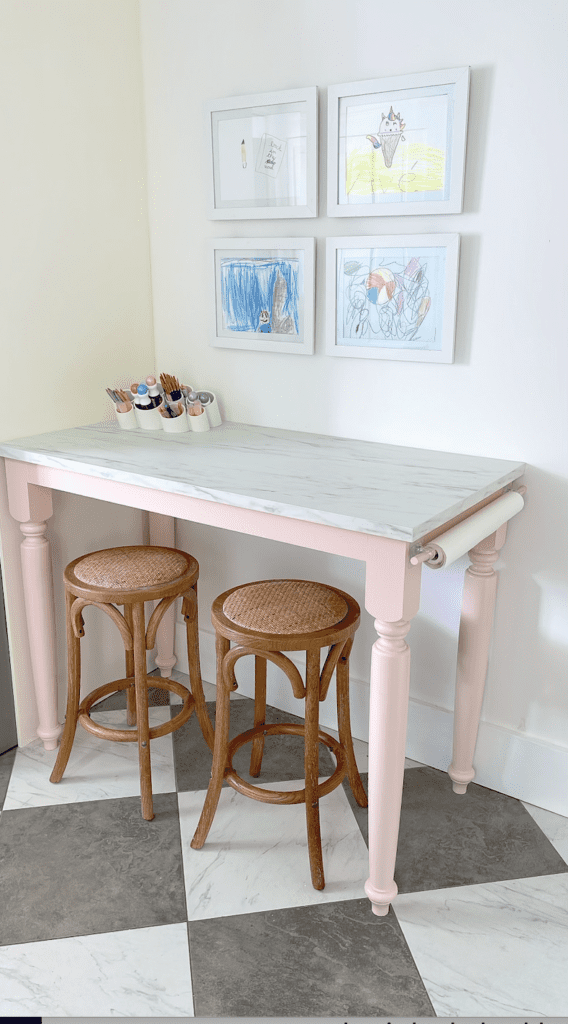
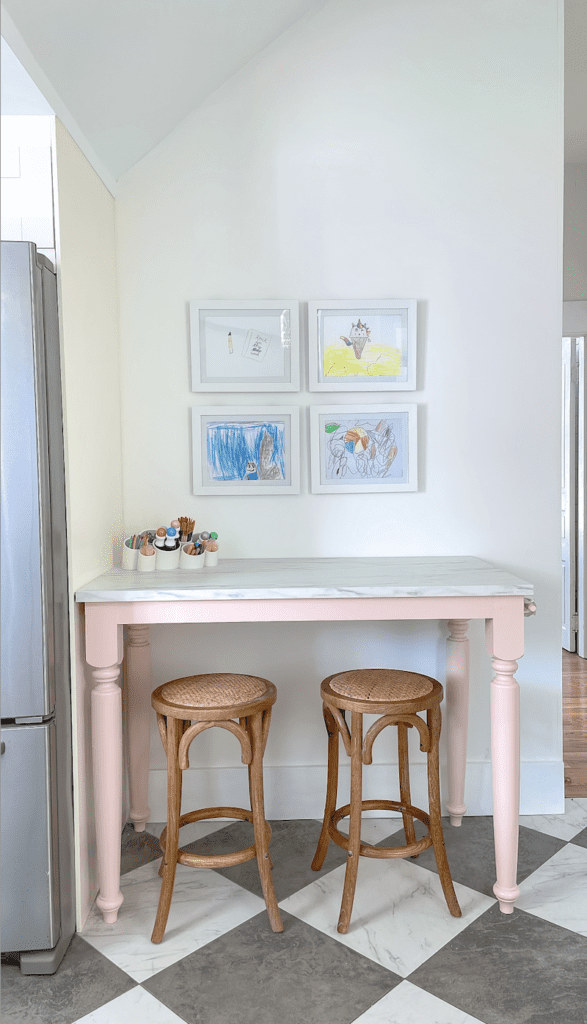
DIY art table with art frames that can be easily changed out for your own art.

Here is what I love about this DIY. You don’t need to be comfortable around power tools to install these cabinets. There is no need for a table saw or circular saw and you won’t be putting in pocket holes or dealing with messy wood glue. While I love creating DIYs, sometimes you just need a project that comes already semi-completed.

Simply follow the directions to install and you are ready to go! This is a great project if it is your first time building to get comfortable around power tools. The whole thing was completed over the course of a weekend and cost approximately $7,000 for our wall to ceiling lockers.

Step 4 Add Your Finishing Touches

Once you have your lockers assembled you can begin my favorite part- adding the finishing touches. You can find all of the supplies I used at the end of the post below!

Cabinet Hardware

I went ahead and grabbed some champagne bronze cabinet hardware. It matches the rest of our cabinets in our house and adds a nice finished look.

Close up of a white cabinet and bronze hardware pulls.

Locker Organization Finds

Naturally, I also had to include some incredible Amazon finds to keep the lockers tidy.

Inside the lockers I have several items to help my kids stay organized. Each locker is outfitted with an adhesive file holder to house important papers for school. I also have smaller adhesive containers to house pens and art supplies. For Sam and I we use the smaller containers to place sunglasses, change, and anything we may need to grab when we are running out of the house in a hurry. The adhesives stick to the inside of the locker door and don’t take up any valuable space.

If you are constantly looking for your car keys, you’ll love the adhesive key catcher that mounts inside the locker and uses magnets to hold your keys. This little device has given me a lot more free time back since I’m no longer looking all over the house for my keys! It’s the little things in life that can really add back valuable time to your day.

Each locker has coat hooks that can hold heavy winter coats for our Midwestern winters. For my boys, they have several adhesive wall mounts for their hats too. In my locker, I love my dry erase board for meal planning and errands. It is a great way to keep myself organized and accountable.

Lastly, each locker has a set of stackable containers to house shoes. I’m not a huge fan of letting shoes just air out in the lockers- especially for my boys. These containers help keep the stinky feet smell away at least for a little bit.

Mudroom lockers open filled with backpacks, shoes, hats, and handbags.

Add In Any Additional Touches

What I love about this project is that everything is completely customizable for your family and your needs. For us, I wasn’t worried about having a bench seat available for my kids. Our back staircase is right by the door and the stairs always end up being the place that everyone gathers to put their shoes on.

DIY Craft Table

Instead, I wanted to take the space I had available for a bench top and place a craft table in its place. This craft table was a fun DIY that I’ll highlight in a later post.

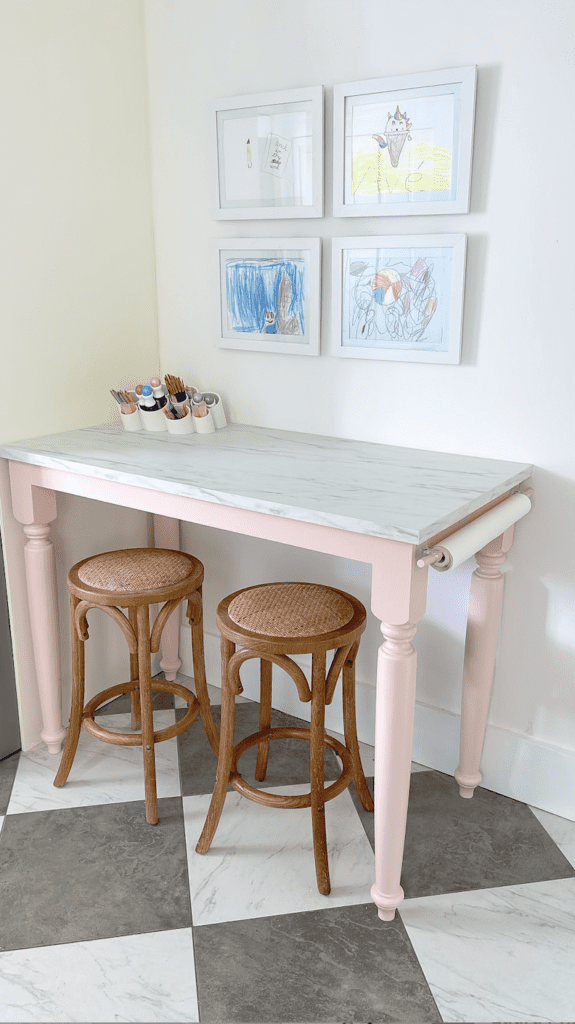
The table has 2 stools so if one of my kids needs a place to sit to put on their shoes, they have a spot readily available. Otherwise, it is a great spot to do crafts or Legos. It was important that they have a space that they can create and be messy without it being on my kitchen counters. I really don’t love leaving Lego builds up overnight. In this space Jack and Walker can build to their heart’s content without taking over my dining room.

I added some frames right above the space to showcase the kids’ art work. Goldie loves creating something new to put on display each day! With four frames, each kid has their own frame to display.

Lastly, with the table top, I went ahead and used a butcher paper roll holder for easy access. In our last house, we had a DIY wall mounted easel. I wanted to recreate that here without mounting it on the wall. So I went ahead and found a way to utilize our table top to make it function in the same way.

Art table, paper roll, and wicker stools.

DIY Mudroom Lockers: Shop My Look

DIY Mudroom Lockers

1 | 2 | 3 | 4 | 5 | 6 | 7 | 8 | 9 | 10 | 11 | 12 | 13 | 14 | 15 | 16 | 17

  1. Champagne Bronze Cabinet Pulls
  2. Wall Mounted Adhesive Remote Control Holders – These are perfect for holding small items that you need handy on the go.
  3. Free Standing Metal Boot Rack
  4. Natural Rattan Stool – These are the stools we have at our DIY craft table.
  5. Champagne Bronze Cabinet Knobs
  6. Kids Art Frames – These are great to display all those masterpieces your kids make for you.
  7. Stackable Storage Containers
  8. Key Catch Adhesive Mount
  9. Chore Chart
  10. Dry Erase Weekly Meal Planning & Errand List
  11. Stackable Storage Container With Front Pull– This is another great option to store shoes.
  12. Folding Wall Hooks
  13. Adhesive Wall Mount File Holder – This is great at holding all those important papers for school.
  14. Plastic Bin Container– This is another great option to store and organize library books or notebooks for school.
  15. Adhesive Wall Mounted Hat Hooks
  16. Cylinder Table Organizer– This is another great option for storing pens, pencils, art supplies.
  17. Wicker Hanging Basket– We love having these on our stairs for easy access.
Home

Home Office Wallpaper Ideas To Boost Your Decor

Shop the Post
Spoonflower Removable Wallpaper -Black Buffalo Plaid
MariGoldie – Peel and Stick Wallpaper
Penny Petal Floral Pink – Peel and Stick Wallpaper
Garden Party – Peel and Stick Wallpaper
Moody Plaid – Peel and Stick Wallpaper
Vintage Floral Peel & Stick 
Black & White Herringbone Peel & Stick Wallpaper
Vintage Botanical Regency Removable Wallpaper
Avocado Green Plaid Peel+Stick Wallpaper
Botanical Garden Songbird Peel+Stick Wallpaper
Neutral Swans Wingspan Removable Wallpaper
Victorian Spring Wildflower Removable Wallpaper
Farmhouse Minimal Ticking Stripe Removable Wallpaper
Protea Art Deco Marble Pink Flower Removable Wallpaper
Vintage Botanical Wildflower Berries Removable Wallpaper
Dark Chinoiserie Peony Branch Removable Wallpaper
Farmhouse Check Soft Blue Removable Wallpaper

Recently, I completed a makeover in my small home office. One of my favorite parts of this space is the gorgeous wallpaper that serves as the focal point.  Home office wallpaper might be the easiest way to add a focal point to your workspace. It can also help you create a unique design element that will make your home office look and feel more inviting. With the right wallpaper, you can create an atmosphere that is both professional and stylish. Whether you’re looking for something modern and minimalistic or something more traditional, there are plenty of home office wallpaper ideas out there that will suit any style. From bold colors to subtle textures, you can find the perfect wallpaper for you.

Home office with green and pink wallpaper.

This post may contain affiliate links and was updated April 2024.

Home Office Wallpaper Ideas To Boost Your Decor

I absolutely love wallpaper. If you have followed my blog over the years, you’ll know that I love using wallpaper to change the overall look of a room. I’ve wallpapered more rooms than I can count. Fortunately, companies today make applying your own wallpaper much easier than it used to be. 

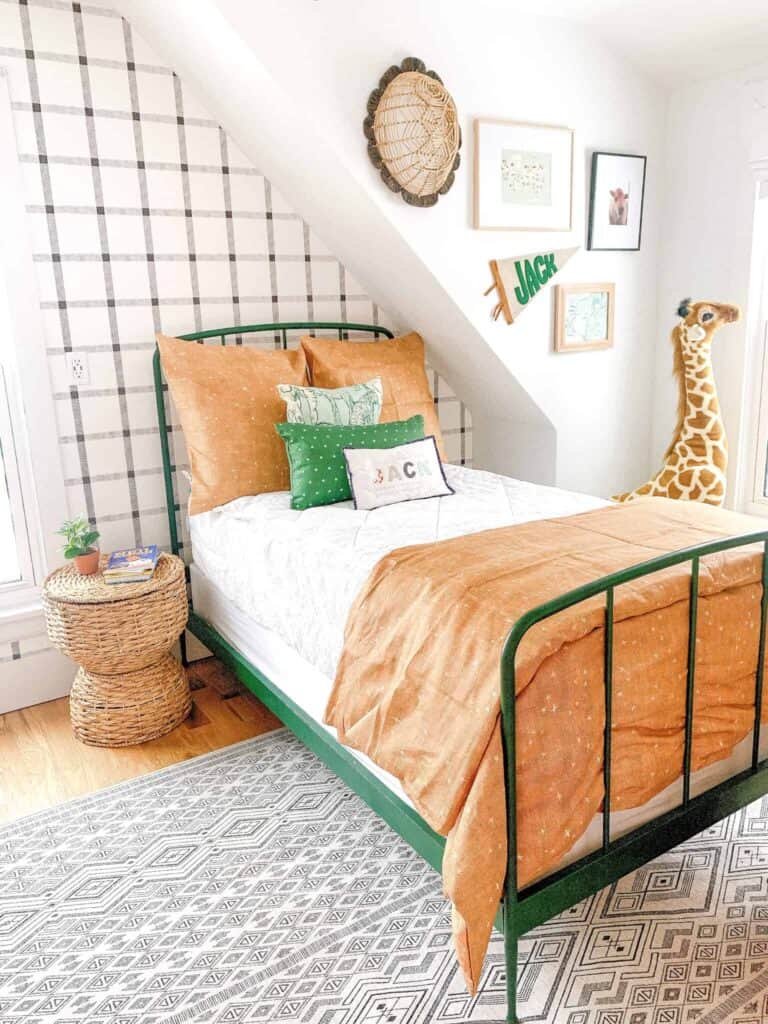
One of my favorite projects was Jack’s black and white wallpaper.  In his room, I used prepasted removable wallpaper from Spoonflower. It wasn’t my first time, so with my husband’s help, it took us just over an hour to hang. The tricky part was working around his windows and window sills. If you have tricky spots to work around, just take your time and be patient with those spots.

Boys room with black and white wallpaper plaid

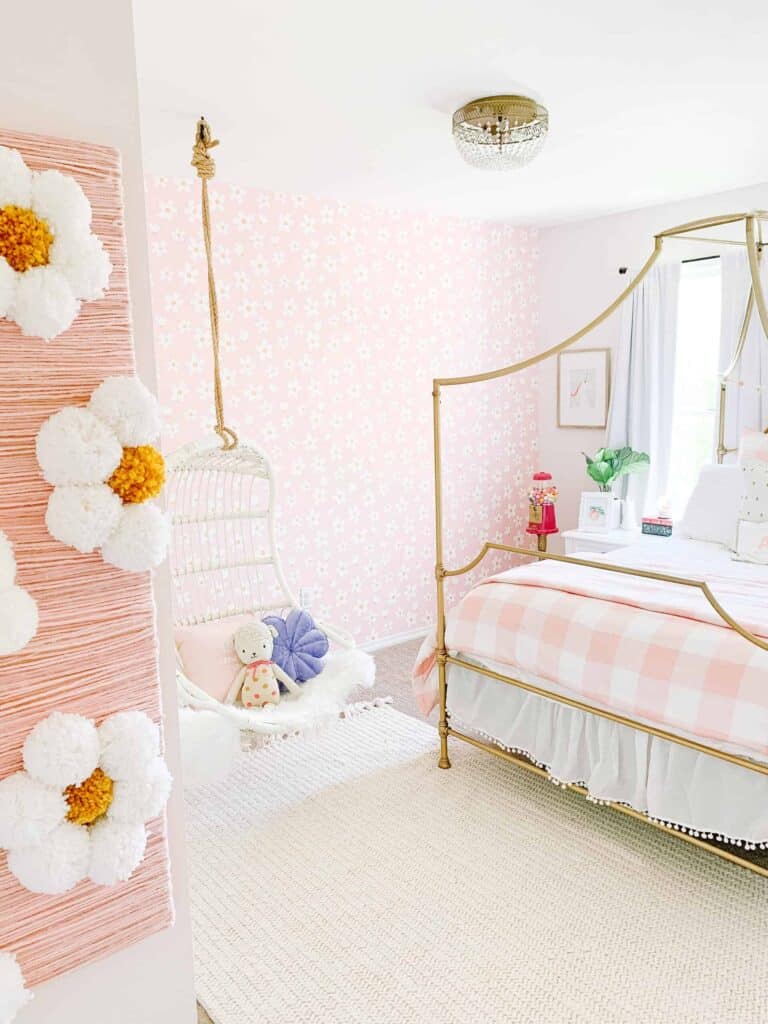
Ave’s wallpaper has changed a couple of times, as you can see here and here. Both of the wallpapers I used were water activated and from Spoonflower. Since this wasn’t a prepasted option, it did take a bit longer to apply. The biggest thing I will say is that it is a two person job. The wallpaper sets quickly so you have to make sure it goes on smoothly before it dries. Otherwise, this was an easy process with multiple hands helping. It took my husband and I a couple of hours to do one accent wall.

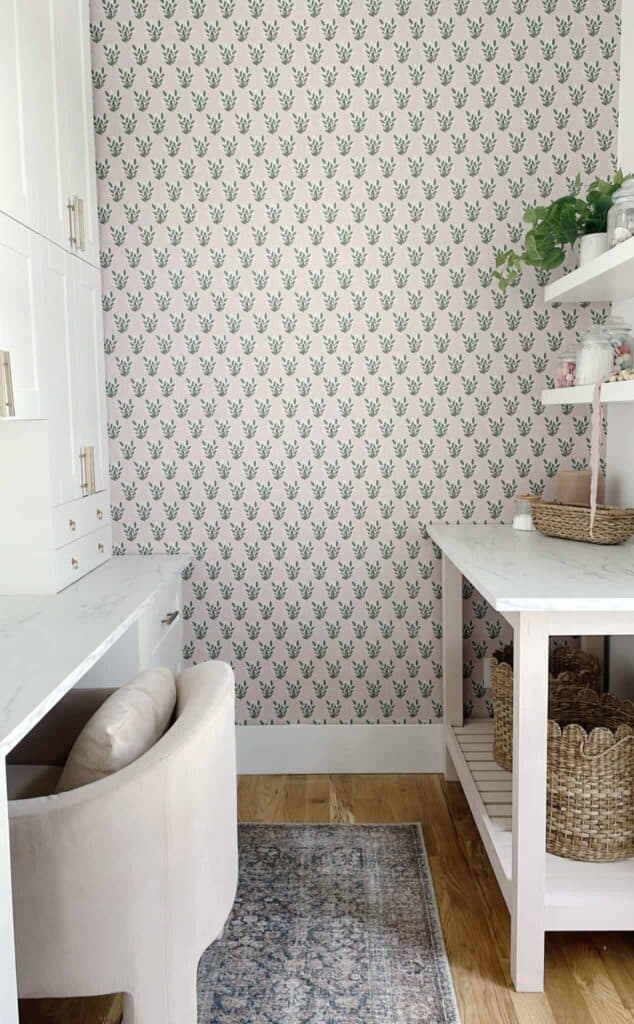
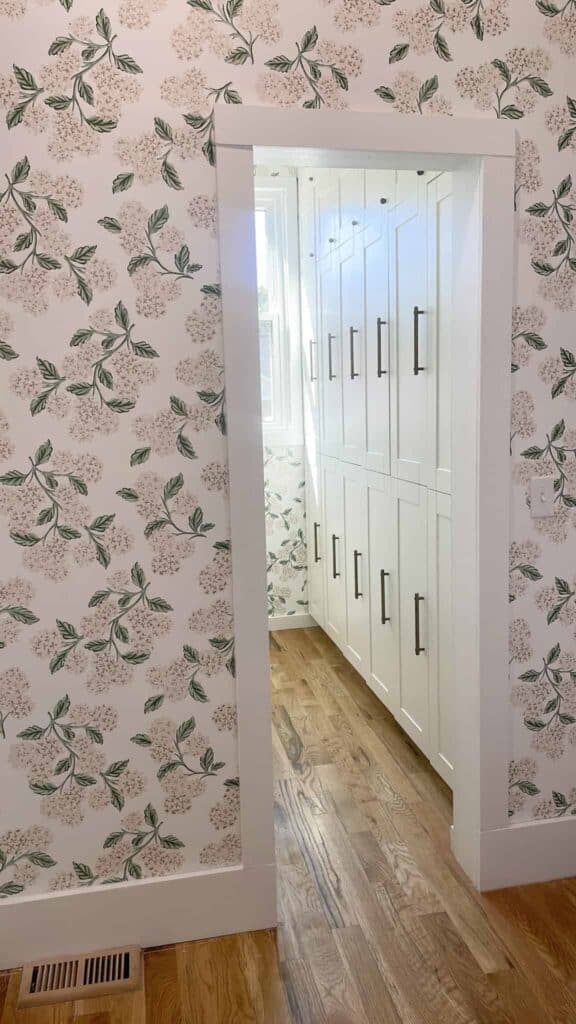
  When we renovated our butler’s pantry, I turned to Rifle Paper Company to get the perfect look. You can check out the pantry’s reveal here.  I will say that due to the pantry’s narrow spacing, it was more challenging. Even with the more challenging application, the end result turned out great!

Lastly, one of my favorite spots in my house is my home office. Because I use it so much and it is where I get creative, I wanted it to bring me joy. When  I teamed up with a local St. Louis company, Our Local Wallpaper Studio, I knew we’d design something amazing. I love bright and romantic, yet vintage feeling designs. So within my home office and the entire Arin Solange line of wallpapers, you’ll notice that vibe. I loved including a bit of my own personality into these designs. You can shop the Arin Solange collection here. Use Code ARIN to save.

Girls pink Daisy Room with Daisy wallpaper

Wallpaper’s History

So why is wallpaper such a great design choice? Wallpaper is a type of decorative material that is applied to blank walls to create a patterned or textured surface. It is typically made from paper or vinyl and is available in a wide range of designs, color schemes, and textures.

Wallpaper has been used as a decorative element for centuries, with the earliest known examples dating back to the 16th century. It became especially popular in the 19th and 20th centuries, as advances in printing technology allowed for more intricate designs and wallpaper patterns.

Today, wallpaper remains an excellent choice for home and commercial interior design. It can be used to add a burst of color, texture, and pattern to a room, and can be applied to one or more walls to create a focal point or accent piece.

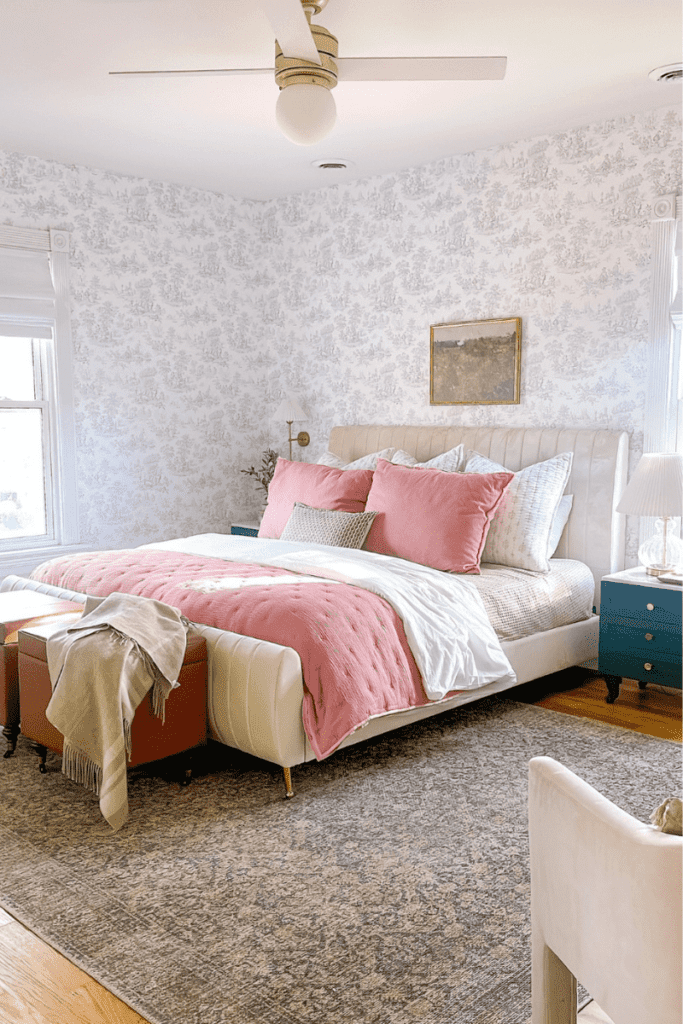
Master bedroom with neutral wallpaper in a french toile wallpaper.

There are many different styles of wallpaper available, including traditional paper-based wallpaper, vinyl wallpaper, and non-woven wallpaper. Each type has its own unique characteristics and benefits, and the perfect choice of wallpaper will depend on factors such as the design style, the intended use of the room, and the level of durability required.

Overall, wallpaper can be a great way to add personality and style to a room, and with so many options available, there is sure to be a wallpaper design that suits any taste or aesthetic.

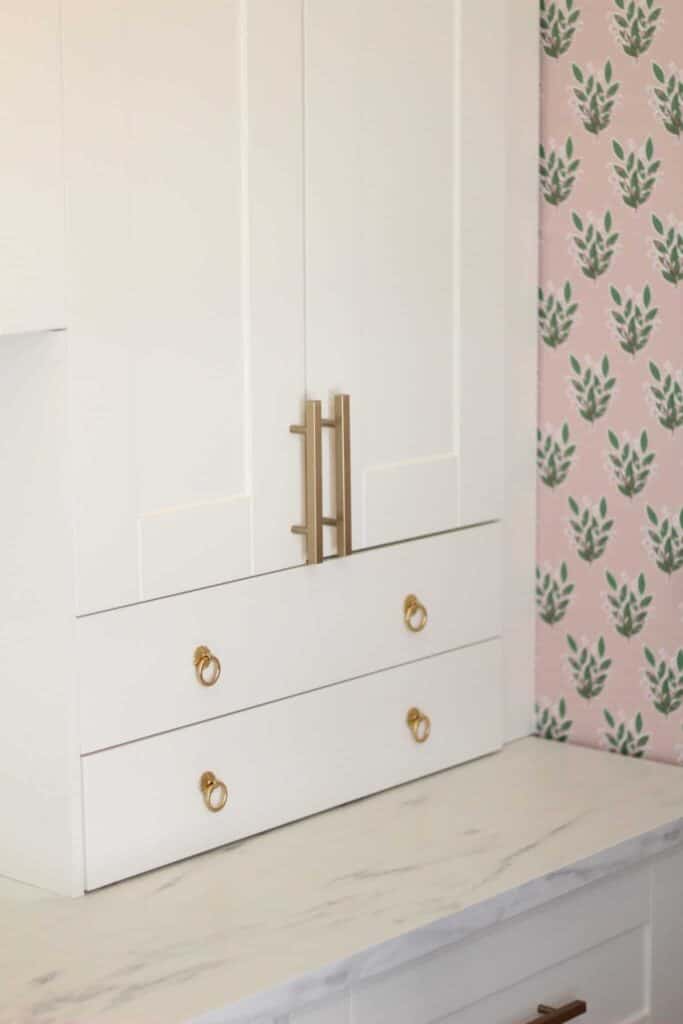
Close up of a white office cabinet and green and pink floral wallpaper.

Tips To Choose The Right Wallpaper

Wallpaper can be a brilliant way to add a unique style to your home. But with so many options available, it can be hard to know where to start. Before we go over home office wallpaper ideas, there are a few things you should consider. First, determine the room you’ll wallpaper and decide your scope. How much wall space will you cover? Then think about what your theme and design elements will be. Do you want something bold or subtle? Once you have the answers to these questions, it will be easier to pick out the perfect wallpaper for your home.

Determine The Room You’ll Wallpaper

Wallpapering is an easy and cost-effective way to transform a room in your home. It can be used to add neutral colors, textures, or abstract patterns to any space. 

When deciding which room you want to wallpaper, it’s important to consider the size, function, and cost of the project. For example, if you’re looking for the best way to update your home office or entire dining room, wallpapering is a great option that won’t break the bank.

However, of course wallpapering one wall of an office will be cheaper than wallpapering the whole room. One wall of wallpaper can pack a punch if the design is bold. If you are wallpapering the whole room, I would recommend using a more subtle design so it doesn’t overwhelm the space and decor. 

You want the wallpaper to make a statement that coordinates with the furniture and decor, without taking away from it. With the right wallpaper design and installation techniques, you can create an attractive look that will last for years.

Close up of a pantry white cabinet and floral pink and green wallpaper.

Decide Your Scope

Wallpaper is a great way to add style and personality to your home. Deciding on the scope of your wallpaper project can be a difficult task. Whether you want to create a feature wall or cover an entire room, there are many factors to consider such as budget, design, and installation. If you only want to cover one wall, your cost will be lower and you may be able to install it yourself. However, if you want to cover your entire office, the cost will be higher and you may want to consider hiring out the project. 

Of course, you can do it yourself, but determine whether it is something you have the time and energy for as well as the skill to do. With careful planning and preparation, you can create the perfect wallpaper project that fits your needs and budget.

Shelf in a home office with green and pink floral wallpaper.

What Is Your Theme & Design Element

Wallpaper can be used to create a theme or mood for any room, from bright and airy to dark and moody. Whether you’re looking for a more modern look, or something classic or unique, there’s a wallpaper design out there that will fit your needs. By carefully selecting the right design elements such as color palette, texture and pattern, you can create an aesthetically pleasing look that will leave a lasting impression on your guests.

It can be used to create texture, depth and a sense of relaxation in an entire room or just on one accent wall. With the right wallpaper, you can create a unique look that will make your home stand out. Whether you want something flat or textured, there are plenty of options to choose from that will fit your theme and design element perfectly.

Whether you want to create an accent wall in your home office or cover the entire room, wallpaper can be used to create a bold statement or subtle patterned effect. It all depends on your desired mood and the design elements you want to incorporate into your space. With wallpaper, it’s easy to bring out your personal style and make any room look amazing.

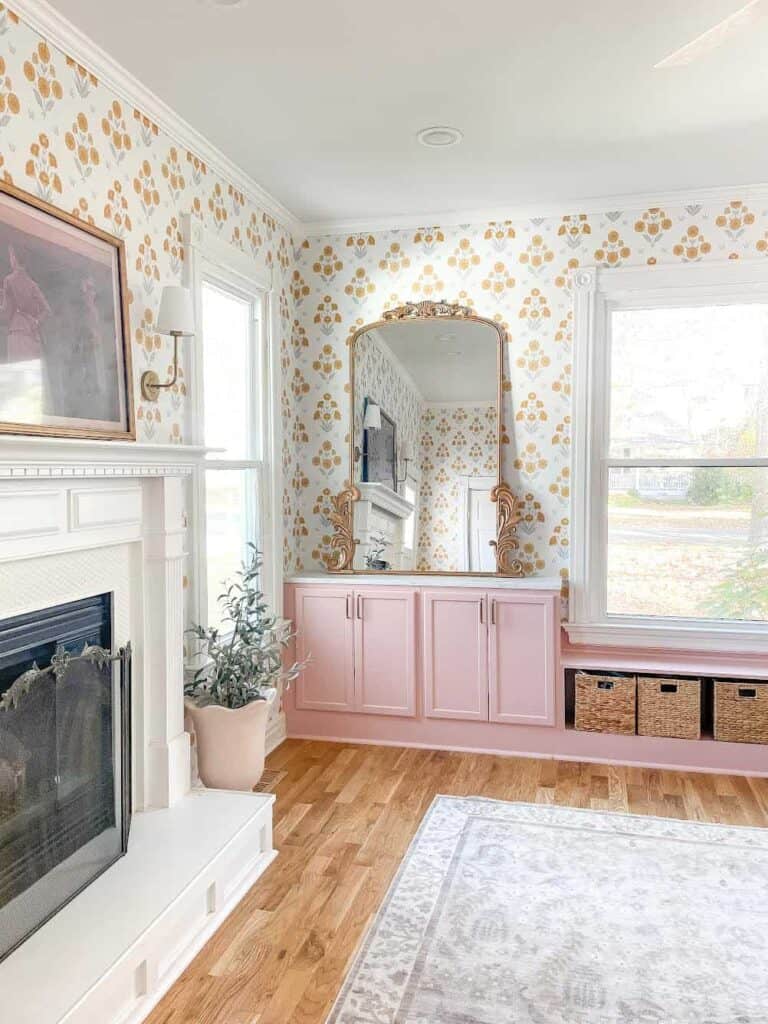
Playroom with pink cabinets, large gold mirror, and golden floral wallpaper.

Planning Is Key

When it comes to selecting the perfect wallpaper for your space, planning is key. Don’t skip this crucial step and take the time to order samples and put them up in your space. Live with them for a few days before deciding on a favorite. This will give you an idea of how the wallpaper looks in good lighting and how it interacts with any existing furniture or decorations.

By taking this extra step, you can make sure that you are selecting the best wallpaper for your home. You wouldn’t paint a room without testing out the paint color in your space and looking at the natural light and furnishings in the room. The same can be said with wallpaper color.

It is also important to make sure you have enough wallpaper. I would recommend having twenty percent more than you think you’ll need on hand. This is good in case you make a mistake or have an intricate pattern that needs to be lined up just right. Having more is always better than not having enough.

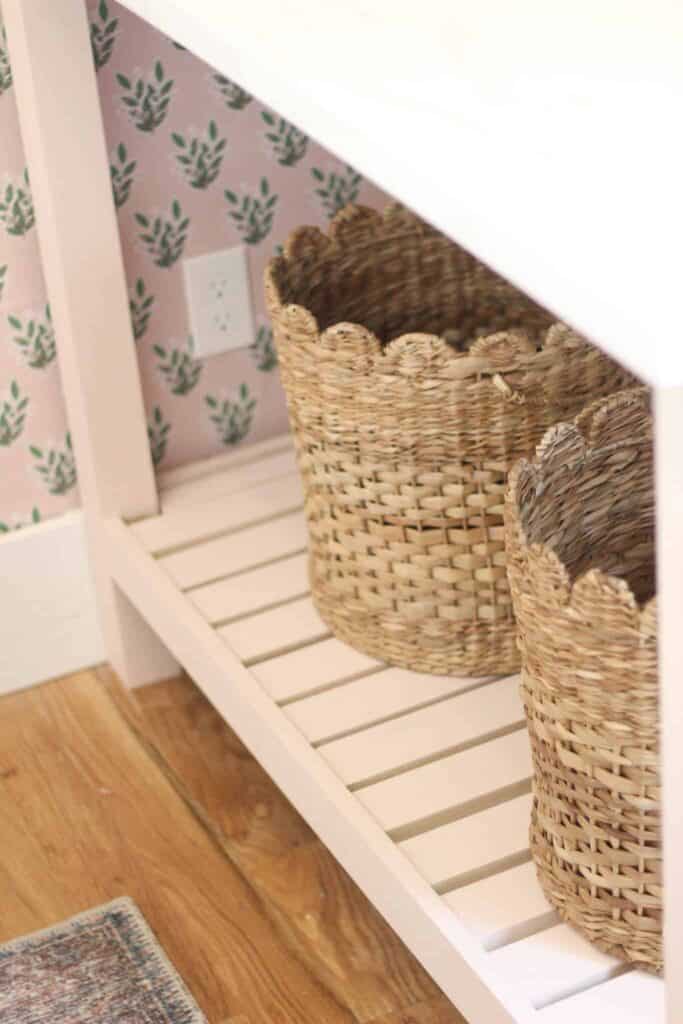
Wicker baskets under a DIY table with pink and green floral wallpaper in the background.

Wallpaper Installation

Whether you’re looking for an accent wall, an entire room, or something in between, there is a wide selection of wallpaper available to fit any budget. The key is deciding whether you want to take on the project yourself or hire out if you haven’t done it before and it’s a big project. Professional wallpaper installers can help ensure that the job is done correctly while saving you time and energy.

Another option is peel and stick wallpaper versus traditional wallpaper. Peel and stick may be the perfect option for your home if you are a beginner but don’t have the budget to hire out the project. There are so many peel and stick options out there that many people have success with. It also tends to be a cleaner choice than using paste on a standard wallpaper install.

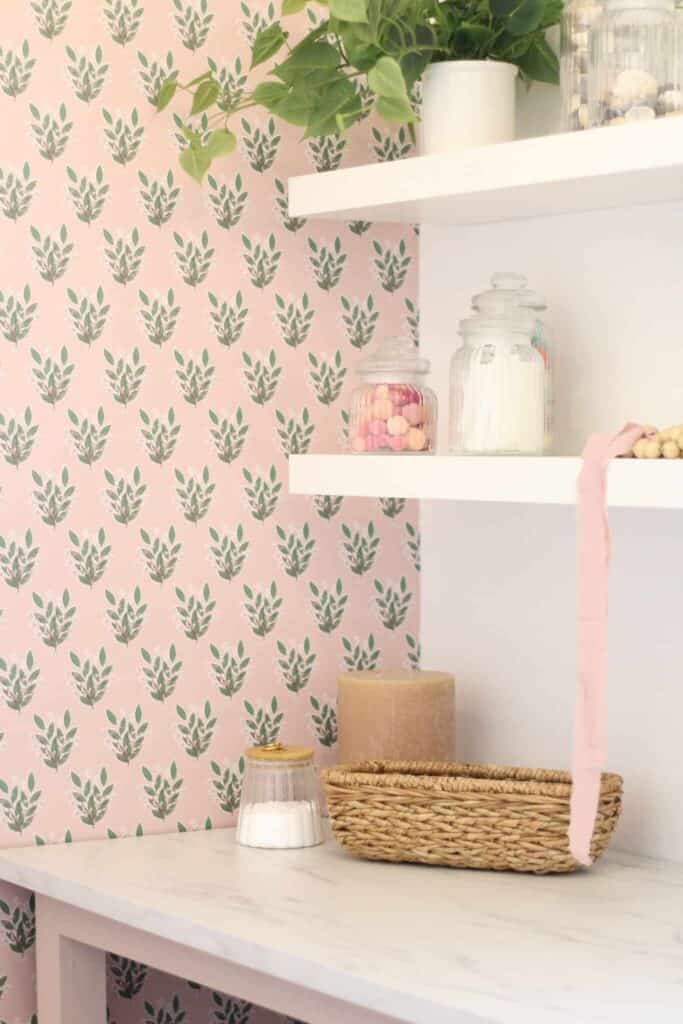
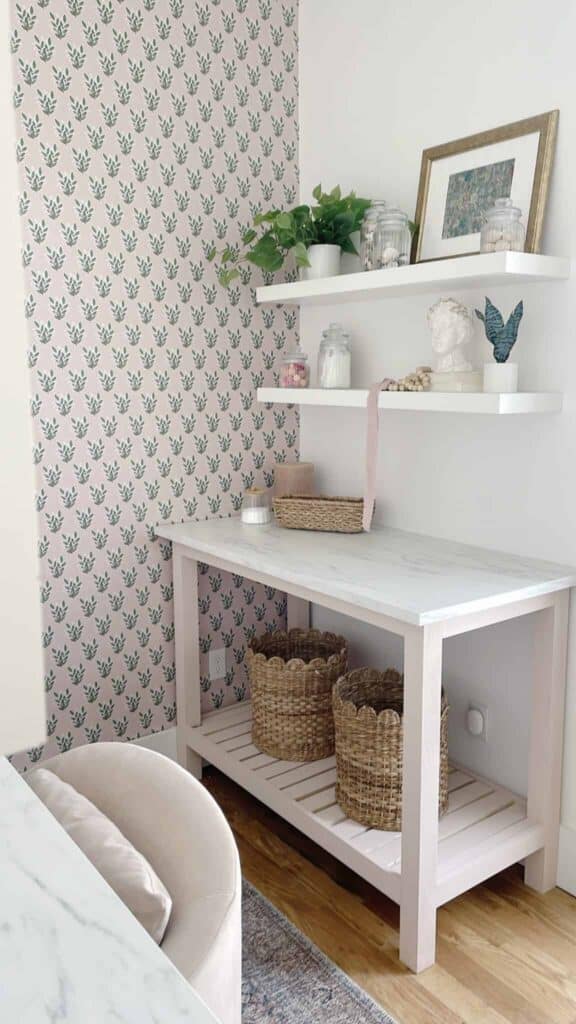
A DIY table complete with DIY floating white shelves and green and pink floral wallpaper.

Home Office Wallpaper Ideas To Boost Your Decor

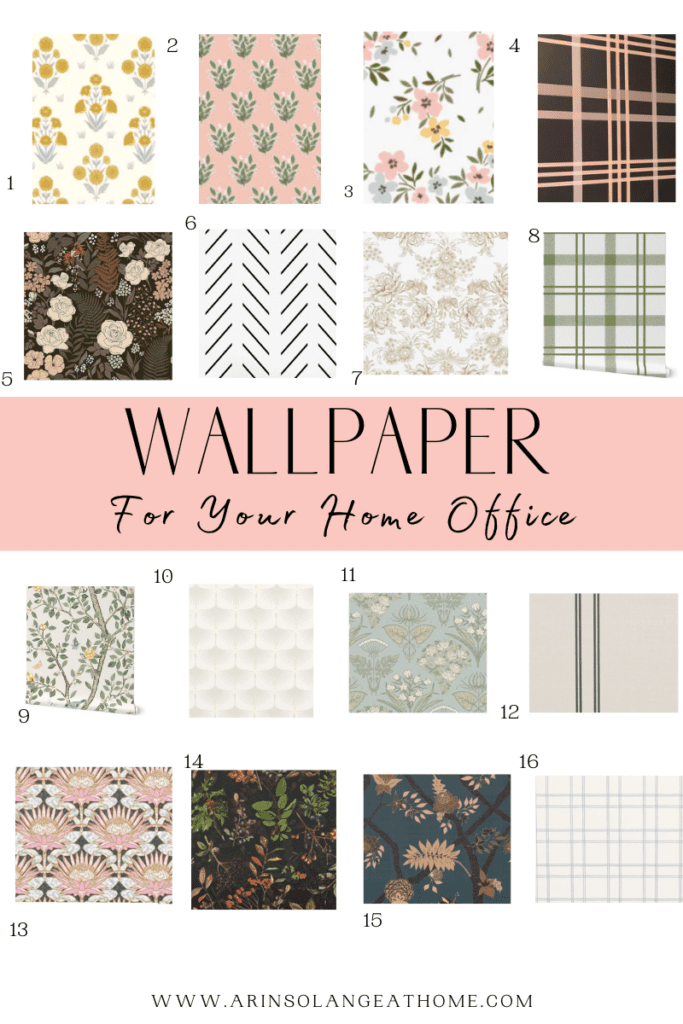
Home Office Wallpaper Ideas Pin Round Up

1 | 2 | 3 | 4 | 5 | 6 | 7 | 8 | 9 | 10 | 11 | 12 | 13 | 14 | 15 | 16

  1. Our Local Wallpaper Studio, MariGoldie
  2. Our Local Wallpaper Studio, Penny Petal
  3. Our Local Wallpaper Studio, Garden Party
  4. Our Local Wallpaper Studio, Moody Plaid
  5. Vintage Floral Peel & Stick 
  6. Black & White Herringbone 
  7. Vintage Botanical Regency
  8. Avocado Green Plaid
  9. Chinoiserie Botanical Romantic Garden Songbird Vintage
  10. Neutral Swans Wingspan
  11. Victorian Spring Wildflower
  12. Farmhouse Minimal Ticking
  13. Protea Art Deco Marble Pink Flower Gold Blush
  14. Vintage Botanical Wildflower Berries
  15. Dark Chinoiserie Peony Branch
  16. Farmhouse Check Soft Blue

Other Posts You’ll Love

Functional Butler Pantry Reveal | Home Office Makeover | Jack’s Room | Daisy Wallpaper

Home

Mudroom Tile Ideas: Design Options For The Best Floor

Shop the Post
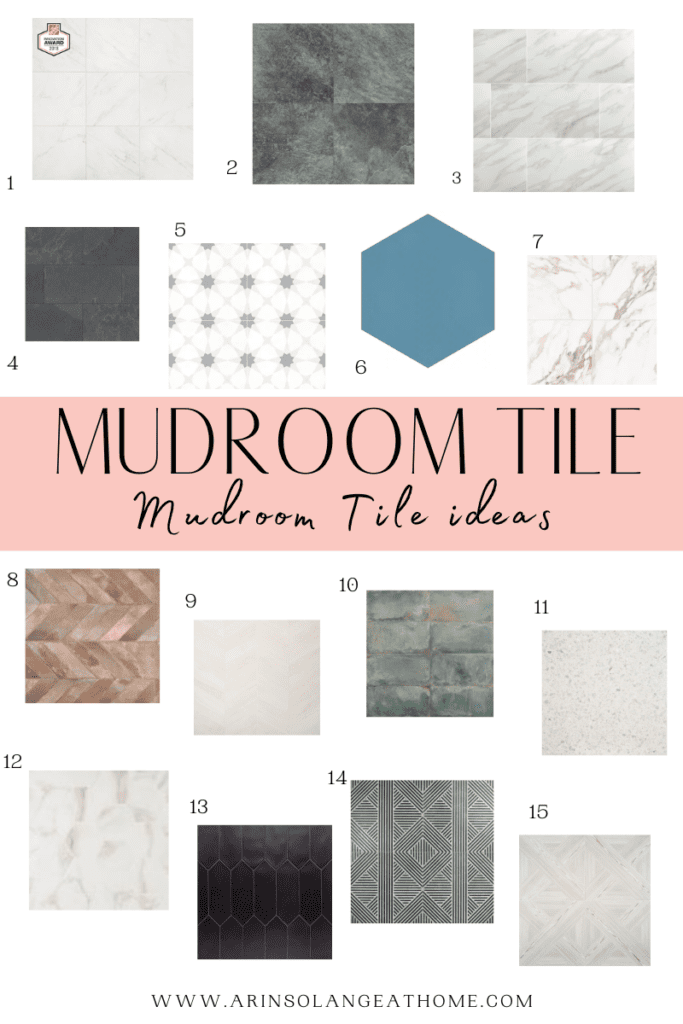
Carrara 18 x 18 Glazed Porcelain Tile
Strata 12 x 12 Matte Ceramic Stone Tile
Montauk 12 x 24 Textured Slate Stone Tile
Encaustic Taylora 8×8 Matte Porcelain Stone Tile
Merola Hexagon Porcelain Tile
Sculpt Chevron Cotta 24 x 48 Natural Porcelain Tile
Kenridge Chevron White Wood Like Tile
Angela Harris Flatiron Aquamarine 12 x 24 Matte Porcelain Tile
Terrazzo Italy Sacra Bianco White Honed Tile
Amalfi Calcatta Hexagon Matte Porcelain Tile
Aliante Black Porcelain Tile
Nolita Black and White 24 x 24 Matte Porcelain Tile
Barberry Decor Mandorla 24 x 24 Matte Wood Look Porcelain Tile
EpicClean Hollendale 24 x 24 Glazed Porcelain Tile

Mudroom tile floors are becoming increasingly popular as homeowners look for different ways to make their mudroom stylish and functional. Whether you’re looking for a classic look or something more modern, there are plenty of design options available to fit your needs. From functional ceramic tile flooring to stylish porcelain tile flooring, there is sure to be a flooring material that will work best for your mudroom and your family. In this guide, we’ll explore the different types of mudroom tile ideas and discuss the best types of mudroom flooring for creating an inviting and practical space in your home.


This post may contain affiliate links and was updated April 2024.


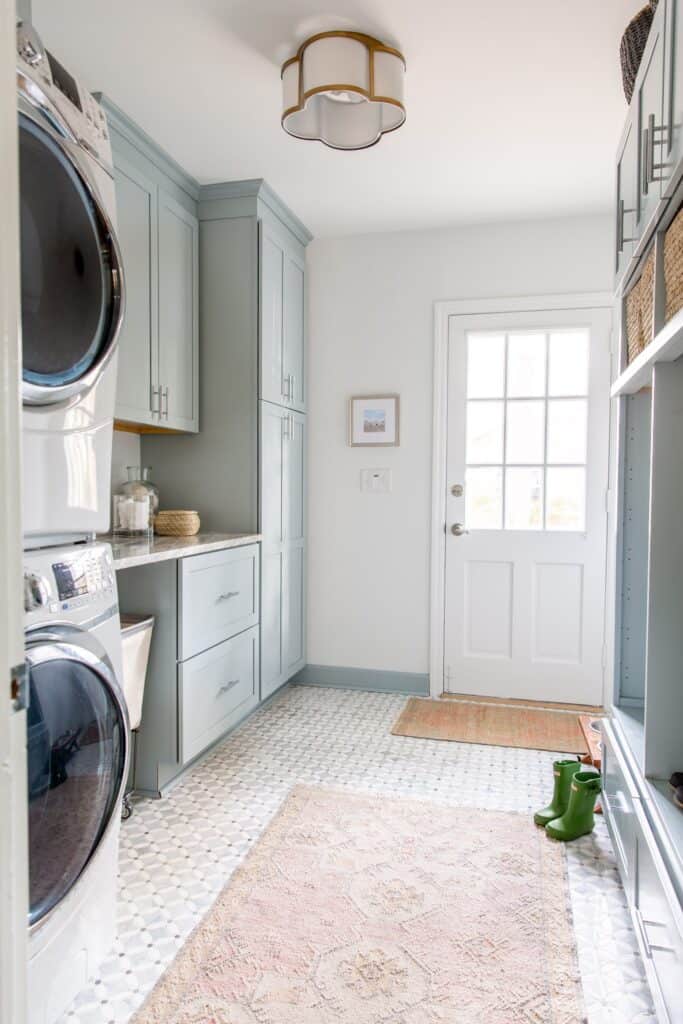
Mudroom grey and white tile marble floors with a pink staircase leading upstairs and wicker baskets hanging on the walls.


Mudroom Tile Ideas: Design Options For The Best Floor


When it comes to creating the best mudroom ideas, flooring is a major factor. You want to choose a tile that is both durable and stylish. We recently renovated our mudroom to make the space much more functional. The tile floors were the first thing to go! As a mom of four, one of my main priorities for my home is to not only make it stylish, but functional. 


The tile floors that were initially installed in our mudroom were not durable nor practical. You should not only love the look of the floors, but they should also be durable and be easy to maintain. Unfortunately, the only way to clean our original tile flooring was to use a magic eraser!


Scrubbing on your hands and knees is not practical, nor should you have to clean your floors that way! So while you may love the look of a tile, make sure you are okay with how to clean it properly.


Of course choosing the look of your new floors is the exciting part of any renovation. There are many design options available for the right flooring for your mudroom area, ranging from classic tiles to modern geometric patterns.


Whether you prefer a classic look or something more contemporary, there are plenty of tile ideas that will make your mudroom stand out. Explore some of the most popular options and find the perfect tile to create a beautiful and functional space in your home.


DIY art table with art easel and frames that are easily changed out for your kid's artwork.


What Is A Mudroom


A mudroom is a versatile space in the home that serves as a secondary entryway for people and pets. It can be used as a drop zone to store coats, dirty shoes, and other items that may not fit in the main living areas of the house.


Mudrooms are often located near the back of the house or side door of a home and provide an ideal place to keep items organized. Additionally, they can help reduce dirt and mess from entering the rest of your home. With careful planning, mudrooms can be designed to fit any size or home’s overall style.


While we have wall to wall lockers to keep our kids’ belongings organized and separate, you don’t need to have a mudroom that is quite that over the top. You can simply have a space in your home with some coat hooks, baskets, and a boot tray to drop off your items. Regardless of the space you are working with, you can still make a mudroom that fits your family’s needs.


Floor to ceiling mudroom cabinets in white and bronze cabinet hardware.


What Makes A Functional Mudroom?


A mudroom is an essential part of any home, providing a convenient place to take off and store outdoor gear. Whether you have an entire dedicated room or a carved out corner, you’ll want to make sure it stays organized and clutter-free for a functional space. 


Dedicated Storage Space


A functional mudroom is a must-have for any household. It provides a dedicated space for storing items like coats, shoes, umbrellas, and other items that may be used on a daily basis. The key to creating a functional mudroom is to ensure it has enough storage space for all the items you need to store. This can include shelves, coat hooks, cabinets and drawers as well as designated spaces for specific items like hats and gloves. 


Additionally, it’s important to make sure the mudroom is easy to access and organized so that you can quickly find what you need when you need it. For my family of six, we have a locker for each of the kids. I have solutions to keep things organized in each one. These lockers keep things off the floor and in place for when my kids need to run out the door.


DIY art table with art organization and art frame.


Durable Materials


To ensure that your mudroom is functional and durable, it’s important to use materials that can withstand the wear and tear of everyday life. This space will be open to elements from outside, including shoes, muddy feet, dirt, water, sports equipment and jackets.


 Durable materials such as hardwood flooring, tile, laminate flooring, and luxury vinyl plank if you want the look of wood without the maintenance of the real thing are ideal for today’s mudrooms because they are easy to clean and maintain. 


Additionally, these materials can also be treated with special sealants or coatings that provide additional protection from moisture and dirt. By choosing the right materials for your mudroom you’ll be able to create a space that looks great and stands up to the test of time.


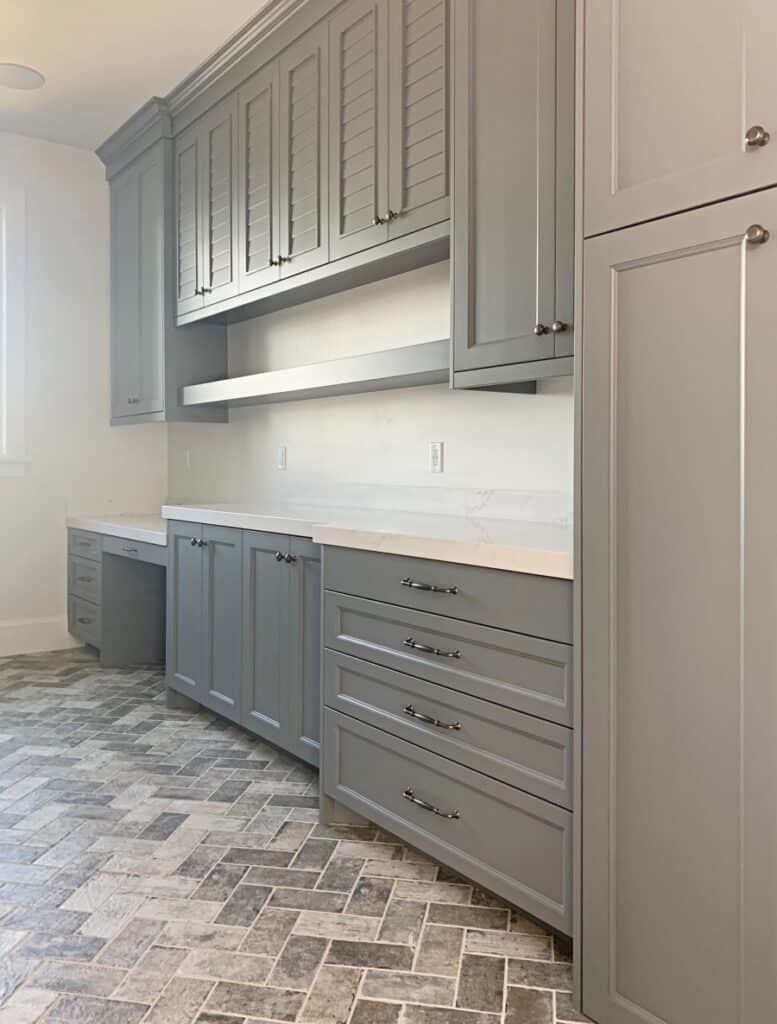
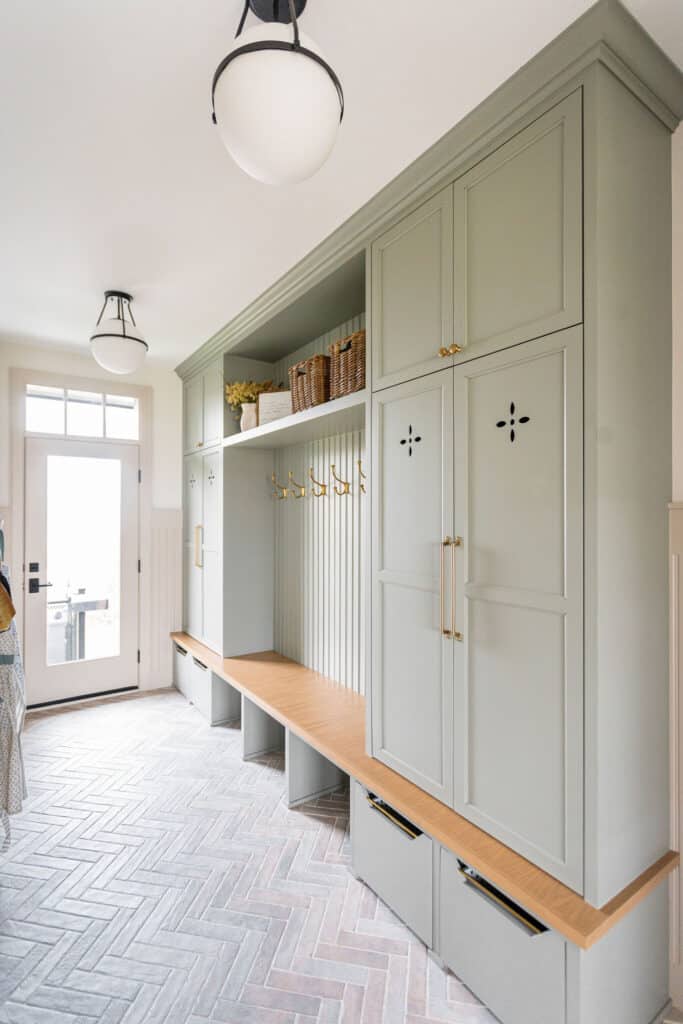
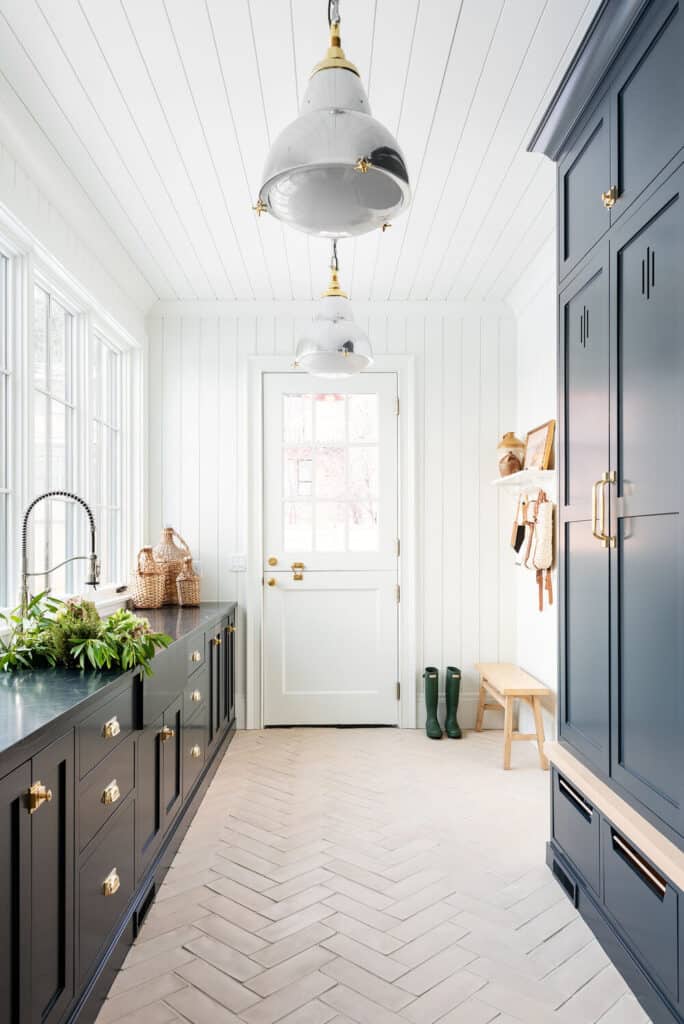
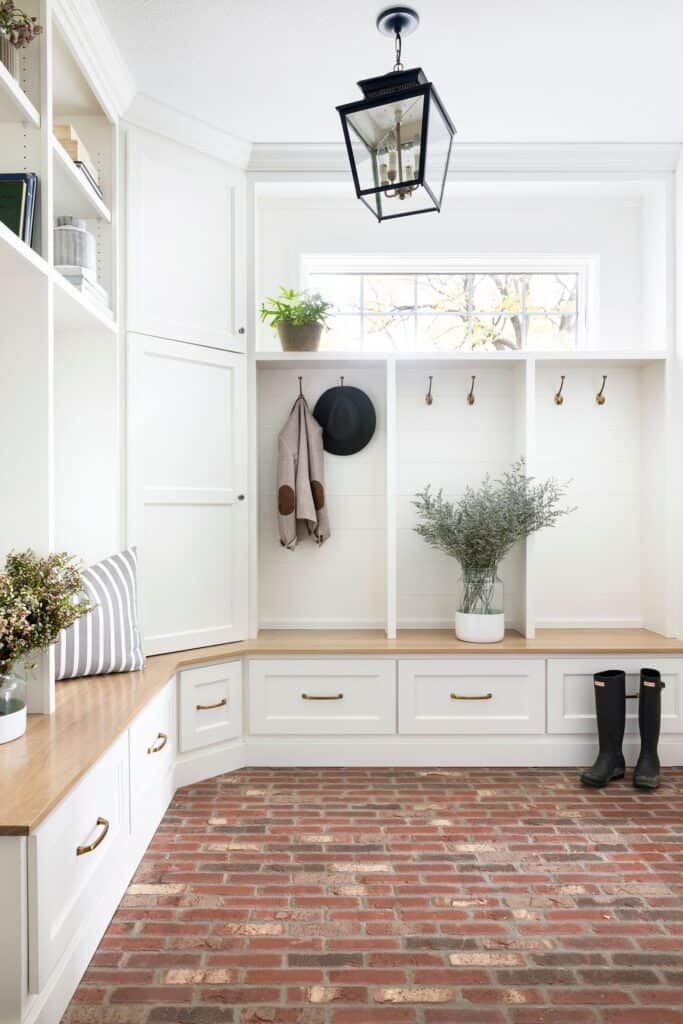
Mudroom brick flooring in a herringbone pattern.
Brick tile is a great example of a durable material for your mudroom.


How To Choose The Best Tiles For Your Mudroom


Choosing the perfect tiles for your mudroom can be an overwhelming task. You have to consider both aesthetics and functionality. It is important to select tiles that are aesthetically pleasing, as they will be a part of your home’s design, but also functional enough to withstand the wear and tear of this high-traffic area. We’ll look at how to pick the best tiles for your mudroom in order to create a beautiful and practical space.


Aesthetically Pleasing


Choosing the right tiles for your mudroom can be a tricky task. You want to make sure that the tiles you choose are aesthetically pleasing because you’ll see them everyday. With so many different tile options available, it can be hard to know where to begin. 


It is important to consider several factors in mind to help you narrow down your focus. Consider the design, pattern, color palette, size, and placement of your tiles. 


Determine the type of style you want in your mudroom. Do you intend to have a space that feels more modern versus traditional? Do you want something moody or light and airy? Would you like to look at tiles with prints, designs, or patterns, or do you want to create your own pattern with solid designs but a pattern placement of tiles? You can also create a focal point in your mudroom with your tiles.  All of these decisions are totally your call and completely dependent on your own personal design choices. 


By keeping these in mind, you’ll be able to find the perfect tiles for your mudroom in no time!


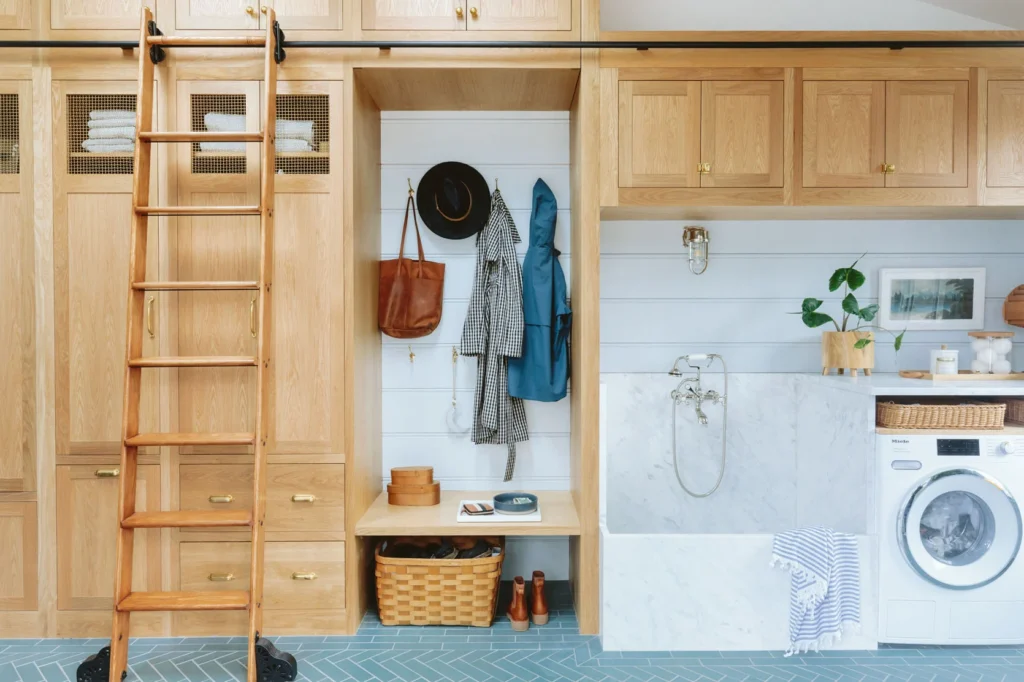
Mudroom with blue herringbone pattern.
This mudroom has it all- including a dog wash!


Functional


Tiles are a great choice for mudrooms because they are functional. They are durable, water resistant, scratch resistant, and overall, a great option. When choosing the best tiles for your mudroom, you should consider how well they will hold up in this high traffic area, as well as how they will look in the space. This means you’ll need to pay attention to the different materials that tiles can be made up of to ensure you are picking the best choice for your family’s needs.


With different materials you’ll need to look at the pros and cons of each. If you don’t have pets or kids, you may be okay with a tile that takes a bit more work to clean.  On the other hand, if you have kids and pets, you’re going to want a tile that is extremely durable and easy to maintain. In other words, you’re not going to want to get down on your hands and knees with a magic eraser to clean your mudroom.


Here are a few examples of different tile materials and a look at their pros and cons:


Porcelain Tile


Porcelain tile floors are one of the most common types of materials that you can pick for your mudroom. While porcelain tile is very similar to ceramic tile, the main difference between the two is how much water is absorbed.  


Porcelain tile absorbs less water than ceramic tile and is therefore, harder, more dense, and more durable than ceramic tile.  On the other hand, they can be more slippery when wet, so you’ll need to watch your step. 


Pros: Durable. Good for heavy foot traffic. Easier to maintain.


Cons: More expensive. Can be slippery when wet. Requires a skilled hand for install.


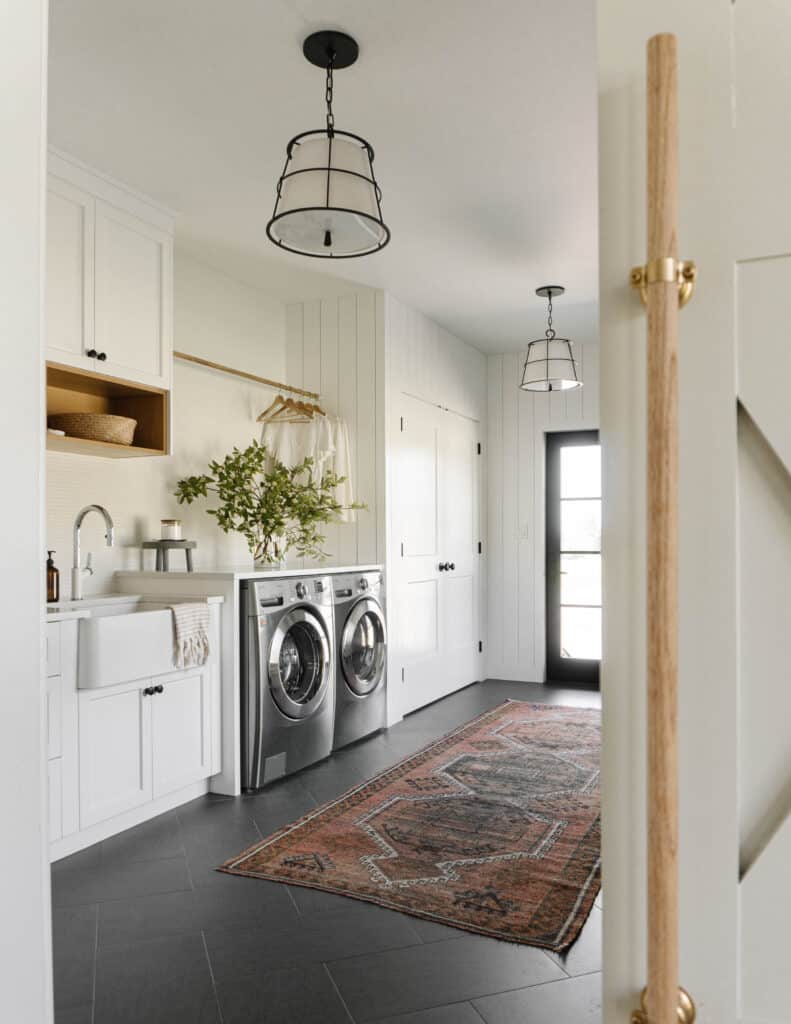
Farmhouse style mudroom with dark black tiles and a southwestern boho red rug.
This beautiful mudroom was completed by Kassandra Dekoning.


Ceramic Tile


Ceramic tile can be a great choice if your design is more important than maintenance and durability. You can find beautiful patterns, colors, and shapes in ceramic tiles for your space. However, keep in mind some of these designs may not be the most durable options. As a result, you may have flooring that is not suitable for heavy foot traffic or may be difficult to clean and maintain. 


Pros: More design options. Easier to install than porcelain. Cheaper.


Cons: Not recommended for high traffic areas. Can be difficult to maintain and clean. Can be prone to cracking with colder weather.


Natural Stone Tile


There are many options when it comes to natural stone tile flooring ranging from marble, limestone, and granite, to travertine and sandstone. All options have their own unique beauty to create a truly one of a kind look. 


Pros: Unique appearance. Sturdy and durable materials. Less slippery than ceramic and porcelain when wet. Helps provide insulation to cool and warm your home in the different seasons. 


Cons: Extremely expensive. Some natural stones can be easily chipped or scratched. Requires regular maintenance and sealants to prevent staining and water damage. 


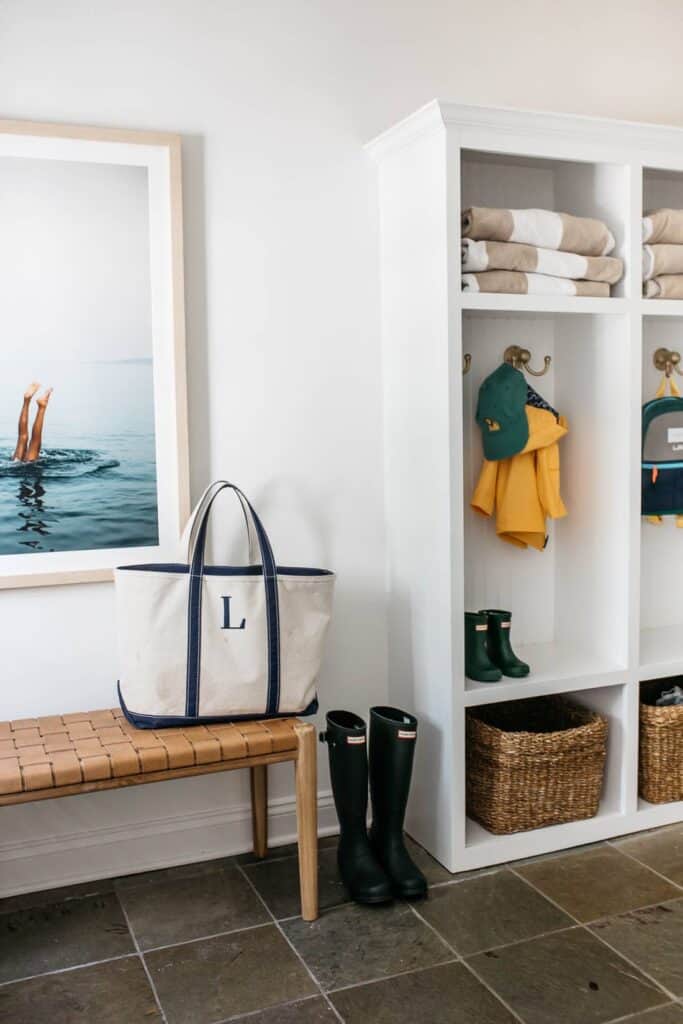
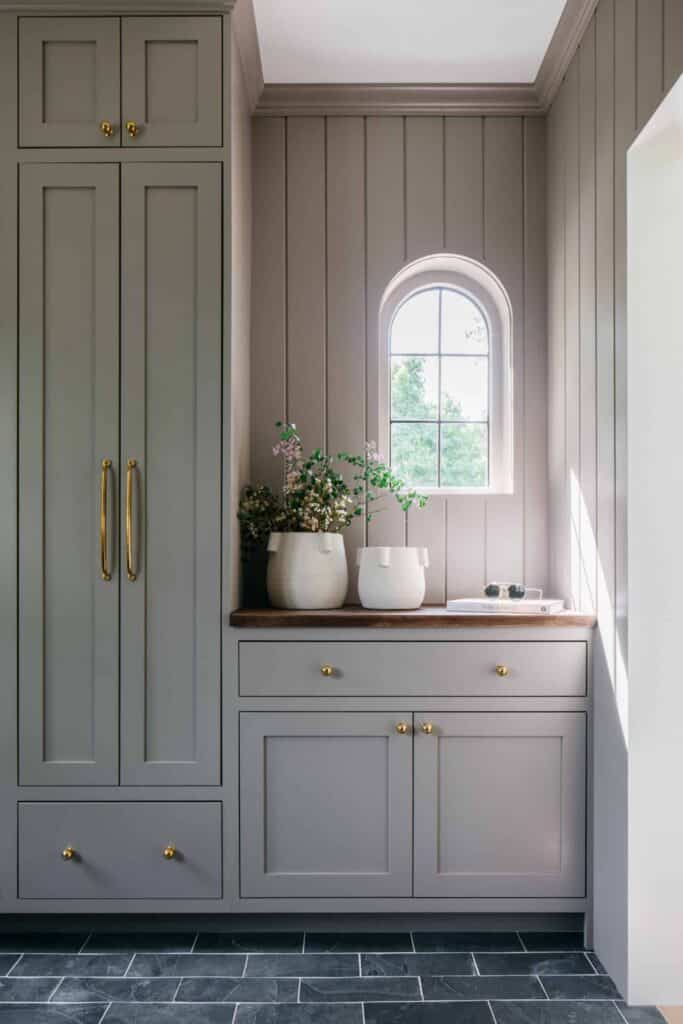
Mudroom with dark stone square tiles.
This is a great example of a smaller spaced mudroom that is functional and pretty.


Mudroom Tile Ideas: Design Options 


Mudroom tile ideas can make all the difference in your home. From classic to modern, there are a variety of design options that can be used to create a stylish and functional mudroom. Whether you’re looking for something sleek and simple or something bold and eye-catching, there’s sure to be a tile option that will fit your needs. With the best mudroom tile ideas, you can create a space that is both beautiful and practical.


Modern Tiles


Mudrooms are often an overlooked space in the home, but they can be transformed into a stylish and functional area with the right tile design. Modern tiles come in a variety of shapes, sizes and colors that can easily be incorporated into any great mudroom design. From classic subway tiles to trendy hexagons, there are plenty of options to choose from when it comes to modern tiles for your mudroom.


Transitional mudroom with green hued tint herringbone tile pattern.
Beautiful modern tiles designed by Alma Homes.


Pattern Tiles


Mudroom tiles are a great way to add texture and pattern to your home. Pattern tiles can be used to create an eye-catching and unique look in your mudroom. Whether you’re looking for something traditional or modern, there are plenty of options available that can help you achieve the perfect look. From classic subway tile designs to geometric shapes and colorful glazes, pattern tiles are a great way to add personality and style to your mudroom. With the right combination of colors, textures, and shapes, you can create a space that is both inviting and stylish.


A black and white geometric tile pattern in an all white mudroom.
This bold pattern looks incredible in this laundry and mudroom.


Neutral Tiles


If you’re looking to create a mudroom that is both functional and stylish, then neutral tiles are the perfect choice. Neutral tiles come in a variety of shapes, sizes, and colors, making them ideal for creating an inviting space without being too overwhelming. With neutral colors you can create a light and airy mudroom. They also pair well with other design elements like wood furniture and brass light fixtures.


Natural stone herringbone tile offsets the dark cabinetry and dark countertops in this mudroom.
Studio McGee’s home mudroom is a great example of a neutral color that adds a bright and airy feeling.


Natural Stone Tiles


Natural materials such as stone tiles are a great way to add a touch of style and sophistication to your mudroom. They are durable, easy to clean, and come in a variety of colors, textures, and sizes. Natural tiles can also help create an inviting atmosphere that is both comfortable and welcoming. Whether you want to go for rustic charm or modern sophistication, natural tiles will help you achieve the look you desire in your mudroom.


Rectangular stone tile in navy is showcased in this farmhouse mudroom.
I love the look of this dark and moody natural slate tile.


Brick Tiles


Adding real brick tiles to your mudroom is an excellent way to add texture and style to the space. Brick tiles are a great choice for mudrooms because they are durable, easy to clean, and come in a variety of colors and textures. Whether you want a classic look or something more modern, brick tiles can help you create the perfect mudroom. With the right tile selection, you can create an inviting atmosphere that will make your guests feel welcome.


An all white mudroom with natural wood and red brick flooring.
The beautiful brick flooring adds texture and warmth to this mudroom.


Geometric Tiles


Geometric tiles are another great way to add texture and interest to your mudroom. You can create an eye-catching design that will make your mudroom stand out. Whether you choose small hexagonal tiles or large format tiles, geometric tiles can bring a modern, contemporary look to any space. With the right combination of colors and patterns, you can create a unique look that is sure to impress.


A laundry room and mudroom with geometric neutral tile.
My good friend at Olive & Tate has the coolest geometric tile in her mudroom.


Mudroom Tile Ideas: Design Options Round Up


Mudroom Tile Ideas Pinned Round Up 15 Choices


1 | 2 | 3 | 4 | 5 | 6 | 7 | 8 | 9 | 10 | 11 | 12 | 13 | 14 | 15


  1. Home Depot Carrara 18 x 18 Glazed Porcelain Tile  – This is one of the tiles we have in our mudroom.
  2. Home Depot Continental Slate Tuscan Blue 18 x 18 Porcelain Tile– I love the shades of blue throughout this one.
  3. Home Depot Strata 12 x 12 Matte Ceramic Stone Tile – This is a perfect neutral that will go with all different designs.
  4. Home Depot Montauk 12 x 24 Textured Slate Stone Tile – This is a gorgeous textured stone tile.
  5. Home Depot Encaustic Taylora 8×8 Matte Porcelain Stone Tile – I love this design and think it is so fun and  playful.
  6. Home Depot Merola Hexagon Porcelain Tile– This comes in several different colors!
  7. Home Depot EpicClean Hollendale 24 x 24 Glazed Porcelain Tile– 
  8. Tile Bar Sculpt Chevron Cotta 24 x 48 Natural Porcelain Tile– If you want a look similar to Studio McGee’s mudroom, this is the tile for you.
  9. Tile Bar Kenridge Chevron White Wood Like Tile – I love this classic look with a fun twist.
  10. Tile Bar Angela Harris Flatiron Aquamarine 12 x 24 Matte Porcelain Tile– I love this aquamarine tile that looks almost like bricks. You could have a cool rustic vibe to your mudroom.
  11. Tile Bar Terrazzo Italy Sacra Bianco White Honed Tile– A beautiful terrazzo stone tile.
  12. Tile Bar Amalfi Calacatta Hexagon Matte Porcelain Tile– This is a classic.
  13. Tile Bar Aliante Black Porcelain Tile – This tile is really chic and sophisticated.
  14. Tile Bar Nolita Black and White 24 x 24 Matte Porcelain Tile – The line designs of this tile adds dimension and interest.  
  15. Tile Bar Barberry Decor Mandorla 24 x 24 Matte Wood Look Porcelain Tile– If you like the look of wood but want some texture and a porcelain tile, this is a great option.
Home

Blind Corner Kitchen Cabinet Ideas For Smart Storage

Shop the Post
LED rechargeable motion activated light
Magic Corner Lazy Susan
4 Shelf Magic Corner Organizer
Lazy Susan Pull Out Drawers
Narrow Pull Out Corner Shelf
Floating Shelves 42×8
Narrow Plastic Storage Bins 2pk
Large Plastic Storage Bins
Open Front Plastic Storage Bins
Clear Plastic Storage Bins w/Handles
Swing Blind Corner Cabinet Organizer
Fluted Lazy Susan

Are you looking for creative storage solutions for your blind corner kitchen cabinets? Blind corner cabinets can be difficult to utilize, as the space is often awkward and hard to access. With four kids and a lot to store, it can be even more challenging. But don’t worry! There are plenty of clever ideas that will help you maximize the space in your blind corner cabinet and turn an otherwise difficult to utilize area into an organized storage solution. Let’s take a look at some of the best ways to make use of this tricky corner without having to bury all your items in a pile of clutter! Take a look at my top blind kitchen corner cabinet ideas to give you the best solutions for smart storage options.


This post may contain affiliate links and was updated May 2024.


White kitchen with natural chairs and a gold vase with floral accents on a large white island.


Blind Corner Kitchen Cabinet Ideas For Smart Storage


Most kitchens have them and many homeowners struggle to find the best solution to utilize them well – blind corner kitchen cabinets. What are you going to store in them and how are you going to access the items when you need them? Will the cabinet become a dark abyss of garbage bags and dish soap or an effective solution with a unique design for small appliances?


The good news is that there are more creative ways to solve blind corner kitchen cabinets’ accessibility problems than ever before. These solutions will maximize storage without sacrificing style. Whether you are looking for something modern or traditional, there are plenty of options when it comes to blind corner kitchen cabinet ideas. 


From sliding shelves and pull-out drawers to open shelving and adjustable doors, there is something for everyone when it comes to these innovative storage solutions. In this post, we will explore some of the best blind corner kitchen cabinet ideas that you can use to make the most of this type of cabinet. We will also discuss some smart storage solutions that you can incorporate into your design in order to make sure your items stay organized and easily accessible. With these ideas in mind, you will be able to create a functional and beautiful kitchen that will last for years!


A close up of a white cabinet corner with a kitchen range.


Why Are Corners So Difficult?


Corner kitchen cabinets provide a great use to maximize storage space in the kitchen, but they can also present some unique challenges. Have you ever had difficulty finding a storage solution for your kitchen that fits in the corners? Upper cabinets and base cabinets both have blind corners and are notoriously difficult to work with, as they are often deeper and more narrow than the rest of the kitchen. This makes it difficult to find a storage solution that will fit in the awkward space, while also providing ample storage and easy access.


 In this article, we will discuss blind corner kitchen cabinet ideas for smart storage solutions that make use of this often neglected space. We will look at why corners can be so difficult to work with, as well as how to maximize depth and height, lighting options, and other creative solutions.


A white kitchen with large kitchen island and large dog posing in front of the island.


Awkward Spacing Can Limit Storage Options


Corner cabinets tend to be deeper and can be more narrow. This results in awkward space, resulting in less storage space being used because of the awkwardness of the shape. These cabinets are often difficult to reach due to the depth of the cabinets, making it hard to access items stored in them. Upper cabinets can utilize vertical space, but then can be difficult to reach due to their height. Additionally, corner kitchen cabinets tend to be darker in these spaces because of the corners and often become unused because of this. It can be harder to see what is buried in the corner. 


It is important for homeowners to consider these challenges when deciding the solution that is right for their home. Whether you have dark corners that are limiting your ability to see, or if you can’t reach those deep base cabinets, there are plenty of great ideas to help you overcome those obstacles.


Close up of white cabinets next to a kitchen stove.


Blind Corner Kitchen Cabinet Ideas For Smart Storage Solutions


Although they can be a nuisance, blind corner kitchen cabinets are a great way to make the most of your kitchen storage, especially the items you don’t use as often as the rest. These cabinets provide an effective way to store items in corners that are often left unused. With their clever designs, they can fit into even the tightest of spaces, allowing you to make use of every inch of your kitchen. Not only do they provide extra storage space, but they also look great and can be customized to suit any style.


Read on to find out more about blind corner kitchen cabinet solutions for you with some pros and cons to keep in mind for each.


Under Cabinet Lighting


There are a few things that can be done to improve corner cabinet accessibility. One idea is to place light fixtures in the corners. You can purchase rechargeable adhesive LED lights that are a cinch to use and take very little effort to install. If you can physically reach your corners, this may be a great option if you are lacking the ability to see the items you want to access. Check out this great LED rechargeable motion activated light that would work perfect in those pesky blind corner cabinets.


Pro: You are able to see quickly and easily with minimum effort.


Con: This solution only helps if you are having trouble seeing your items you have stored. It doesn’t help you if you can’t actually reach your items due to the depth or spacing of your cabinets.


2 pack motion sensory light.


Accordion Cabinet Doors


An accordion door is a common way to handle blind corner kitchen cabinets. This would work for a corner cabinet that is L-shaped. 


Pros:  Accordion doors cover the cabinet with what looks like two side by side doors nicely. It allows all of the kitchen corner cabinet space to be used as extra storage.


Con: It doesn’t help you access whatever is being stored in the cabinet. Depending on how deep and wide the cabinet is, this may be problematic. Sometimes these cabinets become a messy spot because it is a big cabinet space without organizing solutions.


 I would recommend adding lighting if you have one of these types of cabinets. That will allow you to quickly scan and find what you are looking for. I would also recommend using storage organizers in a corner cabinet that is so large. Sections for cooking, baking, and preparation tools would keep things organized. Make sure you check out my favorite organizers at the end of this post.


White kitchen corner cabinet with stove and a white dutch oven sitting on the stove.


Lazy Susans


A lazy susan system is a great solution for a blind corner kitchen cabinet and one of the most popular. It allows you to rotate shelves around and access items from any angel. This makes it easier to find what you’re looking for. 


Pro: You have easy accessibility utilizing lazy Susans because you don’t have to reach way back for anything you have stored. They help you make use of otherwise wasted space, as they can fit in corners that are too small for traditional shelving systems. With a lazy Susan, you can store more items in less space, maximizing your storage capacity in your kitchen cabinets. While you can certainly use a traditional lazy Susan system in your cabinet, you can also buy lazy Susan cabinet pull out drawers  that work in the same manner as a lazy Susan (more on that later).


Con: There may be some dead space in the back of the cabinet that will go unused. This is because a standard lazy Susan is round and the cabinet is square, so the very corners won’t be well utilized space. I would recommend separate sections for items that group well together here too. For instance, if you store food here, I would keep all canned goods apart from boxed goods. This will keep some order in what could otherwise become a black hole.


Clear acrylic lazy susan.


Magic Corner


If you’ve never heard of a magic corner, before you decide what to do with your blind corner kitchen cabinets is the best time to look it up. Kitchen cabinet solutions can be difficult to find, especially if you have limited space. One solution is becoming increasingly popular and that is the use of a magic corner. Magic corners are a new take on lazy Susans.


This type of corner kitchen cabinet utilizes a rotating system to maximize space and provide easy access to items stored in the cabinet. It is an ideal solution for those who have limited kitchen space but still want to make the most out of it. This magic corner lazy Susan is a great option. I also am a big fan of this 4 shelf magic corner organizer.


Pro: They provide the best use of dead corner space by using squared pull outs so as much space as possible can be utilized. They utilize swinging pull out trays on a track to provide easy access to what could have been the hardest to access spot in your kitchen. With this type of corner kitchen cabinet, you will be able to store more items in a smaller area while still having easy access to them.


Con:  They can be on the pricier side of solutions. You’ll also need to make sure you note the correct size of your cabinets and whether you can have the drawers swing out left or right. This will be determined by the layout of your kitchen. Installing may require lots of patience or a professional. Cleaning can also be quite tedious. 


Corner kitchen cabinet shelving solution.


Corner Drawer Slide Outs


Corner drawers can pull straight out of the corner with organizers to help reach in often narrow spaces.  You will need to make sure you measure for the width and depth, but also the height. There are plenty of options in various sizes that can accommodate most cabinets. In addition, be sure to double check which way your cabinet opens: left or right.  This option for left hand opening cabinets is really nice. Or, check out this great option that would make a perfect spice rack.


Pro: Use of narrow space to use every inch of storage space. You can use it for spices, cleaning supplies, and smaller tools. While they are often seen in narrow options, corner drawer slide outs can be very versatile. You can use these under your kitchen sink or in another drawer that needs a bit more organization.


Con: They aren’t able to hold large items and they aren’t accessible while other cabinet doors or drawers are open. Additionally, they will still have space next to them that may either become dead space or hard to reach space at the back corner of the cabinets next to them. 


Pullout corner kitchen cabinet unit.


Open Shelves


Just because you have blind corner cabinets doesn’t mean you need to necessarily use them. If you prefer, you can always forgo the storage space and find another solution that works well for you and  your family. 


Open shelves are a great option to have full access and visibility to all the space in your kitchen, making it easier for you to find and store items. Additionally, open shelves can also be used as a decorative feature, adding a unique touch of style to your kitchen. They are a great place to store small dishes and decorative mugs along with a plant or two. You can easily make your own floating shelf via my DIY here. Or, if you prefer, buy your shelves to save some time. We have these floating shelves and love them! 


Pro: . With the right design and placement, open shelves can be an effective way of maximizing storage space while still keeping your kitchen looking stylish and organized. 


Con: Open shelves can get dusty so adding it into your cleaning routine is a must. Keep in mind that your open shelves are always visible without a cabinet door to hide anything, so it is a good idea to keep it tidy like you would your kitchen counter.


Open floating shelves with pink glasses and floral wallpaper.


Blind Corner Kitchen Cabinet Ideas Storage Solutions


1 | 2 | 3 | 4 | 5 | 6 | 7 | 8 | 9 | 10 | 11 | 12


  1. LED Rechargeable Motion Activated Cabinet Light – These take very little effort to install.
  2. Large Plastic Storage Bins – These bins are great for storing larger items.
  3. Small Plastic Storage Bins – These bins are great for smaller items that usually get lost.
  4. Narrow Plastic Storage Bins – These narrow bins fit in awkward spaces.
  5. Open Front Plastic Storage Bins – The open front of these bins make it easy to reach items that are farther back.
  6. Lazy Susan – A lazy susan is the MVP of organizing and can be used in countless ways.
  7. Lazy Susan Pull Out Drawers – This particular one swings out right.
  8. Magic Corner Lazy Susan Drawers – This organizer swings left and can fit multiple items.
  9. Four Shelf Magic Corner Drawer – I love how this one can be used for right or left swinging cabinets. 
  10. Swing Blind Corner Cabinet Organizer – You can adjust the height for this one to fit your needs.
  11. Narrow Pull Out Corner Shelf – This would work great as a spice rack drawer.
  12. Floating Shelves -I love how adding these really maximizes your space.


Organization

How To Organize Water Bottles In The Kitchen: Smart Storage

Shop the Post
Water Bottle Rack 4pk
12×12 Wicker Baskets
12×8 Clear Container
Clear Plastic Baskets 3pk
Stackable Lidded Bin 2pk
Metal Wine Rack
Over the Door Wire Rack
Over the Door Mesh Organizer
Clear Plastic Storage Bins w/Handles
Tumbler Lid Hooks 2pk
Water Bottle Organizer – 12 bottles
Fluted Lazy Susan

It is no secret that every family has that one kitchen drawer. The drawer where all of your Tupperware and water bottle collection goes to disappear. Just when you think you’ve cleared out all the unmatching pairs, you find another one. With summer coming up, that means lots of hot days in the sun and lots of water bottles to keep track of.  If you are struggling to keep all of your water bottles together, I’ll share how to organize water bottles in the kitchen using storage solutions that work.

This post may contain affiliate links and was updated May 2024.

Butler's pantry with white cabinets

How To Organize Water Bottles In The Kitchen: Smart Storage

We are finally getting a taste of Spring with warmer temperatures. I can’t wait for those warmer months when we can finally come out from our homes and enjoy the outdoors more. My big kids are big into sports. So every weekend we end up being out at the baseball field cheering on our favorite team. 

If you want to check out my must have products to help you battle the heat, check out my Amazon storefront for sports here. One thing we never leave home without are our lot of water bottles. There is nothing worse than having a cranky, sweaty, dehydrated kid in the summer.

While I may remember to pack my kids’ water bottles, organizing those bottles is a different story.  With some prodding, I’m lucky if my older  kids remember to bring their bottles in from the car. From there, then I have to overcome the obstacle of making sure our larger collection of reusable water bottles are placed in an organized space. 

If you are struggling to keep your kitchen cabinets space functional and track of your favorite water bottle, then you’re in luck.  I’ll be sharing some creative ways to store water bottles.  No more mismatched tops or misplaced bottles.  Take back your kitchen space with these water bottle storage ideas.

Little boy in baseball gear

Do A Little Prep

First things first, you are going to have to do a little prep work before you can implement your water bottle storage hack. 

Over the years, you may have noticed that you have lots of water bottles. For some reason, my collection seems to grow each year.   So not only do I have more drinking glasses to keep track of, but I also have to find enough room in my kitchen cabinets to fit all of them.

Before you go out and buy a water bottle organizer, you’ll want to do a bit of prep work.  That means, go through your collection. I know this may seem like a step you can skip, but trust me, you can’t.  Kitchen clutter can accumulate so quickly. If you have a small kitchen, you likely don’t have the extra space to hoard all of those mismatched bottles.  

One of the easiest ways to begin organizing your collection is by pairing it down. Time to declutter and decide what bottles should be kept and what ones may be missing parts and donated. This takes a little extra time but requires no extra cost. It is a simple solution if you already have fairly organized cabinet shelves, but just lacking on available space.

Butlers pantry with cabinets

Consider Your Space & Size

You can’t get good use out of your water bottle organizer unless you consider your space first.  This means, don’t end up buying a stackable water bottle storage rack if you don’t plan on putting it in a cabinet shelf that can accommodate it for the height of the rack.

You need to decide on where you intend to store all of those bottles. The size and location of your collection will impact the organization ideas you can implement. For example, if you don’t have a dedicated cabinet space, a cabinet door may be an option.  If that is the case, utilizing a door shoe organizer is a great idea if you don’t have a lot of space.

For a large family, a dedicated lower cabinet may be a great option. Generally, base cabinets are deep and have plenty of room to house a large collection. It can also be ideal because of it being easy access for those smaller kiddos who want to use their independence.  Keep in mind that if you do place your collection on a lower pantry shelf or cabinet, you’re likely to have to re-organize often if you have a family member with little hands.  For some reason, base cabinets make the best hiding spot in hide and seek. 

White kitchen, white countertops, white backsplash.

Take Inventory Of Your Water Bottle Collection

By now you should have already paired down your collection. I like to make sure all the bottles, lids, straws, and tops are all together and accounted for in my collection. If any parts are missing, time to remove them out of your rotation or buy the missing part to make it complete.

Now is also the time to organize your bottles by size and shape. You don’t need to go crazy and do a color-coded system. Instead, a simple option is to just put your bottles together by similar heights and widths. Since water bottles come in various sizes, you may have a storage solution that is better suited based on your water bottle’s size. 

Do you have a collection of taller bottles that need to be placed on their sides? Or, do you have wide stainless steel mugs that may be shorter and easily stacked?  The size and shape of your collection will play a big role in the type of water bottle storage solution you can implement. 

Inside a pantry with wicker baskets and glass jars labeled with essential foods.

How To Organize Water Bottles In Kitchen: Storage Solutions For Any Space

Regardless of where you plan on storing your bottles or the different sizes of your collection, you can find a storage solution to fit any need. Here are a few of my favorite solutions to answer the question of “How to organize water bottles in the kitchen?”

1. Water Bottle Rack

Water bottle storage 2 tiers.

This stackable water bottle rack is the perfect solution for all of your water bottle woes. You’ll notice though, that the rack accommodates 6 bottles total.  If you need a larger option and have the space, you can always add additional shelves.  You may be limited on the size and shape of your collection.  Either way, this is a great water bottle holder that will work for most types.

2. Large Baskets

Wicker basket for water bottle storage.

I have several travel mugs that have a wide base.  As a result, the special rack isn’t a great solution. Instead, I love using a storage box like these cute wicker baskets to hold those awkward sized bottles.

3. Clear Container

Clear acrylic bin for water bottle storage.

While I love a good wicker basket, I will say that nothing beats being able to quickly see what is in my bins. Wicker baskets can be easily placed out in plain sight and still look aesthetically pleasing while serving its purpose. If you have the space, I much prefer clear containers, but I understand that some people may not have the ability to utilize an entire base cabinet or large drawer. 

4. Plastic Baskets

Tall clear acrylic bins.

These plastic storage baskets are another great alternative. You may have a hard time dedicating enough space to accommodate those larger solutions. These storage baskets are a great way to display your collection on a pantry shelf. I will warn you that they come in and out of stock frequently. I’ve linked a similar item since my original was out of stock.

5. Storage Bins

Shallow clear acrylic bins for water bottle storage.

These clear storage bins are just another example of an easy way to quickly organize your collection. The size is more forgiving for small spaces and can easily hold several bottles. I’d place these in a deep drawer.  If you have multiple sizes of bottles, this bin would be a great alternative for your smaller kid cups.

6. Lazy Susans

water bottle organization

Lazy Susans may be one of the most versatile storage solutions on the market. You can use them from storing condiments in your fridge to storing beauty products on your bathroom counter. It should come as no surprise that a lazy Susan is a great way to utilize shelf space to organize those water bottles.

7. Stackable Bins With Lids

White bins with lids can stack water bottle accessories.

If you need a way to organize all of those smaller parts of your collection, these stackable bins with lids are a great option. I love that you can store straws, lids, and even bottles in these bins. The lids allow you the ability to stack the bins to further maximize storage space.

8. Wine Racks

Brass or gold honeycomb looking wine storage as a water bottle storage.

It’s not that far of a fetch to use an old wine rack to help organize your water bottle collection. A bottle is a bottle, after all.  I love this beautiful wine rack that can hold up to 11 wine bottles- er water bottles. This options works well if you need to showcase your storage solutions due to space. Store it on your kitchen counter for a beautiful storage piece.

9. Stackable Racks

This stackable rack is one of the best ways to store those bulkier tumblers like 40oz Stanleys . I love that you can have multiple rows and columns to fit almost any space you need. This options allows you to store up to 12 water bottles and is ideal for larger families or a large collection of bottles.

10. Over The Door Wire Racks

Over the door pantry organizer can help organize water bottles.

Sometimes you need to make use of every inch of storage space you can find. If you have a laundry room or pantry, consider adding this over the door wire rack. You can store water bottles and other items that you need to grab quickly to be out the door. The perfect solution for a quick grab and go- sunscreen, water bottles, shoes, etc. You have a built in mudroom in these 8 shelves.

11. Over The Door Organizer

Over the door closet organizer can help store watter bottles.

Sure you can use an over the door shoe organizer, but this water bottle organizer takes the cake. If you need an over the door storage solution this is a great option. With enough room to hold up to 12 bottles, there are separate spots for lids and other accessories.

12. 2 pk Tumbler Lid Organizer

If you need an option to store the lids of tumblers and water bottles, these hooks are a great choice.  You can either drill these into your cabinet or use the adhesive backing.  These hooks are great at utilizing the top space above items and give you a nice view to find just what you’re looking for.  

Water Bottle Kitchen Storage Solutions

How to organize water bottles in kitchen

Shop Water Bottle Storage Solutions

2 | 3 | 4 | 5 | 6 | 7 | 8 | 10 | 11 | 12

  1. Water Bottle Rack – This is a great solution if you’re short on cabinet height.
  2. Large Wicker Baskets – These baskets can easily hold those awkward shaped bottles.
  3. Clear Container – I love a good clear container to easily see what’s inside.
  4. Plastic Bins – These storage baskets are a great way to display your collection on a pantry shelf.
  5. Storage Bins – These bins are great for a small space and would work well for kids water bottles. 
  6. Lazy Susans – One of the most versatile ways to store water bottles. 
  7. Stackable Bins With Lids – This option allows you to stack multiple bins on top of each other as well as store all of the smaller parts like straws and lids.
  8. Wine Rack – This solution works great as a beautiful storage piece.
  9. Stackable Rack – This one is awesome because it can fit those larger 40oz tumblers with handles.
  10. Over The Door Wire Racks – If you’re very short on space, consider this option over a laundry room or pantry door.
  11. Over The Door Organizer – I love that this option has dedicated spaces for lids and straws.
  12. 2 pk Tumbler Lid Organizer – You have the option of drilling these hooks in or utilizing the adhesive backing.
Monthly Best Sellers

Amazon Best Sellers List – March 2023

 I am so happy to bring you my monthly best sellers list so that you can easily see all the items in one place. All the items in this round up are from Amazon and can be found in my Amazon storefront. And if you find yourself wondering how to use any of these items in unique ways, make sure you head over to my Tik Tok where I am able to share more detailed reviews of items in video format.

This post contains affiliate links.

Boys in front of ocean

Amazon Best Sellers List- March 2023

With March in the books and April on the way, I’m dreaming of warmer weather. Spring break was a great taste of that summer sunshine I can’t wait to have once again. With spring break, Easter vacations, and summer on the horizon, there are a ton of great warmer weather items to make your fun in the sun a bit easier.

There is nothing I hate more than having to apply sunscreen on my kids. My hands get greasy and their hair gets greasy. If you add in the sand at the beach, you are asking for a big disaster and ultimate meltdown (from both parents and kids). If you want to avoid greasy fingers, make sure you grab this airless cosmetic container. You can apply it with a beauty blender or brush and you’ll avoid those greasy fingers. Bonus, it fits easily in your bag for on the go reapplications! If you really want to avoid greasy hair, grab my favorite brush on mineral powder sunscreen!

There are a ton more great products that will make your time at the beach, pool, or park days that much easier! If you are need of a few more Easter gift ideas, make sure you check the rest of the March 2023 best sellers list too!

As always, I have much more in my Amazon storefront for all of your organizational needs too! Make sure you don’t miss out.

Amazon Best Sellers List Pin

Shop Best Sellers

1 | 2 | 3 | 4 | 5 | 6 | 7 | 8 | 9 | 10 | 11 | 12 | 13 | 14 | 15

  1. Drying Rack – This dish drying rack is a fan favorite! It has been on the best sellers list 2 months and running. I don’t see it going away any time soon!
  2. Fruit & Veggie Slicer– This is another favorite! Easily slice those grapes and other fruits with the punch of a button.
  3. Kids Brush On Mineral Sunscreen– I love using this in my kid’s hair! It works great and no grease.
  4. Leather Car Visor Sunglass Holder
  5. Adhesive Hat Hooks
  6. Silicone Fish Dish Brush– I love to use this to easily brush sand off my hands at the beach. No more sandy snacks!
  7. Airless Cosmetic Dispenser– Pack this in your bag for easy sunscreen application.
  8. Crayola Watercolor Paint Set
  9. Compact Cooler – This is great for on the go. You can fit 10 cans and it slides right into my beach bag.
  10. Collapsable Buckets– The perfect bucket to take to the beach!
  11. Mesh Beach Bag– Pack your beach toys or use this bag to collect sea shells!
  12. Bogg Bag Dividers
  13. Keyhole Companion Marker Tool Set – Easily mark where your nails go to hang pictures!
  14. Easter Egg Decorating Kit
  15. Clear Storage Containers– These work great in the freezer.

To be the first to see Best Sellers + enjoy a sneak peek at my end of year ‘Best of’ series, subscribe to my email list below!

Other Posts You’ll Love

All Amazon Best Sellers | Viral Kitchen Gadgets | Spring Dresses for Girls

Follow On Social For The Latest & Greatest

Pin This Photo Below For Later

Be sure to pin the photo below for later, and if you don’t already – follow me on Instagram (@arinsolange) and Tik Tok (@arinsolange) for more fun! Be sure to check my Amazon store front for all things best seller, home organization, and DIY. 2023 is off to a great start!

Amazon Best Sellers List Pin
Home

DIY Bar Shelf Ideas: Build Stylish Storage Shelves

Are you looking for creative DIY bar shelf ideas to spruce up your home bar? DIY bar shelves are a unique way to add a stylish touch to any home bar. Whether you’re trying to create a rustic, vintage-inspired look or something sleek with a more modern look, there are plenty of DIY bar shelf ideas that can help you achieve the perfect look. From hanging shelves made from reclaimed wood, floating shelves attached with metal pipes, and built-in lights, these DIY projects will help you create the perfect atmosphere for your own bar.

This post may contain affiliate links.

floating shelf with pink glasses

DIY Bar Shelf Ideas: Build Stylish Storage Shelves

Creating a home bar can be an exciting project. With the right DIY bar shelf ideas, you can turn your space into a stylish and functional area for entertaining. Whether you’re looking for a focal point to draw attention or creating a color scheme to set the mood, you can find creative solutions to fit your needs.

 From bar tools like cocktail shakers and bottle openers, there are plenty of options when it comes to styling your own home bar. With the right shelving unit and some clever ideas, you can easily create an inviting atmosphere with all the necessary items at hand.

DIY bar shelf ideas are becoming an increasingly popular trend as they allow you to create a unique and functional space that reflects your own style. From a classic bar cart to a more elaborate wet bar setup, there is something for everyone. Whether you want something that is easy to build or something more complex, we have compiled some of the best DIY bar shelf ideas so that you can create the perfect home bar for any space.

Keep in mind that home bars aren’t just for alcohol. If you don’t drink, you can certainly use these as DIY coffee bar ideas or create a station for your drink of choice.

Floating shelves in kitchen with glassware.

Why Create Bar Shelves?

The importance of shelves in a bar is to keep everything neat and organized. Open shelving can be aesthetically pleasing if it is kept tidy. Storing bottles up high on a shelf is a great place to keep bottles from breaking and ensure that your liquor is stored properly.

If you are looking for a way to add a touch of style and sophistication to your home, then consider adding a bar shelf. Whether you have a small space or a large space, there is an option available for you. Bar shelves come in various shapes and sizes, so it is easy to find one that fits perfectly in your home. Furthermore, these shelves provide extra storage space for drinks and other items that can help make your bar area look stylish and organized. With the right DIY bar shelf ideas, you can create an inviting atmosphere that will be sure to impress your guests.

Kitchen with floating shelves.

Things To Consider

Some things to consider when choosing the best DIY shelves for your space are the number of shelves that will fit best. Once that is decided, you can determine the length that your space allows. When deciding the length, you should also consider what height would be best suited for your space, keeping in mind your height and what you can reach. Of course you can put a high shelf that you’ll need a stool to access if you don’t mind or you don’t use the items stored on it very often.

Next you can choose the style and material you like best. We will go over some different options below. Some of your choices will depend on what your budget is, but you are sure to find something that will fit your style on any budget. Lastly, you can also decide if you prefer lit or unlit shelves depending on your personal preference and the look you are going for.

Close up of floating shelf and glass.

DIY Bar Shelf Ideas For Anyone

Lighted

With the help of LED light strips, you can create a beautiful and unique bar shelf that will make your home bar stand out from the rest. You can easily add a touch of sophistication and style to your home bar while still keeping it affordable. One option would be to add LED light strips to shelves you already have in place. Another is to add them to your own DIY built shelves.  

I love adding LED light strips to the underside of my cabinets and shelving units.  Not only does it provide extra light, it also just elevates your space to feel more customized.  You don’t need to have these lights hardwired by an electrician either.  You can easily find rechargeable LED lights that stick on with strong adhesive for an easy DIY. Check out these under counter rechargeable adhesive lights on Amazon.

Arched bar with white tile and wine storage below.
This arched bar would not be a user friendly DIY. But, adding LED lighting automatically takes your bar up a notch.

Floating Wooden Shelves

If you’re looking for an easy and affordable way to spruce up your home bar, why not consider installing some floating wooden shelves? This is an easy DIY project that anyone can do, and it’s sure to add a touch of style and sophistication to any bar area. Floating wooden shelves are a great way to store all of your favorite liquors and mixers, as well as creating extra space for glasses and other accessories. Plus, they look great too!

I have done this DIY before in my craft room. It was an affordable way to make a big impact. The only supplies I used were wood and paint and the tools I needed I already had, which included a nail gun, wood filler, drill and screws, stud finder, level, and miter saw. If you don’t have a miter saw, you can ask the lumber store to make the cuts for you. You can check out my tutorial here.

This is a super beginner friendly project and I love that you can use these floating shelves in other aspects of your home. Feel free to add these to your kitchen, living room, dining room, or any place that needs a little extra storage and sophistication.

Corner car with wooden shelves.
This couple built their own corner bar using brackets, wooden shelves, and a DIY wine holder.

Industrial Shelves

Floating shelves made from metal pipes are a quick DIY project that will make an instant impact on any home bar. They’re easy to build and can be adapted to fit in with the style of your home. For this project, you’ll need a pipe, two screws per pipe, one screw with a nut and washer for each screw and some metal shelf brackets that can hold the shelf in place. To finish off the floating shelves made from metal pipes, add a piece of wood and coat them in paint or sealant for protection.

Marble Bar Shelves

Marble bar shelves are the perfect solution to your storage woes. Not only do they look great, but they are also incredibly durable and can be used in any room of the house. You can get marble cut to size at a Lowe’s, Home Depot, or your local stone company and make your own shelves this way. 

Alternatively, you can use wooden shelves and paint them to look like faux marble at a fraction of the cost. To make this marble look-alike, you’ll need epoxy and pigment to make the marbling design. White and black or gray would all work depending on what you want the end result to look like.

You’ll do this project in steps, so you’ll have plenty of time to ensure you have the perfect faux marble veining design. I haven’t done this project yet, but do have a friend who has and it turned out beautifully. 

Built in natural wood bar with marble.
Marble shelves may not be in your budget, but painting wooden shelves to appear like faux marble is a great idea. These marble shelves are beautiful.

Glass Shelves

Glass shelves will require you to order them to be sized appropriately. For safety, your glass should be at least four millimeters thick. Tempered glass is preferred. It can be up to four times as tough as untreated glass. Plus, if it breaks, it shatters into crumb like pieces with no sharp edges or shards. Of course it is best to air on the side of safety when possible, but especially when the glass will be holding beer or wine glasses and liquor or wine bottles.

Use Contact Paper

With the right materials and tools, you can give your bar shelf a complete transformation. From using contact paper to create a faux marble look to wallpaper lined shelves, there are many ways to customize your bar shelf and give it any design style you want. You can even use wood shelves that need repair and give them a new life with just a few simple steps.

Glass wet bar with gold accents.
These beautiful gold bars paired with glass shelves elevate this home bar from industrial to luxurious.

Recycled Bookcase

Another option is to recycle a bookcase to create unique bar shelving. It may be ready to go as is, or you can sand it down and stain it, paint it, or cover it with contact paper. You can also add lighting underneath the shelves to make the bottles easier to see and also add a professional looking touch.

Coffee Storage Turn Bar Storage

With a few simple supplies, you can transform any coffee storage into a stylish bar shelf that will give you plenty of space to store your favorite drinks and mixers. This is a great option if you are limited on space and need a small area designated to hold wine bottles, glasses, and other bar tools. This also works great as is to hold coffee mugs, syrups, and coffee pods for your coffee bar. You can easily find these to buy in stores or you can try your hand at building your own.

Boho inspired coffee bar.
This coffee bar shelving system would work great as a bar storage for other drinks too.

Other Posts You’ll Love

Floating Shelf Brackets | DIY Floating Shelves Tutorial | Best Ice Machine For Home Bar

Follow Social For The Latest & Greatest

Pin This Photo Below For Later

DIY bar shelf ideas are a great option for those who want to create their own unique style without breaking the bank. With a few simple materials, you can create a great looking home bar that is both functional and stylish. The best part is that these DIY bar shelf ideas don’t require any special tools or skills – just some creativity and imagination. And the good news is that there are plenty of great ideas out there, so no matter what your budget or style preference is, there’s sure to be a great choice for you. Whether you’re looking for something classic or modern, rustic or industrial, there’s sure to be the perfect combination of materials and design elements available to make your DIY bar shelf look amazing!

Be sure to pin the photo below for later, and if you don’t already – follow me on Instagram (@arinsolange) and Tik Tok (@arinsolange) for more fun!
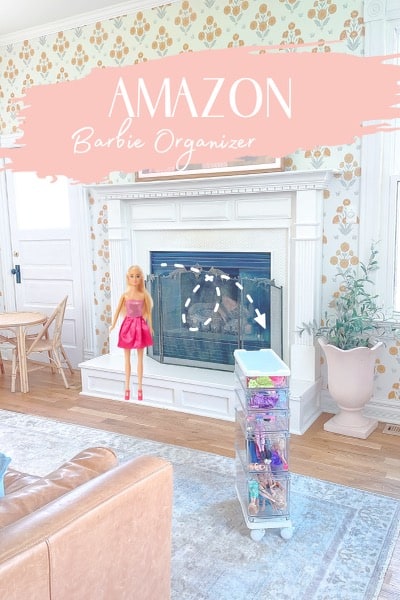
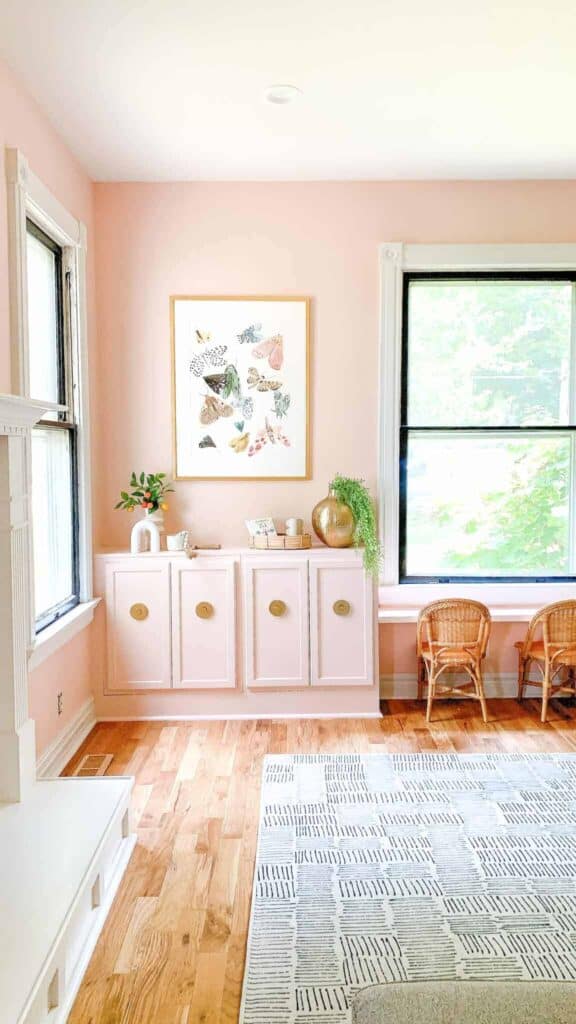
DIY Bar Shelf Ideas Pin
Holidays

18 Best Places To Hide Easter Eggs For Kids Of All Ages

Shop the Post
Small Toy Cars
Lip Smackers
Mini Nail Polish
Glow in the Dark Temporary Tattoos
Disney Mini Brand Surprise
Disney Doorables
Mini Fidget Cube Puzzle
Bunny Croc Jibbitz
Plastic Gold Coins
Easter Sidewalk Chalk
Crazy Aaron’s Thinking Putty
Pokemon Band Aids
Fidget Spinner Soccer Balls
LED Fidget Spinner Bracelets
Fairy Figurines
Animal Figurines
Magnetic Blocks
Mini Lego Sets
Mystery Squishmallows Squishville
Mini Dinosaur Keychains

Hunting for eggs is a fun Easter tradition for the whole family. But where is the best place to hide them? With so many options available, it can be difficult to choose the right spot. Fortunately, there are a few tips that you can use to make sure your Easter eggs are hidden in the perfect place. From finding clever hiding spots around the house to utilizing outdoor areas, this guide will provide you with some of the best places to hide Easter eggs this year.

This post may contain affiliate links.

Little girl with Easter eggs.

18 Best Places To Hide Easter Eggs For Kids Of All Ages

Whether you need sneaky options for the most skilled egg hunter or places to hide eggs in plain sight for your newest family member, I’ll share some of my  excellent hiding places for your annual Easter egg hunt.

Easter is the perfect excuse to get creative and explore new places around the house and yard that you can use for hiding eggs. If your usual spots are the first places they look and the scavenge doesn’t take a lot of time, I hope to give you fun alternatives to help you find the perfect hiding spots to take your hunt to the next level.

Easter egg cake with chamomile and a bunny cake topper.

Fun Easter Activities

There are many ways to get into the Easter spirit even if the ground is still covered in snow. One of my favorite ways is by decorating the house. It always helps me feel festive inside even if it isn’t spring outside yet. I find my Easter box and get to work. Little touches of bunnies, carrots, colorful eggs and fresh tulips around the house do the trick!

Another thing I love to do with my kids is decorate hard boiled eggs. However, we have also tried other options in recent years. Craft stores tend to carry plastic eggs that can be decorated or cardboard eggs for a more eco-friendly option. These eggs are great because they last longer than hard boiled eggs – and this year, may even be cheaper!

Kids with puppy in bed.

One more thing my kids and I enjoy doing to celebrate Easter is by making sweet treats. One of my favorites is bird’s nest cookies. All you need to make these chocolate treats is chow mein noodles, chocolate chips, butterscotch chips, and chocolate eggs.

Melt equal parts chocolate and butterscotch and coat the chow mein noodles. Then form it into small balls and use your fingers to make a dip in the middle, like a nest. Place three chocolate eggs in each one and set aside to firm. This is a great one for the kids to help with because it is so quick and easy!

By far, our favorite Easter tradition is our annual Easter egg hunt. My kids love the thrill of finding the eggs in all of the obscure places Sam and I find to hide them. Whether you choose to hide them inside or outside, the fun never stops.

Easter table scape with bunny plates.

Origins Of Easter Egg Hunts

Easter egg hunts have been a popular tradition for centuries. It is believed to have originated in the early 1700s in Germany, when children would search for eggs that were hidden by their parents. The children believed that the Easter hare laid eggs in the grass. It was even customary to add extra obstacles to the game by putting them in hard-to-reach places among nettles or thorns. 

This tradition spread throughout Europe and eventually to the United States, where it has become an integral part of Easter celebrations. Fortunately, hiding eggs among thorny bushes is no longer part of the tradition. But, tricky hiding spots can still be used to add to the enjoyment.

Today, Easter egg hunts are still popular among families and friends. While hiding these eggs can be a fun activity for adults and children alike, there are certain places that are better suited for hiding them than others. I’ll share with you some of the best places to hide Easter eggs so that everyone can join in on the fun!

Kids playing.

Indoor Hiding Locations

We like to take our Easter egg hunt outside, but sometimes the weather doesn’t allow it, so we need a backup plan. Here’s our list of the nine best places to hide your Easter eggs inside.

  1. Fruit basket: A red or green egg may blend in perfectly with a bowl of apples or an orange egg with a bowl of oranges. This would be a great place for older kids to find their Easter eggs.
  2. Tissue box: A light colored egg would hide well right behind the tissue on the top of a tissue box. As tempting as it could be, avoid popping the egg into the box or your kids will never find it.
  3. Coffee mugs: Leave a coffee mug on the counter with an egg inside. This will be better for the older children because it’s a challenging place to find an egg and coffee mugs are fragile.
  4. Table legs: This one depends on what your table legs look like. If they’re straight, this one won’t work for you. But if you have crossed table legs, sticking an egg right on the top of that cross would be a great place for little egg hunters to find their egg.
  5. Cookie jar: This hiding place may require a hint unless you have a super clever kiddo who is meticulous in their search. Make sure you place the egg right on top so they don’t miss it once they open the cookie jar!
  6. Top of a door: Hiding an egg on the top of a door may require some clever maneuvering and if your kiddos open or close the door, the egg may fall down in front of their feet. After the shock, it’ll be a happy surprise!
  7. Couch cushions: The perfect place to hide indoor Easter eggs! If you have eggs that match your couch color or pillow pattern, go with those.
  8. Home decor: Try to blend the eggs right in with your home decor. A plant would be the perfect place to hide a green egg!
  9. Kids’ toys: This might be the perfect place to hide indoor eggs as it is one of the first places the kids will look. Will they notice something off in their toy lineup or not because you always clean it up for them?
3 kids jumping in the air.

Outdoor Hiding Locations

If your weather is bright and balmy, why not head outside for your hunt? I personally think it opens up more possibilities for places to hide your eggs. Here are nine of my favorite outdoor hiding spots!

  1. Gardening glove: Leave a pair of gardening gloves on your potting bench and open one to have an egg peeking out.
  2. Kids swing sets: Hide those eggs in your child’s favorite location- their swing set. If you have a playhouse in your backyard this is the perfect location.
  3. Picnic table: Consider sticking an egg in the umbrella hole or the cross of the legs for an excellent hiding spot for younger kids.
  4. Patio steps: Sometimes hiding in immediate view, especially for young children, is the perfect place.
  5. Plant pots: Do you have empty plant pots on your potting bench? For older kids, toss one right in. For younger kids, lay the pot on its side and it’ll be easier for them to see.
  6. Bike basket: Make sure the bikes are outside where they’re searching so they can peek into this perfect spot.
  7. Garden shed: Maybe better for bigger kids because they will take care searching through it, the garden shed is an unexpected place to find an egg.
  8. Cycling helmet: Are the helmets hanging on the bike’s handlebars? Stick an egg in a helmet or two – an excellent place to scavenge for Easter eggs.
  9. Hidden corner of the garden: If scanning the yard is all your kids think they have to do to earn their eggs, they better think again! The Easter bunny is working overtime this year. One of the last places they will think to look is in the corners, which is why this is a perfect sneaky idea!
Baby dressed as a bunny.

Easter Egg Filler Ideas

If you are scratching your head on what to fill all of those Easter eggs with, I’ll share with you some of my favorite fillers.

Keep in mind you don’t have to use candy. We love putting in a mixture of candy, special silver dollar coins, and smaller trinkets. You can also opt to hide a golden egg that contains a larger prize. For this, we generally try to get the kids a family gift that all four of them can enjoy together. I’ll print out a picture of the toy and hide it in the egg so that once the golden egg is discovered, the child who discovers it can announce the gift. You can do this same concept with smaller trinkets that may not fit well in the eggs, but can still be used as a great prize.

Here are some of my favorite Easter egg filler ideas:

best places to hide easter eggs

1 | 2 | 3 | 4 | 5 | 6 | 7 | 8 | 9 | 10 | 11 | 12 | 13 | 14 | 15 | 16 | 17 | 18 | 19 | 20

Shop Finds Below

  1. Small Toy Cars– These small toy cars are a great option. You can also use hot wheels or any other brand for your car obsessed little one.
  2. Lip Smacker– this is alway a big winner in our house.
  3. Mini Nail Polish
  4. Glow in the Dark Temporary Tattoos
  5. Disney Mini Surprise– This would be a great alternative to a golden egg. You wouldn’t even need to change out the packaging since it already looks somewhat egg like.
  6. Disney Doorables– Another great option for mini figures.
  7. Mini Fidget Cube Puzzles– This is a great option for older kids.
  8. Bunny Croc Jibbitz– So cute and festive!
  9. Gold Coins– You can have these redeemable for extra screen time, a certain money amount, a special prize, or make it a game and have a larger prize available to whoever collects the most.
  10. Easter Sidewalk Chalk
  11. Crazy Aarons Dragon Glow in the Dark Putty– This would be a great one for my boys. You could split it among a few eggs or have it redeemable at the end of the hunt.
  12. Band Aids– For some reason my younger kids love to be decked out with band aids. You can get any character your child likes.
  13. Fidget Spinner Soccer Balls
  14. LED Light Up Glow in the Dark POP Bracelet and Fidget Spinner
  15. Fairy Figurines
  16. Animal Figurines
  17. Magnetic Blocks– This is another great one to split into multiple eggs.
  18. Mini Lego Sets– If you prefer to keep this as a prize item, you can always have it redeemable for a gold coin or split the Legos up into multiple eggs.
  19. Squishville Mini Mystery Squishmallows- This is another option that you can hide outside of an egg because it looks so similar to one. The other option is this can be redeemable for a gold coin too!
  20. Mini Dinosaur Keychains– I love that these come as eggs already! Such a fun idea for that Dino-obsessed boy in your life!
Home

Standard Kitchen Base Cabinet Dimensions: Cabinets 101

Kitchen cabinets are an essential part of any kitchen design. Standard base cabinet dimensions are important to consider when planning a kitchen renovation or new build. Understanding the different sizes and shapes of base cabinets will help ensure that your kitchen design is both aesthetically pleasing and functional. Whether you opt to install custom cabinets or stock cabinets, your standard kitchen base cabinet dimensions will provide functional storage space to your kitchen. This article will provide an overview of the standard kitchen base cabinet dimensions, as well as some tips on how to choose the right size for your space. 

This post may contain affiliate links.

White kitchen with dog posing in front of the white island.

Standard Kitchen Base Cabinet Dimensions: Cabinets 101

If you have been around my blog for a while, you’ll know that our family has had our fair share of renovations. If you are beginning kitchen renovations, you’ll be looking into all of the details that comes with building both a functional, yet beautiful space.

One of the most important aspects in your kitchen are your kitchen base cabinets.  After all, these base cabinets can hold a ton of storage.  If you are limited on space, arranging these base cabinets are essential to ensure you come up with a layout that works well for the flow of your kitchen and maximizes storage.

Typically, kitchen base cabinets have standard dimensions. They range from 24 and 36 inches in width and 24 to 30 inches in depth and tend to stand at 36 inches high, including the countertop. There are many ways to approach adding cabinets into your kitchen. Stock cabinets, semi-custom and full custom are your options. These options offer you various price ranges as well as different sizes and styles.

Regardless of the type of cabinets you add to your kitchen, you’ll want to keep a few important details in mind when it comes to designing your new space. 

White kitchen with island of vase of flowers and bowl of apples.

Designing A Kitchen

When designing a kitchen, one of the most important aspects to consider is the standard kitchen base cabinet dimensions. The size and shape of these cabinets will determine how much storage space you have available. It will also determine how much counter space you can fit in your kitchen. Knowing the standard dimensions for base cabinets can help you make sure that your design is both functional and aesthetically pleasing.

If you think you may need help in this area, consider hiring a designer to make the process a bit easier. If you are up for the challenge yourself, you’ll want to consider a few important key concepts.  

Below, I’ll go over five key points to help you design your kitchen and incorporate those standard base cabinets to be used to their fullest potential.

Butlers pantry with white cabinets and floral pink and white wallpaper.

Consider Your Layout Carefully

When it comes to designing your kitchen, the base cabinet dimensions are an important factor to consider. Kitchen cabinets come in a variety of sizes and shapes. This is why it is so important to plan carefully and measure accurately when deciding on the size of your base cabinets. 

Knowing the standard kitchen base cabinet dimensions will help you determine what size cabinets and the overall amount you’ll need for your particular layout. It is also important to consider your layout carefully before making a decision, as this will determine the type of cabinet that best suits your space. With careful consideration and accurate measurements, you can ensure that you have the perfect kitchen base cabinet dimensions for your needs.

Close up of butler's pantry cabinets with brass hardware and floral wallpaper.

Create A Focal Point

The kitchen is the heart of the home, and it’s important to design it in a way that makes it both functional and aesthetically pleasing. One way to do this is by creating a focal point in your kitchen.  While you can certainly do this with standard base cabinets by utilizing a bold color or stain, I typically look to other areas of the kitchen as a focal point.  

By choosing a  complementary backsplash, you can create a focal point that will accentuate your cabinets. Your backsplash is a good place to go bold, especially if your cabinets are an airy neutral color.

White kitchen with natural chairs, gold lighting, and gold vase of flowers.

Countertop Space Is Key

 Countertop space is key in determining how much usable storage and workspace you will have. Knowing the standard dimensions of base cabinets can help you plan for the amount of countertop space needed to accommodate your desired layout. 

Be mindful of whether you will store appliances in the cabinets or on top of the counter. What else do you want to display on the counter and what do you want to keep hidden? Will it go in the base cabinets or the uppers? How often do you cook and does it require a lot of counter space to prepare? All of these things are important to keep in mind when creating the perfect kitchen for you. 

Countertop space is closely tied to the size of the base kitchen cabinets.  This is another reason why being mindful of the dimensions of your kitchen cabinets is key.

Corner of kitchen with close up of stove and hood.

Design Aesthetics

Kitchen cabinetry is an essential component of any kitchen design. Their dimensions play an important role in the overall look and feel of the kitchen. This is why it’s important to consider them carefully when planning a kitchen renovation or remodel. 

The standard dimensions for a kitchen base cabinet vary depending on the type of cabinet, but typically range between 24 and 36 inches in width and 24 to 30 inches in depth. Design aesthetics should also be taken into account in terms of selecting a particular style of cabinet.

The style can have a significant impact on the overall appearance of the kitchen. Cabinet fronts can come in many styles such as Shaker, inset, beadboard, flat panels, glass, etc.  The style of your cabinets can further help accentuate the theme of your kitchen overall. 

So while it is important to know your standard kitchen cabinet dimensions, you’ll also need to consider other elements such as backsplashes, finishes, styles, and color schemes. By taking all these factors into consideration, you can create a beautiful and functional kitchen that is sure to impress.

Close up of kitchen cabinet corner with stove, hood, and cutting board.

Cabinetry 

Kitchen base cabinets are the foundation of any kitchen. They provide the storage space for all of your cooking and baking needs, as well as a place to mount countertops and other fixtures. As such, it is important to consider your cabinetry options to plan accordingly when designing or remodeling your kitchen. 

Cabinetry manufacturers generally adhere to standard measurements when producing base kitchen cabinets. This makes it easier for homeowners and contractors alike to plan the layout of their kitchens with confidence. 

Cabinets come in different shapes, sizes and dimensions. Custom kitchen cabinets are more expensive than stock cabinets by quite a lot of money. 

Office cabinets in white and brass hardware.

On the other hand, stock kitchen cabinets are a more affordable option. Keep in mind that they might not always have the specific sizes you need. Fortunately, I have had a lot of success with Klearvue cabinetry exclusively available from Menards stores. We have successfully used this line in three rooms of our home: my home office, our Butler’s pantry, and our mudroom.

Semi-custom cabinets are another option. As they sound, these cabinets are able to be customized somewhat. There are base options available and certain things can be switched. That may include enlarging the depth, changing the size of the drawer, door fronts, or other finishing options. This allows you more options at a lower price range than full custom.

Another option is painting or refinishing cabinets. This is something I did in my last house. It definitely took our cabinets from standard builder grade to just our style on a small budget. Check out the post here if you are interested in refinishing your cabinets.

White cabinets in an all white kitchen with black hardware and brass lighitng.

Standard Kitchen Base Cabinet Dimensions & Function

There are three main types of kitchen cabinets: kitchen base cabinets, kitchen wall cabinets or upper cabinets, and tall or specialty cabinets. They each have standard kitchen cabinet sizes and serve different purposes. Upper cabinets tend to hold plates, cups, bowls, and food items. Base cabinets tend to hold large pots, pans, and even small appliances.

While I focus on standard kitchen base cabinets and the standard dimensions of a base cabinet, you can check out my article on kitchen wall cabinets here.  For standard base cabinets, you’ll see that cabinet height and depth tends to be pretty standard across the board, while width is much more variable, depending on the cabinet’s use as well as your needs.

Standard Base Cabinet Height

Standard kitchen cabinet height is 34 1/2 inches tall. This is the height from the top of the cabinet to the floor, including the toe kick. The toe kick sits at the bottom of the cabinet and may seem like dead space, but it does provide an important role in supporting much weight from the cabinets and their contents, including kitchen appliances. 

Standard cabinet height can be customized for people who need shorter heights, such as wheelchair users, but isn’t standard and requires something custom-made. After accounting for the kitchen’s countertop height of about 1 1/2 inches, the standard total height generally stands at about 36 inches tall.

Taller individuals may appreciate tall kitchen cabinets and that is doable, so do not fear. The only downside is tall cabinets have to be customized as well. This can be done with a custom box frame that can be covered by a toe kick and molding so it doesn’t appear out of place.

Baby sitting in a high chair in front of a white kitchen.

Standard Base Cabinet Width

Standard widths of the base cabinets are widely variable and tend to be determined by what the use of the cabinet will be. There is no one standard cabinet width when it comes to base cabinets in the kitchen. They may range from 9 to 48 inch wide cabinets in 3-inch increments. 

They are chosen to meet space needs and provide specific functions. Nine to 24 inch cabinet widths are filler cabinets that can accommodate pull-outs, such as narrow rolling racks that are great for storing baking pans and spices. Thirty inch cabinets can accommodate a single basin sink, while 33 inches accommodate a double-basin or offset sink. Thirty-six inches also are used to accommodate double basin sinks. Forty-eight inch lower cabinets are the largest size commonly found in kitchens.

Close up of a gold vase with pink and green flowers next to a pink bowl of oranges and a candle.

Standard Base Cabinet Depth

Depth of base cabinets is taken from the front of the cabinet to the wall. Stock cabinets’ standard depth are generally 24 inches deep, not including the countertop overhang. With deep cabinets come even deeper countertops and it becomes difficult to plug in appliances or reach items in a corner cabinet. With overhang, the countertop depth is typically 25 or 26 inches. Special cabinet depths range from 12 to 18 inches deep, but tend to have to be custom ordered as they aren’t generally in stock.

Standard Kitchen Cabinet Base Dimensions Considerations

Before you pick out new cabinets, think about the amount of space you’ll need versus the amount you space you have. The wider and deeper your base kitchen cabinets are, the more counter space you can have. However, don’t forget that you’ll want to be able to reach everything on top of your countertop and in the back of the cabinets underneath it. You want to be able to move comfortably throughout your kitchen as you work in it, while getting as much storage out of your kitchen as possible.

Price is also an important part of the decision. Stock cabinets are available at a lower price point and will work well if you don’t need custom dimensions. However, if you want something more high end and your budget allows, custom options are available. Just be aware that custom cabinet prices can really add up.

White kitchen with a charcuterie board, two glasses of wine, and a DIY skeleton vase filled with wheat grass.

Other Posts You’ll Like

Functional Butler’s Pantry Reveal | Klearvue Cabinetry Review | Best Paint For Cabinets | How Deep Are Kitchen Wall Cabinets

Follow On Social For The Latest & Greatest

Pin This Photo Below For Later

Knowing standard base kitchen cabinet dimensions is key to renovating your kitchen. With these tips in mind you’ll be ready to find the best kitchen cabinets for your home that will afford you both storage space and an eye catching design! I hope you’re able to design the kitchen of your dreams.
Be sure to pin the photo below for later, and if you don’t already – follow me on Instagram (@arinsolange) and Tik Tok (@arinsolange) for more fun!
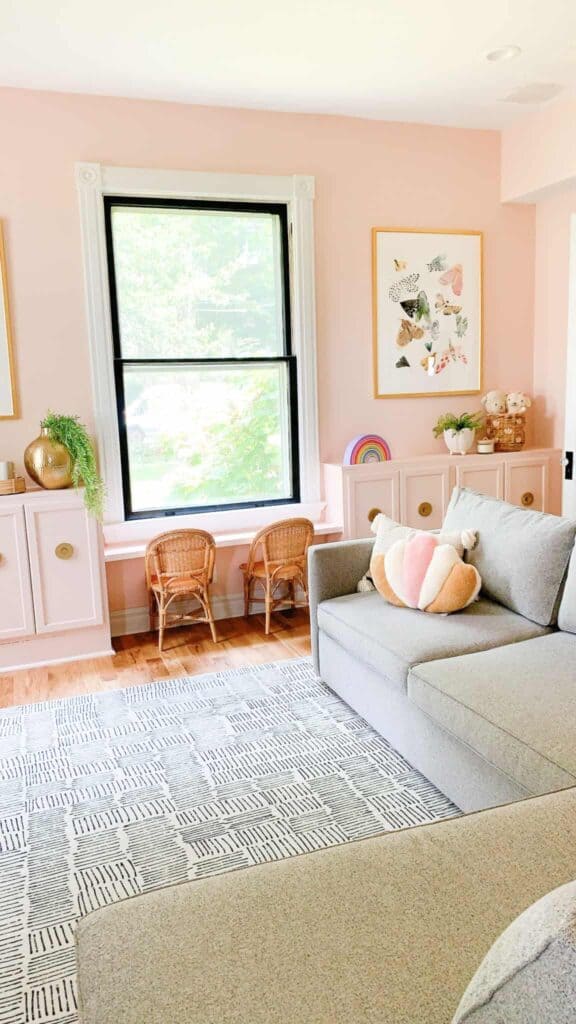
Standard Kitchen Base Cabinet Dimensions Pin