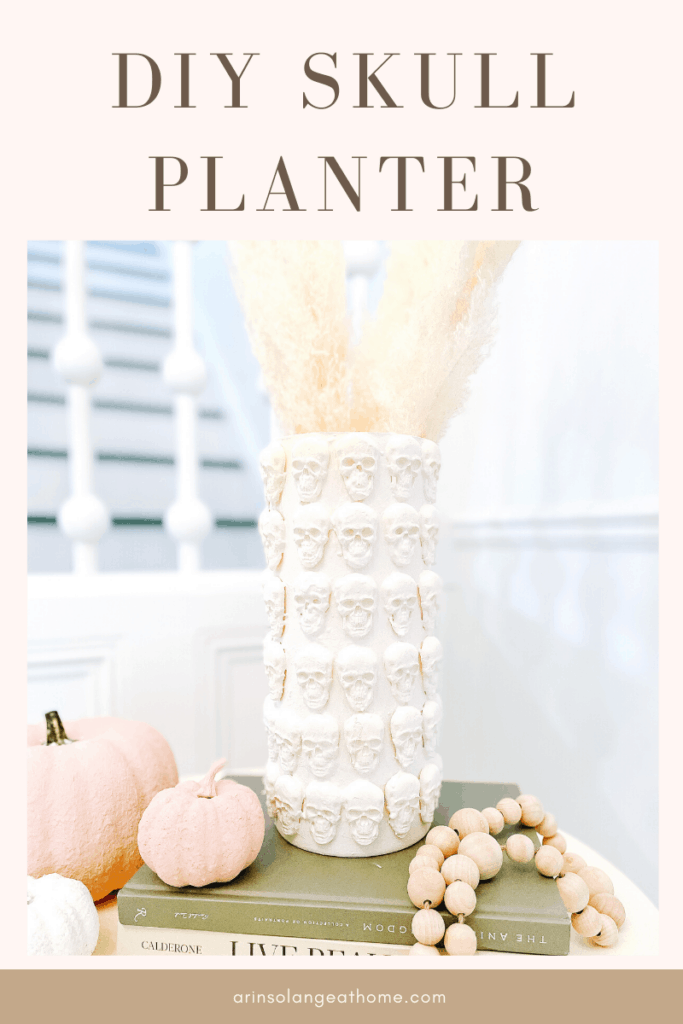
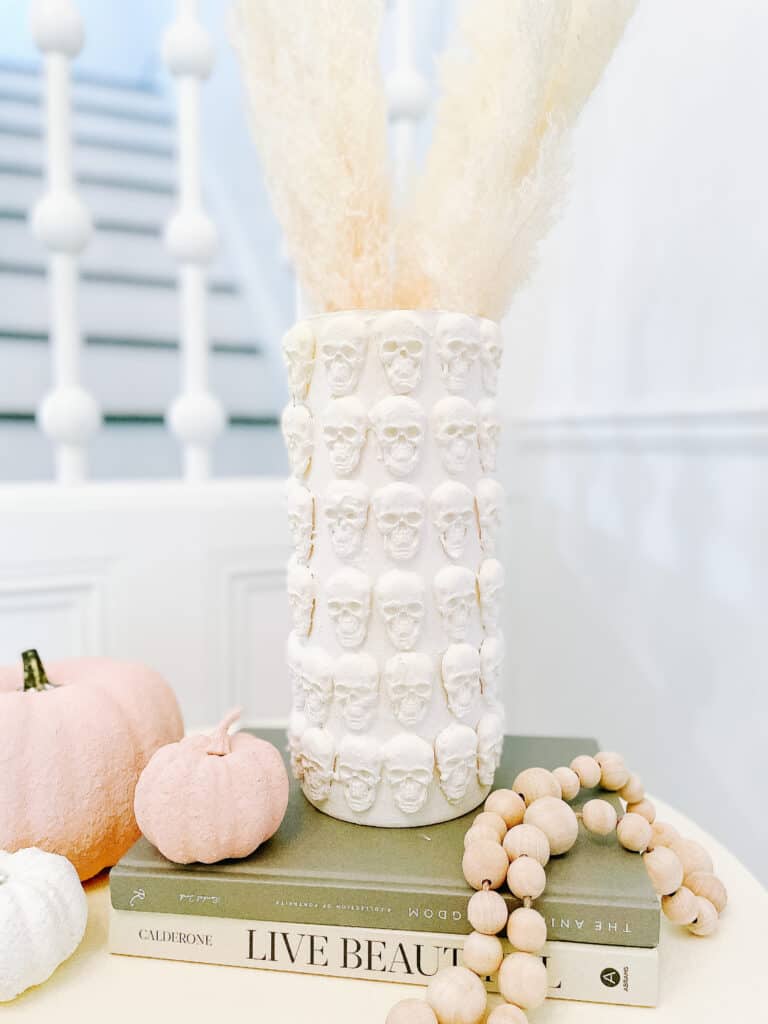
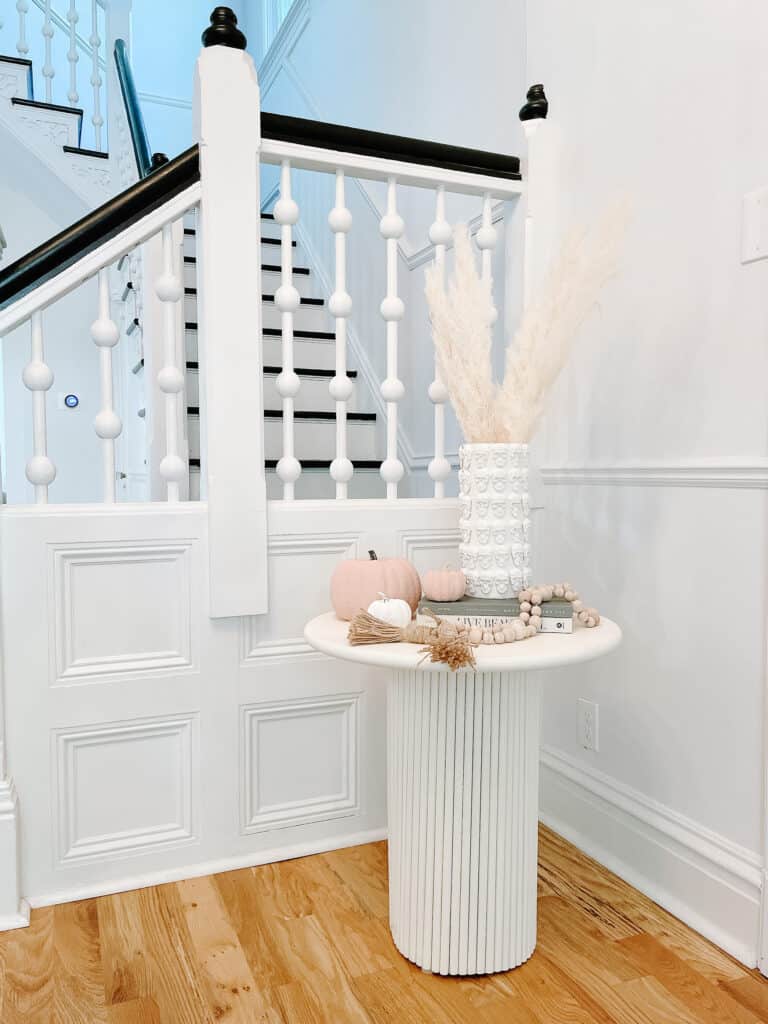
Last week I was scrolling the internet and found a skull planter that I was obsessed with. It was sooooo cute, but also so expensive…so I knew I had to try my hand at a DIY. I am going to share how I did my DIY Skull planter for anyone who wants to do one this fall….or honestly for year round!
This post may contain affiliate links – post written in 2021 and updated with additional option in 2022
DIY Skull Planter
I LOVE fall and holiday decor, but don’t like my house to feel cluttered, so when I can I like to make the decor feel very cohesive with my house. When I saw a skull planter online I was in love with the subtle Halloween vibe it was giving, while also being really pretty for your home.
The smallest size of that planter is $220….so it was not going to happen, but I instantly thought…I think I can make that myself.
This was a REALLY easy DIY, but also a bit time consuming, but the end outcome was SO worth it.
It is a project you could 100% do on other things. I originally thought about doing it to canisters in my kitchen or my utensil holder, so think outside the box on where to try the diy skull planter method.
** A year after doing this first one I did a second, larger version – so be sure you check out the tutorial for that one to see which you like better.
Working with Resin
This DIY requires you to use resin, which I know can be really intimidating, so I wanted to share a few tips and things that will help you.
I actually did my first resin project a year ago on these letters, and since then I have done 3 or 4 other projects. I have learned a ton along the way, and want to share what I have learned, and also lead you to the right project.
10 Min Resin vs Normal Resin
Last year when I did my letters I used your traditional resin. This is something that takes 24 hours to cure, and takes a bit more finesse because it is meant to be left ‘clear’. It is such a fun medium to work with, but you do need to leave it sitting for 24 hours.
For this project, as well as my daughters dresser, and my mirror I used a 10 minute resin. This is essentially a resin that sets in 10 minutes but it dries white. I always use this more for something that you will paint. Think of this as a way to add a mold to something that you will cover.
Prepping your space with Resin
One thing that you need to know with resin is that it will ruin a work surface. I personally like to use a large trash bag and tin foil or one of these disposable tin things to work in.
I just want you to know that going into it. Take care while you are working!
Making your DIY Skull Planter
Okay now onto this DIY! One thing to note – if you are okay with making the molds over the course of a day or two you will only need 1 mold, but if you want it to go a bit faster I would buy 2 or 3 molds for the skulls!
Supplies for Skull Planter
- Skull Mold (remember my disclaimer above when it comes to how many you buy)
- Quick Dry Resin – I used one whole box.
- Vase – similar
- Acrylic Craft Paint + Baking Soda
- Hot Glue Gun
Tutorial for Skull Planter
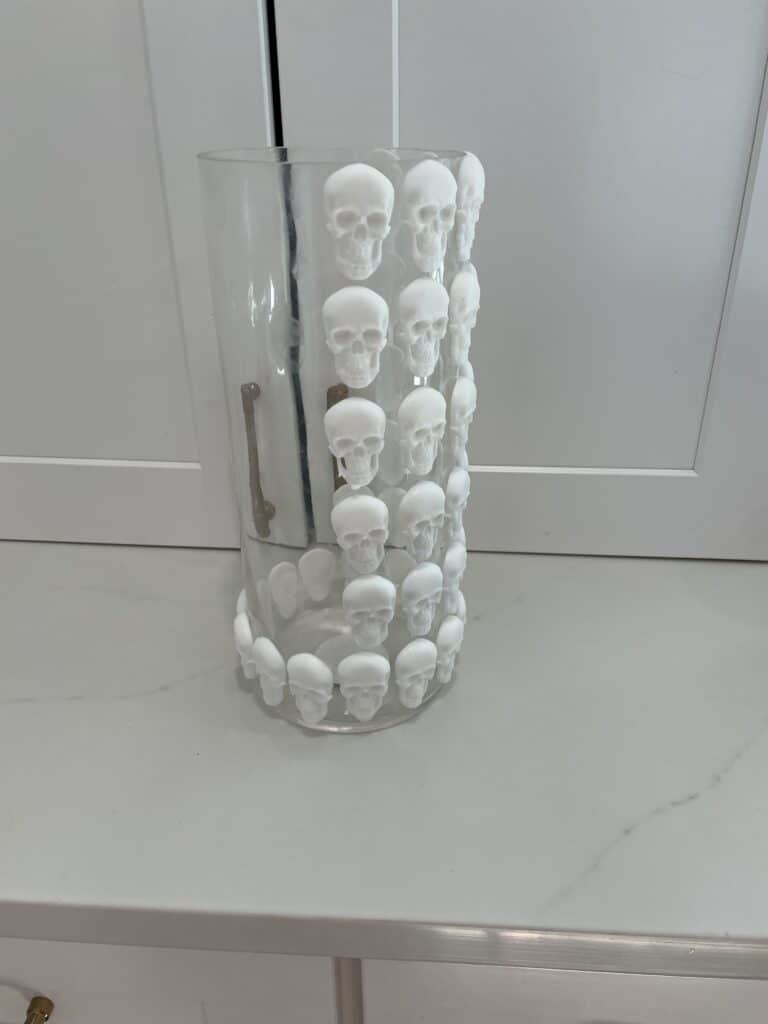
- First things first – you need to make LOTS of your skulls. Follow the instructions on the resin, but essentially you will mix equal parts of each together then pour in the mold. In 10 minutes you can pop them out and make another set.
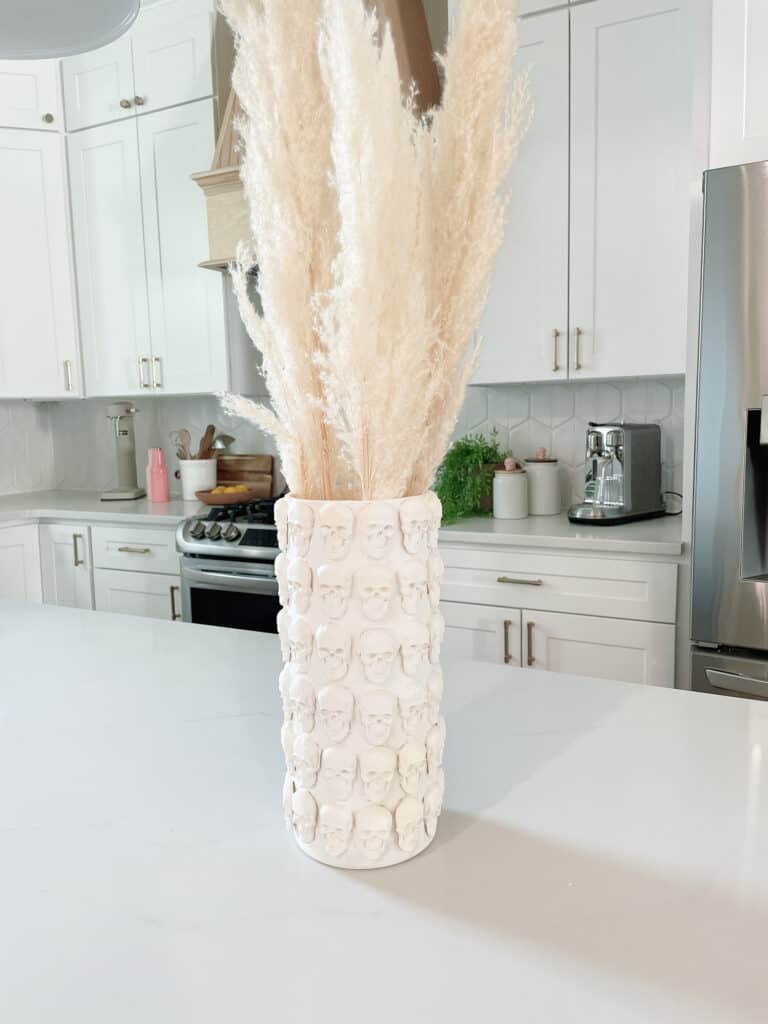
- Once you have made all the skulls start to hot glue them on your vase. I started at the bottom and went around a few then up. I sort of worked in batches. Don’t worry about perfection because the paint method makes it messy.
- Once your Vase is fully covered in Skulls it is time to paint. To give the paint that cement planter look Mix 1 part paint with 1 part baking soda. Then add a couple teaspoons of water. This will make the paint dry very matte. I went sort of messy with the paint and even let there be some lumps!
That is IT! It is honestly really that easy. In total this project cost me about $25. I had coupons for the Resin and the vase, but this would also be something great to do with those plain vases you get from the florist.
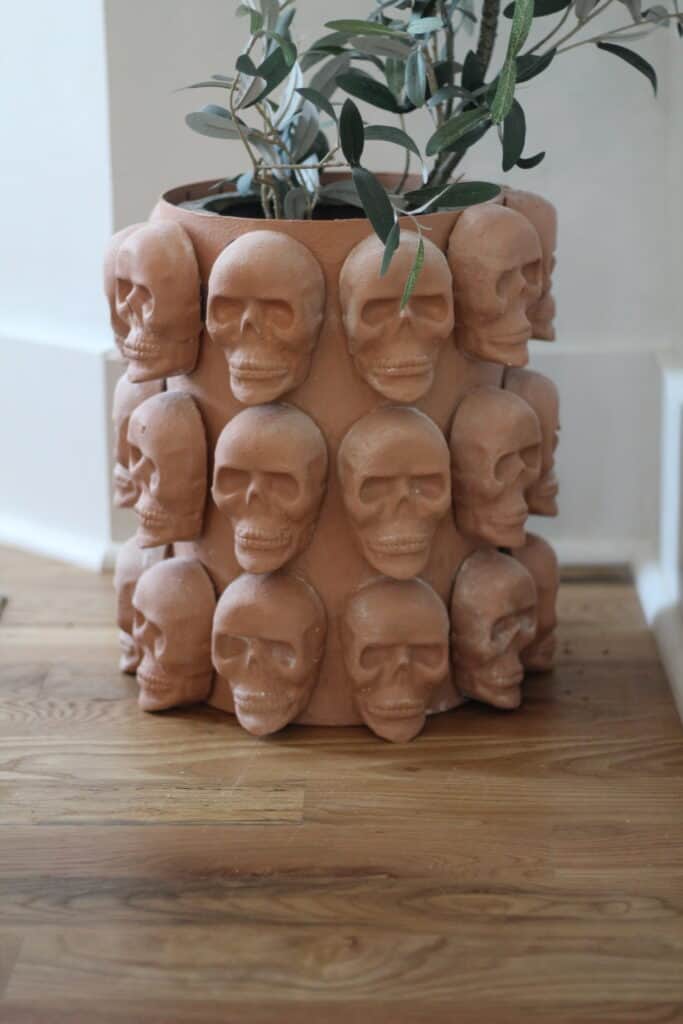
Updated Skull Planter using Plaster
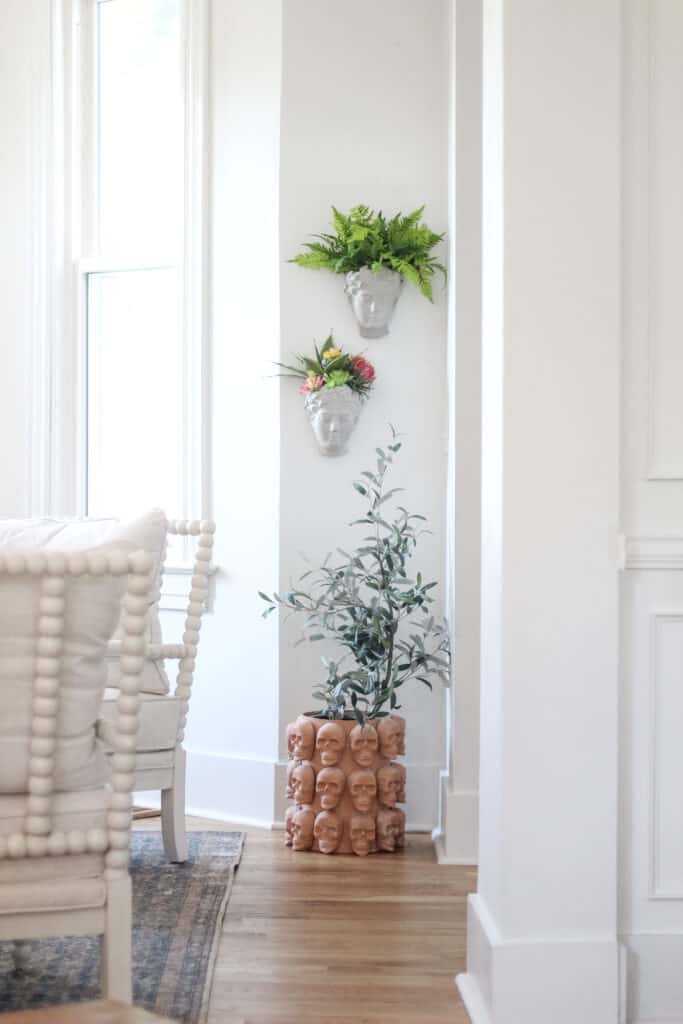
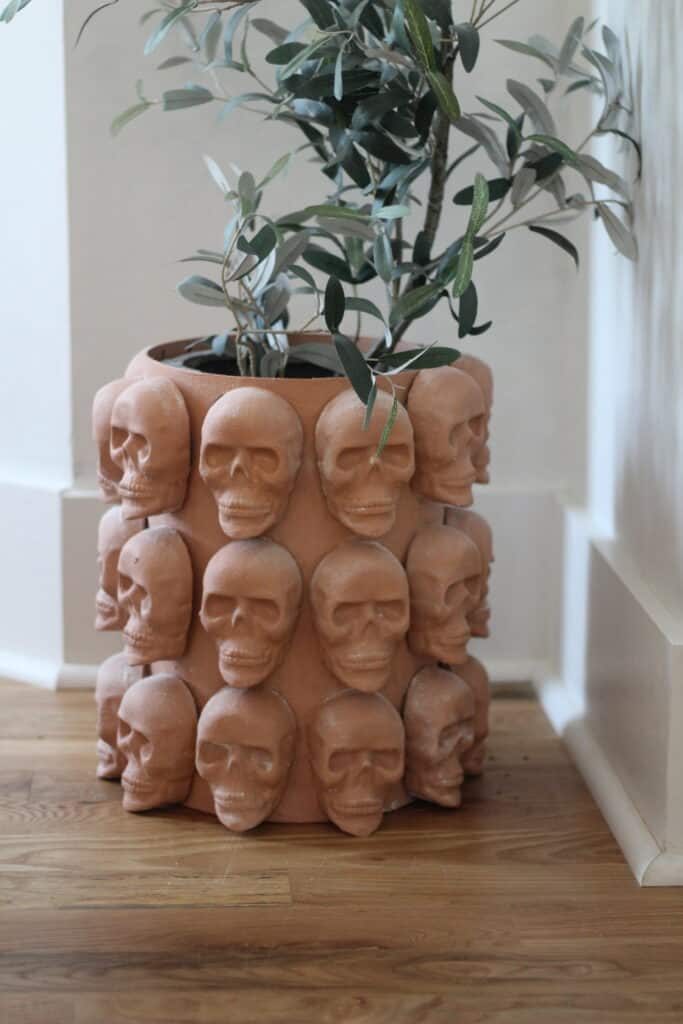
1 year after creating the above skull planter I really wanted larger ones for our front porch with huge skulls. I knew that would be expensive with resin so really wanted to find an alternative. I ended up trying plaster and it was such a win – I LOVED the end outcome.
Supplies for Larger Skull Planter
- Trash can, vase, or planter of some sort for the base – the sturdier the better!
- A bag of plaster of Paris mix from the hardware store
- container for mixing
- Skull mold – I used one from Michaels, but here is another
- E600
- Paint + Baking soda
Tutorial for Large Planter
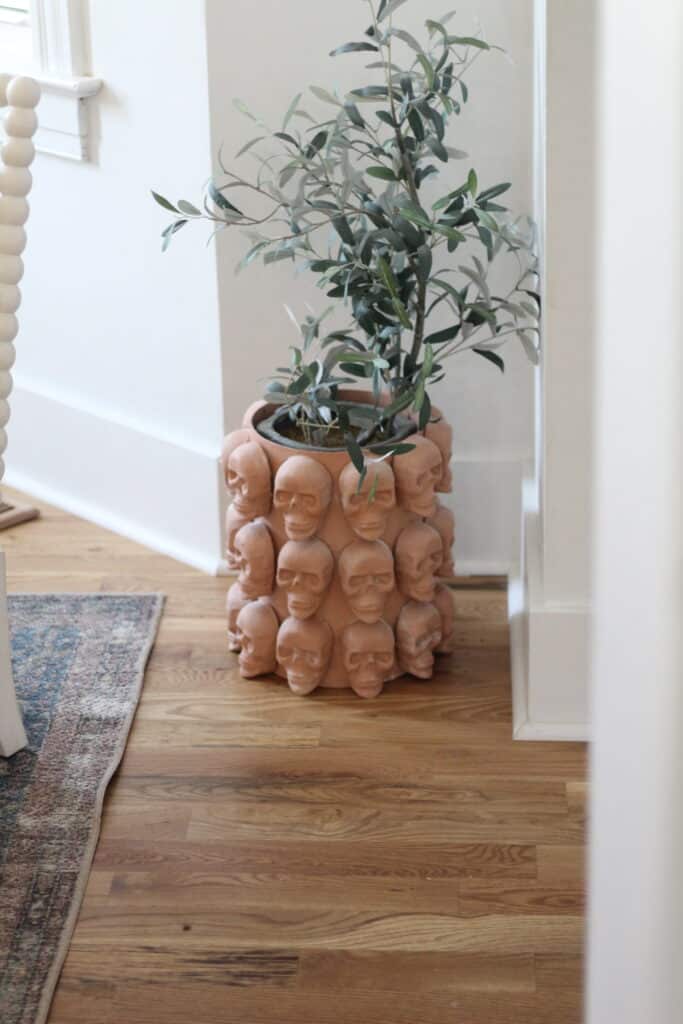
- Make your skulls with the Plaster mix – the bag should have instructions on mixing and making them. Make quite a few and set them aside to FULLY dry.
- Once you have your molds it is time to glue them on the planter. Using e600 glue each skull on the planter. You will likely have to take your time on this letting them dry in rows.
- Once the skulls are all on – paint the planter. I used a combination of orange, brown and white craft paint for a terracotta look.
- Last – When the planter is 90% dry dust it with baking soda!
This is heavy, but turned out so pretty and was WAY more affordable than working with Resin.
Considerations on Resin vs Plaster
- Cost: Plaster can make a lot for a small budget. Resin is expensive!
- Safety: Resin is kind of toxic so you need to be careful
- Ease: Working with resin once the molds are made is easier. They are lighter weight so glue down easily, and less porous so were easier to glue.
- Other: Resin is not breakable so the Resin planter if done on a plastic inner container could able to withstand more in that manner.
Other Posts You’ll Love
DIY Dresser with Resin | Spooky Basket fillers | Halloween Pajamas for your family | Trash can planter hack
Pin the Photo Below for Later
Hopefully you feel ready to tackle your DIY Skull planter after this easy tutorial! I would love to see your end results, so be sure to tag me on Instagram (@arinsolange). If you have any questions leave them in the comments below, and be sure to pin the photo below to find this tutorial later.