Shop
Parties

Happy Birthday Sunshine Girl – Goldie is One

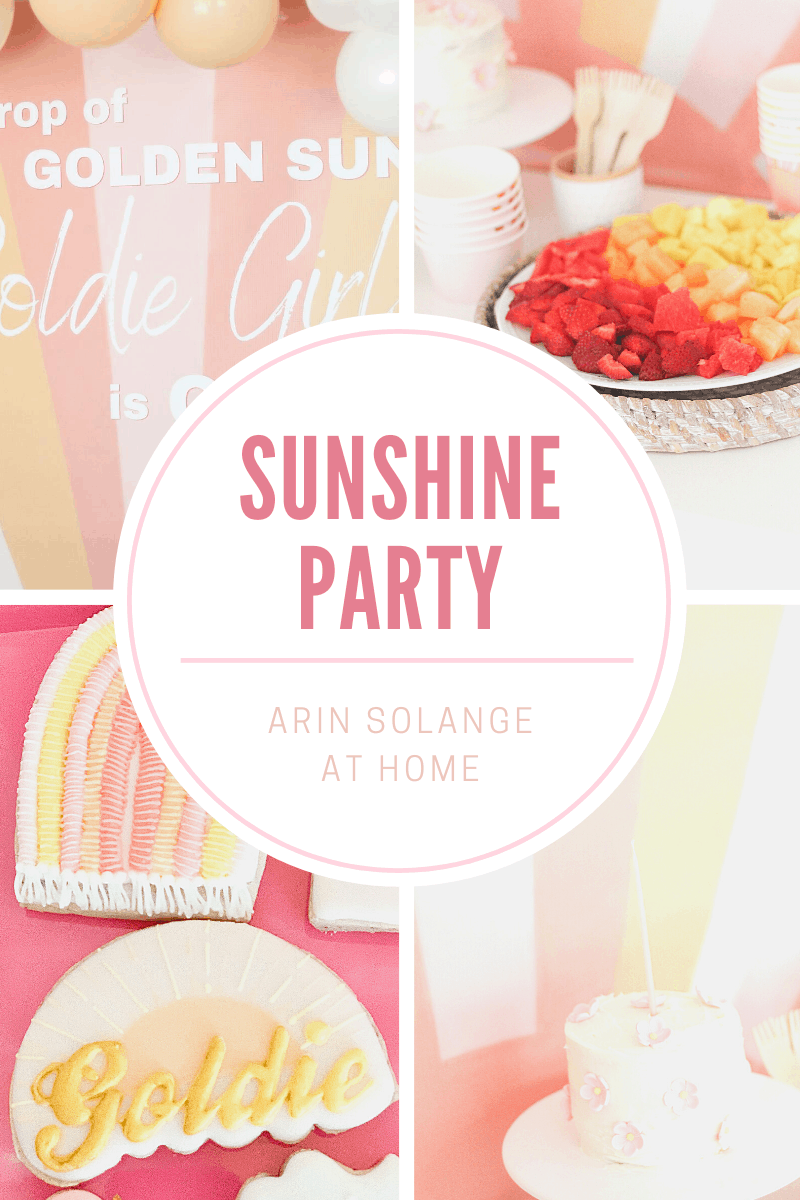
Happy Birthday Sunshine Girl!! Our Goldie Mae is ONE!  I can barely believe it has been a year since she was born – but more on her one year update later.  Until then lets talk birthday party.  We had Goldie’s ‘A Drop of Golden Sun, Goldie Girl is One’ Party a few weeks ago and it was sweet, simple, and perfect for our girl. 

this post may contain affiliate links

A drop of golden sun Goldie girl is One

Happy Birthday Sunshine Girl

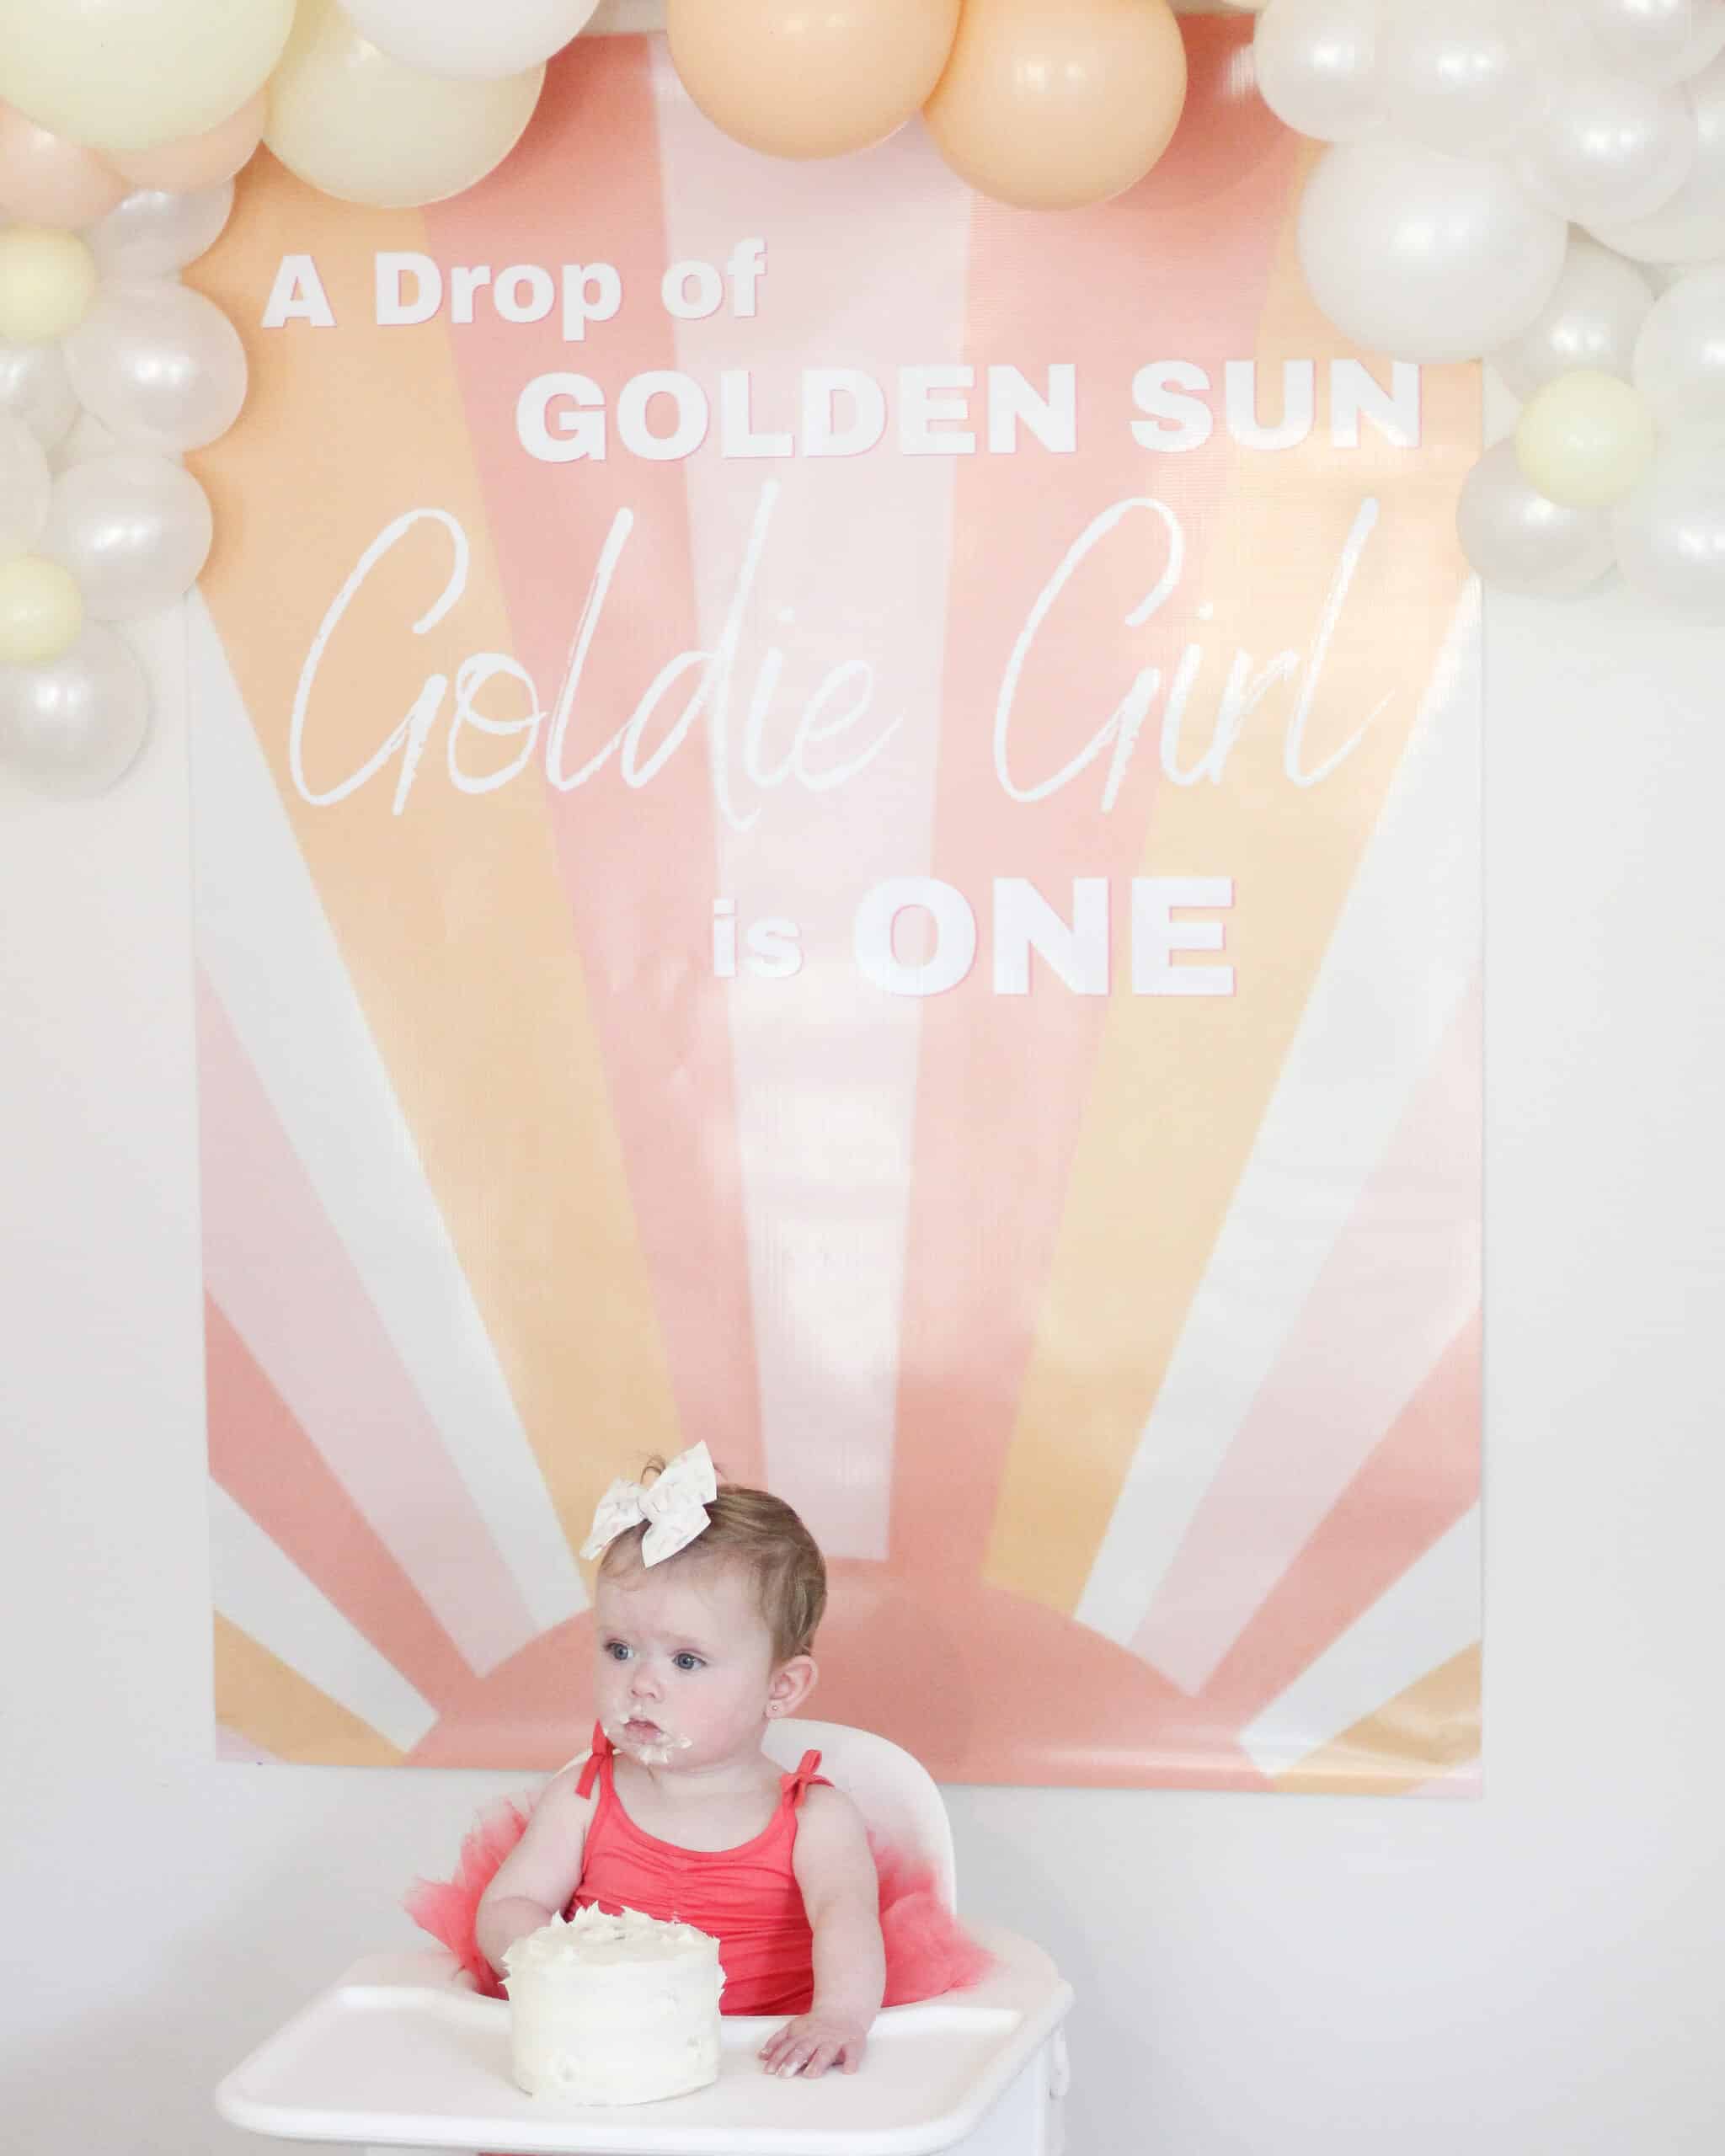
When I started planning Goldie’s First birthday I knew I wanted to somehow incorporate sunshines.   Her nursery sign that says ‘A drop of Golden Sun’ has been one of my favorite things in her nursery and I decided to incorporate that. 

Clearly this was a 2020 Birthday with very few people at her party because of stay home orders and such, SO we went simple for just the family and it was perfect. I will share all the details of the party in this post, but if you are looking for more party inspiration be sure to check out the rest of my parties linked below. 

All Party Posts

sunshine themed first birthday party

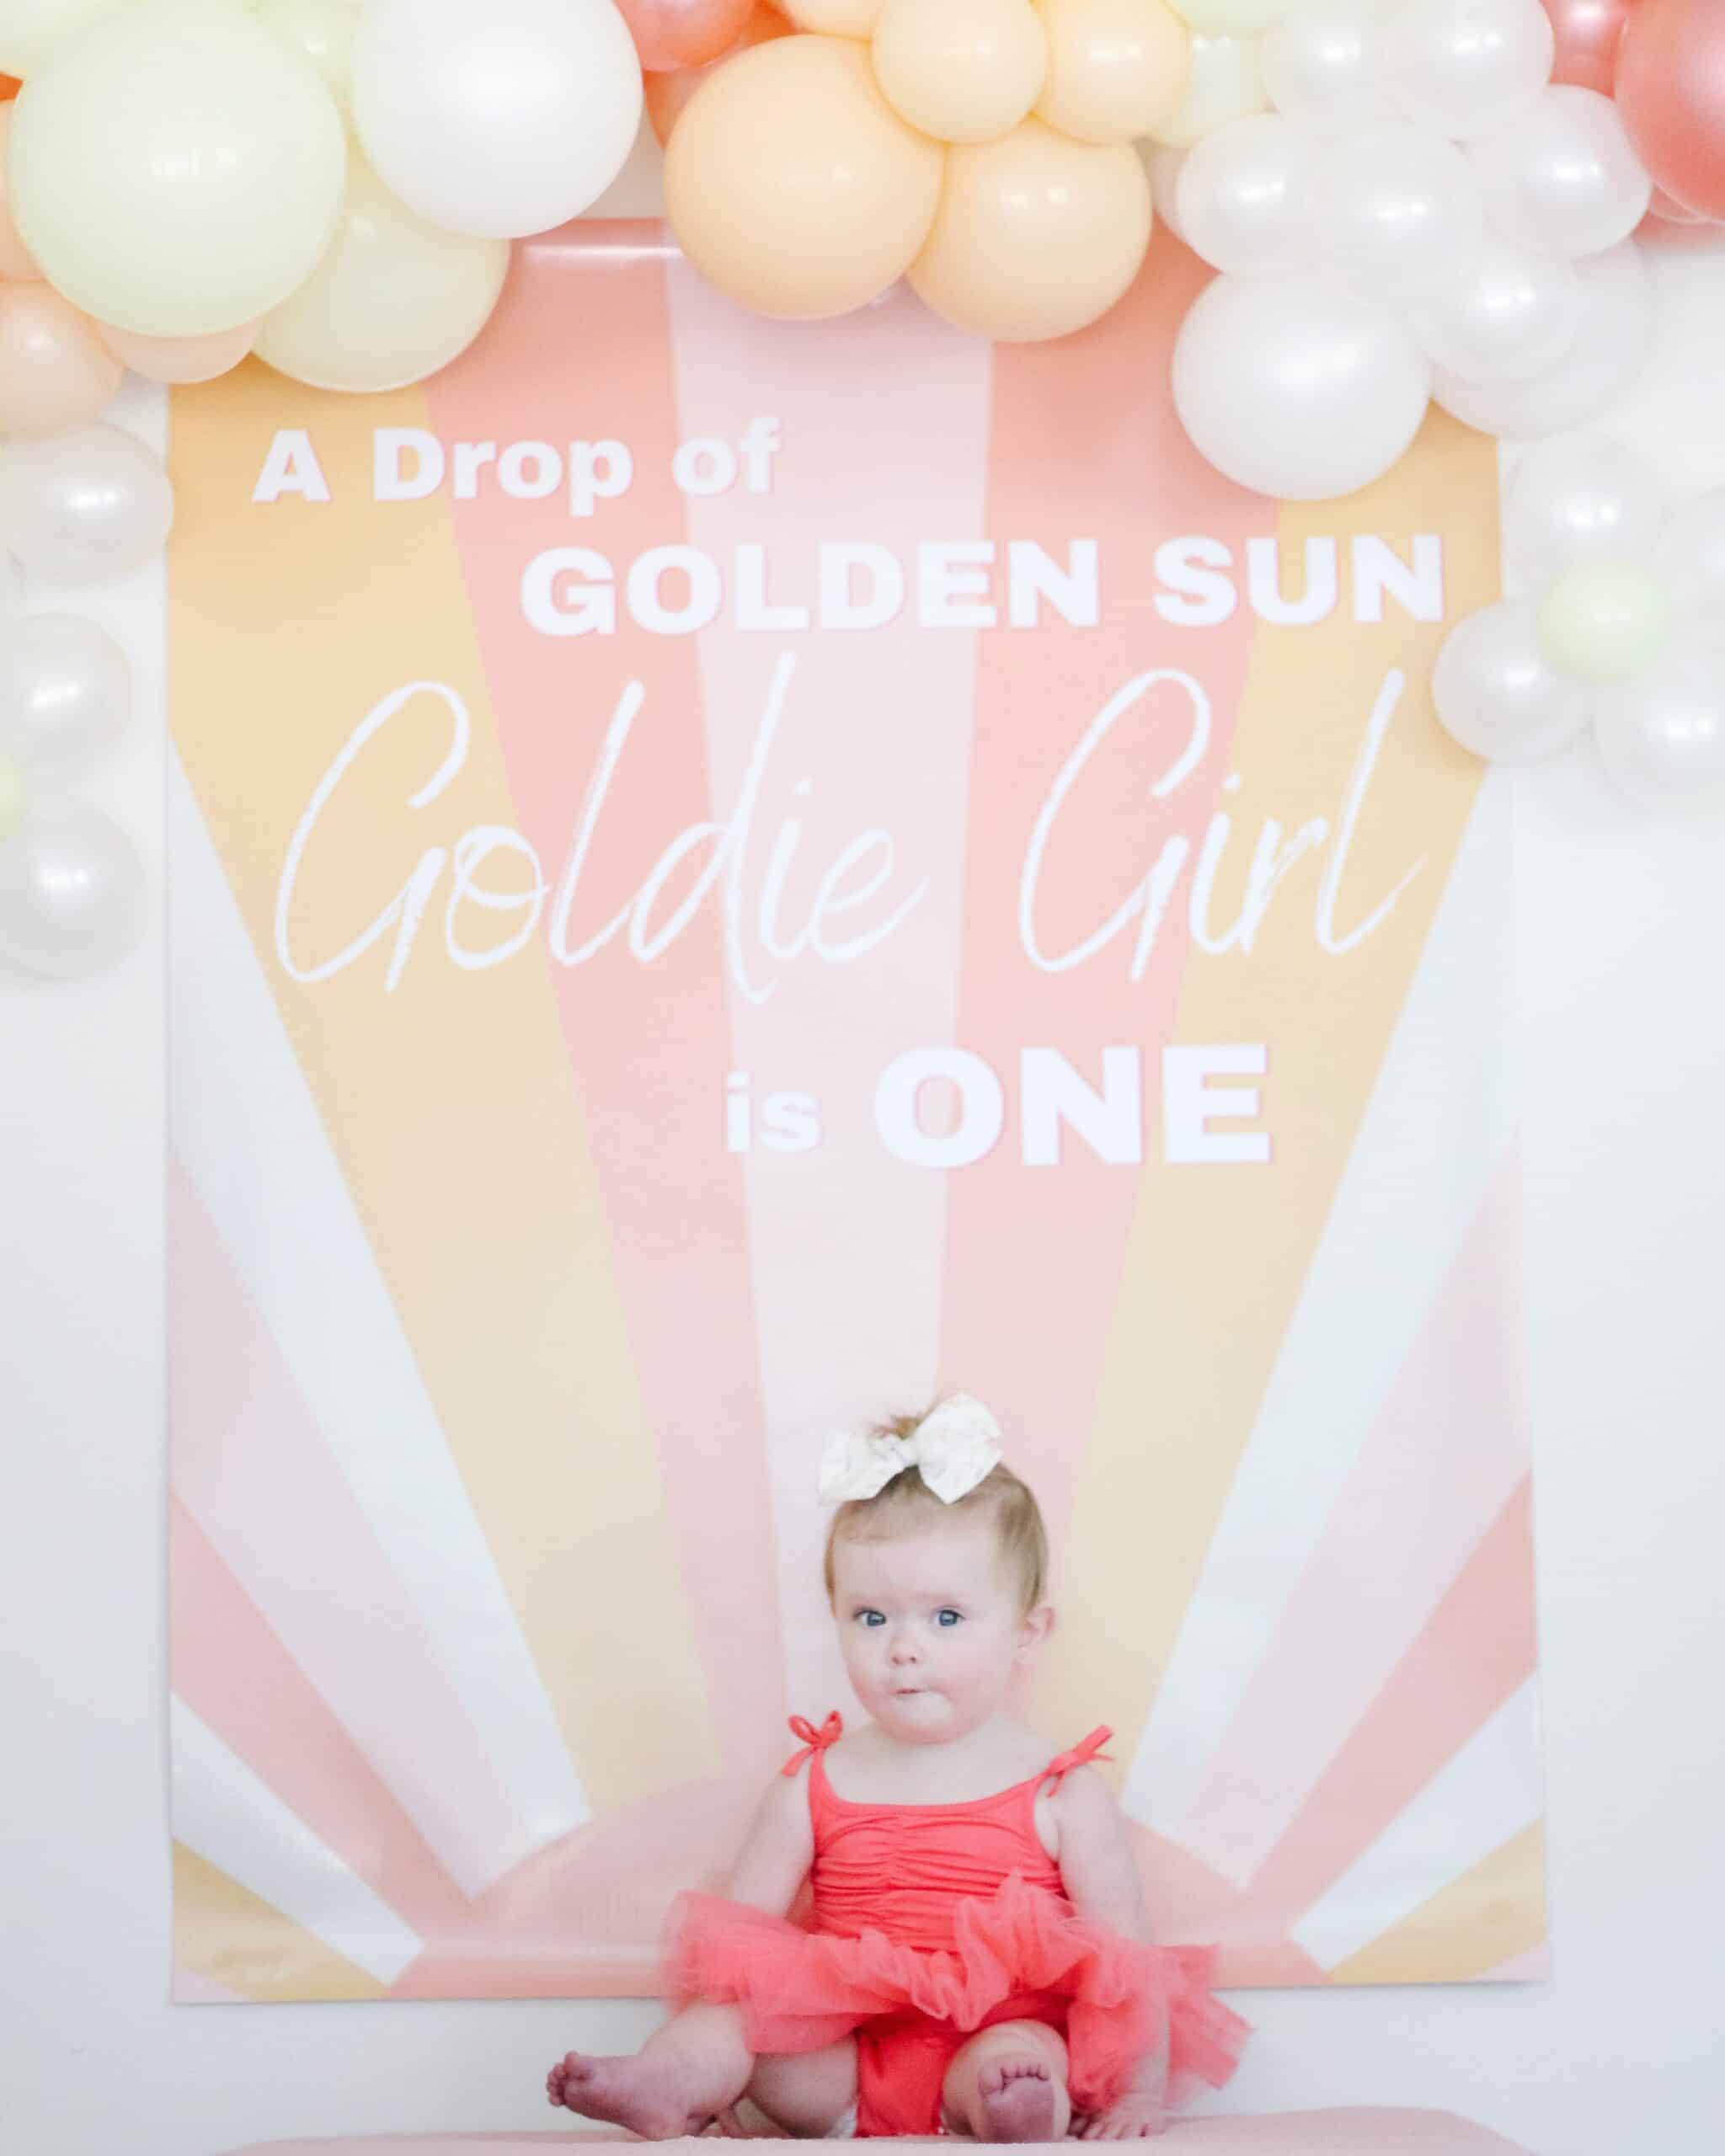
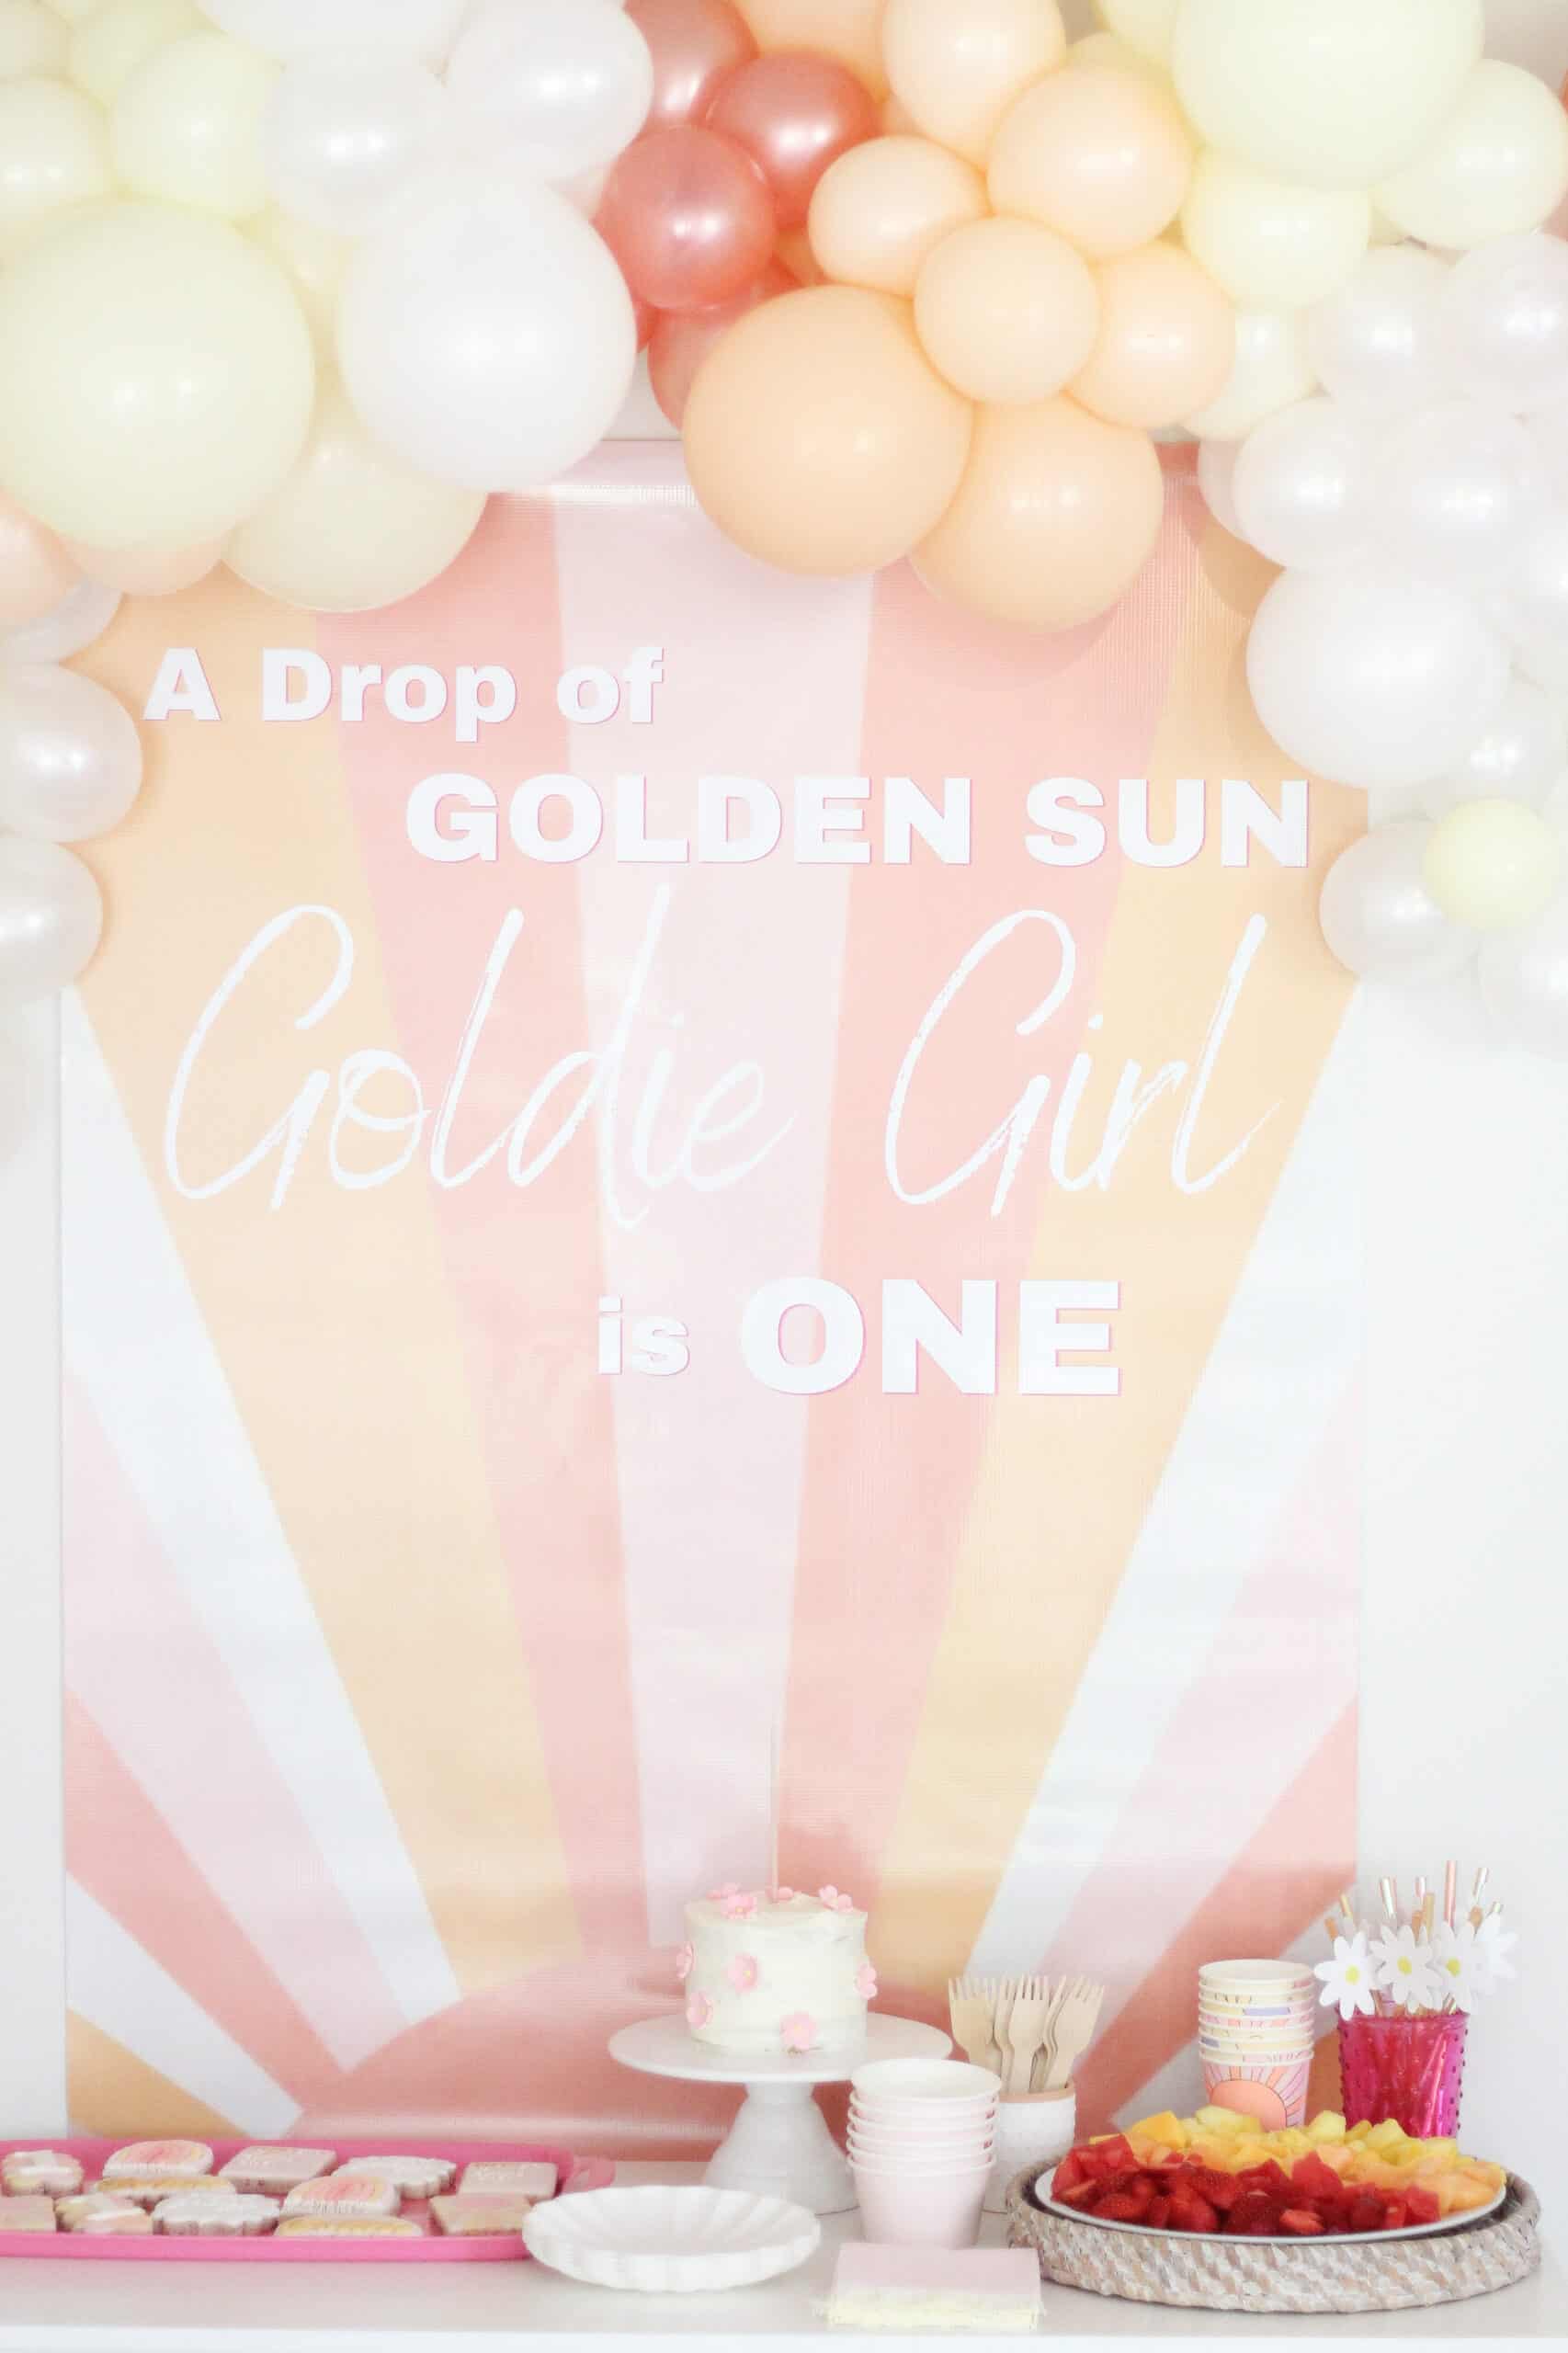
A Drop of Golden Sun – Goldie Girl is One

When I was planning the party I was not only up against this hellish year, but also trying to figure out how to make her party something cute and special while also getting ready to move out of our house about a week later. 

Baby girl with her pink flower smash cake

We moved out the day before she turned one so we did her party a little early, and I took on very little of the decor in a DIY way – which isn’t real like me. 

Poster Backdrop

I knew I wanted a really cute backdrop for her – but when it came to coming up with that in a DIY fashion I knew I would lose my mind trying to find time with the move happening. 

sunshine backdrop with balloon garland

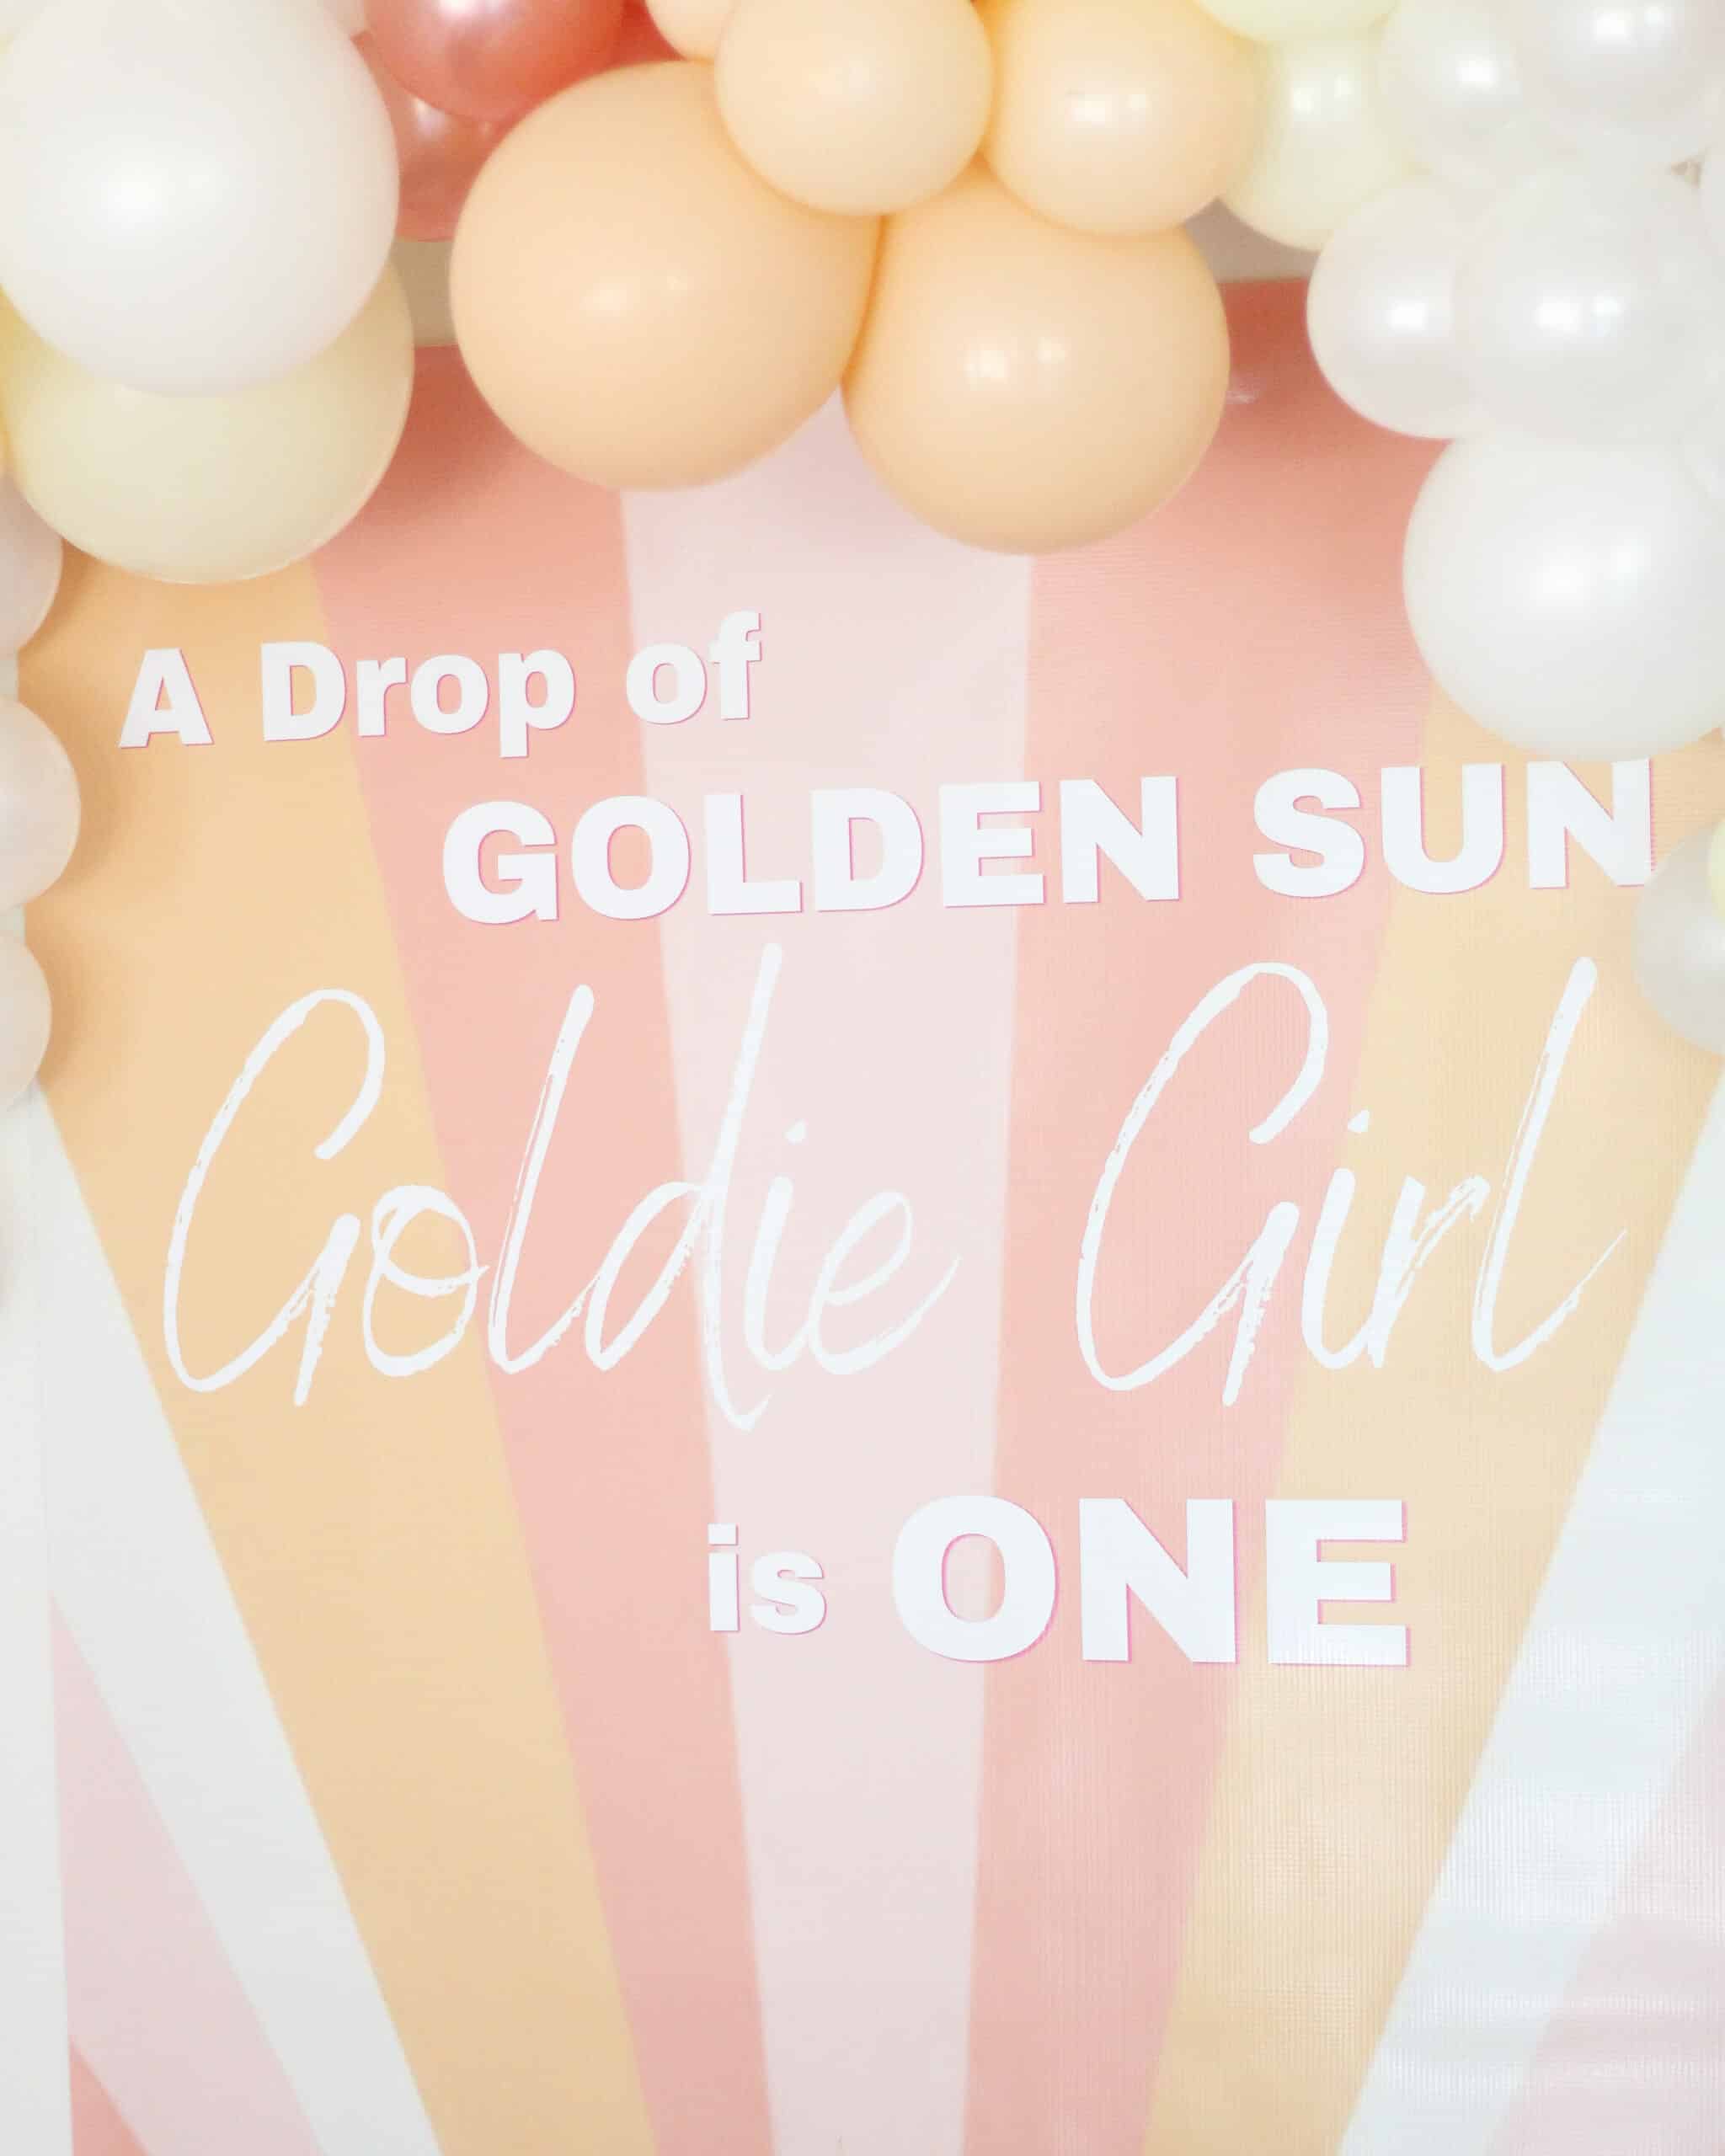
I ended up coming to Instagram and asking for some resources on printing a poster and a sweet friend – Taylor has a business where they print posters, wallpaper, all sorts of things.  I had her print out the poster and it was PERFECT! It made for the most simple backdrop and I am sure you will see it done for future parties. 
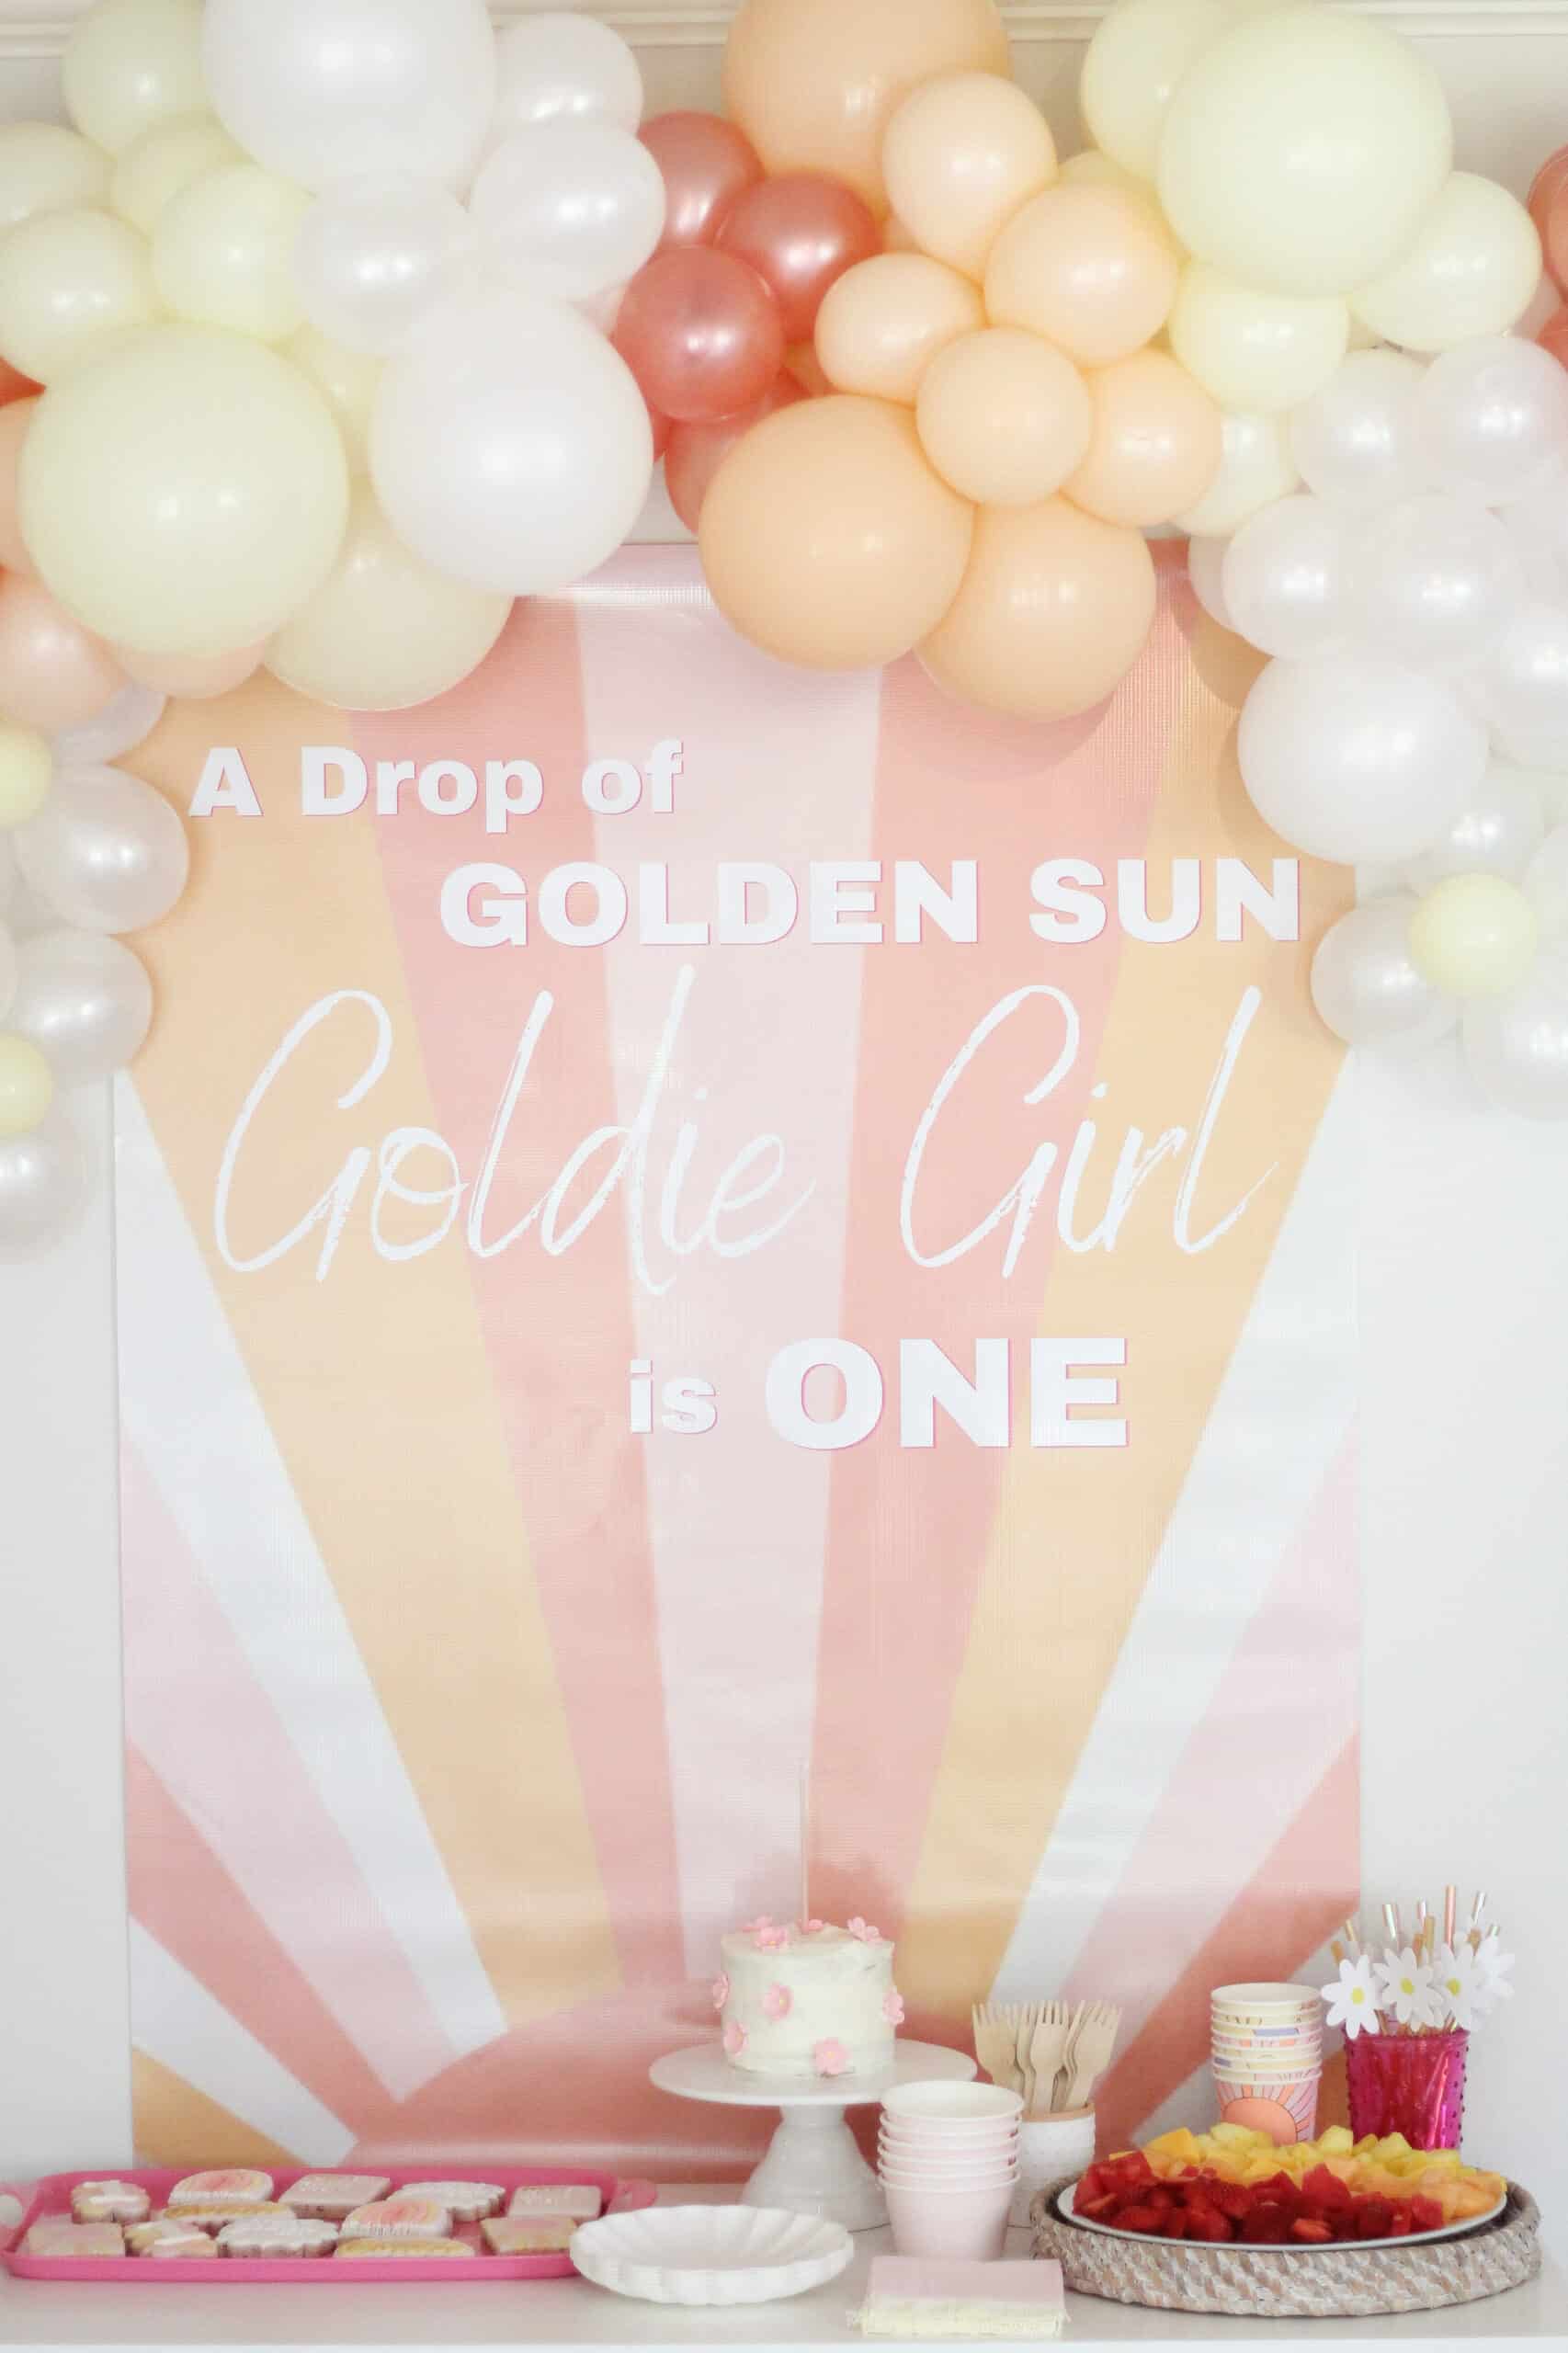
Happy birthday sunshine girl party

Balloon Garland

Something I started outsourcing for my parties as well is my balloon garlands.  Party Hop Shop here in St. Louis is amazing at their garlands and it just cuts down on so much stress.  I told them a size and color scheme I was going for and they did the rest.

pink yellow and coral balloon garland

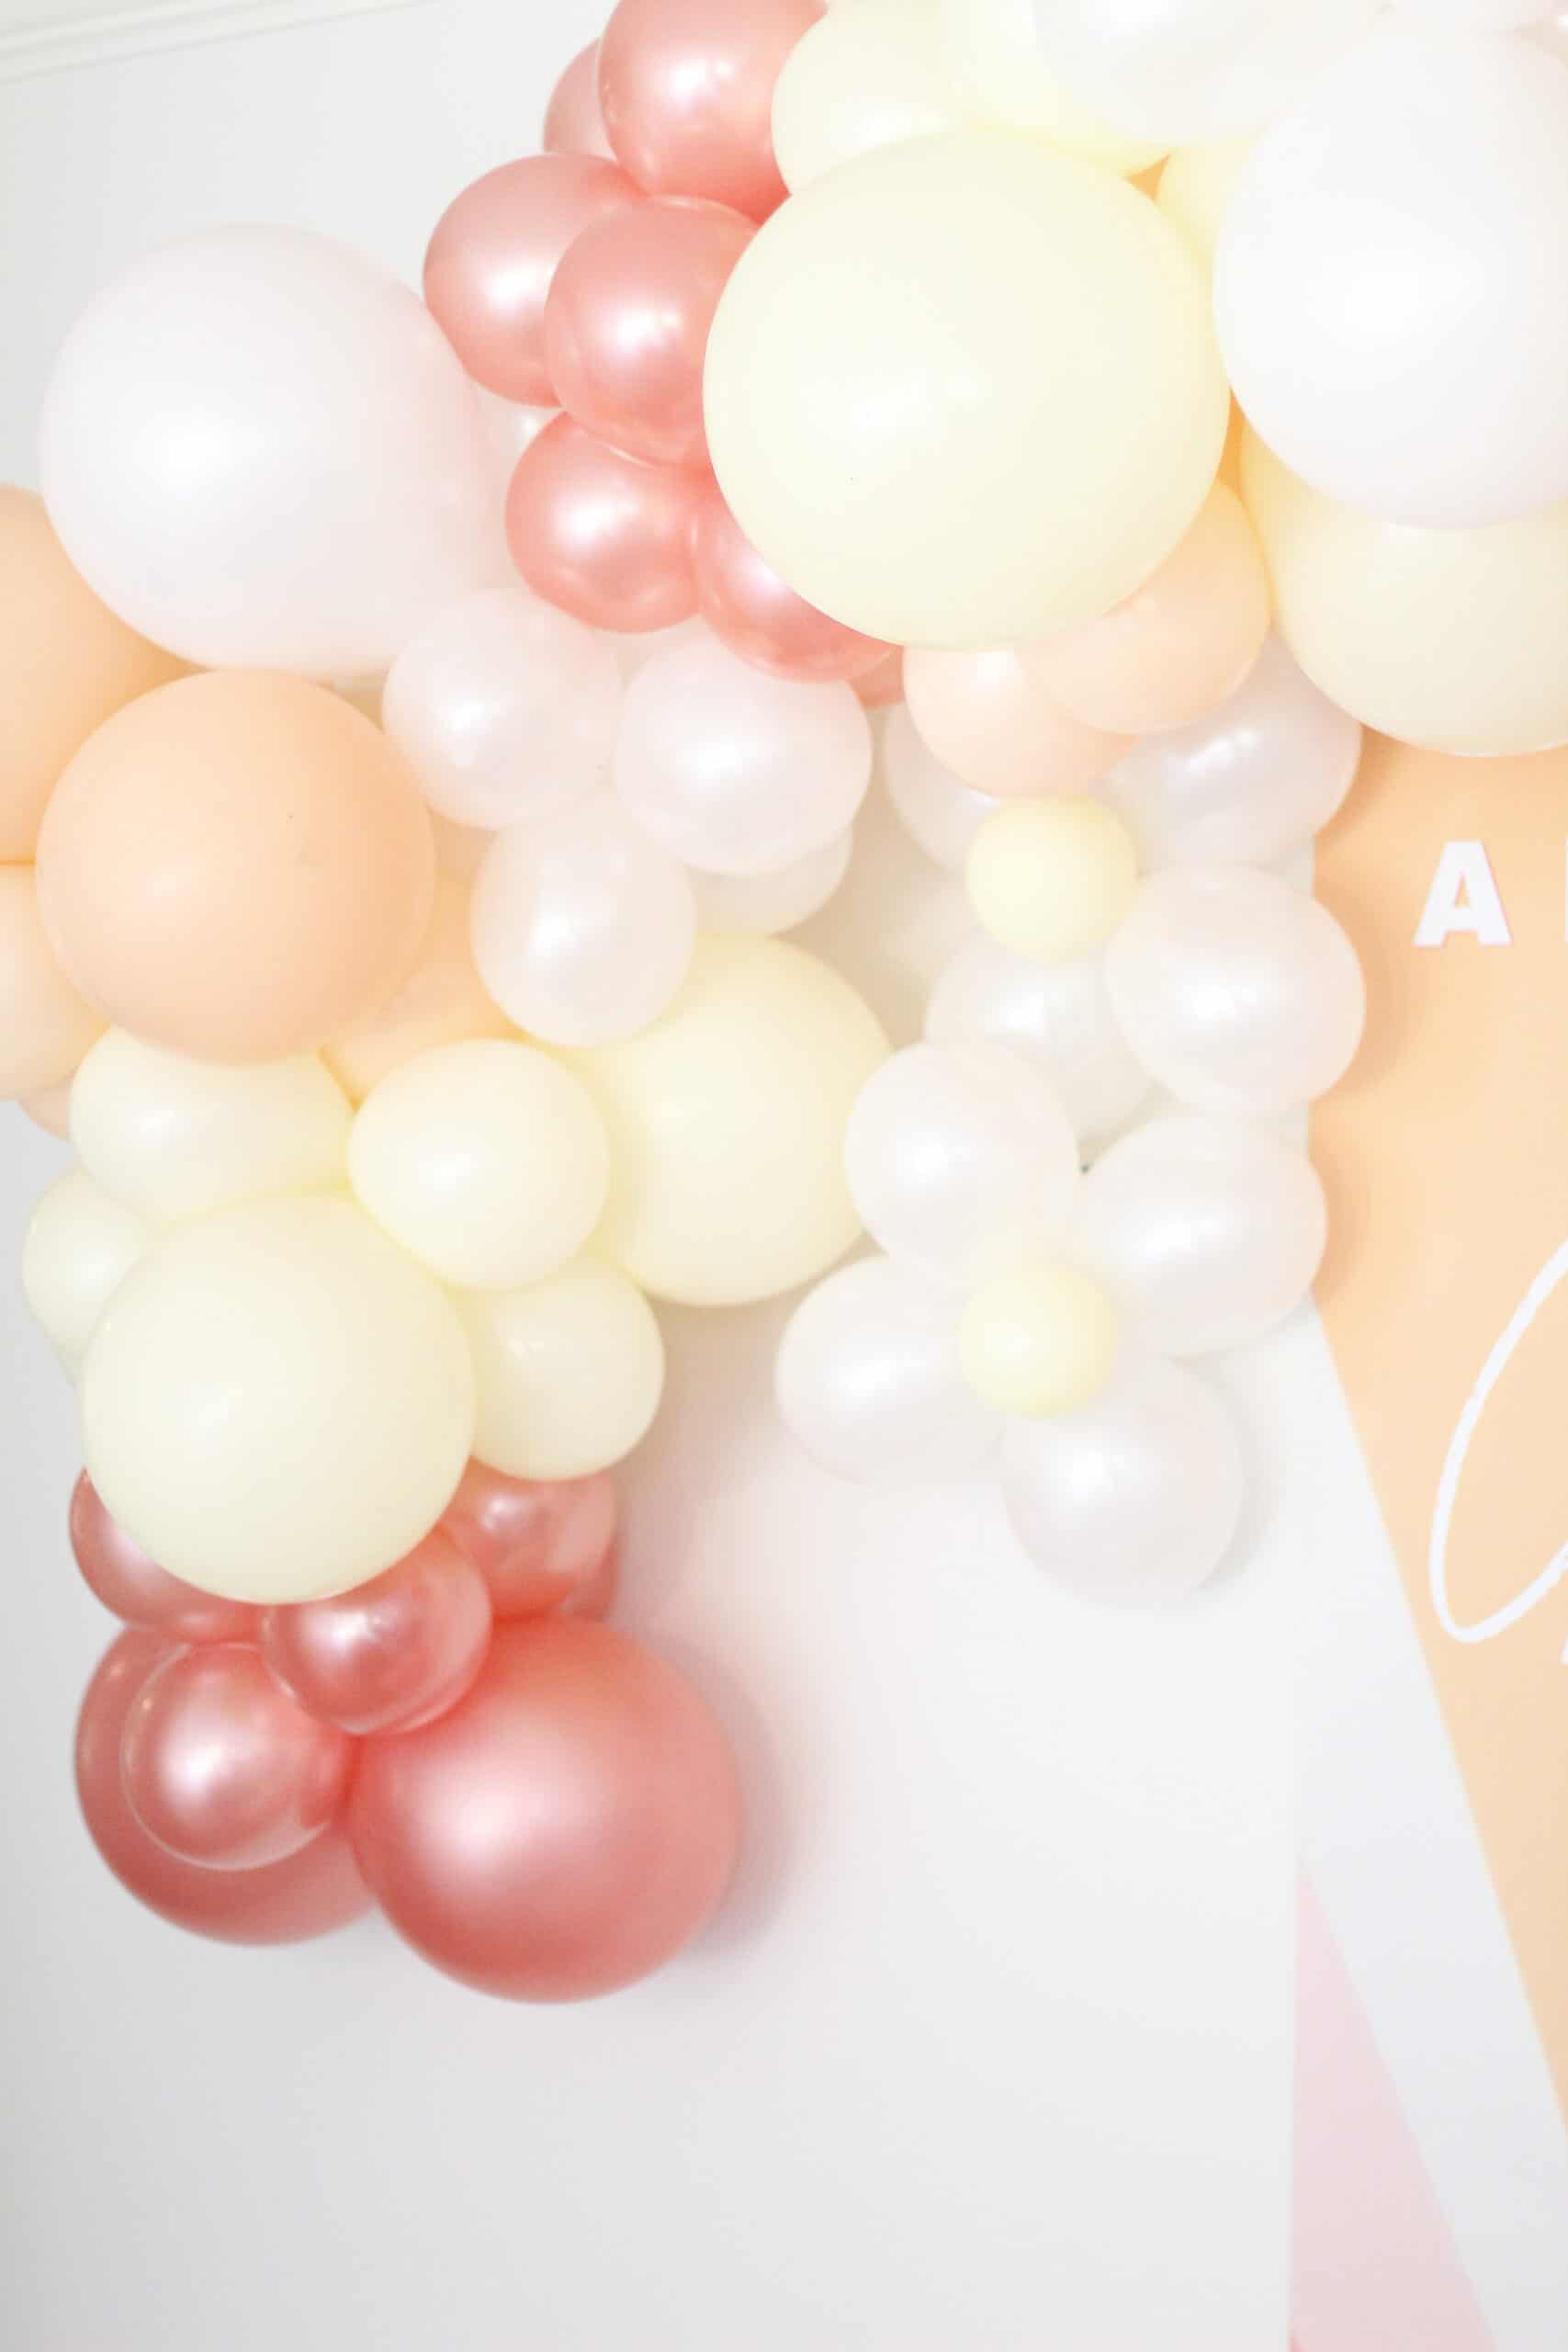
One thing I appreciate about the Party Hop Shop girls is they have such a good eye.  They added in the few little balloon flowers and it was perfect. I can not recommend taking the stress of making that off your plate and getting the perfect garland.  
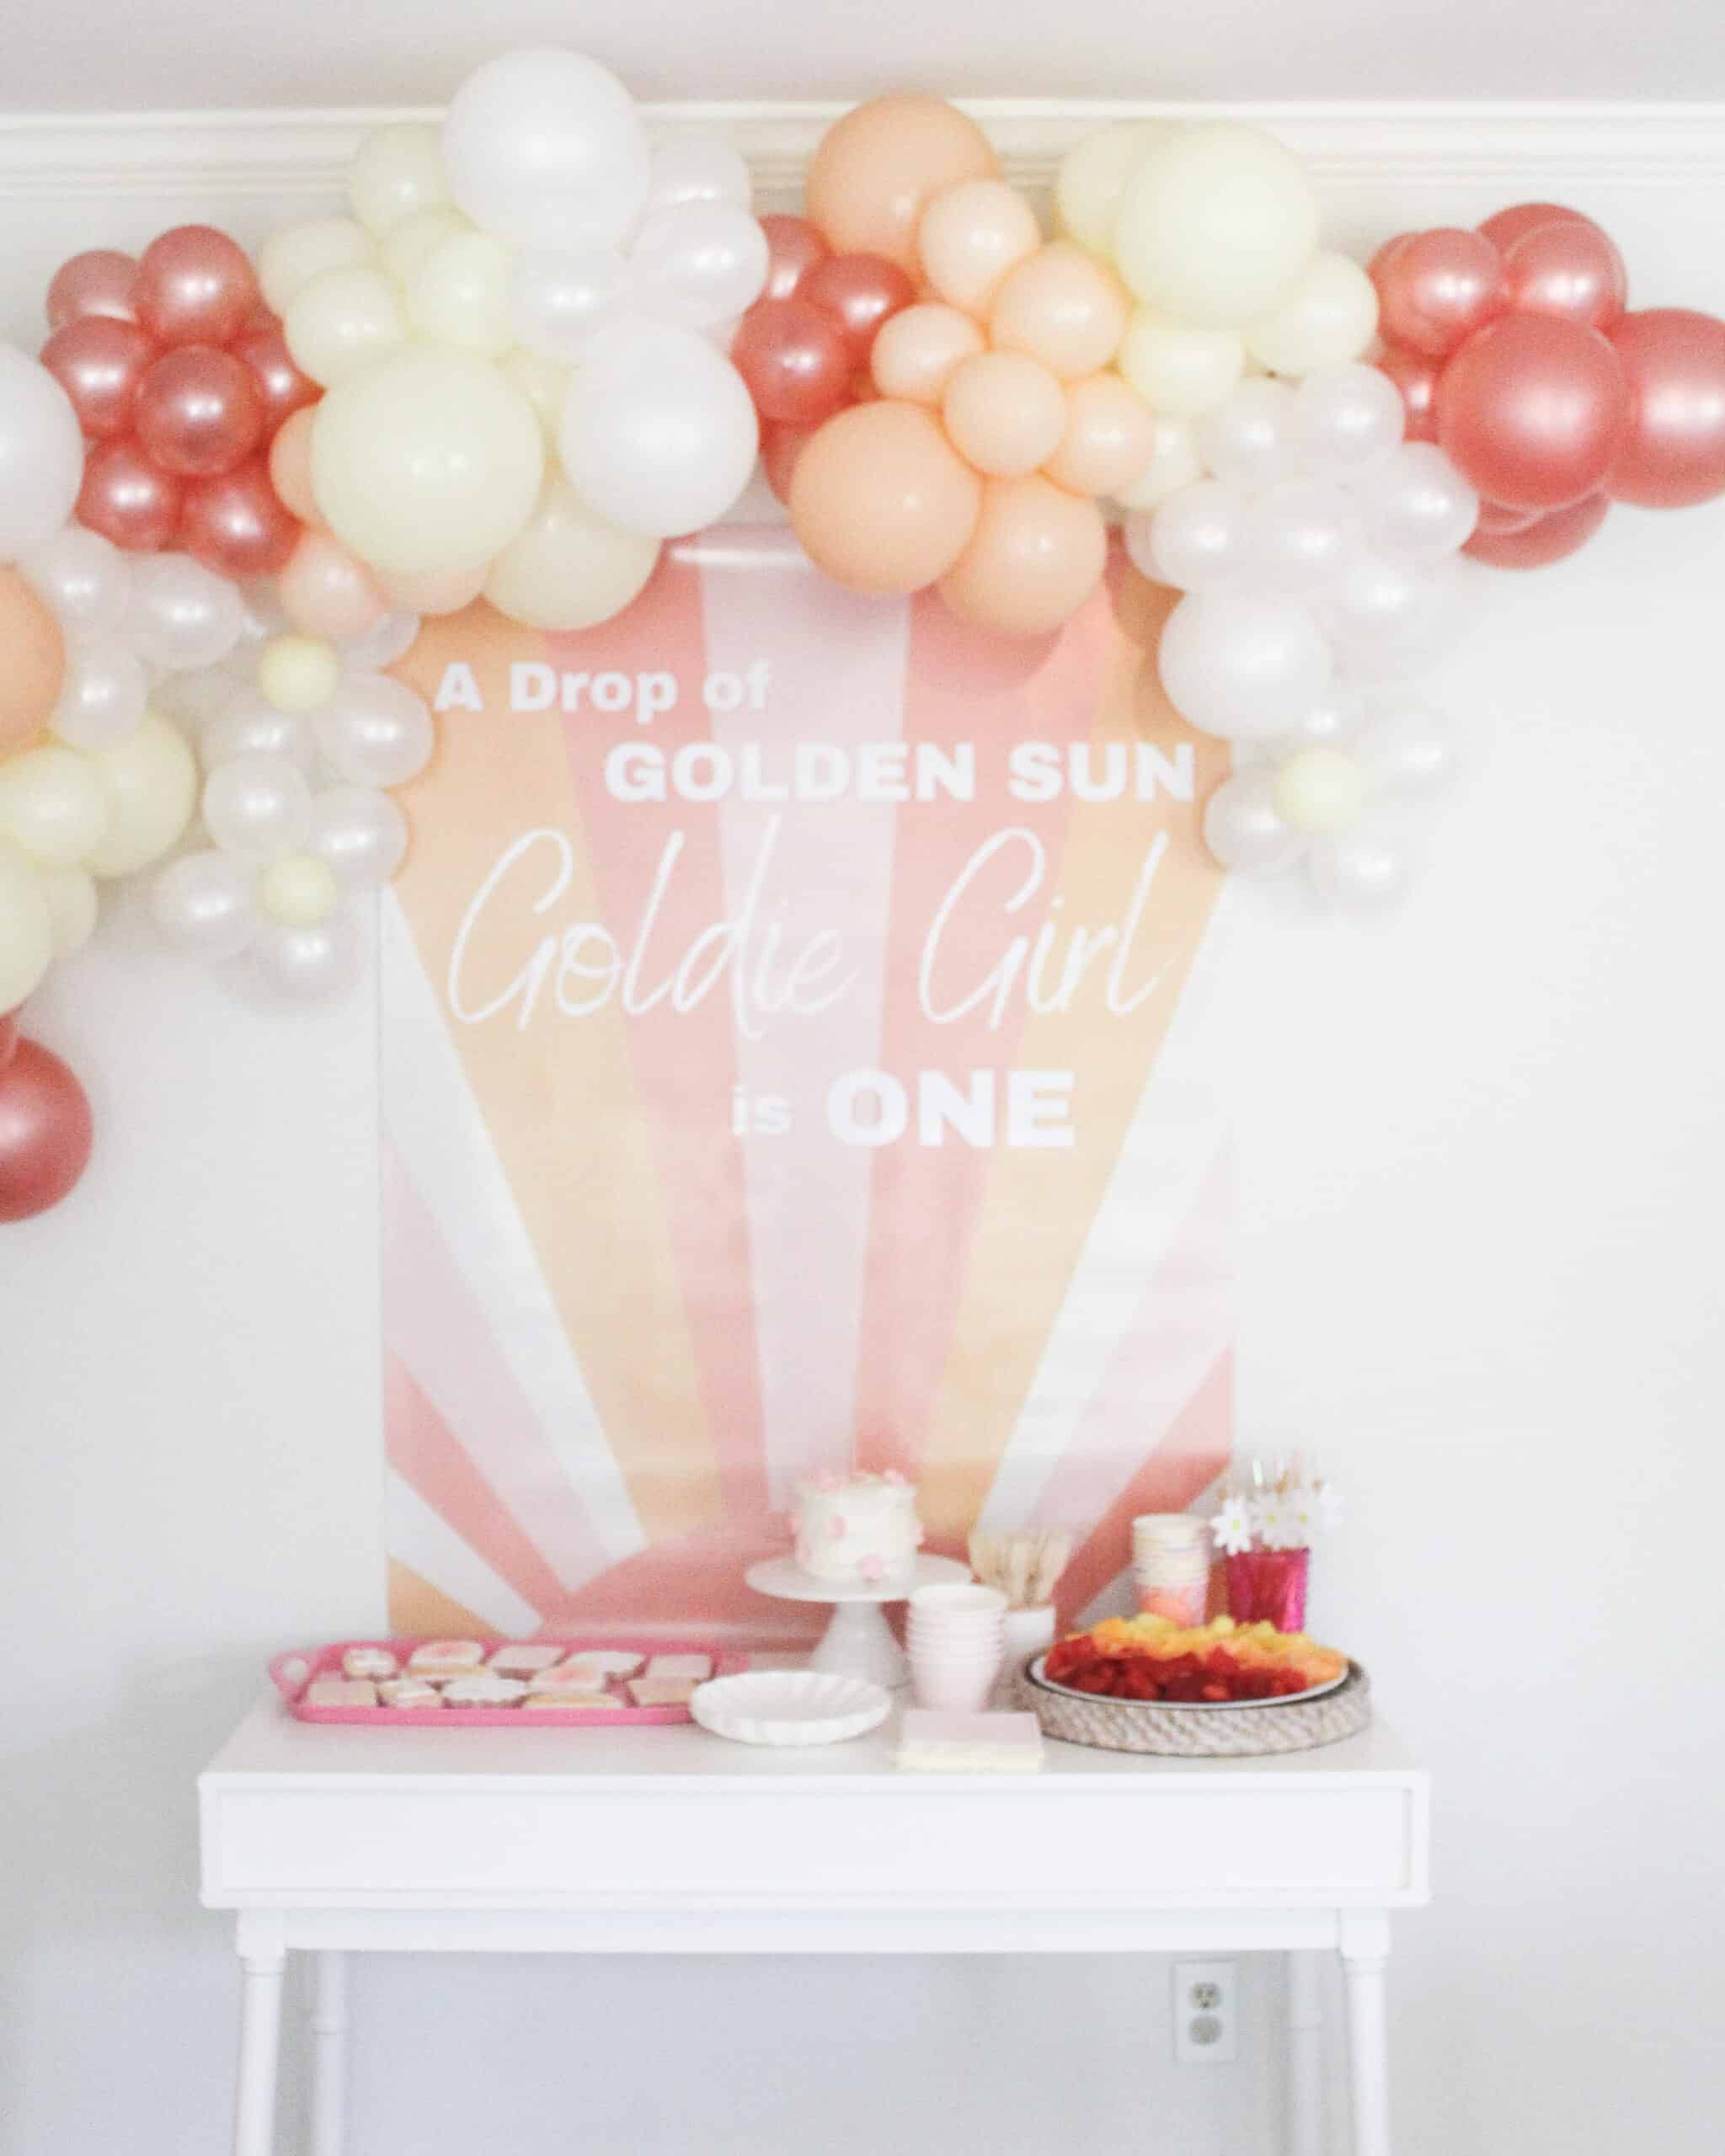
Happy birthday sunshine

Food

I typically for a small party try to host mid afternoon where it won’t be over a meal.  For Goldie’s party it was no exception –  I went with a 3:30 pm party so didn’t offer too much in the way of food.  I had chips and salsa/chips and dip, cookies, Ice-cream cake, fruit, and of course Goldie’s smash cake.
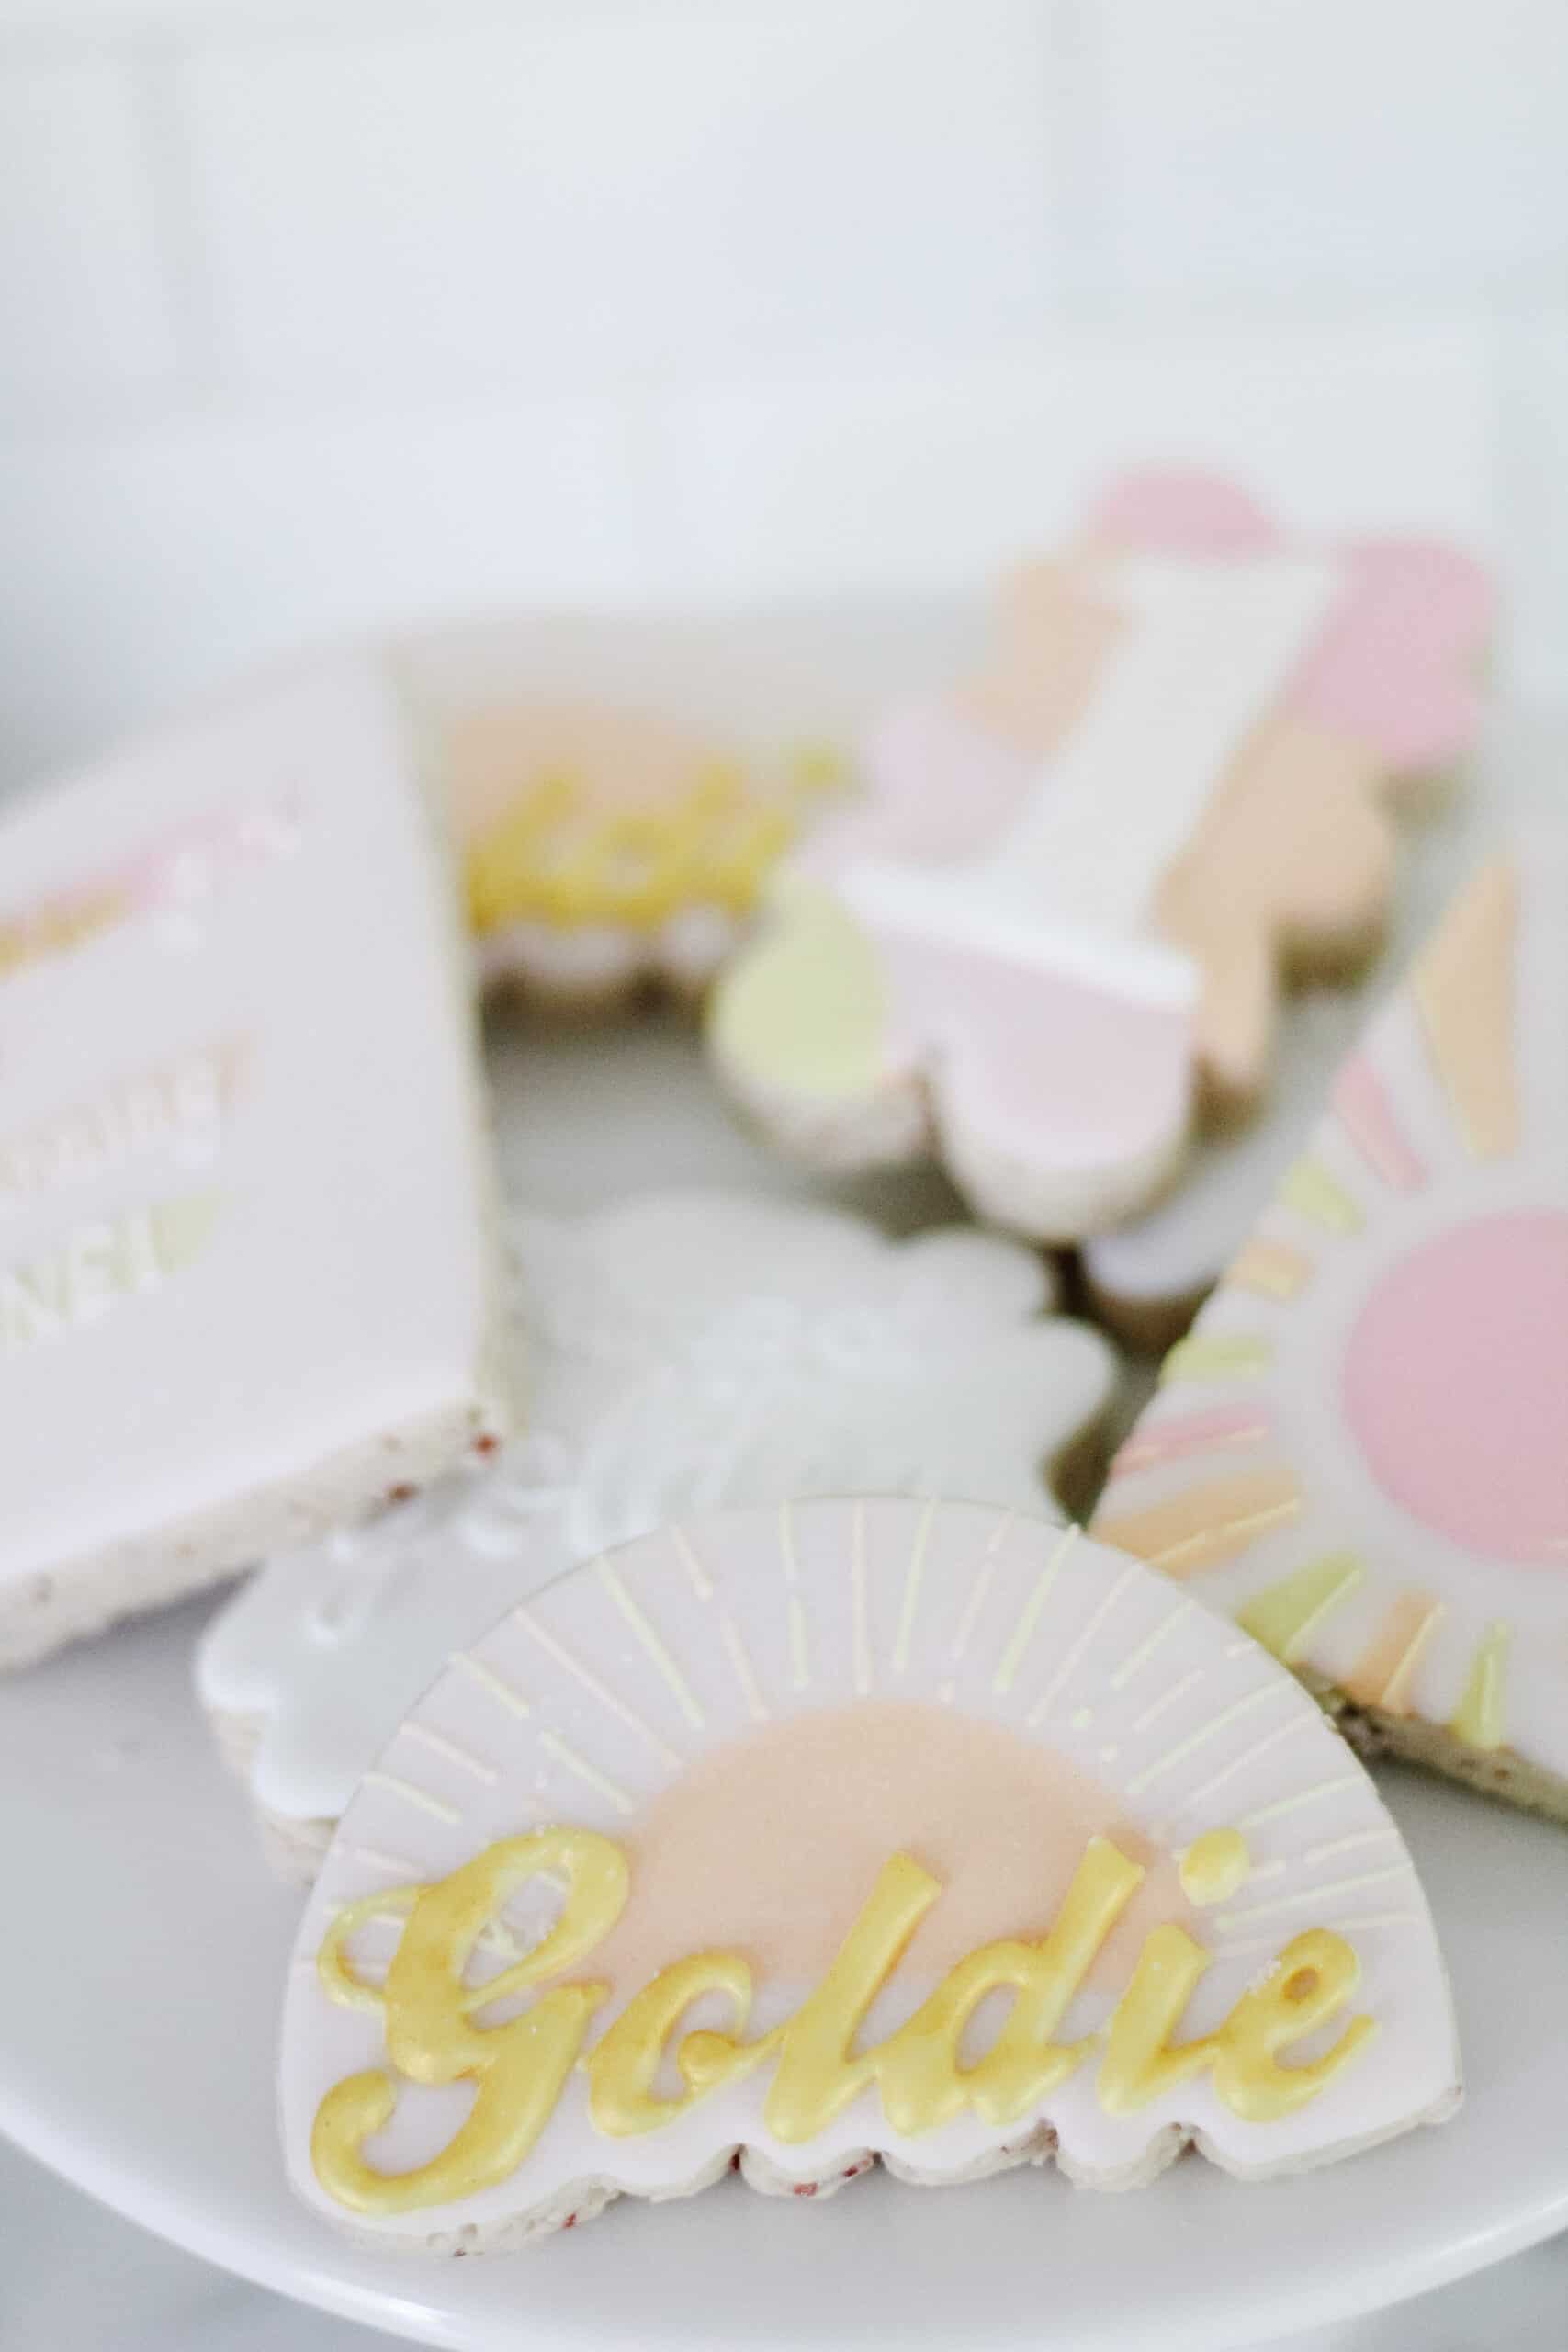
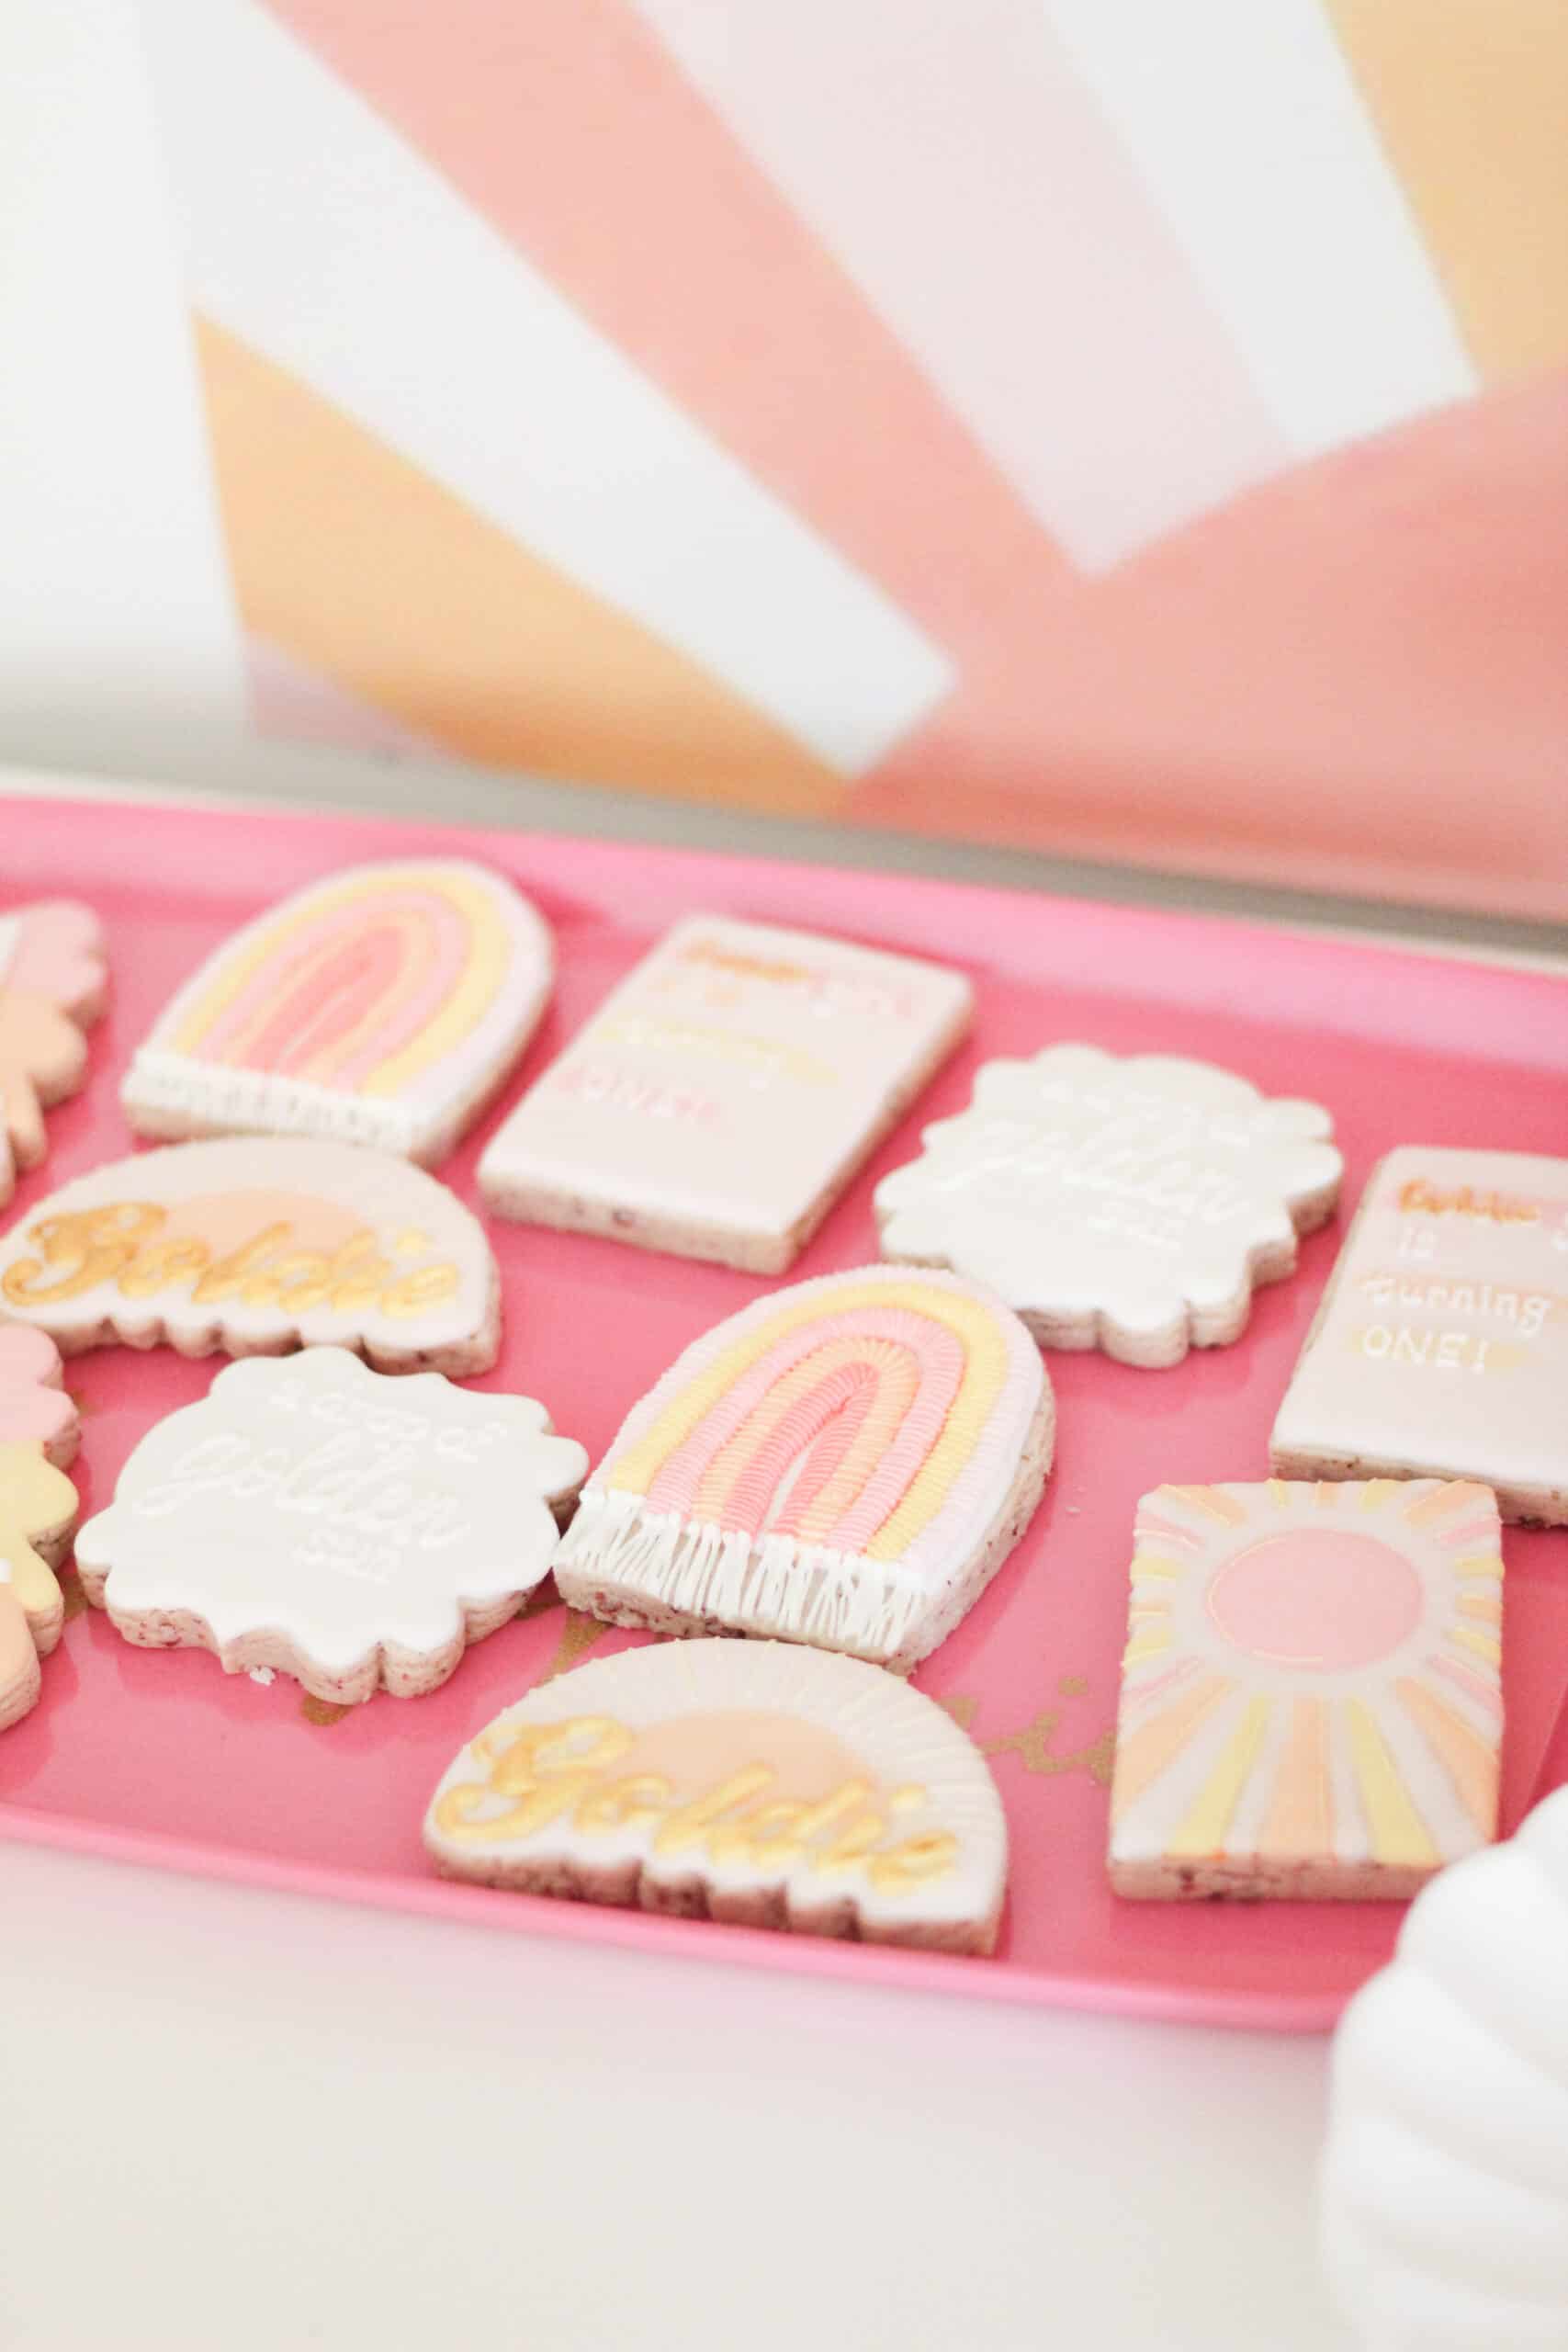
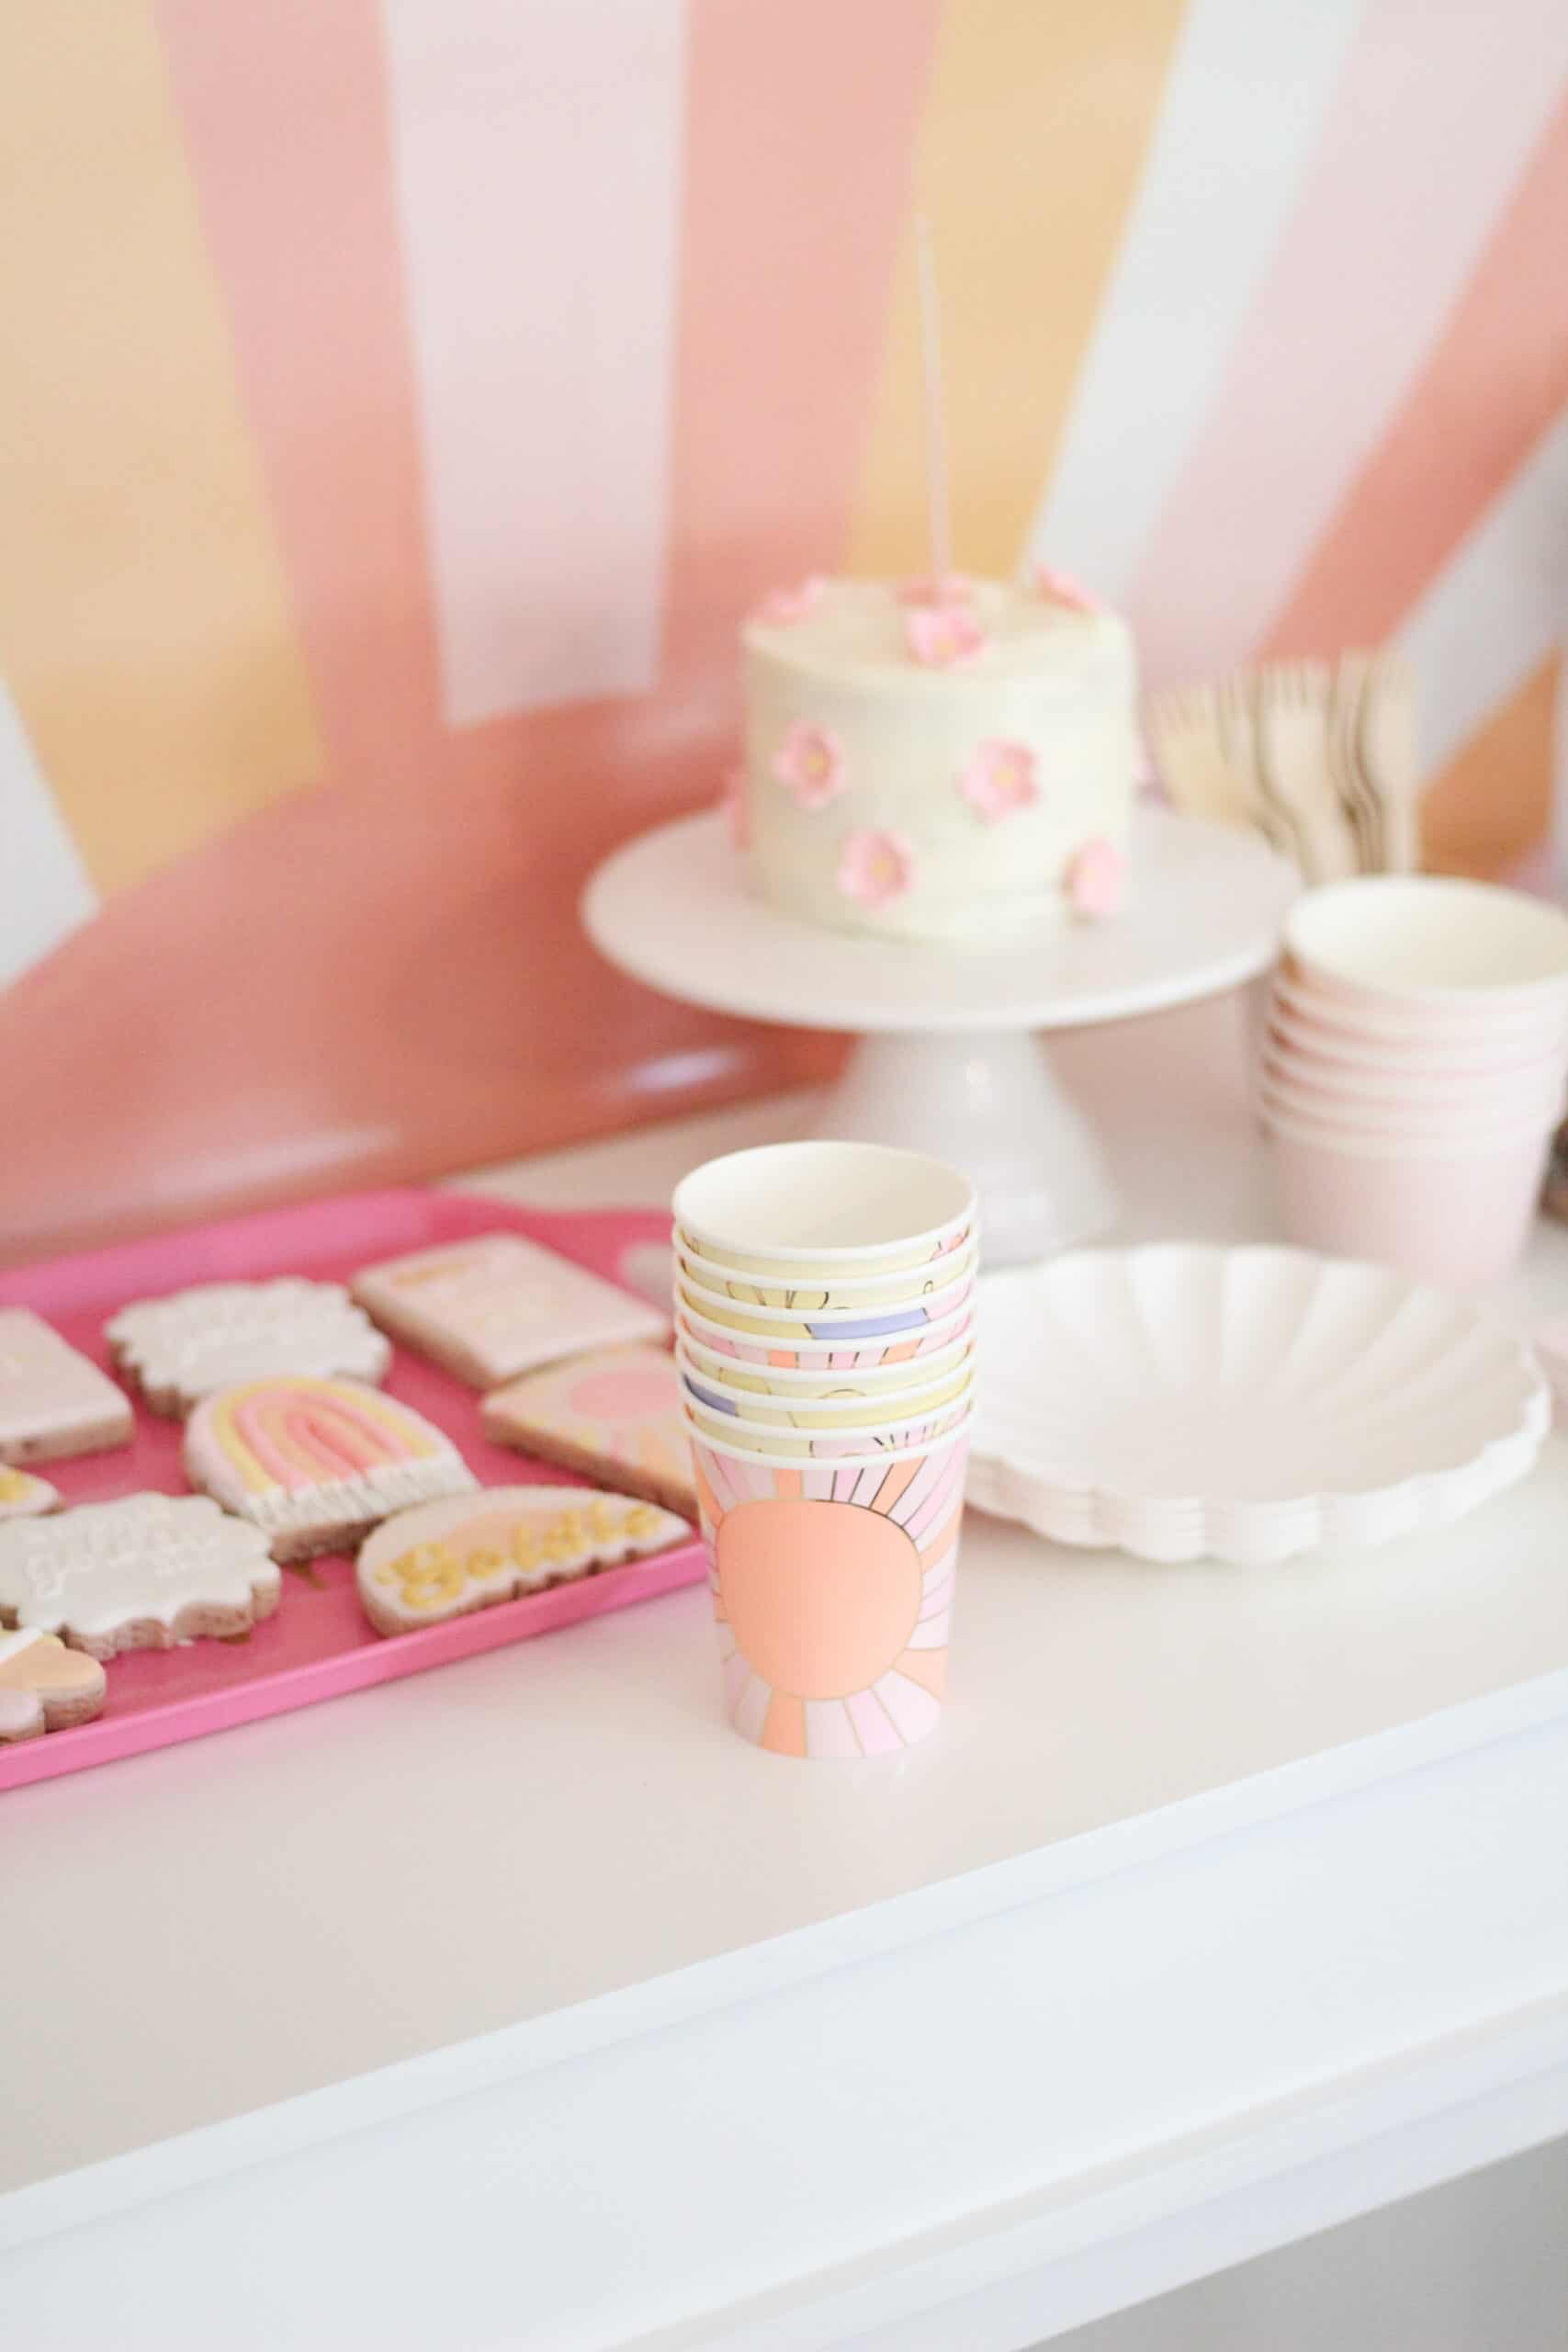
pink and yellow party table

Cookies

I use the same baker here in St. Louis every time for these cookies and she KILLED Goldie’s.  I gave her a little direction on party theme and colors which matched her nursery and she based them off a mix of her nursery and the photos I sent her.

pink yellow and white birthday cookies with sunshines and rainbows

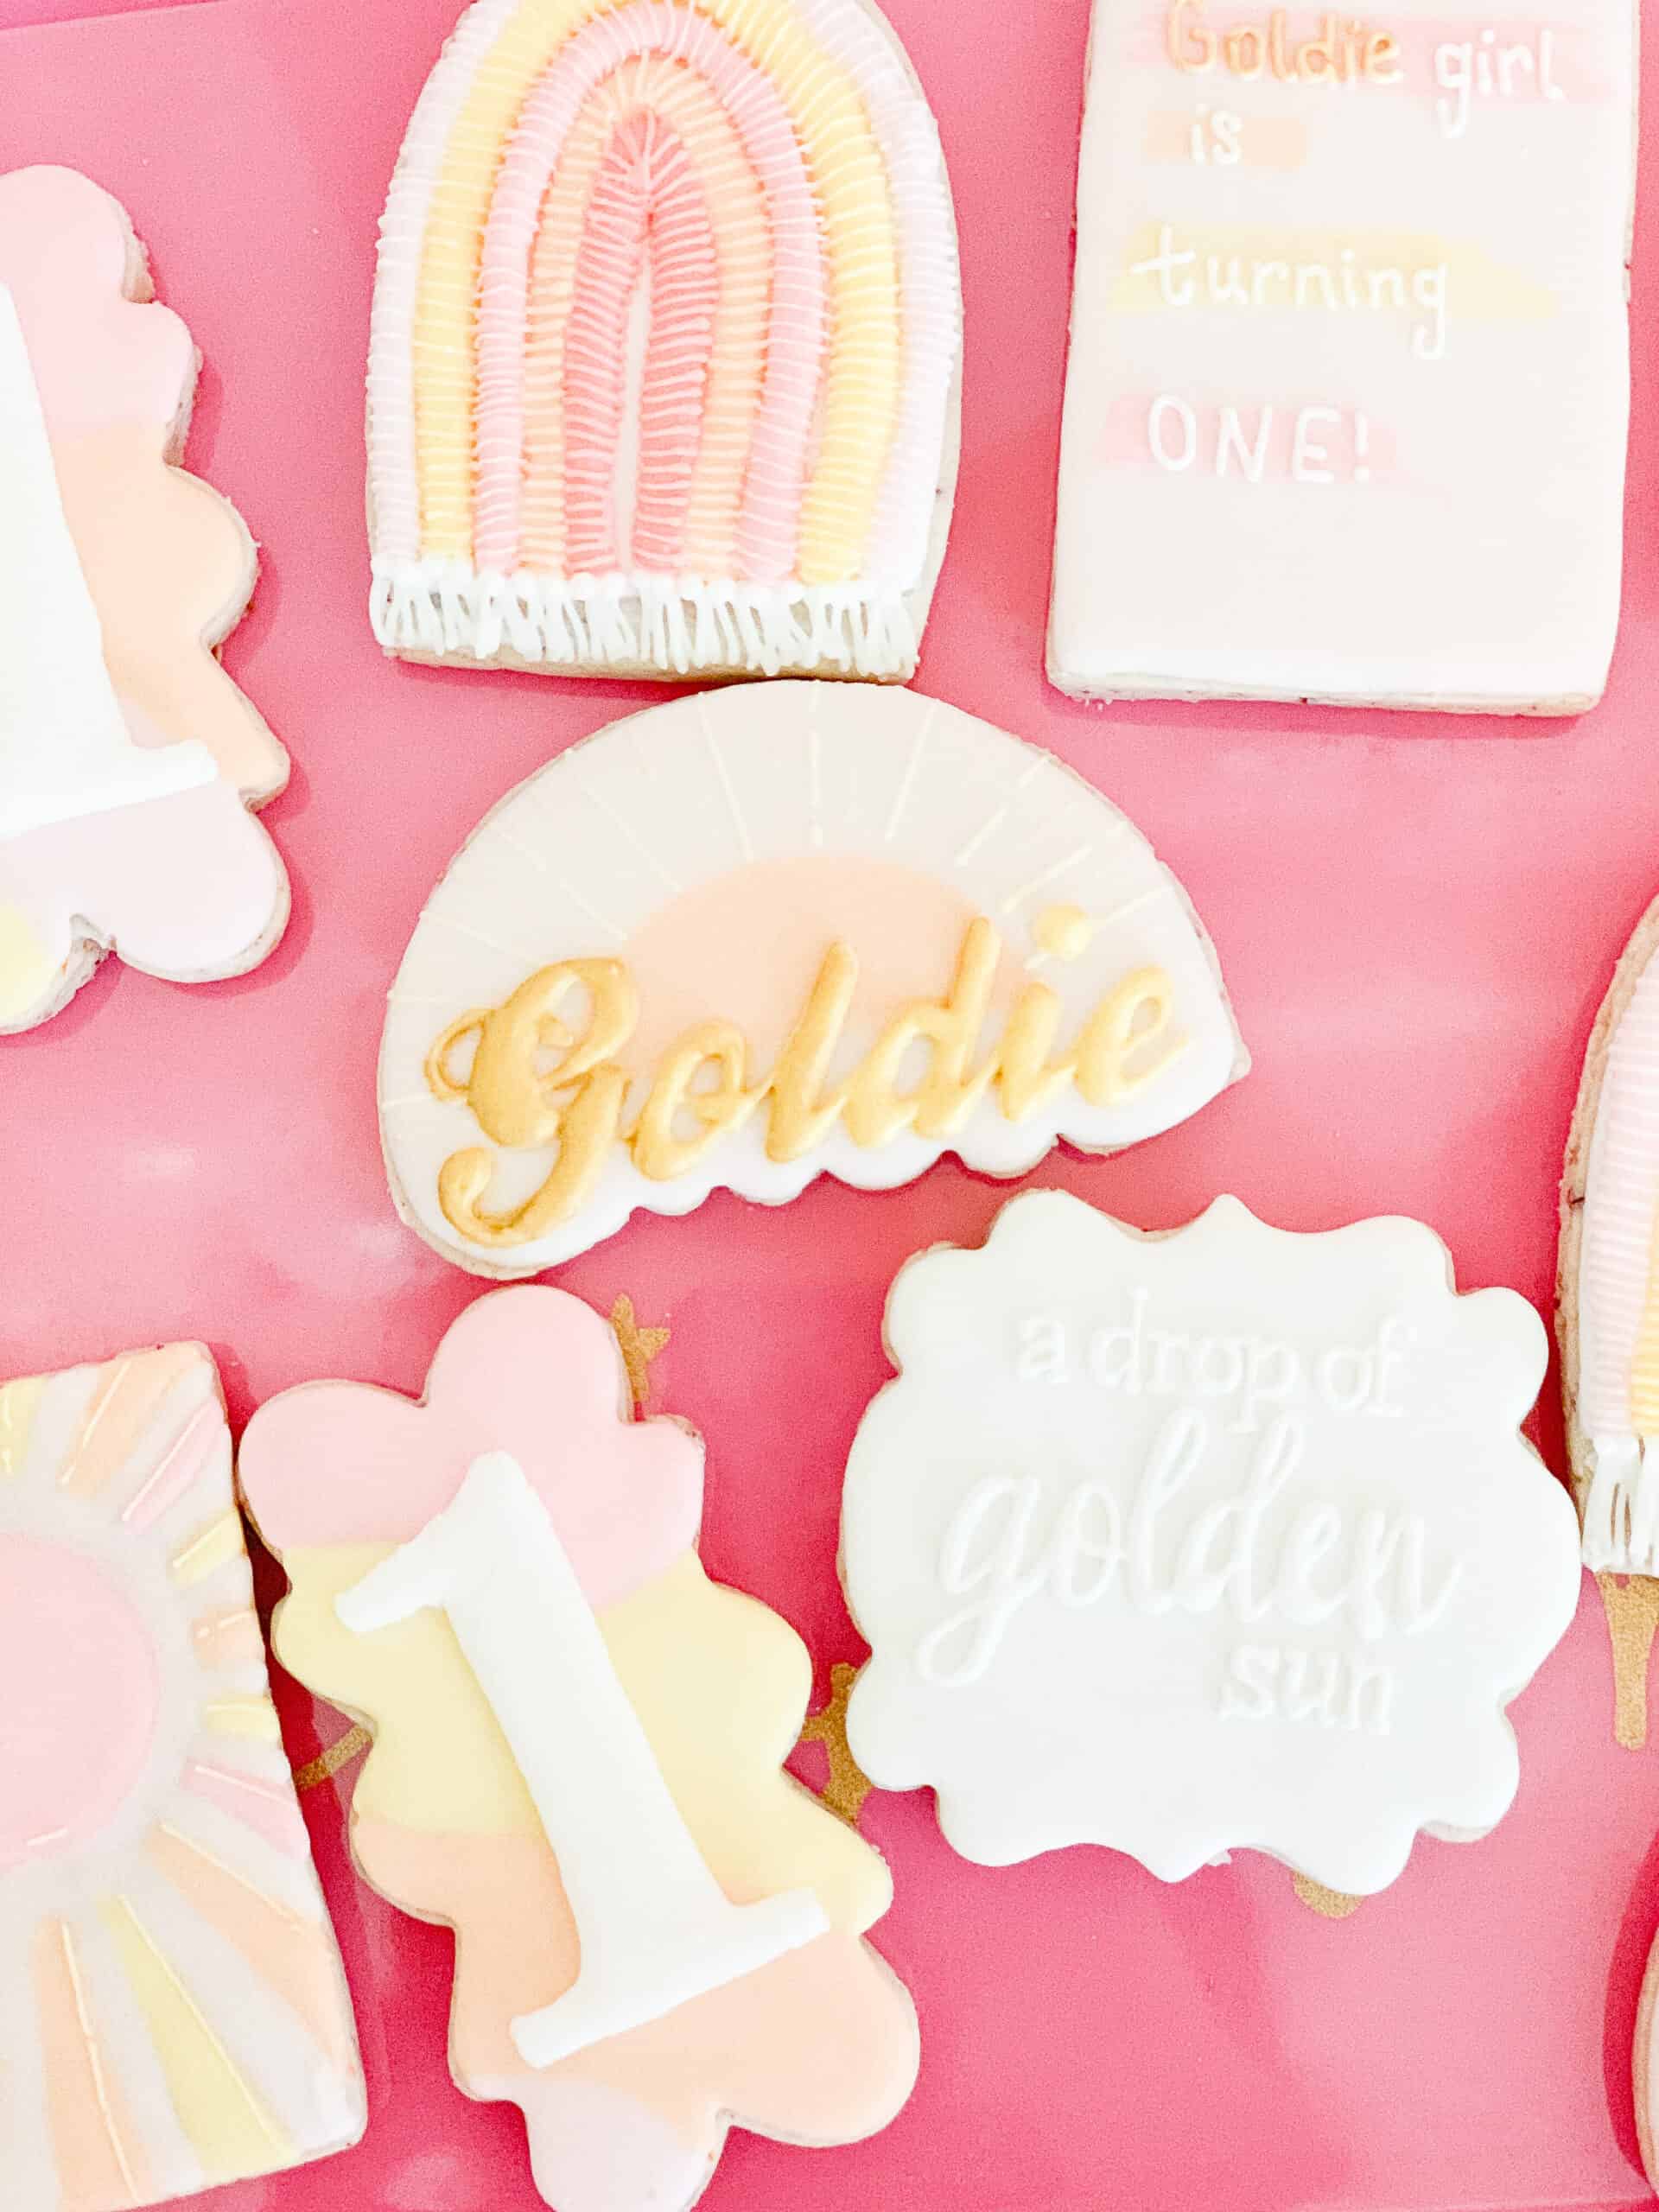
It was actually extra sweet and special for me because I had just dismantled Goldie’s room so it was so fun to see all those details at her party.
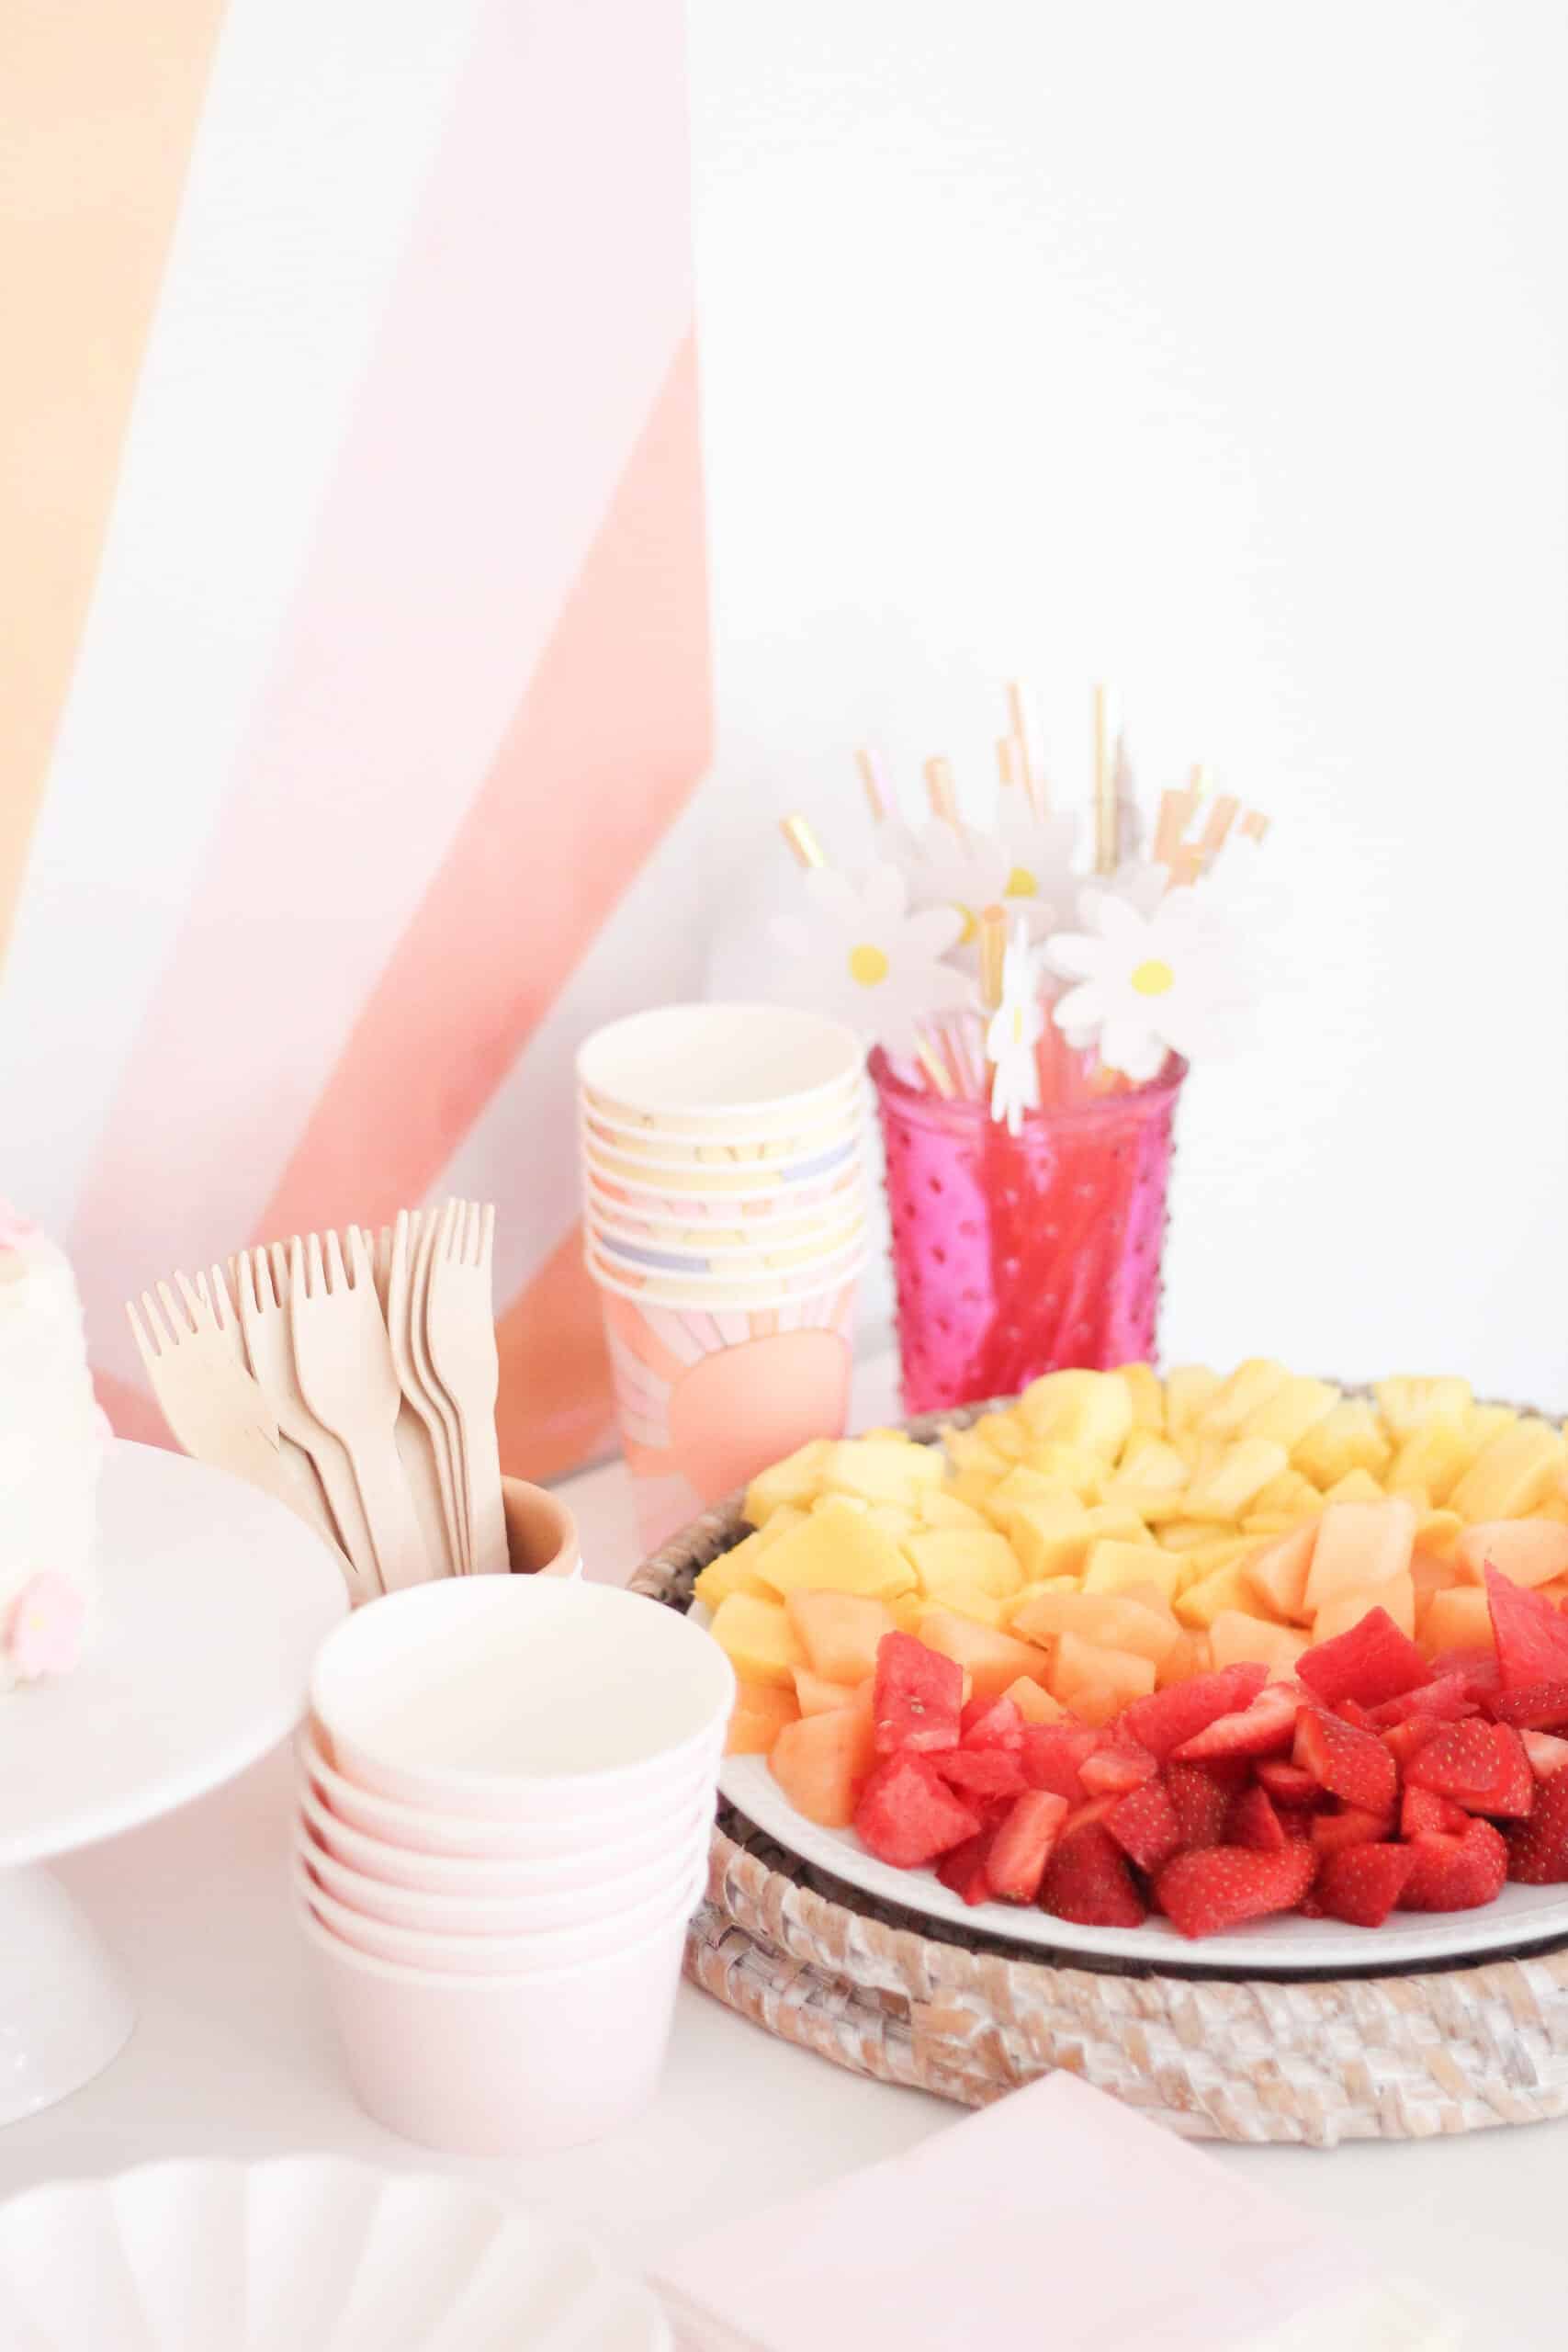
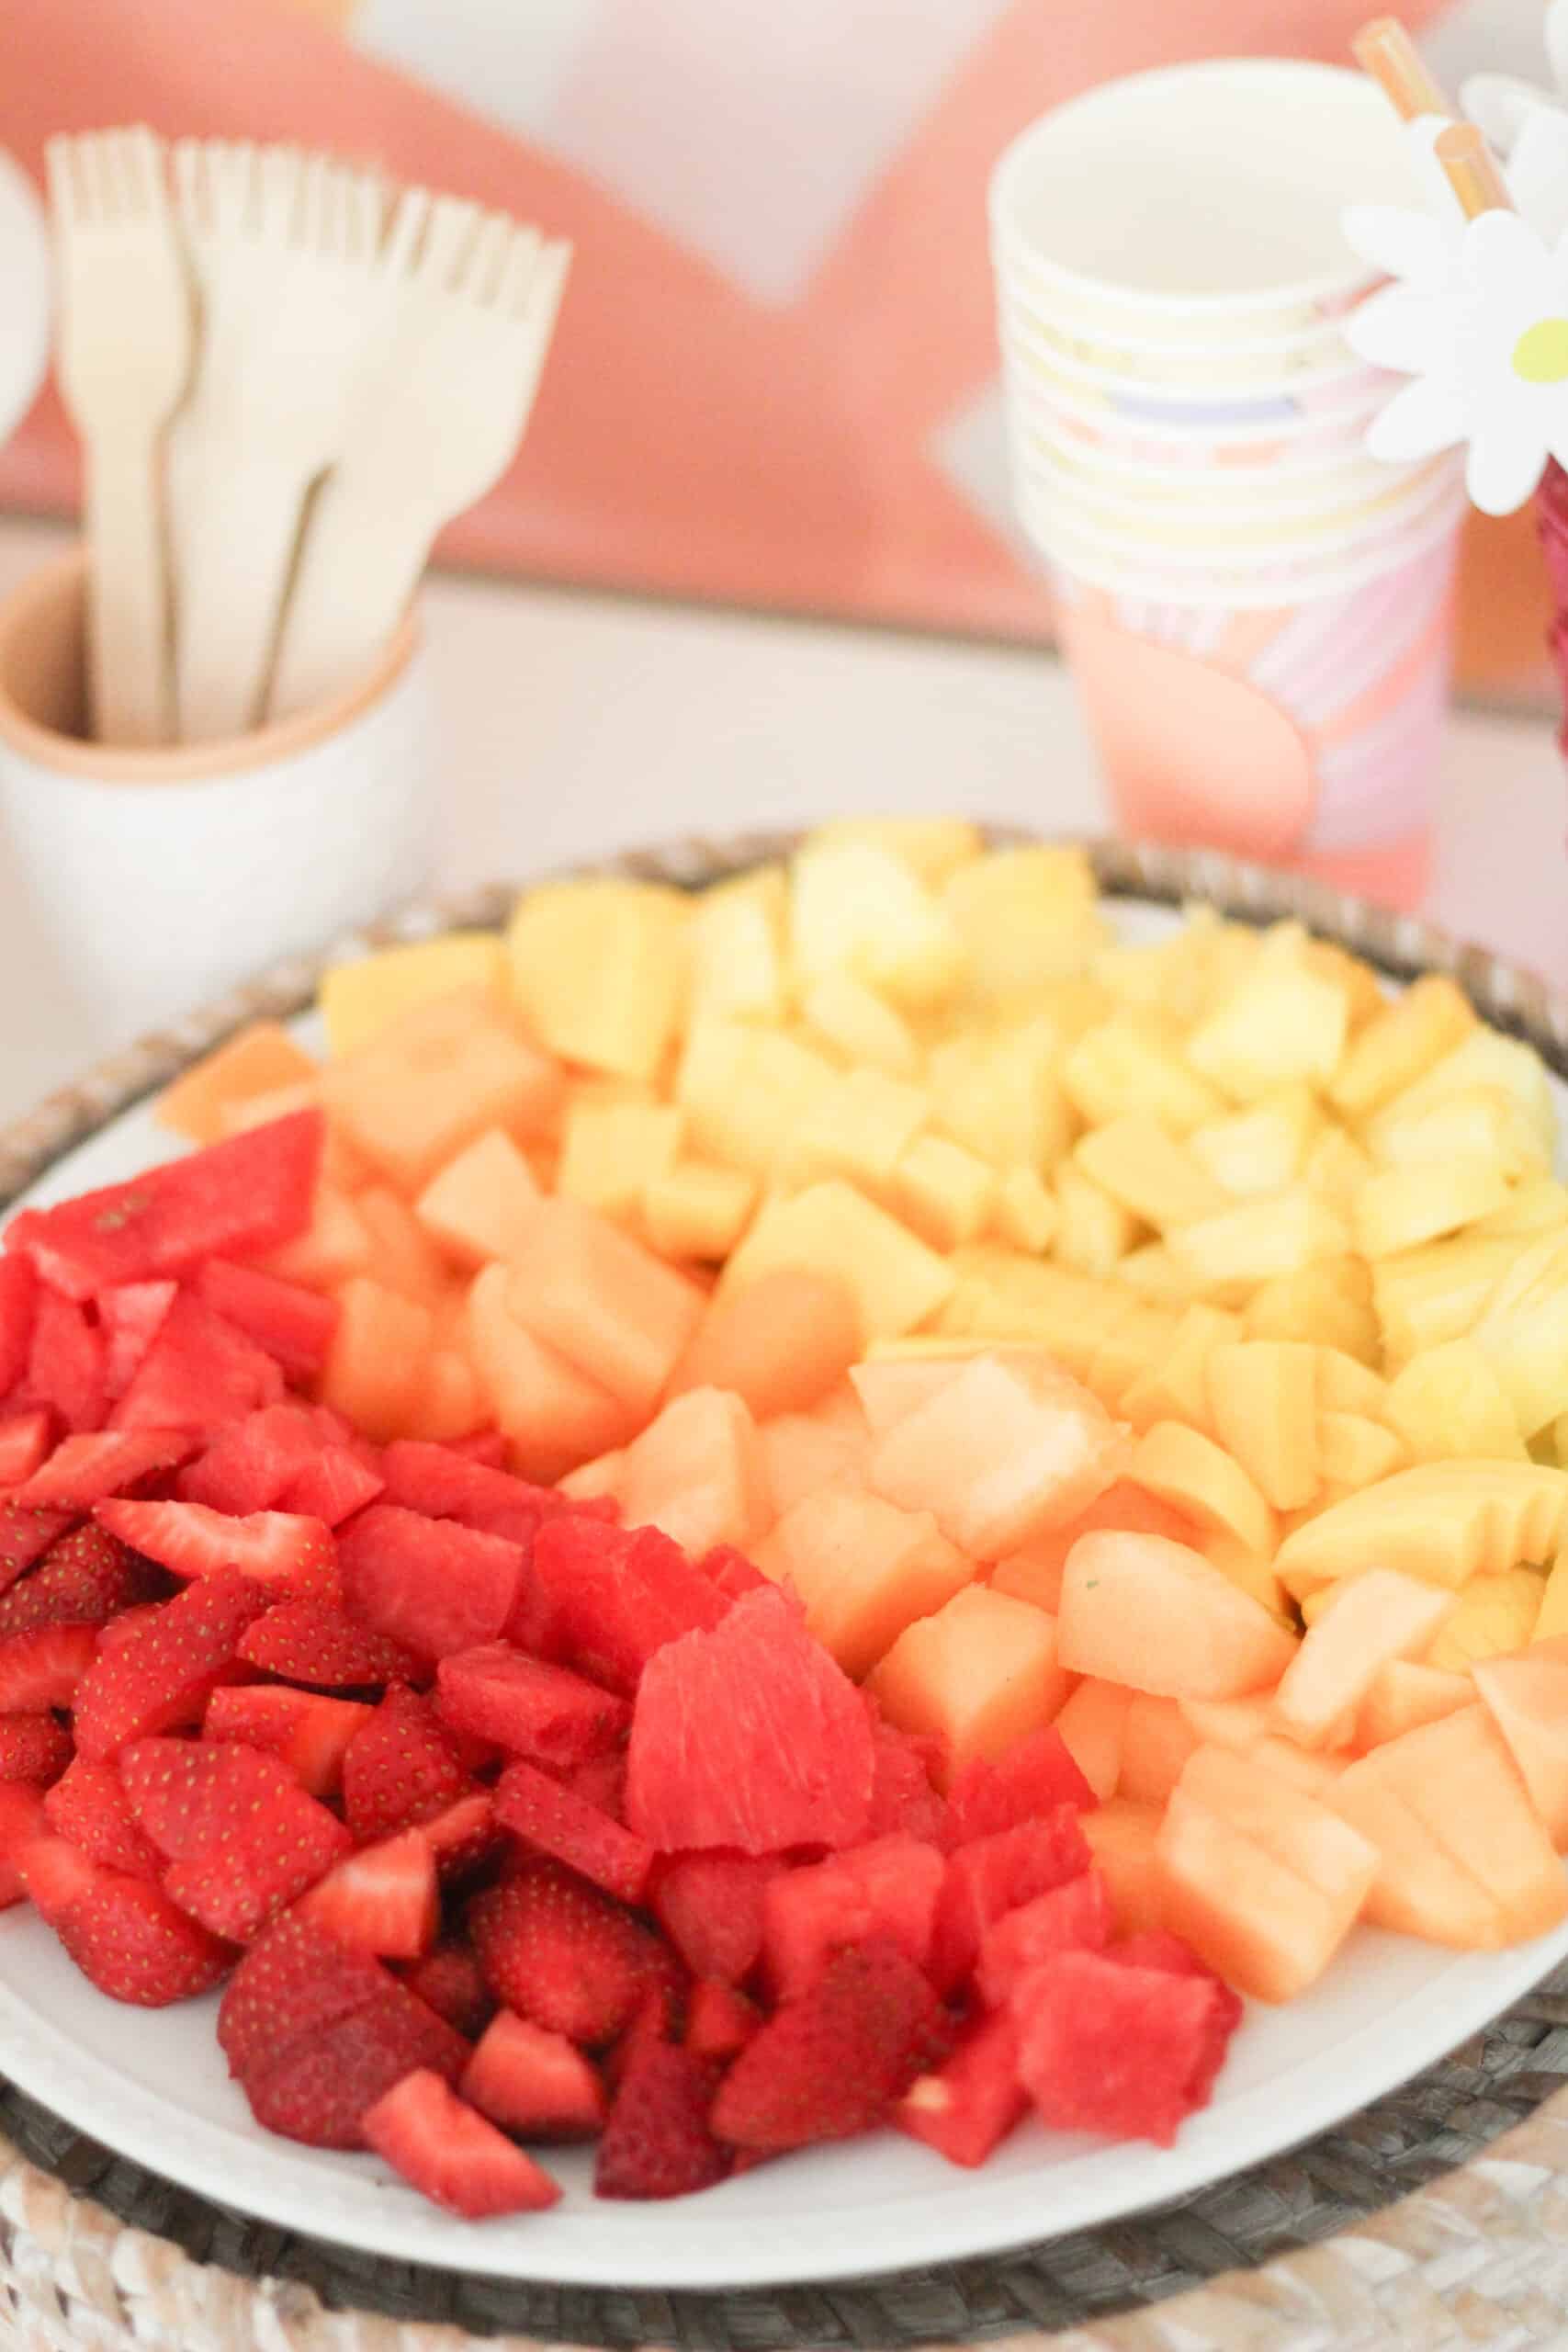
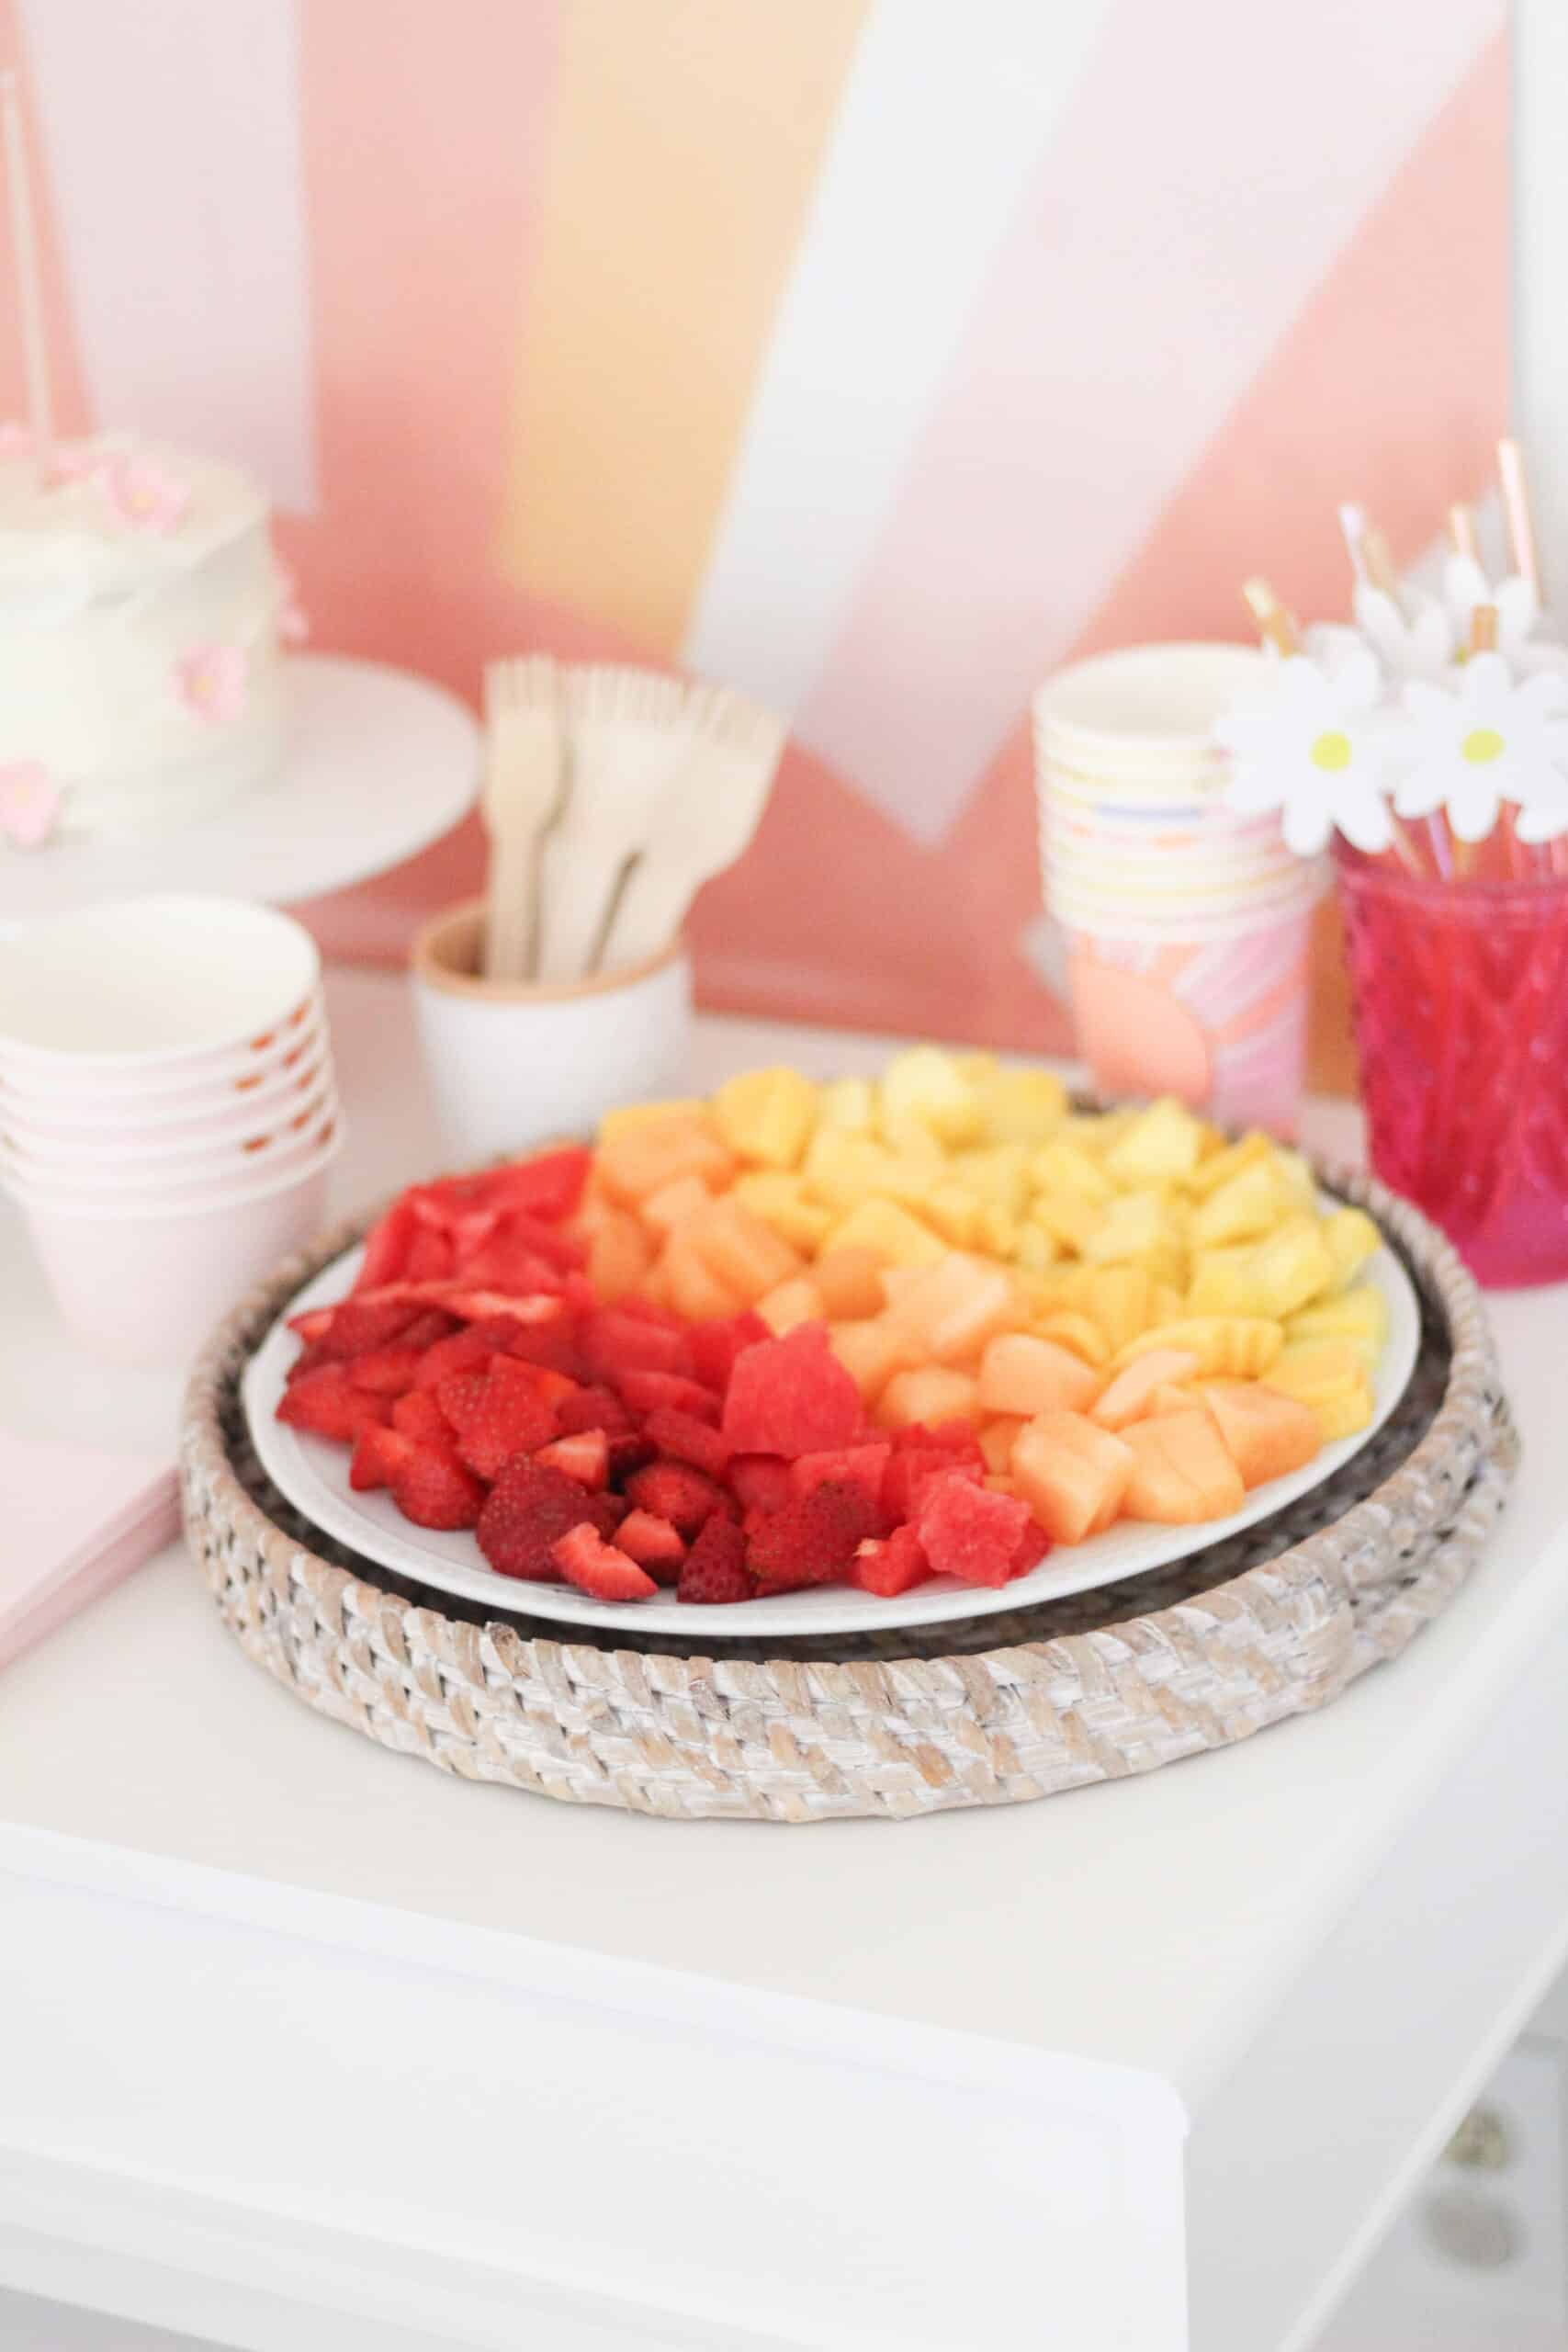
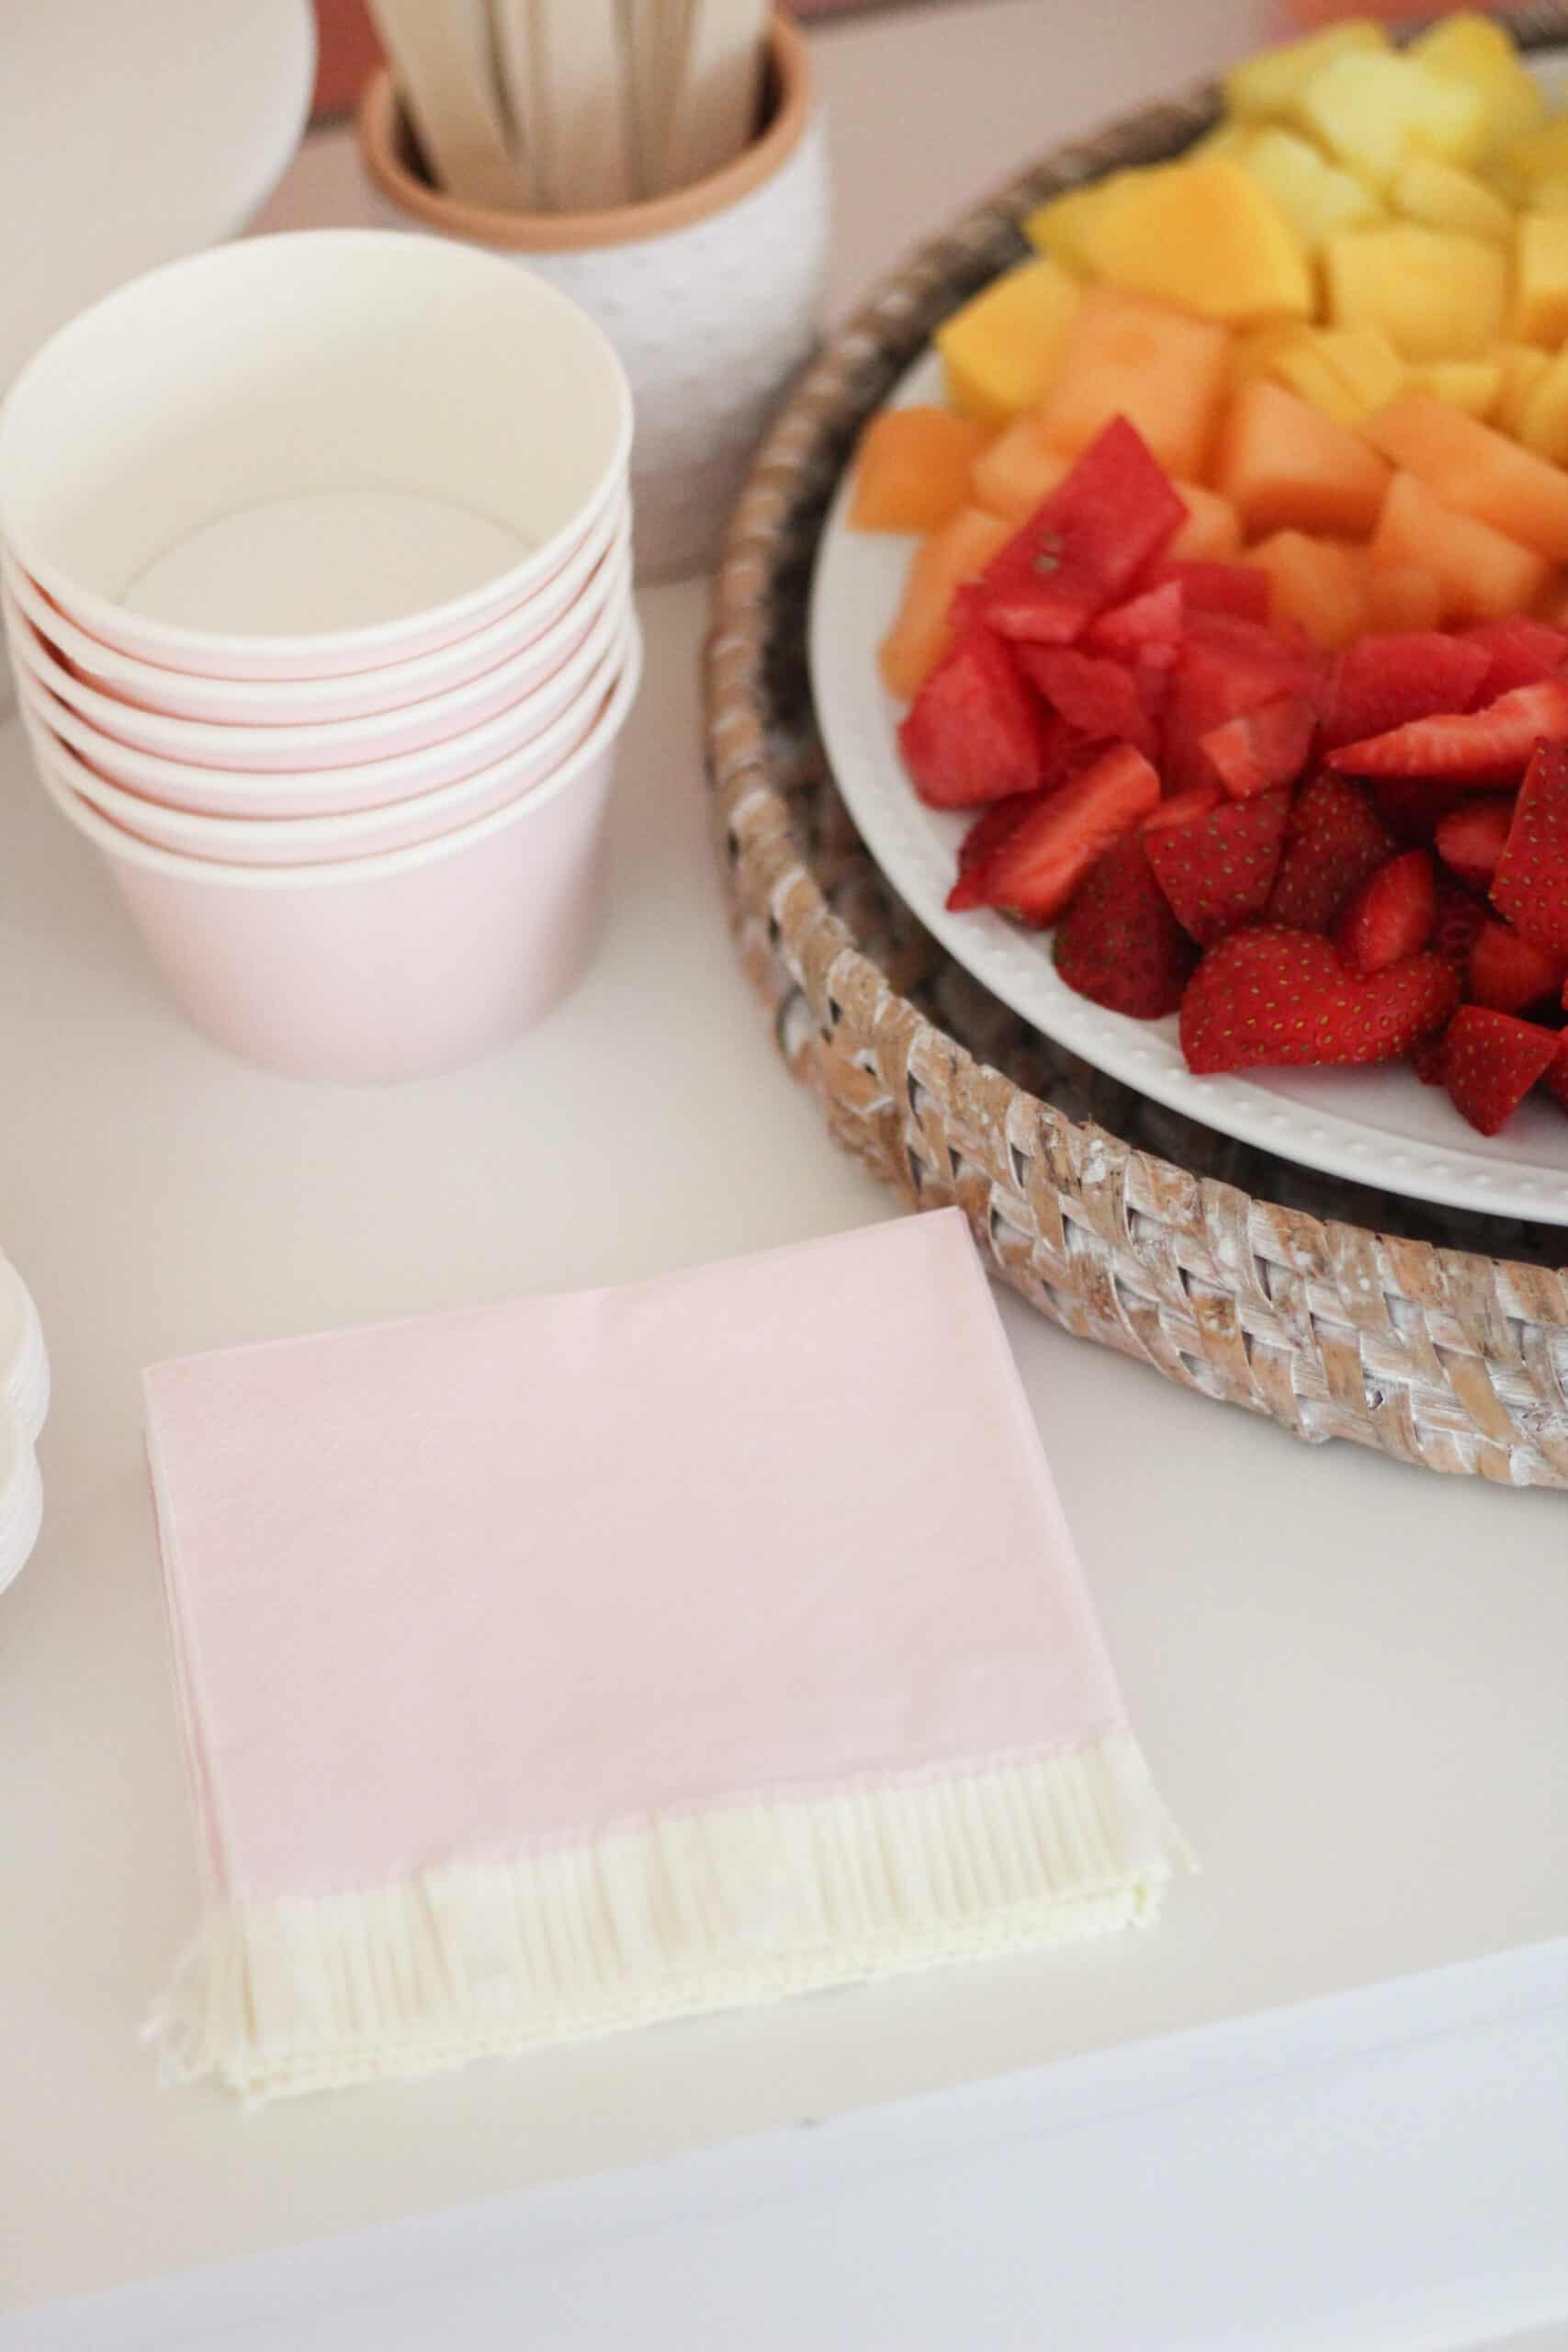
birthday cookies

Fruit Tray

For the fruit tray I simply got fruits in the color scheme of the party and laid them out like a rainbow.  It ended up being one of my favorite parts of the party because it was so simple and sweet. 
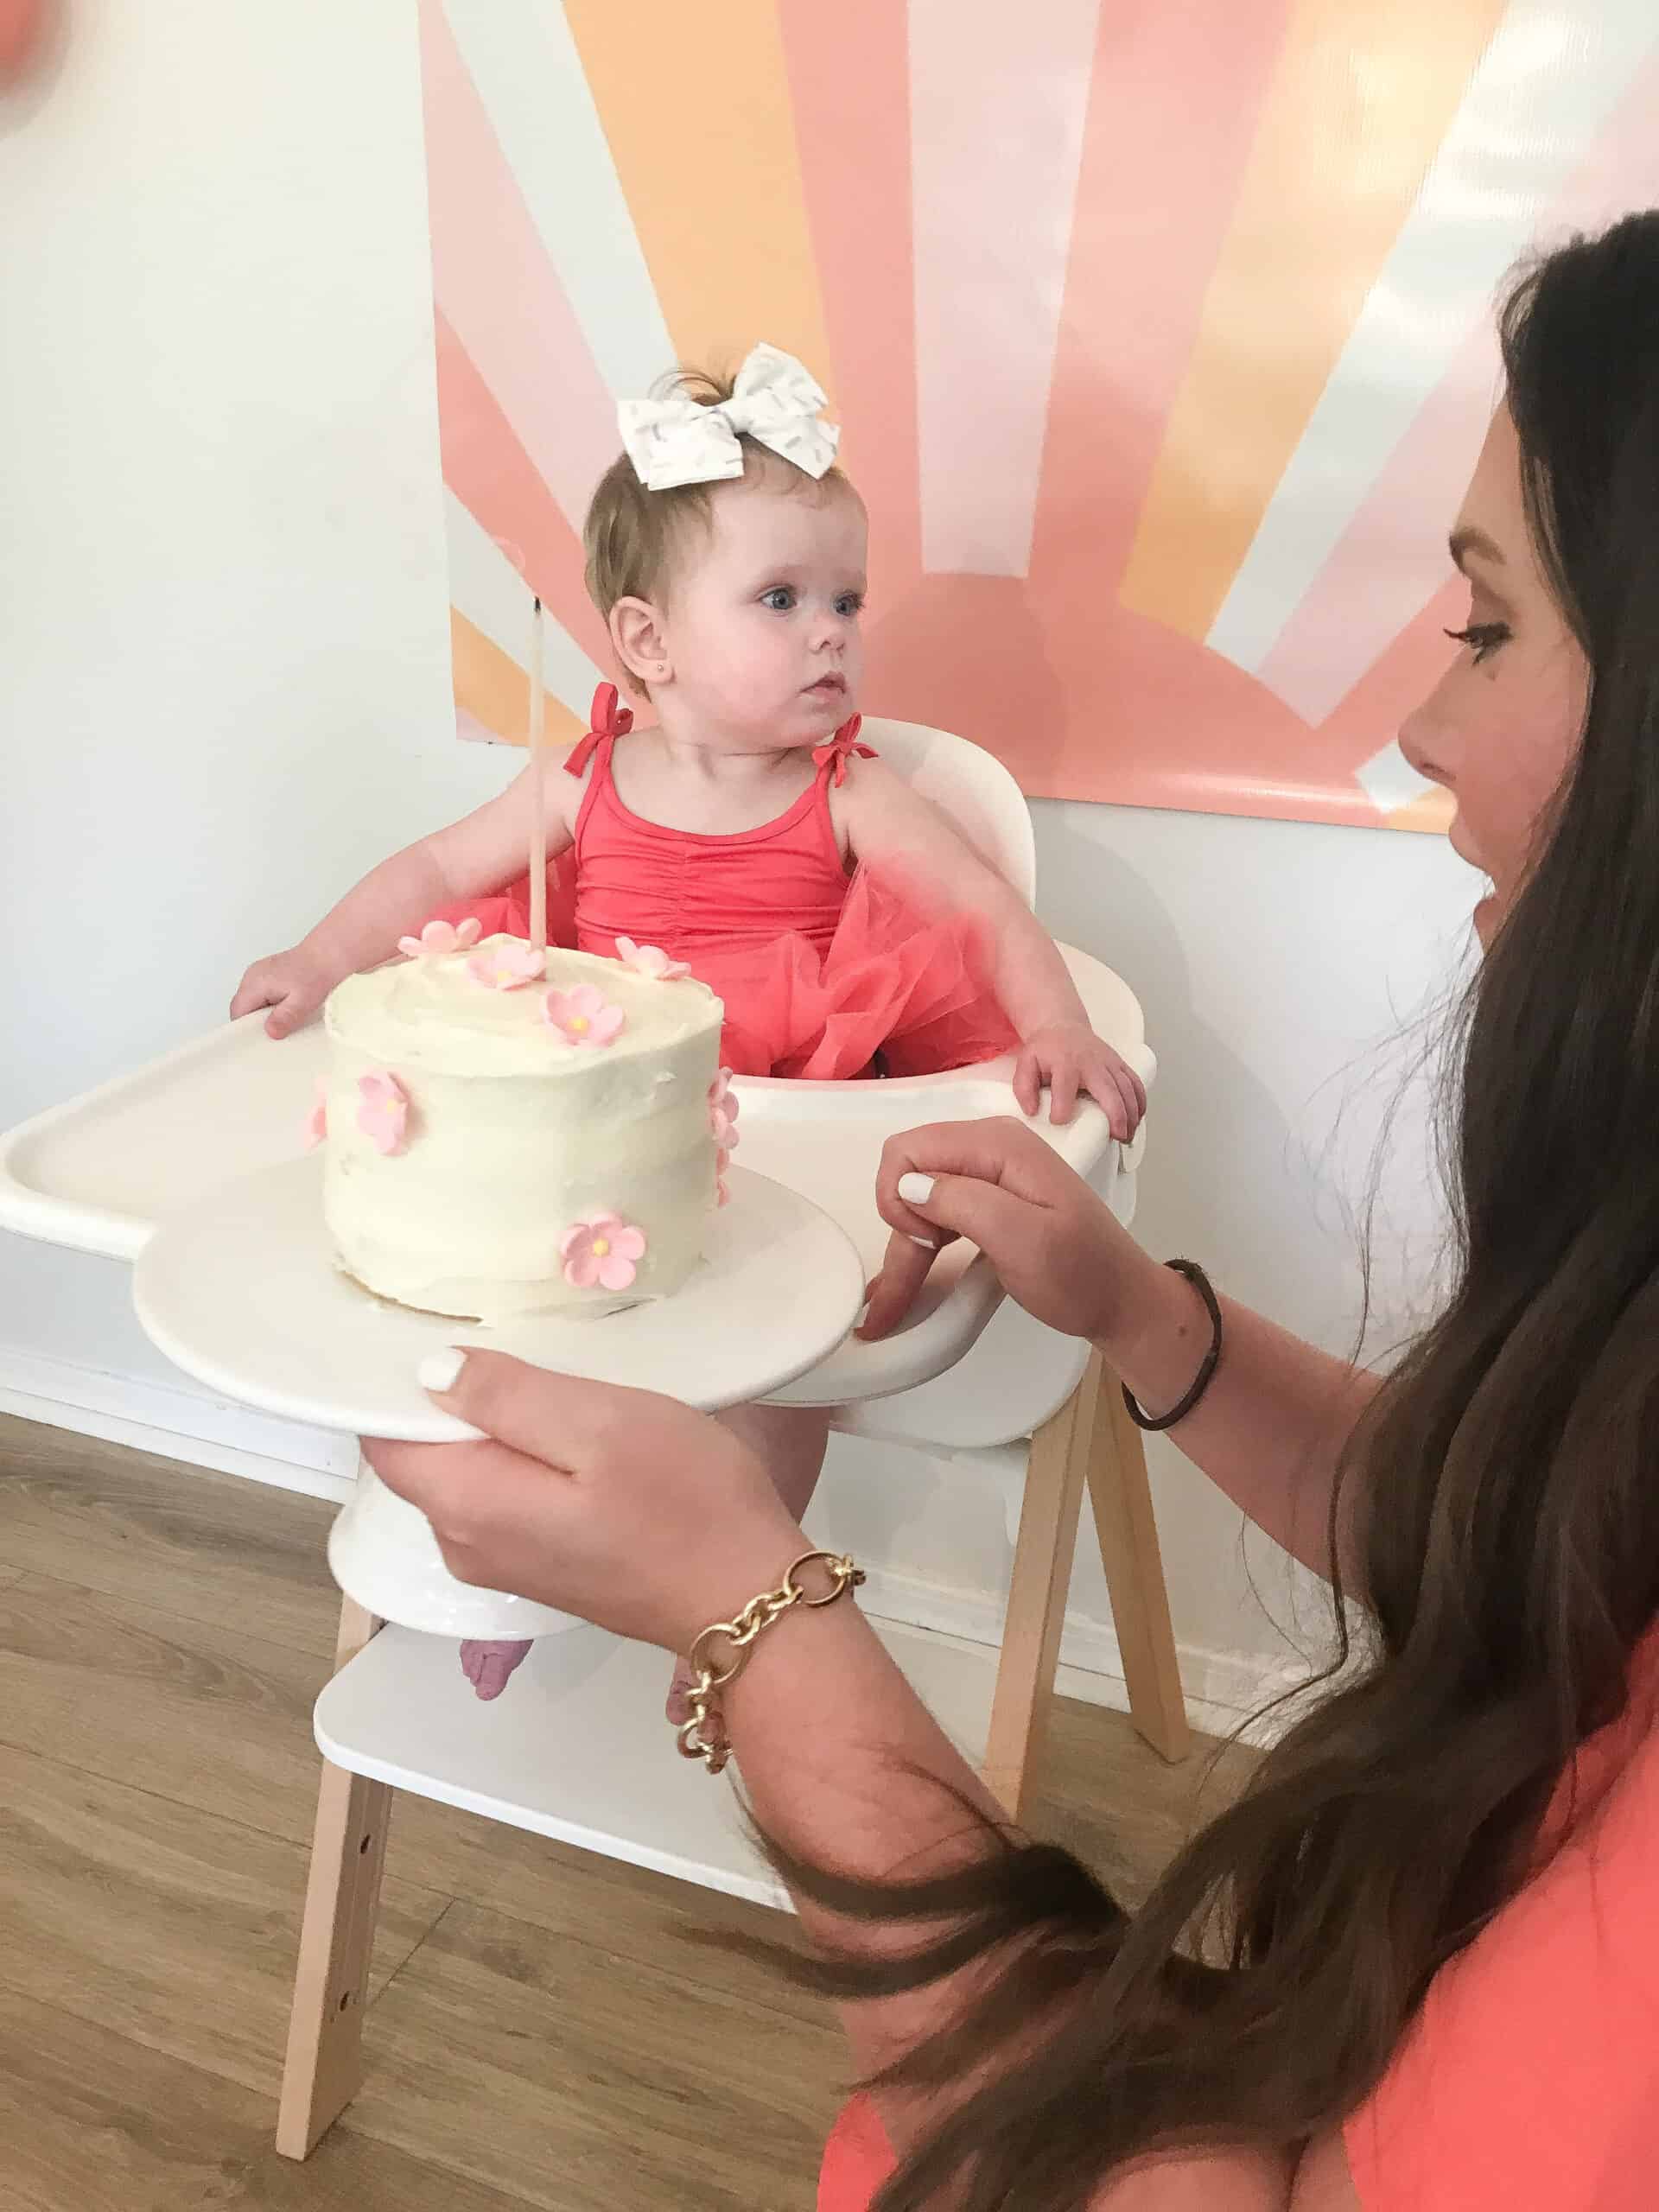
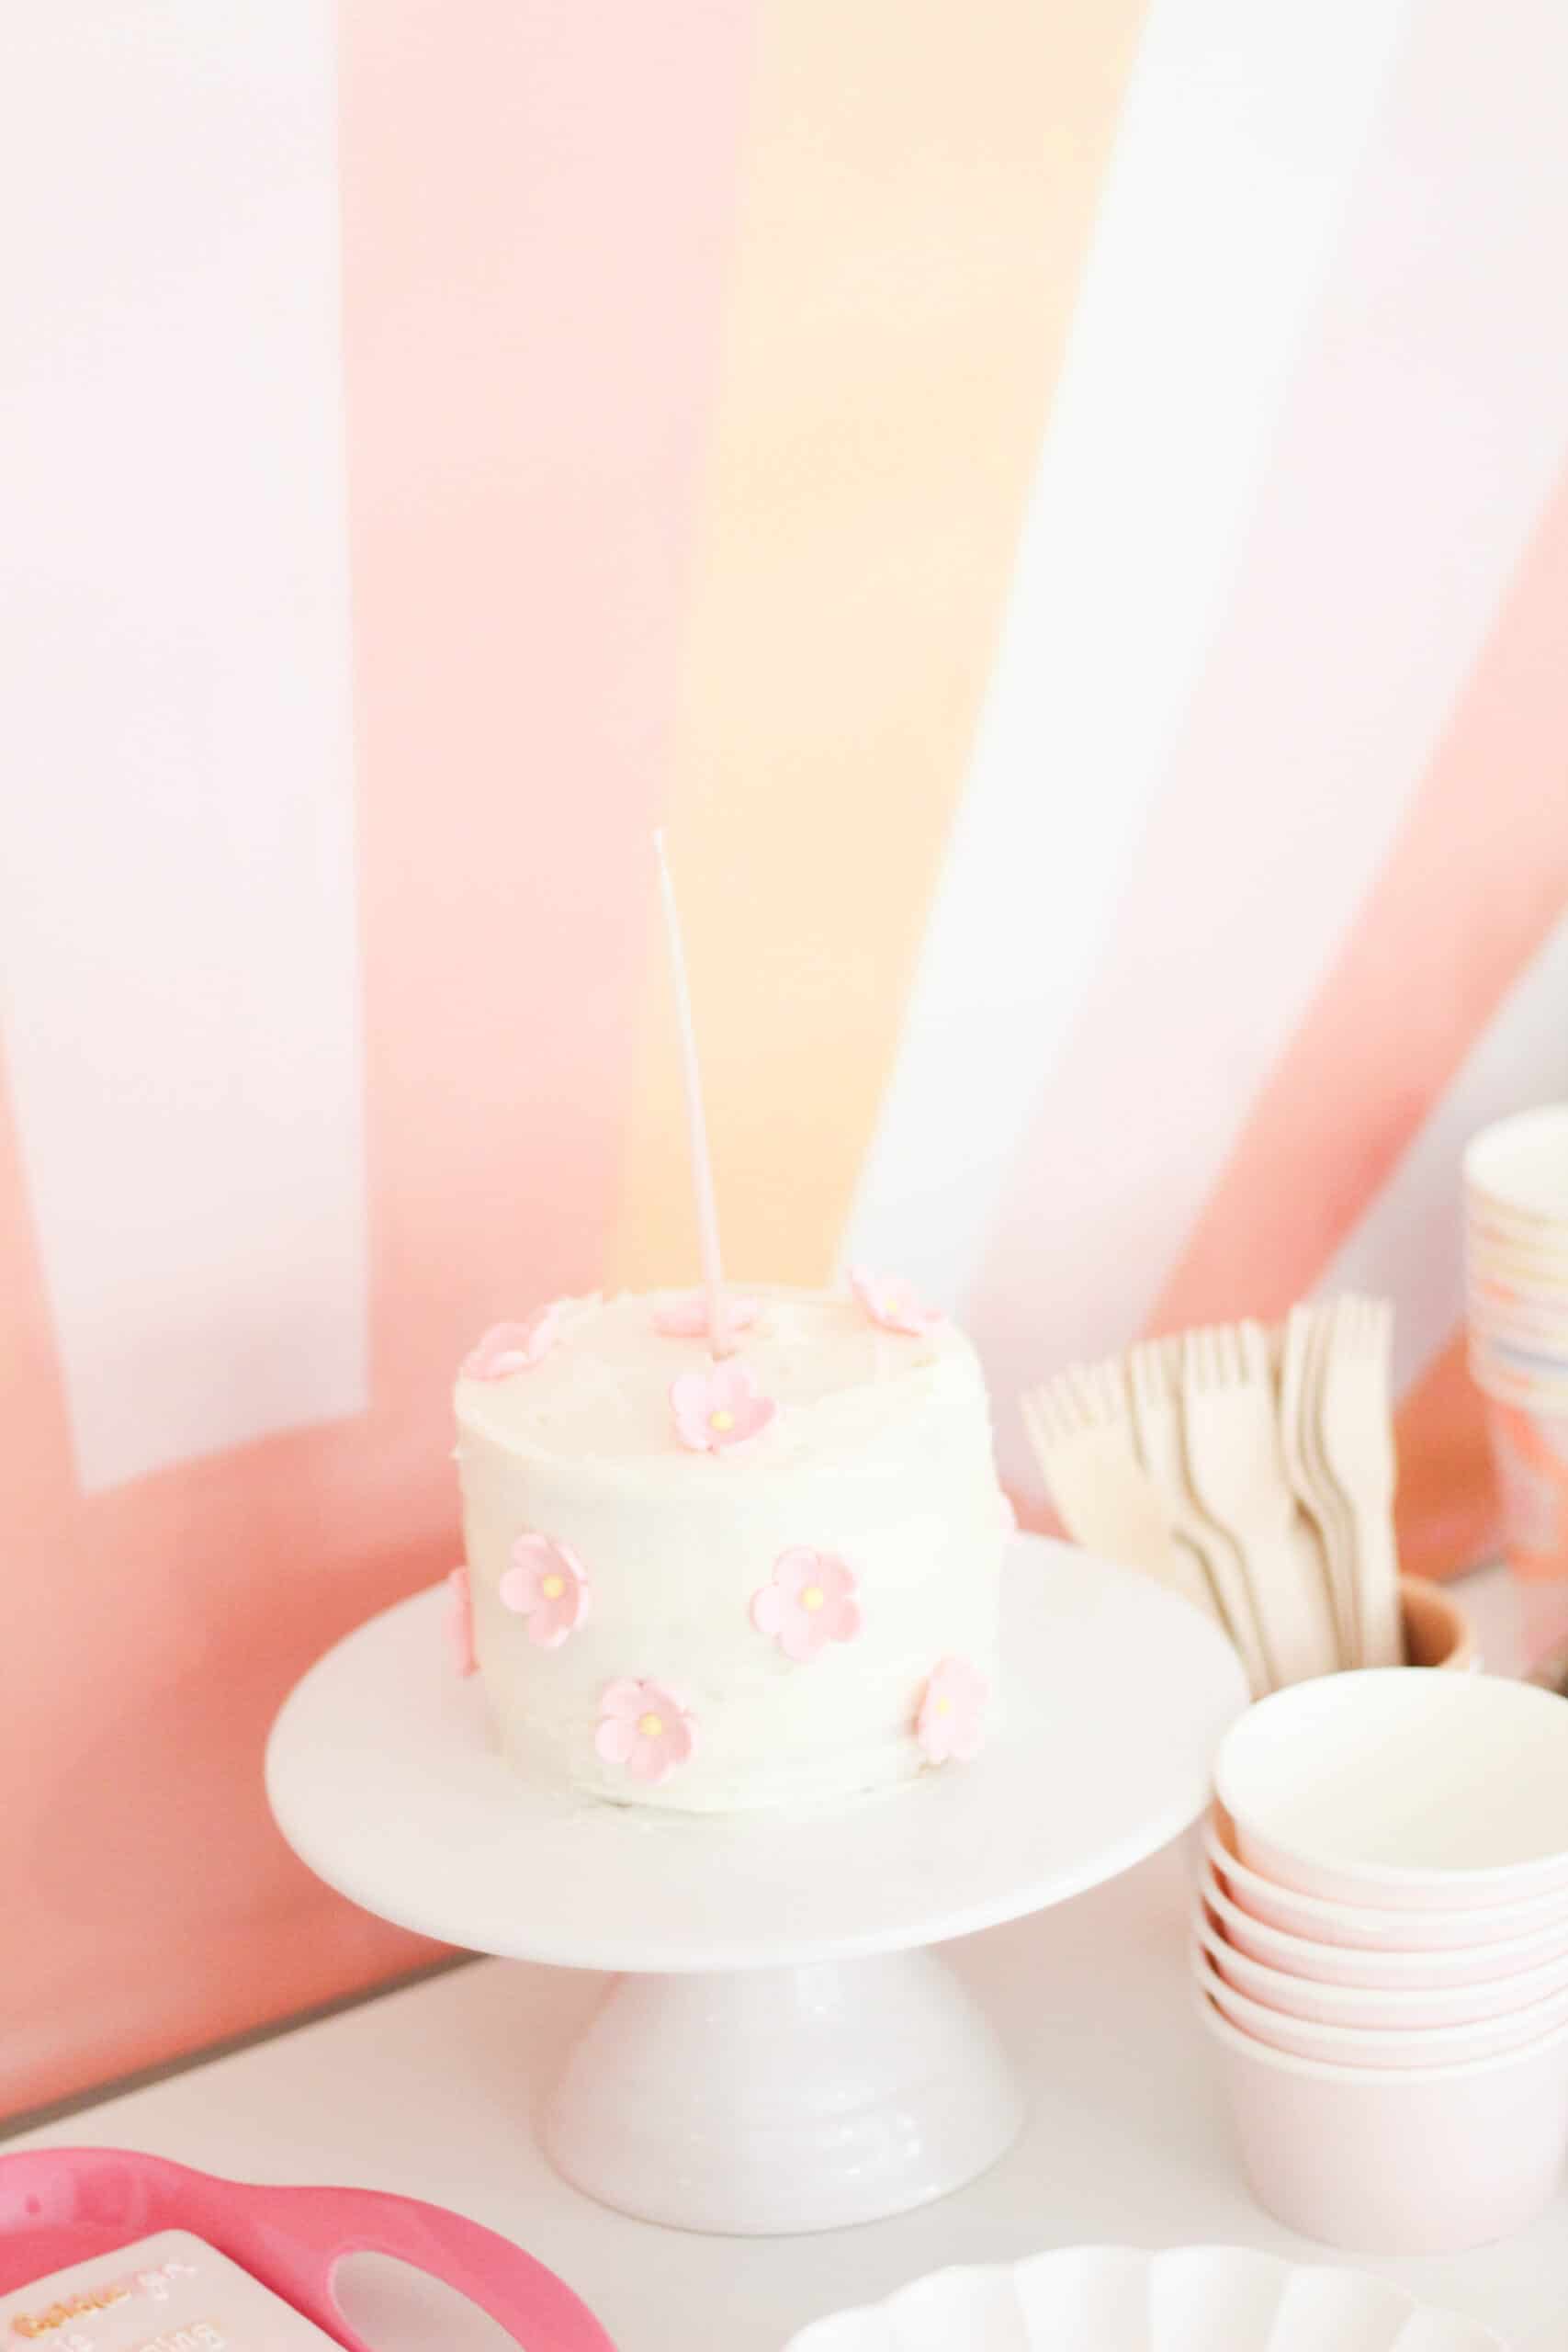
ombré fruit tray from red to yellow

ombre fruit tray

Smash Cake

Her smash cake was less than perfect haha.  I am NOT a cake decorator and Goldie has an egg allergy so I baked my own and added pink and yellow edible flowers to the cake to tie it into the party. 

smash cake with pink and yellow flowers

Other Decor and Details 

I didn’t want to spend a fortune on this party – hello moving was already making me feel BROKE! But I wanted some unique little details.  Below are links to all of the items I ordered for decor.

Happy Birthday Sunshine party table

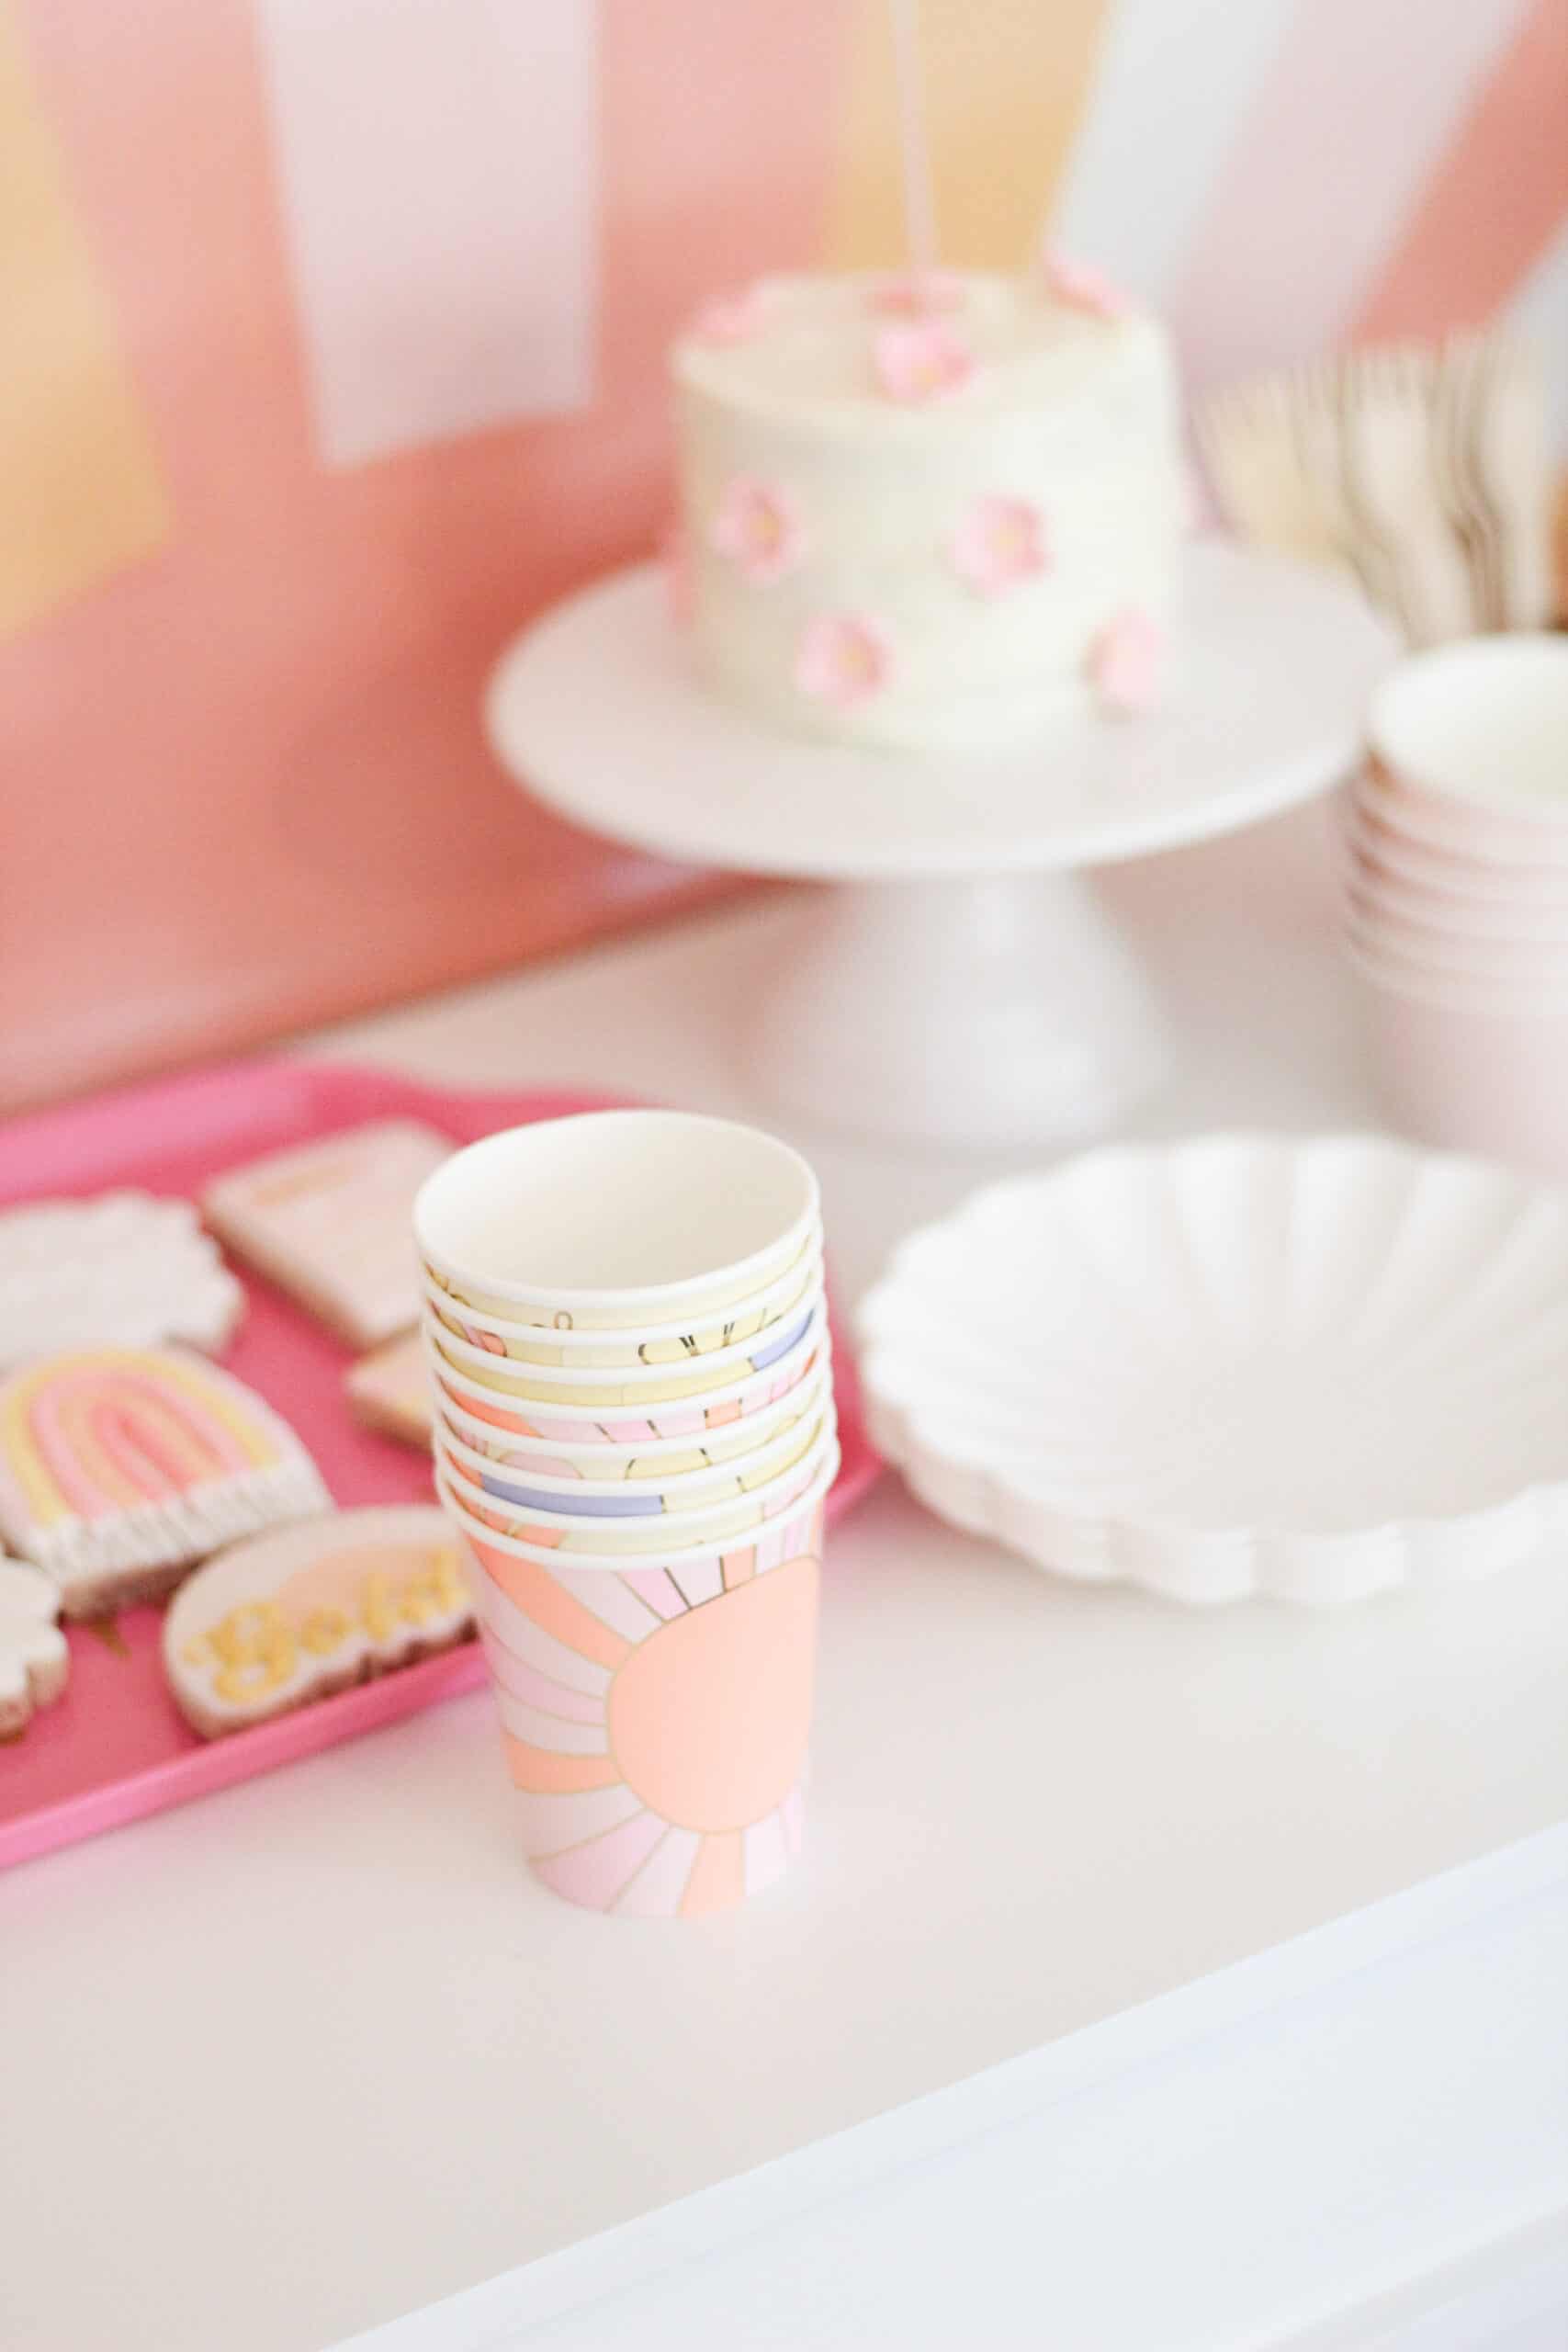
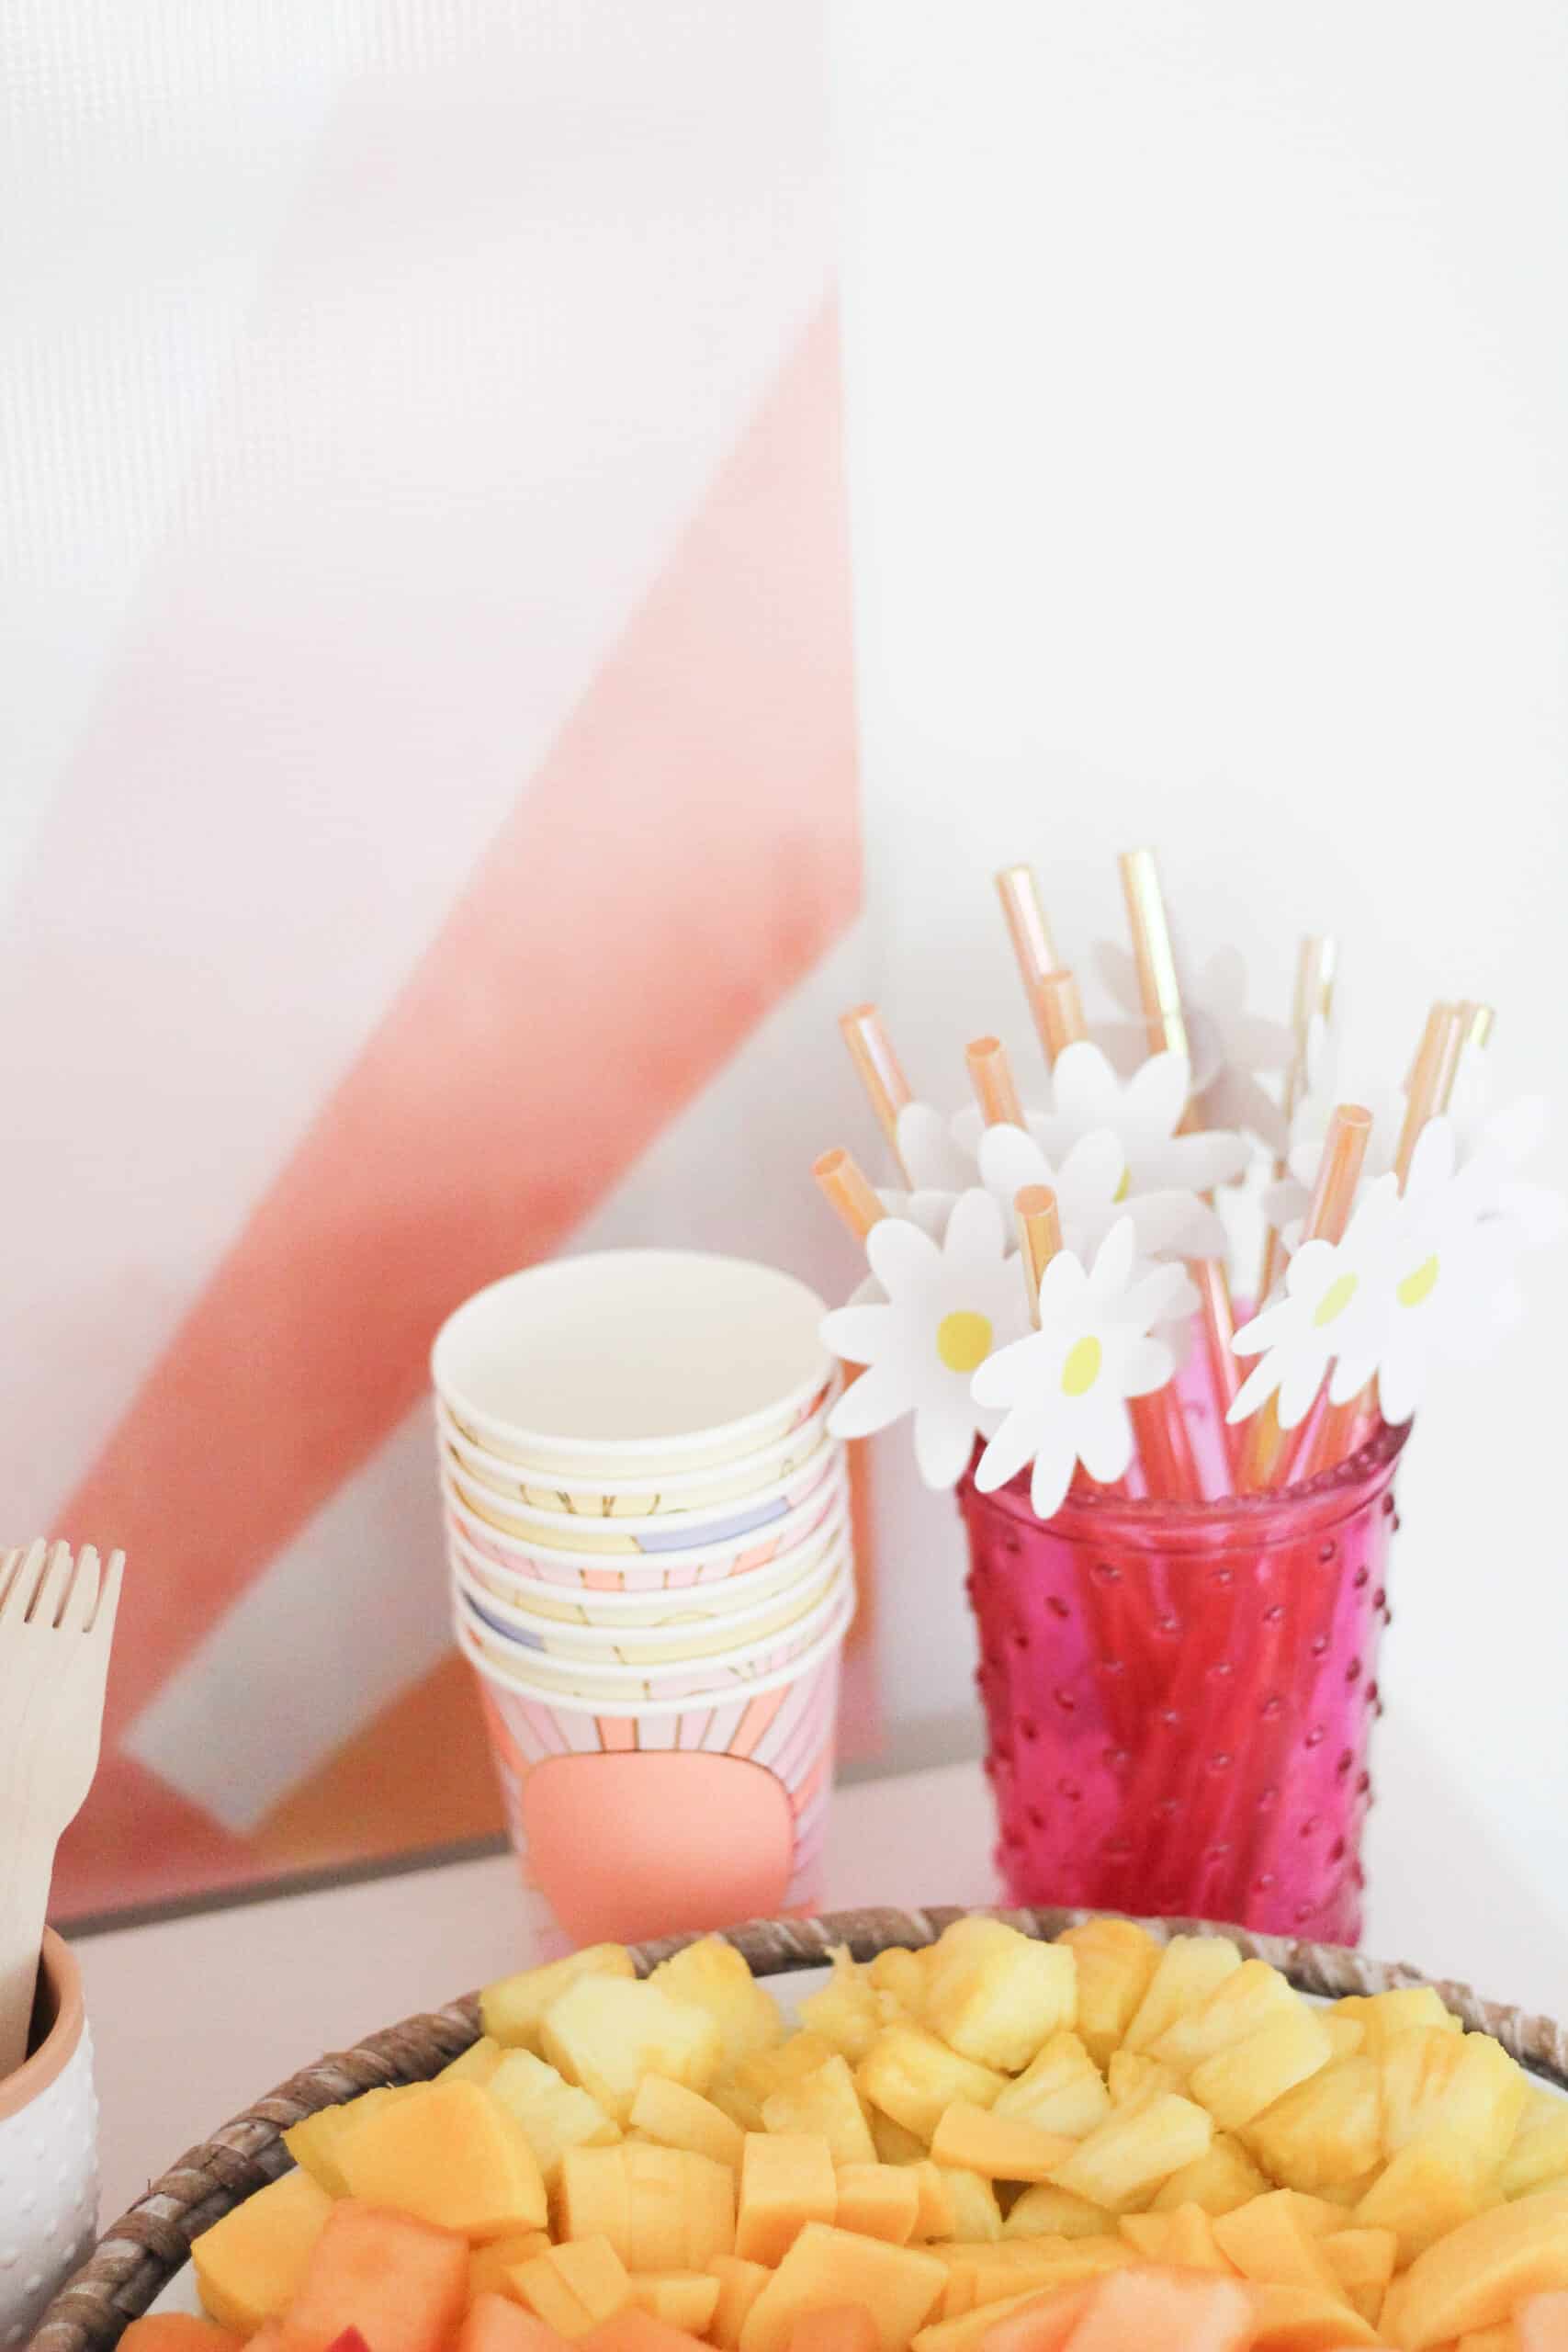
Fun paper cups – These were perfect and cute.  I loved that they tied in a little extra color.

Retro paper cups at birthday party

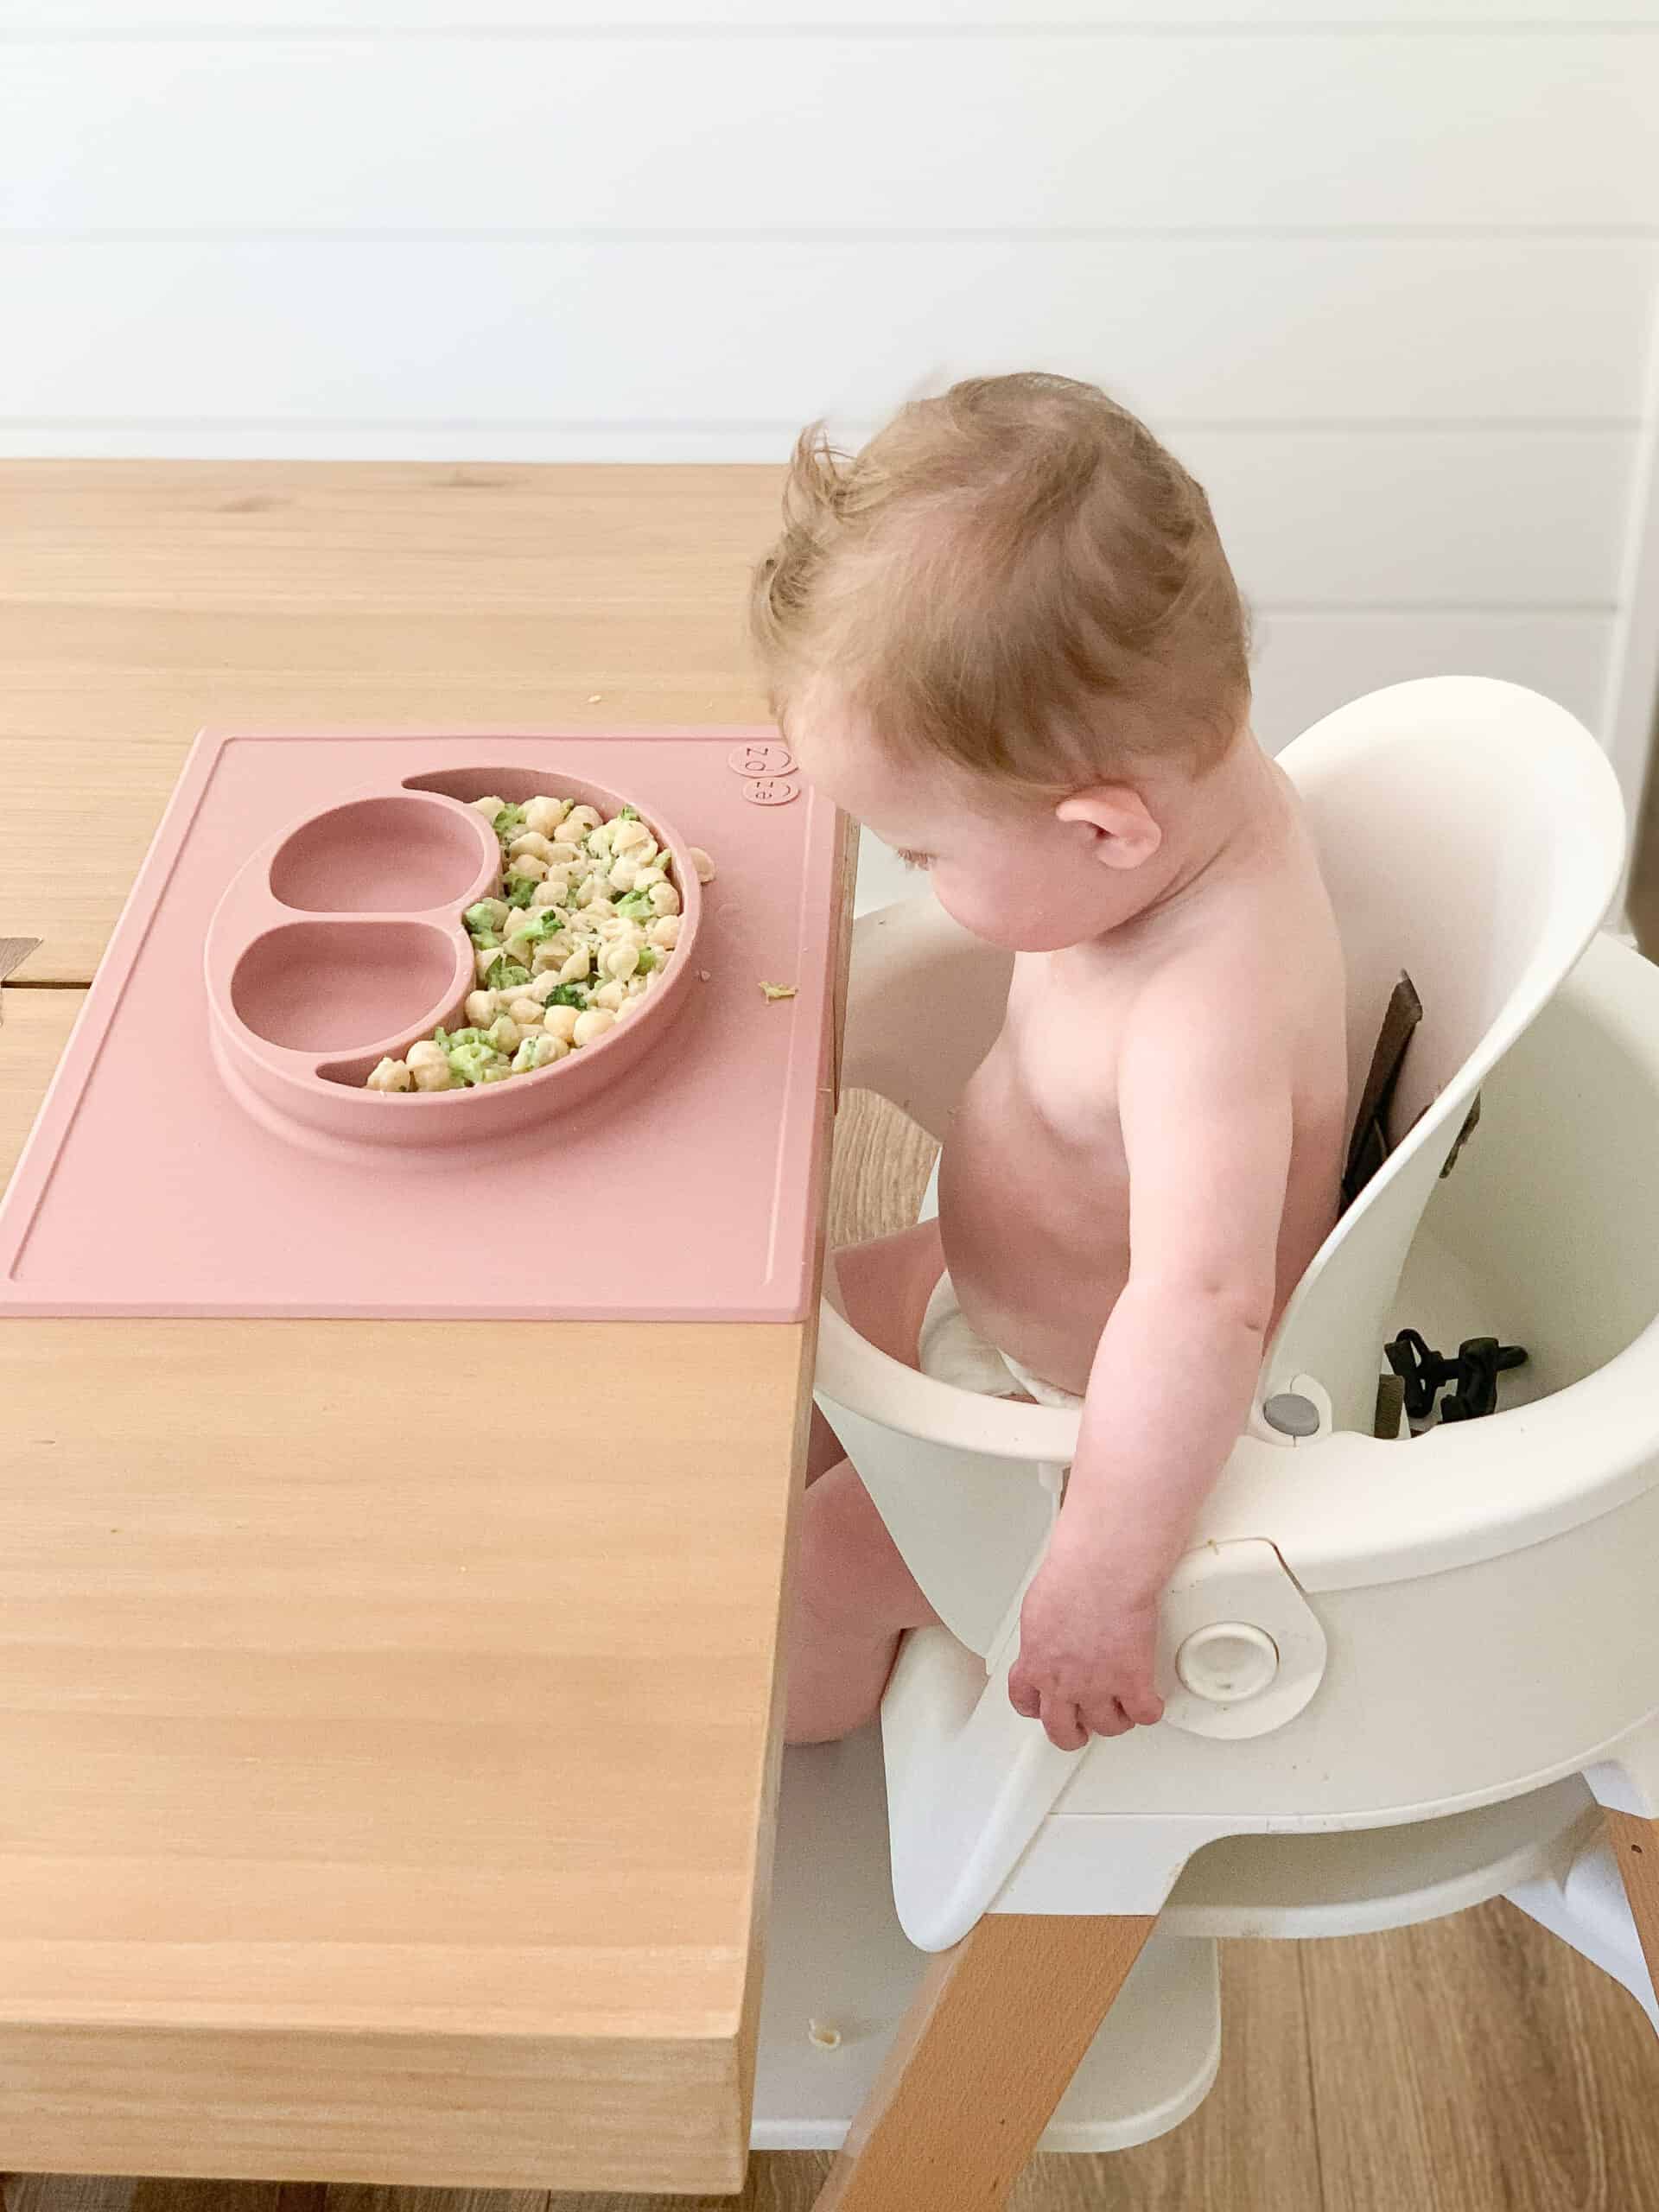
Pink tray – I know we will use that a lot around our house

pink and yellow cookies for party

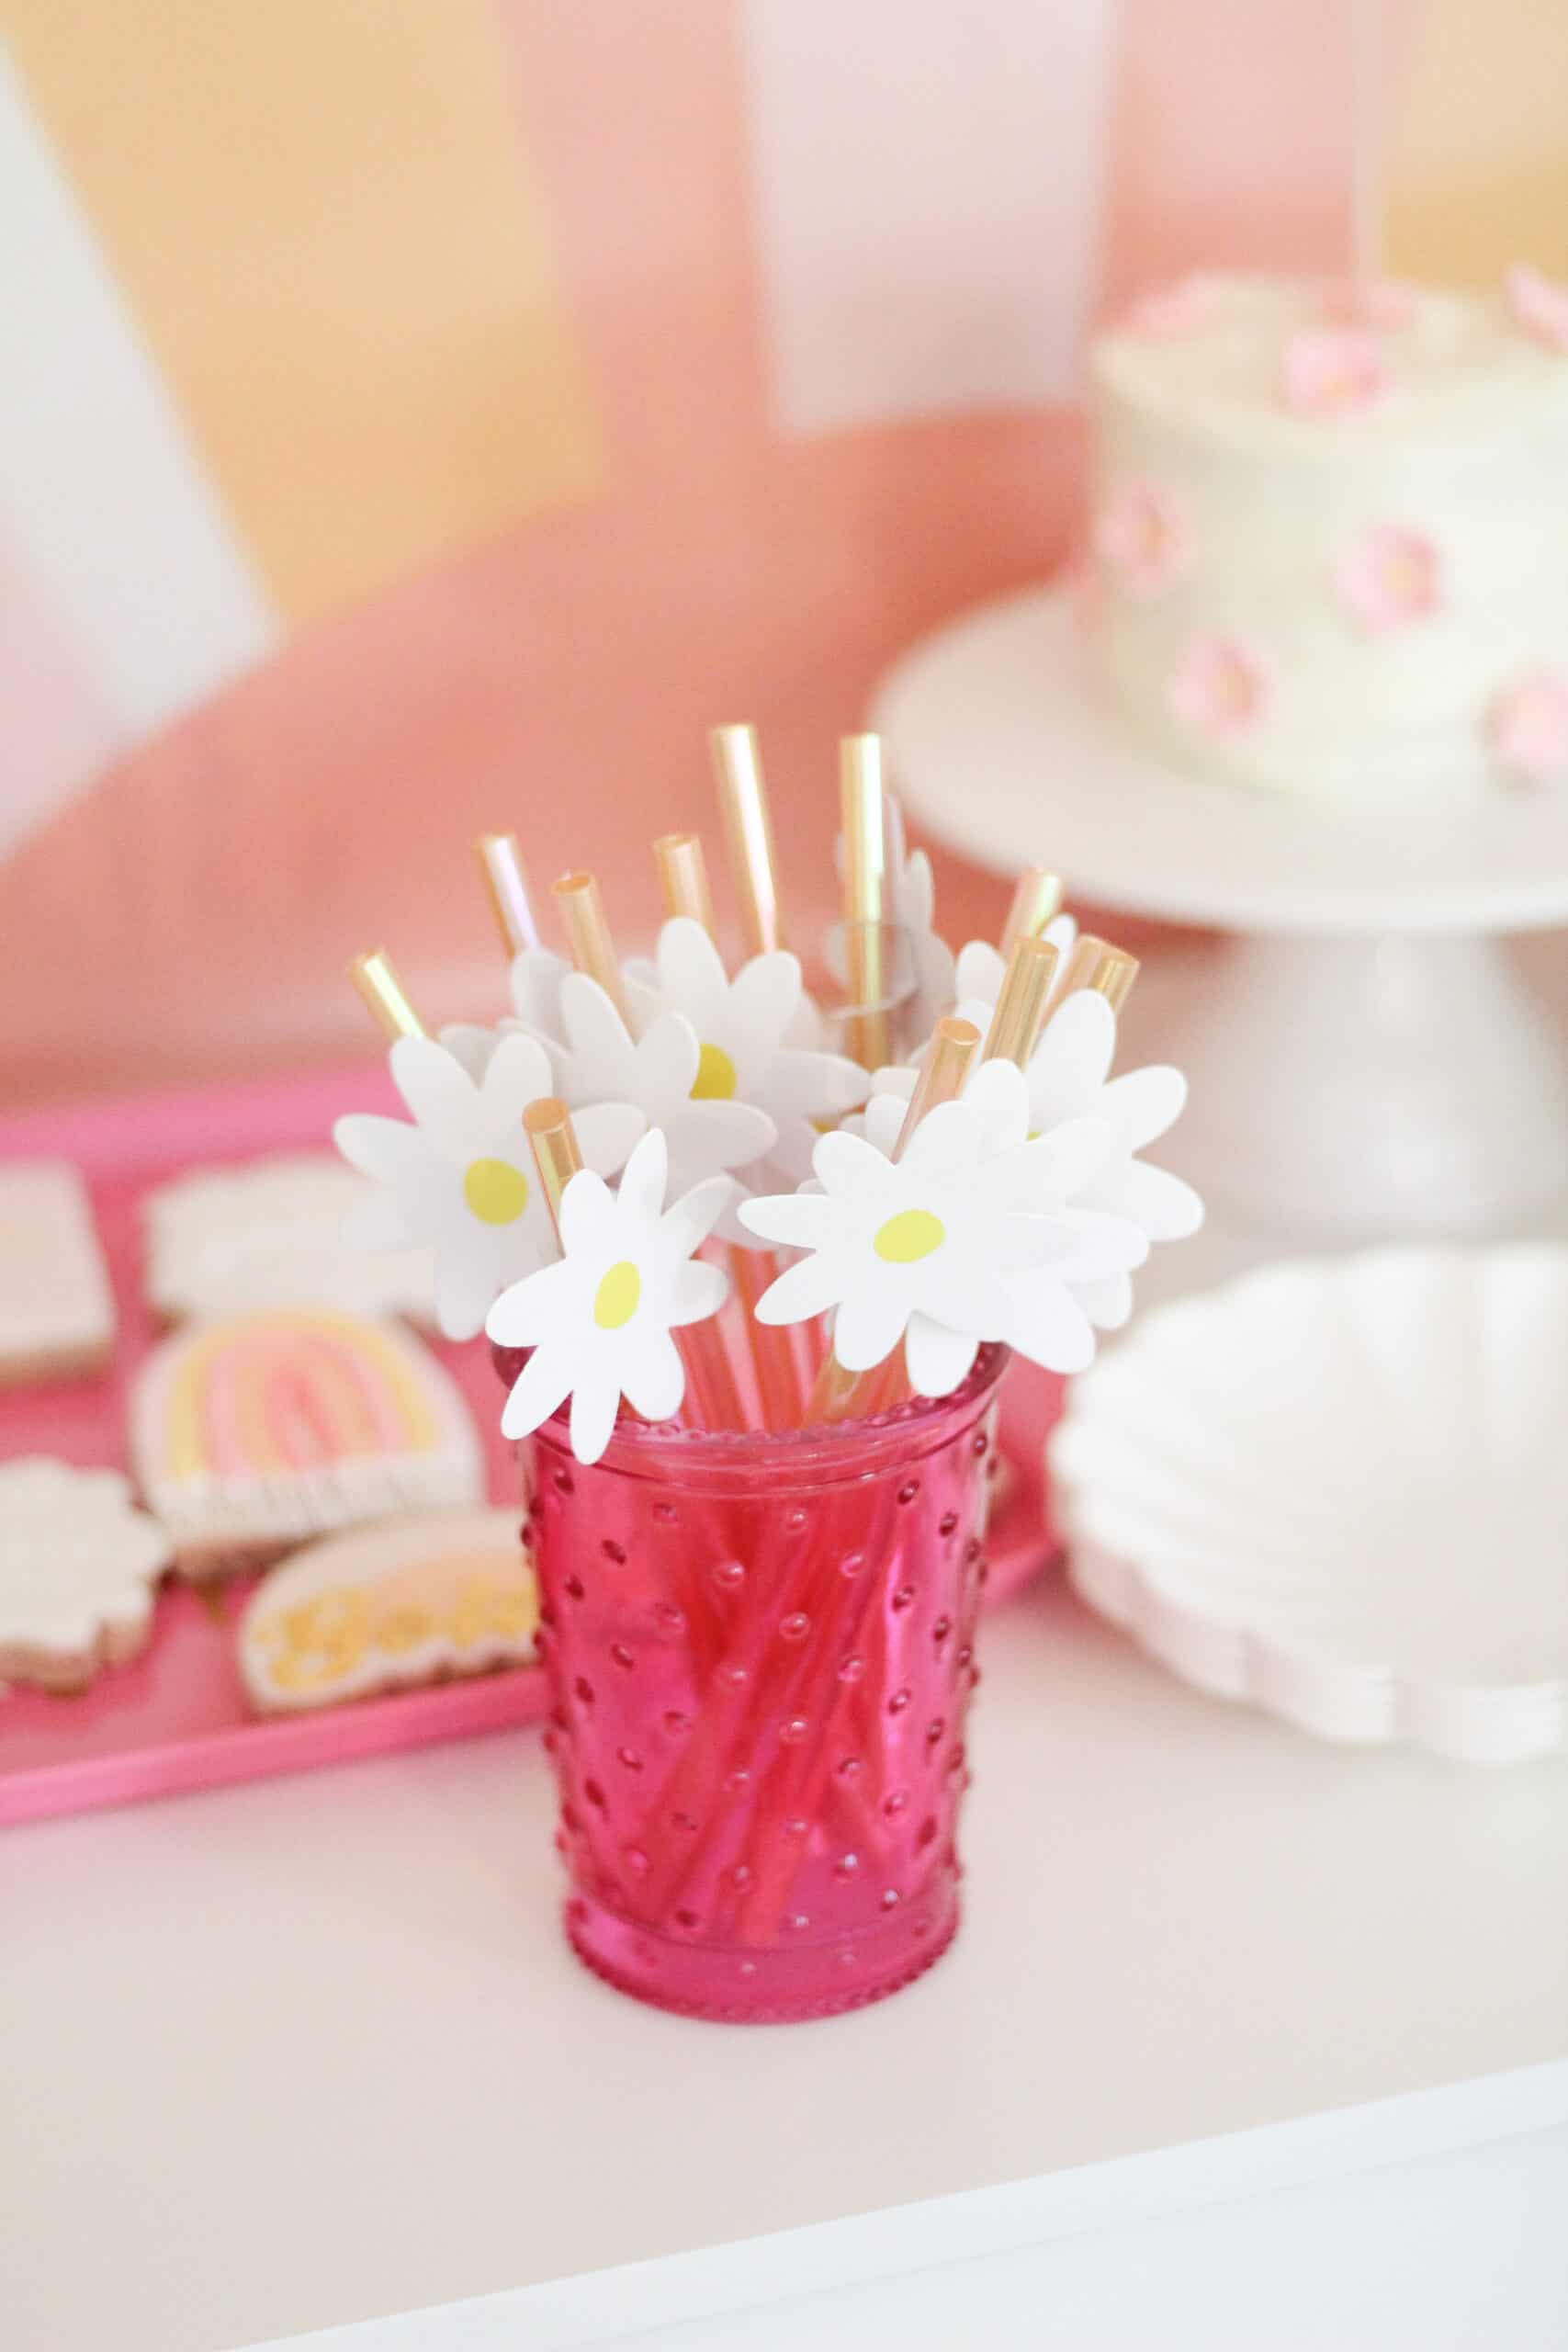
Straws – I bought these straws on sale and already had the little paper daisies to go on them so it ended up being a perfect way to make them look more special. 

pink cup with yellow daisy straws

Napkins – I ordered these fringe napkins and LOVED them.  Another great option are these super cute ones!

pink fringe paper napkins

Scalloped Plates – These were also super cute and if you are looking for plates for a party they are SUPER thick and heavy so won’t droop.

pink and yellow birthday party

The Rest – For the plates and trays aside from the one pink one I went with all white.  I did add one wicker tray to add in a natural element.  I used some other pink and white details and wood forks for the cake and fruit to tie in that natural element. 

Happy birthday sunshine party table

Overall the party was sweet and perfect for our little sunshine girl.  She wasn’t a huge fan of her smash cake, but the ice-cream cake was a hit.  She loved the attention and her siblings though it was the best thing ever celebrating our girl. 

pink and yellow sun and flower party decor

I love that over the nearly 7 years since my oldest turned one until now I have learned to go simple, not try to do it all, and be able to enjoy the day.  If you are a first time mom or 10th time mom I hope you are able to do the same for your child and YOURSELF and not stress your next party. 

baby girl at her happy birthday sunshine party

Pin the Photo Below for Later

If you have any questions leave me a comment below or DM me on Instagram (@arinsolange).  I will share in the next week more about Goldie being one – HAPPY BIRTHDAY SUNSHINE GIRL!

happy birthday sunshine


Products we Love

Prepping your Home for Homeschool

Fall means back to school – but this year that looks a whole lot different for most families.  I think that as a whole, families with young children are either prepping their homes for homeschool or need to have put some thought into it in-case that is where we all end up again come the end of the year!  I have put together some tips and things to think about when you are prepping your home for homeschool this fall that might not be the obvious so you can have a great, successful year – even if that looks different!

This post was graciously sponsored by Hoffmann Brothers but all opinions are my own. 

dining room with dark ceiling

Prepping your Home For Homeschool 

I would say at this time everyone with school aged children reading this have had some disruption in their back to school routine for the year. For us, we are going back to school with some modifications, but we are also prepping things at home knowing things could change at any moment.

Last spring we didn’t have the luxury of the forewarning of what was to come with kids not going back to school, so now that we do it is important that no matter who we are we do some things to make life with homeschool happier and healthier for all!

In this post I am going to share some products that you can buy for organizing your item and keeping your home functioning better as well as some tips for some things you maybe hadn’t thought of that would be great to get done this fall.

Hoffmann brothers


Is your House Ready?

Homeschooling means that after 6 months straight of being home as a family that is only going to continue.  That means a lot of people inside one house all the time.  A couple of things we have thought of doing in our new house are:  Getting our ducts cleaned, and specifically adding an air scrubber so we are breathing cleaner, healthier air – especially as cold and flu season creep up on us.

Air Scrubbers suck the air into that system first then shoot out purified air for a cleaner healthier home.  For us here in the St. Louis area we are going to use Hoffmann Brothers to add that air scrubber and have our ducts cleaned for that cleaner home! 

Another thing to think about is if your home is prepped with the right placement of electrical outlets, and if your panel can handle the surge in devices that will likely be used at once.

If you know your kids are going to be doing e-learning in one place all the time it might be worth it to get some outlets installed by Hoffmann Brothers in the right spot, and have them come out and check out your electrical panel to make sure you are set and ready to go.

We have 4 kids, and thank goodness they aren’t all learning age, but I can only imagine if we had 6 computers working all day.  Hoffmann Brothers is so knowledgeable and is a great resource in the St. Louis  OR Nashville area for that!

hanging bins for school work

Is your Internet Ready?

 Another thing to do now instead of later is look into your current internet.  If you can get faster and better internet this is the time to invest in that.  You will likely have zooms for both parents and kids and the last thing you want is to be kicked off those calls.

For us this was an easy call to our internet provider to see what they could do, and we found out that a new program was available in our current area.  We got twice the bandwidth for 10 dollars more a month and things have been working much smoother.

homeschool organization bins

Items to Organize and Keep You Sane

 For me one of the hardest parts of homeschool was we suddenly had ALL SORTS of extra stuff everywhere and were trying to find ways to make our home a school on the fly.

I suggest either buying desks, or some sort of table for your kids, or setting them up in one area that is not going to be overly distracting.

For our family that was our formal dining room.  There was plenty of room for the kids to learn and spread out and it wasn’t an area that couldn’t be left covered with school supplies.

That said  – there are items I wish I had gotten last spring that would have kept our tables nicer, our items more organized, and myself more sane in return.  Below is a round up of some of those items.

homeschool organization items

Shop items below for Prepping your home for homeschool

1  |  2  |  3  |  4  |  5  |  6  |  7  |  8  |  9  |  10  | 11  |  12  

  1. Desk – There are so many great options for desks, but if you are looking for a stylish option that is super functional – this one comes in several colors and is amazing!
  2. Storage Caddy – I will give a few options for this, but I think pending your learning space having a caddy for the supplies you need is key!
  3. Wall hooks – I think having some command hooks on hand to hang whatever your heart desires is a great idea!
  4. Clear bin – These are great for storing your papers, work books, and all sorts of things. 
  5. Collapsible caddy – these are so dang cute!
  6. Wall Calendar
  7. Storage container for markers and crayons and such
  8. Acrylic board – I love that this is super sleek and a great place to do notes because it is just blank
  9. Storage bin – We use these all over our house, but I have been using them for homeschool since the spring.  I filled one for each kid with all their school supplies and for my first grader at the time the top had all the daily needs as far as other supplies.  So there was change, glue, a little clock and so on. (see more on those bins here!)
  10. Mat to protect your tables – this is KEY!
  11. Wall storage bins – we have these and love them.  Last fall we put all finished school work in these bins to keep it stored and out of the way. 
  12. A rolling cart – these are so crazy functional!

homeschool organization  space


Hopefully some of these tips will help you to get your home ready to go for a new kind of back to school experience.  I know it isn’t ideal for nearly any family, but I know for myself planning and keeping my home safe, and organized helps to make it feel more planned and less like something I had no control over.

Pin the Photo Below for Later

If you need any help with some of those larger home changes be sure to reach out to Hoffman Brothers, and if you have questions on any of the other items I found to help in prepping your home for homeschool leave me a comment below or shoot me a DM on Instagram (@arinsolange). 

Items for Prepping your Home for Homeschool

Family

10 & 11 Month Baby Favorites – Goldie Mae

If you have been following along, you may have noticed that I skipped the 10 month baby favorites – and that was because I felt like things were changing less and less and it made more sense to just group the updates and favorites for 10 and 11 month olds here in one post. 

this post may contain affiliate links

11 month old baby girl

10 & 11 Month Baby Favorites

I have been tracking all my favorites for sweet Goldie Mae month by month.  My hope is you can make your way through these posts and see what was a favorite and for how long so you know what is worth spending on. 

Check out the rest of those favorites below!

MONTHLY BABY FAVORITES

baby girl and gold star

Goldie Mae Update

Sweet Goldie Mae is doing amazing.  She is full of spunk, chatty, crawling like crazy, cruising on furniture, and just being as sweet as can be.  She LOVES to go on Walks in the stroller or her little car, and can find the smallest ANYTHING and will put it in her mouth.

11 month old baby girl

This past month she got her ears pierced, and she hit 11 months still having only 2 teeth (however I think she will have several more by her first birthday!).  She LOVES Jack, loves to listen to the songs from Frozen 2 – has taken to liking Elmo when he is on tv. 

Overall she remains such a light in this family.  We are incredibly blessed to be her parents and can’t wait to celebrate her first birthday with her. 

one year old girl in slumberkins

10 & 11 Month Favorite Products

Like I said above – I have been tracking all my favorite products month by month for Goldie so you could see what we REALLY use.  This isn’t to say it is the only things we have used, but it is the big stuff that has been true favorites!  

Favorite products for 10 and 11 month old baby

1  |  2  |  3  |  4  |  5  |  6  |  7  |  8  |  9  |  10  |  11  |  12  |  13  |  14  |  15  |  16  |  17  |  18  |  19  |  20  |  21  |  22 |  23

Shop Items Below

  1. Drying rack for bottles – this is the same one we have used for all 4 babies.  It is great from birth until they are toddlers and I highly recommend it. 
  2. Infant Bath seat – we use one similar to this for the first year and it is honestly the best thing ever. 
  3. Pacifiers – this is the kind we went with for Goldie and love them
  4. Pouch toppers – these are seriously top 10 fav items for baby.  I didn’t have these until Goldie and they are a game changer.  You pop them on the top of any pouch and if they throw it it doesn’t splatter, they can’t squeeze it all out at once, and it helps them learn to drink through a straw.
  5. Pool Float – we have this for Goldie and it is hands down the BEST baby pool float ever.
  6. Clek convertible carseat – when we had our older two I did SO much research on convertible carseats and in the end went with these Clek seats.  They are the best – have a longer expiration date, and are super safe.
  7. Baby Bling Bow headbands – these are hands down the best headbands for baby. 
  8. Nuk sippy cup – I tell all my mom friends that this is the best sippy cup to get them off the bottle.
  9. Veer Wagonread my review here
  10. Pacifier clips 
  11. hatch sound machine – we have this in our two youngest kids rooms and it is the best sound machine ever.  You can manage it all from your phone. 
  12. Bottles 
  13. Freshly Picked Diaper bag – I have a full review of it here, but this is HANDS DOWN the best diaper bag ever.
  14. Push car – we have had this since Ave was little and I swear all kids LOVE going on walks in it. 
  15. Joovy walker – simple but a great way to put baby down fora little bit
  16. Snack cup – this is one piece (aside from the lid) and is the best thing ever
  17. Crinkle book
  18. Highchair – I talk all about this one in this post, but honestly it is the best highchair EVER
  19. Jumper – we went with this one for Goldie and it was so great.
  20. This xylophone is SO CUTE.  My kids all love it. 
  21. Slumberkins – Goldie loves hers, and so do all of my older kids
  22. Glow worm – I have talked about this every month.  It is the best thing for getting her to sleep at night. 
  23. Mattress – this one is higher end, and honestly so nice, and worth the money. 

10 month old baby girl

Hopefully this post helped you find some of the best items for a 10 or 11 month old and if you are following along with the monthly posts you will know just what is worth investing in.

Pin the Photo Below for Later

If you have any questions shoot me a DM on Instagram (@arinsolange) or comment below!

Favorite products for 10 and 11 month old baby

Amazon Finds

Affordable Amazon Home Finds – 4

Affordable Amazon home finds have become a favorite thing for me to share!  I love rounding up decor from Amazon that you won’t find in any other home to make your home stylish at an affordable budget. Read on to find my 4th round up of these great finds – and make sure you check out the others while you’re here!

this post may contain affiliate links

small entry way with Serena and Lily nesting stools

Affordable Amazon Home Finds

When I was rounding up decor from Amazon for this post I went with a very mid century modern feel.  I personally LOVE mid century modern decor, and think that everything in this post would work SO well together.

One thing I have been trying to do with these posts as I continue to round them up is pick items that will compliment each other well so it can be sort of a one click shopping experience for decorating a room.  

In this case – I think you could add all of this to a living room or a master bedroom and create a gorgeous space that is both neutral but has perfect pops of greens and a light pink to keep things from being too blah. 

neutral bedroom with baskets on wall

Other Amazon Finds

Because you are here – I am assuming Amazon is your thing – so while you’re here, be sure to check out some other Amazon posts, as well as the other Amazon Home Round-ups!

Amazon Store Front  |  Amazon Posts

Amazon Home Finds Under $100

Amazon Home decor round up

VISIT POST HERE

Natural and Neutral Amazon Home Finds

neutral modern decor from Amazon

VISIT POST HERE

Studio McGee Inspired Amazon Home Finds

Modern amazon home decor

VISIT POST HERE

Now that you have seen all the other posts with great home decor from Amazon check out this post and all the great finds below!

Mid Century Modern Amazon Home Finds

1  |  2  |  3  |  4  |  5  |  6  |  7  |  8  |  9  |  10  |  11  |  12  |  13  |  14  |  15  |  16  |  17  |  18  |  19  |  20  |  21

Shop Amazon Home Finds Below

  1. Geometric pillow – this is so gorgeous and reminds me so much of something you would find at Anthropologie at a great price point.
  2. Ladder – I have shared this on past posts because it really is such a good budget friendly blanket ladder.
  3. Black Striped pillow – this brand of throw pillows on Amazon is great and has a high end look!
  4. Eye Mirror – This is such a fun piece of decor
  5. Black Oval Mirror – absolutely love this one – it reminds me of the mirror in the photo at the start of this post!
  6. End table – we have a very similar end table in our living room and I love it. 
  7. Round basket – you can use this flat or hang it on the wall like the picture I posted from my master bedroom.  
  8. Hanging plant basket
  9. Wood Bead Chandelier – this is a good look alike to higher end ones
  10. Ottoman – This little ottoman is the perfect pop of color and is a great modern look.
  11. Little rope baskets – LOVE THESE
  12. Mermaid looking planter – this is again a great way to add a little color and texture to the room
  13. Fiddle leaf fig 
  14. Blanket – this is is pretty!
  15. Small plant – I talk about this a lot, but small plants like this are great to get from Amazon
  16. Another round basket – pair this with the one above for your decor
  17. Pink planter – I am so OBSESSED with this one and will be getting it for my house.
  18. Rattan chair – these are so pretty.  They would be great at a table or as an accent chair in any room.
  19. La Jolla Basket – Serena and Lily has these baskets and I LOVE THEM – this is a great version at a much lower cost.
  20. Black planter – this is a great neutral which is definitely my true love. 
  21. Rug – I LOVE this rug.  The charcoal will be really friendly for stains but the print is classic.  

amazon home decor

All of these finds from this round up are such great deals for what they are, and the perk of getting items like this, is that you won’t have the same thing as everyone else. 

Often times I have readers or followers who think that you have to spend a lot of money to get more unique items, but thats really not the case.  Especially on smaller decorative items.  

Other Posts You Will Love!

Aside from the Amazon Home links from the beginning of this post here are a few more posts you may Love!

Amazon Nursery Finds for Boys  |  Amazon Nursery Finds for Girls 

Gift Guides for your Whole family

Pin the Photo Below for Later

Hopefully you found some things you wanted today, but if not – be sure to shop these Amazon Home Decor finds later by saving it to your Pinterest!

Mid Century Modern Amazon Home Finds

Fashion

First Day of School Outfits – Home or Classroom Edition

Shop the Post
Navy Blue ABC Pajamas
Pink Gingham Bow ABC Pajamas
School Supplies Pajamas
School Themed Pajamas
Pink ABC Nightgown
Pencil Hair Bows
Coloring Pajamas
School and Bus Pajamas
ABC Pajamas
Bus Pajamas
Animal ABC Pajamas
Smiley Slippers
Apple Pajamas
Scalloped Edge Hairbow Pink
Blue Gingham Apple Pajamas
Letters Pajamas
Kids Denim Jacket
Scalloped Edge Bow
Kids Blue Truck Shirt
Kids Red Stripe Shirt
Kids Boat Shoes
Kids Apple Dress
School Themed Bow
Kids Rainbow Heart Skirt
Kids Printed Leggings
School Seersucker Onesie Romper
Kids Rainbow Pencil Apple Charm Bracelet
Kids Apple Socks
Kids ABC Tee
Kids Worm in Apple Tee
Kids Pointelle Cotton Cardigan
Kids Pull On Joggers
Kids Glitter Yellow Hunter Boots
Kids Canvas Velcro Shoes
Kids Nap Dress
Kids Button Up Shirt – School Theme
Kids Long Sleeve Apple Dress
Pencil Headband
Kids White Converse Shoes
Kids Red Leather Sandals
Kids Gold Star Sneaker

I started this series on first day of school outfits when we were all locked down in 2020, and incorporated pajamas and other fun items, and it has become a tradition now to tie in fun items for both wearing at home and school. My older kids wear a uniform, so I now love having the fun school themed items in small ways and pajamas. Hopefully you find something festive and fun in this post.


This post may contain affiliate links – updated July 2025


First Day of School Outfits


If you are a mom with school aged kids, then you probably encountered the last day of school photo issue this past spring…and here we are again still trying to navigate the world that is just so far from normal.


boy and girl first day of school


I am a firm believer in celebrating back to school – no matter what that looks like for your family, and will be sharing some ideas and resources to tackle the school year for ALL families as the next month goes on.  I am hoping that as a community we can all come together to really support every family in the choice they make (OR are forced to make) in what this fall looks like for their family.


For first day of school outfits I tried to share some great traditional looks as well as some more casual stay at home looks!


First Day of School Outfits – At Home Addition


So when it comes to being at home – I don’t think you necessarily have to embrace things ‘normally’.  I think sometimes the joy comes into leaning into the abnormal, and finding the small wins that way.


This round up contains so many gorgeous outfits, but it also contains some really inexpensive play clothes versions, and lots of pajamas.  Let’s face it – the pandemic has normalized lazy clothes and pajamas, so why not make them festive.


first day of school pajamas


No matter if you go festive like one of the options in this post or you go stay in pajamas to homeschool- looking back on how much your kids have grown over the year is so fun, so snap the picture.  


I’ll start with the back to school clothes – both casual with some shorts and joggers- and a bit more festive with bows and the cutest kids’ varsity jacket I’ve ever seen.


Shop Back to School Clothes


1  |  2  |  3  |  4  |  5  |  6  |  7  |  8  |  9  |  10  | 11  |  12  |  13  |  14  |  15  |  16  |  17  |  18  |  19  |  20  |  21  |  22  |  23  |  24  |  25


  1. Denim Jacket – The perfect denim jacket with a cool retro feel. 
  2. Scalloped Edge Bow – I love the scalloped edges and these come in so many colors.
  3. Blue Truck Shirt – The little embroidered truck is just so cute!
  4. Red Stripe Shirt – Such a great classic look for boys and girls.
  5. Boat Shoes – An affordable Sperry alternative.
  6. Apple Dress – I love the ruffle sleeve on this dress. 
  7. School Themed Bow – this bow is too cute!
  8. Blue Heart Skirt – I love how easy this pull on skirt is to get on and all of the colorful hearts are just adorable.
  9. Leggings – These come in so many prints and are a great staple.
  10. Smocked Romper Onesie – I love the embroidered detailing on this one!
  11. Bracelet – this is DARLING.  Plus there are personalization options too!
  12. Apple socks – I love how subtle these are.
  13. ABC Tee – I love the colors on this one!
  14. Worm in Apple tee – Great price point!
  15. Cardigan – Comes in several sweet colors.
  16. Toddler joggers – Joggers are the perfect fall preschooler pants.
  17. Hunter Rain Boots – Say goodbye to soggy sneakers!
  18. Canvas velcro shoes – These pair easily with so many looks. 
  19. Kids Nap Dress – Such a comfy and cute way to do a mommy and me look.
  20. School Collared Shirt – You have to zoom in on this. It has small beakers and science equipment on it – so cute!
  21. Long sleeve red apple dress – The apple socks above would love so darling with this dress.
  22. Pencil Bow Headband – such an adorable accessory! 
  23. White converse tennis shoes – I love a good plain shoe option that can pair with anything above. 
  24. Red Shoes – We have and love these!
  25. Gold Star Sneakers – I love this gold color.


    And now for the back to school pajamas! Whether you’ll be homeschooling or just celebrating the back to school season, these cozy options will get your family in the school spirit!


    Shop Back to School Pajamas


    1  |  2  |  3  |  4  |  5  |  6  |  7  |  8  |  9  |  10  | 11  |  12  | 13 | 14 | 15  | 16 | 17 | 18

    1. Navy Blue ABC Pajamas
    2. Pink Gingham Bow ABC Pajamas
    3. Coloring Pajamas
    4. School Supplies Pajamas
    5. Pink ABC Nightgown
    6. Pencil Hairbows 
    7. School Themed Pajamas
    8. School and Bus Pajamas
    9. ABC Pajamas
    10. Bus Pajamas
    11. Animal ABC Pajamas
    12. Pencil Headband 
    13. School Bow
    14. Smiley Slippers 
    15. Apple Pajamas
    16. Pink Hairbow 
    17. Blue Gingham Apple Pajamas
    18. Letters Pajamas
    Family

    Baby Led Weaning from a Mom of Four

    One of the biggest questions I get – how do I go about baby led weaning?  Goldie is our 4th baby and I have done some version of baby led weaning with all 4 of my kids.  I am fairly confident in my abilities to come up with great baby and kid friendly meals that are safe and healthy for them during that first year or two, and have even navigated a food allergy with 2 kids.  

    This post will walk you through how I go about baby led weaning as well as what some of my go to meals are!

    this post may contain affiliate links

    mom feeding toddler

    What is Baby Led Weaning?

    If you are a first time mom baby led weaning might be such a foreign term for you.  So what what is it exactly?  The definition from Wikipedia is:  

    “Baby Led Weaning a method of adding complementary foods to a baby’s diet of breastmilk or formula. A method of food progression, BLW facilitates the development of age appropriate oral motor control while maintaining eating as a positive, interactive experience [1]. Baby-led weaning allows babies to control their solid food consumption by “self-feeding” from the very beginning of their experiences with food.”

    So basically to break that down – instead of feeding your baby purees you do a combination of purees and baby friendly adult foods.

    baby girl doing baby led weaning on pink Ezpz mat

    6 Months

    I personally don’t start food until 6 months old with my babies.  That is personal preference, but I have found that they are content in not starting until then and honestly especially as I had more kids – I relished the time I had less work during meal time. 

    For the first couple of weeks I do stick to mostly puree type foods.  I get them used to swallowing and get their feet wet (and mine) to see how they do eating. I have found that each baby has had different gag reflexes and comfort levels when it comes to eating. 

    Go to foods for those first couple weeks: 

    Mashed bananas – but tread lightly because they can constipate your baby really easily. 

    Mashed Avocado – a great food for them to love.  However ALL of my kids have hated it ha.

    Baby food – this is a great time to just stick to good ol baby food.  You can make it or you can buy it but get them used to swallowing. 

    baby girl in stokke highchair

    6.5 Months – 1 Year ish

    Ages on here are just an estimate.  But basically this is all about when you are ready to start the baby led weaning and throw some real food at them. A general rule I think you should follow – I am an allergy mom.  

    I have 2 kids with an egg allergy (which is in everything I swear haha).  So when it comes to the higher allergen foods – introduce them ALONE and plain the first time.

    Before you get into complex recipes you want to know if they are okay with the top allergens like Milk, Egg, PB, nuts and so forth.  Normally how I handle that is for breakfast I will do just PB on my finger for a day or two.  If they are okay with that then I consider it passed.  Scrambled eggs are another one.  Basically test those things so you know when you are offering normal food they are good. 

    baby girl eating

    Then just start by giving them small soft foods first – think strawberries, noodles, things like that.  My general size reference is a cheerio. 

    Below is a list of both store bought and homemade foods I do a lot for the first year.  I am not a fancy cook as a mom, so I go very simple.

    mom feeding baby Gerber Puffs

    Tips for Cutting

    Never EVER cut round foods in half – they are still just as much of a choking hazard.  quarter them.  Pizza cutters are the best thing ever for baby foods – you can cut things super fast.  

    I am working on a blog post that will be up in the next week or so with great recommendations on my favorite kitchen tools that make feeding your family easier. 

    Foods I do a lot the First Year

    • Gerber puffs and cheetoh puff type things
    • Peanut Butter puffs – they have them at trader joes or here online.  These are a great way to keep them from developing a peanut butter allergy!
    • Adult cereal
    • YoBaby yogurt
    • Sandwich – I take bread and heat cheese and lunch meat up on it in the microwave.  Smush it together then cut it into small squares with a pizza cutter
    • Annies pasta – a huge go to for us.  For added protein mix the powder with plain greek yogurt instead of milk, or to add tomato use this tomato soup instead of the milk.  (The tomato soup is better with the white cheddar).   You can add veggies or canned tuna or ground beef to this too!
    • Pancakes – make your own and add cinnamon and finely grated carrots and or zucchini for veggies.  Sometimes I add a little syrup to the batter because I don’t give the tiny age syrup. 
    • Spaghetti with ground beef
    • Pasta with olive oil, canned tuna, cooked broccoli and feta and a splash of olive oil is a favorite for my kids. 
    • Quesadillas
    • Any Fruit
    • Cooked Veggies
    • Black Beans – serve on their tray with shredded cheese – I just rinse them under hot water to warm them
    • Cut up lunch meat and a cut up cheese stick
    • Cut up olives 
    • beats
    • Pasta with pesto
    • White chicken chili – this is my go to recipe
    • We also love to give Goldie the fruit and veggie type pouches with these toppers – they make them so they can’t squeeze it all over and kind of have to work for the food, but have been one of my favorite things with Goldie. 

    When kids are this age it’s a great time to add bold flavors and spices where you can to get them used to it.  Add in veggies anywhere you can  to things like quesadillas, sandwiches, and pastas.  you can bake kale down and let it get crispy then crumble it and add it to so many recipes.  Just play around with it. 

    Think easy meals – and anything you’re eating that is soft.  So if you are having lasagna give them lasagna.  But if you are having chicken Pesto sandwiches maybe just give them cheese and chicken with pesto on it.  

    Feeding The Older Toddlers

    Many of these meals have remained go to meals for me.  But I will say that I have a rule when it comes to lunches as my kids get older.  I am a stay at home mom so we have a rule that I don’t cook for lunch. It has to be microwaved or cold just like it would be for school.  

    That may sound harsh but I don’t like to cook and don’t want to do it all day long.  I also generally go with cleaner lunches. 

    Go to Foods:

    • Many of the foods above remain
    • Salami and cheese sticks
    • English Muffin Pizzas
    • Hot dogs plain or hot dogs wrapped in flat outs in the air fryer
    • Cheesy Chicken and Rice
    • Chicken Fried Rice
    • Pizza – if you do homemade pizzas make it fun for them to add their own items
    • Frozen Taquitos haha
    • Cheese and hot dogs, or ham or pizza toppings in croissants wrapped up. 


    toddler girl eating apple in white kitchen

    You get the idea – I like easy meals you can throw together in just a few minutes – I pair them with a lot of raw veggies, and fruit.  I don’t do a lot of side dishes for my kids – I try to stick to a main course they will eat and do veggies and fruits as the side.  

    They do cracker type things for snacks so this makes them gravitate to the fruits and veggies if they are still hungry or don’t love the main dish!  With baby led weaning your kids will likely be used to eating what you eat – so you shouldn’t have to do special meals, but this is a good example of kid friendly meals.

    We got in a habit of doing different food at times for our kids because Jack and Goldie can not eat a lot of what we eat with their allergies, so that has made our baby led weaning slightly modified from the typical. 

    mom and baby in the kitchen

    Other Posts You’ll Love

    MONTHLY BABY FAVORITES  |  STOKKE HIGHCHAIR REVIEW  |  TRAVEL TIPS FOR BABIES AND KIDS

    Pin The Photo Below for Later

    Hopefully this gave you some great ideas on what to feed your kids and toddlers.  I think that it’s easy to think that baby led weaning is hard or complicated, but hopefully this shows you that it is really meant to be an easier way to feed your little one!  If you have questions feel free to Dm me via Instagram (@arinsolange) or comment below!


    Home

    Pergo Flooring Review by a Mom of 4

    Three years later – and finally I am coming at you with a Pergo Flooring review.  I have been asked COUNTLESS TIMES about our flooring in our home, and honestly it was one of the best choices we have made in this house – so I can’t wait to give you a full review of our floors in this post.

    This post may contain affiliate links

    pergo flooring in living room

    Why we Chose Pergo Flooring

    3 years ago we had been in our home for about a year and decided that we really wanted to update the floors.  The engineered wood that was in the entryway and the kitchen area were horrible quality and impossible to maintain and keep clean.

    We knew that hardwoods weren’t the right choice for us because of 3 things:

    1. We were close to having our third baby and didn’t want it to take a terribly long time.  No nesting mama needs that.  

    Esperanza Oak Pergo Flooring

    2. Budget – we really didn’t want to spend a huge amount of money.  We had moved in a year prior and 2 of the rooms we were doing these floors to had recently been carpeted – so we were essentially double spending. 

    3. Durability.  We built our first house and had Jack and Avé there until they were 3.5/1.5 and the wood floors were beat up!! We learned that hard wood floors do take a lot of careful treatment to keep them up, so we really didn’t want to have to worry about that this time around. 

    baby looking out the window

    Ultimately we obviously went with Pergo flooring – hence the post, so I wanted to talk about my experience with the floors, as well as where we got them and our over all install, to 3 years later experience. 

    laminate pergo flooring

    What is Pergo Flooring?

    Pergo flooring is durable flooring solution for your home – there are typically some major FAQs that come up when it comes to choosing Pergo Flooring, so I wanted to address some of those questions before we get to my review!

    Is Pergo Flooring Laminate?

    I am asked a lot if Pergo is laminate flooring, and the answer is yes – Pergo is a brand of laminate wood flooring. They use a unique three layer system to create durable, quiet laminate flooring that has a hardwood floor look.

    little girl dancing

    Is Pergo Flooring Waterproof?

    I think sometimes there is a misconception that ALL laminate flooring is waterproof – which isn’t the case. When we were looking at laminate flooring we went with Pergo due to the fact that some of them are uniquely waterproof.

    With 4 little ones at home the waterproof nature of the floors was amazing because we didn’t worry about spilled waters that we didn’t nonie and such!

    Little boy in a cape

    Do Pergo Floors Scratch Easily?

    Pergo claims that the floors are scratch resistant but not scratch proof! We had the floors for roughly 3 years before we moved from our last home and I didn’t notice any scratches and we WERE NOT EASY ON THEM.

    Pergo claims that the floors are scratch resistant but not scratch proof! We had the floors for roughly 3 years before we moved from our last home and I didn’t notice any scratches and we WERE NOT EASY ON THEM.

    messy living room for kids

    How to Clean Pergo Flooring

    There are several cleaners you can choose but Pergo recommends a damp mop and warm water with white vinegar which was my personal choice. I loved that it was an affordable way to keep the floors clean.

    Feel free to add some essential oils for a better smell if you prefer.

    small entryway

    Overall Pergo Flooring Review

    Let’s not beat around the bush on this – my overall review is A+,  but I also know that doesn’t really help to hear “I love them” without the reasons why. 

    We personally decided on Pergo Flooring from Home Depot – we had been wanting to update our flooring and Home Depot was having a 89 cents install deal that made the price per square foot to be purchased and installed SO INEXPENSIVE.  

    esperanza oak Pergo Flooring

    This was easy, and allowed us to get it done within a month – which was key because I was very pregnant at the time.  When we were first searching I took home samples from a few brands and was pretty well set on a general idea for the floor color – BUT I was torn on brands.

    I did a lot of research and decided to go with Pergo because they are a name brand that has been known for so long.

    I knew that they weren’t going to disappear next week without being able to find more of this color and such if needed.  So all in all the quality of the brand weighed heavily on my choice. 

    Where we purchased: HOME DEPOT

    Color: ESPERANZA OAK

    Pad: WE DID A HIGHER END PAD FOR MORE COMFORT WALKING

    barn door in modern home

    Installation

    Like I said – we went with Home Depot to both purchase and install our flooring.  I am going to weigh in on my overall thoughts on that – but I feel like it is worth noting that nothing that they did wasn’t communicated.

    One thing I DIDN’T love was the the baseboards are not taken off when you get this project done – so they add quarter round to your budget.  

    I knew that would be the case, but in hind sight I don’t love the quater round so probably would have don’t this when also budgeting new baseboards.  

    pocket of living room wth built in shelving

    You can see the quarter round below – it isn’t horrible, but I have found that it has been harder to keep in good shape than normal baseboards with 4 kids.  So that is just something to warn you on.

    We recently did a little work in our kitchen doing this shiplap wall, and changed the trim on that wall – they don’t fully butt up to the existing baseboards in all spots, so if you don’t do new baseboards at that time you will possibly always need quarter round, or a REALLY thick baseboard. 

    white kitchen cabinets and Pergo Flooring

    We also had a last minute price change because our floors weren’t level so in order to have all the Pergo sit at the same height we did have to pay for some extra work below them.  

    This was a last minute surprise cost, but well worth the money.  As with any home Reno update there is always the chance of hidden costs. Just make sure you are prepared for that incase it pops up.

    The installation was only 1 or 2 days and the nice things about laminate flooring is that it is ready to go next day.  So essentially once we were done in those 2 days we were fully moved back in and back to our normal life, which is slightly different than wood floors that do take time to go on.

    toddler boy with Ikea doll house

    Maintaining Pergo Flooring

    If you are looking for great – LOW MAINTENANCE floors Pergo Flooring is a great option.  The biggest reason we went with Laminate was due to the low maintenance they require to still look great. 

    We sweep/vac/mop as you would any floors.  I have found no issues with water sitting on them – we had a dishwasher leak and of course the occasional ice cube, and neither of those things have caused any warping  or issues.  And I love that no matter what I use to clean them I don’t see streaking.  

    With wood floors there is a lot more consideration that needs to go into those choices.

    Skip hop baby play mat

     Cost for Main Floor Pergo Flooring

    I can’t remember exactly what we paid for our floors but I do know it was under 10k for floors and install on our entire main floor (aside from the office and laundry room).  

    We have a fairly large main floor so in my opinion it was a great – affordable option that looks great. 

    Home Depot does sales on their Pergo Flooring (and install) frequently so I would highly suggest watching for a sale if you are going with them as your retailer.  But there are also many other places you can get Pergo flooring – I am just speaking from my own experience. 

    little girl coloring on a wall mounted easel

    Other Posts You’ll Love

    ALL DECOR POSTS  |  AFFORDABLE DECOR FROM AMAZON |  HOW TO SHIPLAP A WALL

    Pin the Photo Below for Later

    Hopefully this helped explain a little better why we love our floors and why we ultimately went with Pergo Flooring.  If it weren’t for buying a home that has beautiful original hardwoods we would likey have chosen to go with a similar Pergo Laminate in the next house as well.  If you have any questions feel free to DM via Instagram (@arinsolange) or leave me a comment below.

    review of Pergo Flooring

    Products we Love

    Toddler Bike and Kid Bike Options

    Who else is investing in all the things to use while were at home this year?  I rounded up my favorite toddler bike and kid bike options that are stylish and well rated in one post.  In my 8 years of mom life I have learned that not all bikes are created equal – you want something that is light weight and works well.  

    In this post I touch on price, style, and features of each bike so you can find what is best for you!

    This post may contain affiliate links

    toddler on strider bike

    Toddler Bike & Kid Bike Options

    I am the mom that does ALL THE RESEARCH on ALL THE THINGS I buy my kids – which is probably why doing gift guides is one of my favorite things in this job. This summer all three of my older kids needed new bikes, so I have been doing so much research it isn’t even funny.

    I am in a unique position because although I was only looking for a toddler bike for my youngest, my older two still use training wheels, so I needed some toddler bike features on the kid bike options I found too. 

    toddler bike

    For the sake of this post I looked at a few balance bikes, and up to size 20.  Many of the bikes come larger than that, but that was my main focus. 

    I very much so care about how my kids bikes look – especially for my girls, but I also know that when it comes to a bike it really needs to work well.  My oldest sons first bike was SO HEAVY that he honestly couldn’t ever really ride it.  I didn’t realize it was such a big deal until getting my 3 year old a new bike recently and seeing how much easier that is to ride.

    toddler on toddler bike

    Things to Consider

    A couple of things to consider – Do you care about  a hand break?  In the United States bike manufacturers HAVE to use a back pedal break option.  Some bikes also offer hand breaks as a learning option along with the back pedal break (and from what I have read some also sell after stock options to get rid of the back pedal break option too). 

    Back pedal breaks are on the bikes because they take very little coordination for kids to master so they are deemed safer – that said just decide if that matters to you before you buy. 

    Another consideration – do you want to do the balance bike route?  We have only done one balance bike but have for the most part just gone traditional with things and done the training wheels bikes, but many parents find that the balance bike option is the best for their kids, then they go straight to a pedal bike with no training wheels. 

    Below are my picks for stylish, great toddler bikes and kids bikes.

    stylish toddler bikes and Kids bikes

    Shop Toddler Bikes & Kids Bikes Below

    1  |  2  |  3  |  4  |  5  |  6  |  7  |  8  |  9  |  10  |  11  |  12  |  13  |  14  |  15  |  16  |  17  |  18  |  19  |  20  | 21  |  22  |  23  |  24  |  25  |  26  |  27  |  28  |  29  |  30  |  31

    1. Blue Helmet – this one comes in several colors and they are all matte which I love!
    2. Cupcake Helmet – I love this so much! My daughter would love it. 
    3. Orange Helmet 
    4. Green Helmet – I included this in 2 colors – this helmet is awesome because you can use it as a ski/snow helmet or a bike helmet either one by removing the insert.  If you live somewhere where you do winter sports this would be a great one helmet fits all sports situation. 
    5. Rainbow Helmet
    6. Pink Helmet – this is the same situation as the green one from #4 – a all season all sport option
    7. Pink Helmet – I am a sucker for the matte look
    8. Streamers for Handle bars 
    9. Strawberry Bell
    10. Black Bell
    11. Pink Bell
    12. Old School horn – this is so cute – I remember having one on my bike growing up
    13. Green Bike basket
    14. Pink Bike Basket
    15. Brown wicker bike basket
    16. Basket that can be used as a backpack, a bike basket, or a purse! Such a good option for a little girl
    17. Black Bike – comes in several plain colors and has a hand break option which I love. This is such a good option!
    18. This bike is deemed the safest on the market – This one comes in girls and boys options and when you read about it I am sure you will love it too. 
    19. A great budget option that looks so much like the Banwood bikes
    20. Colorful bike
    21. This ivory and orange bike is SO CUTE 
    22. White and black bike with basket
    23. Banwood balance bike – this is DARLING
    24. Dark green bike – I LOVE dark green for boys and this one is so cute
    25. Coral bike – this is such a fun colorful bike option
    26. Pink Bike with leather accents
    27. Coral pink little balance bike 
    28. White bike with leather accents – this is a great option if you have multiple kids and both genders – you could pass it down to all of your kids. 
    29. Strider Bike – These are a great option for kids learning because you can add pedals down the road 
    30. White balance bike with basket 
    31. Light pink bike with basket – This is a super great budget friendly version of some of the high end bikes at $130.

    This was such a wide variety of options when it comes to toddler bikes and kids bikes, but also should give you a great option no matter your budget and taste.  I got sucked into the rabbit hole of looking at bikes during all of this and honestly now can’t decide which beauty I will land on for Avé, and what to get Jack.

    Based on their ages we have very different needs and wants from their bikes – as well as my taste is slightly different for my boys and my girls.  Both will be bikes that are passed down, which leaves me inclined to pay a bit more if needed – where I maybe wouldn’t if we didn’t have SO MANY KIDS haha. 

    Other posts you may love  – 

    Check out all the gift guides I have for each age on this page if you are looking for other great ideas to get kids!

    Pin The Photo Below for Later

    Hopefully this helped you find some great toddler bikes and kids bikes both that you will love for years to come.  Keep a look out on Instagram (@arinsolange) to see what I end up with, and comment with any questions. 

    stylish toddler bikes and Kids bikes


    Home

    Vertical Shiplap Laundry Room

    After doing shiplap in our kitchen last month we decided to go vertical and do vertical shiplap in our laundry room when we gave it a refresh.  I am FINALLY getting around to sharing how we did the shiplap, and all the little organizational hacks we used to make the laundry room functional while looking great!

    this post may contain affiliate links

    vertical shiplap laundry room

    Vertical Shiplap Laundry Room

    Shiplap is a really practical wall covering option, which has made it really popular in the past few years.  I think the ease of hanging, and the huge impact it can make to a space makes it incredibly popular.  

    Shiplap can be purchased from several places in several different styles, but I will share more about what we picked and some things to think about when going vertical with your shiplap verses horizontal.

    vertical shiplap in laundry room

    We also did some other really functional changes to our laundry room during this process to make it clean, functional and pretty.  I really wanted the room I walked into first when I got home to be a better representation of the rest of our home, so that is what we did! 

    Overall Goals for the Room

    We had a few goals for this room when we set out on the project they were:

    1. Make a better storage solutions for hanging, cupboards, and mudroom area.
    2. Clean up poor craftsmanship done when the laundry room was last done.
    3. Make things less cluttered
    4. Make the room fit the aesthetic of our home better.

    mudroom with vertical shiplap

    The goals weren’t huge – but overall we just needed the laundry room to function better and not only represent the look of our home better, but also the craftsmanship we have put into our projects.  The cabinets and moulding that were in place had so much gunk on the ceilings and such it just didn’t look clean and professional in any capacity. 

    Our obvious first step in all of this was demo – we took EVERYTHING out of the room.  The mudroom storage, the cupboards, the crown moulding – all of it. Once that was done it was time for shiplap.

    Laundry Room with Vertical Shiplap

    Hanging Vertical Shiplap

    I have a great tutorial HERE on hanging shiplap, but because hanging vertical shiplap is a bit different I want to give some tips for adjusting that tutorial for vertical.

    I will not give every step because THIS POST has such a well worded tutorial that it will likely help to read that one too. We used the same 8 foot shiplap boards, and due to not wanting to remove the baseboards every board had to be cut.

    Vertical Shiplap Laundry Room

    If we were to do vertical shiplap again in our next home, I will remove our baseboards and put them back on in front of the shiplap – there were a few reasons we didn’t do that in this room, one of which being the fact that midway through demo we realized we were moving, and 2 – it went behind the washer and drier where we didn’t go all the way to the floor so it would have just been a pain!

    The biggest thing to note when you are doing vertical shiplap verses horizontal is that your ceiling is likely not perfectly squared off, so you need to measure before each cut.  This does take a bit longer,  but it is worth it for a cleaner look.

    You will also likely need to caulk along the ceiling when going vertical verses when you went horizontal for a more finished look.  Aside from that the same ease of instal, and tips on cutting outlet holes and adding outlet extenders remains.

    black bench in laundry room

    We did two walls shiplap instead of just one, so it was a better view from the kitchen and I was really happy with that decision.  Once we got all of our vertical Shiplap installed we were ready to paint and do the rest of the room. 

    One thing to note on doing a laundry room is you will have more cutting than a normal room – behind the washer and drier meant lots of small cuts to make it work!  

    Also when you are going vertical with your shiplap you may have to rip an entire board so be prepared for that – we didn’t go all the way to the floor where the washer and drier are so we were able to not have to rip a full 8 foot board! 

    You can see in the image below where we stopped.  This will always be where a washer and drier go, so it made sense!

    laundry room with vertical shiplap

    Creating the Mudroom 

    When we moved in we already had a mudroom bench and storage, that was really nice, but like I said it was lacking some in craftsman ship and there were a few things I wanted to change (one of which I didn’t…which I will explain why!). 

    I wanted more hooks – we had 3 sets of hooks, but with 6 people in our family that just didn’t work.  I wanted shelving instead of cubbies, because I felt as tho so much of the storage space was taken up by the dividers, and I wanted bins for shoes not shelves. 

    black bench in laundry room with mudroom

    We took our entire mudroom area down and had every intention of starting fresh, BUT we ended up still using the same bench.  This was because at this point in the process we had put an offer in on a new house, so we decided to paint the existing bench black – which was what we were going to build and call it a day. 

    Looks wise this works just as well, but if you are doing your own laundry room/mudroom I would suggest doing a bench that allows for baskets for shoes if you have several kids.  

    I hung THESE hooks which were such a good deal – and I was able to hang several.  I did them closer together because in the winter I like to be able to hang kids backpacks and coats.

    We then mounted this shelf above.  We already had both the shelf and the brackets – linked below, and I loved that it gave a good pop of natural wood in the room and allows me to store boots, lunch boxes, and whatever else my heart desires. 

    Overall – I actually am much happier with the easy function of the mudroom like this over the more ornate design of it in the before.  It was a very affordable way to create a mudroom, and honestly something anyone could add to their laundry room if space permits. 

    Washer and Drier Area

    With this being the laundry room – I do have to to touch on how we made it a more functional laundry room – because you know, as much as I would love to not ever visit that part of life, with 4 kids it’s also way too big a part of our day. 

    When we moved in there were cupboards over the washer and drier which I loved, but they were so tiny that the honestly basically stored nothing so I knew we needed to adjust that.  It ended up being perfect because when we redid our kitchen last month we took down one cupboard, and decided that would work great.

    large kitchen cabinet in laundry room

    We used the same paint and method for painting kitchen cabinets for that one as we did in our kitchen and we got to work. Once the cabinet was fully painted we used the same hardware from the kitchen as well and hung that over the drier so there was a big gap between the cabinet and the wall.  

    The gap was on purpose because we had also purchased a wood dowel for hanging clothes to dry that went from the cupboard to the wall.  I was a little worried it would look off center, but I actually was so happy with the end outcome! 

    hanging wood bar in laundry room

    Another thing we did with the laundry area that I LOVE was used a little extra shiplap and built an N shaped piece to fit right in behind and under the washer and drier.  

    small wire hiding shelf for washer and drier

    We drilled holes and cut outs for cords, but it keeps clothing from falling behind, and keeps the room looking a little more clean and put together.  To connect those pieces we used small L brackets on the corners. 

    hanging vertical shiplap

    The Details

    Those were really the big areas of the room, but there were still a couple of things I wanted to make more functional – 1 thing was that I liked to hang my ring slings, and baby carriers, as well as my diaper bag and purse away from the kids stuff.  

    I used to hang them on the wall right by the door but honestly it felt like PURE CHAOS in the area all the time, so I needed a better solution.  We ended up using a leftover strip of trip and nailing it to the wall across from the washer and drier and put several more of the hooks we used on the mudroom area in that space.  


    It has been amazing to have a place to hang all of those things without them being in the way.  I also used to have a homework bin on the wall by the door, and knew that wasn’t working well to just have one, so I ordered more from amazon with the intentions of being able to add 2 more, or a calendar over top of it for a command center as time went on.

    Those two little changes made a huge overall change to the space without making it expensive or hard to maintain.  

    One other thing I did to the room was HEAVILY clean the grout and it was SO needed.  I bought this little tool on Amazon and it was seriously LOVE!

    Shop all the Details

    Incase you missed any of the links mixed into this post, I figured I would list them all out below!  

    Hooks  |  Shelf  |  Shelf Brackets  |  Wooden Dowel  |  Dowel Holders  |  Shiplap  |  

    Door Hardware  |  Wall Bins |  Grout Cleaner  |  Laundry Basket  |  Step Stool 


    Overall – adding vertical shiplap to our laundry room increased the curb appeal, while adding so many little functional changes increased how it works for our family.  Overall the entire update cost was only a couple hundred dollars which included the new laundry basket, paint for the whole room and ceiling and all the little details.  It was a great budget way to bring the room up to the level of the rest of the house. 

    Pin the Picture Below for Later

    laundry room update with vertical shiplap


    DIY

    Mid Century Modern Dresser Update

    I have been in love with the mid century modern dresser that we use in our living room as our media stand for 4 years.  It remains a favorite piece of furniture that has loved hard and remained beautiful, but after this long I was itching for change, and did a gorgeous EASY update that you guys will love!

    this may post contains affiliate links

    DIY cane Mid Century Modern Dresser

    Mid Century Modern Dresser Update

    When we moved into our current home it had this gorgeous traditional charm so I knew I wanted to balance that with midcentury modern furniture to keep things fun and more modern.  We got our beloved couches and ottoman and I ended up falling in love with an old mid century modern dresser to work as the tv stand.

    I knew I wanted something that had a lot of storage for toys and such, and this piece was just that.  I didn’t want the walnut (beautiful as it was) so it went white, and I painted the very old handles black for contrast. it turned out beautifully and has honestly remained a favorite piece in our home for 4 years.

    DIY cane mid century modern dresser

    This spring as we were doing updates to our house I really wanted to give this a facelift to match our DIY IKEA Hack with cane that I did a few months back, so I came up with a plan that I LOVE!

    The Inspiration

    Like I said – the inspiration for this post was an IKEA hack I did a few months ago that seriously remains one of my favorite projects to date.  We took an IKEA Brimnes cabinet and removed the glass and replaced it with cane mesh to create a modern coastal piece that you would NEVER know is from IKEA.

    I had some leftover cane and knew I wanted to use it somewhere so decided to take my chances on updating our loved mid century modern dresser with it.   (It was a risk…once we started we knew there was no going back!).

    Gather your Supplies

    Below is everything you need for this project

    Dresser or piece of furniture

    Cane webbing – This is the cane I got for both of my projects

    Jigsaw

    Drill

    Staple Gun

    Sander/sand paper/sanding block (one of these)

    [Optional]  Paint – I used this paint that I had leftover from painting our kitchen cabinets and can’t say enough good things about it.

    DIY cane webbing dresser hack

    How We Did It

    Obviously you won’t have the same piece as me, but this is a fun diy you could do with so many different pieces.  You might have to play around with the placement and how much cane you need based on your piece of furniture but the general idea should work across the board.

    First – remove whatever area you want to add the cane to.  Remember if it’s drawers you may have to add different handles such as these to make it work.

    Figure out what you want to cut out for the cane.  For us this was pretty easy – our piece had inlaid rectangles so we used that as a guide. Draw with pencil the line you will cut

    Drill into each corner of the rectangle you are removing, then use that as your starting point with the jigsaw.  Cut all the way around to remove your piece.

    cut out doors on cabinet from jigsaw

    Sand with an electric sander or sandpaper/sanding block.

    Now is when you would paint if you are looking to change or update the paint.  For me my piece was already white but I really wanted to give it a fully new coat of paint so I repainted the piece and am so happy that I did.

    Once your paint is dry it is time to attach your cane.  Cut your cane to be a couple inches longer and wider than your hole, then take that sheet and soak it in your sink with water for 5 min.  Don’t wait too long or it can start to break it down.

    DIY cane webbing dresser hack

    Take the cane out of the water and dry it off, then get ready to staple gun it in place.  Find a good starting spot on the middle of one of your long sides and staple your cane in.  Use the picture below for a good example of how to do that.  It is kind of tricky so take your time, and remove any staples or hammer in any that aren’t tight enough.  You will do this all the way around each opening.

    cane webbing inside dresser

    One thing to note is once you start one piece finish it – I stopped mid way through one and the cane dried and it was so much harder for me to work with.  You will be able to get into the corners easier if you have it wet.

    Once the cane is in place trim it down as far as you can and you should be ready to reassemble your piece.

    DIY Cane dresser hack

    Styling it …

    Okay okay, I only styled this for pictures.  It actually houses the most expensive of decor – a big ol tv haha. Let’s be real – the Instagram houses you see and love do have TV’s hidden somewhere – but kind of like mirrors, they are tricky to photograph!

    Styled dresser top

    For the sake of showing you the piece, and to test it out for the next house I styled it with it with items we already had and I am SOLD on using it in our dining room as a buffet when we move.

    I used this big framed picture that I LOVE – I usually have this in my office and it remains a favorite piece for sure.   I then added some fun accessories from our built ins and ta-da!

    Styled dresser

    Other Posts You’ll Love

    CANE IKEA CABINETPAINTING KITCHEN CABINETS$50 DIY OUTDOOR TABLE
    DIY Cane Dresser

    If you try to do this to one of your pieces, be sure to let me know if you have any questions.  A little tip to consider – don’t go to pink on your outside pieces.  Our piece is super thick nice wood so could easily withstand, but the stapling is hard on the piece so you don’t want a fragile frame.

    If you check your local Facebook marketplace you will likely be able to find a great mid century modern dresser to update too if you’re looking for something really similar to this piece.  If you have any questions while you’re updating your piece leave me a comment below or DM me on Instagram!

    Pin the Photo Below for Later

    cane webbing dresser hack

    Products we Love

    Dock a Tot Review – is it a must?


    With 4 babies I am pretty sure I have tried it all, and figured out the best of the best, (and the biggest waste items) for babies. I am doing a full review of the Dock a Tot Grand and Deluxe in this post to help you decide if it is worth the buy.

    This post was written originally on 1/18 and was updated on 6/20. The post may contain affiliates. 

    Dockatot grand with baby girl

    Dock a Tot Review

    When we had our 3rd child (FOUR YEARS AGO….where does the time go??) I knew I had to try the Dock a Tot. It was a newer on the item and slightly unabtainable purchase with our second baby so I was itching to see what all the hype was about.

    We loved the deluxe which I reviewed here, and although he didn’t sleep in it every night, it made travel and naps so much easier on us.  That ended up bringing us to looking at the Dock a Tot Grand and deciding if that was worth the purchase.

    In this blog post I will share the differences in the sizes and my thoughts on owning both sizes 4 years later.

    What is the Point of the Dock a Tot?

    Per the Dock a Tot Website – it is a dedicated napping and lounging spot for babies and toddlers. It is to be used supervised.

    Per what I would say – most moms buy it as a place for baby to sleep for naps or bedtime, although as with anything else that goes inside of a crib or bassinet that is not recommended by safe sleep experts.

    slumberkins and dockatot

    Is the Dock A Tot Safe?

    I think this, as parents is our number one concern. When we got the Dock a Tot Deluxe with our son, Walker, I was SO NERVOUS about using anything new. We had used something called the Nap Nanny with my older two that was later recalled, and that had me crazy nervous.

    I did lots of research on the safety, and felt very confident in the design and fabric choices that Dock a Tot made when designing their product, however still treaded lightly on infant use.

    For us we used the Dock a tot as a portable napping space around the house, as well as a place for the baby to sleep for the first week or 2 in our bed. This is not recommended, but for me I found that doing so allowed for my anxiety of the baby being outside me to subside, while allowing each baby to have a dedicated place and not fully co sleep.

    ** This is not recommended by the company or the American Academy of Pediatrics – it was simply a choice I made for my family.

    In my opinion – it is one of the earlier hard choices you have to make to decide what is right for you and your family.

    Dock a Tot Deluxe vs Dock a Tot Grand

    I have mentioned the Grand and the Deluxe already in this post, and some of you are probably thinking – what the heck? Those are names for different sizes.

    If you are pregnant and registering for a baby don’t even think about the Grand yet. You are only focusing on the Deluxe as that will get you through the first 8+ months of your babies life. Then you can make an assessment on if you want/need the Grand down the road.

    Dock a Tot Deluxe – The smaller ‘Baby’ Size

    Dock a Tot Grand – The larger ‘Toddler’ Size.

    Do You Really Need the Dock a Tot? An Honest Review from a Mom of 4

    Alright So now you know what the Dock a Tot is – but lets talk about if you really need it. I will start this off with stating – I both LOVED the Dock a Tot, but also don’t think it is a need.

    I have had 4 kids – all of which were pretty good sleepers, and I wouldn’t say I saw any better or worse sleep because of the Dock a Tot. It is a big investment – and many moms will swear by it – but don’t think that if you can’t afford it or don’t want to budget that in that your baby won’t sleep well.

    I loved the Dock a Tot Deluxe for couch naps and such with my younger two, and did find it to be helpful because of how portable it was. I also did let both babies sleep in it for a few weeks when newborns which I felt maybe made them less ‘restless’ in their sleep – but honestly that only effected me not them.

    baby girl sleeping in Dock a Tot

    Babies are super noisy and move a lot at night, so I think the combination of the extra padding and the cocoon feeling helped them to be more still – but in no way do I think it meant they woke up less.

    I also would say as far as for day time help it is the most help during the first 6 or so weeks. After that I found that other pieces of gear were better for the movement.

    You can actually see what months I used what in this series of posts I did with my 4th baby.

    All in all – Do I think it is a worth while investment? I am a realist on what I tell moms to register for and I do always recommend this one. So yes – I do think so.

    baby sleeping in dock a tot grand

    When to Move to the DockaTot Grand

    So now to talk about the DockaTot Grand – I have both. The photos of the green leaves in this post are all the Grand – and I will be honest – for the first 3 years owning it didnt think it was worth it. Our babies didn’t sleep in the Dock a Tot Deluxe long term so it just wasnt a needed purchase.

    That said – we were moving when Goldie (my 4th) was 1 and Goldie slept in the Dock a Tot Grand in the pack n play and is now a full on addict haha. So it has now been a very worth while while item for us.

    All in all – I would say you should wait until your baby is old enough to get one. Moving to the DockaTot Grand normally happens somewhere around 9/10 months – the Deluxe is meant to seam snug before they move, and honestly moving them too soon can make you think they don’t like their new one. 

    If your baby is sleeping in the Dock a Tot nightly then I would say they will love the Grand just as much and it will be worth the investment – I have friends who’s kids used it daily for years making their bed seem more comfortable, so it is definitely worth looking into it.

    baby girl in pink outfit inside Dockatot Grand

    Considerations and Final Thoughts

    Because this is a true and honest review from a mom of 4, I would say one thing to think about with using the Grand is if you fly very often or will have room to take this when you travel.  We are now getting ready to fly with our daughter who is almost 2 and I am dreading taking the Grand with us…but also..I love sleep.

    The Dock a Tot Grand is a pretty big piece of baby gear, and if your baby is dependent on it, it could make travel tricky.  I would just put some thought into your lifestyle before you decide if moving them to the next size up is a good idea, or if that is the time to break the habit. 

    Dockatot Grand with baby girl in it

    Differences in Grand vs Deluxe

    Aside from the size – the DockaTot Grand is nearly identical to the Deluxe – but one thing that is different is when in use you never use the Grand buckled at the bottom.  You are to always leave it open just like you would on the Deluxe as your baby starts to get bigger.  

    This is done for safety and something may people don’t know about. The Grand comes in the plastic zip up case just like the Deluxe so it does make it easy for storage and for travel, so keep that in mind if travel is something on the radar. 

    baby sitting in dock a tot grand

    Overall – DockaTot has been a brand that I have loved with my younger two kids.  They are cutting edge as far as coming out with fun, on trend prints and colors (which for me does matter – because if you are paying that price you want something you like to look at).  They take safety very seriously, and they are a product that in my opinion really helped my youngest two sleep well from night 1!  

    Other Favorite Products!

    With my 4th baby I have been tracking the products I used month by month – be sure to check out this tab with the monthly tracking.  This can be helpful to see how long certain items remained heavily used in our home!

    I am also linking to some other posts that you will love!

    Monthly Baby Favorites | Rainbow Nursery | Beddys Bedding Review | Jenny Lind Bed Review

    Pin the Photo Below for Later

    Hopefully you found this review of the Dock a Tot helpful and are more prepared to make the choice on getting one. If you have any questions leave them below or reach out to me via Instagram (@arinsolange).

    baby sleeping in dock at tot grand

    Products we Love

    Keeping a Tidy Home with Shark VACMOP Floor Cleaner

    This post was graciously sponsored by Shark VACMOP however all opinions are my own. 

    We are on a mission with all 6 of us home all day every day to find better ways at keeping a tidy home. Cleaning your house is one thing, but the more kids we have had, the more I have realized that having certain items on hand for just day to day cleaning and tidying is ESSENTIAL.  I am really excited to share with you all the Shark VACMOP, and how much that has helped in our day to day cleaning.

    Keeping a Tidy Home with Shark VACMOP

    We have been long time LOVERS of our Shark cordless vacuum, so knew how great Shark was as a brand, so when I was approached to try out the new Shark VACMOP I was really excited to have something just as convent on hand for daily cleaning of our floors. 

    With four little ones our house is basically in need of mopping DAILY, so I loved that this was a convenient, cordless option I could grab and go when needed on the daily. 

    Cutting Down Steps and Fuss

    So by the name you have probably gathered that this is both a mop and vacuum.  There is powerful Shark Vacuum suction that captures both small and large debris between the chamber and the disposable pad.  For me this has been super helpful for quicker clean up!

    The disposable pad traps and locks away debris (like dirt and pet hair), but is 4 layers thick so can actually handle a mess.  And HELLO – with 4 kids that is a much.  I swear I need to keep a tally of how often milk is spilled at the dinner table.  Once you’re done with the clean up you can toss the disposable pad with one click – you never have to touch the dirty pad!

    So basically – click on the pad, clean your floors with the mop and vacuum in one, then click and toss the dirty pad away!

    shark

    Finding Set Times to Tidy Up

    One thing we have been doing during this crazy time is setting times to do things like mop, do dishes, and clean up toys.  There is a fine line when life is hectic between keeping things clean and tidy, and constantly feeling as tho you are working against a moving target.  

    For us, we do dishes after breakfast, and after dinner.  Dishes during the day sit in the sink (unless I bake or something).   I like to clean the floors after every meal and because the VACMOP is a vacuum and mop in one I save time cleaning while also getting a complete clean on my floors. 

    woman mopping

    The kids toys are all cleaned up before lunch on the main floor, then before bed on the main floor as well, but we have learned that 2/3 days for the basement is fair.  They are spending so much time down there that we don’t want the kids feeling as tho that’s all they are doing too.

    Finding the right products, and items to make keeping your house clean daily will make your life SO MUCH EASIER, so if you are looking for a way to streamline cleaning your floors, check out the Shark VACMOP floor cleaner, and make keeping your floors clean easier.