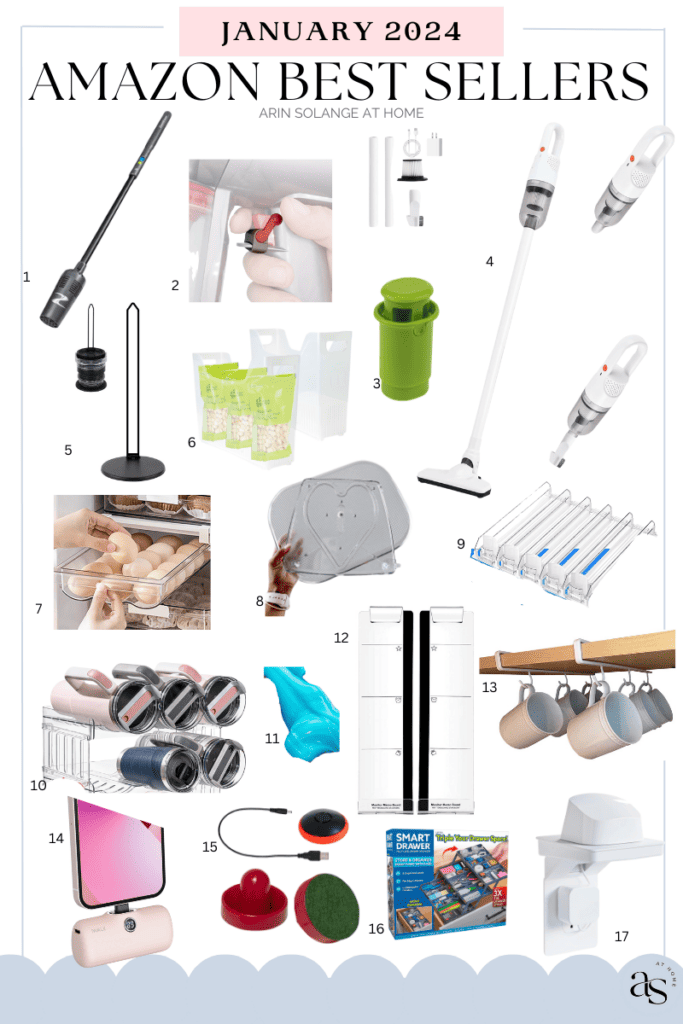
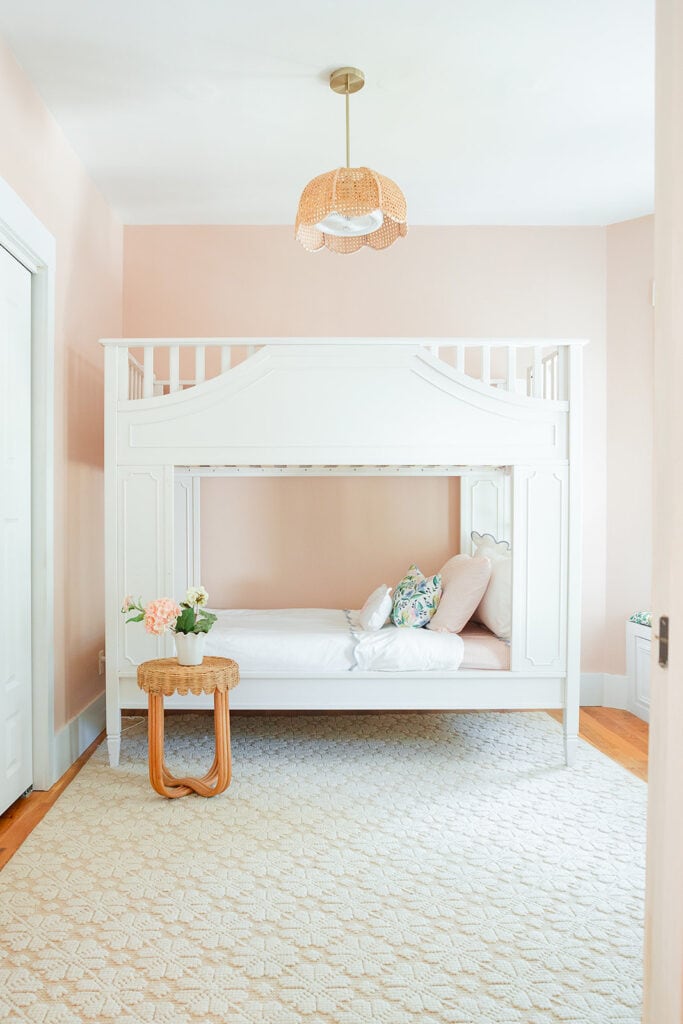
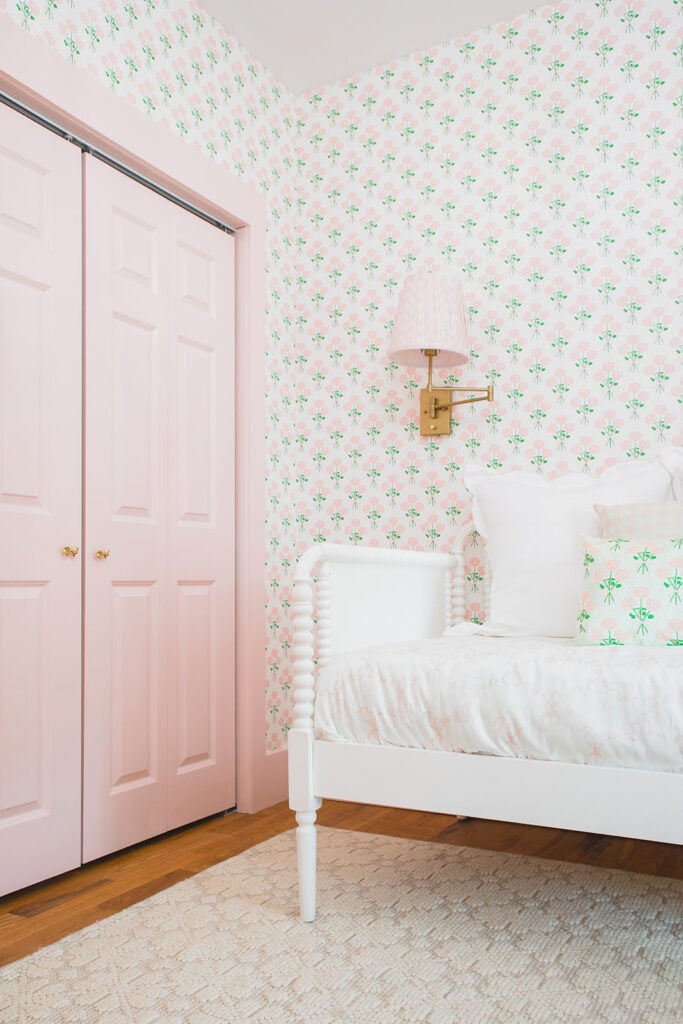
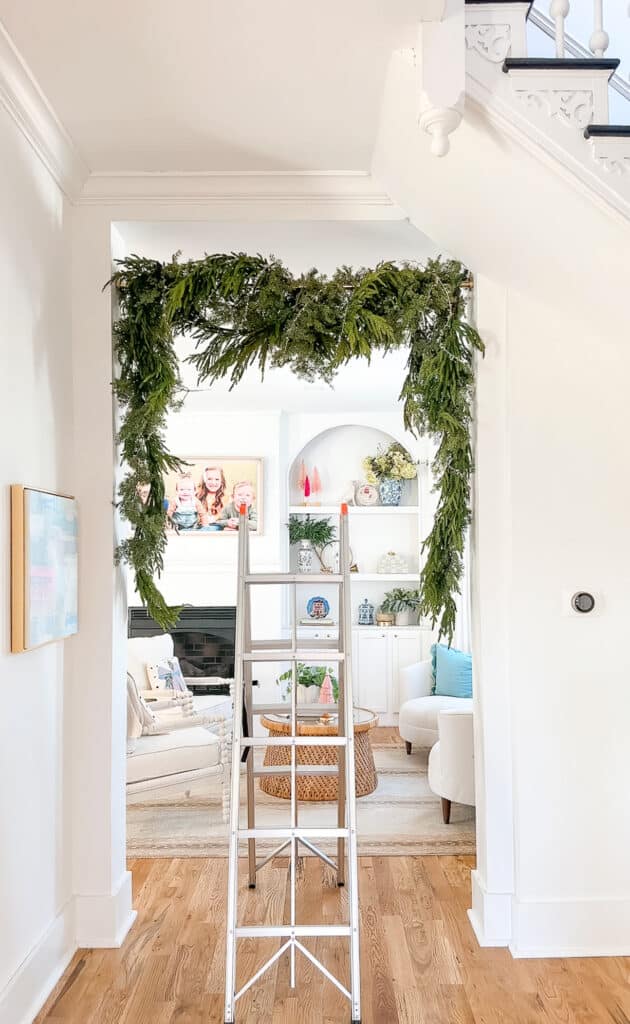
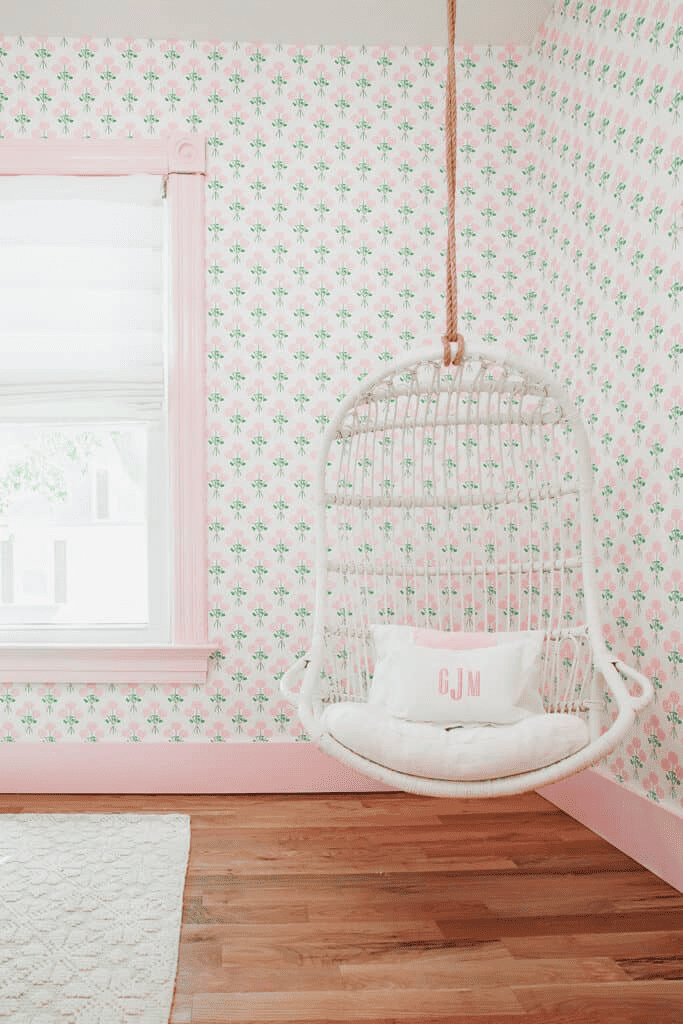
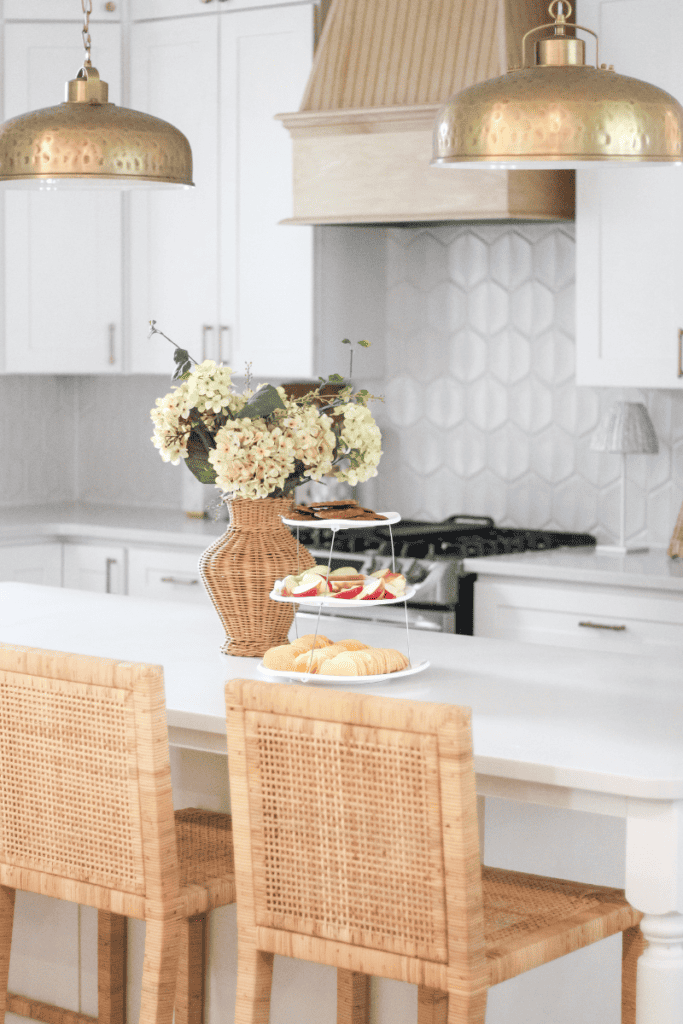
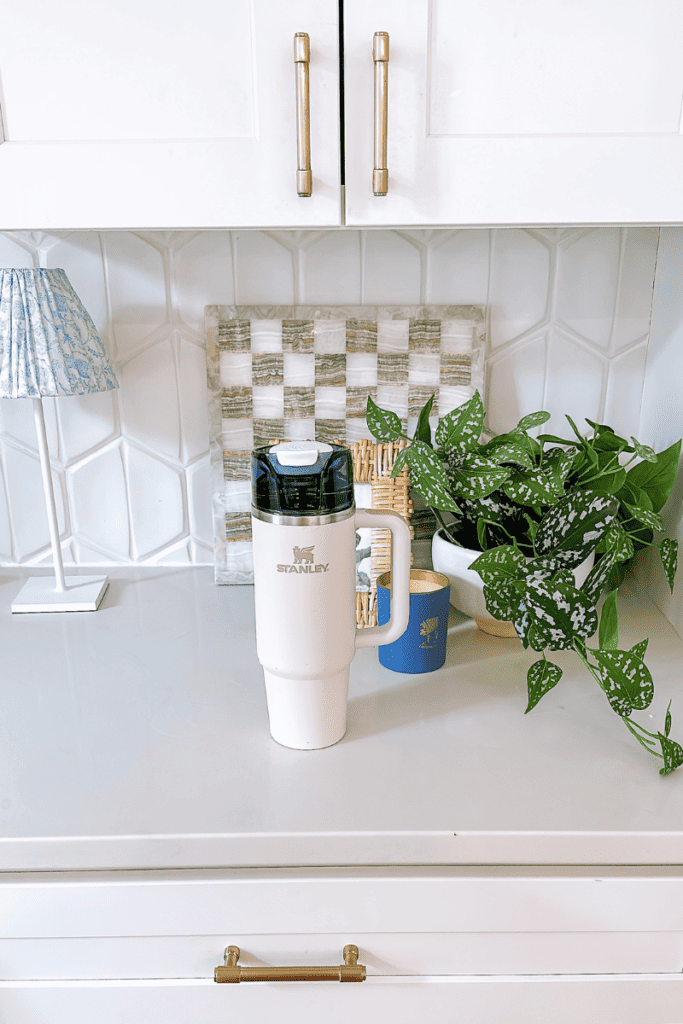
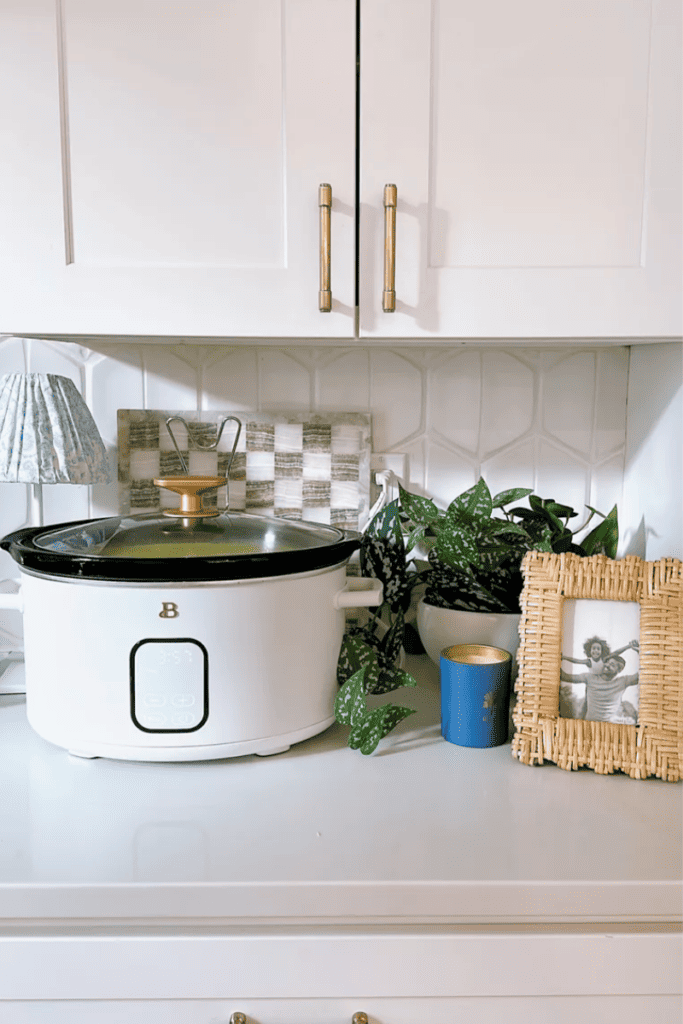
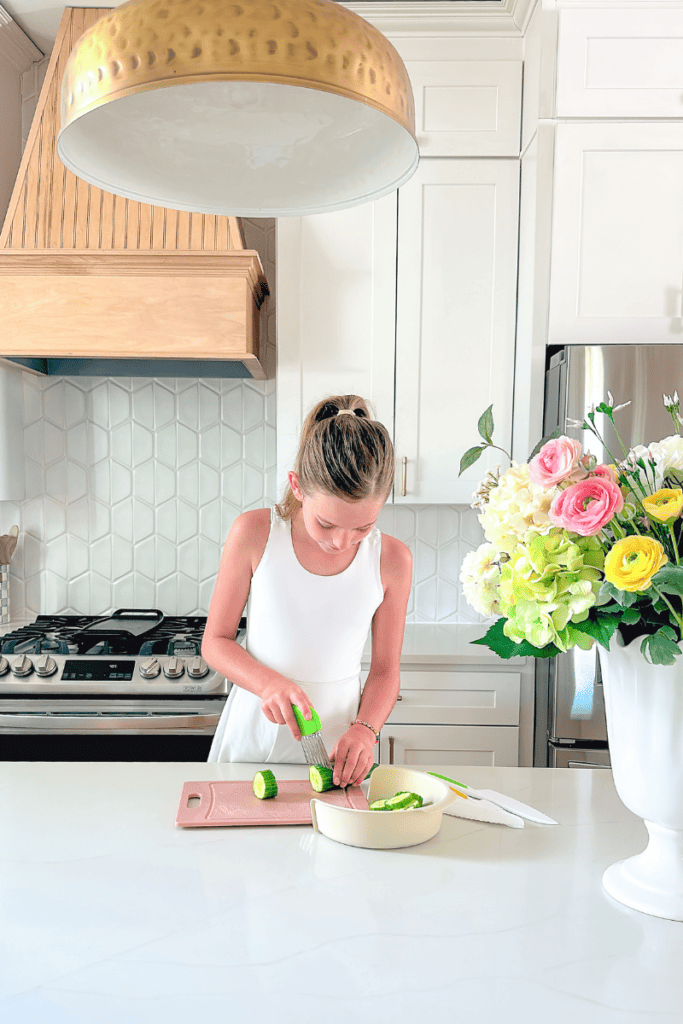
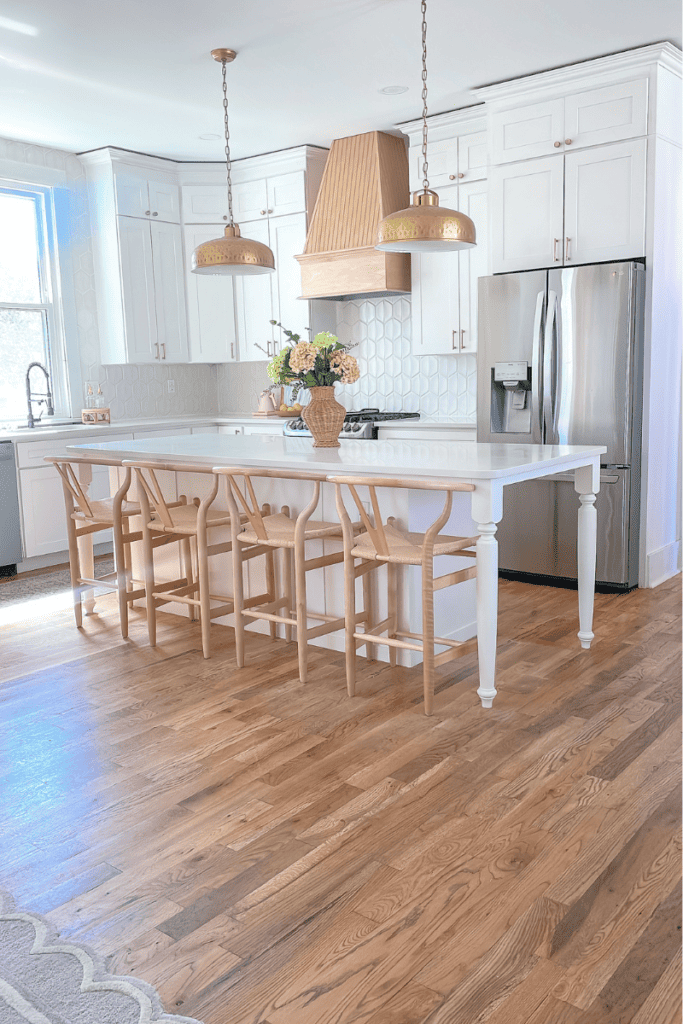
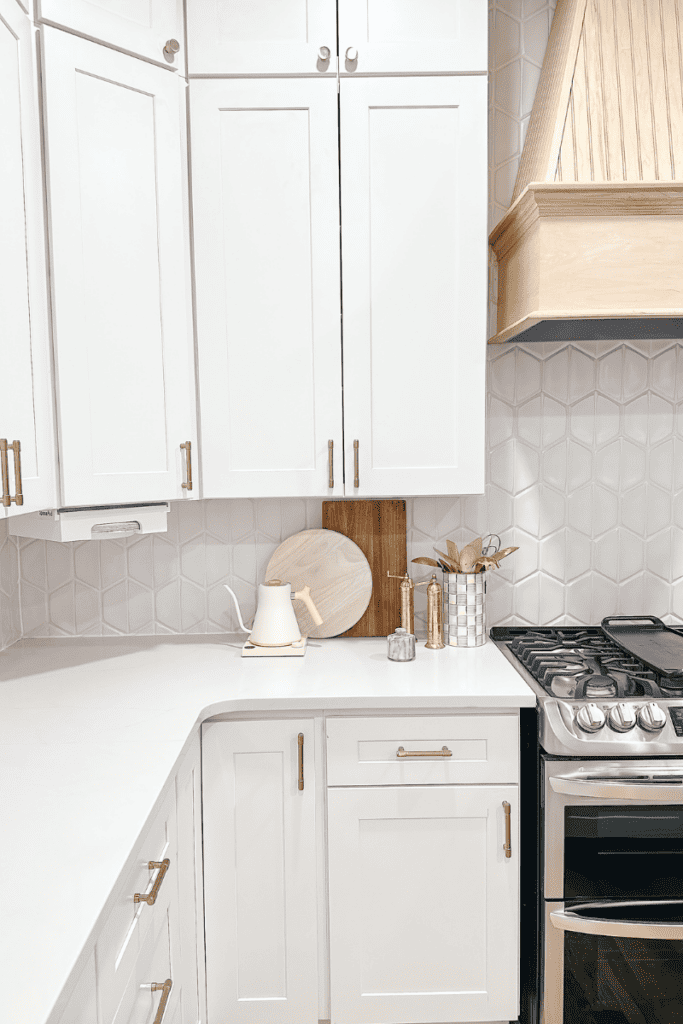
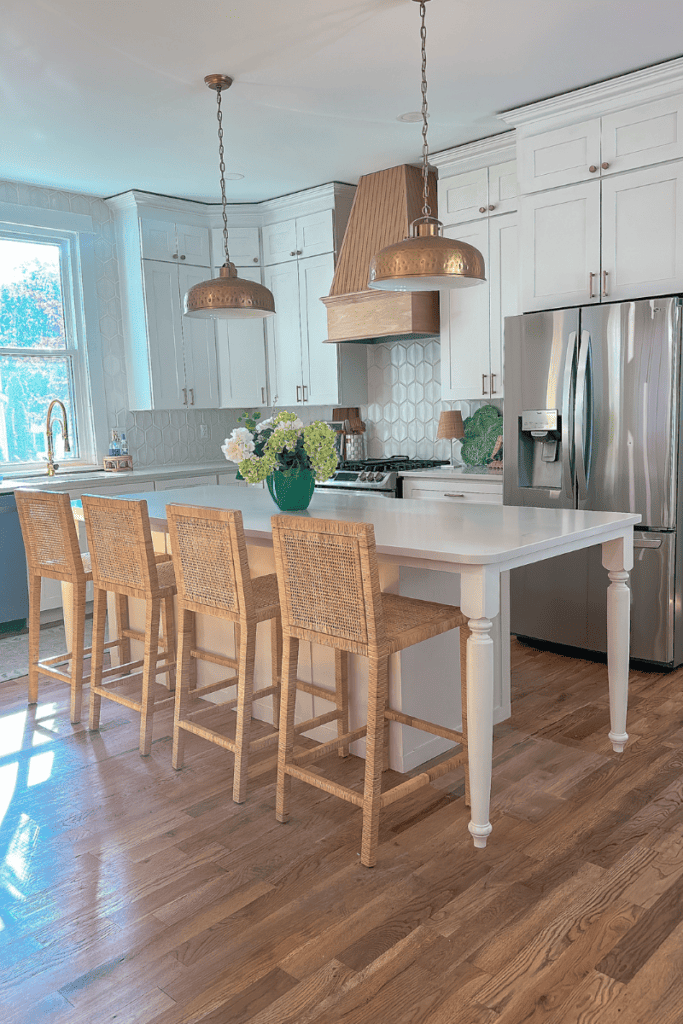
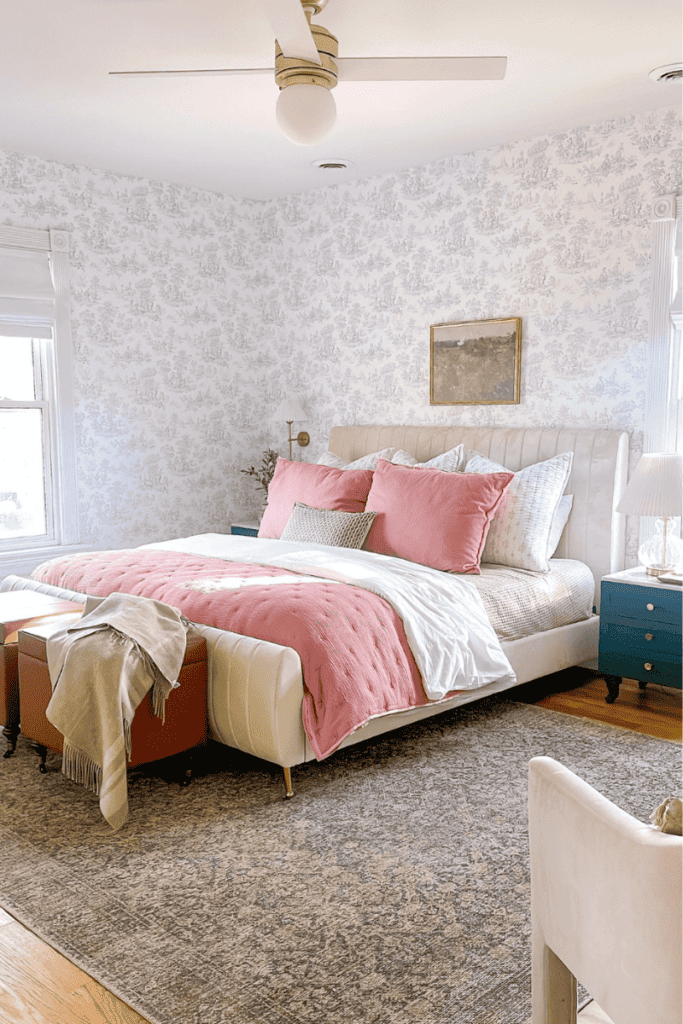
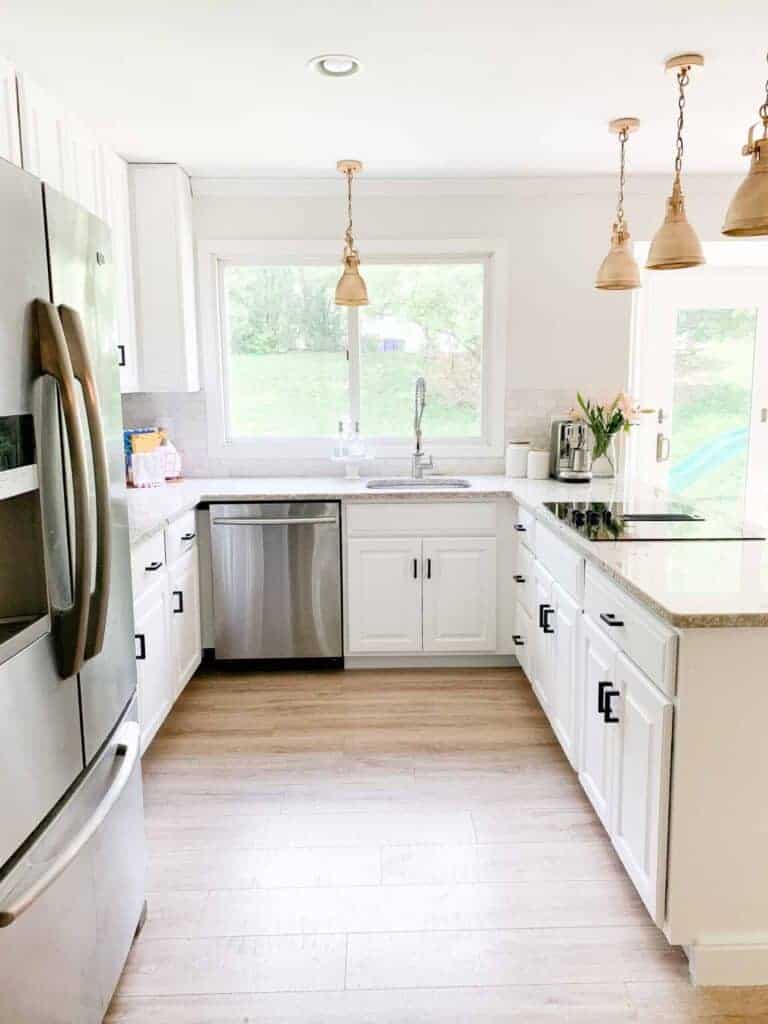
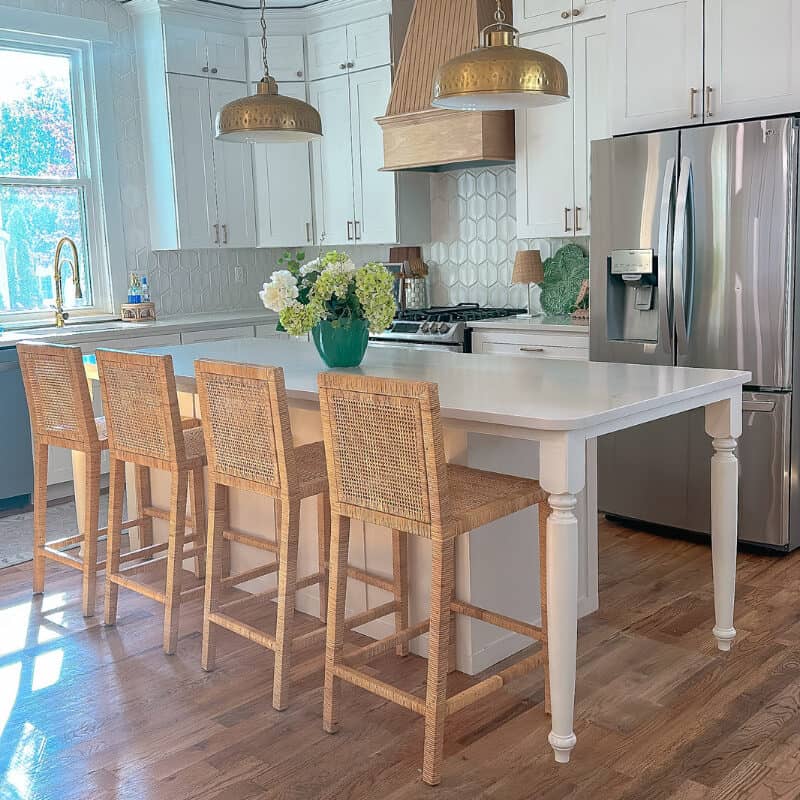
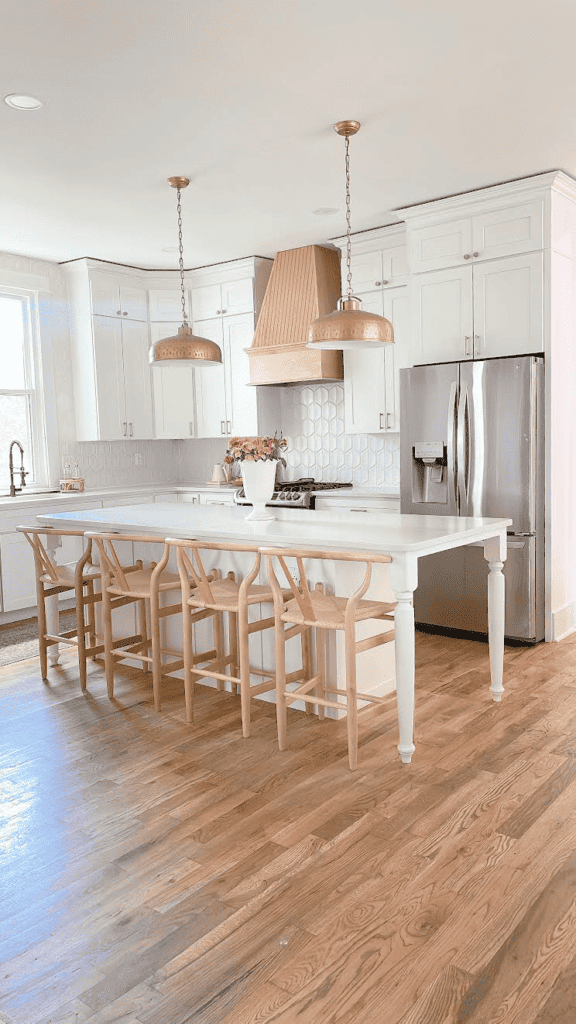
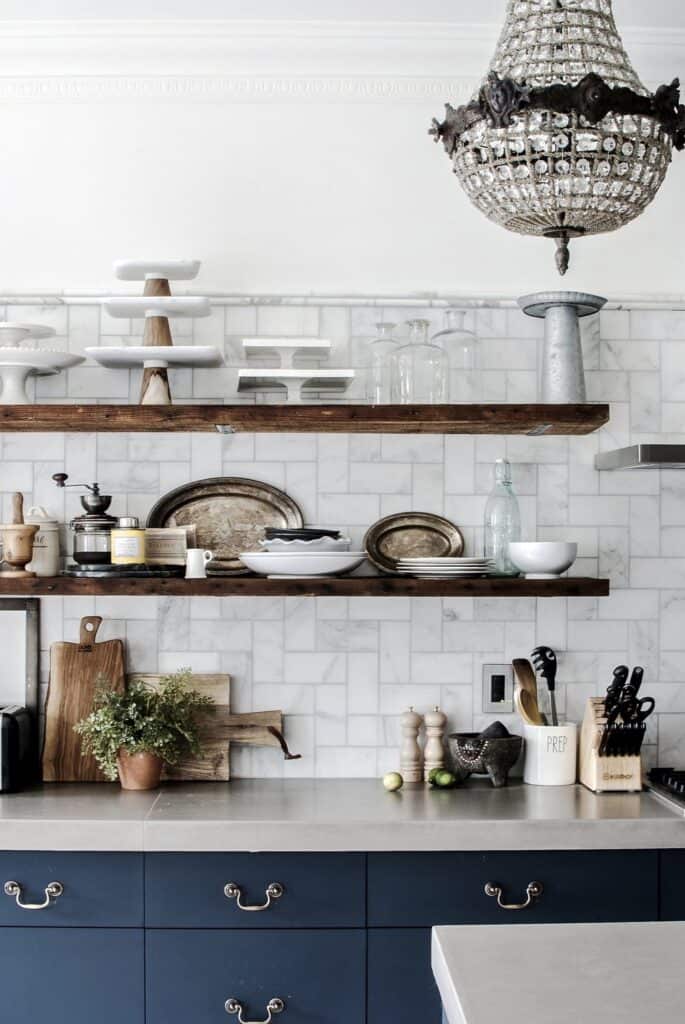
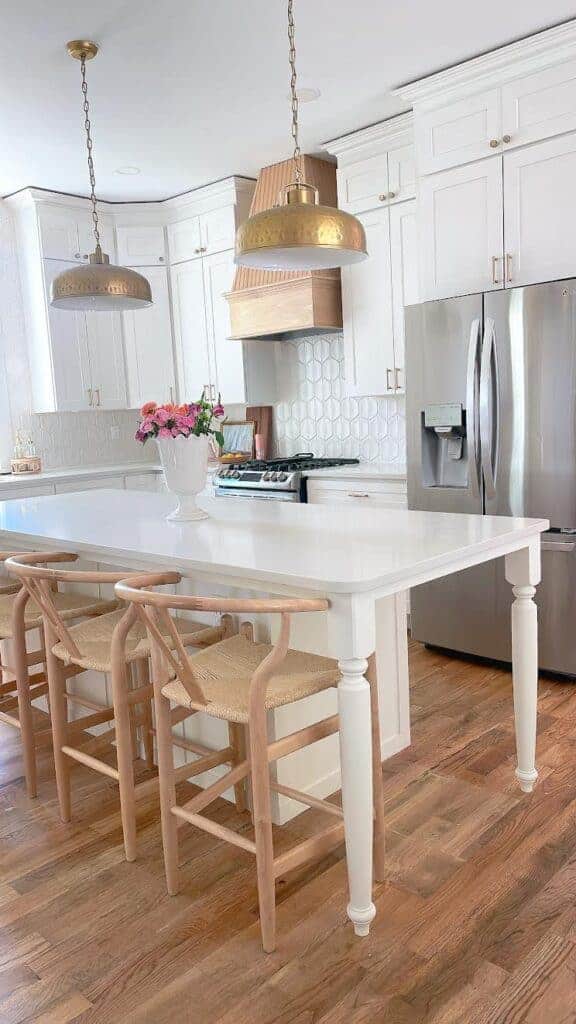
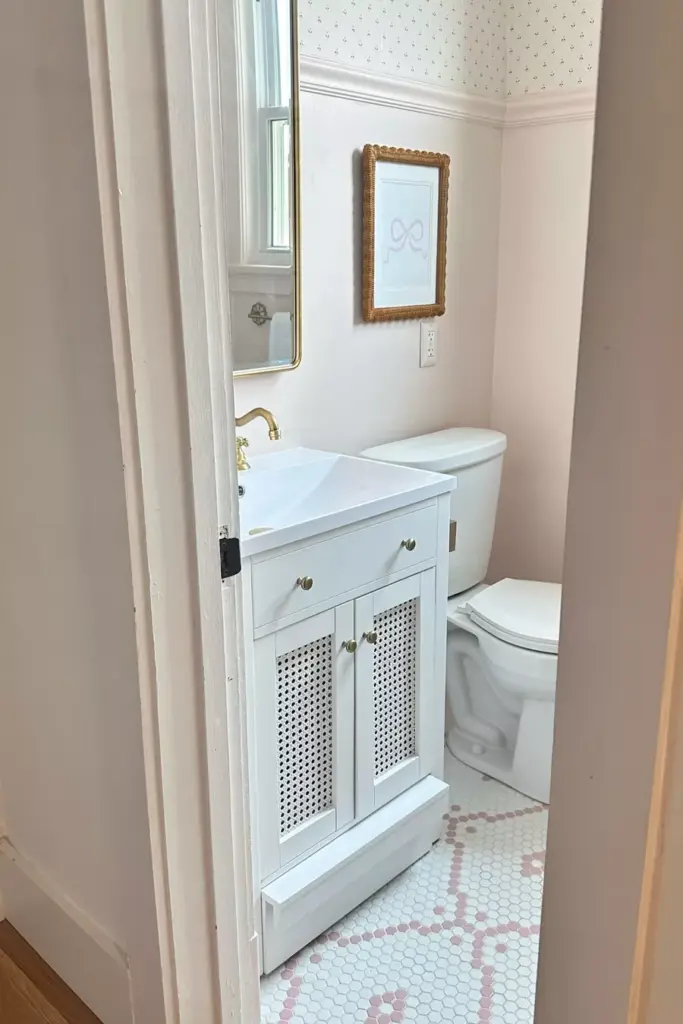
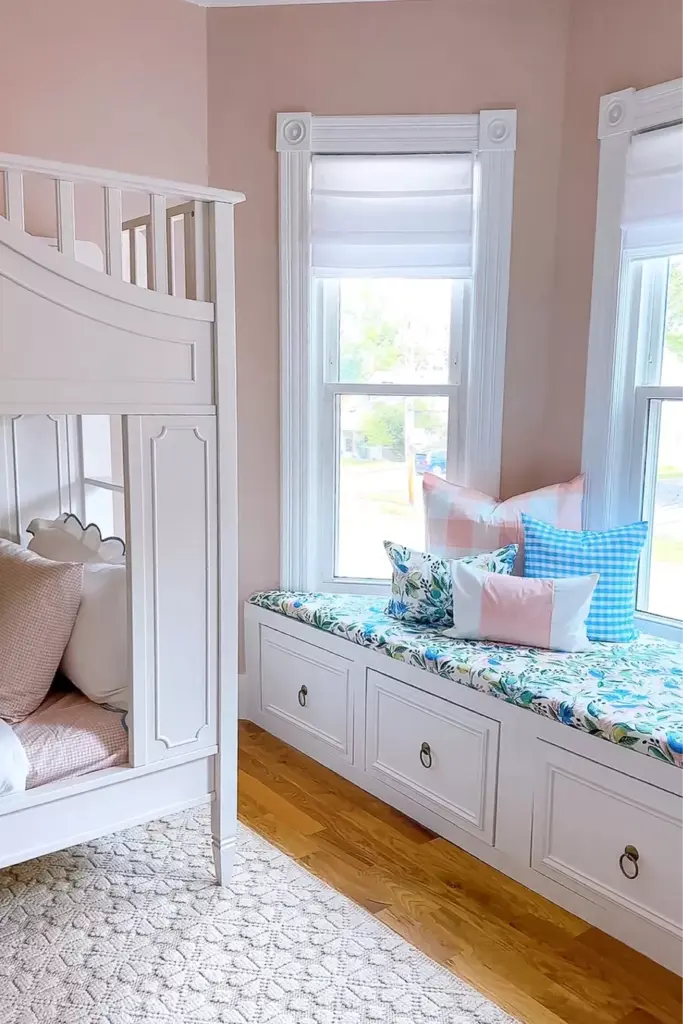
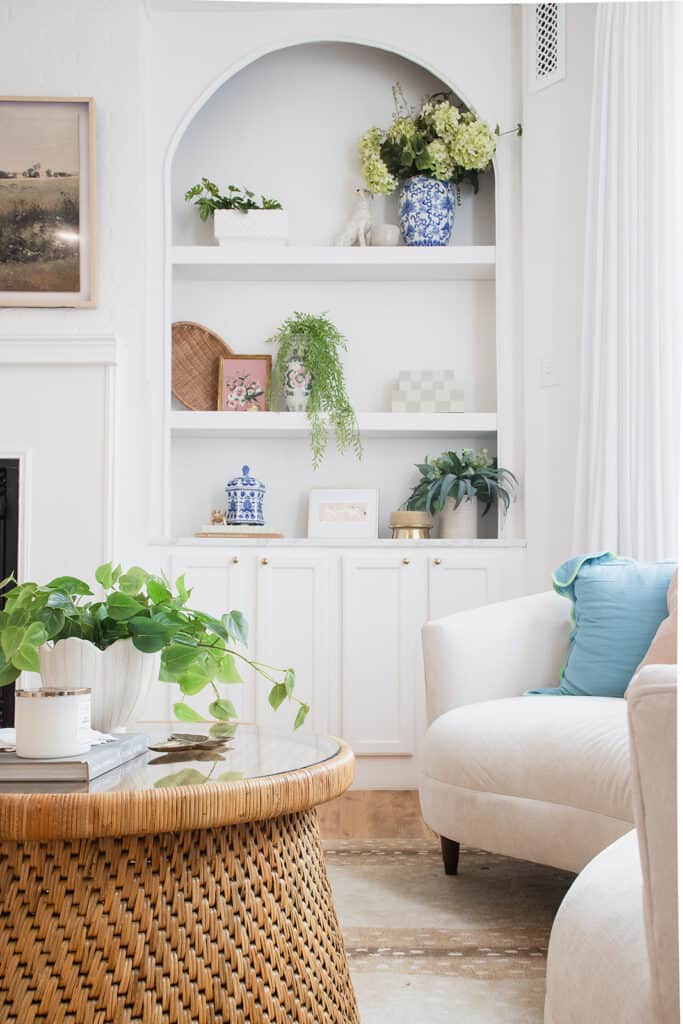
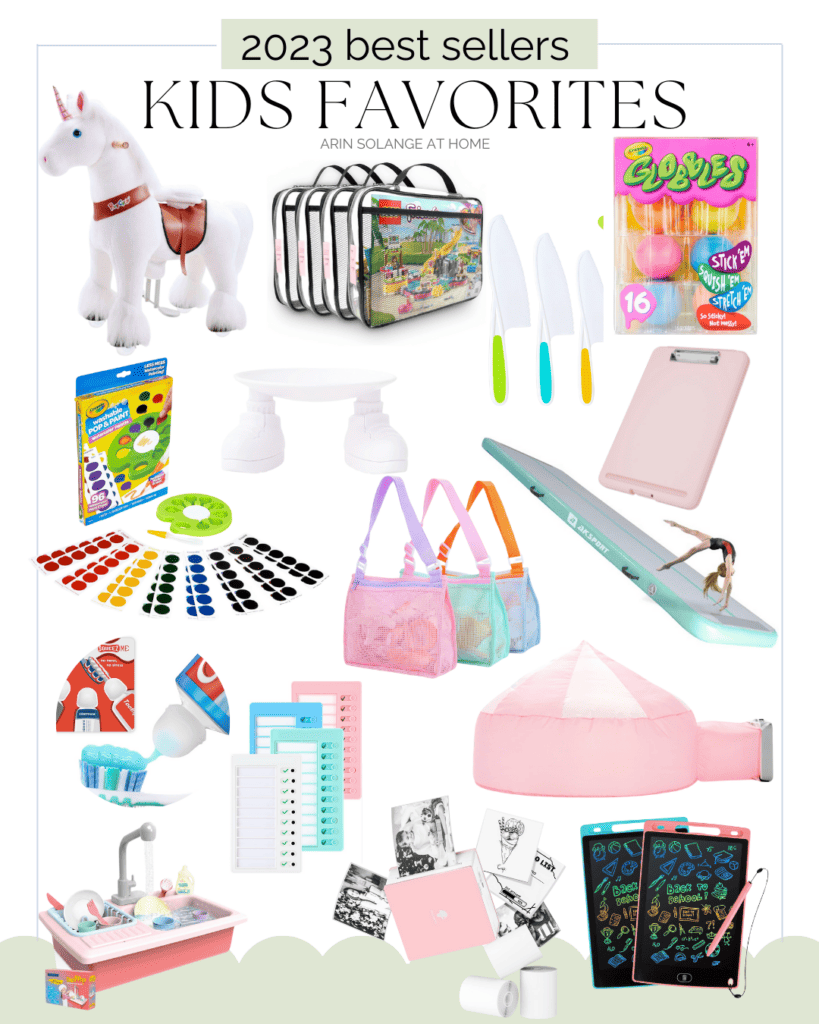
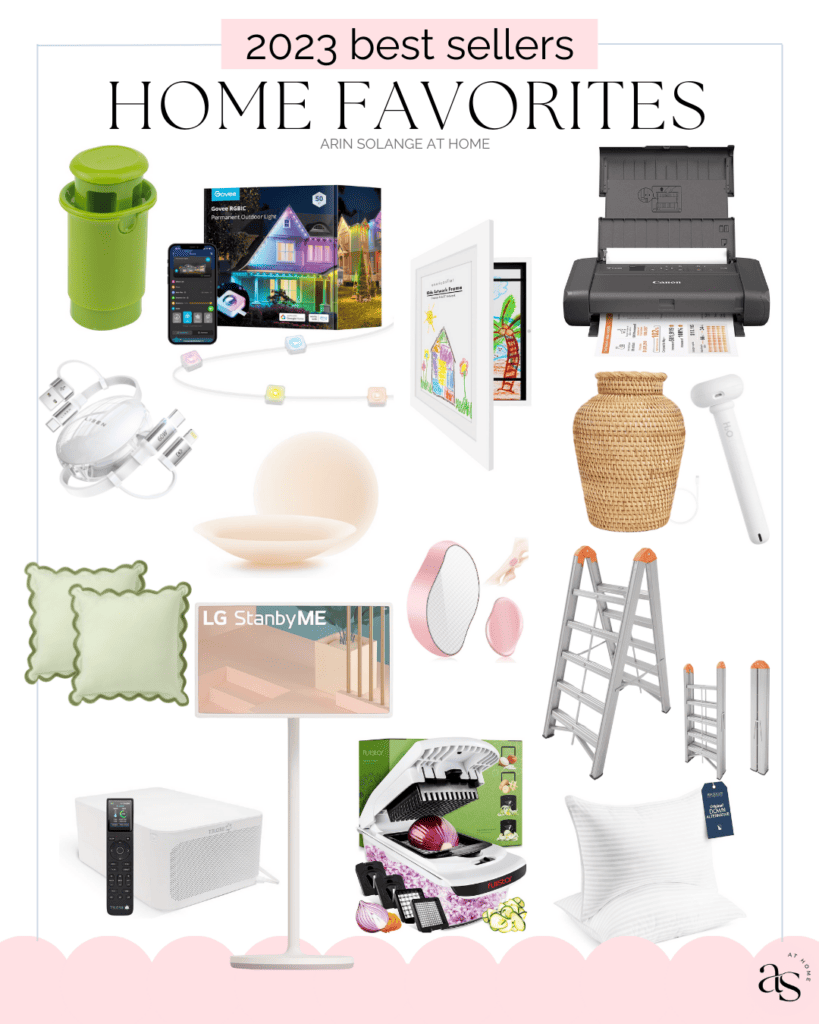
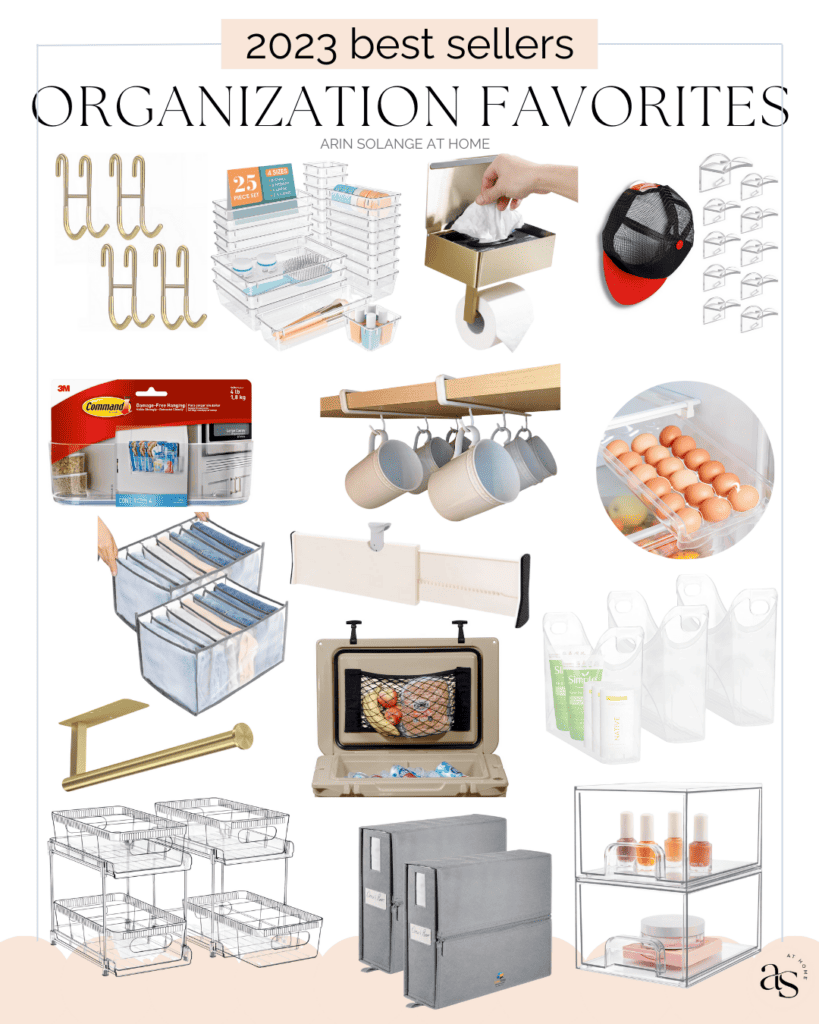
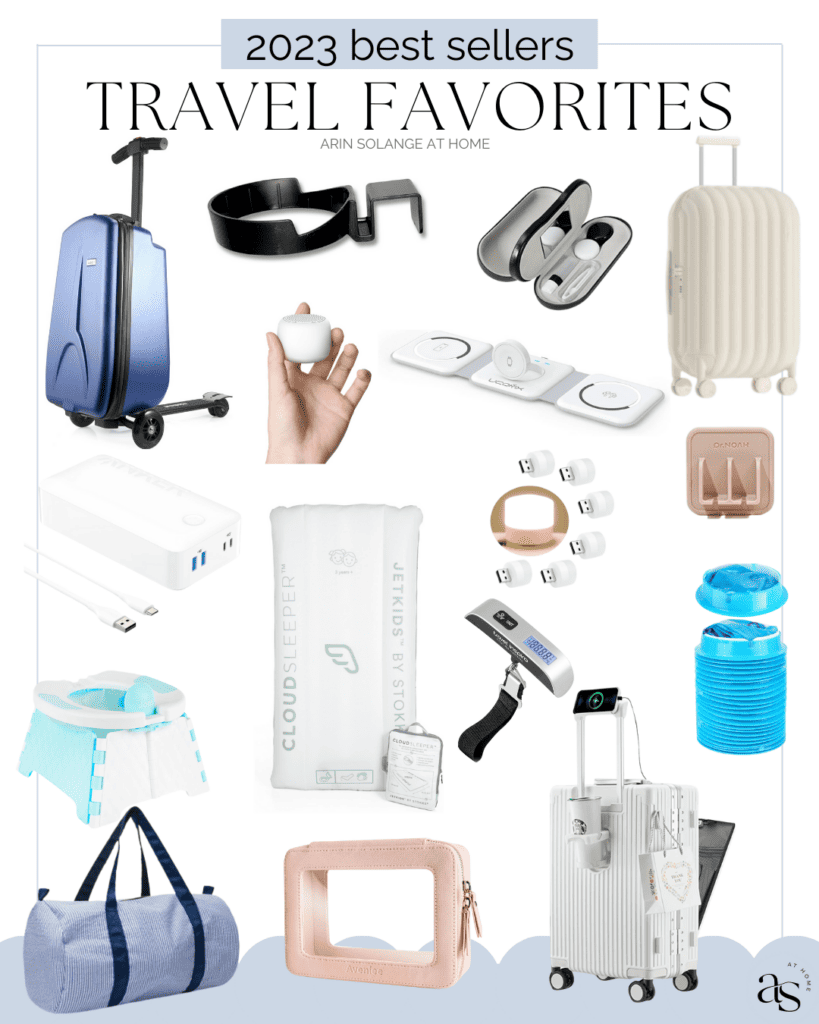
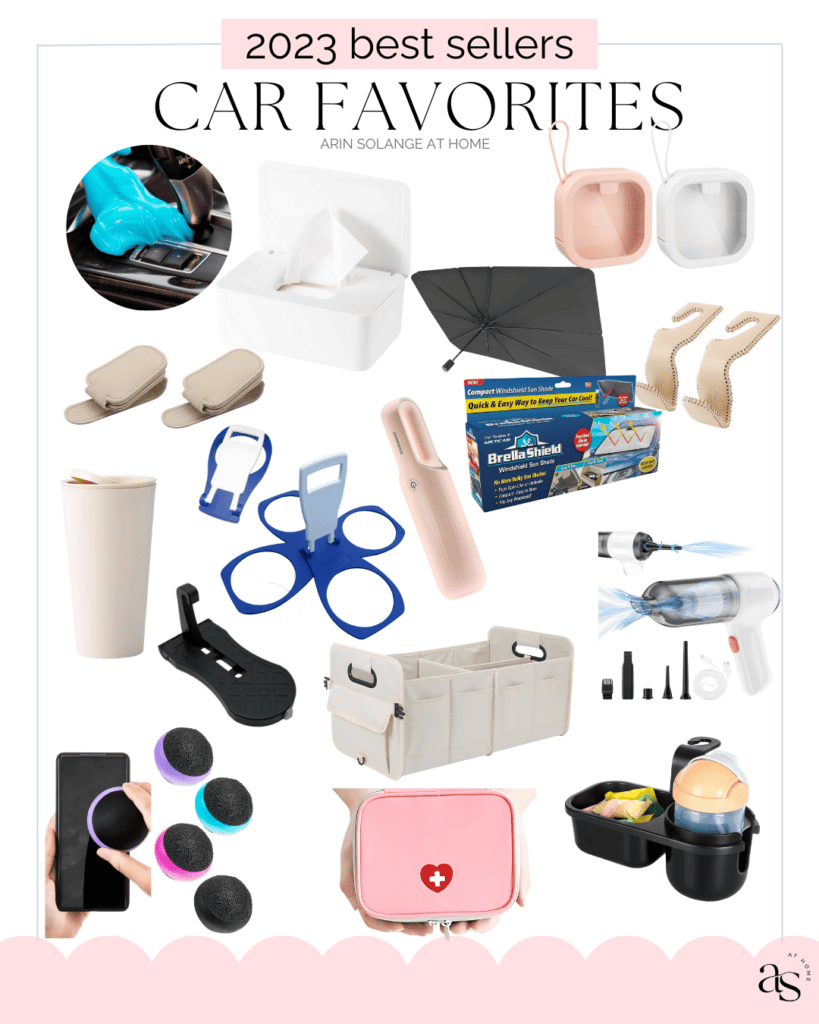
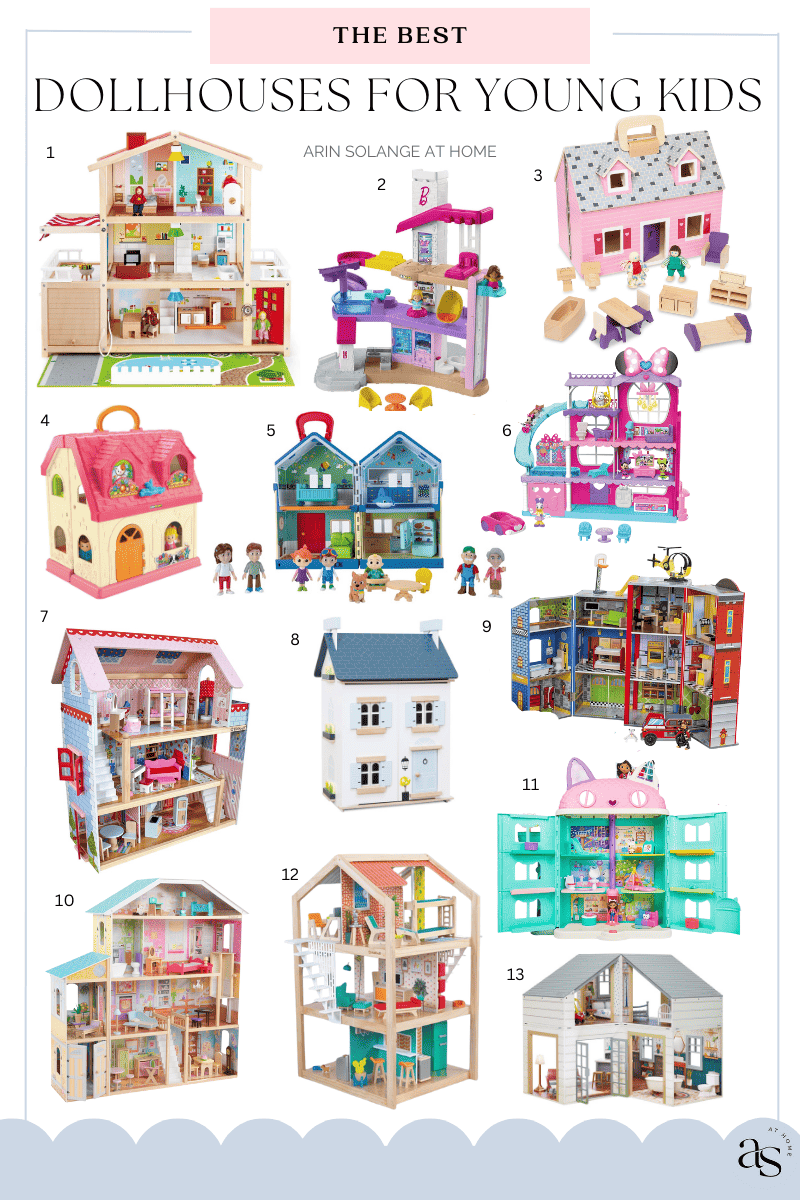
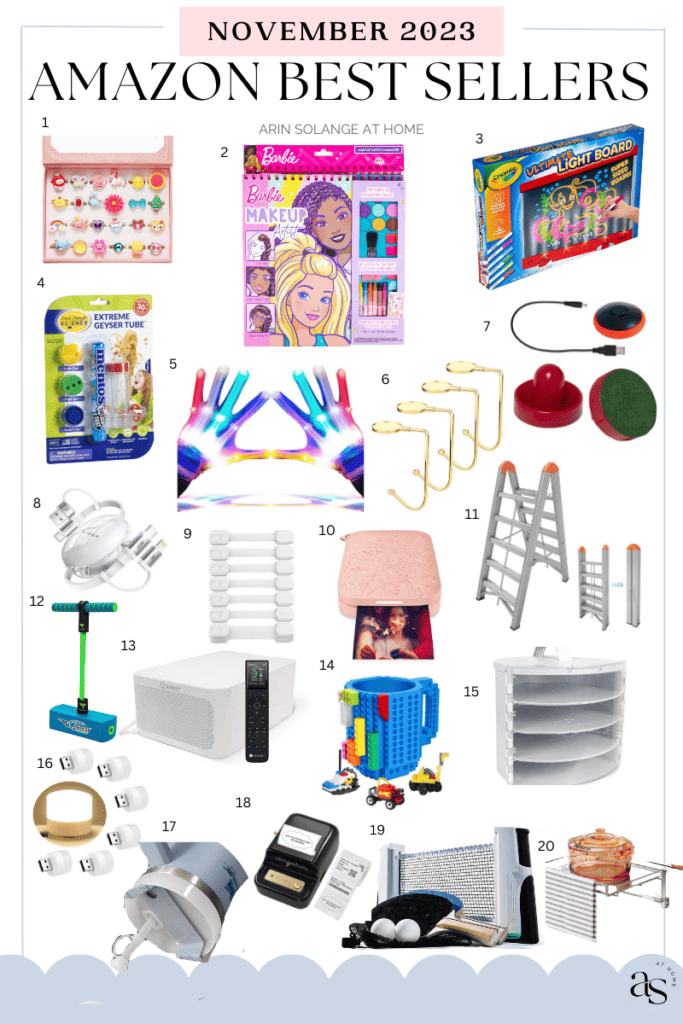
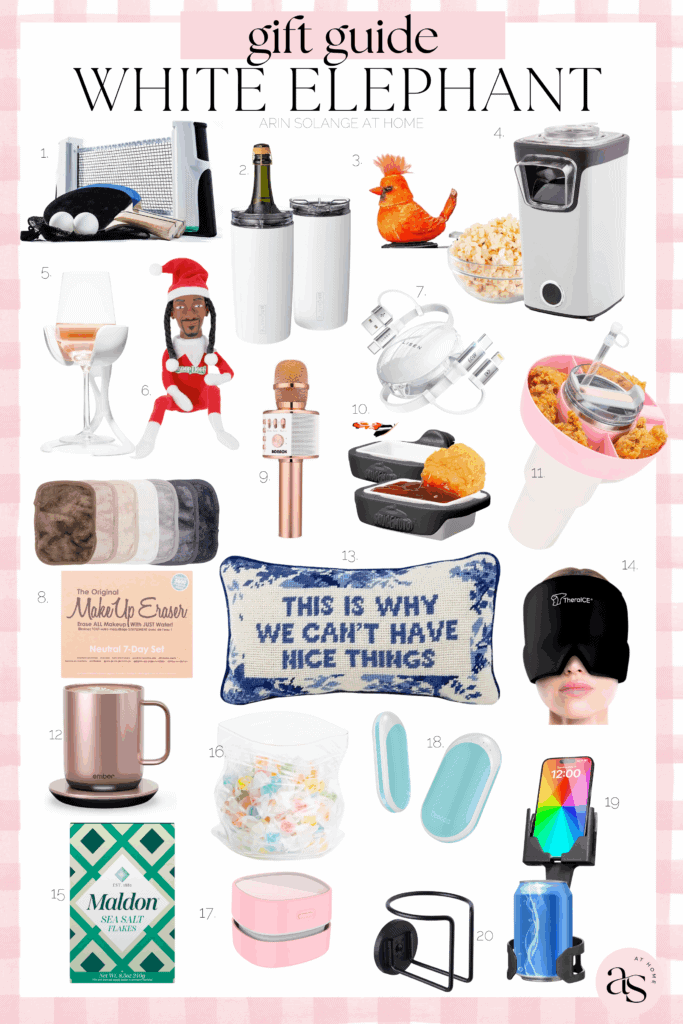
I am so happy to bring you my monthly best sellers list so that you can easily see all the items in one place. All the items in this round up are from Amazon and can be found in my Amazon storefront. And if you find yourself wondering how to use any of these items in unique ways, make sure you head over to my Tik Tok where I am able to share more detailed reviews of items in video format.
If you haven’t seen our news yet, you’ll be shocked to know that our family will be moving across the country in just a few short weeks! Yes, weeks!
Arin Solange At Home is moving from St. Louis Missouri to South Carolina!
We are so excited for our move to South Carolina. Our house closes in February and we plan to make our way across the country in March. Our original plan was to wait and move during the summer. However, when we thought more about it, we decided to make the move all at once.
It is so hard to know what is right. While we thought it would be easier on the kids to wait, we realize now that prolonging this transition may make it harder rather than easier on our kids. At the end of the day, we just want to do what is best for our family.
Life Updates
As you can imagine, January has been a complete blur. Our historic home went on the market and sold all within a matter of days. Once we went under contract it was off to the races to arrange for our move.
Fortunately, January is my month where I do a 30 Day Declutter Challenge. So, I was already pairing down our belongings, which is perfect for preparation for our move.
Not only have we been decluttering our home, but packing is happening at a rapid pace. We are selling a lot of our larger pieces to avoid moving them thousands of miles. Instead, we plan to keep just what we need for our furniture and buy new furniture once we get to our new home.
I am looking forward to decorating our new place and can’t wait to share it with all of you. In the meantime, packing is the biggest project at Arin Solange At Home.
If you are looking for packing supplies, I’ll be sharing some of my favorite products that have helped us stay organized. I also have a printable moving checklist that is perfect for anyone going through a move.
It is so easy to get overwhelmed with any move. Making a plan and sticking to that plan is absolutely key. As tired as we are, we still need to keep pace and stick to our packing schedule. In the end, I know it will be well worth it.
Family Updates
With the upcoming move, we have had to say some tearful “See You Laters” to many close friends and family members.
Our kids have taken the news of us moving absolutely wonderfully. They are excited for the adventure and looking forward to being at the beach more.
At the same time, the reality that we are moving is also hitting our family. I’ve been calm throughout the day- checking off my to-do list and staying on task. In reality, I’m also extremely sad and questioning myself on whether or not we are doing the right thing.
While I know these are just nerves for the transition ahead, I’m also trying to remind myself to give myself grace.
We did not make this decision lightly. In total transparency, moving to the beach has always been a part of our plan. We just didn’t know about the timing.
At the end of the day, you only get to live one life.
Life is too short to wait for happiness and adventure to find you. You have to go out there, find it, and hold on to it for dear life.
Our family is my happy. I know that wherever we live, happiness will surround us.
In the meantime, we are going to make the most of our time left in St. Louis. We will spend time with friends and family; eat at our favorite restaurants; and play at our favorite spots.
Our home may look empty, but our hearts sure are full.
Shop My Amazon Best Sellers List- January 2024
January best sellers are full of products that are super helpful at making your home organized and efficient! When you take the time to declutter your life, you not only clear out unused items, but you can also make your spaces function much more efficiently.
Whether it’s a large mirror or a smaller decorative piece of artwork, protective packing is the best way to pack artwork for moving. In this comprehensive guide, we’ll explore the steps and techniques for securely packing artwork and mirrors to safeguard them during the moving process.
This post may contain affiliate links.
Best Way To Pack Artwork & Mirrors For Moving Safely
As we gear up for our upcoming move, the process of organizing and safeguarding cherished pieces has become a top priority.
In an effort to streamline this daunting task, we’re delving into the intricacies of packing valuable artwork and mirrors, and we’ll soon be sharing a comprehensive moving checklist to aid others in their own relocations.
We’re in the midst of paring down our belongings. While a lot of our furniture will be sold we do plan to move our wall art, frame televisions, and large decorative mirrors.
With these belongings, packing can be tricky. I’ll share here how we plan to move them safely and tips for you too.
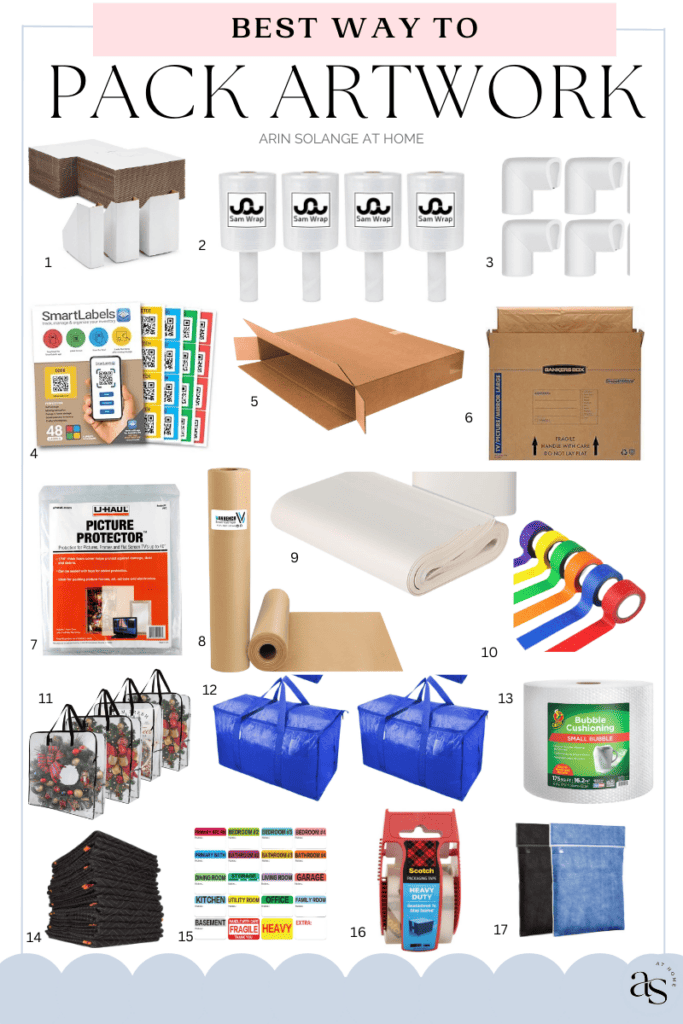
Gather The Right Packing Supplies
The first thing to do when preparing for your next move is to stock up on the right supplies.
Strong moving boxes are a must. However, you may need speciality boxes for larger paintings, mirrors, or frames.
In addition to moving boxes, you’ll want to have packing tape or masking tape; plastic wrap; bubble wrap; and some type of paper. You can use glassine paper, parchment paper, tissue paper, or brown paper. Each of these have slightly different benefits, but overall they are great protectors.
Lastly, you’ll also want to gather cardboard corner protectors. These are perfect for flat picture boxes or mirror boxes to protect the frame edges.
How To Pack Art Pieces With Glass Covers
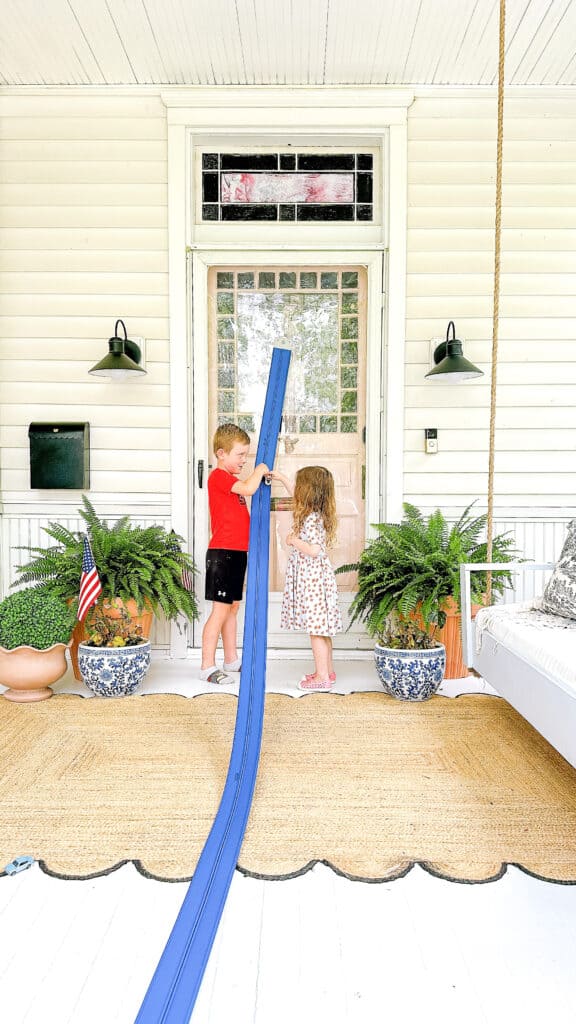
For art pieces with a glass cover, start by using blue painter’s tape to make an X across the glass surface.
This simple trick can save your piece if the glass breaks during transport.
Then, wrap the glass-covered artwork in glassine paper, which acts like parchment paper, providing a barrier against fingerprints and moisture.
Next, you’ll want to apply a thick layer of bubble wrap for extra padding.
Finally, secure it all with packing tape.
Once your items are secured you can choose to pack these pieces in appropriate size boxes or specialty box frames.
Personally, I love packing smaller picture frames in larger boxes with blankets and towels for extra padding. This is a great way to pack your sheets, towels, or blankets, and helps stabilize the frames within the box.
How To Pack Canvas Paintings And Fine Art
When it comes to canvas art, such as oil paintings, extra care is a must.
Wrap your canvas painting in glassine paper to protect it from direct contact, then add cardboard corner protectors.
Wrap the entire piece in bubble wrap for a snug fit, and consider placing it in its own cardboard box or custom wooden crate for added protection.
How to Pack Mirrors, TVs, And Large Pictures
Large mirrors, televisions, and pictures demand a flat surface for safe packing.
Begin by reinforcing the glass with masking tape and then swaddle the piece in a generous amount of bubble wrap.
Ensure there’s enough room in the moving box for a snug fit, and fill any extra space with packing paper to keep the mirror or glass from shifting.
Depending on the size of your larger items, you may need to get creative to find a box to fit.
For extra protection, you can double-box the piece by placing the first box into a second box lined with more cushioning material.
If you are unable to find a box that fits, I highly suggest transporting those items yourself and not placing them on the moving truck.
You can use moving blankets as extra protection and place these fragile items in the trunk of your car.
How To Pack Sculptures And Delicate Items
Small sculptures and other delicate items require plenty of packing paper and bubble wrap.
Wrap each entire sculpture in tissue paper first, followed by bubble wrap for extra protection, and place them in their own box, ensuring that the bottom of your box is lined with a soft layer of packing material.
Larger sculptures might need a custom solution, such as a wooden crate, to prevent any risk of damage.
Packing Valuable Paintings And Art Collections
Each valuable painting should have its own box.
Lay a piece of cardboard or a layer of packing paper at the bottom of the box for added cushioning.
After wrapping each painting, place it in the center of the box and fill any extra space with crumpled packing paper to keep the painting from moving.
If you have valuable paintings, consider opting for climate-controlled storage during transport for the best protection.
Transportation Tips
When loading into the moving truck, make sure that your packed artwork and mirrors are placed in a safe place, ideally towards the back of the truck.
You’ll want to secure them so they don’t shift during the journey. Use extra padding around the boxes if needed to ensure there’s no movement.
Labeling Is Key
Always label your boxes containing art pieces and mirrors as “fragile” to alert anyone handling them to proceed with caution.
This is especially important if you’re working with a professional moving company, as it will inform the movers to handle these items with special care.
Enlisting Professional Movers
For those particularly valuable items or if you’re not comfortable packing them yourself, consider hiring professional movers who specialize in art and mirrors.
These experts often provide services that include custom crating and climate-controlled transportation, which can be crucial for fine art and delicate items.
Unpacking Your Art In Your New Home
Once you’ve arrived at your new home, unpack your art and mirrors as soon as possible. This minimizes their risk of being damaged by other moving activities.
Carefully inspect each piece as you unpack to ensure there are no damages. If you do find damage and you’ve hired a moving company, report it immediately since most companies have a limited window for insurance claims.
FAQs
Check out these frequently asked questions on the best way to pack artwork and mirrors for your next move.
Q: Can I Use Regular Boxes To Pack Artwork & Mirrors?
A: It’s generally not recommended to use regular boxes to pack artwork and mirrors, especially if they are large or fragile.
Artwork and mirrors are best packed in specialty mirror boxes or artwork boxes that are designed to provide adequate protection.
These boxes are sturdier and offer additional support to help prevent damage during transit. Using the right boxes can help ensure that your artwork and mirrors arrive at their destination safely and in good condition.
Q: Should I Use Tape Directly On The Surface Of The Artwork Or Mirror?
A: It’s not recommended to use tape directly on the surface of artwork or mirrors, as it can leave residue or damage the item.
However, if you need to secure the surface of a glass artwork or mirror, you can use a specific kind of tape called “artist’s tape” or “framing tape.”
This tape is designed to be gentle on delicate surfaces. It should be applied in a crisscross pattern to help prevent shattering in case of breakage. Always test a small, inconspicuous area first to ensure the tape won’t cause any damage.
Q: Can I Pack Multiple Pieces In The Same Box?
A: It’s generally best to pack each piece of artwork or mirror separately to prevent them from bumping into each other and causing damage during transit.
This approach allows for better protection and reduces the risk of scratches, cracks, or breakage. If you must pack multiple pieces in the same box due to space constraints, be sure to wrap each item individually and provide ample padding to keep them securely in place and prevent movement.
However, whenever possible, it’s advisable to pack each piece separately to ensure the highest level of protection.
Q: How Do I Transport Packed Artwork Or Mirrors?
A: When transporting packed artwork or mirrors, it’s important to handle them with care to prevent damage.
Always transport artwork and mirrors in an upright position to minimize the risk of damage. This helps prevent undue pressure on the glass or frame.
When loading the packed items into a moving truck or vehicle, place them in a secure location where they are less likely to shift during transit.
Use straps or tie-downs to keep them in place.
Try to avoid exposing the packed artwork or mirrors to extreme temperatures during transport, as rapid temperature changes can cause glass to expand or contract and increase the risk of breakage.
Finally, plan your route carefully to avoid bumpy roads and sharp turns, as these can potentially damage the packed items.
Q: Should I Consider Professional Packing Services For Valuables?
A: Yes, considering professional packing services for valuable artwork or mirrors is a prudent choice. It may be a good investment, especially if the items hold significant monetary or sentimental value.
Professional packers have the expertise, experience, and specialized materials necessary to ensure that your valuable pieces are packed securely and transported safely. Consider insuring valuable items during the moving process for added peace of mind.
Shop My Favorite Products For The Best Way To Pack Artwork & Mirrors
Check out some of my favorite products for the best way to pack artwork and mirrors for your move.
Get those Pinterest boards ready, coordinate those outfits, and get ready to make some magical winter memories with your loved ones. We’re talking all things family photoshoot outfit ideas for winter. Let’s dive in!
This post may contain affiliate links.
Family Photoshoot Outfit Ideas To Wear In Winter
With the winter months upon us, it’s the perfect time to capture those magical moments with a winter family photo shoot. The crisp air, the white snow blanketing the earth, and the cozy vibes create an enchanting backdrop for family portraits.
I want to equip you with the top tips, fashion do’s and don’ts, and location ideas so that you’re all set to plan the perfect winter family photo shoot. Bundle up, be merry, and capture those moments that’ll warm your heart through any cold day.
Remember to smile, have fun, and let your whole family’s unique personality shine through. After all, the best family picture ideas are the ones that truly reflect who you are together.
Our Family Photo Shoot This Winter
I can normally plan an outfit, and even six that coordinate for a photo shoot. But I find it significantly harder to plan warm-while-still-being-cute outfits for cold winter photo shoots. If you struggle with this too, I hope these ideas will help you with your planning.
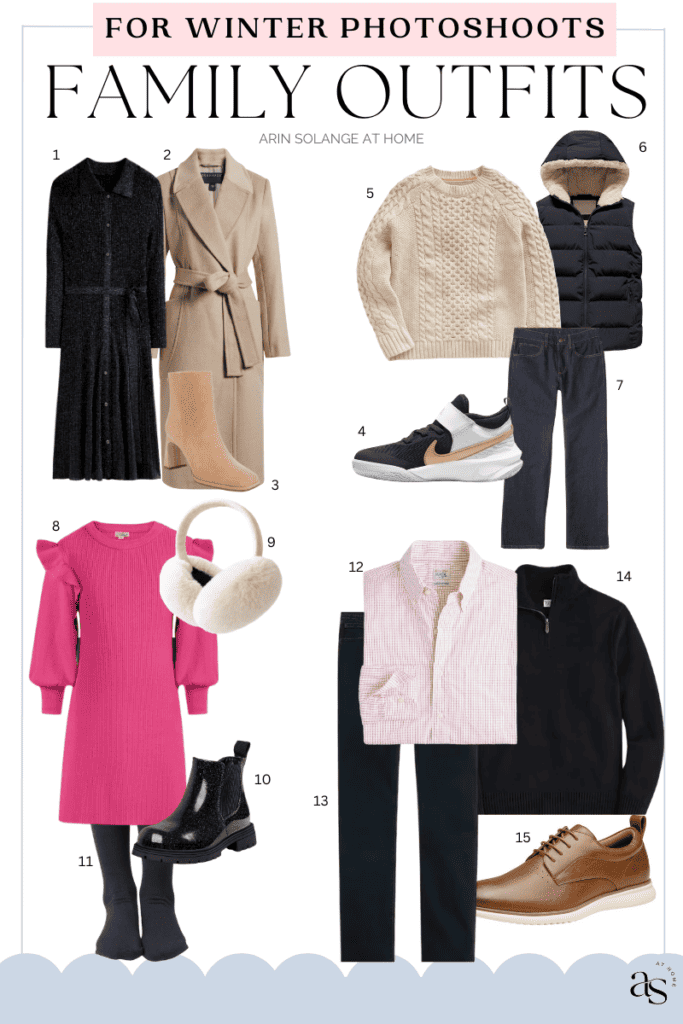
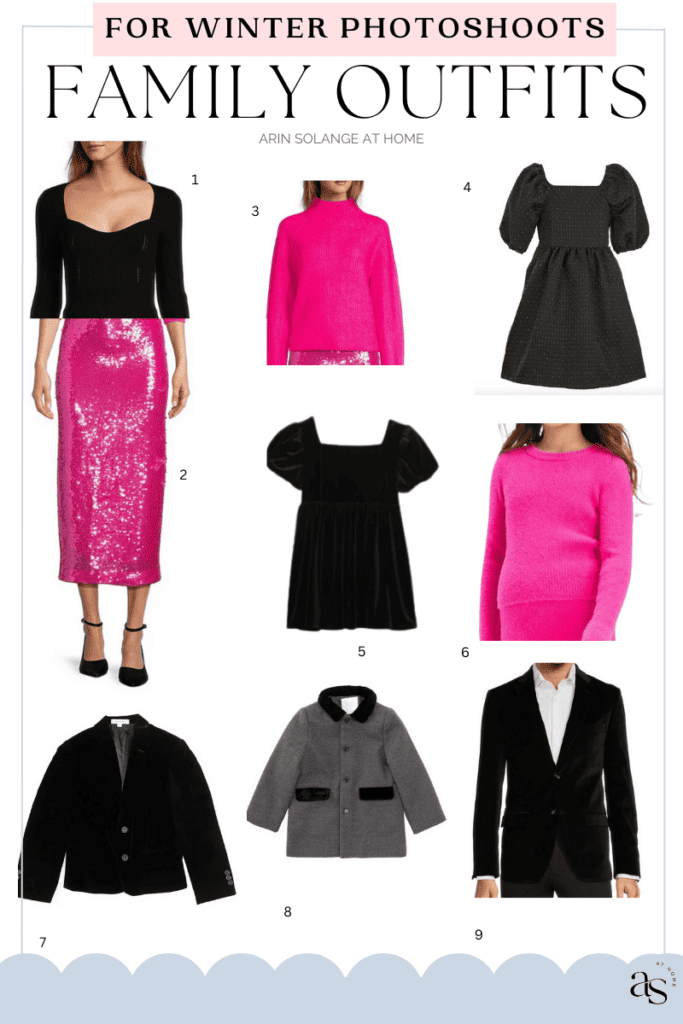
For our family photo session this year, we wore black and pink. If you know anything about me, you know how much I love the color pink. I thought bright pink would add a fun, unconventional pop of color to our Christmas cards. I knew we would be taking our photos outside where the trees and ground looked bleak and bare, and thought this would provide a nice contrast.
We took our photos before the holidays so we could include them in our cards, but now is a great time to take them too!
Photographers generally have more time to fit clients in during the winter months than the busy fall season. Plus, a snowy backdrop makes for a lovely, whimsical photo session. Depending on your location, snowy photo shoots may require waiting until January or February.
If your climate is too cold to offer a pleasant experience for your family members, spring, summer or fall may be more suitable for your photo shoot.
However, if you’re searching for the ultimate guide to selecting the right outfits for your winter session, you’re in the right place.
Let’s get into some fantastic family photo outfit ideas that will make your winter photo shoot as memorable as the holiday season itself!
Tips On What To Wear For Photos
Winter is the perfect time to coordinate your family’s outfits with the season’s natural color palette.
Think neutral colors for a timeless feel or jewel tones like emerald green and ruby red for a pop of color that stands out against the white snow.
A cohesive look with the family wearing different shades of the same color can make your winter family pictures look unified without being uniform.
To add some visual interest without overwhelming the photo, opt for subtle patterns or different textures.
Pairing knit sweaters with smooth winter coats can add depth to your family’s outfits. Layering is not only practical for the cold weather but also adds a richness in texture that looks fabulous in photos.
For the little ones, ensure they’re extra bundled with plenty of layers so they stay toasty throughout the family session.
Cute hats, scarves, and gloves can add a fun twist to your family outfits. They’re functional and fashionable, and they can easily be removed or swapped to change up the look mid-shoot.
What Not To Wear For Photos
While subtle patterns can add interest, steer clear of overly busy patterns that can distract from your family’s faces. The focus should be on those smiling faces, not the loud prints on your sweater.
Coordinating is great, but matching every piece is a bit over the top. You want to look like a family, not a sports team in uniform.
How To Dress In Winter For Photos
You can’t go wrong with layers. They’re practical for the unpredictable winter weather and add depth to your photos.
Think warm layers like flannel shirts under cozy sweaters or cardigans over dresses.
If your winter session is set in a snowy park with pine trees, choose colors that complement the environment. Earth tones and lighter neutrals can look stunning amidst the greens of the pine and the whites of the snow.
The winter season is a great time to play with color hacks and fashion tips.
Warm tones and lighter neutrals create a soft, timeless feel, while darker colors provide a striking contrast against the winter landscape. Jewel tones, such as deep purples and blues, are always a hit for winter family pictures, as they stand out beautifully against the snow.
Special Considerations For Winter Photo Shoots
If you can, schedule your winter photo session during golden hour. That’s when the sun casts a soft, golden light right after sunrise or just before sunset. It’s truly the best light for glowing family portraits.
A shivering family is not a happy one. Make sure everyone is dressed warmly enough to enjoy the session, and consider bringing along some hot drinks to keep spirits high.
Locations For Winter Photoshoots
Choosing a picturesque location for your winter photo session can set the scene for beautiful photos.
Some great winter photoshoot ideas for locations include:
Christmas Tree Farm
For a quintessential holiday vibe, you can’t beat a Christmas tree farm. The rows of evergreens make a festive and fun backdrop for your family photo shoot.
Your Own Backyard
Don’t forget about the beauty of your own space. Dress up your own backyard with some holiday decor, and you’ve got a personal and convenient setting for your winter family photo shoot.
If it’s after the holidays, you can always use the beauty of the natural elements. This works especially well in fresh fallen snow.
Many photographers schedule snow sessions for those families who wait all year for that first fallen snow!
Snowy Park
A local park can transform into a winter wonderland during the colder months, providing a stunning natural backdrop for your winter session.
The bare branches dusted with snow, open fields, and stone pathways can add a rustic charm to your photos.
The Great Indoors
If the winter weather is too harsh for you this time of year, consider an indoor shoot.
A professional photographer can make the most of natural light streaming through windows, and your home’s decor adds a personal touch to your family portraits.
Do’s and Don’ts
Here are the main dos and don’ts to help you remember how to make the most and plan your family photoshoot outfit ideas winter edition:
The Do’s
Do consider the location when planning your outfits. If you’re at a local park with pine trees, earth tones or jewel tones like emerald green and olive greens work beautifully.
Do dress for the weather. Ensure everyone is comfortable, and the little ones are bundled up to avoid red noses and unhappy faces.
Do incorporate textures. Embrace different textures in your outfits to add visual interest to the photos. For instance, mix in some chunky knits, faux fur, or tweed to create depth and dimension in your family’s ensembles.
Do consider comfort. Ensure that everyone’s outfits are not only stylish but also comfortable. You want your family members to feel at ease and enjoy the photo session without being distracted by uncomfortable clothing.
The Don’ts
Don’t shy away from a pop of color! While neutral colors are a safe bet, a primary color scheme or bright colors can bring life to your photos, especially against the snow.
Don’t match too perfectly. You want to achieve a balanced overall look. Aim for a coordinated look rather than completely matching outfits. Choose a color scheme or a few complementary colors and let each family member express their individual style within that palette.
Don’t go overboard with busy patterns. You want to avoid visual chaos. Steer clear of clothing with large logos, slogans, or busy graphics, as they can be distracting and take the focus away from the family members themselves.
Don’t be too trendy. While it’s great to incorporate current trends into your outfits, be cautious of overly trendy pieces that might quickly look outdated in your photos. Opt for timeless styles that will stand the test of time.
Coordinating Family Photoshoot Outfit Ideas For Winter
If you need some inspiration for family photoshoot outfit ideas to wear in winter, check out some of my favorite looks:
Moving To South Carolina: Relocation & Things To Know
Surprise! Arin Solange At Home is moving to South Carolina! Our family is so excited for this next adventure and can’t wait to share it with all of you.
This post may contain affiliate links.
Moving To South Carolina: Relocation & Things To Know
If you would have asked me two months ago where we would be this summer, I would have looked at you like you were crazy.
We have almost completed our historic home renovation. We finally got each of the kids their own rooms. More importantly, our pool just went into the ground in November. We have big plans for epic pool parties.
Of course, we would be living in our current home. Why would we ever leave?
The Big Question: Why Are You Moving?
When we announced that our family would be moving from Saint Louis, MO to a suburb of Charleston, South Carolina, we heard the same question over and over, “Why?”
Why would we move away? Your kids have their school. Your family is in the Midwest. Your friends are all in St. Louis. Why would you want to leave that behind?
I don’t have any tea to spill with you regarding why we would leave such a great place. All in all, the reason why is because we felt compelled to make this move for our family.
We are fortunate to be able to work from home and can live anywhere we want. We are happy in our home, love being near friends and family, and adore our kid’s school.
At the same time, there has always been a gut feeling deep in our bones that something was missing.
Following God’s Presence
Sam and I got married and lived in Destin, Florida many years ago. We have always loved the beach and our family is happiest around water.
Each time we’ve gone to the beach for vacation, we’ve made the best memories and have struggled to come back.
As a family, we knew that we wouldn’t want to live in Florida. However, we have loved Charleston. When we brought up the idea to our kids, instead of moans of despair, we heard excitement in their voices.
After praying over the idea and discussing it as a family, we made the decision to visit Charleston. Avé’ and I decided to take a girl’s trip together to see if our feelings would change.
We looked at schools for the kids and found one that is a dream. That same day, we found our forever home. It is absolutely perfect in every way. I can truly see our family living there and making memories for many years to come.
You can say the stars aligned, or fate stepped in to make this move possible.
At the end of the day, we undoubtedly felt God’s hand moving us in this direction and His presence along this journey.
All About South Carolina
If you are thinking of moving to South Carolina, you may be weighing the pros and cons.
Here are a few fun facts about our soon to be home state.
South Carolina is known as the “Palmetto State”
It is nestled in the southeastern part of the United States.
It shares a border with North Carolina (N), Georgia (SW) and the Atlantic Ocean (E).
Its diverse range of landscapes includes the coastal plains, the Blue Ridge Mountains, and the Piedmont Region.
Columbia is the state capital and known for its historic architecture and rich cultural scene.
The state is known for its traditional Southern hospitality and delicious cuisine, with specialties such as shrimp and grits, barbecue, and sweet tea.
The history of South Carolina is deeply intertwined with the story of the United States. It was one of the original 13 colonies and played a pivotal role in the American Revolution.
Prior to manufacturing, tourism, and technology sectors being the leading economic sources, the original economy was dependent on agriculture, mainly rice, indigo, and cotton.
South Carolina experiences a humid subtropical climate with hot, humid summers and mild winters. The state typically has four distinct seasons.
One of the standout features of South Carolina’s cost of living is its favorable housing market. With a median home price below the national average, South Carolina provides an affordable opportunity for homeownership, making it an attractive prospect for individuals and families seeking to establish roots in the state
Quirky regulations in South Carolina state that it is illegal to keep a horse in a bathtub. Another curious law in South Carolina prohibits the use of profanity in public places, with potential fines for those who violate this statute.
Beyond The Facts
Beyond the tangible aspects of cost of living, South Carolina’s allure lies in its exceptional quality of life.
The state’s charm, rich cultural heritage, and welcoming communities contribute to a lifestyle that is both enriching and fulfilling.
South Carolina offers a rich tapestry of experiences for individuals and families seeking a balanced and affordable way of life. Families will love the scenic beauty of its coastline and the tranquility of its inland regions.
We know our family will be content living in South Carolina for years to come.
Top Cities in South Carolina
From the historical streets of Charleston to the college town vibrancy of Clemson, South Carolina’s cities are as diverse as they are dynamic. If you are thinking of visiting South Carolina or moving, here are some favorite cities to check out:
Charleston
Charleston is known for cobblestone streets, antebellum architecture, and a rich cultural heritage. It stands as a timeless gem among South Carolina’s cities.
Filled with history and southern charm, this coastal city is not short on places to explore. Visitor can stroll along its waterfront promenades, explore historic plantations, and savor in a renowned culinary scene.
Between the historic French Quarter to the picturesque Battery, Charleston captivates with its blend of elegance, history, and Lowcountry allure.
Columbia
As the capital of South Carolina, Columbia exudes a dynamic energy. It offers a blend of urban sophistication and splendor.
Columbia is home to a thriving arts and culinary scene. It boasts an array of museums, galleries, and vibrant festivals that celebrate the city’s cultural diversity.
Columbia is filled with lush parks, riverfront vistas, and a burgeoning culinary landscape. Overall, residents and visitors can savor its eclectic offerings and embrace its welcoming spirit.
Greenville
Greenville is located in the foothills of the Blue Ridge Mountains which offers a harmonious blend of captivation and urban vitality.
The city’s charming downtown is lined with tree-shaded streets. You’ll have an array of dining and entertainment options that creates a welcoming atmosphere for residents and visitors alike.
Greenville’s commitment to innovation and sustainability has contributed to its reputation as a hub for technology, entrepreneurship, and outdoor recreation.
Overall, Greenville is a desirable destination for those seeking a balanced and vibrant lifestyle.
Mount Pleasant
Mount Pleasant epitomizes the essence of coastal living, seamlessly blending historic charm with modern allure.
Nestled along the stunning shores of the Lowcountry, this vibrant town beckons residents and visitors with its picturesque waterfront vistas, rich cultural heritage, and a welcoming community spirit.
From the quaint streets of the Old Village to the bustling Towne Centre, Mount Pleasant offers a harmonious fusion of timeless elegance and contemporary amenities, making it a captivating destination for those seeking the perfect balance between coastal tranquility and vibrant living.
Top Beaches in South Carolina
The beaches of South Carolina are among the most beautiful beaches on the East Coast. Specifically, Folly Beach is near our new home and offers an unforgettable mix of scenic views, surfing, and laid-back vibes.
While we will live near Folly Beach, out crew is excited to explore all of the surrounding beaches in South Carolina.
Myrtle Beach
Myrtle Beach is a beloved destination for families and offers a plethora of attractions, including amusement parks, water sports, and lively boardwalk entertainment. Most notably, Myrtle Beach is known for its extensive stretch of pristine sand.
Hilton Head Island
With upscale resorts, championship golf courses, and serene ambiance, Hilton Head Island is the epitome of luxury coastal living. Visitors and residents are drawn to the beautiful beaches and thriving nature preserves.
Kiawah Island
If you are seeking a tranquil and unspoiled coastal retreat, Kiawah Island’s is perfect spot. You’ll escape the hustle and bustle of everyday life being surrounded by pristine beaches, expansive marshlands, and lush maritime forests.
Hunting Island State Park
Nature enthusiasts will find paradise at Hunting Island, where an iconic lighthouse, maritime forest trails, and a natural beach create an idyllic setting for exploration and relaxation.
Folly Beach
Folly Beach stands out as a gem among the state’s many picturesque beaches. We are moving close to this beach and are so excited to do so! With its laid-back atmosphere, stunning beauty, and vibrant local culture, Folly Beach offers an unforgettable coastal experience for all who visit.
Folly Beach is also known as “The Edge of America,” and stretches for six miles along the Atlantic Ocean. This beach offers something for everyone.
The warm, sandy shores provide the perfect setting for relaxing strolls, beach-combing, or building sandcastles with the family.
Savoring the Flavors of South Carolina
While I’m going to miss some of my favorite restaurants in Saint Louis, I have eaten many of my favorite meals in South Carolina.
Despite the sadness I feel for leaving behind my favorite Mexican restaurant in St. Louis, Malinche, I do look forward to enjoying more meals.
Given that I’m a big foodie, I’ve picked out some of my favorites spots for South Carolina dining:
Charleston Restaurants
Charleston’s historic charm and vibrant culinary scene makes it a popular destination for foodies.
Charleston is a hotspot for exceptional dining experiences. From award-winning restaurants to beloved local eateries, the city offers a diverse range of culinary delights, including Lowcountry cuisine, fresh seafood, and innovative farm-to-table fare.
Some of my favorite restaurants include: Magnolias, Delaney Oyster House, Berkleys, Lewis Barbecue, and Neon Tiger.
Greenville Restaurants
Greenville has earned a reputation as a foodie paradise. Foodies will love the thriving downtown dining district and a focus on locally sourced ingredients.
Visitors can indulge in a wide variety of cuisines, from upscale dining to casual bistros, showcasing the city’s culinary diversity.
Make sure you check out these amazing Greenville restaurants: Green Lettuce, O-Ku, The Anchorage, and Fork and Plough.
Myrtle Beach Restaurants
Myrtle Beach is a great destination to go from the beach to fine dining. Spend the day under the sun and enjoy the finest meals that Myrtle Beach has to offer with the freshest seafood.
Notable restaurants include: SeaBlue Restaurant & Wine Bar, Ciao Italian Restaurant, Brentwood Restaurant & Wine Bistro, and Hook & Barrel.
Favorite South Carolina Dishes
Whether you eat out or make your own fare at home, make sure you check out the local dishes of South Carolina: shrimp and grits, mustard barbecue, she-crab soup, and low-country boil.
Shrimp & Grits
A quintessential Southern dish, shrimp and grits is a beloved delicacy. It combines plump, flavorful shrimp with creamy, stone-ground grits, often enriched with a savory gravy or a hint of spice. Many restaurants across South Carolina offer their own take on this classic dish, making it a must-try for visitors.
Carolina Barbecue
South Carolina’s barbecue tradition is deeply rooted in history and flavor. The state is famous for its unique mustard-based barbecue sauce, which adds a tangy and slightly sweet flavor to slow-cooked pulled pork or tender ribs.
Personally, I love a Carolina sandwich with pulled pork and coleslaw.
She-Crab Soup
A coastal delicacy, she-crab soup is a creamy, bisque-like dish made with blue crab meat and crab roe, delicately seasoned to create a rich and indulgent flavor. This iconic soup is a staple on menus throughout South Carolina’s coastal regions.
Low-Country Boil
Lowcountry boil, also known as Frogmore stew, is a hearty one-pot meal that features a mouthwatering combination of shrimp, sausage, corn, and potatoes, seasoned with Old Bay and other spices. This communal dish is a true celebration of South Carolina’s seafood and Southern culinary traditions.
Festivals and Celebrations
South Carolina knows how to throw a party. The state’s calendar is dotted with festivals celebrating everything from history and culture to food and music.
Particularly, festivals are a great way to explore a new community’s culture. Here are a few festivals our family are excited to check out once we are settled:
Spoleto Festival USA
Held annually in Charleston, the Spoleto Festival USA is a prestigious performing arts festival that presents a diverse array of music, dance, theater, and visual arts performances, attracting artists and audiences from around the world.
The Spoleto Festival returns the end of May to early June.
South Carolina State Fair
Celebrating the best of South Carolina’s agriculture, food, entertainment, and art, the South Carolina State Fair offers a fun-filled experience with live music, thrilling rides, agricultural exhibits, and delicious fair fare.
The fair returns in October.
Gullah Festival
Embracing the rich Gullah Geechee heritage of the Lowcountry, the Gullah Festival in Beaufort highlights the unique culture, traditions, music, and cuisine of the Gullah community through performances, art, and educational programs.
Make sure to check it out February to March.
Kid-Friendly Activities in South Carolina
There are plenty of fun kid activities in St. Louis. So, making the transition to South Carolina, it was important for me to make sure there would still be plenty of kid-friendly activities to entertain my crew.
If you are ever in South Carolina, these are undeniably some of the best places for kids:
Museums, Zoos, Aquariums, & Theme Parks
South Carolina is home to several hands-on museums that provide engaging and educational experiences for kids.
The Children’s Museum of the Upstate in Greenville offers interactive exhibits focusing on science, technology, engineering, arts, and math (STEAM), providing a stimulating environment for young minds to explore and learn.
The South Carolina Aquarium in Charleston provides an immersive experience with marine life, while the Riverbanks Zoo and Garden in Columbia offers a chance to encounter fascinating animals from around the world.
Theme parks and attractions such as Family Kingdom Amusement Park in Myrtle Beach and the EdVenture Children’s Museum in Columbia offer exciting rides, interactive exhibits, and educational programs designed specifically for kids, ensuring a day filled with laughter and unforgettable experiences.
State Parks & Beaches
South Carolina’s beautiful coastline provides ample opportunities for family beach outings.
Destinations such as Myrtle Beach and Hilton Head Island offer family-friendly beaches with calm waters and a variety of activities, including sandcastle building, seashell collecting, and water sports suitable for kids.
State and national parks in South Carolina, such as Congaree National Park and Table Rock State Park, offer family-friendly hiking trails, nature walks, and opportunities for wildlife spotting.
These outdoor adventures provide kids with a chance to connect with nature and appreciate the state’s lure.
Pros and Cons of Life in the Palmetto State
After visiting South Carolina and seeing all of the perks it offered, our family knew this was the right place for us to plant our roots.
If you are still on the fence or considering a move to South Carolina, make sure you weigh all of your options.
For us, living in South Carolina comes with its fair share of perks. The mild climate, low crime rates, affordable housing, and high quality of life are significant draws.
However, no place is perfect. South Carolina’s humid summers can be intense, with afternoon thunderstorms a common occurrence. At the same time, we are used to humid summers from Missouri, so this wasn’t really a draw back for our family.
While the cost of living is generally low, some coastal towns may have higher real estate costs. Additionally, the state’s unemployment rate, although improving, may still be a concern for those seeking job opportunities.
FAQ
These are some of the top FAQ’s I’ve been getting regarding the move. If you have a question or fun place to share in South Carolina, make sure you leave me a comment below.
Why Mount Pleasant?
We were pulled to live someplace closer to the beach and had a slower pace of living. At the same time, we wanted to still feel the seasons. The size of the area, culture, and entertainment was also important. For this reason, Mt. Pleasant checked all of those boxes. We are so excited to explore a lot of areas in the region and live in one of the best places!
When will you move?
While, we aren’t moving until summer, we will be doing a staged move. Since we have to be out of our current home in February, we will need to span the bridge until our official move date. Once we are out of our current home, we will be staying with family in the area for a few months before we move officially. We can’t wait for our first summer at the beach.
What about the kids’ schools?
Firstly, we love our kids’ school. This was the hardest part of a move. However, we found an amazing private school. We have loved our school in St. Louis, so if we weren’t able to find something that was just as wonderful, we wouldn’t move. Fortunately, when we visited the school it felt like home. So that was another sign that we were going in the right direction.
Do you know people in the area?
Currently, no we don’t have any friends in the area. I actually “know of” other people in the area through the influencer world, but that’s about it. We are so fortunate to have amazing friends here, and I know we can continue those friendships just in a different capacity. I’m excited to find friendships that happen organically once we get settled. I know it will take time and I’m okay with that.
How are the kids handling the news?
Presently, they are actually all so excited! They can’t wait for a new adventure and to meet new friends. Once they saw the house, their eyes lit up. The new house will have quite a lot of land and the kids are looking forward to playing outside more. While I know they are excited, I also know that they will miss their friends and it will take some adjusting. But, in the end they can’t wait too!
Will anything change with Arin Solange At Home?
Presently, no. Nothing is going to change with ASAH. We are lucky in that we can work from anywhere and our team is also remote. As far as content, I will still focus on organization, Amazon finds, and you’ll get a lot more home decor content of our new place.
Lastly, South Carolina presents an ideal place for those seeking the charm of a small town feel with the benefits of living in a bustling and vibrant state.
With its beautiful landscape, rich history, and southern hospitality, it’s no surprise that many find their perfect place in this diverse southern state. South Carolina offers a heart-warming welcome that might just convince you to call a moving company and make it your new home.
Overall, we are so excited to start this new adventure. There are certainly nerves, but we can’t wait to make new memories in our new home.
When it comes to tackling projects in spaces with tall ceilings, having the right ladder is essential for safe and efficient access. In this post, we’ll explore the best ladder for high ceilings.
Whether you’re a homeowner, contractor, or DIY enthusiast, finding the best ladder for high ceilings can greatly enhance your ability to tackle tasks with confidence and ease.
This post may contain affiliate links.
The Best Ladder For High Ceilings: Tested And True
When it comes to home maintenance and decoration, having the right tools can make all the difference.
While we live in a historic home, our ceilings are actually quite high. At the same time, our storage space is limited. So, it was important to find a ladder that was both tall enough to handle the height of our ceilings, but also folds up for easy storage.
One of my favorite tools that has become indispensable in my home is the Aparecium Aluminum 5-step ladder. It has simplified many tasks around my house, making it an essential part of my home improvement toolkit. We have had the ladder for many months so I can attest that it holds up to wear and tear.
Why Do You Need A High-Ceiling Ladder?
As a homeowner, having a reliable ladder is essential for tackling a wide range of tasks around the house.
From changing light bulbs and wiping down ceiling fan blades to cleaning gutters and painting walls, a sturdy ladder is a versatile tool that can make many household chores much easier and safer.
With a quality ladder, you can confidently take on DIY projects, perform routine maintenance, and access hard-to-reach areas both indoors and outdoors.
Whether you opt for a step stool, extension ladder, or platform ladder, having the right type of ladder on hand can greatly enhance your ability to maintain and improve your home.
What Are Different Types Of Ladders
When it comes to selecting the right ladder for your needs, understanding the various types and their functions is crucial.
By understanding the functions of these different ladder types, homeowners can make informed decisions when choosing the right ladder for their specific projects, ensuring safety, efficiency, and successful completion of tasks around the home.
Step Ladders
Step ladders, perhaps the most common type, are ideal for tasks like reaching high shelves, changing light bulbs, and painting interior walls.
This A-frame ladder provides stability and support, making them a versatile choice for indoor use.
Extension Ladders
Extension ladders, or straight ladders, are designed for outdoor tasks that require reaching high places, such as cleaning gutters, trimming trees, or painting the exterior of your home.
These adjustable ladders make them practical for a wide range of projects, and they can be leaned against surfaces for access to elevated spaces.
Platform Ladders
For specific jobs that require a larger working platform and added stability, platform ladders are an excellent choice.
These ladders feature a wide, flat platform at the top of the ladder, offering a secure area to stand and work, making them perfect for tasks that take more time or require both hands, such as electrical work or ceiling repairs.
Multi-Position Ladders
Finally, for projects that involve working on uneven surfaces or staircases, multi-position ladders are a versatile solution.
With the ability to transform into various configurations, including A-frame, extension, and scaffolding, these ladders provide flexibility and adaptability for a wide range of home improvement tasks.
What to Look for In a Ladder?
When shopping for a ladder, several key factors should guide your decision to ensure you select the right one for your needs.
Type Of Ladder
First and foremost, consider the design and type of ladder that best suits your intended use. Whether it’s a step ladder for indoor tasks, an extension ladder for outdoor projects, or a multi-position ladder for versatility, understanding your specific requirements is crucial.
Ideally, choosing a ladder that can accommodate all your needs is preferred. However, the type of ladder can vary greatly depending on your needs.
Ladder Height
Ladder height is another critical consideration. Ensure that the ladder you choose provides adequate reach for the tasks at hand, whether it’s accessing high shelves or working on exterior surfaces.
The ladder height will vary greatly depending on the type of ladder.
Step stools are typically about 24 inches tall. Any step stool over 24 inches requires a handrail. Step ladders range from 6 to 30 feet, while extension ladders can accommodate a maximum height of up to 60 feet!
For most house projects, a step ladder can easily accommodate any home improvement task. However, an extension ladder is a great choice to help with exterior projects beyond 30 feet.
Material
Additionally, the material of the ladder plays a significant role in its performance and durability.
Keep in mind the material of the ladder will directly impact how heavy and portable the ladder is for your home.
Aluminum ladders are lightweight and corrosion-resistant, while fiberglass ladders are non-conductive and suitable for electrical work.
If you are wanting a ladder for your home, choosing an aluminum ladder for its lightweight material is a smart choice.
Portability
Portability is essential, especially if you’ll be moving the ladder frequently. Look for extra features such as foldability and lightweight construction to ensure easy transportation and storage.
This is one of the biggest factors I looked at when choosing a ladder. If I’m unable to easily move the ladder, then I likely won’t ever use it.
Price
Of course, price is a factor for many homeowners, so consider your budget and weigh it against the ladder’s quality, key features, and longevity.
Additional Features
Consider any additional elements that could enhance safety and convenience, such as non-slip steps, integrated tool trays, or locking mechanisms.
Furthermore, be mindful of the ladder’s weight capacity to ensure it can safely support both you and your tools while working.
Safety Considerations
Prioritizing safety when using ladders is paramount for homeowners.
Always inspect the ladder for any damage or defects before each use, ensuring that it’s set up on a stable, level surface. You’ll also need to ensure that all its components, such as locks and hinges, are secure.
Maintaining three points of contact when climbing or descending, using non-slip footwear, and avoiding overreaching can significantly reduce the risk of accidents.
Additionally, it’s essential to adhere to the ladder’s weight capacity and never use a ladder near power lines or in inclement weather.
By following these safety guidelines and investing in appropriate safety accessories, such as stabilizers and ladder levelers, homeowners can ensure a secure and accident-free experience when using ladders for various tasks around the home.
What Is The Best Ladder For High Ceilings?
When selecting a ladder for high ceilings, consider the height you need to reach, the ladder’s weight, storage area, and whether you need it for multiple purposes or a specific task.
Always prioritize safety features like sturdy construction, anti-slip feet, and weight capacity.
Remember, while price is an important factor, investing in a high-quality ladder ensures safety and longevity, saving you money in the long run by avoiding accidents and the need for replacements.
Be sure to follow the manufacturer’s guidelines for safe use, and never exceed the recommended weight limit.
With the right ladder for your high-ceiling tasks, you can work efficiently and safely, whether you’re a professional contractor or a DIY enthusiast.
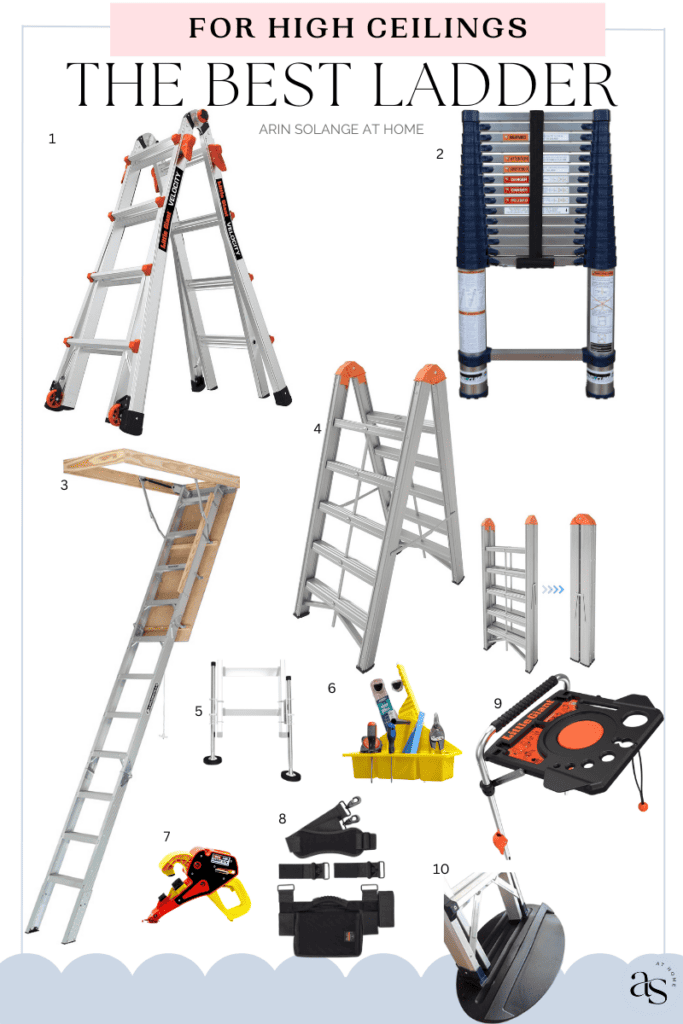
Take a look at these top-rated ladders to take your home maintenance and decor to new heights.
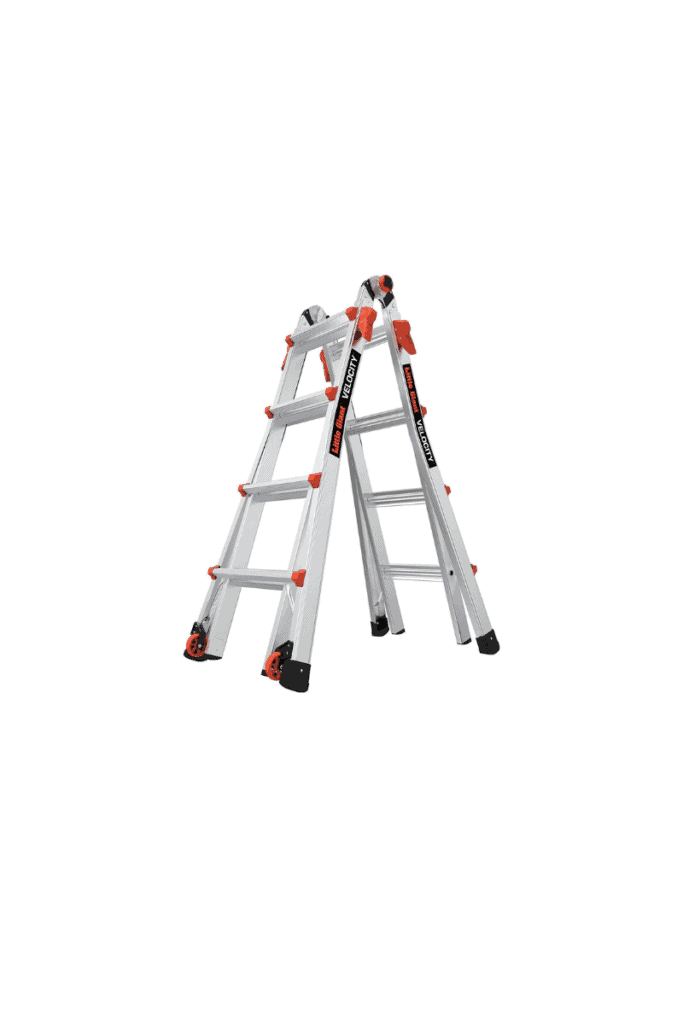
The Little Giant Velocity is more than just a ladder; it’s a multi-functional tool designed to cater to a wide range of tasks.
From painting walls to reaching the most elusive vaulted ceilings, this ladder adjusts to your different needs with ease and assurance.
The Little Giant Velocity typically retails for around $200 – $300, a competitive price for a ladder with such a breadth of capabilities.
With the ability to convert into a 19-foot extension ladder, A-frame, 90-degree ladder, or even a scaffold system, the Little Giant Velocity is a true all-in-one solution.
Switching between configurations is a breeze thanks to its Rock Lock adjusters, which make changing heights and positions quick and secure.
Tip and glide wheels facilitate easy transport around your home or job site, making it convenient to move the ladder without lifting it.
Price: $281.94
Pros
The ladder is designed with wide-flared legs, providing exceptional balance and reducing the risk of tipping.
Rated to hold up to 300 lbs, it’s strong enough to support you and your tools. Made from aerospace-grade aluminum, this ladder offers durability without excessive weight. The quick adjustment system saves time, allowing you to focus on the task at hand rather than setup.
Cons:
Although it’s made from lightweight aluminum, the multi-use functionality means it’s heavier than single-purpose ladders.
For those new to multi-use ladders, the various configurations may initially seem daunting. While it provides value through its versatility, the price point may be higher than simpler ladders that serve fewer functions.
Is the Little Giant Velocity the Right Choice for Your Home?
The Little Giant Velocity Multi-Use Ladder is an excellent investment for anyone who regularly encounters different tasks at a range of heights.
Whether you’re a DIY enthusiast tackling home improvement projects or a professional in need of reliable equipment, the Velocity ladder offers a blend of flexibility, safety, and convenience that’s hard to beat.
By selecting the Little Giant Velocity, you’re not just getting a ladder; you’re choosing a multifaceted tool that adapts to your changing needs. Its price reflects the additional features and the high-quality construction that Little Giant is known for.
Before making your purchase, consider the specific requirements of your projects and compare them against the pros and cons listed above. If versatility, safety, and durability are at the top of your list, the Little Giant Velocity Multi-Use Ladder could be the best option for you.
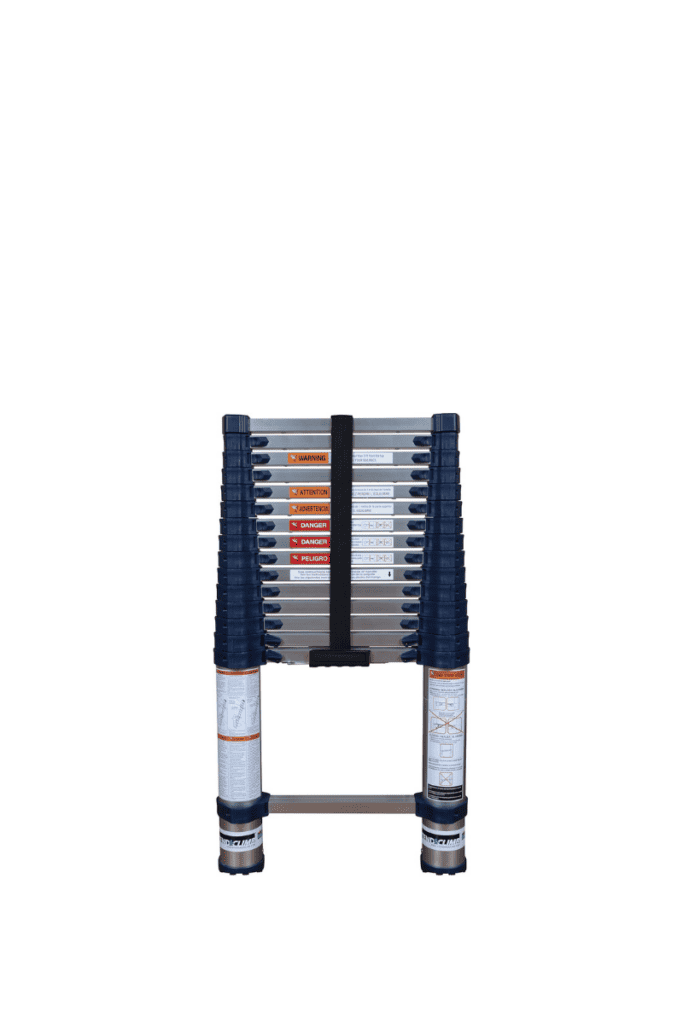
The Pro Series 785P+ is the epitome of innovation in ladder technology, offering a flexible solution with its retractable design.
This ladder is perfect for both indoor and outdoor tasks, extending to an impressive 15.5 feet while maintaining a storage-friendly profile.
The Pro Series 785P+ is typically priced between $300 – $400, reflecting its premium build and advanced features.
The ladder extends and locks by the foot, allowing you to adjust it to the exact height you need.
The ladder’s aluminum alloy construction ensures strength and durability while remaining light weight.
The no-pinch closure system feature protects your fingers when collapsing the ladder, making it safe to use and store.
The integrated carrying handle and heavy-duty closure strap make transporting and storing the ladder a breeze.
Price: $354
Pros:
The telescoping design means it collapses down to just 36.5 inches, making it ideal for those with limited storage.
It’s easy to move around, thanks to the carrying handle and lightweight frame. You can adjust the ladder to the perfect height for any job, eliminating the need for multiple ladders.
It can hold up to 250 lbs, suitable for most users and tasks.
Cons:
Some users might find a telescoping ladder less stable than a traditional extension ladder, particularly at its full extension.
It’s on the higher end of the market, which might not fit all budgets. First-time users may need to familiarize themselves with the extension and retraction process to ensure safety.
Is the Xtend & Climb Pro Series 785P+ Right for You?
If you’re constrained by storage space but need a full-sized ladder, the Xtend & Climb Pro Series 785P+ is a great option. It’s an ideal ladder for those who require the maximum reach of an extension ladder without the inconvenience of storing a large, bulky tool.
Whether it’s for home use, contracting jobs, or even recreational activities like RV trips, this ladder provides the functionality and convenience you need.
Given its premium construction and advanced safety features, the Pro Series 785P+ is a ladder that offers peace of mind and adaptability, justifying its price tag.
Potential buyers should weigh the pros and cons, considering both the ladder’s versatility and the investment cost.
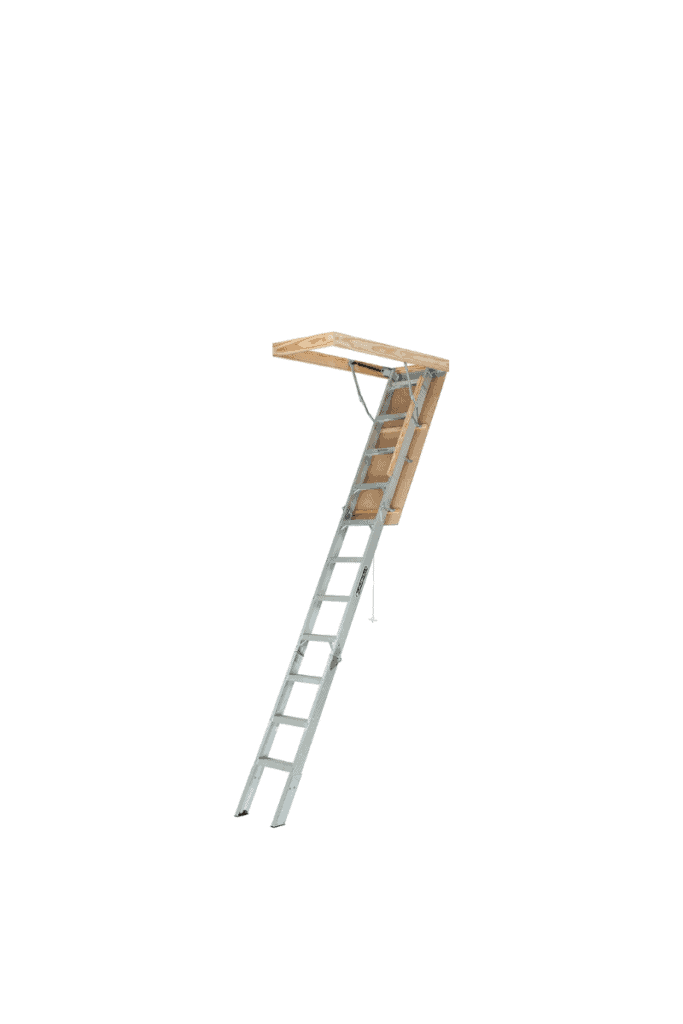
The Louisville Elite series offers a sleek, lightweight design without compromising on strength or functionality. This ladder is specifically crafted to provide easy access to your attic while seamlessly integrating into your home’s aesthetic.
Expect to invest between $250 – $450 for this high-quality attic ladder, a fair price for its features and the value it adds to your home.
The ladder’s aluminum build ensures it is both lightweight and strong, with a load capacity to support typical household use.
An insulated door reduces energy costs, preventing heat from escaping during the winter and keeping your home cooler during the summer. This feature allows the ladder to fit ceiling heights of up to 10 feet, ensuring a perfect fit for your home.
Ergonomic T-handles make it easier and more comfortable to pull down the ladder when needed.
Price: $371.22
Pros:
Aluminum construction makes it easier to pull down and stow away the ladder.
It can generally support up to 375 lbs, accommodating a wide range of users and storage items.
The insulated door is a significant benefit for energy conservation and cost savings. The ladder comes with clear instructions, making it possible for DIYers to install it themselves.
Cons:
While offering excellent features, the Louisville Elite is priced higher than some other attic ladders, which may be a consideration for budget-conscious buyers.
As a specialized attic ladder, it’s not suitable for other tasks around the house or yard.
The ladder necessitates adequate clearance space in the attic and room below for safe deployment and use.
Is the Louisville Elite Aluminum Attic Ladder the Right Choice for Your Home?
If you’re looking for a reliable, long-lasting attic ladder that doesn’t skimp on design or energy efficiency, the Louisville Elite Aluminum Attic Ladder is a standout selection.
Its robust construction paired with thoughtful features like an insulated door and adjustable feet make it an ideal choice for homes with high ceilings.
This ladder is especially suitable for those who prioritize energy efficiency and ease of use in their attic access. While the investment may be slightly higher than some basic models, its durability and added energy savings provide a return on investment that can justify the initial cost.
Before making a purchase, measure your space to ensure a proper fit and consider if the ladder’s features align with your needs.
For homeowners requiring regular attic access, the Louisville Elite Aluminum Attic Ladder might just be the best upgrade you can make, blending functionality with finesse
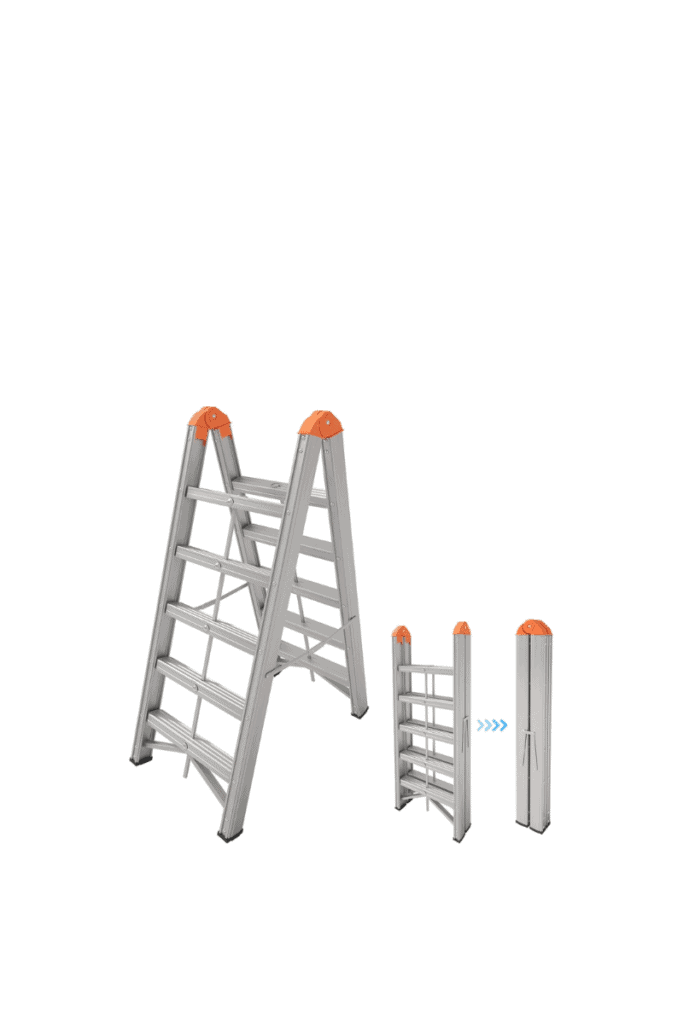
My personal favorite that I’ve recommended time and time again, the Aparecium Aluminum 5-Step Ladder. It offers unbeatable value for its quality and durability.
With its affordable price point, this ladder provides an excellent return on investment for both homeowners and professionals.
Crafted from premium aluminum, the Aparecium 5-Step Ladder is designed to ensure stability and safety during use.
Its EN131 certification guarantees compliance with stringent safety standards, providing peace of mind for users.
The ladder’s sturdy construction makes it suitable for a wide range of tasks, from reaching high shelves to performing maintenance and repairs around the house or at work.
My absolute favorite feature of this ladder is its compact size. When folded it effortlessly tucks away into a closet of corner, allowing me to reclaim valuable space that would have otherwise been occupied by a bulkier ladder.
Price: $139 – $169
Pros:
The aluminum construction makes the ladder lightweight and easy to move around, allowing for effortless transport and storage.
With its anti-slip steps and rubber-capped feet, the ladder ensures a secure and stable climbing experience, reducing the risk of accidents.
The 5-step design provides the perfect balance between height and practicality, making it suitable for various projects around the home or workplace. The ladder’s smooth aluminum surface is easy to clean and maintain, ensuring long-lasting performance.
Cons:
While the 5-step design is suitable for most tasks, users requiring additional height may find it necessary to consider tall ladders.
Is the Aparecium Aluminum Ladder Right for You?
The Aparecium Aluminum Ladder stands out against the competition for its perfect blend of safety, convenience, and affordability.
With its user-friendly features, robust safety measures, and a price that reflects its high quality, it’s an excellent choice for anyone looking to invest in a reliable ladder.
Whether you’re a handy homeowner or a professional tradesperson, the Aparecium Aluminum Ladder offers the stability and durability you need for your projects.
It is the perfect ladder for my home, and it may just be for your home too!
Shop The Best Ladders For High Ceilings
Check out my favorite ladders and accessories for a high ceiling height:
There are a ton of choices when it comes to kitchen utensils. With so many materials being linked to health concerns, what is the best material for kitchen utensils?
In this post, we will explore the various materials commonly used for kitchen utensils and weigh their pros and cons to determine the best options for your culinary endeavors.
This post may contain affiliate links.
What Is The Best Material For Kitchen Utensils?
I have a lot of kitchen utensils. I love finding items that have multiple purposes and can make my life easier in the kitchen. As I retire old utensils, new and exciting ones are popping up all the time and I love to browse what has been invented.
When it comes to selecting the best material for kitchen utensils, several factors come into play, including durability, heat resistance, maintenance, and of course, food safety.
The choice of material can significantly impact the cooking experience and the longevity of the utensils.
From traditional options like stainless steel and wood to modern innovations such as silicone and nylon, each material offers distinct advantages and drawbacks.
Understanding the properties of different materials is essential for making informed decisions about which utensils will best suit your cooking needs and preferences.
If you are feeling overwhelmed with the number of choices on the market, we will narrow down key concerns and considerations to help you find useful gadgets next time your utensils need an upgrade.
Types of Kitchen Utensils To Consider
There are numerous types of kitchen utensils that are essential for cooking and food preparation. Not all utensils are created equal.
The utensils you use may depend on your comfort level in the kitchen and your needs. Having a well-rounded collection can make cooking and food preparation more efficient and enjoyable.
Here are some common kitchen utensils, along with their pros, cons, and uses:
Spatula
A spatula is a broad, flat, flexible blade used for lifting, flipping, and spreading foods.
Spatulas are versatile and come in various materials, such as silicone, stainless steel, and nylon, making them suitable for different types of cookware.
Some spatulas may not be heat-resistant at high temperatures, and metal spatulas can scratch non-stick surfaces.
For this reason, it’s important to consider the type of cookware you use and your needs for a spatula before choosing the spatula’s preferred material.
Wooden Spoon
Wooden spoons are gentle on cookware, do not conduct heat, and are suitable for stirring hot dishes.
They can absorb flavors and odors and require more care to maintain than some other utensils.
Wooden spoons are ideal for mixing and stirring, especially in pots and pans where metal utensils may damage the cooking surface.
Tongs
Tongs provide a firm grip on food items, are versatile, and come in various lengths and materials.
Some tongs can be difficult to clean, and certain materials may not be suitable for high-temperature cooking.
Tongs are commonly used for flipping meats, tossing salads, serving pasta, and handling hot items on the grill or in the oven.
Whisk
A whisk is a kitchen tool with wire loops used for blending, whipping, and beating ingredients.
Whisks come in various sizes and are efficient at aerating and thoroughly mixing ingredients.
Some whisks may be challenging to clean, especially if food becomes stuck between the wire loops.
For this reason, you may prefer one material over another for ease of maintenance and cleaning.
Mixing Bowls
Mixing bowls are used for combining ingredients, marinating, and serving food.
Mixing bowls come in various materials, sizes, and shapes, making them versatile for different purposes.
Some materials, such as glass, can be heavy and prone to breakage, while plastic may retain odors and stains.
This is another example of why choosing the best material for your kitchen utensil can make an impact on its lifespan.
Ladle
A ladle is a deep-bowled spoon with a long handle, used for serving soups, stews, and sauces.
Ladles are designed for easy pouring and serving of liquids, and they come in various sizes to accommodate different portions.
Some ladles may be too large or too small for certain serving needs so you’ll want to pay attention to the size you pick.
Measuring Cups and Spoons
Measuring cups and spoons are used for precisely measuring dry and liquid ingredients.
Measuring cups and spoons are essential for accurate recipe preparation and come in standardized sizes for consistency.
Low-quality measuring cups and spoons may not provide accurate measurements, and some materials can be prone to breakage.
Furthermore, some materials aren’t dish-washer safe, and can lead to rusting. Again, this is another reason why you want to pay close attention to your utensil’s material and cleaning instructions.
Grater
A grater is a kitchen tool with sharp-edged perforations or blades used for shredding or grating foods.
Graters come in various sizes and types, including handheld, box, and rotary, and are versatile for shredding cheeses, zesting citrus, and grating vegetables.
Improper use can lead to injury, and cleaning some types of graters can be challenging.
You may want multiple graters for different needs. The type of grater you choose should help make you more efficient in your kitchen.
Colander Or Strainer
Colanders come in various sizes and materials, such as stainless steel, silicone, and plastic, and are essential for draining pasta, rinsing fruits and vegetables, and straining stocks and sauces.
Personally, I prefer to have multiple strainers that have specified functions. For example, we have one strainer that is dedicated for pasta, and another strainer for fruit. This helps keep the colanders in great condition.
Rolling Pin
A rolling pin is a cylindrical kitchen tool used for flattening and shaping dough.
Rolling pins are available in various materials, such as wood, marble, and stainless steel, and are essential for rolling out pie crusts, cookies, and other doughs.
This is an essential kitchen utensil if you love to bake!
What To Look For in A Kitchen Utensil
When looking for kitchen utensils, there are several factors to consider to ensure you get the best value for your money.
Here are some key aspects to keep in mind:
Durability
Look for utensils made from high-quality materials such as stainless steel, silicone, or heat-resistant nylon.
These materials are durable and can withstand regular use without deteriorating quickly.
Lastly, check for solid construction and sturdy handles, as well as any warranties or guarantees offered by the manufacturer.
Price
Consider your budget and look for utensils that offer a balance between quality and affordability.
Keep in mind that while higher-quality utensils may come with a higher upfront cost, they are likely to last longer, ultimately providing better value over time.
Cooking Quality
Choose utensils that are designed to enhance cooking performance.
For example, silicone spatulas are gentle on non-stick cookware, while stainless steel whisks are great for whipping and blending ingredients, but may damage some surfaces.
You’ll want to balance the need for enhanced performance and functionality.
Look for utensils with ergonomic designs that are comfortable to use and provide good control.
Eco or Health Consciousness
Opt for utensils made from sustainable or eco-friendly materials, such as bamboo or recycled plastics, if you are environmentally conscious.
Check for certifications or labels indicating that the utensils are free from harmful chemicals such as BPA, lead, or phthalates, especially if you are concerned about health and safety.
Ease of Cleaning
Consider how easy the utensils are to clean.
Dishwasher-safe utensils can save time and effort, while non-porous materials are less likely to harbor bacteria and odors.
Multi-functionality
Look for utensils that can serve multiple purposes to minimize the number of tools you need in your kitchen.
For example, a multi-use spatula with a straight edge and a serrated edge can be used for different tasks.
Reviews and Recommendations
Research utensils online and read customer reviews to gauge the experiences of others who have used the products.
It may also be helpful to seek recommendations from friends, family, or cooking professionals for trusted brands and specific utensils that have performed well for them.
The Best Kitchen Utensil Materials
The type of kitchen utensils you decide to purchase may align with your needs or lifestyle priorities.
For example, if you are environmentally conscious, you may want to opt for bamboo utensils.
Likewise, if you are a serious cook or baker, buying kitchen utensils that are made with quality materials and function for your needs, should be your top priority.
This may look different for each person depending on your wants and experience level.
Here are the top materials used in kitchen utensils:
This Tuscan Ribolita soup from The Defined Dish is comforting and filling. Using a ladle is perfect for these big bowls of soups.
Wooden Utensils
Wooden spoons and other wooden kitchen utensils have been a staple in home kitchens for a long time.
Made from traditional woods, wooden tools are a great choice for various reasons.
First, wooden utensils do not conduct heat, making them perfect for stirring hot food on the stove. They are also gentle on your pots and pans, preventing scratches on your nonstick cookware.
However, wooden utensils may not last as long as some other materials. They can also absorb flavors over time and are not as easy to clean as some synthetic materials.
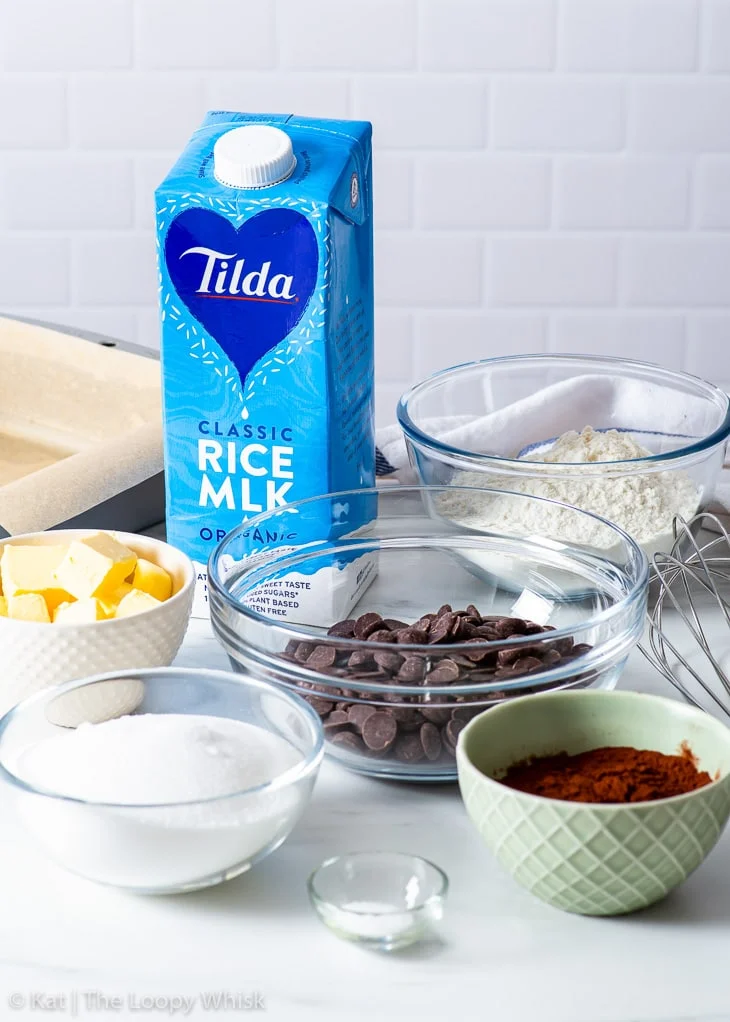
Check out how these ingredients become decadent vegan salted caramel brownies. A wire whisk is always preferred for mixing baked goods.
Silicone Utensils
Silicone cooking utensils are an excellent choice for many home cooks due to their heat resistance and flexibility.
Silicone spatulas and other silicone tools can withstand high temperatures and are safe for use with non-stick cookware. They are non-toxic, do not absorb flavors, and are easy to clean.
The best silicone utensils are made from food-grade silicone, a safe material that does not leach harmful chemicals even at higher temperatures.
I love using a wooden spoon to keep my pots and pans free from scratches. Check out Half Baked Harvest’s recipe for chili crisp chicken ramen.
Silicone is also a good choice for delicate foods like eggs or fish, as it is soft and flexible. A fish spatula with silicone tips can be a great addition to your kitchen utensil set.
Overall, I love using silicone for all my bakeware and with any of my non-stick cookware.
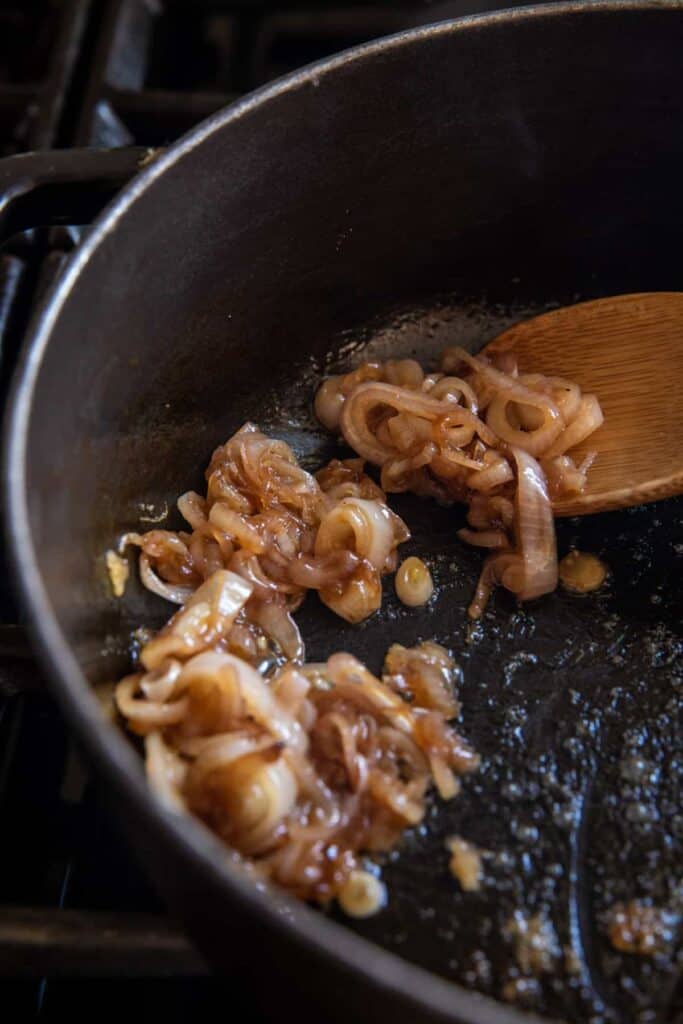
One of my favorite recipes is Pioneer Woman’s Pasta Bolognese. I always cook this in my dutch oven using a wooden spoon to prevent scratches.
Stainless Steel Utensils
Stainless steel cooking utensils are a top pick due to their durability, heat resistance, and ease of cleaning.
They are perfect for use with stainless steel pots and cast iron cookware. However, they should not be used with nonstick or ceramic cookware as they can scratch the surface.
Stainless steel is also a safe material, as it does not release toxic fumes or harmful chemicals.
Skinny Taste’s breakfast strata is perfect for a busy morning. Using a stainless steel turner helps keep the strata’s shape for serving.
Bamboo Utensils
Bamboo kitchen utensils are a popular eco-friendly alternative to wooden and plastic utensils.
They are lightweight, durable, and heat resistant.
Bamboo utensils are a great option, especially for non-stick cookware, as they won’t scratch the surface.
Wooden tongs are perfect for tossing delicate salads. I love this pear and prosciutto salad!
Plastic Utensils
Plastic cooking utensils are often a go-to due to their affordability and ease of use.
However, they are not the best option for cooking at high heat, as they can melt or release harmful chemicals like bisphenol A (BPA). Additionally, some plastic utensils can also be damaged by acidic foods.
Overall, plastic cookware won’t hold up for long term use.
The ingredients for this Mediterranean Eggplant Nourish Bowl look incredible. I love using small mixing bowls when you have many ingredients to measure.
Other Types of Utensils
Nylon utensils are a better option than plastic as they can tolerate higher temperatures without melting. However, they are not as heat resistant as silicone or metal utensils.
Iron utensils, especially from brands like Le Creuset, are perfect to use with cast iron pans.
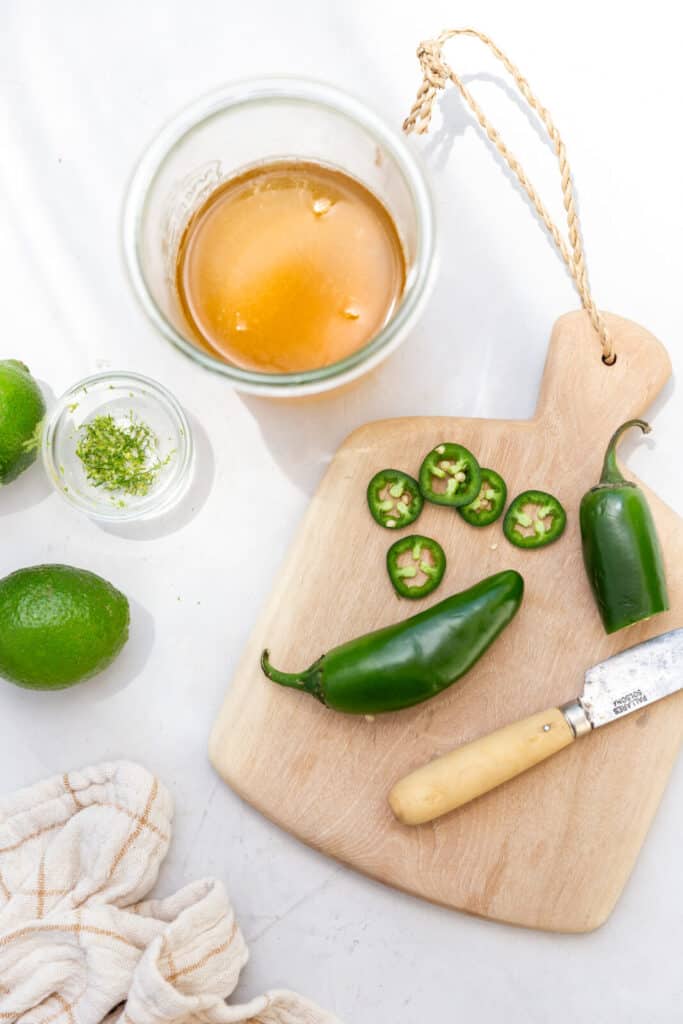
My love for spicy margaritas run deep. If you need a jalapeno simple syrup recipe this is a great one! Glass bowls are perfect for containing small ingredients.
Aluminum utensils, on the other hand, should be avoided as they can pose health issues such as kidney damage due to leaching of heavy metals.
As for copper cookware, while it conducts heat well, it can react with acidic foods, leading to potential health risks. Ceramic cookware is a good choice for cooking on moderate heat and is non-reactive, but it’s prone to chipping.
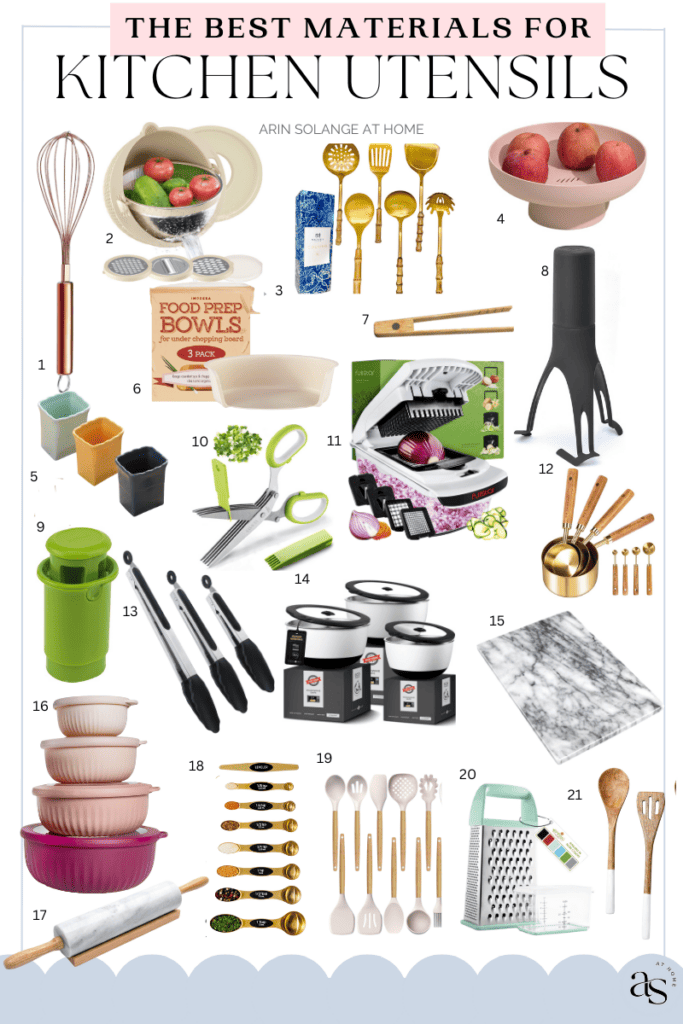
Make sure you check out my favorite kitchen tools, utensils, and gadgets below! If you want to see some of these in action, make sure you check out my Instagram!
No matter how many purses I own, I am still collecting more. This works well for my fashion game, but is not so great for my closet storage. If you are wondering how to hang purses in a closet to maximize storage space, you’re in good company.
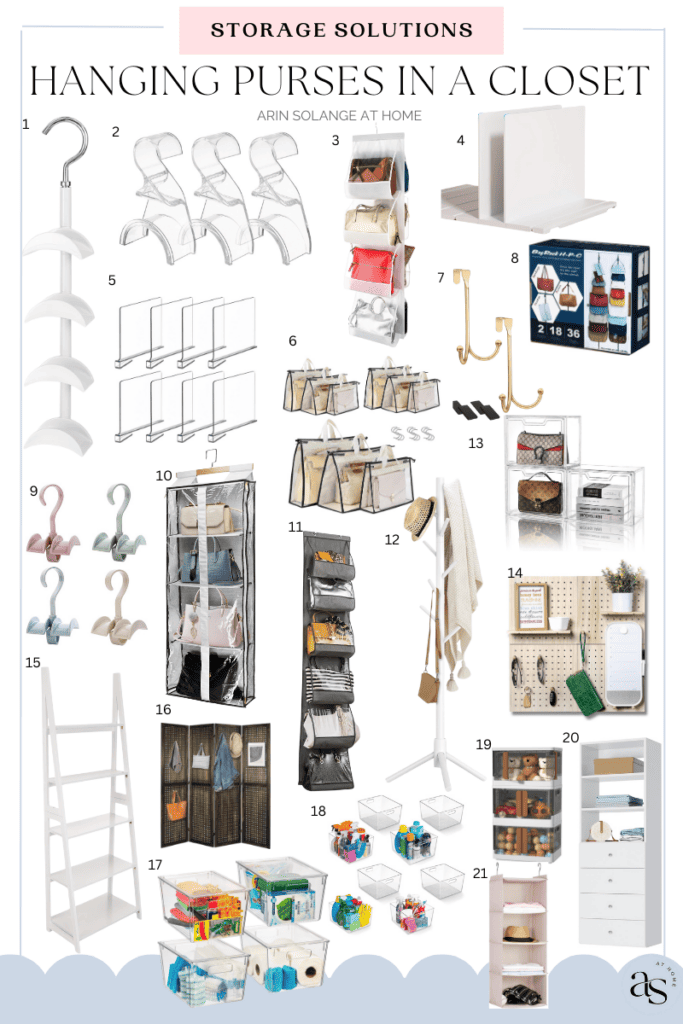
Let’s go over 11 storage ideas on how to hang purses in a closet.
This post may contain affiliate links.
11 Storage Ideas On How To Hang Purses In A Closet
If you’re an avid collector of purses, you’re likely familiar with the struggle of finding the best way to store your handbag collection.
The challenge of handbag storage is finding a method that keeps them in good condition while ensuring they’re easy to access. I’ll go over purse storage ideas that cater to different sizes, shapes, and materials of bags, and are great for small spaces or large walk-in closets alike.
Ways To Maximize Storage Space In Your Closet
Hanging purses in my closet can be a challenge because I have a smaller closet due to living in a historic home.
Historic homes are known for their charming features, but often lack large walk-in closets commonly found in modern houses.
The key to maximizing storage in a smaller closet is to be intentional and utilize every available space, whether it’s the walls, doors, or floors.
With creativity and intentional planning, you can maximize the storage space in your closet and find clever ideas for hanging your purses.
Here are some general rules on how to intentionally create more storage space in your closet:
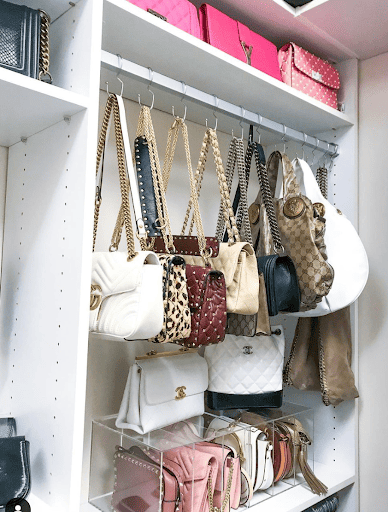
First, consider using the vertical space in your closet by installing hooks or over-the-door organizers specifically designed for purses. These solutions allow you to hang your purses neatly without taking up valuable shelf or floor space.
You can also use a tension rod across your closet to create additional hanging space. Another option is to repurpose a garment rack or clothing rod to hang your purses.
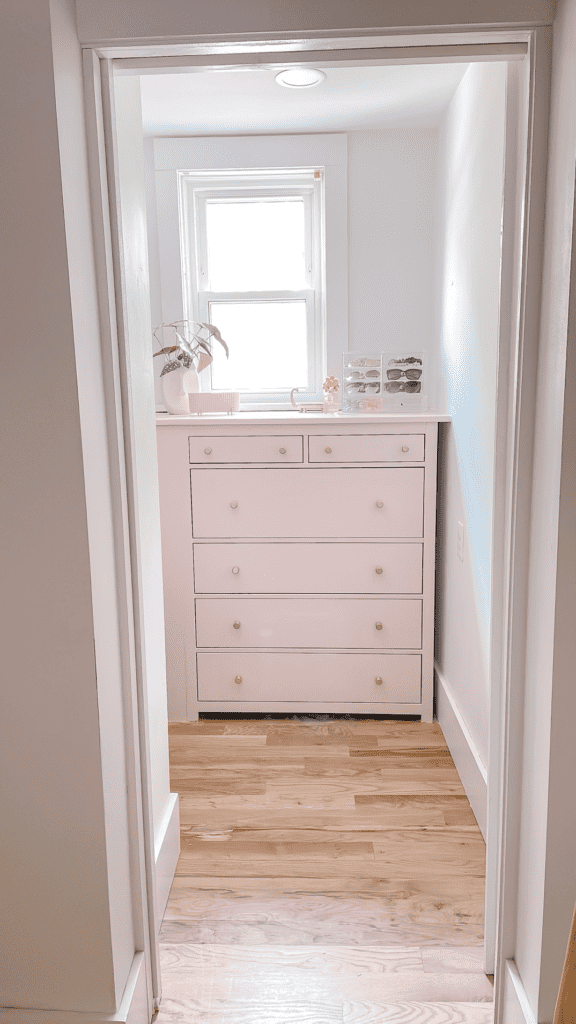
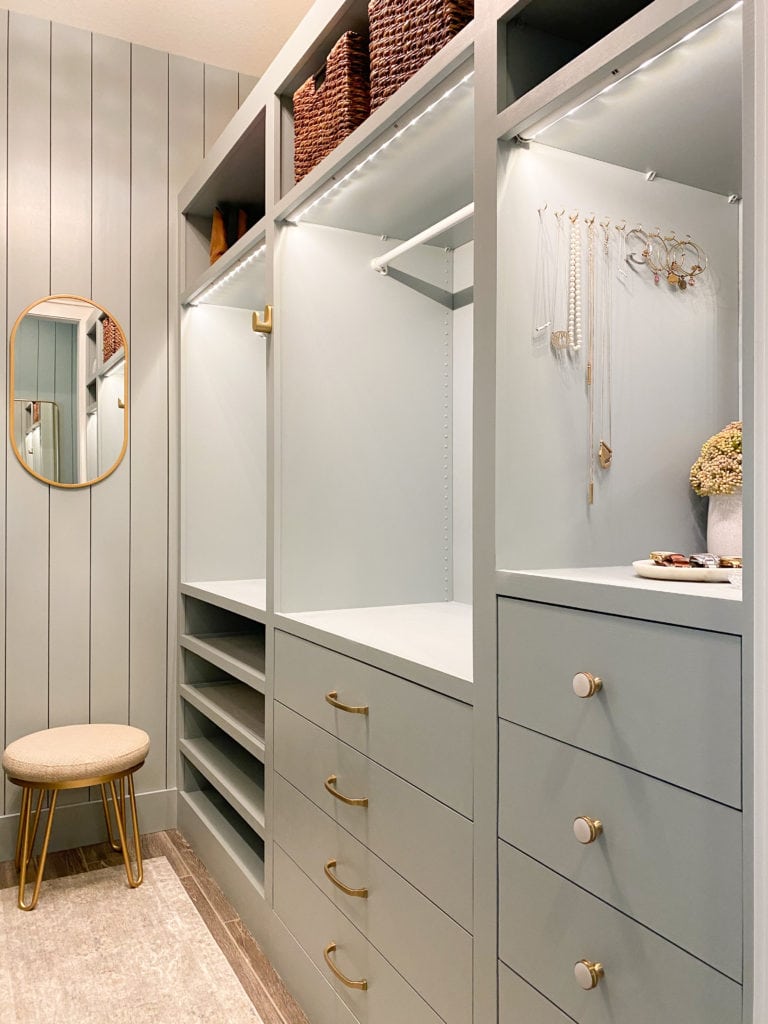
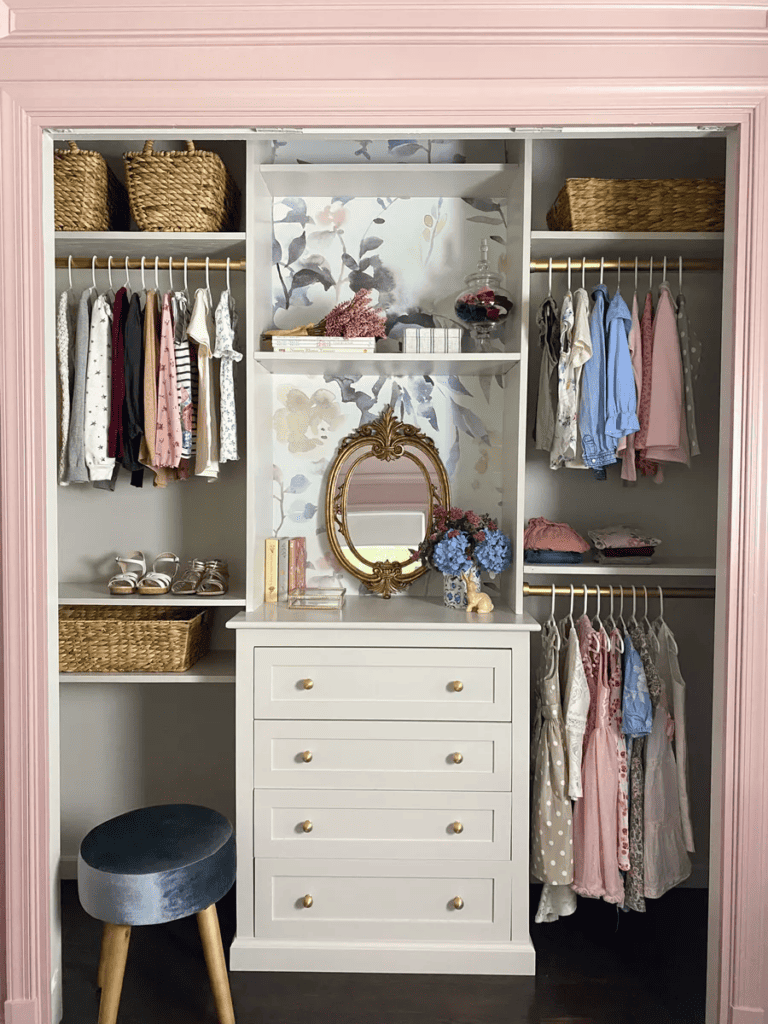
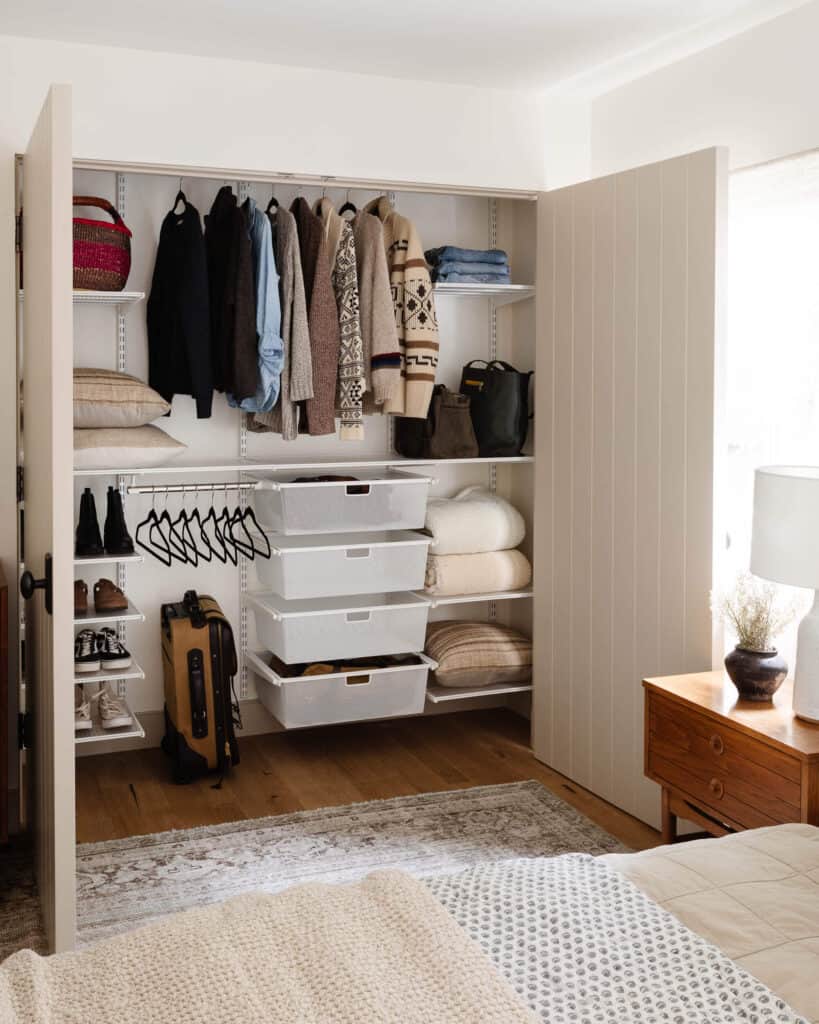
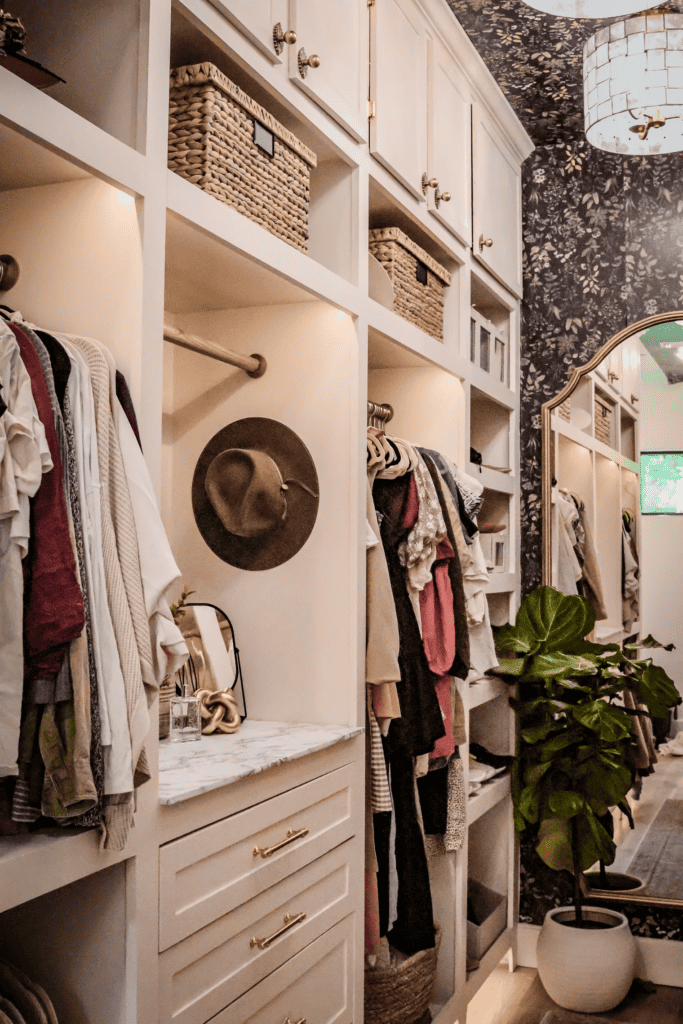
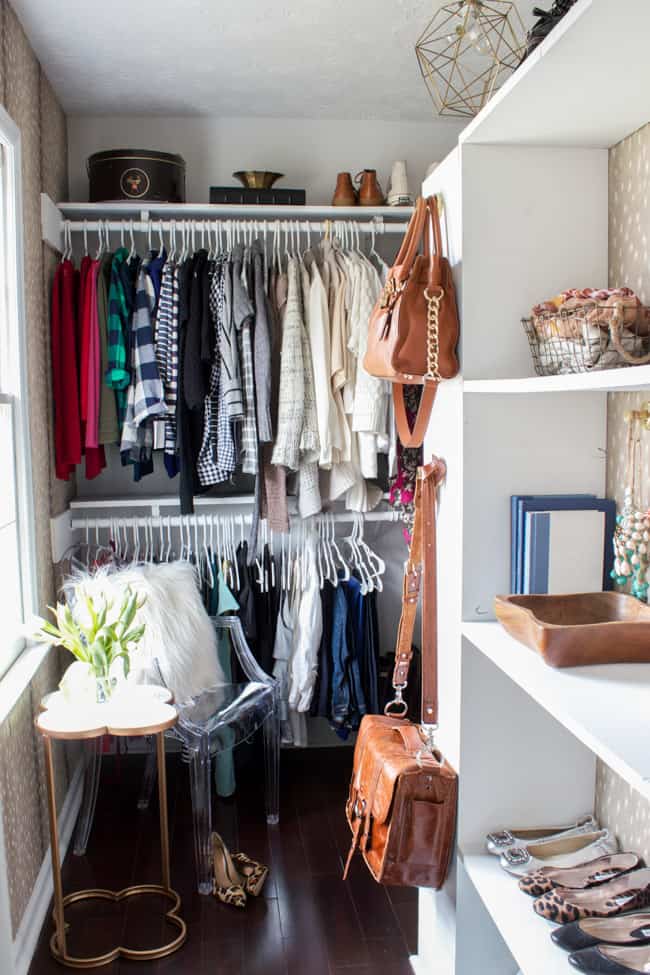
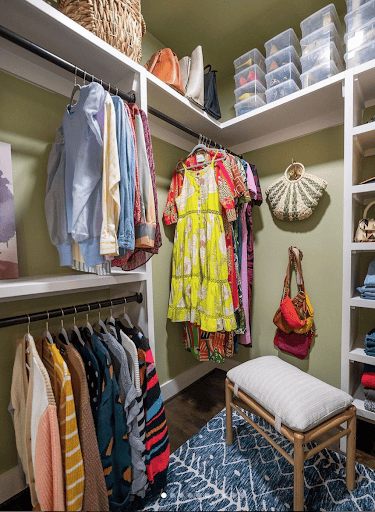
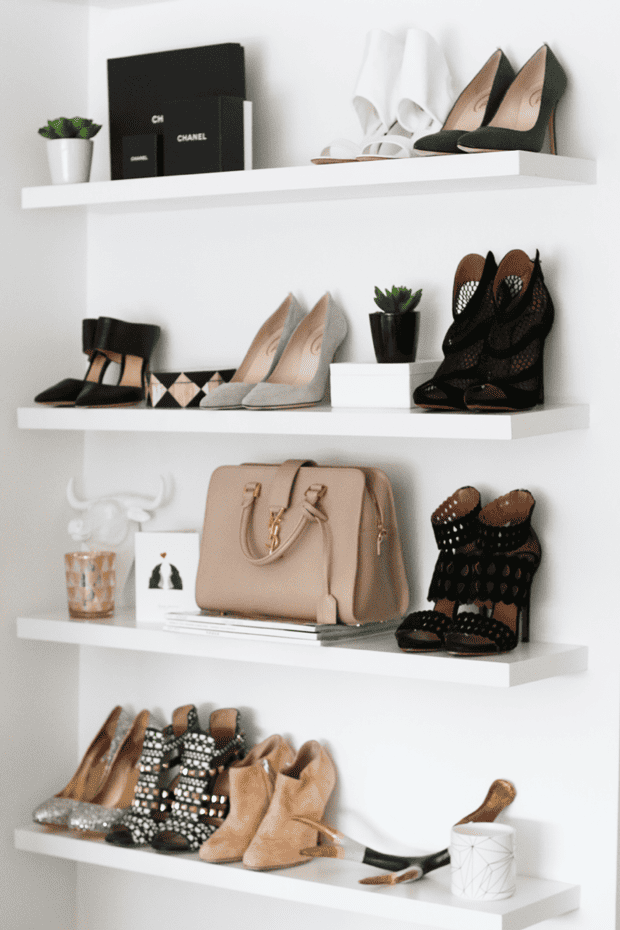
This closet reveal has some amazing tricks to create extra storage and plenty of space to hang purses.
#2 Maximize Overlooked Space
By thinking outside the box and exploring various storage ideas, you can find practical and stylish ways to keep your purses organized and protected in your smaller closet.
Additionally, you can make use of the back of your closet door by attaching adhesive hooks or a hanging organizer designed for accessories.
Subsequently, you can hang your purses in a space that is often overlooked and utilize every inch of your closet.
Maximizing your bare wall space doesn’t need to be complicated.
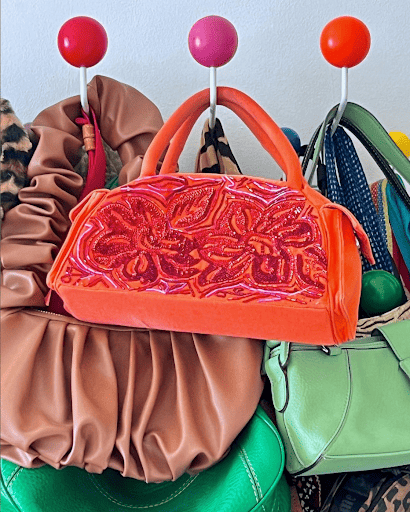
One of my favorite ways to use wall space is by installing a pegboard system. By attaching hooks of different sizes, you can create a customizable storage solution for your purses.
This allows you to easily adjust the hooks to accommodate purses of various shapes and sizes.
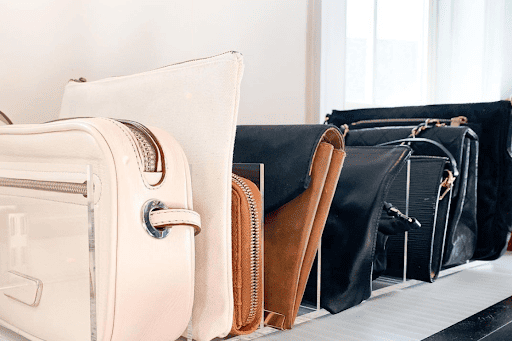
If you have a shelf in your closet, consider using shelf dividers to create designated sections for your purses, preventing them from getting tangled or stacked on top of each other.
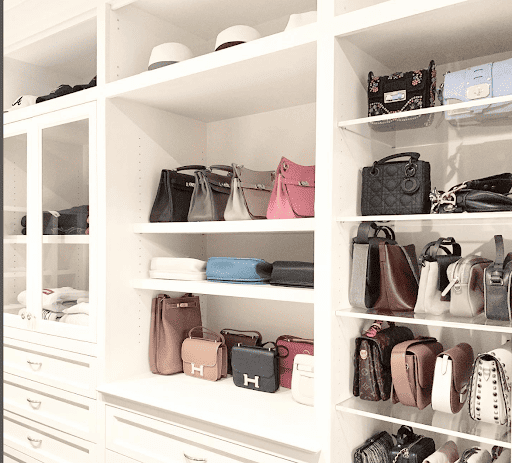
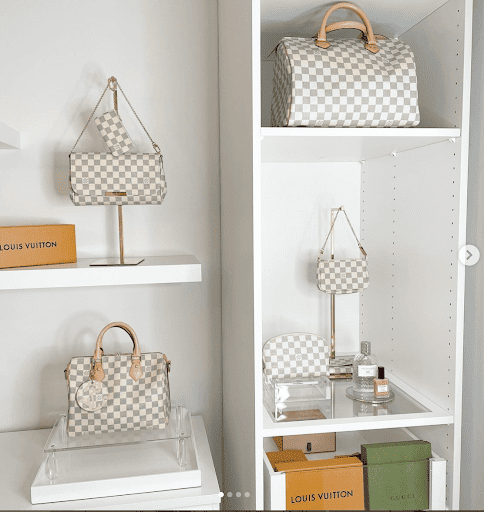
Shelf space can be precious in smaller closets. If you have some luxury brand purses, this may be a perfect spot to prioritize to showcase your collection.
Consider what other storage needs you have and what space is available. It may take some creative thinking, but your other belongings can be stored elsewhere so your purses can be displayed.
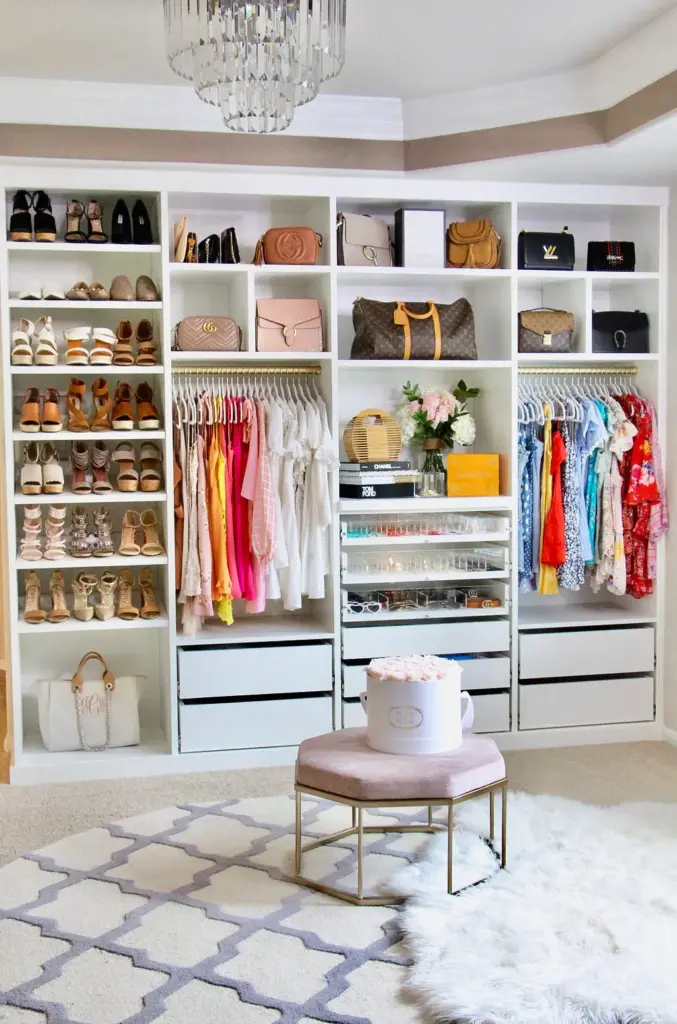
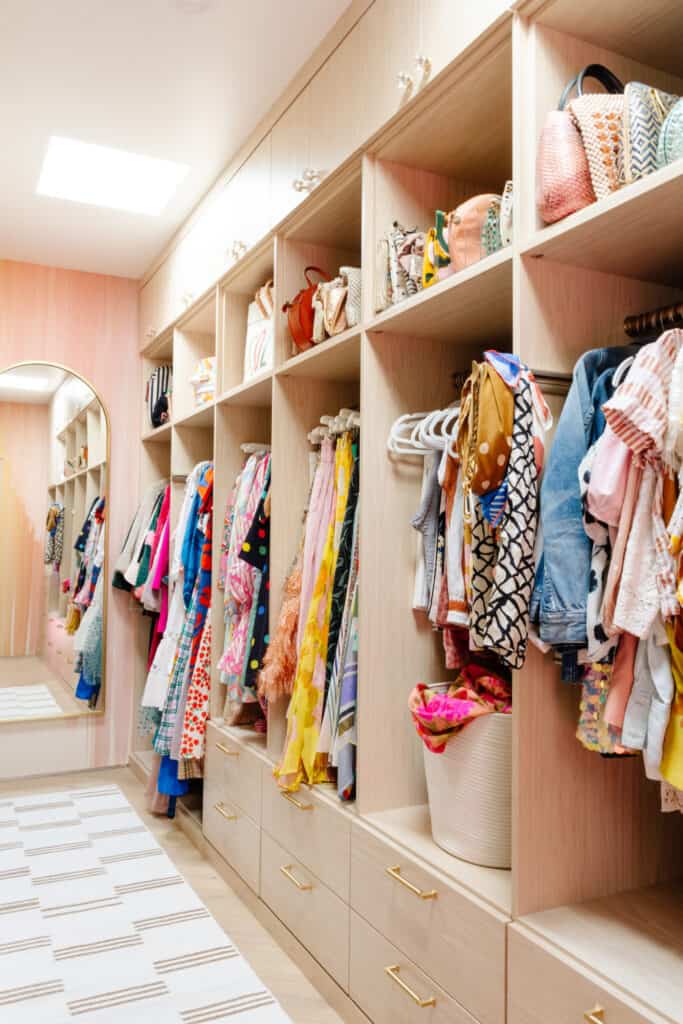
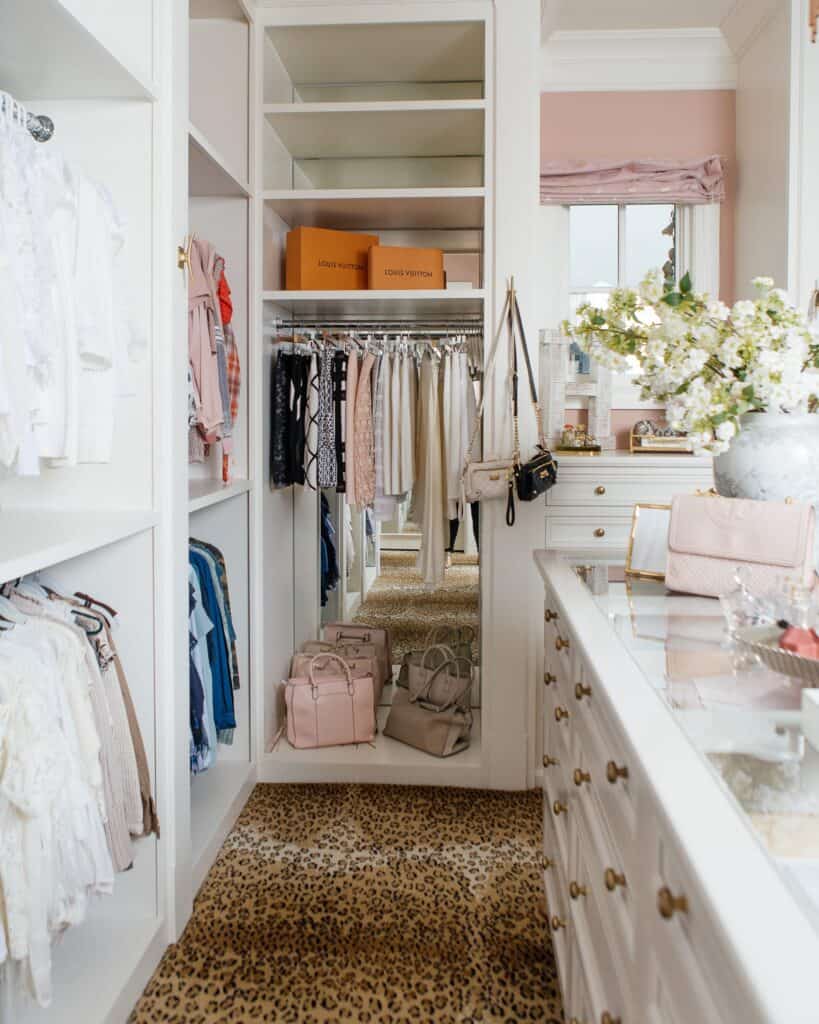
This closet reveal is a dream with ample space for hanging purses.
#5 Maximize Floor Space
Finally, you can use clear plastic bins or storage boxes to store your purses on the closet floor. Label the boxes or use transparent containers to quickly identify and access the purse you want.
This is a great way to sort and organize by season, style, or material.
Right now, I’m not in a season of life where I’m attending a lot of black tie formals. Storing those fancier purses away can free up space for more items.
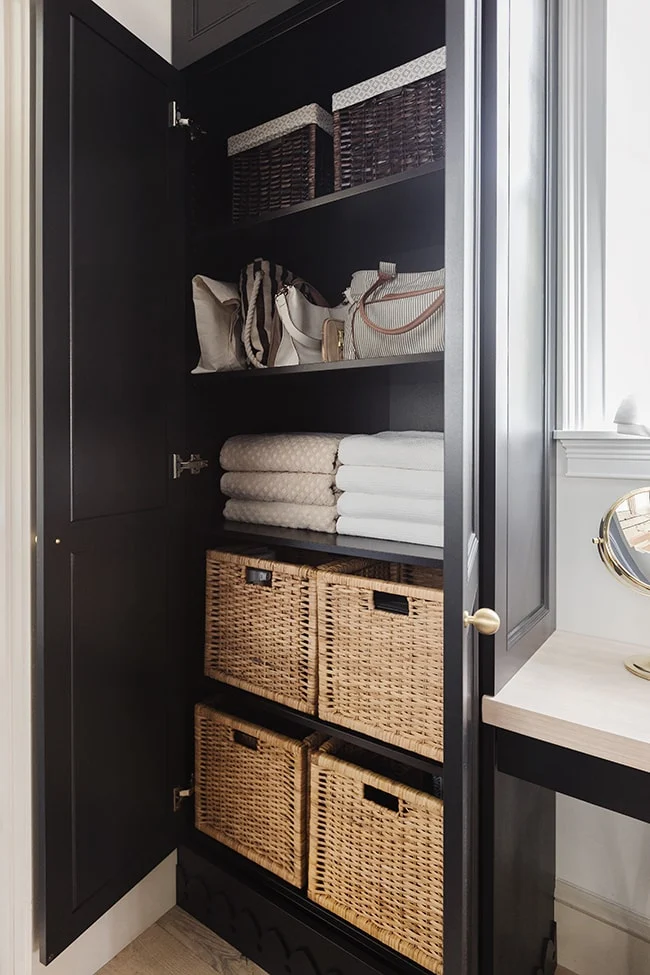
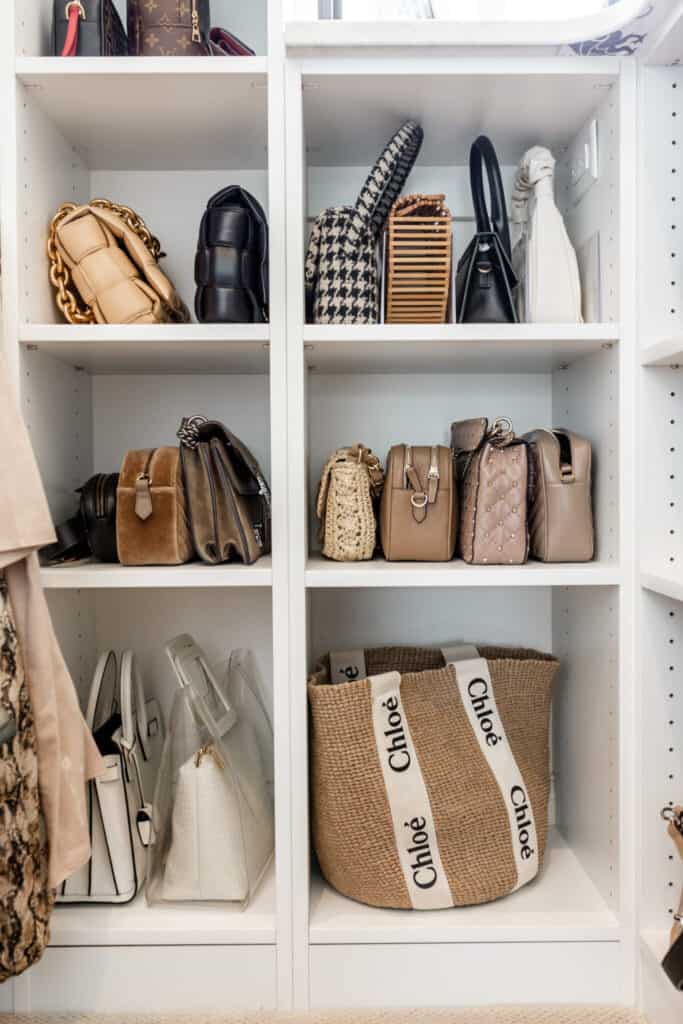
Hanging purses in a closet doesn’t need to be complicated. These wicker baskets and shelves contain plenty of space for your collection.
Prioritizing Your Purses
Regardless of the method you choose, keeping your purses in good condition should always be a priority.
When storing your purses, it’s important to keep them in a cool, dry place, away from direct sunlight, to prevent any damage.
Dust bags, tissue paper, and proper storage can help them retain their shape, extend their life and keep them looking their best.
This is such a great example of how to maximize space in a small closest and hang your purses.
If you have a lot of space, a dedicated storage solution may be the best way to showcase and protect your favorite items.
Remember to rotate your bags often to give them a break, and clean them according to their material type before storing them away.
This is a great example of maximizing space by using hooks to hang purses in a closet.
11 Storage Ideas To Help Maximize Storage Space For Your Purses
Check out my favorite ways to maximize storage space in your closet to hang your purses:
#1 Purse Hangers
Purse hangers are specialized hangers designed to hold purses. They typically have multiple hooks or loops, allowing you to hang several bags on a single hanger. Purse hangers can be hung from a closet rod or from a hook on the wall. Sometimes purse hangers have individual hooks that can easily attach to a closet rod. They provide an easy way to keep your favorite purses in good condition and easy to find. Either of these options are excellent methods for storing your purses safely.
This colorful closet uses cubbies to organize each purse.
#2 Purse Organizers
A professional organizer would likely recommend dedicated storage solutions like purse or handbag organizers. Available at stores like The Container Store or Amazon, these purse organizers provide compartments of different sizes and shapes to accommodate your purse collection.
Some are designed to hang on your closet rod, making good use of vertical space.
For larger bags, handbag organizers offer a perfect solution.
I love that this closet uses a mixture of hooks and risers to organize purses.
#3 Shelf Dividers
If you have shelves in your closet, consider using shelf dividers to create compartments for your purses. This can keep them organized and prevent them from toppling over.
Closet shelves provide plenty of space for your handbag storage needs. Acrylic shelf dividers are a great way to separate your purses and keep your closet clutter-free.
Leather purses can be stored in dust bags on these shelves to keep them in good condition.
Small purses and wallets can easily fit in a dresser or pull out drawer for storage if you closet allows.
#4 Hooks
Install hooks along the closet walls or on the inside of the closet door.
You can find over the door organizers specifically designed for purses. These hooks typically have a rounded shape to help prevent the straps from slipping off. As a bonus, they are stacked, so more than 2 handbags can be accommodated.
A beautiful collection of handbags is displayed in this closet.
Hang your purses individually on the hooks, making sure to distribute the weight evenly. This is a good option for hanging purses with longer straps and helps hold a lot of purses in a limited storage space.
Attach S-hooks to your purses’ straps and hang them directly from the closet rod. This method is simple and cost-effective, as it utilizes the existing infrastructure of your closet. Just make sure to space the purses evenly and avoid overloading the rod.
A purse divider is a great way to organize purses in your closet.
#5 Pocketed Over-The-Door Organizers
A door organizer is a convenient way to make use of the back of your closet door. Use an over-the-door organizer with clear pockets to store your purses.
What I love about this option is you utilize overlooked space and you are protecting your purses using the organizer as a dust bag.
These organizers have pockets of different sizes to store handbags, small items, and smaller bags.
This option saves space and allows you to easily see and access your bags. Simply place one purse in each pocket.
A coat rack or decorative ladder is another option to help hang your purses in your closet. With this option, you would need to have more available space.
You can lean the ladder against a wall and drape your purses over the rungs. This not only provides a unique and visually appealing storage solution but also keeps your bags easily accessible.
If you have spacious closet shelves, consider installing stackable display boxes specifically designed for purses.
These boxes have ample storage space, a magnetic door, and can stack for added space. As a bonus, they provide a stylish way to showcase your collection.
Utilizing a designated stand for each handbag is a fun way to hang purses in a large closet.
#8 Peg Boards
Alternatively, consider installing a pegboard on one of the walls in your closet and attach hooks or pegs to hang your purses.
Pegboards are versatile and customizable, allowing you to arrange the hooks at different heights and configurations to suit your needs.
Remember to consider the weight of your purses and the overall load capacity of the storage solution you choose. It’s important to distribute the purses evenly to prevent any damage to the bags or the storage system itself.
This is a great example of using wall space to strategically hang purses in a closet using hooks.
#9 Clear Plastic Bins
Opt for clear plastic bins with lids to store and protect your purses while keeping them visible. This keeps them dust-free and prevents damage.
Place the bins on shelves or stack them on the floor of your closet. Label the bins or take pictures of the purses to easily identify the contents.
Hooks are a great way to easily reach your purses for everyday wear.
#10 Modular Closet Organizers
If you have a large collection of handbags and enough space to dedicate to their storage, modular closet organizers are the best option.
These are designed to provide a lot of space and keep your collection neat and tidy. A walk-in closet can be transformed into a handbag paradise with a good closet organization system, which often includes a mix of shelves, rods, and drawers.
Consider using hanging cubbies that can be multi purposeful as a hanging shelf organizer. These organizers utilize vertical space while keeping your closet tidy.
While relatively inexpensive and are easy to travel with, they can take up quite a bit of closet space. You’ll need to be mindful of how much hanging space you have available should you choose this route.
Displaying your purse collection and utilizing shelves is a great idea to help organize your purses.
Shop My Favorite Way To Hang Your Purses In A Closet
Check out my favorite products to help maximize your storage space to hang your purses in your closet.
Your kitchen cabinets are one of the most important elements of your home. To keep your painted cabinets protected from damage and to extend their lifespan, a clear coat of paint can enhance their appearance.
We’ll go over the best clear coat for painted kitchen cabinets to help keep your cabinets in their best shape.
This post may contain affiliate links.
Best Clear Coat For Painted Kitchen Cabinets
Are you a passionate DIY enthusiast who loves to give your home a personal touch?
If you’ve already tackled the task of painting kitchen cabinets, you know firsthand the transformative power of a fresh coat of paint.
Whether you’ve revamped your kitchen cabinets in a crisp white shade, or breathed new life into a bathroom vanity, you’re no stranger to the magic of paint. However, to ensure the longevity and durability of your hard work, choosing the best clear coat for your painted cabinets is crucial.
I’ve painted my fair share of cabinets in my DIY days. If you’ve been around my blog, you’ll remember in our last house, we painted our kitchen cabinets white.
Sam and I have also done many bathroom remodels over the years. One of the best ways to make a tired bathroom look new is by painting the vanity. Our bold pink powder room in our last house is still a favorite.
In this blog post, we’ll explore the world of clear coats for painted kitchen cabinets. We’ll discuss the importance of using a clear coat, its benefits, and factors to consider when selecting the ideal product. So, if you’re ready to take your cabinet painting skills to the next level, let’s dive in!
Types Of Cabinet Paint
When it comes to painting kitchen cabinets, you have several options. The best paint for your cabinets will largely depend on your specific needs and preferences.
When choosing the type of cabinet paint, consider factors such as your desired finish, durability requirements, application method, and personal preferences regarding odor, drying time, and cleanup.
It’s essential to follow the manufacturer’s instructions for proper surface preparation, application techniques, and any recommended topcoats or sealers to achieve the best results.
Remember, regardless of the type of paint you choose, proper surface preparation, including cleaning, sanding, and priming, is crucial for ensuring optimal adhesion and longevity of the painted cabinets.
Oil-based paints have been a traditional choice for cabinet painting due to their durability and smooth finish. However, they have become less popular due to their strong odor, longer drying time, and cleanup challenges.
Oil-based paints offer excellent durability, hardness, and adhesion, making them highly resistant to scratches and wear. They provide a smooth and lustrous finish. However, they require solvents for cleanup, which can be messy and time-consuming. They have a longer drying time, often taking several hours between coats. Additionally, these paints tend to yellow over time, especially in areas with low natural light.
Latex or Acrylic Paint
Latex or acrylic paints are popular choices for cabinet painting due to their ease of use, quick drying time, and low odor. They are available in a wide range of colors and finishes.
Latex or acrylic paints are water-based, making them easy to clean up with soap and water. They provide good adhesion and durability, resisting chipping and peeling. They also tend to have minimal yellowing over time.
While latex or acrylic paints are generally durable, they may not be as resistant to heavy wear and tear as some other types of paint. They may require multiple coats for optimal coverage and may not provide the same level of hardness as oil-based paints.
Chalk Paint
Chalk paint is a popular choice for achieving a vintage or shabby-chic look. It has a unique matte finish and requires minimal surface preparation.
Chalk paint is known for its excellent coverage and ability to adhere to various surfaces, including wood, without extensive priming or sanding. It dries quickly and can be distressed easily for a weathered appearance.
Chalk paint is not as durable as some other types of paint, and it may require a protective topcoat, such as wax or polyurethane, to enhance its durability. It also has limited color options compared to latex or oil-based paints.
Cabinet Paint
Some paint brands offer cabinet-specific paints formulated with enhanced durability and resistance to moisture and stains. These paints are designed to withstand the demands of kitchen environments.
Cabinet-specific paints, like Benjamin Moore Advance, often provide excellent adhesion, durability, and a smooth finish.
They may also have built-in features like stain-blocking, anti-microbial properties, or specialized self-leveling properties, reducing visible brush strokes, for a professional look. They are also available in a variety of finishes.
Cabinet-specific paints can be more expensive than standard paints. They may also have a limited color selection compared to other types of paint.
How To Paint Kitchen Cabinets
Painting kitchen cabinets can be a time-consuming process, but the results can be incredibly rewarding.
Here’s a quick rundown on how to achieve the best results:
Preparation
Preparing kitchen cabinets for paint is an essential step to ensure a successful and long-lasting paint job.
Proper preparation helps to create a smooth and durable surface, allowing the paint to adhere properly and provide a professional finish.
Remove all items from the cabinets to make it easier to access all areas and protect your belongings from paint splatters or damage.
Thoroughly clean the cabinets to remove any grease, grime, or residues that may have built up over time by using a mild detergent or a mixture of warm water and vinegar to clean the surfaces. Scrub the cabinets gently with a soft sponge or cloth, paying attention to areas around handles and knobs.
Next, take off all hardware such as handles, knobs, hinges, and drawer pulls. This will make the painting process easier and allow you to achieve a more professional finish. Place the hardware in a labeled bag or container so that you can easily reinstall them later.
Sanding is an important next step to create a smooth and even surface for the paint to adhere to. Use medium-grit sandpaper or a sanding block to lightly sand the cabinet surfaces. This step helps to remove any existing finish, roughen the surface, and promote better paint adhesion. Be sure to sand in the direction of the wood grain and remove any dust or debris afterward.
Then, inspect the cabinets for any holes, dents, or imperfections. Fill these areas with wood filler or putty, using a putty knife or a similar tool. Allow the filler to dry completely, and then sand it smooth to achieve a seamless finish.
After sanding and filling, it’s important to clean the cabinets once more to remove any dust or debris that may have accumulated. Use a tack cloth or a slightly damp cloth to wipe down the surfaces thoroughly.
Priming
To begin, stir the primer well before use, following the manufacturer’s instructions.
Using a brush or a foam roller, apply an even coat of primer to all surfaces of the cabinets, including the fronts, backs, and edges.
Ensure complete coverage, but avoid applying the primer too thickly, as it may lead to drips or uneven drying. For detailed or hard-to-reach areas, use a small brush or foam brush.
Allow the primer to dry according to the manufacturer’s instructions. This can typically take several hours or overnight.
Once the primer is dry, lightly sand the primed surfaces with a fine-grit sandpaper or sanding block.. Wipe away the sanding dust with a clean, lint-free cloth.
Now your kitchen cabinets are properly primed and ready for painting.
Painting
Start by stirring the paint thoroughly. Begin with the cabinet frames, using a brush, foam roller, or paint sprayer to apply the paint in thin, even coats.
Work in the direction of the wood grain for a smoother finish.
Pay attention to any drops or excess paint, smoothing them out as you go.
Allow the first coat to dry completely before applying additional coats as needed.
Repeat the process for the cabinet doors and drawer fronts, painting one side at a time and allowing each side to dry before flipping them over.
Once your final coat of paint has dried, it’s time to apply the clear coat finish. This protective layer will ensure your cabinets stand up to daily use and maintain their beautiful finish over time.
Types Of Clear Coating
There are different types of clear coats available, including polyurethane, lacquer, varnish, and acrylic sealers.
Each type has its own characteristics and application methods. It’s essential to choose a clear coat that is compatible with the type of paint you used on your cabinets.
For that reason, it is recommended to test the product on a small, inconspicuous area or a sample board before applying it to your entire cabinet surface.
This will help you assess the finish, compatibility, and overall satisfaction with the chosen clear coat.
Here’s an overview of different types of clear coats commonly used for finishing kitchen cabinets:
Polyurethane is a popular clear coat known for its durability, water resistance, and protective properties.
It is available in both oil-based and water-based formulas.
Oil-based polyurethane tends to have a slight amber tone, while water-based options remain clear.
Polyurethane can be applied with a brush, roller, or sprayer. It is typically applied in multiple thin coats, allowing sufficient drying time between each coat. Sanding between coats helps achieve a smooth and even finish.
Lacquer is a fast-drying and durable clear coat that provides a high-gloss finish.
It is commonly available in nitrocellulose or acrylic formulations.
Nitrocellulose lacquer offers a traditional finish, while acrylic lacquer is more environmentally friendly and less prone to yellowing.
Lacquer is typically applied with a sprayer for an even and smooth finish. It requires multiple thin coats, with sanding between each coat to achieve a glossy result.
Proper ventilation and safety precautions are necessary due to the fumes and flammability of lacquer.
Varnish is a clear coat that provides a protective and durable finish.
It is available in various formulations, including oil-based, water-based, and polyurethane-based varnishes.
Oil-based varnishes tend to have an amber tone, while water-based options remain clear.
Varnish can be applied with a brush, roller, or sprayer. It is typically applied in thin coats, allowing drying time and light sanding between each coat.
Varnish provides a protective layer that enhances the natural beauty of the wood.
This kitchen in Maine is absolutely breathtaking and has a custom cabinet color to boot.
Acrylic Sealers
Acrylic sealers are water-based clear coats that provide a clear and non-yellowing finish. They are often used for sealing and protecting painted surfaces, including cabinets.
Acrylic sealers come in various sheens, including matte, satin, and glossy.
Acrylic sealers are usually applied with a brush or roller. They require multiple thin coats, with drying time between each coat.
Some acrylic sealers may require sanding between coats for better adhesion. They are a popular choice for protecting painted cabinets.
Before applying a clear coat, ensure that the painted cabinets are fully dry.
Follow these general steps for clear coating. Clear coating requires a clean and dust-free surface.
Before you begin, wipe down the cabinets with a tack cloth or slightly damp cloth to remove any dust or debris.
Chrissy Marie’s kitchen is a beautiful warm and inviting space with these painted white cabinets.
Use a brush, foam brush, or a sprayer, depending on the type of clear coat chosen. Apply thin, even coats, working in the direction of the wood grain or in smooth, overlapping strokes.
Avoid applying the clear coat too thickly, as it can lead to drips or an uneven finish.
Allow each coat to dry completely before applying subsequent coats. The number of coats required may vary, so refer to the manufacturer’s recommendations.
Between coats, you may choose to lightly sand the surface with fine-grit sandpaper to achieve a smoother finish. Be sure to remove any sanding dust before applying the next coat.
Clear coats typically require a curing period to fully harden and provide maximum protection. Follow the manufacturer’s instructions regarding the drying and curing time.
It’s important to allow the cabinets to cure fully before subjecting them to regular use or cleaning.
Once the clear coat has cured, maintain the cabinets by cleaning them with a mild, non-abrasive cleaner and a soft cloth. Avoid using harsh cleaners or abrasive materials that can scratch the clear coat.
Applying a clear coat to painted cabinets is a highly recommended step in the finishing process, as it offers several benefits, especially in terms of protection, durability, and aesthetics.
What Are The Advantages Of Using A Clear Coat For Painted Kitchen Cabinets?
Here are some of the many benefits of using a clear coat for painted kitchen cabinets:
This is such a fun twist for a modern kitchen with these painted cabinets that add contrast and depth.
Improved Resistance to Moisture
Kitchens and bathrooms are exposed to moisture and humidity. Without proper protection, the paint on cabinets can bubble, crack, or peel over time.
A clear coat creates a water-resistant barrier, preventing moisture from seeping into the wood or damaging the paint.
This is particularly important in high-moisture areas, as it helps to maintain the cabinet’s structural integrity.
Clear-coated cabinets are generally easier to clean and maintain compared to cabinets without a protective layer.
The smooth surface of the clear coat makes it more resistant to dirt, grease, and stains, allowing for easier cleaning with mild soap and water.
Additionally, the clear coat helps reduce the absorption of spills and stains into the wood, making it easier to wipe them away before they cause permanent damage.
These dark and moody kitchen cabinets look incredible in this kitchen.
UV Protection
Over time, exposure to sunlight can cause painted surfaces to fade or discolor.
A clear coat with UV inhibitors helps to block harmful ultraviolet (UV) rays, preventing the paint on your cabinets from fading or yellowing prematurely.
This is essential if your cabinets are located near windows or receive direct sunlight.
Cabinets in kitchens and other high-traffic areas are subjected to constant use, which can lead to scratches, scuffs, and general wear over time.
A clear coat acts as a protective layer, forming a barrier between the painted surface and potential damage.
It helps shield the underlying paint from daily wear and tear, ensuring that the cabinet finish remains intact for a longer period.
I will always love this kitchen with beautiful painted cabinets.
Resistance To Stains & Spills
Clear coats provide an additional level of protection against stains and spills.
Kitchen cabinets, in particular, are exposed to various substances like food, grease, oils, and liquids that can potentially stain or damage the paint.
The clear coat creates a barrier that makes it easier to clean up spills, preventing them from seeping into the paint and causing permanent stains.
This feature is beneficial in areas prone to moisture, such as near sinks or dishwashers.
Benjamin Moore’s Natural Cream paint color looks incredible on these painted cabinets.
Enhanced Scratch Resistance
Clear coats are often formulated with additives that improve scratch resistance.
By applying a clear coat to painted cabinets, you create a harder and more resilient surface that is less prone to scratches and scuffs caused by everyday use.
This is especially beneficial in households with children, pets, or a high level of activity.
Clear coats are available in various finishes, such as glossy or satin. These finishes can add depth and dimension to the painted surface, giving your cabinets a polished and professional appearance.
A glossy finish can create a sleek and modern look, while a satin finish offers a more subtle and refined appeal. The choice of finish depends on your personal preference and the style you want to achieve in your space.
Black painted kitchen cabinets don’t need to be overly dark. This is a great example of how you can use black cabinets and still have a bright kitchen.
Enriched Color And Depth
Clear coats can intensify the color and richness of the underlying paint on your cabinets.
By applying a clear coat, the paint’s pigments are brought to the forefront, resulting in a more vibrant and visually appealing finish.
This can enhance the beauty of bold or darker colors, making them appear more striking and luxurious.
Char Brown by Benjamin Moore gives these painted cabinets drama and depth.
Highlighting Wood Grain
If your cabinets are made of wood and you want to showcase the natural grain patterns and textures, a clear coat can be an excellent choice.
The transparent nature of the clear coat allows the wood grain to shine through, providing a warm and organic aesthetic.
It brings out the unique characteristics of the wood, adding visual interest and enhancing the overall beauty of the cabinets.
I love how these green cabinets make this kitchen feel so natural and earthy.
Smooth And Uniform Appearance
Applying a clear coat can help achieve a smooth and uniform finish on your cabinets.
It helps to minimize brush strokes, roller marks, or any imperfections that may be present in the painted surface.
The clear coat acts as a leveling agent, creating a seamless and professional look. This is particularly beneficial if you want your cabinets to have a flawless and high-end appearance.
Factors to Consider When Selecting the Best Clear Coat
Before you pick out the best clear coat for painted kitchen cabinets, you’ll want to consider the following factors:
Compatibility
Ensure that the clear coat you choose is compatible with the type of paint you used for your cabinets.
Different clear coats work best with specific paint formulations, so read the product labels carefully or consult with a professional if needed.
Studio McGee showcases this creamy paint color for these kitchen cabinets.
Finish
Clear coats are available in various finishes, including matte, satin, semi-gloss, and high-gloss.
Consider the overall aesthetic you want to achieve in your kitchen and select a clear coat finish that complements your style.
Application Method
Clear coats can be applied with a brush, roller, or spray gun.
Consider the size and intricacy of your cabinets, personal preference, and the equipment you have available before deciding on the application method.
This kitchen received a full renovation to help achieve this look.
Drying Time and Curing
Be mindful of the drying time and curing process required for the clear coat you choose. Some products may require multiple coats or longer curing times, which can impact your project timeline.
The 4 Best Clear Coat For Painted Kitchen Cabinets
Here are some of the best clear coats you can use for your painted kitchen cabinets, along with their pros, cons, and prices:
Pros: This water-based polyurethane from Minwax is another good choice.
It’s available in a matte finish for a subtle, low-sheen look. It’s also resistant to changes in temperature and humidity. It comes in both a paint for a brush on application and a spray paint.
Cons: It may not be as durable as some other options, particularly for heavy use areas. Some users have stated it can yellow with cheap white paint.
Pros: This clear coat is a high-quality option that offers a beautiful, long-lasting finish. It does not yellow, is tint-able, quick-drying, and provides easy clean up with just soap and water.
Originally, this product was created for hardwood floors, so you know this is a great and durable option.
Despite the high price tag, this is still our number one pick.
Cons: It is on the pricier side. You’ll have better results thinning this and using it in a paint sprayer versus using a paint brush.
Pros: This is a great clear top coat to use if you plan to use a brush to apply it. It does come in several sheens: gloss, matte, satin, and semi-gloss. It has a low VOC for indoor use so strong odors aren’t a worry.
Cons: It can dry fast, so you’ll need to be quick and to not make mistakes. This is not recommended for use with a spray painter, so you may need to have a more experienced hand.
Adding a clear coat to your painted kitchen cabinets is a great way to protect them and keep them looking beautiful for a long time. It requires a bit of extra work and a learning curve if you’re new to DIY projects, but the results are well worth it. If you try this in your own DIY, let me know how it goes in the comments!
We have officially completed a full year of our Amazon Best Sellers List for 2023! In honor of that major accomplishment, we’ll take a look back at our Amazon Best Sellers List- The Best Of The Year.
I am so happy to bring you my monthly best sellers list so that you can easily see all the items in one place. All the items in this round up are from Amazon and can be found in my Amazon storefront.
And if you find yourself wondering how to use any of these items in unique ways, make sure you head over to my Tik Tok where I am able to share more detailed reviews of items in video format.
As we say goodbye to 2023, I’m reflecting on how much this year has meant to me and my family. We couldn’t be more grateful to each of you for all your support.
I could never imagine that when I started blogging my home projects it would lead to this. It is thanks to you for supporting this dream of mine and our family. So thank you from the bottom of my heart.
With 2023 behind us, I’m looking back at our top Amazon Best Sellers List- the best of the year! There are tons of products that have helped you organize your home, brought joy to your kids, or have made you more efficient in your life.
I truly love sharing my finds with each of you and love that you are loving them too! It is always my goal to find products that can help you be more functional in your day to day.
As a mom to four kids, I understand the importance of being able to prioritize your family, but also keep your home still functioning and organized.
2023 At A Glance
In honor of our favorite Amazon Best Sellers List from 2023, I’m going to share with you some of my favorite memories from the past year.
Arin Solange At Home Favorites From 2023
Take a look back at some of my favorite projects from the past year. Our home is always a work in progress and I just absolutely love to see how far we have come and where we will go.
With a new year, we revealed our master bedroom makeover. What I loved about this makeover is that it was so simple. We were able to purchase as much as we could from Amazon and kept the update super cost-efficient. All the products we used can be found in my Amazon storefront.
Can I just tell you how much I still love our mudroom? If there is one room in the house that is my organized heaven, it is this room. We used Klearvue Cabinetry to complete a built in-look.
We also opted to make a crafting table, but unfortunately, that wasn’t being utilized. So in 2024, you’ll see more cabinets in that space. Check out all of the products we used in our mudroom reveal.
Sam is never surprised when I come to him with a project. So, it should come to you all as no surprise that I requested Sam to rebuild our kitchen island. We initially had a built-in-microwave in our oven. Unfortunately, that didn’t hold up and it left an unsightly hole. Enter Sam to save the day and rebuild our island!
We underwent not one, not two, but three bathroom renovations this past year. It was well overdue and something that had to get completed ASAP. Fortunately, all kids now have their bathrooms complete and are loving their own spaces for girls and boys. Check out all of our bathroom products. For more sources, make sure you check out our girl’s bathroom and boy’s bathroom.
Avés bedroom got an upgrade this past year too. She was wanting something different and I was happy to change it up for her into a room she could grow into as she ages.
We found this pottery barn bunk bed at the outlet and she had to have it! Once we found it, the ball got rolling and we went with it.
I love how girly, bright, and clean her room looks with all the special touches. Make sure you check out all of the room decor, organization, inspiration, and details.
2023 was the year to complete projects! I’m so happy that after almost 5 renditions, our hearth room is finally complete. I love how bright it is! It flows seamlessly with the rest of the house and is a great room just off our kitchen.
When our wallpaper in our playroom started to yellow due to our fireplace heat, we needed to pivot. While I loved the wallpaper, I knew it was a great opportunity to do something drastic to this space!
Instead of using my traditional and signature pink color, I went completely rogue, and turned our playroom blue.
I love how it turned out and how it truly captures the grand millennial style that our home has evolved into.
The best part about this makeover was the simplicity. We ended up using pieces we already owned. With paint and this incredible wallpaper, the space transformed.
Could there be a cuter room in our house? After years (I mean years!!) of Goldie not having her own dedicated and decorated space, she finally got her room. Boy, was it worth the wait!
Goldie’s room is darling and truly captures the grand-millennial style. I love that a lot of her decor, such as her bed, was already owned. We simply swapped furniture and decor around to repurpose it in a new way.
Her wallpaper was the biggest expense and truly made the difference.
The Pool
This is a controversial topic, but I’m adding it as a 2023 win! Our much anticipated pool finally went into the ground of our backyard in November of 2023! While we didn’t have summer pool parties in 2023, I’m hopeful that 2024 will bring lots of fun outdoor projects for you to follow!
While the pool is in and functions, the outdoor space still needs some major work! So in the meantime, let’s remember back to our DIY stock tank pool days instead! Outdoor oasis coming soon!
Office Upgrades
My small home office received a makeover back in 2022. I love having a dedicated space to do my work and create my own chaos.
One of the design decisions at the time was to have open shelves above our work benches. However, after using the space for a year, I realized this wasn’t functional.
Enter Sam. Again.
Sam was able to update those open shelves and convert them into closed units. I really needed something that could hold more items and keep it organized.
Your home is all about function and what you make of it! So don’t be afraid to go back to the drawing board or pivot.
Most of my favorite family memories from the past year are ones we spent together, simply being.
We took some amazing trips to the beach and are finishing our 2023 at Disney! I can’t wait to share all of the details on that trip in the future.
In the meantime, I love remembering all of the fun our little (big) family had together.
The kids and I cheered Sam on in his Ironman competition. We were so proud of his hard work and dedication!
I had a fabulous time in California and Austin attending Amazon’s creator summit. I was able to enjoy some time away, eat great food, meet amazing people, and learn from my fellow creators.
The kids excelled at everything they set their little hearts to! I was proud to watch Jack and Walker play baseball this year. My heart always soars watching Avé dance, and Goldie rocked her first semester of big girl school!
All in all, 2023 was so good to our family. We are so blessed and grateful for the love and support surrounding our family.
Shop Amazon Best Sellers- The Best Of The Year
We have had so many great products that you all have loved! To help you navigate these amazing products, you’ll notice I’ve broken them all down into groups.
Do you have a toddler that is ready for their first dollhouse? Picking out the best dollhouse for 2 year old toddlers and preschoolers is an exciting time!
We will go over the best dollhouse for toddlers and preschoolers that are age appropriate, encourage child development, and can last for years to come!
This post may contain affiliate links.
Best Dollhouse For 2 Year Old Toddlers And Preschoolers
When it comes to choosing the best dollhouse for 2-year-old toddlers and preschoolers, there are several important factors to consider.
The best dollhouse for 2-year-olds should be designed with their safety and developmental needs in mind, featuring sturdy construction, large pieces to prevent choking hazards, and engaging, interactive elements. Additionally, the dollhouse should encourage imaginative play and provide opportunities for fine motor skill development.
As such, selecting a dollhouse that is both durable and stimulating is key to providing young children with an enriching play experience.
Over the years, I have had many dollhouses for my kids, and I have found that these playsets offer numerous developmental benefits for young children.
Benefits Of Playing With A Dollhouse
Playing with a dollhouse is not just an entertaining and engaging activity for children, it also holds numerous benefits for their development.
A dollhouse can be a fantastic tool for promoting various stages of play, fostering imaginative play and social skills, enhancing language skills, and introducing routines and schedules.
Furthermore, dollhouses can help children enhance their fine motor skills as they manipulate the small figurines and furniture within the playset, promoting dexterity and hand-eye coordination.
Dollhouses encourage social interaction and cooperation when children engage in pretend play together, fostering important social and emotional skills.
Moreover, dollhouses provide a tactile and visual learning experience, as children can explore concepts such as spatial relationships, organization, and cause and effect through arranging furniture and creating their own miniature environments.
Ultimately, dollhouses offer a versatile and engaging play experience that supports holistic child development.
Here’s a deeper look at the benefits:
How Does A Dollhouse Encourage Onlooker Play?
Onlooker play is especially prevalent in younger children who are still learning about their environment.
It involves the child watching others play without directly participating.
A dollhouse can facilitate onlooker play as the child observes a parent or older sibling interacting with the dollhouse. This observational learning can help a child understand how to engage with the dollhouse and the various scenarios that can be played out.
How Does A Dollhouse Encourage Parallel Play?
Parallel play occurs when children play alongside each other but do not interact directly. Each child is engrossed in their own activity.
Dollhouses are large enough to accommodate multiple children playing side by side. Each child can focus on their own part of the dollhouse, fostering their ability to concentrate and play independently while being aware of the presence of others.
How Does A Dollhouse Encourage Associate Play?
As children grow older, they begin to interact more with each other during play.
In associate play, children start to share, lend, and take turns, but there is still no organized activity or common goal.
With a dollhouse, children can begin to interact with one another, discussing the dolls’ actions or swapping pieces of furniture.
How Does A Dollhouse Encourage Cooperative Play?
Cooperative play involves organized activities with rules and assigned roles. Here, children begin to work and play together towards a common goal.
A dollhouse can be a great tool for cooperative play as children can play out intricate scenarios together, each taking on different roles (e.g., one child playing the role of the doll parent, while another child takes on the role of the doll child).
How Does A Dollhouse Encourage Imaginative Play?
Playing with a dollhouse encourages imaginative play, allowing children to create their own narratives and scenarios. This not only stimulates creativity and imagination, but it also fosters social skills.
Children learn about roles and responsibilities within a family and a household, and they can practice social interactions and problem-solving.
Through playing with dollhouses, kids can also learn about home life, daily routines, and different family dynamics, which can contribute to their understanding of the world around them.
How Does A Dollhouse Encourage Language Benefits?
Dollhouse play can significantly enhance language development. As children engage in pretend play, they practice their communication skills, narrating the actions, and expressing the thoughts, feelings, and dialogues of their dolls.
This helps them to improve their vocabulary, sentence structure, and storytelling abilities.
How Does A Dollhouse Help Kids with Schedules and Routine?
A dollhouse can be an effective tool for teaching children about routines and schedules. By simulating daily routines such as meal times, bedtimes, and housekeeping tasks, children can understand and get used to the concept of schedules.
This can also help children feel more secure and help in establishing their own routines.
What To Look For In A Dollhouse
Choosing the perfect dollhouse can be a fun yet challenging task. The right dollhouse can be a source of hours of fun and a great way to stimulate imaginative play, refine fine motor skills, and foster language development.
Here is a guide to help you select the ideal dollhouse for your child:
Age Appropriateness For Dollhouses
One of the most important factors to consider is the age of your child.
For younger children, look for dollhouses that have easy access, large play pieces, and no small parts that could be a choking hazard.
For older kids, you can consider more complex dollhouses with small pieces for a detailed play experience.
Consider The Type of Play
Consider the type of play the dollhouse encourages.
For imaginative and open-ended play, look for dollhouses with various rooms and pieces of furniture that allow your child to create their own narratives. Different rooms and wooden furniture pieces allow for plenty of imaginative play.
For pretend play and role-playing, dollhouses with unique features like working front doors, garage doors, or a kitchen set with a frying pan can offer a more realistic play experience.
Size and Portability Of The Dollhouse
The size of the dollhouse is another important factor.
If space is a constraint, a small size dollhouse or a portable dollhouse with a built-in or carry handle could be the best choice.
If you have plenty of room and want a dollhouse that makes a statement, a large dollhouse could be the ultimate dollhouse pick.
Personally, we have a larger dollhouse with wheels. This is great because we can easily move it in and out of storage for my kids.
Material and Quality Of The Dollhouse
Consider the material of the dollhouse.
Wooden dollhouses are high-quality options that can stand the test of time. On the other hand, plastic houses are usually more brightly colored and can be easier to clean.
While I love large wooden dollhouses, I do see the benefit of plastic dollhouses. They are a great short term investment and much more durable with young toddlers. Wooden dollhouses, on the other hand, are a great long term investment that can grow with your family.
Included Accessories In The Dollhouse
Look at what is included with the dollhouse.
Some come with a range of dollhouse furniture and play pieces, while others may require additional purchases.
If the dollhouse comes with plenty of furniture pieces, it can provide a more immediate, complete play experience.
Dollhouse Theme and Style
I love a great theme! Dollhouses come in different shapes, sizes, colors, and themes!
If your child loves traditional, homely settings, a classic wooden house or a traditional dollhouse would be a great option.
If your child prefers modern or fantasy themes, something else may be a great addition to their playroom.
There are plenty of dollhouses that are themed based on your child’s favorite characters. From superheroes to Minnie Mouse, there is a beloved character out there for any kid.
Check out all the details on this adorable DIY dollhouse.
Price And Budget
Overall, you need to keep in mind your budget and the price of the dollhouse.
Dollhouses come in a wide range of prices. The higher quality dollhouses are generally wooden and are more expensive than plastic dollhouses.
If this is your child’s first dollhouse, you may want to start out with something more budget friendly to determine how much your child enjoys playing with it.
From there, you can upgrade the dollhouse as your child ages.
On the other hand, if you have multiple children, it may be worthwhile getting a dollhouse that is large and big enough for multiple children to play at once.
In the end, your budget and needs will help narrow down your decisions of the best dollhouse for 2 year old toddlers and preschoolers.
A Look At The Best Dollhouse For 2 Year Old Toddlers & Preschoolers
Here’s a look at the best dollhouse for 2 year old toddlers and preschoolers! There is a wide range from young toddlers to older kids fitting every style and budget.
Foldable Stainless Steel Door Hook Organizer & Countertop Shelf
I am so happy to bring you my monthly best sellers list so that you can easily see all the items in one place. All the items in this round up are from Amazon and can be found in my Amazon storefront. And if you find yourself wondering how to use any of these items in unique ways, make sure you head over to my Tik Tok where I am able to share more detailed reviews of items in video format.
It officially is the holiday season and we are in full swing! Our halls are decked and the stockings are hung by the chimney with care.
As much as I love the holiday season, it is such a busy time. Between deals on Black Friday, Small Business Saturday, and Cyber Monday paired along with holiday parties and festivities, November and December are always a blur.
This November we had a great time celebrating Thanksgiving visiting my parents! It was so fun to go back home and to be surrounded by our family. We don’t get to spend too much time visiting family, but this short trip was just what my heart needed.
Sam and I also spent some time decorating the house to get the kids excited for Christmas. Do you like to decorate and put up your holiday decor before Thanksgiving or after?
I absolutely love our holiday decor so I aim to put it up as soon as possible!
I try to do a mixture of DIY and store-bought holiday decor. There are many beginner friendly holiday DIY projects out there that you can make to give your home a fresh look. One of my favorite projects is my Easy DIY Life Size Nutcracker.
It may look super intimidating, but I promise, the actual process is super easy! If you want something more subtle, my DIY painted Santa mugs are a great way to add some festive cheer too!
I hope your holidays are shaping up to be everything you imagined.May you have a relaxing holiday season filled with lots of fun family memories.
Life Updates For October
November was such a busy month professionally for Arin Solange At Home. Our team was hard at work with big sales on Black Friday, Small Business Saturday, and Cyber Monday!
I’m so incredibly thankful to each of you for supporting our family.
Arin Solange At Home Updates
Wow! November was a whirlwind! We had such a busy month with big sales! I hope that each of you were able to find something you love during the Black Friday-Cyber Monday weekend event.
I love using this weekend to make sure I have all of our Christmas presents shopped for! Amazon Best Sellers are a great location to find some great presents and this month showed!
If you are looking for more great deals, make sure you join my private Facebook group for a lot more deals and sales! There are new deals added every day!
As far as projects go in our home we have been on a bit of a break.
Our pool is still ongoing and we are making progress! We completed Goldie and Ave’s rooms and they are pure perfection!
Right now, we are redoing our dining room table. Our current table was moved into the kid’s playroom. I realized that having a couch set up in that playroom wasn’t working well for my kids’ needs.
Walker LOVES to play with his LEGO sets. He needs a good table to make all of his builds. As a result, our dining room table was LEGO land.
As much as I love seeing his LEGO builds, I also want my dining room table. I prefer to keep the kid’s toys confined to the playroom or their rooms. Since there was no table in that playroom, we opted to move our large dining room table in there to help confine the chaos.
I’ve always preached that function and style can go hand in hand. Since our playroom wasn’t functioning well for our needs, we pivoted. Will we have a dining table in that room forever? Absolutely not! But for now, this works great! As an added bonus, the dining table is beautiful!
I love watching the kids gather around it and work on their own separate projects.
Stay tuned for a dining room facelift as we play musical tables!
Family Updates
With the holidays approaching we start to get our family ready for all the festivities in December.
After Thanksgiving, our family starts our holiday movie tradition. Every Friday night we preview a new holiday movie.
This is a fun time to sit down with the kids and not only watch the classics, but also experience new movies too.
Once November hits, I also try to get myself organized for Christmas. We do participate in matching family pajamas and stick to a few fun traditions.
Of course one of those traditions is our Elf on the Shelf. So naturally, I have to make sure I can still find our elf and get prepared to set my alarms!
Jack participates in his school’s holiday chapel show. Last year he did a solo and we were so proud of him!
Ave has been having a blast helping move our Elf into new and fun scenarios. I love that she is now old enough to join in on this tradition and to help make the holidays special for her siblings.
Walker and Jack both started basketball. The boys love sports and we love watching-so it works well!
Goldie is still as sweet as she is spicy! We love watching her little personality shine! She has been loving her time at school with her older siblings.
Shop Amazon Best Sellers List- November 2023
Check out the October best sellers list with these top rated products.
The holidays are so fun for many reasons, but one of my favorite traditions is finding white elephant gifts.
Our friend group does a white elephant gift exchange and it’s always a battle to find the best white elephant gifts.
If you are celebrating a white elephant gift exchange this year, check out these white elephant gifts that everyone will want!
This post may contain affiliate links and updated in 2025
White Elephant Gifts Everyone Will Want
Every year our group of friends participates in a white elephant gift exchange. This is such a fun time to see who can give the most ridiculous gift.
While my friends love to find the most ridiculous gift, I prefer to go along the lines of whimsical or practical.
I love challenging myself to find gifts that are either hilarious or has a functional motive behind it.
How To Play White Elephant
Finding white elephants gifts can take some time and creative thinking.
Set Ground Rules
As a general rule, our group of friends always agrees on a price limit. The price limit allows everyone to get a gift that is around the same amount, that way it is even.
In year’s past, we have also agreed upon a theme. The theme can range from gifts that are useful for a party or gifts that are considered funny. Whatever theme you pick, it always makes the game that much more interesting.
If you have never played white elephant, you may be wondering what this game entails. It’s a simple game that can get really cutthroat!
You have a set number of players. Each player brings a gift, as decided upon a price or theme.
Every player picks a number and that determines the order in the game.
When we play white elephant, we also agree on a set number of swaps. Again, this keeps everything fair, yet still interesting.
Once the ground rules are established you can begin the game.
Begin The Game
Sit together as a group with the gifts presented for everyone to see.
The first person can pick a gift from the pile and will open the gift. The person who goes first will get a chance to swap their gift after everyone has gone.
Subsequent Players Make Their Move
The second player can now pick a gift from the pile or can swap and take player 1’s gift.
Next, the third player can choose a gift from the pile to open or can take player 1 or player 2’s gift. This continues with all players.
If you have a gift that is swapped out, you can choose a new gift to open or steal someone else’s gift. The goal is to always have a gift if you have taken a turn.
The Game Ends
Once everyone has a turn, player 1 can now decide if they want to keep their gift or swap it out.
This is now the end of the game and everyone is set with their gifts.
It is so fun to see what everyone starts with and ends with. Sometimes you get really lucky and swap out a gift for one you’ll love. Other times, you end up getting something that is more whimsical.
We also like to pick out awards for best gift giver and most ridiculous gift.
Shop My Favorite White Elephant Gifts
Check out some of my favorite white elephant gifts everyone will love.