Shop
Home

Simply White Vs. Chantilly Lace Benjamin Moore Paint: Choosing The Perfect White Paint

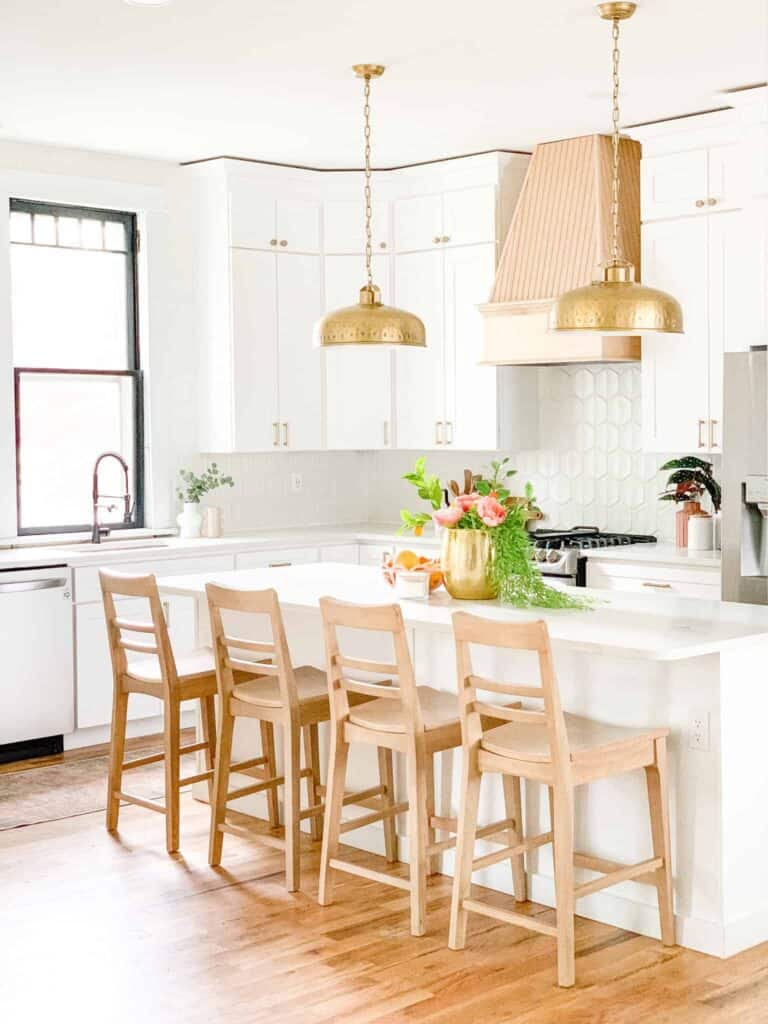
When it comes to choosing the perfect white paint color, there are plenty of great choices to pick from. There are other things to consider as well before painting your home. Lighting, undertones and paint finish all play an important role in the final look. If you’ve been trying to decide on the perfect white color, I’ll go over Simply White vs. Chantilly Lace Benjamin Moore Paint, and how to pick the perfect color.

This post may contain affiliate links.
Simply White Vs. Chantilly Lace Benjamin Moore Paint: Choosing The Perfect White Paint

I am currently planning to paint my home and deciding on the perfect neutral white to do the job. My top two contenders are Benjamin Moore’s Simply White and BM Chantilly Lace. These are two of Benjamin Moore’s most popular white paint colors. I think they would be the best white paint colors for my house, but each home is different.

When weighing my options, I have to think about the lighting in my home. Light reflective value, which refers to the percentage of light a paint color reflects, determines how the colors will show up in my home. The room orientation as well as north, south, east and west lighting also affect how the undertones will appear. Natural lighting and artificial light make a vast difference in how the paint shows up too. 

I want to make sure the undertones of the paint convey a comfortable, calming and relaxing mood in my home. I want them to match my other paint colors as well. Another decision I will have to make is the finish of the paint that is best to use depending on what areas of my home I am painting.
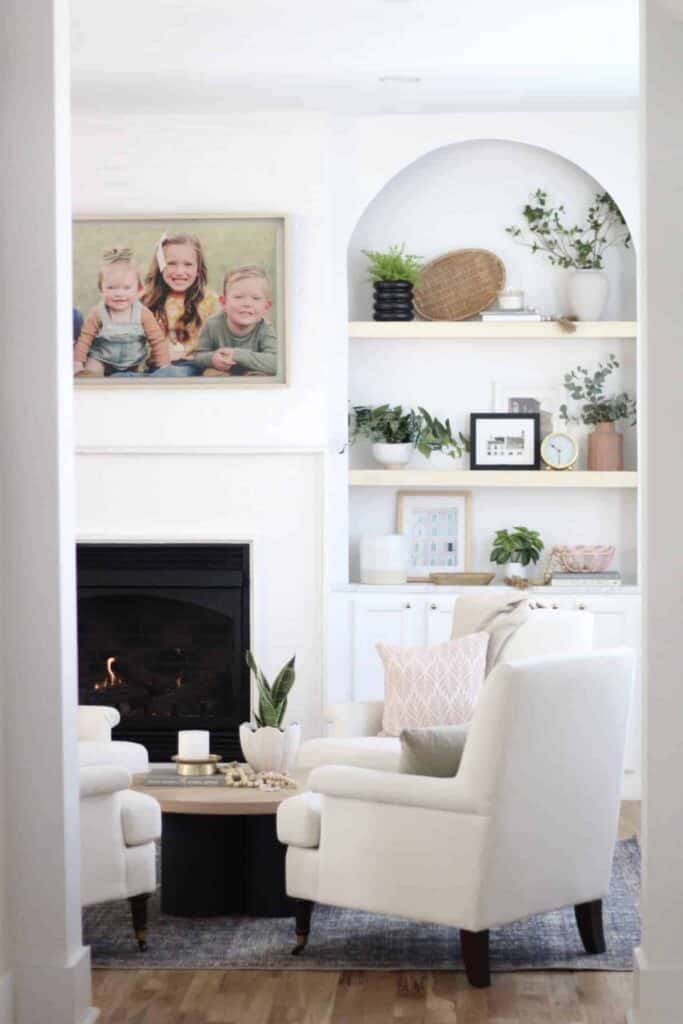
How To Pick The Perfect White Paint Color

The perfect white paint color is different for each home. A good place to start is the natural and artificial lighting in your home. Undertones in the white paint colors will look different depending on where the sun rises and sets in your rooms so it is important to assess the lighting in your home before choosing your favorite white color.

Assess Your Lighting In Your Home

Lighting plays an important role in how you perceive paint colors. LRV, or light reflectance value, refers to the percentage of light a paint color reflects. A value of 0 is the darkest black and a value of 100 is the truest white color.

Consider Room Orientation

Room orientation also affects the way paint is perceived. Northern light can wash out some paint colors. To counteract the cool tones of north-facing rooms, paint with warm undertones will create balance. Cool colors can add nice accents, but will double the effect of the lighting.
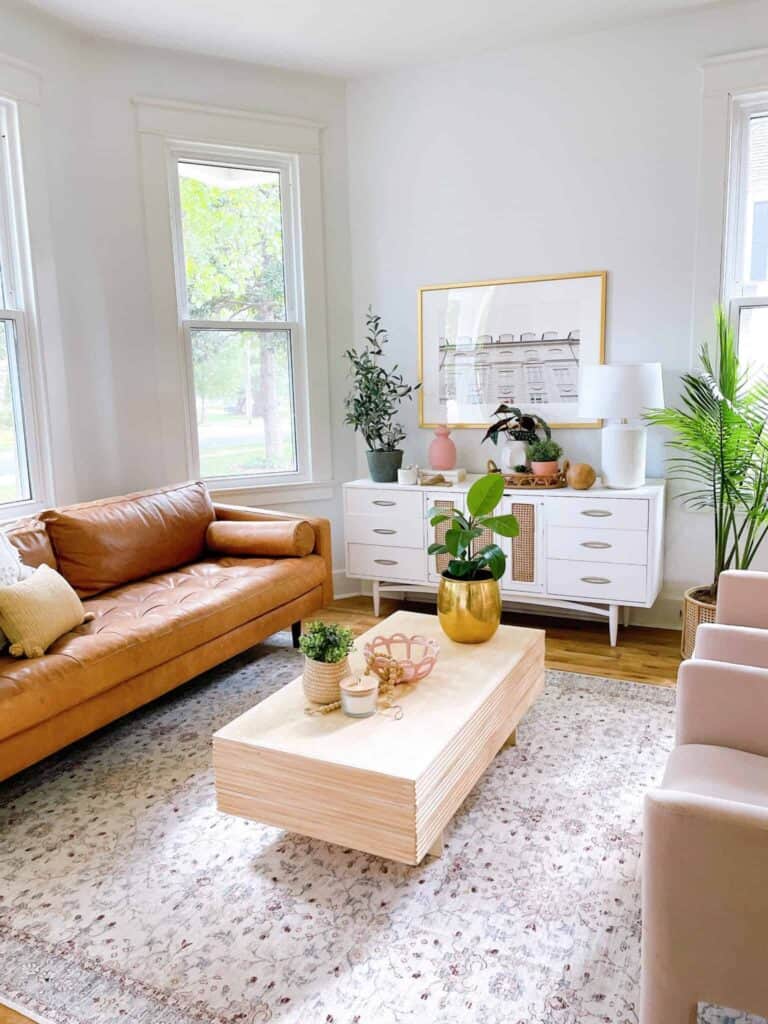
North facing rooms rely heavily on paint color and lighting to feel warm and inviting, but south facing rooms receive plenty of natural lighting throughout the day to do this. With that said, time of day makes a difference in how the natural light affects your paint color. Southern light tends to have warm tones. Your paint will look different at noon time versus late afternoon. The best way to decide which is the right white paint color for you in this situation is to stick a few paint samples on the wall and look at them during different times of the day. This way you can find which feels most balanced for your own home.

Eastern and western facing rooms are a bit trickier to work with because the sun doesn’t rise on one side of the room and set on the other. They will always have partial sunlight. This makes picking a paint color more challenging. You may notice shadows in an east-facing room in the morning. The morning light is slightly warm in these rooms. However, it will turn colder as afternoon light begins to hit it. Warm tones may help to balance this out.
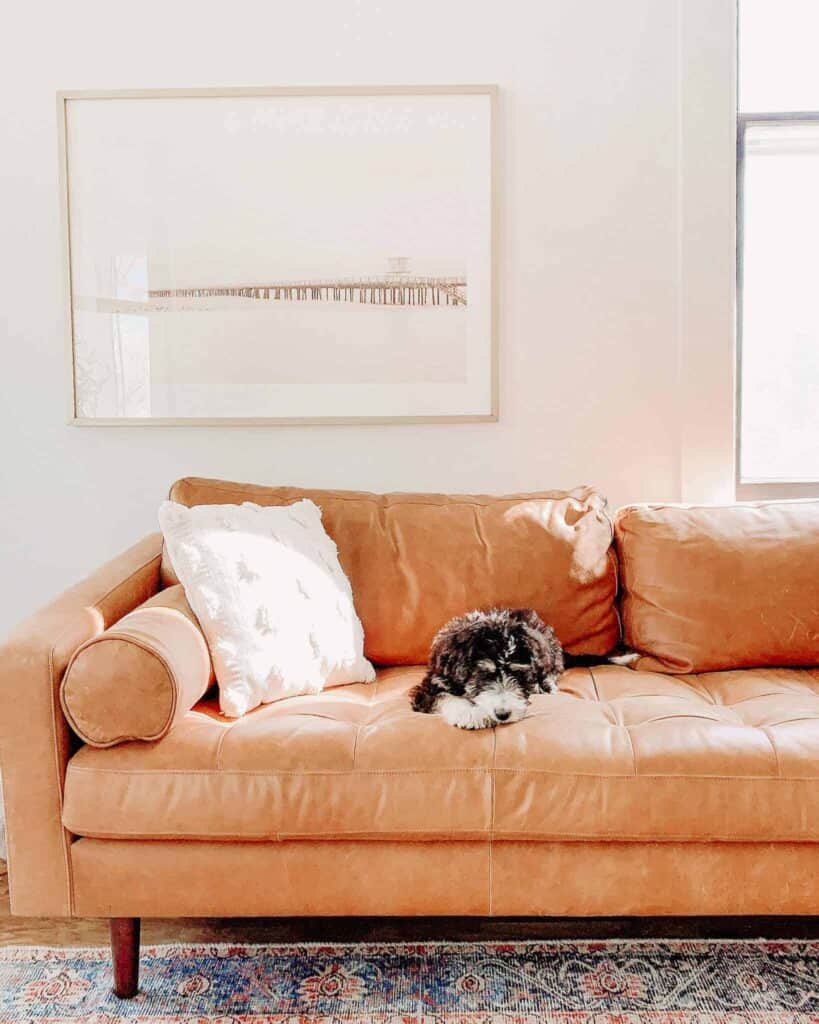
Finally, a western facing room, similar to an eastern facing one can prove a challenge when it comes to paint tones. In the morning, gray undertones are prominent. When the sun is brightest, at noon, the light tends to wash out the colors. As afternoon light seeps in, a golden glow will warm up the room.

Artificial vs. Natural Lighting

Natural light only comes from the sun, but artificial light can come from many sources within your home. These sources are ones you have control over and should consider especially in rooms that don’t get much direct sunlight.
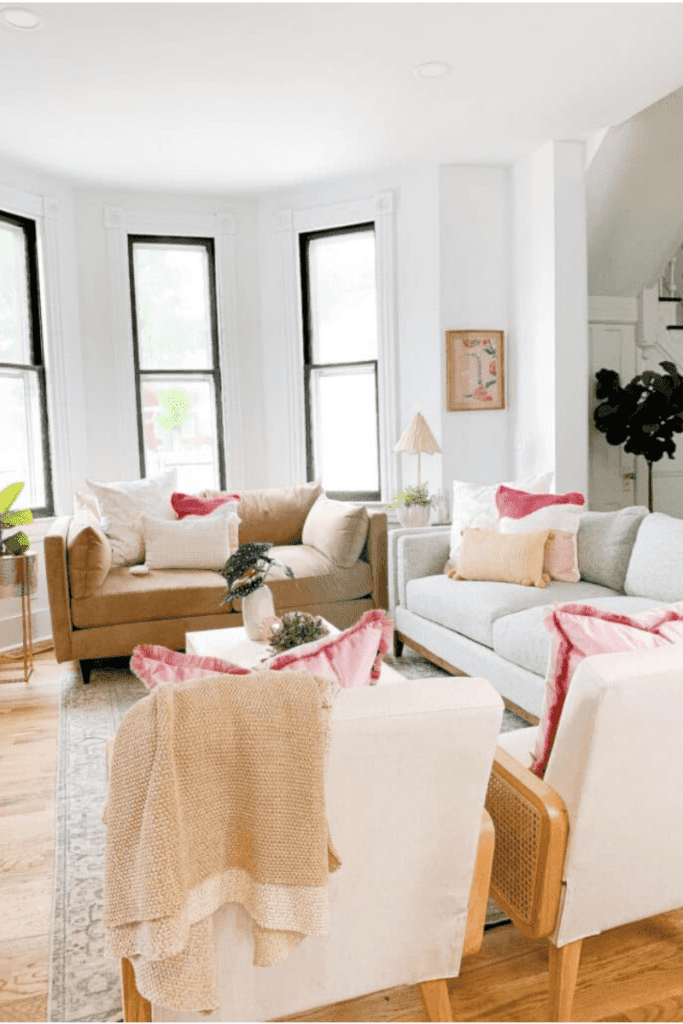
 It is important to use the right kind of light bulb for the ambiance you are looking to create. Incandescent intensifies warm colors with the bright yellow light it gives off. Because of this, cooler colors become washed out. Fluorescent bulbs are cooler in comparison and enhance blue undertones and green undertones. Halogen lights are most similar to natural lighting, so they don’t affect the way colors appear as much as incandescent and fluorescent bulbs do. If you don’t get much light and use artificial sources, think about how these may change the look of your white walls throughout your whole house.

Match Your Undertones

There are three kinds of colors: warm, cool and neutral. Warm colors like red, orange and yellow, bring energy and positivity into a room. Cool colors like green, blue and purple, provide a space with a sense of calmness and relaxation.

Neutral colors such as white and gray can lean toward warm, cool, or neutral depending upon their undertones. 

The undertone plays a significant role in the feel of the room. Warm undertones create intimate and cozy spaces. They are associated with energy, playfulness and happiness. Warm colors are often used in kitchens and living rooms. They make larger spaces feel more inviting.
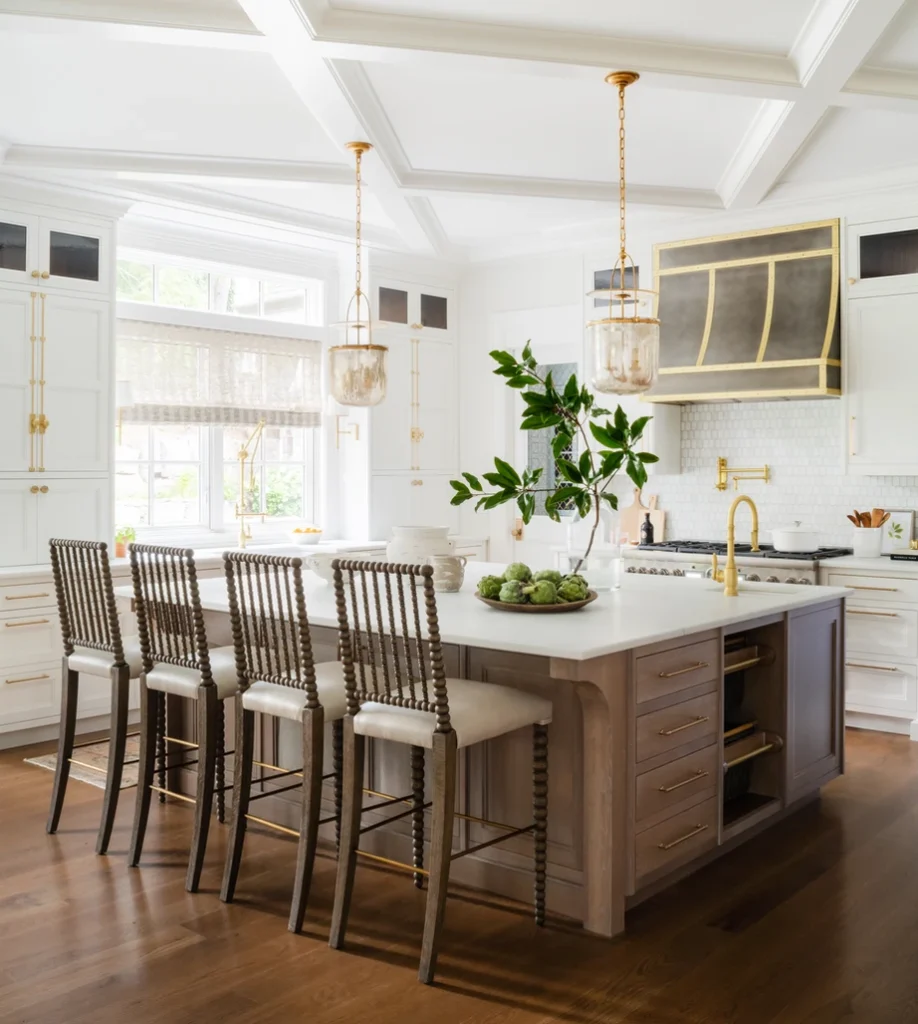
Britt Design Studio used BM Chantilly Lace in this timeless kitchen.

Cool undertones convey a sleek and soothing feel. They promote calm, relaxation and a fresh look. They are popular in bathrooms and bedrooms and make smaller spaces feel more expansive.

Benjamin Moore Simply White and Benjamin Moore Chantilly Lace have different undertones. Simply White has a warm undertone, while Chantilly Lace has a neutral undertone. That is something to consider when deciding which shade will look best in your home.

Pay Attention To Your Paint Finish

There are several paint finishes to consider once you’ve narrowed down paint colors and undertones. They include flat, matte, eggshell, pearl, satin, semi-gloss and high-gloss. These seven finishes, or sheens, are a measure of how much light reflects off the surface, resulting in a gloss.

Julie Rootes used Chantilly Lace in this coastal living room.

Flat

  • No Gloss
  • Does not reflect light
  • Has no sheen resulting in more pigment coming through
  • Does not clean easily and can result in burnishing
  • Commonly used on ceilings, walls, low traffic spaces

Matte

  • Similar to flat but a bit more forgiving and more easily able to clean
  • Provides luxurious deep colors
  • Commonly used on living room, dining rooms, bedrooms

Eggshell

  • Provides low sheen and soft smooth “eggshell” finish
  • Better washability in comparison to flat paint
  • Commonly found in high traffic areas: living rooms, bedrooms, kitchen

Pearl or Satin

  • Medium gloss
  • Highly durable
  • Easy to clean
  • Commonly found in high traffic areas indoors: walls, trim, doors, and cabinets
  • Can be used outdoors on siding, trim, shutters, and doors

Semi-Gloss

  • Extremely durable
  • Easy to clean
  • Creates smooth finish and great at showcasing dimensions
  • Commonly used on trim, doors, cabinets, wainscoting
  • Can be used outdoors on trim, shutters

High Gloss

  • Reflects light, creates depth and clarity
  • Mirror-like appearance
  • Commonly used indoors on trim, doors, cabinets
  • Can be used outside on architectural detailing
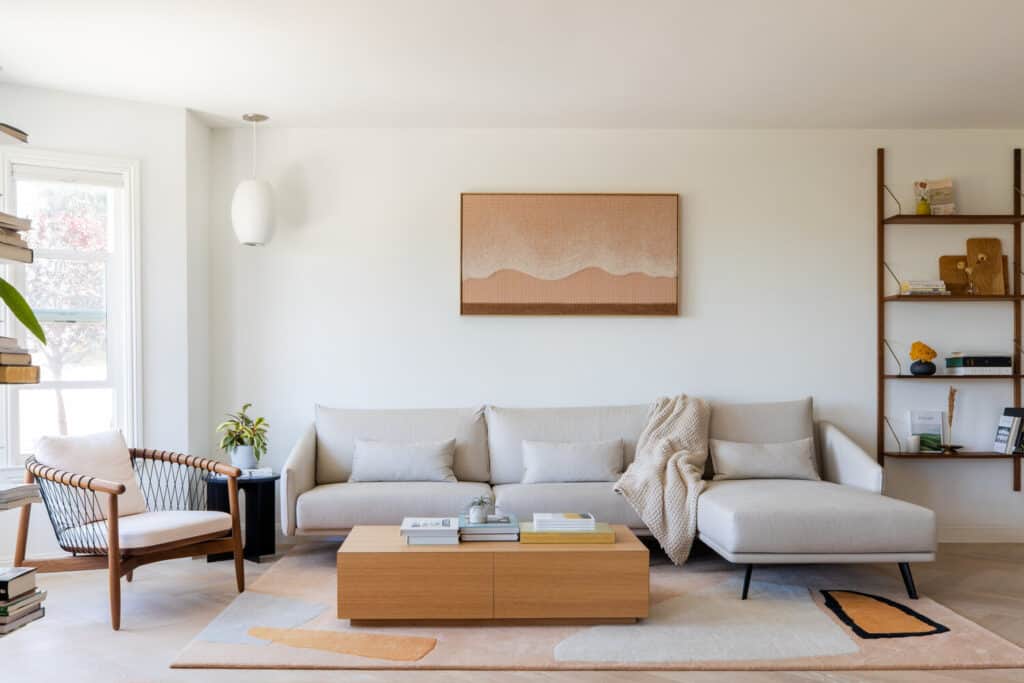
Cathie Hong created this minimalist living room with Chantilly Lace as the perfect background.

Benjamin Moore Simply White

I will be discussing my two favorite white colors in depth here, explaining the undertones and considerations under different lighting circumstances.

Benjamin Moore’s Simply White paint, also referred to as OC-117, is one of the company’s warm white colors. It was the 2016 Benjamin Moore Color of the Year and remains one of the most popular whites among homeowners. The LRV, or light reflective value, is 89.52 on a scale of 0 being fully black to 100 being completely white.

Simply White Undertones

Simply White has slightly warm undertones. It doesn’t pull much yellow in natural lighting, but it is an off-white shade. With warm lighting, this will be more visible.
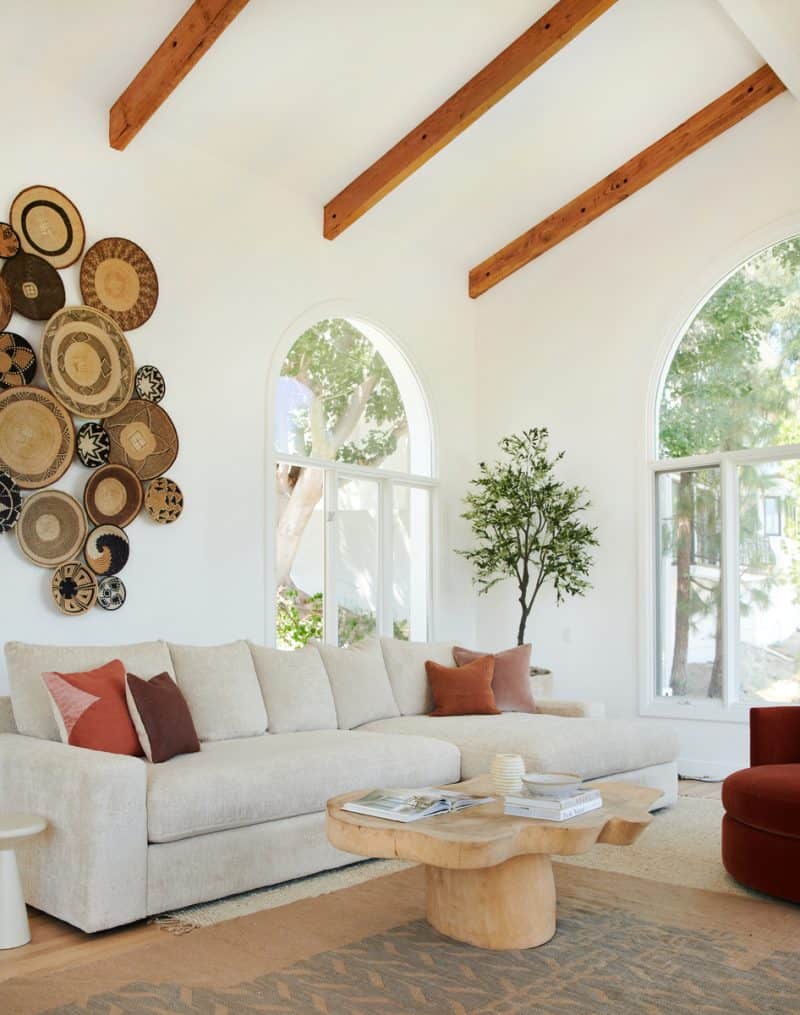
Keltie Knight’s amazing living room looks gorgeous with Simply White paint.

Simply White Under Different Lighting Circumstances

White paints, more than other colors, change depending on lighting circumstances. In bright natural light, Simply White will appear a bright white color. East lighting will bring in a lot of natural light and Simply White will appear brighter and more white with less yellow undertones. As the sun begins to set, some yellow will show through with subtle undertones.

Northwest lighting will bring out some yellow undertones of Simply White paint, but not as much as warm lighting would. This warmer color would not look like a cream. In northern lighting, it will look like a true warm white.
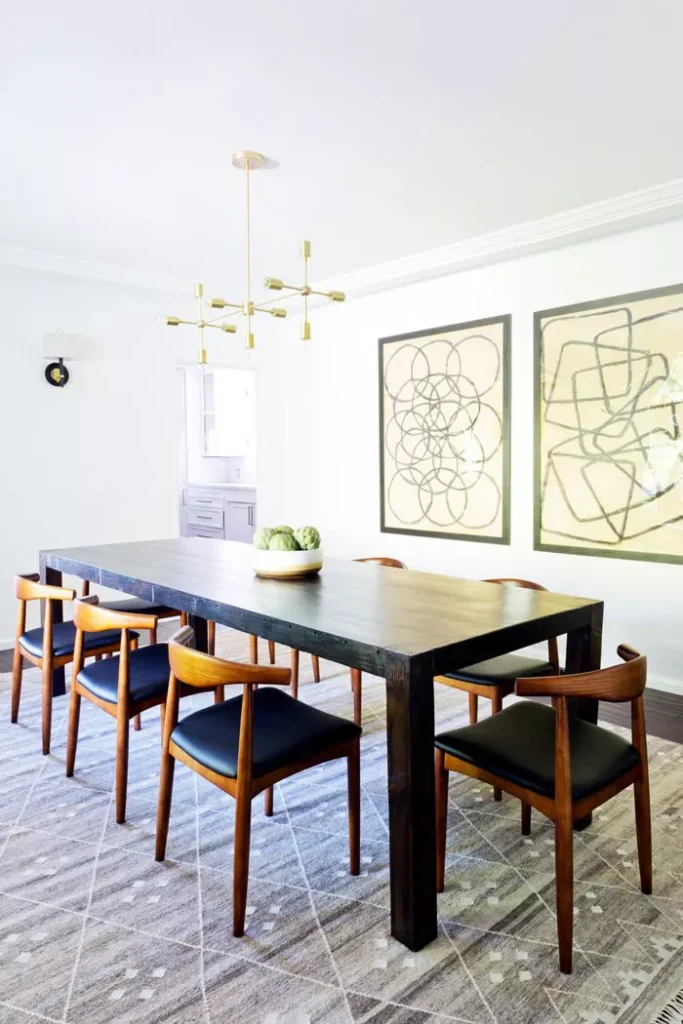
Katie Hodges Design created this modern dining room with BM Simply White.

Benjamin Moore Chantilly Lace

Benjamin Moore’s Chantilly Lace OC-65 is one of the company’s neutral white colors. The LRV of Chantilly Lace paint, or light reflective value, is 90.04 on a scale of 0 being fully black to 100 being completely white. As far as Benjamin Moore paint colors, Chantilly Lace is their brightest white paint. Sherwin Williams does have whiter white colors. A stark white look isn’t what I want in my home so I’ll go into detail on the undertones Chantilly Lace has and how it looks under different lighting circumstances.

Chantilly Lace  Undertones

Chantilly Lace is a clean white and has neutral undertones, making it a versatile color. That means lighting plays a major role in what colors it picks up. Chantilly Lace has minimal undertones which means it acts mostly like a pure white and has a clean look.
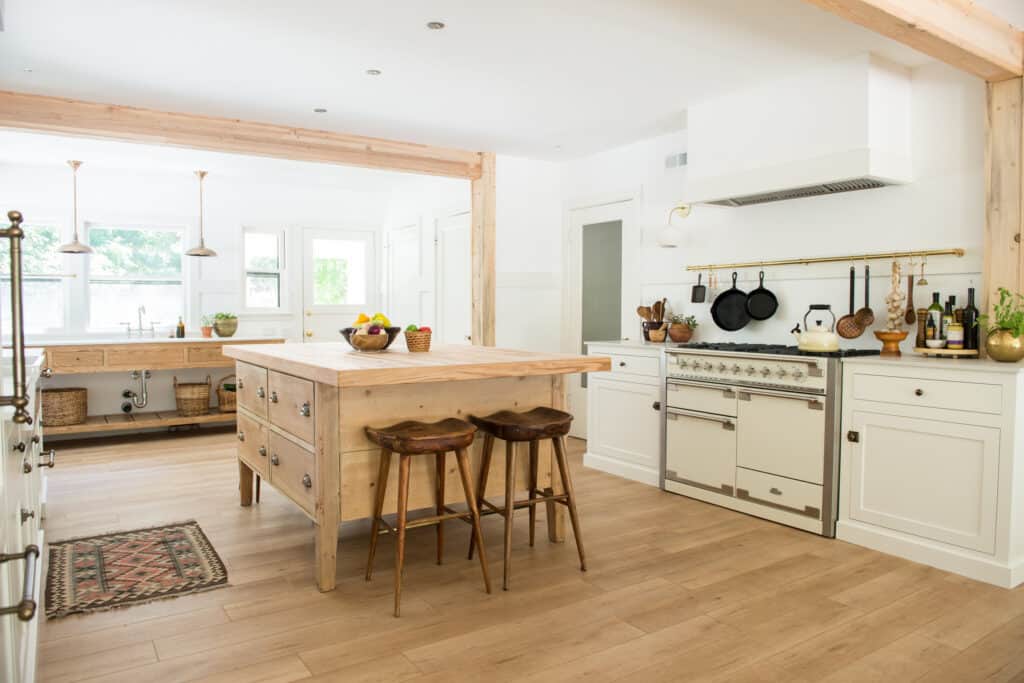
What a beautiful kitchen with BM Simply White walls and BM Swiss Coffee cabinets.

Chantilly Lace Under Different Lighting Circumstances

If you have northern light, it may show a little bit blue or gray. Southern light, or even western afternoon light, may lean somewhat warm.

Other Similar White Paint Colors

Some other similar great colors include White Dove, Super White and Cloud White. I’ll discuss the undertones and lighting considerations below.

Benjamin Moore White Dove

Benjamin Moore White Dove, OC-17, is a clean and classic white. It is in the Benjamin Moore Off White collection. It is a warm white paint color with a yellow undertone.
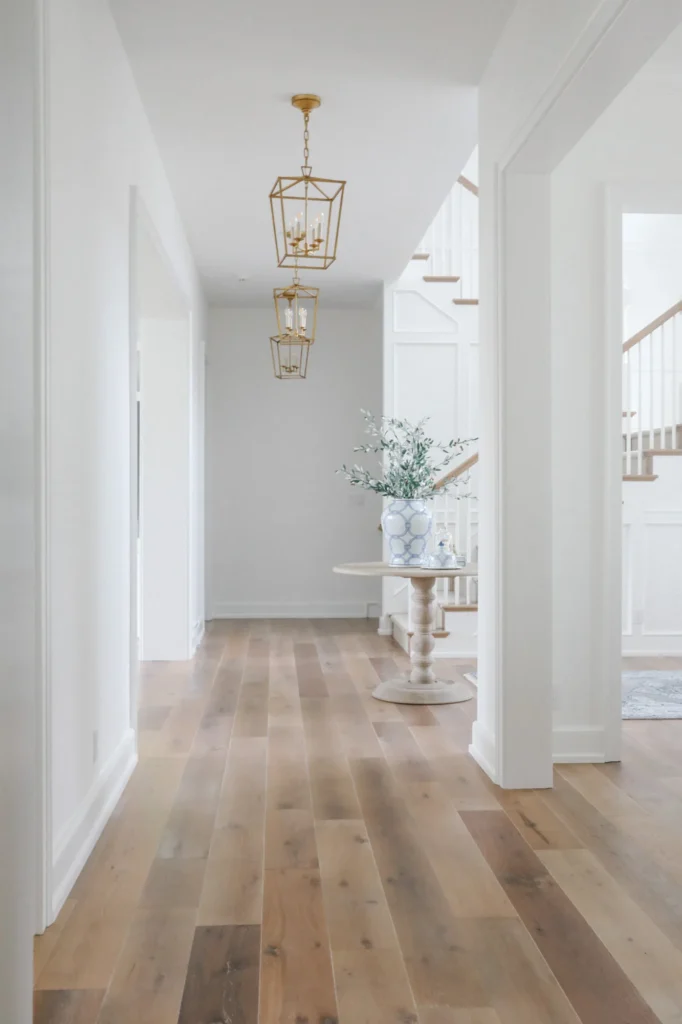
This hallway is crisp and bright thanks to Simply White by Benjamin Moore.

This hallway is crisp and bright thanks to Simply White by Benjamin Moore.

Benjamin Moore Super White

Benjamin Moore Super White, OC-152, is a bright white paint color. It is in the Off White collection as well. It is a very slightly cool white paint color that reflects color very well. 

Benjamin Moore Cloud White

Benjamin Moore Cloud White, OC-130, is a soft and balanced shade of white. It can be found in the Off White collection. It is a creamy white color. Depending upon the lighting, it can appear more yellow at times.
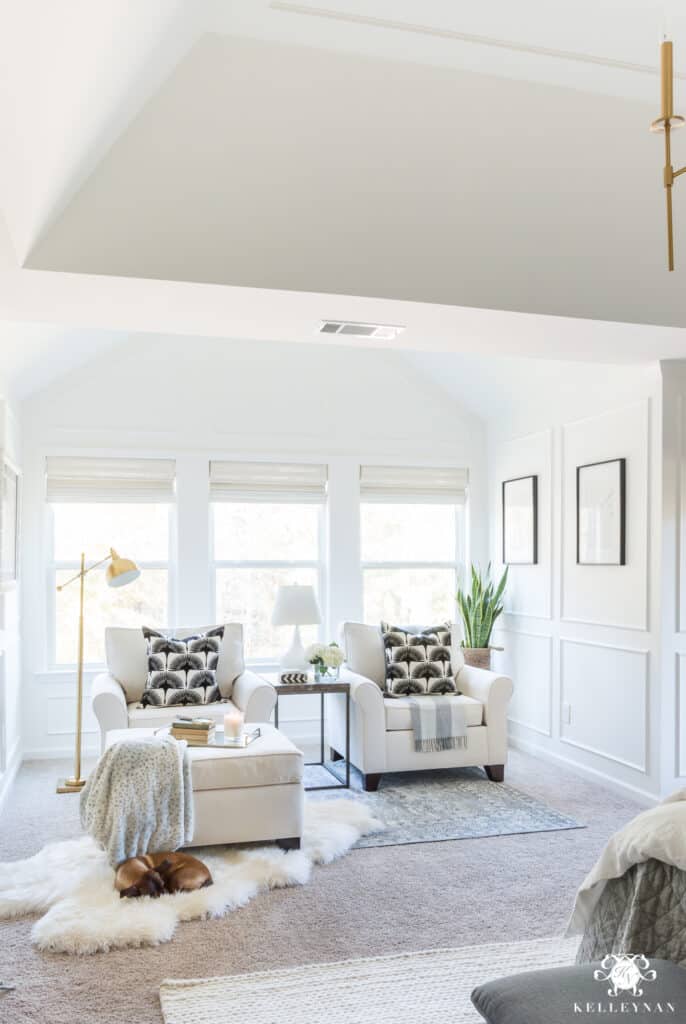
Kelly Nan’s sitting room is seen with Simply White by Benjamin Moore.

Other Posts You’ll Love

Best Coastal Living Room Paint Colors |  Best Paint Finish Dining Room  |   Best Paint Sprayer For Walls  

Pin This Photo Below For Later

I hope this post has given you some helpful suggestions to consider when picking the perfect paint color for your house. Each of these shades of white would be an excellent choice – they are tried and true with slight differences. I know that with these tips in mind, you will make the best choice for your home. Be sure to pin the photo below for later, and if you don’t already – follow me on Instagram (@arinsolange) and Tik Tok (@arinsolange) for more fun.
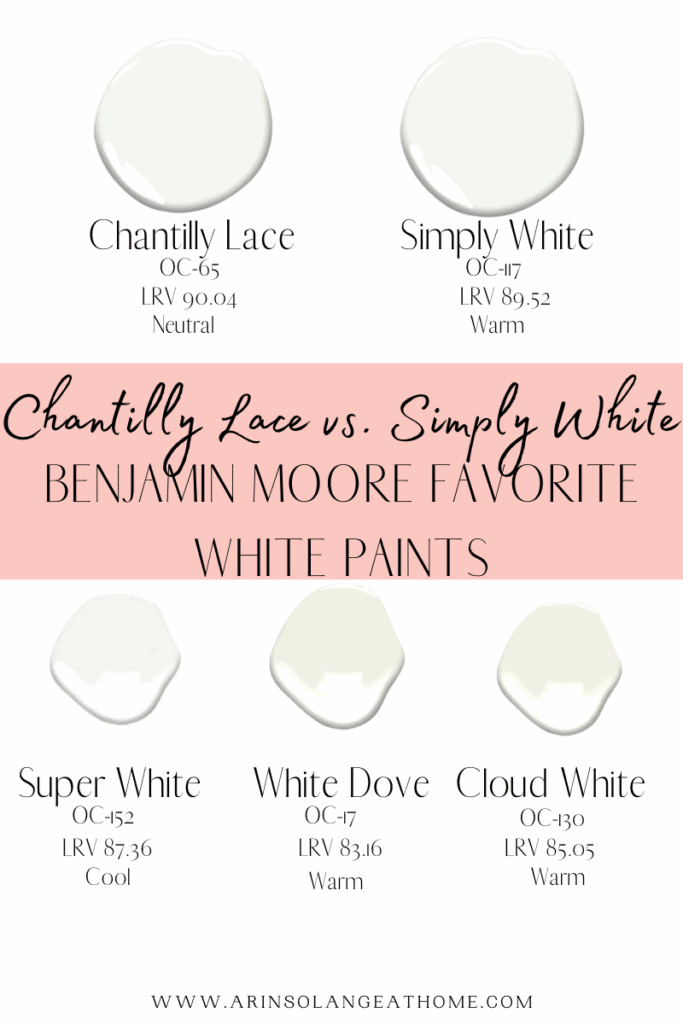
Simply White vs. Chantilly Lace Benjamin Moore Paint + Other Paint Colors Differences
Home

Best Ice Machine for Home Bar Put to the Test

Are you planning to add a home bar to your house? Or maybe just wanting to do a simple upgrade to the one you have? One of the questions you may be asking is what is the best ice machine for home bar set ups. We are BIG ice people over here. Look, if you know you know. So today I am breaking down everything you need to know when it comes to those ice machines. I’ll share with you different types of ice makers and my own top pick for a delightful ice-cold drink.

This post may contain affiliate links.

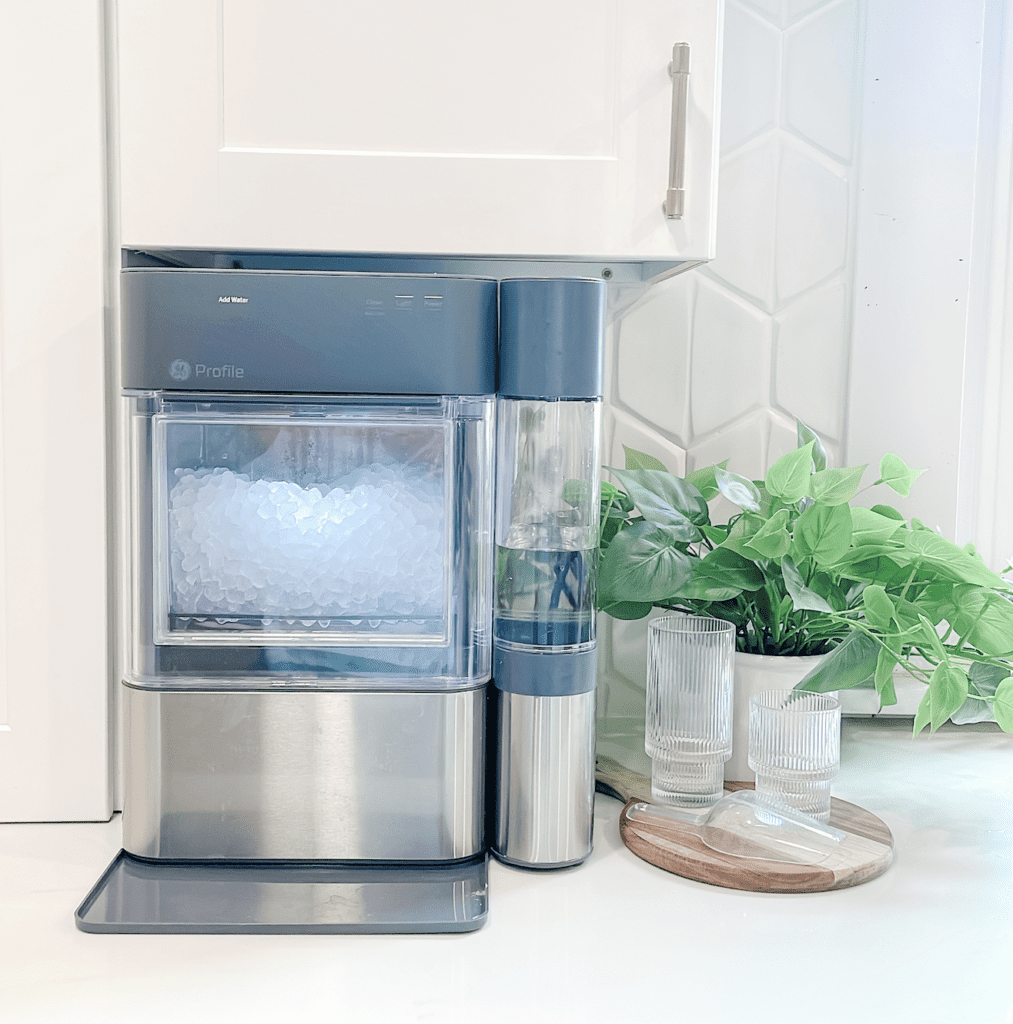
GE Opal Nugget Ice Maker

Best Ice Machine for Home Bar Put to the Test

For years, I was stalking Black Friday sales and thinking to myself, “This year, I’m going to finally buy a good ice maker.”  Each year the sale would pass, and I would ultimately regret not having bullet ice to chomp on. 

Until one year: it happened.  I finally bought my ice maker.  I was eyeing the GE Opal Nugget Ice Maker for some time.  It would frequently go on sale on Amazon, but for some reason, I had such a hard time justifying spending the money on it.  I finally decided to treat myself, and boy am I glad I did. The GE Opal ice maker is still the best choice for our family.  We use it daily with no regrets.

So what makes this ice maker superior?  Really, what makes any ice maker worth purchasing for your own home and kitchen? Before you check out Amazon’s newest sale (at the time of publishing the GE Opal is on sale), you’ll want to do a bit of research. Decide what is important to you in terms of space requirements, your water supply requirements, different sizes of ice and types of ice, maintenance, and of course, budget.

Things To Consider Before Purchasing:

When deciding on an ice machine for a home bar there are some things to consider. Like most things in homes it is not one size fits all, so make sure you look at these considerations before getting to my favorite options.

Capacity:

How much ice do you need to produce and store on a daily basis? How big is your family, and how often is the bar being used?

This also may be affected by the location of the bar. If your kids will have access to the ice dispenser, then you’ll want to factor that into your decision.  Trust me, I speak from experience on this. You’ll want to make sure you have enough ice to go around for the entire family without having to make multiple batches.  If you have a large family, you’ll want an ice maker that makes large amounts of ice.

Butler's Pantry

What Kind of Ice Can it Make?

Home ice machines can make a variety of ice types. It is worth noting that some ice machines are only capable of making one kind of ice, while others are able to make multiple types. Some of those ice types to consider when making your decision are:

  • Cubed ice: This is the most common type of ice and is typically used in drinks, coolers, and ice buckets.
  • Crushed ice: This type of ice is ideal for blended drinks and cocktails, as well as for use in ice packs and coolers.
  • Nugget ice: Also known as “chewable” ice, this type of ice is made by compacting and shaving small pieces of ice. It is ideal for use in drinks and can also be used in ice packs and coolers.
  • Gourmet ice: This type of ice is typically larger and more transparent than regular cubed ice. It is ideal for use in premium drinks and cocktails.
  • Flake ice: This type of ice is made by shaving a block of ice into thin, flat pieces. Ice Flakes are often used in seafood displays, as well as in drinks and ice packs.

Ice shape and ice size is not something to take lightly. People often seek out machines that make chewable ice, or as I like to call it, Sonic ice.  If the shape and size is important to you, make sure you pay attention to what kind your machine will make.

What Does Your Space Allow?

Ice machines come in several sizes and shapes. You have everything to consider from an ice machine inside a fridge/freezer, to a large stand alone, built-in appliance. There are also several counter top ice machine options.

For smaller kitchens, a portable countertop ice maker may be a great option.  However, you’ll need to keep in mind that if you lack kitchen counter space and storage space, you’ll want to look for something that is a more compact size.  A commercial ice maker takes up a lot of room, and may not be a great choice if you are limited on storage capacity.

Butler's Pantry with Bar Built In

Water Line & Water Tank Considerations

When picking a home ice machine, there are a few things to consider in terms of a water line or water tank:

  • Water line connection: Some ice machines require a direct water line connection in order to operate. This means they will need to be installed near a water source and plumbed in by a professional.
  • Water tank capacity: Some ice machines have built-in water tanks, which can be convenient if you don’t have a nearby water line. Consider the size of the water tank and how often it will need to be refilled based on the ice production rate.
  • Self-contained or remote condenser: Some ice machines have a self-contained condenser, which means the condenser unit is located within the same cabinet as the ice maker. Other ice machines have a remote condenser, which means the condenser unit is located separately from the ice maker.  This can be a good option if you have limited space in your home bar.

It’s also important to ensure that the ice machine you choose is compatible with your water source and the water pressure in your home. If you are unsure about this, consult with a professional plumber.

Maintenance

You need to consider how easy the machine is to clean and maintain. Some home ice makers have a self-cleaning function while some require you to do this yourself on a regular basis. This is a major consideration to take into account.

Price

Last, I have to mention price. The price range for a home ice machine can vary greatly, depending on the type, capacity, and features of the machine.

  • Entry-level ice machines: These are typically small, countertop models that can produce a limited amount of ice and may only make one type of ice. These can range in price from around $100 to $300.
  • Mid-range ice machines: These models are typically larger and can produce more ice, as well as make multiple types of ice. They may also have additional features such as built-in water dispensers or ice storage bins. These can range in price from around $300 to $1,500.
  • High-end ice machines: These models are typically larger, more advanced, and can produce a large amount of ice quickly. They may also have advanced features such as self-cleaning, digital displays, and smart home integration. High-end ice machines can range in price from $1,500 to $5,000 or more.

It’s worth noting that these prices are approximate and vary depending on brand and location. Also, it’s important to consider that installation and maintenance may also add to the overall cost of the ice machine.

Best Entry Level Ice Machines For Home Bars

Taking into account the above considerations, here are the best two entry level ice makers for your home or home bar. Both of these ice machines are great options for those who are looking for a small, affordable ice maker that is easy to use and maintain. They are suitable for home bars and small parties.  However, they can only  produce a limited amount of ice and make only cubes.

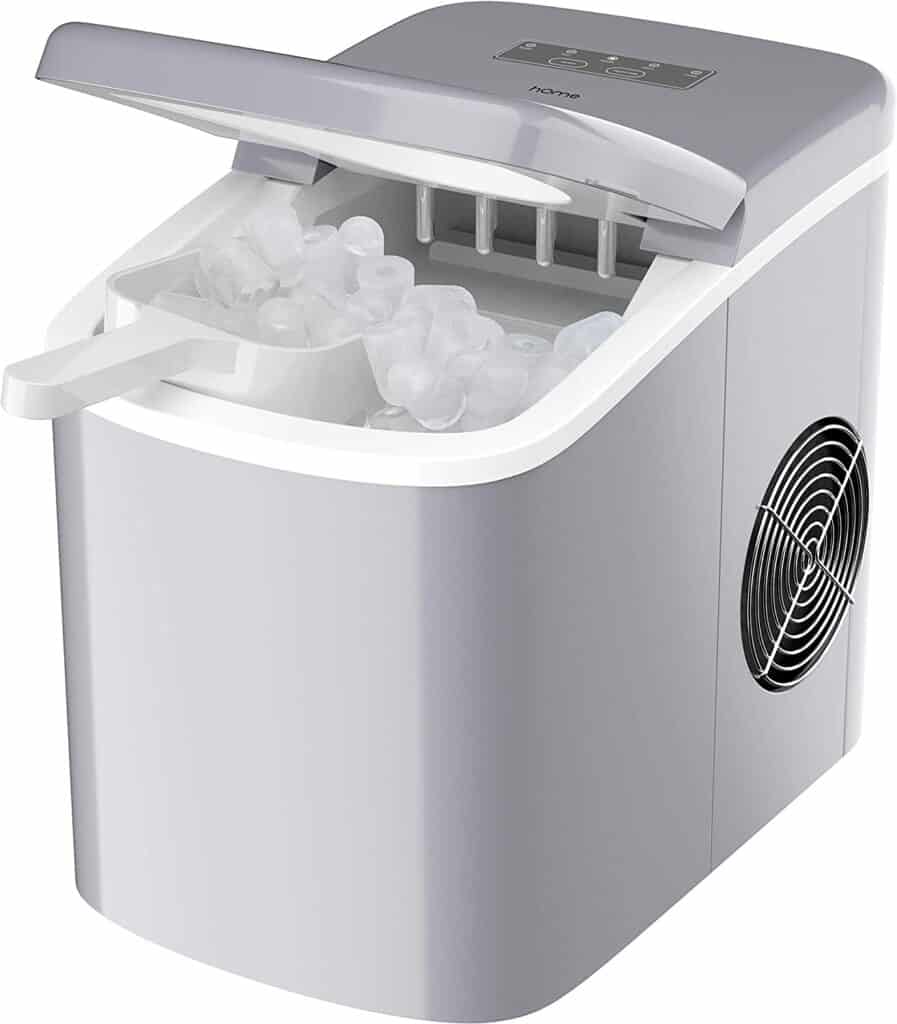
The hOmeLabs Portable Ice Maker Machine

This portable ice maker is a great option for those who want a compact and lightweight machine that is easy to move around. It can produce up to 26 lbs of ice per day and can make a batch of ice in as little as 6 minutes. It has a simple control panel and is easy to clean and maintain.

Pick #1: HOmelabs Portable Ice Maker

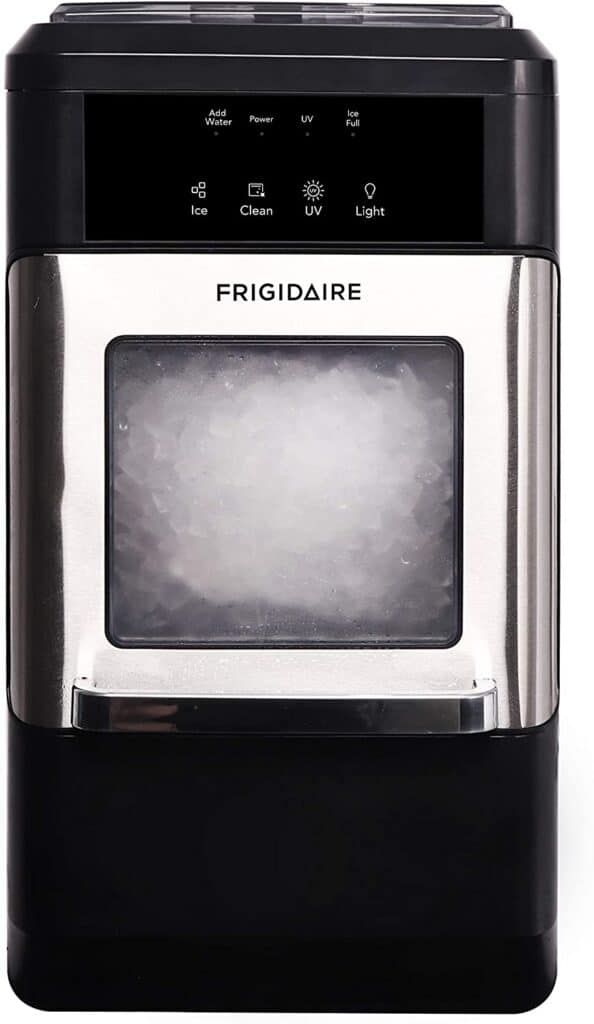
Frigidaire EFIC235-AMZ Countertop Crunchy Chewable Nugget Ice Maker

The Frigidaire is a higher end option when looking at entry level ice machines. It is capable of producing up to 26 pounds of ice per day and can store up to 1.5 pounds of ice at a time. I personally love the new color options that this ice machine comes in. Personally, I think the off white version that would look gorgeous sitting on your countertop.

It uses a specialized freezing process to create small, “chewable” nugget ice that is similar to the ice found in commercial soft drink dispensers.

It easy to operate with a  LED control panel. The panel will  let you know when the ice basket is full or when the water level is low. It has a sleek, modern design and is easy to clean and maintain.

This ice machine is not designed to work with a direct water line connection. On the plus side, it does have a self-cleaning function. This ice maker is a good option for those who are looking for a high-end machine on a lower end budget that can produce a large amount of high-quality nugget ice.

Pick #2: Fridgeaire Ice Maker

Best Mid Level Home Ice Machines For Your Home Bar

Now we are moving up to those more mid-level ice machines. These are still going to be fairly affordable in the range of ice machines. Keep in mind the price point is rising and these will make a higher quantity of ice on a daily basis.

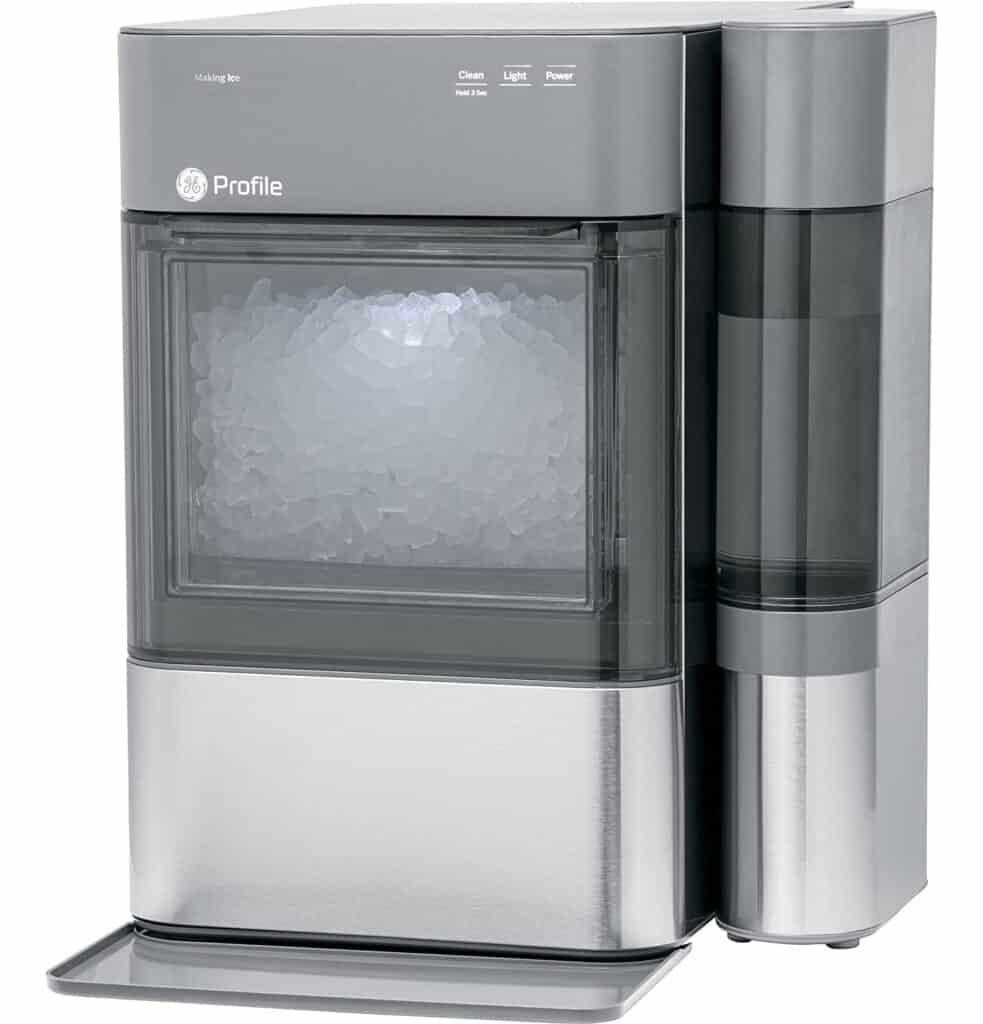
GE Profile Opal Home Ice Machine

This is our personal ice machine. The GE Profile Opal is a high-end, countertop nugget ice maker that is designed for home use.

It is capable of producing up to 24 pounds of ice per day and can store up to 3 pounds of ice at a time. It uses a specialized freezing process to create small, “chewable” nugget ice. This ice is similar to ice found in commercial soft drink dispensers.

Pick #3: GE Opal Nugget Ice Machine

One of the unique features of the GE Profile Opal is its Bluetooth connectivity, which allows you to control the ice maker using a smartphone app. You can view the current ice level, schedule ice making, and even receive alerts when the ice bin is full or when it’s time to change the water filter.

The Opal has a sleek design and is easy to clean and maintain. The ice maker is designed to work with a direct water line connection. It also has a self-cleaning cycle function.

This ice machine typically falls in the $400-$600 price range, and is easy to find on sale on Amazon.

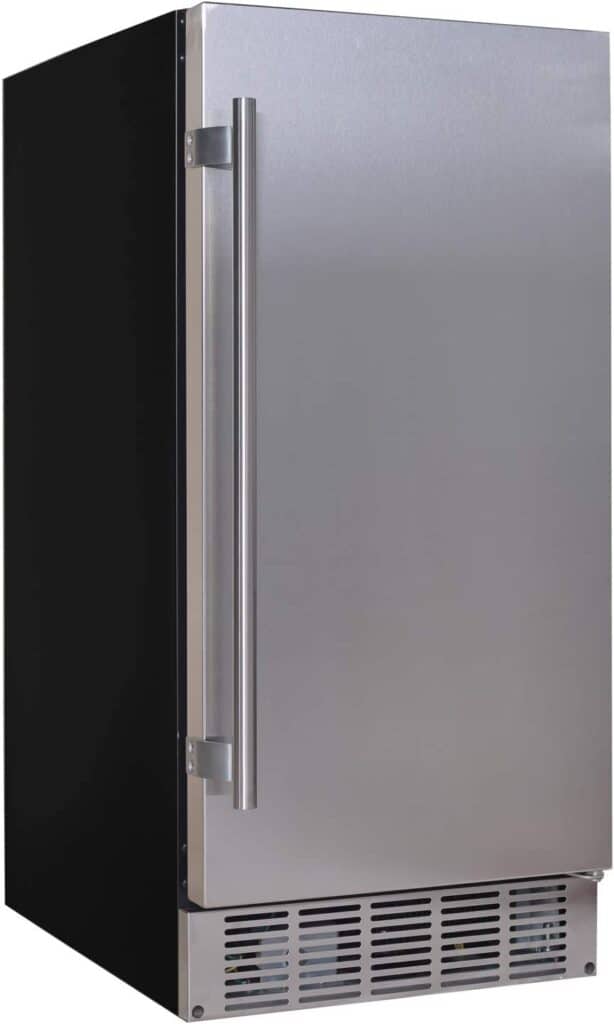
EdgeStar IB120SS

The Edgestar 1B20SS is a built-in ice maker that is designed for home use. It is capable of producing up to 12 pounds of ice per day and can store up to 6 pounds of ice at a time. It can make a batch of ice in as little as 6 minutes with a variety of ice cube sizes.

This ice maker is designed to be built-in to a home bar, kitchen or any other room. It has a sleek, stainless steel design. The control panel is simple and easy to use. Plus, it has a self-cleaning function leading to easy maintenance

This is a great option for those who want a high-end built-in ice maker. It can produce a large amount of ice quickly. It’s suitable for all your entertaining needs. The price for this machine is currently under $500 on Amazon which is a great affordable option.

It’s worth noting that the installation of this built-in ice maker should be done by a professional, as it requires a direct water line connection and a drain.

Pick #4: Edgestar Ice Machine

Best High End Home Ice Makers

Now for the high end options. These are great options if you are looking for a built-in machine that makes a lot of ice. Both of these commercial ice machine options are frequently used in residential spaces. If you frequently have large gatherings I would keep these great options in mind. Remember, neither of these options are a compact ice maker. Ultimately, you’ll need to make sure you have plenty of space to take on their large sizes.

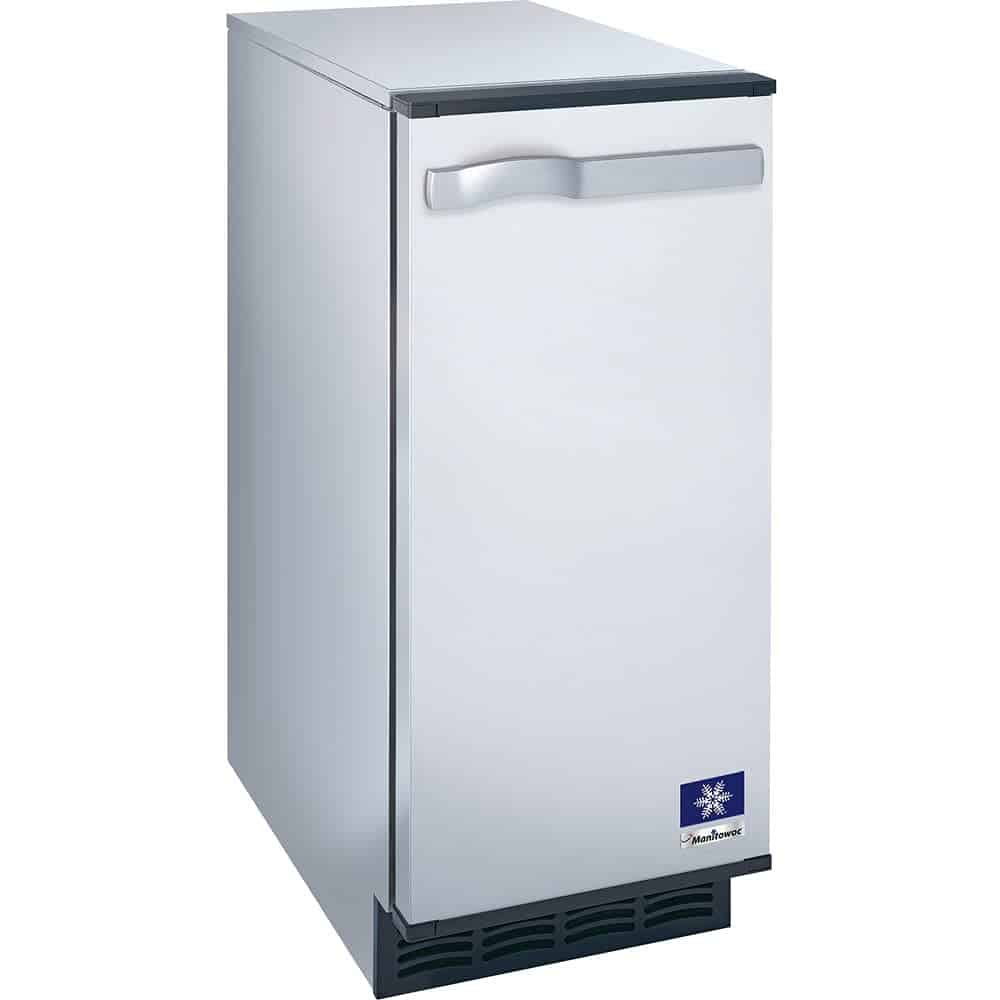
The Manitowoc SM-50A

The Manitowoc SM-50A is an under-counter ice machine that is designed for commercial and residential use. It is capable of producing up to 55 pounds of ice per day and can store up to 20 pounds of ice at a time. It can make a variety of ice cube sizes and can be configured to make different types of ice.

It is built with a durable stainless steel construction and self-contained design. In other words, the condenser unit is located within the same cabinet as the ice maker. It has a simple control panel, and it’s easy to clean and maintain

Pick #5: Manitowoc Ice Machine

This under-counter ice maker is designed to be installed under a counter or in a cabinet and requires a direct water line connection and a drain. It’s a great option for those who want a high-end ice machine that can produce a large amount of ice quickly and can store a good amount of ice, but don’t have enough space for a freestanding machine.

The Manitowoc SM-50A is a suitable option for home bars, small restaurants, and for those who like to entertain guests at home. The price for this machine is typically around $2,000 – $3,000.

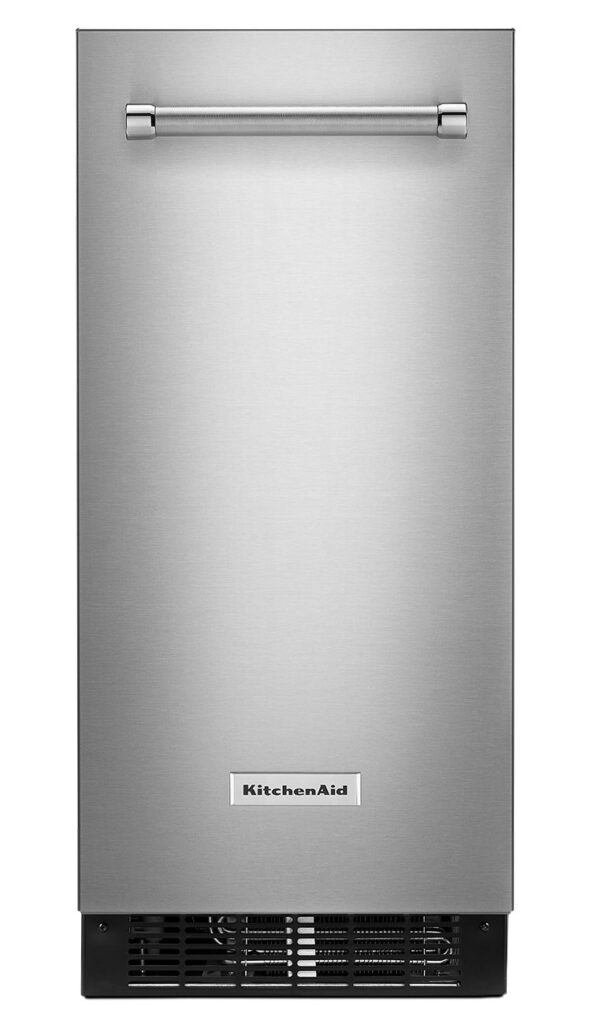
Kitchenaid 15 in 50 lb Built-in Ice Maker

The KitchenAid 15 in. 50 lb. Built-In Ice Maker is a high-end, built-in ice maker that is designed for home use. It is capable of producing up to 50 pounds of ice per day and can store up to 25 pounds of ice at a time. It can make a variety of ice cube sizes and has a PrintShield stainless steel finish that resists fingerprints and smudging.

This ice maker features an intuitive control panel with an LED display, which allows you to easily monitor and adjust the settings. It also has a self-cleaning function, which makes it easy to maintain. It has a built-in drain pump for easy installation and the ability to produce ice in two different sizes.

It is designed to be built-in to a home bar, kitchen or any other room and requires a direct water line connection and a drain.  This is another great option for those who want a high-end built-in ice maker that can produce a large amount of ice quickly and can store a good amount of ice, but don’t have enough space for a freestanding machine. The price for this machine is typically around $2,000 – $3,000.

Pick #6: Kitchenaid Ice Machine

Round Up Of Favorite Ice Machines

Take a look at my favorite ice makers all in one convenient location.

Best Ice Machines For Home Bar Round Up

Other Posts You’ll Love

Bar Renovation With Gold Accents | Painting Kitchen Cabinets White |  Best Kitchen Cabinet Handles

Pin This Photo Below For Later


All of the options we’ve covered have different pros and cons.  Each of them would be a great addition to your home bar or kitchen. Take a look at each feature and determine what works best for your home and family’s lifestyle. Be sure to pin the photo below for later, and if you don’t already – follow me on Instagram (@arinsolange) and Tik Tok (@arinsolange) for more fun! 

Best Ice Machines For Home Bar Round Up
Home

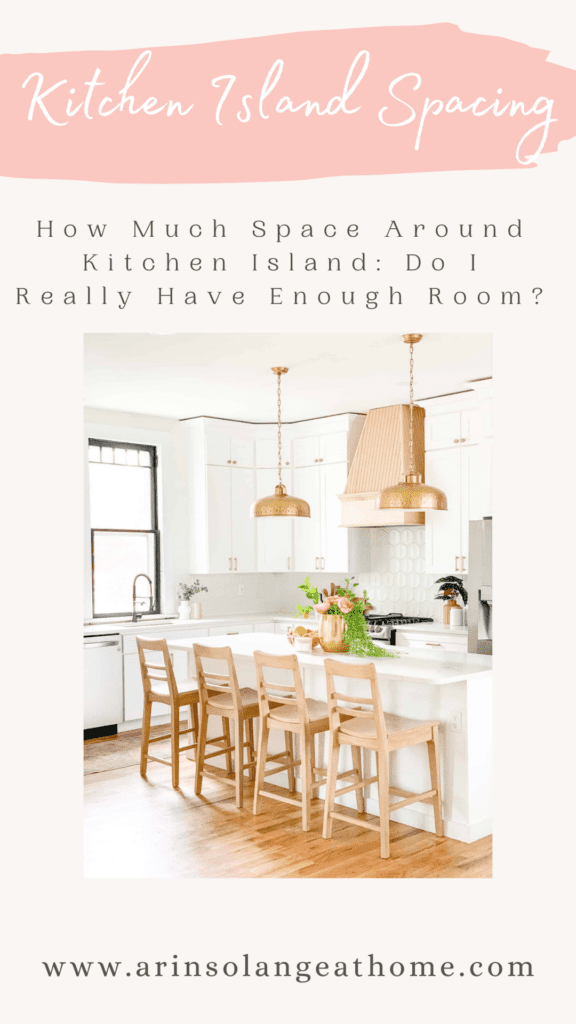
How Much Space Around Kitchen Island: Do I Really Have Enough Room?

One of my most anticipated projects for 2023 is updating the stone for our kitchen island. I absolutely love our kitchen island, but to be honest, I’m ready to change out the work surface for something different. While I want a different material, I would never want to change out our kitchen island dimensions. I absolutely love how much space our large island provides for work areas. If you are in the process of renovating a kitchen, or have ever wondered about the size of your kitchen island, I’ll go over how much space around the kitchen island is adequate to perform your daily tasks.

This post may contain affiliate links.

How Much Space Around Kitchen Island: Do I Really Have Enough Room?

Our kitchen remodel was done with HGTV. While it sounds glamorous, I’d make some different choices had I been given an option. While one of those choices is a different material, I would never change the size of the island.

I love the ability to spread out and have space for our kids to eat, do homework, and prep for meals. It is a dream when it comes to entertaining, and makes meal prep a cinch. However, for those who either don’t have room for a kitchen island or need to find alternative ways to incorporate counter space, I’ll share with you how much space around your kitchen island is necessary to make a functional kitchen.

Importance of Spacing In The Kitchen

It goes without saying, the kitchen is a busy space. So much enjoyment happens in the heart of the home. It is where food preparation, cooking and cleaning take place for each meal and snack. It is where people gather to eat, drink, and celebrate. For many, it is a command center and the island is the center of the modern kitchen. We all want it to be a comfortable space for our families and friends.

If you have a smaller kitchen, you may be wondering if you can fit an island and the best way to achieve your vision. Spacing is so important in a kitchen so you can work efficiently and have enough space to work safely. This idea is called the work triangle. It is a concept used to determine efficient kitchen layouts that are aesthetically pleasing as well as functional. 

The primary tasks in a kitchen are divided between the stove, sink, and refrigerator. It is a good idea to keep these three appliances in a triangle shape for the most practical use. If the size of a fixed kitchen island won’t work for your space, there are alternative options. Below we will discuss kitchen island sizes, clearance space, island alternatives, and less traditional shapes and sizes. 

Kitchen Island Spacing

Minimum & Maximum Sizes Of Kitchen Islands

The minimum size of a kitchen island should be four feet long and a bit more than two feet deep. However, it also must allow for people to move and work around it efficiently. If your kitchen doesn’t have a minimum space of at least eight feet by twelve feet, an island may not be the best choice for you. If your space allows, it is worth it to give yourself ample room to move carefully with multiple people in the kitchen. 

The average kitchen island size is 80 by 40 inches. The standard height of an island is 36 inches, but if it is used for seating, the standard size is 42 inches tall. As for floor space around the island, 36 to 42 inches around all sides is the suggested clearance zone, and 48 if multiple people will be using different areas of the kitchen at the same time.

Kitchen Triangle Spacing

Kitchen Island Sizing Considerations

The minimum dimensions recommended for an island is two by four feet. However, kitchen island size guidelines suggest the total area it should take up is ten percent of the square footage of the kitchen. For example, if the kitchen is 200 square feet, the island should be a maximum of 20 square feet.

Another consideration for the kitchen island is the number of stools that will comfortably fit around it. An appropriate amount of space ranges from 28 to 30 inches. It is easiest to take the total length of the island and divide it by 30 to determine the maximum number of stools. Keep in mind that if your island is standard kitchen island height, you will need counter height stools, but if the seating area is bar height, you will need bar stools. 

For a full breakdown of how much knee space for a kitchen island is needed, check out my post here.

Alternatives To Kitchen Islands

If space doesn’t permit you to have a kitchen island, you aren’t completely out of luck.  There are several different alternatives to allow you to have the functional space that a kitchen island affords, without sacrificing physical space.

Perhaps the most common alternative to a kitchen island is a kitchen peninsula. A peninsula is an extension of the existing counter and base cabinets, rather than a free-standing piece. It is great for a small kitchen. Our last home had a kitchen peninsula and I was grateful for the extra counter space.

Alternative Kitchen Peninsula

Another great option is to utilize a standard dining table. It provides extra counter space, but no additional space for storage. 

If storage is what you are looking for, a bar cart is a good idea because it doesn’t take up much room and it fits in a small space. It is easy to move as well because it is on wheels and not a fixed island. It is often the right size for apartment living and it doesn’t require the long term commitment a fixed island does. Oftentimes, you can find one with a butcher block top which is an affordable way to add a versatile prep station to your kitchen.

A more unique route to take is using a long console table in place of a kitchen island. It can serve as a dining area or a place to complete prep work and serve food. This would be a great idea in a galley kitchen. 

Some other uncommon options are bistro tables and breakfast nooks. You may not get both a countertop and extra storage, but both of these choices give you some help in your kitchen. Remember, a functional island is one that you use. It doesn’t have to be standard. Let your personality shine!

Alternatives to Kitchen Island for Small Kitchen Spaces

Kitchen Islands In Different Shapes & Sizes

While a typical island is rectangular or square in shape, there are other options as well. More unique shapes may be used to help align the kitchen and the surfaces that run parallel to the island. 

The largest kitchen island design is U-shaped. If your kitchen space allows, this is a great way to add additional storage and plenty of space for seating. There are three walls of cabinetry on the inside of the U and three rows of seating around the outside. This style isn’t for everyone as it grabs a lot of focus away from the entire kitchen to this large centerpiece. Some also don’t like the multiple corner cabinets as they tend to be more difficult to access.

Another less common island design is an L-shape. It tends to be a larger island size than a rectangle, which means extra storage on one side of the island. However, this kind of island may break up the flow of your kitchen.

Once you’ve considered the wide variety of options for your kitchen island, you can decide the most well-planned layout for your space. It is important to consider your floor plan and the ease of use for each major appliance you own. 

Remember the work triangle. There should be adequate space between island cabinets and wall cabinets for easy access and safe movement. A poorly planned island can make spending time in your kitchen a nightmare while a properly planned one can make it a joy. 

The main reason for your kitchen island should be aesthetic, functional or better yet, both. If it accomplishes these goals, the end result should be a part of your home you are proud to show off!

Other Posts You’ll Love

A Guide On How Much Knee Space  | How Deep Are Kitchen Wall Cabinets? | Painting Kitchen Cabinets WhiteBest Kitchen Cabinet Handles

Pin This Photo Below For Later

I hope this post has helped you realize how much space around kitchen island is needed for both a functional and aesthetically pleasing home. Whether you have a large kitchen or smaller space, you’ll be able to find some way to incorporate additional counter space that can work for you and your family.  Be sure to pin the photo below for later, and if you don’t already – follow me on Instagram (@arinsolange) and Tik Tok (@arinsolange) for more fun!

How Much Space Around Kitchen Island Pinned
Holidays

Treats For My Sweets: Valentine Cookie Gifts

Can you believe that we are already almost to the end of January? With Valentine’s Day right around the corner, I am getting myself organized to create some fun Valentine’s content for you.  If you have a sweet tooth like my family, you’ll love these Valentine cookie gifts to give to your sweethearts.

This post may contain affiliate links.

Treats For My Sweets: Valentine Cookie Gifts

While I love Christmas time, my real favorite holiday is Valentine’s Day. Can you blame me? There is so much pink that it makes my heart so happy to see everything in my absolute favorite color. I’ve been trying to get myself organized and think of some great ideas to share with you for this Valentine’s Day. If you need an idea for a super cute Galentine’s Day party or a super fun cherry pink Valentine’s Day kid party, check out my posts! 

For our Valentine’s Day, I have a tradition with my kids where I get them all coordinated Valentine’s Day pajamas. If you want to start your own tradition, check out some fun pajamas I found here

One other tradition I try to follow is to make sure each of my kids feel loved, treasured, and safe.  While I certainly strive to do that each and every day, I feel that for me, on Valentine’s Day, I try to go the extra mile.

You don’t need to go overboard and get the perfect Valentine’s Day gift.  Sometimes, it is the little things in life that mean the most. Thoughtful gifts that show your loved ones that you are thinking about them and care are perfect.

One way I show my love to my family members is through food. If you are like me and want to gift sweet treats this Valentine’s Day, I’ll share with you my favorite Valentine’s cookies that are a great way to show you care.

Valentine’s Day Cookies

Can we be honest for a hot minute? I rarely bake my own goodies when it comes to gift giving. While I love giving food, I tend to stick to hiring professionals if someone other than my kids is going to be eating it.

Valentine’s Cookies You Can Order For Your Sweet Tooth

If you are in a time crunch or simply just don’t want to make your own cookie gift, check out my round up of my favorite Valentine cookie gifts for your loved ones!

3 Count Valentines Day Cookie Gift Box

3 Count Sugar Cookies

How cute is this 3 count sugar cookie gift box? This would be great for a teacher or friend who loves coffee. You can add a Starbucks gift card and have a complete set.

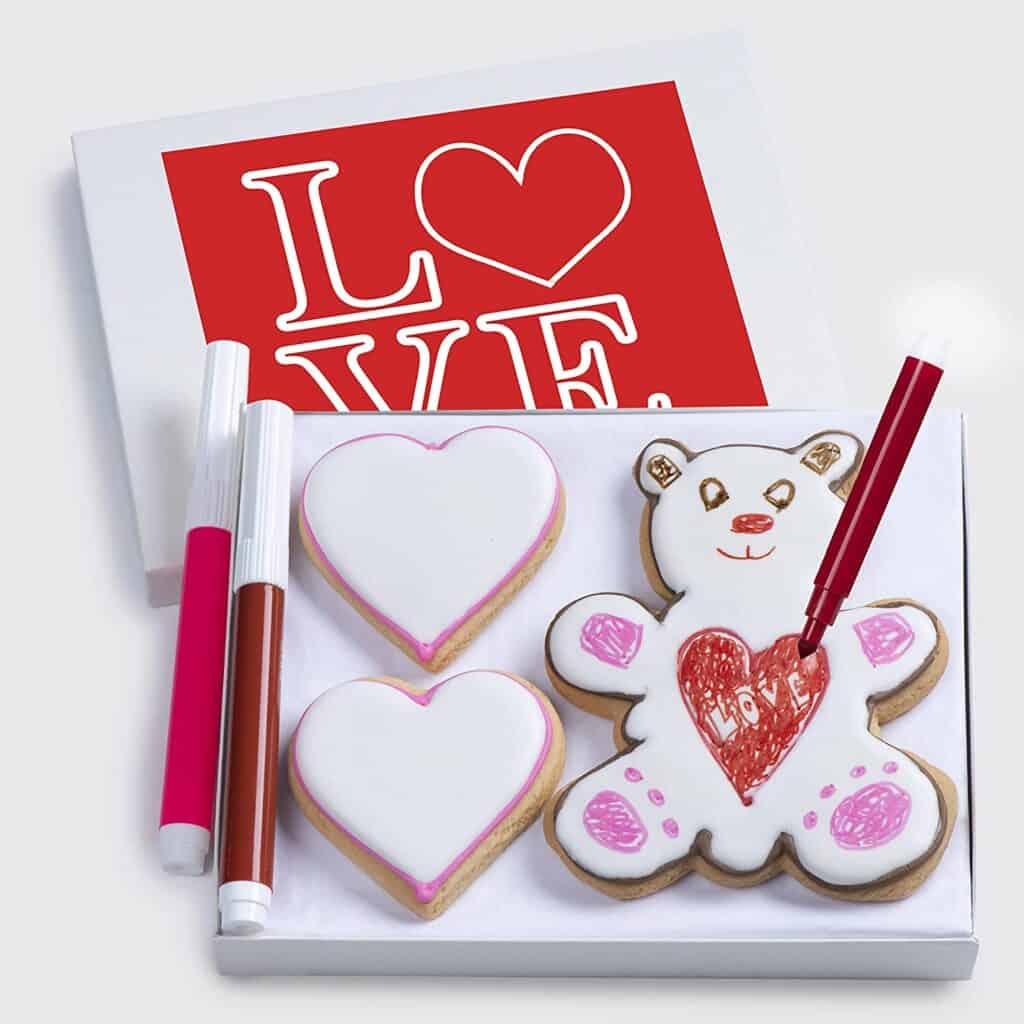
Cookie Gift Basket Decorating Set

This is a favorite in our home. There is nothing my kids love more than to be able to decorate their own cookies. I love this because it is way less messy when you get edible markers and have cookies pre-made and iced. Overall, it is a win win in our home!

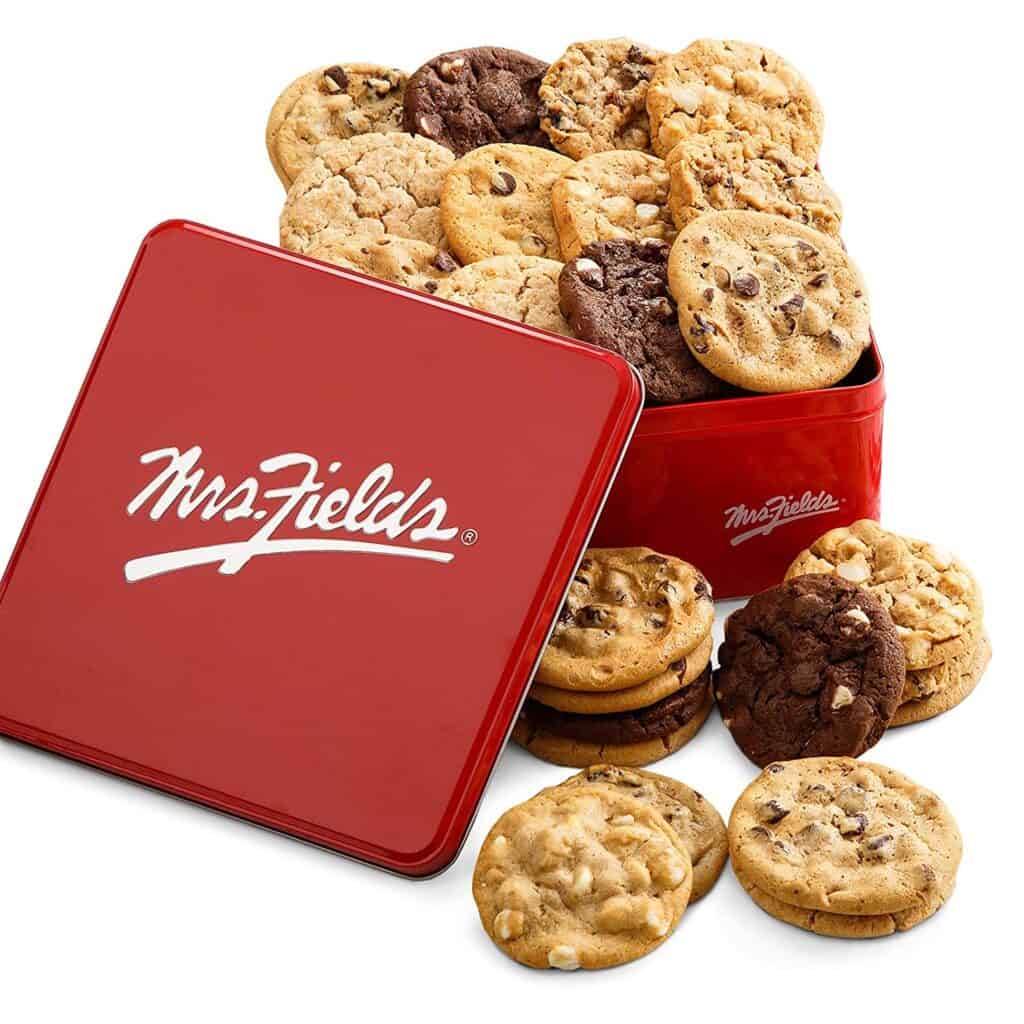
Mrs. Fields 2 Dozen Assorted Cookies 

If you need cookies for a crowd, this cookie basket (tin) is  perfect to send to school or the office. You have an assortment of cookies that will please any taste buds.

Valentines Day Basket Of Snacks

I realized that this post is all about cookies, but can we all agree that this basket contains just about every type of snack, including cookies!

Personally, I love this idea for a college student. If I received this as a care package in college, I think I’d be set for the entire week. Or until my roommates all decided to steal my snacks! 

Chocolate Caramel Crunch Tower Gift Set

If you are looking for something with a bit more variety other than cookies, this impressive gift tower has both sweet and salty. 

Decorate Your Own Cookie Bouquets

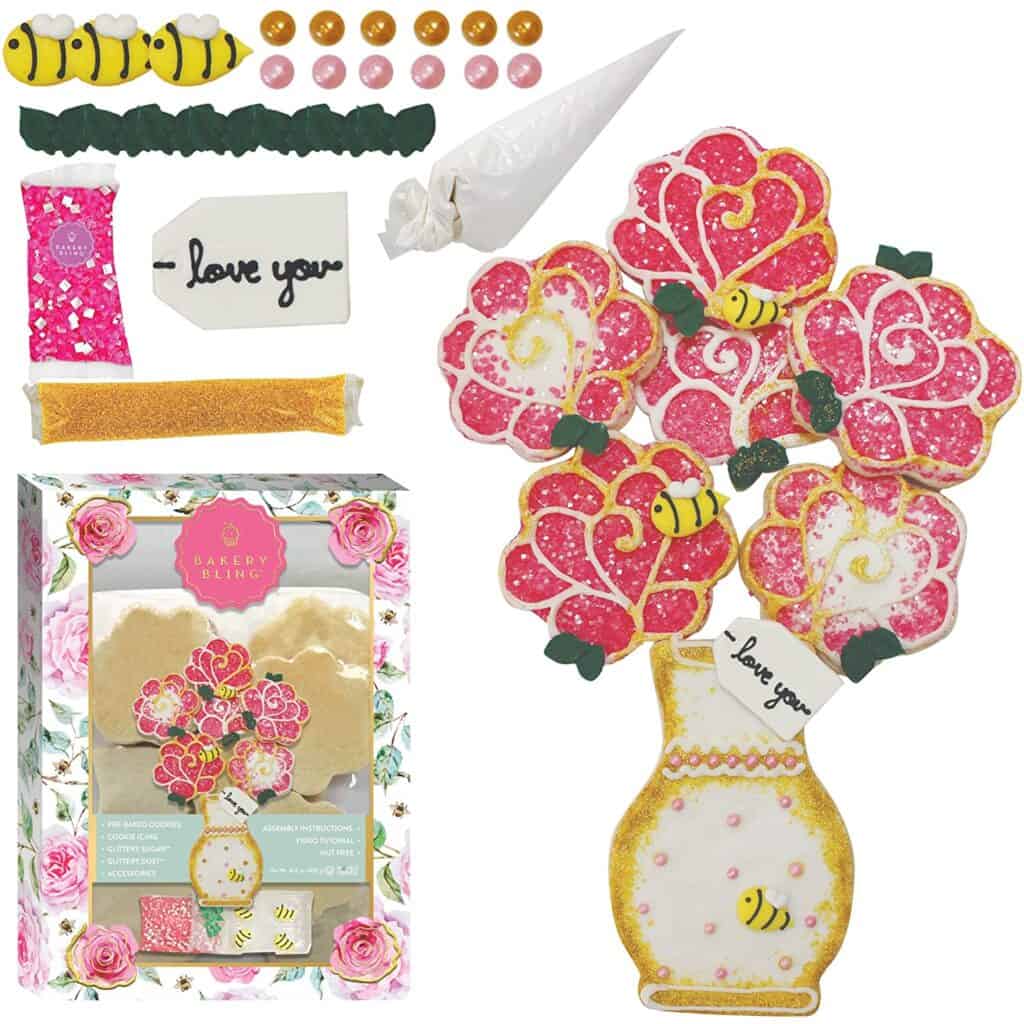
What a fun and sweet way to say “I love you” to someone special in your life. This is a kit where you can decorate your own sugar cookies to look like a bouquet of flowers. It would be a great activity for your kids to then gift to their grandparents.

Decorate Your Own Puppy Theme

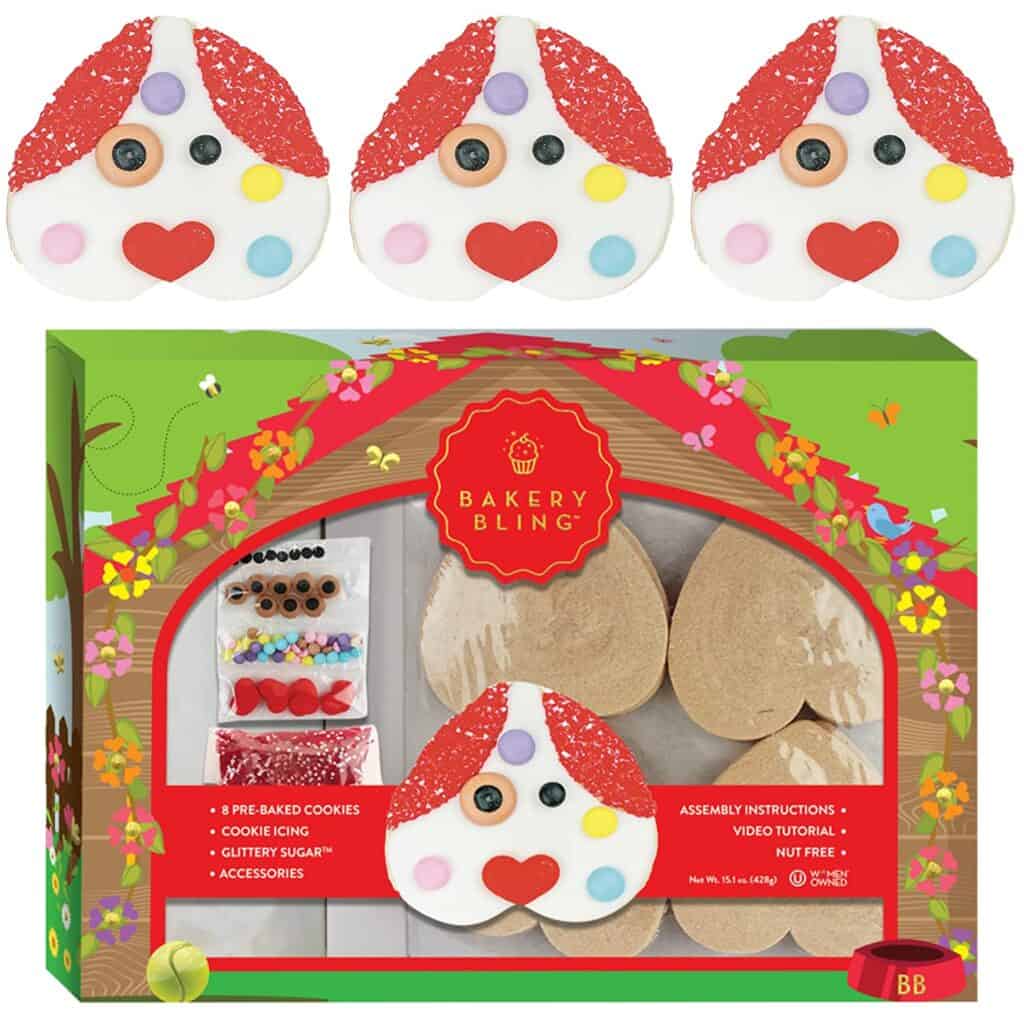
This is another fun kit to decorate your own cookie.  I love the heart-shaped smiley cookie in the form of a dog. I could see this as being a great activity for a preschool class or Mom’s Day Out program.  Less mess, less stress, and too much fun for all involved!

Make Your Own Valentine’s Cookie Gifts

If I’m not pressed for time, I actually do enjoy baking my own cookies. Valentine’s gifts can be in so many fun forms and I love making treats that I know my friends and family will love.

One great thing about making your own cookies is that you can customize it any way you’d like.  As an allergy mom myself, being able to customize the ingredients can be super important. I would hate for some kids to not be able to participate in a treat because of ingredients in store-bought food. 

Galentines Party Decor

What You’ll Need

The first thing you’ll need to do is pick out a recipe. You can go as simple as a chocolate chip cookie shots (more on that later) or a complicated and intricate sugar cookie design. 

I’d recommend looking at some recipes and deciding what you want to make.  Keep in mind the time commitment, skill level, and any ingredients involved. If the recipe requires a full day for the dough to chill plus the finest ingredients, you may have a high-maintenance recipe on your hands.  

I prefer to keep it more simple. My go to chocolate chip cookie recipe is ready in under 30 minutes.  You can make these chocolate chip cookies into regular cookies, turn them into cookie cakes, or make cookie shots. These are delicious and go great with a big glass of milk.

Another classic cookie recipe is sugar cookies. You have to be careful when you look at sugar cookie recipes as some doughs do require a lengthy time to chill in your fridge. I absolutely hate working with dough that is sticky and the chill time helps the dough be more workable.

If I’m in a time crunch, it just seems that sugar cookies are out of the question.  Unless, you can find a recipe that requires minimal chill time and is easy to work with.  Oh wait, I’ve found just the one

Favorite Baking Supplies

If you plan on making your Valentines cookie gifts for your sweetheart, here are some of my favorite baking supplies.

Buffalo Pink Plaid Apron

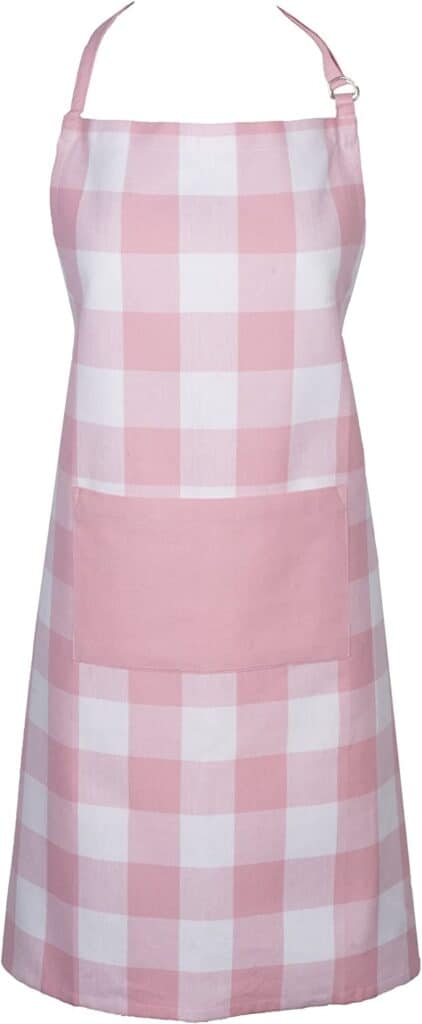
To get myself into the spirit of baking for Valentine’s Day, I have to dress the part. How adorable is this pink buffalo plaid apron?

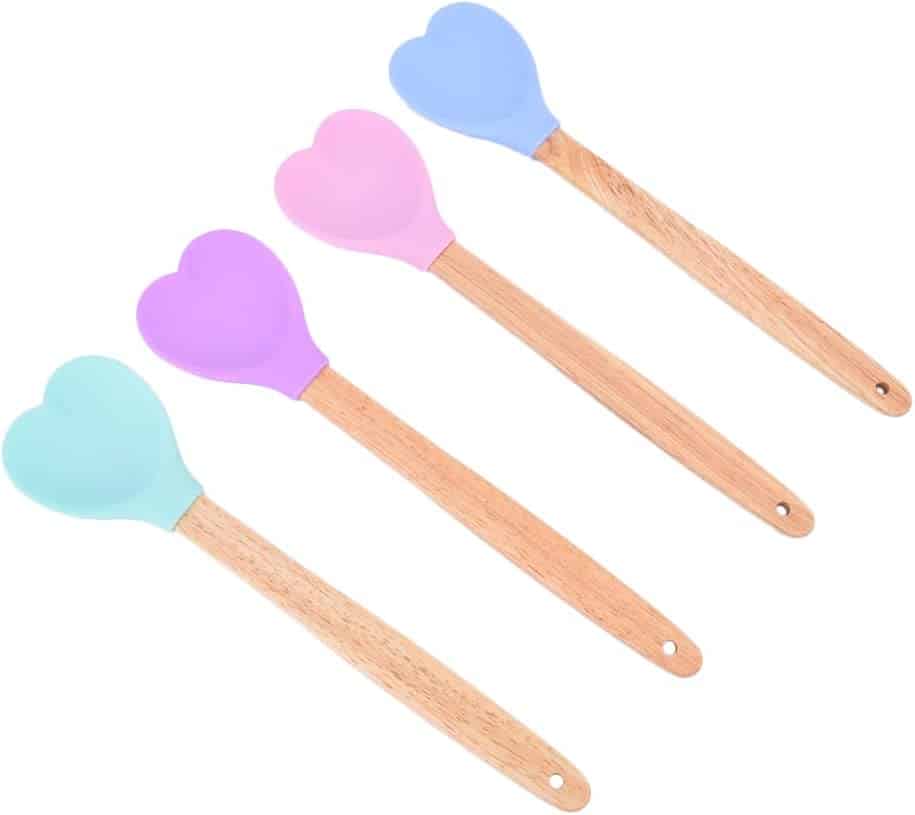
Heart Shaped Spatulas

What kind of baking goddess would I be without using a heart shaped spatula? I may have to order two sets of these to make sure Goldie has her very own set.

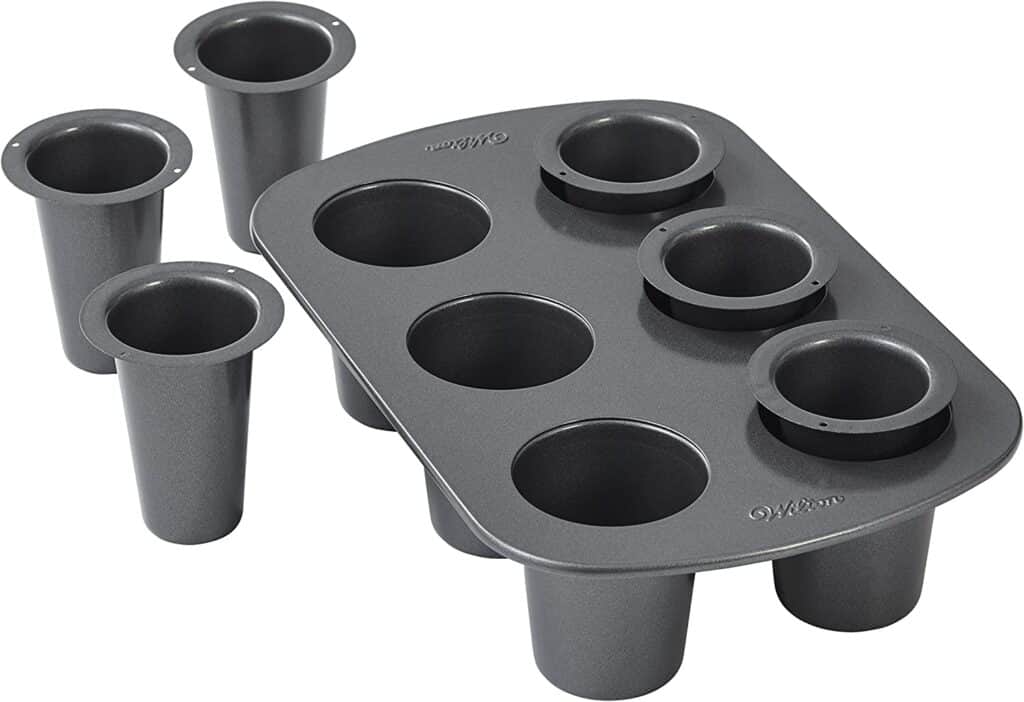
Cookie Shot Glass Mold

If you want a spin on a traditional cookie, check out this cookie shot glass mold. You can actually use melted candy to seal in liquid like milk. Or, simply fill with a delicious chocolate mousse for a decadent treat.

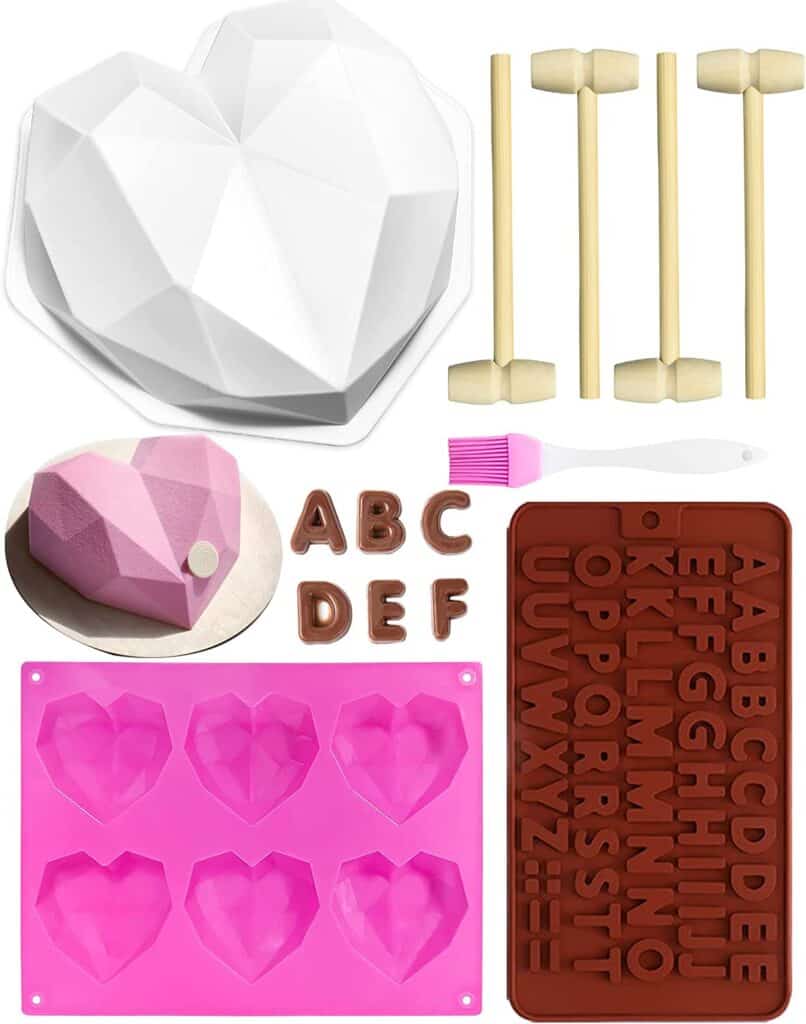
Breakable Heart Silicone Molds

Normally, you see these breakable heart molds made out of decadent chocolate made to look like beautiful gemstones. For a truly impressive spectacle, make your very own breakable heart. You can even use the larger mold to make a cookie surprise that is found when the heart is broken in the center of the mold.

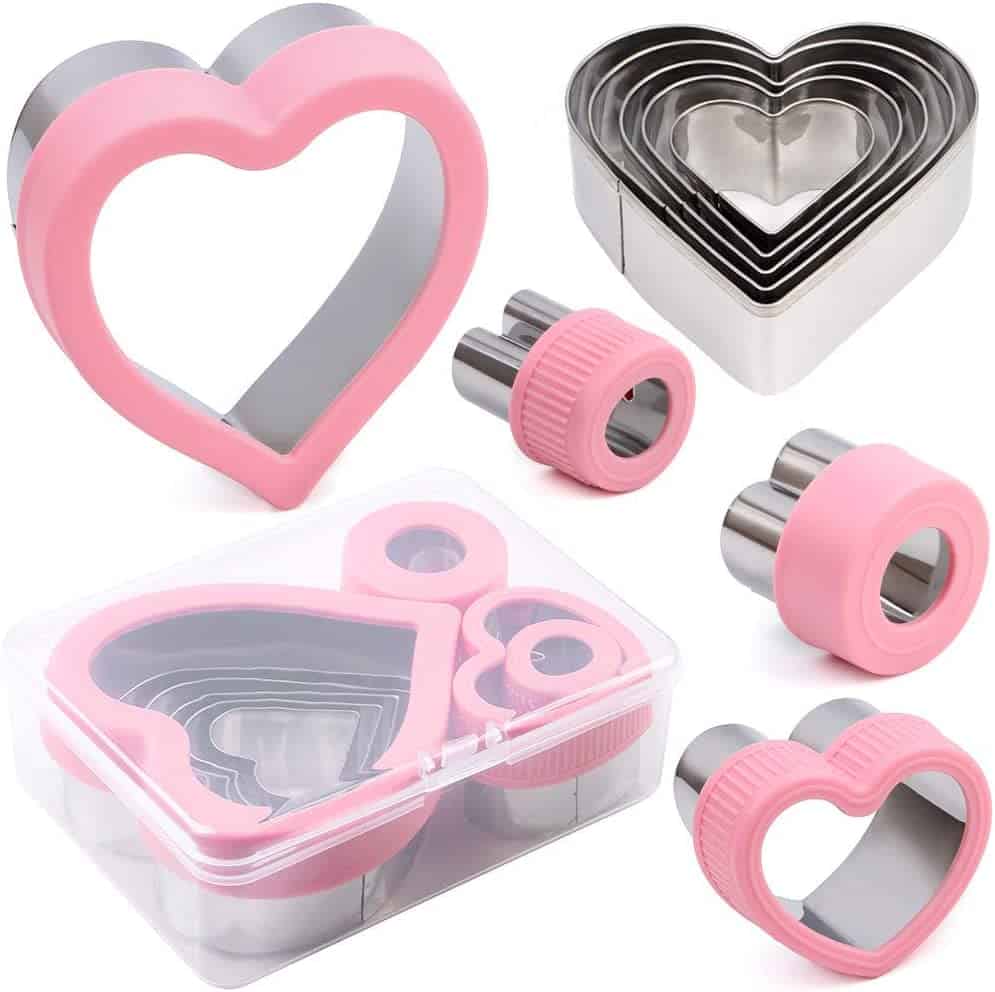
Valentine’s Day Cookie Cutters

No matter what size heart shaped cookie cutter you need to find, I guarantee this kit has it all. You can use these to make your own sugar cookies, but I also love to use them to cut out heart shaped sandwiches, fruit, or cheese for a Valentine’s Day themed lunch box.

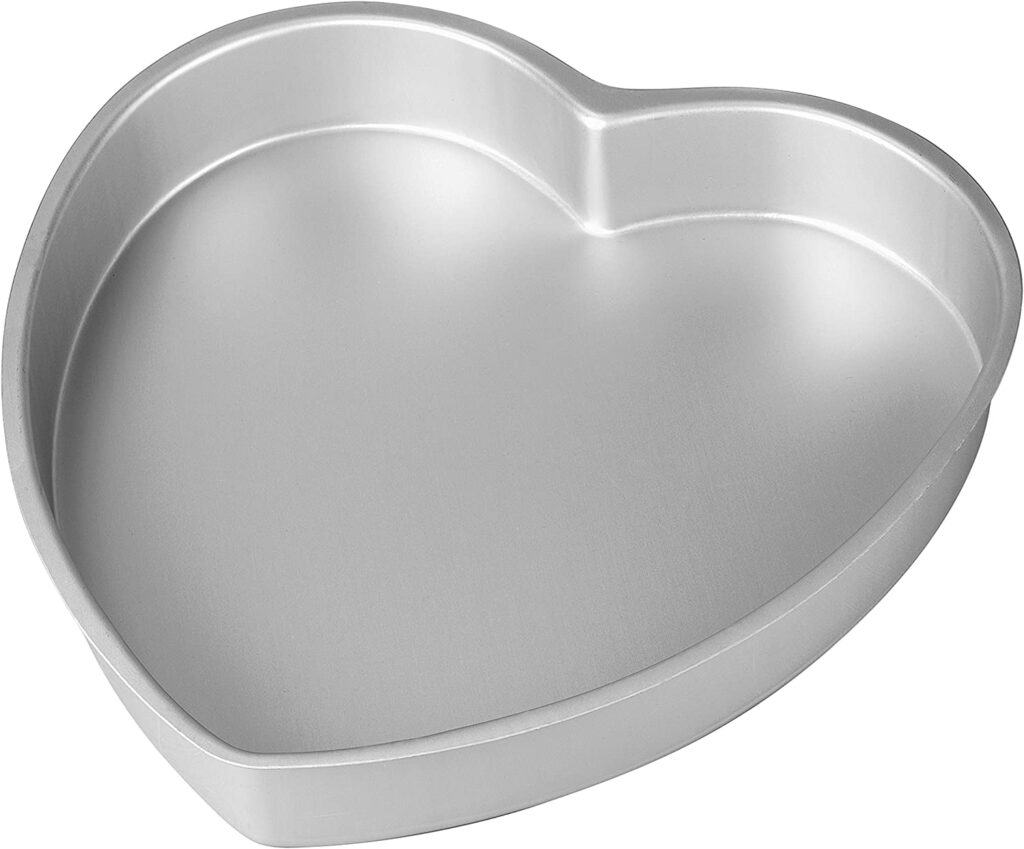
Heart Shaped Cookie Cake Pan

Cookie cakes are a favorite in our house and are sometimes preferred over regular cakes. If you are looking for a lovely cake mold, this heart shaped cake pan would work well for a cookie cake or regular cake too!

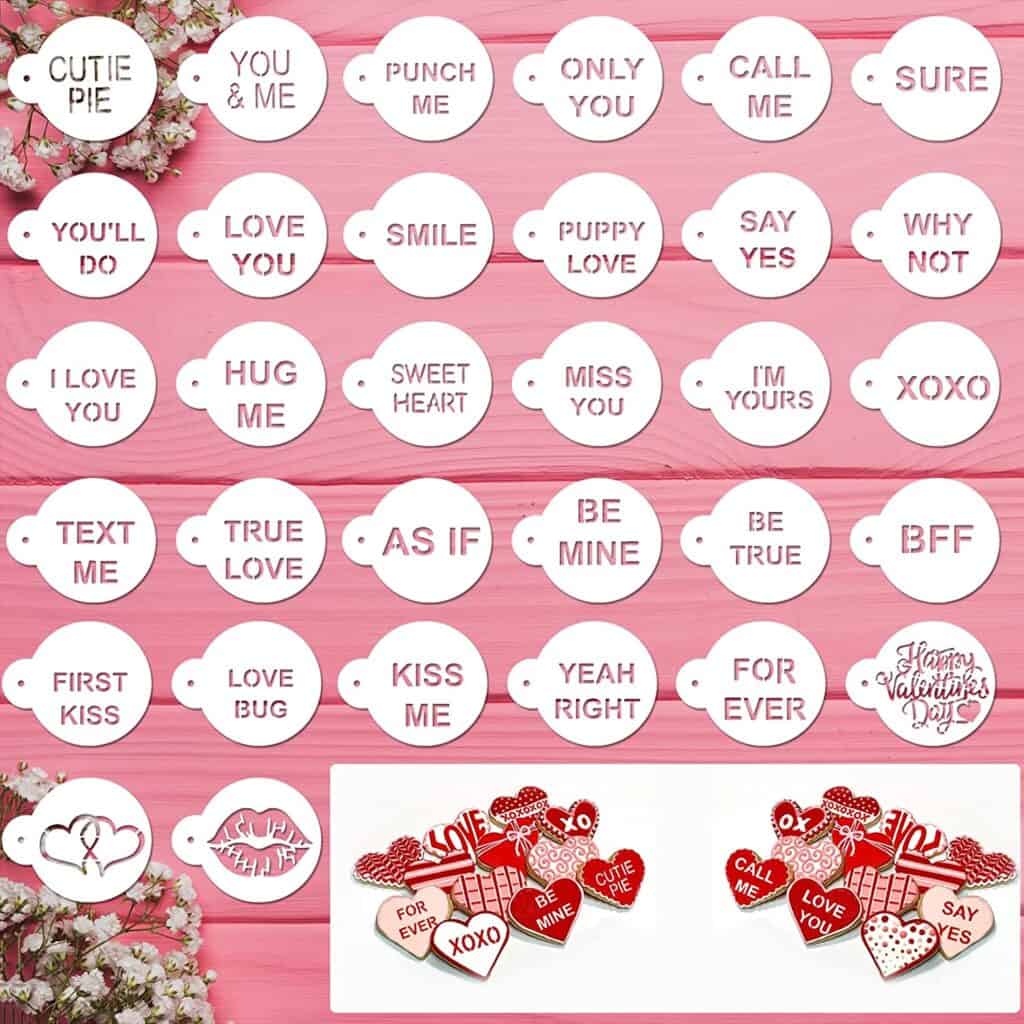
Valentine Cookie Stencils

If you plan on making sugar cookies and want to really impress your family, check out these stencils. You can make your own “candy hearts” in the form of sugar cookies by using these stencils. I would use edible markers or royal icing to make sure you get a nice read on the letters.

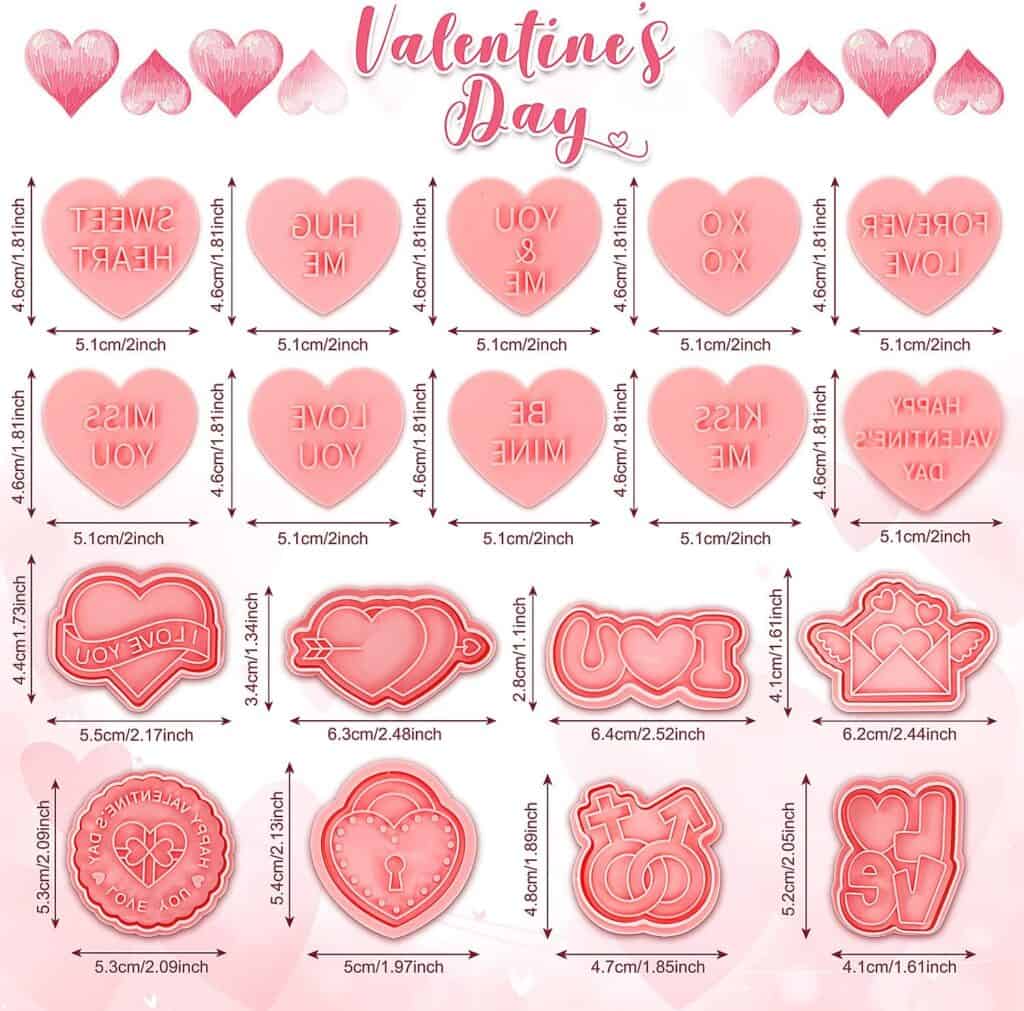
Cookie Cutter Conversation Heart Molds

If stenciling seems like it is way too ambitious for you, then try these conversation heart cookie cutter molds instead. Rather than use icing to spell out the words, these molds will cut it directly into the cookie.

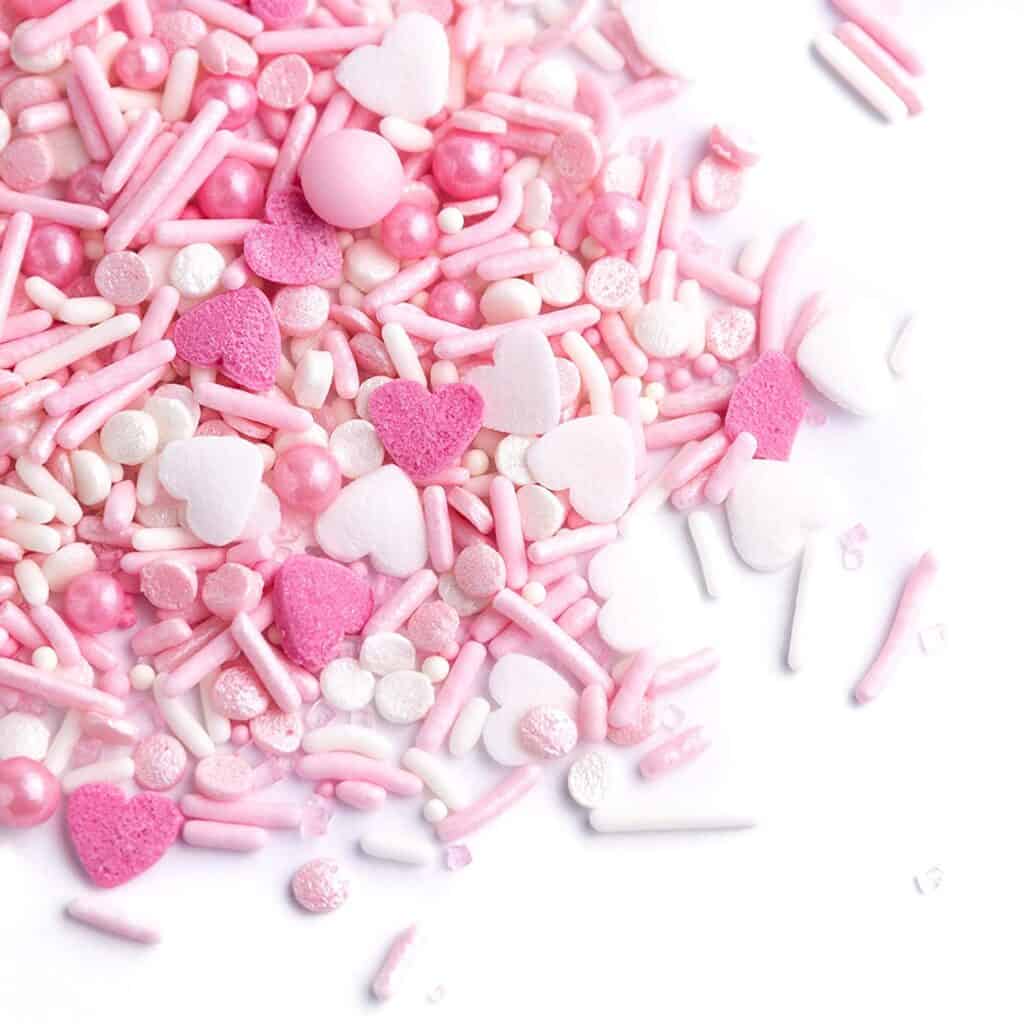
Sweet Indeed Valentine’s Day Sprinkles

How can you make sugar cookies without having sprinkles? Honestly, sprinkles are how I get my picky eaters to try new foods. If you put sprinkles on anything they automatically look fun and inviting.

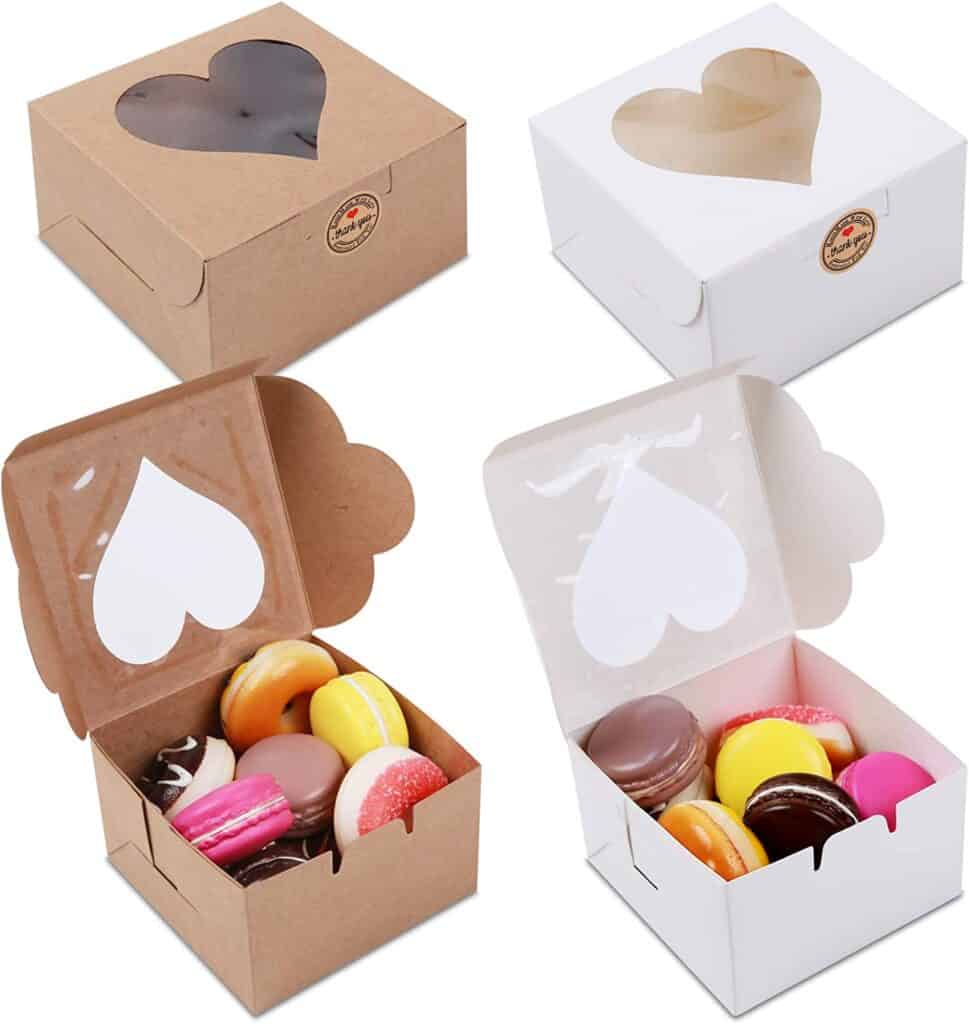
Heart Shaped Bakery Boxes

If you are looking for a fun way to package your Valentines cookie gifts, these heart-shaped bakery boxes are perfect. Valentine’s Day cookie delivery coming right up!

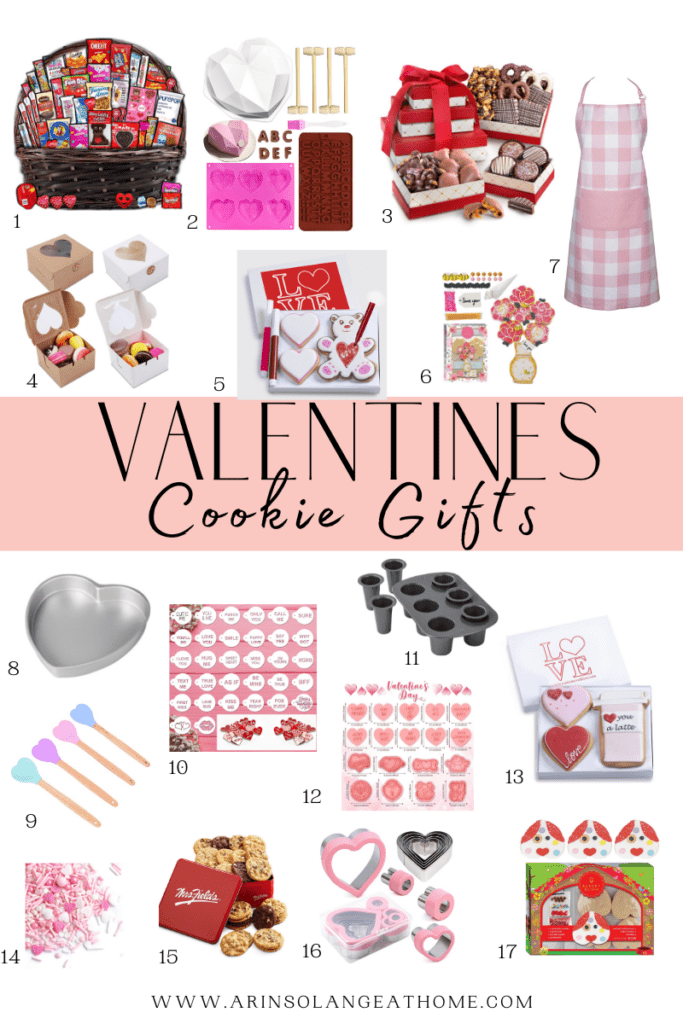
Valentines Cookie Gifts Amazon Finds

Check out my round up below for your Valentines cookie gifts.

Valentine Cookie Gifts Supplies

1  |  2  |  3  |  5  |  8  |  10  |  11 12 13  |  14  |  15 16  |  17 

  1. Valentines Day Basket Of Snacks
  2. Breakable Heart Silicone Molds
  3. Chocolate Caramel Crunch Tower Gift Set
  4. Heart Shaped Bakery Boxes
  5. Cookie Gift Basket Decorating Set
  6. Decorate Your Own Cookie Bouquets
  7. Buffalo Pink Plaid Apron
  8. Heart Shaped Cookie Cake Pan
  9. Heart Shaped Spatulas
  10. Valentine Cookie Stencils
  11. Cookie Shot Glass Mold
  12. Cookie Cutter Conversation Heart Molds
  13. 3 Count Valentines Day Cookie Gift Box
  14. Sweet Indeed Valentine’s Day Sprinkles
  15. Mrs. Fields 2 Dozen Assorted Cookies 
  16. Valentine’s Day Cookie Cutters
  17. Decorate Your Own Puppy Theme

Other Posts You’ll Love

Galentine’s Day Party | Valentines Day Party | Valentine’s Day Pajamas | Cherish You: A Pink Cherry Valentine’s Day Party

Pin This Photo Below For Later

Is anyone else hungry for cookies now? I hope this post gave you some great ideas on Valentines cookie gifts for your loved ones. Whether you decide to order cookies or make your own, the thoughtfulness of your gift will be appreciated by all who get to enjoy it. Be sure to pin the photo below for later, and if you don’t already – follow me on Instagram (@arinsolange) and Tik Tok (@arinsolange) for more fun!  

Valentine Cookie Gifts Supplies
Parties

Cherish You: A Pink Cherry Valentine’s Day Party

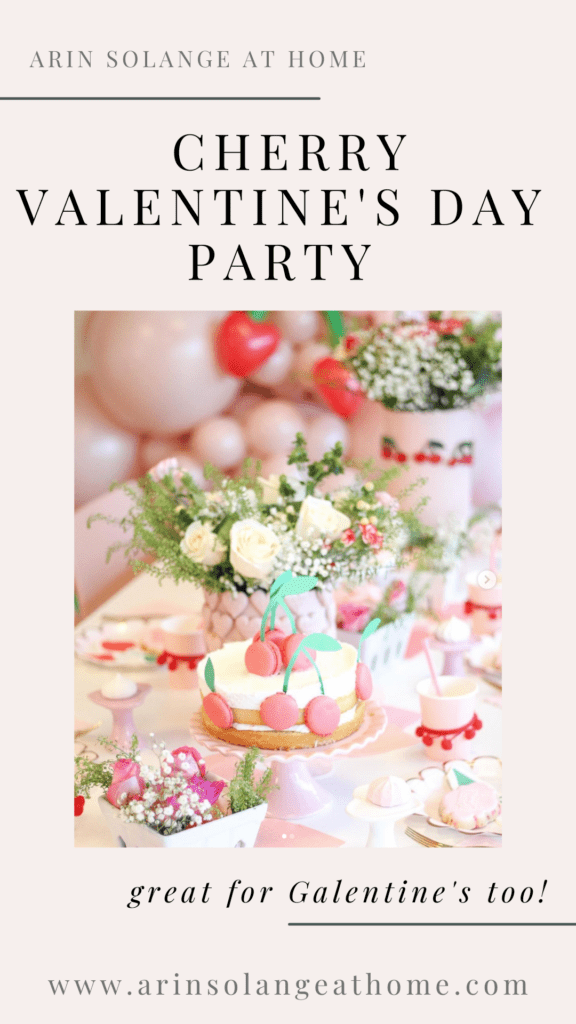
You guys know that my ability to resist a good Valentine’s Day party is basically zero. Last year Party Hop Shop and I set out to do another round of holiday parties with a kids pink cherry Valentine’s Day party. We wanted something sweet for our girls to celebrate Valentine’s Day together, while also giving inspiration that would be perfect for a cherry birthday party too! Even if I’m a year late at bringing you this post, this party will always on be on trend.

This post may contain affiliate links

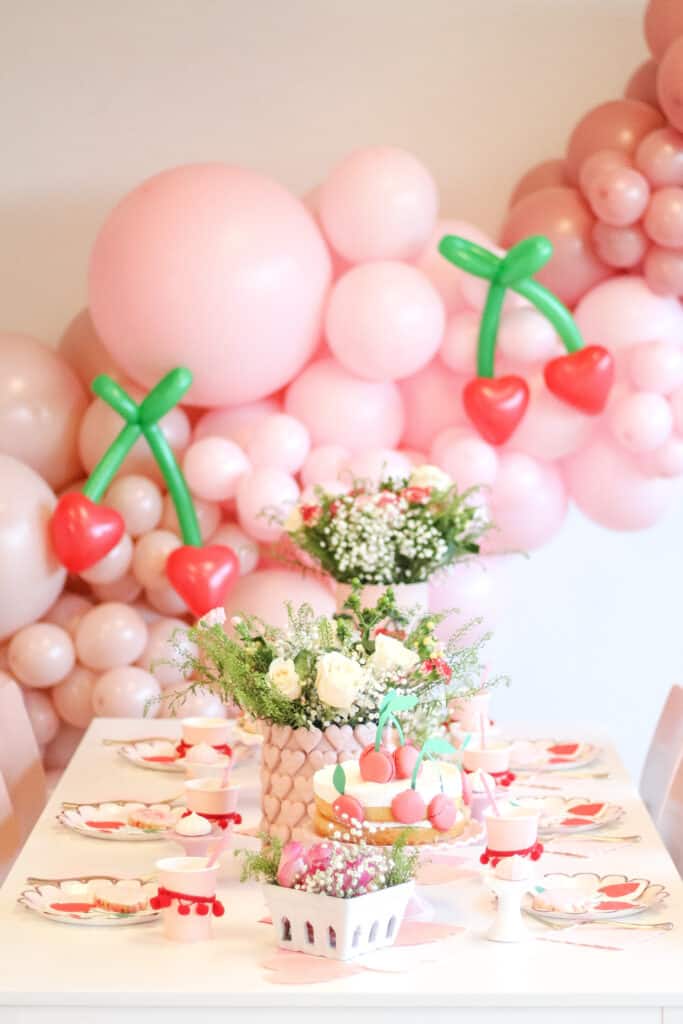
Cherish You: A Pink Cherry Valentine’s Day Party

How many of you throw a Valentine’s Day party for your kids? Maybe something small, or even a big Galentine’s Day party for your little girls? The Party Hop Ashley’s and I were dying to put together a party that you could replicate in big or small ways for Valentine’s Day or a birthday party and the end results were exactly what we envisioned.

We went with something fairly easy to recreate yourself aside from a few minor details, so hopefully you can use this inspiration at your sweet party too!

What to Buy for your Pink Cherry Party

If you are looking for supplies for this party, make sure you check out Party Hop Shop first, but I am linking to some of the supplies from Amazon as well!

Setting up your Pink Cherry Party

Now for the fun part! Setting up this sweet party.

Prep Work

My overall best advice for any party is to set up whatever you can ahead of time. You will always have last minute tasks that pop up and take up valuable time. If you can set up 90% of it ahead of time, it will save your sanity.

Depending on the location of your party, you may be able to knock out more than others. If you have the party at your own home, chances are you can have the table setting completely done and room decorated ahead of time. That way, all you have to worry about is food prep and hosting duties.

If your party is at a different location or you have curious little ones who like to get into everything, then I’d suggest making sure you have all your supplies gathered together in one area. That way they are easily accessible when it is time to assemble.

Any time I use balloon garland, I always make sure the actual garland is put together ahead of time. This is something that can easily be assembled the night before. Set it aside and you can hang it in your space once you arrive.

If you are making silverware bundles (silverware + napkins), you can also make those the night before so they are ready to go.

DIY Heart Resin Vase For Cherry Valentines Day Party

Set The Stage

For this party, we chose to keep it simple and kid-friendly. In other words, think lots of sugar and pink.

Setting the table was pretty simple. We assembled and hung the balloon garland. If you don’t have room for a balloon garland, you could also do a cute felt garland or paper garland to hang instead.

Once the garland was up, we tackled the table. Putting together your table is pretty easy once you have all your supplies at your finger tips.

If you want to live on the edge and set your table with a table cloth, I love this scalloped washable table cloth that would be adorable for any girl’s party!

Next, set the table using your plates, silverware, cups, and napkins. You can get as fancy and frilly as you want here. Simply set out the supplies or if you want to assign seating, make name cards for each place setting. If I was doing this for a birthday party and wanted a cute way to assign seats, I love the idea of making DIY resin letters for each child’s initial. It would be a cute keepsake to take home.

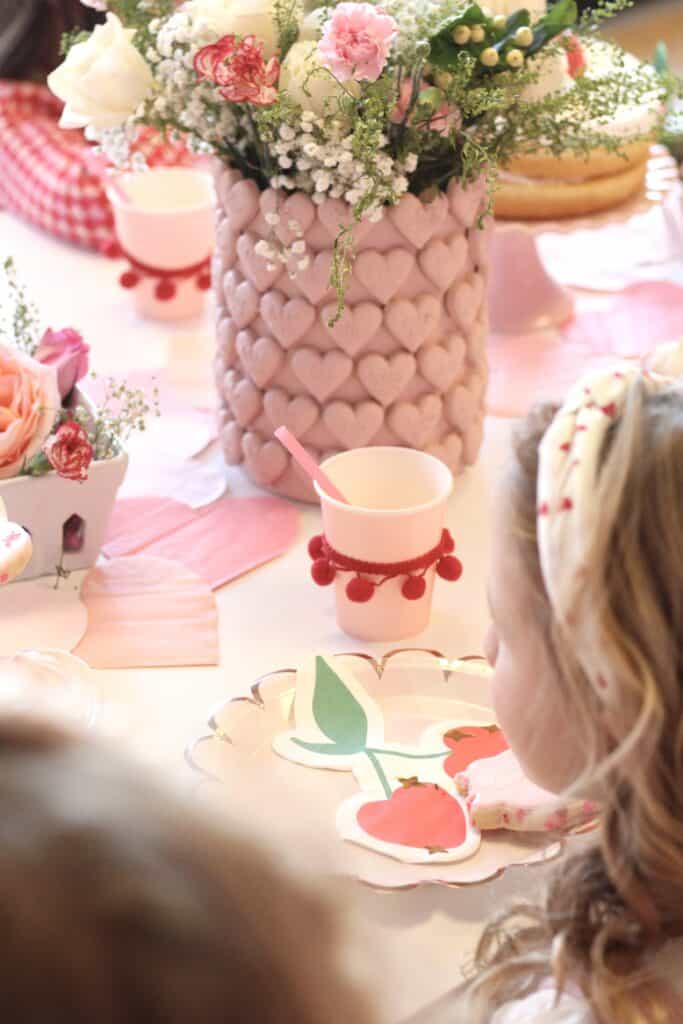
For our table, we chose to use a runner for the middle to add texture and a pop of color. Again, this doesn’t need to be a specially ordered runner. We actually used heart napkins that we lined up in the center of table to create our own runner.

Add The Details

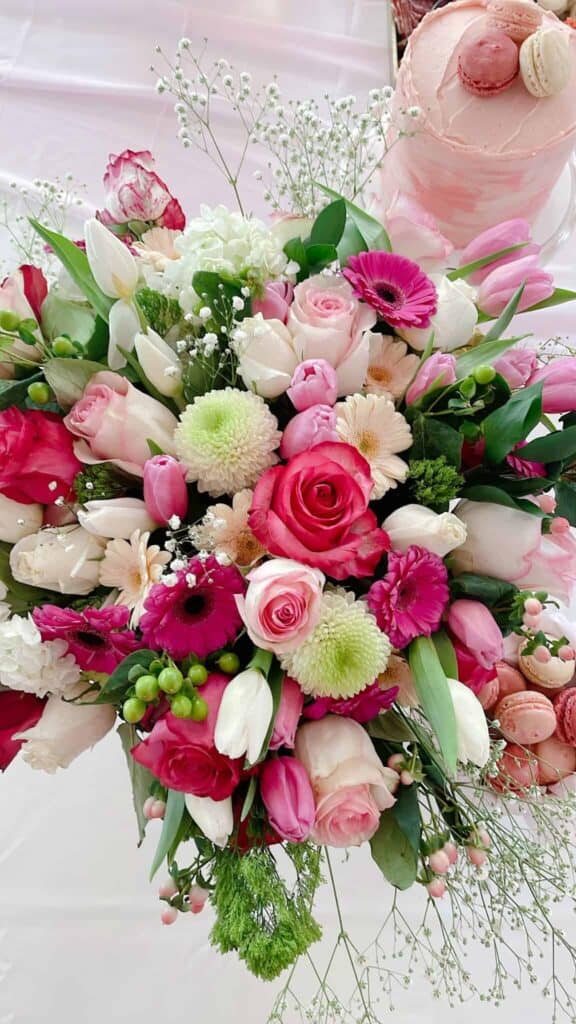
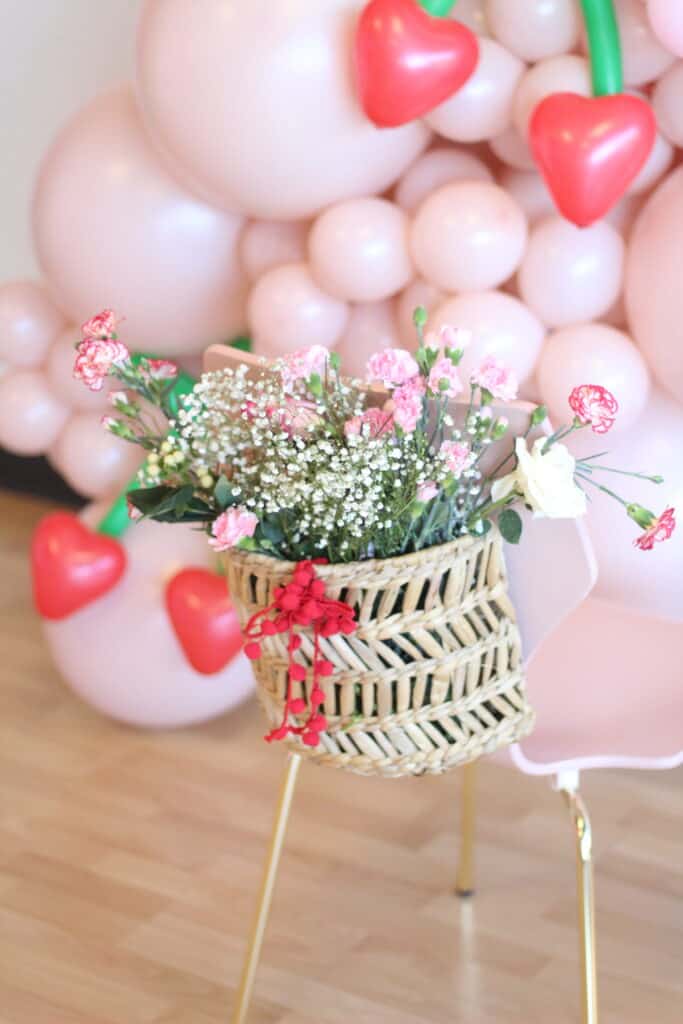
No Valentines Day party would be complete without a ton of flowers! Flowers not only add texture to a table but the different heights help your decor stand out. You can use mason jars, vases, baskets, or water pitchers to hold the flowers.

I used a DIY vase that I made with a cherry and heart resin mold. If you have any interest in making your own, check out my post on how I’ve made other resin mold vases. Simply swap out the molds for a cherry or heart shape!

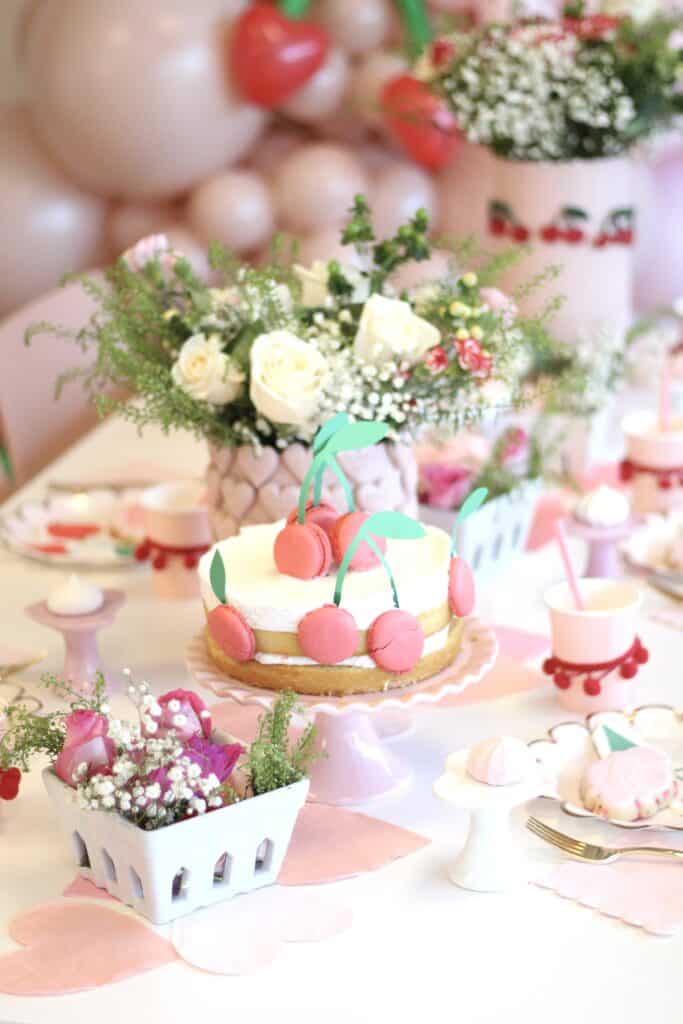
We also used a mixture of cake stands to hold various sweet treats. Again, the different heights helps draw your eye upward and creates more visual appeal.

Cherry bowls, heart bowls, and berry baskets helped strengthen our theme and tied in nicely with the rest of the decor. I like to keep the table fairly clear so it isn’t overly decorated. If you need to have a basket hold an item, I like to make sure that it is not only functional, but also enforces the party decor.

Cherry and Heart Cookies For Cherry Valentines Day Party

Final Touches

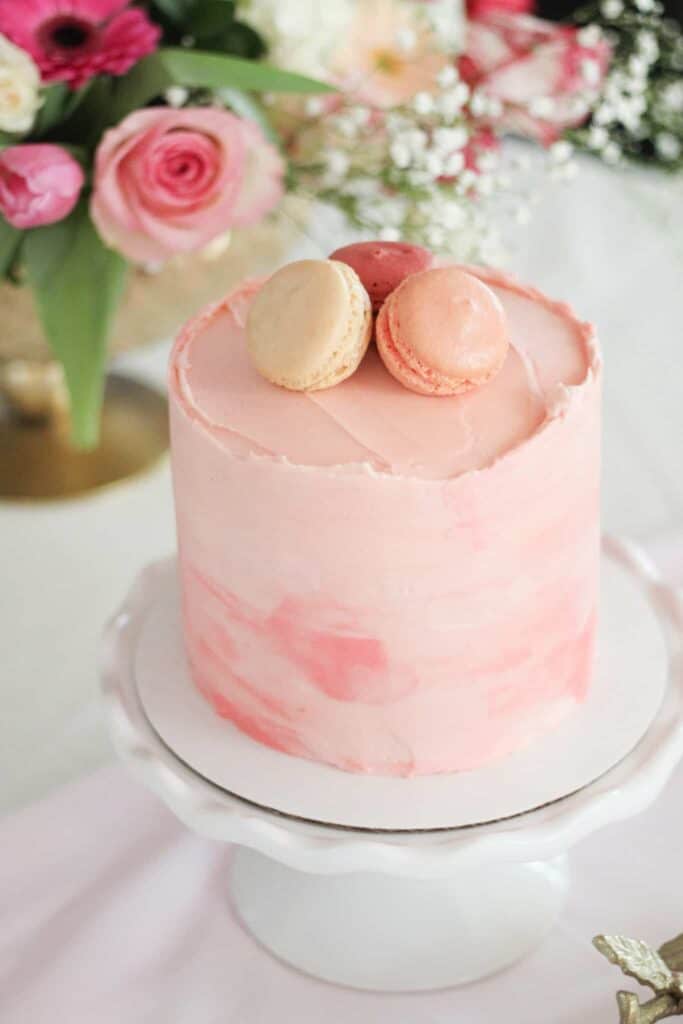
Last, add your final touches. Usually, this means food. We kept our party strictly desserts. We added a few macarons to our cake to resemble cherries. I love buying pre-made desserts or flowers to use to decorate a simple cake. This is an inexpensive way to get a custom looking cake.

Since you’ve done 90% of the work ahead of time, now you can sit back, relax, and enjoy your party!

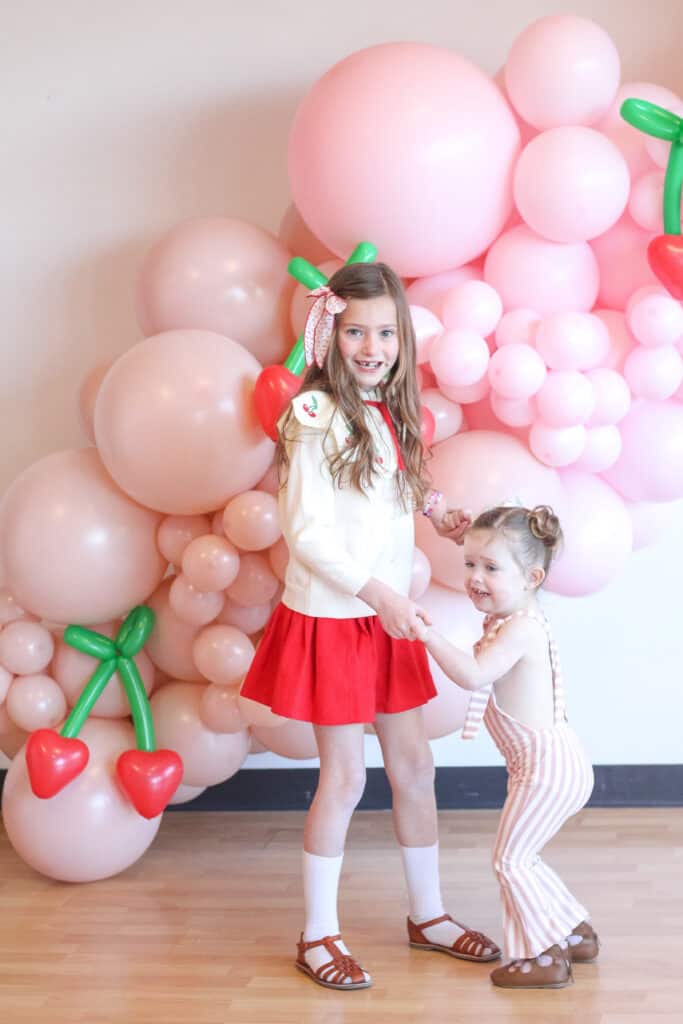
Dress the Part

You all know how much I love pink. So naturally, Valentines Day is a big favorite in our household. My girls love getting dressed up and this party was no exception. I’m sharing a few of my favorite outfits for Valentines Day you can get on Amazon.

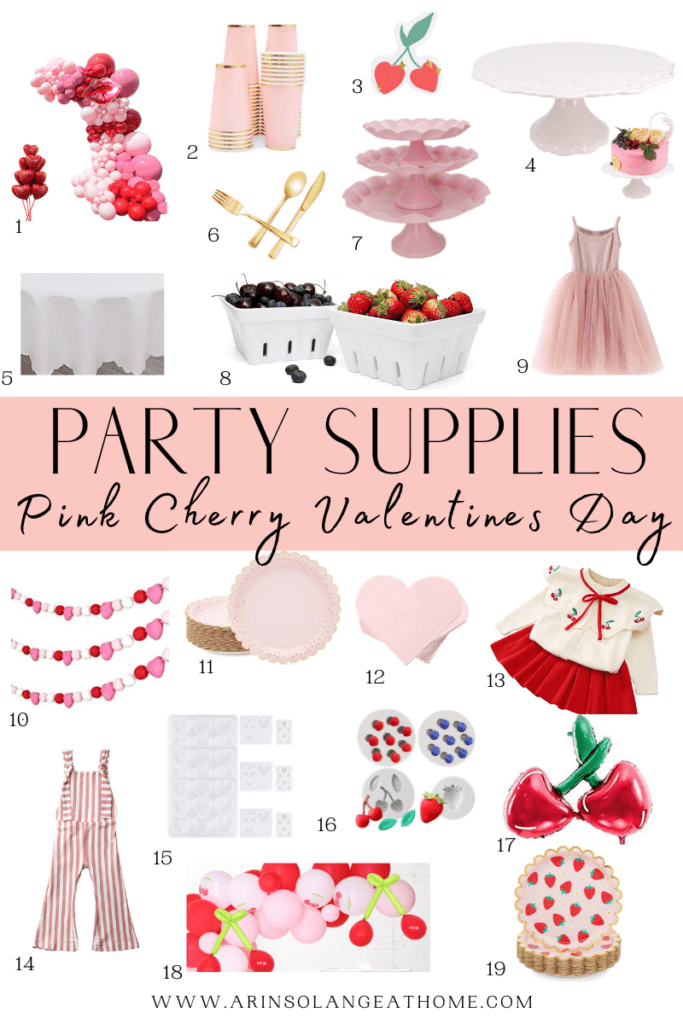
Pink Cherry Valentines Day Party Supplies

Here is a round up of everything you need to throw your very own pink cherry Valentines Day party!

Party Supplies for Pink Cherry Valentines Day Party

1 | 2 | 3 | 4 | 5 | 6 | 7 | 8 | 9 | 10 | 11 | 12 | 13 | 14 | 15 | 16 | 17 | 18 | 19

  1. Pink Balloon Garland Kit
  2. Paper Cups
  3. Cherry Napkins
  4. White Cake Stand
  5. Scalloped Washable Table Cloth
  6. Gold Disposable Silverware
  7. Pink Cake Stand Set
  8. Ceramic Berry Dishes
  9. Pink Tulle Dress
  10. Velvet Heart Garland
  11. Pink and Gold Plates
  12. Pink Heart Napkins
  13. Cherry Outfit
  14. Pink Striped Romper
  15. Heart Resin Mold
  16. Fruit Resin Mold
  17. Cherry Foil Balloon
  18. Cherry Balloon Garland Kit
  19. Strawberry Disposable Plates

Other Posts You’ll Love

Galentine’s Day Party | Valentines Day Party | Valentine’s Day Pajamas

Pin This Photo Below For Later

Hopefully this post gave you some great inspiration to throw your very own pink cherry Valentines Day party this year! I love throwing a party with a theme, and many of these items can be reused for a little girl’s birthday. If you are looking for ideas on what to include on your tablescape, make sure you check out my Amazon store front. Be sure to pin the photo below for later, and if you don’t already – follow me on Instagram (@arinsolange) and Tik Tok (@arinsolange) for more fun! 

Pin for Pink Cherry Valentines Day Party
Amazon Finds

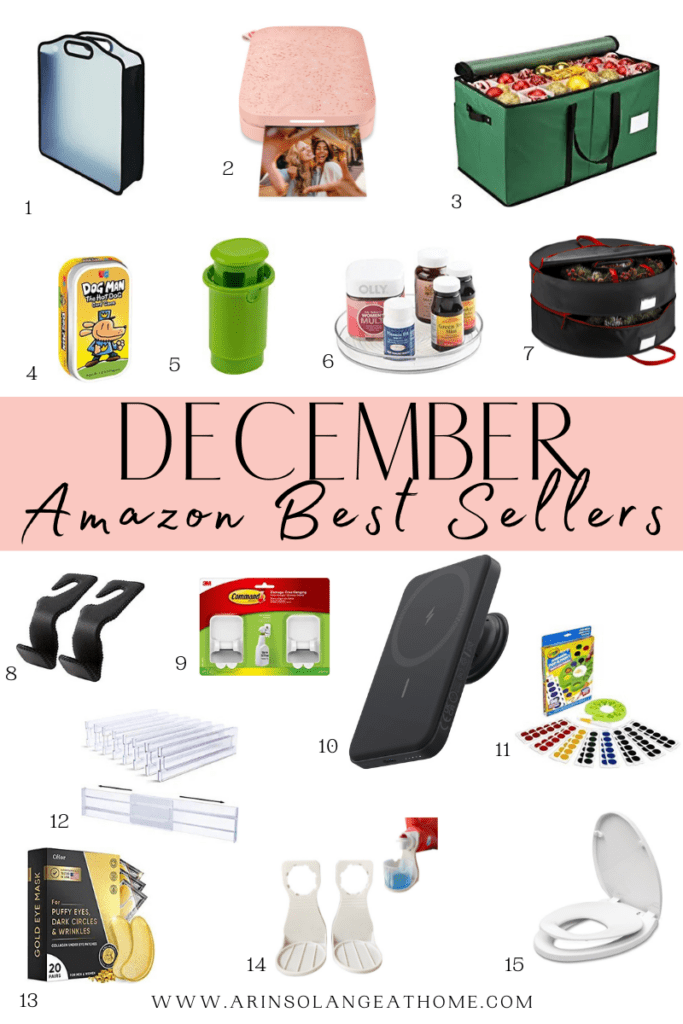
Amazon Best Sellers List- December 2022

I am so happy to bring you my monthly best sellers list so that you can easily see all the items in one place. All the items in this round up are from Amazon and can be found in my Amazon storefront. And if you find yourself wondering how to use any of these items in unique ways, make sure you head over to my Tik Tok where I am able to share more detailed reviews of items in video format.

This post contains affiliate links.

Amazon Best Sellers List 2022- December

With the holiday season closed, I’m so grateful to have spent the past month enjoying my friends and family. As always, I have some great home organization finds in my Amazon storefront.

If you have been looking for some great ways to organize your holiday decor, check out these holiday organization finds with this wreath storage bag and ornament storage bag.

Looking ahead for some Valentines Day gift ideas? Check out this Crayola watercolor paint set that has been a sold-out hit! Goldie has loved creating masterpieces and I’ve loved the no-fuss and mess free set up.

Shop Best Sellers

1 | 2 | 3 | 4 | 5 | 6 | 7 | 8 | 9 | 10 | 11 | 12 | 13 | 14 | 15

  1. Samsill 12×12 Paper and Scrapbook Storage Organizer – this is the more affordable and more readily available alternative to my beloved Linenmate sheet organizer.
  2. HP Sprocket– This is such a fun gift idea for a tween!
  3. Christmas Ornament Storage Box– Time to box up the holiday decor and keep it organized for next year
  4. University Games Dog Man The Hot Dog Game
  5. Good Cook Fruit & Veggie Divider
  6. iDesign Kitchen Turntable – This is so versatile and can be used in kitchens, pantries, bathrooms, closets, etc.
  7. Wreath Storage Box– I love that these storage boxes keeps those delicate wreaths protected
  8. Headrest Hooks For Car
  9. Command Spray Bottle Hanger – Make room on your countertops and put those spray bottles under your sink
  10. Pop Socket External Charger
  11. Crayola Watercolor Paint Set – This is a favorite for Goldie
  12. Drawer Dividers
  13. Under Eye Patches – Party too much this holiday season? Get these eye patches to at least pretend like you’ve had enough sleep
  14. Laundry Detergent Cup Holder & Catcher– Never have a laundry spill again with this catcher
  15. Toilet Seat

To be the first to see Best Sellers + enjoy a sneak peek at my end of year ‘Best of’ series, subscribe to my email list below!

Other Posts You’ll Love

15 Gold Mirrors To Dazzle Your Home | All Gift Guides | All Amazon Finds

Pin This Photo Below For Later

Be sure to pin the photo below for later, and if you don’t already – follow me on Instagram (@arinsolange) and Tik Tok (@arinsolange) for more fun! Be sure to check my Amazon store front for all things best seller, home organization, and DIY. With 2022 in the books, you won’t want to miss what I have in store for 2023!

Home

15 Gold Mirrors To Dazzle Your Home

Can we all just agree that gold mirrors are having a moment? I absolutely love the look of ornate gold mirrors to add a big statement to any room in your home. This trend has been around for a few years now and I don’t see it going away anytime soon. If you are looking to add a gold mirror to your home decor, I’ll share with you my top 15 gold mirrors.

This post may contain affiliate links.

15 Gold Mirrors To Dazzle Your Home

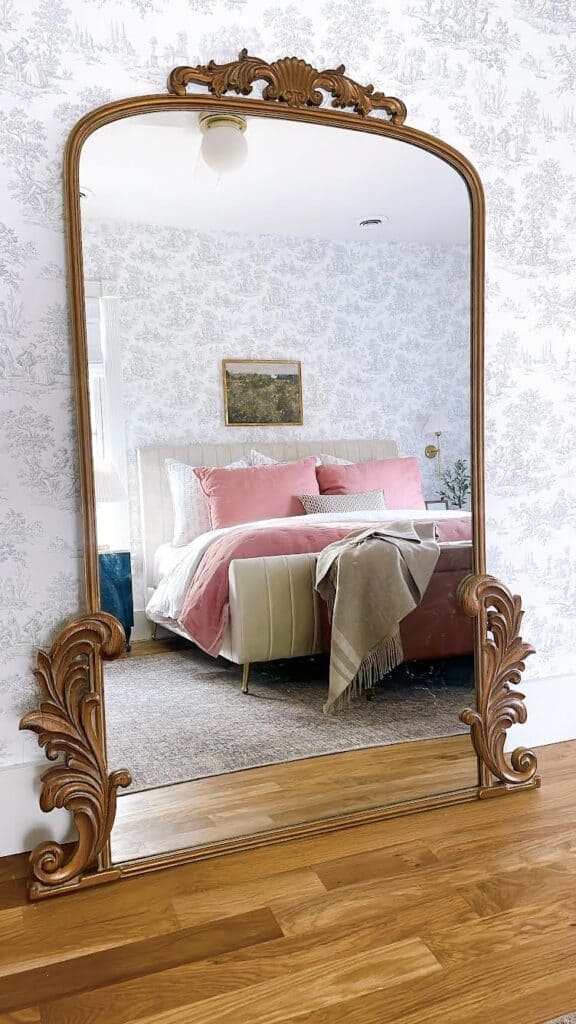
I just completed an overhaul on our master bedroom using Amazon products.  This was the first room in our house that I did just for ME.  Normally, I’m focused on updating spaces that are shared or for my kids. In this case, it was time for me to take care of myself and create a sanctuary where I could truly unwind and relax.

If you are interested in checking out the full reveal of our master bedroom, check out my Instagram post here

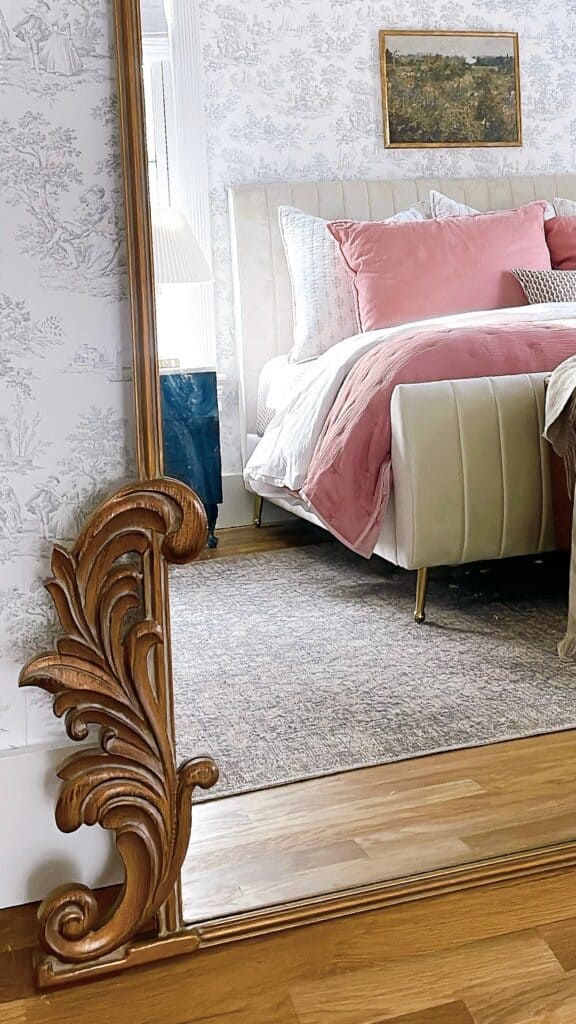
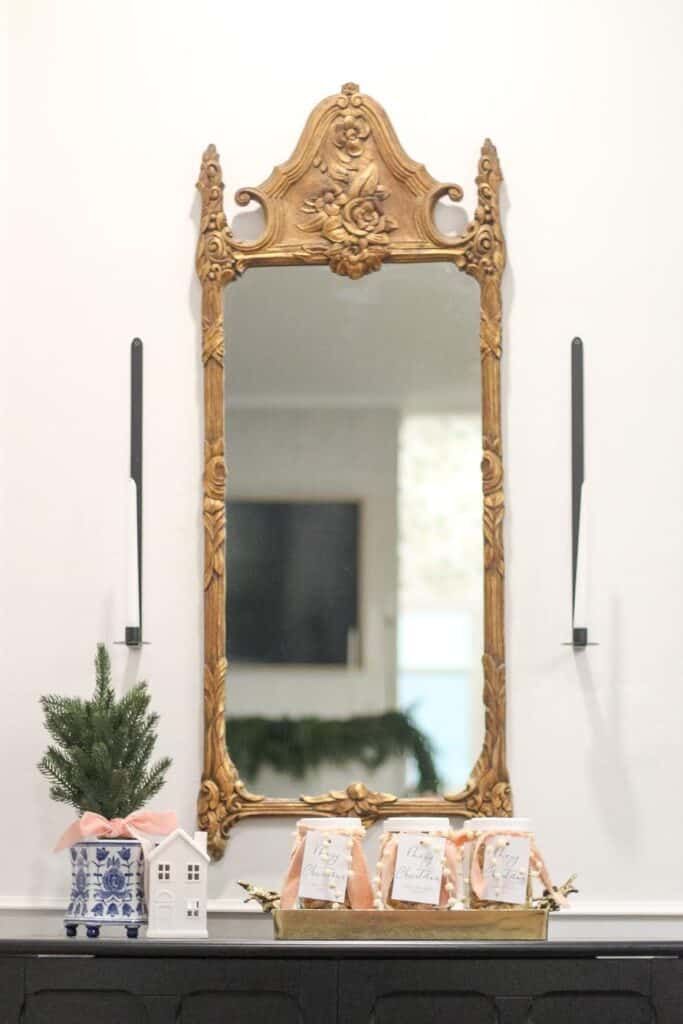
One of my favorite features is our floor height, antique gold mirror.  It brings in so much extra light and makes our bedroom appear even larger.  But what I really love about it is the overall look. The ornate features of the mirror with arches, gold leaf finish, and rounded edges fits perfectly with our vintage romantic style.

Antique gold leaf mirror detail

Benefits of Decorating With Mirrors

If you’ve been around my blog or Instagram long enough, you’ll know that I love adding visual interest by using mirrors. 

With a historic century home, I try to stay true to the overall age of the house by adding in vintage pieces mixed with modern elements. Throughout our house we have nods to our home’s 1800s roots. 

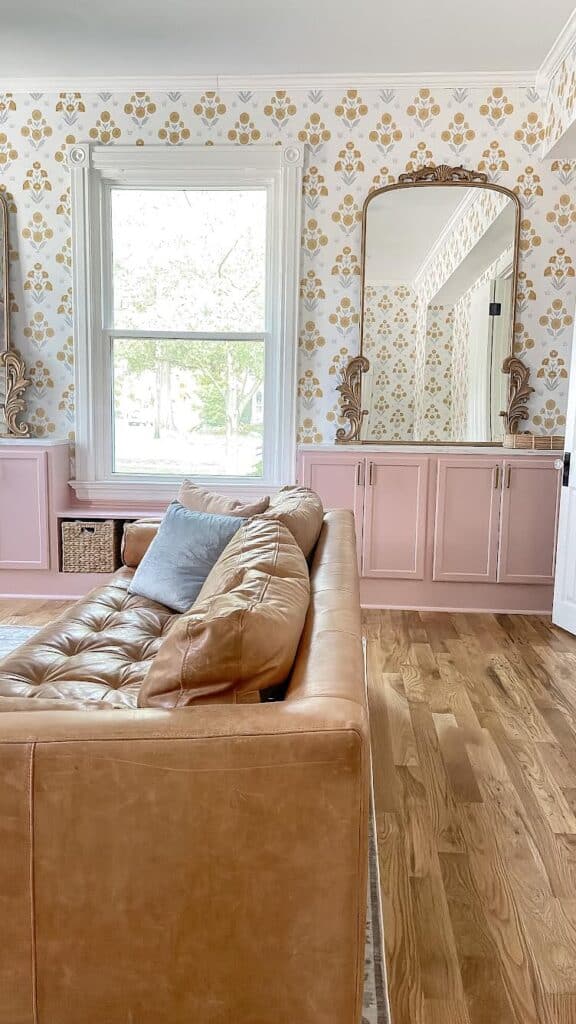
An antique mirror is the perfect addition to any room in our home. Finding an antique gold mirror is not as hard as it sounds.  Fortunately, you can find a decorative mirror in many styles. Our master bedroom is not the only room in our house to benefit.  Both our playroom and dining room have large mirrors as well.

So why do I use them in so many of our rooms? The answer is quite simple.  It is such an easy way to effortlessly tie together your decor and add visual appeal.  Not only that, but it makes the room feel brighter, larger, and just much more cohesive. 

Placement of Gold Mirrors

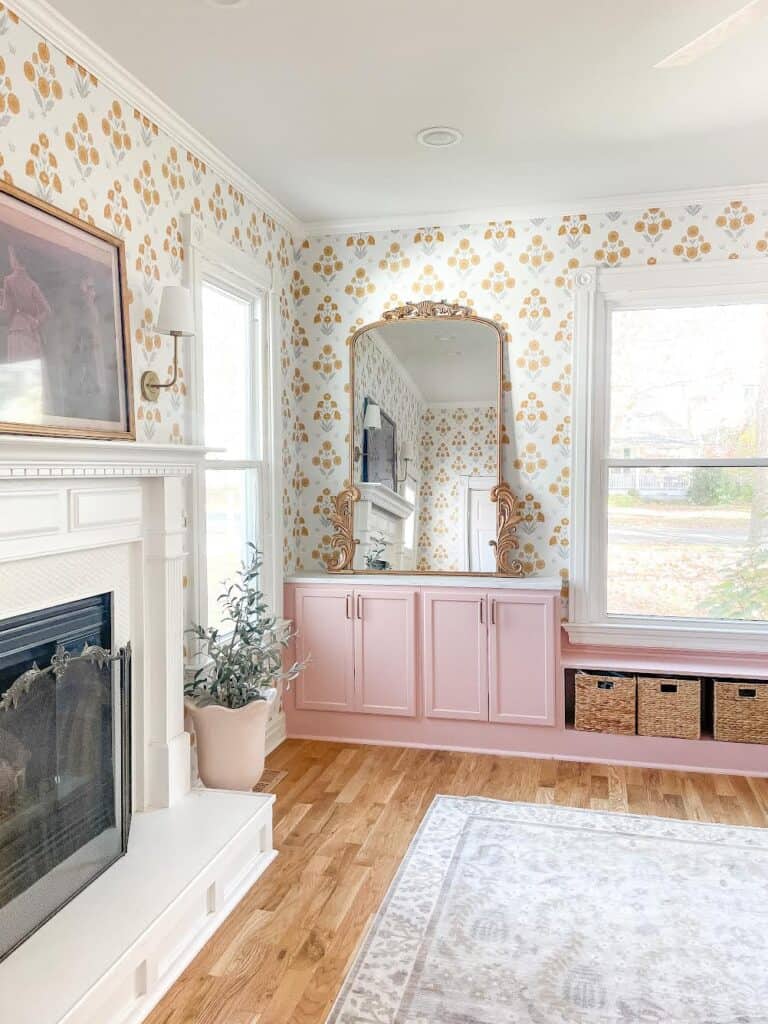
You don’t have to add mirrors only to your walls.  While a decorative wall mirror is an easy way to take up wall space, you can always think outside the box.  In our playroom and living room, our large mirrors actually sit on top of tables.  In our master bedroom, the mirror is propped against the wall for a floor length mirror. 

Have you ever been in a home where the mirror is so high you can’t even use it? I love that by propping your mirrors at eye level you have a quick view for easy access.

Try playing around with your space. You can place your mirrors in corners, on shelves, tables, or propped against the wall. The placement is entirely up to you.

How to Choose Your Mirror’s Shape & Size

Mirrors can come in all different shapes and sizes, so how do you choose?  Again, this is personal preference and depends on the style of your room.

There are a few general rules I try to follow to help maximize the room’s style and function.

Floor Length Mirrors

If you plan to have a large statement mirror, I would definitely recommend going with something that has a rectangular long shape. It can still have rounded edges or an arched top, but you’ll want the length to maximize the mirror’s square footage. 

Mirrors Above Furniture

If you plan to hang your mirror above furniture, round mirrors are a great choice. You’ll want the mirror to be a few inches smaller than the furniture piece so that it creates balance. Otherwise, the mirror will swallow the furniture up and it will be off balance. 

The same rule can be applied when propping your mirror on a shelf or on top of a table.  You’ll need to have a few inches on either side to frame your piece of furniture.  A rectangular mirror, round mirror, or arched shape are all great options.

If you are struggling on the shape of the mirror, a rule of thumb is to pick contrasting shapes. If you have furniture that has sharp edges, pick a mirror that is arched or rounded. Likewise, if you have more rounded lines, picking a mirror with sharp edges is a great way to create contrast.

Wall Mirrors

Hanging mirrors on your wall can be tricky. You’ll want to balance the mirror’s size and shape with any other decorative wall objects and the size of the wall itself. Don’t be scared to mix shapes.  Square mirrors can look great with rounded wall decor. But, sizing needs to be appropriate and should complement the other wall decor. 

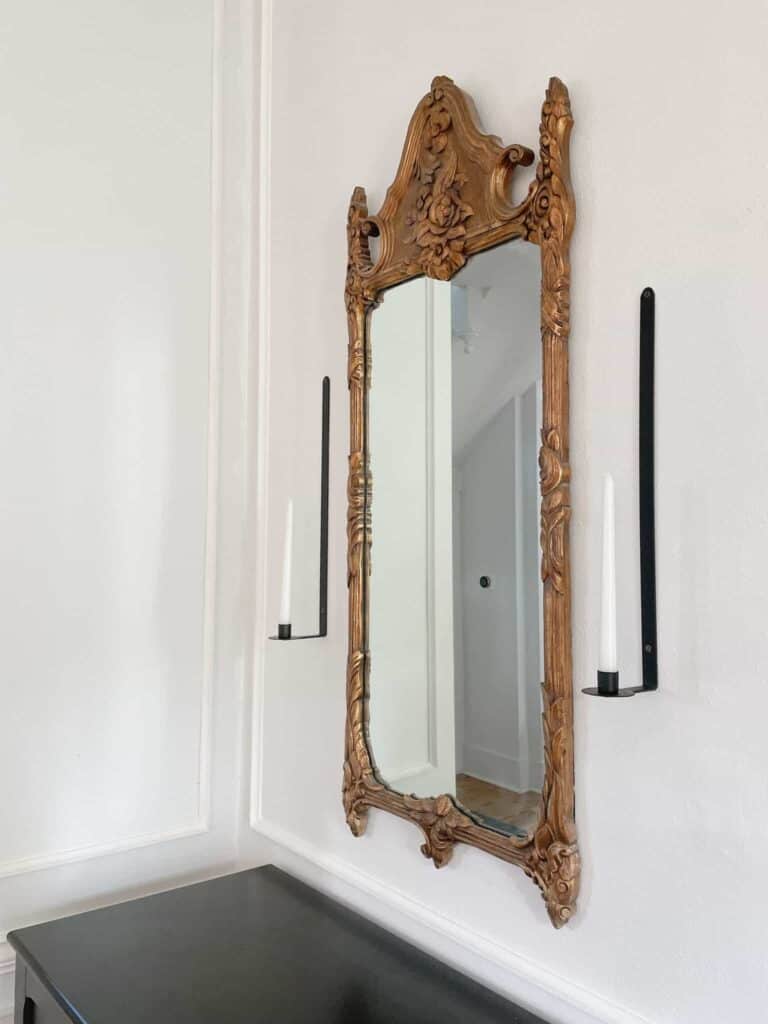
I love the look of wall sconces on either side of a large mirror hanging on a wall.  It complements the overall appearance of the mirror and balances out the wall space. 

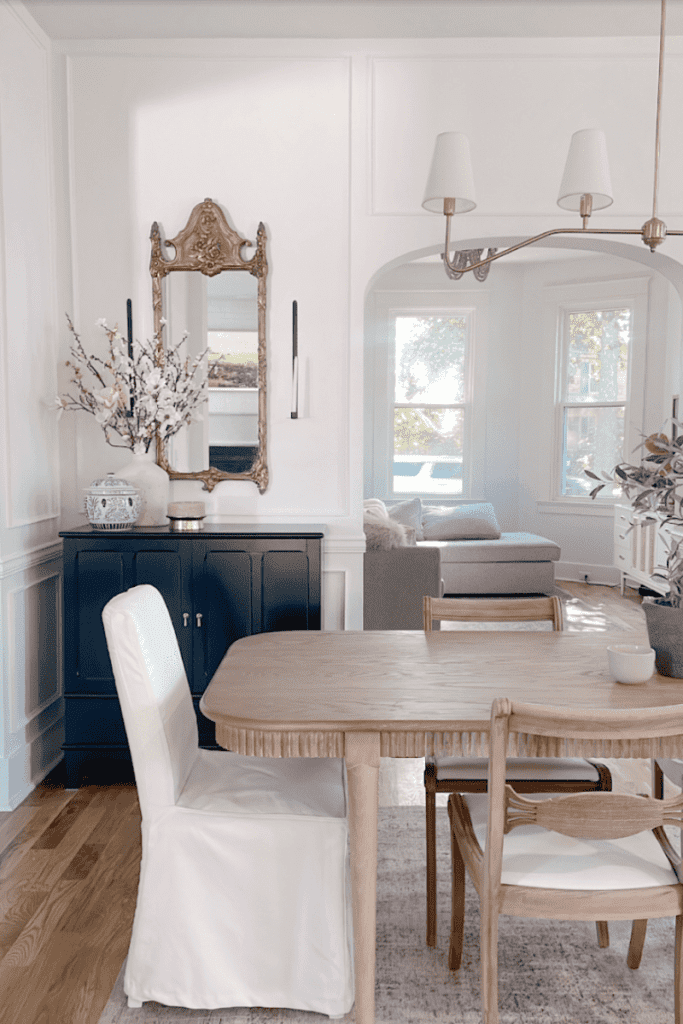
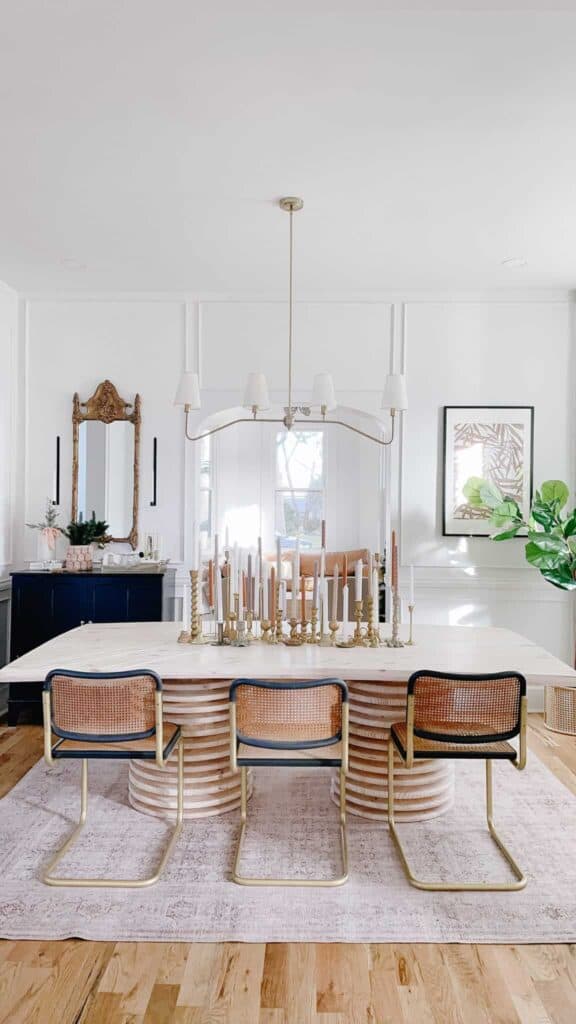
Large antique gold mirror in dining room

Favorite Gold Mirrors

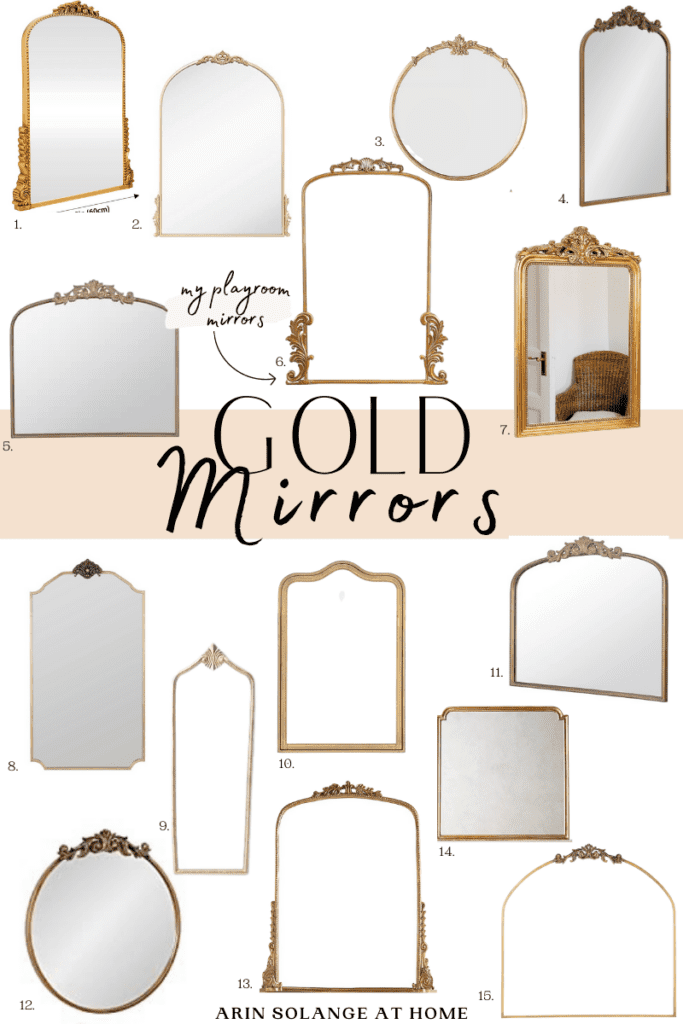
I’m including a round up of my favorite gold mirrors. I hope these provide you some inspiration to add elegance and a statement to your own home.

Round up of 15 top gold mirrors


1 | 2 | 3 | 4 | 5 | 6 | 7 | 8 | 9 | 10 | 11 | 12 | 13 | 14 | 15

  1. Antique Wall Mirror Gold Baroque – Great reviews on this mirror and it comes in 2 sizes. I love the larger size for hanging above a fireplace.
  2. Hobby Lobby Decor Carved Elegant Gold Arch – I love the delicate lines of this piece.
  3. Anthropologie Cecilia Mirrors – Anthropologie mirror with tons of sizes and styles! A bit pricey but so worth it!
  4. Kate & Laurel Arendahl Traditional Mirror– A classic antique mirror.
  5. A&B Home Arched Vertical Mirror – This has a great mixture of sharp lines with rounded edges. I love the contrast.
  6. Kirkland Gold Bordeaux Ornate Leaner Mirror – This is the mirror we have in our playroom and they have been great! Plus, it is on sale right now! 
  7. Hamilton Hills Vintage Gold Mirror – This mirror is a great option if you need to balance out a room with more delicate features. With the thicker lines, you can create a large focal point in a room with this mirror. 
  8. West Elm Empress Wall Mirror– Another splurge but this one is just so pretty.
  9. Target Floor Gilded Decorative Wall Mirror– An affordable floor option.
  10. Pottery Barn Sansome Arch Wall Mirror– This is definitely a classic. 
  11. Home Depot Arched Iron Gold Mirror – A beautiful piece to hang above a mantle.
  12. Kate and Laurel Arendahl Ornate Glam Mirror – There are several sizes available. This would look great hanging above a piece of furniture.
  13. Anthropologie Gleaming Primrose Mirrors– Another beautiful Anthropologie piece.
  14.  Anthropologie Aperture Mirror– If you need a piece that has shaper lines this is a great option.
  15. Lulu & Georgia Tulca Ornate Mirror– This is very much a splurge but SO elegant. 

Other Posts You’ll Love

Best Paint Finish For Dining Room  | 6 Steps To Add Picture Frame Molding | 9 Area Rugs For Your Home

Pin This Photo Below For Later


I hope this post gave you some inspiration to buy your own mirror. Obviously, I love the gold mirrors we own and really think they make a huge impact on our rooms.  If you have any questions, feel free to leave them in the comments section or DM me on Instagram. I share many more projects and products on both Instagram and TikTok ( @arinsolange) so be sure to follow me in both places!

Round up of 15 top gold mirrors
Home

Painting Stone Fireplaces: 8 Fireplaces Where Paint Created a Cozy Vibe

There is nothing I love more about winter than to cozy up in front of a fire.  For those who have been around my blog long enough, you’ll know that in our current historic home, our entire fireplace has undergone quite a transformation. If you need some inspiration to turn your ugly fireplace into the fireplace of your dreams, then you are in the right place.  I’ll share with you how to transform your outdated stone fireplace and go over painting stone fireplace ideas for an updated look.

This post may contain affiliate links.

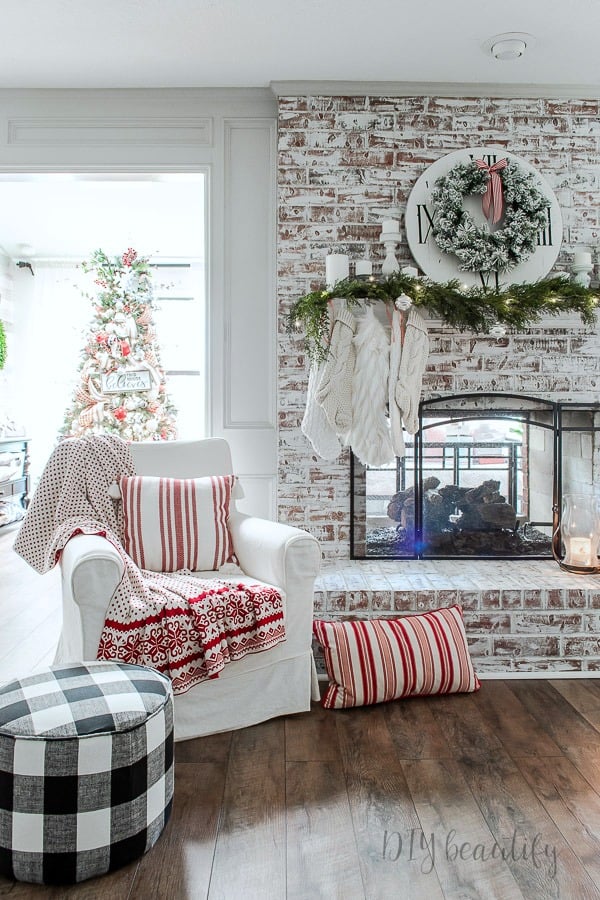
Painting stone fireplace ideas: peel and stick + white painted mantel

Painting Stone Fireplace Ideas: 8 Fireplaces Where Paint Created A Cozy Vibe

Over the course of our home journey, Sam and I have refinished several fireplaces.  In our last house, we updated the brick fireplace by painting it a fresh bright white to match out white walls.  We also ended up staining the wood mantle a lighter color to help brighten the room up.  

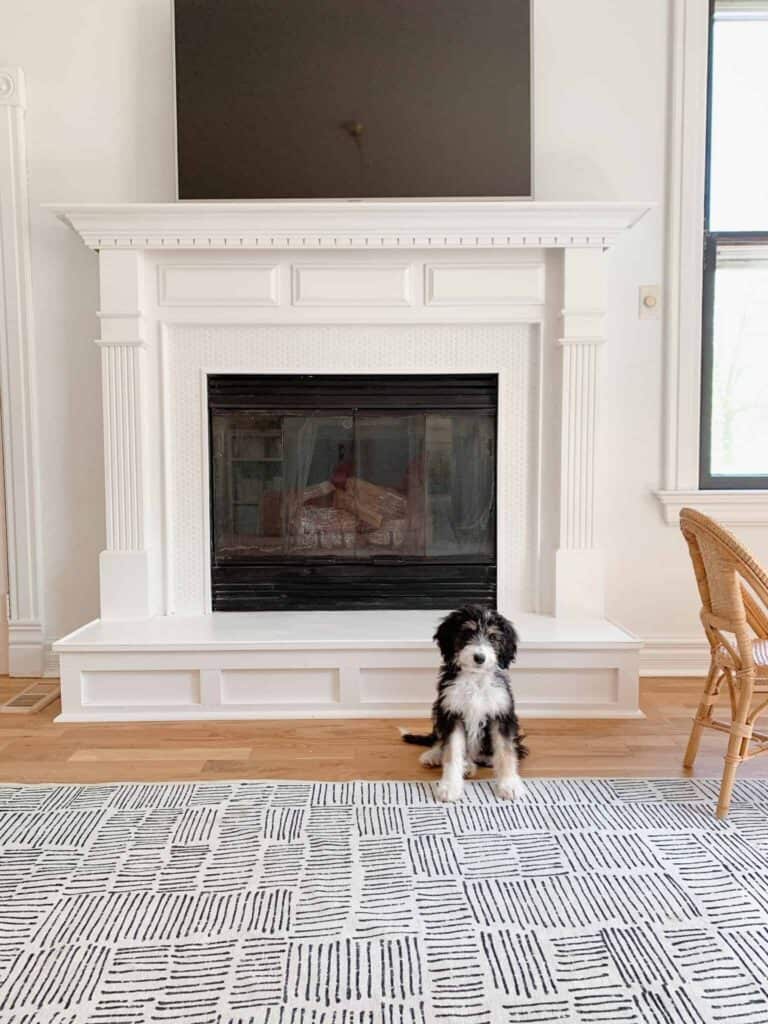
In our current home, while we don’t have a stone fireplace surround, we do have a gas fireplace that required a major facelift when we moved in.  Last year, we took our old fireplace that had green cultured marble and a light wood fireplace mantel and transformed it with a fresh coat of paint and some penny tiles.  The result ended up being exactly what I had envisioned for our playroom.  

I’ll share with you some tips on how to take your old fireplace to make it pop as a focal point for your room.  There is nothing worse than having a giant eyesore in the middle of your living room.  With the right paint you can take your outdated ugly stone fireplace and create a more modern look.

Getting Started To Paint Your Own Stone Fireplace

Painting stone fireplace ideas can be as simple as finding inspiration and using the right products to create something anew.  So what exactly do you need to know before you take on this DIY? 

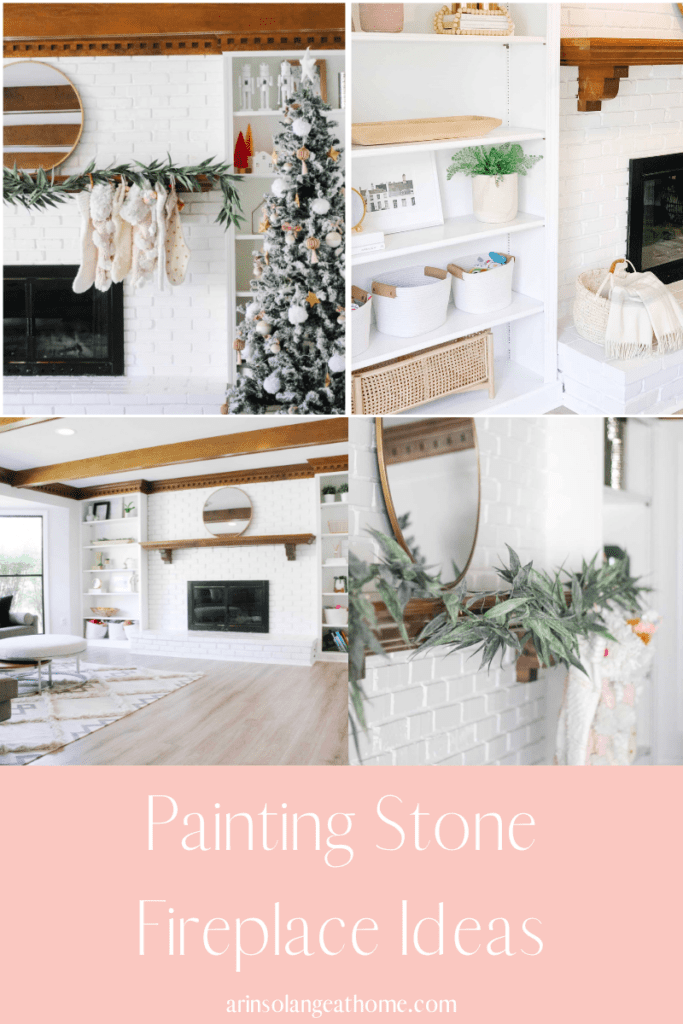
Built in bookcase with white brick painting stone fireplace ideas

Step 1: Prepare The Original Stone

Before you head off to Sherwin Williams to pick out a paint color, the first thing you’ll need to do is to prepare your stone surround for its transformation. Grab a scrub brush or wire brush, and give your stone wall a good scrub.  This will help prepare the stone for paint.

Whether you are painting a rock fireplace or a red brick fireplace, you can’t skip this first step. Fireplace painting must have the proper prep work done before hand. It is important that you clean off any debris before you get started or your paint will stick and clump.

Be sure you wear protective equipment to protect your eyes and lungs from any flying debris. Make sure you sweep up your mess.

Painting stone fireplace ideas and fall decor

Step 2: Wash Your Stone With TSP

TSP is one of those supplies that you should have on hand if you end up being a big DIYer.  TSP is a cleaning product that you should always use to prep the surface you are painting beforehand. You can use it on cabinets, fireplace doors, walls, etc.

If you don’t properly clean your surfaces, the paint won’t stick and you won’t end up with a professional finish.  This is the best way to clean off any sticky residue or grease that your kids leave behind.

Make sure you let this dry for a full day before heading on to step 3.

Step 3: Paint Your Stone Fireplace Base

If you have painted a dark color on your walls and decide to use a white paint, chances are you’ll be encouraged to use a primer. Primers help your paint adhere better and act as a sealer.  The same logic is applied when it comes to painting a rough surface like a stacked stone fireplace.  

Make sure you grab a 3:1 primer at your local hardware store.  The 3:1 primer will not only help your paint adhere to the stone, but will also help prevent soot from staining your fresh coats of paint. Personally, I love using Kilz supplies for all my painting needs.

You may need to use a brush to get the primer into any cracks or spots that are difficult to reach within the stones.  At this point, you can also use caulk to repair any noticeable cracks surrounding the stones. 

Let your first coat dry completely on the stone and then continue painting the stones with your second coat of primer.

Painting stone fireplace ideas and Christmas decor

Step 4: Paint Your Stone Fireplace Surfaces

Before you start painting your stones, you’ll want to ensure you pick out the correct type of paint. There isn’t necessarily a special fireplace paint. However, if you have a fireplace that does not work and is simply a part of your home decor, then you won’t need to use any special paint.  Instead, you can use regular latex paint or chalk paint on your stones. Both options adhere well and are easy to use since they are a water based paint.

However, if you plan on turning your fireplace on, you’ll need to make sure you get heat-resistant paint. If you don’t, your freshly painted fireplace will end up peeling and blistering all your hard work away. 

I will say that some painting experts still maintain that an interior latex paint won’t blister and peel as long as the exterior of your painted stone fireplace does not reach over 200 degrees Fahrenheit.  

In my opinion, it really isn’t too difficult to find heat-resistant paint, and I’d rather not take the risk of having all my hard work look less than stellar.  I’d say a good choice is to go with fireplace paint that can withstand high temperatures just to be safe. 

Painted Stone Fireplace Design Ideas

Now that you know a stone fireplace makeover is completely doable, let’s take a look at some design inspiration.  Painting stone fireplace ideas don’t need to be overly complicated.  A simple white fireplace is timeless and classic.  But, I also love seeing how others incorporate their personal style to achieve a whole new look with this DIY. Here are my top 8 painting stone fireplace ideas to give your entire room new life.

#1. Classic White Fireplace Painting

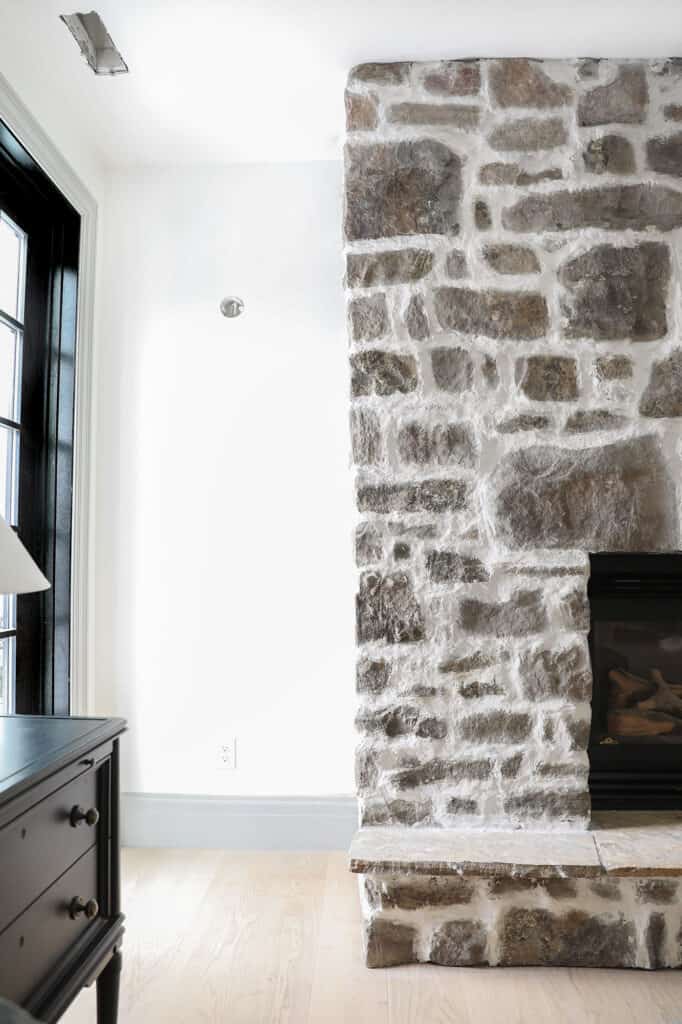
Benjamin Moore’s Cloud White is a popular choice for a crisp and inviting white paint color. It creates an inviting fireplace that is complete with a matching mantel.  I love that the whole fireplace, including the mantel, is one singular white color of paint. It really adds a layer of continuity and draws your eyes upward to give the impression of a tall ceiling. The painted stones look completely modernized with this simple DIY.

#2. Classic Black Stone Fireplace

Painting stone fireplace ideas with black fireplace

If you prefer to not have a single color of paint in your home, consider offsetting all those white walls with some black paint. This black fireplace stands out from the bright white wall color. I love how they took their natural stone fireplace and transformed it into a more modern focal point.

To offset the black paint, they kept their fireplace ledge a natural color, rather than paint all the stones in black. I love that the mantle that surround the fireplace has also been incorporated into the same sleek black painted look.

#3 Chalk Paint On Stones

Painting Stone Fireplace Ideas with Chalk Paint

DIY Beautiful took her 80’s red brick fireplace and used chalk paint to create this stunning feature.  If you are wanting to update your fireplace’s appearance but not completely cover the charm of the bright color of the stone, this chalk paint technique is a great idea.  You have more neutral colors with the white wash but the character of the brick still can shine through. This is a DIY I love to see because it still allows for the natural beauty of the stones to shine through. This paint fits perfectly with the chic and shabby decor.

#4 Small Simple Changes To Your Stone Fireplace

Chris Loves Julia wanted to update their stone fireplace but still wanted the natural beauty of the real stone to shine through.  Instead of painting stone, they opted to grout over their fireplace to lighten up the overall appearance.  

The neutral colors complement their bedroom and it is a great way to show off a fireplace with natural stone that is still in good condition, but may need a minor facelift.

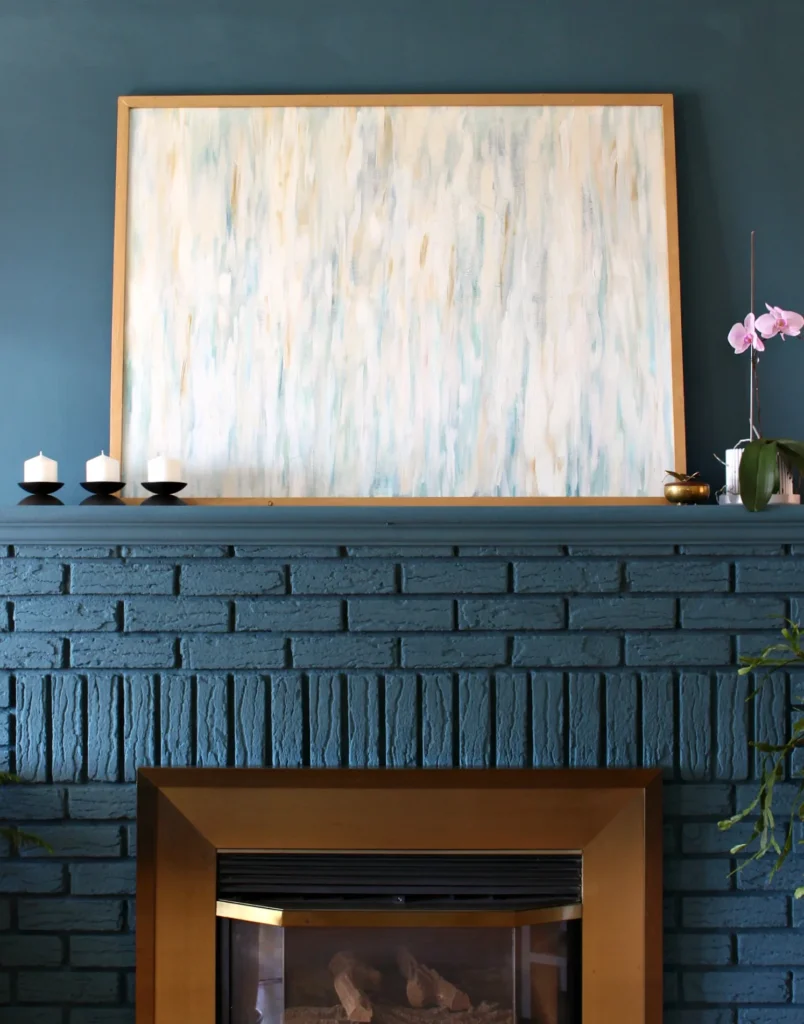
#5 A Moody Modern Stone Fireplace

Painting Stone Fireplace Ideas- bold blue fireplace

If you want to make a bold statement, paint your stone a dramatic color like this dark blue fireplace.  With the help from some chalk paint, this former all white brick fireplace turned dark and moody.  I love how there is a solid color that matches all from the fireplace to the mantel and to the walls.  This is one dramatic dining room.

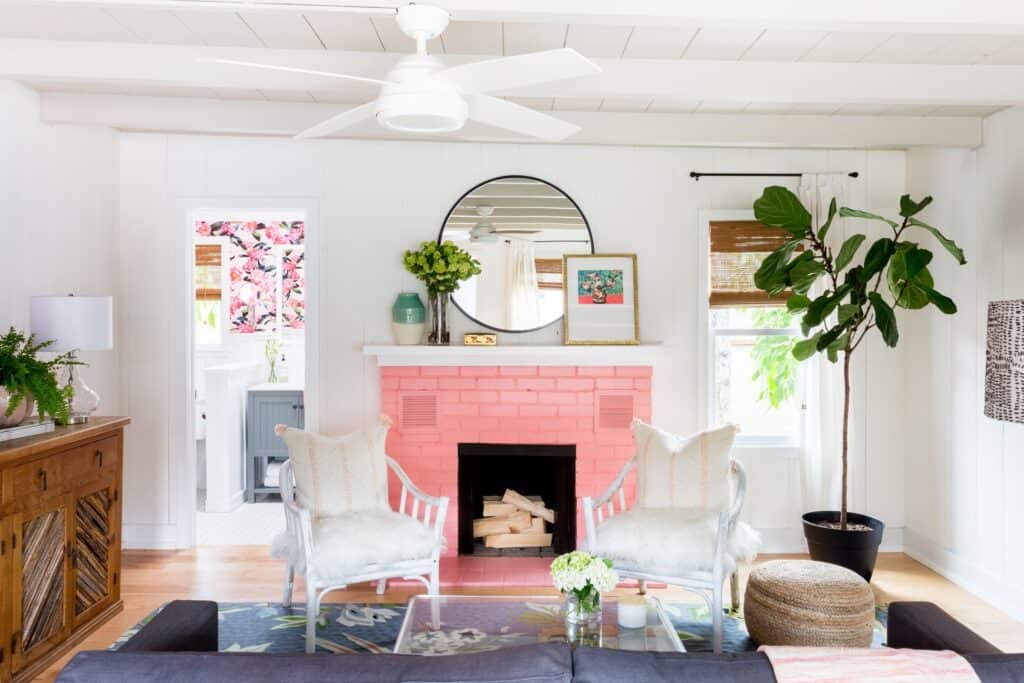
#6 A Pink Dream

Painting stone fireplace ideas with a modern pink painted fireplace

Can you hear my squeals through the internet? I absolutely love this freshly painted pink fireplace designed by J Kurtz Design. I’m surprised I didn’t think of doing this in our last house. How fun is that pop of color in what otherwise appears to be a fairly traditional color scheme and design.  

It takes this family room from stuffy to playful and fun. It was such a good idea to tie in the fireplace color with the wallpaper that is seen in the next room. A fresh coat of paint created such a whimsical atmosphere that otherwise would have been far less interesting had the stone been covered in white paint.

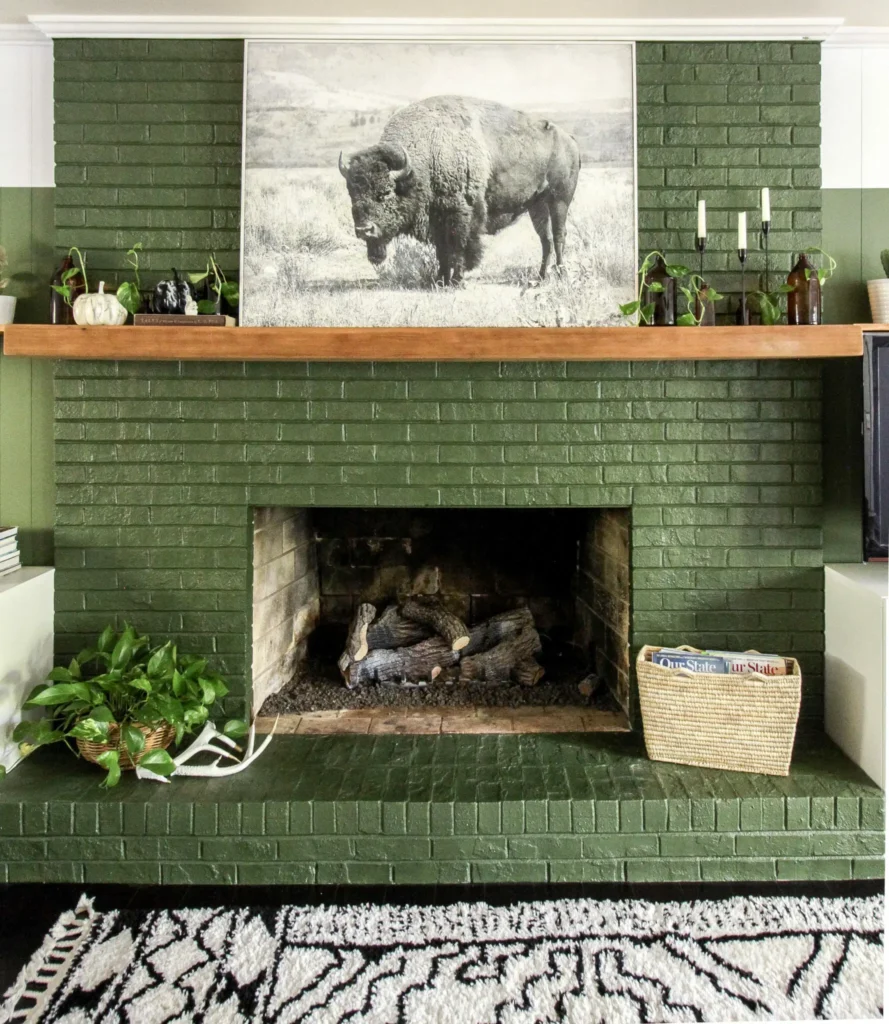
#7 Boho Green Paint 

Painting stone fireplace ideas with a boho green fireplace painted

This is another bold fireplace that takes a little paint and goes a long way. The use of green paint is daring in a fireplace and yet, it ties in perfectly with this boho living room. Even though this dark paint color is used throughout the room, it still gives off plenty of natural light, which makes the space feel open and airy.

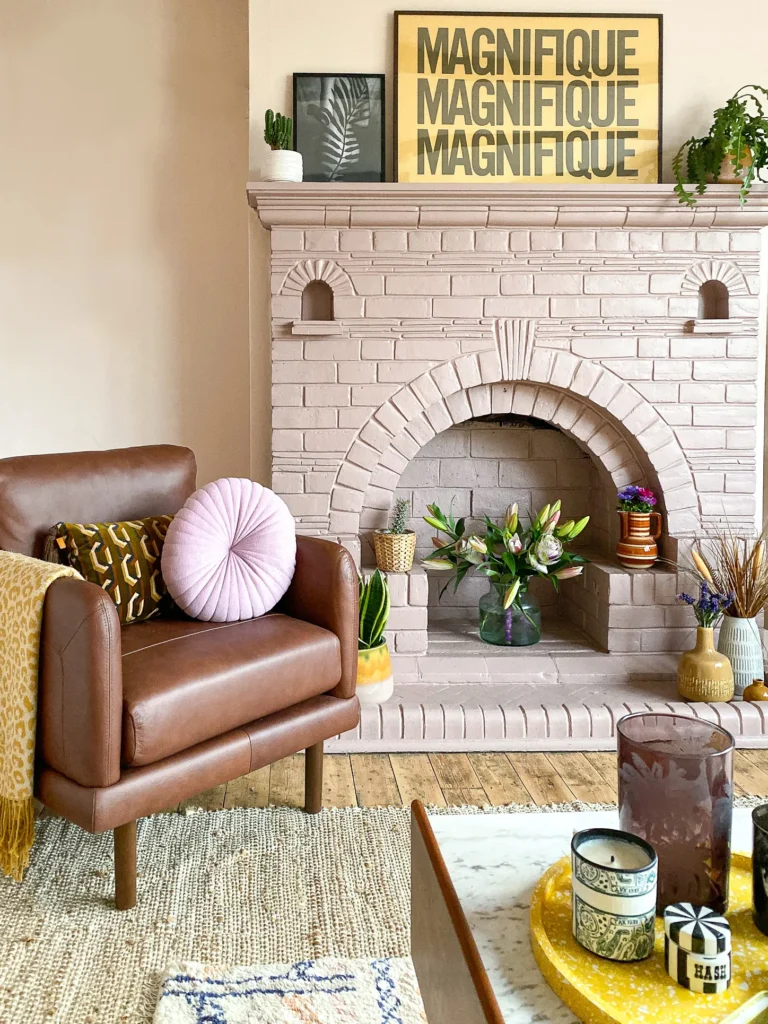
#8 A Soft Pink Paint

Painting Stone Fireplace Ideas with a light pink and modern painted fireplace

You know I had to input another pink fireplace. While a white or black fireplace is more commonly seen, I actually really enjoy the use of this more neutral paint color that is seen as a dusty pink.  It gives off just enough color to pop, but at the same time, isn’t so overly pink that it doesn’t feel natural.  The pops of yellow in the room really add a modern touch. 

Adding dimension, intrigue, and interest to your stone can be as simple as using paint in a bold color. The texture and dimension of the stone can really shine through the paint. Whereas, if you use white paint or black paint, there tends to be a bit less intrigue. When you use bold paint, you truly create a statement in your home.

Other Posts You’ll Love

DIY Penny Tile Fireplace| Peel & Stick Backsplash Fireplace Update| Home Tour Before & After Renovation

Pin The Photo Below For Later

I hope this post gave you plenty of painting stone fireplace ideas. With a little effort, you can make the fireplace of your dreams and enjoy a cozy fire this winter. If you have any questions, feel free to leave them in the comments section or DM me on Instagram. I share many more projects and products on both Instagram and TikTok ( @arinsolange) so be sure to follow me in both places!

Painting Stone Fireplace Ideas Pinned Image
Home

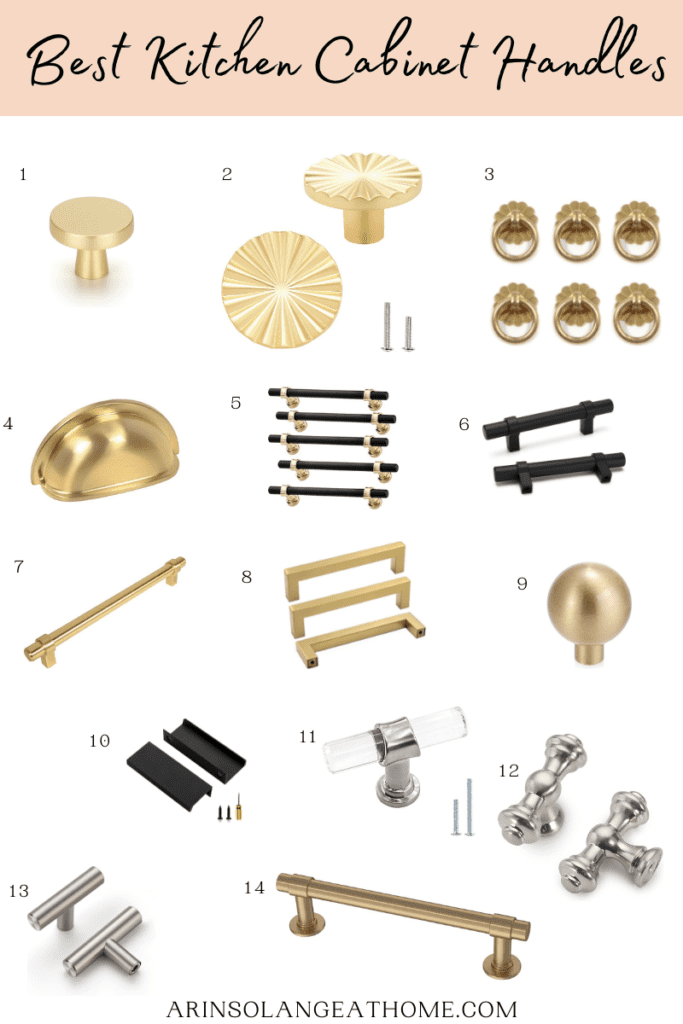
Best Kitchen Cabinet Handles: My 14 Top Hardware Picks

Who is ready for some new kitchen cabinet handles?  One of my favorite ways to update the overall look of a space in my home is to make subtle changes.  Depending on the room in your home, you can easily swap out textiles, rearrange furniture, or paint.  All of these are easy and relatively inexpensive ways to give your home a facelift. 

Updating a kitchen can be as simple as replacing kitchen cabinet handles. It can completely change the style of your kitchen for a customized appearance without wreaking havoc on your budget. If you are interested in making a change, I’ll go over the best kitchen cabinet handles for the kitchen of your dreams.

This post may contain affiliate links.

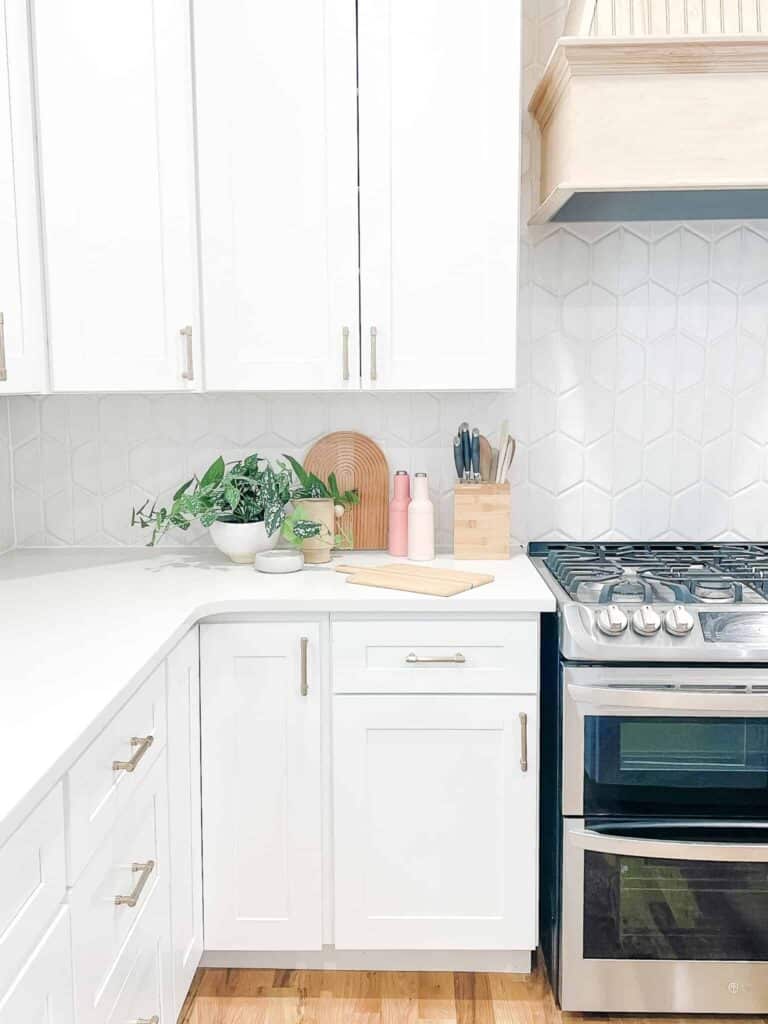
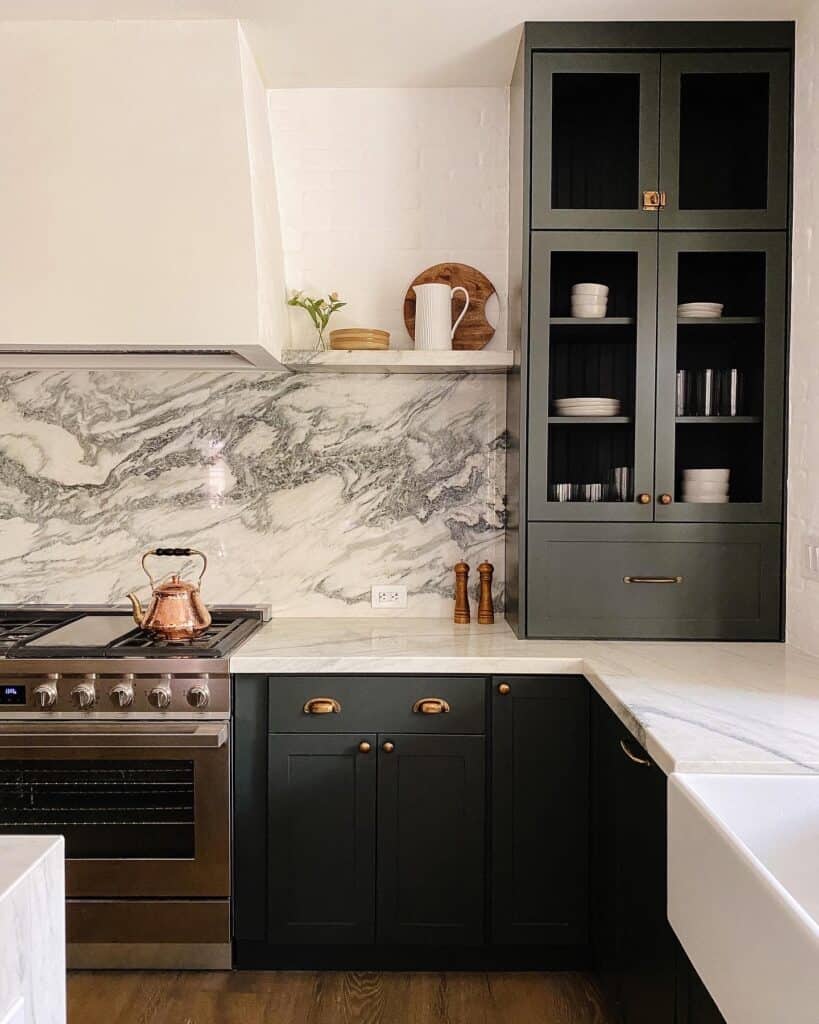
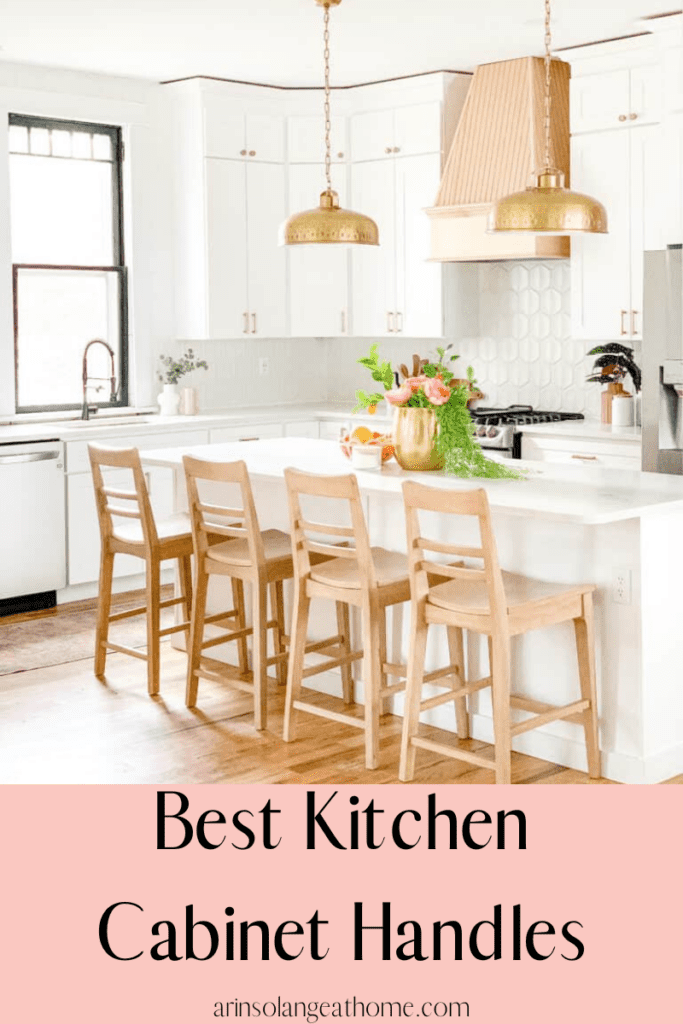
Best kitchen cabinet handles- white kitchen

Best Kitchen Cabinet Handles: My 14 Top Hardware Picks

While I’m going to focus on hardware for your kitchen cabinets, this entire post is not limited to just kitchens.  The right hardware can be used in any cabinetry, including bathrooms, offices, and other spaces.  

We’ve recently completed a renovation in our butler’s pantry and installed Klearvue Cabinetry. I loved this line so much after using it in my small office, that I knew it was the perfect choice for our pantry and soon-to-be-completed mudroom makeover. 

The white cabinets are further highlighted by the hardware we chose and different finishes.  You’ll notice that in each of these rooms, we used different styles and a different type of hardware.

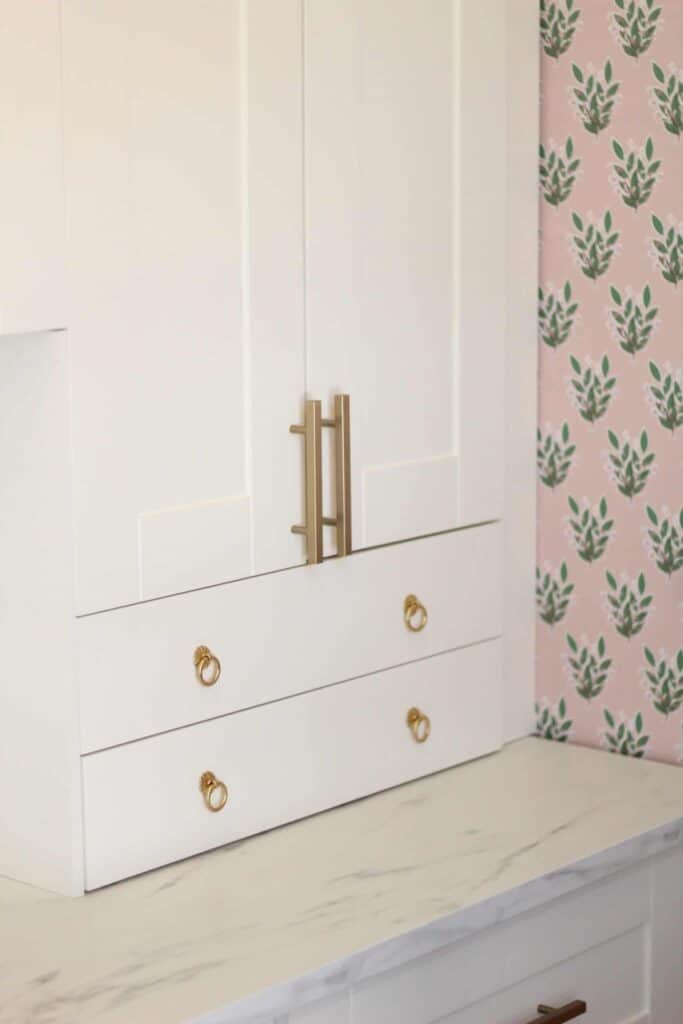
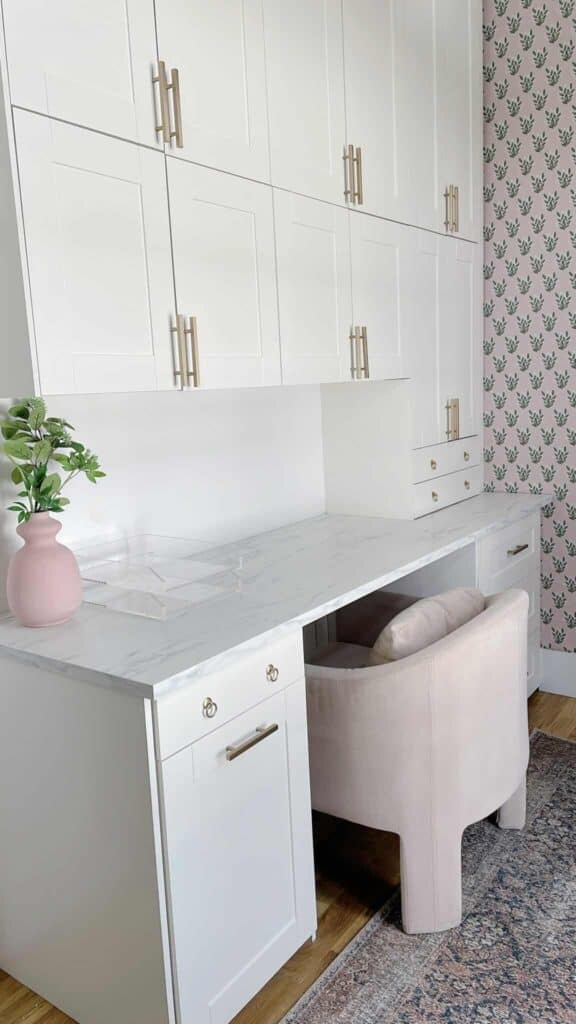
I love that while we have the same cabinets in these rooms, the hardware we chose makes them look totally different.  In our office, we used a mixture of gold hardware with both cabinet pulls and an elegant, yet simple knob on the cabinet drawers. 

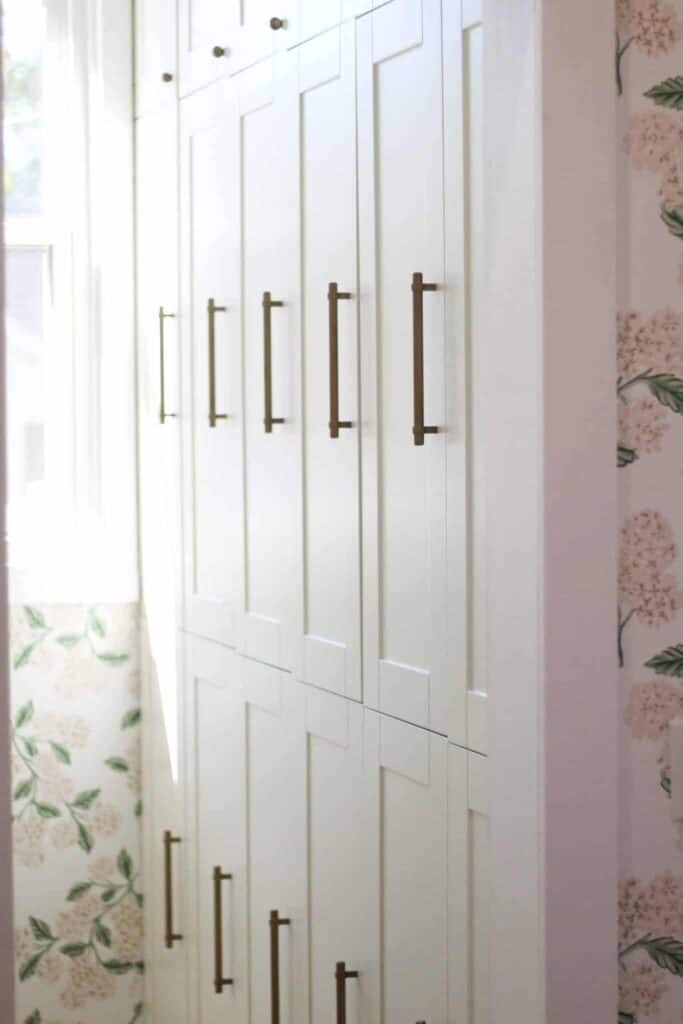
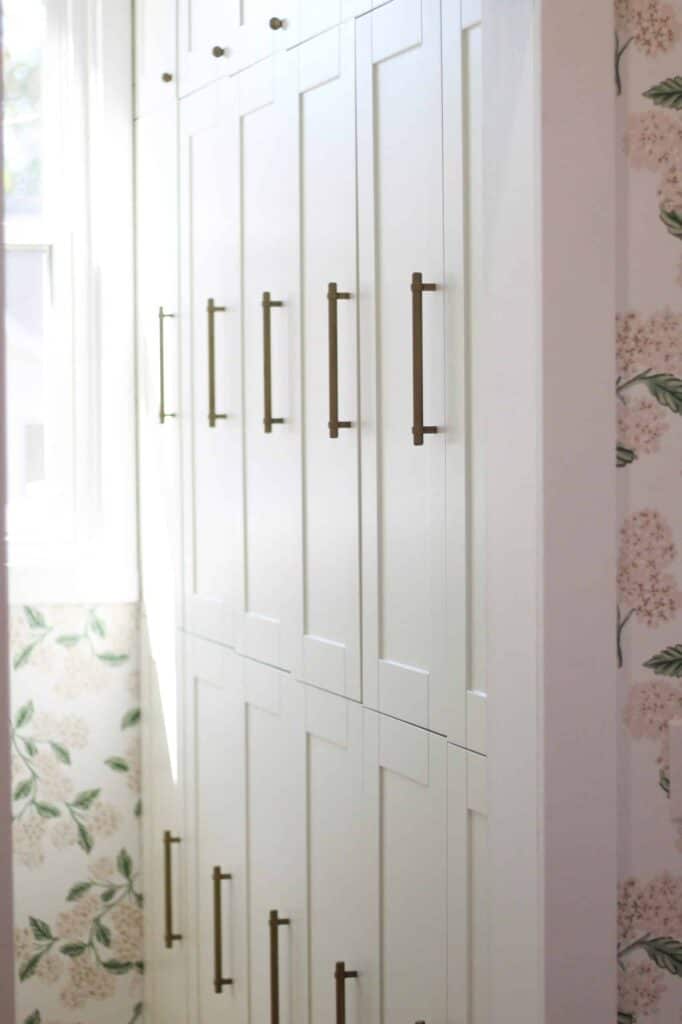
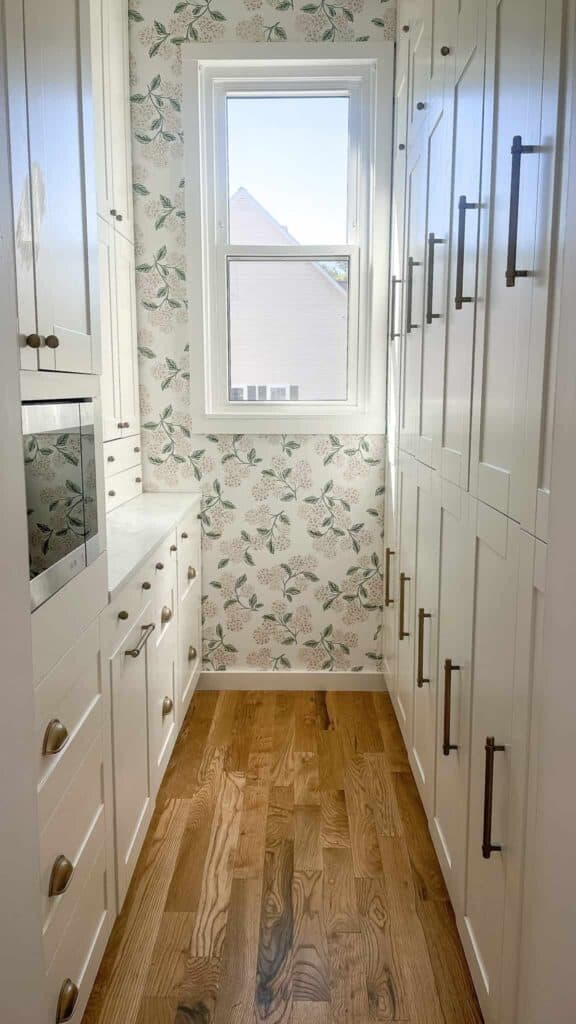
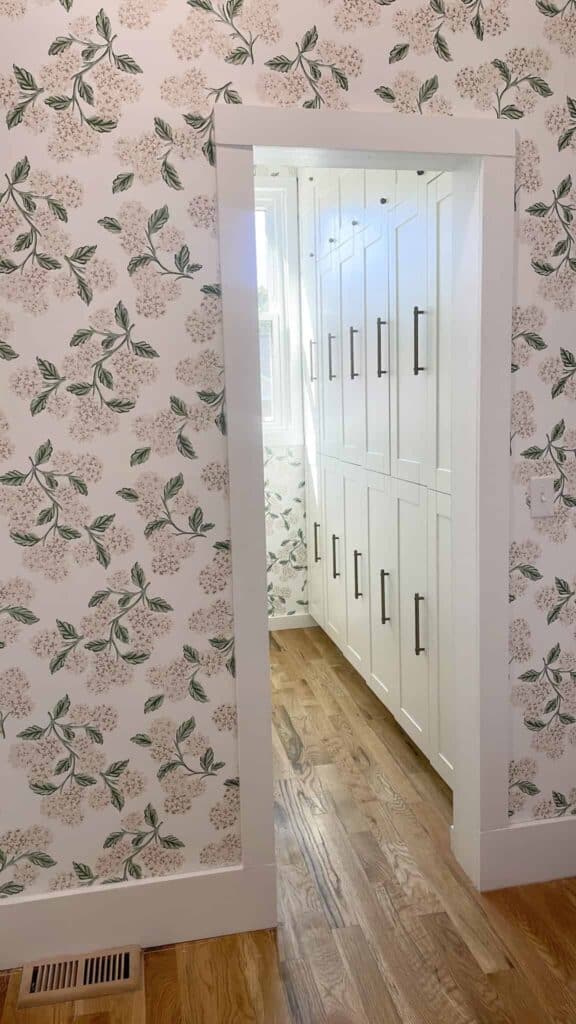
In our pantry, however, we used a combination of brass hardware with cup pulls, bar pulls, and drawer pulls.  Both rooms give off a modern style with such a simple design that is enhanced by the cabinet hardware placement and materials. The small details matter and these finishes go a long way.

Best Kitchen Cabinet Handles- shaker white kitchen

Benefits of Updating Cabinet Handles In Your Kitchen

If you aren’t convinced yet to upgrade the hardware for your kitchen cabinetry, then maybe I can convince you with these four top reasons.

#1. Great On Budget With Large Impact

Renovations can be costly. Sometimes you don’t necessarily have the time, budget, or energy to undergo a full blown remodel.  At the same time, if you are tired of your kitchen finishes or want to make some changes with a big impact, then getting new cabinet hardware is an excellent choice.  As a bonus, it takes very little time or effort and won’t hurt your bank account too much. 

Best Kitchen Cabinet Handles- Brass Home Office

Simply switching out your bronze knobs for some black hardware can take your kitchen from a more traditional decor to a contemporary style.  Add a neutral coat of paint to the walls and you could update your early 2000s kitchen into the 2020s.

You don’t need to custom order anything as most hardware stores like Home Depot have a huge selection of options to fit any style. The best part is you also won’t have to break out any power tools. If you already have finished cabinets, then you should have existing holes in your drawer fronts and cabinet doors.  With minimum effort and time, you can make a big difference in your kitchen’s appearance and bring new life to your home.

Best kitchen cabinet handles in brass long vertical hardware

#2. Hardware Creates A Customized Feel

If you’ve been around my blog long enough, you’ll notice that I like to change out cabinet hardware to get a customized look for less.  Many of my DIY projects use cost efficient materials that are then customized to my home’s color palette and to have a vintage feel. 

I’ve had several IKEA dresser DIYs that I’ve loved and the drawer hardware has only made their transformation that much better. To check out what I’m talking about, see my DIYs on Ave’s dresser and Goldie’s dresser.  Sam and I also used stock cabinets in our playroom to create built-in organization for all those toys around our house.  We complemented those cabinets with DIY drawer pulls.

As I previously mentioned, our Klearvue cabinets in our pantry and office are the exact same cabinets, but have an entirely different look thanks to the different styled hardware. You can mix and match between different sizes, colors, and styles. In the end, it is your own personal preference and a great way to give your beautiful cabinets a custom appearance. 

#3. Improves Your Cabinet’s Functionality

Aesthetic reasons aside, ensuring the right kitchen cabinet hardware is installed will improve your cabinet’s overall functionality. The whole purpose of having a traditional cabinet knob is to easily open and shut your cabinets and drawers. If you have a difficult time opening them, it could lead to damage.  

Overall, you’ll want to pick cabinet hardware that will provide you with the ease, comfort, and ability to use your kitchen cabinets and drawers. If you or  a family member have hand mobility or mobility issues, picking the right hardware can be crucial to allow them to have independence for as long as possible.  

Best Kitchen Cabinet Handles- brass in home office

#4. Reduces Wear & Tear To Kitchen Cabinet Doors

Because you use your kitchen on a daily basis, the type of hardware you pick has an important role.  Different colors and styles will certainly add to your kitchen design, but overall, the type of material you pick for your kitchen’s hardware will help determine just how durable your kitchen cabinets will be and how much wear and tear they’ll see. 

Materials range anywhere from ceramic knobs and leather pulls to stainless steel and aluminum.  The best option is to pick a type of material that will be waterproof, and able to withstand stains, splatter, and grease.  

After all, your kitchen can get quite messy. The last thing you want to do is have a leather handle that has spaghetti sauce splattered on it or a ceramic pull that is waterlogged.  The idea is that your cabinet hardware takes the hit for these messes, rather than your wall cabinets and drawers. In turn, leading to the longevity of your kitchen cabinets.

Types of Kitchen Hardware Handles & When To Use Them

With all of this talk on the importance of your kitchen hardware, how do you know when to use a knob versus a pull? In fact, there are so many options when it comes to hardware, how do you pick?  

Ultimately, whether you choose a knob, pull, latch, or handle, the choice comes down to size, style, and function.
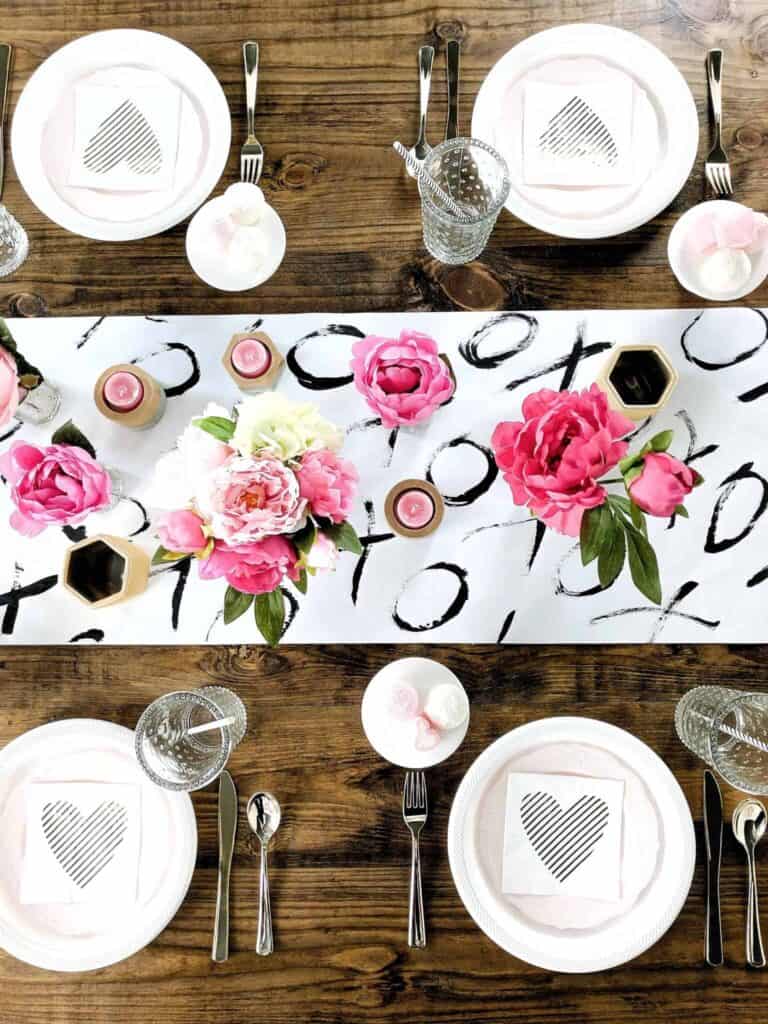
Your personal preference may end up trumping over everything. Having the right finishes is important, but don’t lose sight of the importance of functionality and size in your cabinet hardware. 
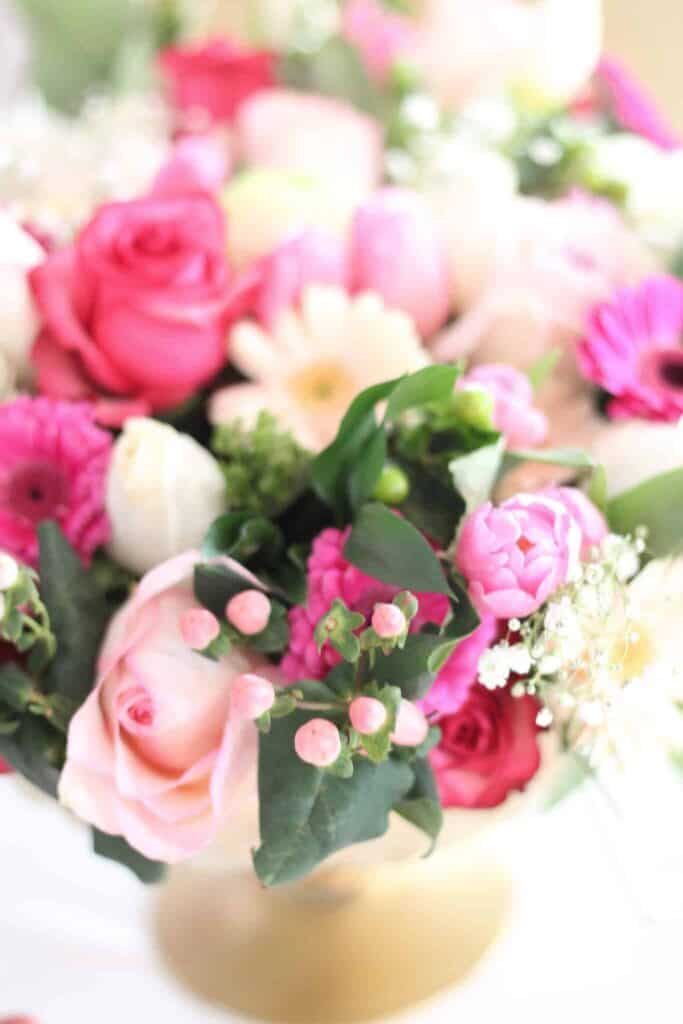
Best kitchen cabinet handles in brass long vertical hardware


#1. Cabinet Hardware Knobs

Knobs help you get to whatever is on the other side of the door.  It is as simple as pulling open the door or small drawers to get your item.  Often, they are small and strategically placed a few inches from your cabinet’s corner.  

The size of your knobs should be in proportion with the size of your cabinet or drawers.  If you have a smaller cabinet or slim drawer, consider a knob that is less than 1.25 inches.

#2. Pulls

Pulls typically are seen on large doors or drawers.  When you see a bar-like appearance, you are typically viewing a pull.  Because of the length of the pull and overall size, it can be much easier to open a cabinet or drawer with a pull. 

Consider the amount of surface area you need to open a drawer.  Grabbing a small kitchen cabinet knob to slide open a drawer is not as easy as grabbing a large pull. 

 Personally, I love the look of mixing both cabinet pulls and knobs.  Not every cabinet and drawer are going to be the same size.  As such, their function will vary and will require a mixture of pulls and knobs.  In general, I prefer to include kitchen cabinet knobs on upper cabinets and a pull on drawers, lower cabinets, or doors that require a bit of leverage to open. 
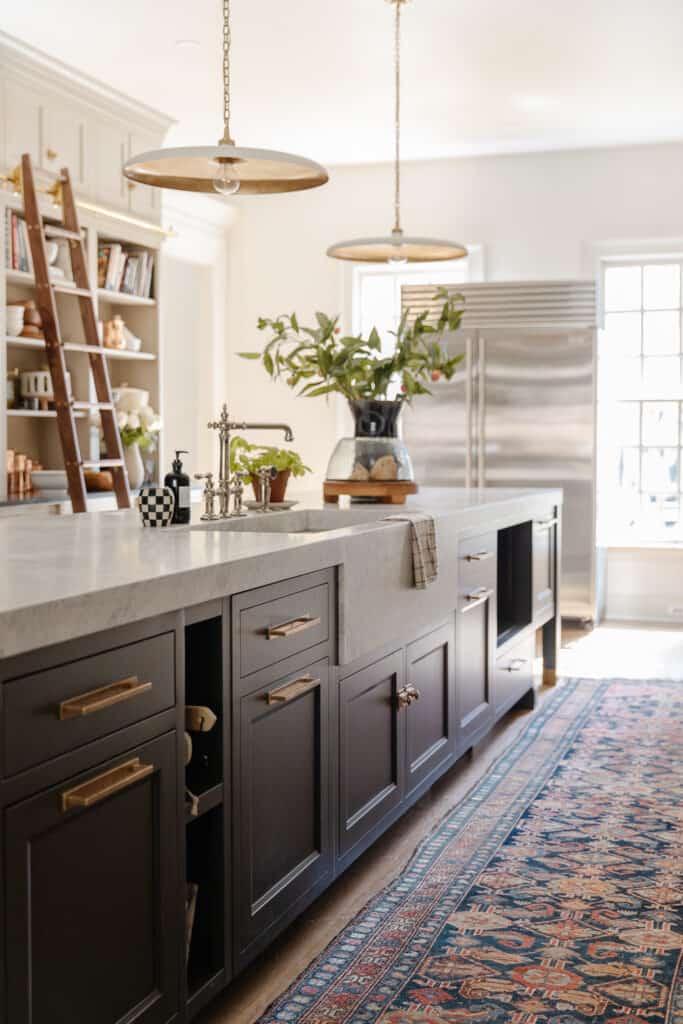
Kitchen Hardware Aesthetics 

Ultimately, whether you use cabinet pulls or a knob is entirely your choice.  You’ll also need to decide on the finish.  You can make a bold statement by pairing your hardware with your cabinet style. 
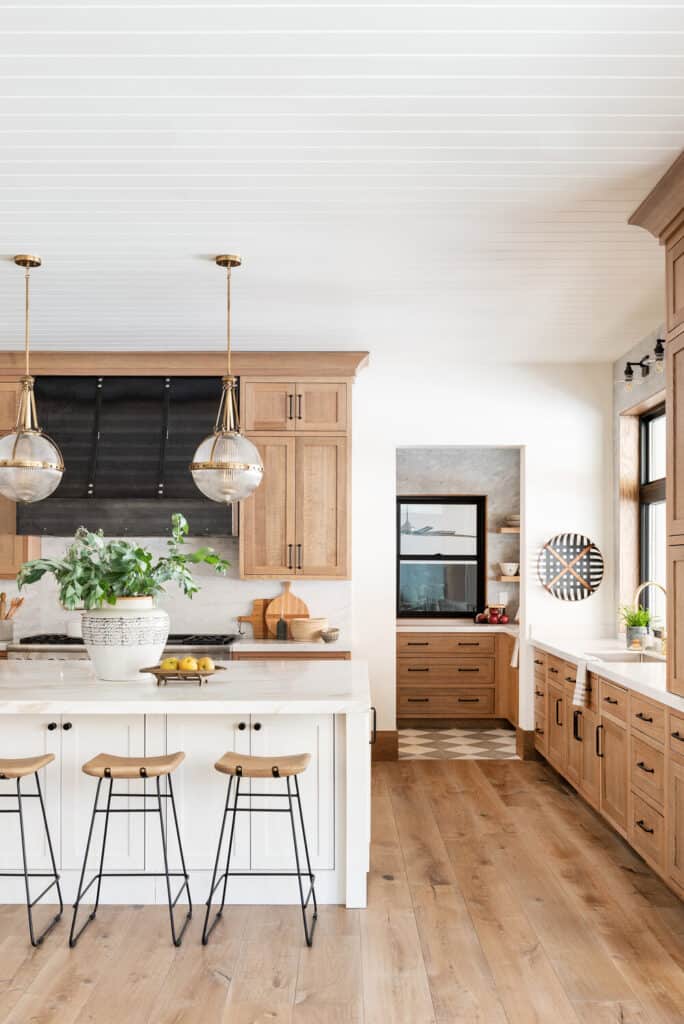
Sleek white cabinets with black kitchen hardware are commonly seen in contemporary designs.  Whereas, oil-rubbed bronze top knobs are more aligned with a traditional style.  You’ll see satin nickel and matte black as popular choices that can be paired with any style. Brass is more aligned with my style so most of our cabinet hardware falls in that category.

A great option is to mix metals to create layers.  Often, you’ll see this technique used in more modern kitchens, but it has become more popular as it can create a focal point for a kitchen.  If it is your first time mixing metals, you’ll want to keep it simple with one main metal and an accent metal.  Don’t go overboard mixing unlacquered brass fixtures with bronze hardware and stainless steel appliances.

Ideally, keep your kitchen cabinet hardware one metal, while your fixtures can be your second metal. 


Kitchen Cabinet Hardware Ideas

The best way to find the best cabinet pull or knob is to take a look at some kitchens in action. I’ve rounded up a few of my favorite kitchens with some dreamy kitchen hardware. These are my favorite kitchen cabinet hardware styles that I hope will inspire you to take the leap to replace your own.


# 1. A Moody Modern Kitchen

Angela Rose Home’s kitchen is a great example of using mixed styles of kitchen hardware to create a modern design. You’ll notice that her drawers have top knobs and brass pulls, while her cabinets have small circular knobs.  Her upper hutch even has a stylish cabinet lock in that signature satin brass. These modern finishes complement the dark and moody cabinet color.

Best Kitchen Cabinet Handles In Moody Modern Kitchen


#2. A Traditional Timeless Kitchen

Whitney Parkinson Design nails this timeless kitchen. The colors are rich, creamy, and flow beautifully with the tones of the wood floor.  But, let’s be real and talk about the bold brass hardware. It pops among all those neutral tones, catching your eye and creating even more light into this already bright kitchen.

Best kitchen cabinet handles in traditional kitchen


#3. A Transitional Kitchen With Functionality

Remember when I said your cabinet hardware should not only be stylish but also functional? This kitchen is the perfect example. The modern kitchen hardware is large and makes a big statement. Even more so, the hardware has a purpose. On either side of the sink, the cabinets are hiding their dual dishwashers. Those appliance pulls are perfect for leveraging the weight of the dishwasher open and close.

Best Kitchen Cabinet Handles with appliance hardware

# 4. A Classic Farmhouse 

Studio McGee creates magic wherever they go and this kitchen is no exception. While the past kitchens have had brass and gold hardware, Studio McGee outfits these cabinets with hardware in a black finish. There are super clean lines with vertical pulls on the upper cabinets and horizontal pulls on drawers.

Studio McGee creates an optical illusion by pairing these vertical pulls on top because your eye is drawn upward which in turn elongates the ceiling. The island cabinets have a simple black knob but they pop with the contrasting white paint color. I love the mix of modern elements in this classic kitchen.

Best kitchen cabinet handles in a modern farmhouse kitchen

Kitchen Cabinet Hardware Amazon Round Up

Take a look at the best kitchen cabinet pulls, knobs, and handles from Amazon!

Best Kitchen Cabinet Handles- Round Up

|   |  |   |  5  |  6  7  |  8  |  9  10  |  11  |  12  |  13  |  14

  1. Gold Cabinet Knobs– Sometimes simple is truly best!
  2. Vintage Gold Cabinet Knobs– I love the look of these cabinet door pulls. They would look amazing in kitchens or even on a dresser.
  3. Antique Brass Handle Pulls – I used these in my home office, but also have used them to make minor changes to pieces like you can see in this video. They are the best!
  4. Brushed Brass Bin Cup Drawer Handle Pull – We ended up using these in my pantry but kitchens would also look incredible.
  5. Black & Gold Cabinet Pulls – These would look so good in a modern kitchen! The price is the best with a multi-pack option.
  6. Black Cabinet Pulls – These would pop on white kitchen cabinets. It adds a touch of modern style with a simple statement. This is another great buy.
  7. Brushed Brass Cabinet Bar – These are the best and super versatile. We used these in my pantry 
  8. Brushed Brass Drawer Pulls – Cabinet pulls can be useful opening heavier appliances and these would work best for those cabinets that may hide trash cans or dishwashers. The price may seem steep but really can’t be beat when you see how many cabinet pulls you get in one package.
  9. Brushed Brass Cabinet Ball  Knob – We also used these solid round balls in my pantry for a simple cabinet hardware knob. 
  10. Matte Black Finger Pulls– This is not what you traditionally think of as cabinet pulls, but still get the job done and have a unique style.
  11. Acrylic & Nickle Knobs– A good choice for a transitional kitchen decor. For those people who can’t choose between modern and traditional decor, this marries the style.
  12. Brushed Satin Nickle Knobs– Another great option for traditional kitchen cabinet hardware.
  13. Satin Nickel Handle Knobs– If you want the look of kitchen cabinet handles, but only have one pre-drilled hole, these knobs will give you a similar bar or pull appearance and without the extra hassle of creating a second hole.
  14. Champagne Bronze Pull – The best color! I love how this can fit almost any style.

Other Posts You’ll Love

Small Home Office Makeover  |  Functional Butler Pantry  How Deep Are Kitchen Wall Cabinets? 

Pin This Photo Below For Later

You should be feeling inspired and ready to find the best kitchen cabinet handles for your home. I hope all of the cabinet hardware ideas help you create a custom look and refresh your room. You can create a completely new style with an easy and relatively budget friendly solution. Keep in mind the finish, material, style, and size is entirely your preference but, you’ll be helping keep your cabinets in great shape with this simple change.  If you have any questions, feel free to leave them in the comments section or DM me on Instagram. I share many more projects and products on both Instagram and TikTok (@arinsolange)  so be sure to follow me in both places!

Best Kitchen Cabinet Handles Pinned
DIY

10 Christmas DIYs You’ll Love

The only thing better than decorating for Christmas is trying out fun new DIY Christmas decorations. The Christmas season is my absolute favorite time of year to DIY & it’s a great way to get the whole family involved! The holidays can be expensive & this is a way to find budget-friendly DIYs. I’ve rounded up 10 Christmas DIYs you’ll love this holiday season.

This post may contain affiliate links. 

Nutcracker life sized DIY

10 Christmas DIYs You’ll Love

Nothing says Merry Christmas quite like candy canes, jingle bells, and a home smelling like  orange slices and cinnamon sticks. With Christmas right around the corner I’m ready to deck the halls and I’m sure you are too!

These DIYs may not require googly eyes, pine cones or mason jars but save those for another day. Some may be a simple project while others may challenge you. I’m always up for a challenge when it comes to my own Christmas decorations. I think you’ll love all 10 as much as I do. If any of these 10 DIYs aren’t really your speed check at the bottom of this post for more DIYs I think you’d love. 

#1 DIY Christmas Tree

10 Christmas DIYs You'll Love-Pink yarn Christmas tree- an easy DIY

Let’s start with one of my favorites that I made for my daughter’s room! Of the 10 Christmas DIYs you’ll love, this DIY Christmas tree is by far the most complicated. If you are looking for an intermediate level project this tree is such a fun way to add bright colors to any room. I have a video linked in my blog post that I suggest watching before you attempt this one. It’s a short video where I share a lot of the process to hopefully make it a bit easier. 

This is a great way to incorporate colors from your already existing color scheme in your christmas decor. I can envision one of these in each of your kids rooms with coordinating colors to their room. It may take a lot of patience but the outcome was well worth the work and Avé loved it so much!

#2 Make Pour Painted Iridescent Ornaments

10 Christmas DIYs You'll Love-DIY Ornaments

On the opposite end of the spectrum, this next project may be the easiest among our 10 Christmas DIYs you’ll love. These easy DIY Christmas ornaments are a fun way to get the whole family involved! This is a budget-friendly DIY  that allows you to match your tree decor to your home decor. It’s just 4 easy steps- so grab your ornaments, acrylic paint and get shaking! 

What I love about this project is you don’t have to be crafty to do it.  In fact, this is the perfect project for young kids. If you want to take it up another level try adding a little bit of glitter to the paint for some super cute glitter ornaments. 

If you’ve checked out my easy DIY life size nutcracker tutorial, you’ll notice that I used these for our Nutcracker’s hands. 

#3 Advent Calendar

10 Christmas DIYs You'll Love-Advent Calendar DIY

If you love your Cricut as much as I do, here’s another excuse to pull it out and use it! Or, if you’ve been eyeing a Cricut here is another reason to get one. They make a great Christmas gift or gift to yourself. You can use them for a variety of projects like labeling for storage, crafting all the things, your kids’ school supplies and much more. If you’re new to the Cricut or want a refresh I have several blog posts on all things Cricut. If this is your first time using the Cricut, start with this post. 

Advent calendars are such a fun tradition to add to your home. If you’re not familiar we use it to countdown the days until the 24th of December. Some people do a gift each day but we do a mixture of an activity or small knick knack each day instead. It helps to get our whole family involved during such a busy season. 

This is not only an easy Christmas craft, but also a fun way to get my kids involved in the fun too. If you need some great ideas to put into your new advent calendar, here are a few examples of different things we’ve used in the past: driving through Christmas lights, tickets to a local holiday event, or a pizza & movie night as a family. We number each slip of paper and each day someone gets to read the activity of the day. You can make the advent calendar be as budget- friendly or spend as much money as you like. I love how personalized you can truly make this. 

#4 DIY Cake Stand Wooden Christmas Tree Village

10 Christmas DIYs You'll Love-DIY Cake Stand Village

My girl Stephanie Hanna always has a great DIY for any holiday. This cake stand village with a ribbon bow and minimalist decor is a perfect way to use things you might already have at home. Check out her video where she shows you how you can make your very own. 

This is another Christmas DIY that you can make budget friendly by heading to the dollar store for any supplies you might need. You can easily create scenes from a winter wonderland out of a snow globe or even Santa’s workshop.

If a village sounds too daunting, you can always stick to various shades of colors of trees made from bottle brushes. Bottle brush trees are another great DIY that are versatile, inexpensive, and on trend! To see how you can make your own version, check out my post here.

# 5 Santa Planter DIY

10 Christmas DIYs You'll Love-DIY Plant Santa Planter

Who doesn’t love a good Santa moment? I had no idea how challenging it would be to find a Santa planter at the store. Of course if you’re a DIY dreamer like me, that gave me motivation to make my own. 

I got my inspiration for the design from Anthropology plates that I love.  I think making the outside of your home decorated is just as important as the inside. My kids love to see our home decorated for each holiday when we come home. These make the perfect front door christmas decor and were such a fun project. This DIY requires free hand drawing but I have a video for tips on how to get started. See my post here for all the details.


#6 Easy Salt Dough Ornament Recipe

10 Christmas DIYs You'll Love-DIY Salt Ornaments

Did anyone make these salt dough ornaments as a kid? This is for the sentimental DIY mama out there that wants to make memories with your kids. Target has the cutest cookie cutters right now and these would be absolutely perfect. If you don’t want to grab cookie cutters, using your child’s hand print is another great way to remember their age during this season.

 Nothing is cuter than a homemade Christmas decoration from the kids to their grandparents. Kelsey Bang gives you step by step on the 3 ingredients and all of the supplies needed to make them. You can make this custom to your color scheme and put personal touches on them as well. To go even another step above you could add gold spray paint too.


#7  Gingerbread House Doormat

10 Christmas DIYs You'll Love-DIY Gingerbread House


Another Cricut project? Count me in! I saw this Anthropologie inspired DIY Christmas doormat from At Home With Ashley and fell in love! This is a great time to play around with your Cricut and try new things. She notes that she is at beginner level, but this project is not so make sure to read carefully before starting.

With only 5 steps to make this great gingerbread doormat, it can’t be beat.  On the plus side, it is also budget friendly and the perfect addition to your front door. She has a video tutorial giving an overview on everything she did. Be sure to check out her video before getting started. 


# 8 DIY Pink Santa Mugs

10 Christmas DIYs You'll Love-DIY pink Santa coffee mugs

If you could describe a person in a color my color would be pink. I love the color pink THAT much! So what is better than a Santa mug? If you said a pink Santa mug then you are correct! 

I’ve been seeing these Santa mugs all over the internet but of course pictured them in pink. Before getting started reading my entire post is a must because this was a trial and error DIY.

 I tried several types of matte paints before finding one specific paint from Target that did the trick. This is another creative way you can use different designs and pick the color scheme that goes best with your favorite decor. These would be a great hit at a holiday party with friends or fun holiday crafts night with your girls. If you do that, please invite me!

#9 Winter Pom Pom Wreath

10 Christmas DIYs You'll Love-DIY POM POM wreath

Here’s another great DIY that could be created to match the decor in your home.

You’ll need to have a hot glue gun handy along with some yarn, and any other fun embellishments you’ll want to add.  With a dab of hot glue or a little more you’ll be on your way to making the cutest pom pom Christmas wreath. 

Modern Glam gives a step by step tutorial on how she did it. She even mentions repurposing another wreath she already had at home. I personally love the look of all white poms but you can pick any color for your poms. What I love most about DIYs is that everything can be customized.  This makes the perfect Christmas craft to have your littles join in on too.


#10 Easy Life Size Nutcracker

10 Christmas DIYs You'll Love- Nutcracker life sized DIY

I’m pretty sure this is my all time favorite Christmas DIY that I’ve ever done. I’ve been seeing life size nutcrackers everywhere, but didn’t want to pay the price tag for one. In true Arin fashion I also envisioned not one but two nutcrackers. My inspiration was a beautiful piece from Frontgate, but I could never justify the price. At first, I was extremely intimidated by this DIY, but this ended up turning out to be so easy. I’m only wishing I would have done it sooner. 

I ran to our local store to get all the supplies needed and turned these into one of my favorite Christmas decor ideas of all time! I give step-by-step instructions on how to do this and it’s super affordable. Again, we all know how much I absolutely love the color pink. Doing it myself gave me the ability to customize this to whatever color I wanted and it matches my current Christmas decor perfectly. 

I spent under $100 per nutcracker and this only took Sam and I a weekend to get it done. These nutcrackers are the cutest greeters at your front door and are the perfect way to make any porch say, “Merry Christmas!” I also posted this to my Instagram with a video tutorial of how I did it!

Other Posts You’ll Love

Neutral & Pink Christmas Decor  |  Bottle Brush Tree DIY  | Merry & Bright Decor

Pin This Photo Below For Later

I hope these 10 Christmas DIYs you’ll love and put you in the holiday spirit! My best advice if you’re new to Christmas crafts is to pick one and just have fun! If any of the 10 I shared above aren’t what you’re looking for, check out my other posts on my blog. I have a lot of DIYs to get you in the mood for this time of year. The holidays are such a busy time. So, if you want to slow down and enjoy your family, but still have a fun holiday craft, then grab a gingerbread house kit at your local store instead. If you have any questions, feel free to leave them in the comments section or DM me on Instagram. I share many more projects and products on both Instagram and TikTok so be sure to follow me in both places!

Round up of 10 Christmas DIYs You'll Love
DIY

Easy DIY Life Size Nutcracker Tutorial

It’s the most wonderful time of year! With the holiday seasons in full swing, I’ve been decking the halls to create a magical experience for our kids. I go a bit overboard with our Christmas display and knew I needed something even more *extra* to make our home over the top. 

I had my eye on a life-size nutcracker, but the price tag was insane! So, I decided to make my own.  How hard could it be? Turns out it was super easy and a great beginner project. Without further ado, here is my easy DIY life size nutcracker tutorial that will make your home just as special.

This post may contain affiliate links.

DIY life size nutcracker

Easy DIY Life Size Nutcracker Tutorial

If you are like me and love Christmas decorations, you’ll love this beginner-friendly  DIY. I’ve had my eye on a giant nutcracker from Frontgate for years.  However, the price tag was insane with it being several hundreds of dollars. 

 Not to mention, I have a pretty specific color palette I like to follow.  While I have a lot of decorations, they all coordinate and match.  Finding a life size nutcracker that coordinates with my decor and isn’t over six hundred dollars seemed impossible.

I’m not going to lie, I really put off this DIY project thinking it was going to be too expensive and too difficult to pull off. I’m so glad I gave it a chance.  Not only did I spend less than $100, but it was also so easy.  Plus, I was able to make exactly what I wanted and bypassed any shipping cost.  This easy DIY life size nutcracker tutorial can be done in one weekend.

Make A Plan For Your Nutcracker

The first thing you’ll want to do is make a plan before you build your nutcracker soldiers. It was important to me that we have a 6 foot nutcracker to make it as realistic as possible.  If you don’t have the space, you can always modify these plans to make it fit in your home. 

You’ll also want to decide on a design concept. A great idea is to look up nutcracker designs for some inspiration.  We opted to go with a pink and gold color palette to match our home. 

DIY life size pink nutcracker

 You can get as detailed as you want or keep it more simple.  We chose to keep ours much more simple and let the larger than life soldier speak for itself.  But, I’ve seen some really cool designs that incorporate fur or even a toy drum or sword. 

My biggest piece of advice is to decide on what you want and execute it.  Don’t be afraid to fail, you’re always just one hardware store trip away from the nutcracker of your dreams.

 Gather Your Supplies To Create Your Nutcracker

Now that you have an idea of what you want your nutcracker to look like it is time to gather your supplies.  I’m including our list as is, but if you want to customize your own soldier, you’ll need to keep that in mind.

The supplies listed are for one nutcracker.  Our nutcracker stands 6 feet tall.  The base for our nutcracker is 18 inches around.

Tools: 

Base + Body + Arms + Hands

  • Scrap 2×4 (we only needed 1 2×4)- You’ll need 4 pieces that are each 6 inches
  • 18 inch wood round base- You’ll need a base with ¾ inch or more thickness
  • 12 inch wood round base – You’ll need a base with ¾ inch or more thickness
  • 12 inch x 48 inch wide concrete form tube
  • 4 inch PVC pipe – You’ll need 2 pieces that are each 24 inches
  • 3 inch PVC pipe- You’ll need 2 pieces that are each 24 inches
  • 3 inch PVC pipe caps – You’ll need 2 pieces for the shoulders
  • Paint
    • Gold metallic craft paint (base + shoulders + detail work)
    • Black satin paint  (legs + belt + face)
    • Valspar Quartz Blush (body + hat)
    • Valspar New Penny (face + hands)
  • Plastic clear ornaments – You’ll need 2 of these for the hands

Facial Features + Embellishments

  • Paint
    • Valspar New Penny 
    • Black satin paint 
    • White satin paint
  • Scrap foam – You’ll cut this to become the nose
  • Black ribbon- You’ll use this for the hat
  • Wooden stars

Assemble Your DIY Nutcracker

I’ve created a helpful video of our nutcrackers in the process of being built.  If you get stuck, don’t hesitate to refer to my video in this post to help clarify the steps.  You should be able to complete these fairly quickly and easily.

Step 1: Cut Your PVC Pipes & Scrap Wood

Using your saw, you’ll need to cut your scrap wood and PVC pipes if they have not been precut.  

Cut 4 pieces of scrap 2x4s at 6 inches (or longer if needed).  These 2x4s will be attached to your wood rounds (18 inch and 12 inch).

Next, cut your PVC pipes to 24 inches each.  You’ll need to cut your 4 inch PVC pipes to 24 inches each for a total of 2 pieces.  Cut your 3 inch PVC pipes to 24 inches each for a total of 2 pieces.

Step 2: Secure Your 2x4s To Your Rounds

Next, using your drill and screws, secure your 2x4s into your wood rounds.

Take 2 pieces of 2x4s and attach them using screws to your 12 inch wood round. Wait to follow the same process for your 18 inch wood round until Step 3. 

The wood rounds will resemble a small step stool once the 2x4s have been attached.

Round Base + 2x4s create the base for this DIY life size nutcracker

Step 3: Secure Your Base & Build Legs

This next step sounds more complicated than it is. If possible, I’d recommend watching my video tutorial to help you visualize this step.

Set you 18 inch round on the floor, with your 2x4s on top.*Your 2x4s should not be secured yet in your 18 inch wood round.* 

Set the 4 inch PVC pipes over your 18 inch wood round base with the unsecured 2x4s in place.  The PVC pipe will fit over your 2x4s.

Next, drop the 12 inch wood round that has been secured with your 2x4s into the top of your 4 inch PVC pipes.

Your 18 inch round and 12 inch round should line up within the 4 inch PVC pipes to create your legs. Mark with a pencil where your legs are aligned.  You can trace your PVC pipes that will become your legs to ensure they are straight.

Go back and secure your 2x4s to your 18 inch round so that the 2x4s are in the center of your PVC legs.  Place your 12 inch wood round back into the top of your 4 inch PVC pipes and you now have aligned legs!

Base rounds + PVC pipe make for the bottom half of this DIY life size nutcracker

Step 4: Attach Your Body

Grab your significant other or a friend to help you complete this next step. You’ll need to grab your 12 inch concrete form and place it over the 12 inch wood round. 

One person will need to hold the large concrete form steady, while another person carefully drills through the concrete form into the wood round in 4 different spots. 

Step 5: Attach Your Arms

Take your 3 inch PVC pipe pieces that are cut to 24 inches each to create your nutcracker arms.

Line up the PVC pipe with the bottom of the body and drill them into the body from inside the PVC pipe.  This is the trickiest part of the whole tutorial, mainly because you are working in such a tight spot.  You will only need to use 2 screws per arm.

Step 6: Create Shoulder Caps

Pop on your 3 inch PVC pipe caps to create your shoulders.

Congratulations, you have an assembled nutcracker!

Life size nutcracker in building process

Step 7: Divide Your Nutcracker Into Sections

Take your painter’s tape and divide your nutcracker into 3 main sections: the body, face, and hat.  You can paint and decorate these sections in your own way. This is where your creative self can shine.  Feel free to follow your own design here.  I’ll share with you what we did, but you are welcome to change it up to suit your needs.

Step 8: Paint The Body & Hat

I painted the body and hat using the same color: Valspar Quartz Blush. I went ahead and divided the legs in half and painted the bottom half a black satin paint to signal boots, and the top half, the same color as the body. 

I also added a little black belt embellishment on the body.  You can divide your body using painter’s tape above and below to create a 1 inch thick belt using black satin paint. 

Don’t forget to paint your arms too.  Again, I used Valspar Quartz Blush.

Step 9: Paint The Face

Next, I painted the face using Valspar New Penny.

Step 10: Paint Your Base & Shoulder Caps

I used gold metallic craft paint to paint the base and 3 inch PVC pipe caps for our shoulders.  You can certainly paint when your nutcracker is assembled, or if you prefer, you can paint your 18 inch wood round and PVC caps ahead and time so it is a bit easier and requires less painter’s tape. Alternatively, you can always spray paint your wooden round and PVC caps ahead of time.

Step 11: Paint & Attach Your Hands

Now it is time to fill your empty clear plastic craft ornaments with skin colored paint. The top of the ornament should pop off so that you can pour your paint inside.  Swirl the paint around to make sure it is evenly coated.  Next, pop the top back on, and hot glue those to the bottom of your arms. 

Step 12: Add Embellishments

You can get as creative and detailed as you want. For embellishments, I found wooden stars that I painted using my gold craft paint. I hot glued them on to the hat, along with some black ribbon to create a timeless look.  I also added a star to the center of our soldier’s belt to create a buckle in the middle of his torso.  

You can add fur or feathers to the hat if you want to add some texture. For some bling, you could add jewels to create a bit of shine.

Creating hands for a life size nutcracker is as easy as filling a clear ornament with paint.

Step 13: Create A Face

 This next step can seem intimidating, but it does not have to be. You’ll need to create facial features for your DIY nutcracker.

If you aren’t a great drawer or painter, you can always use decals in place of paint.  If you have a cricut, you can design facial features in design space and use permanent vinyl instead.

I ended up free handing the face for my first DIY nutcracker.  If you do this, make sure you do it in pencil first! Once I had the face completed, I traced it onto parchment paper and used it to trace those features on to my second nutcracker that I made.

This same principle applies if you aren’t a good artist. Feel free to search for facial feature images online and print them out in sizes that will complement your nutcracker. You may have to play around with this some before you find the right fit.  Tape them to the face, and then trace onto parchment paper.  From there, you can then trace it onto your nutcracker’s face and paint.

For the nose, I opted to create some dimension using a scrap piece of foam that I cut into a triangle. I painted it the same color as the face and hot glued it on. 

DIY life size pink nutcracker

Step 14: Show Off Your Nutcracker

You have now completed this easy DIY life size nutcracker tutorial. You have your very own life size nutcracker for a fraction of the cost and customized to your liking!  

You can choose to keep your DIY giant nutcracker inside or on a covered front porch! I will say that if you plan on using your nutcracker for outdoor use, you’ll want to pick paint and embellishments that can withstand the elements.

Other Posts You May Like

DIY Pink Santa Mugs  |   Neutral & Pink Christmas  |   Merry & Bright Decor

Pin the Photo Below For Later

I hope this easy DIY life size nutcracker tutorial fills your home with the holiday spirit. I can’t believe I waited so long to create my very own. At less than $100, you can create a large toy soldier of your own to guard your home this Christmas. If you have any questions, feel free to leave them in the comments section or DM me on Instagram. I share many more projects and products on both Instagram and TikTok so be sure to follow me in both places!

Pinned Image Easy DIY Life Size Nutcracker