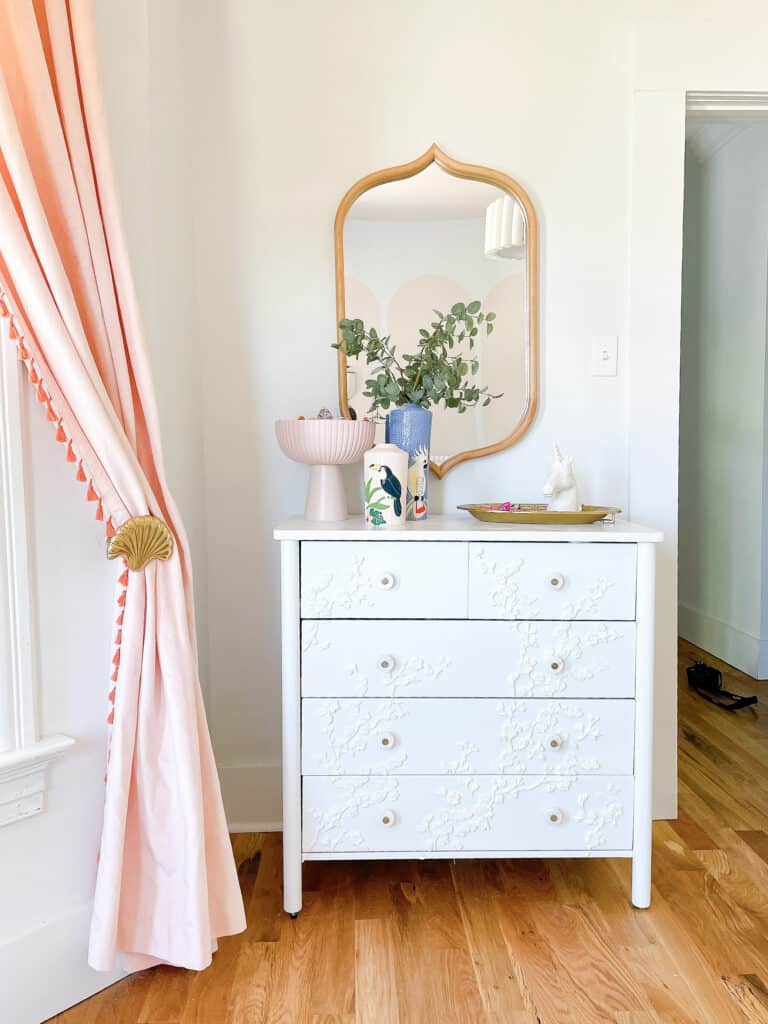
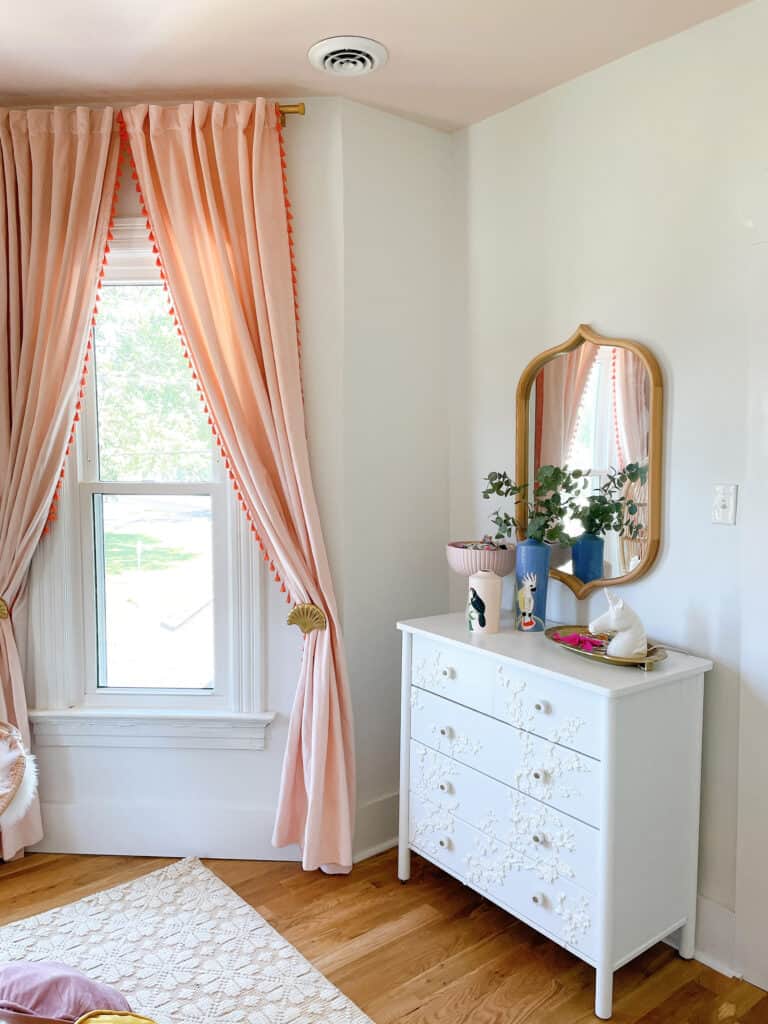
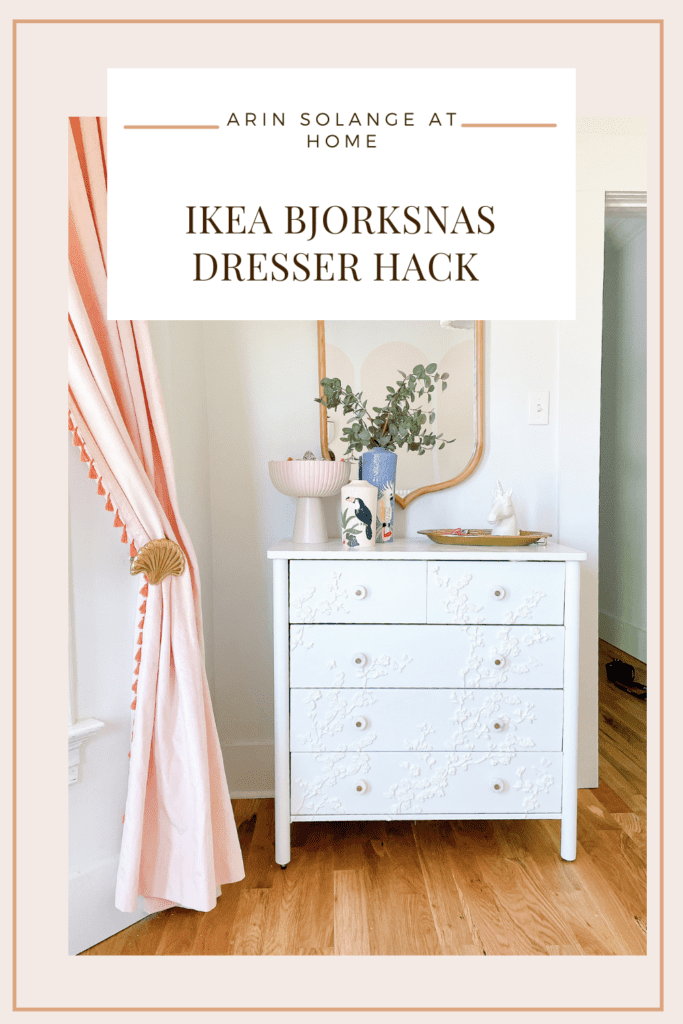
This blog post is months over due, but I finally finished Avé’s IKEA Bjorksnas dresser hack with resin. This was a LONG time coming finding just the right way to update that IKEA dresser for Avé’s room (with a few different looks along the way), so I am thrilled with the end outcome, and excited to share!
This post may contain affiliate links
IKEA Bjorksnas Dresser Hack
Last year when we moved into our new house we needed dressers for 3 of our 4 kids. Our youngest daughter has an IKEA Tarva dresser that I have done a hack on – so I knew I loved the IKEA dressers and qualiy, and the Bjorksnas fit perfectly in both my oldest two kid’s rooms.
For my oldest son – I left the Bjorksnas dresser as is – because honestly it is a beautiful dresser that is a bit more modern and finished than many of the other IKEA pieces.
That said – the Bjorksnas dresser is a perfect dresser for DIY because similar to a couple of IKEA’s other great options, such as the Tarva, it is unfinished wood. The unfinished wood leaves it ready for a DIY without the prep work that many dressers would take, so between that and its great size I went for it.
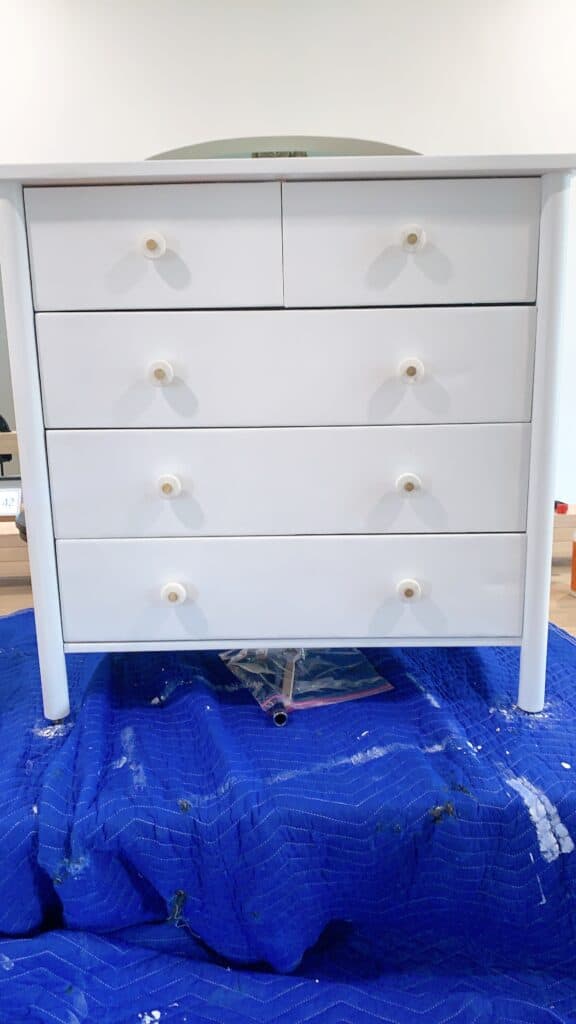
What to Know about the Bjorksnas Dresser
The IKEA Bjorksnas dresser is a 5 drawer dresser – going 4 drawers up with a split top drawer. When it comes to DIY that top split is something to keep in mind because it could play into some designs.
Like I said above, the dresser is unfinished wood. It comes with leather dresser pulls and is overall a very heavy duty dresser. (Something to keep in mind is that it is very heavy – and many times does need to be put together before putting in the room due to the DIY.)
Working with Resin
If you follow me on Instagram then you likely know that I have fallen down the Resin rabbit hole the past few months, and have used it on more things than I can count.
One of my favorite things to do with Resin is to use it to make molds then paint it. Resin comes in 2 different (or probably more) varieties – One that dries see through, and one that dries white.
The clear resin is a 24 hour dry time and a bit trickier to work with – if you want to read more about working with that resin, and making DIY Resin casted letters I have a resin letter tutorial here.
In this case – we are working with what I call ’10 minute resin’. This is essentially a fast curing resin that dries in 10 minutes but does not dry clear – but rather dries white. This makes is a better candidate for DIY’s like the one I am going to share due to the lack of time.
When I get to the tutorial there will be directions on how to make the molds and work with the resin – but it is important to know that A: Resin can ruin things – so you have to prep your space well, and B: Resin should be kept off your skin if you can, so wearing gloves can be really helpful.
Supplies for This IKEA Dresser Hack
Below is a comprehensive list of everything you need for create this exact dresser hack.
Optional – if you are planning to move the drawer pulls you will need wood filler and sand paper.
DIY IKEA Bjorksnas Dresser Resin Hack Tutorial
Now that you have your supplies – let’s get going on this IKEA hack. This one is honestly REALLY EASY – so if you have been wanting an easy IKEA hack, then this one is for you.
Prepping the Dresser
First – Assemble your dresser – Your Dresser will need to be fully assembled before moving forward with anything else in this DIY.
Once it is assembled – IF you chose to change the location of your drawer pulls you will want to fill those holes and sand them down. I personally didn’t choose to do that.
Next up – Paint your dresser. You don’t have to do this in that order, but I found that it made most sense to give the dresser a good coat of paint before adding the resin molds.
Making the Resin Molds
While your paint is drying it is a great time to start making your resin molds. These directions will also be on the box of your resin – so read those over before you work.
First – prep your work station. I tend to put down a trash bag on my counter AND aluminum foil for double coverage. You will need 3 cups for the resin, and something to mix the resin up. Anything you use will get ruined, so I tend to use either party cups, or small shot glass style cups from the dollar store.
To make the molds you will add equal parts of each liquid that came in your box. You will then pour those two together in a 3rd cup and mix. The biggest thing when working with 10 minute resin is that it dries quickly – so you don’t have a lot of time.
When your resin is mixed – you need to pour it in the molds. You will quickly add it to the molds then let it sit for 10 minutes. With the molds I used I found that I needed to make sure I did plenty of the larger floral collections and not as many of the small ones. Just continue to make these molds and set them to the side.
Adding the Resin Molds to the Dresser
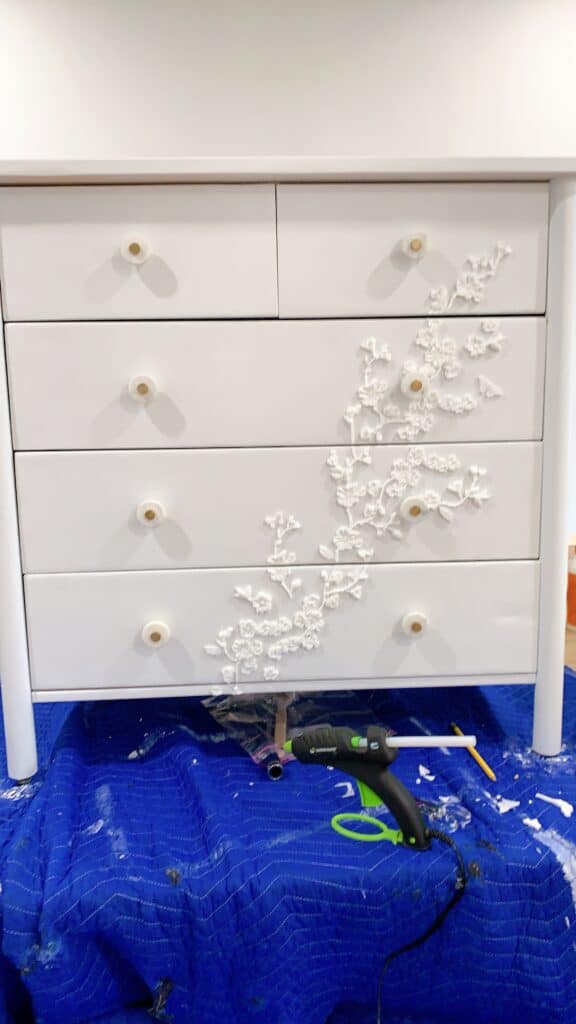
Once you have a good amount of finished resin molds you can start adding them to the dresser. For me – I started down in one corner and sort or worked up, but you can add things in your own pattern. Use hot glue to add them to the dresser.
Keep in mine the drawers being able to open and close. I had to cut some molds in half to split the drawers.
One thing that will help you save on resin is to get a good start on your dresser before you make too many molds. I personally made a lot of the flowers I didn’t end up using and could have saved a lot of resin and time had I started my glueing a bit earlier.
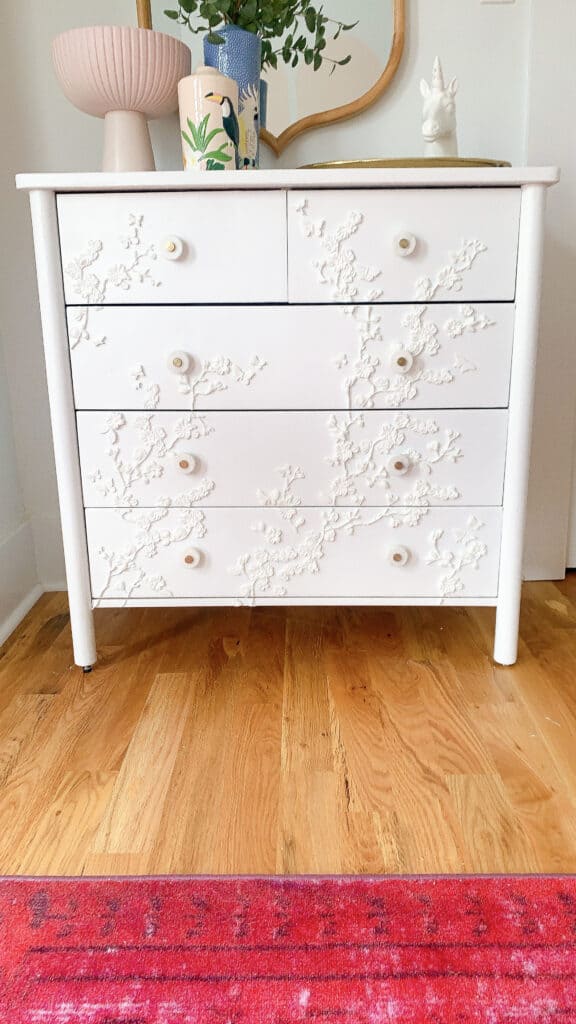
Finishing the Dresser
Once you have all of your resin molds on you need to go through and make sure there are no hot glue strings. This can be tedious but it is super important.
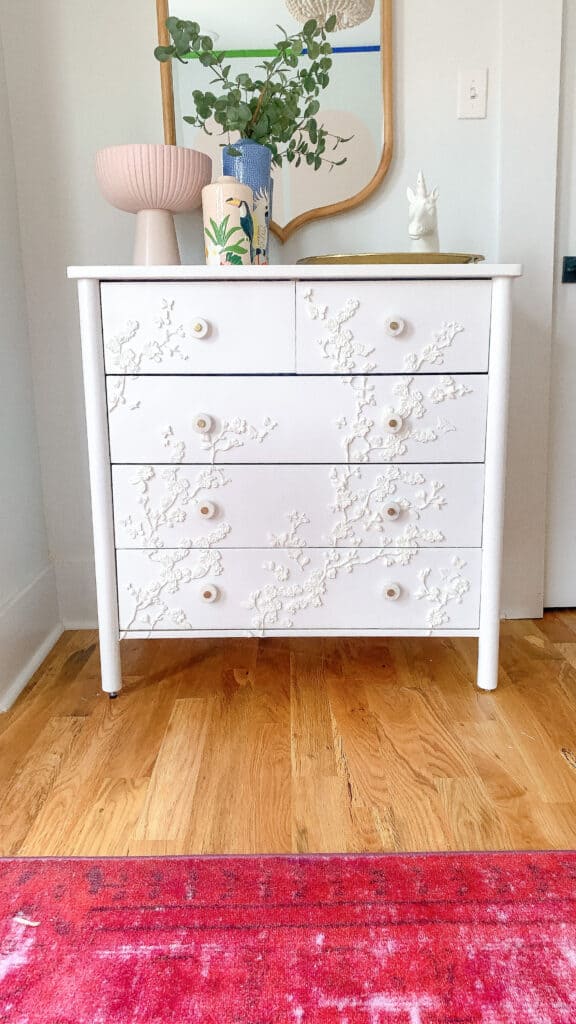
After that is done – give the dresser one more coat of paint so the molds are fully covered. This will give it a look as if it is part of the wood.
Now you just have to add your drawer pulls and the dresser is done. This DIY honestly was a 1 day project for me. I was able to start the paint and resin molds in the morning and finish late in the evening.
Can You believe it is that easy? This is honestly one of the easier DIYs I have ever done and the end outcome does not look that way.
Other Posts You’ll Love
If you loved this post – I have several other great posts that you will love below.
Hopefully you feel confident in doing an IKEA Bjorksnas Dresser Hack with Resin after this post, and I would love to see your end results. Be sure to tag me or message me on Instagram (@arinsolange), and leave any questions you have in the comments below.
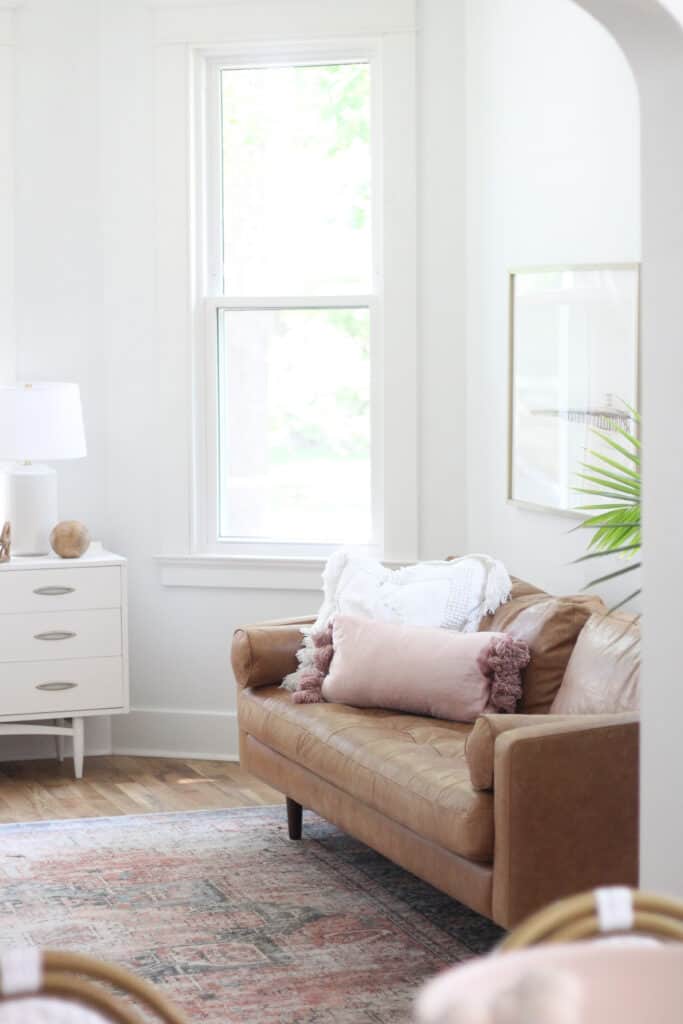
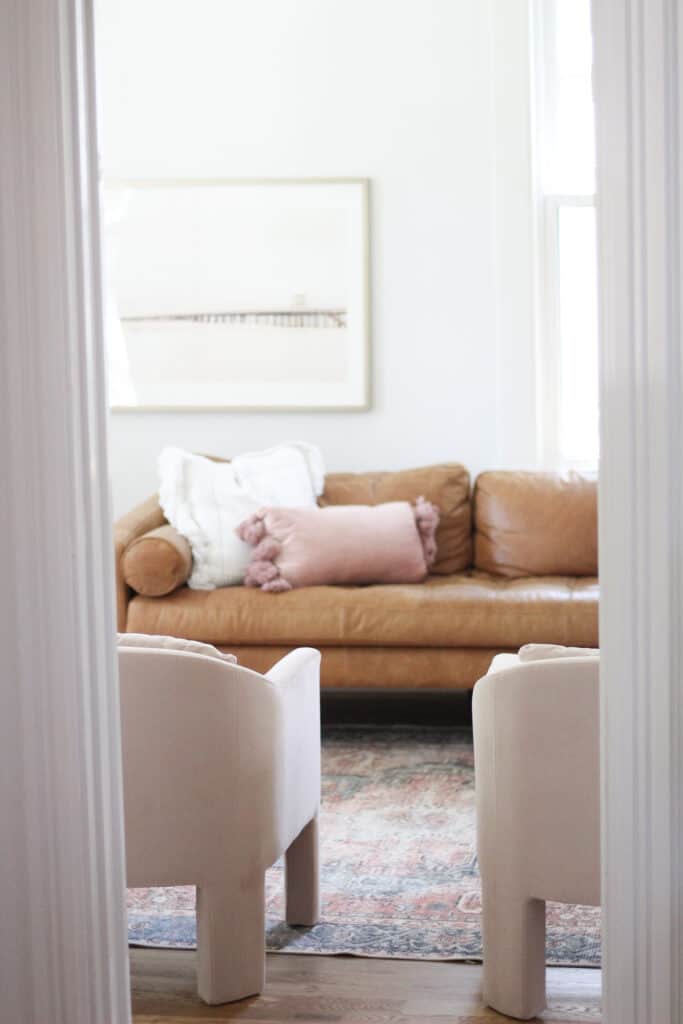
After a year of owning our Poly and Bark Napa Sofa it was high time I wrote a review of the sofa for anyone else that is considering it. I know when I was deciding on which sofa to get (and ultimately landed on the Napa) I did SO MUCH research….because let’s face it – buying a couch online is a big decision. Hopefully my review will help you decide if it is right for you!
This post may contain affiliate links – you can read more in my privacy policy
(for reference – I am 5 foot 8 inches – so not petite)
Talk about a difficult time in the world getting furniture. Shipping delays and supply chain issues has everything delayed, and a lot of us scrambling to find quality furniture with a quick delivery date. We are currently looking for chairs for our hearth room, and it honestly feels all but impossible!
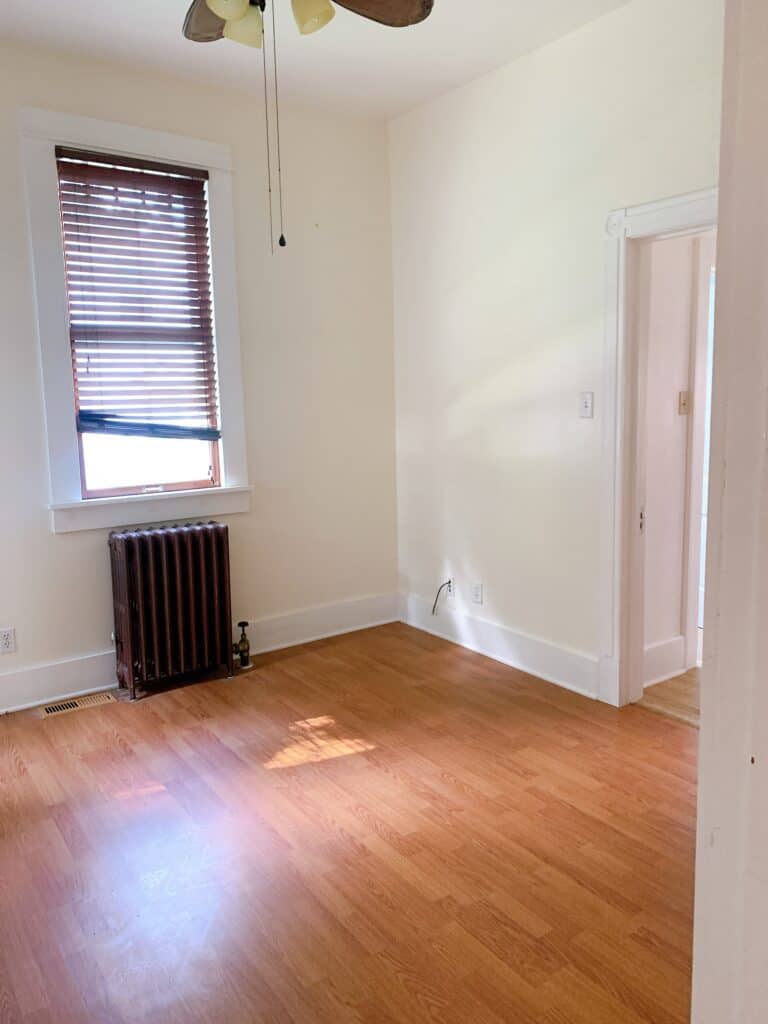
1 year ago my husband and I purchased a 150 year old home to renovate. Moving in during a pandemic came with LOTS of challenges – one of which was longer than we cared to live with only camping chairs.
We have several rooms to fill with furniture and I really wanted to add leather to our house somewhere – and landing on the Poly and Bark Napa sofa was one of our best furniture decisions. Actually just this past week we did a major furniture swap all over the house, with talk of selling one, and that one was the only one my husband was NOT willing to get rid of.
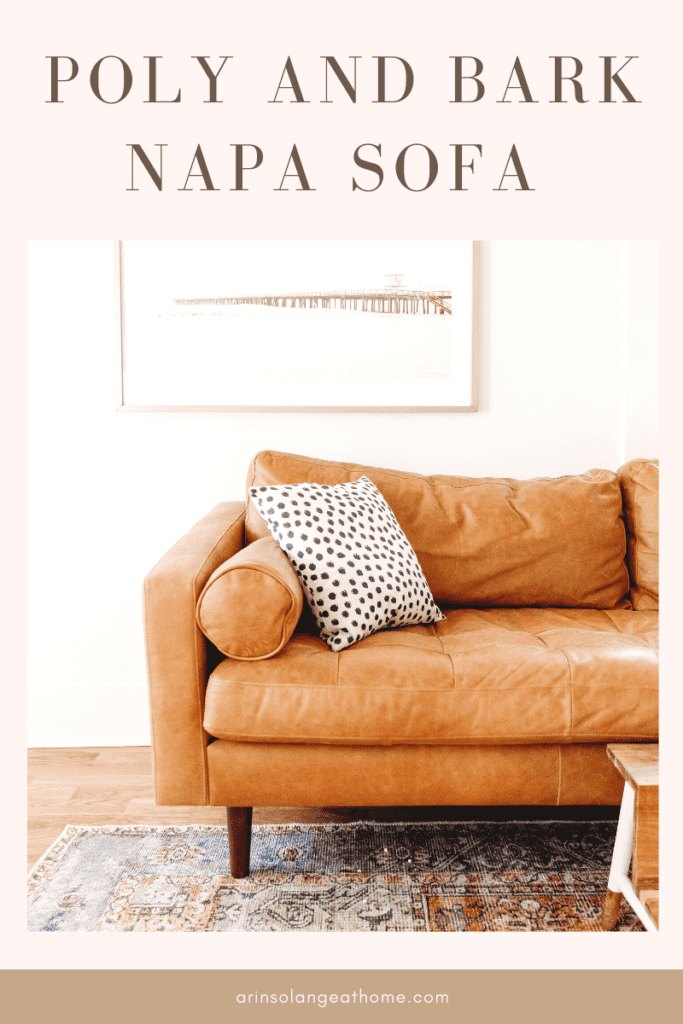
Poly and Bark Napa Sofa
Last year we had just moved into our current home and the wait time on furniture was INSANE. I loved the idea of a leather sofa, and landed on the Poly and Bark Napa Sofa after countless hours of research and comparing with other similar sofa options.
If you are also in that position I want to talk to you about our experience with the sofa, all the way down to the delivery, and what I learned in my `research on similar sofas.
Why I chose the Poly and Bark Napa Sofa
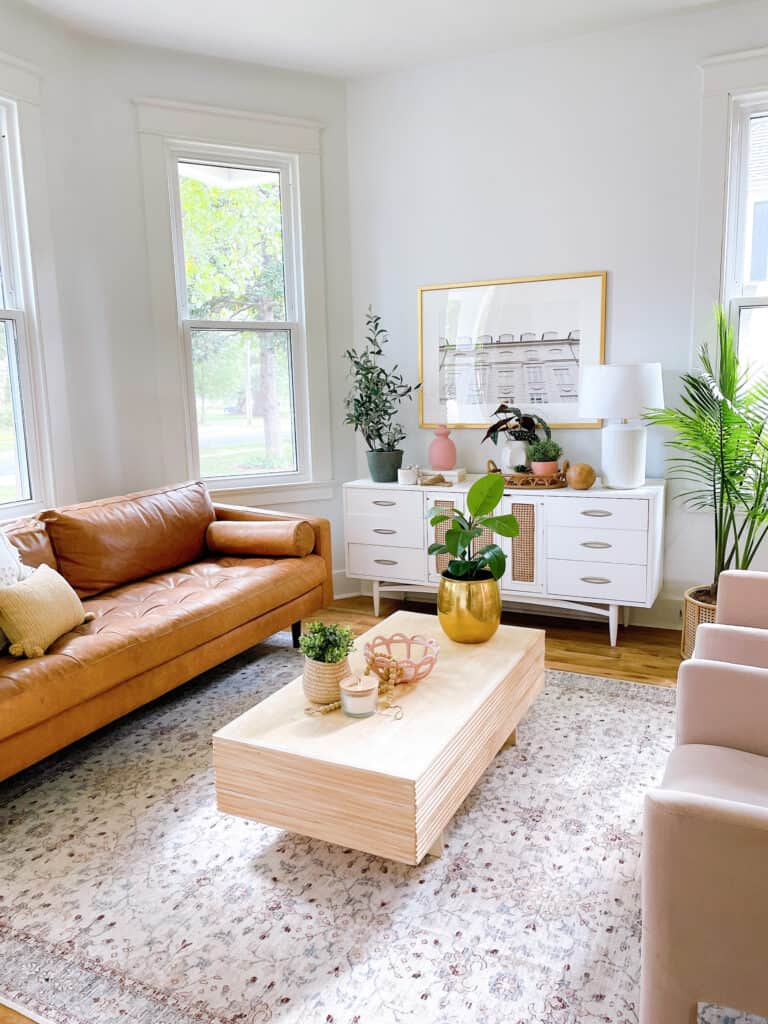
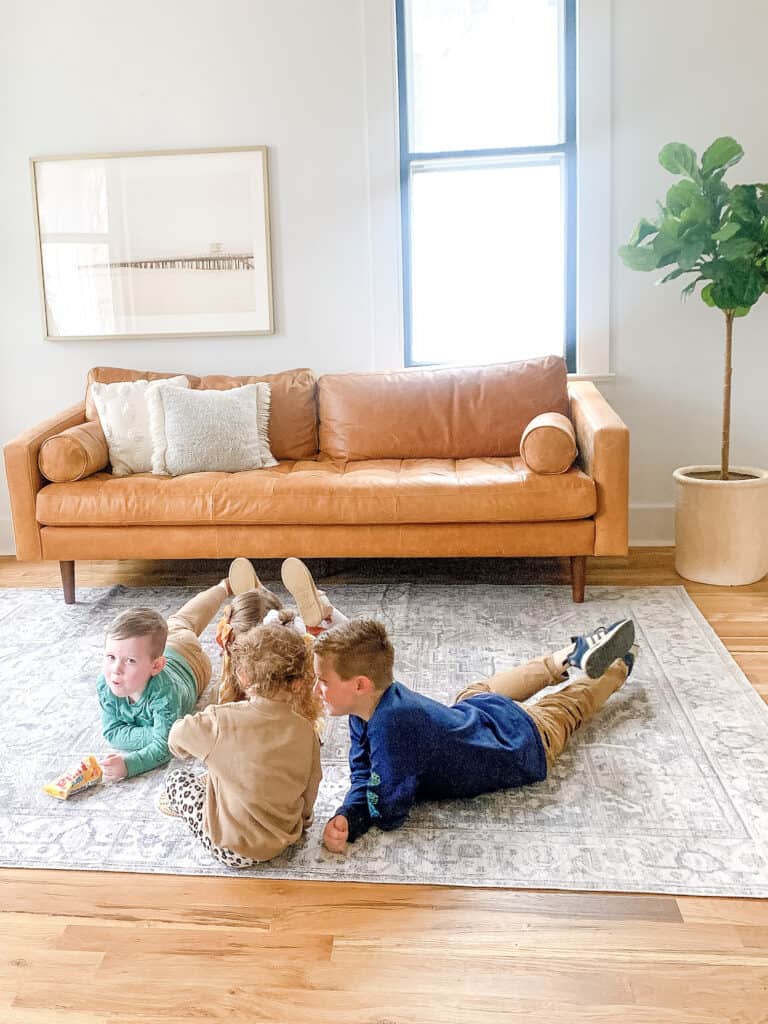
Before I talk more about the sofa – my overall review is that the Napa sofa is GORGEOUS and one of my best purchases for this house. I have 4 kids and a large dog (although we didn’t have the dog when we got the sofa) so I was honestly slightly nervous about leather and scratches.
After a year and a 60 lb puppy the sofa has weathered in all the right ways and it just added to the charm! The way leather weathers is loved by me – which is not normally the tune I am speaking after a year with a sofa.
I want to talk about why I landed on the sofa, but I am going to be really honest – delivery date played a HUGE roll in the sofa choice for me. I wanted something that would be to my house quickly because we had sold all our furniture before our move.
I personally purchased our sofa on Amazon (highly recommend this, and will touch on it again later) and from the day I ordered to the day it was delivered was exactly one week. In a world where there were such long wait times on furniture this was HUGE for us.
I also loved the color of the Napa sofa – we went with the cognac tan color, and I felt it looked high compared to some other similar leather sofas.
Last – when looking at a leather sofa, one of the big perks is that leather is timeless. I knew this had the ability to last us for years to come, so I needed something with reviews stating it was comfortable and had high quality cushions that wouldn’t look deflated in a year.
Things to know about the Poly and Bark Napa Sofa
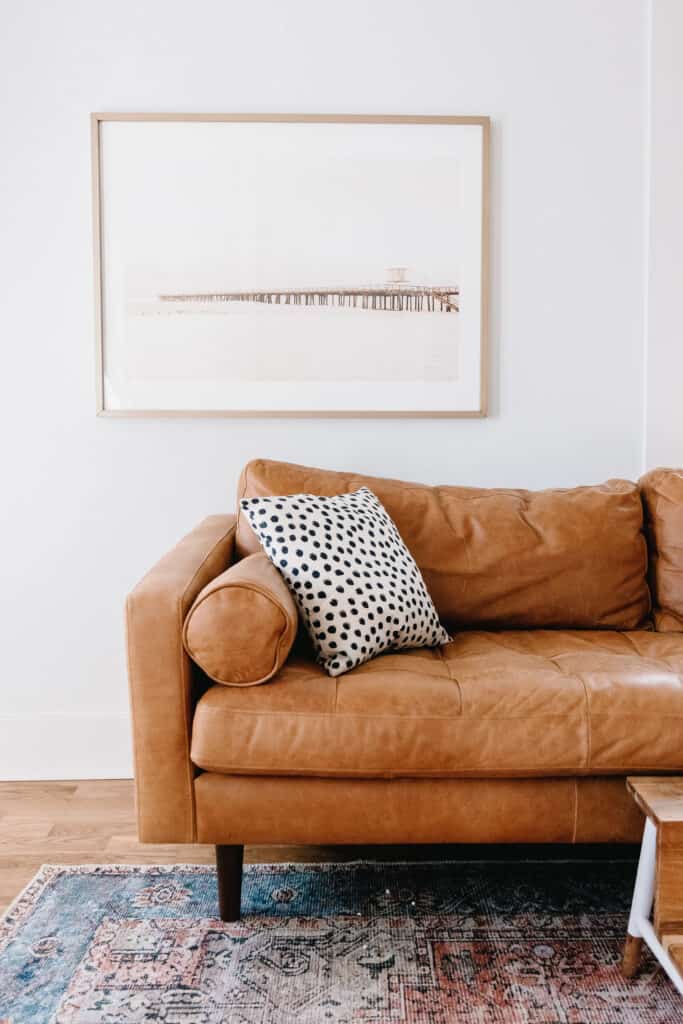
The Napa sofa is a high quality leather sofa upholstered in Napa leather. This means it is a high quality leather that will soften and wear with age. It does also come in a velvet option now which I can not speak to the material on, however the rest of the details will remain the same.
There are several configurations and sizes available in the Napa sofa including a 88.5 inch length (this is what we own), left-facing sectional, right-facing sectional, and even a chair. Each size is comprised of a wooden frame with a single long cushion that is made of high-density foam over polyester filling. It then has a duck feather topper which makes it soft and comfortable while keeping its support and form.
What to know about the Napa Leather
Napa leather is made of aniline hides which means that each sofa will have its own unique look that is not exactly like another. With that said – when I read that I was kind of nervous thinking it was going to be a bit too rustic for my home. I decorate on the more modern side and didn’t want a cozy country look with this sofa.
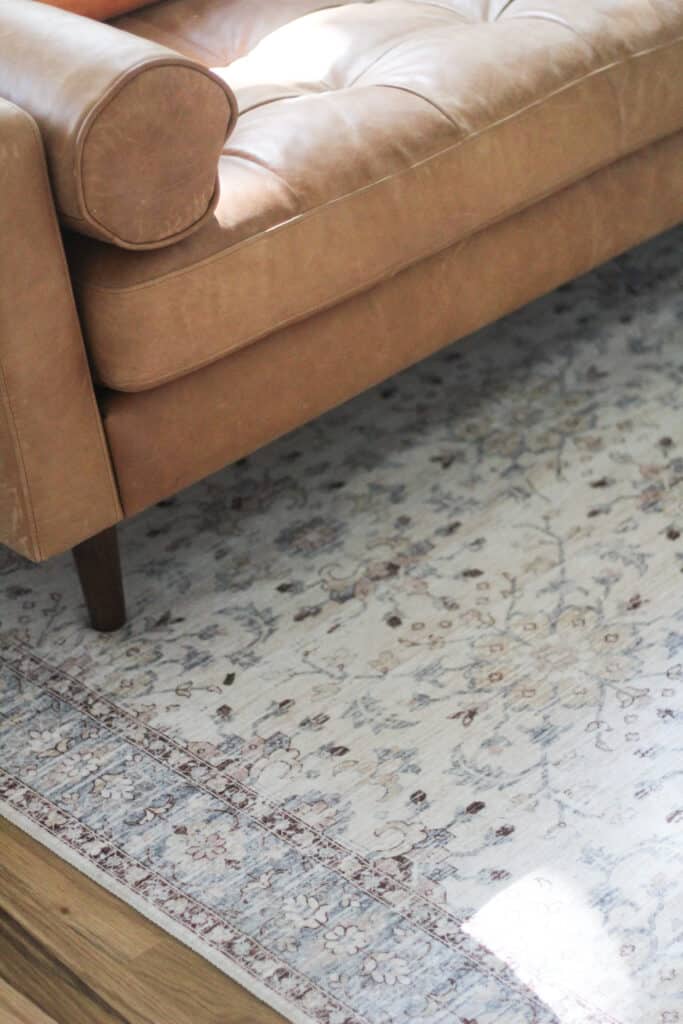
In fact it was smooth and gorgeous and very modern in its coloring. That said I think it would fit well in any style home (which is pretty unique!). Over time the sofa will show scratches and the natural hallmarks of genuine leather that are nothing short of gorgeous. The photo below shows you our sofa – never conditioned after one year with my kids and dog on it all the time.
Where to Buy the Poly and Bark Napa Sofa
I mentioned earlier in this post that I personally chose to purchase my Poly and Bark Napa Sofa from Amazon. I know that seems nuts, right? But it was actually a faster ship date than on their website at the time of ordering for me.
Both locations however do offer free shipping and offer a free return option, which I think can be huge with ordering something so large online. I would personally: Compare the delivery estimate between the two places, but also just decide which site you’re more comfortable with. For me – I knew I trusted shopping with Amazon, so I went that route.
You really can’t lose when it comes to purchasing the sofa – and it seems as though it will get to you pretty quickly either way.
One thing I am asked frequently is how to care for the sofa. Like I said above – due to the kind of leather it weathers well, and the scratches and wear and tear really do add to the look. ( I am not just saying that! ha). That said – I know there may be times that you want to clean the leather a bit.
I have personally used vinegar and water on small spots and that has worked well but you may also want to have this leather conditioner on hand for keeping it looking its best as well.
Hopefully this Poly and Bark Napa Sofa review has you feeling more confident on if it is the right sofa for you! Feel free to leave any questions you have in the comments below, or as always you can DM me on Instagram ( @arinsolange).
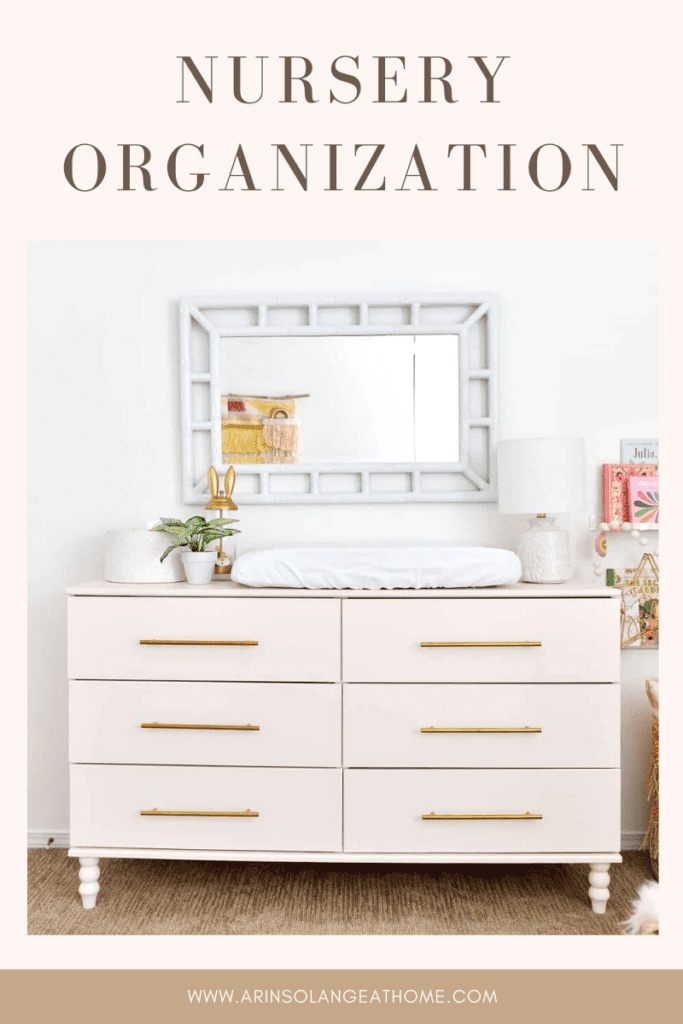
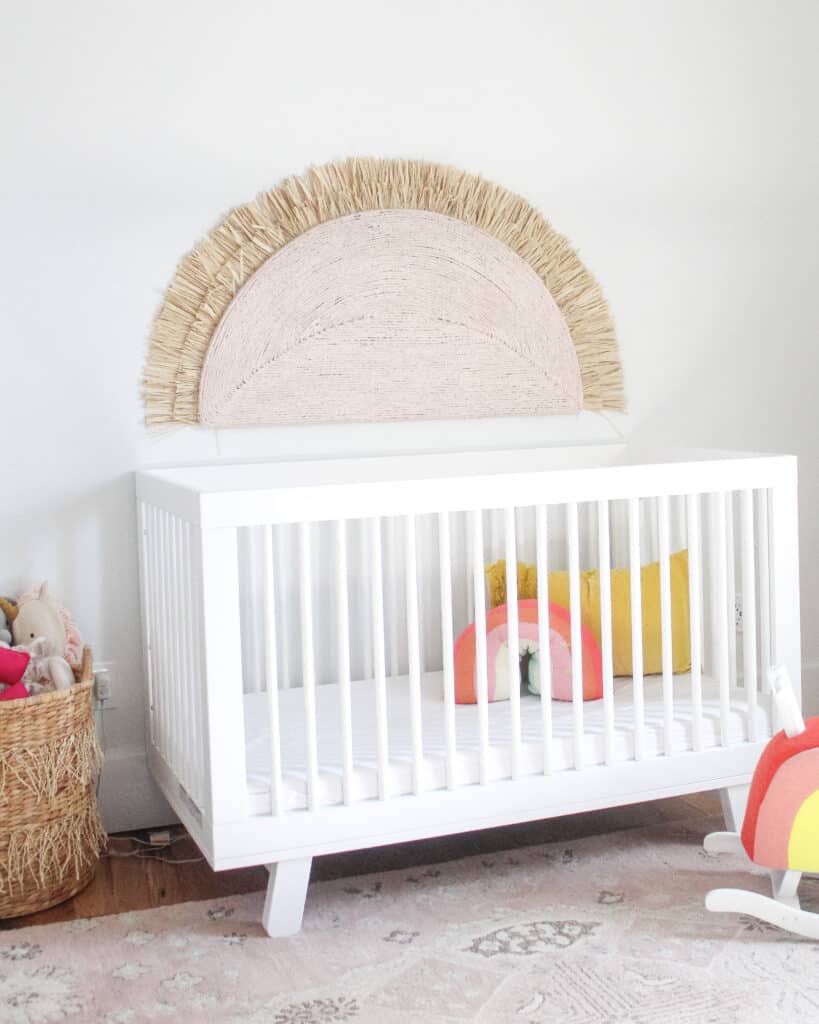
Out with the old and in with the new year! Which means if you have a baby you might be on the nursery closet organization train! Whether you have an established nursery, or you are prepping a nursery for a baby on the way, hopefully these organization tips in my post help you get the room feeling organized and ready to go!
This post may contain affiliate links.
To see more of my youngest son’s nursery check out this post
Decluttering Before you Start
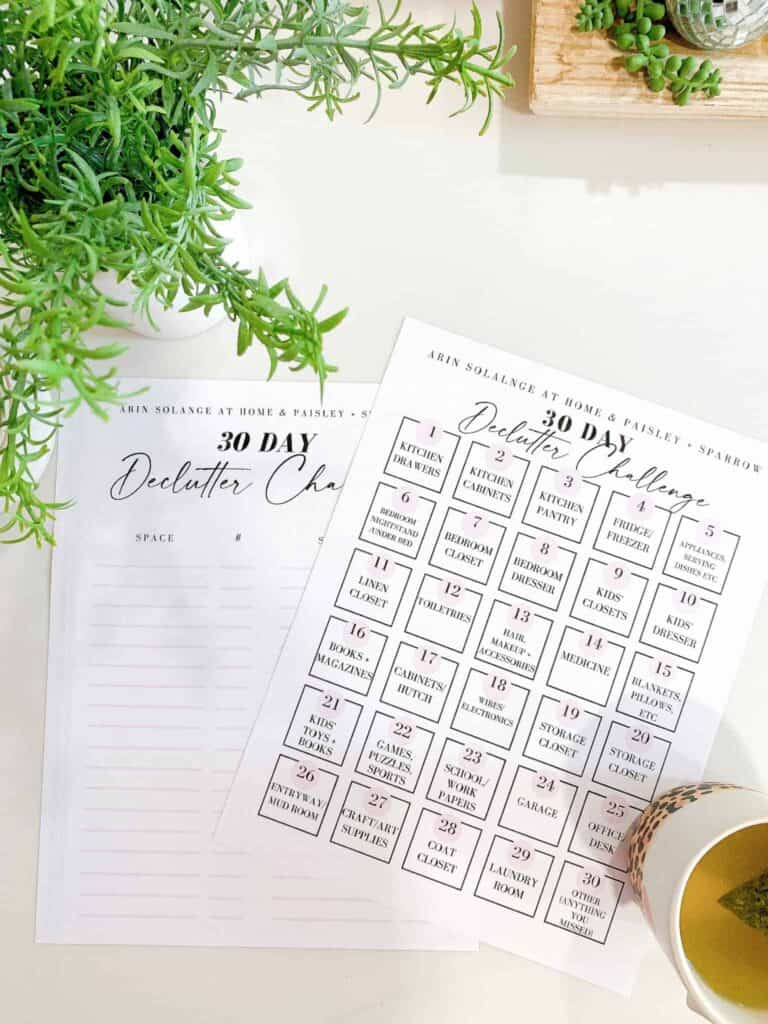
If you have been around my blog long enough, you’ll know that every year around this time I do a declutter challenge! This is my 3rd year doing it and I love the feeling of having my home organized and purged of all the unnecessary items that collect throughout the months.
In honor of the challenge, I’ll focus on providing you with some organization tips for your baby’s nursery and closet space. We’ll look at the best way to organize all of your baby’s things and utilize the storage space you have for an organized dream rather than organized chaos.
Have you ever noticed that baby gear just seems to accumulate? From the moment you find out you are expecting to add a new baby to the family, it seems that baby items appear out of nowhere, from burp cloths to baby socks to baby clothes (hey even extra diapers, you’ve got to buy those while they are on sale!).
Baby showers are a great way to get all of your baby essentials, but before you know it, your baby’s closet is exploding and you can’t close the closet door. With the exception of professional organizers, who has the time or patience to handle this mess? With a few products and important tips, you can not only have an organized baby room closet, but also can maximize unused space.
First things first, you need to be set up for success. You can’t expect to dump all of your new baby’s clothes into dresser drawers and hang random cute outfits up without any rhyme or reason.
You need to have some organization or method to the madness in order to succeed and have a useful space. A great idea is to spend some quality time with your significant other and tackle this project together. If you are like me and way too much of a control freak, be prepared to spend some time alone.
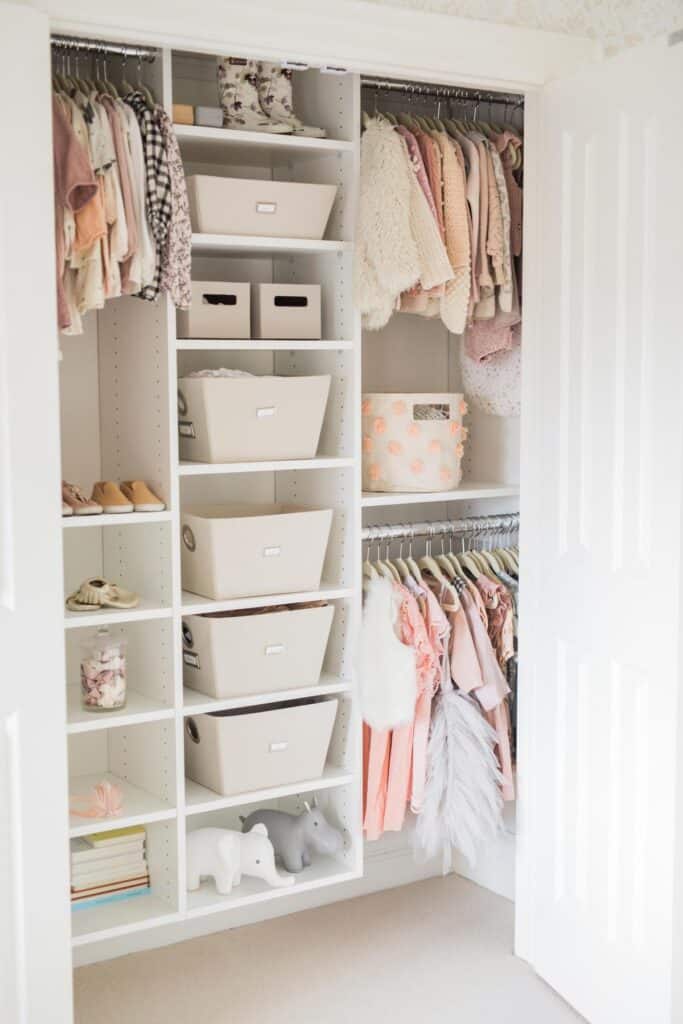
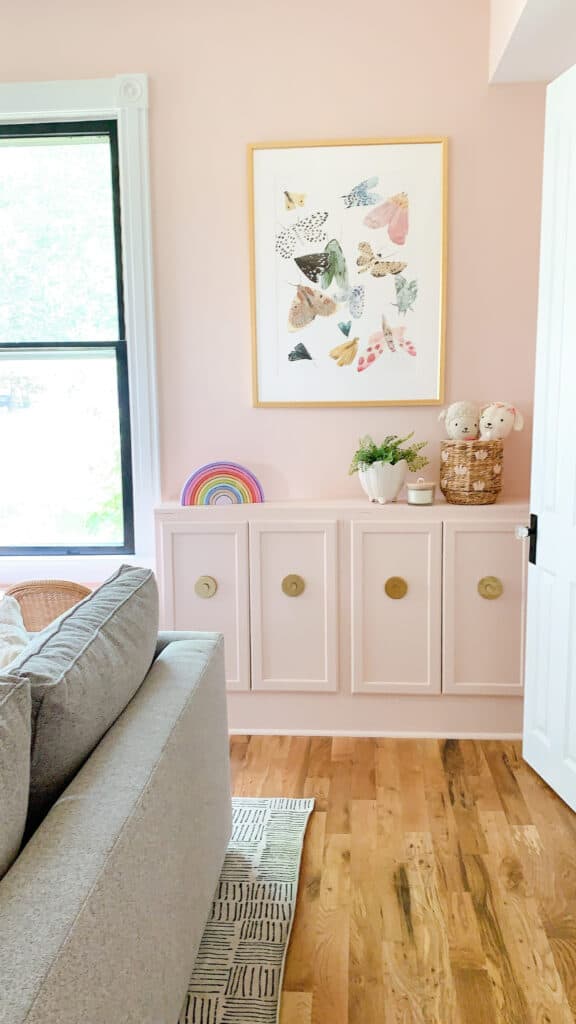
This is some serious organization for a beautiful little girl’s closet.
If you are starting from a place as a new parent, you may not have as many items as seasoned parents. Don’t worry before you know it you’ll be wondering how in the world you have so much stuff and where your floor went too! The best part about being a first time parent is that you get to start from scratch and create your own organized system that will never be out of place. Right? Right.
Keep in mind that whether you are a first time parent or seasoned parent, you’ll want this space to be not only organized but easily accessible for your child. While you may be starting the initial design as a baby nursery closet, one day, that baby will grow into a toddler and want to dress themselves as a pirate or princess. Keep that in mind while organizing and placing your items in the designated space.
Before you start placing items in the closet, consider decluttering the space. You’ll want to get the items you have to display and use into a manageable amount. That means, that while your best friend may have gifted you a tub of 3T clothes, that doesn’t mean you need to have those items out if you still have a 3 month old.
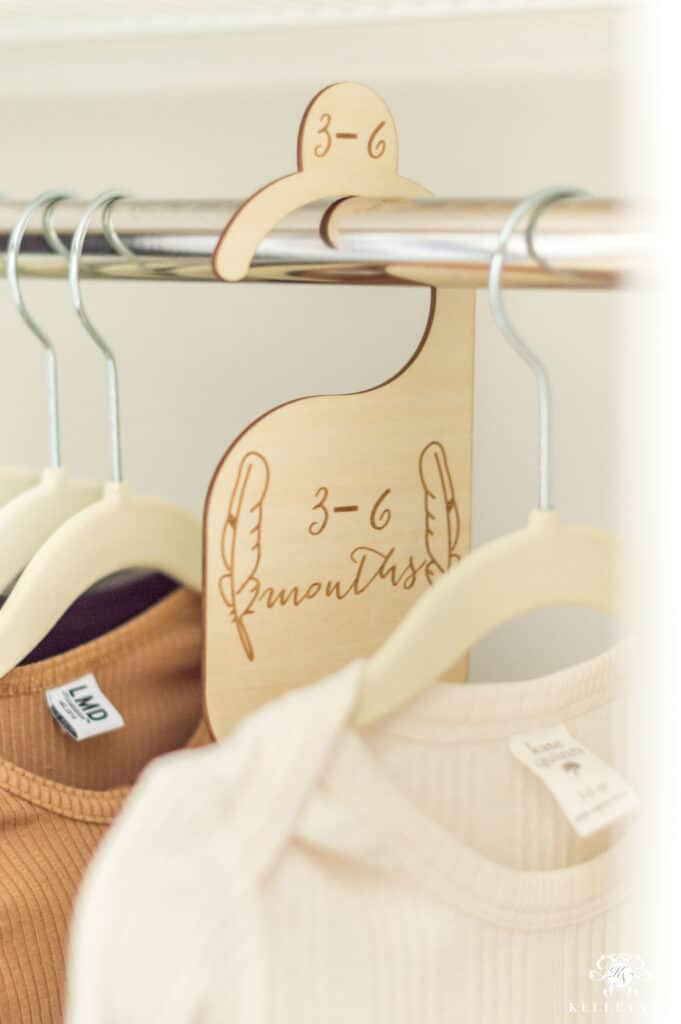
Go through your baby’s clothes, shoes, and accessories and organize them by size (0-3 months, 3-6 months, and so on). You may take this a step further and organize your baby clothing by season. When you have a new baby, you’ll find that they don’t stay in those early sizes for long. As they grow and get closer to 12 months old, they will be staying in that size for longer. You may have multiple seasons in the same size that require some organization.
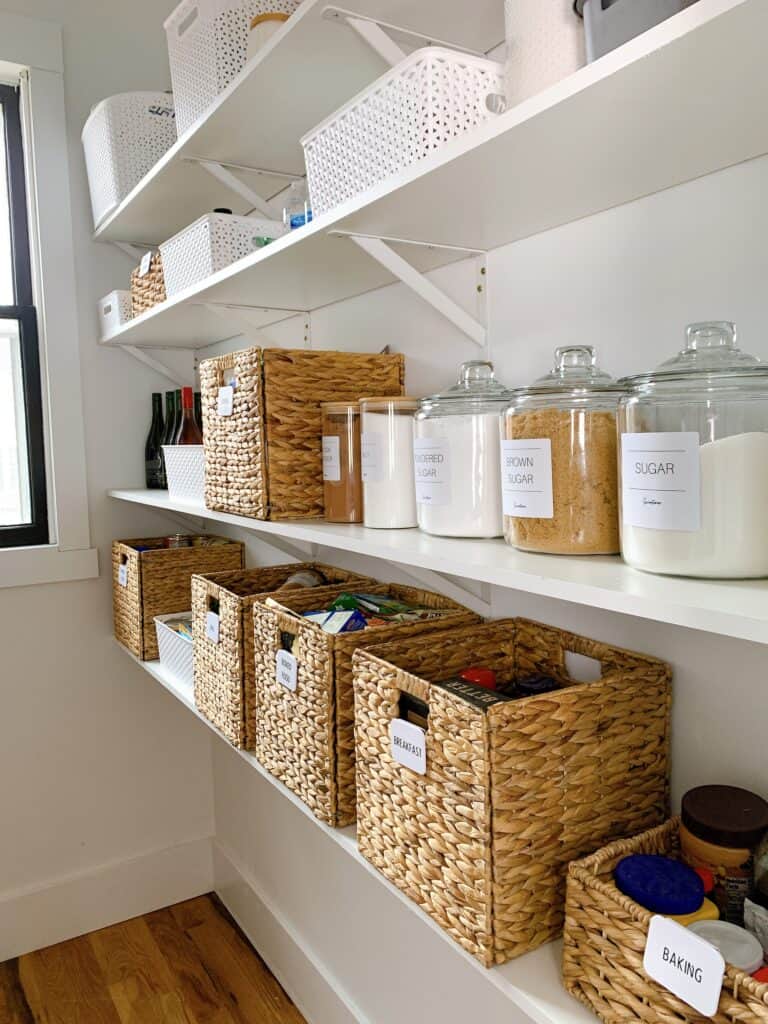
Clear storage bins will be your best friend. You can generally find these on Amazon, Target, or the Dollar Store. I repeat, buy these plastic bins in bulk. Take the sizes (and seasons) that you are currently not using and place the items into these storage containers.
Make sure you label the bins clearly. For sizes that are not in the distant future, I tend to keep those in storage and out of the closet. I do, however, keep the next size up nearby and available for easy access. You’ll also want some type of plastic bin or wire baskets in the closet for when your child outgrows a piece of clothing and it is no longer the right size.
This small bin is an easy way to collect items that no longer fit. Your third use of storage containers (told you to buy in bulk) is for those items you plan to either store for siblings or if you plan to donate or sell. These need to be separate so you don’t accidentally give away your baby’s 1st birthday outfit.
Now that you’ve got an idea of how to organize your items, let’s talk about actually setting up the closet.
There are so many different ways to set up your baby’s closet. The amount of space you have may dictate how you go about setting up and organizing your little one’s closet. For example, a small nursery closet may not be able to accommodate displaying different sizes of clothing, whereas a larger closet can and would benefit from closet dividers that clearly label the size of the clothing.
For those with smaller closets, storage bins are key to keeping the clutter at bay and changing out clothes with changes in size and season.
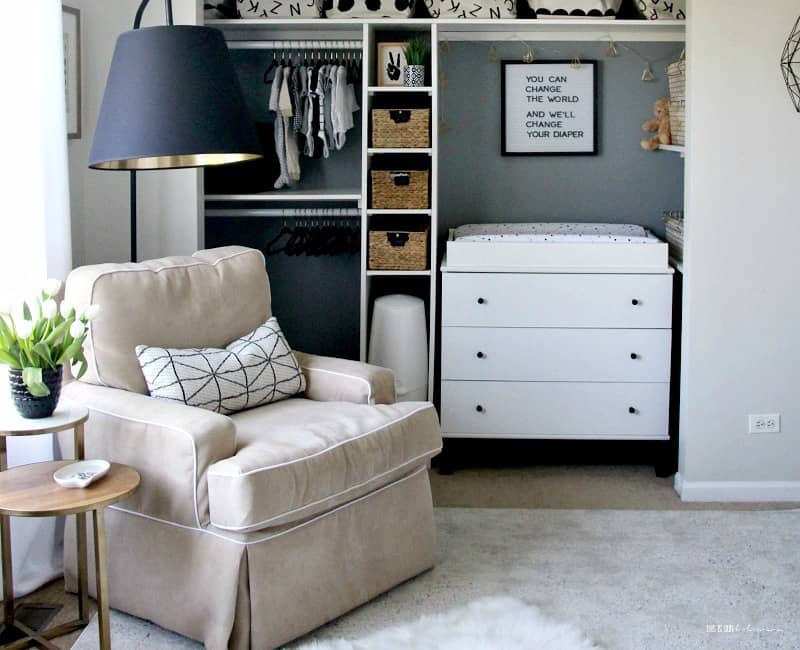
This Is Our Bliss nailed this nursery reveal with this incredibly thought out closet.
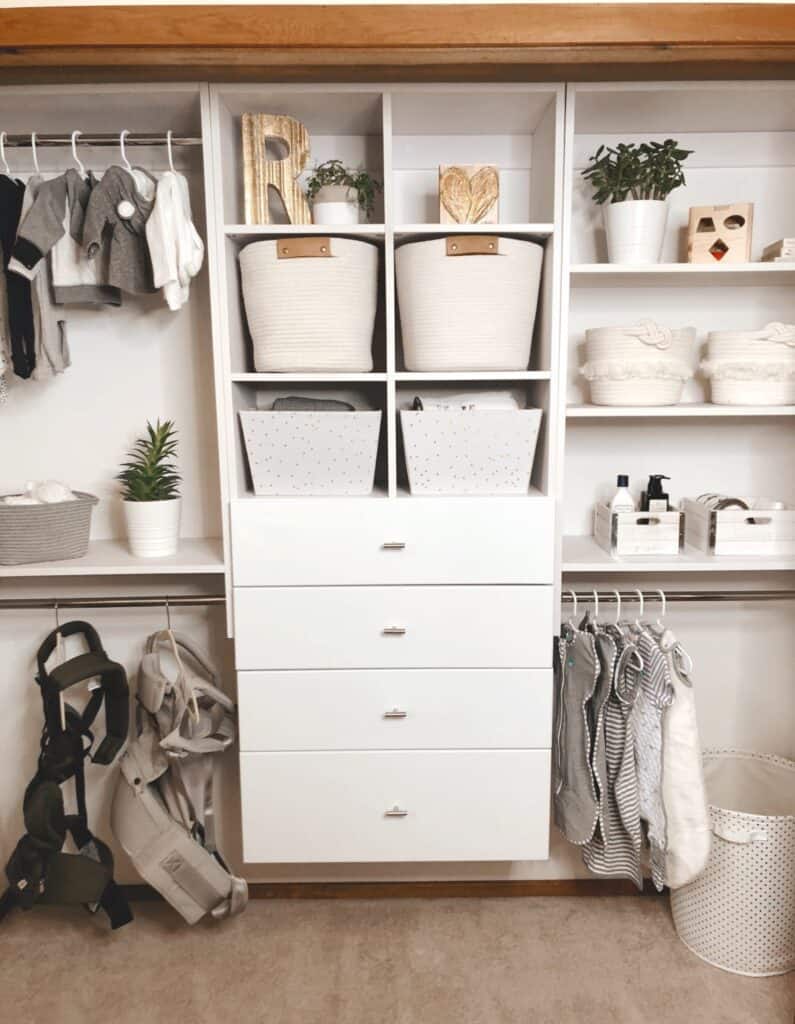
Use Your Dresser Strategically
Another key note is that some baby’s nurseries are large enough to accommodate a dresser in addition to a closet, while other nurseries would benefit from no dresser or a dresser strategically placed in the closet to maximize a small space.
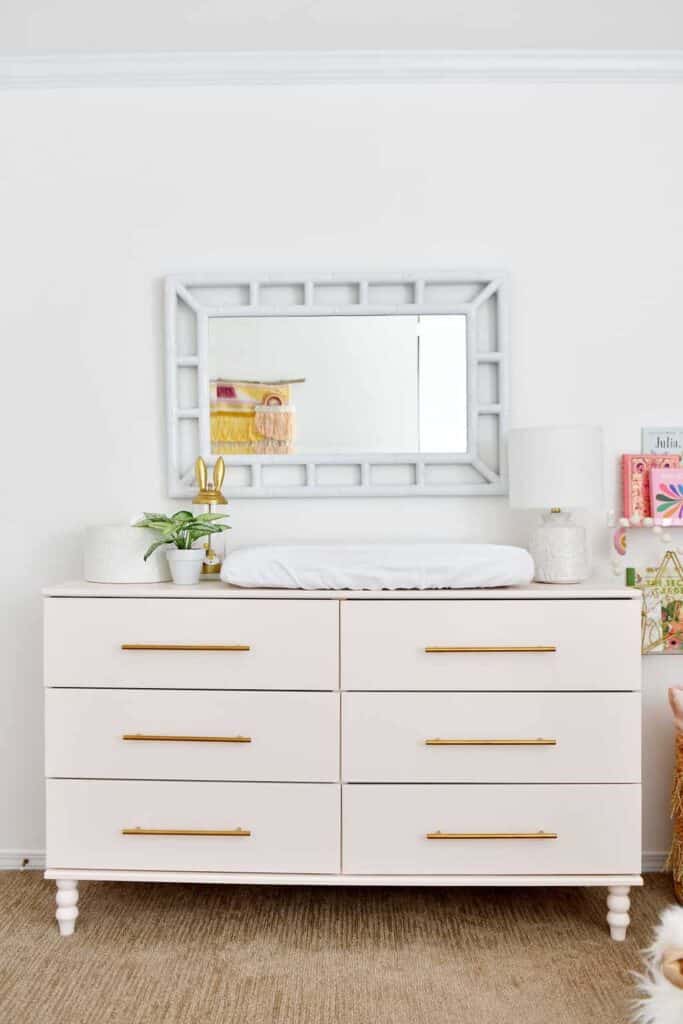
Dressers are a great option to utilize to not only store items like extra crib sheets, diapers, and burp clothes, but can also serve as a changing table by placing a changing pad on top of the dresser. Drawer dividers and drawer organizers can be used for smaller items like socks and burp clothes. Pajamas are a great option to place in dresser drawers for little ones.
This allows them to easily access it while still keeping the clothing in an organized fashion. Goldie loves getting her own PJs out as a big toddler helper. For those who don’t have the option of a dresser, a rolling cart is a great idea to help organize diaper changing and feeding supplies.
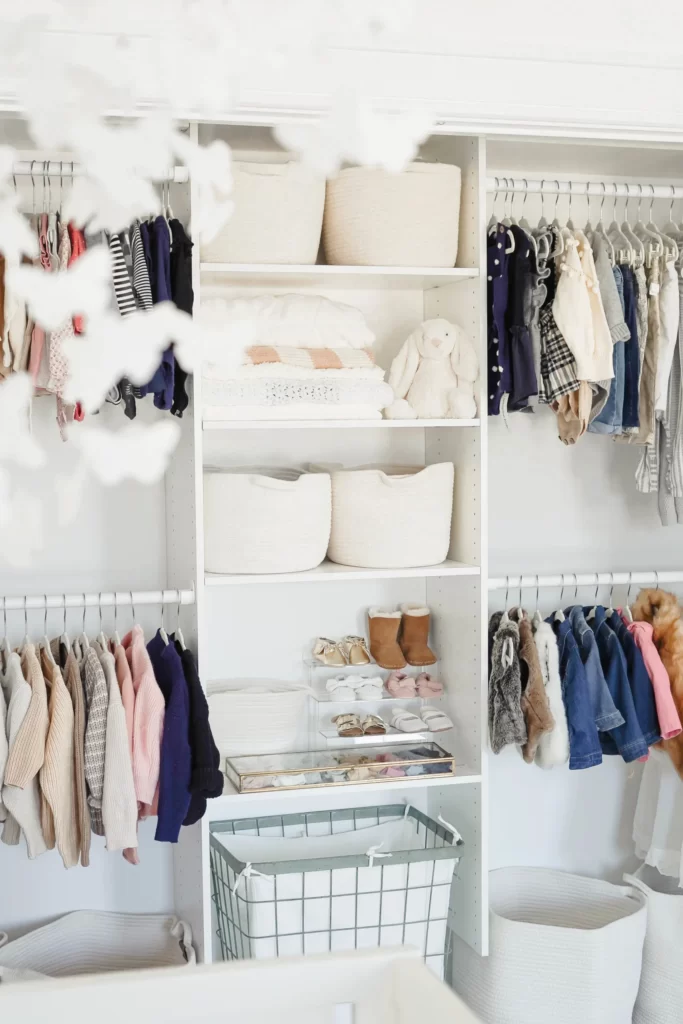
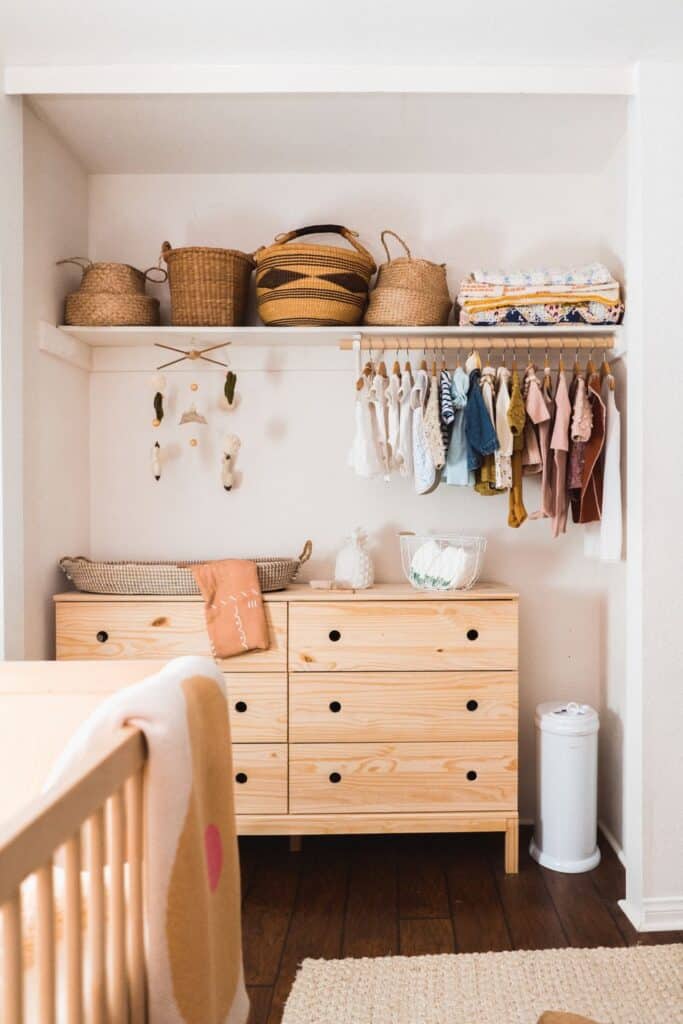
When it comes to nursery closet organization – If you want to maximize a small closet, look at the unused space. Children’s clothing is much smaller than adult clothes and can therefore be hung up in a closet by placing a hanging rod both above and below your typical hanging space. Keep in mind that the closet rod towards the bottom of the closet will be more easily accessible to young kids as they grow.
This can be great for their independence (not so great for keeping it tidy). By utilizing this vertical space you can double the amount of hanging space an adult closet would otherwise have. While we are on the subject of hanging space, a great idea is to keep your hangers all the same color for a more seamless look. By keeping the closet accessories one color and material, you’ll have a more cohesive and uniform look.
Another way to get extra space out of your closet is to look at the inside walls of the closet as well as using door organizers for door storage. You can find some great options to use on the back of the door to hang accessories, as well as shoes, wipes, diapers, pacifiers, hair accessories, and other small items.
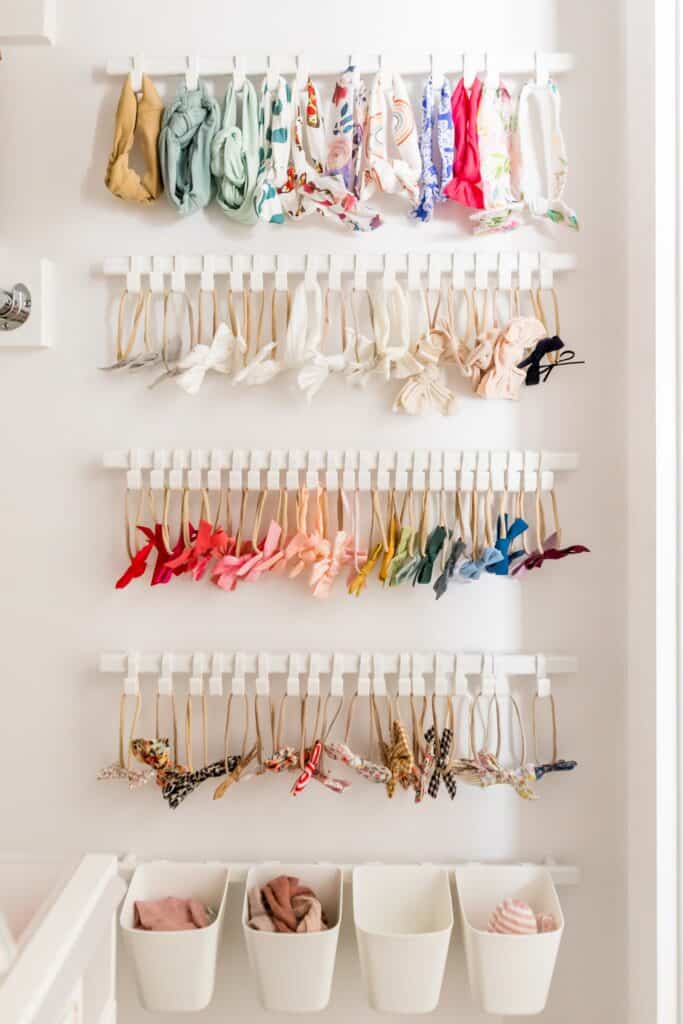
The inside of the closet wall is a great way to display a little girl’s bow collection or hat collection. These smaller items can often be easily lost otherwise and having a designated spot is the perfect use of that small space.
Kate L Photography used every inch of her daughter’s closet.
Shelving Units
Another great way to use a lot of space in the closet is to install a shelving unit or closet drawers. We used the Boaxel system from IKEA in Ave’s closet and I loved it so much I decided to put it into our other closets in our home. By installing extra storage space you are creating more opportunities for placing items in their designated homes.
It is key that every item has a designated spot otherwise, you’ll just end up with clutter on the floor and things stuffed into drawers. The best part about this is you don’t have to pay an extreme amount of money to make a functional closet. Instead, you can add a few closet shelves or even just a top shelf to create that extra space for all of those little things.
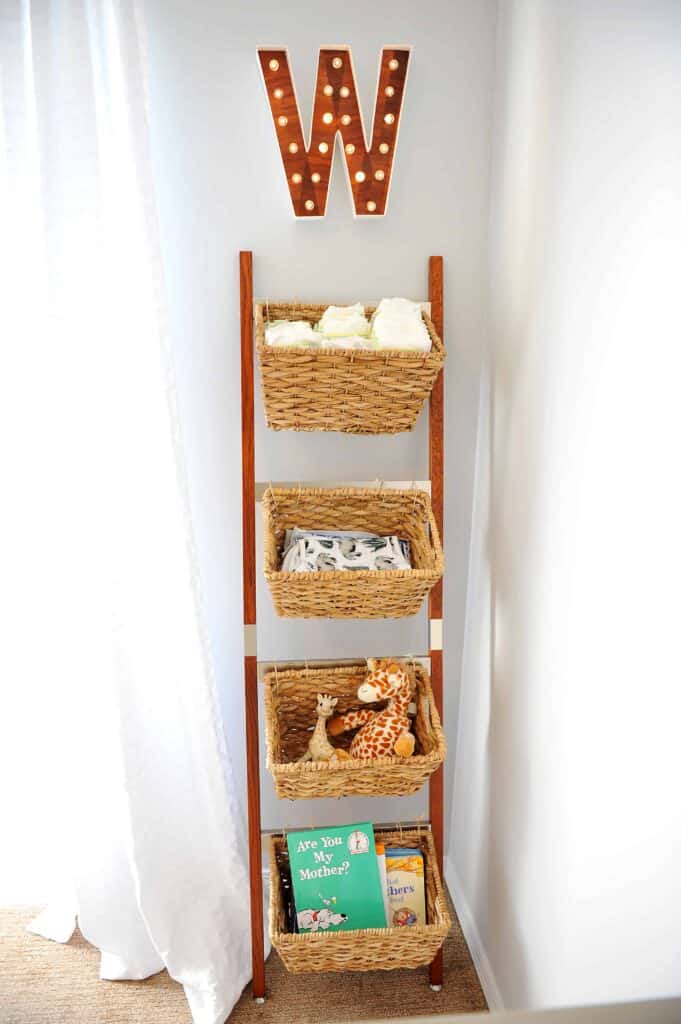
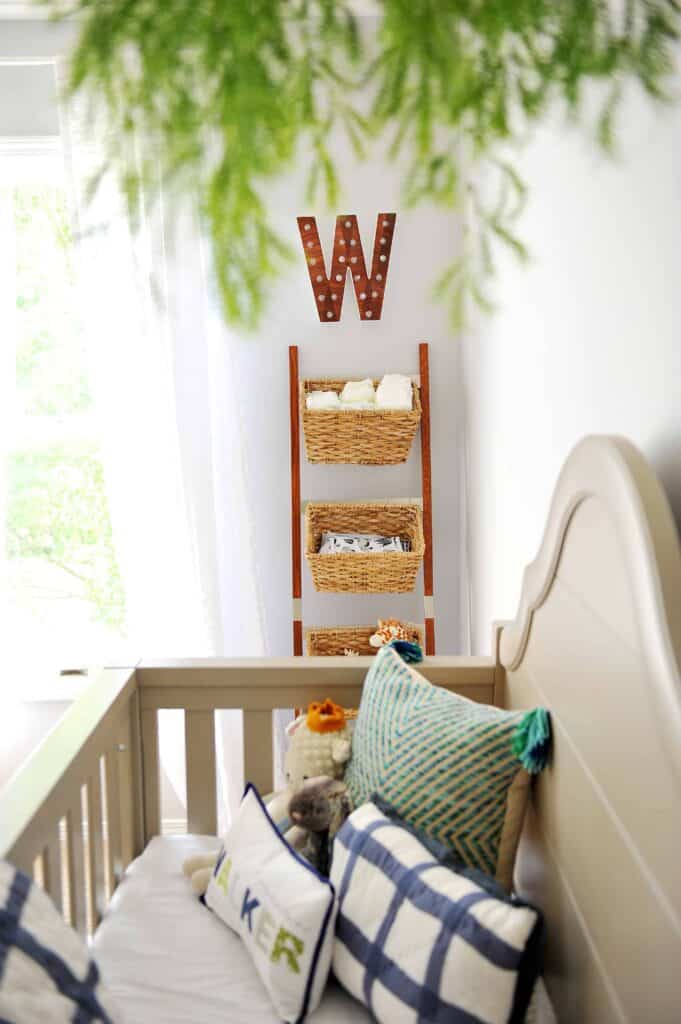
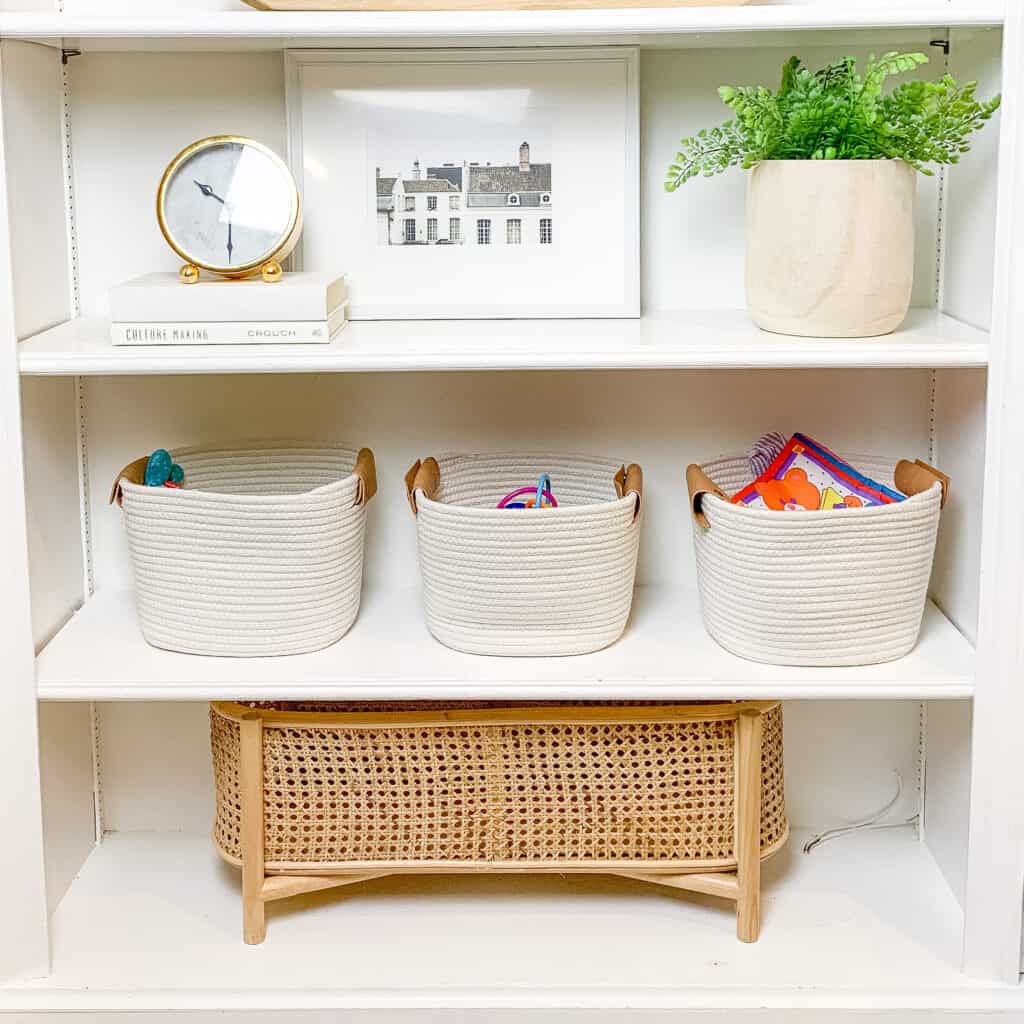
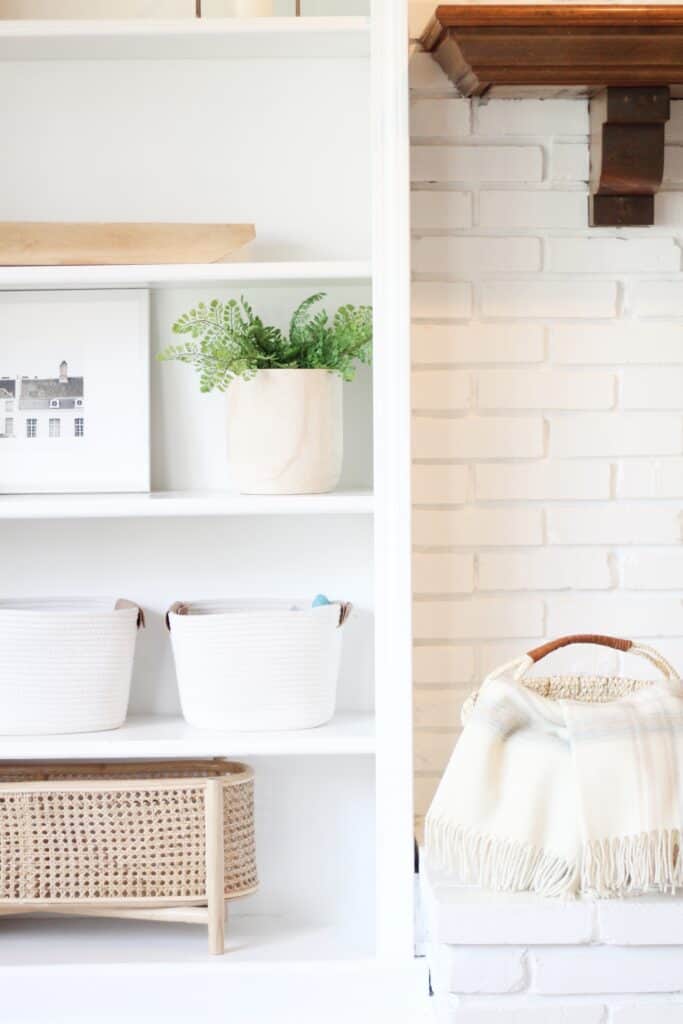
Even putting in an extra shelf above and below your hanging rod allows you to place several small baskets to store those items and create an organized closet. Small baskets are not only useful in closets, but can also be great in the nursery to hold odds and ends such as shoes, blankets, burp cloths, etc.
I also recommend keeping these baskets once your baby outgrows diapers and burp cloths and instead use it for organizing all of their toys. Legos may look small but add up in a hurry.
I also added a DIY Ladder for my youngest son in his nursery to store random items. Using these creative ideas makes adding storage fit well with decor, which is a huge bonus and saves money over all.
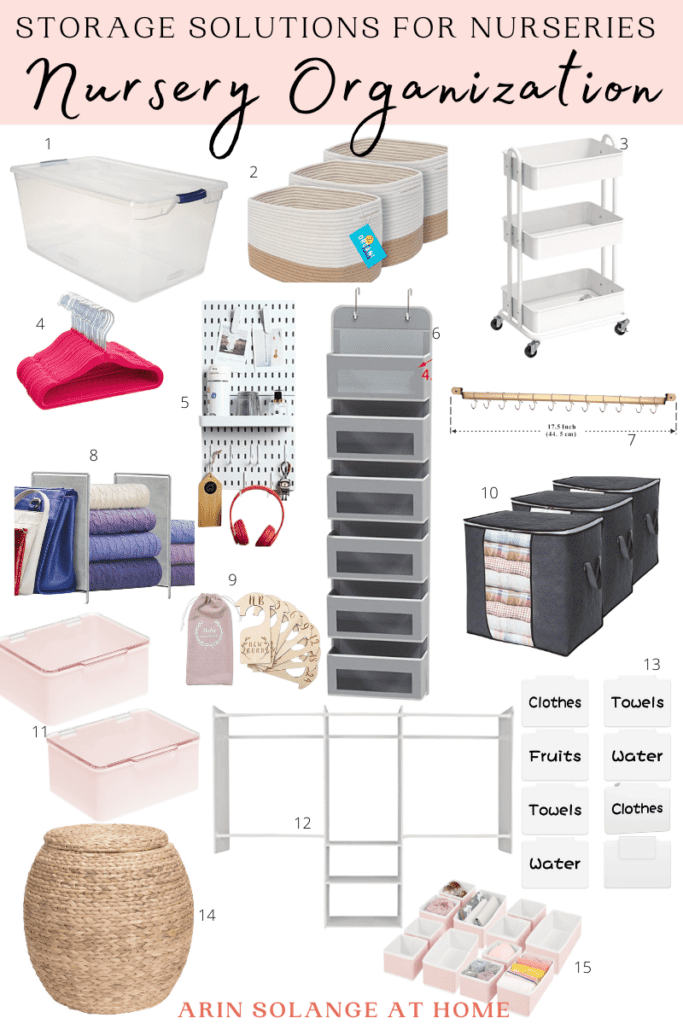
Favorite Nursery Closet Organization Items
To help you get started organizing, I thought I’d share with you a few of my favorite closet organization items that make my closet functional. Some of these items I shared in my previous post on organizing your kid’s closet but added some of my favorites for a nursery too.
Large Plastic Totes – These clear plastic totes are useful for storing clothes that are awaiting to be worn and clothes your little one has outgrown. We use these in bulk!
Rope Storage Baskets – These rope storage baskets are great for storing shoes, toys, diapers, etc.
Rolling Cart – A rolling cart is a great option to have for those with smaller spaces who may not be able to have a full size dresser. See how I used one here.
Velvet Hangers – These are great for saving space, and the fun color is just an added bonus. I mean who doesn’t love a pop of color?
Peg board organizer – This would be great for holding small accessories, and adds wall decor as an added bonus. I love finding ways to organize while adding decor and this fits that ticket.
Gold wall mounted organizer – This is great for all those little girl bows. I actually just put these in my closet for accessories for myself, and it can even hang pants and such.
Shelf dividers – these are great for keeping your space tidy!
Storage cubes – these are great for storing extra linens!
Stackable containers – these are perfect for smaller toy storage and little accessories.
Custom closet system – this is a great option for a great closet but for a fraction of the price
Basket labels – you can write on these with a dry erase marker and hang over the sides of baskets. This is a great option since you need so many different labels for things in the first year!
I hope this post gave you some great ideas on nursery closet organization. I know it can seem daunting at first when you are faced with a mountain of baby gear. Take the time now to organize and you’ll have a functional space that your little one can grow into for years to come. If you have any questions, feel free to leave them in the comments, and follow me on Instagram @arinsolange and Tik Tok for more home, decor, and DIY. If you don’t see what you need, make sure you check out my Amazon Storefront for more great organization items! Happy Organizing!
This post has been a long time coming! I am about to kick off a 3rd year of a 30 Day Declutter challenge, and one thing I wanted to share was where to donate items in St. Louis. This post will still be helpful if you aren’t local, but if you are in St. Louis, and have been looking for where to donate items, or give back to the city, hopefully this post will help!
Declutter Challenge
Before I get to the donation locations I wanted to touch on the declutter challenge. You can read more about the challenge here, and sign up at this link. It is completely free and just helps walk you through getting rid of clutter in your house over a 30 day time period.
I am very passionate as a St. Louis mom myself about keeping my home as clutter free as I can so that I can enjoy the space with my kids. We also use decluttering as a learning lesson for my kids on giving back and passing along things that no longer bring you joy.
I took to Instagram to help me come up with as many resources and Ideas across the metro area that would be helpful for donations. I will divide things a bit so you know where to give new, where to give used, and where to donate things like food.
I personally think that finding somewhere that both fits your convenience needs as well as somewhere that means something to you will help you to donate items more quickly and more often.
If you find that you have items in the back of your car that need to be donated
Buy Nothing Facebook Groups
Before I get into the individual locations, one big option I want to bring up is the buy nothing groups on Facebook. There are several out there in our area, and some have rules on only joining one, so do your research on what one you want to join.
Essentially these allow you to post something and offer it to someone for free. It is a great way to fill a need and not have to leave your home. That said – I think when doing a large declutter challenge like the one I talked about above, there are some more impactful options in the list below to consider as well.
Where to Donate Food In St. Louis
Lets start with food. One thing that I try to declutter a couple times a year is our pantry. Obviously there are things to consider like expiration dates – where you need to throw it out, but for food you just have too much of (or maybe decided you just don’t like) there are some great options below.
Nurses for Newborns – The link provided gives a great list of specific kinds of food they tend to look for for infants and toddlers. A great place to take formula samples. They support babies and families where the infant is born with health problems, teen moms, mothers with disabilities both physical and mental, and families generally struggling financially.
KirkCare – You can donate food in person or schedule a pick up.
STL Food Pantries – Use the link I provided and find local food pantries you can donate to
Where to Donate Furniture and Household Goods in St. Louis
Circle of Light – Located in North County. They have a current need for furniture and home rehab materials.
Ditto – This is your general drop off donation type place, but the proceeds all support local private schools to give scholarships to those that need them. Ditto is near and dear to my heart, and somewhere I donate time because they give back to our school.
Animal Shelters – A great place to donate blankets and towels.
Helping Hand me Downs – They serve families in the St. Louis area experiencing unemployment or unsafe housing situations. They take just about anything in terms of household goods and clothing!
Home Sweet Home – This non profit helps women and children escaping abusive situations by furnishing places to live. The link provided shares what is on their list of accepted donated items.
Clothing Pick up STL – this free pickup service supports several area non profits. You simply schedule and pick up and leave it on your porch in a box. They accept household items and clothing – basically anything that is useable and can be lifted by one person!
Lydias House – Household goods donated will help women and children escaping abusive situations.
Second Hand Heros – Crystal City, MO – this is donation location where those struggling at the moment can come and shop free of charge no questions asked.
The Sharing Shed – O’fallon MO – They accept furniture and household items that help furnish a home for those they are serving.
Salvation Army – Schedule a pickup online for free of almost anything that is a household item.
St. Vincent De Paul – this is an option with drive up donations all over the metro area. The proceeds from shoppers go directly back into the community.
Baitimul house of goods – works with immigrants and refugees
St. Patrick Center – helps locals in need. They take household items and clothing!
Shelter Shop – Bellville, IL – They support victims of domestic abuse. You can help stock their shop where the victims are given vouchers to shop for free. They accept household items and clothing.
City of Refuge– Columbia, MO – This supports refugees in getting what they need to start a life here. They accept both household items and clothing.
Goodwill – This is an obvious option but I feel it is only right if I add that.
Helping Hand me Downs – They serve families in the St. Louis area experiencing unemployment or unsafe housing situations. They take just about anything in terms of household goods and clothing!
Clothing Pick up STL – this free pickup service supports several area non profits. You simply schedule and pick up and leave it on your porch in a box.
Second Hand Heros – Crystal City, MO – this is donation location where those struggling at the moment can come and shop free of charge no questions asked.
Salvation Army – Schedule a pickup online for free of almost anything that is a household item.
St. Vincent De Paul – this is an option with drive up donations all over the metro area. The proceeds from shoppers go directly back into the community.
Baitimul house of goods – works with immigrants and refugees
St. Patrick Center – helps locals in need. They take household items and clothing!
Shelter Shop – Bellville, IL – They support victims of domestic abuse. You can help stock their shop where the victims are given vouchers to shop for free. They accept household items and clothing.
City of Refuge – Columbia, MO – This supports refugees in getting what they need to start a life here. They accept both household items and clothing.
Goodwill – This is an obvious option but I feel it is only right if I add that.
Where to Donate Baby/Child Specific Items in St. Louis
Nurses for Newborns – They take anything for infants and toddlers other than cribs! They support babies and families where the infant is born with health problems, teen moms, mothers with disabilities both physical and mental, and families generally struggling financially.
Helping Hand me Downs – They serve families in the St. Louis area experiencing unemployment or unsafe housing situations. They take just about anything in terms of household goods and clothing!
Local department of Children and Families – a great way to find needs in your local area.
Sweet Babies – This local non profit accepts donations of baby items to help mothers in the area who are in a hard spot!
St. Louis Children’s Hospital – You can drop off NEW toys to either the Mason and 40 location or downtown Children’s hospital. They use these for their patients.
Misc Donation places
Leftovers – This is a really cool local way to donate items that would typically be thrown away or donated. They accept craft supplies, bottles and all sorts of items to supply schools and programs with DIY projects.
Our Little Haven – this is a great non profit to donate schools supplies, therapy supplies, fidget toys and lots of other more unique items that other places maybe are not looking for. The full list is linked.
I am sure there are SO MANY other options, and if there is somewhere that you love to donate I would love to add it, so make sure you leave it in the comments, or message me on Instagram.
If you want to find where to donate items in St. Louis later be sure to pin the photo below. I am assuming if you are reading this you might be local – so follow me on Instagram (@arinsolange) to see what my family is up to. If you have places to add to this post please feel free to leave them in the comments below.
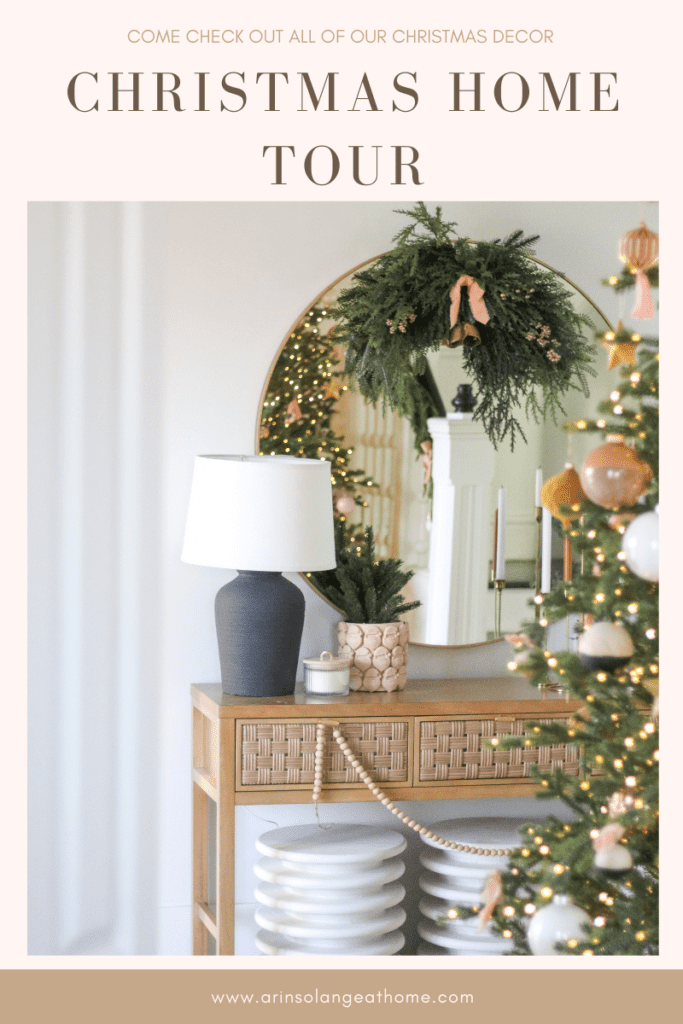
I am finally finding time this year to share some of my neutral and pink Christmas decor. Honestly…this is the first year in our new house with furniture and I thought I would go ALL OUT with Christmas decor…but Honestly, I haven’t…and I am not sure I am even mad about it. Let me share what I did do, so you can hopefully gain inspiration for next year.
This post may contain affiliate links
Neutral and Pink Christmas Decor
I have been doing a true ‘Merry and Bright’ Christmas for the past 3 years or so, and this year I finally transitioned just a bit. My decor has shifted a bit, and because of that I knew the full Merry and bright just wouldn’t look right.
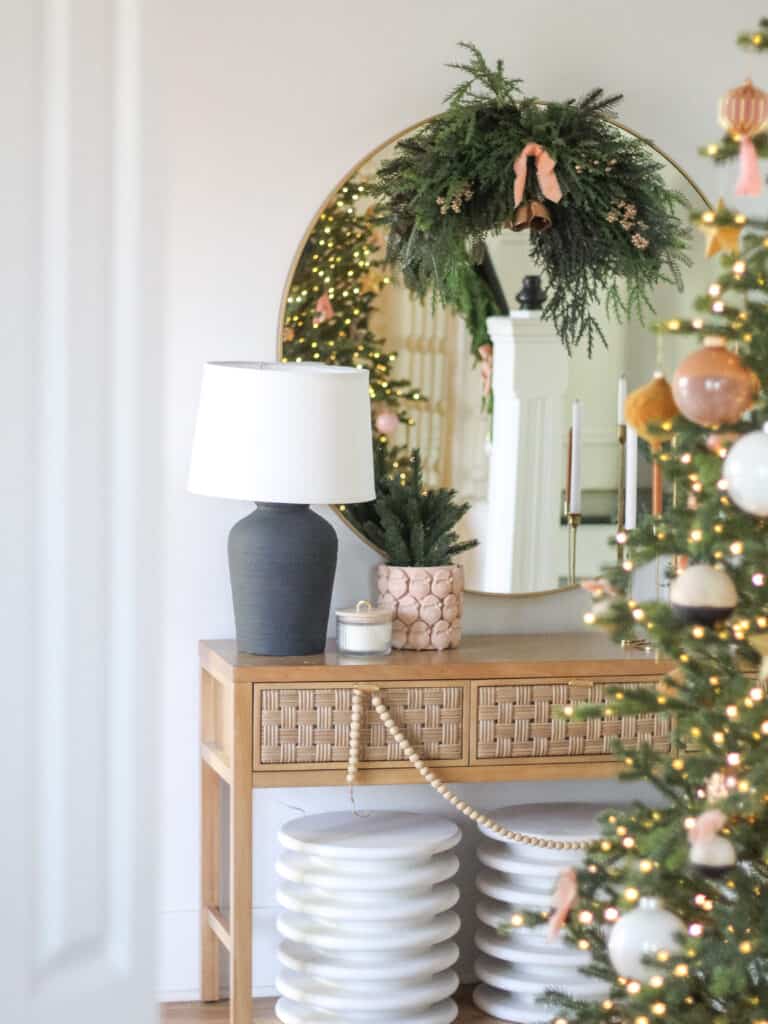
I opted to keep pink (because if you follow me, you know that I LOVE PINK, but I added in a lot of black, cognac, and natural greens this year too. This gave things a bit more of an elegant and warm feel for the holidays, while still being pink and fun.
As always, Christmas is always full of DIY for me, so this year was no different. I haven’t yet blogged all of the little DIYs (and maybe won’t), so I am throwing them all in one place for you to enjoy and hopefully gain inspiration from next year!
Minimal Decor for Christmas
This was my 2021 decor, but likely if you are reading this, you found it on Pinterest years later. I went into my Christmas decor this year thinking I would do it all. A big all out Christmas with decor everywhere. But the reality was that my heart and head weren’t in that space for the holiday.
Where I ended up was a very minimal, yet pretty Christmas feel with non traditional colors. It was exactly what I had in my mind going into the holiday as far as color and it was filled with little DIYs all over the place, which is exactly how I like to do things.
The Christmas Trees
I am a bit ‘extra’ and always end up with several Christmas trees – this year was no different. I have quite a few, but they are all sort of getting retired one by one because when we moved our house had higher ceilings. Long story short – although I didn’t do a ton in terms of my normal decor, but the trees – those still happened but in a toned down version.
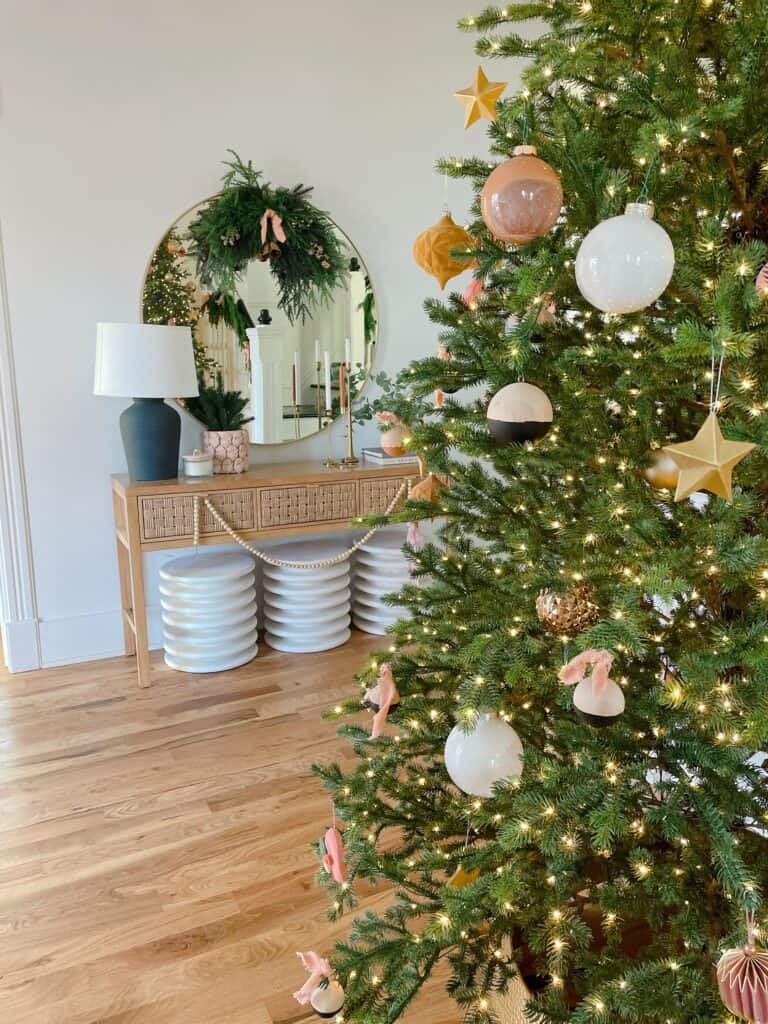
Our main Christmas tree was in our front entryway this year and was our new tree. We went with a 10 foot tree from Home Depot and LOVE.
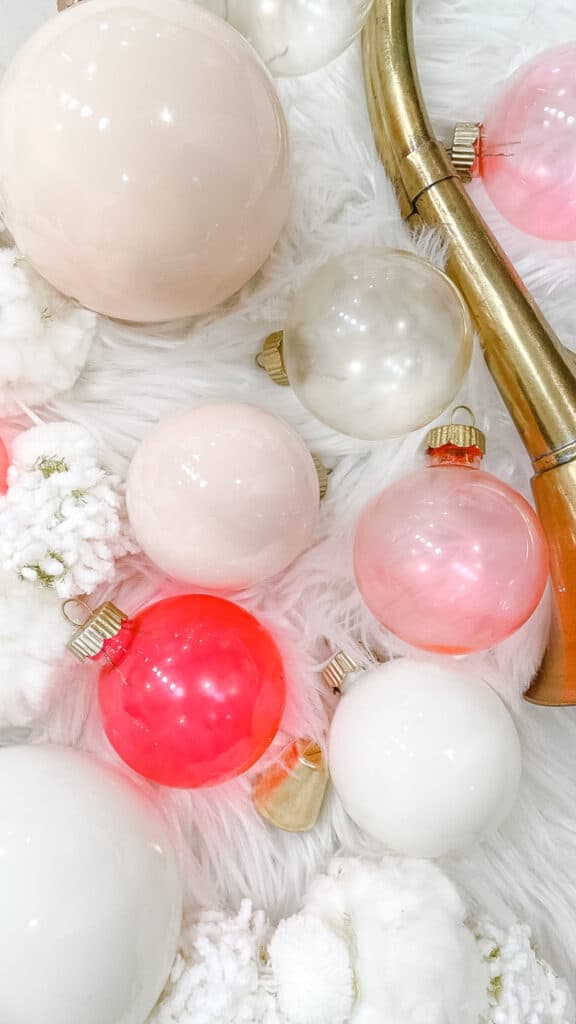
This tree had mostly black, cognac and pink ornaments with some splashes of ribbon and metallic. The overall feel was very simple and minimal but so fun. I have a blog post coming on how to make the faux stained glass ornaments which will be repeated next year FOR SURE!
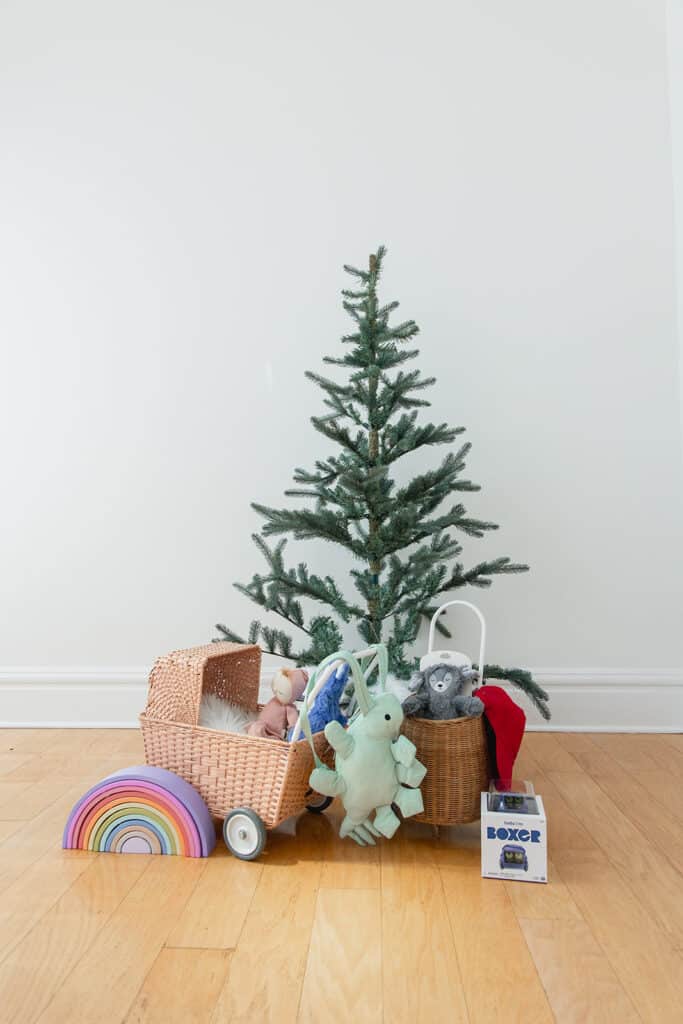
I also did our merry and bright tree in the playroom which I love doing. This is the kids tree full of animals and unicorns, and all the things that the kids like. It is such a fun tree for them and works perfect in the playroom!
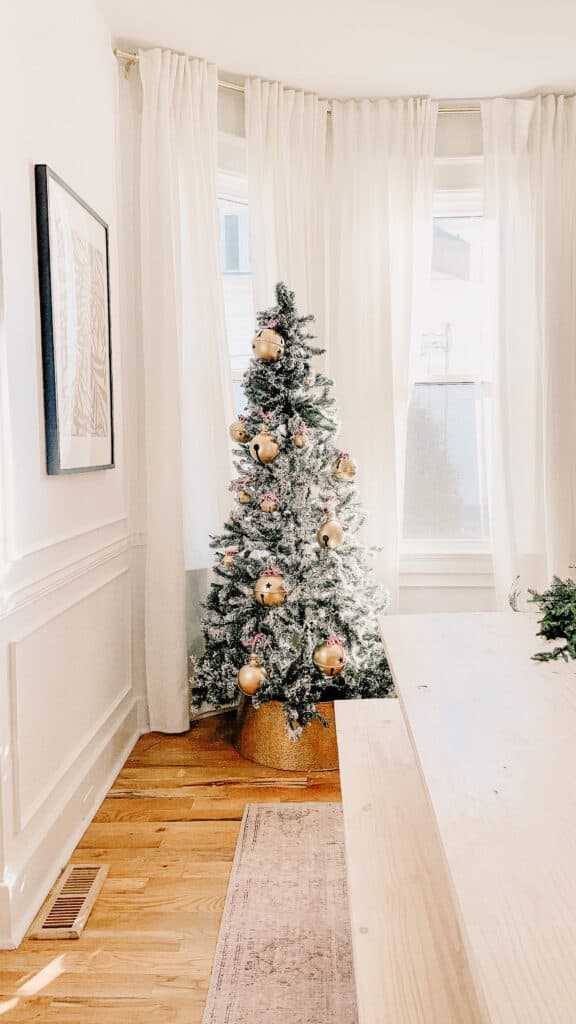
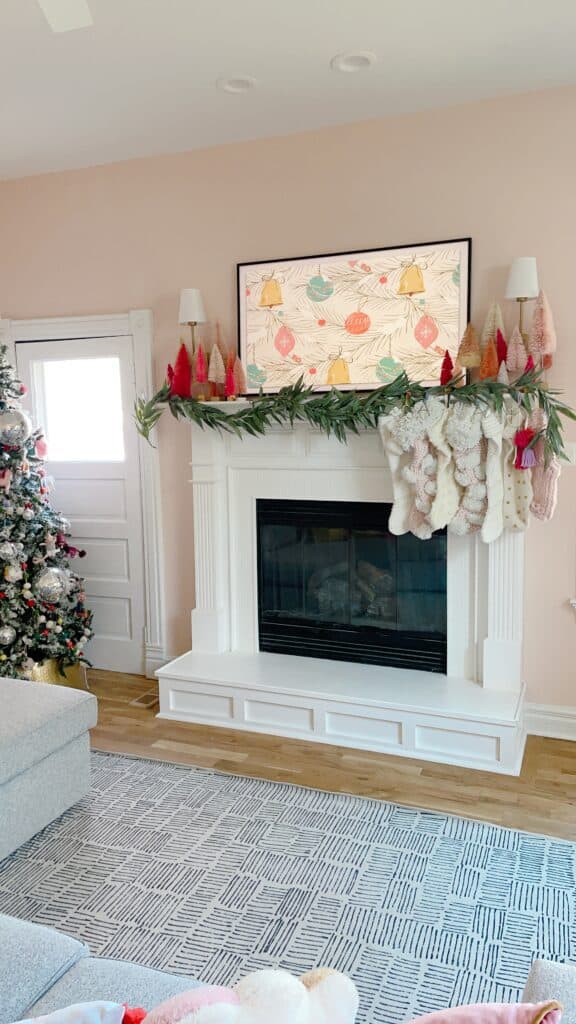
Our last tree this year was a gold bell tree. I actually saw one at Anthropologie that was epic, and recreated it to some degree by painting large bells gold and adding neon pink yarn to them to tie them. It was so subtle but pretty, and I will definitely be doing it again next year.
Other Decor
So what else did I do for decor? Like I said, It was minimal – but lets walk through it! Some of it is past DIY content, and some of it is new – I will try to get full blog posts up on the new.
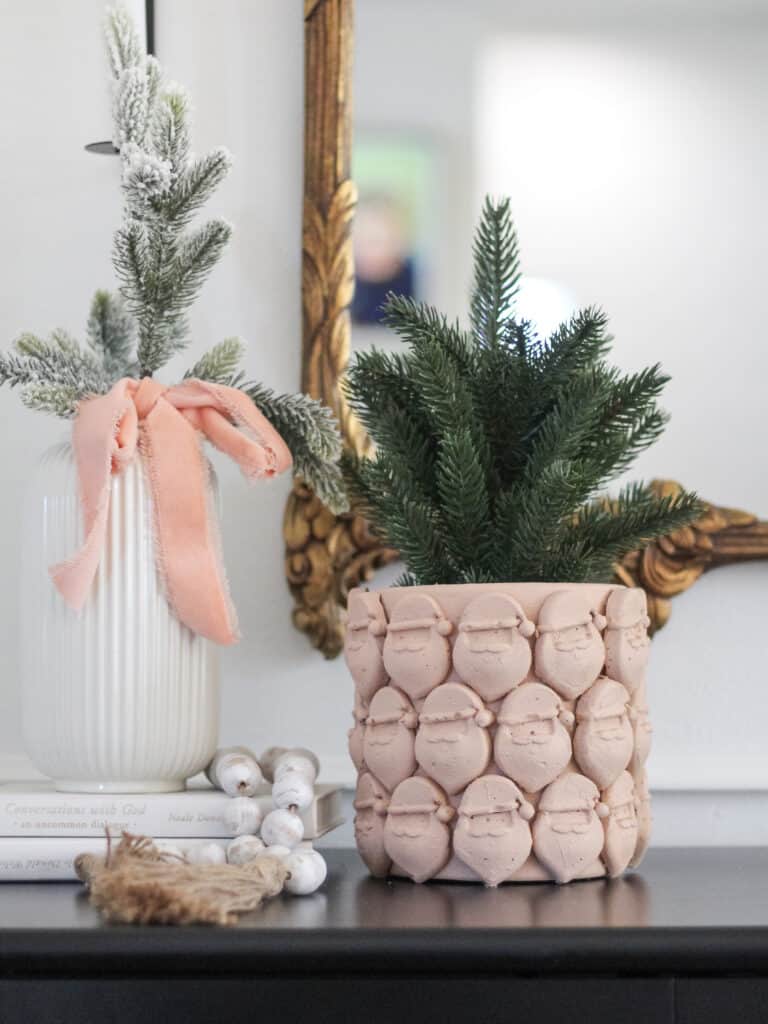
DIY Pink Santa Planter
My absolute favorite piece of decor this year was SO SIMPLE. Using the same tutorial that I used to make my skull planter I made a Santa planter. However this time I tried using hot glue instead of resin.
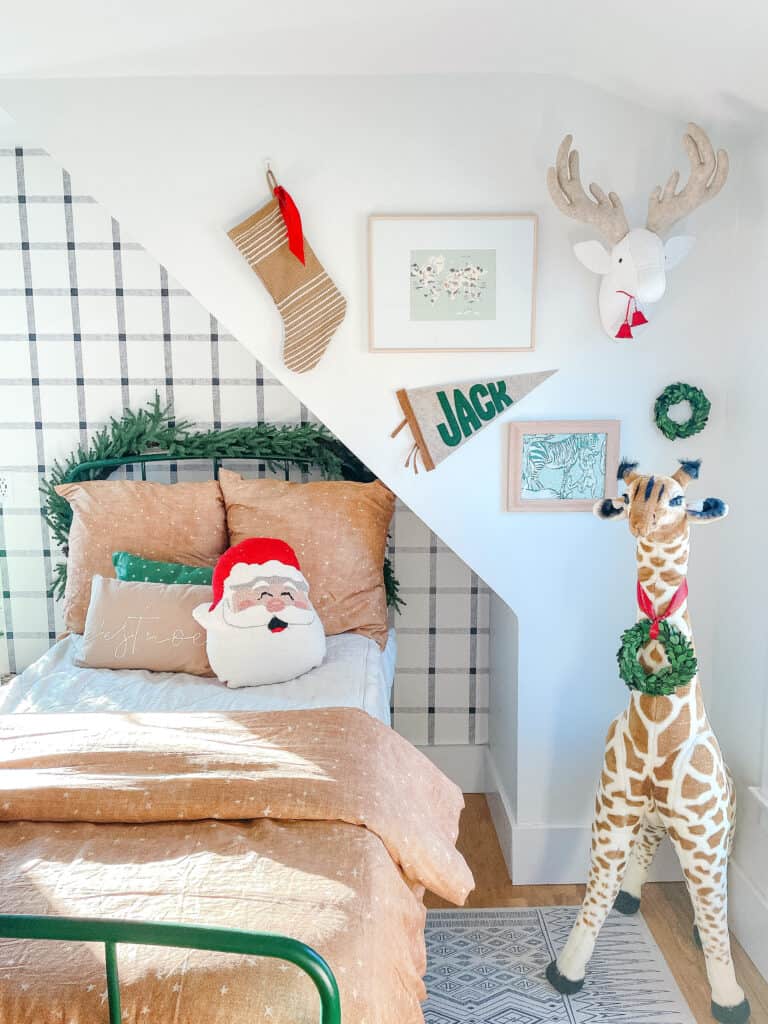
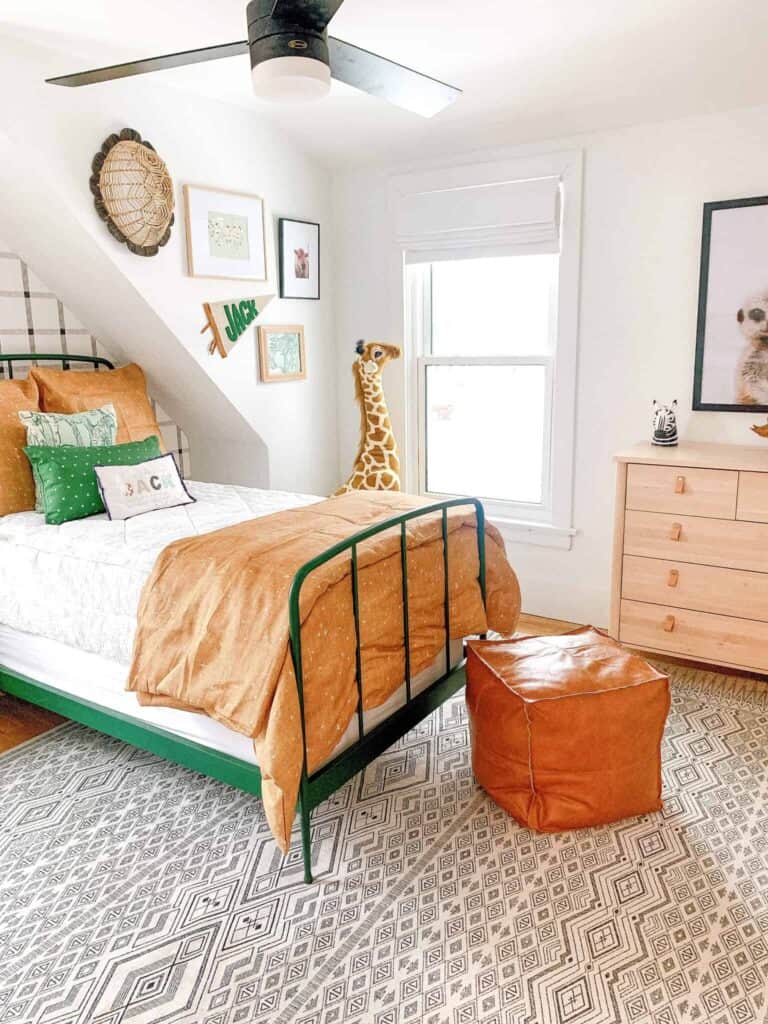
2 years ago I decorated my boys shared room and it was SO CUTE. I had all of the stuff so I wanted to do Jack’s room again this year. The end outcome was second on my list of favorites this year for Christmas decor.
For the garland I used an older one but this was our FAVORITE garland this year. The stocking was new this year and so pretty. It is thin so was perfect for hanging on a wall like this. The blanket was from Home Goods years ago so I of course can’t link it.
I framed a piece of wrapping paper over his dresser as opposed to printing the free printable from the shared room – but both were cute ideas and super inexpensive. Here is the link for the red Santa pillow that is a favorite. For the rest of the decor it was just adding simple pops of green and red!
Pink and Fun Playroom
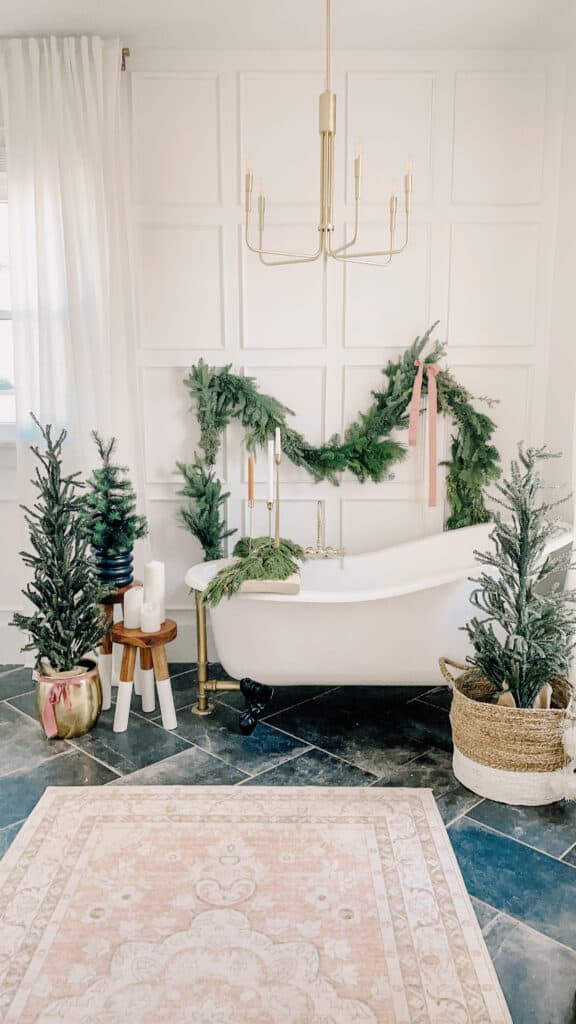
For our playroom we went with a more traditional merry and bright look. All of our stockings were hung in here, and I added all of my pink bottle brush trees. It was so simple but oh so cute.
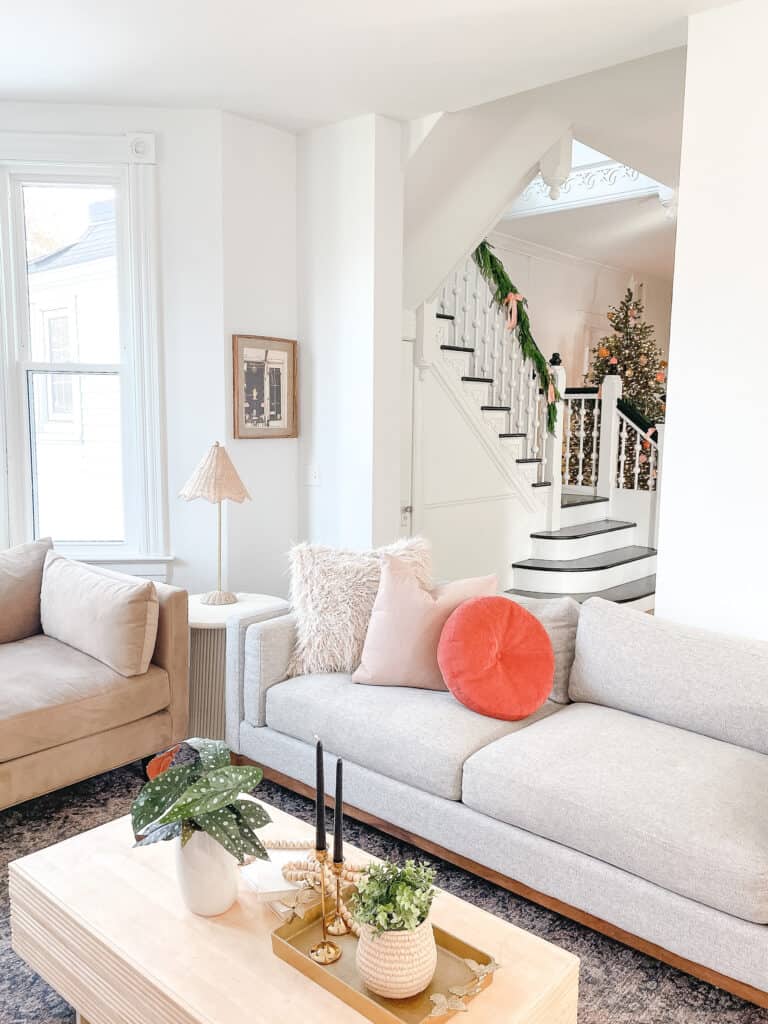
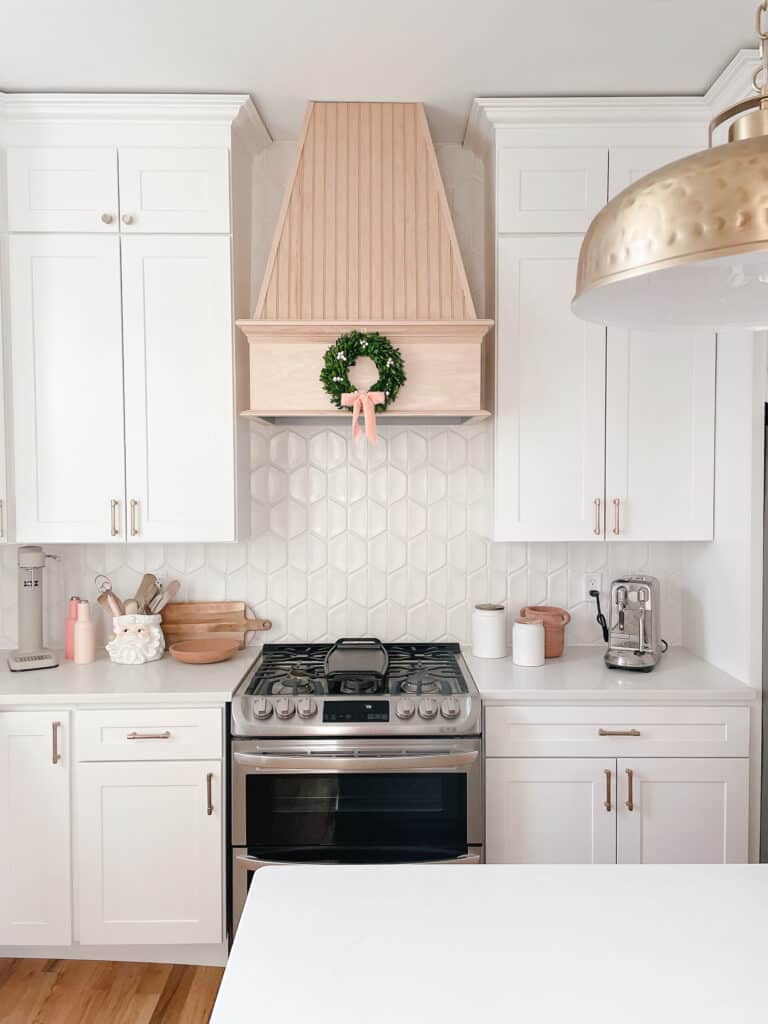
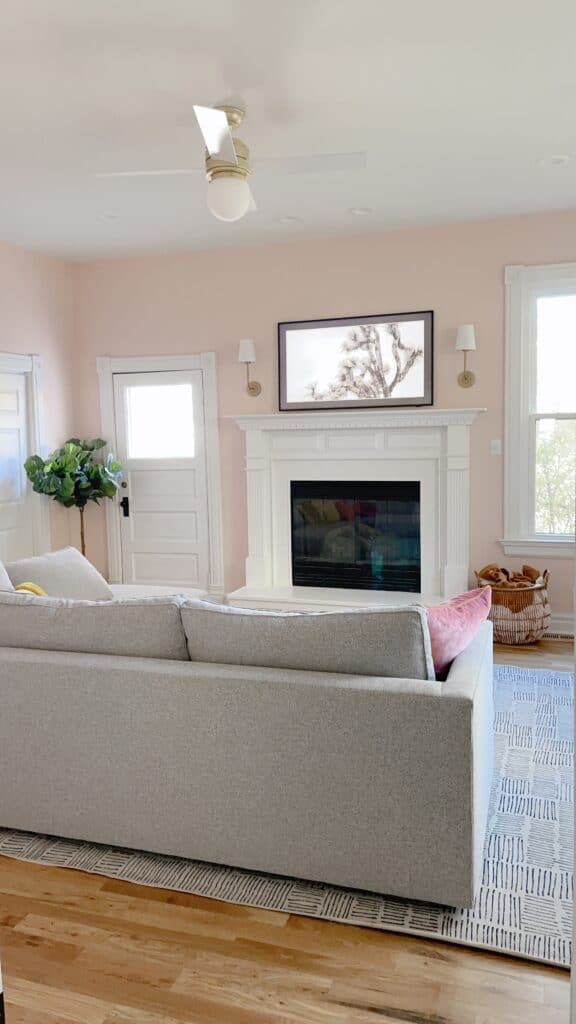
Our living room got very little in terms of Christmas decor this year – we have been working on the fireplace and built ins, so it was not a high priority. I did love that the view to the entryway still made it feel like Christmas.
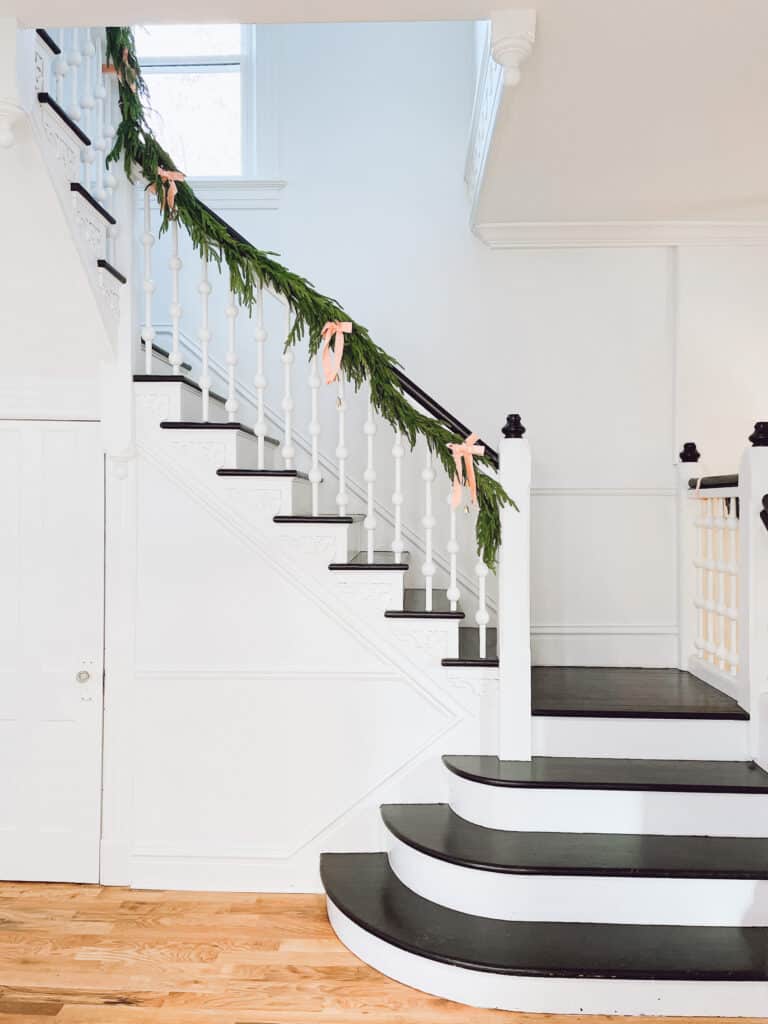
For our staircase we went with simple garland – I LOVE this faux garland, but it sold out really fast. So if you are seeing this early I highly recommend getting it early. I added a pink ribbon and small gold bells to the bows for a bit of interest. This was so simple and pretty.
And that is it! I hope that this simple decor inspires your holiday decor! If you have questions on sources or rooms please feel free leave comments.
Hopefully you enjoyed this post. Like I said above – if you need help with sources, be sure to leave me a comment below. And be sure to follow me on Instagram (@arinsolange) for more holiday decor and Inspiration year after year.
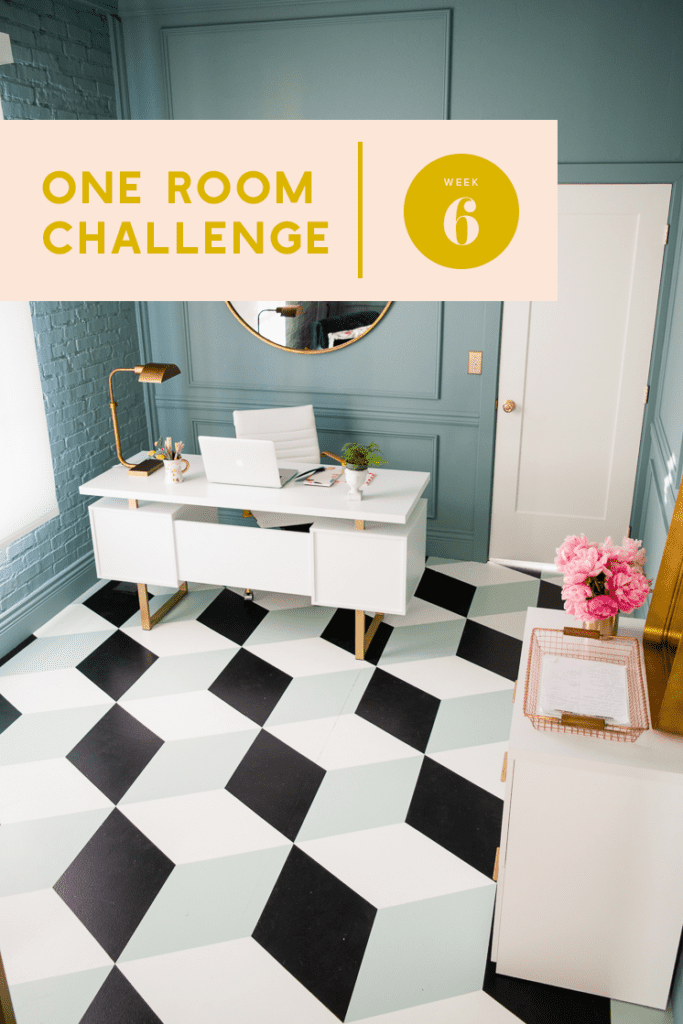
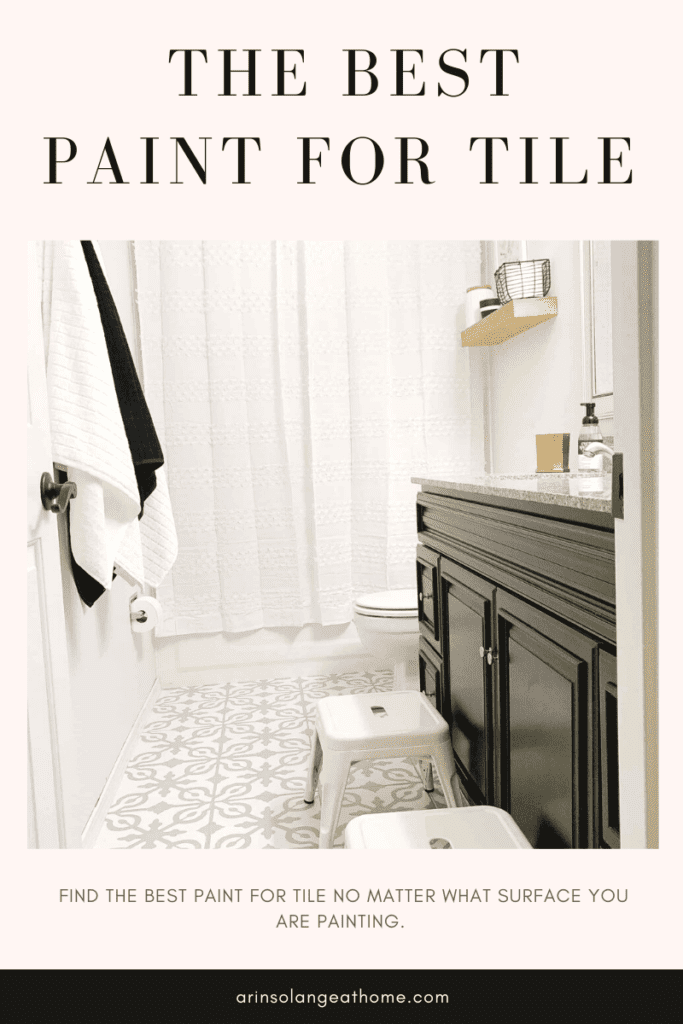
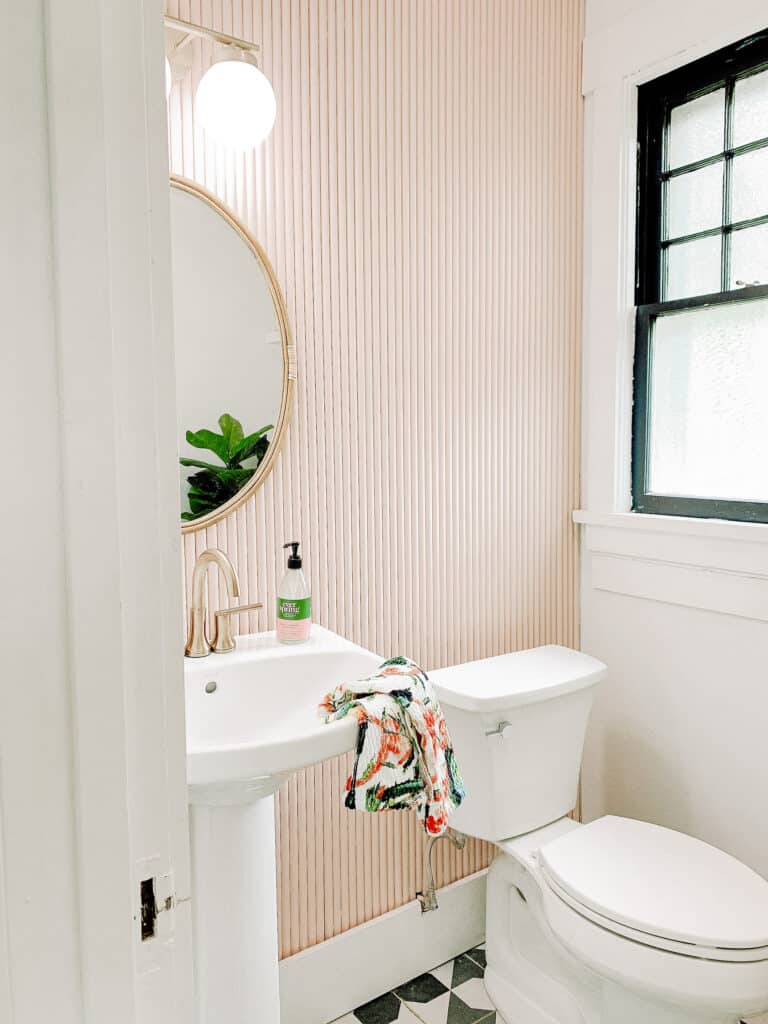
Every new year, I get the itch to do some major declutter and DIY. We will definitely have more on a declutter challenge soon, but in the meantime, let’s talk DIY. I am all about immediate gratification (for better and for worse) and a couple years ago that set me on a path to paint our tile floors in a bathroom. I am asked all the time about the best paint for tile, so I wanted to share what I found.
This post may contain affiliate links
The Best Paint for Tile
What do you think about when I say the word floor tiles? For some, you may love tile and others may have an entirely different relationship all together. I definitely love tile floors in high-traffic areas (like mudrooms) and water-prone areas like bathrooms.
Otherwise, I think tile floors can date themselves significantly when in comparison to a timeless wood floor. Bring in paint. Yes, that’s right, paint! Did you know that you can paint your outdated old tiles to bring new life and a new look to a room?
Painting tile is an affordable way to drastically change the entire look of a room without undergoing any major renovations. If you’ve ever wondered about painted tile, I’ll go over the best tile paint for your project to yield the best results.
Check out my DIY on painting your own tile floors here.
My Experience with Tile Paint
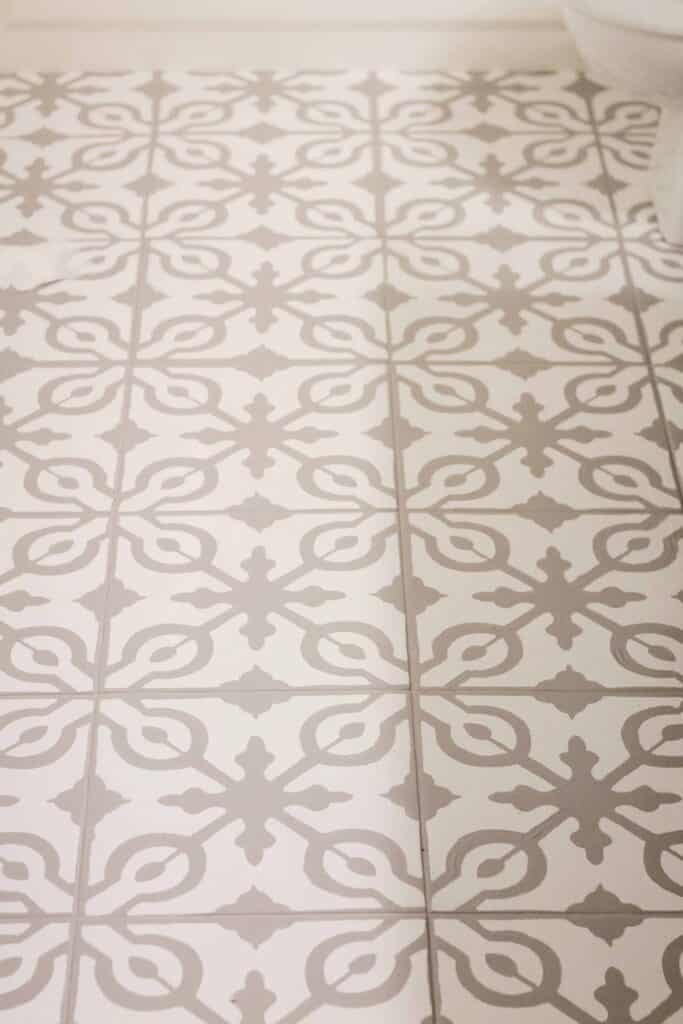
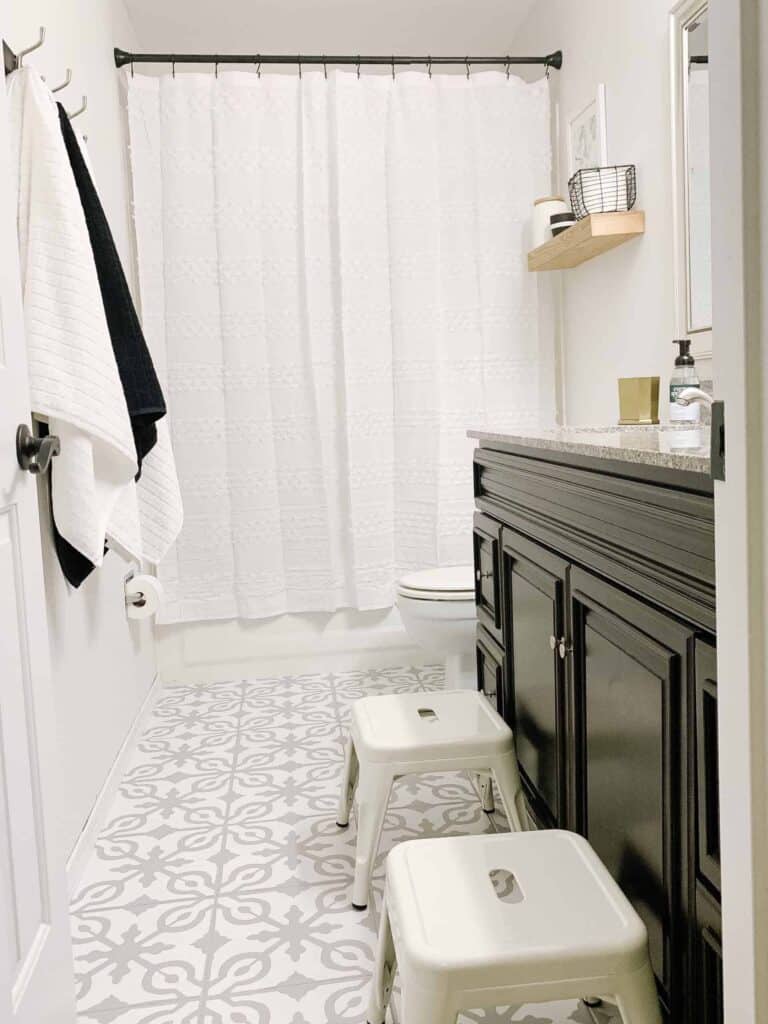
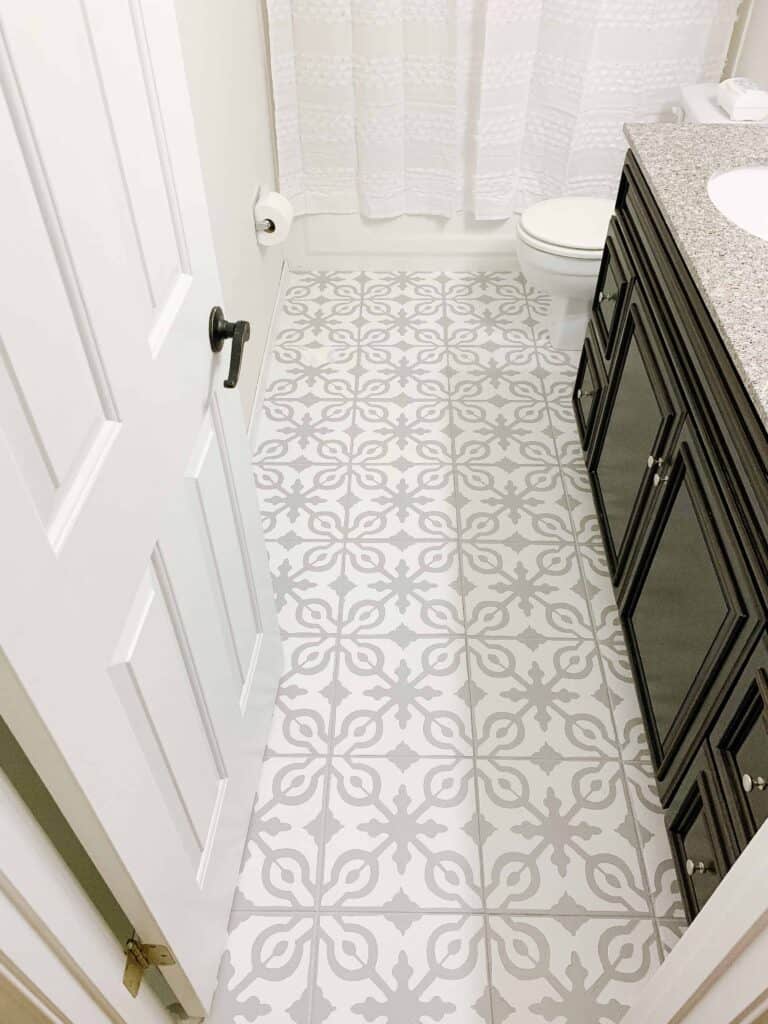
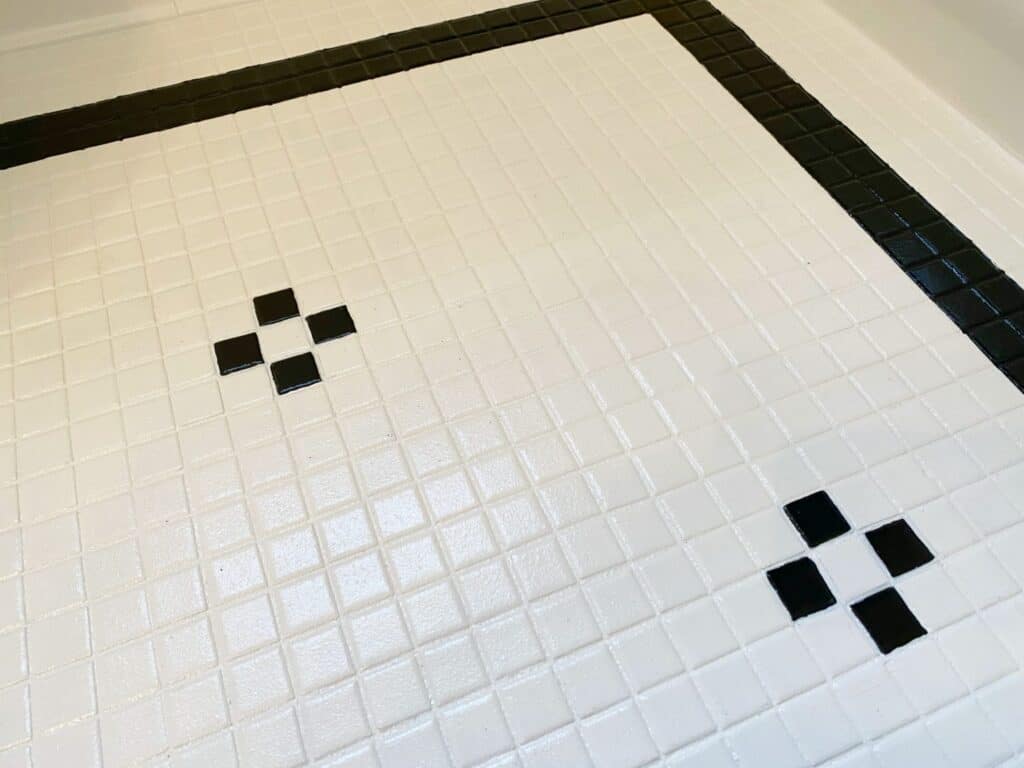
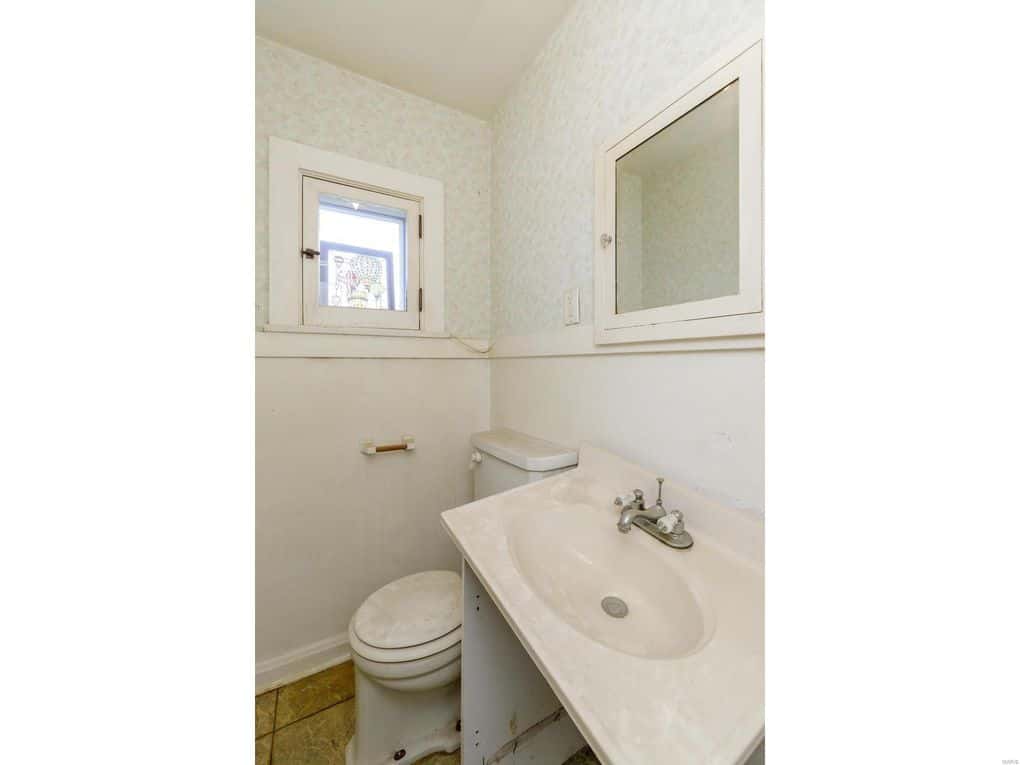
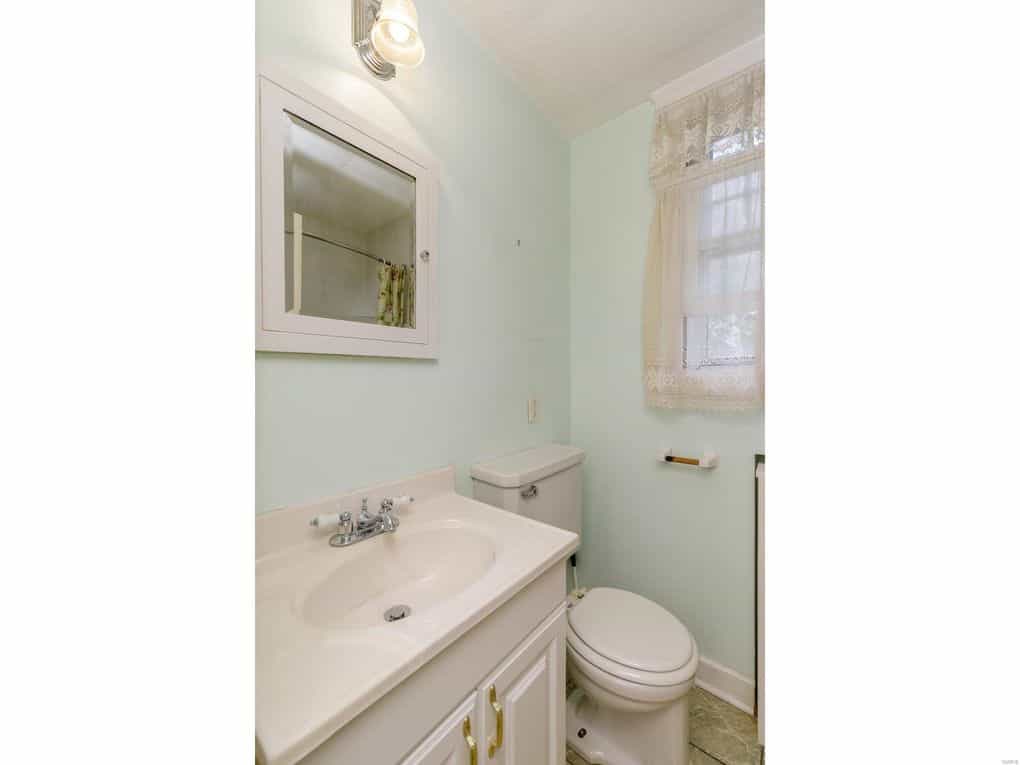
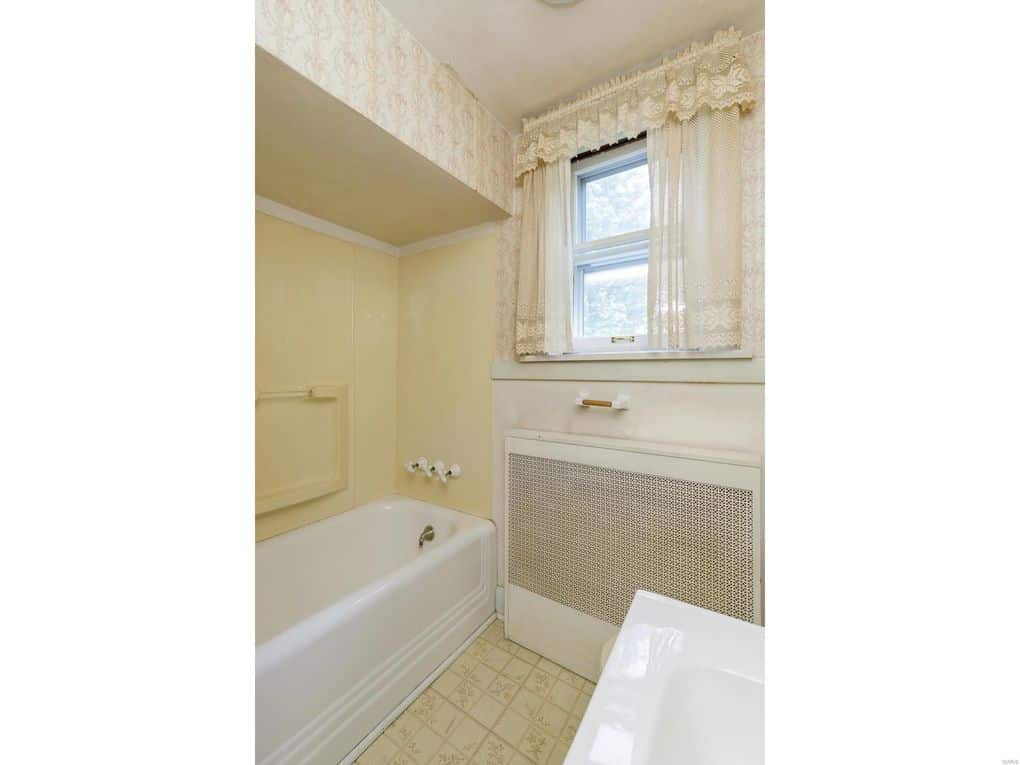
In our last house, as I made my way from room to room and DIY project to DIY project, I came to a screeching halt at my kids’ bathroom. The early 2000s ceramic tile floor was a huge eyesore and no matter how much updating I did around it, the bathroom tiles gave away it’s age. I knew I needed to figure out a way for it to match the rest of our home, but I didn’t want to spend the insane amount of money on new tile. I mean, it is my kids’ bathroom after all!
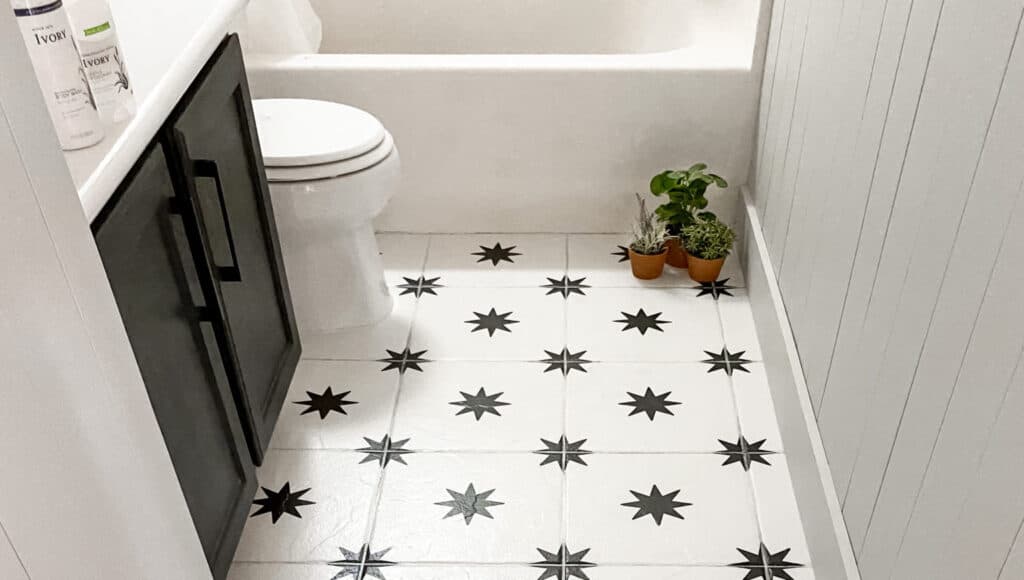
Enter tile paint. I decided to give it a try and create a stencil pattern over freshly painted tile. The bathroom floor tile had to look better than what was already there, so I took my chance and jumped into this project. To view the whole project, check out my post here. The end result was stunning and ended up costing very little, but made a huge impact.
Check out my DIY on painting your own tile floors here.
What is the Best Paint for Tile?
So what type of paint can you use to paint tile and where do I start? It all starts with your supplies, of course. Keep in mind that while my project was tile flooring, you can use these same rules and apply it to other tiles like tile backsplashes.
You may have an outdated kitchen backsplash that could use updating or an old tiled laundry room. The good news is you can apply these principles and you’ll have a dramatic change to your space in no time. The first step is to pick the right paint for your project.
No matter what type of paint you use, you may still need to have touch ups done over time. Paint can chip and is not as durable as ceramic or porcelain tile. If the tile is in a heavy wear area, you’ll definitely want to ensure you keep extra paint for touch ups. Now I don’t say any of this to scare you away from doing this project.
Rather, I want you to have a realistic expectation that paint can chip and with foot traffic, you may need to touch up the floors periodically. But what area of your home doesn’t require a bit of maintenance from time to time?
Best Paint: Paint Types
There are several types of paint you can choose to paint your tile from latex paint, acrylic paint, to epoxy paint. All are options when it comes to your project. While we used chalk latex paint to paint our floor, if I could go back, I’d choose a different option. It did work well in our project, but paint designed specifically for tile would be the best bet.
There is no right tile paint, but there are paints specifically designated as tile paint. Epoxy paint is a tile paint that is resistant to abrasions and the use of detergents allowing the tile to be easily cleaned and durable. This may be your best option for high-moisture areas like your shower area or bathroom wall.
Keep in mind that tiles near water will require a waterproof barrier as well. Epoxy paint can come in two forms. One-part epoxy paint is easy to work with as it dries naturally and generally only requires a base coat. Two-part epoxy paint is a chemical process that requires two substances to be mixed together to then be used.
Another tile painting option is two-process paint. This is just as it sounds: a two step process with a bonding agent that is applied as a first coat and then a finishing top coat is applied last. This yields better results with durability and is a good idea for areas that see higher traffic. Another paint product for tile paint includes alkyd paints that are generally seen in cabinet painting. Similarly to enamel paints, alkyd paint gives a durable long lasting finish and can also be used to paint metals.
Acrylic paint (specific to tile) is another ceramic tile paint option that is designed to be water resistant and more durable than your
standard acrylic latex paint. All of these are options when it comes to the right paint for your project.
Regardless of the type of paint you use, you’ll need to ensure you take the time to properly prepare the surface area before you begin to paint your ceramic tile surface.
The before picture of this kitchen backsplash is a must see!
Steps For A Fresh Coat of Paint
So you’ve decided to take the leap and find a paint color for your tile! Congratulations! Before you go to Home Depot and pick out your color, the first step is to spend some time making sure you understand the process and what supplies you’ll need.
In any type of paint job, you’ll want to clean your surface to make sure that it is free from dirt, grease, and debris. If you are painting tile bathroom floors or another tile floor, make sure you vacuum the space and sweep very thoroughly. You’ll want to get any dust off the surface. For wall tiles, you still may want to run a handheld vacuum over the surface or use a dry duster to get particles off and out of the way.
The next step you’ll need to do is roll up your sleeves and be prepared for some elbow grease. You are going to use a degreaser to clean the surface area that you are painting. We’ve used a product called Krud Kutter (available here) but you can also use another great product called TSP (available here).
Both products are great to have on hand if you plan on doing any other DIY projects, especially when it comes to painting. Make sure you wear proper protective equipment like gloves, eyeglasses, and respirators when dealing with chemicals and any project with harsh fumes. You’ll need to ensure you rinse the surface area with lots of water and get as much grime up as you can. Once the surface area has been cleaned, allow enough dry time before starting your next step.
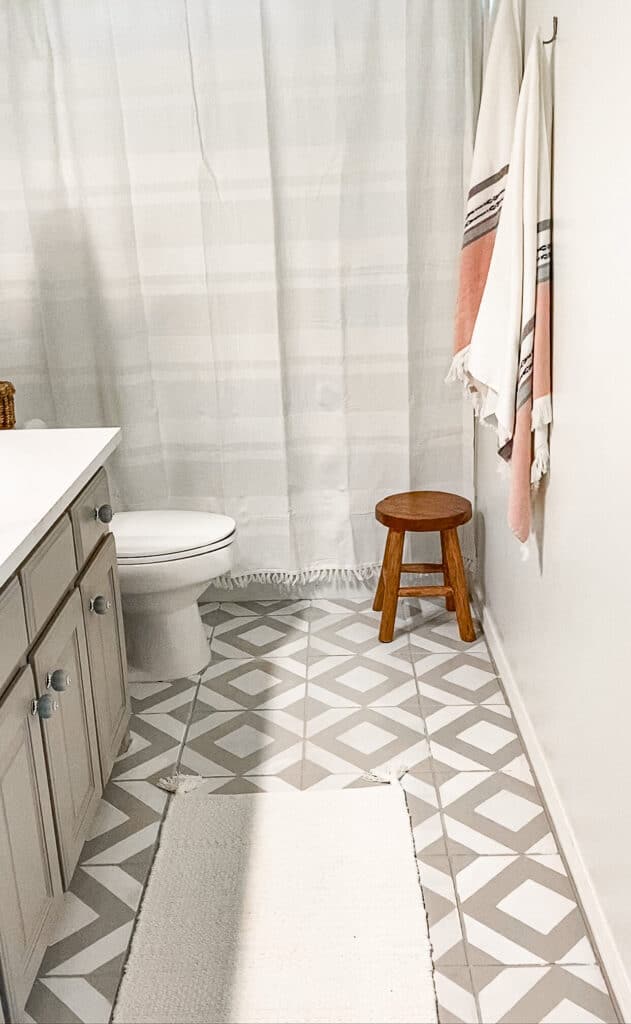
This is another amazing transformation on their bathroom tile walls and floor!
Step 2: Repair Any Defects
Whether you are painting walls, cabinets, or tile, you’ll need to repair any visible defects in the surface area before applying your paint. Don’t push it off any longer, this is the time to do it! For tile, look for any cracks or chips in the tiles themselves and along the grout lines and grout joints. You can use caulk to repair small tile cracks and grout can be repaired with, well grout.
Step 3: Cover Your Assets
This may be a play on words and if you are offended, then it is most definitely not a play on words. Basically, you need to tape off the areas that you don’t want your paint to go- so cabinets, toilets, appliances, etc. If you don’t want tile paint to be splattered on it, then I highly suggest taking the time to use painter’s tape and plastic sheeting to protect your assets. This is the best tool to prevent an unwanted mess.
I’ve seen this done both ways- sanding versus not sanding. You’ll want to lightly sand your surface area just enough to scuff them up but not enough to do any real damage. The key to sanding is that this helps the primer and paint bind to the materials.
You’ll need to clean the area again (yes, again) to rid the tiles of any sanding dust. Also be sure to check the products you use as some will say that sanding before application is not required.
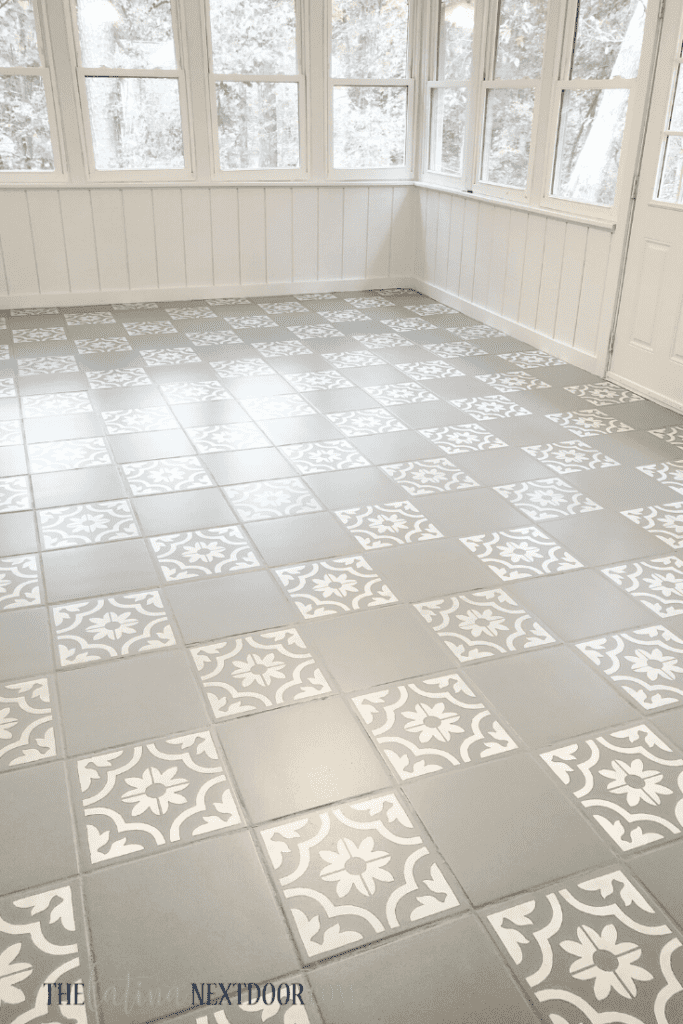
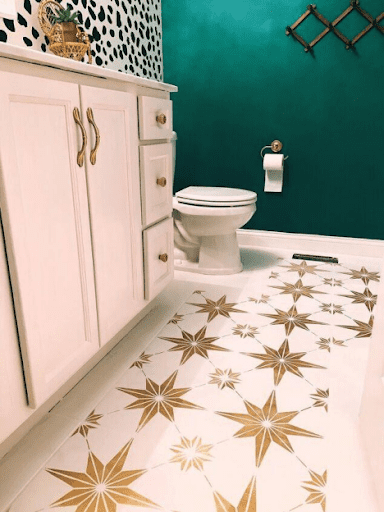
Here is another super fun bathroom tile floor makeover.
Step 5: Prime Time
This is another step that you’ll want to check the products you are using to paint your tile. You may not need a bonding primer. I do think as a general rule of thumb, having a good primer makes a huge difference in your outcome. If the product you are using doesn’t require a primer, I don’t think it would hurt at all to add a coat of primer before you begin painting.
If you do add a layer of primer, you’ll want to make sure that it is a high-adhesion primer that is formulated to bond to tiles. Once you’ve added your primer, make sure you allow plenty of time for the primer to dry before starting your base coat. This may take up a lot of time, but the end result will be worth it.
Now you can finally begin to paint! The best way to begin is to start in small sections. You’ll want to use a paint brush to help the paint get into the grout lines, but then use a foam roller to roll over the entire area. If you use a brush to paint the whole area, you’ll get brush lines and won’t be happy with the result.
The foam rollers will allow you to have an even consistent result. Again, this base coat needs to dry completely before you do anything else. I’d let it dry for a full day! We did a second coat of paint before we began our stencil design. I’d highly recommend a second coat of paint with the foam roller for the best results. If you are using white paint and your tile is a darker color, multiple coats of paint may be necessary.
Keep in mind that while you are painting, you’ll need to keep the area as clean as possible to avoid painting and later sealing in any dirt and debris. If you are painting floor tile, my best tip is to wear clean white socks in the area.
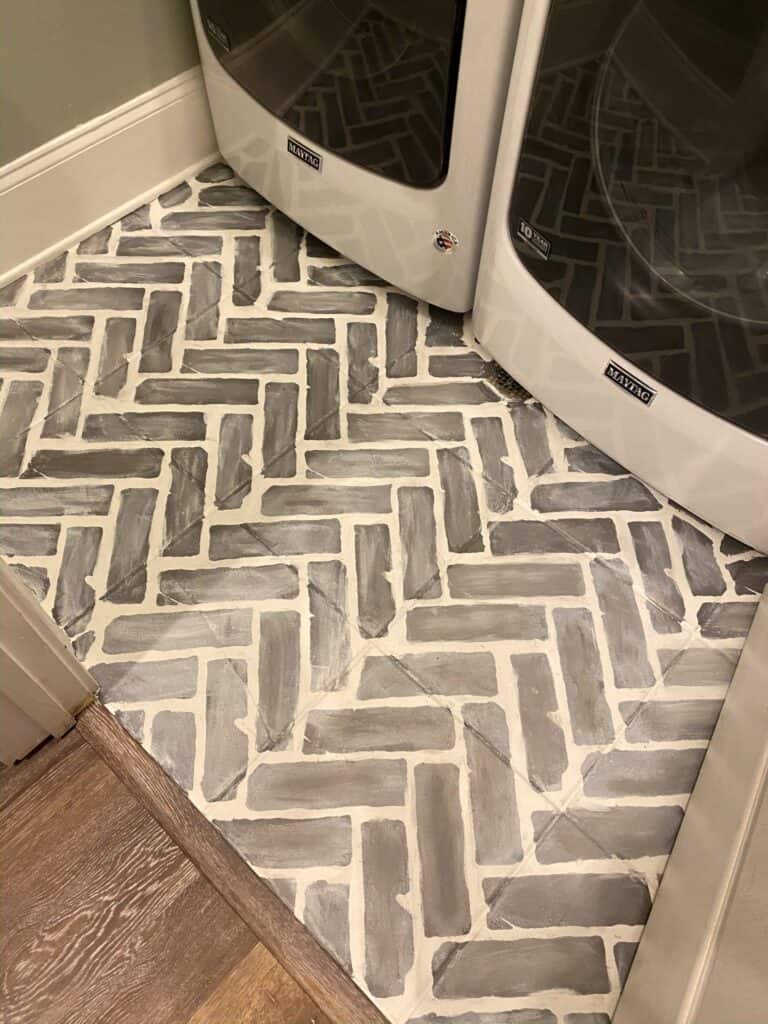
This laundry room tile floor was stenciled to look like faux brick.
Step 7: Stencil Time
If you are going to add a design to your tile, this is the time to begin. If you want to see my full blog post on how to get the stencil design down, check out my post here. Keep in mind that you’ll need lots of patience for this step. This is not something you want to rush and it may take a long time to achieve the results you want.
Going slow, using thin coats of paint, and ensuring plenty of dry time between coats is key. If you are stenciling and using a different color, you’ll also likely need to touch up the paint and design once you have completed painting. After removing the stencil, look for places that need to be touched up. If you don’t find any, then you aren’t looking hard enough!
You are so close to the finish line. Before you let anyone near your new beautiful tile, you’ll want to seal it to ensure all your hard work lasts as long as possible. You MUST make sure your floors are totally, completely, without a doubt, DRY.
I repeat, the floors must be dry! You’ll use a foam roller to apply the sealer. Some products recommend only 1 coat, but I would definitely do more if your tile is in a high traffic area. Between sealing, you can lightly (very lightly) sand the area for a smoother finish. If you do this, make sure you remove the dust particles so you don’t seal those in your tile.
One thing that I stress heavily in my tutorial for my floor is that you need to use a water based sealer – oil based will leave a yellow color!
Step 9: Enjoy Your Hard Work
Before you enjoy all that hard work, you’ll want to leave your surface area alone for a few days. Tile can take up to 20 days to fully cure once you’ve painted it, so I would recommend leaving it alone for as long as you can! Now you get to enjoy your beautiful new tile!
Beautiful painted tile backsplash in this kitchen.
Best Paint for Tile
If you are ready to take on this project and grab some paint, here are some of my favorite paints for tile.
This is a great acrylic tile paint that is perfect for high-moisture areas like bathrooms and laundry rooms. This also contains a paint and primer in one product. The best part in my opinion, is that this paint is also mildew resistant. The acrylic paint is durable and won’t fade overtime.
This is another great option if you are looking to paint showers, tubs, or bathroom porcelain tile surfaces that hold up to water (both cold and hot soapy water). As an added bonus, this also comes in an aerosol spray form as well. The doc kit can be tinted to match other paint colors, but the aerosol spray is only available in a white gloss finish.
This is another great product for showers and bathrooms. This is a two part epoxy system that allows you to paint ceramic and porcelain tiles. The one downside is that you are limited on colors as this comes as white tile paint.
It does, however, give you great results and easy to use instructions to help you achieve those results. You will have to mix the parts together and use within a 6 hour time frame, so be sure to set aside plenty of time to not get interrupted. We actually used this on our wet bar backsplash in our last house and it worked amazing!
I hope this post gave you some good ideas when it comes to painting your tile, and you feel confident in the best paint for tile. It may look like a daunting task, but you can definitely achieve an incredible look for less by utilizing tile paint! If you have any questions, feel free to leave them in the comments, and follow me on Instagram @arinsolange for more home, decor, and DIY. Happy painting friends!
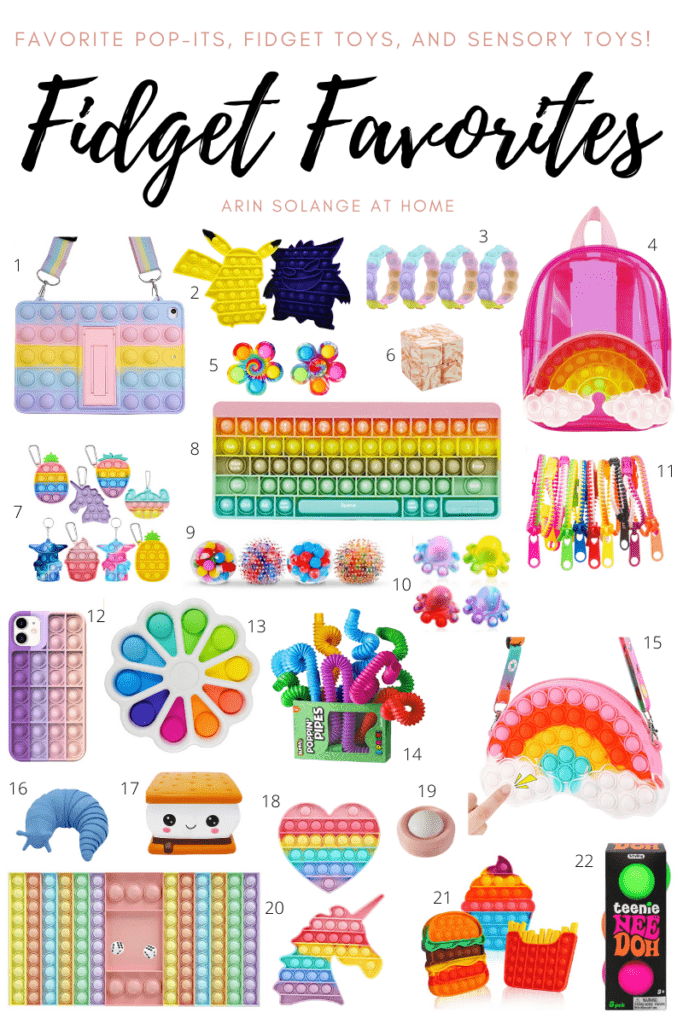
Fidget Toys are all the rage right now with kids. I have 4 little ones and every single one of them loves them, so it is a natural option for little prizes or gifts. As I was rounding up options for my kids stockings I figured I would share the wealth and give you some great options as well.
This post may contain affiliate links
Fidget Toys for Kids
So what the heck is a fidget toy? Fidget toys are essentially sensory toys that can help a person in a multitude of ways pending the toy and need. They are historically used by an occupational therapist, but have gotten increasingly popular in mainstream life in recent years.
Pending the fidget device it can help with specific skills or help in coping. Some fidget items help work as a stress reliever, others can help with fine motor skills, and many are used to help with attention deficit hyperactivity disorder.
Kinds of Fidget Toys
Lets break down the kinds of fidget tools in this post so you know what you are looking at. But also – I want to be clear this is serving in more of a ‘fun’ manner than medical advice. I knew they would make amazing stocking stuffers, or small gifts for kids this year, so rounded them up. But I also think the dual purpose they can serve (as a mom with a sensory kiddo) is wonderful!
Pop Fidget Toys
These are essentially silicone or plastic and silicone toys that work like bubble wrap. You sort of ‘pop’ the little bubble in and out. These are currently BIG for kids and come in basically every shape, and on everything. You will see them in this post on phone/ipad cases, keychains, and so much more. I think I even included bubble pop bracelet options.
These are great for general fidgeting. A good way to keep hands busy – think clicking a pen. This takes the place of other such behaviors.
Squeeze Stress Balls
Stress balls, and squishy fidget ball shapes are HUGE too. Stress balls are one of the best sensory tools for calming down and exerting energy into something positive. My oldest son jack uses a stress ball at school and it works well in a stressful situation with little attention being drawn to him.
Fidget Cube
Fidget cubes and other such toys work as another item to keep kids hands busy. These are a great way for ADD or ADHD kids to focus. They are similar in use to the puzzle balls and other similar sensory gadgets.
Hopefully that gives you some basic ideas of what you might see in this post.
Other Gift Guides
Like I said above – this post was done in a gift guide manner as I was looking for fidget toys for my kids for gifts this year. If you are shopping for kids or adults check out the link below for all of my gift guides. You will see 40+ guides broken apart by age and gender from baby to adult. So be sure to check there when you are done!
Hopefully you found fidget toys you love in this post and feel like you know exactly what your kids will love. Be sure to follow me on Instagram (@arinsolange) so you don’t miss any of my other posts, and leave any questions you have in the comments below.
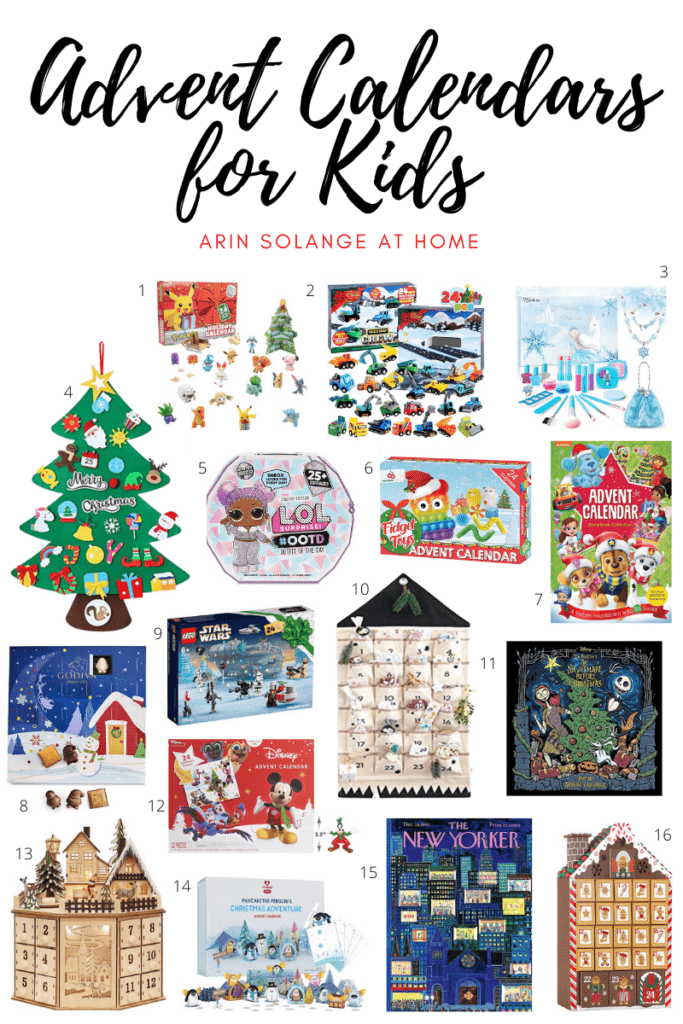
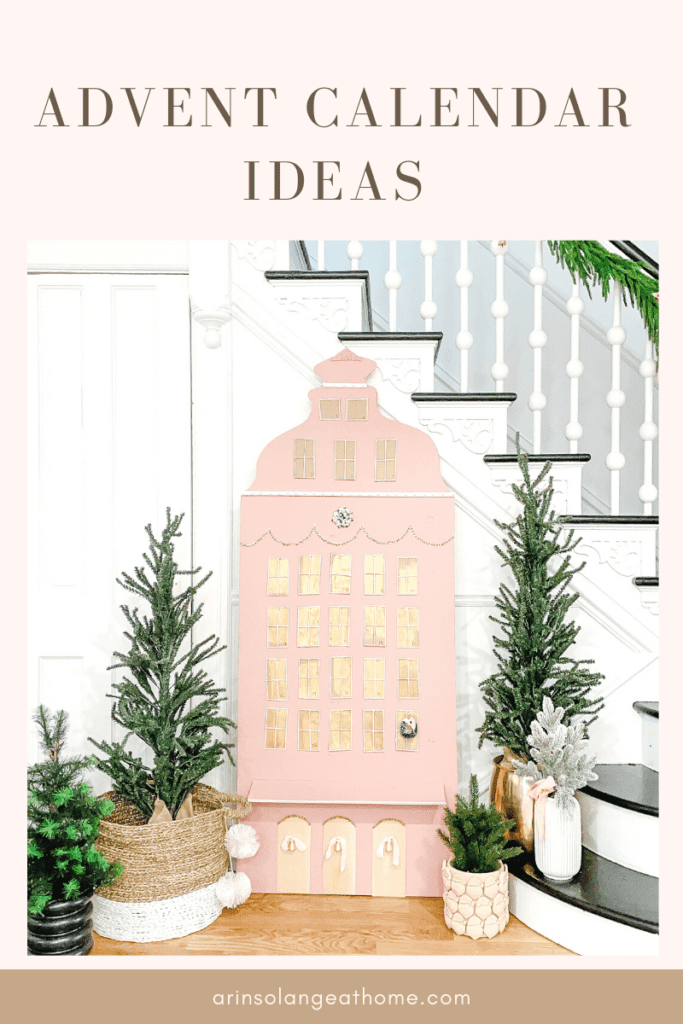
Who is looking for Advent calendar ideas for kids? The holiday season is quickly approaching and that means the countdown to Christmas is on for our family. One holiday tradition that we do every year is an Advent calendar with the kids. It is a great way to countdown the days to Christmas and remember the reason for the season. So if you are looking for some inspiration for a family Advent calendar and some fun ideas to do with the kids look no further. I’ll be sharing some of my favorite Advent calendar activities for your kids. If you’ve never had an Advent calendar, now is the perfect time to get started with a new family tradition.
This post may contain affiliate links.
Check out my DIY from last year’s Advent calendar here.
Story of Advent Calendars
It is almost December 1st, so I know I need to get my act in gear and get my newest Advent calendar DIY up and going (more on that later). For those of you who aren’t familiar with an Advent calendar, it is essentially a countdown to Christmas day.
You can have Advent calendars with a fun activity each day or small gifts, candies, or trinkets leading up to Christmas morning with the last day being Christmas Eve. It is a wonderful way to spend time together as a family and a great annual tradition in our house. It helps us celebrate the Christmas season as we prepare our Christmas tree and other Christmas traditions.
The first Advent calendar was actually created by a young man in Germany whose mother made him an Advent calendar when he was a small boy to mark the days down until Christmas. The original homemade Advent calendar was made with candles and each night, this young boy would light the candles.
His mom is the OG of DIY. When that little boy grew up and went into the printing business, he printed the first Advent calendar with 24 little pictures instead of candles. The Advent calendar idea grew from that 19 century little boy into the major phenomenon that it is today.
There’s Something for Everyone: Considerations
There is something for everyone when it comes to Christmas Advent calendar ideas. You can Google kids Advent calendar and you will get a zillion hits of different themes, family activities, and gift ideas. It is easy to get overwhelmed when you see so many choices to pick from.
A great place to start is to consider the ages of your children. If you have young children, you’ll want to consider explaining what an Advent calendar is and the story of Christmas. You may also want to consider avoiding calendars that are filled with treats or small knick knacks.
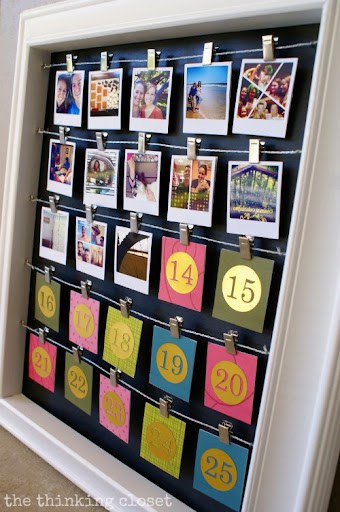
This photo Advent calendar would be great for teenagers and older kids.
For older children, consider who are some of their favorite characters or what some of their favorite activities are to help narrow down the focus. Another good idea is to consider the price of the calendar. Most calendars aren’t too pricey, unless of course you are getting yourself a wine Advent calendar.
Then those can get pretty pricey, but alas, we are talking kids Advent calendar ideas here. In some cases, you may get an Advent calendar that can be reused year after year. You’ll also want to consider the timeframe and how fast you’ll need it. The countdown to Christmas activities starts on the first day of December.
So, if you are like me, and it is November 30th, and you are scrambling to find an Advent calendar, you may consider what is available. Unfortunately, in our current world, supply chain issues are popping up all over. So if you have your heart set on a certain family calendar, you’ll need to plan ahead to order it (not one of my strong suits). Or, you could spend time together as a family and create your very own DIY advent calendar (this is definitely more in my wheelhouse).
Advent Calendar Ideas for Kids you Can Buy
So you have your heart set on a certain Advent calendar or maybe your kids are obsessed with a certain character and the whole DIY isn’t your thing. There are ton of Advent Calendars You Can Buy full of awesome ideas with lots of fun activities that you can buy for your family to help countdown to Christmas. Here are some of my personal favorites and where you can pick them up!
Pokemon Character Advent Calendars – So you don’t have older kids yet who can patiently wait to put together an entire puzzle? I know how you feel. For those of you with smaller kids or kids who lack patience (ahem, Walker), you can always pick a favorite character or theme. You can pretty much find any character in an Advent calendar and your kids will have so much fun being surprised each day by a new small toy, sticker set, or book. This one is Pokemon, which Jack got really into in 2nd grade – but there are several other in this round up!
2. Trucks– Walker would LOVE THIS. I love the idea of the small gifts being something useful, and in my 9 years of parenting I have realized you can basically never have enough small cars!
3. Makeup– Avé is very into makeup right now, and would LOVE this kids advent calendar idea. They get a little a piece of makeup each day which is so fun.
4. Felt Tree Advent Calendar – This is a GREAT option for toddlers. You can treat it like a normal Advent Calendar or even give them all of the pieces at once as a winter activity. Either way they will love it.
5. LOL Character Advent Calendar – Another great one if your child is into characters. This one is more expensive but so cute.
6. Fidget and Popit Advent Calendar – Are your kids as into fidget toys as mine are? This calendar is so fun and would be great for all ages.
8. Godiva Chocolate Advent Calendar– One of my favorite Christmas traditions is baking Christmas cookies and sipping on hot cocoa while listening to Christmas music. It just gets me in the Christmas spirit. So I know you would be totally shocked to know that this Godiva Advent calendar would go perfectly with my cookies and hot cocoa. As an added bonus, it is a fun way to try new chocolates!
9. Star Wars Advent Calendar – Jack and Walker are both very into Star Wars right now, so the combination of lego an Star Wars would blow their minds.
10. Simple Pocket Advent Calendar – This Advent Calendar is SO CUTE and simple. Fill it with whatever you want for your kid or kids. I love that the pockets are big enough for multiple kids which is clearly important in my house.
11. Books: Christmas Story Advent Calendar – Who has a family tradition of reading a certain book on Christmas Eve? We do this every year with our kids before they go to bed. We all get into our Christmas PJs, read our books, cuddle up with hot cocoa under the Christmas lights, and put out Santa’s milk and cookies before bed. Of course we can’t forget the reindeer food either! I love our tradition of reading books together and it always makes me think of Christmas. These Advent calendar books with Christmas stories are great ways to stay connected as a family all throughout December and can be read every year after. This is one of two options in this round up.
12. Disney Advent Calendar – This one has stickers and all sorts of other fun things that your little one will love.
13. Wooden Advent Calendars – Intricate wooden details and Advent calendars that look more like works of art can be a beautiful added bonus to your Christmas decor. Just because you have younger kids doesn’t mean these classic wooden calendars aren’t suitable for you too. Melissa & Doug make a beautiful wooden Advent calendar that can be used for years to come. While these may be more expensive due to the materials, you can use them year after year.
15. Puzzle Advent Calendar– Do you have an older kiddo who loves puzzles? This is a great idea for older kids who have lots of patience and practice with more intricate puzzles. Each day you get a new puzzle piece and complete the puzzle on Christmas Eve. These puzzle pieces make a fun New York themed Christmas in the city. This is a great example of an activity advent calendar that is fun for the whole family.
Another awesome option for little ones is a Coloring Book Advent Calendar – There are lots of options for an Advent activity calendar that focuses on easy activities and coloring pages for kids. I love having the option to do some fun Christmas crafts each day to get into the holiday spirit. If you prefer, you can always search for printable Advent activities to add to your collection for each day.
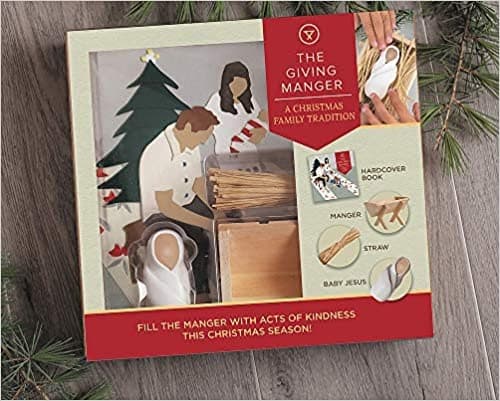
The Giving Manger
The Giving Manger is one of my favorite ideas for Christmas and really focuses on the meaning of the season. I know not everyone follows the same faith based beliefs, so I am certainly not trying to push anything on to anyone. Whatever you believe in, this is a great way to just give back and show acts of kindness. This is one that I feel is a great way to help kids understand the Christmas season for those who believe in Christianity.
The Giving Manger is not necessarily an Advent calendar, but it can be paired with a visual countdown calendar for the full effect. The idea of the Giving Manger is that every day in December (leading up to Christmas), you and your child perform good deeds. For every good deed performed, a piece of hay is placed in the manger.
On Christmas Eve, after twenty-four days of random acts of kindness and good deeds, you place Jesus in the manger. The hay is a visual representation of all the good you did leading up to Christmas. These good deeds don’t need to be anything fancy. It can be as simple as having your kids color a card for a neighbor, hold the door open for a stranger, donate items to a food bank, be kind to their sibling, etc.
I just love the idea of teaching my kids empathy, compassion, and kindness. In today’s world, we can get so overwhelmed with things. ALL THE THINGS. We are constantly talking about buying, deals, the best of the best to keep up with everyone else. This is a great reminder to slow down and to think of others this holiday season. As an added bonus, you can do this every year.
DIY Advent Calendar Ideas for Kids
I’ve gone through some great options to buy, but my guess is if you are anything like me, you just realized that it is now November 30th, and you still don’t have an Advent calendar. You want to do something fun, but also, not really interested in waiting for Amazon to arrive or you may want to keep costs lower. I have some great DIY options that can be made for your very own advent calendar.
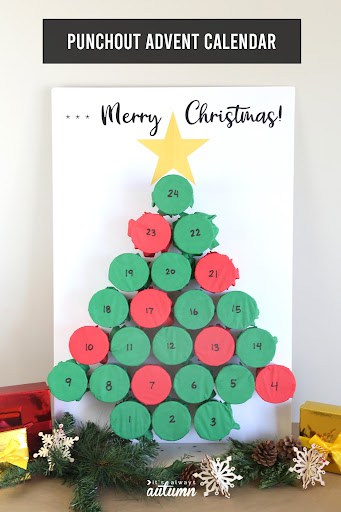
Last year, I did a DIY that was so easy and inspired by Target’s dollar section! That’s right, all of my materials came from the dollar section at Target! Plus, it took absolutely no time at all to put together. For that inspiration, check out my post here.
Get your kids involved and have them help create their Advent calendar. It can be a fun family tradition for everyone.
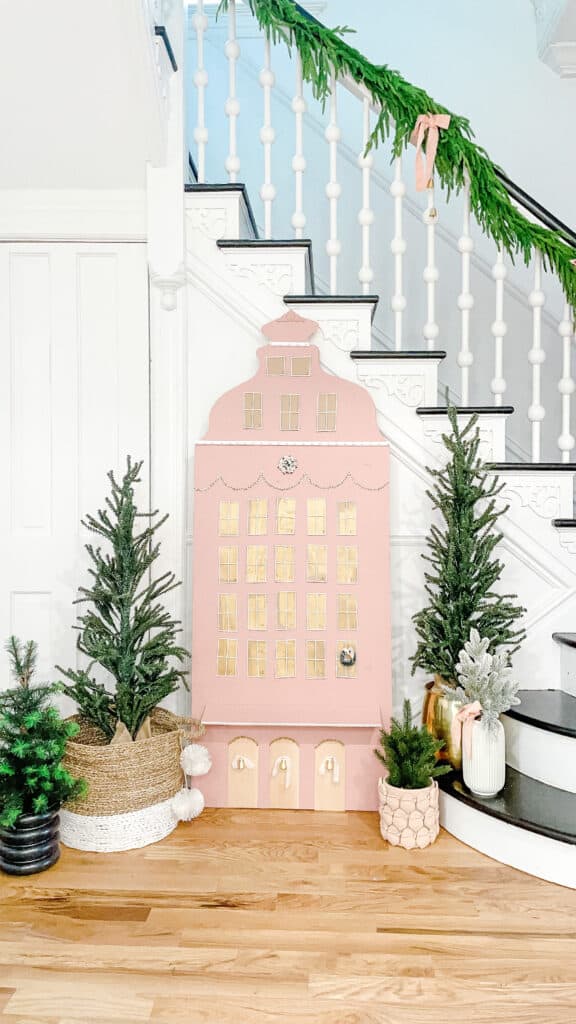
Large DIY Christmas Countdown
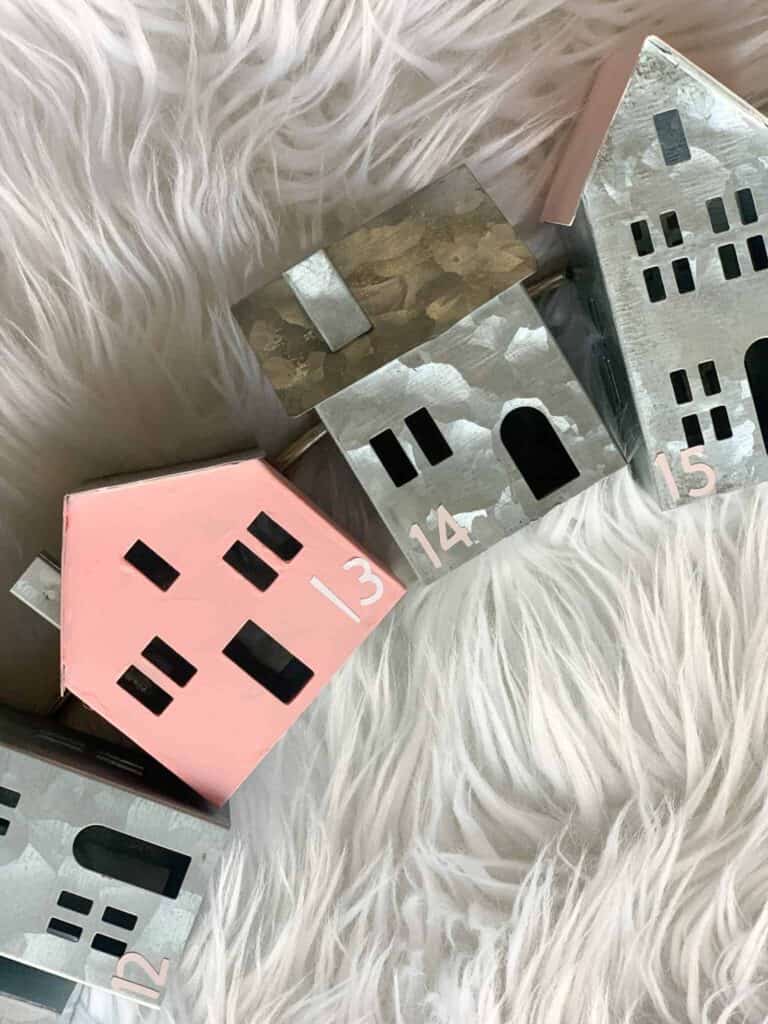
This year I went with a Christmas countdown DIY calendar using plywood and balsa wood. It was a labor of love, but turned out so cute.
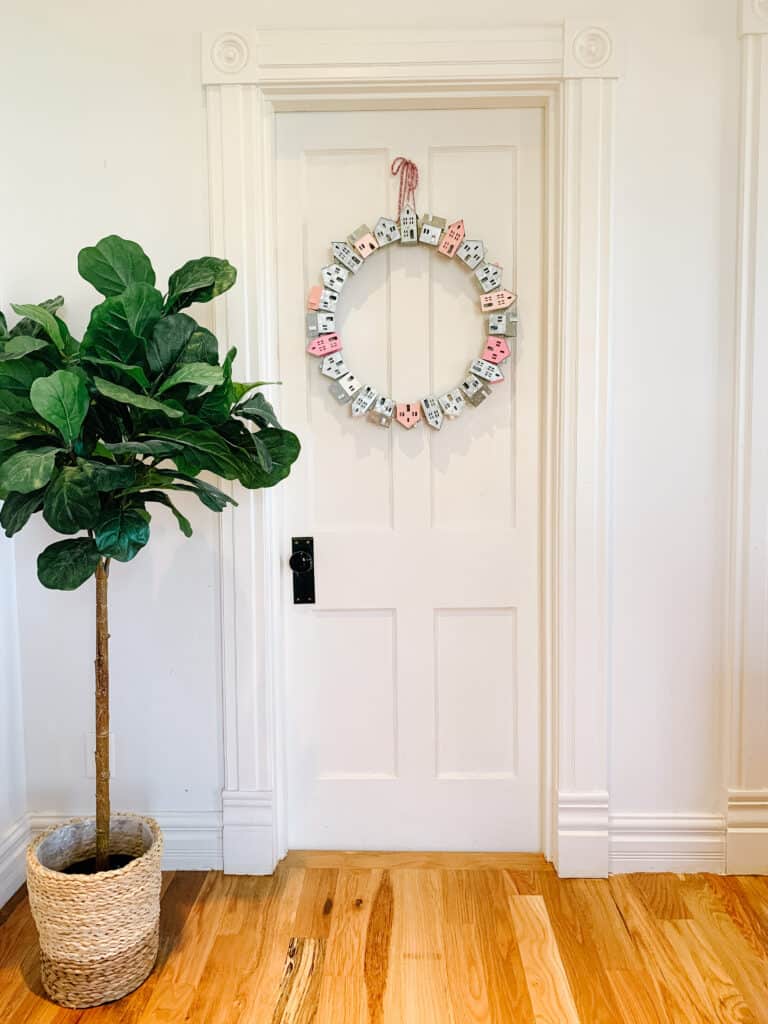
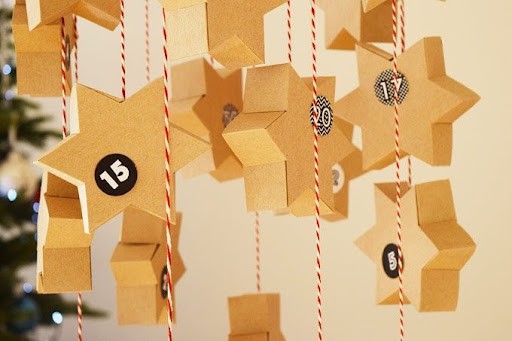
DIY Boxes
I love using shaped boxes to create a fun advent calendar. You can usually find these boxes at the dollar section of Target or the Dollar Store. These small boxes are perfect to number 1-25 and string together with ribbon or twine to hang from a mantle.
For the activity ideas, you can always print out your own Advent activities with coloring pages for younger kids. Or, you can write different fun activities on a roll of paper to put in the box. One night could be a movie night, ice cream for dinner, or pillow fight!
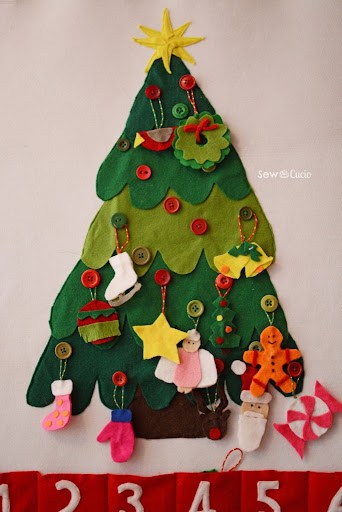
DIY Felt Advent Calendar
I know I listed a ready to buy one…but making one can be such a fun activity. You can create a fun Advent calendar for your young kids by using felt. Cut out the shape of a Christmas tree and trace other felt pieces for ornaments. From there, add velcro pieces to your felt Christmas tree for your child to stick each ornament on once they receive it each day. Below the Christmas tree can be a simple calendar from 1-25.
You can draw this or cut it out with felt and make small red pockets. Each day your child gets a new ornament to hang on the Christmas tree. This is a great activity for toddlers and as an added bonus you can use this idea for next year. If you aren’t too crafty, you can usually find pre-cut felt Christmas trees in craft stores.
Sew Cucio creates this felt Advent calendar. You don’t need to have sewing skills for this calendar, velcro works just as well!
The ornaments don’t need to be terribly detailed either. They can be as simple as using different pom poms that have velcro pieces glued on. You can even make the ornament pieces together with your kids. Have them add different beads or sparkly jewels. Craft kits can be found in most stores for ornaments too! This can be a fun and creative way to make an Advent calendar together.
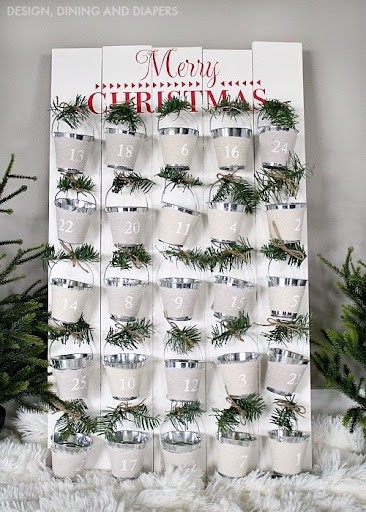
Farmhouse Inspired Advent Calendar
This farmhouse inspired Advent calendar is fairly quick to put together and doesn’t require a ton of materials. You could use a large piece of flat wood from Home Depot or your local hardware store. Paint the wood with some chalkboard paint (black or white would pop). From there, find 24 galvanized metal buckets. You can use 3M command hooks to hang each bucket.
Taryn Whiteaker uses metal buckets for a fun and easy DIY Advent calendar.
On each bucket, you can use a sharpie or craft store pen to write 1-25. If you want to get fancy you can adorn each bucket with twine or ribbons. Use chalk to write a holiday greeting above the buckets and voila, you have an easy Advent calendar. Again, you can roll pieces of paper up and place them inside the buckets for activities. Or place small toys or candies in each bucket for a surprise.
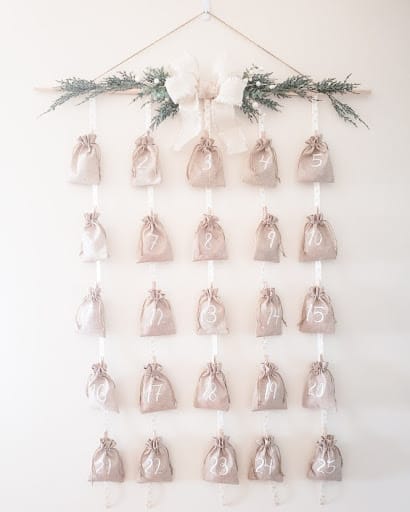
Another great farmhouse inspired Advent calendar is this beautiful burlap bag inspired calendar by Nayla Smith. She used burlap bags, ribbon, and clothespins to create this stunning Advent calendar that would complement anyone’s decor. I love the look of this and how easy it is to put together.
What kid doesn’t love opening presents? You can create an easy Advent calendar by wrapping different sized boxes, labeling each box, and placing your activity or goodie in each box for a surprise. Use your own wrapping paper with colorful contrasting colors or make an outline of a Christmas tree with shades of green.
Another easy and kid-friendly Advent calendar can be achieved by taking empty rolls of toilet paper or paper cups. Wrap each cup with tissue paper or wrapping paper. Label each cup from 1-24. Your child can punch through the paper to reach the activity. For younger children, you could place different sensory items in each cup for sensory play and to help with their fine motor skills.
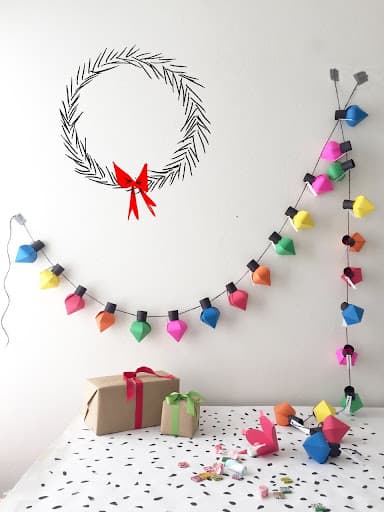
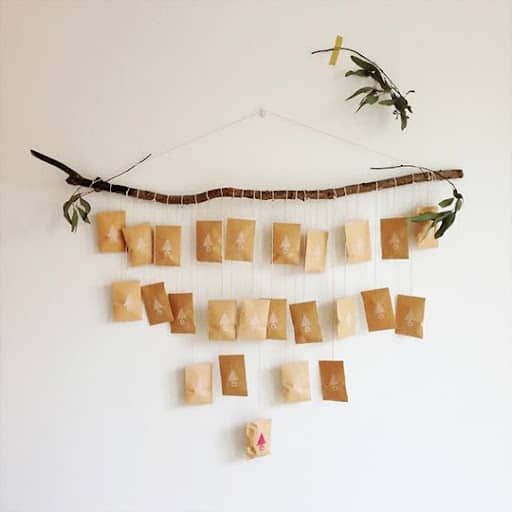
Consider creating a paper chain Advent calendar by using small brown envelopes. You can stamp each envelope and number them from 1-25. The envelopes can hang with twine and would be a beautiful decor piece. As an added bonus, this DIY can be done with items found around the house and even outside.
Slips of paper can be placed inside each envelope detailing a fun activity or try slipping in some small ($5) gift cards to different places for a fun outing in place of some activities. Kids would have so much fun trying to figure out which day had activities versus which days were filled with gift cards.
This elegant Advent calendar uses items found around the house.
Other Posts You’ll Love
Before you go – check out these other great posts you will love!
I hope you found some great kids advent calendar ideas to get you all set up with your Advent calendar this Christmas. Whether you decide to purchase your calendar or DIY, I hope you spend precious memories with your family this holiday season. If you have any questions, feel free to leave them in the comments, and follow me on Instagram @arinsolange for more home, decor, and DIY. Merry Christmas and Happy Holidays!
I can’t believe the holidays are right around the corner! The older I get the more I love personalized gifts that hold meaning or feel well thought out for those that I love (and to receive) so I couldn’t wait to share some ideas with you all. I am going to share some meaningful and personalized gifts for the family in this post and hopefully it leaves you with great ideas.
This post was sponsored by Minted. All opinions are my own, and I greatly appreciate you supporting the brands that support my blog. Post may contain affiliate links.
Personalized Gifts for the Family
I am a mom of 4 little ones – which means I have lots of shopping to do come holiday season. I mean let’s be honest… as a mom I do ALL the shopping for both sides of the family. As time has gone on I have found such a love for gifting and giving people things that bring them joy.
I think that personalized gifts can add such a sweet level to gifting that makes the recipient feel extra loved and thought of!
Meaningful and Personalized Gifts from Minted
Personalized gifts have come a long way and don’t have to be useless items, so I am excited to share my favorites from this year with Minted.
Minted has long been known for their high quality items, and getting my hands on some of their gorgeous gifts this year just solidified that everything they create is gorgeous! Each of their designs in created by one of 16,000 individual artists, and each purchase helps support one of them!
If you decide to grab anything you see in this post – be sure to use the code ARINGIFTS for 20% off your order AND free shipping.
Puzzle – They have cute options like this with photos of your loved ones, or kids ones with their names on them.
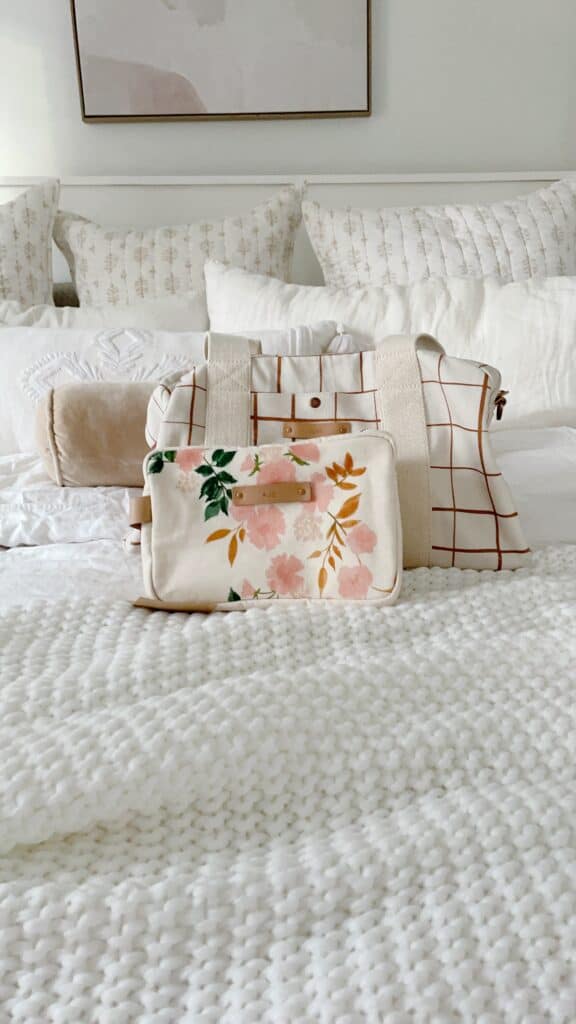
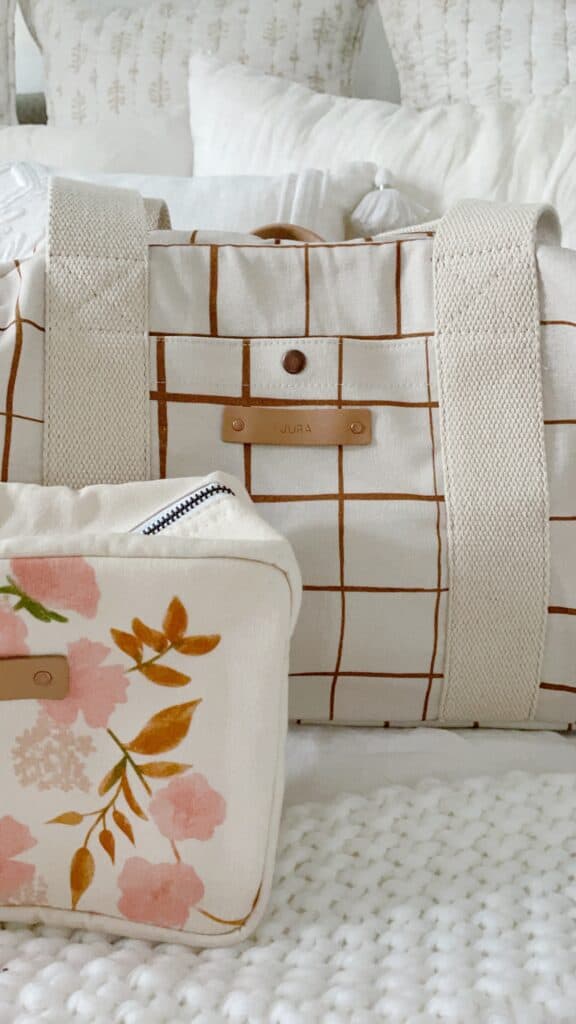
Dopp Kit – Makeup bag or little anything bag. This can be personalized on a little leather tag. I decided to add my initials to mine so that myself or my daughter (with the same initials) can use it. (seen in this Botanical Cascade)
Calendar – I think this is a great gift for nearly anyone. I love the idea of getting one for my parents this year.
Weekender – I got this this year and it is so cute and functional. The pockets and size are well thought out. I went with our last name on the personalized leather spot so that anyone in our family can use it for a weekend away. (seen in Montauk)
Small pouches – These are DARLING and have the same little leather personalization tags
Again be sure to use my code ARINGIFTS to get these great items!
Pin the Photo Below for Later
Hopefully you found meaningful and personalized gifts you are excited to gift in this round up. Be sure to follow me on Instagram (@arinsolange) for more inspiration and fun, and if you have any questions leave them in the comments below!
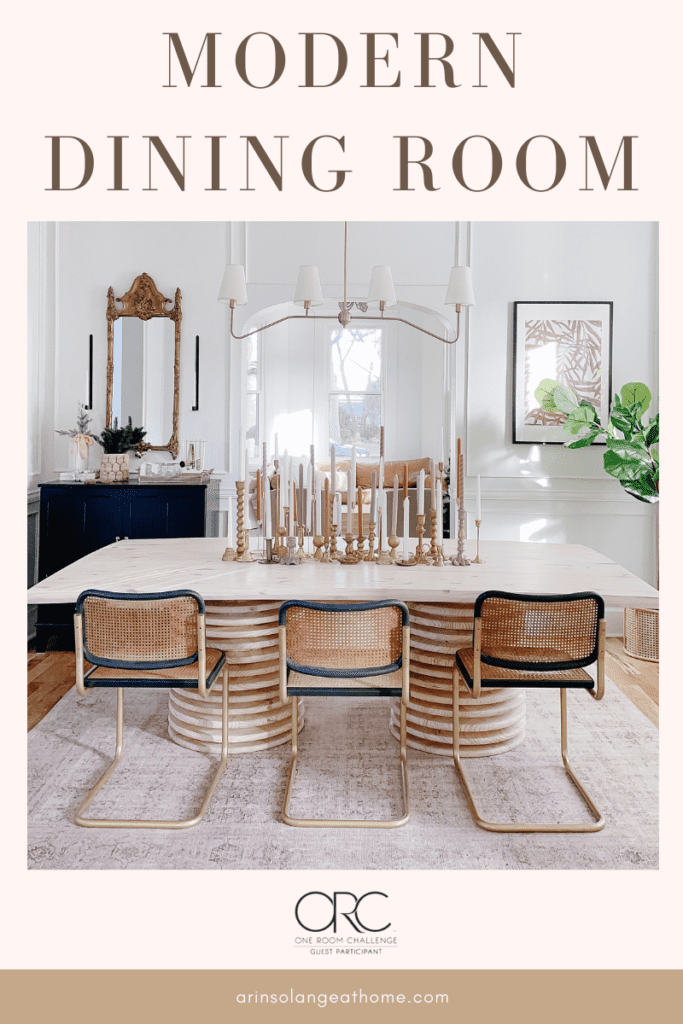
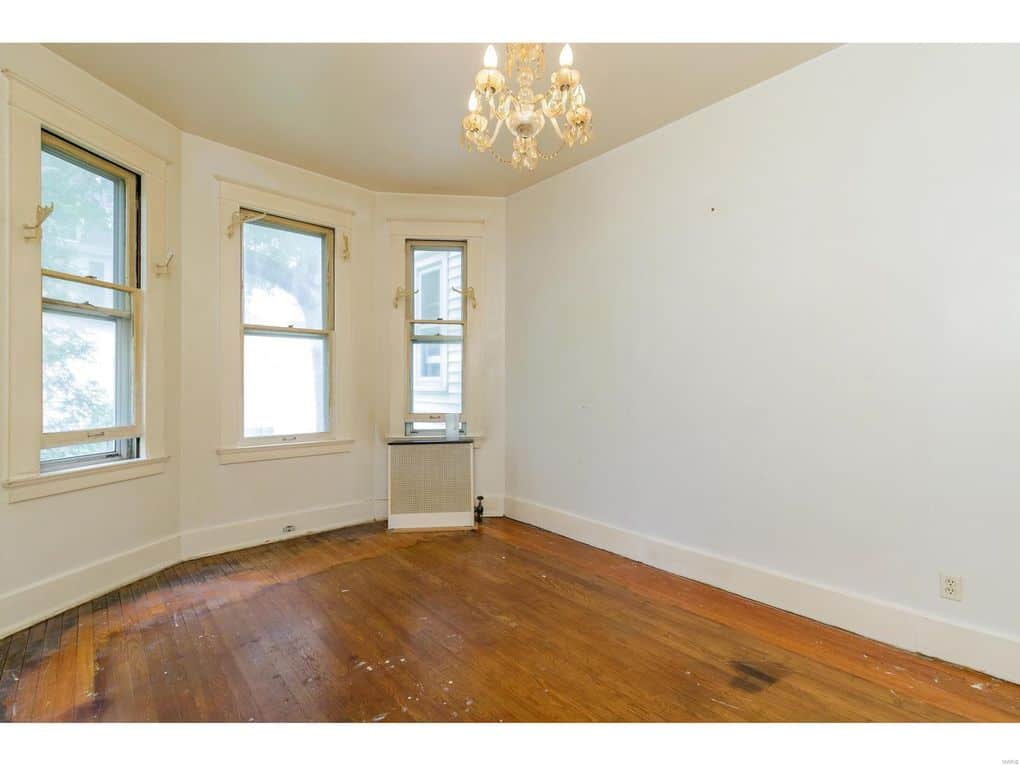
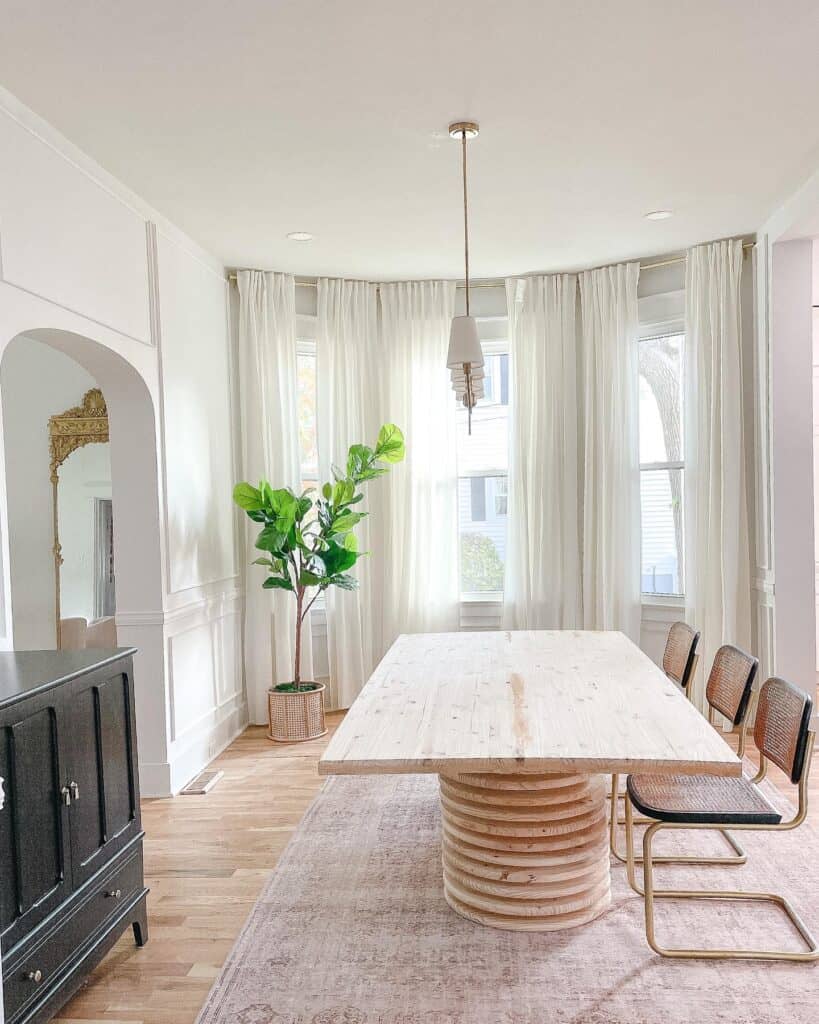
The One Room challenge is officially done and that means our dining room is done too! We took 8 weeks to completely transform our blank slate of a dining room into a modern dining room that we would love! The end results have me enjoying a room better than I imagined!
This post may contain affiliate links
Modern Dining Room
I have always leaned slightly modern in my decor. Mid Century modern, Vintage modern….basically just pops of modern. I like clean lines, and no clutter, so that modern little twist to things tends to speak to my soul.
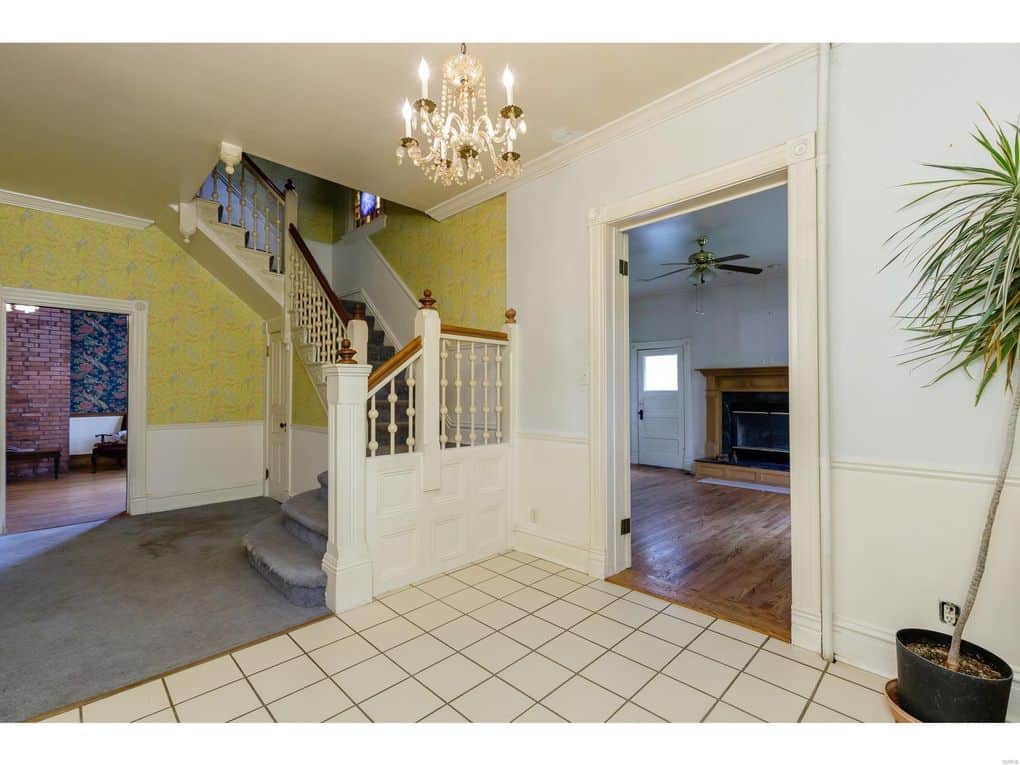
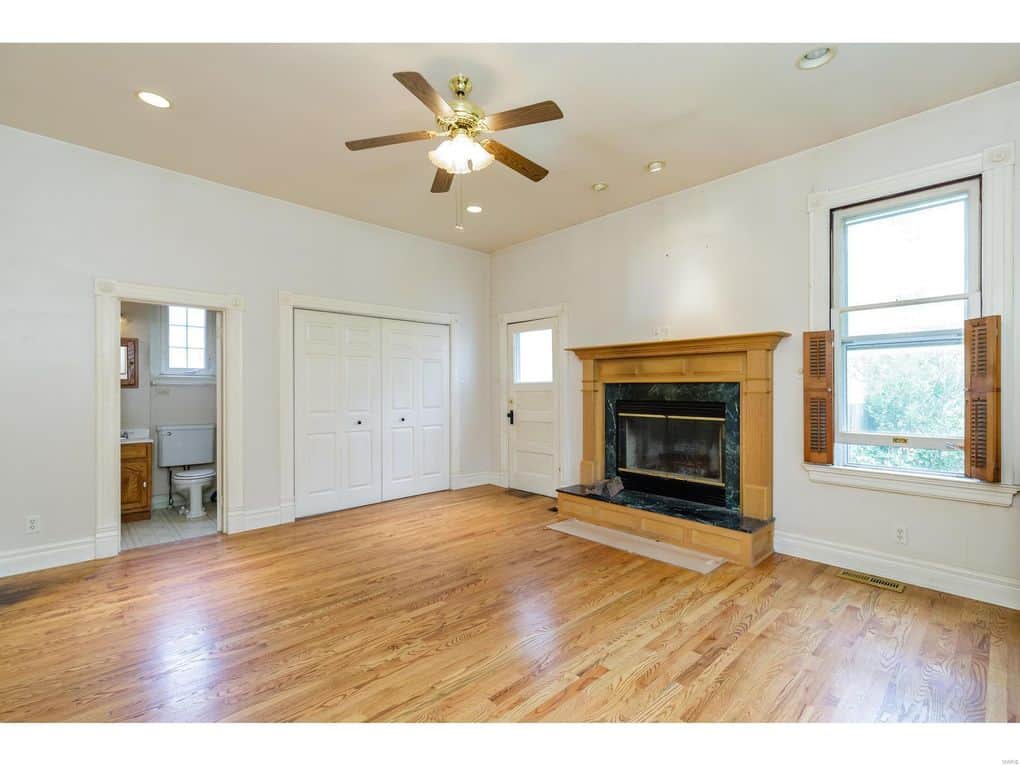
We currently are renovating an 1860’s home so that leans to more of the vintage modern look when it comes to decor. I wanted to play into the vintage feel of the home while still feeling clean and modern for what I love.
One Room Challenge
As mentioned at the start of this post – this room makeover was taken on as a part of the ‘One room Challenge’ where I set out to transform one area in my house in 8 weeks. This was the perfect push for me to push the envelope and create a room that we would love before the holidays!
It was such a fun, and challenging thing to take on a big makeover in 8 weeks, and I cant wait to join the next one to keep my butt in gear again haha!
Details to our Modern Dining Room
A modern dining room can go a million directions. In my opinion modern normally just means clean lines, and somewhat minimal. Because I love the vintage modern look right now I tied in some more vintaged elements with the clean lines that are more traditionally modern.
I will share all the details to the dining room below, and have blog posts sharing the process of most of it, so will also link to each weekly update to give you more inspiration and back story to the steps.
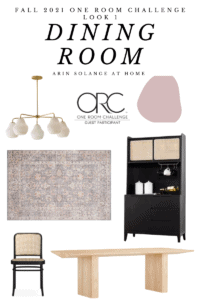
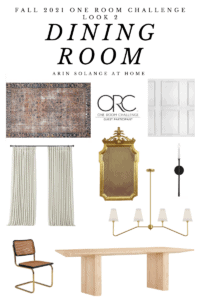
Before I get to that though, I wanted to share my two original mood boards, and then my final mood board – so you can compare those to the end results. I know not everyone is super visual, so hopefully it will help you to process things.
1 of 2 original thoughts
1 of 2 original thoughts
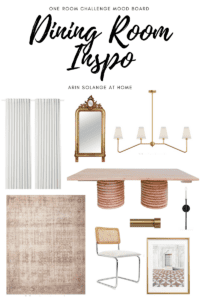
Final Mood Board
Modern Dining Room Walls
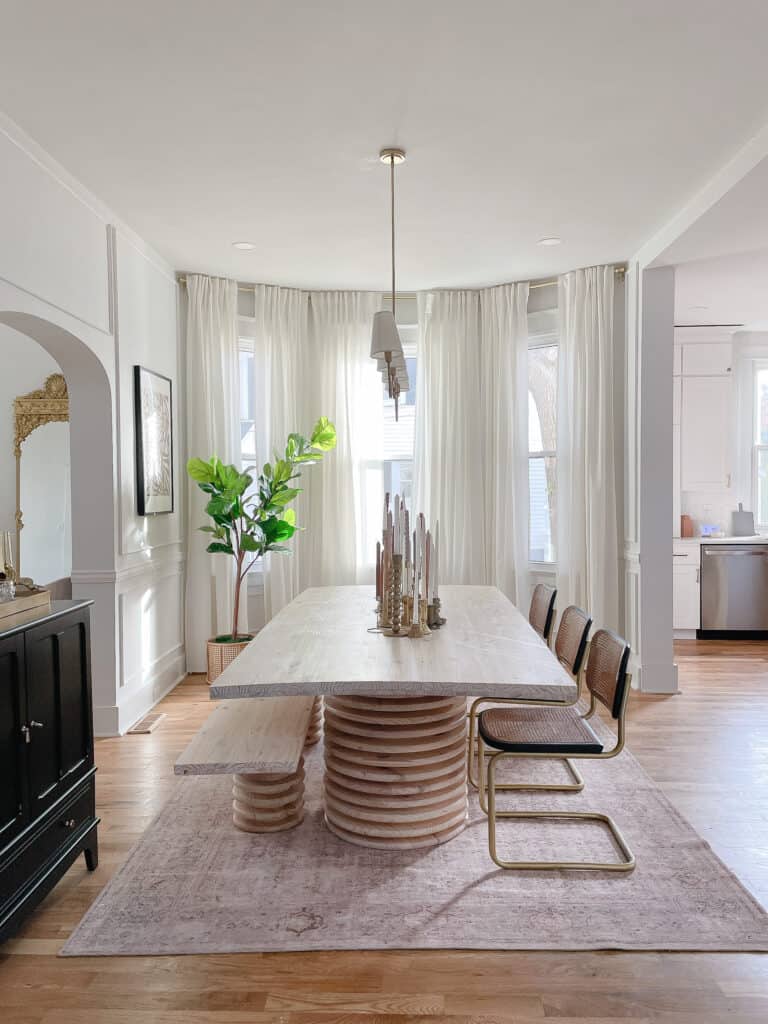
So this is probably one of the least modern aspects to this room. We added some very traditional wainscoting and extended a chair rail that was already in portions of the main floor, and honestly I think it was the biggest punch.
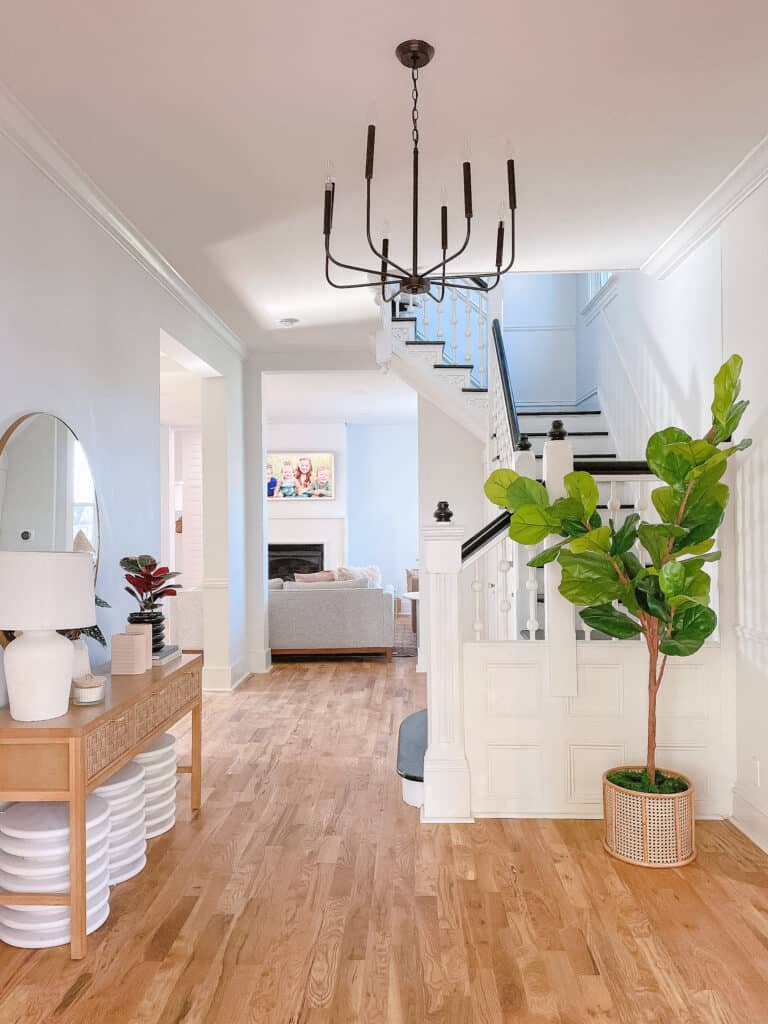
We kept the walls a bright white (which I was torn on) but I have plans for adding more color in other areas, and felt with the curtains and the rug it still felt warm.
We went with Valspar Du Jour for the paint color, which we have used in both this house, and our past house and I love. It is a great bright white that doesn’t feel too stark.
Furniture Choices
Furniture is obviously always going to be a major part of a dining room. In most cases it is nearly the only thing that exists especially with open floor plans, so bold is never a bad idea in my opinion.
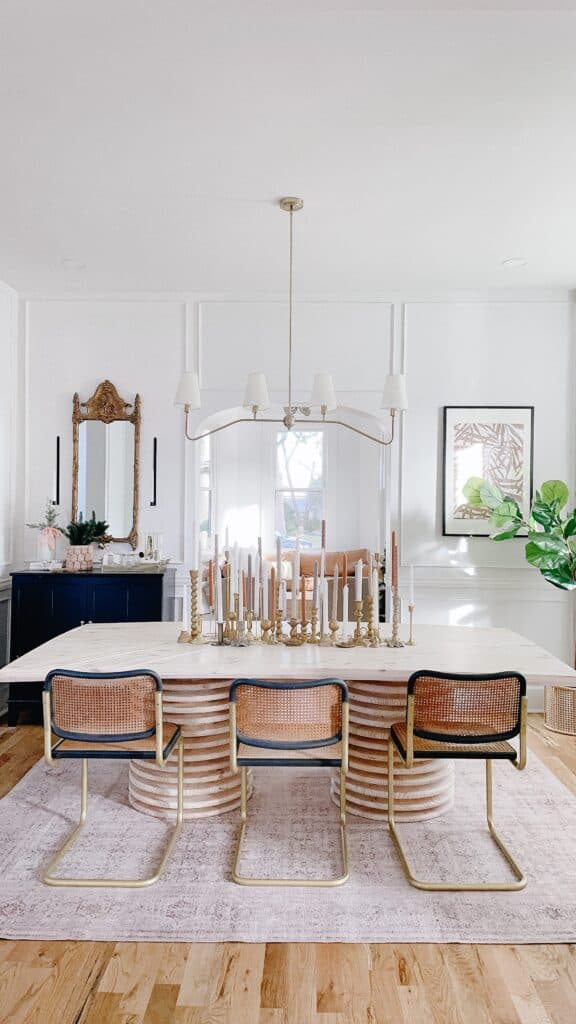
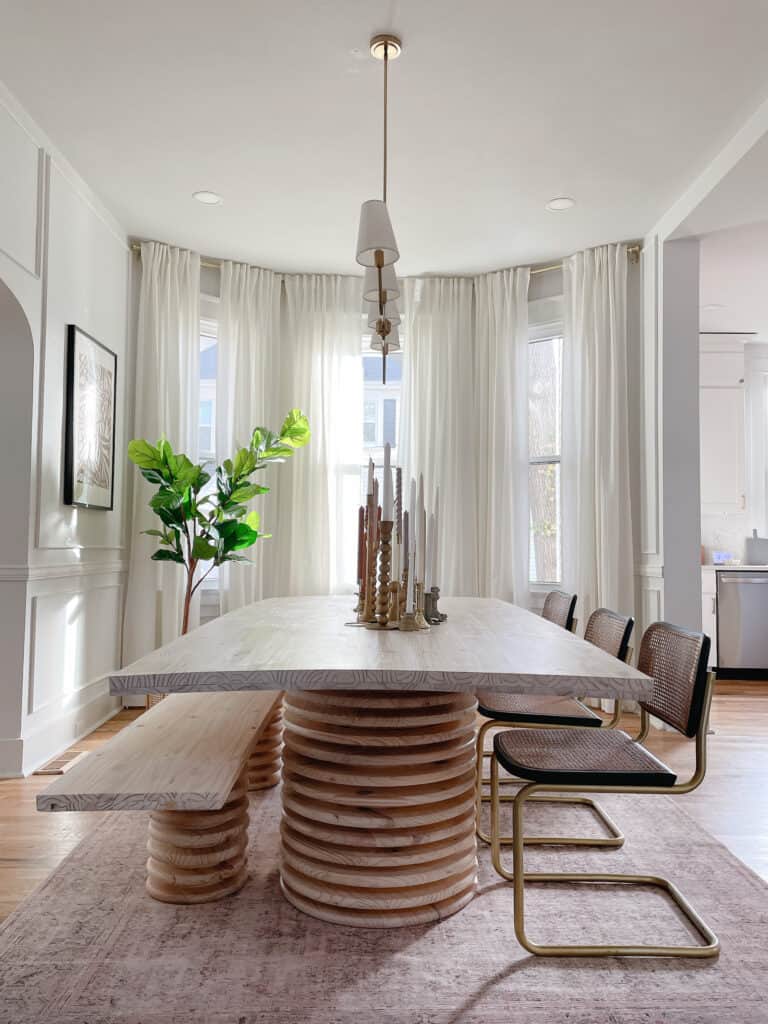
We decided to do a DIY dining table and matching bench – yo can read the blog post here on how to make your own, but it is worth noting that it is a GREAT DIY if you don’t have much practice with tools.
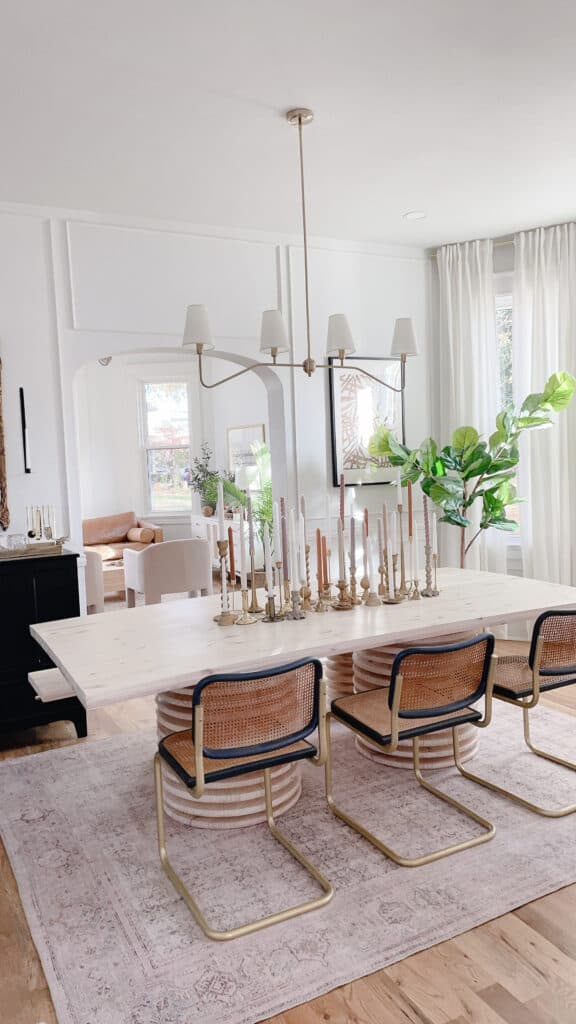
The bold round pedestal legs were something I HAD to try, and honestly the end outcome is exactly what I wanted. It is modern, and bold with-out being in your face.
We paired the table with vintage mid century modern dining chairs that were updated – you can read about that here. Eventually we will also add chairs to the head of the table but I haven’t found just what I want yet.
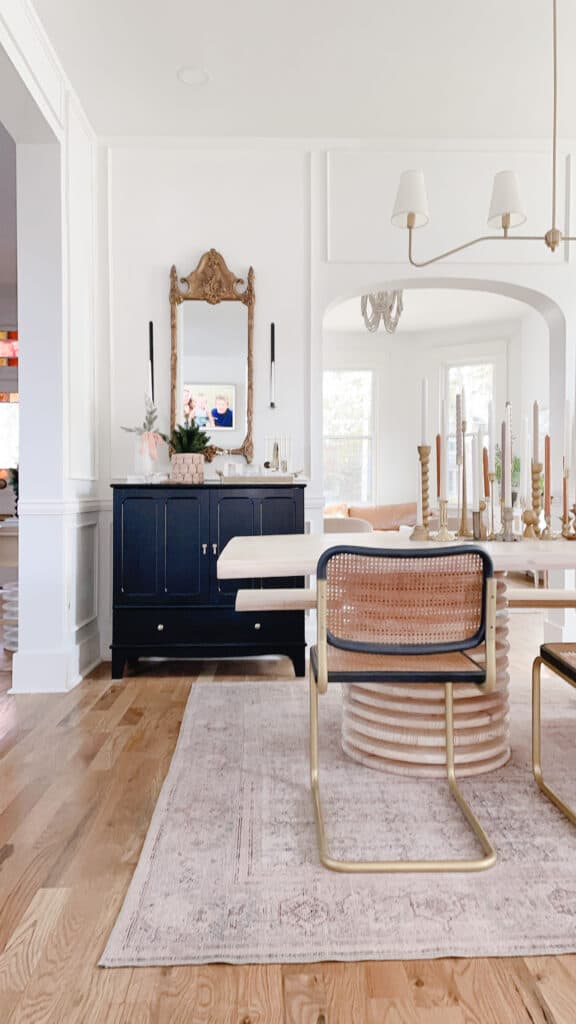
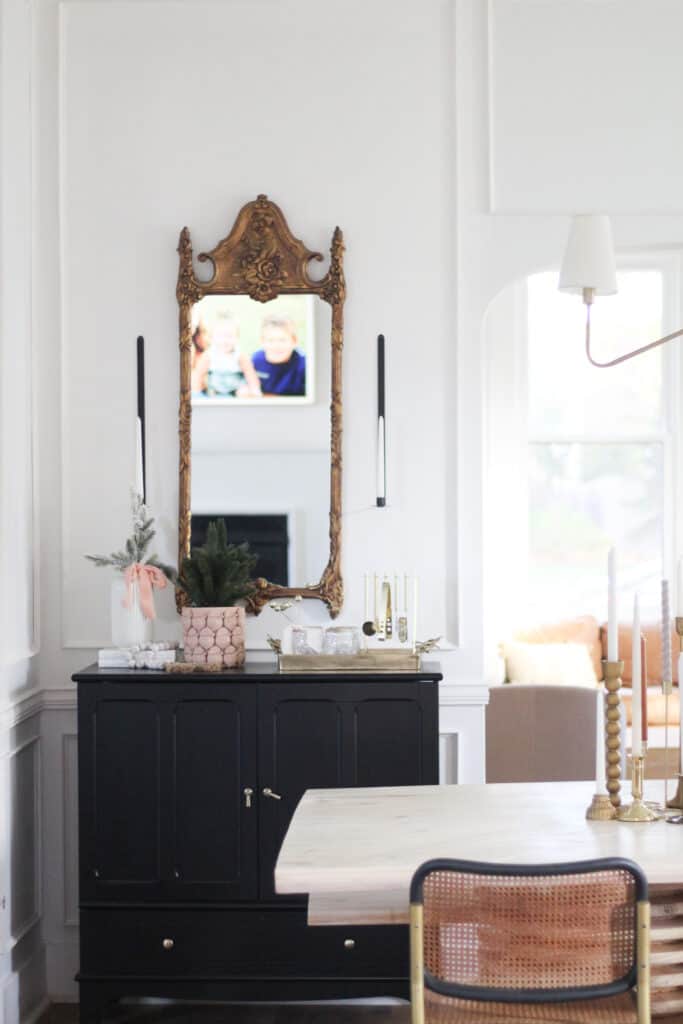
For the black chest we actually went with an IKEA piece. I went to IKEA planning to do a hack, and left with a piece perfect for the space that didn’t need any hacking. It is taller than average, and with our tall ceilings that really helped make the scale feel right.
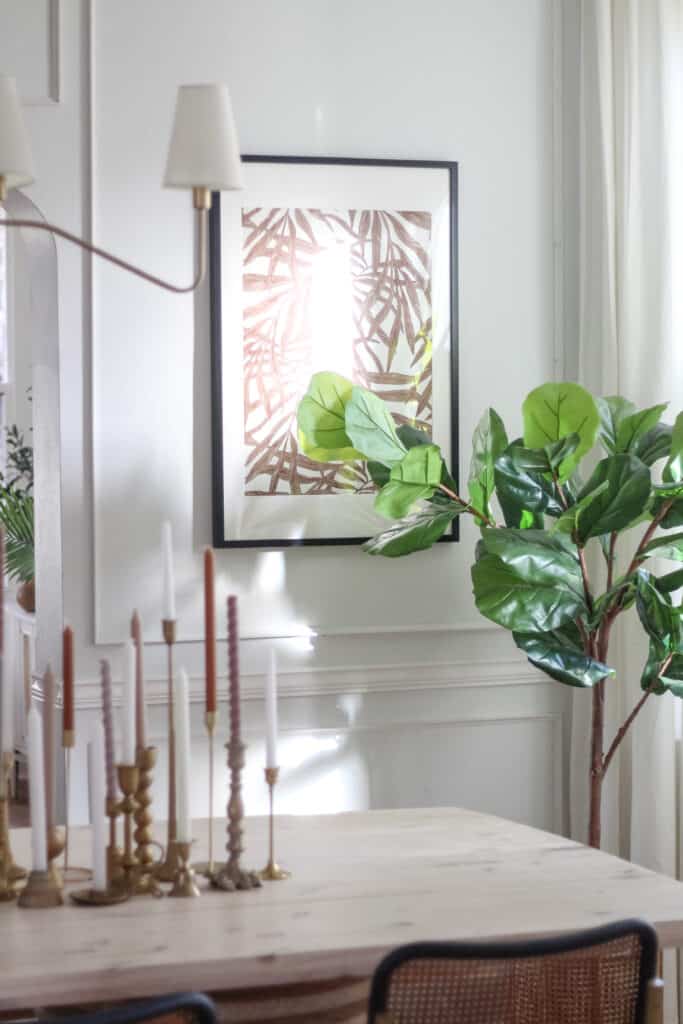
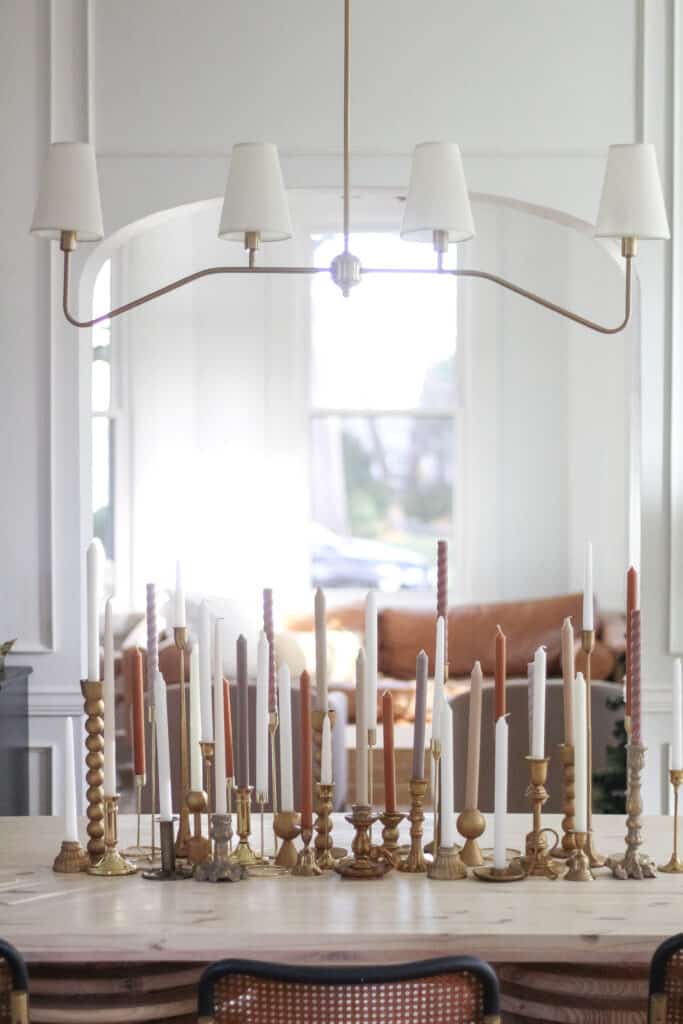
Warming Things Up With Textiles
We had NO window treatments on the main floor before this challenge…now we have no window treatments on the main floor other than this room haha! I went back and forth on my end plan for the window treatments in this house, and ultimately ended up where I never thought I would, with curtains.
The white walls and tall ceilings in the house can make things feel a bit too cold and stark, so adding the long white curtains warmed this room up a lot, and has me ready to do some other rooms too.
Because it was a bay window I decided on the same curtain rods I got for my daughters room. You buy these little connectors and it turns it into a bay window curtain rod that works for any angle. I paired it with some IKEA curtains (purely from and expense stand point) but actually really love how they look.
We also opted to put a rug in the room which really grounded the space, and gave it the slight pop of pink that everyone expects from me in a room. This rug is so affordable and just gorgeous incase you are also looking.
Lighting Choices
When it came to this room there was no lighting aside from can lights. When we renovated with HGTV they didn’t want a light fixture to disrupt the sight line and I respected that decision, however quickly realized that it wasn’t in my opinion the best choice.
Adding a ceiling light was extremely helpful in making the room feel more formal and finished. I went with this choice from Amazon that is crazy affordable and so pretty.
I also really wanted sconces on the wall by the vintage mirror to bring the width of that focal point out…my original order of scones got delayed, and it was probably for the best because when the electrician came he made it very clear that adding wired sconces to that wall would be a REAL MESS with how old the plaster was in the space.
We opted to find a plan B and I ended getting candle sconces that I think look great, and really compliment the age of the mirror between them. You can read more about the lighting choices and thoughts in this post.
Finishing Details to our Modern Dining Room
Once everything I shared was done, we just needed to figure out wall and tabletop decor. For the walls I had a vintage mirror that was I was determined to use, and worked great over the black piece from IKEA. I knew I needed art on the other side of the room, and honestly still haven’t found exactly what I want.
Because of that I ended up grabbing an affordable place holder, and I actually think it looks great for now. I framed a piece of this wallpaper in an IKEA frame I already owned and the end results were great.
On the table I fell in love with the idea of having LOTS of brass and gold candle sticks and neutral candles in them. I found lots of vintage candles at antique malls but also brought in some new ones (new was actually cheeper). For the new ones that weren’t already brass I used rub n buff to give them the vintage gold look, and I love how it looks.
Below I will link to lots of candle and candle stick options that will help you in getting started if you are interested in doing this look.
For the decor on top of the black credenza I actually just used some items I had and a new DIY because Christmas is just around the corner, so I wanted to add something festive to the space.
And that’s all she wrote. The challenge was beyond fun. I pushed myself to do an update almost every week to keep myself on track, and it really showed me how long my projects tend to take, because the weeks flew by. I am already dreaming up future projects for the next one room challenge….so this wont be the last of them for me!
Hopefully you loved the modern dining room reveal, and found inspiration you can use in your own home. Be sure to follow me on Instagram (@arinsolange) so you don’t miss future projects, and if you have any questions leave them in the comments below.
Finally the cat is out of the bag and you guys know why I have had to be so tight lipped with our home renovation. Filming for an HGTV show was nothing short of a whirlwind, but I am MOST excited to finally be able to share our whole house with you all as my readers and followers. Enjoy this home tour of our 1860’s home in Kirkwood, MO!
This post may contain affiliate links
1860’s Home House Tour
Incase you are new to my page – let me catch you up to speed a bit. Summer of 2020 my husband and I fell in love with a real fixer upper in a quaint area of St. Louis. We had been doing lots of updates to our old house and had kind of hit a place where we knew we would price ourselves out of our neighborhood.
Add to that the fact that we really wanted another bedroom, and when we found this home in our dream location we had to jump on it. Then there was a little HGTV show situation where the renovation happened, AND NOW I am finally sharing more on the renovation. (if you want to watch the episode on HGTV look up ‘Call the Closer – The Perfectionists’)
I am going to speak further on the renovation in the coming weeks, but for today just wanted to give a good house tour with before and after photos of the house so you could really see what we were working with and where we are going.
My hope is that you are able to get a better feel for our home with this tour, and don’t forget there is a video on the post with the tour as well.
Watch the Video Home Tour
If a video tour is up your alley be sure to watch the video below. The images as this post go on will show you more context!
Main Floor House Tour
I am going to start with the main level of the house – that is where things start in the video as well. I will then move to the upstairs. The main floor had things moved around quite a bit in a few areas, so hopefully it isn’t too hard to follow.
For the whole house there are new hardwoods and fresh paint. For the floors we have white oak with no stain. We tried to save the original hardwoods, but they were only in a couple of the bedrooms, and a couple of the main floor rooms – and those weren’t in great shape. We decided ultimately that new flooring was the way to go.
Paint color is Valspar Du Jour – you can read more about my favorite paint colors here.
Foyer
The entryway mostly just needed the walls and floors updated. The stairs were a soft wood so unable to be stained and sanded so we opted for a black and white look and I am beyond happy with how they turned out. We kept the original banister as well and it remains one of my favorite things in the house.
Entryway beforeFoyer after
Playroom/ Main Floor Full Bath
The playroom is a room we personally did all the work on. It was a fairly blank slate, and the bathroom isnt fully finished, but you can see where it is at and where it is going here.
The full bath in this space is TINY. Like honest to goodness the smallest bathroom ever. We cant even fully open the door due to the toilet haha.
The parlor or formal living room is one of my favorite rooms in the house. It has a long way to go in terms of finished product but is getting there. This room didn’t change much in terms of the renovation.
This is where things started to majorly change. The dining room was a closed off room when we purchased the house. We had the wall removed between the dining room and what is now the kitchen to make one open space. We also took out the small pocket door to the entryway and opened that as well.
We opted to keep the arched opening to the parlor for original character.
I am currently finishing that space for the One Room Challenge, so you can check all the progress photos and details of the furniture and decor here.
This room was SO PRETTY when we bought the house, and the one space that I don’t think we have done justice yet. It had this gorgeous green wallpaper and we couldn’t save that in the renovation.
The entryway to this room from the front entry was opened up from a pocket door to an open entry, and the wall between the room and the room to the side of it no longer exists.
We also added a gas fireplace so have gotten creative adding on to the original chimney.
What’s to come? This room needs some finishing decor, and we are adding built in shelving and cabinets to the side of the fireplace. I am hoping that will add warmth and character.
Talk about a change. What is now the kitchen was a very random room. So when you see the before photos you might think there wasn’t a kitchen – there was, you just have to keep scrolling down to see where it was.
The kitchen was a huge part of the renovation and show and in my opinion turned out beautifully. There are changes I would have and may make in the future, but for now we feel VERY blessed to have such a wonderful space.
The only immediate change that will happen is new bar stools – there were sort of filler stools while I found something I loved, and here we are a year later.
Before of where the kitchen is – but this was a random empty room
new kitchen
Office and Pantry
These two rooms were once the kitchen of the house. They are two rooms that added a lot of function and tuck in wonderfully in the back of the house. Both spaces are big priority projects for the next year.
The office will be transformed into Arin Solange at Home headquarters – for now the dog and all the other crap in our life lives there and its a MESS.
The pantry is fine, but has so much potential to be both pretty and more functional, so that is on our list.
For these two rooms to happen we clearly turned one space into 2. We also had to give up half of a window, which was well worth the end results.
before – location of office and pantry – was the kitchen
after – view into home office
after – view into pantry
Mud Room
The mud room was once a pantry and a bit of a mudroom as well. This room is a blank slate with big plans, but it needs to be REALLY functional so we are really trying to figure it out.
mud room before
Mudroom After
Main Floor Powder
The main floor powder was maybe the best room in the house when we purchased it, but it had to be changed for the kitchen. We took it from a full bath to a half bath, and when we moved in it was black shiplap. We didn’t love the shiplap so we ended up switching things to a pink PVC pipe wall and we LOVE the end product.
Now onto the upstairs. Same goes for the lower level when it comes to floor and paint. The other big thing to realize when looking at photos is that when we purchased the home there was no hallway through the upper level. If you see the photos you will see these random doorways and that is what they are.
We carved space out of most of the rooms to give a hallway, so there was a total overhaul.
Avé’s Bedroom
When we bought the house Avé’s bedroom was by far the best bedroom. For her room we removed the window seat that wasn’t in great shape, and actually reduced the size of her room quite a bit. Her For the hallway we took mostly from her room and Goldie’s bedroom. The end results were a cute room that still has plenty of space.
You’ll see in the staged photos that all of the bedrooms aside from Goldie’s were staged with full sized beds, and thus have plenty of room for the kids to grow into.
Goldie’s Room took the biggest hit with the reno. It was a good size before and it is now a smaller room, but still works fine for a child. It is definitely going to be a daybed room, but that is fine. We have not done ANYTHING in her room yet because she needs to move up to a twin or toddler bed in the coming months.
Before of Goldie’s Room
Goldie’s Room After
Jack’s Room
Jack’s Room is FULLY done and is one of my favorite spaces in the house. When we renovated his room the chimney from the main floor was found behind a wall so we left that exposed. It is a great size and the room has a good amount of character.
I will say that as with all the rooms there are draw backs, and for his it is a REALLY small closet.
When we bought the house his room actually had a small powder room in the bedroom and that bathroom is now in the hallway so can be shared by both boys someday.
Walker’s room is similar to Goldie’s in the fact that we haven’t done anything in there yet. It is generally a blank slate. His room changed the least in the renovation – mostly just closing off the doorway from Goldie’s room.
Walkers room before
Walkers room – after (ish)
Kid’s Bathrooms
Both of the kid’s bathrooms are completely untouched so far so I am just leaving you with photos of them when we bought them. They are fairly high priority projects…but also daunting ha.
Boys half bath before and now
Kids bathroom Before
Main Bedroom and Closet
For the main bedroom and closet the doorway was moved up in the hallway to give us a bit of an ‘entrance’ to the bedroom, which I love. The closet was actually in the hallway before the renovation, and at the time was a full bathroom. We opted to lose the bathroom for the closet because it was a bigger need.
So far both of the spaces are sort of sitting and waiting, and as one does as a parent – they are constantly put on the back burner as far as projects to complete.
The main bathroom ended up GORGEOUS. When we bought the house the main bathroom was actually not in horrible shape, and the size was great. It had a gorgeous clawfoot tub that we knew we were going to keep.
The bathroom was fully renovated during the show, and after we added decor, molding and a chandelier. I will blog that process soon.
I am hoping you have a better feel for our house and the renovation with this house tour blog post. I am happy to answer any other questions on Instagram (@arinsolange) or in the comments below. If you want to find this post later don’t forget to pin the photo below.
It is week SIX of the One Room Challenge..which is crazy, but this week was all about lighting. We finally picked a dining room light fixture this week, and had it hung, which was major progress, and had me dreaming up al the other dining room light fixture options.
this post may contain affiliate links
Dining Room Light Fixture
When we bought our house we had a dining room light fixture, then decide to remove the original chandelier because of the change in floor plan. We went from a closed floor plan to an open floor plan and I wanted to be sure the sight lines were right.
We have large pendant lights in our kitchen over the island that I LOVE and I needed to make sure that the dining room light fixtures would compliment those but also stand alone beautifully to finish its own room. I think that can be the tricky part of an open dining room in general.
in this blog post I will share some of my favorite dining room lights as well as some things to take into acoundwhen looking at dining room lighting as far as height to hang the light, size of the lighting fixture and so much more!
Dining room lights can be SO FUN – I tend to think you get to be really bold and really ‘you’ in a dining space. But you also really have to think through your room and how it plays into the rest of your home. Table size, table shape and open or closed spaces play a big effect, on top of the style of the light.
Personal style
The first thing to think about when picking a dining room light fixture is your style.
My Favorite Dining Room light Fixture Choices
Here are my favorite dining room light fixtures. Shop them below, and let me know if you have any questions!
Hopefully you found the perfect dining room light fixture for your home in this post, or know exactly what to look for. Be sure to follow me on Instagram (@arinsolange) for more inspo with our home. If you have questions leave them in the comments below!