Shop
Food

How Long Does White Chicken Chili Last In The Fridge?

As the weather grows cooler, there’s nothing quite like a hearty bowl of chili to warm you up. One of my favorite soup recipes that is always in rotation at my home is a crockpot white chicken chili. One common question I often get asked is how long does white chicken chili last in the fridge? 

 In this post, I’ll go over how long it lasts in the fridge and freezer, how to reheat it, and how to freshen up the leftovers so they taste like they were just made.

This post may contain affiliate links.
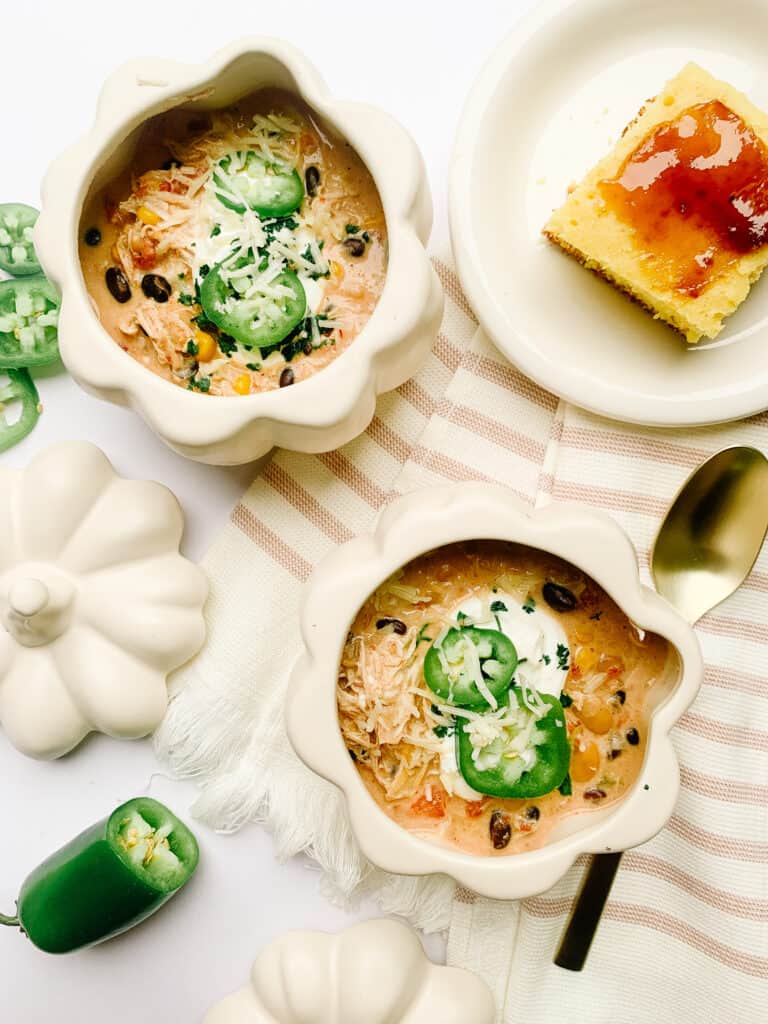
White chicken chili with garnishes

White Chicken Chili In The Crockpot

Enjoy this creamy white chicken chili that comes together in just 10 minutes set to cook on low in your crockpot.

How Long Does White Chicken Chili Last In The Fridge?

My white chicken chili is always a hit with my family and not at all difficult to make. It’s a creamy white chicken chili, packed with white beans, chicken breasts, bell peppers, and a blend of spices including chili powder and garlic powder, slow-cooked to perfection.

The importance of proper storage of leftover chili cannot be overstated. Not only does it affect the taste and quality of your chili, but it can also prevent bacterial growth and potential food-borne illness. 

Storing your chili correctly extends its shelf life and ensures it remains a delicious treat for days after cooking. 
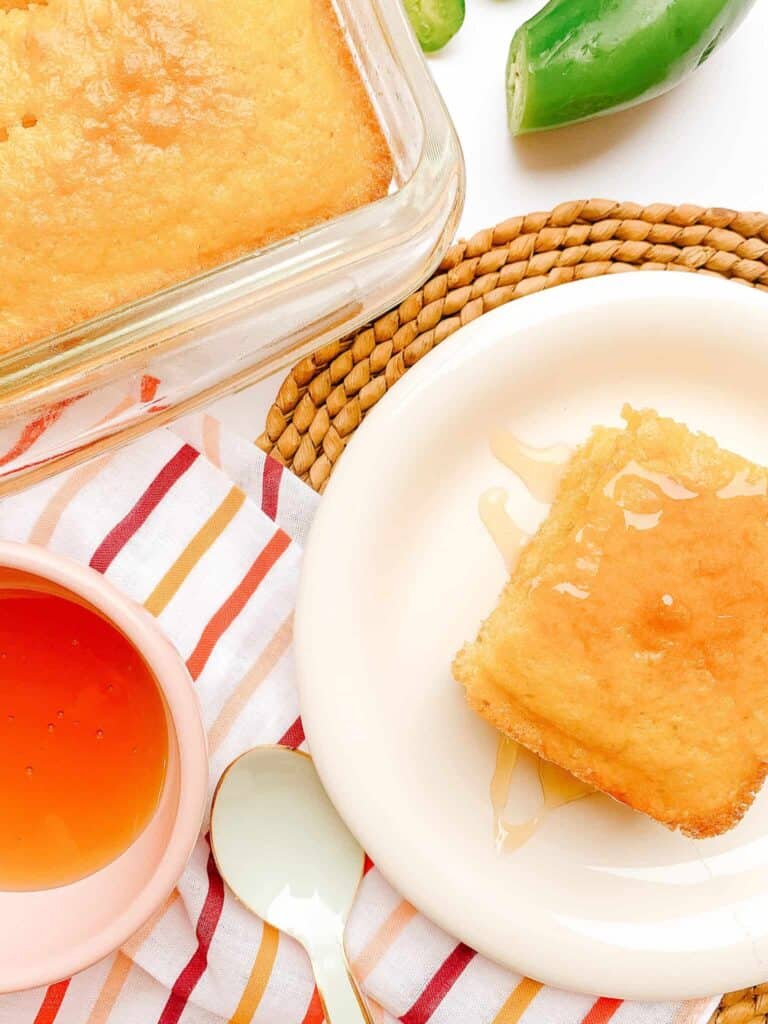
cornbread to go with white chicken chili

Preparation

After hours of cooking your white chicken chili in the slow cooker, it is essential to let it cool down to room temperature before storing it away. 

Remember, perishable foods like homemade chili should not be left at room temperature for more than two hours, as this can encourage bacteria growth and potentially lead to food poisoning symptoms such as stomach cramps.

When it comes to storing white chicken chili, one of the key factors to consider is the temperature. Bacterial growth thrives in the temperature danger zone between 40°F (4°C) and 140°F (60°C). 

To minimize the risk of food-borne illness, it’s crucial to cool down your chili quickly and store it in the refrigerator within two hours of cooking.
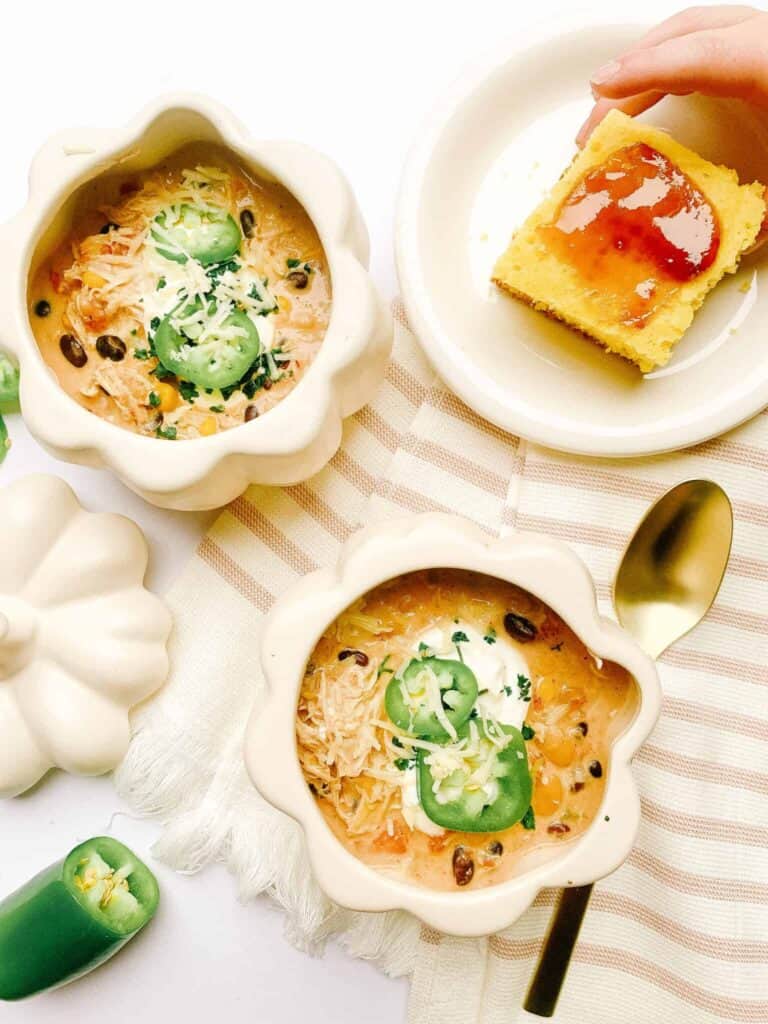
white chicken chili in pumpkin ceramic bowls

To expedite cooling, transfer your chili to a large bowl or shallow containers rather than leaving it in the slow cooker. This allows for faster heat dissipation and reduces the time it spends in the temperature danger zone. 

Placing the containers in an ice bath or using a fan can further speed up the cooling process.

Fridge Storage

Once your chili has cooled, transfer it to an airtight container, as this is the best way to store chili in the refrigerator. It helps maintain the chili’s moisture content and prevents it from absorbing any odors from other foods in the fridge. 

If you’re using containers with lids, make sure they fit tightly to create a proper seal. Alternatively, you can use plastic wrap or aluminum foil to cover the bowl tightly.
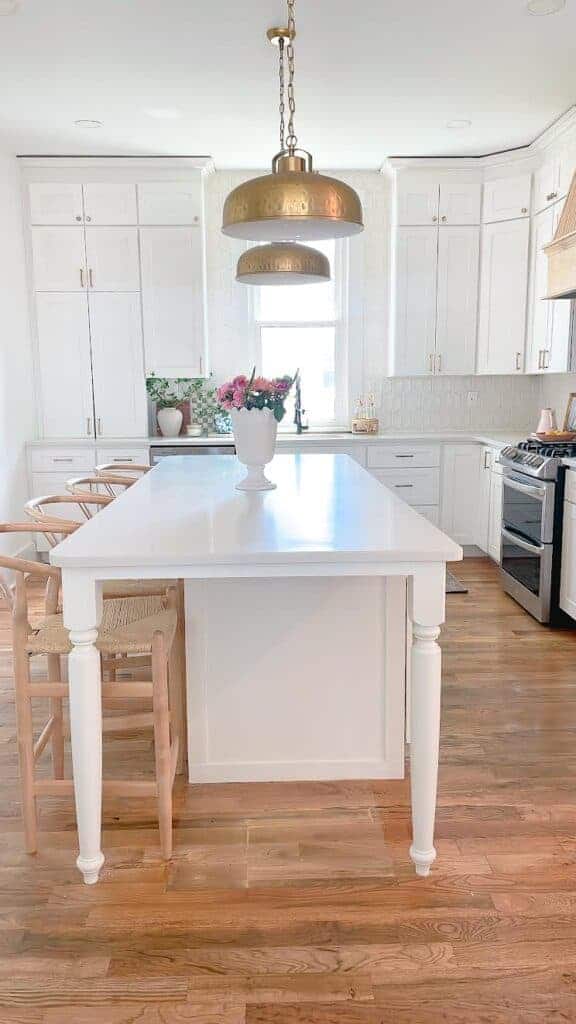
white kitchen with wine and charcuterie spread

If you’ve made large amounts, consider portioning it into smaller, shallow containers. This not only helps it cool faster but also makes it easier to grab the perfect serving size for your next day lunch or dinner. 

Store these containers on the bottom shelf, the coldest part of the fridge, to maintain the best quality and prevent the growth of bacteria. This helps maintain a consistently low temperature and minimizes the risk of cross-contamination with other foods. 

If you’re using multiple containers, arrange them in a way that allows for proper air circulation. Avoid overcrowding the fridge, as this can lead to uneven cooling and potentially compromise the quality of the chili.
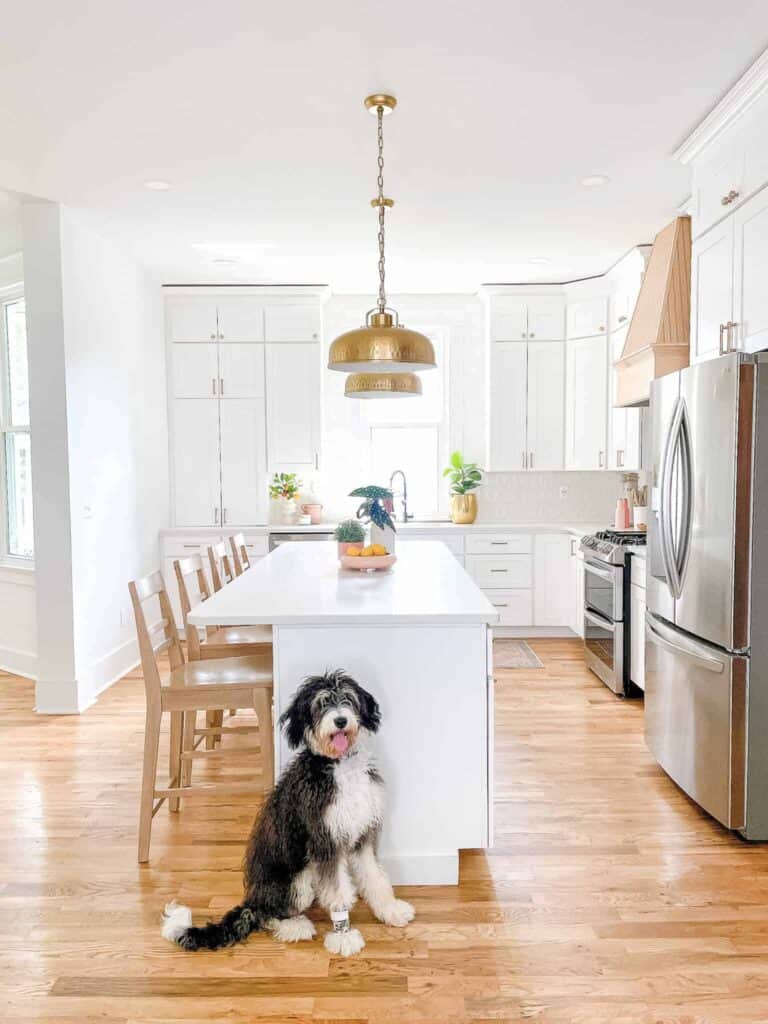
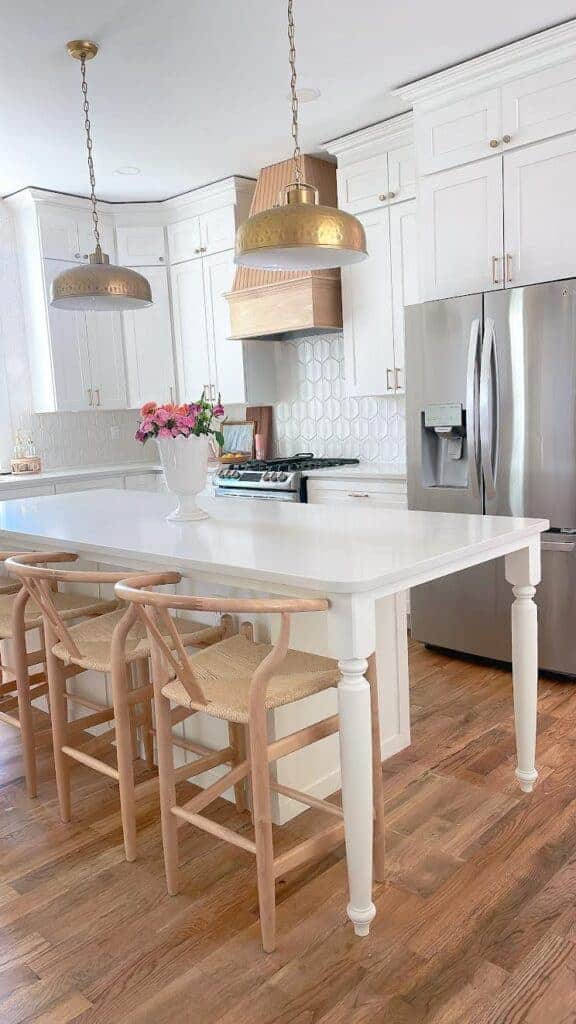
white kitchen with brass pendant lights

How Long Does White Chicken Chili Last In The Fridge With Proper Storage?

So, how long does this delicious chili last in the fridge? 

Generally, leftover chili, whether it’s a spicy stew of chili con carne, a simple white bean chicken chili, or even a meatless chili with kidney beans, will last for 3-4 days in the refrigerator.
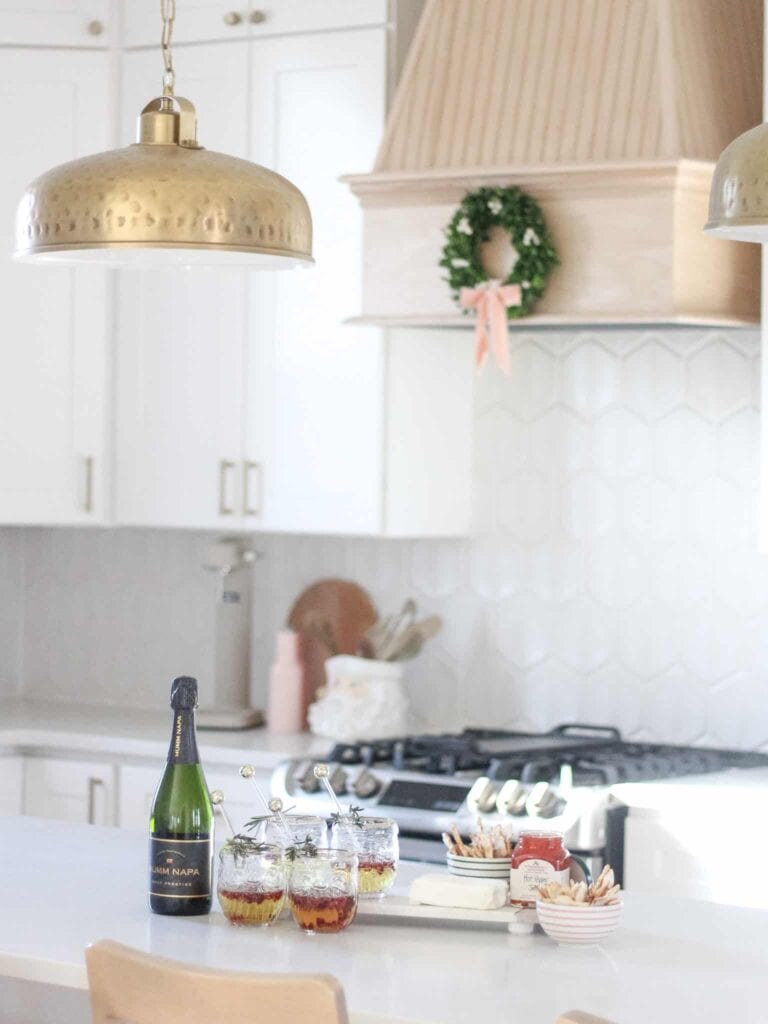
White kitchen with wine glasses and charcuterie

 It’s important to note that this time frame can vary depending on several factors, including the freshness of the ingredients used and how well the chili was stored.

 Always check for signs of spoilage such as a sour smell, slimy texture, or an unpleasant odor before eating old chili.
White kitchen with dutch oven on stove.

Additional Storage Options

But what if you’ve made a large pot of chili and can’t consume it within this time frame? Fear not, freezing is a great option for longer shelf life. 

Before freezing your chili, let it cool down completely at room temperature. Once cooled, transfer the chili into a freezer-safe container or heavy-duty freezer bags. 
white kitchen with brass vase

Be sure to leave some space at the top as the chili will expand when frozen. Properly stored, your chili can maintain the best quality for about 4 to 6 months in the freezer, though it will remain safe beyond that time if kept at a constant temperature of 0°F. 

Be mindful of freezer burn, and always check the chili for signs of spoilage before reheating.
white kitchen with rainbow cutting board

Reheating

To thaw frozen chili, it’s best to move it to the refrigerator and let it defrost slowly. This process can take a day or so, depending on the quantity of chili. 

If you’re in a hurry, you can also defrost it in a sink of cold water or use the defrost function of your microwave. 

Avoid thawing at room temperature, as this can promote bacterial growth. Once thawed, reheat the chili thoroughly before serving, ensuring it reaches an internal temperature of 165°F (74°C) to kill any potential bacteria.

Chelsey’s Messy Apron has a great traditional chili recipe.

Reheating the chili is a cinch. Simply transfer the chili into a large pot or your instant pot and reheat over medium heat until it reaches an internal temperature of 165°F, stirring occasionally. 

If the chili seems too thick, add a splash of chicken broth to thin it out. Alternatively, you can reheat the chili in a microwave-safe bowl on medium-high heat, ensuring to stir occasionally for even heating.

Chili
For a delicious Whole30 chili recipe, check out 40 Apron’s version!

Potential Concerns

Now, let’s address some common concerns when it comes to leftover chili. 

One question that often arises is whether it’s safe to reheat chili multiple times. The answer is yes, as long as you handle the leftovers properly. 

When reheating, ensure that the chili reaches a high enough temperature to kill any bacteria that might have grown during storage. It’s best to reheat only the portion you plan to consume and avoid reheating the entire batch repeatedly. This helps maintain the quality of the chili and minimizes the risk of bacterial growth.

White chicken chili enchiladas for leftovers
Looking for a fun way to use leftover white chicken chili? Try making a chili enchilada casserole like Hilda’s Kitchen Blog.

Another concern is the use of different ingredients in white chicken chili. For instance, if you’ve added dairy products like sour cream or cream cheese to your chili, it’s important to note that dairy can sometimes affect the texture and consistency of the chili after being frozen and reheated. 

While the flavor may remain intact, the texture might become slightly grainy or separated. However, this does not affect the safety or edibility of the chili. 
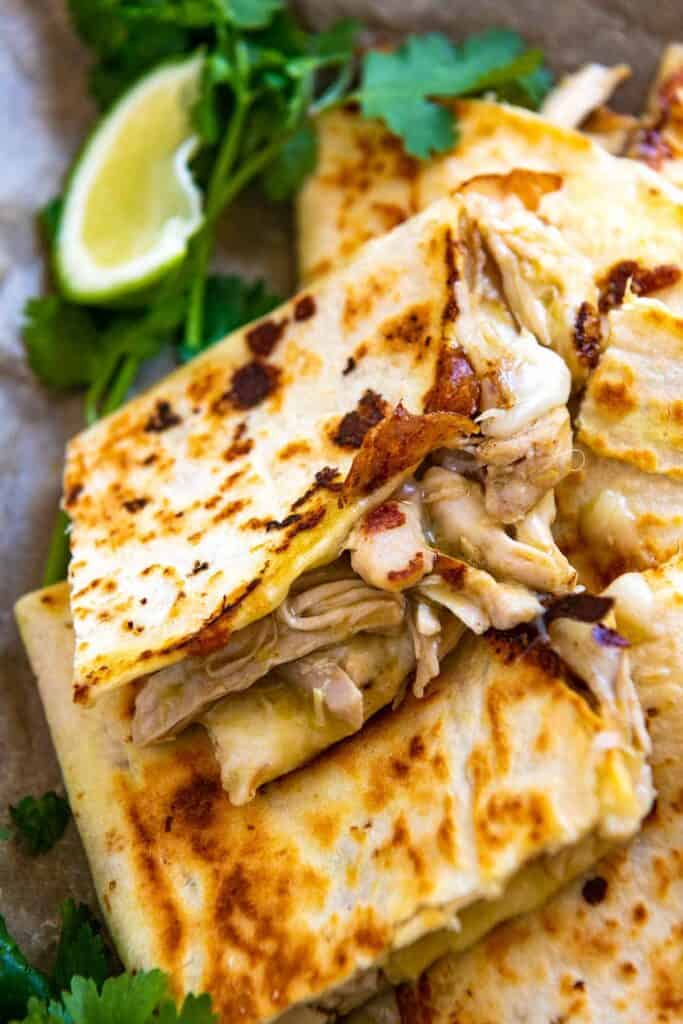
White chicken chili quesadillas
A great option for using leftover white chicken chili is to make quesadillas. Try out this recipe from Inspired Taste.

If you find the texture less desirable, you can give the reheated chili a good stir or even use a food processor to blend it back to a smooth consistency.

If I know I plan to freeze my white chicken chili, I will wait to add any dairy ingredients until I plan to defrost it for consumption. 

Chili Toppings

Now, let’s talk about jazzing up your reheated chili. 

One of my favorite ways to serve leftover chili is to add some fresh ingredients to brighten it up. 

A squeeze of lime juice, a dollop of sour cream, or a sprinkle of fresh green chilies can make your chili taste as good as it did the day you made it. 

Don’t forget your favorite toppings like shredded cheese, diced avocado, or crispy tortilla chips.
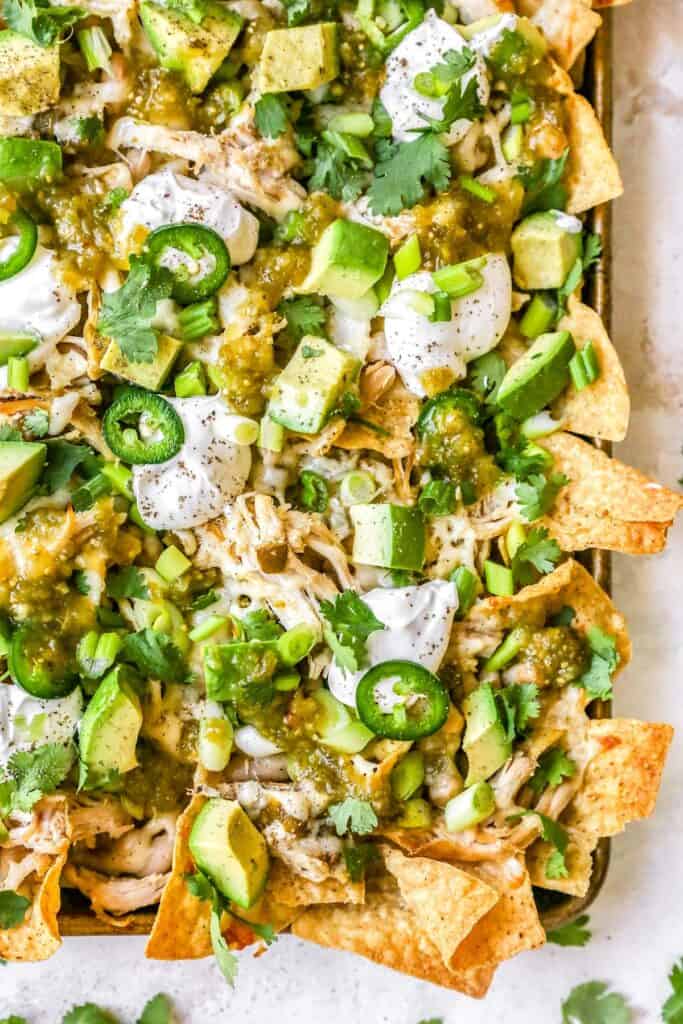
White chicken chili nachos
White chicken chili nachos are a great way to use leftover chili. Two Peas & Their Pod has a great recipe.

Using Leftover Chili 

You can also use leftover chicken chili in different ways – try it as a filling for enchiladas, a topping for nachos, or even mix it in with some cooked pasta for a chili mac and cheese.

Making Modifications

Whether you’re using leftover rotisserie chicken or starting with raw meat like chicken thighs or ground beef, making a homemade white chicken chili is always a great way to create a delicious meal. 

If you’re looking to switch things up, you can always substitute the chicken with turkey for a tasty turkey chili or use a variety of beans like navy beans or cannellini beans. 

Vegan white chicken chili with jackfruit
If you are looking for a great vegan chili recipe, consider using Jackfruit. From My Bowl has a great vegan white chicken chili recipe.

For those who prefer a vegetarian option, simply omit the meat and add more beans and veggies for a meatless chili that’s just as hearty and filling.

While making your chili, remember to adjust the spices to your liking. Chili recipes are flexible that way. 

You can add more chili powder, cayenne pepper, or salsa verde for a spicier stew, or tone it down with cream cheese and sour cream for a more creamy white chicken chili. 

If you don’t have fresh bell peppers or chili peppers on hand, you can always use green chiles from a can, or even a dash of hot sauce.
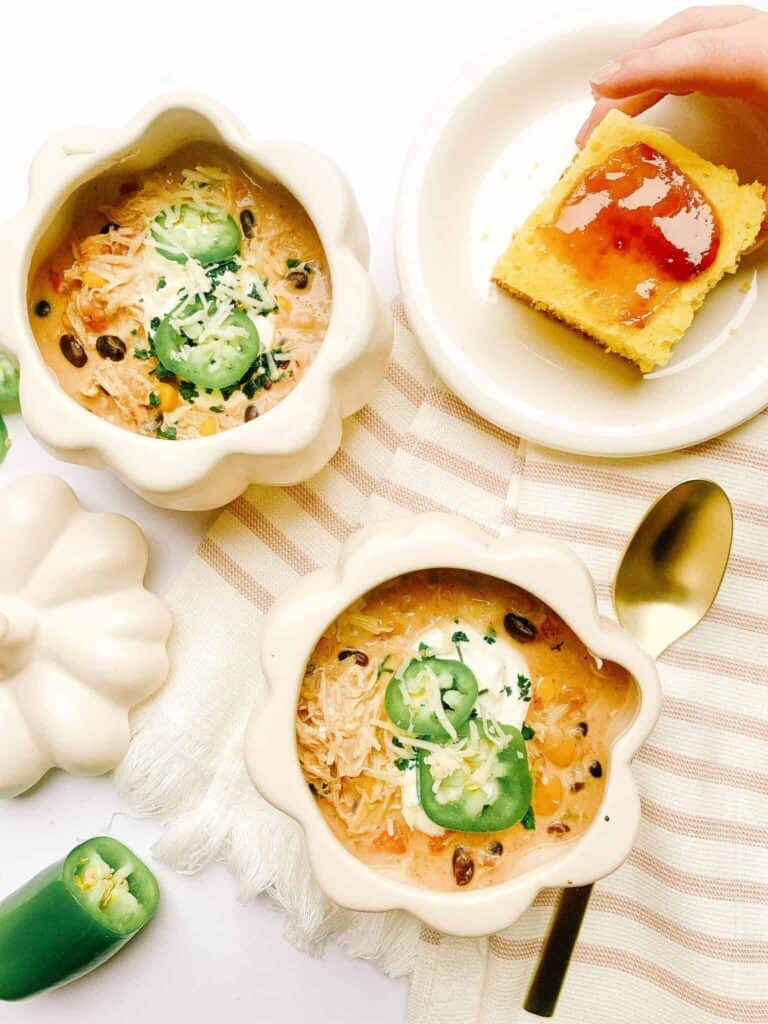
white chicken chili in pumpkin ceramic bowls and cornbread

Shop My Favorite Amazon Products

Make sure to check out my favorite kitchen products for chili season! These are great to have on hand to enjoy a big bowl of chili!
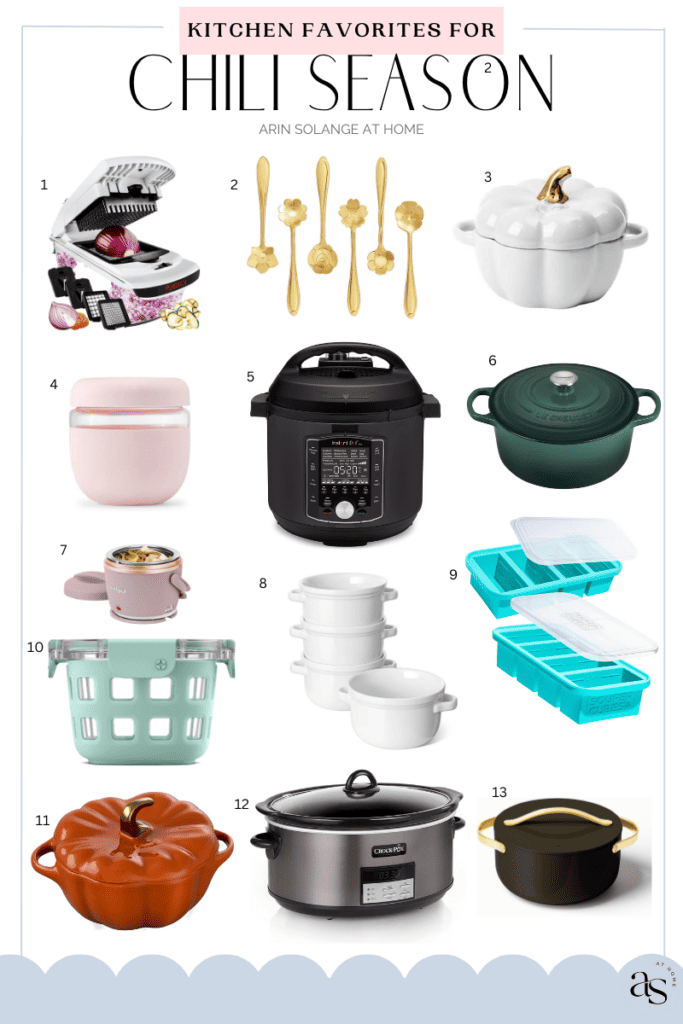
Favorite kitchen products for chili season!

1 | 2 | 3 | 4 | 5 | 6 | 7 | 8 | 9 | 10 | 11 | 12 | 13

  1. Vegetable Chopper – Make meal prep a cinch with this best selling vegetable chopper.
  2. Stainless Steel Floral Spoons
  3. White Ceramic Pumpkin Bowl – The perfect bowl to celebrate fall.
  4. Seal Tight Glass Bowl – A great option for storing any leftovers or taking it to go.
  5. Instapot 10:1 Cooker – Make mealtime a breeze! You can slow cook or whip up a chili in no time with the pressure cooker function.
  6. Le Creuset Dutch Oven – My favorite way to make chili. This is a splurge but will last you for decades with proper care.
  7. Travel Crockpot– Take your chili to go!
  8. Soup Bowls
  9. Souper Cubes – Easily freeze leftover chili and soup with these silicone cubes.
  10. Round Glass Bowl– These are great for individual serving sizes to take on the go.
  11. Pumpkin Baking Dish – A great option for serving your chili and can also be used in the oven.
  12. 8 Qt. Crockpot – This is an essential kitchen item for our house. We use it to make soups, chilis, pulled chicken, and more!
  13. Caraway Dutch Oven – Another favorite for our house!

Other Posts You’ll Love

White Chicken Chili In The Crockpot | 10 Spooky Halloween Coffee Recipes | Easy Sweet Cornbread Recipes

Follow Social For The Latest & Greatest

Pin The Photo Below For Later

With proper storage, your homemade chili can be a delicious meal you can enjoy throughout the week. Remember, the safety of your chili, like all foods, depends largely on how it is handled. Food safety is crucial to prevent food-borne illness and to ensure maximum freshness and quality. 

If you’ve tried my white chicken chili recipe or have a different type of chili that you love, be sure to comment down below and share your experiences. I’d love to hear your favorite ways to serve and store chili, and any tips you have for prolonging its shelf life. Nothing beats a bowl of warm, comforting chili, especially when it’s a beloved recipe that can be enjoyed time and time again. 

Favorite kitchen products for chili season!
Amazon Finds

Amazon Best Sellers List – September 2023

I am so happy to bring you my monthly best sellers list so that you can easily see all the items in one place. All the items in this round up are from Amazon and can be found in my Amazon storefront. And if you find yourself wondering how to use any of these items in unique ways, make sure you head over to my Tik Tok where I am able to share more detailed reviews of items in video format.

This post may contain affiliate links.

Little girl

Amazon Best Sellers List – September 2023

With Fall in full swing, our days are getting busier and busier. You’d think that once the kids are in school there would be more time to get all the items on your To-Do list checked off.

I don’t know about you, but does anyone else feel even more pressure to just be productive during those times when your littles are out of the house?

There always seems to be something that needs to be done. Couple that with kids activities, school events, doctor’s appointments, sick days, etc. The days are too short and there never seems to be enough time to get it all done.

Mom with her kids

We are so lucky to be able to work from home with our business. I thank each and every one of you every single day for this blessing. Without your support, our family wouldn’t be able to do it.

So, when I get overwhelmed, I look around and try to remember the main focus.

The dishes can wait. The laundry can wait. The house will be clean one day. Right now, my goal is to provide a safe, loving, and fun home for our kids. Everything else can wait.

In the meantime, as the daily tasks pile up, I look for ways to be as efficient as possible so I can truly spend time together with each of our kids when they get home.

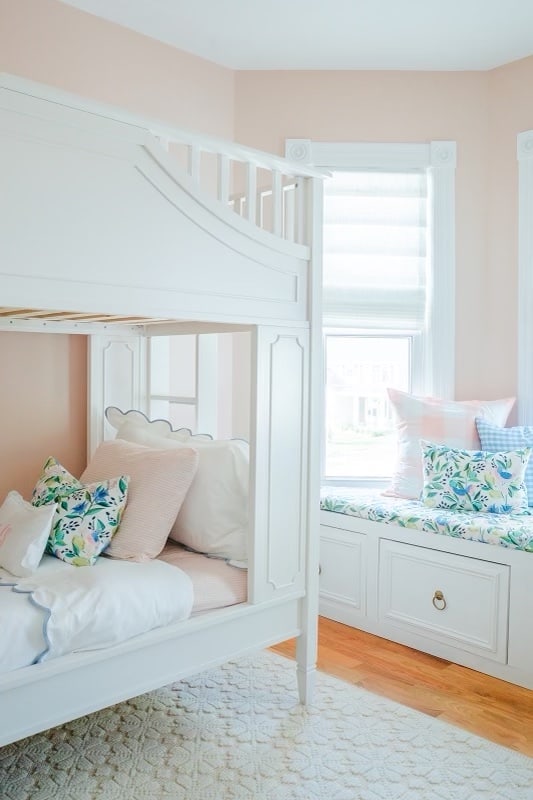
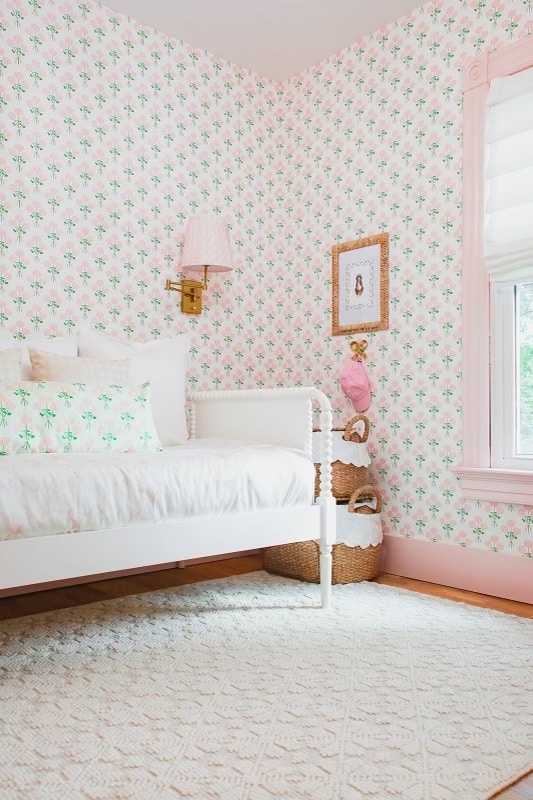
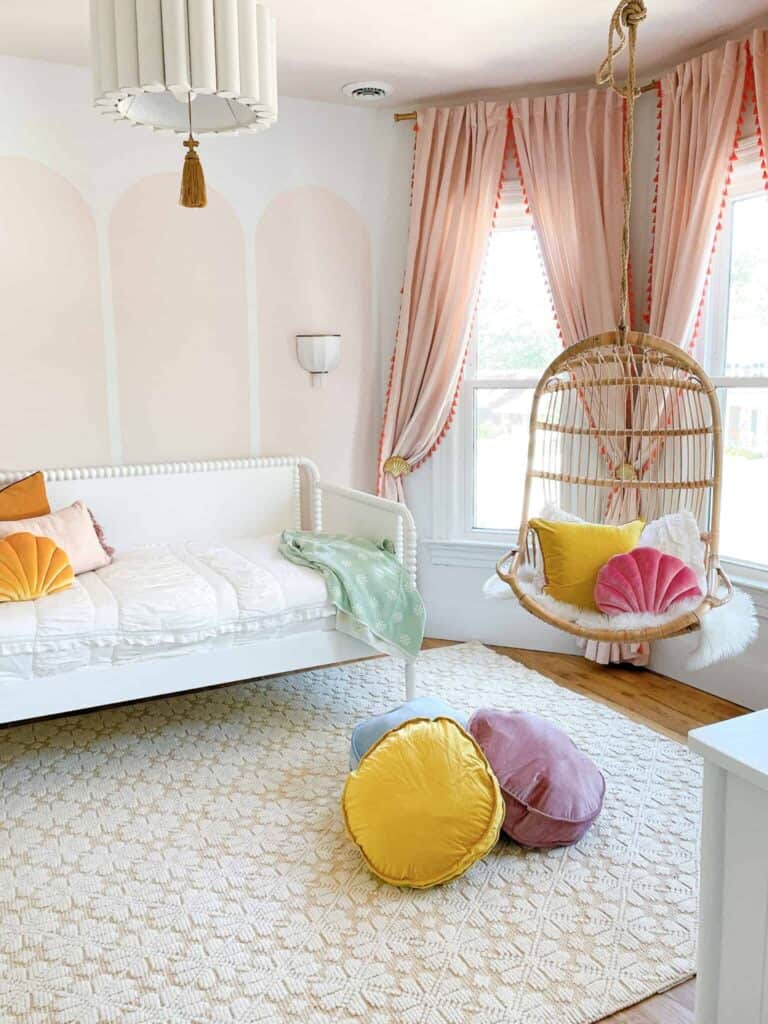
Grand millennial girl room

That’s why I hope the products I bring to you help you in your day to day lives. I try to find items that will not only be practical, but may also have a fun or stylish edge!

I am also a big fan of daily deals! If you can get something at a discount, then it makes me even happier!

Life Updates For September

There has been no shortage of spare time around our house. We have been go-go-going! I’m hopeful that we can slow down a bit soon to enjoy the Fall weather and spend time together making memories!

kids on golf cart

Project Updates

I have some big news! Buckle up because we have 3 big announcements that I know you guys will love!

Arin Solange At Home Insiders

Did you know that I have a daily deals private Facebook group? Arin Solange Insiders will have all the information you need on the best deals out there! You’ll be the first to know on Prime Day early access deals!

Once a week I will answer your questions on what deals you want to see from me. You can drop what you are looking for and I’ll send back my favorite picks!

This group is a great way to find the best savings and be the first in the know before I share it on any other social platform!

Make sure you join the group today!

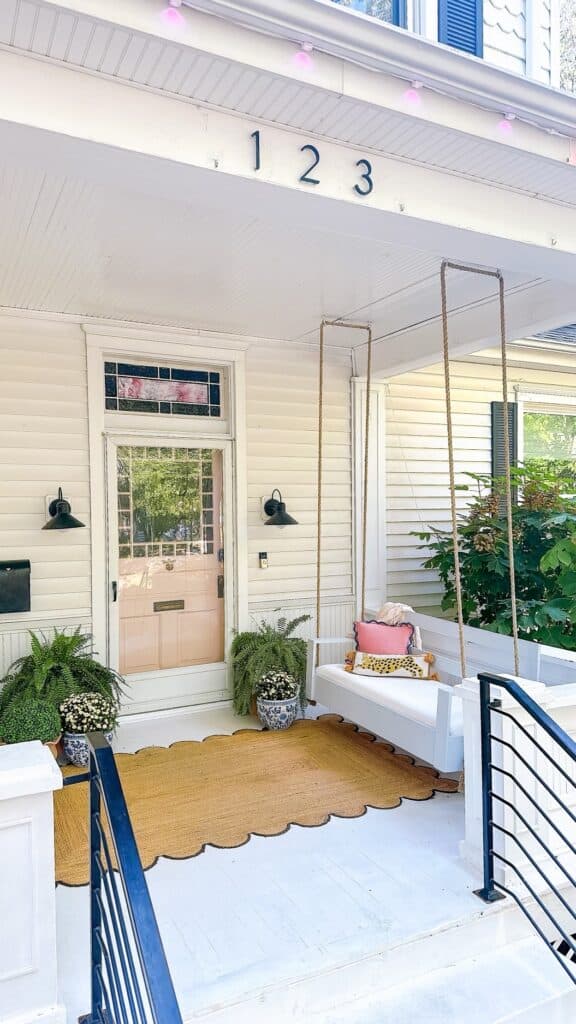
Grand millennial front porch
Goldie’s Room

The day has finally come! Goldie’s room is complete! Hooray!

This has been a long time coming! Goldie has been such a great sport and waited so patiently for her big girl room. I wanted her to love it and she is absolutely thrilled with it!

I spent a long time collecting inspiration to complete this room. My style has evolved over the past two years and I’m finally feeling like our home is coming together to reflect that style.

Goldie’s room perfectly sums up my grand millennial style. It is the perfect balance of vintage, antique, homey with girly floral prints and modern touches.

Little girl grand millennial room
The Pool

We have broke ground on our pool! It has been such a long process, but I am so happy we are here!

We opted to go with a fiberglass pool. Because of this, the construction time is significantly less time consuming than a more traditional build.

While cooler temperatures are on their way, we are excited to be able to use our pool next summer!

I’m dreaming of lots of pool parties!

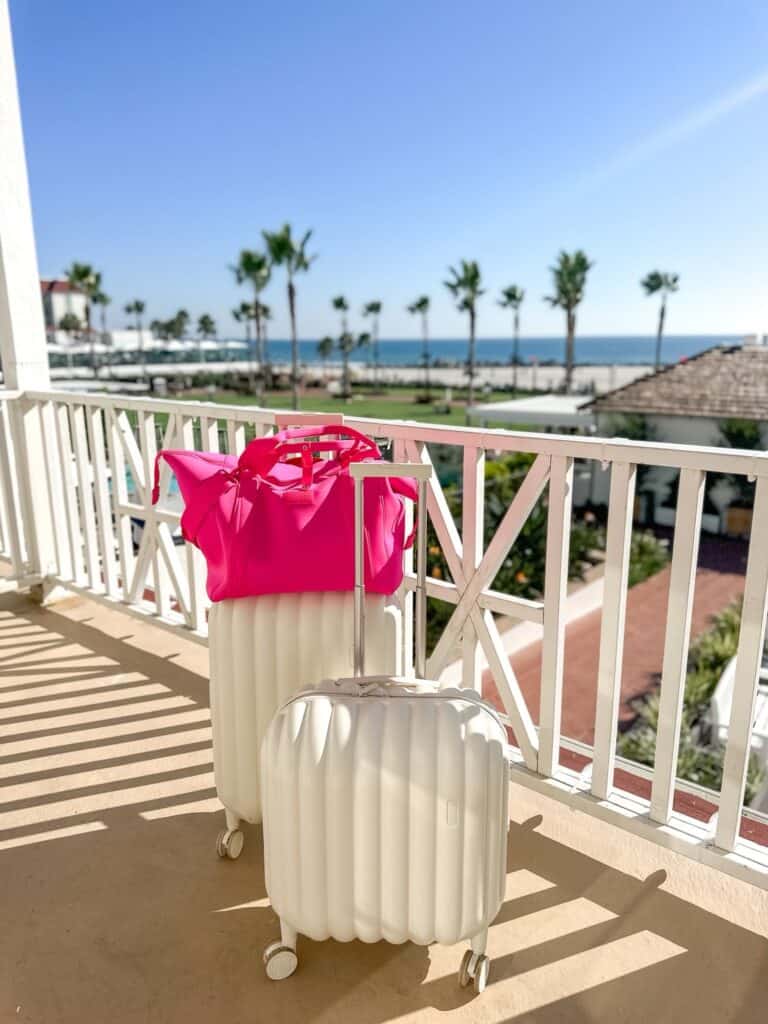
suitcases on a balcony with palm trees

Family Updates

Our family has been so busy! Like most families, back to school time is just insane! It takes time getting into a new schedule.

With all of our kids in the same school, pick up and drop off has been such a breeze. I love seeing all four of the kids go into the school together. I also know that they have each other while they are there.

Goldie was unsure when she first started school, but she has taken to it so well! She loves playing outside at recess and gets to see her big sister too!

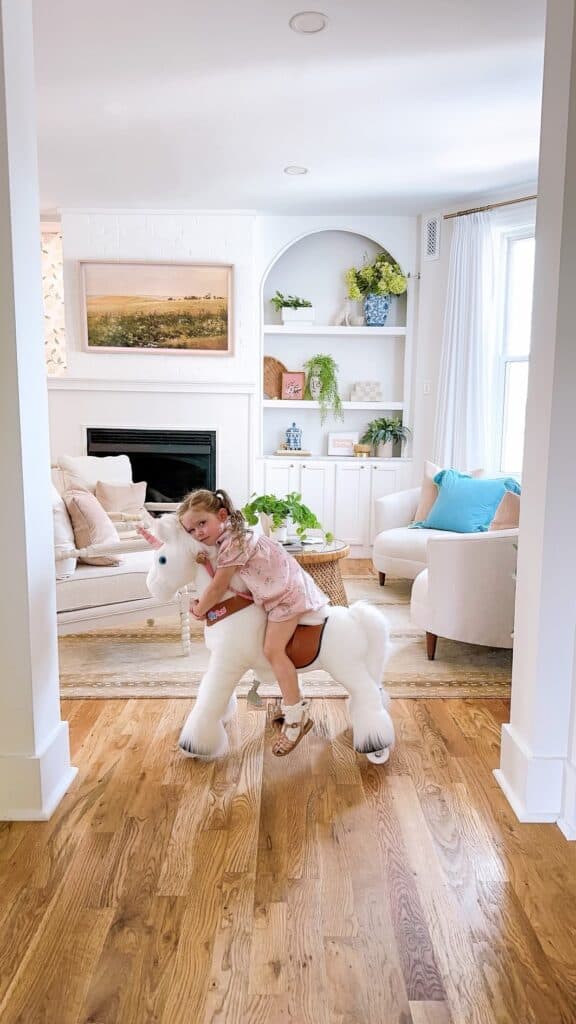
Pony Cycle and little girl

Walker is playing soccer and living his very best life out on the soccer field. The girls are still dancing and Jack is devouring books lately.

Sam completed his first Ironman and I can’t wait to cheer him on with his second Ironman coming up in just a week!

After Sam completes his Ironman we plan on going to Florida for a family vacation! I’m looking forward to the beach and spending time watching the kids play in the sand.

After my trip to San Diego for an Amazon work trip, I am ready for some R & R.

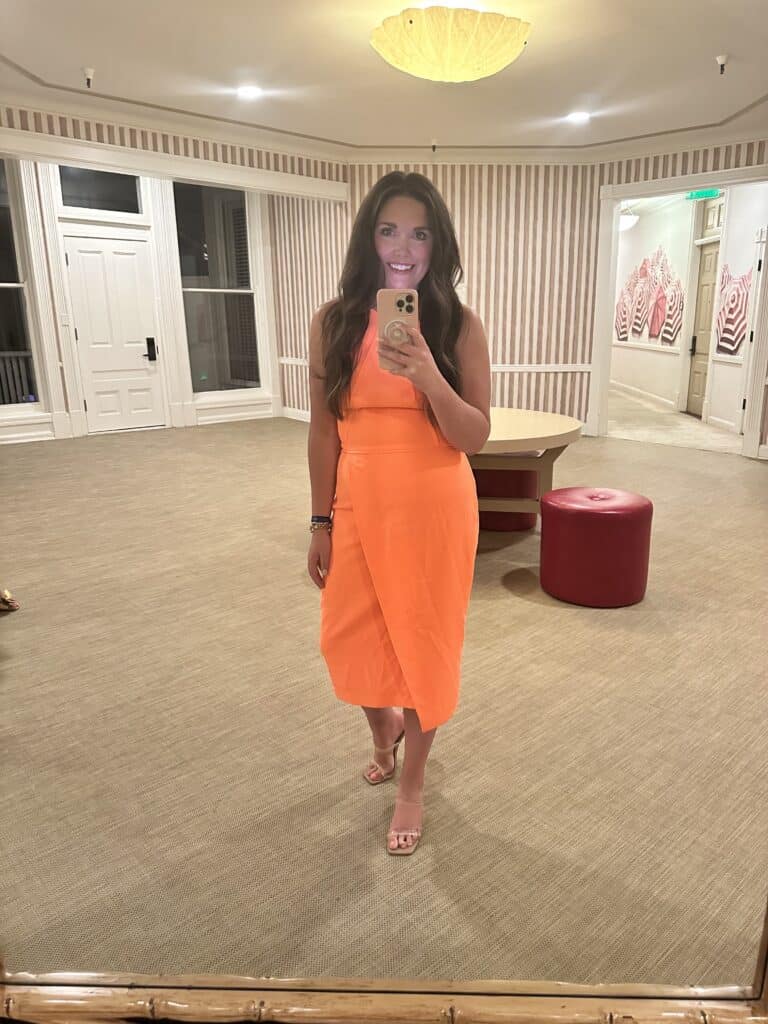
girl in neon orange dress

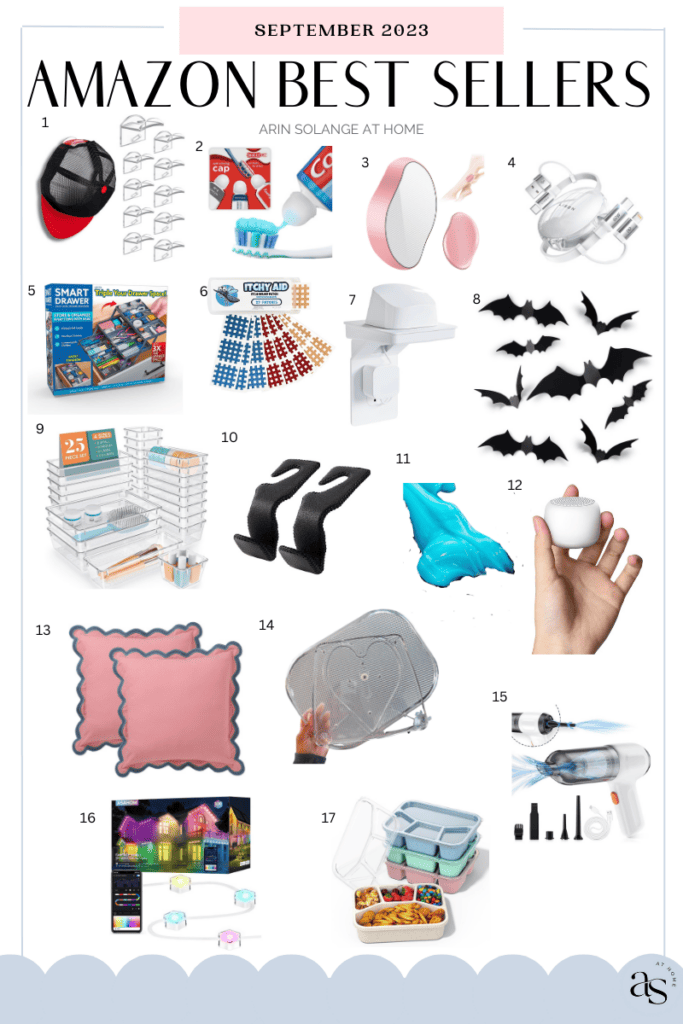
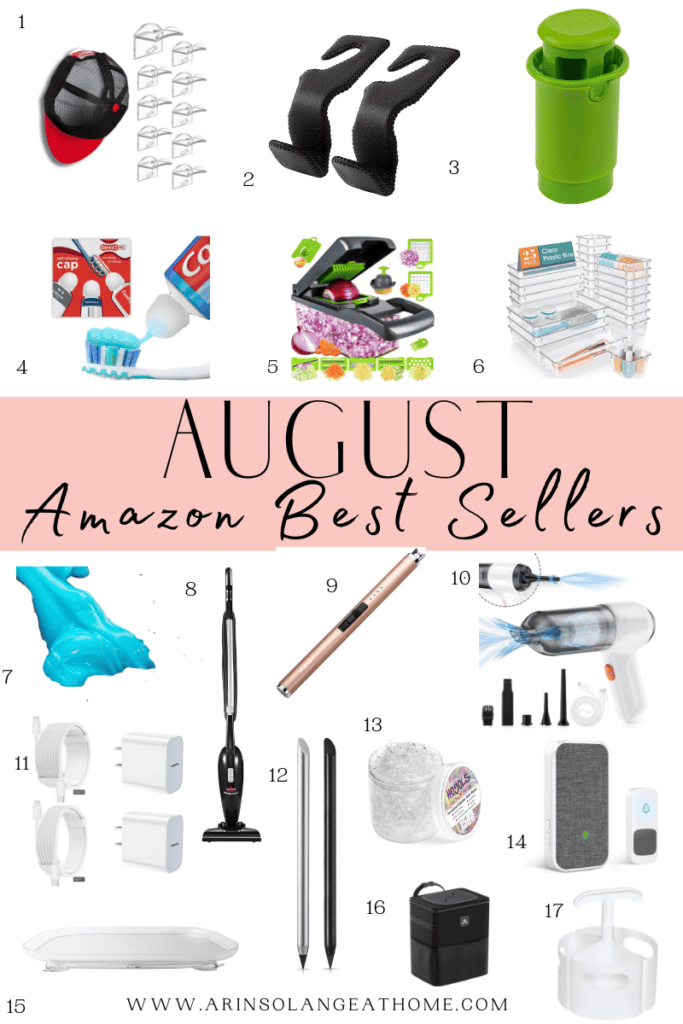
Shop Amazon Best Sellers For September 2023

Check out these amazing products that are topping the charts for September 2023. The products range from Halloween to the sold-out grand millennial throw pillows!

Whether you are wanting to organize or space or clean up your car, these Amazon best sellers are the top products that have been well-loved by my followers.

I have much more in my Amazon storefront for all of your organizational needs too! Make sure you don’t miss out.

September Amazon Best Sellers List of 17 products.

1 | 2 | 3 | 4 | 5 | 6 | 7 | 8 | 9 | 10 | 11 | 12 | 13 | 14 | 15 | 16 | 17

  1. Vorceary Adhesive Hat Hooks for Wall
  2. Toothpaste Caps 3 Pack
  3. Crystal Hair Remover – This has been great for my oldest daughter! At 9 years old, she was a little too young to shave, but this was perfect!
  4. LISEN Multi Charging Cable
  5. Ontel Smart Drawer Organizer for Standard Drawers
  6. ITCHY AID Bug Bite Itch Relief Patches
  7. ECHOGEAR Outlet Shelf for Standard Outlets – This was such a great hack and space saver.
  8. Coogam 60PCS Halloween Bats Decoration – It is Halloween time!
  9. WOWBOX 25 PCS Clear Plastic Drawer Organizer Set – Perfect for organizing your desk, bathroom, junk drawer, etc.
  10. AMVOYOA Headrest Hooks for Car – Space saver for your car!
  11. Car Cleaning Gel Kit – This gel gets down deep in cracks and pulls up even the hardest to reach crumbs.
  12. White Noise Machine Babelio Mini Sound Machine – This is a great travel sound machine.
  13. Folkulture Throw Pillow Covers – You guys have sold these out many times! We have them and LOVE them.
  14. LAMU Lazy Susan Turntable Organizer 
  15. Fanisic Mini Vacuum – This works great with a super strong suction.
  16. ASAHOM Permanent Outdoor Lights – We use these for our home and it makes decorating for the holidays so easy.
  17. XGXN Bento Box Adult Lunch Box – We use these for dinner on the go and it works great!

To be the first to see Best Sellers + enjoy a sneak peek at my end of year ‘Best of’ series, subscribe to my email list below!

Other Posts You’ll Love

The Best Gifts For 9 Year Old Girls | Best Bags For Moms | 12 Tips On Where To Put A Fire Pit

Follow Social For The Latest & Greatest

Pin The Photo Below For Later

Be sure to pin the photo below for later, and if you don’t already – follow me on Instagram (@arinsolange) and Tik Tok (@arinsolange) for more fun! Be sure to check my Amazon store front for all things best seller, home organization, and DIY

September Amazon Best Sellers List of 17 products.
Amazon Finds

How Much Does It Really Cost To Furnish A Bedroom?

How much does it really cost to furnish a bedroom? 

The cost of furnishing a bedroom can vary greatly depending on personal style, type of furniture, and whether you’re furnishing a new home, an apartment, or just a room. 

I’ll break down the cost of each item you might need to furnish a bedroom, from bed frames to side tables, and from lamps to wall decor. 

This post may contain affiliate links.

How much does it really cost to furnish a bedroom with a king size bed?

How Much Does It Really Cost To Furnish A Bedroom?

 The average person spends a considerable amount of time in their bedroom, making it an important space in any home. Over the years and multiple houses later,  I have furnished many bedrooms between myself and my four kids. We just completed Ave’s room and are now working on Goldie’s. 

We like to keep the room designs consistent with the kids’ personalities and interests so I change them up more often than my own. You can imagine the costs can add up quickly. I do all I can to keep costs low and I want to share some suggestions with you as well.

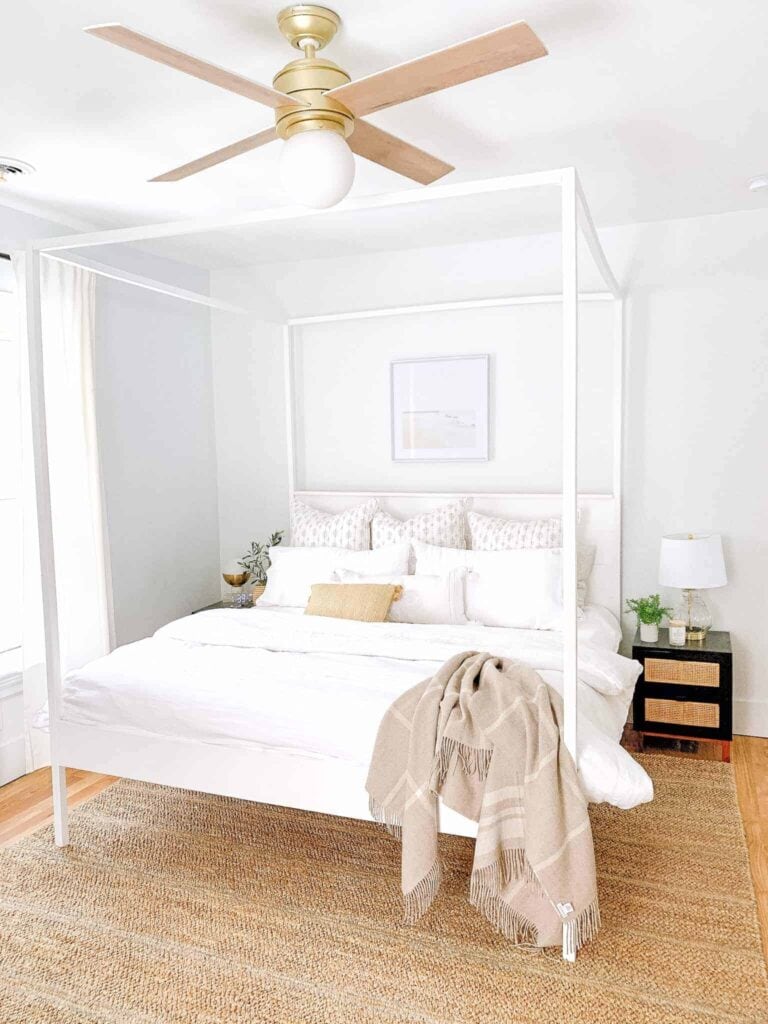
How much does it really cost to furnish a bedroom with a king canopy bed diy

8 Tips To Furnish A Bedroom On A Budget

Furnishing a bedroom on a budget requires careful planning, creativity, and a willingness to repurpose and DIY. 

By utilizing strategies such as reusing furniture, switching furniture between kids, changing textiles, and painting or wallpapering, you can keep costs low while still creating a stylish and functional space. 

Here’s a few tips to help you furnish a bedroom affordably:

#1. Assess Existing Furniture

Start by evaluating the furniture you already have. Determine if any pieces can be repurposed or reused in the bedroom. Consider items like dressers, nightstands, or bookshelves that can be given a fresh look with a coat of paint or new hardware.

#2. Swap Furniture Out Between Family Members

If you have multiple children, consider switching furniture between them. This can give each child a fresh look without spending extra money. For example, swap beds, dressers, or desks between siblings to create a sense of novelty.

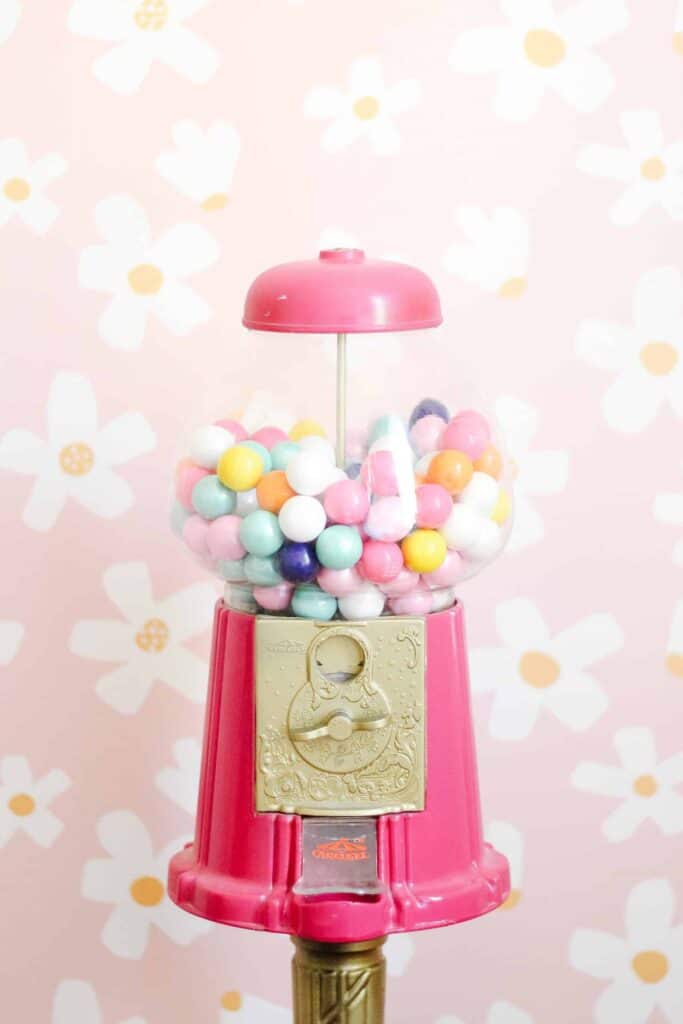
bubblegum machine

#3 DIY Projects

Embrace your creativity and tackle some do-it-yourself projects. 

For instance, you can transform an old headboard by reupholstering it with new fabric or repainting it. Similarly, you can give new life to a plain dresser by adding stencils, decals, or changing the knobs.

Some of my favorite bedroom pieces have been DIY projects I’ve done over the years. Sam and I wanted a king canopy bed, but couldn’t justify spending $4,000. So, we opted to make our own DIY king canopy bed frame.

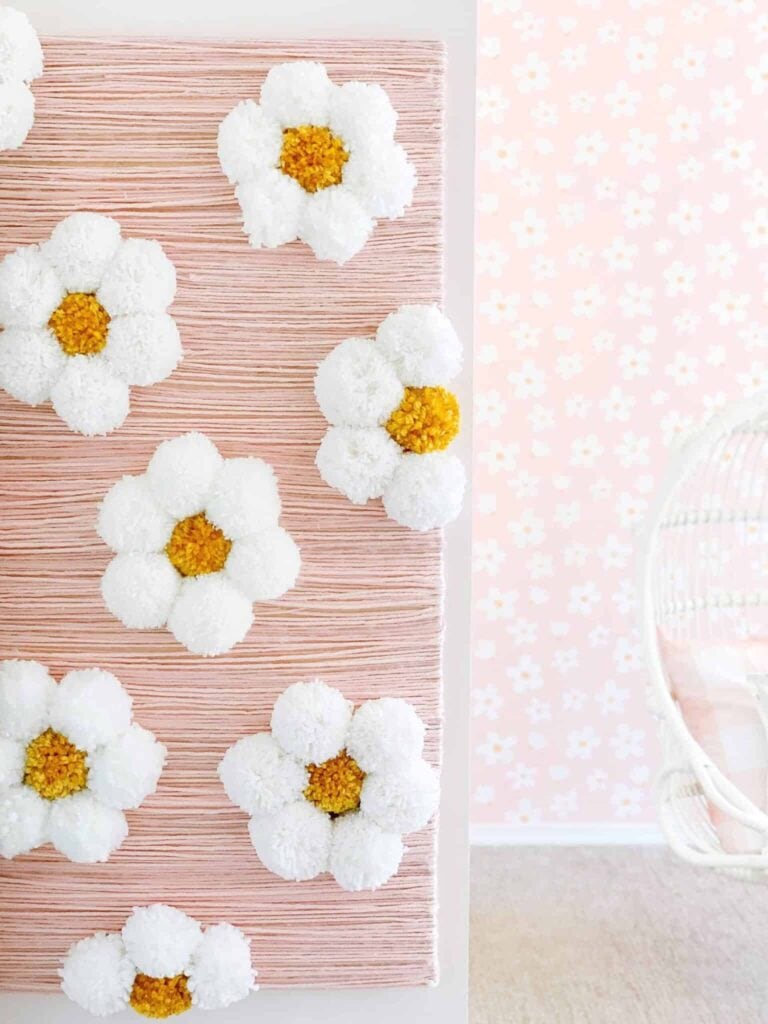
How much does it really cost to furnish a bedroom with diy daisy wall art?

Light fixtures can also be costly. This DIY light fixture cost next to nothing and was the perfect addition for my daughter’s room.

One of my favorite DIYs was in our last house with a DIY daisy wall! It was such a fun piece and added to the decor of the room.

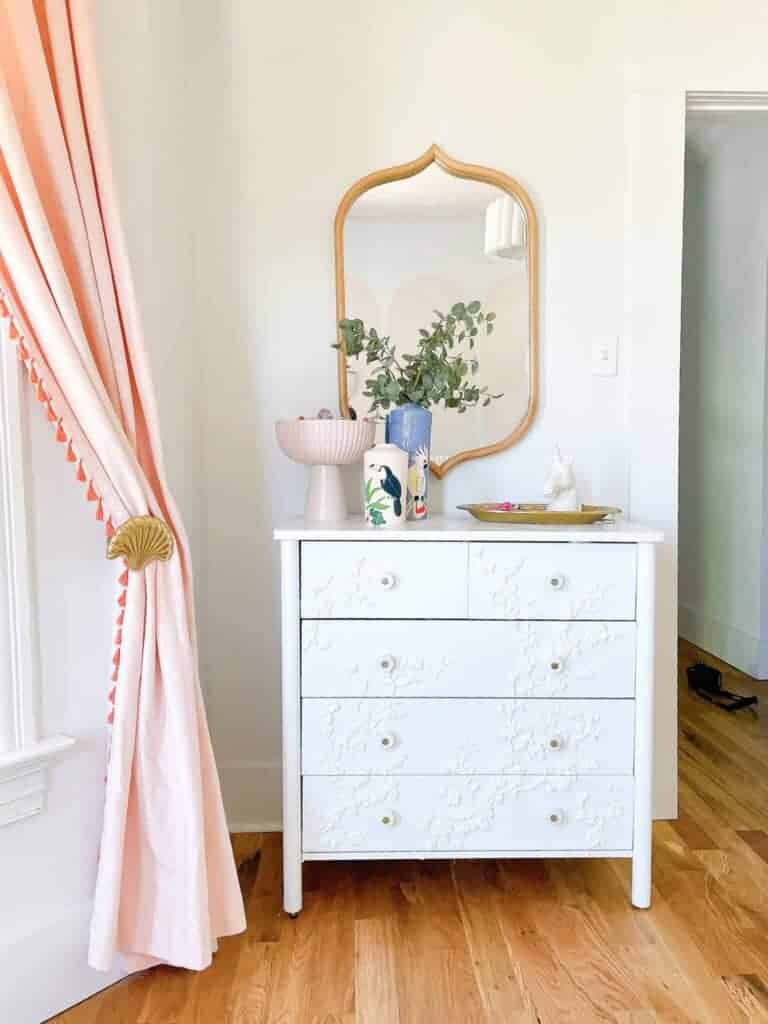
I also love buying IKEA furniture and transforming the pieces into an entirely different looking item. Ave’s IKEA Bjorksnas dresser was transformed with resin and the end result was my favorite! 

How much does it really cost to furnish a bedroom with diy resin dresser?

#4 Change Out Textiles

One of the easiest and most affordable ways to refresh a bedroom is by updating textiles. 

Swap out bedding, curtains, and throw pillows to give the room a new look. Look for sales, discounts, or even consider making your own pillow covers or curtains to save money.

#5 Update With Paint Or Wallpaper

Walls have a significant impact on the overall aesthetic of a room. Consider repainting the walls with a fresh coat of paint in a new color to change the atmosphere.

 Alternatively, you can use wallpaper to add pattern or texture to the room. Both options are cost-effective ways to transform the space.

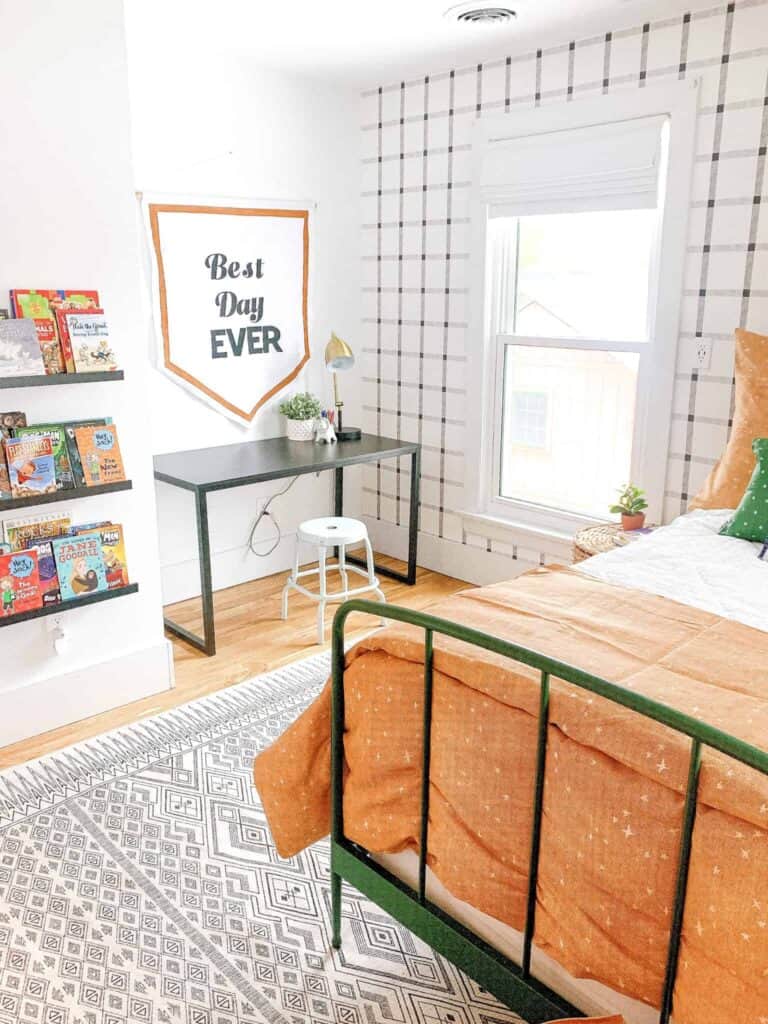
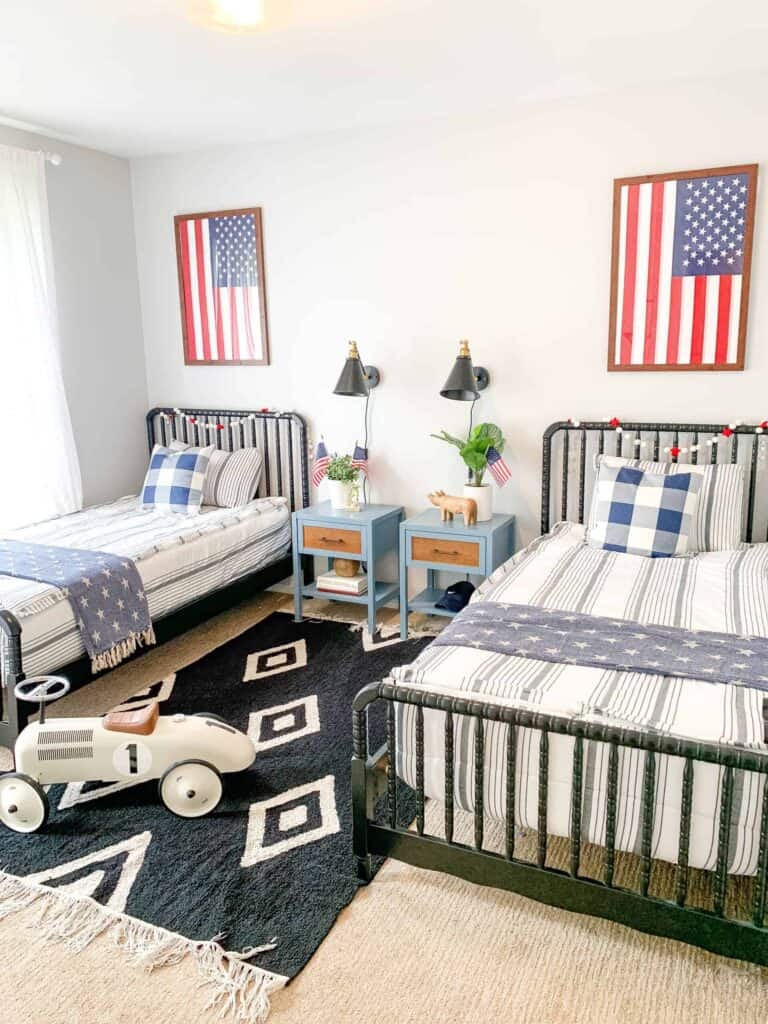
How much does it really cost to furnish a bedroom with black and white wallpaper boys room?

#6 Shop Antique & Thrift Stores

Explore antique stores, consignment shops, or online platforms to find affordable furniture and decor. 

You might discover hidden gems at a fraction of the price compared to buying new. Remember to inspect items carefully for quality and functionality.

I enjoy antiquing to not only add one of a kind items to my home, but to also have the ability to give it a facelift. Antiquing is such a fun way to fill your home with pieces that have a story.

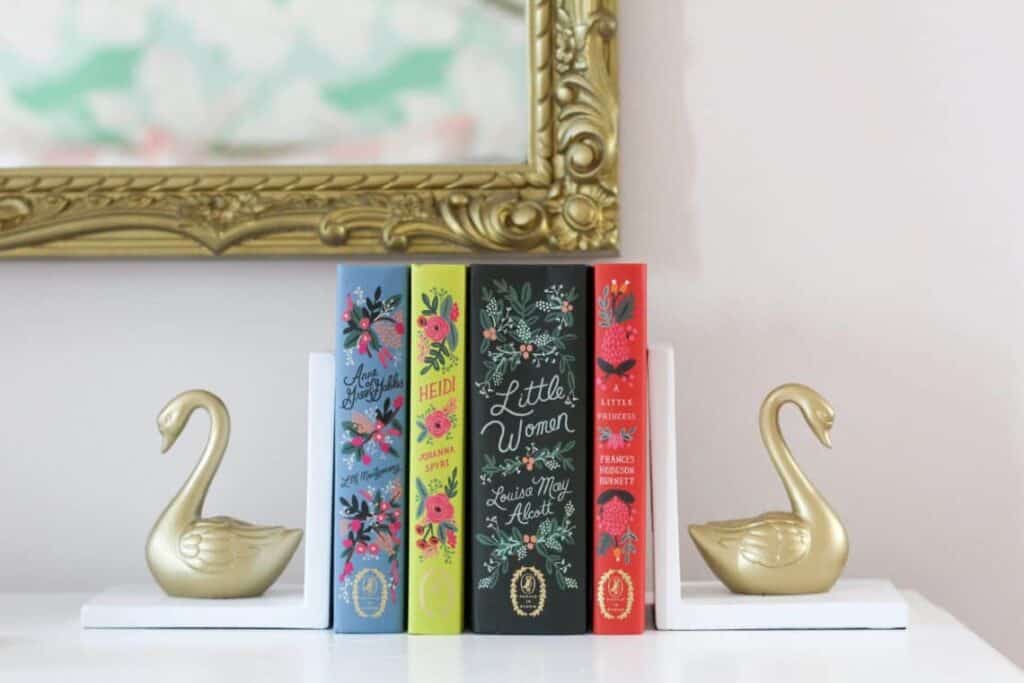
How much does it really cost to furnish a bedroom with gold antique swans and books.

#7 Prioritize Essential Purchases

Focus on purchasing essential items first, such as a comfortable mattress, functional storage solutions, and a sturdy bed frame. 

Consider allocating a larger portion of your budget to these key items while keeping other decorative elements more budget-friendly.

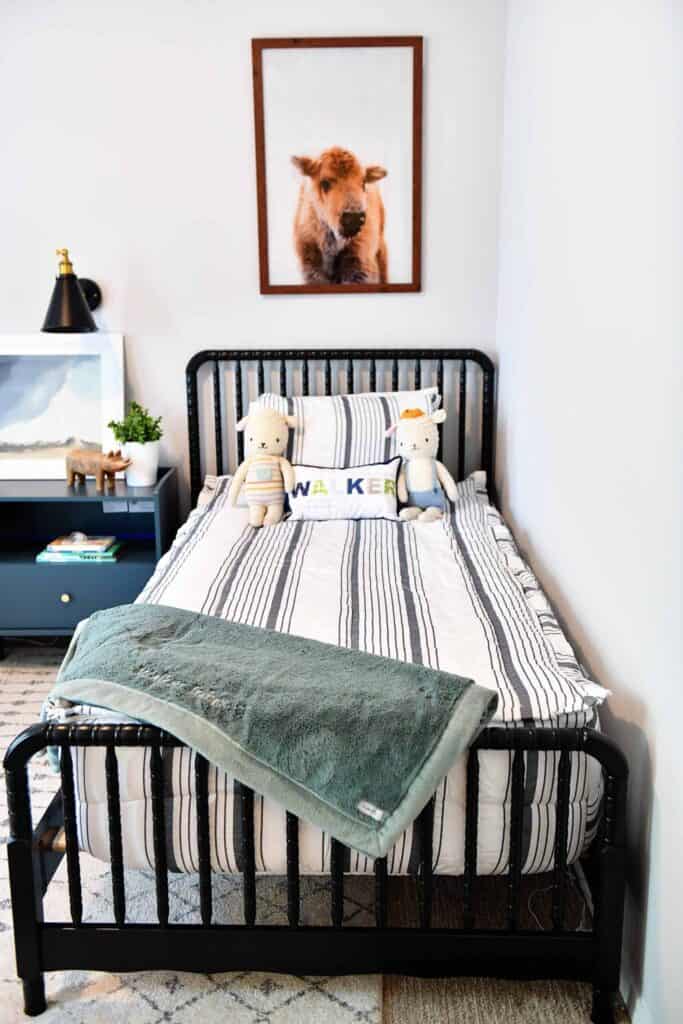
How much does it really cost to furnish a bedroom with black jenny lind bed?

#8 Comparison Shop & Wait For Sales

Before making any purchases, compare prices across different stores and online platforms. Look for discounts, clearance sales, or seasonal promotions to get the best deals. Waiting for sales can greatly reduce your overall expenses.

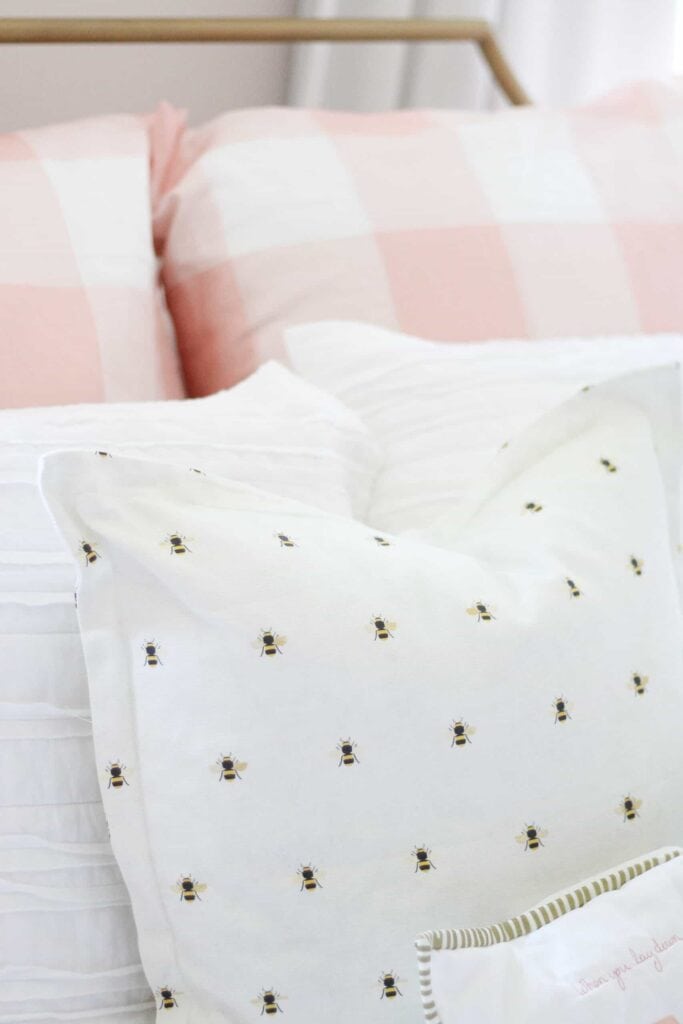
How much does it really cost to funish a bedroom with bee pillows?

Essential Elements To Furnish Your Bedroom

Not only should your bedroom be comfortable, it should also be functional and aesthetically pleasing. Your bedroom is your safe space. It can be a place where you spark creativity or your mind relaxes.

Regardless of the size of your bedroom, there are a few essential items that you need in order to make your space comfortable and function well. 

How much does it really cost to furnish a bedroom for double twin beds?

Beds & Bedding 

The first step to furnishing your bedroom is choosing a bed frame and mattress. This crucial decision will set the tone for the rest of the design process. 

Bed Frames

On average, a good-quality bed frame can cost anywhere from $300 to $1,000, depending on the material and style. Mattresses have a similar price range, with higher-end mattresses reaching up to $2,000 or more.

With a bed frame, determine the appropriate bed size based on the available space and your needs (e.g., twin, full, queen, king). Choose a bed frame that complements your bedroom’s overall style, whether it’s contemporary, traditional, rustic, or modern. 

Consider the durability and maintenance requirements of different materials like wood, metal, or upholstered frames. Decide if you need extra storage options like drawers or shelves within the bed frame.

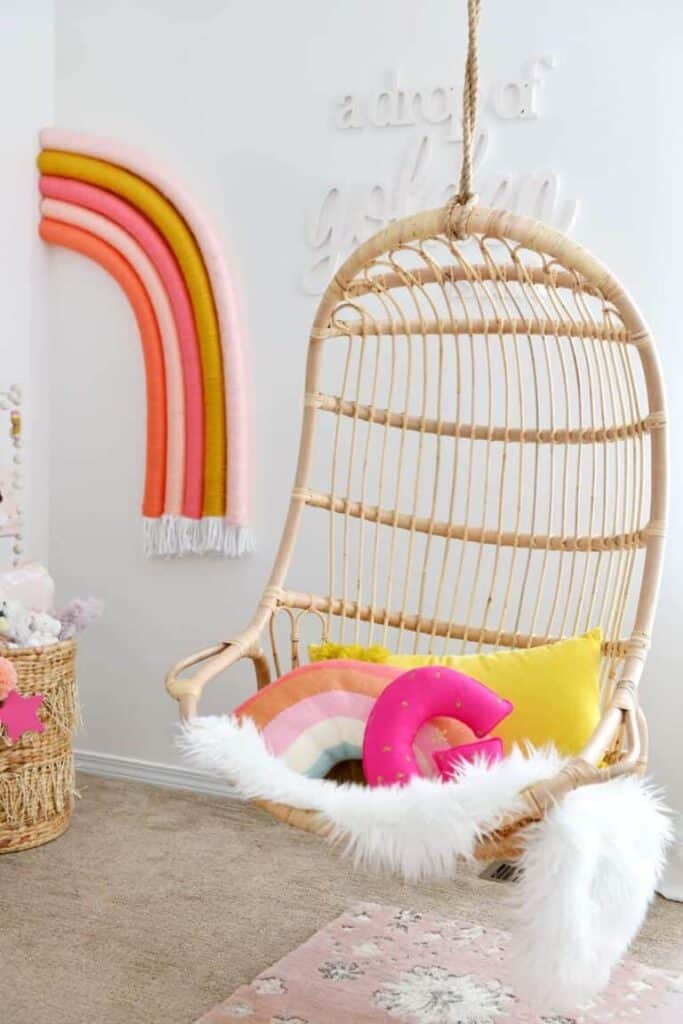
How much does it really cost to furnish a bedroom girls room and hanging swing.
Mattresses

For a mattress, select a mattress that suits your preferred level of firmness or softness. Look for a mattress that provides proper spinal alignment and supports your body weight. 

You’ll want to choose a mattress size that matches your bed frame and allows for comfortable sleeping space. Consider the durability and longevity of the mattress. Your choice will depend on your comfort preference and budget.

Pillows

Pillows are another good consideration to make when looking at bed frames and mattresses. 

Choose pillows that provide the desired level of support for your sleeping position. Determine the appropriate pillow size based on your bed size and personal preference. Consider different pillow fillings (e.g., down, memory foam, polyester) and choose based on comfort and hypoallergenic needs.

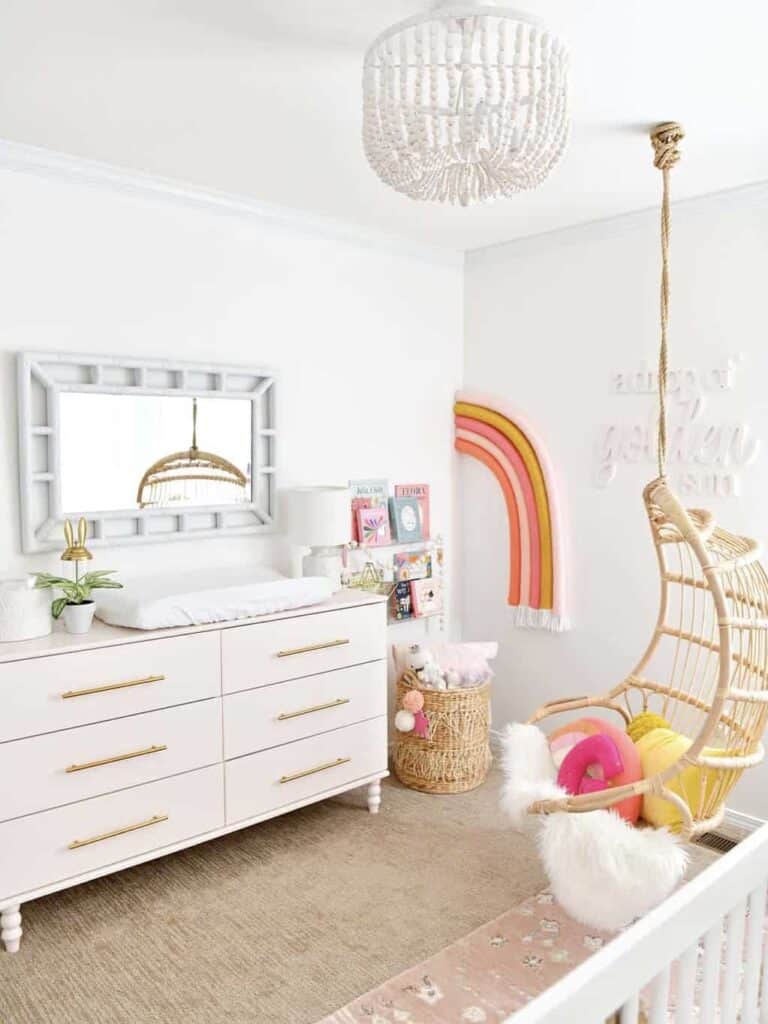
How much does it really cost to furnish a bedroom and rainbow nursery?

Side Table & Dressers

Side tables are an essential furniture piece for any bedroom and can range from $50 to $300 each. A dresser is another important item, the average cost of which can vary from $200 to $800, depending on the size and quality. 

When it comes to side tables, determine the appropriate size and shape based on the available space and whether you want one or multiple side tables. Decide if you need drawers or shelves for storage or prefer a simple design. Match the side table(s) with the bed frame and overall bedroom style.

As for a dresser, assess the amount of storage space required for your clothing and personal items. Choose a dresser or chest of drawers that fits well within the bedroom without overwhelming the space. Consider the style and finish of the piece to ensure it harmonizes with the overall bedroom decor.

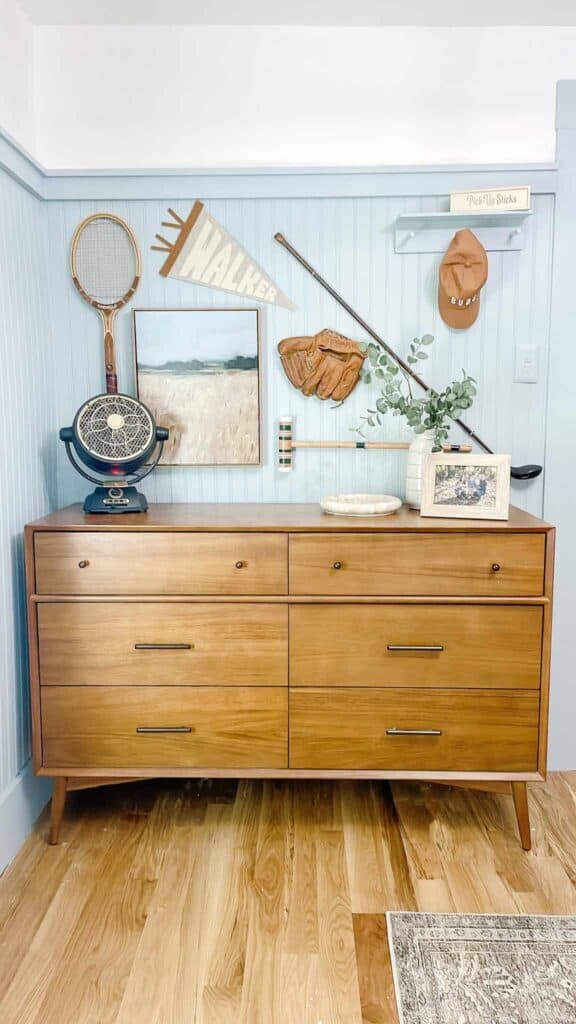
How much does it really cost to furnish a bedroom with antique dresser and decor?

Decorative Pieces

Decorative pieces help anchor your bedroom while also cohesively bringing your room together. Lamps, rugs, mirrors, and wall decor are all examples of decorative items that may not be considered essential but serve a bigger picture.

Wall Art

When deciding on wall art and decor, select artwork or decor that resonates with your personal style and preferences. Decide if you want to follow a specific theme or color scheme in your bedroom. 

Consider the wall space available and how the art or decor will fit within the overall layout.

Wall art can easily get expensive in a hurry. My biggest tip to keep costs down is to look at antique shops or try your hand at DIYs.

How much does it really cost to furnish a bedroom with swinging chair.
Area Rugs

An area rug can add a nice touch to your room and can cost anywhere from $100 to $1,000, depending on the size and material. While this isn’t essential for bedrooms, it does help anchor your bed and creates a warm environment.

When it comes to picking a rug, measure the bedroom area to determine the appropriate rug size. Consider the texture, durability, and maintenance requirements of different rug materials. Choose a rug that compliments the color scheme and style of the room.

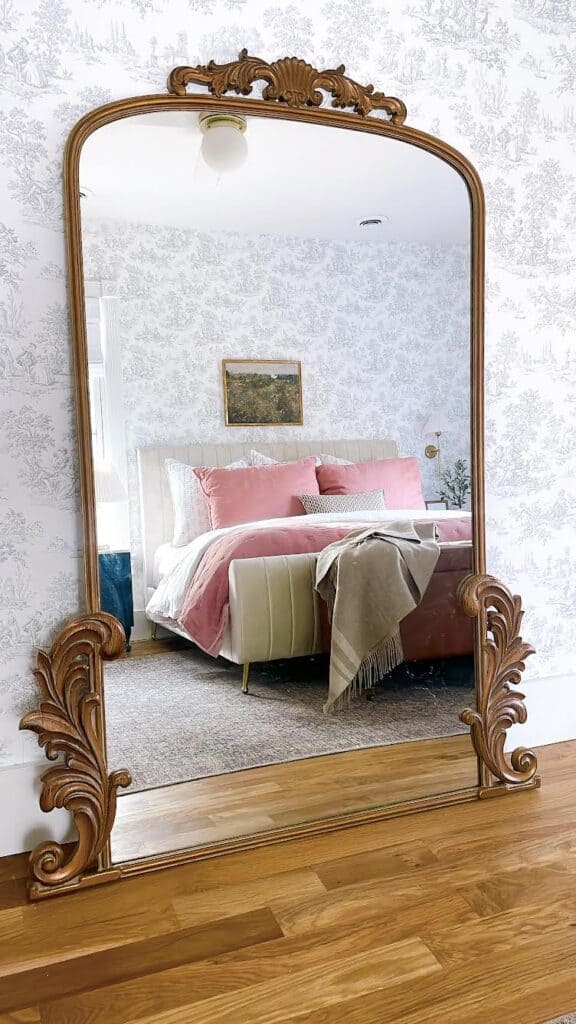
How much does it cost to furnish a bedroom with antique gold mirror and area rug?
Mirrors

A full length mirror is not necessary for all bedrooms. However, it is not only functional, but can also make your bedroom appear brighter and larger due to its reflective properties.

A mirror can set you back $100 to $300. However, if you pick a mirror that is timeless you won’t need to switch it out with each bedroom upgrade.

Select a mirror that enhances the overall aesthetic of the bedroom. Determine the ideal location for the mirror, considering both functionality and visual appeal.

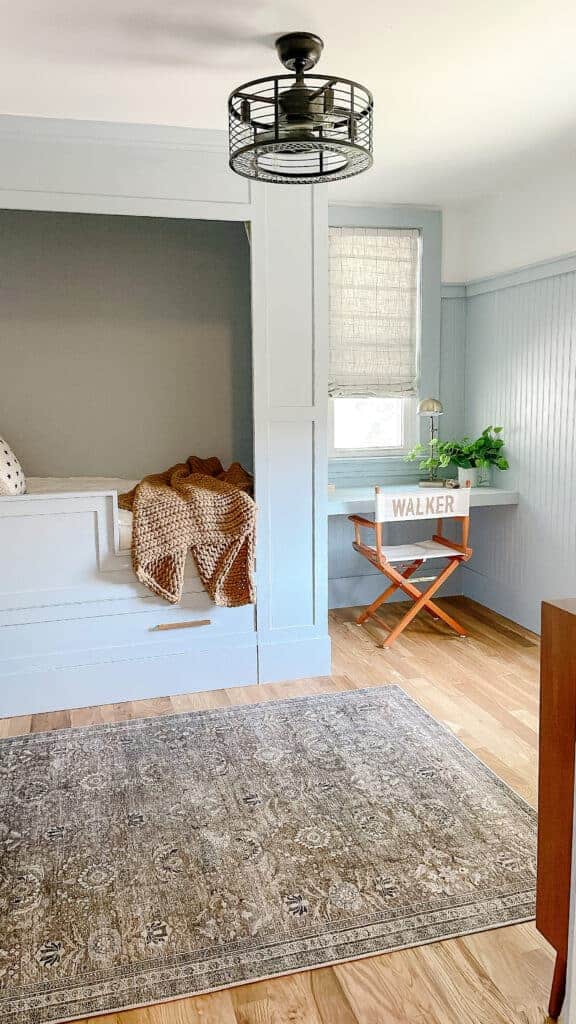
How much does it really cost to furnish a blue boy's bedroom.
Lamps

Lamps and other decorative items vary widely in price, but you can expect to spend between $50 and $200 per item.

Before you purchase any lamps make sure to assess the type and amount of lighting in your bedroom. 

Choose a lamp that fits the overall decor style and complements other elements in the room. Consider features like adjustable brightness and easy-to-use switches.

You can choose to have lamps on your side tables for symmetry. Adding lamps to longer dressers look nice to offset the balance of the length. Hanging a wall mirror above a dresser, paired with a lamp, can greatly enhance lighting in your room and make the space appear larger.

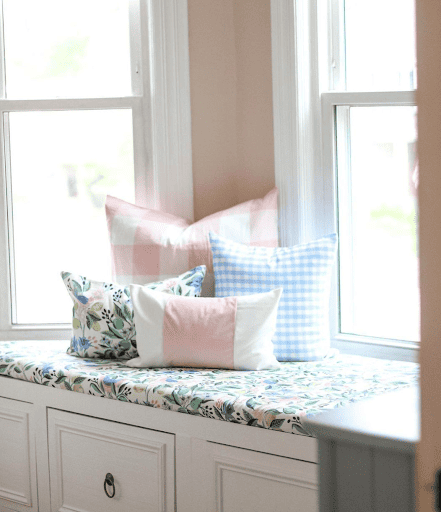
How much does it really cost to furnish a bedroom with a diy window seat and pillows?
Window Treatments

Window treatments are another essential part of a bedroom. The costs can fluctuate between $50 to $500, depending on the size of your room and the choice of materials. 

Decide if you prefer curtains, blinds, shades, or a combination to achieve the desired privacy and light filtering. Consider the ease of use and maintenance of different window coverings. For example, curtains can be easily opened and closed, while blinds offer adjustable light control.

How much does it really cost to furnish a bedroom window treatments and gold decal.

 If energy efficiency is a concern, consider window coverings that provide insulation and help regulate temperature. Black out curtains are a great example of energy efficient options.

 Determine the level of privacy you desire and choose window coverings accordingly. Sheer curtains provide less privacy than blackout curtains or blinds.

Accent Chairs

An accent chair can range from $100 to $500, depending on the style and quality. While accent chairs are necessary in a bedroom, they do offer additional seating.

Personally, I don’t think accent benches and chairs are necessary. With smaller spaces, too much furniture can make a room feel cramped.

How much does it really cost to furnish a bedroom with boys room?

Additional Items and Tips

Assess if there are any specific furniture pieces or accessories you need based on your lifestyle and preferences. This could include a desk, bookshelf, vanity, or television stand. 

Choose furniture pieces that serve multiple purposes, such as a storage ottoman or a bed frame with built-in shelves. Ensure that any additional pieces you choose harmonize with the overall style and color scheme of the bedroom.

When making decisions for each item, it can be helpful to create a mood board or gather inspiration from home decor magazines or online platforms. 

Additionally, consider your budget, quality, and personal comfort when making final choices for each furnishing item in your bedroom.

How much does it really cost to furnish a girl's bedroom with diy light fixture.

Budget Brands Versus Luxury Brands for Kids Rooms

When it comes to kids’ rooms, the decision between budget and luxury brands can be a tricky one. 

Budget-friendly furniture stores like IKEA offer complete bedroom sets for as low as $500. High-end retailers, like Pottery Barn Kids, can charge up to $3,000 for a similar bedroom set. 

It’s a good idea to strike the right balance between cost, durability, and design. 

The decision can be approached from both sides. 

A budget brand may work best for kids’ rooms if their furniture will be destroyed or grown out of and replaced when they are older. Alternatively, a luxury brand may work better for your children’s room if the pieces are timeless and last longer than the budget brand.

How much does it really cost to furnish a girl's bedroom with DIY daisy wall and swinging char.

How Much Does It Cost To Furnish A Bedroom?

Adding up all these items, the total cost of furnishing a bedroom can range from $1,000, for the bare minimum, to $10,000 or more for a luxury setup. 

This doesn’t include design fees if you hire an interior designer or decorator to help with the design process.

Whether you need to furnish an entire house or new apartment, stick to your furnishing budget. You can always add quality furniture over time to create a comfortable home. The important thing is that your entire home is yours and you stick to a price point that won’t cause you to go into debt.

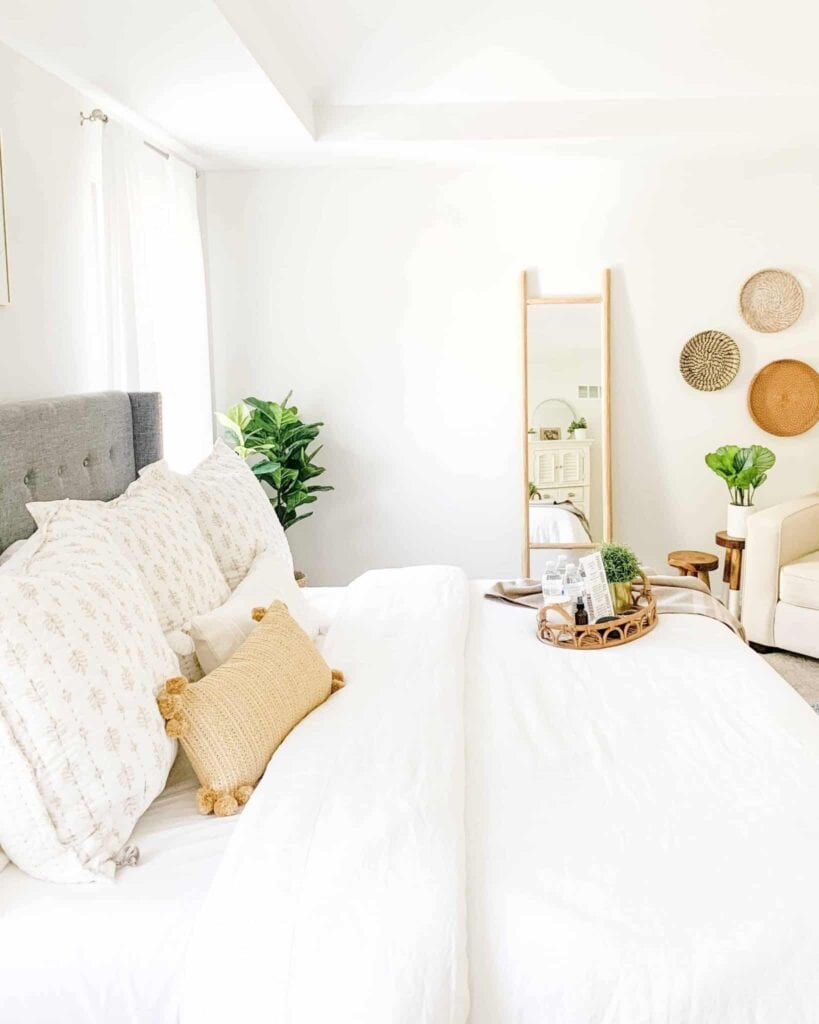
How much does it really cost to furnish a bedroom for with all white bedding?

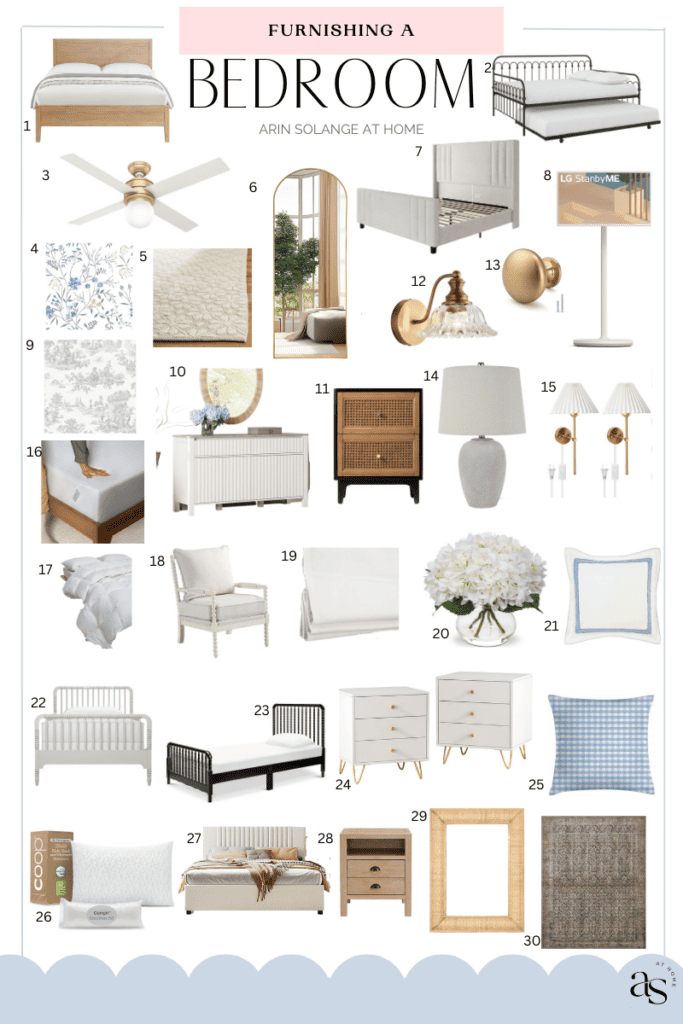
Shop My Favorite Bedroom Furniture Finds

How much does it really cost to furnish a bedroom shop my favorite amazon bedroom finds.

1 | 2 | 3 | 4 | 5 | 6 | 7 | 8 | 9 | 10 | 11 | 12 | 13 | 14 | 15 | 16 | 17 | 18 | 19 | 20 | 21 | 22 | 23 | 24 | 25 | 26 | 27 | 28 | 29 | 30

  1. Alaterre Furniture Arden Platform, Queen, Light Driftwood
  2. Novogratz Bright Pop Full Metal Daybed with Twin Trundle Bed – Great option for a guest room or kid’s room.
  3. Hunter Fan Company, 59320, 52 inch Hepburn Modern Brass Ceiling Fan
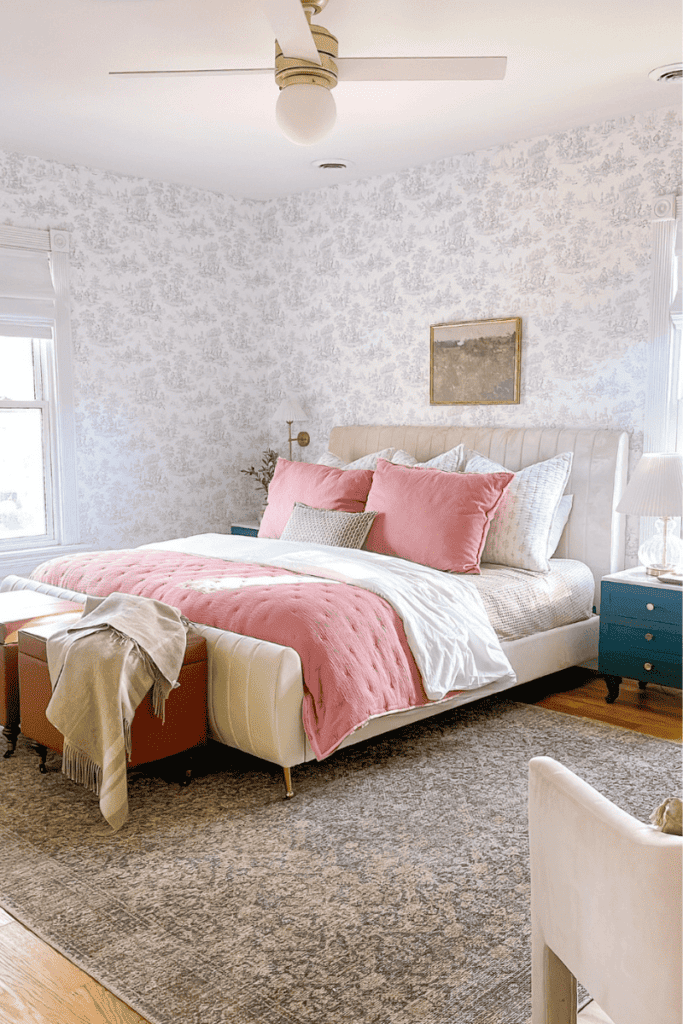
  4. RoomMates RMK12181PLW White Meadow Mix Peel and Stick Wallpaper
  5. SAFAVIEH Vermont Collection Accent Rug
  6. NeuType 65″x22″ Arched Full Length Floor Mirror with Stand – Sell out risk.
  7. Amerlife King Size Bed Frame
  8. LG 27-Inch Class StanbyMe 1080p-Portable Touch-Screen-Monitor
  9. NextWall Chateau Toile Peel and Stick Wallpaper
  10. WAMPAT White Dresser for Bedroom, 57” Dresser with Fluted Doors – Would look wonderful in a bedroom or as a buffet table next to a dining table.
  11. COZAYH Fully-Assembled 2-Drawer Woven Cane Front Accent Nightstand
  12. XIEDUN Bathroom Vanity Lights Brass Vintage Vanity
  13. 10 Pack-Kitchen Cabinet Knob Gold
  14. Nourison 23″ Grey Vintage Distressed Ceramic Pot Table Lamp – A neutral lamp perfect for bedrooms, a home office, or living rooms.
  15. Plug in Dimmable Wall Sconces Set of Two – Sell out risk!
  16. Tuft & Needle – Legacy Original Full Mattress – The best mattress for your master bedroom.
  17. Airluck Feather Down Comforter King Size 
  18. OSP Home Furnishings Kaylee Spindle Accent Chair
  19. White Cordless Roman Shades
  20. Hydrangea Artificial Flowers with Vase – Swap these out to a coffee table easily.
  21. Laura Ashley Mila Euro Sham, 26×26, Blue
  22. Little Seeds Rowan Valley Linden Twin Size Bed, White
  23. DaVinci Jenny Lind Twin-Bed with Wood Spindle Posts in Ebony
  24. Homsee Set of 2 Nightstands
  25. Ambesonne Checkered Throw Pillow Cushion Cover
  26. Coop Home Goods Original Loft,Queen Size Bed Pillows
  27. DNYN Upholstered Queen Size Platform Bed with Storage Drawers
  28. Alaterre Furniture Arden 2-Drawer Wood Nightstand
  29. Creative Co-op EC0527 Rectangle Wall Rattan Detail, Natural Mirror
  30. Amber Lewis x Loloi Billie Collection -Perfect for your living room or bedroom.

Other Posts You’ll Love

King Canopy Bed Frame DIY | Shaker Style Bedroom Inspiration | 10 Toddler Girl Bedroom Ideas On A Budget

Follow Social For The Latest & Greatest

Pin The Photo Below For Later

Furnishing a bedroom involves more than just buying a few pieces of furniture.

 It’s about striking the right balance between comfort, functionality, and style. Whether you’re shopping at high-end furniture stores or hunting for a great deal at local flea markets or online marketplaces, there are many ways to create a beautiful and comfortable bedroom that fits your budget. 

How much does it really cost to furnish a bedroom shop my favorite amazon bedroom finds.
Food

10 Spooky Halloween Coffee Recipes To Brew This Fall

Halloween happens to be my favorite time of year. When the cooler weather hits there is no better way to celebrate getting into the Halloween spirit than by putting up spooky DIY Halloween decorations while sipping on my favorite coffee. To celebrate the Halloween season, I’m sharing 10 spooky Halloween coffee recipes to brew this fall! 

This post may contain affiliate links.

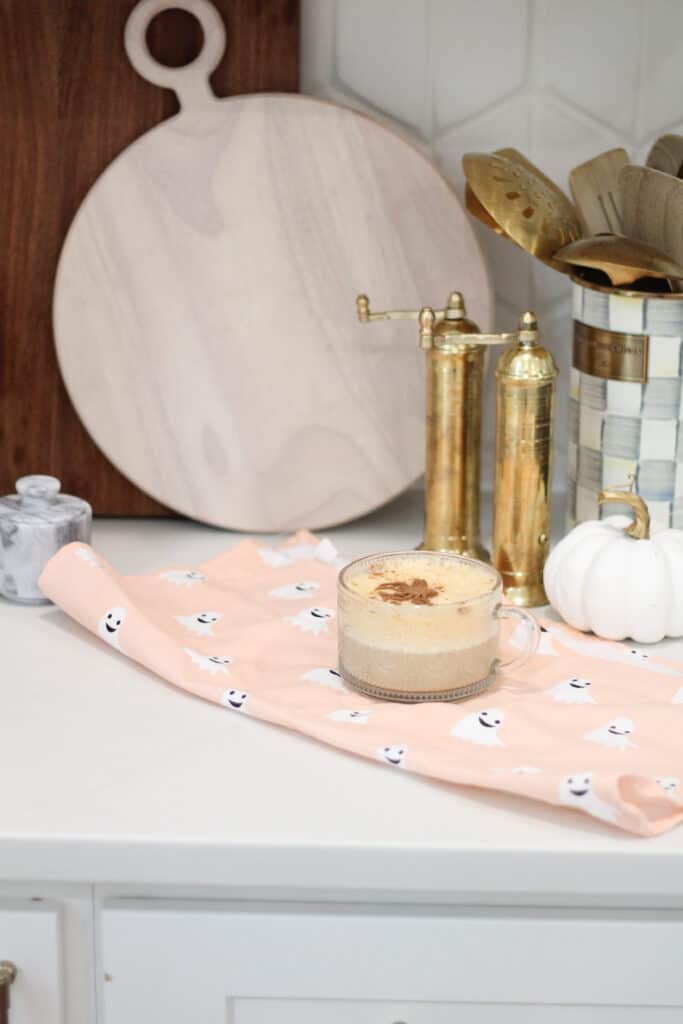
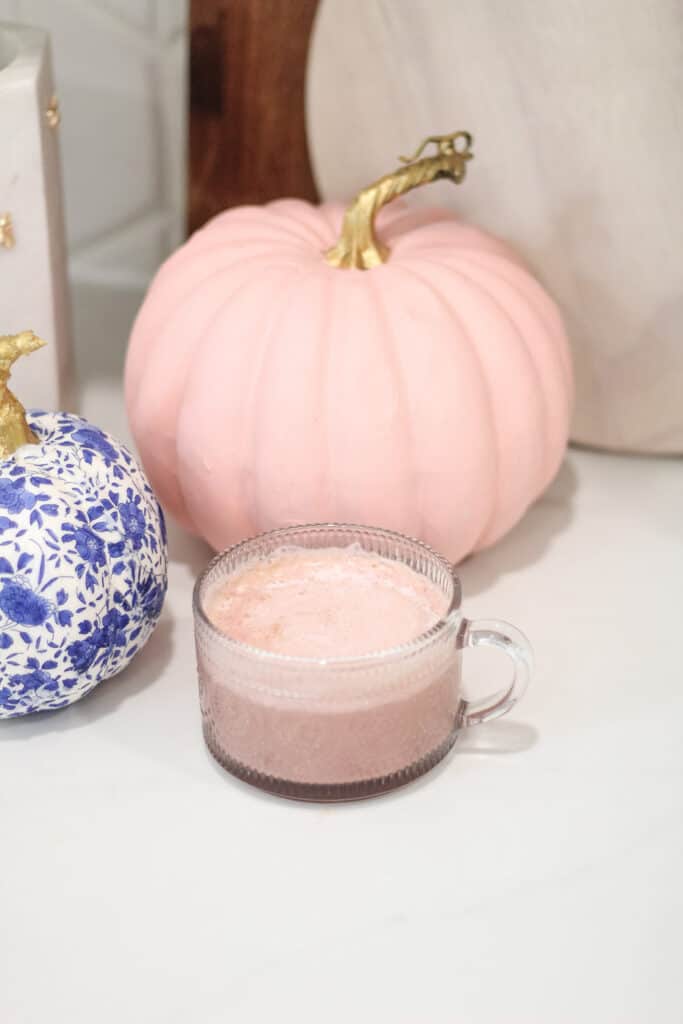
Halloween Coffee Recipes with PSL on ghost towel
Pumpkin Spice Latte
previous arrowprevious arrow
next arrownext arrow

10 Spooky Halloween Coffee Recipes To Brew This Fall

​Whether you prefer lattes or hot chocolate, these 10 Halloween coffee drinks are the perfect way to celebrate the upcoming season. Each drink features a spooky twist to delight your taste buds. 

While I generally don’t get too excited for pumpkin spice latte season, I still really enjoy fall coffee recipes. With my trusty nespresso machine, I’m able to make most of these recipes in no time. You don’t need to have a fancy coffee machine to get started. You can easily make these spooky drinks with your favourite coffee.

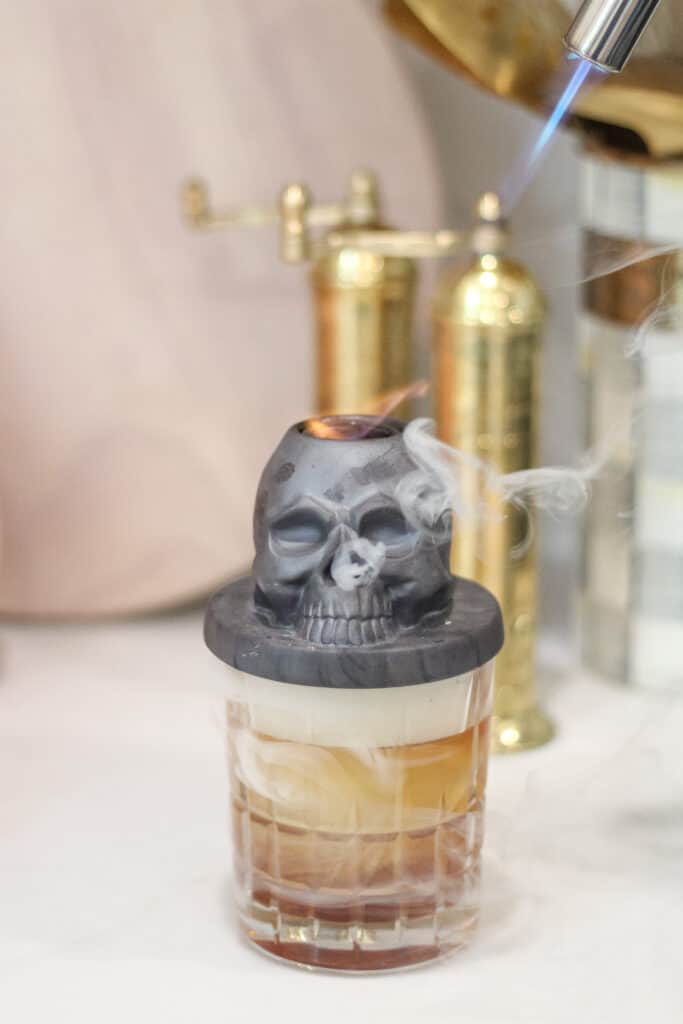
Halloween coffee recipes with a fire torch for a coffee old fashion.

All of these recipes can be tailored to your taste. So if you have a sweet tooth and want to add more sweetness to your coffee mixture then you can! Or, if you are like me, and only want a touch of sweetness, feel free to keep the sweet level down to a minimum.

These spooky coffee recipes are perfect for Halloween night or throughout the month of October. Enjoy them all month long and save money by skipping your local coffee shop and making your own delicious treats at home.

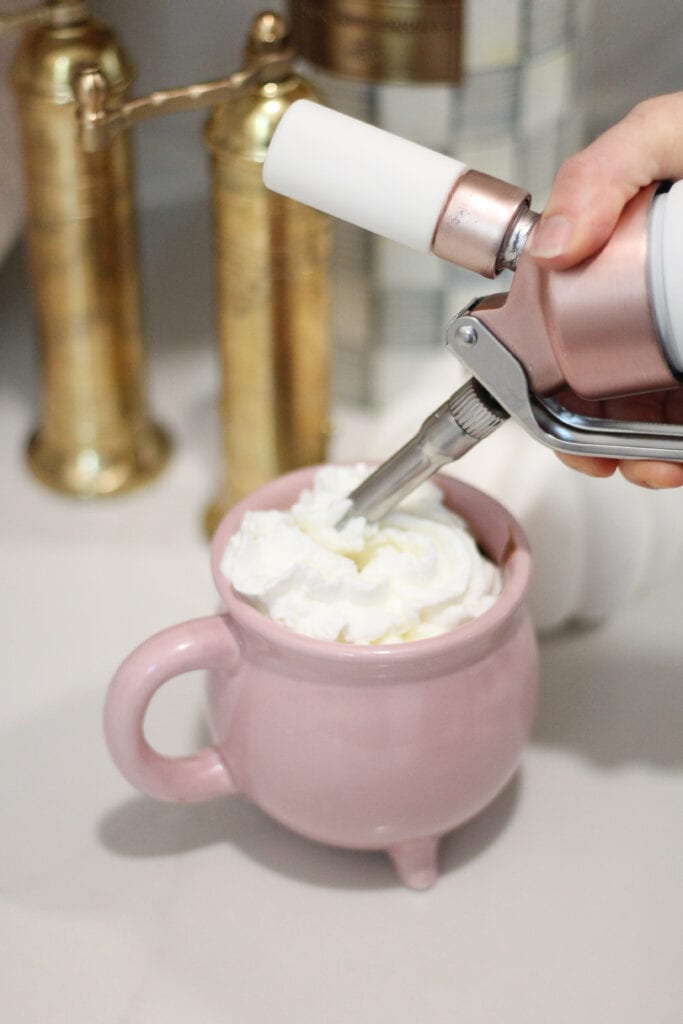
Halloween coffee recipes with whipped cream hot cocoa.

Tips For Making A Flavoursome Halloween Coffee

All of these recipes can be tailored to your dietary needs. Remember you can always substitute decaf coffee or a decaf shot of espresso. 

Additionally, feel free to use your milk of choice. Whole milk and half and half will give you a creamier taste with a frothy foamy topping. However, you can still use skim milk or non-dairy alternatives like soy milk or almond milk. 

If you prefer to have your coffee more sweet, simply add in more of your sweetener of choice. If you prefer less sweetener or none at all, you can certainly omit it altogether. The same can be said in terms of adding milk or cream. If you like a more robust coffee, add less milk mixture or try another shot of espresso.

Halloween coffee recipes with toasted marshmallow.

#1. Pumpkin Spice Latte

Nothing says Fall more than pumpkin coffee. While you could go to Starbucks and grab their most popular drink, the PSL for $6, you could also make your own at home.

The best part is your drink isn’t filled with added sugar and preservatives. Instead, you get all of the goodness without sacrificing your wallet and health.

​Making your own coffee drink is such an easy way to skip out on added sugar and extra calories.

Halloween Coffee recipes of pumpkin spice latte with ghost towel.
Print

Pumpkin Spice Latte

5 Stars 4 Stars 3 Stars 2 Stars 1 Star

No reviews

If you love the taste of Fall, you’ll swoon over this easy to make pumpkin spice latte. It is free of added sugars and preservatives, but full of flavor!

Enjoy!

  • Author: Arin Solange At Home
  • Prep Time: 5 minutes
  • Cook Time: 7 minutes
  • Total Time: 12 minutes
  • Yield: 1 serving 1x
  • Category: Beverages

Ingredients

Scale
  • 2 shots of espresso or ½  cup of coffee of your choice
  • 1 cup of milk of choice 
  • 2 tbsp of pumpkin puree
  • 2 tbsp of maple syrup
  • 1 tbsp of vanilla extract
  • ½ tsp of  pumpkin pie spice + more for topping
  • Pinch of pink Himalayan sea salt
  • Whipped cream topping
  • Cinnamon stick for garnish
  • Pumpkin or festive fall stencil

Instructions

Notes

You can adjust the sweetness level to your liking. Feel free to add more or less maple syrup. If you like your pumpkin spice with a bolder pumpkin flavor, you can add another tablespoon of pumpkin puree. 

Store any of the leftover pumpkin spice mixture in an airtight jar for future lattes.

Did you make this recipe?

If you loved this recipe, make sure you share a photo and tag me on  Instagram to show me! I can’t wait to see what you’ve made!

#2. Wicked Matcha Latte

​Matcha tea has been having a moment. Over the past few years I’ve heard about how great matcha tea is for your health. While I can say that I have tried matcha lattes, they aren’t my favorite drink. 

However, many people love drinking matcha for not only the taste, but the benefits. Matcha contains not only caffeine, but also antioxidants and amino acids. Both are great for the health of your immune system, skin, hair, and nails. 

​People describe the taste of matcha as umami flavored. Personally, I think it taste very earthy. The temperature at which you brew your matcha tea will dictate how sweet or bitter the tea will taste. 

With all of the health benefits of matcha, many people find matcha lattes to be the perfect drink!

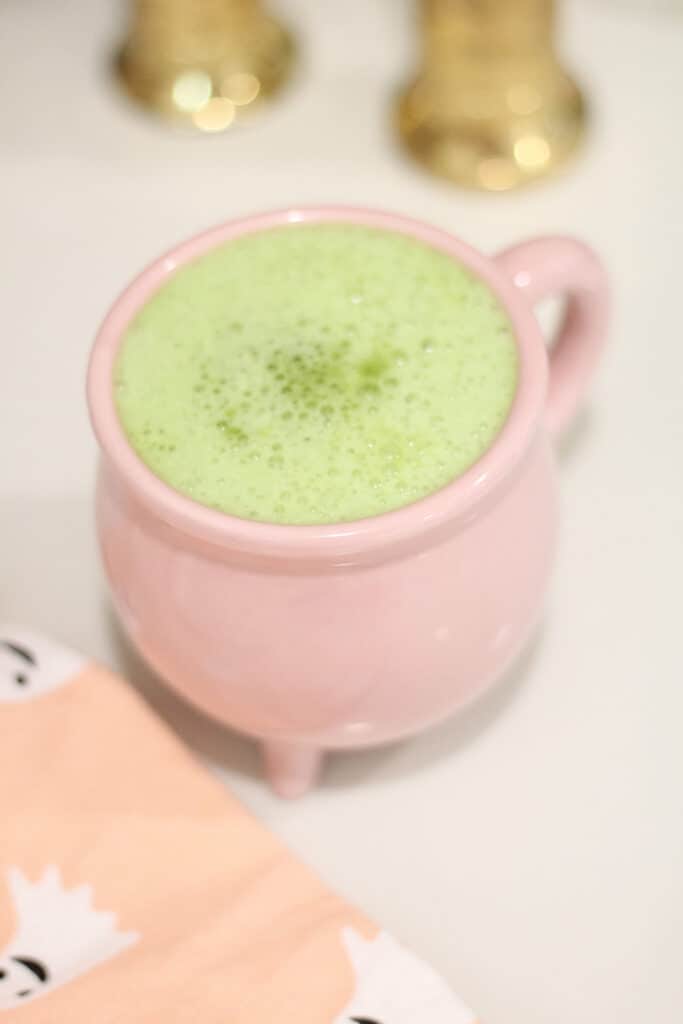
Halloween Coffee Recipes include a wicked matcha tea in a pink cauldron mug.
Print

Wicked Matcha Latte

5 Stars 4 Stars 3 Stars 2 Stars 1 Star

No reviews

Bold earthy flavors are at the core for this wicked green matcha latte! 

  • Author: Arin Solange At Home
  • Prep Time: 2 minutes
  • Cook Time: 5 minutes
  • Total Time: 7 minutes
  • Yield: 1 serving 1x
  • Category: Beverages

Ingredients

Scale
  • 1 tsp of matcha powder of choice
  • ¼ cup of hot water brewed to 165°F 
  • ½ cup warmed coconut milk, no hotter than 165°F 
  • Maple syrup, honey, or sweetener of choice, optional

Instructions

  1. ​Using matcha powder requires a bit of love. Measure out your matcha powder and either sift or whisk the powder free from lumps. You want a nice smooth consistency.
  2. Add the matcha powder to a coffee cup.
  3. Brew your hot water. The hotter water you use to brew your matcha, the more bitter your tea will taste. To avoid overly bitter tea, do not boil your matcha. Instead, aim to heat your water to 165°F for a more sweeter taste profile.
  4. Pour your hot water over the powder. Whisk continuously until your powder is incorporated and free of lumps.  To create foam, make sure you are whisking in a side to side pattern, rather than circles.
  5. Add your warmed coconut milk to the matcha tea and continue whisking again. You can choose to use a milk frother at this point to help get your latte a nice foam topping.
  6. Add in any sweeteners you may want. I’d recommend tasting your latte first to determine how much sweetener you’ll need.

Notes

Not all matcha powders are created equally. You may notice that matcha powders can be listed as ceremonial or culinary. 

Ceremonial matcha powders are the highest quality and made from young green tea leaves. Generally, you avoid adding any sweeteners to this grade. Rather you opt to enjoy the earthy flavor profile.

Culinary matcha powders are used in the baking and cooking world. This grade is what you will commonly see used in lattes and smoothies. With a more bitter taste it pairs well with the creaminess of coconut milk.

Did you make this recipe?

If you loved this recipe, make sure you share a photo and tag me on  Instagram to show me! I can’t wait to see what you’ve made!

#3 Skull Iced Coffee

Iced coffee is pretty much in my veins 24/7. I keep iced coffee stocked in my fridge at all times. To save yourself time, you can buy iced coffee from stores and have it ready to go or make your own batch. 

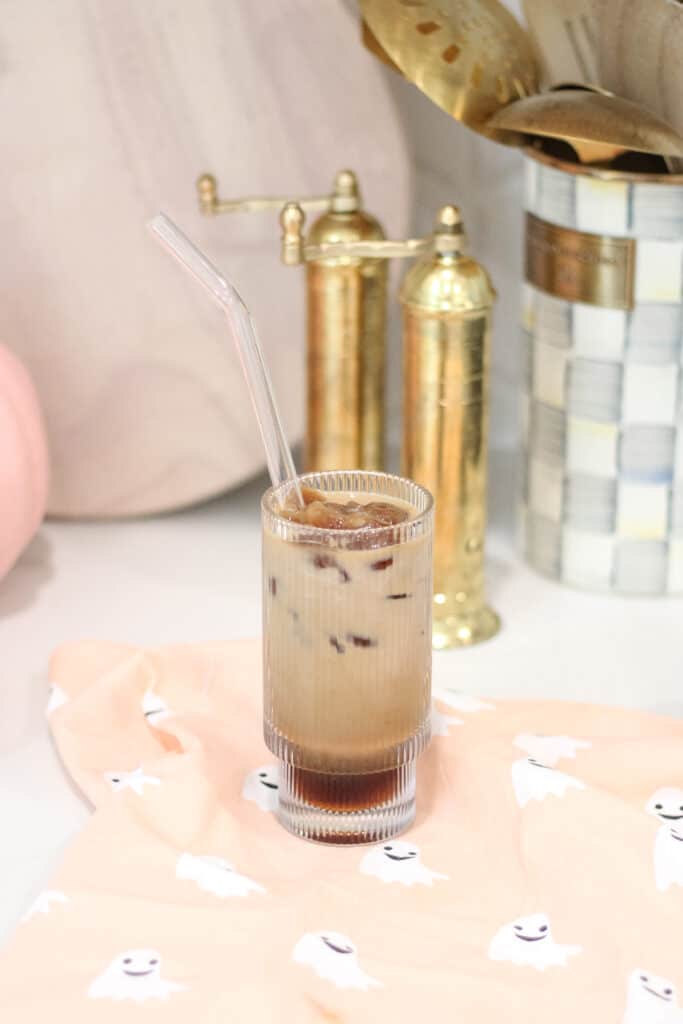
What really sets this fun recipe apart are the skeleton coffee ice cubes.

I hate when I order iced coffee from a coffee shop and the drink gets watered down by ice. To solve that problem, I love freezing coffee for coffee ice cubes. You can plop them in hot coffee to cool it off or use in your iced coffee to keep the flavor. Plus the scary faces floating around are always a fun surprise.

​What I love about this kind of coffee is that it is so easy to customize to make your very own.

Halloween Coffee Recipes include an iced coffee with skull coffee ice cubes.
Print

Skull Iced Coffee

5 Stars 4 Stars 3 Stars 2 Stars 1 Star

No reviews

Sip on this delicious iced coffee made with brown sugar simple syrup and skeleton coffee ice cubes.

  • Author: Arin Solange At Home
  • Prep Time: 5 minutes
  • Freeze Time: 4 hours
  • Cook Time: 5 minutes
  • Total Time: 4 hours and 10 minutes
  • Yield: 1 serving 1x
  • Category: Beverages

Ingredients

Scale
  • Coffee ice cubes *
  • 1 cup of coffee, chilled or at room temperature
  • Brown sugar simple syrup (½ cup of brown sugar: 1 cup of water) *
  • ¼ cup of milk of choice

Instructions

  1. ​To begin, use up leftover coffee from the end of the day and pour it into silicone ice trays. I used a skeleton silicone mold for a fun surprise. Allow the ice cubes to freeze prior to making your coffee.
  2. Next, you need to make your simple syrup. I like to make a batch of this for the week. Combine water and brown sugar in a saucepan over medium heat. Stir the mixture until all the sugar dissolves. Do not let the mixture boil. Remove from heat and let it cool to room temperature.
  3. Fill a tall glass with coffee ice cubes. 
  4. Pour your chilled or room temperature coffee in the glass.
  5. Add in your desired amount of sweetness using your simple syrup. I use only a little bit of sweetener. You can add more or less as you like.
  6. Add your milk of choice.
  7. Stir your ingredients together and enjoy!

Notes

This recipe can be made in a few short minutes. However, you need to make sure you do some prep work ahead of time. Both the skeleton coffee ice cubes and brown sugar simple syrup need to be prepared before making your iced coffee.

Did you make this recipe?

If you loved this recipe, make sure you share a photo and tag me on  Instagram to show me! I can’t wait to see what you’ve made!

#4. Witches Brew: Caramel Apple Cider

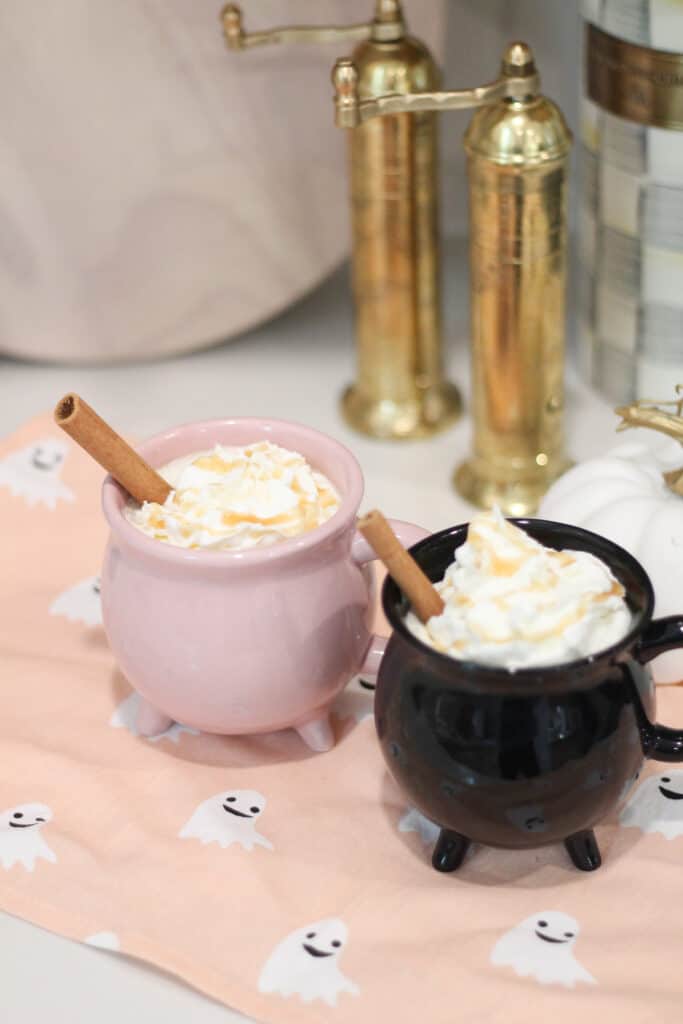
Out of all of the delicious Halloween coffee recipes, this one is Goldie approved. She LOVED this drink. 

If you take your kids to the apple orchard this fall, don’t leave home without making this first. The sweet and tart taste of the apple cider combined with salty caramel syrup is delicious. 

This festive drink is a great addition to any kids Halloween party.

Halloween Coffee Recipes with Witches Brew salted caramel apple cider in pink and black cauldron mugs.
Print

Witches Brew: Caramel Apple Cider

5 Stars 4 Stars 3 Stars 2 Stars 1 Star

No reviews

This decadently sweet and salty caramel apple cider will have your kids begging for seconds.

  • Author: Arin Solange At Home
  • Prep Time: 5 minutes
  • Cook Time: 5 minutes
  • Total Time: 10 minutes
  • Yield: 2 servings 1x
  • Category: Beverages

Ingredients

Scale
  • 4 cups of apple cider
  • 2 tbsp of salted caramel sauce + more for serving
  • Whipped cream
  • A pinch of cinnamon

Instructions

  1. Let me start off by saying, I like to make things easier, not harder. So I bought my salted caramel sauce. If you want a great salted caramel sauce recipe, check out Bobby Flay’s version.
  2. Heat 4 cups of apple cider in a saucepan over medium heat. Do not allow the mixture to boil.
  3. Add in 2 tbsp of salted caramel sauce. Stir to combine.
  4. After about 5 minutes, check that your cider is to a desired temperature.
  5. Pour mixture into mugs.
  6. Top with whipped cream, cinnamon, and more salted caramel sauce.

Notes

This drink is sweet, salty, and oh so heavenly. You can make this for a big batch by combining the ingredients into a slow cooker on low. If you want to make this adult-friendly, try adding a shot of caramel vodka.

Did you make this recipe?

If you loved this recipe, make sure you share a photo and tag me on  Instagram to show me! I can’t wait to see what you’ve made!

#5 Monster Maple Oat Latte

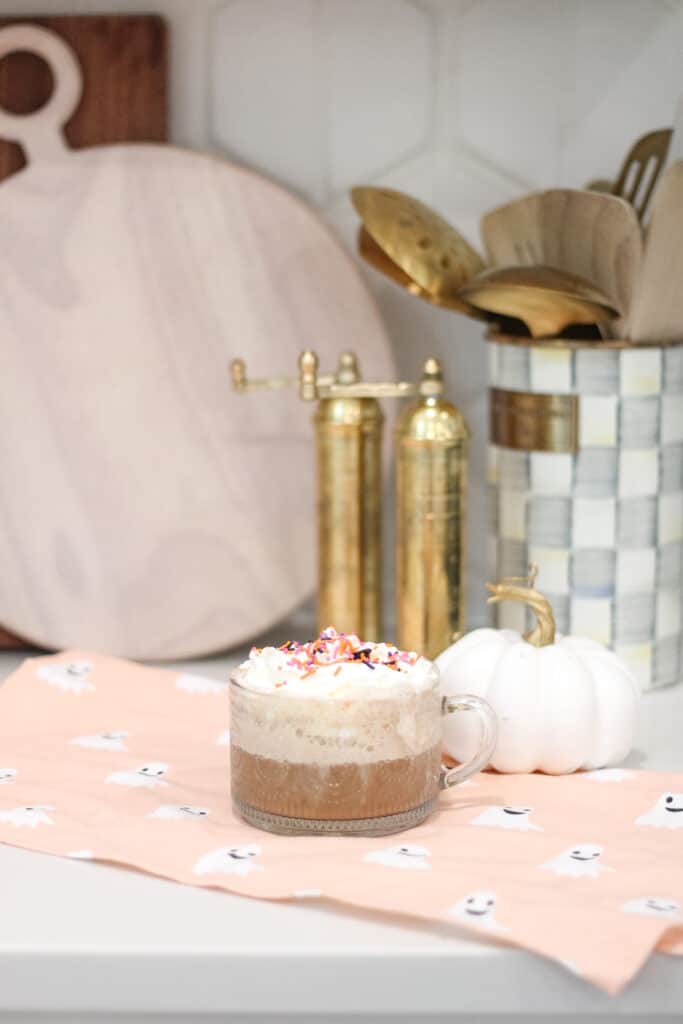
​Some days I like to switch up my coffee and use oat milk instead of regular milk. I love the nutty taste and how it packs a subtle sweetness with a coffee punch. 

I also love how you don’t need to add extra sweeteners to make this drink flavorful. The maple syrup paired with the nutty oat milk gives you plenty of flavor. However, if you do want to add more sweetness, you can easily add in a brown sugar simple syrup for some extra decadence.

As an added bonus, this drink is vegan and dairy free!

Halloween Coffee Recipes with a Monster Maple Oat on a pink ghost towel next to a pumpkin.
Print

Monster Maple Oat Latte

5 Stars 4 Stars 3 Stars 2 Stars 1 Star

No reviews

The subtle nutty flavor of oat milk pairs perfectly with the sweetness of maple syrup.

  • Author: Arin Solange At Home
  • Prep Time: 5 minutes
  • Cook Time: 5 minutes
  • Total Time: 10 minutes
  • Yield: 1 serving 1x
  • Category: Beverages

Ingredients

Scale
  • 2 shots of espresso or ½ cup of coffee of choice
  • 1 cup of oat milk
  • 2 tbsp of maple syrup
  • 2 tsp of brown sugar simple syrup, optional (½ cup of brown sugar: 1 cup of water)
  • 1 tsp of cinnamon
  • Coconut whipped cream, optional
  • Nutmeg sprinkle
  • Monster sprinkles, optional

Instructions

  1. You can easily make your own oat milk, but again, I prefer to buy mine.
  2. If you prefer to add brown sugar simple syrup, prepare it ahead of time. Combine brown sugar and water in a saucepan over medium heat. Stir the mixture and heat until the sugar dissolves. Do not allow the mixture to boil. Set it aside and store in a mason jar for later use.
  3. Prepare your espresso or coffee of choice and set it aside.
  4. In a saucepan or heated milk frother, add your oat milk, maple syrup, and cinnamon. Heat and froth until warmed through.
  5. Pour your coffee or espresso into a mug. 
  6. Add your oat milk mixture to your coffee mug.
  7. If you are using brown sugar simple syrup, pour it in now to taste. 
  8. Top with coconut whipped cream, nutmeg, and monster sprinkles.

Notes

You can substitute any milk type you prefer. If you keep the ingredients of oat milk and coconut whipped cream, you have a vegan recipe. 

Did you make this recipe?

If you loved this recipe, make sure you share a photo and tag me on  Instagram to show me! I can’t wait to see what you’ve made!

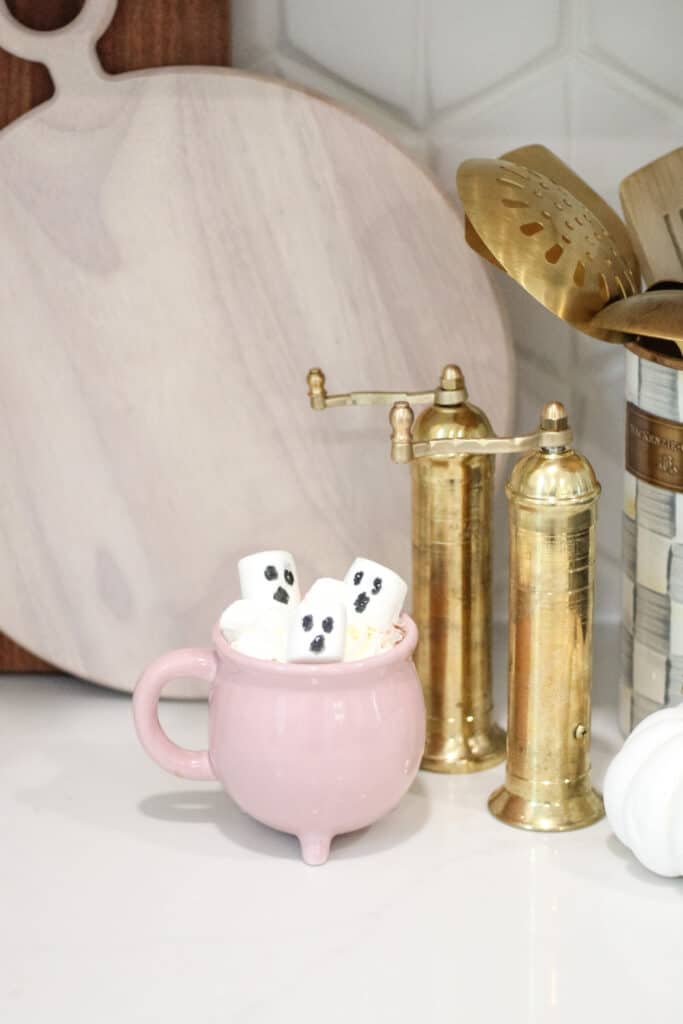
#6 Ghastly Hot Cocoa With Boo Marshmallows

Who can resist decadent hot cocoa with marshmallows? There is something special about homemade hot cocoa that doesn’t begin to touch boxed mixes. 

Box mixes may be convenient, but making your own hot cocoa doesn’t need to be hard. You can prepare the dry ingredients ahead of time in a small resealable plastic bag and have your own mix on hand. 

Halloween Coffee Recipes with boo marshmallows hot cocoa in a pink cauldron mug
Print

Ghastly Hot Cocoa With Boo Marshmallows

5 Stars 4 Stars 3 Stars 2 Stars 1 Star

No reviews

Decadent rich chocolate combines with whole milk and cream to create a magical hot cocoa. Top your hot cocoa with boo marshmallows for a frightening fun delight.

  • Author: Arin Solange At Home
  • Prep Time: 5 minutes
  • Cook Time: 15 minutes
  • Total Time: 20 minutes
  • Yield: 2 servings 1x
  • Category: Beverages

Ingredients

Scale
  • 3 cups of whole milk
  • 1 cup of half and half
  • ¼ cup of unsweetened cocoa powder
  • 3 tbsp of white sugar
  • ¾ cup semi-sweet chocolate chips
  • 1 tsp of vanilla extract
  • Whipped cream
  • Large marshmallows
  • Black edible food ink marker

Instructions

  1. Combine unsweetened cocoa powder, white sugar, and chocolate chips in a saucepan. Carefully add in your milk, half and half, and vanilla.
  2. Over medium heat, whisk continuously until it is heated through. Do not boil your mixture to avoid burning your hot chocolate.
  3. Once chocolate has melted and your hot cocoa is to your desired temperature, pour the mixture into your coffee mug.
  4. Take marshmallows and edible black marker to draw eyes and mouth for your boo marshmallows. 
  5. Top hot cocoa with whipped cream, chocolate, and/or boo marshmallows.

Notes

Take time to avoid burning your hot chocolate mixture. Slow and steady works well to gradually melt your ingredients together to form a rich cocoa.

Did you make this recipe?

If you loved this recipe, make sure you share a photo and tag me on  Instagram to show me! I can’t wait to see what you’ve made!

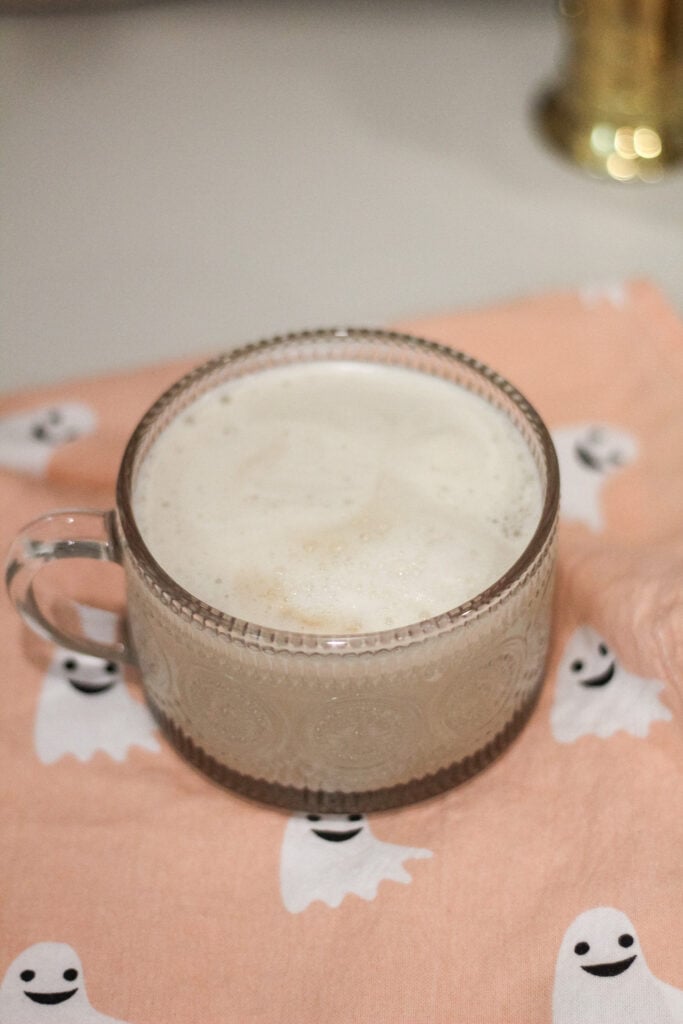
#7 Dirty Ch”eye” Latte

Tea infused with comforting spices of cardamom, ginger, clove, and cinnamon are paired with steamed milk to create a chai latte.

Chai lattes are as delicious as they are comforting. When you add espresso or coffee into a chai latte it becomes a dirty chai latte. 

Coffee on a ghost towel for a Halloween Coffee Recipe
Print

Dirty Ch”Eye” Latte

5 Stars 4 Stars 3 Stars 2 Stars 1 Star

No reviews

Comforting spices infuse this tea, milk, and espresso beverage.

  • Author: Arin Solange At Home
  • Prep Time: 5 minutes
  • Cook Time: 5 minutes
  • Total Time: 10 minutes
  • Yield: 1 serving 1x
  • Category: Beverages

Ingredients

Scale
  • 2 shots of espresso or ½ cup of coffee of choice
  • ½ cup of chai concentrate
  • ½ cup of milk of choice
  • 1 tsp of brown sugar
  • Nutmeg, star anise and cinnamon sticks to garnish

Instructions

  1. Start by brewing your espresso or coffee. Set it aside in a mug.
  2. Add the chai concentrate to a saucepan and heat over medium heat. Alternatively, you can put it in the microwave for a few seconds to heat it up.
  3. Combine the chai concentrate with your espresso.
  4. Steam you milk using a heated milk frother. If you don’t have a heated frother, you can microwave your milk and then use your milk frother to make your foam.
  5. Combine your steamed milk to your mug.
  6. Add in brown sugar to taste.
  7. Garnish with nutmeg, cinnamon sticks, and star anise.

Notes

If you don’t have chai concentrate on hand, you can make your own. Simply take a box of chai tea bags (usually about 16) and combine with 5 cups of water. Allow the mixture to boil. Once it reaches a boil, reduce your heat and allow the mixture to simmer for 15 minutes. Remove from heat. Remove your tea bags. Store in an airtight container in the fridge.

Did you make this recipe?

If you loved this recipe, make sure you share a photo and tag me on  Instagram to show me! I can’t wait to see what you’ve made!

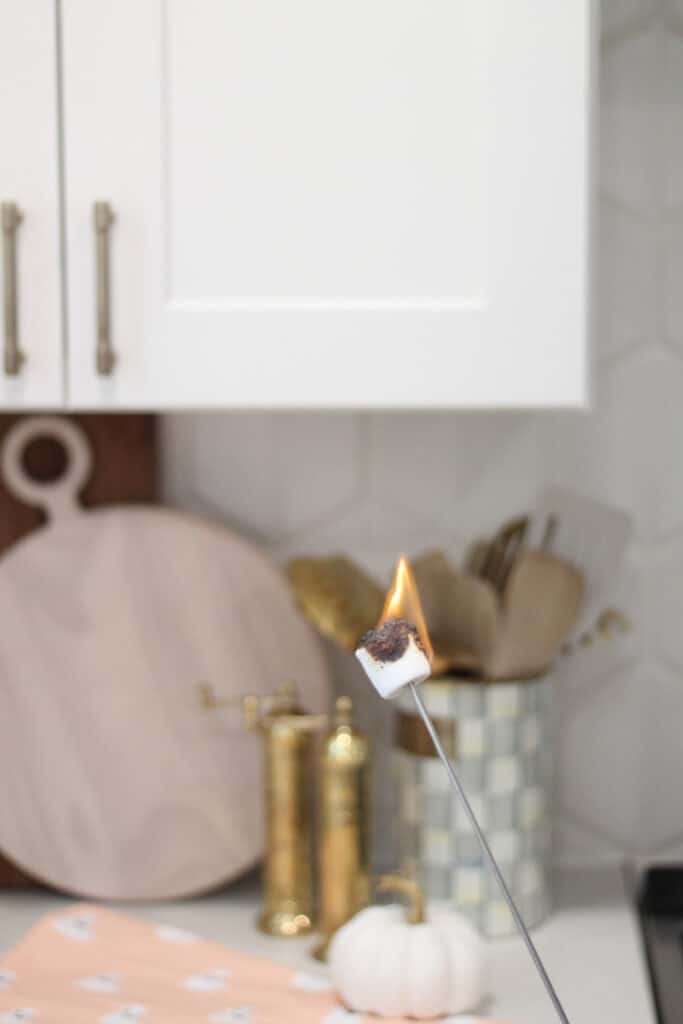
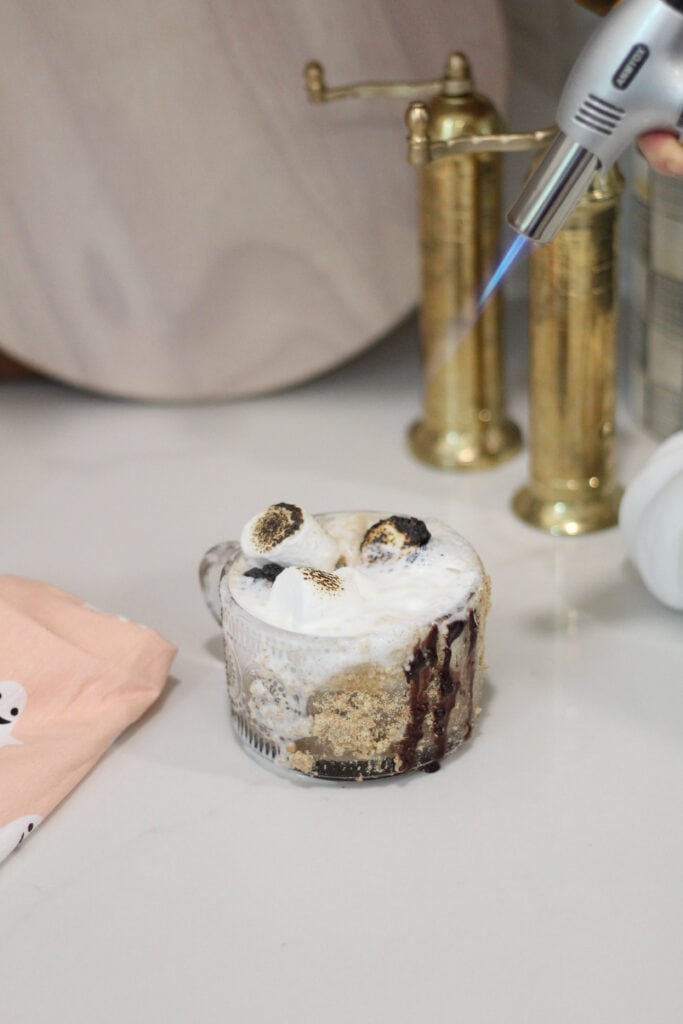
#8 Flaming S’mores Latte

Nothing says Happy Halloween like Halloween bonfires! In my neighborhood growing up, all the houses would sit outside with bonfires in their driveways on Halloween night. 

It was a special time where we could go from house to house, grabbing candy, and also sharing a special treat with our neighbors: a Halloween s’more.

S’mores always remind me of Halloween for that reason. I hope this drink brings you special memories too!

Halloween Coffee Recipes with S'mores latte and torched marshmallows
Print

Flaming S’mores Latte

5 Stars 4 Stars 3 Stars 2 Stars 1 Star

No reviews

Nothing is more fun than toasted marshmallows by a fire. Enjoy this campfire favorite treat from the comfort of your kitchen.

  • Author: Arin Solange At Home
  • Prep Time: 5 minutes
  • Cook Time: 8 minutes
  • Total Time: 13 minutes
  • Yield: 1 serving 1x
  • Category: Beverages

Ingredients

Scale
  • 56 crushed graham crackers
  • 1 tbsp of vanilla extract or vanilla simple syrup
  • 2 shots of espresso or ½ cup of coffee of choice
  • ½ cup of milk of choice
  • Chocolate syrup 
  • 4 large marshmallows
  • 1 pinch of salt

Instructions

  1. ​Crush your graham cracker to resemble fine cookie crumbs. Add the crumbs to a plate.
  2. Take your coffee mug and roll the rim in water or simple syrup.
  3. Coat your mug in the graham cracker crumbles.
  4. Brew your coffee or espresso shots and place into your cookie coated mug.
  5. In a separate mug, add your milk and vanilla or vanilla simple syrup. Use a heated milk frother or microwave to heat your milk mixture. You’ll want to make sure this gets nice and frothy.
  6. Pour your milk mixture into your cookie coated mug.
  7. Add marshmallows to the topping along with chocolate sauce.
  8. Carefully, use a kitchen torch to torch the marshmallows for that famous toasted effect.
  9. Top with sea salt and enjoy.

Notes

Always be careful when handling fire and kitchen torches. Make sure you have a fire extinguisher near by.

Did you make this recipe?

If you loved this recipe, make sure you share a photo and tag me on  Instagram to show me! I can’t wait to see what you’ve made!

#9 Vlad’s Red Velvet Latte

Red velvet cake is a decadent dessert made with cream cheese, cake flour, cocoa powder, and red food coloring. 

​It is just as decadent as a latte. If you like a mix of hot cocoa with coffee, this drink is perfect for you.

Halloween Coffee Recipes with red velvet latte.
Print

Vlad’s Red Velvet Latte

5 Stars 4 Stars 3 Stars 2 Stars 1 Star

No reviews

If you can’t choose between hot chocolate and coffee, this red velvet latte is the best of both worlds.

  • Author: Arin Solange At Home
  • Prep Time: 5 minutes
  • Cook Time: 7 minutes
  • Total Time: 12
  • Yield: 1 serving 1x
  • Category: Beverages

Ingredients

Scale
  • 2 shots of espresso or ½ cup of coffee of choice
  • ½ cup of milk of choice
  • 4 ounces of semi-sweet chocolate, melted
  • ½ tsp of vanilla extract
  • 23 drops of red food coloring 
  • Whipped cream, optional
  • Pinch of sea salt

Instructions

  1. Prepare by making your espresso or coffee and setting it aside in a coffee cup.
  2. In a saucepan, combine your milk and chocolate. Stir continuously over medium heat. Do not allow the mixture to boil or the chocolate will burn.
  3. Once your milk and chocolate are heated through, remove the saucepan from heat.
  4. Stir in food coloring and vanilla extract.
  5. At this time, froth the milk mixture using a milk frother.
  6. Add the frothed milk mixture to your espresso.
  7. Top with whipped cream and sea salt.

Notes

If you happen to have hot cocoa prepared already, you can simply add in vanilla extract and red food coloring to your hot cocoa mix. Once that is combined, add in your coffee of choice.

Did you make this recipe?

If you loved this recipe, make sure you share a photo and tag me on  Instagram to show me! I can’t wait to see what you’ve made!

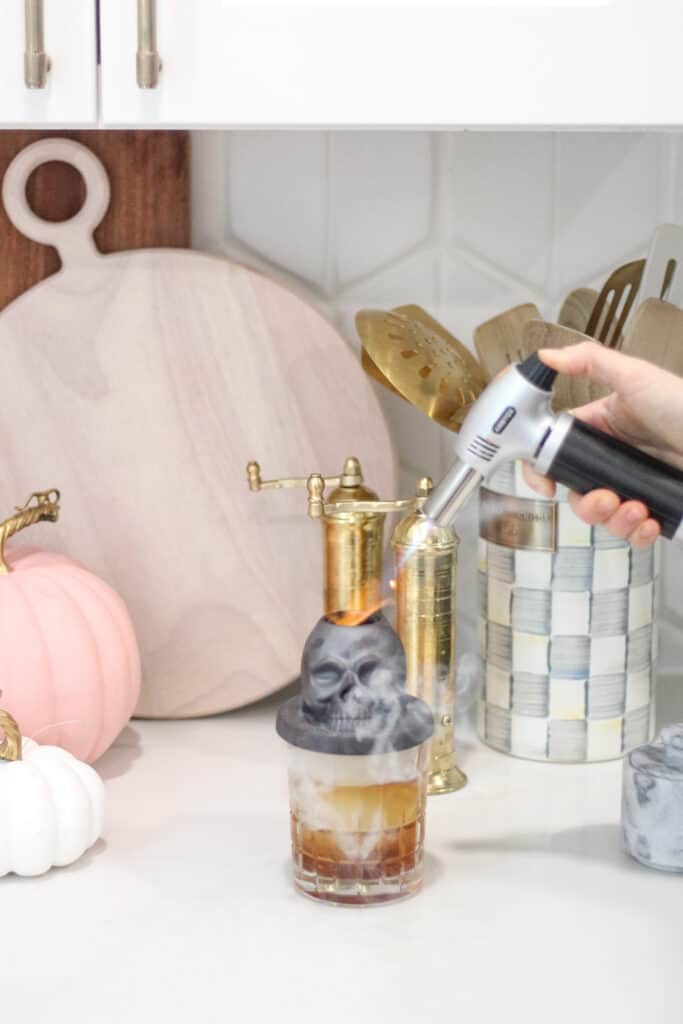
#10 Smoked Coffee Old Fashion

​I feel like everywhere I look people are  drinking a coffee martini. As much as I love coffee martinis, I actually prefer bourbon over vodka for my Halloween coffee cocktail.

​This recipe uses a cocktail smoker to achieve a smoky finish that pairs perfectly with your coffee. 

Halloween Coffee Recipes with a Coffee Old Fashion and skeleton cocktail smoker.
Print

Smoked Coffee Old Fashion

5 Stars 4 Stars 3 Stars 2 Stars 1 Star

No reviews

Smoked bourbon meets coffee in this twist on the classic old fashion cocktail.

  • Author: Arin Solange At Home
  • Prep Time: 5 minutes
  • Cook Time: 5 minutes
  • Total Time: 10 minutes
  • Yield: 1 serving 1x
  • Category: Beverages

Ingredients

Scale
  • 12 tsp of brown sugar simple syrup  (½ cup of brown sugar: 1 cup of water) 
  • 2 shots of quality bourbon
  • 3 tsp of coffee liquor 
  • 3 dashes of Angostura bitters
  • 1 peeled orange skin
  • 4 espresso or coffee whole beans
  • Large round ice sphere

Instructions

  1. ​To begin, make your brown sugar simple syrup. I love making this ahead of time and keeping a batch in my fridge for other recipes. Combine your brown sugar and water in a saucepan over medium heat until sugar is dissolved. Set aside.
  2. Using a silicone sphere mold, freeze your ice for later.
  3. Once your ice has frozen, set your ice sphere in a glass. Add 2 shots of quality bourbon.
  4. Add in simple syrup, coffee liquor, and bitters. Stir to combine.
  5. Take your cocktail smoker. Fill your smoker using your desired choice of wood- I recommend cherry wood for this drink.
  6. Using your kitchen torch, light the cocktail smoker. Allow the smoke to encompass your drink for 2 minutes and then remove your smoker.
  7. Add the orange peel and 4 coffee beans as garnish.

Notes

If you like to have a real smoky flavor, you can allow your smoker to sit longer than 2 minutes. The longer the smoke sits, the more infused the taste will become.

Always be careful when using a kitchen torch. You should have a fire extinguisher nearby in the event of any accident. 

Did you make this recipe?

If you loved this recipe, make sure you share a photo and tag me on  Instagram to show me! I can’t wait to see what you’ve made!

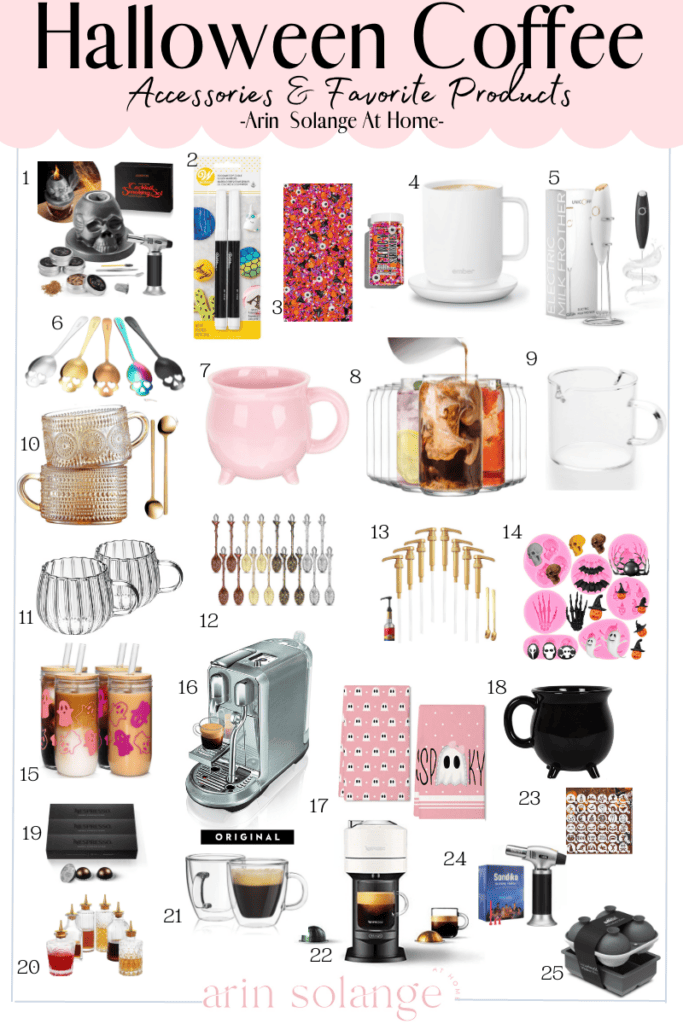
Shop My Favorite Halloween Coffee Products

​To shop the products I used to make these festive drinks, make sure you check out all the details below. These are great kitchen tools to have on hand for hosting or just enjoying a cup of coffee in your own home. 

Shop my favorite Halloween Coffee Recipes and 25 favorite products for a spooky coffee.

1 | 2 | 3 | 4 | 5 | 6 | 7 | 8 | 9 | 10 | 11 | 12 | 13 | 14 | 15 | 16 | 17 | 18 | 19 | 20 | 21 | 22 | 23 | 24 | 25

  1. Cocktail Smoker Kit with Torch
  2. Wilton 609-1192 Black Food Writer Edible Ink
  3. Fancy Sprinkles Limited Edition Halloween
  4. Ember Temperature Control Smart Mug
  5. Milk Frother White
  6. Skull Spoons Stainless Steel Coffee and Espresso Spoons
  7. Healeved Pink Cauldron Mug
  8. Le’raze Drinking Glasses Set of 10
  9. BCnmviku Shot Glasses Espresso
  10. Gezzeny Vintage Coffee Mugs
  11. Clear Pumpkin Cups with Handle Classic Halloween Mugs
  12. Retro Spoon Crystal Alloy Spoon
  13. DupakSYS Premium 8 Packs Coffee Syrup Pump Dispenser
  14. MIYAHOUSE Halloween Fondant Molds Skull Silicone Mold
  15. ANOTION Halloween Cups
  16. Breville Nespresso Nespresso Creatista Plus Coffee Espresso Machine
  17. ARKENY Halloween Kitchen Dish Towels Set of 2
  18. SUMMIT COLLECTION 12 fl oz Witch’s Brew Cauldron Mug
  19. Nespresso Capsules VertuoLine
  20. Bitters Bottles Set of 6
  21. JoyJolt Savor Double Wall Insulated Glasses Espresso Mugs
  22. Nespresso Vertuo Next Coffee and Espresso Machine by De’Longhi
  23. 36 Pieces Reusable Halloween Cake Cookie Stencils
  24. Sondiko Butane Torch
  25. Samuelworld Large Silicone Premium Ice Tray

Other Posts You May Love

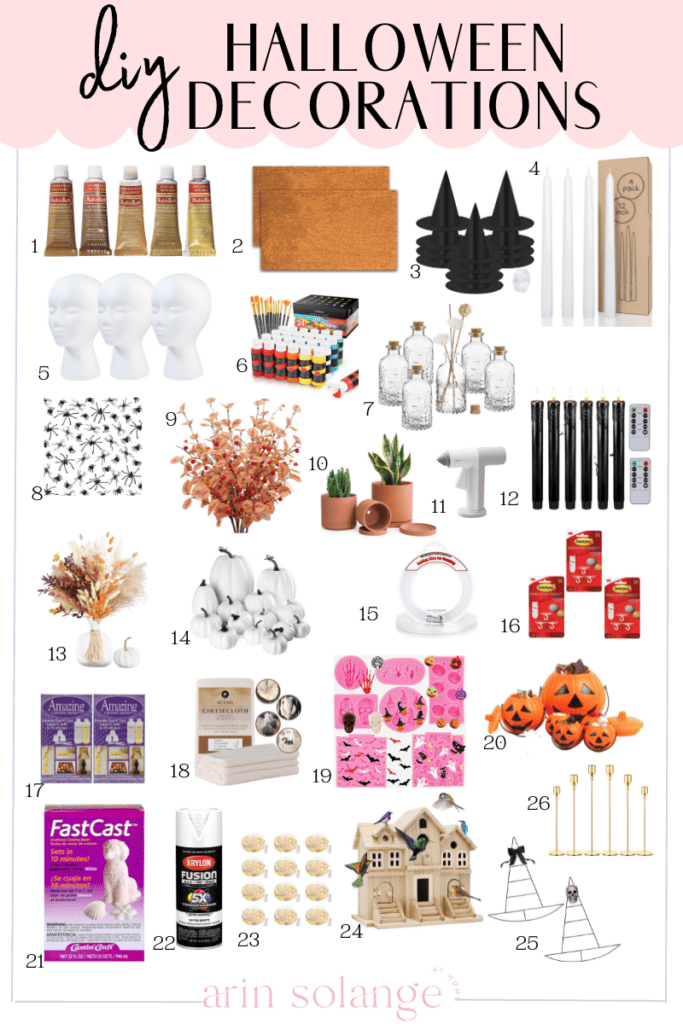
15 Easy & Scary Halloween DIY Decorations | Easy Halloween Costume For All Ages | Spooky Basket

Follow Social For The Latest & Greatest

Pin The Photo Below For Later

I hope you were able to find some magical inspiration to keep you well caffeinated this Halloween season. May you be blessed with children who sleep. But on the off chance they don’t sleep, you have some great recipes to help wake up and start your day.

Happy Halloween!

Shop my favorite Halloween Coffee Recipes and 25 favorite products for a spooky coffee.
DIY

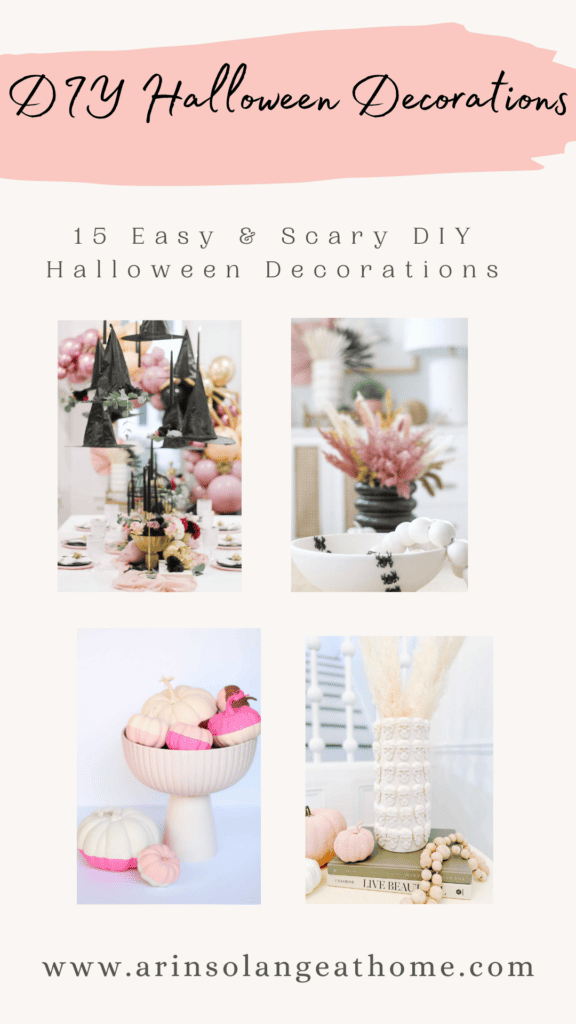
15 Easy & Scary DIY Halloween Decorations

You don’t need to spend a fortune on Halloween decorations. I’ve rounded up my favorite 15 easy and scary DIY Halloween decorations that are not only a fun way to celebrate Halloween, but are also within anyone’s budget. 

If you love getting crafty, these easy Halloween decorations are a great way to have fun with your kids and get in the Halloween spirit. Head to your Dollar Tree, Hobby Lobby, or Dollar Store and pick out some crafts supplies to make your very own homemade Halloween decorations. 

This post may contain affiliate links.

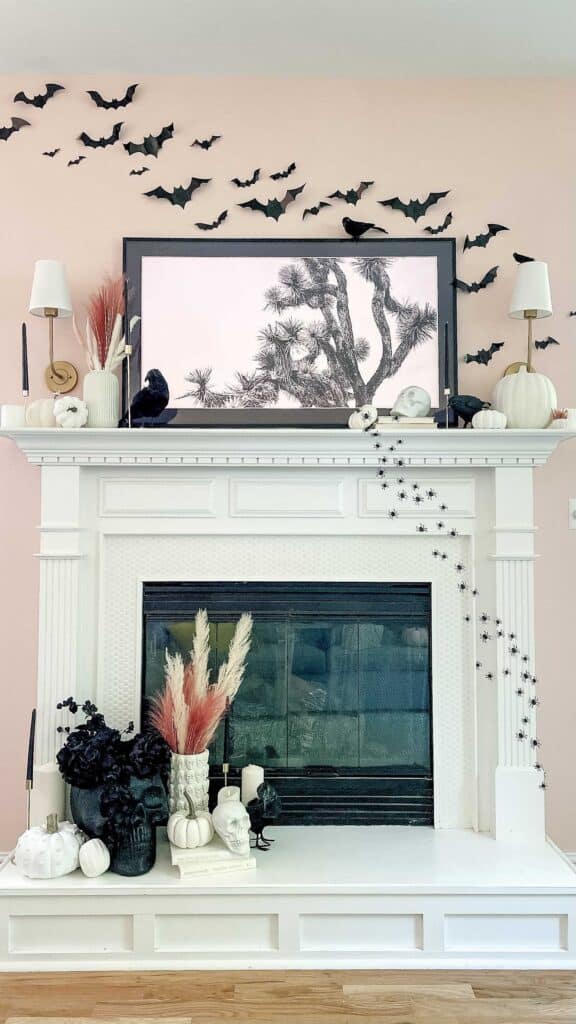
DIY Halloween Decorations on fireplace mantle filled with bats, vases, pumpkins

15 Scary & Easy DIY Halloween Decorations 

My friends and family know that I love crafting and I’m a big Halloween fan. So it should come as no surprise that I love creating easy Halloween crafts! 

It can get extremely expensive between outdoor Halloween decorations, a Halloween costume, candy, and Halloween decorating indoors too. It’s easy to see how you could spend lots of money for one holiday. Here’s the thing: you don’t have to!

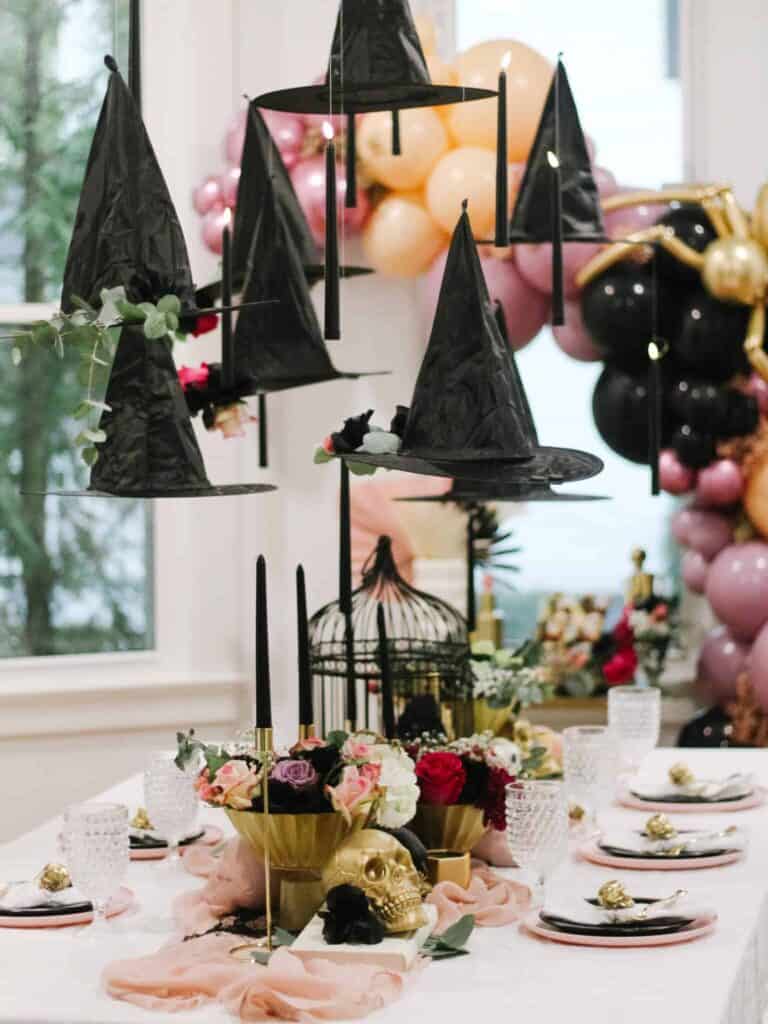
DIY Halloween Decorations hanging witch hats.

I love walking through Target, Hobby Lobby, and other local stores to find Halloween inspirations. You don’t need to spend an arm and a leg on scary Halloween decorations. With a few supplies, you can easily make your own. 

I’ve taken inspiration from the best Halloween decorations in stores and have rounded up my favorite DIY decorations.  So if you are in need of a spooky makeover, you’ll be sure to find something for your next Halloween party.  Here are the 15 best DIY Halloween decorations to bring your home to life!

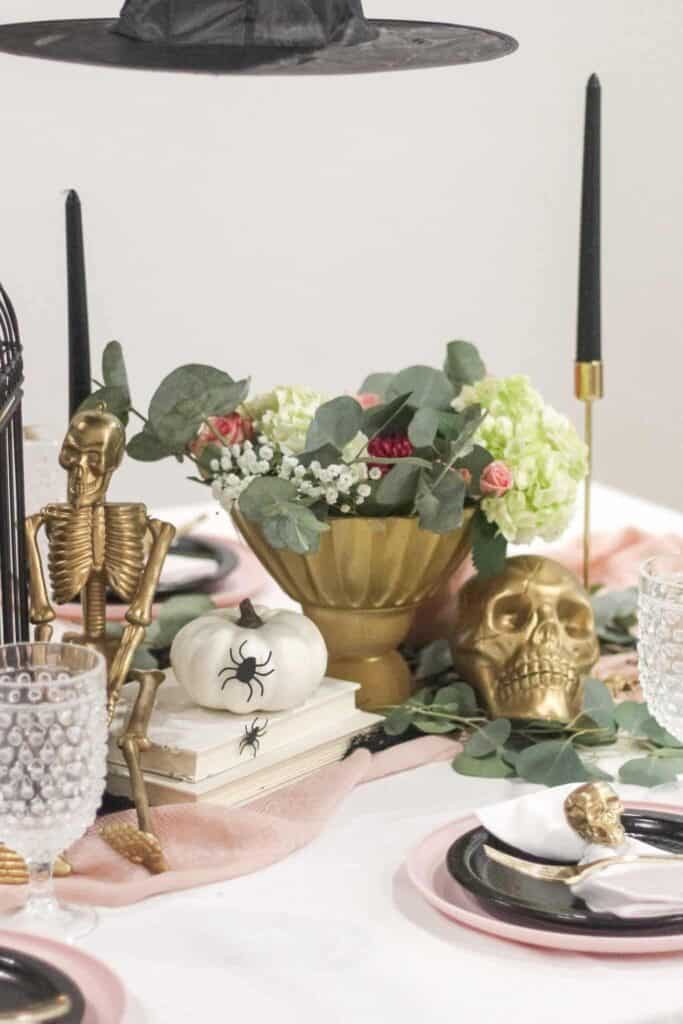
DIY Halloween decorations with gold skulls, white pumpkins, and spiders.

1. DIY Halloween Wreaths

I love creating a seasonal wreath for any occasion. Wreaths can be extremely expensive to buy from you local store. If you take the time to plan out a design and make it, you’ll end up saving more in the long run. 

Wreaths are an easy way to greet your guests and decorate your front door. Best of all, there are tons of choices and designs to choose from for Halloween door decorations.

For the past 2 years I’ve made different versions. 

This year, I’m hoping to do something entirely different.  If you want some inspiration for your own Halloween wreath, check out my post on Halloween Wreath DIY Ideas

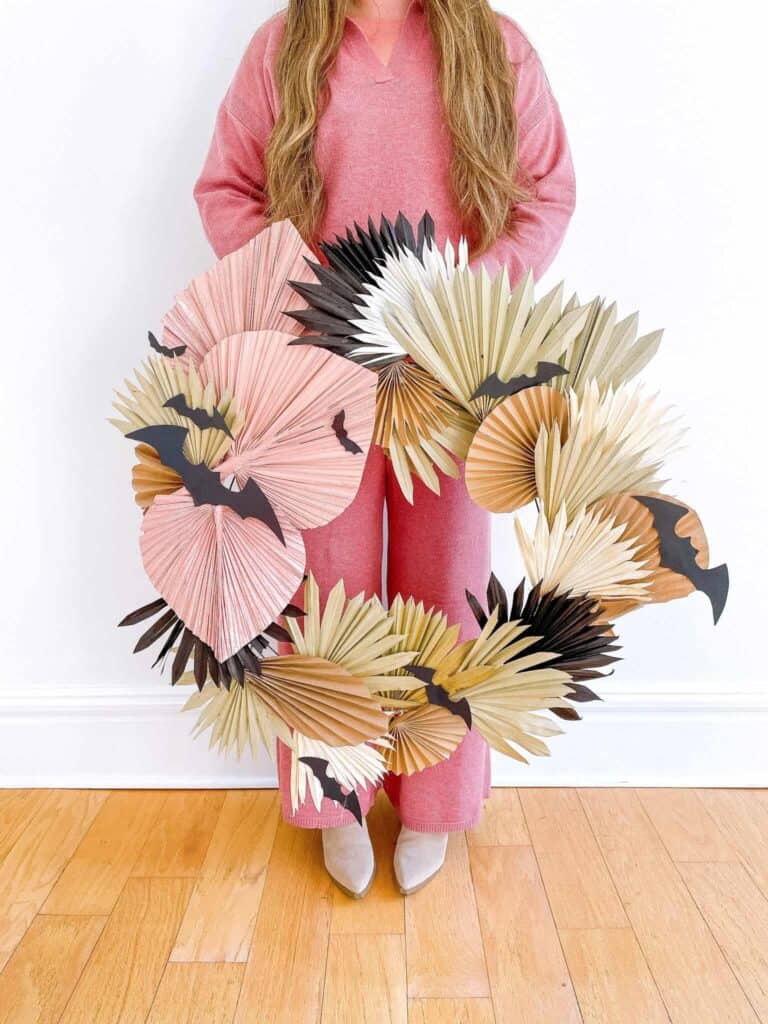
DIY Halloween Decorations with a palm leaves wreath.

For my first wreath, I used wire wreath form, a hot glue gun, palm leaves, black construction paper, and paper bats to create an elegant, yet spooky wreath. I love the way it turned out and the best part is it was so easy! 

Another wreath I created was used for decorating inside our home. It added a spooky touch to our living area and was a fun decoration to create. All you need is some tree branches or florals, a wire witch hat from The Dollar Tree, and some construction paper. 

I love how it has girly elements for a fun pop of color. Check out my Dollar Tree witch hat wreath for the full tutorial! 

DIY Halloween Decorations With Witch Hat wreath and pumpkins

2. DIY Skull & Ghost Planters

​I originally found this idea online when I come across the cutest Halloween planters. The biggest problem is that those planters started at $220 for the smallest size. There was no way I was going to buy that but it gave me a great idea! 

With a glass vase or mason jar, resin, a silicone mold, and acrylic paint, you can make almost any themed planter.

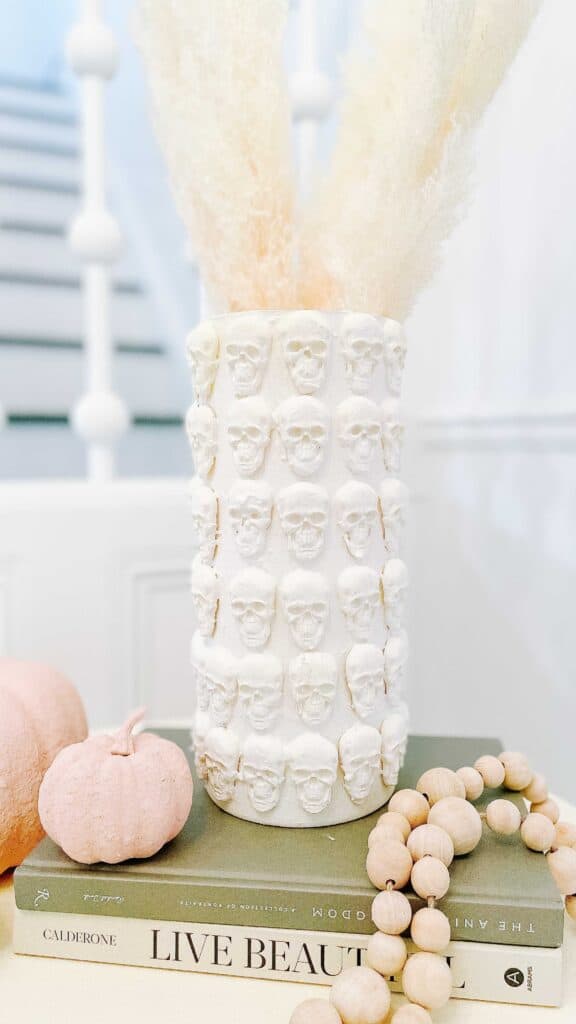
I started off small for my first planter and it was such an easy craft. Once I got the hang of it, I went a bit bigger with a large Terracotta skull planter to sit on my front porch. Find the step by step instructions on your own DIY Skull Planter.

DIY Halloween Decorations skull planter with pink pumpkins.

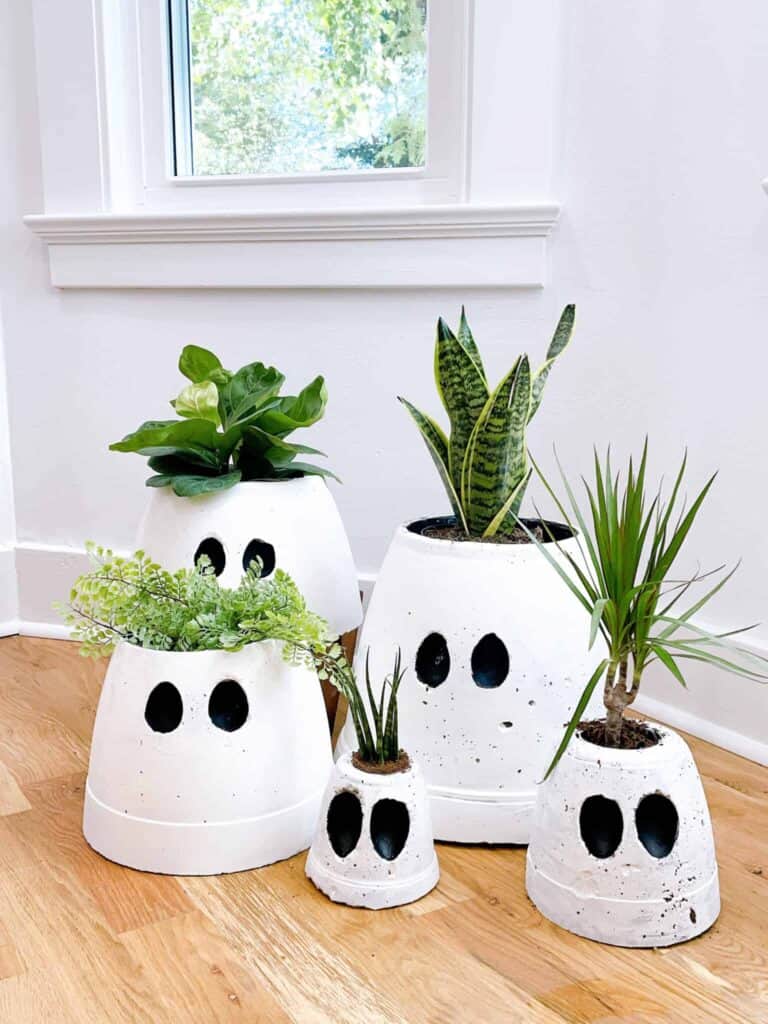
If skulls aren’t your thing, make sure you check out my DIY Ghosts too! I love how these friendly ghosts turned out! They are a great option to set on your porch, outdoor patio, or indoors too. 

This is another super easy idea that only requires a few supplies: planters, cement, white and black acrylic paint, a styrofoam ball, and hot glue. These ghosts are the perfect addition to your outdoor decorations. 

DIY Halloween Decorations Ghost Planters

3. Hanging Witch Hats

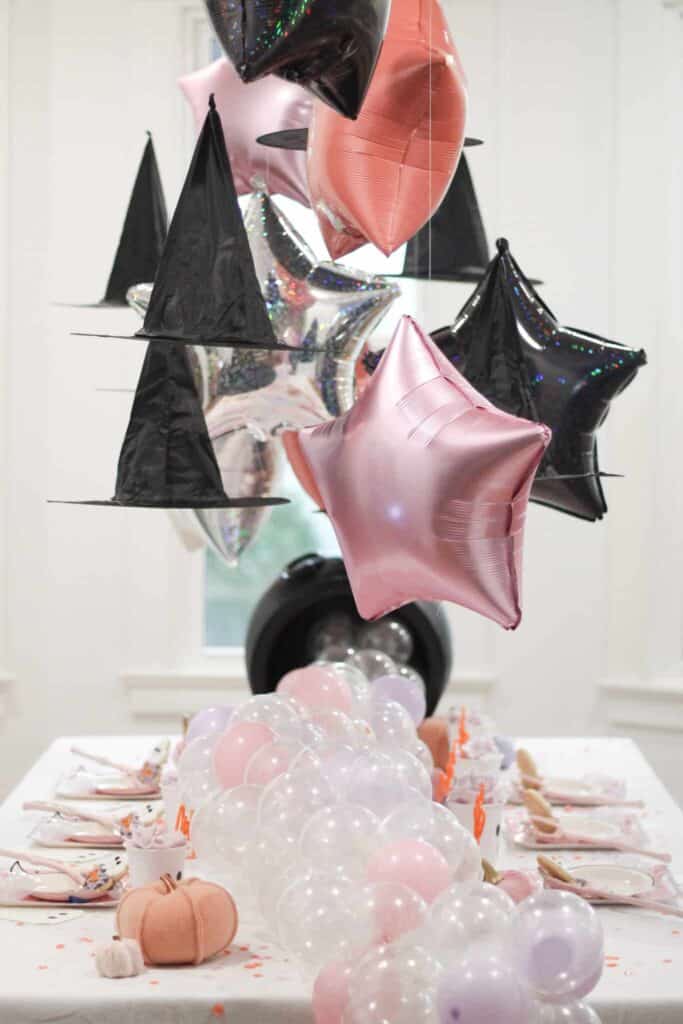
​You don’t have to stick to decorating just your built-ins. In fact, one of my favorite ways to decorate for Halloween is by hanging fun decor from the ceiling. My hanging witch hats add the perfect ambience for spooky decor with an elegant twist. 

​A great place to hang your hats is in your kitchen or dining area. This is so much fun and adds that pop of extra for any party guests or visitors. If witch hats aren’t your thing, you can easily apply this same DIY and swap out witch hats for candlesticks. Floating candlesticks will give you a great hall vibe via Harry Potter. 

DIY Halloween Decorations hanging witch hats.

Grab your supplies: fishing wire, command strip ceiling hooks, witches hats, and/or candles, and florals.  You can glue florals or embellishments to your witch hats before hanging them or leave them as is. From there, you’ll tie your fishing wire to your hats and candles, and hang them using your command hooks. 

You can hang them at different levels to give off different heights. The full tutorial is available in my Halloween Party post!

These are such easy decorations that give you that wow factor! 

DIY Halloween Decorations hanging witch hats and black cauldron tablescape.

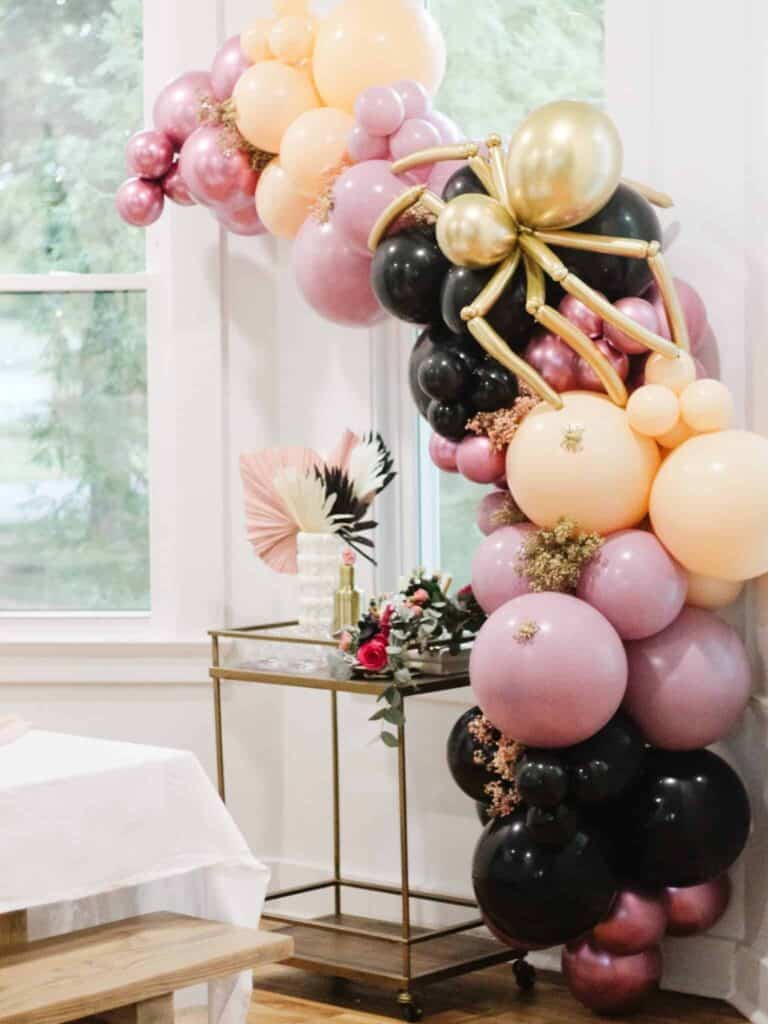
 4. Balloon Garland

Of course an easy and fun way to make a big impact is by putting together your own Halloween balloon garland. My friends over at Party Hop Shop  always have the best balloon garland kits! 

With several different sizes and colors, you can make a balloon arch that takes up an impressive amount of space. From there, you can fill it with plastic spiders or balloon giant spiders, googly eyes, or spider webs. Any filling you can find at a Dollar Tree works well to stick between the balloons to add to your decor.

If you plan on having a Halloween party  you won’t want to miss out on the balloon garland.

DIY Halloween decorations balloon garland in black, purple, gold, and peach with spiders.

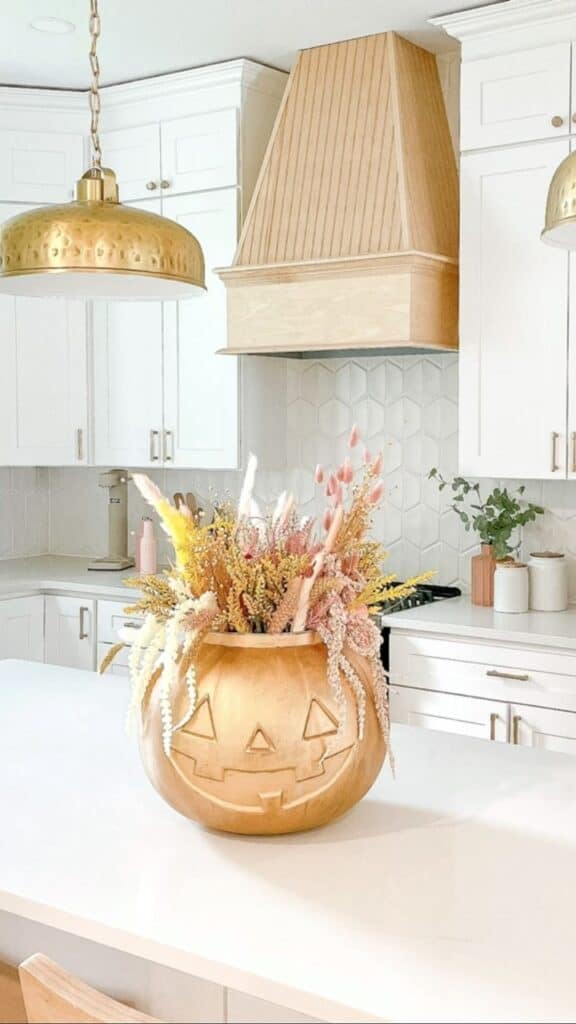
5. Rub N Buff Plastic Pumpkin Vase

​There is no shortage of creative ideas when it comes to using items you can find at the Dollar Store. 

One of my favorite DIYs is taking a plastic pumpkin that is often bright orange and in my opinion, ugly. From there, take your rub and buff, and apply to cover the orange. This will turn the pumpkin a bronze or gold shade.

Next, add florals and you’re done! You have a beautiful pumpkin centerpiece for very little time or money!

DIY Halloween decoration gold pumpkin vase.

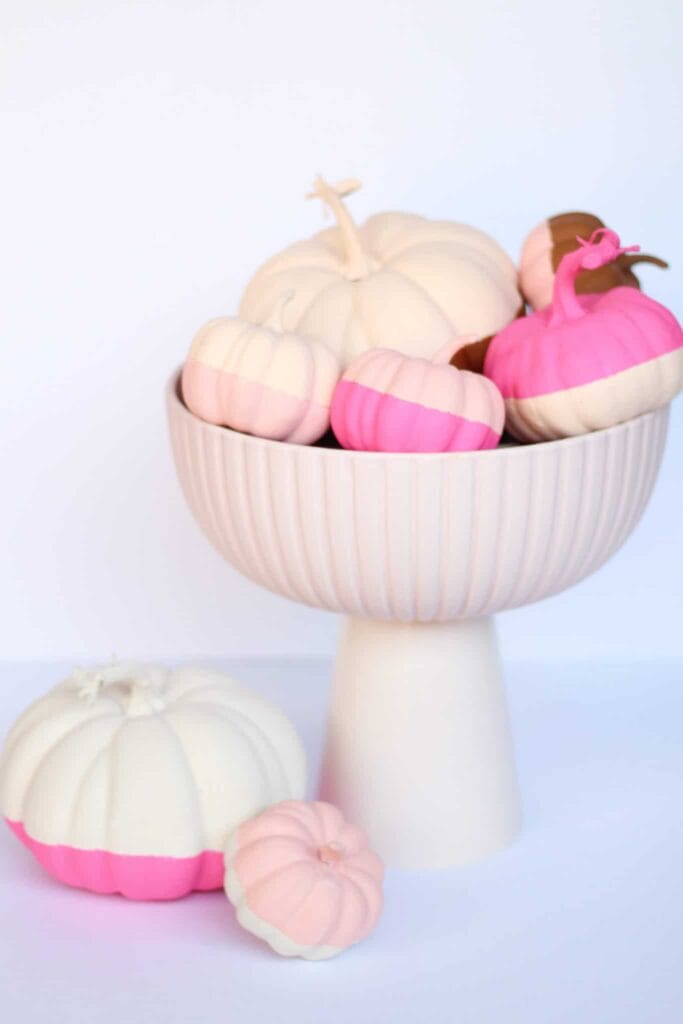
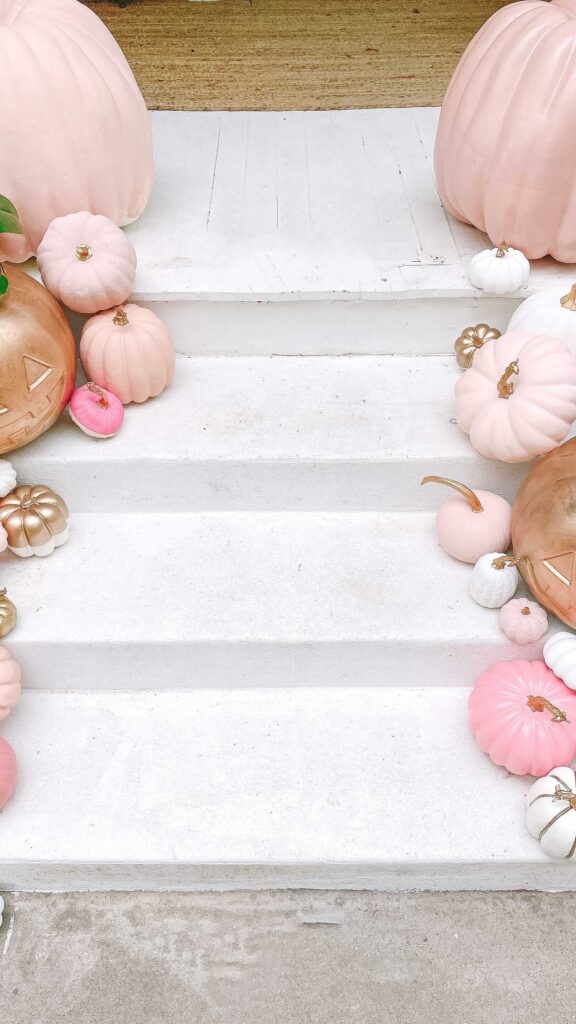
6. Color Block Pink Pumpkins

​Have I mentioned I’m not a fan of bright orange pumpkins? When I’m using pumpkins in my decorating, I try to stick with white pumpkins or pink. Sometimes pink pumpkins are hard to find. Frankly, sometimes I just want to make my own pumpkins to go better with the color scheme in my house. 

Simply take some white pumpkins, add painters tape, and paint the bottom or top half of the pumpkin. You can use any type of paint you’d like and any color. From black paint to pink paint, it is totally your decision. 

DIY Halloween Decorations pink color block pumpkins.

Once you remove the tape, you have your very own color block pumpkins! These are cheap Halloween decorations and will look great indoors or outside.

 If you do plan to use these outdoors, I wouldn’t use faux pumpkins. You can use white pumpkins that are found at your local grocery store. You may also need to make sure that you keep them on a porch to avoid the elements ruining your paint. 

DIY Halloween Decorations pink, gold, and white pumpkins.

7. Dollar Tree Hanging Ghosts

​My kids love Halloween just as much as I do. So, I don’t limit my decorating to just the main family areas. Instead, I try to bring the spooky season to each of their rooms.

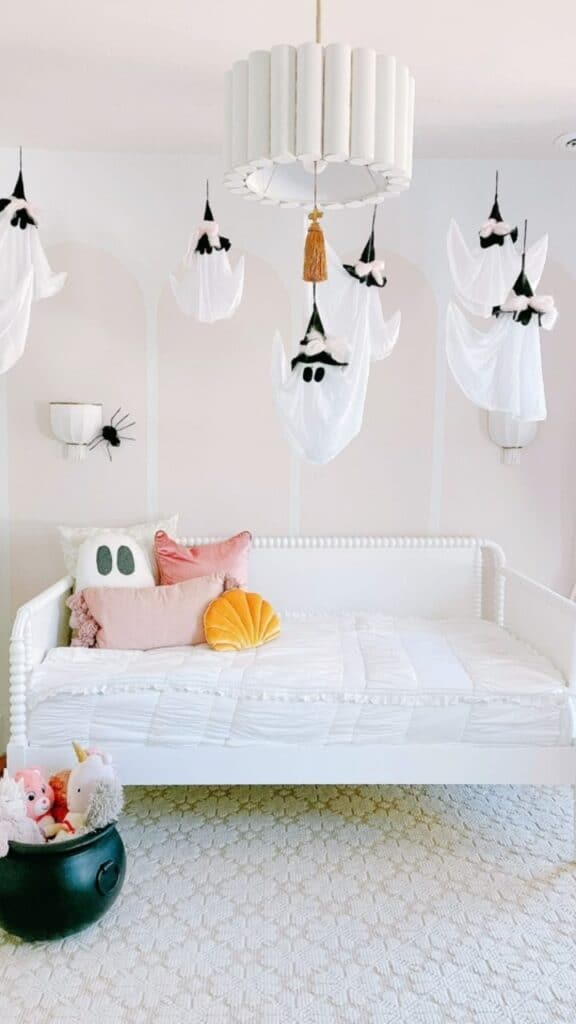
Last year, Ave had her own hanging ghosts that were a huge hit! I found these ghosts at Dollar Tree and simply cut the legs, arms, and bow off. Next, I added some pink yarn and applied fishing wire to hang them up. You don’t necessarily have to go with pink yarn, you can pick a black ribbon or any other color of your choice! 

You will also notice I have a giant cauldron holding several stuffed animals and books! 

DIY Halloween Decorations Hanging ghosts in girls bedroom.

8. Ghost Candles

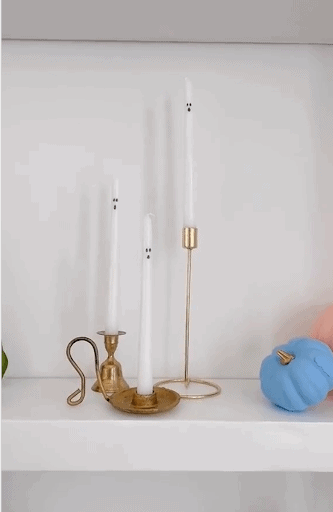
​File this next DIY under easy Halloween decoration ideas. This may be the easiest DIY ever! These ghosts candles are so stinking cute and add such a fun and whimsical look to your candle holders.

Simply use a sharpie to draw on a ghost face to your white tapered candles. Voila! Done! The best part is, it won’t cost you anything! 

If you want to add even more ambience, add some spooky apothecary jars using empty bottles and place a tea light inside. They will accompany your ghost candles perfectly.

DIY Halloween Decorations ghost candles.

9. Spider Bowl

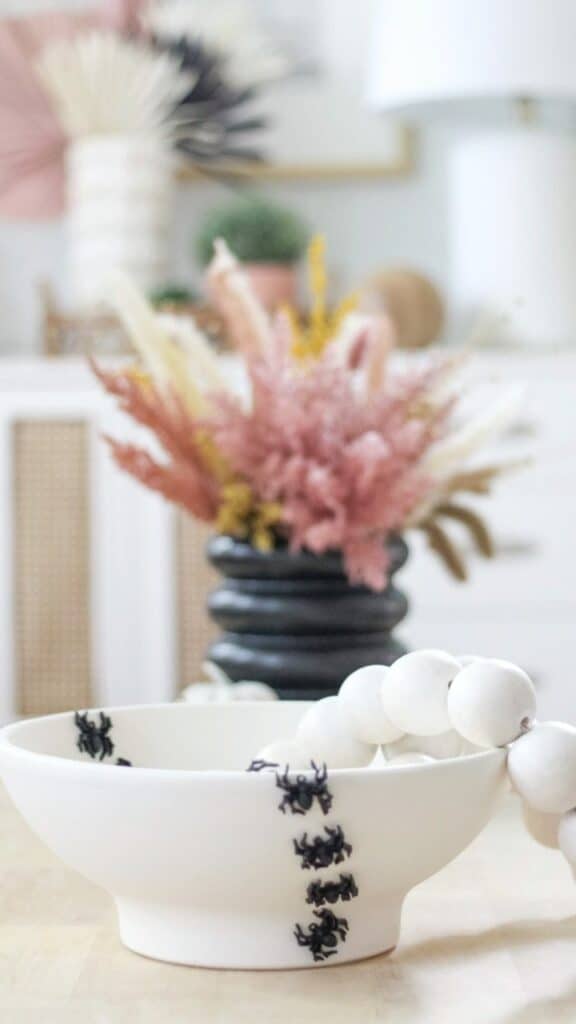
​If you haven’t guessed by now, I love using resin to create unique seasonal pieces. My spider bowl is just another example of a fun and easy DIY. While I’ve seen this idea in stores, I wasn’t willing to pay over $40 for a decorative bowl.

Instead, I picked out a bowl that was way cheaper and added spider decor using resin molds. Once you make your spider resin molds, you can use black spray paint and glue them on the bowl.

I love how this spider bowl looks like spiders have taken over! This is a great idea for your kitchen island!

DIY Halloween Decorations spider bowl.

10. DIY Halloween Doormat

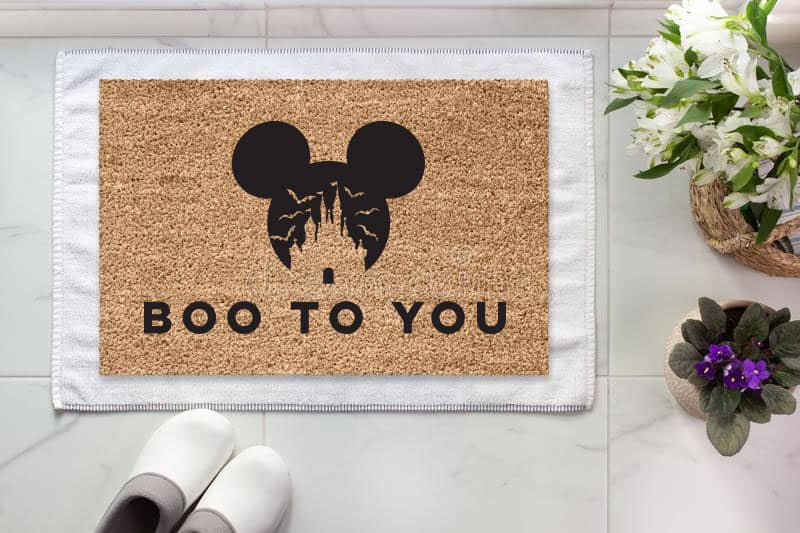
I love how creative you can get with you own DIY Halloween doormat. The sky is the limit! All you need are a few supplies and if you have a Cricut it is even easier.

Grab your plain doormat, plan out your design and cut it in Cricut, then use an outdoor paint such as Flex Seal to uphold to the elements. While I’ve created an everyday doormat, you can create one that is Halloween inspired or any other holiday.

I love this DIY Disney Halloween doormat

DIY Halloween Decorations Disney Boo Dormat.
This is such a cute doormat create by Kelly Does Life.

11. DIY Dollar Tree Mop Head Ghost Pillow

​I love adding in textiles that go with the holiday season. But, changing out textiles for every season can be expensive. Frankly, I don’t want to spend top dollar on a pillow that will only be used for a month out of the year.

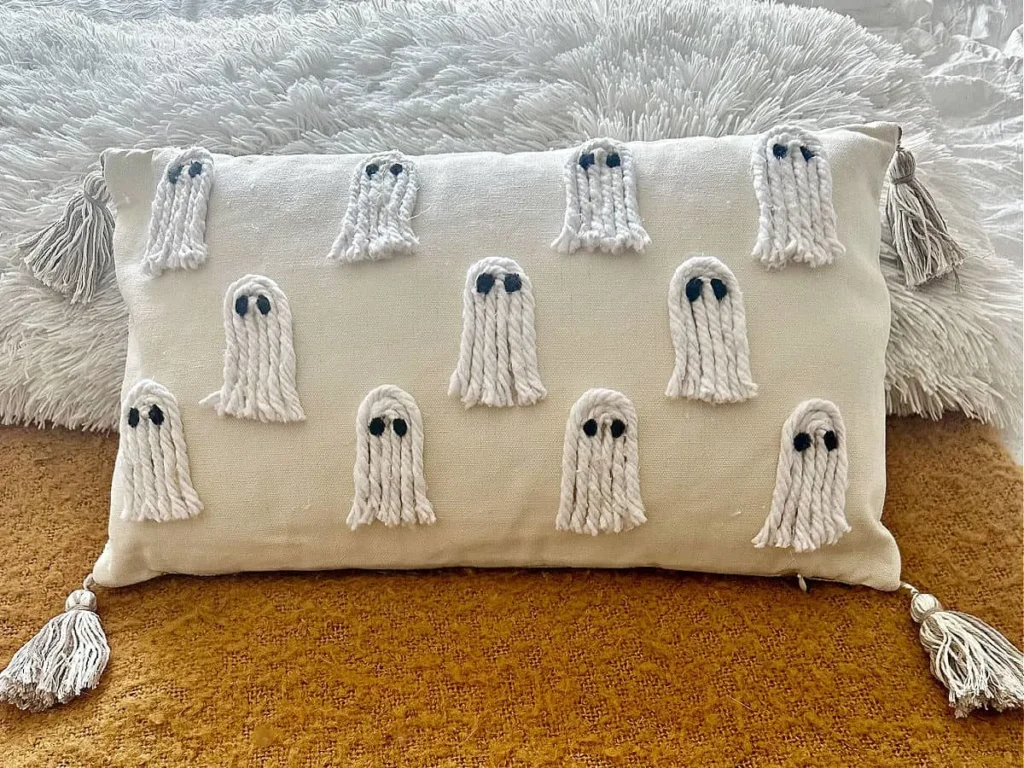
I found this DIY Dollar Tree mop head ghost pillow that is pure genius! I love how she uses a thrift store pillow, a mop head for yarn, glue, and black marker to create this gem!

DIY Halloween Decorations Ghosts Mop head pillow
This ghost pillow is the best idea!

12. DIY Halloween Village

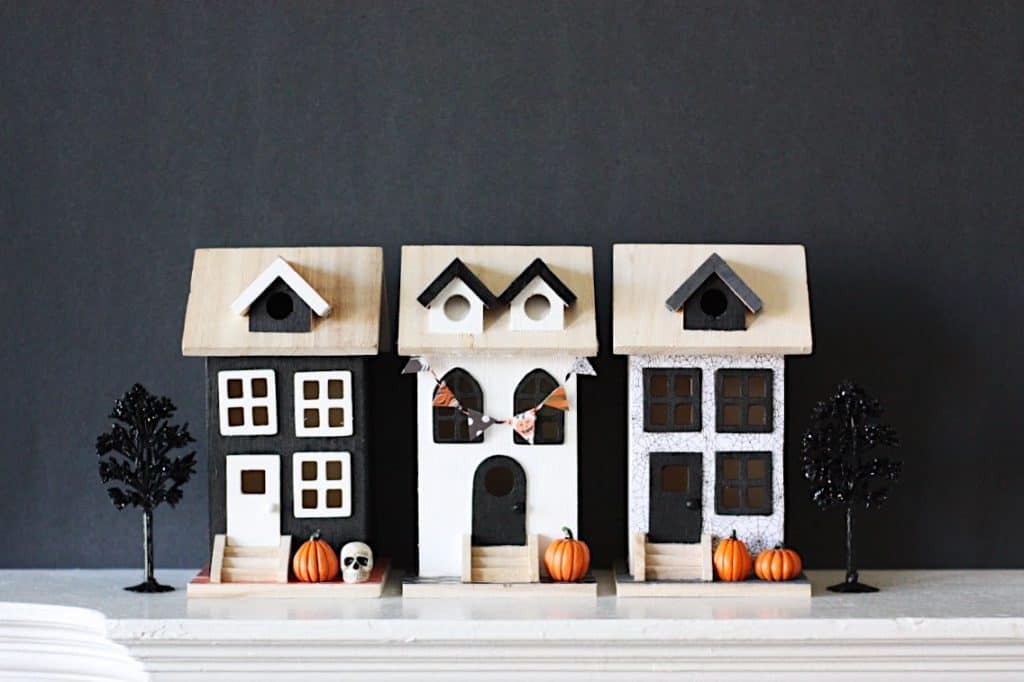
​Forget Christmas villages! I love seeing a haunted house village made from unfinished houses or older Christmas village homes. You can paint them and add Halloween embellishments like plastic skulls and string lights to make it pop! 

DIY Halloween Decorations Haunted Village
I love how you can customize this haunted village.

13. DIY Ghost Garland

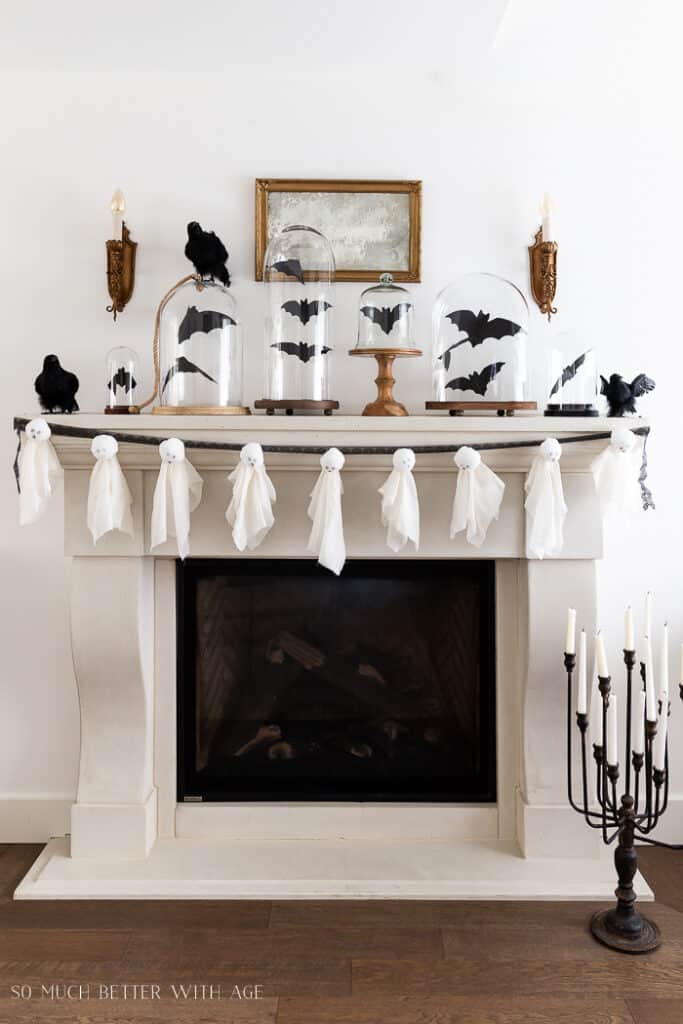
Ghost garland makes for a great decoration to add to your fireplace mantle. You can easily make this in a few hours using supplies found in stores. You’ll need some extra sheer curtains or gauzy material, fluff to fill the ghosts, elastic bands, a black marker, and black ribbon!

You can add more embellishments like sparkles or spiderwebs to take it up a notch!

DIY Halloween Decorations ghost garland on fireplace mantle.
This ghost garland is a classic Halloween decoration staple.

14. DIY Potion Bottles

Once fall hits, Target generally puts out all of the Halloween decorations. For the past several years they have had potion bottles in the dollar section. You can remove the old labels from the bottles, paint them, and add your own labels that match your decor!

Add your DIY potion bottles to your mantle, built-ins, or kitchen shelves! 

DIY Halloween Decorations potion bottles and spiders.
Easily customize your own DIY potion bottles to match your decor.

15. Cheesecloth Spirits

To take your spooky up a notch, consider trying your hand at these cheesecloth spirits. You can easily hang them from your ceiling or front porch.

You’ll need to grab cheesecloth, styrofoam head mannequins, a brush, watered down glue, screw eyes, and fishing wire. Make sure you check out the full tutorial for these cheesecloth spirits.

Cheesecloth spirits for easy DIY Halloween decorations.
These cheesecloth spirits will frighten anyone who comes close!

Shop Supplies For My Favorite DIY Halloween Decorations

Shop supplies for my favorite 15 DIY Halloween Decorations

1 | 2 | 3 | 4 | 5 | 6 | 7 | 8 | 9 | 10 | 11 | 12 | 13 | 14 | 15 | 16 | 17 | 18 | 19 | 20 | 21 | 22 | 23 | 24 | 25 | 26

  1. F|S FRAMER SUPPLY Amaco Rub ‘N Buff Wax Metallic Finish
  2. PLUS Haven Coco Coir Door Mat
  3. ELCOHO 12 Pieces Halloween Costume Witch Hat with 100 Yards Hanging Rope
  4. CANDWAX White Taper Candles 12 inch Dripless
  5. BALABALA 3 Pcs Foam Wig Head, Female Styrofoam Mannequin
  6. Caliart Acrylic Paint Set with 12 Brushes, 24 Colors
  7. MyGift Vintage Design Embossed Fleur De Lis Clear Glass Bottles
  8. BAINFE 3 Sizes 150 Pieces Plastic Spiders
  9. VGIA 6 Pcs Fall Eucalyptus Stems
  10. D’vine Dev Terracotta Pots for Plants
  11. HOTO Cordless Hot Glue Gun
  12. Homemory Black Flameless Taper Candles with Remote and Timer
  13. HUMINBO Fall Decor Autumn
  14. Joyhalo14 Pack White Pumpkins
  15. Clear Fishing Wire
  16. Command 17008-ES Ceiling 9 Hooks
  17. 2-PACK – Alumilite Amazing Casting Resin
  18. Cheesecloth
  19. Halloween Molds Silicone 
  20. LOMIMOS 6pcs Halloween Pumpkin Bucket
  21. Molding and Casting Material
  22. Krylon K02753007 Fusion All-In-One Spray Paint for Indoor/Outdoor Use
  23. Brightown 12 Pack Led Fairy Lights Battery Operated
  24. Lyfreen Bird Houses for Outside Wooden Bird House 
  25. Hotop Witch Hat Shaped Metal Wreath Frame
  26. 6Pcs Lemon Gold Candle Holders

Other Posts You’ll Love

Kids Halloween Party | Best Family Halloween Costumes | Fun Halloween Hairstyles

Follow Social For The Latest & Greatest

Pin The Photo Below For Later

I hope you found some easy and scary DIY Halloween decorations that you feel confident to complete! Regardless of how crafty you are, these DIYs are perfect for beginners! 

You don’t need to go overboard by spending tons of money on Halloween decorations. Instead, try your hand at creating your own and make some fun memories with your kids! Feel free to DM me on Instagram or leave a comment in the comments section if you have any questions!

DIY Halloween Decorations Pinned Photo
Fashion

21 Pearl Earrings & Pearl Earring Sizes: A Guide To Buy

Pearl earring sizes don’t need to be complicated. Pearls are a timeless piece of jewelry that brings elegance and sophistication to any outfit. They are a popular choice for women of all ages, from young teens to older adults, due to their classic style and versatility.

However, pearl earring sizes can range from small pearl studs to large pearl earrings. It can be challenging to find the right size. Follow along to learn about pearl earring sizes, a guide to buy, and my favorite 21 earrings.

This post may contain affiliate links.

Bride on her wedding day wearing pearls.

21 Pearl Earrings & Pearl Earring Sizes: A Guide To Buy

The girls and I went back to school shopping recently. During our trip, Avé found some earrings she liked. She wanted her own set of pearls so we picked a pair that was small and dainty. I think they best fit her ear lobes and looked perfect for her face. 

Pearls are a classic type of jewelry. They serve as a great gift for young girls. As long as your child can take care of them properly, they will be able to wear them.

As a bonus, pearls are meant to last for many years to come. More importantly, they are a great heirloom to pass down from one generation to the next.

Pearl earring sizes come in different shapes and styles for bridal jewelry.
These beautiful pearl earrings are small but make a perfect statement for a bride.

Size Of Pearl Earrings

Not all pearls are the same size, type, shape, or color. Each will vary based on the pearl itself.

Before you buy pearl earrings, there are several crucial factors to keep in mind. One of those is the ability to understand the size of the pearls. 

Overall, the most important factor when choosing the size of pearl earrings is the personal preference and comfort of the person who will be wearing them. It’s always a good idea to try on different sizes to see what looks and feels best.

Pearl earring sizes can range from 2.0 mm up to to 16 mm. Commonly, you’ll see sizes in the 6.0 mm to 11.0 mm range.

In order to find the best pearls for you, your face shape, and your budget, you’ll need to keep these concepts in mind:

Pearl earring sizes range from dangling pearls to studs. Gold dangling pearls with sun details.
A beautiful set of dangling pearl earrings.

Measurement Of Pearls

Pearl sizes are typically measured in millimeters (mm). They can start from as small as 2mm and go up to 13mm or more. Obviously, the larger the pearl, the more expensive they can get. 

Common Sizes Of Pearls

The most common sizes for pearl stud earrings fall in the 7.0-8.0mm range. These sizes strike a balance between subtle and noticeable, making them versatile for different occasions and outfits.

Age and Facial Features

Smaller pearls, such as 6.0mm pearls, are often a great choice for younger ladies, older teens, and those with petite facial features. Larger pearls can make a more striking statement and are often chosen by mature women or those who want their earrings to stand out.

Pearl earring sizes show a small set of dainty flower pearl earrings on a green box.

Occasion

Smaller pearls are versatile and can be suitable for everyday wear, while medium-sized pearls are often a good balance for both day-to-day wear and special occasions. Larger pearls can make a bold statement and are often reserved for formal events or special occasions.

Style and Comfort

The right pearl size should complement the wearer’s style and be comfortable to wear. Some people prefer the subtlety of smaller pearls, while others prefer the boldness of larger pearls. 

Hooped pearl earrings in a model's ear makes it appear there are two different earrings.
Beautiful hooped pearl earrings.

Type of Pearl

The type of pearl can also influence the size. For instance, Akoya pearls, known for their high luster and classic elegance, usually range from 6.0mm to 8.5mm. On the other hand, Tahitian and South Sea pearls are often larger, starting from around 9.0mm.

Matching Jewelry

If you’re planning to match the earrings with other pearl jewelry like a necklace or bracelet, consider the size of those pearls as well.

Large pearl earring sizes with necklace and ring.

What Are The Different Types Of Pearls

When buying pearl earrings, understanding the type of pearl is as important as knowing the size. Each type of pearl comes with its unique characteristics, including color, size, luster, and price. 

While considering the type of pearl, it’s also essential to check their authenticity. Real pearls have a grainy texture when rubbed against the teeth, while fake pearls will feel smooth. 

You will also want to remember that each type of pearl carries its distinct charm and beauty. The best way to choose is by considering personal taste, the desired look, the occasion, and your budget.

Here are the main types of pearls you should know about:

Large pearl earring sizes show a teardrop dangling pearl.
A beautiful large pearl earring from baroque pearls.

Akoya Pearls

 Known as the classic pearl choice, Japanese Akoya pearls are famous for their luster. They’re usually white or cream with overtones of rose, silver, or ivory. Akoya pearls range in size, typically from 6.0mm to 8.5mm, making them a favored choice for pearl earrings.

Freshwater Pearls

These pearls are known for their wide range of sizes and colors. They’re often more affordable than other types. For this reason, freshwater pearls are a popular choice for those looking for value without sacrificing beauty. 

Freshwater pearls can range in size from 2mm to 16mm.

Husband and Wife with bride wearing pearls on her wedding day.

Tahitian Pearls

These pearls are unique because of their natural dark colors. They’re often referred to as “black pearls.” Still, they can come in a range of colors from silver to deep green. Tahitian pearls are generally larger, starting from around 9.0mm.

South Sea Pearls

These are the largest and most valuable pearls grown today. They are  known for their incredible size, satin luster, and delicate colors. 

Golden South Sea pearls feature a deep golden hue, while White South Sea pearls are silver or white with subtle undertones.

 They range in size from 9mm up to 20mm.

Freshwater pearl earring sizes range from 3.4 to 7 mm.
Beautiful freshwater pearl earrings ranging in size from 3.5 mm to 7 mm.

Keshi Pearls

Keshi Pearls are non-nucleated pearls typically formed as by-products of pearl cultivation. They come in a variety of shapes, most commonly baroque, and have a high luster.

Mabé Pearls

These are blister pearls cultivated on the inside shell of a mollusk rather than in the body. They’re hemispherical in shape and are often used in earrings, rings, or brooches.

Pearl earring sizes range from 2 mm up to 11 mm with these kitten pearl earrings at 8.5 mm.
Large cultured pearl earrings are adorable for a little girl who loves cats.

Color Of Pearls

When buying pearl earrings, it’s important to consider certain factors related to the color of the pearls. 

I always recommend visiting a reputable jeweler or pearl specialist for your first purchase. 

These professionals can provide you with accurate information and help you choose the best pearls based on your preferences and budget.

Here are some key points to know about pearl colors:

Natural vs. Cultured Pearls

Most pearls available in the market today are cultured pearls, which are created by introducing an irritant, such as a bead or tissue, into an oyster or mollusk. 

Natural pearls, formed without human intervention, are rare and highly valuable. The color of natural pearls can vary widely, while cultured pearls are often more uniform.

Large pearl earring sizes go up to 12 mm for studs and dangling pieces on this model.
Large 12 mm dangle pearl earrings make a statement.

Pearl Color Spectrum

Pearls come in a variety of colors, including white, cream, pink, silver, gold, black, and various pastel shades. The color of a pearl is influenced by the type of oyster or mollusk that produces it, as well as the water and environmental conditions in which it grows.

Luster and Overtone Of Pearls

The luster of a pearl refers to its reflective quality and how well it reflects light. High-quality pearls have a strong, bright luster that gives them a luminous appearance. 

Pearl overtones are secondary colors that can be seen on the surface of the pearl, such as rose, green, or blue. These overtones add depth and complexity to the pearl’s color.

Matching Pearls

If you are buying a pair of pearl earrings, it’s important to ensure that the pearls match in terms of color, size, shape, and luster. This consistency enhances the overall aesthetic appeal of the earrings.

Pearl earring sizes can include floral and gold pearl earrings in different shapes.
Stunning floral pearl earrings are the perfect piece to dress up or down.

Personal Preference Of Pearls

The choice of pearl color is largely a matter of personal preference and style. Consider your skin tone, wardrobe, and the occasion for which you plan to wear the earrings.

 For example, white or cream pearls are versatile and can complement various outfits, while black pearls can add a touch of elegance and sophistication.

Treatments and Enhancements

Pearls may undergo treatments or enhancements to improve their color or appearance. Common treatments include bleaching, dyeing, and irradiation. 

It’s essential to inquire about any treatments or enhancements applied to the pearls before making a purchase.

Price Considerations

The price of pearl earrings can vary depending on factors such as size, shape, luster, surface quality, and rarity of the pearl color. Generally, white and cream-colored pearls are more common and thus more affordable compared to rarer colors like black or pink.

Beautiful drop pearl earrings on a model with crystals.
Stunning drop pearl earrings can accentuate any outfit.

Shop My Favorite Pearl Earrings

Regardless of your budget, a classic pearl stud earring is the best choice to wear daily. You don’t need to go to a professional jeweler to find these precious pearls. Fortunately, pearls are a common staple in many people’s jewelry boxes and are readily available to find anywhere. 

You may not be wearing the largest or most expensive pearl, but your little girl can still feel special. 

Here are my favorite pearl earrings in various shapes and sizes to fit anyone’s budget! 

Shop my 21 favorite pearl earring sizes!

1 | 2 | 3 | 4 | 5 | 6 | 7 | 8 | 9 | 10 | 11 | 12 | 13 | 14 | 15 | 16 | 17 | 18 | 19 | 20 | 21

  1. Pearl Earrings for Women 18k Gold Plated Handpicked AAAA Freshwater Cultured Pearls
  2. Kendra Scott Ashton Pearl Stud Earrings – The cutest small pearls!
  3. Ross-Simons 8.5-9mm Cultured Pearl and 15mm Mother-Of-Pearl Drop Earrings
  4. Ross-Simons 20.00 ct. t.w. Gemstone and Cultured Pearl Earrings – Such a gorgeous statement piece.
  5. PAVOI Handpicked AAA+ Quality Freshwater Cultured Pearl Earrings
  6. OwMell Elegant 925 Sterling Silver Simulated Shell Pearl Drop Earrings
  7. THE PEARL SOURCE Round Pink Freshwater Real Pearl Earrings – A classic and beautiful earring.
  8. 8-12MM Genuine Tahitian Black Pearl 18K Gold Stud Earrings
  9. PAVOI 14K Gold 925 Sterling Silver Huggie Half Hoop
  10. Pearl Stud Earrings for Women, 7 mm– These are adorable for kids.
  11. Ross-Simons 8-8.5mm Cultured Pearl Cat Earrings– Another great pick for kids!
  12. 14K Gold AAAA Round White Freshwater Cultured Pearl
  13. SWEETV Pearl Wedding Earrings for Brides
  14. Sorrelli Isabella Stud Earrings
  15. PAVOI 14K Gold Plated Solid 925 Sterling Silver Post Cubic Zirconia
  16. Kate Spade New York Fresh Squeeze Pearl Flower Studs
  17. Gem Stone King 14K Yellow Gold 9MM Cultured Freshwater Pearl Dangle Earrings
  18. Anthony Vincent White Baroque Pearls with 14 K Yellow Gold- The size of pearl earrings can vary and these are considered large and gorgeous!
  19. AVORA 10K Yellow Gold Freshwater Cultured Pearl Princess Cut
  20. ISAAC WESTMAN White Japanese Akoya Cultured Pearl Stud Earrings
  21. XYJZXY Freshwater Cultured Pearl Earrings for Women 18K Gold Pearl Drop

Other Posts You’ll Love

Best Bags For Moms | Best Items For Organizing A Closet | Klearvue Cabinetry

Follow Social For The Latest & Greatest

Pin The Photo Below For Later

Pearls are a timeless addition to any jewelry collection. They come in a range of sizes, allowing women to choose what suits them best. 

From small pearl earrings for young teens to large pearl studs for a special lady, pearls are indeed the perfect gift for any occasion.  In the end, pearl earring sizes are perfect when the one wearing them feels confident and beautiful. 

After all, as famously said by Jackie Kennedy Onassis, “Pearls are always appropriate.” So, whether you’re a young lady, a new bride, or a proud mother, there’s a perfect size and a perfect pair of pearl earrings waiting just for you.

Shop my 21 favorite pearl earring sizes!
Monthly Best Sellers

Amazon Best Sellers List- August 2023

I am so happy to bring you my monthly best sellers list so that you can easily see all the items in one place. All the items in this round up are from Amazon and can be found in my Amazon storefront. And if you find yourself wondering how to use any of these items in unique ways, make sure you head over to my Tik Tok where I am able to share more detailed reviews of items in video format.

This post may contain affiliate links.

Little girl

Amazon Best Sellers List- August 2023

School is back in session! I repeat, this is not a drill! School is back!

Parents everywhere rejoice! While I am so excited that my kids are back in school, it is also bittersweet. We had such a fun summer filled with tons of adventures. I’ll miss having them home and hearing their voices echo throughout the house.

I am, however, very excited to be back in a routine and have a set schedule. This is the first year that all four of my kids are in school together. They were eager to get back too – well almost all of them!

Now with summer coming to a close and cooler temperatures on the horizon, I am dreaming of all things Fall!

Whether the weather is getting cooler where you live or not, it will be the holidays before we know it. Now is the time to start preparing for that busy season of life. I hope you are able to find something in this guide that may make your morning routines a bit easier. Or, maybe you find something special for a loved one in your life to give in just a few short months.

Birthday girl with mom and dad

Life Updates For August

Now that the kids are back in school, Sam and I are able to focus on completing more projects around our house. I have some exciting goals planned for this year and I can’t wait to share them all with you over time.

Project Update

We are coming up on three years since we bought out home and two years since we completed the HGTV renovation. It has been an uphill road and learning process, to say the least. When we bought our home we knew we would need to complete a full renovation to have the home of our dreams. It wasn’t always easy, but I can say that now that we are nearing the finish line it was worth it!

While I am grateful we did the HGTV show, I am still in the process of changing out some of the decisions that were made for the show. My style has evolved and as I look around our home, there are a few rooms that I am changing to be more in line with my vision.

Playroom Reveal

The biggest news in our home is that we completed our playroom remodel. It is exactly what I envision and I am so happy with the results. The blue wallpaper is so serene and we went for a cohesive look with blue trim and doors. Overall, this playroom flows effortlessly into the other rooms of our home.

Blue living room with lots of Amazon best sellers list.
Main Floor Bathroom Update

Next up on our agenda was to switch out our DIY PVC fluted wall bathroom. While I love the color pink, it was time for a change. I am heavily inspired by grand-millennial decor. I envisioned our main floor bathroom off our mudroom to have a bit more elegance to it.

In reality, I needed the main floor bathroom to capture the essence of our home. Unfortunately, the PVC wall wasn’t cutting it anymore.

I found some wallpaper that I absolutely fell in love with. From there, the vision came to life centered around this wallpaper. I never thought I would be brave enough to go so bold with a paint color like we did. I am so glad I took the risk because the end result is stunning.

Once we complete the ceiling and door jam, the bathroom will be ready for its full reveal. In the meantime, enjoy this sneak peak!

Green bathroom and wallpaper with woven mirror on amazon best sellers list
Works In Progress

We still have several projects that are a work in progress. I still have Goldie’s room on my agenda as a top priority. I was able to find some wallpaper to help bring my vision to life. Unfortunately, right when I got her wallpaper, we ended up having our entire HVAC system replaced.

Not only did we have our HVAC system replaced, it fell on the hottest week of the entire year. It was straight up smoldering in our home. Thankfully, we had lots of fans going throughout the house so we were still able to stay in our home. Needless to say we didn’t get much work done in her room because of the dangerous temperatures outside.

My hope is that we will get that completed once we have finished the main floor bathroom. In the meantime, Goldie and Avé are enjoying spending more time together- both at school and home.

Living room with grand millennial style and amazon best sellers list

Once Goldie’s room is complete, we also plan on changing up our formal living room. The wallpaper has been picked out. Our furniture may also make some moves, but we will mostly be focusing on changing out textiles for an easy update.

Lastly, I know many of you have been eagerly awaiting the swimming pool reveal. Unfortunately, the timeline has not gone like what we expected. There is a lot of red tape and hoops that have to be jumped through before we can break ground. At this point, we are still in a waiting game. While we wait, so do our plans for our outdoor space.

Two boys in blue polos

Family Updates

Our family update this month is much like many families everywhere. All four of our kids have started school. This is a new feeling of emptiness as our youngest, Goldie, has started Pre-K at the same school as her older siblings. We are so lucky to have a school we love and an environment where our kids can learn and grow safely.

Jack started 5th grade and is excited to be a big kid at school. I am so proud to be his mom and watch as he matures into a young man. It is almost mind boggling to me that I have a pre-teen on my hands!

Meanwhile, Avé started 3rd grade and has been such a big help with Goldie. When Goldie first started school, she was very unsure in the beginning. There were tears from both her and I! I should have known that big sister would save the day and be a calm and comforting presence for her at school.

Four kids on first day of school.

Walker is officially a Kindergartener and I can’t believe it! He has gone from my wild man to….still my wild man! He is determined, brave, and so silly. I love watching his personality shine and can’t wait to see what this year has in store for him!

At the end of the school days, everyone in our crew has an after school activity. Our girls are still dancing and love the spotlight. While our boys are playing soccer this fall.

Overall, this is a very busy season of life. Sam and I are so blessed to be given this beautiful opportunity to watch our kids thrive and do what they love most.

In the meantime, Sam and I are also very tired! When we look at those smiles on their faces, we get over the tiredness and are just grateful.

Dad and sad little girl in pink dress.

Shop Amazon Best Sellers For August 2023

Our Amazon best sellers for August 2023 has many products to help streamline your life for this busy season. Whether it means helping get your kids ready faster in the morning, organizing their closets for easy access, or prepping dinner, there is something for everyone.

I hope that you are able to find a product that you love and that will make your life much easier in the long run. As parents, our time is spent working, shuttling kids around, and preparing our kids for the next school day.

If you are lucky, you get to spend that quality time with them. I try to find products that help save time and energy so we always have room at the end of the day together.

As always, I have much more in my Amazon storefront for all of your organizational needs too! Make sure you don’t miss out.

Shop Amazon Best Sellers List August 2023 in this round up.

1 | 2 | 3 | 4 | 5 | 6 | 7 | 8 | 9 | 10 | 11 | 12 | 13 | 14 | 15 | 16 | 17

  1. Vorceary Adhesive Hat Hooks for Wall
  2. Headrest Hooks for Car
  3. GoodCook Everyday Fruit and Veggie Divider
  4. Toothpaste Caps
  5. Vegetable Chopper
  6. WOWBOX 25 PCS Clear Plastic Drawer Organizer Set
  7. Cleaning Gel for Car
  8. BISSELL Featherweight Stick Lightweight Bagless Vacuum
  9. ARECTECH Rechargeable Electric Candle Lighter
  10. Fanisic Mini Vacuum
  11. iPhone Charger
  12. 2 Pieces Metal Inkless Pen
  13. HOYOLS Clear Elastic Hair Rubber Bands
  14. Wireless Doorbell
  15. SmileXBag: Lazy Susans Organizer Oval Turntable
  16. AUJEN Trash Can
  17. Learning Resources Create-a-Space Storage

To be the first to see Best Sellers + enjoy a sneak peek at my end of year ‘Best of’ series, subscribe to my email list below!

Other Posts You’ll Love

Tips On How Low Should Kitchen Pendant Lights Hang | Painting Stone Fireplace Ideas | Gifts For 8 Year Old Girls

Follow Social For The Latest & Greatest

Pin The Photo Below For Later

Be sure to pin the photo below for later, and if you don’t already – follow me on Instagram (@arinsolange) and Tik Tok (@arinsolange) for more fun! Be sure to check my Amazon store front for all things best seller, home organization, and DIY.

Shop Amazon Best Sellers List August 2023 in this round up.
Products we Love

Best Bags For Moms In 2023 For Every Style & Budget

Finding the best bags for moms can be a daunting task. As a mom, you need a bag that offers large capacity, easy access, and plenty of pockets for organizing both personal items and those of your little ones. Here’s our top pick list of the best bags for moms in 2023 catering to every style and budget.

This post may contain affiliate links.

Little girl with backpack and mom with best bags for moms.

Best Bags For Moms In 2023 For Every Style And Budget

As a mom to four kids I can tell you that kids come with a lot of stuff. No matter how old they are I still find myself packing my purse with miscellaneous items. Finding a bag that is both stylish and functional can be a hard task. 

From backpacks to clutches I’ve rounded up the best bags for moms in 2023 for every style and budget. 

Best Backpacks for Moms

Chances are if you have young kids you’ll want to maximize your space. Backpacks are considered as one of the best bags for moms due to the numerous benefits they offer. Here are several reasons why backpacks are a popular choice among moms:

Hands-Free Convenience Of Backpacks

One of the key advantages of backpacks is that they allow moms to have their hands free while carrying their essentials. This is particularly beneficial when juggling multiple tasks or tending to children. With a backpack, moms can easily navigate through crowded spaces, hold their children’s hands, or push a stroller without the hassle of a bag slipping off their shoulder. In other words, they are the VIP of mom bags.

Best bags for moms will have a backpack on the list as seen here with little boy

Comfortable and Ergonomic

Backpacks are designed to distribute the weight evenly across both shoulders, reducing strain on the back and neck. This ergonomic design is especially crucial for moms who often carry a significant load of baby essentials, such as diapers, bottles, and extra clothing. The adjustable shoulder strap on backpacks provide a customized fit that ensures comfort even during extended periods of wear.

Ample Storage Space

Moms need a bag that can accommodate all their essentials, from baby items to personal belongings.

Backpacks typically offer generous storage space with multiple compartments and pockets. My personal favorite feature is that most backpacks offer exterior pockets that fit a water bottle or baby bottles. Interior pockets are also widely available to store larger items such as a mobile changing pad. A larger front pocket is also available to store smaller items that need to be readily available, like keys.

All of these pockets allow for efficient organization and easy access to items. This is why backpacks are above all the essential mom bag.

Little boy, Mom, and baby in baby carrier

Versatility

Backpacks are versatile bags that can be used beyond the early stages of motherhood. As children grow older, the need for carrying baby-specific items may diminish. However, backpacks can still serve as reliable companions for various activities, such as outings with the family, travel, or even as a work bag. Their versatility makes them a long-term investment.

Even Weight Distribution

The design of backpacks helps distribute the weight evenly across the back and shoulders. This is particularly beneficial for moms who may experience back or shoulder pain from carrying a shoulder bag or tote. The balanced weight distribution can help alleviate discomfort and reduce the risk of strain or injuries.

Mom with her four kids

Security and Peace of Mind

Backpacks offer a sense of security as they securely hold belongings close to the body. This is especially important when moms are out and about, ensuring that their valuables and essential baby items are safe and easily accessible. Additionally, many backpacks have interior pockets with a zipper closure, providing an extra layer of security.

Stylish Designs

Backpacks have evolved beyond their utilitarian origins and now come in a wide range of stylish designs. Moms can find backpacks that suit their personal style, whether they prefer a sleek and modern look or a more playful and vibrant design. This allows them to express their individuality while still enjoying the practical benefits of a backpack.

Best bags for moms come in many shapes as seen here with multiple bags

Best Tote Bags for Moms

Tote bags are another option for those moms who need to maximize their storage space.  Known for their spaciousness, durability, and versatility, tote bags make some of the best beach bags out there for moms.

Ample Storage Space

Tote bags are usually larger than most other bags, which makes them perfect for moms who need to carry a lot of items. They are spacious enough to hold diapers, bottles, snacks, toys, wipes, a change of clothes for the kids, and even personal items like wallets, keys, and phones. However, with ample storage you’ll need to be careful you aren’t carrying a heavy load.

Versatility

Tote bags come in many different styles, colors, and materials, which means moms can choose one that suits their personal style. Whether the occasion calls for a more formal leather tote or a casual canvas one, there’s a tote bag for every scenario. This means moms can transition from a day out with the kids to a business meeting without having to switch bags.

Best bags for moms is tote and backpack combo seen in this picture with mom and little girl

Durability

Tote bags are typically made to be sturdy and durable. They’re designed to withstand a lot of weight, which is great for moms who need to carry around heavy items like baby gear. In addition, tote bags often have reinforced handles, which means they’re less likely to break under pressure. While you have a heavier bag, many tote bags come with convertible straps to help you easily carry the weight.

Organization

Many tote bags come with multiple compartments, pockets, and zippers, allowing moms to keep their belongings organized. This can be very helpful when trying to find a specific item in a hurry.

Eco-Friendly

 Many tote bags are made from environmentally friendly materials such as organic cotton or recycled materials. For moms who are conscious about their environmental impact, tote bags can be a great choice.

Mom with her four kids in front of white fence.

Ease of Cleaning

Depending on the material, many tote bags are easy to clean. This is especially useful for moms dealing with spills or other messes. Some tote bags are even machine washable.

Affordability

While the price of tote bags can vary greatly depending on the brand, material, and design, there are plenty of affordable options available. This means moms can choose a bag that fits their budget.

Mom and dad with four kids in fall colors at sunset

Best Crossbody Bags for Moms

Crossbody bags are an excellent option for moms on the go. Whether you have kids young or old, crossbody bags have several key benefits.

Hands-Free Convenience

One of the major benefits of crossbody bags is that they leave your hands free to attend to your children. The bag can be worn diagonally across the body. Many crossbody bags are considered to be a messenger bag or fanny pack. Regardless of style, they distribute weight evenly. This allows moms to have easy access to their essentials while keeping their hands available for tasks like holding their child’s hand or pushing a stroller.

Best bags for mom offer hands free convience to push a stroller as seen with this mom and baby.

Compact and Lightweight

Crossbody bags tend to be smaller and more compact compared to tote bags, making them a great choice for moms who prefer a lighter load. Despite their smaller size, they are designed to maximize storage space and provide multiple compartments to help keep items organized.

Security and Accessibility

Crossbody bags offer enhanced security as they are worn close to the body, making it harder for potential thieves to snatch them. Additionally, the bag stays in place while you move, ensuring that important items like wallets, keys, and phones are easily accessible and less likely to be misplaced.

Style and Versatility

Crossbody bags come in a wide range of styles, designs, and materials, allowing moms to find one that suits their personal taste and lifestyle. Whether it’s a sleek leather crossbody for a more sophisticated look or a nylon one for casual outings, there are options available to match any outfit or occasion.

Dad carries a  green backpack diaper bag that works as best bags for moms and dads

Ease of Use

Crossbody bags typically have a long adjustable strap, which allows moms to customize the fit to their preferred length. This adaptability is particularly useful for moms of different heights or for those who want to wear the bag in various ways, such as across the chest or on the hip.

Travel-Friendly

Crossbody bags are ideal for moms on the go. They are compact enough to be easily carried while traveling or running errands, and many designs include features like RFID-blocking pockets for added security when traveling with passports or credit cards.

Best bags for moms can be taken all over including the pool with mom and daughter lounging on pool

Best Purses for Moms

Purses will always be a great option for moms on the go. With plenty of styles and sizes to choose from, purses offer tons of benefits for the fashionista mom.

Style and Fashion

Purses are often designed with fashion in mind, offering a wide variety of styles, materials, and designs. They can add a touch of elegance and sophistication to a mom’s outfit, allowing her to express her personal style while still fulfilling practical needs.

Organization

Many purses come with multiple compartments and pockets, enabling moms to keep their essentials organized. Often, an internal cell phone pocket is available to keep your phone organized and readily available. This helps in finding items quickly especially when time is of the essence.

Best bags for moms as a grey Freshly Picked Backpack

Portability

Purses are typically smaller and more compact than tote bags or backpacks, making them easier to carry around. They are lightweight and convenient, allowing moms to move freely without feeling weighed down.

Versatility

Purses come in various shapes and sizes, allowing moms to choose one that suits their specific needs. From small crossbody purses for quick outings to larger shoulder bags for carrying more items, there is a wide range of options available to accommodate different preferences.

Ease of Access

Purses are designed for easy access to belongings. They often feature secure closures like zippers or magnetic clasps, ensuring that items stay in place while still being easily reachable when needed.

Family by ocean smiling.

Timeless and Long-Lasting

The perfect purse is crafted with durable materials and a timeless design.  Investing in a high-quality purse can be a wise choice as it can serve moms beyond their child-rearing years.

Occasion Flexibility

Purses are versatile and can be used for a range of occasions. They are suitable for both casual outings and more formal events, allowing moms to seamlessly transition from day to night without needing to switch bags.

Best bags for moms in a crossbody purse on mom with birthday girl and dad

Best Designer Bags for Moms

Designer bags can be an appealing choice for moms for several reasons:

Quality and Durability

Designer bags are often crafted with high-quality materials and meticulous attention to detail. These bags are designed to withstand daily use and are made to last, ensuring durability and longevity. This is especially beneficial for moms who need a reliable bag to carry their essentials over an extended period.

Fashion and Style

Designer bags are known for their exquisite designs and aesthetic appeal. They often feature unique and sophisticated patterns, colors, and embellishments that can elevate a mom’s overall look. Carrying a stylish bag can be a way for moms to express their personal style and add a touch of luxury to their outfits.

Best bags for moms can range in style. This little girl is posed next to a bag in pink.

Craftsmanship and Attention to Detail

Designer bags are typically crafted by skilled artisans who pay great attention to every detail. From the stitching to the hardware, these bags are meticulously made to ensure a superior product. The craftsmanship and quality of materials used in designer bags can contribute to their overall appeal and functionality.

Resale Value and Investment

Designer bags from reputable brands often retain their value over time and can even appreciate in worth. This makes them a potential investment for moms who may consider selling or trading their bags in the future. Additionally, some designer bags have a timeless appeal, which means they can be used for many years without going out of style. Overall, while they may be a splurge they may save you money in the long run.

Mom with her 2 small kids.

Functionality and Organization

While designer bags are known for their style, many of them are also designed with functionality in mind. They often feature well-thought-out compartments, pockets, and organizational systems, which can be beneficial for moms who need to keep their belongings neatly arranged and easily accessible

Attention to Comfort

Some designer bags prioritize comfort by incorporating features such as padded straps or ergonomic designs. This can be especially important for moms who carry their bags for extended periods, as it helps reduce strain on their shoulders and backs.

Mom with 3 kids and er diaper bag. The best bags for moms can store enough for 3 kids.

Best Budget-Friendly Bags for Moms

Budget-friendly bags can be an excellent choice for moms for several compelling reasons:

Affordability

The most obvious advantage of budget-friendly bags is that they are more affordable compared to high-end designer bags. This allows moms to find a bag that fits their budget without overspending. At the same time, if you are a mom who tends to be hard on your bags, budget-friendly bags are a great option.

Practicality

Budget-friendly bags are often designed with practicality in mind. They offer functionality with features that cater to the needs of moms.  This may come in the form of multiple compartments, pockets, and adjustable straps. Despite their affordability, these bags can still provide ample storage and organization for essentials like diapers, wipes, bottles, and personal items.

Family in front of home with four kids and parents.

Variety and Style

Budget-friendly bags come in a wide variety of styles, colors, and materials, allowing moms to find something that matches their personal taste and lifestyle. Whether it’s a trendy backpack, a spacious tote, or a versatile crossbody bag, there are budget-friendly options available that can complement different outfits and occasions.

Easily Replaceable

Budget-friendly bags are often readily available and accessible. If a bag gets damaged or worn out over time, it can be replaced without breaking the bank. This flexibility allows moms to adapt their bag choices as their needs change or as fashion trends evolve.

Less Worry

Carrying a budget-friendly bag can eliminate the stress and worry that comes with using an expensive designer bag. Moms can feel more at ease when using a bag that they don’t have to be overly cautious about. This allows them to focus on their daily activities without constantly worrying about potential damage or theft.

Full Reviews of Diaper Bags

Over the years I have done a few reviews of diaper bags that may help you in deciding.

Freshly Picked Diaper Bag Review | Fawn Design vs Freshly Picked Diaper Bag | Fawn Design Bag

Mom with daughter posing. Best bags for moms can be carried eerywhere.

Shop The Best Bags For Moms In 2023 For Every Style & Budget

Best Bags For Moms in 2023 Round Up of 20 purses in all shapes and budgets.

1 | 2 | 3 | 4 | 5 | 6 | 7 | 8 | 9 | 10 | 11 | 12 | 13 | 14 | 15 | 16 | 17 | 18 | 19 | 20

  1. Kate Spade Rosie Leather– This is a beautiful bag.
  2. MOMINSIDE Diaper Bag Tote Leather Diaper Bag Backpack– The perfect backpack for everyday use.
  3. UTO Large Sling Bag – This sling bag has a sleek design for all your essentials.
  4. ECOSUSI Tote Bag Convertible Backpack – This tote to backpack is super functional and at an affordable price.
  5. WITSTEP Diaper Bag Backpack with Changing Station – I love this roll out diaper station!
  6. Large Travel Backpack Women – This backpack has a spacious interior filled with compartments for all of your items.
  7. Michael Kors Backpack Handbag – It may be a splurge but this backpack comes in tons of color options!
  8. NIBD Flower Pearls Rattan Tote Bag – A sweet and sassy bag for the summer.
  9. Freshly Picked Classic Leather Diaper Bag Convertible Backpack Tote – One of my favorite diaper bags that I love and use.
  10. FashionPuzzle Multi Pocket Casual Crossbody Bag – This is perfect from day to night out.
  11. HOXIS Oversize Vegan Leather Tote – This simple design is a great option for those who need a large tote.
  12. Tory Burch Women’s Kira Crossbody Bag – Such a beautiful purse.
  13. Overbrooke Large Vegan Leather Tote – Another great option for a large tote.
  14. Itzy Ritzy Dream Convertible Diaper Bag – The convertible bag that is the perfect size for any needs.
  15. Pander Everywhere Belt Bag– A great option for a belt bag.
  16. JESSWOKO Retro Women’s Top-handle Bag Tote -I love this stylish tote.
  17. BOGG BAG X Large – A great option for a pool and beach bag.
  18. Sauberkugel – The Clean Ball – Put this in the bottom of your purse to help control crumbs and spills.
  19. Vercord Purse Organizer Insert – Throw this in your tote bag for instant organization.
  20. I IHAYNER Girls Bowknot – A super sweet backpack.

Other Posts You’ll Love

LEGO 101 The Best LEGO Storage Ideas | Best IKEA Nursery Hacks | Best Steam Mop For Tile Floors

Follow Social For The Latest & Greatest

Pin The Photo Below For Later

There’s a perfect bag out there for every mom. Consider your personal preference, needs, style, and budget when making your selection. So here’s to finding the perfect bag that makes your journey through motherhood a little more stylish and a lot more organized!

Best Bags For Moms in 2023 Round Up of 20 purses in all shapes and budgets.
Home

12 Tips On Where To Put A Fire Pit In Your Backyard

With summer coming to an end and the nights getting cooler, I’m starting to think about cozy nights my family will have around the fire pit. We love to roast marshmallows together in the fall or just sit and chat around the fire. With this in mind, I want to discuss where to put a fire pit in your backyard and a few tips to consider before you choose a spot.

This post may contain affiliate links.

12 tips on where to put a fire pit in your backyard as seen on this patio surrounded by chairs.

12 Tips On Where To Put A Fire Pit In Your Backyard

With Fall approaching, I’m dreaming of cool evenings. One of our favorite activities as a family is to sit around our fire pit at night. The warmth, smell, and crackling sounds of the fire are core memories from my childhood that I hope to pass along to my own kids.

Whether you chose to build your own fire pit or buy a fire pit, you’ll want to ensure you keep your family safe this fall with these 12 tips on where to put a fire pit in your backyard.

Why Have A Fire Pit In Your Backyard

The addition of a backyard fire pit can drastically enhance your outdoor space. It provides warmth on chilly nights, offers a focal point for gatherings, and can be a great option for roasting marshmallows or even barbecuing. Overall, a backyard fire pit is a great addition to any home. It can boosting the appeal and value of your property and create fun memories in the process.

Where to put fire pit in backyard surrounded by wooden deck carved out space.
This is a beautiful backyard deck with a designated backyard fire pit space photographed by Kory Kevin Studio.

What To Look For In A Fire Pit

When choosing a fire pit, there are several factors to consider to ensure you select the right one for your needs. Here are some key things to look for:

Size and Space

First, consider the available space in your outdoor area and choose a fire pit that fits appropriately. Ensure that there is sufficient clearance around the fire pit to prevent any safety hazards. Remember to check local regulations or homeowner association rules regarding fire pit size and placement.

Fuel Type

Next, decide whether you prefer a wood-burning or gas-powered fire pit. Wood-burning fire pits provide a traditional experience with the crackling flames and aroma of burning wood. Gas fire pits, on the other hand, offer convenience and ease of use.  Additionally, gas fire pits offer adjustable flames and no smoke or ashes. Choose the fuel type that suits your preferences and lifestyle.

The perfect spot in your backyard for where to put your fire pit.
This beautiful fire pit is perfect for cool fall nights.

Construction and Materials

Look for a fire pit made from durable and heat-resistant materials to ensure longevity and safety. Common materials include steel, cast iron, copper, and stone. In addition, consider the quality of craftsmanship and the reputation of the manufacturer or brand. 

Stone fire pits and those made with natural stone can withstand high temperatures and are durable. Metal ring fire pits are also a popular choice and often come in portable options. 

Safety Features

Above all, safety should be a top priority when selecting a fire pit. Look for features such as a sturdy base or legs for stability. A spark screen or mesh guard is key to prevent embers from escaping. Lastly, a safety shut-off valve for gas fire pits is crucial. These features help minimize the risk of accidents and ensure safe operation.

A lake is the perfect spot to where to put your fit pit in a backyard.
What a gorgeous setting for a backyard fire pit.

Heat Output

Consider the heat output of the fire pit. This is especially important if you live in a colder climate or if you intend to use the fire pit for warmth during chilly evenings. Check the BTU (British Thermal Unit) rating for gas fire pits For wood-burning fire pits you’ll want to check the design and air circulation determine their heat output.

Ease of Use and Maintenance

Evaluate the ease of use and maintenance requirements of the fire pit. Gas fire pits typically offer greater convenience with features like electronic ignition and adjustable flame controls. However, wood-burning fire pits require more effort and maintenance.

Keep in mind you’ll need to light and maintain the fire. At the end, you’ll need to clean out the ash embers. Overall, you’ll want to consider your preference for simplicity or the desire for a more traditional experience.

Carve out your own sunken fire pit next to your pool for the ultimate backyard fire pit.
Chris Loves Julia has a beautiful custom sunken fire pit next to their pool.

Aesthetics and Design

Choose a fire pit that complements your outdoor decor and personal style. Fire pits come in various designs, shapes, and finishes. Whether you prefer a modern, sleek look or a more rustic and natural appearance, there are options available to match your aesthetic preferences. Additionally, you’ll need to determine if you prefer a portable fire pit versus a built-in fire pit.

Additional Features

Some fire pits come with additional features such as cooking grates or grill attachments. These attachments are handy for outdoor cooking. Others may have integrated seating or storage compartments for firewood or accessories. Consider these extra features if they align with your intended use of the fire pit.

Where to put a fire pit in your back yard doesn't need to be a difficult question. Carve out space in the backyard with this fire pit surrounded by chairs and lights.
This DIY fire pit project is a great addition.

Types Of Fire Pits To Choose From

Choosing a new fire pit can be overwhelming due to the varieties available, but here are some types of fire pits to consider:

Wood-Burning Fire Pit

This type of fire pit provides a traditional, rustic experience. You can use various outdoor woods or wood logs for fuel. Wood-burning fire pits come in both portable and stationary or built-in fire pits.

Gas Fire Pits

These are a cleaner alternative to wood-burning fire pits. They are powered by propane or natural gas and produce less smoke. While maintenance is a breeze, you will have to keep inventory of gas.

Beautiful deck with backyard fire pit placed surrounded by chairs.
This backyard deck reveal is complete with a gas fire pit.

Portable Fire Pit

This is a great option if you want flexibility in your fire pit location. They’re typically smaller and easy to move. If you enjoy camping, portable fire pits can not only provide warmth at a campsite but also provide an easy way to cook meals over a campfire.

With several different shapes and sizes, a portable fire pit can be used for any location. Most importantly, if you live in an apartment, smaller portable table fire pits are a great option to enjoy the benefits of a crackling fire without the major hassle.

Fire Table

A fire table is a hybrid between a fire pit and an outdoor dining area, providing warmth and a surface for placing items. These are a great option if you don’t have a location for a large outdoor fire pit. Additionally, these can be used if you prefer something more aesthetically appealing.

DIY Fire Pit Kits

Home Depot offers various DIY fire pit ideas and kits. If you have a section of yard that would easily accommodate a fire pit consider this a weekend project.

Close up of fire pit and tea kettle in a backyard
This gorgeous picture was taken by Julie Pointer Adams and features one of the many benefits of a backyard fire pit.

Where To Put A Fire Pit

Most importantly, safety is the first thing to consider when deciding where to put your fire pit. Choose a fire pit area that is a safe distance (at least ten feet) from your home, shed, fence, or any flammable materials. Avoid areas under large trees, light posts, and other permanent structures to prevent the open fire from reaching them. 

The middle of the yard is often the best place for a fire pit to serve as a gathering place. If you have enough space, consider adding a seating area with Adirondack chairs or seat walls around the pit. 

In addition, ensure that the location you choose adheres to local laws and regulations. Contact your local fire department or local authorities to inquire about any restrictions or permits needed for your fire pit project.

Create your own fire pit space in your backyard with a pergola and chairs.
A relaxing backyard fire pit space created with several DIY projects.

Here is a checklist of tips to consider:

1. Safe Distance

The fire pit should be placed at least 10 feet away from any structures, including your home, shed, or fence, and any flammable materials to prevent potential fire hazards. In addition, be sure to keep it away from overhanging branches or shrubs.

2. Flat Surface

Choose a level surface to ensure the fire pit is stable and the fire spreads evenly. This is particularly important for portable fire pits.

3. Wind Direction

Pay attention to the prevailing wind direction in your backyard. Position your fire pit in a location where the smoke will not blow directly into your home or seating area.

Backyard fire pit seating
A serene backyard fire pit seating area surrounded by trees.

4. Accessibility

Place your fire pit in an area that is easily accessible but not in a high-traffic area where people are likely to trip over it.

5. Outdoor Space

Consider the overall layout of your backyard. The fire pit should complement other elements of your outdoor space, such as the patio, garden, pool, or seating area.

6. Local Regulations

Above all, check with your local fire department or local authorities for any regulations or restrictions on fire pit placement. Some urban areas or communities may have specific rules regarding how far a fire pit must be from a structure.

Gas fire pit with seating area
A gas fire pit seating area accompanies this beautiful Pergola in this backyard.

7. Utility Lines

If you are building your own fire pit, make sure to call your local utility companies. You’ll want to ensure you won’t hit any underground lines.

8. Seating Area

Consider the space needed for seating around the fire pit. There should be enough room for people to comfortably move around and away from the fire.

A space of at least seven feet from the fire pit to the seating area gives you plenty of room to move around safely.

9. Fire Pit Size

The size of the fire pit should be proportional to the size of your backyard. A fire pit that is too large can dominate the space and pose a bigger fire risk. 

A good rule of thumb is to have a fire pit that is no larger than one-third of your yard or patio. For smaller spaces, consider tabletop fire pits or gas fire pits which are compact and easy to manage.

Where to put a fire pit in your backyard doesn't need to be complicated. A cozy corner of your yard is the perfect spot surrounded by trees.
This cozy corner is the perfect spot for a low key and relaxing backyard fire pit area.

10. Fire Pit Safety

Most importantly, always have a fire extinguisher, bucket of water, or garden hose nearby when you’re using your fire pit. Avoid using flammable liquids to start the fire, and never leave the fire unattended.

In addition, start your fire small and let it grow gradually. A roaring fire might seem appealing but can be dangerous if not managed properly.

11. Fire Pit Material

The material of your fire pit should be sturdy and able to withstand high temperatures. Fire brick, natural stone, and concrete blocks are good choices.

Additionally, you can enhance your fire pit with accessories like a fire ring or lava rocks. Not only do these add aesthetic appeal, but they also improve the functionality of your fire pit. A fire ring, for instance, improves safety by containing the fire, while lava rocks help distribute heat evenly.

12. DIY or Professional

If you plan to build a fire pit, consider whether you want to build it yourself or hire professionals. DIY can be a fun project, but professionals may be needed for more complex designs or to ensure safety regulations are met.

A city garden with a small fire pit area.
You don’t need a large backyard to have a fire pit as seen in this city oasis.

How To Start A Fire In A Fire Pit

Starting a fire in a fire pit is relatively straightforward. However, there are best practices to follow for safety. 

Starting A Fire In A Wood Burning Fire Pit 

Follow these key steps to start a fire in your wood burning fire pit:

  1. First, Lay a few inches of gravel at the bottom.
  2. Next, arrange your fire brick or concrete blocks to form a circle. 
  3. Place kindling in the center of the fire pit, then add larger wood logs. 
  4. Lastly, avoid using flammable liquids like lighter fluid, as they can be dangerous. Use a fire starter or match-lit system for a safer start. 

Starting A Fire In A Gas-Burning Fire Pit

For gas-burning fire pits, including propane and natural gas options, the process is even simpler. These typically come with electronic ignition systems for easy lighting.

  1. First, simply turn on the gas and ignite.
  2. Lastly, enjoy the warmth. 

Shop My Favorite Fire Pits & Accessories

Round Up of Where To Put Fire Pit In Backyard with 19 options to buy

1 | 2 | 3 | 4 | 5 | 6 | 7 | 8 | 9 | 10 | 11 | 12 | 13 | 14 | 15 | 16 | 17 | 18 | 19

  1. Sunnydaze 36-Inch Northland Outdoor Rectangular Fire Pit – This is a great option as it comes with a screen, cooking grill, and fire poker.
  2. Party Flames Fire Color Changing Packets – Add some fun to your fire with these color packets.
  3. Mr. Bar-B-Q – Hershey’s Deluxe S’mores Caddy
  4. PaPaJet 36 Inch Fire Pit with 2 Grill
  5. Solo Stove Bonfire 2.0 with Stand – We love our Solo stove. This is a smokeless fire pit and so easy to move around for a fun time.
  6. Aoxun Chiminea Fire Pit with Grill
  7. Large Fire Pits Wood Burning 44” High Chimineas
  8. Pleasant Hearth Martin Extra Deep Wood Burning Fire Pit
  9. 48″ Round Fire Pit Mat – This is a great choice to place under your patio to protect it from ash and heat.
  10. COSIEST Outdoor Propane Fire Pit Coffee Table – This is definitely a splurge but at 40.5 inches it has plenty of room for large family gatherings.
  11. Superior Trading Fire Starter Pods
  12. Yaheetech 30in Propane Fire Pit – A great table fire pit option for easy use and maintenance.
  13. TIKI Brand Reunion Smokeless Fire Pit – With a four foot heat radius this fire pit is great for big families.
  14. Sunnydaze 34-Inch Cauldron Style Outdoor Fire Pit Bowl – This pit comes with a poker, screen, and wood grate and can accommodate several people.
  15. 8″ Table Top Fire Pit Bowl  – Perfect for any apartment or small living situation.
  16. Sunnydaze Outdoor Firewood Log Hoop and Cover Set – Store all your firewood here.
  17. Jolly Green Products Rotating Marshmallow Roasting Sticks – Toast those marshmallows with this set of 5 sticks.
  18. Bettermade 26″ Fireplace Tongs – Stay safe and move logs with tongs.
  19. Solo Stove Yukon Big Yard Bundle – A splurge but this is the largest Solo Stove size and comes with everything you need for the ultimate experience.

Other Posts You’ll Love

Easy DIY Outdoor Table | 12 Modern Concrete Patio Ideas On A Budget | The Best Luxury Outdoor Furniture Brands

Follow Social For Latest & Greatest

Pin The Photo Below For Later

Choosing the right fire pit and deciding on the best location requires careful consideration of several important factors. With correct planning and adherence to safety protocols, a fire pit can be a great addition to your backyard. Above all, remember to consult local codes and regulations before embarking on your fire pit project. As always, safety is the number one priority. 

Whether you choose a modern fire pit, a DIY fire pit or a portable one, the warmth and ambience provided by your new fire pit will turn your backyard into the perfect oasis for relaxation and entertainment. Enjoy the glow!

Round Up of Where To Put Fire Pit In Backyard with 19 options to buy
Home

Tips On How Low Should Kitchen Pendant Lights Hang

When it comes to interior design, pendant lighting is a popular choice for kitchen island lighting. Not only do these gorgeous pendants add a decorative element to your space, but they also serve as task lighting and accent lighting. Pendant lights can provide direct light to a specific work area like island counters, making them an essential component in any kitchen. However, determining the right pendant light height can be a tricky task. This blog post will be your ultimate guide for tips on how low should kitchen pendant lights hang.

This post may contain affiliate links.

White kitchen with brass pendant kitchen lights

Tips On How Low Should Kitchen Pendant Lights Hang 

Recently, Sam and I upgraded our kitchen island. When our home renovation was completed by HgTV, we had some design choices that were not entirely ours that were made. While the island functioned well, it wasn’t exactly the look I wanted. Once our island built-in microwave broke, I knew it was the perfect time to change up the style and create something I would love. If you are looking at updating your kitchen island, be sure to check out my DIY Kitchen Island post for some helpful tips.

Now that our island is complete, it is the perfect addition to our kitchen. One of my favorite parts of the island are the pendant lights that hang overhead. While we have tons of natural lighting, those pendant lights complement the overall aesthetics of our kitchen and provide much needed lighting on darker days.

I struggled with figuring out the proper height to hang our pendant lights. I didn’t want to hang them too low and have the view obstructed by the lights. At the same time, I didn’t want to hang them too high and have them look out of place or odd. If you are in the middle of a kitchen renovation or looking at upgrading your lighting, we will go through tips on how low should kitchen pendant lights hang to find the perfect height.

Coffee Station with open shelves and three champagne pendant kitchen lights

Understanding the Role of Pendant Lights

Before we delve into the specifics of pendant light height, let’s first understand their role. Kitchen pendants serve as a focal point in the room, providing both ambient lighting and general light. They can create a mood or highlight specific areas. They also come in different sizes – smaller pendants for smaller islands and larger pendants for larger islands, so the size pendant you choose will depend on your island size. 

Ceiling Height

The height of your ceiling is a crucial factor in determining the appropriate pendant light height. For kitchens with low ceilings, such as 8-foot ceilings, you’ll want to hang the pendant lights higher to create a sense of openness and avoid head bumps. In this case, aim to hang the pendants around 30-36 inches above the table or island bench. On the other hand, for kitchens with high ceilings, you can hang the pendant lights lower to visually anchor the space and create a more intimate atmosphere.

White kitchen island, brass kitchen pendant lights hanging over white island.

Island Size and Length

The size and length of your island play a significant role in determining the pendant light height. For larger islands, you can opt for larger pendant lights or multiple smaller pendants hung in a row. In these cases, you might want to hang the pendants slightly higher so that they don’t overpower the island. Conversely, for smaller islands, smaller pendants or a single larger pendant hung lower can create a proportional and visually appealing look.

Consider the Size of the Pendant

The pendant size also plays a crucial role in determining the correct height. Smaller pendants can be hung a little lower while large pendants should be hung higher to maintain sight lines. Interior designers suggest that the diameter of your pendant should be in relation to the length of your island.

A good rule of thumb is to leave at least 12 inches of space from each edge of the island to the edge of the pendant for small islands, and more for larger islands. This ensures that the pendant lights visually complement the island without appearing too cramped or undersized.

Coffee station and open shelves with champagne pendant kitchen lights hanging over island.

The Right Height

Your pendant’s height may be determined by your island’s size, pendant’s size, and ceiling height. However, a general rule of thumb is that the bottom of your pendant should hang between 30 to 36 inches above the top of the table or island, but this also depends on the height of your ceiling.

For standard 8-foot ceilings, hanging the pendant about 30-36 inches from the table top is a good starting point. However, for every additional foot of ceiling height, add 3 inches to the hanging height. This means for a 9-foot ceiling, the bottom of the light fixture should hang 33-39 inches above the table top.

Although there are basic rules, remember that the ideal height also depends on personal preference and specific lighting needs. Ultimately, the height at which you hang your pendant lights should align with your personal style and the aesthetic you want to achieve in your kitchen.

Bernedoodle dog posing in front of white kitchen island with brass kitchen pendants hanging over kitchen island.

Special Considerations In Your Pendant’s Height

While there are guidelines to help you get started, don’t be afraid to experiment and trust your instincts. Interior design is a creative process, and your personal preferences should shine through in the final result. Consider the overall theme, color palette, and design elements in your kitchen when making decisions about pendant light height.

Layering with Other Lighting

Pendant lights should complement the overall lighting scheme in your kitchen. They can be used as task lighting for specific work areas, but it’s essential to consider other light sources as well. Combining pendant lights with recessed lighting, under-cabinet lighting, or a central ceiling fixture can create a layered and balanced lighting design. This allows you to adjust the overall brightness and ambiance of the space to suit different activities and moods.

Stove top and range with brass kitchen pendant light hanging over kitchen island.

Sight Lines and Functionality

Consider the functionality and sight lines in your kitchen when determining the pendant light height. You’ll want to ensure that the pendant lights don’t obstruct the line of sight or interfere with daily activities.

For example, if you frequently cook or work on the island, hanging the pendants higher can provide better visibility and prevent any potential hazards. On the other hand, if the pendants are primarily for decorative purposes and won’t interfere with your sight lines, you can experiment with lower hanging heights for added visual impact.

Applying Your Pendant’s Height To Other Locations

The right place for pendant lights isn’t limited to the kitchen. They are also perfect for creating a cozy dining space. The general guidelines for a dining room table are similar to those for a kitchen island, but you might want to hang the pendant a little lower (around 28-32 inches above the table top) to create a more intimate atmosphere.

For a side table in the living room, pendant lights can be used as task lighting. The right height in this case is generally at eye level, which is usually 18-24 inches from the top of the end table. However, for low ceilings characteristic of older homes, the pendant light should be slightly higher to avoid head bumps.

White kitchen island with brass pendant kitchen lighting hanging over white island.

The Takeaway

When it comes to hanging pendant lights, there’s no fast rule that applies to all situations. The height of pendant lights, as well as the type of pendant, is contingent upon the height of your ceiling, the size of your island, and your specific lighting needs. A larger island might call for a larger fixture or several smaller ones, while kitchen pendants over a smaller island or dining table might need to be adjusted to the right size and height.

The industry standard and general guidelines are good starting points, but remember that personal preference plays a role too. It’s your space, after all, and the lighting should work for you and your family.

Christmas kitchen with festive holiday decor and brass kitchen pendant lighting hanging over kitchen island.

In large kitchens, pendant lights can bring the scale of the room down to a more human level, making the space feel cozier and more intimate. In smaller kitchens, they can serve as a focal point, drawing the eye and giving the room a sense of direction. 

Remember, lighting should never be an afterthought in your design process – it’s an integral part of creating a space that’s not only beautiful, but that works for your needs. So take your time, consider your options, and you’ll be well on your way to creating a beautifully lit kitchen that you love.

Chart On How Low Should Kitchen Pendant Lights Hang

Shop Kitchen Pendant Lighting

Kitchen Pendant Lights Found on Amazon Shop My Look

1 | 2 | 3 | 4 | 5 | 6 | 7 | 8 | 9 | 10 | 11 | 12 | 13 | 14 | 15 | 16

  1. Emliviar 1-Light Farmhouse Pendant Light – We used these in our last house and they were great!
  2. Electrot Linear Kitchen Island Lighting Fixture Classic Chandeliers – This is what is in our dining room.
  3. LAMPKEDUO Black Chandelier Modern Farmhouse Chandeliers
  4. Amazon Brand – Rivet Mid-Century Modern Metal Rod Ceiling Pendant Light – We also have this in our home and love the mid-century look!
  5. Sanoni 3 Pack Pendant Lights Kitchen Island
  6. BISAMIYA 1-Light Modern Pendant Lights – This is a super affordable option.
  7. Wood Pendant Light for Kitchen Island, Farmhouse Pendant Lighting
  8. Vpazg Industrial Pendant Light Fixture
  9. Audickic Pendant Lights Kitchen Island, Modern Gold Pendant Light – This is so affordable and such a classic modern look. I love the gold and glass touches.
  10. CLAXY Ecopower Industrial Vintage Style 1-Light Pendant
  11. SGLfarmty Gold Pendant Light – This is so fun! Mixed materials can really elevate a space.
  12. Savoy House Black Pendant – This is a splurge but so dreamy!
  13. AIRYPHANT 2 Pack Modern Pendant Light – These are gorgous!
  14. TLOLGT 2-Pack Pendant Light – Hello grand-millennial light fixtures!
  15. DLCL Pendant Light Fixtures – This is another great grand-millennial light fixture option.
  16. FookChak Hammered Glass Pendant Light

Other Posts You’ll Love

Best Kitchen Cabinet Handles | How Deep Are Kitchen Wall Cabinets? | White Kitchen Cabinet Backsplash Ideas

Follow Social For The Latest & Greatest

Pin The Photo Below For Later

Whether you’re looking to illuminate a specific work area, create ambient lighting, or establish an aesthetic focal point, pendant lights are a fantastic addition to any kitchen. By keeping in mind the tips mentioned above and adjusting them to your personal preference, you’ll be able to hang your pendant lights in the right place at the right height, ensuring your kitchen is both functional and aesthetically pleasing.

Kitchen Pendant Lights Found on Amazon Shop My Look
Home

Backyard Patio Steps: 10 Ideas To Build For Your Home

When it comes to enhancing your outdoor living space, one of the most important considerations is the architectural design of your backyard patio. Whether you have an upper level deck, a garden patio, or a raised patio, a well-constructed set of steps is a focal point that provides a seamless transition between different levels of your outdoor space. If you are looking to renovate your backyard patio steps, I’ll share with you some tips and tricks we’ve learned along the way in our own renovations.

This post may contain affiliate links.

White wooden backyard patio steps leads to our historic 1800s brick pavers.

Backyard Patio Steps: 10 Ideas To Build For Your Home

Recently, my husband Sam renovated our own backyard patio steps. With a home that was built in the 1800s, we have a never ending “to-do” list.  To prepare for our upcoming pool installation, Sam decided it would be a great time to update our backyard patio steps leading from our back door to our patio. Structurally, the steps were in bad shape and in all honesty, they needed some major TLC. It was important to us that we not only have structurally sound backyard patio steps, but also something that would complement the original pavers and soon to be new pool. 

Whether you need a simple straight step design or want something a bit more modern, backyard patio steps are a necessary feature of your outdoor patio. In this post, I’ll share with you some of the basics of renovating your own backyard patio steps.

Stone concrete for large backyard patio steps.
This beautiful patio is designed by Oh So Glam.

 Styles Of Backyard Patio Steps

From concrete steps to deck stairs, there are numerous design ideas for patio stairs that can make your backyard a more appealing and accessible area. Backyard patio steps are an essential element in creating a functional and visually appealing outdoor space. They provide access to different levels of your backyard, connect various areas, and can serve as a focal point in your overall design. 

Remember to consider the overall style of your home and patio when selecting a step design. Additionally, ensure that the steps are built to code, with proper dimensions and a safe and secure structure. If you’re unsure about the construction process, it’s always a good idea to consult with a professional contractor or builder to ensure the steps are built correctly and meet local building regulations.

Here are some ideas to consider when building backyard patio steps for your home:

1. Straight Steps

Straight steps are the most common and straightforward design. They are simple to construct and provide a clean and minimalist look. Straight steps work well for small patios or when you want to maintain a symmetrical appearance.

2. Curved Steps

Curved steps add an elegant and organic touch to your patio design. They can be built in a sweeping or meandering pattern, creating a more visually appealing and inviting look. Curved steps work well in larger spaces or when you want to create a focal point in your backyard.

Backyard patio steps lead to a black door and a white patio with large trees.
The Sweeter Occassion has a beautiful patio reveal complete with finished backyard patio steps.

3. Tiered Steps

 If you have a sloping backyard, tiered steps are an excellent choice. They consist of multiple levels or terraces that follow the natural slope of the land. Tiered steps provide a gradual ascent and can be adorned with plants or flowers on each level, creating a stunning visual effect.

4. Floating Steps

Floating steps, also known as cantilevered steps, are a contemporary and stylish option. They give the illusion of floating in mid-air as they are supported by hidden steel or concrete structures. Floating steps provide a sleek and modern look, perfect for a minimalist patio design.

5. Stacked Stone Steps

Stacked stone steps offer a rustic and natural aesthetic. They are constructed using large, flat stones stacked on top of each other to create each step. Stacked stone steps blend well with various patio styles, from traditional to Mediterranean, and add texture and character to your outdoor space.

Backyard patio steps of rounded stone lead to an extensive deck with lots of greenery and beautiful details.
Studio Plumb completed an entire patio renovation that is pure perfection complete with rounded stone backyard patio steps.

6. Wooden Steps

Wooden steps provide a warm and inviting atmosphere. They can be built using various types of wood, such as cedar, teak, or treated lumber. Wooden steps are versatile and can be designed to complement different architectural styles, from rustic to contemporary.

7. Brick or Paver Steps

Brick or paver steps are a classic choice that offers durability and a timeless appeal. They can be laid in various patterns, such as herringbone or basket weave, to add visual interest. Brick or paver steps work well with brick or stone patios, creating a cohesive and harmonious look.

8. Integrated Lighting

 Don’t forget to consider incorporating lighting into your patio steps design. Outdoor lighting along the steps enhances safety and provides an inviting ambiance during nighttime. You can install lighting fixtures along the sides of the steps, under the treads, or even use solar-powered lights embedded in the steps themselves.

Concrete backyard patio steps lead to a herringbone pattern brick patio.
Emily Henderson’s patio is so dreamy. I love how her concrete backyard patio steps seamlessly transition to her brick herringbone patio.

9. Built-in Planters or Seating

Another creative idea is to integrate built-in planters or seating areas into your patio steps. This not only adds functionality but also enhances the aesthetic appeal of your outdoor space. Built-in planters can be filled with colorful flowers or greenery, while built-in seating areas provide a convenient spot to relax and enjoy your backyard.

10. Mixing Different Materials

Consider combining different materials to create a unique and visually appealing look. For example, you can use stone for the risers and pavers for the treads, or combine wood and concrete for a modern and contrasting design. Mixing materials adds texture and interest to your patio.

Concrete patio with neutral decor and concrete backyard patio steps.
Leave it to Studio McGee to create rectangular and modern backyard patio steps that lead to a seating area.

Starting the First Step: Planning and Preparation

The first step in your new search for patio steps is to consider your outdoor area’s layout. If you have an upper-level deck or a raised patio, you may need to install deck steps or concrete patio steps to create a safe and easy path from the upper level to the lower level. If your patio area is on the same level as the rest of your backyard, you could consider building garden steps that lead to a small garden or a fire pit, creating a natural flow throughout your outdoor space.

One of the most important factors in planning your patio steps is the local building codes. These regulations provide design specifications for the height of the risers (typically a 7-inch rise is standard), the depth of the treads, and the width of the step, among other requirements. It’s crucial to ensure your steps comply with these rules to avoid creating a safety hazard.

A beautiful deck with backyard patio steps leads to an even more beautiful pool area.
This outdoor space is the ultimate entertainer’s dream.

Choosing the Best Material for Your Steps

Once you have a design in mind, the next step is to select the best materials for your patio steps. Concrete steps are an excellent option for a modern look, especially if you have a concrete slab patio. Concrete stairs are sturdy, durable, and can be crafted into various shapes to match your patio’s architectural design. For a more natural look, consider natural stone steps or wooden steps. Stone steps, made from materials like flagstone and limestone, can blend seamlessly with a garden patio, while wooden steps are a perfect match for a deck.

Simple concrete backyard patio steps leads to a small hang out spot.
Simple concrete backyard patio steps leads to a fun hangout spot!

An attractive alternative to traditional concrete or stone steps are paver steps made from concrete pavers or paving stones. These steps provide a more customized look. You can select pavers in different colors and patterns to match your home’s exterior or your outdoor space’s aesthetic. Paver patio steps can be built using paver base panels and set on a gravel base for stability.

If you’re looking for a bold color and unique design, consider using concrete blocks for your outdoor steps. Concrete blocks can be painted or stained to match your outdoor decor, and they can be arranged in straight lines for a sleek, modern appearance, or in a spiral design for a unique visual appeal.

Concrete backyard patio steps opens out to a lake view and hot tub!
This beautiful lake house’s backyard patio steps opens out onto a great view.

Building Your Patio Steps

When it comes to building patio steps, the process begins by marking out the location of the steps and installing the stair stringers, which serve as the backbone of the stairs. The bottom of the stringer should rest on a flat surface, such as a concrete slab or a gravel patio, while the top step attaches to the deck or the raised patio.

If you are building concrete stairs, you’ll need tools like a magnesium float to smooth out the concrete. For stone steps, place and level each stone to ensure a stable and even surface. Wooden steps require careful measuring, cutting, and securing of the boards to create a solid structure. For our steps, we stuck with wood to keep it nice and simple.

Stamped concrete backyard patio steps leads to a wooden oasis.
These stamped concrete backyard patio steps leads to a wooden oasis for any nature lover’s dream.

Special Considerations When You Build

The width of the steps is an important consideration, as wider steps can make for a more comfortable and safe ascent and descent. Large stoops or landings can also be incorporated into the stair design, providing a place to rest or even a seating area.

As you build your patio steps, it’s essential to pay attention to the height of the risers. Consistency in the height of each step is crucial for safety and ease of use. Deep treads provide a comfortable walking surface and reduce the risk of tripping.

If your backyard patio is located near a swimming pool or a water feature, it’s important to create a seamless transition from the patio steps to the pool area. Consider using materials that are slip-resistant and can withstand exposure to water and moisture.

In cases where your patio is at a lower level than the surrounding ground, you might need to incorporate retaining walls into your step design. Retaining walls can provide structural support and prevent soil erosion, creating a more stable and durable outdoor space.

Patterned concrete backyard patio steps leads to a patio filled with texture and depth.
These patterned backyard patio steps give off such fun texture and depth to the overall look of the patio.

Seeking Professional Input

While DIY projects can be fulfilling, it’s always a good idea to seek professional input when it comes to complex construction projects like patio steps. Consulting with a contractor or a professional landscaper can ensure that your design ideas align with safety standards and building regulations. They can also provide guidance on the best materials and construction techniques based on your specific needs and preferences.

Other Posts You’ll Love

12 Modern Concrete Patio Ideas On A Budget | Front Porch Railing Ideas | Easy DIY Porch Swing Tutorial

Follow Social For Latest & Greatest

Pin The Photo Below For Later

Building backyard patio steps is an exciting project that can transform your outdoor living space into a functional and visually appealing area. Whether you opt for concrete steps, natural stone, wooden steps, or paver steps, the design possibilities are vast. By considering important factors such as safety, compliance with local building codes, and the overall aesthetic of your outdoor area, you can create a set of patio steps that seamlessly connects different levels of your outdoor space while adding a focal point to your backyard. Remember to plan carefully, choose high-quality materials, and, if needed, seek professional assistance to ensure a successful and enjoyable patio step project. With the right design and execution, your backyard patio steps will be an inviting and beautiful addition to your home.

Backyard Patio Steps: 10 Ideas To Build For Your Home - White patio.
Products we Love

How To Clean A Countertop Ice Maker In 10 Easy Steps

Ice makers have become a common appliance in our homes, offices, and even our RVs. They are small, efficient, and can be a lifesaver during a hot summer day or at your next party. But like any other appliance, your countertop ice maker requires regular maintenance to keep it running smoothly and to ensure you’re enjoying fresh, pure ice. To keep your ice makers in tip top shape, I’ll share with you how to clean a countertop ice maker in 10 easy steps.

This post may contain affiliate links.

How to Clean A Countertop Ice Maker in 10 Easy Steps with your GE Profile Nugget ICe maker

How To Clean A Countertop Ice Maker In 10 Easy Steps

I have the GE Profile Opal Nugget Ice Maker and I LOVE it! It’s in my butler’s pantry and makes the best nugget ice in my opinion. It’s definitely a splurge but my family uses it daily, so I’ve found it to be worth the investment. Plus, you can often find it on sale on Amazon. 

It can make up to twenty-four pounds of ice per day and store up to three pounds of ice at a time. That was important to me because there’s six of us who use the ice machine everyday. I love that this machine uses a special freezing process to create small, “chewable” nugget ice. I sometimes refer to it as Sonic ice because it’s similar to the ice found in commercial soft drink dispensers.

One of the coolest features about this ice maker is its Bluetooth connectivity that allows you to control the ice maker using a smartphone app. You can view the current amount of ice, schedule it to make more, and receive alerts when the bin is full or when it’s time to change the filter. The Opal machine has a sleek stainless steel design and is designed to work with a direct water line connection. It also has a self-cleaning cycle function to make it easier to clean and maintain. I highly recommend it!

White kitchen island in white kitchen

Why Clean Your Countertop Ice Maker?

Regular cleaning of your ice maker machine is a good idea for a number of reasons. First, it helps to maintain the taste of the ice. Over time, the water reservoir can accumulate mineral deposits, especially in areas with hard water. This can affect the taste of the ice cubes and the efficiency of the ice-making process.

Secondly, cleaning helps to prolong the life of the ice maker. Left unaddressed for a long time, mineral buildup can damage the internal parts of the machine, reducing its ice production and overall performance.

Finally, regular cleaning helps to rid your ice maker of harmful bacteria. Ice storage bins can become a breeding ground for bacteria if not cleaned on a regular basis.

Butlers pantry with appliance garage hiding a countertop ice maker and how to clean a countertop icemaker

10 Easy Steps On How To Clean Your Countertop Ice Maker

Cleaning your ice maker doesn’t require professional help. With a few household items and this step-by-step guide, you can achieve great results. Here’s the best way to clean your ice maker:

1. Disconnect The Power Source

Before you begin the cleaning process, it is crucial to ensure safety. Always unplug your ice maker from the power source before starting the cleaning process. This prevents the risk of electric shock. This step also prevents any unintended operation of the machine while you’re cleaning it.

2. Remove Any Removable Parts

The next step is to remove all the removable parts, such as the ice bin, ice basket, ice tray, and ice scoop. Check your manufacturer’s instructions to know which parts are removable. Removing these parts allows for a more thorough cleaning of the machine.

Wet bar with white cabinets and countertop ice maker

3. Clean The Removable Parts

Once the parts are removed, they should be cleaned separately. Fill your sink or a large basin with warm soapy water. Add a few drops of mild soap or dishwashing detergent. Submerge the removable parts in the water and clean them using a cloth or a brush with soft bristles. After  scrubbing the parts, rinse them thoroughly with clean water and set them aside to air dry.

4. Prepare Your Cleaning Solution

To clean the interior of the ice maker, you’ll need a suitable cleaning solution. A vinegar cleaning solution is a great way to deal with mineral deposits. Mix equal parts water and white vinegar. For the best results, use distilled or filtered water to avoid adding more minerals to your machine. This vinegar solution effectively dissolves mineral deposits without harming the interior parts of the machine. You can pour this solution into a spray bottle for easy application.

5. Clean The Interior Of The Ice Maker

Spray the vinegar solution liberally inside of your ice maker, focusing on areas with visible mineral buildup. Let it sit for a few minutes to dissolve the deposits. Then, using a soft cloth or a brush with soft bristles, scrub the interior of the machine. Hard to reach areas like the water line and water tank can be cleaned with a toothbrush.

After scrubbing, rinse the interior parts with warm water. If your machine has a drain plug, use it to remove the remaining water. If not, you can use paper towels or a soft cloth to absorb the remaining liquid.

Butlers pantry hiding a countertop icemaker in appliance garage

6. Run A Cleaning Cycle

If your ice maker has a cleaning cycle, now is the time to use it. Fill the water reservoir with a mixture of vinegar and water, then run the cleaning cycle as per the manufacturer’s instructions. If your machine doesn’t have a cleaning cycle, you can run a normal ice-making cycle instead.

The vinegar in the water will help to clean and sanitize the internal workings of the machine without the use of harsh chemicals. Ensure to discard the ice cubes made during the cycle as they will contain vinegar and are not suitable for consumption.

7. Rinse Thoroughly

Once the cleaning cycle or ice-making cycle is complete, unplug the machine and drain the vinegar solution through the drain plug. Then, rinse the water reservoir thoroughly with clean water. This is crucial as it ensures all vinegar residue, which can affect the taste of the ice, is removed. Drain the vinegar solution, refill the reservoir with clean water, and run another cycle. Discard the ice produced during this cycle too.

All white kitchen with brass elements

8. Clean The Exterior Of Your Ice Maker

While the inside of the ice maker is important, don’t forget about the exterior of your ice maker. Use a soft cloth and a mild detergent mixed with warm water to clean the exterior. If your ice maker machine is made of stainless steel, use a cleaner specifically designed for stainless steel to avoid streaks or damage. After cleaning, rinse the exterior with clean water and wipe it dry.

9. Dry The Machine

Once you’ve rinsed the machine, leave the lid open and allow the interior to air dry completely before you reassemble the machine. This is a crucial step as it prevents the growth of mold and bacteria.

10. Reassemble & Run A Fresh Water Cycle

After all the components have dried, replace the removable parts and plug the machine back in. Fill the water reservoir with fresh water and run one or two ice-making cycles. Discard the ice produced in these cycles to ensure any residue from the cleaning procedure is completely removed.

Butler's pantry

Additional Cleaning Tips:

  1. Use of Commercial Cleaners: If mineral deposits are stubborn, you may opt for commercial ice machine cleaners. These are specially designed to remove mineral buildup and can be used as per the manufacturer’s instructions.
  2. Filter Replacement: If your ice maker has a water filter, remember to replace it regularly as regular cleaning won’t be enough. Over time, filters can become clogged with minerals and impurities, reducing the efficiency of the ice-making process. Make sure to replace old filters according to the manufacturer’s recommended schedule.
  3. Use of Filtered Water: Finally, if the taste of your ice still isn’t as fresh as you’d like, you could use filtered water instead of tap water in your ice maker. This can help reduce the amount of mineral buildup over time as filtered water contains fewer minerals, which could improve the taste of your ice and mean you need to clean your machine less frequently.
White kitchen

The Importance of Establishing A Cleaning Routine

Regular cleaning of your countertop ice maker is an essential part of its maintenance. A clean ice maker not only produces better tasting ice but also operates more efficiently and lasts longer.

It’s a good idea to establish a cleaning routine. For instance, if you use your ice maker daily, you might need to clean it monthly. If you use it less frequently, cleaning it every three to six months might be sufficient.

Regular cleaning of your countertop ice maker is not just about keeping it looking good. It’s a vital part of maintenance that keeps the machine running efficiently and ensures the ice it produces is clean and fresh. A clean ice maker is less likely to break down and will last longer, saving you money in the long run.

Regular maintenance also includes checking for any visible signs of wear and tear, ensuring the machine is level, and replacing any old or worn-out parts.

How to Clean A Countertop Ice Maker in 10 Easy Steps with your GE Profile Nugget ICe maker

Shop Countertop Ice Makers & Products For Cleaning 

Countertop ice makers and accessories for how to clean your countertop ice maker and shop my finds

1 | 2 | 3 | 4 | 5 | 6 | 7 | 8 | 9 | 10 | 11 | 12 | 13 | 14 | 15 | 16

  1. GE Profile Opal Countertop Nugget Ice Maker
  2. Frigidaire EFIC235-AMZ Countertop
  3. FRIGIDAIRE Gallery EFIC255 Countertop
  4. AGLUCKY Countertop Ice Maker 
  5. AGLUCKY Nugget Ice Maker Countertop
  6. Thereye Countertop Nugget Ice Maker
  7. Nugget Countertop Ice Maker
  8. Essentials Values Ice Machine Cleaner
  9. Gevi Household Ice Maker Cleaner & Descaler 
  10. PurTru Ice Maker Cleaner & Descaler
  11. Spring Chef Magnetic Ice Scoop
  12. AIEVE Appliance Slider
  13. Glacio Ice Mallet and Lewis Bag
  14. DZHJKIO Mini Ice Cube Trays
  15. S’well Stainless Steel Ice Bucket with Tongs
  16. Rubbermaid Ice Bin

Other Posts You’ll Love

Best Ice Machine For Home Bar | Best Kids Ice Cream Maker | 10 Back To School Hacks

Follow Social For The Latest & Greatest

Pin The Photo Below For Later

There you have it: ten easy steps to clean your countertop ice maker. The process may seem a bit tedious, but the benefits of regular maintenance far outweigh the time commitment. You’ll not only extend the life of your ice maker but also ensure you’re serving fresh, clean ice at your next gathering. So, no more bags of ice or worrying about how much ice is left. With a clean ice maker, you can always enjoy clear ice any time.

Remember, it’s always a good idea to refer to your manufacturer’s instructions before starting the cleaning process. Happy cleaning!

Countertop ice makers and accessories for how to clean your countertop ice maker and shop my finds