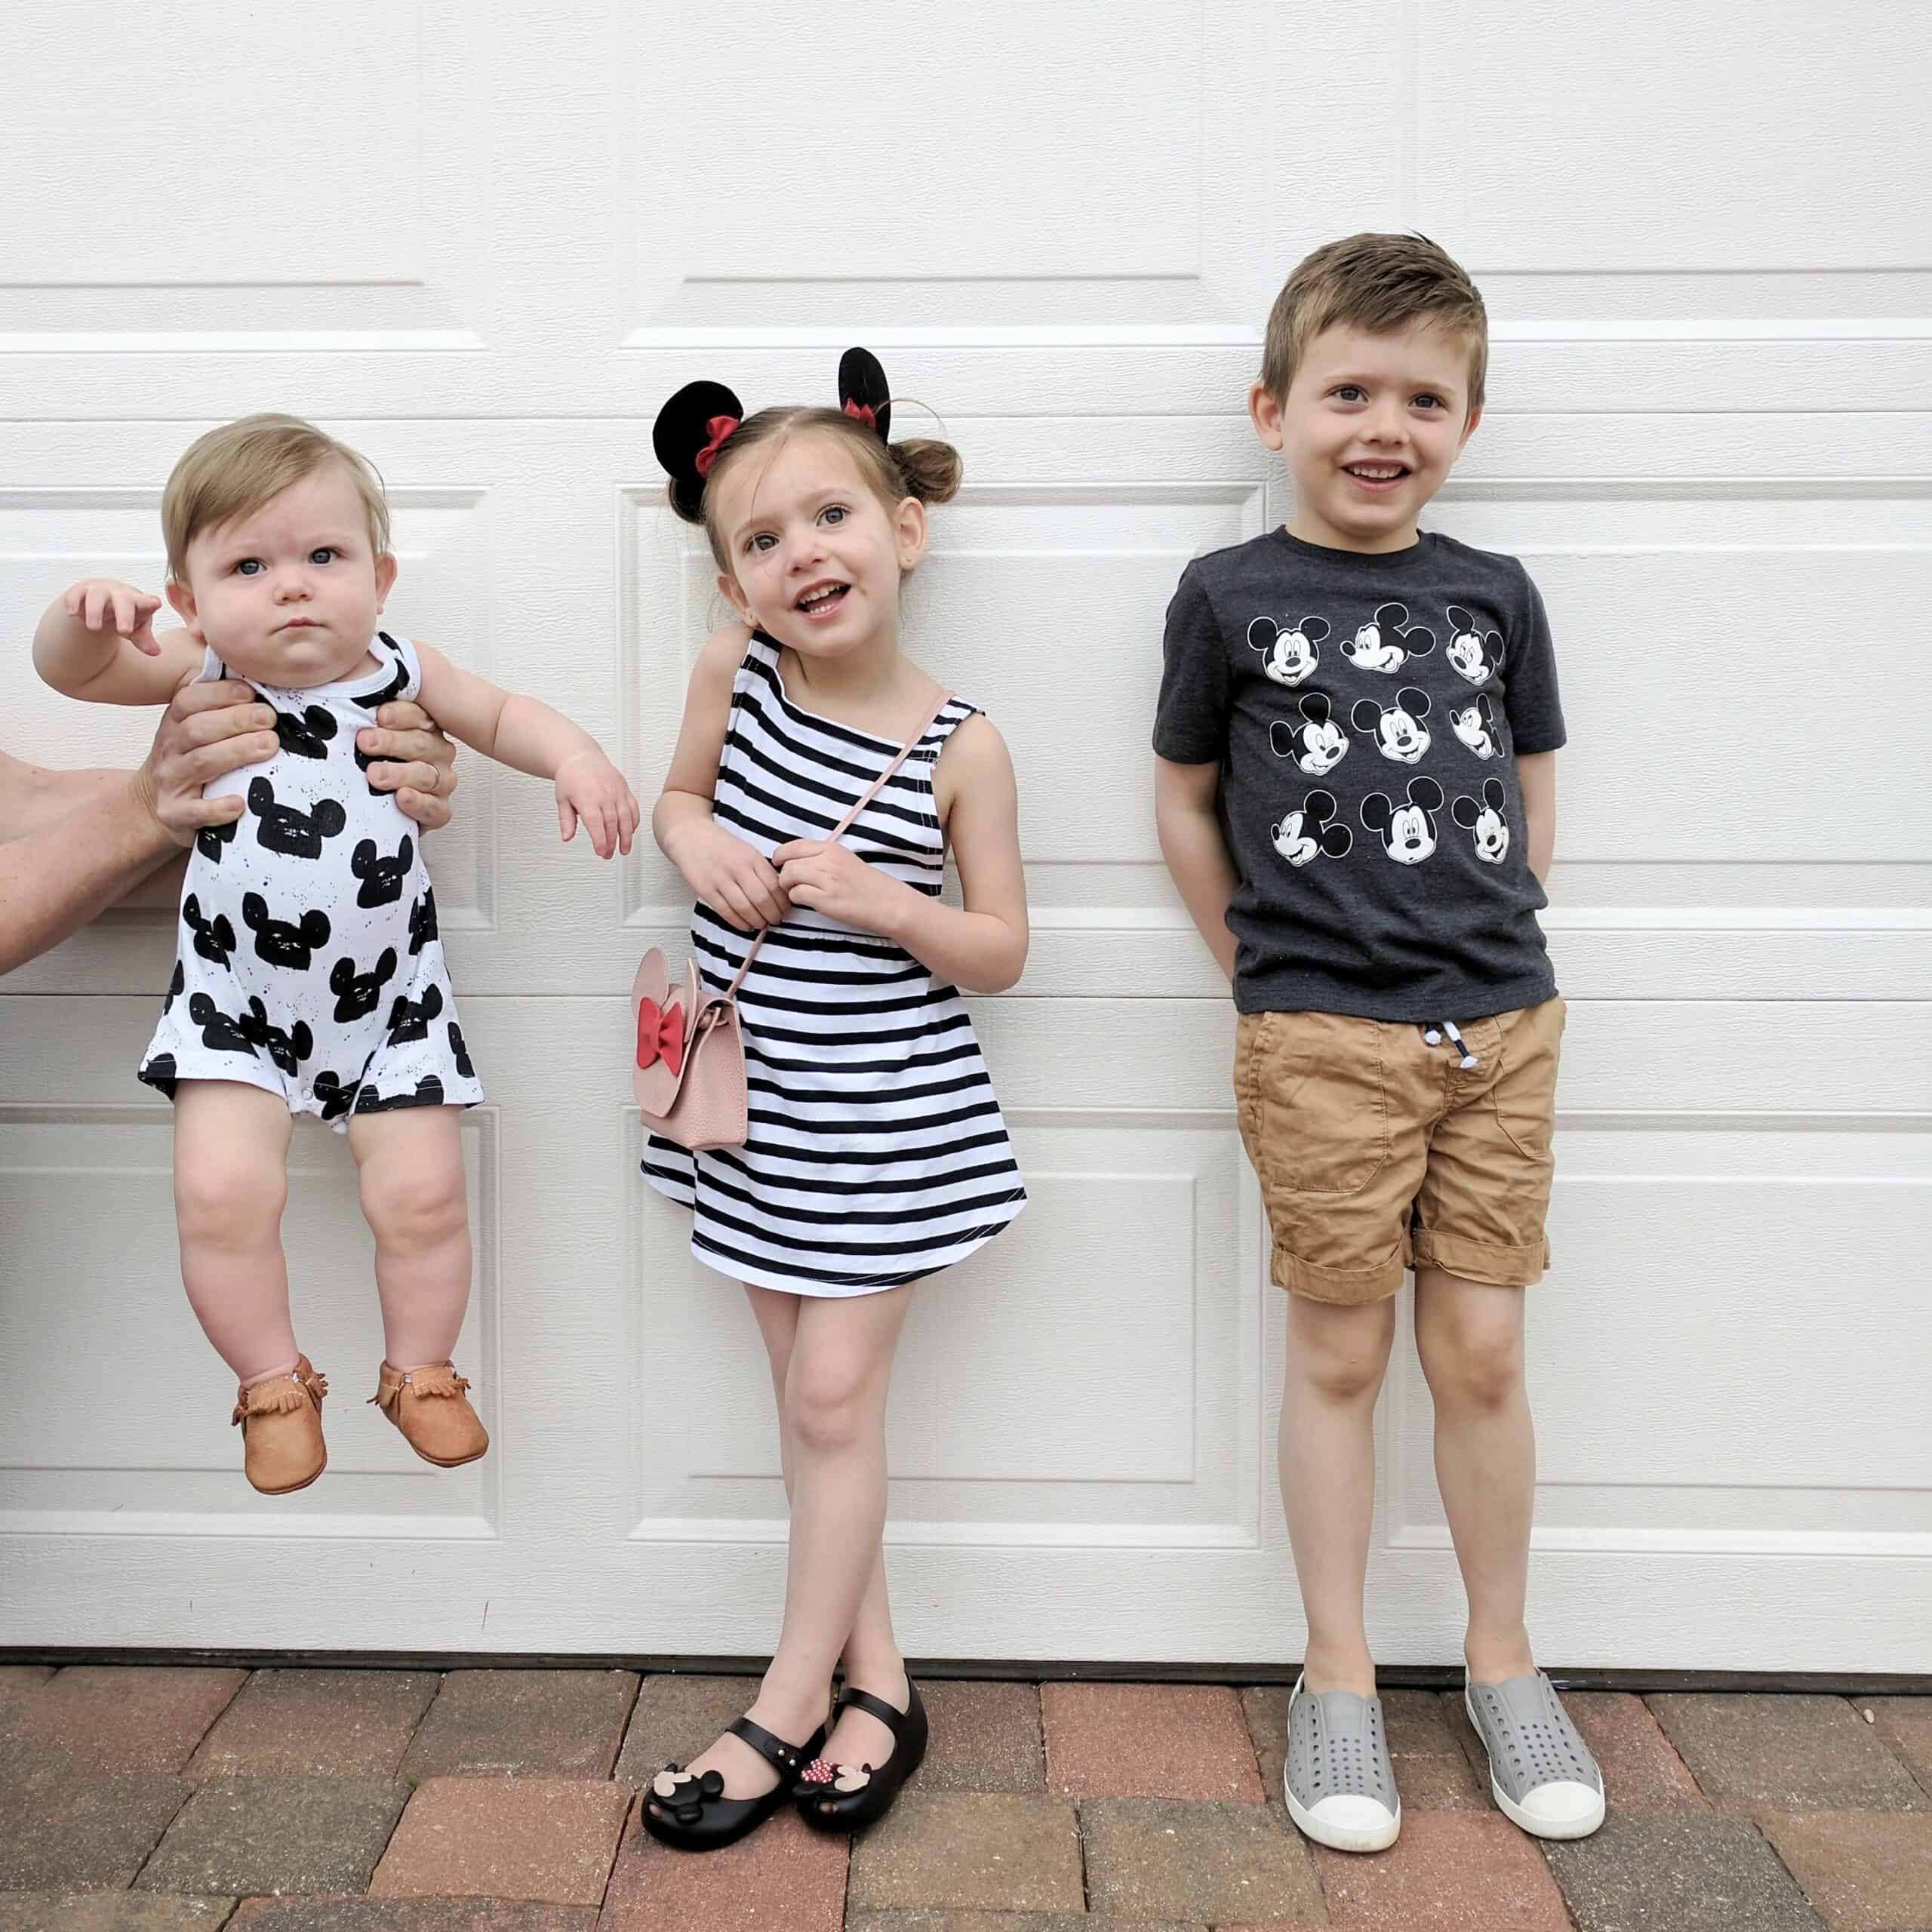
We are Disney bound once again! I mean why wouldn’t we want to head to the happiest place on earth during the hottest, busiest time on earth? HA! I’m kidding, we are super excited, and as per usual I wanted to show you guys some Disney World Outfit ideas.
I love sharing what we are packing and my inspiration so you will have some great Disney World outfit ideas next time you’re headed that way! If you like these make sure you check out the rest of my Disney outfit posts, and HAPPY SHOPPING!
This post contains affiliate links
This post was originally written on 7/26/18 and was edited and added to on 3/4/20
Disney World Outfits
We try to go to Disney world 1 or 2 times a year, but only for a day or two. I am constantly trying to find unique and fun Disney outfits for the trips, and love sharing those ideas with you all.
I rounded up some really unique ideas this year for little girls that are all Character themed, so if you are going for several days, that would be a great post to check out for extra inspiration.
Minnie melissas – Avé has these in 2 colors. They are so cute and comfortable enough to wear all day. (another great place to check for these is Nodstrom Rack online!)
Hopefully if some of the items you were still loving from the image above are no longer available, they gave you some inspiration on other items you can find.
I love that this is a great mix of ideas that are both very themed, as well as some that are just a nod to Disney and Disney outfits! Are you a character person on your trip to the happiest place on earth, or do you just find fun things with nods to the Mouse?
Don’t forget to check out all those other Disney fashion posts, and if you need more Disney tips, my friends Katie and Jen are two sisters with a blog devoted to all things Disney and tips, so you might want to check out all their money saving ideas!
To see what we wear this month follow me on Instagram (@arinsolange), and remember to watch for these fun round ups every time we go!
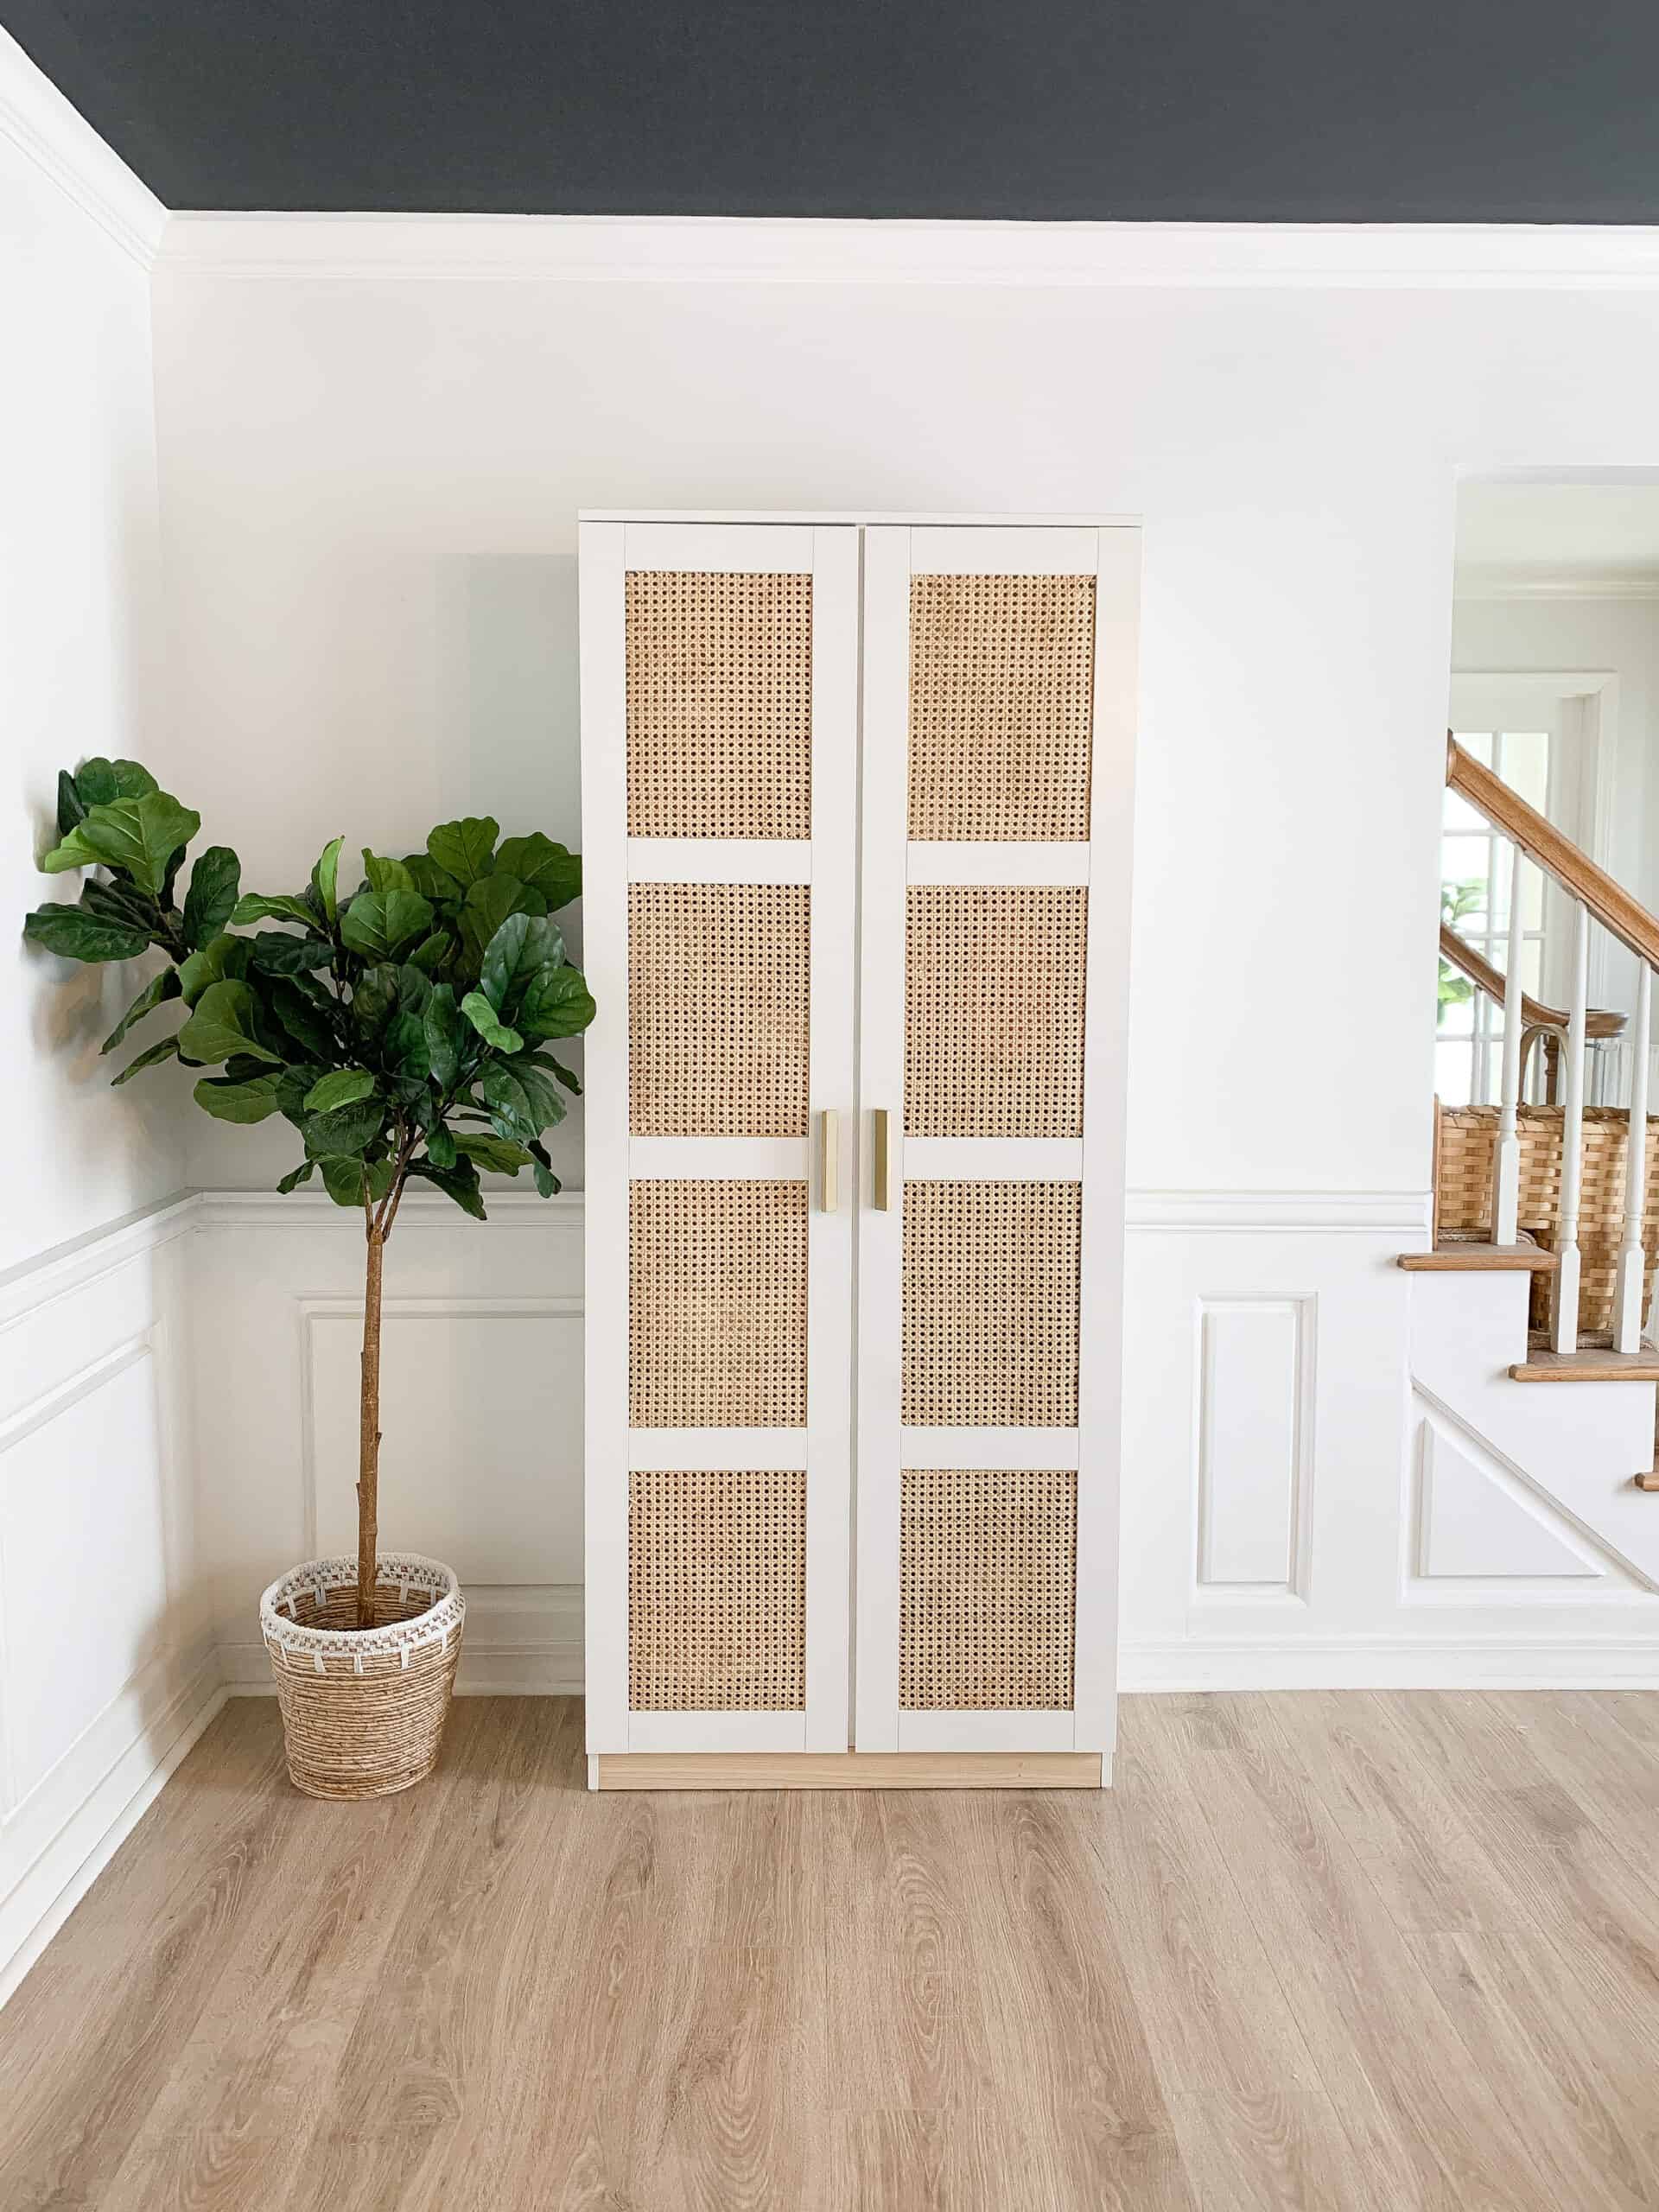
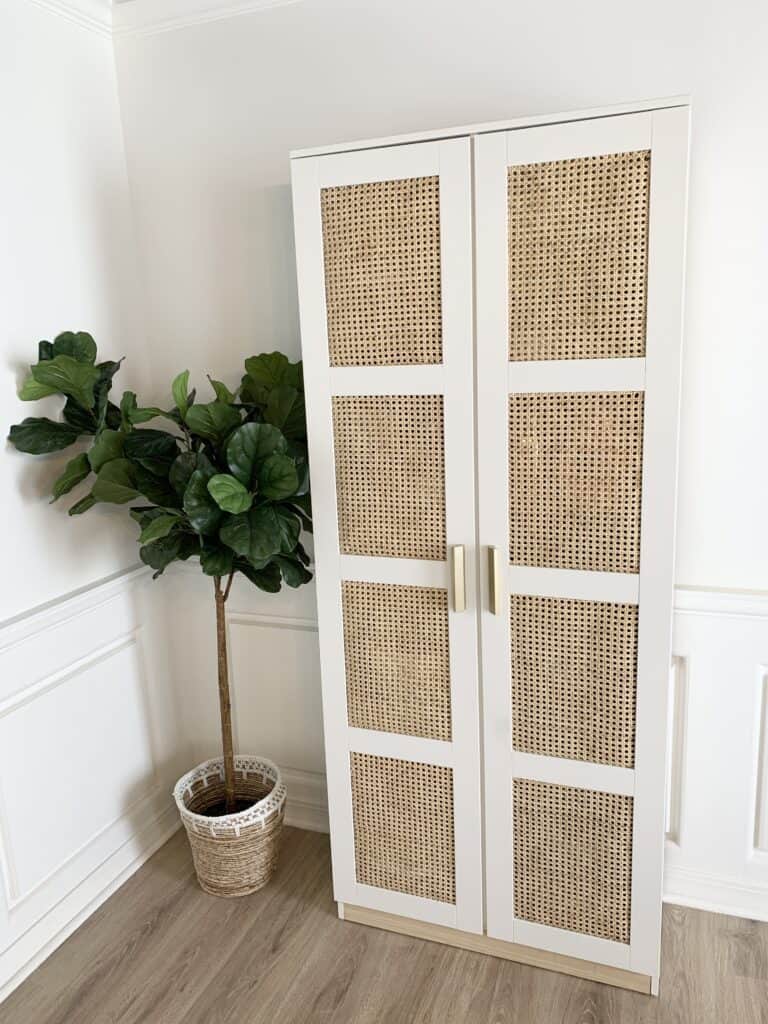
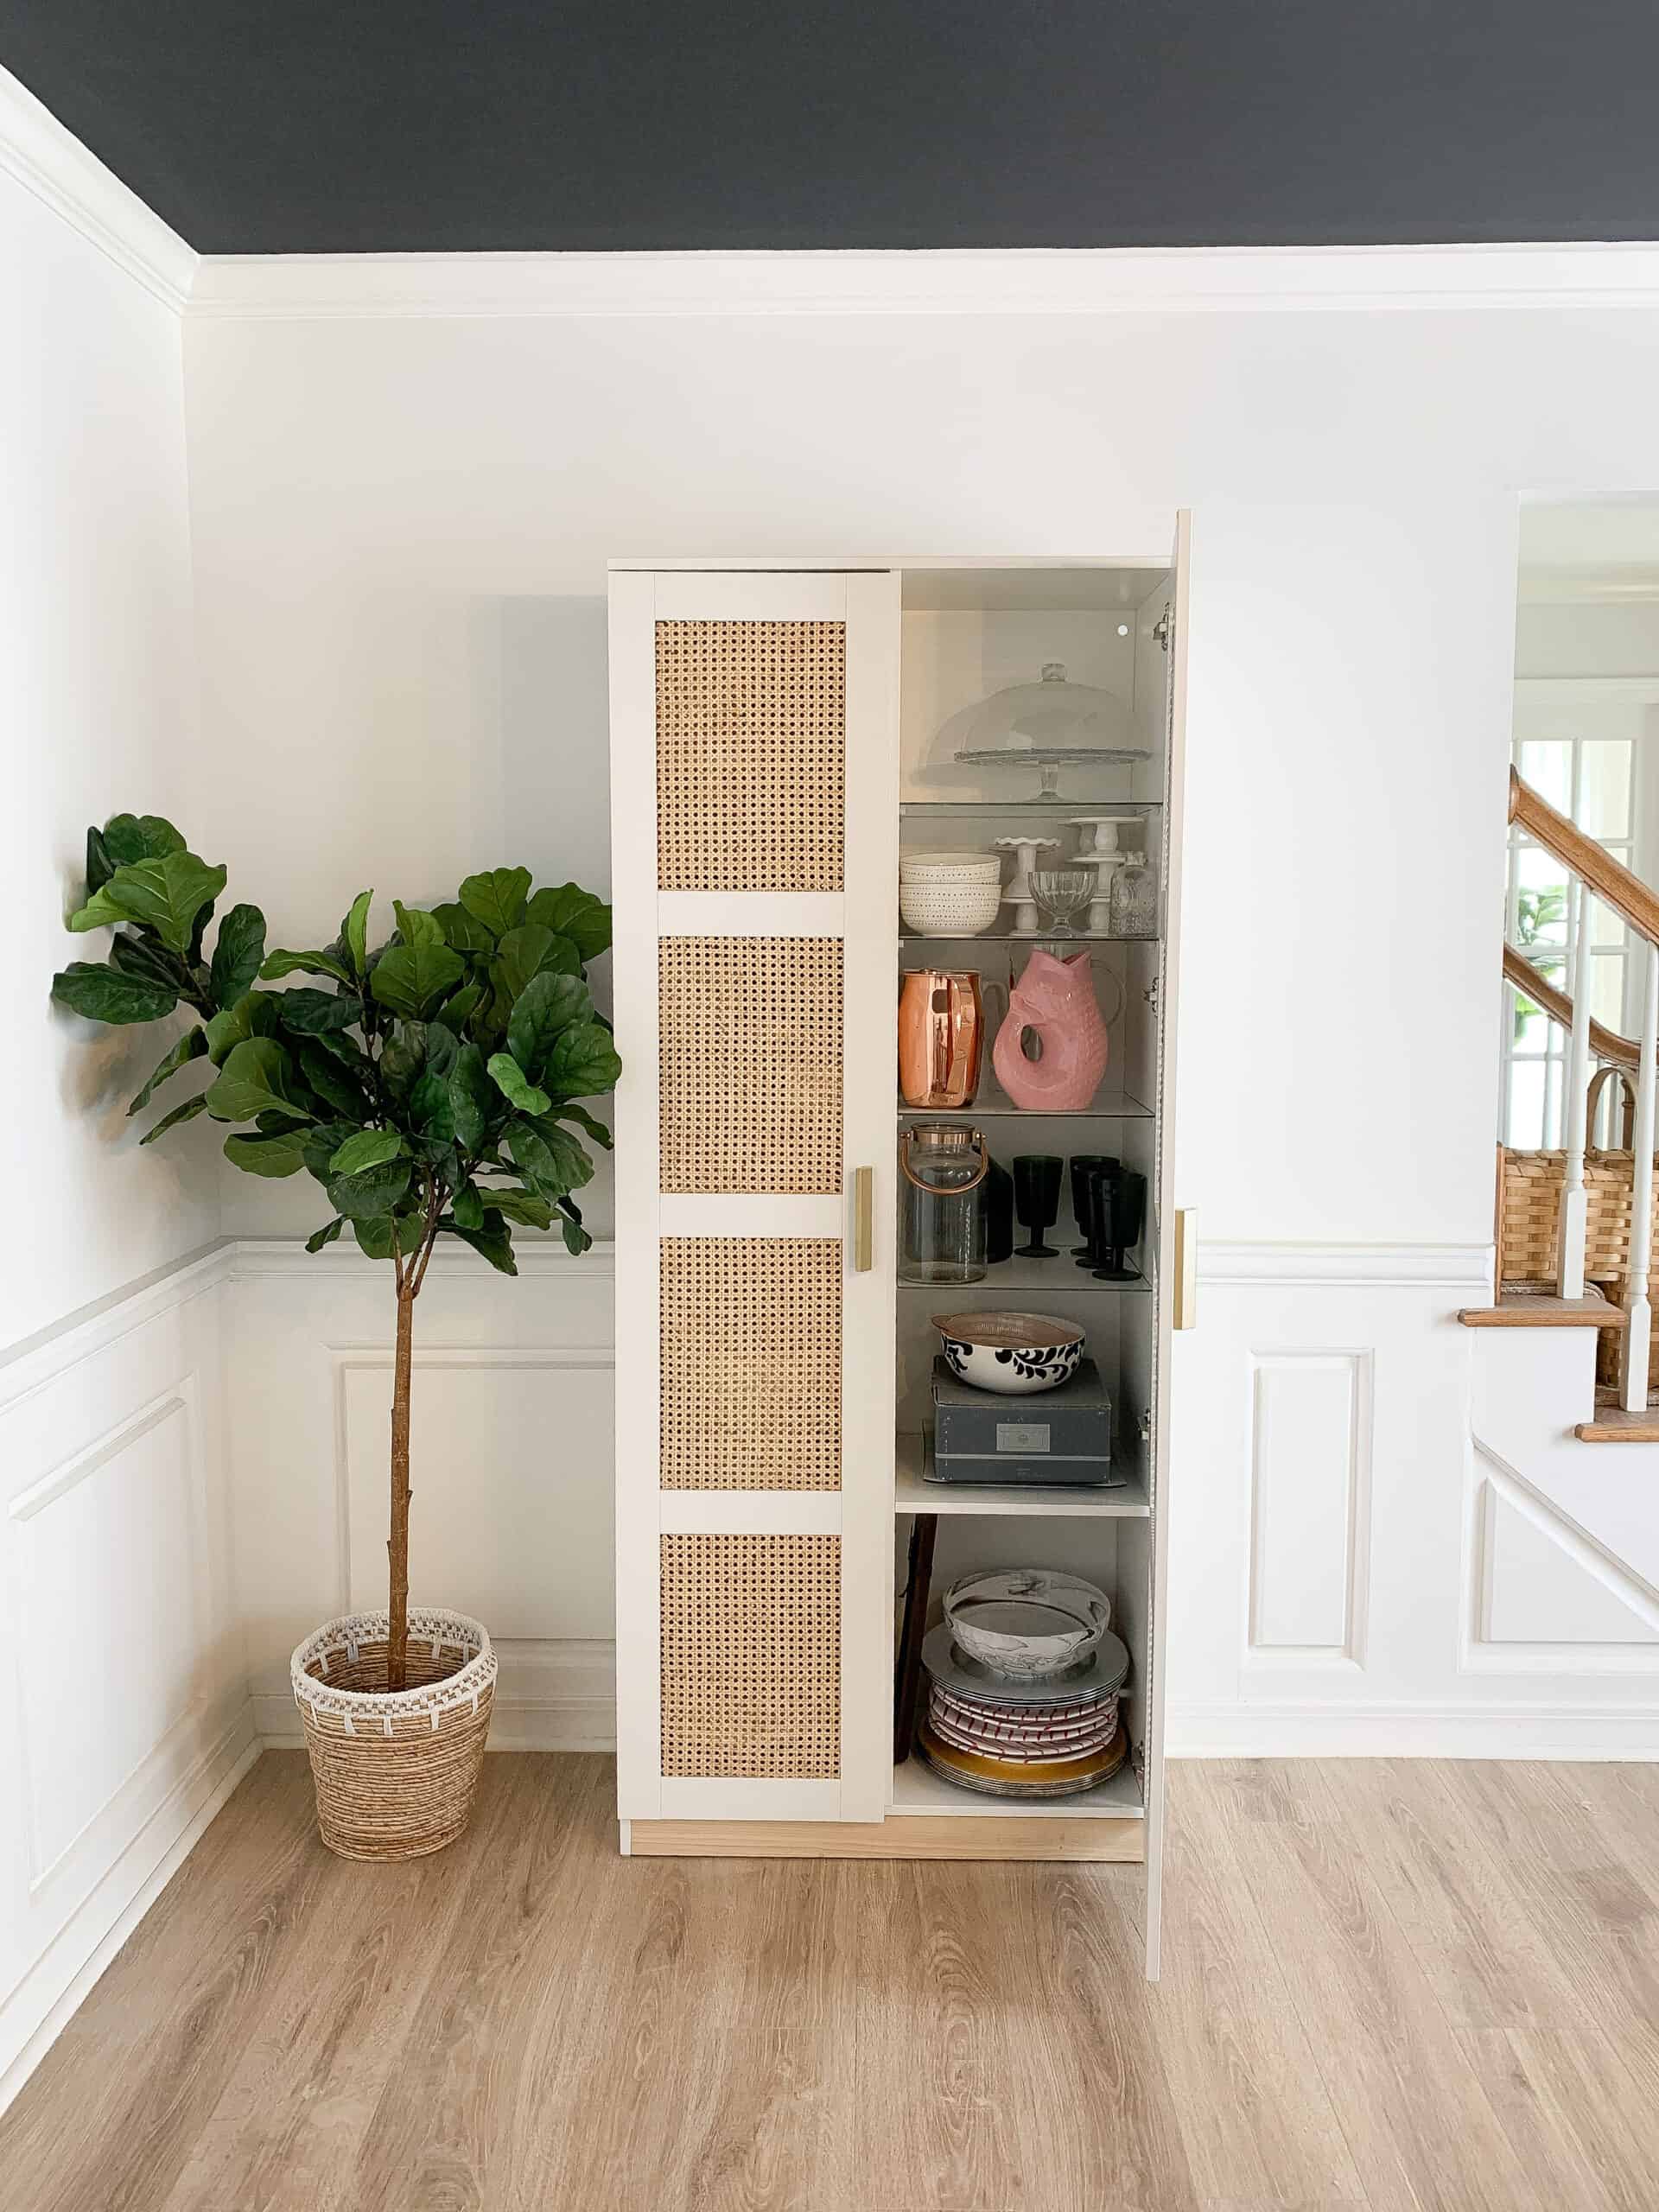
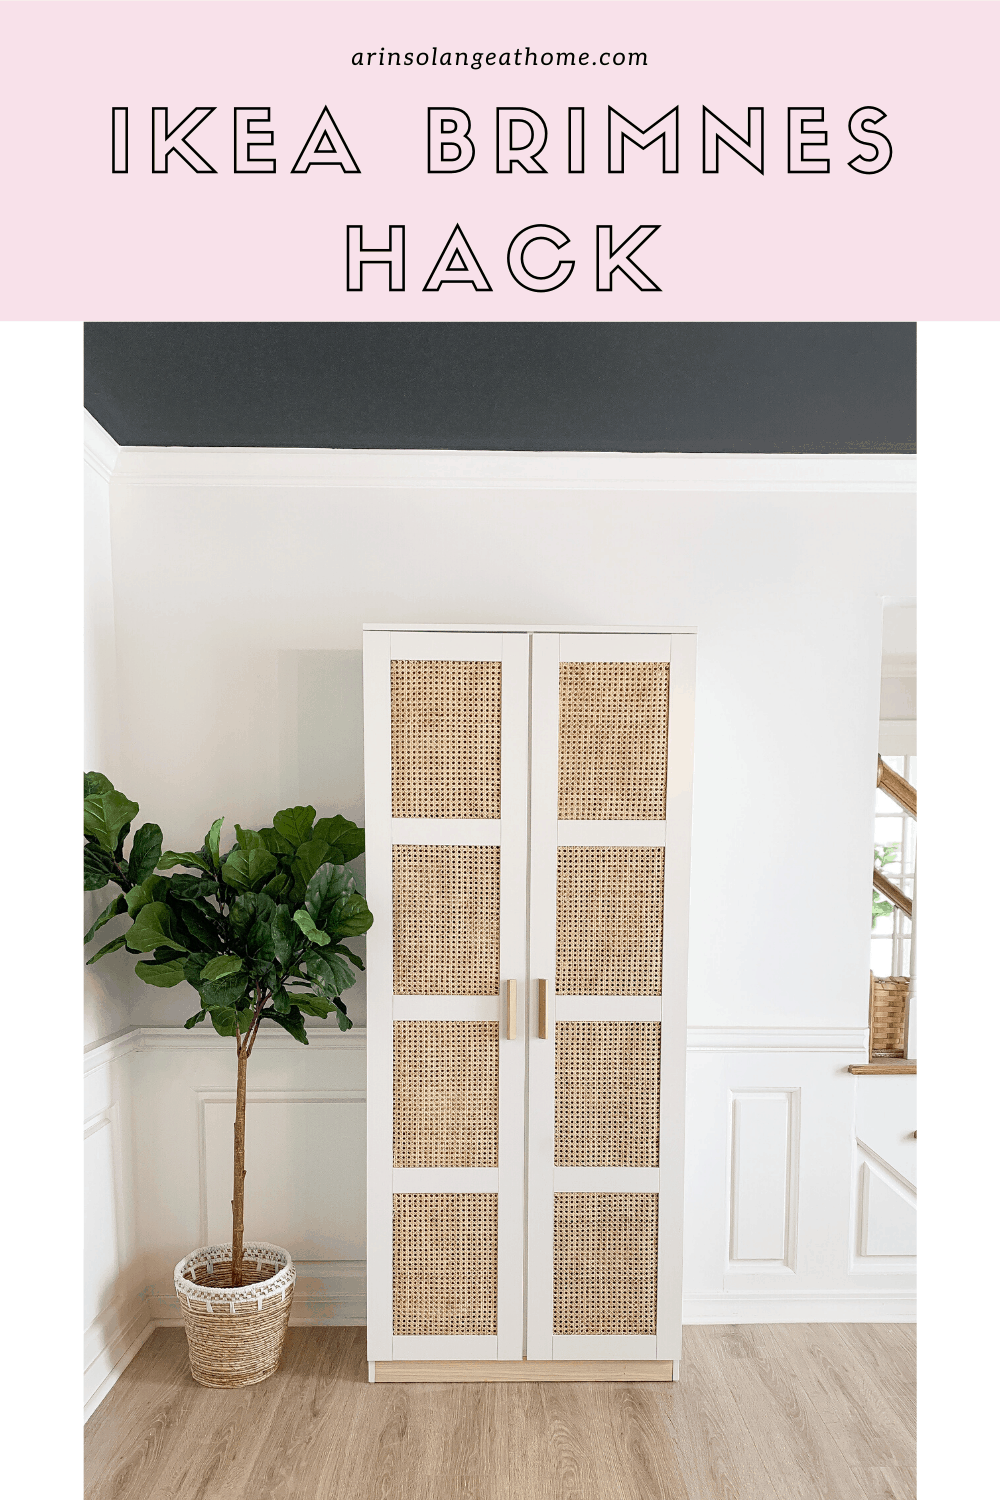
I have been dying to do a hack on the IKEA Brimnes cabinet. If there is one thing I love to do in the world of DIY and decor it’s a good IKEA hack, and this one did not disappoint! Today I am going to finally share my DIY Cane IKEA Brimnes Cabinet.
I am walking you through all the ins and outs of the DIY, including some of the trickier aspects we didn’t expect, so make sure you read through the whole post before you dive in on yours!
This post may contain affiliate links
DIY Cane IKEA Brimnes Cabinet
Like I said before – I am no stranger to a good IKEA hack. I seriously love turning the inexpensive, but well thought out pieces from IKEA into something even better. This project was no exception to that.
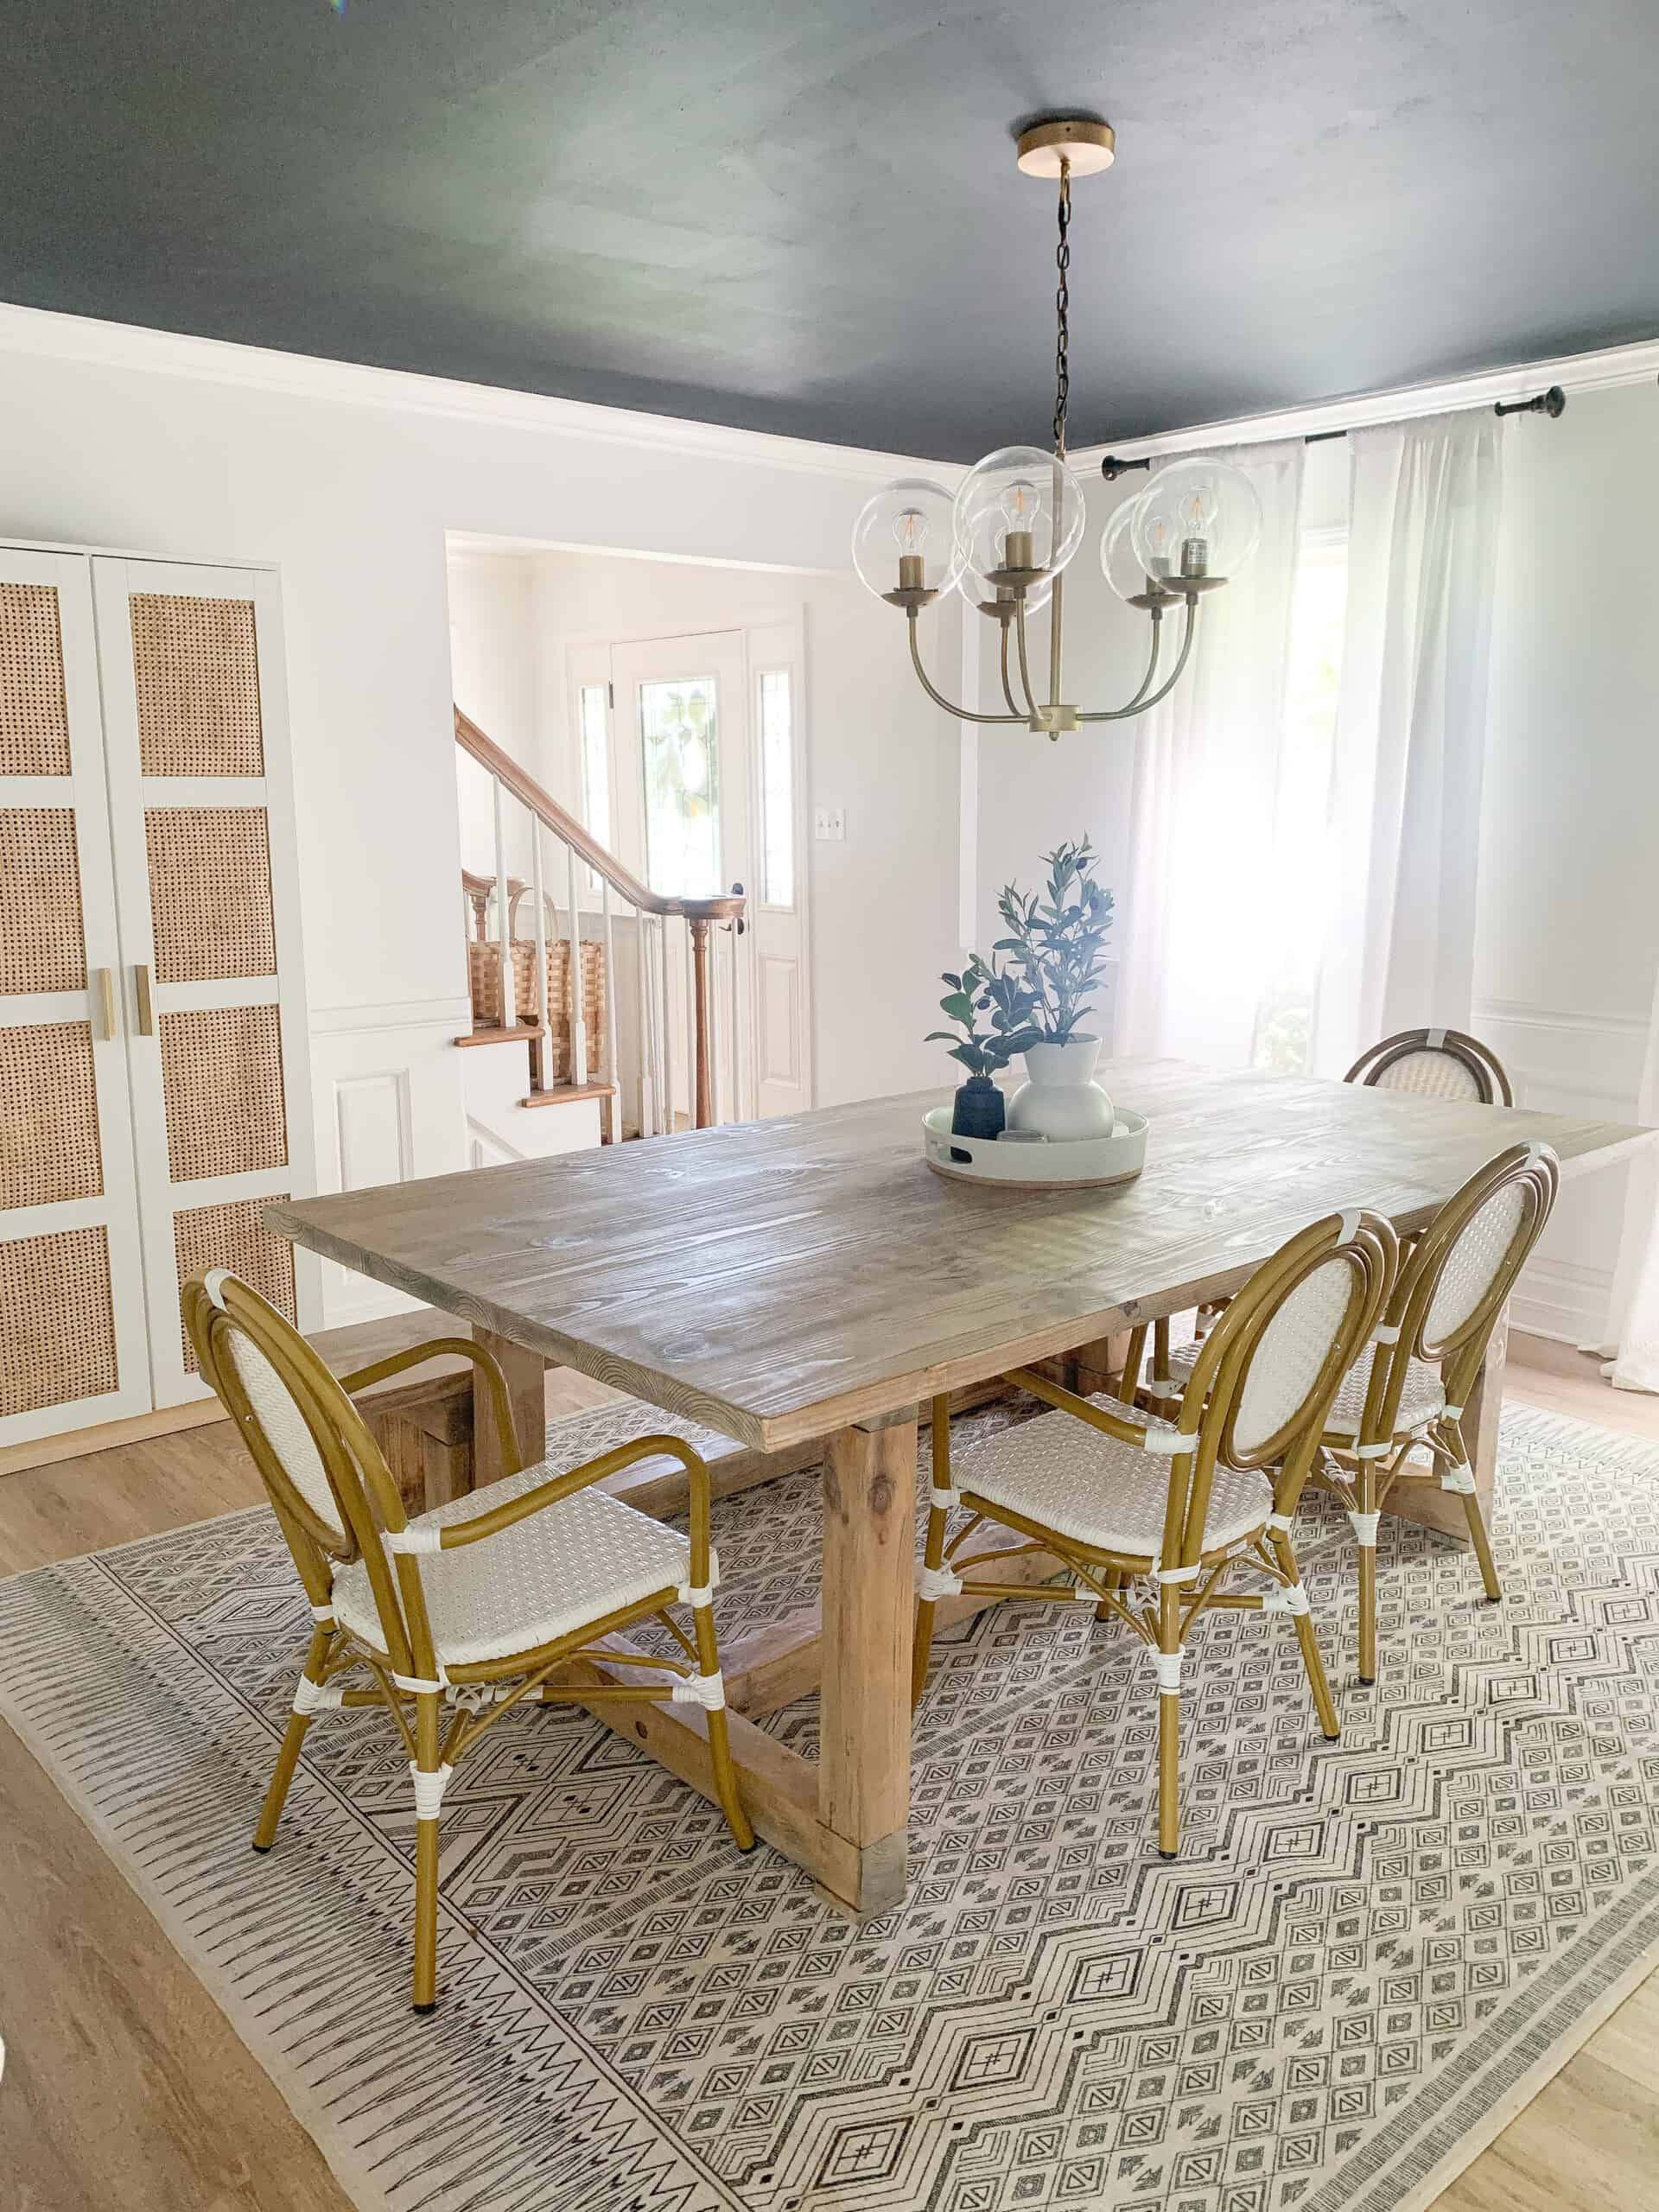
I did this DIY as a part of my March Room Refresh, that I will touch on here in a few minutes, and might just be my favorite aspect of the room!
We had a need for a cabinet in our dining room to store lots of our serving dishes and such. I honestly didn’t want to do something like a buffet again, just because I wanted the simplicity of nothing on top of it.
We previously had a shorter cabinet with shelves over top and I think I just prefer the simplicity of everything hidden!
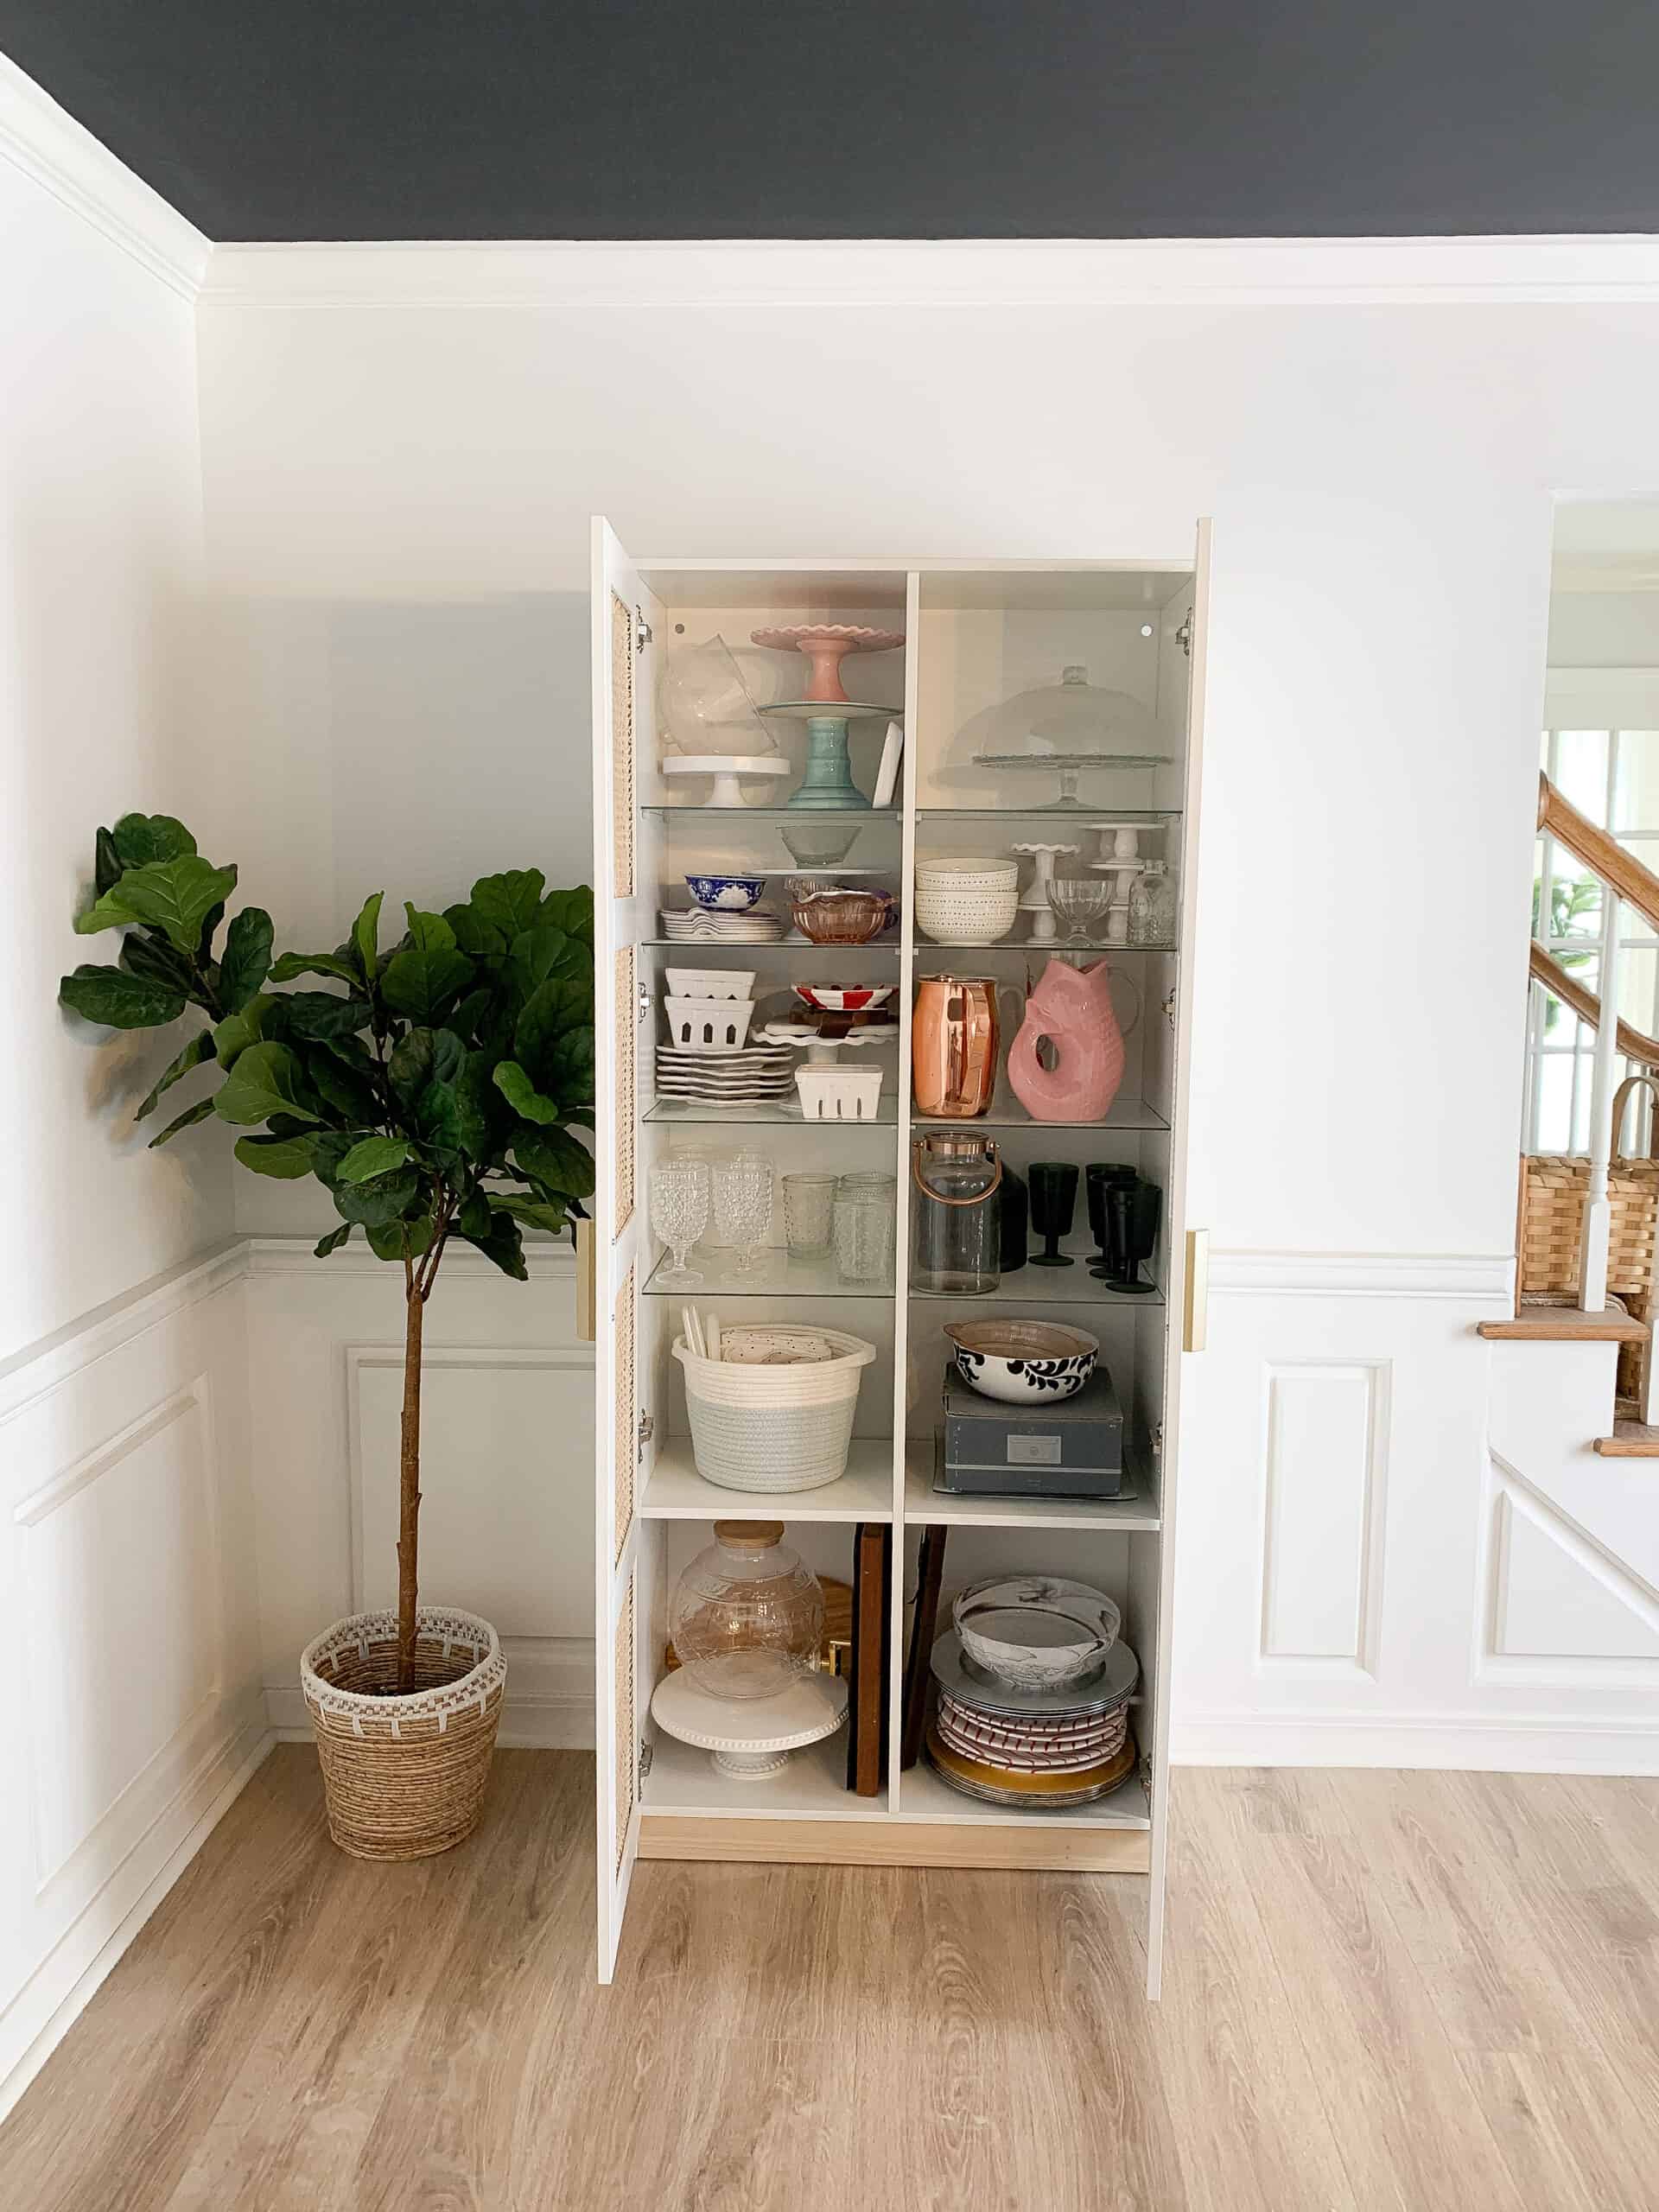
I also loved the idea of HOW much storage the IKEA Brimnes cabinet offered, and knew we would have the option to adding a second one if we wanted.
I am assuming the DIY I will walk you through will in some cases work for other options in the IKEA Brimnes line, however I can’t be fully sure.
A video with some behind the scenes
I filmed a few little things showing how I did this that will probably be super helpful when it comes to doing your project, so be sure to watch. I also am giving you a video version of the cabinet!
Other IKEA Hacks
While you are here, be sure to check out this post with the rest of my IKEA hacks. I LOVE using the inexpensive and simple pieces from IKEA to create something better, whether it just be an upgraded version of the original purpose like this, or a totally new one like I did with my wall mounted easel.
March Room Refresh
As mentioned above – I did this DIY as a part of my March Room refresh, which if that has you going ‘huh’? then head to this post to read more about what I am up to!
To give you the short version, my girls Chrissy and Jen have teamed up with me to do a 3 week room refresh challenge.
We are inviting all of you to join in with us and use the hashtag #MarchRoomRefresh, and those of you that compete your room will be entered to win $250.
The best part – we are going to let our readers and followers do the voting!! So again, if this sounds like something you want to jump in on, head to this blog post and read a bit more and get going on a room refresh – big or small!
One thing you will hear me preach over and over on my blog and Instagram is that you don’t always have to go expensive when you want your home to look great.
There are times to invest in what you are buying, but there are also lots of times that some hard work can make something budget friendly just as great.
Take into account the expense of the other suppliers when you are deciding on your project, and make sure you can truly accomplish a polished look. Remember it is only worth it if you can create something either beautiful or useful. Don’t do a hack that leaves you with something subpar.
Supplies You Need for IKEA Brimnes Hack:
To complete this DIY the first obvious is the IKEA Brimnes cabinet. We went with the white.
For us, we are local to an IKEA which makes these projects much more feasible for me, but if you aren’t local to an IKEA – I found this cabinet online that I think would make an amazing alternative. In fact – I almost used this one for my DIY.
8 feet of Cane Sheeting– I actually ordered 9 feet, so I had enough for a mess up, and am glad I did, but if you follow this closely you should be fine with 8 feet!
It arrived in a few days flat, and was jut what I ordered. I know that ordering from ETSY can be a little nerve wracking so hopefully that eases your worries if that’s the source you decide to use! this adhesive
You also need – some sort of adhesive (I used hot glue)
Below is the steps for actually doing this hack. I will tell you that this hack is both easy, and tricky all at once. You need to be patient with a couple of the steps.
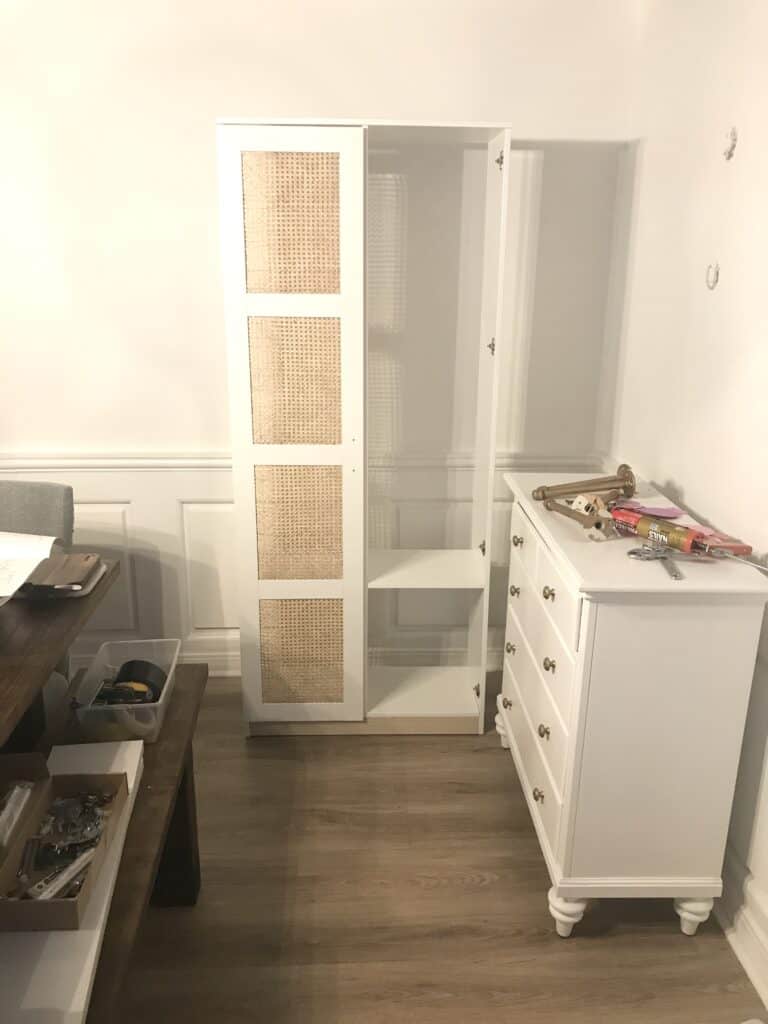
Firs you are going to assemble your cabinet as per the instructions. It is not a hard assembly in terms of IKEA, and aside from attaching the doors, you can do the entire thing per the instructions.
Once the cabinet itself is put together put it aside to work on the doors, where the true hack takes place.
Removing The Glass
Now that you’re ready to get started on the hack – you are going to notice that the glass doesn’t easily come out of this piece. You are going to have to break the glass.
DO THE DOORS ONE AT A TIME – I WILL SHARE WHY
We took the doors to the garage and laid them on a large tarp and folded the tarp over the cabinet. Take a hammer and break the glass. It isn’t super easy to break, so you will have to use some force.
Once you have done that you will see that all of the glass doesn’t just fall out.
Take the tarp off, but leave it UNDER the door. Take a small tool (like a screw driver) and slowly, and carefully remove the rest of the glass. You will have to be really careful – my husband did get a couple of small cuts in this process.
When we did this, on both doors one of the horizontal pieces fell out. I assume that it will happen with all of them, due to the fact that it happened on both doors for us. This is why you only want to do one door at a time.
We then took the door inside, laid it on top of the other door with a piece of Saran Wrap between them and glued the piece that fell out back in CAREFULLY using this glue.
We found that it was easier to know it was perfectly lined up to just lay them on top of one another.
Once your first door glue is drying move on to door 2 and follow the full process above!
Adding Cane to the Doors
Once your doors are both glass free and the glue is dried you are ready to do the exciting step and start to see how it comes together.
I have personally never worked with cane sheeting before, so this was all new for me, and the first try I made DID NOT work. Once I worked through the problems I made a plan and it worked really well, and before are the steps!
Step 1
Cut one piece of cane sheeting to – 11 1/4 x 15.5Once you do this first piece and know that it works well for you, you can definitely cut them all, but I feel like it would be wise to try one piece in my method FIRST before you go cutting into all the cane!
Step 2
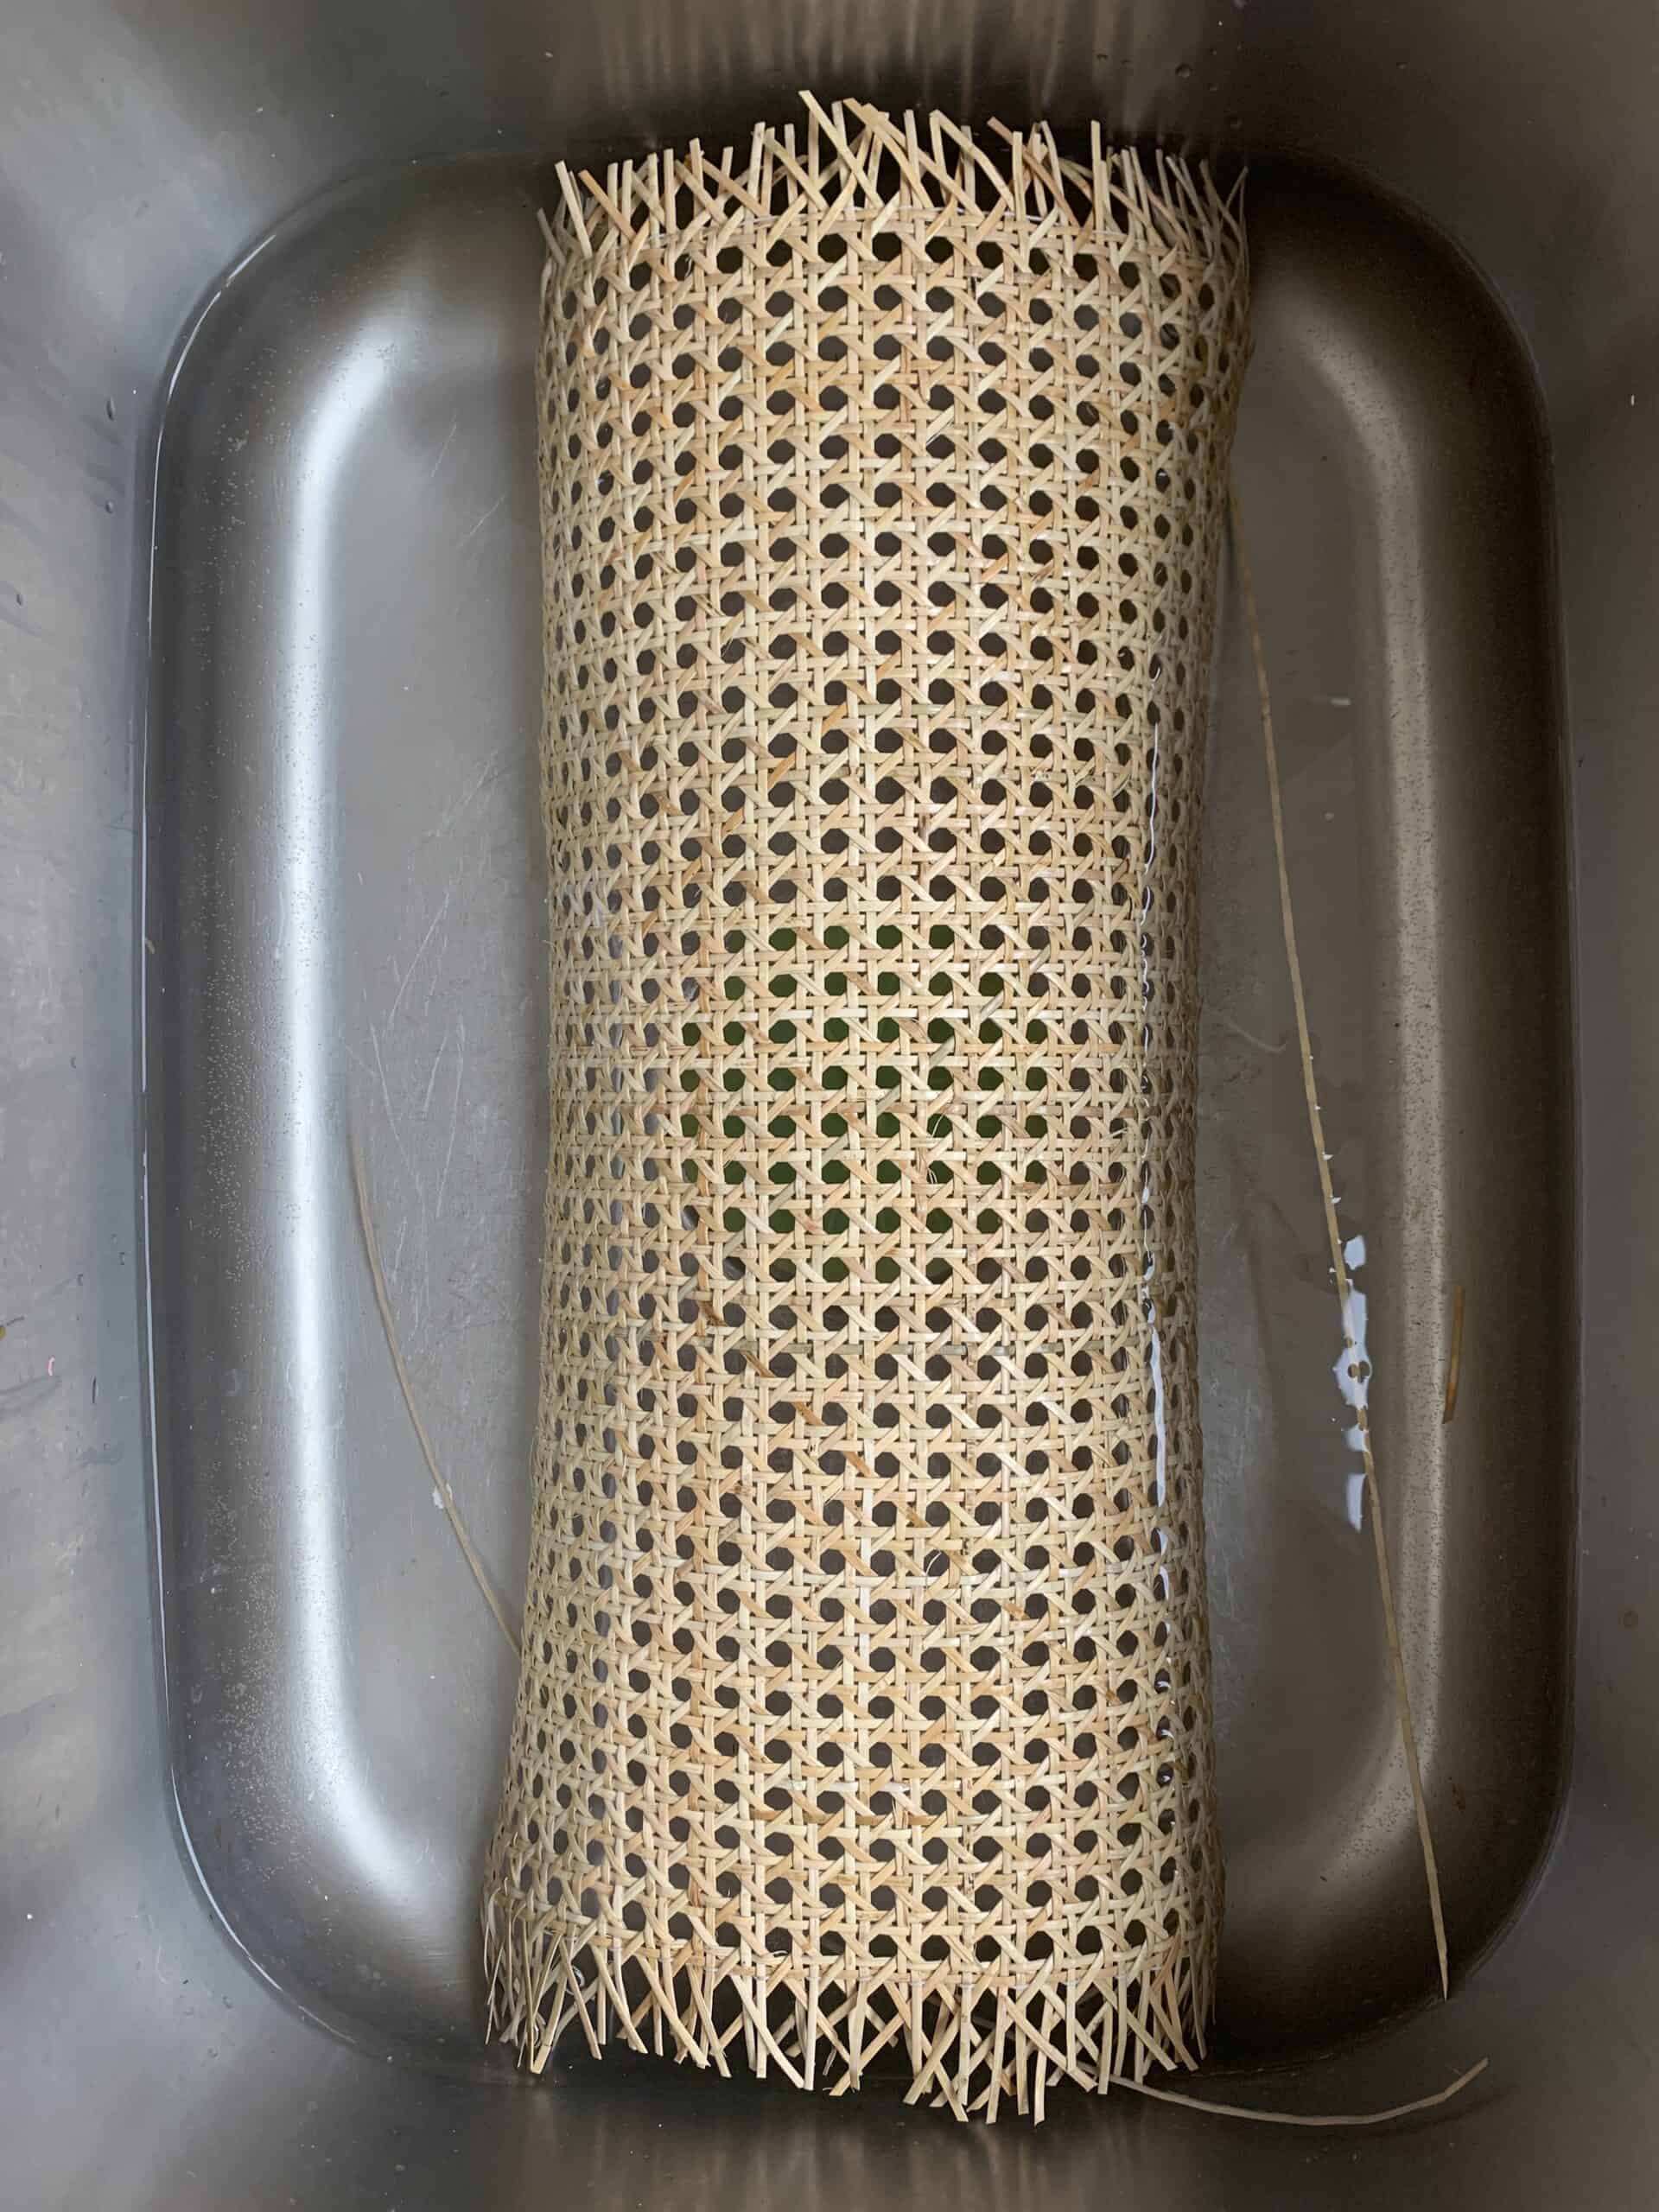
Soak your sheet of cane in a sink of water for 5 or so minutes. It doesn’t take long, just allows it to be a bit more flexible for you. Once you remove it from the water, dry it off on a towel and take it to your door to get to work. Do this step one at a time, even if you cut them all in one step!
Step 3
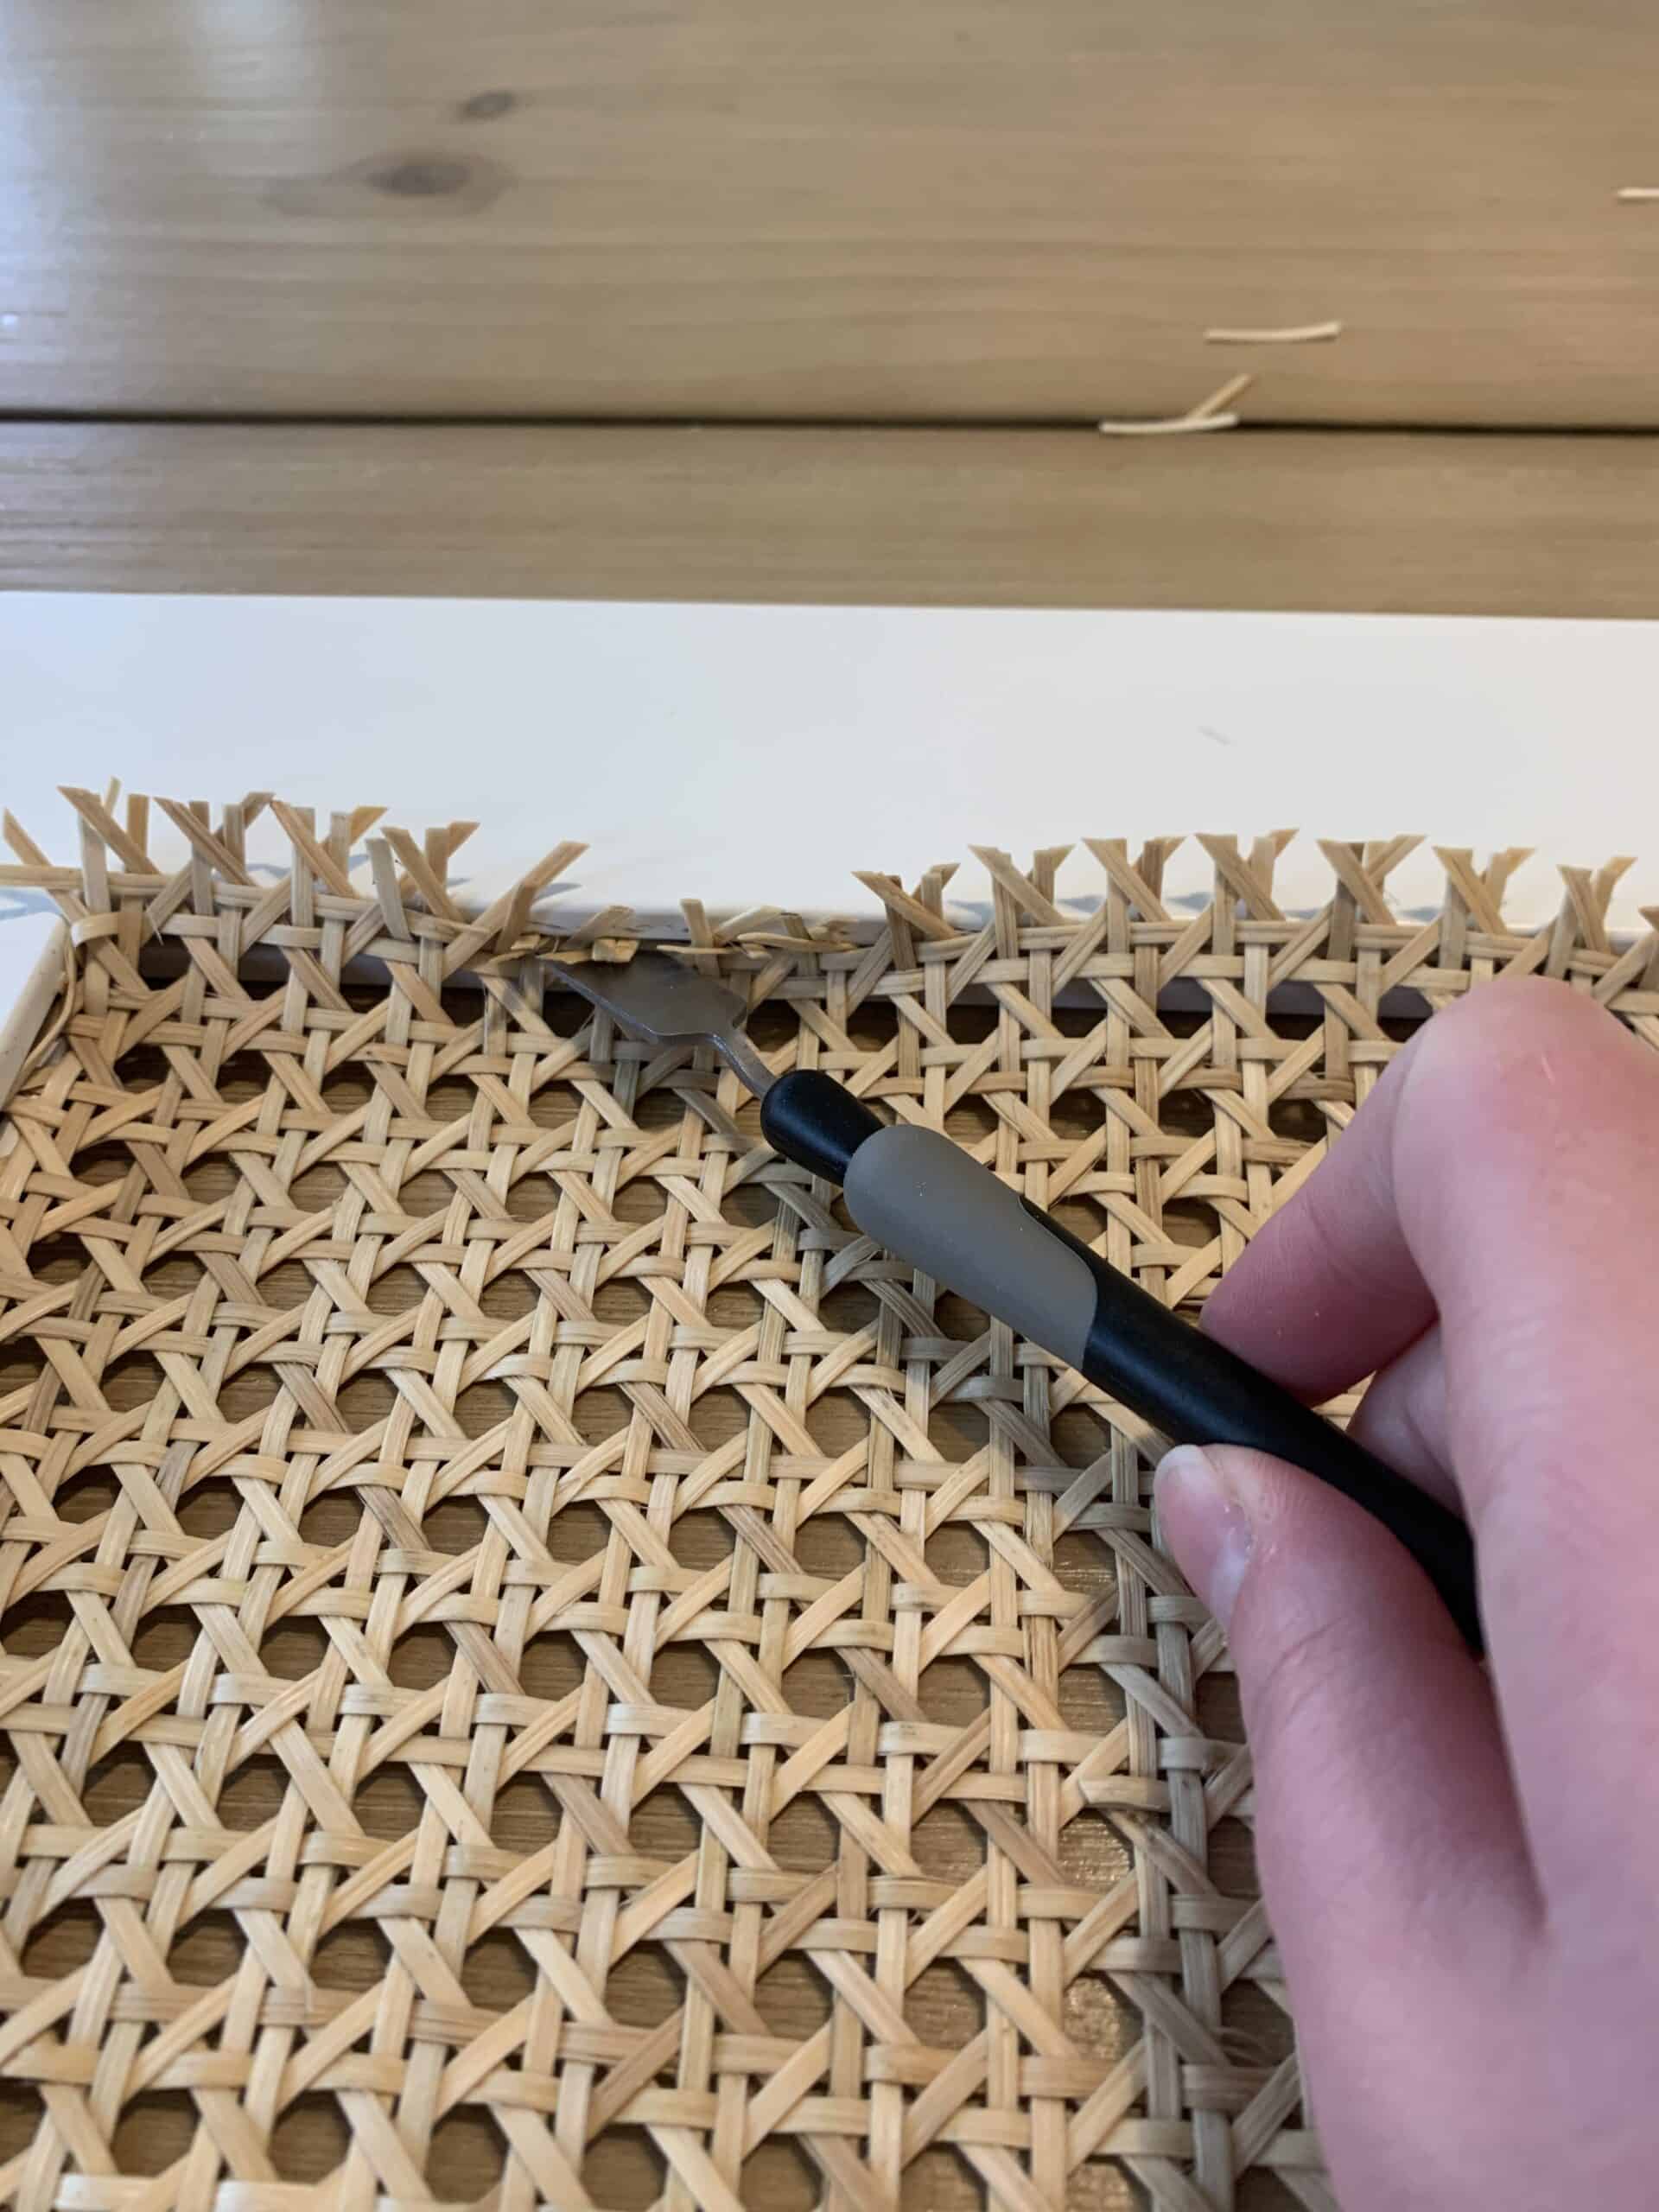
Put your Cane sheeting into your first door opening. I am going to give you some major tips on this step, but know that it might seem confusing until you finish this first square.
In the video at the top of this post here are some short clips showing how I did this, and I highly suggest watching them – it will make it much more easy to understand!
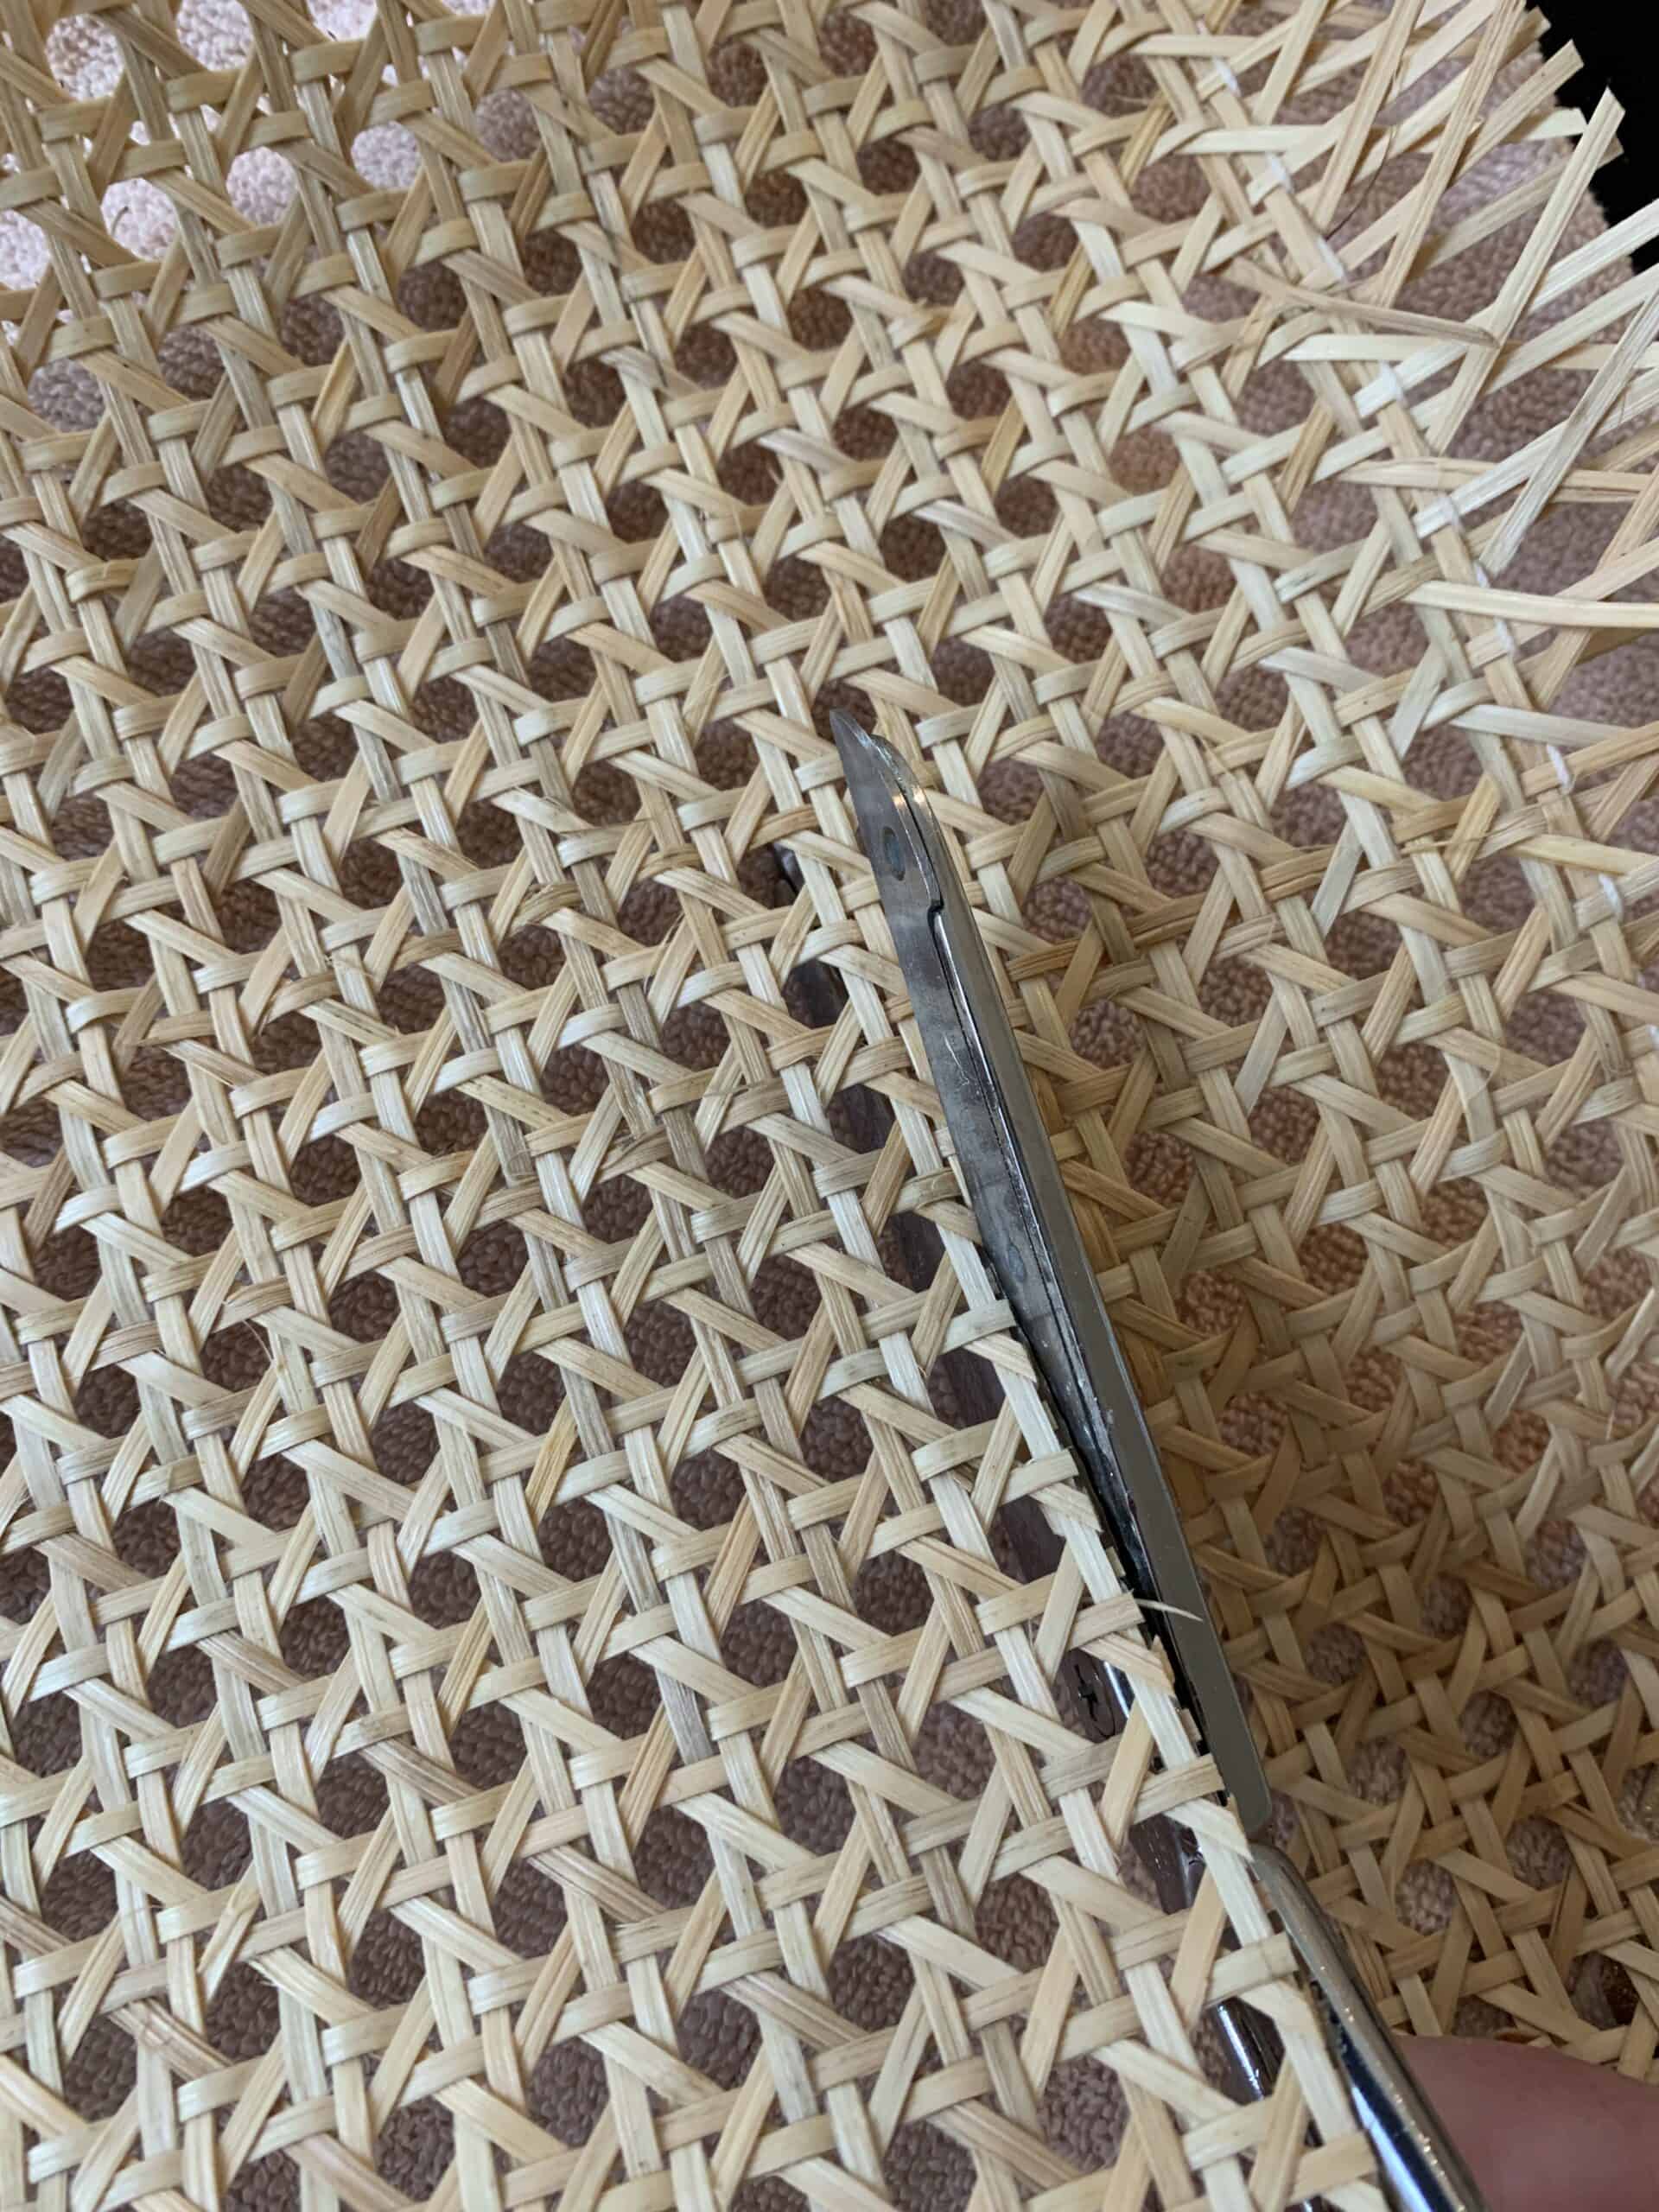
Working from the INSIDE of the door (so the outside should be laying on your surface), take your piece of cane and carefully slide the sheet into ONE SIDE and THE BOTTOM.
You are going to find that you can sort of easily slide in one on each, but then you’re going to think I told you to cut it too big. YOU DIDN’T!
Once the sheet is fully in on those two sides make sure you push to get it AS FAR IN as it will go. Now you are going to take your tool and start to sort of shove in the cane on the other two sides. As per the video you will get the two sides In slowly, but there will be lots of whispies hanging out.
Once it is all in go back through and slowly shove those in with the tool. That helps to keep it really tight.
One huge thing to remember in this is that you want to make sure as you are pushing it in on those sides you’re holding it tight in the sides you already had slid in easily. Keeping those two sides as far in as possible is important.
Repeat for all the squares on each door, and then assemble your doors onto the cabinet!
Now you need to look to see if any areas need glue – I took my hot glue gun and shot some glue into the gaps from the inside of the door to keep things in place. I worked slowly so the glue was only down in the opening, but it kept things much more secure!
This is also why I told you to assemble with the top and bottom in mind. It is easier to shoot the glue DOWN into the door verses up. I didn’t think of that with door one so adjusted for door 2.
The Details
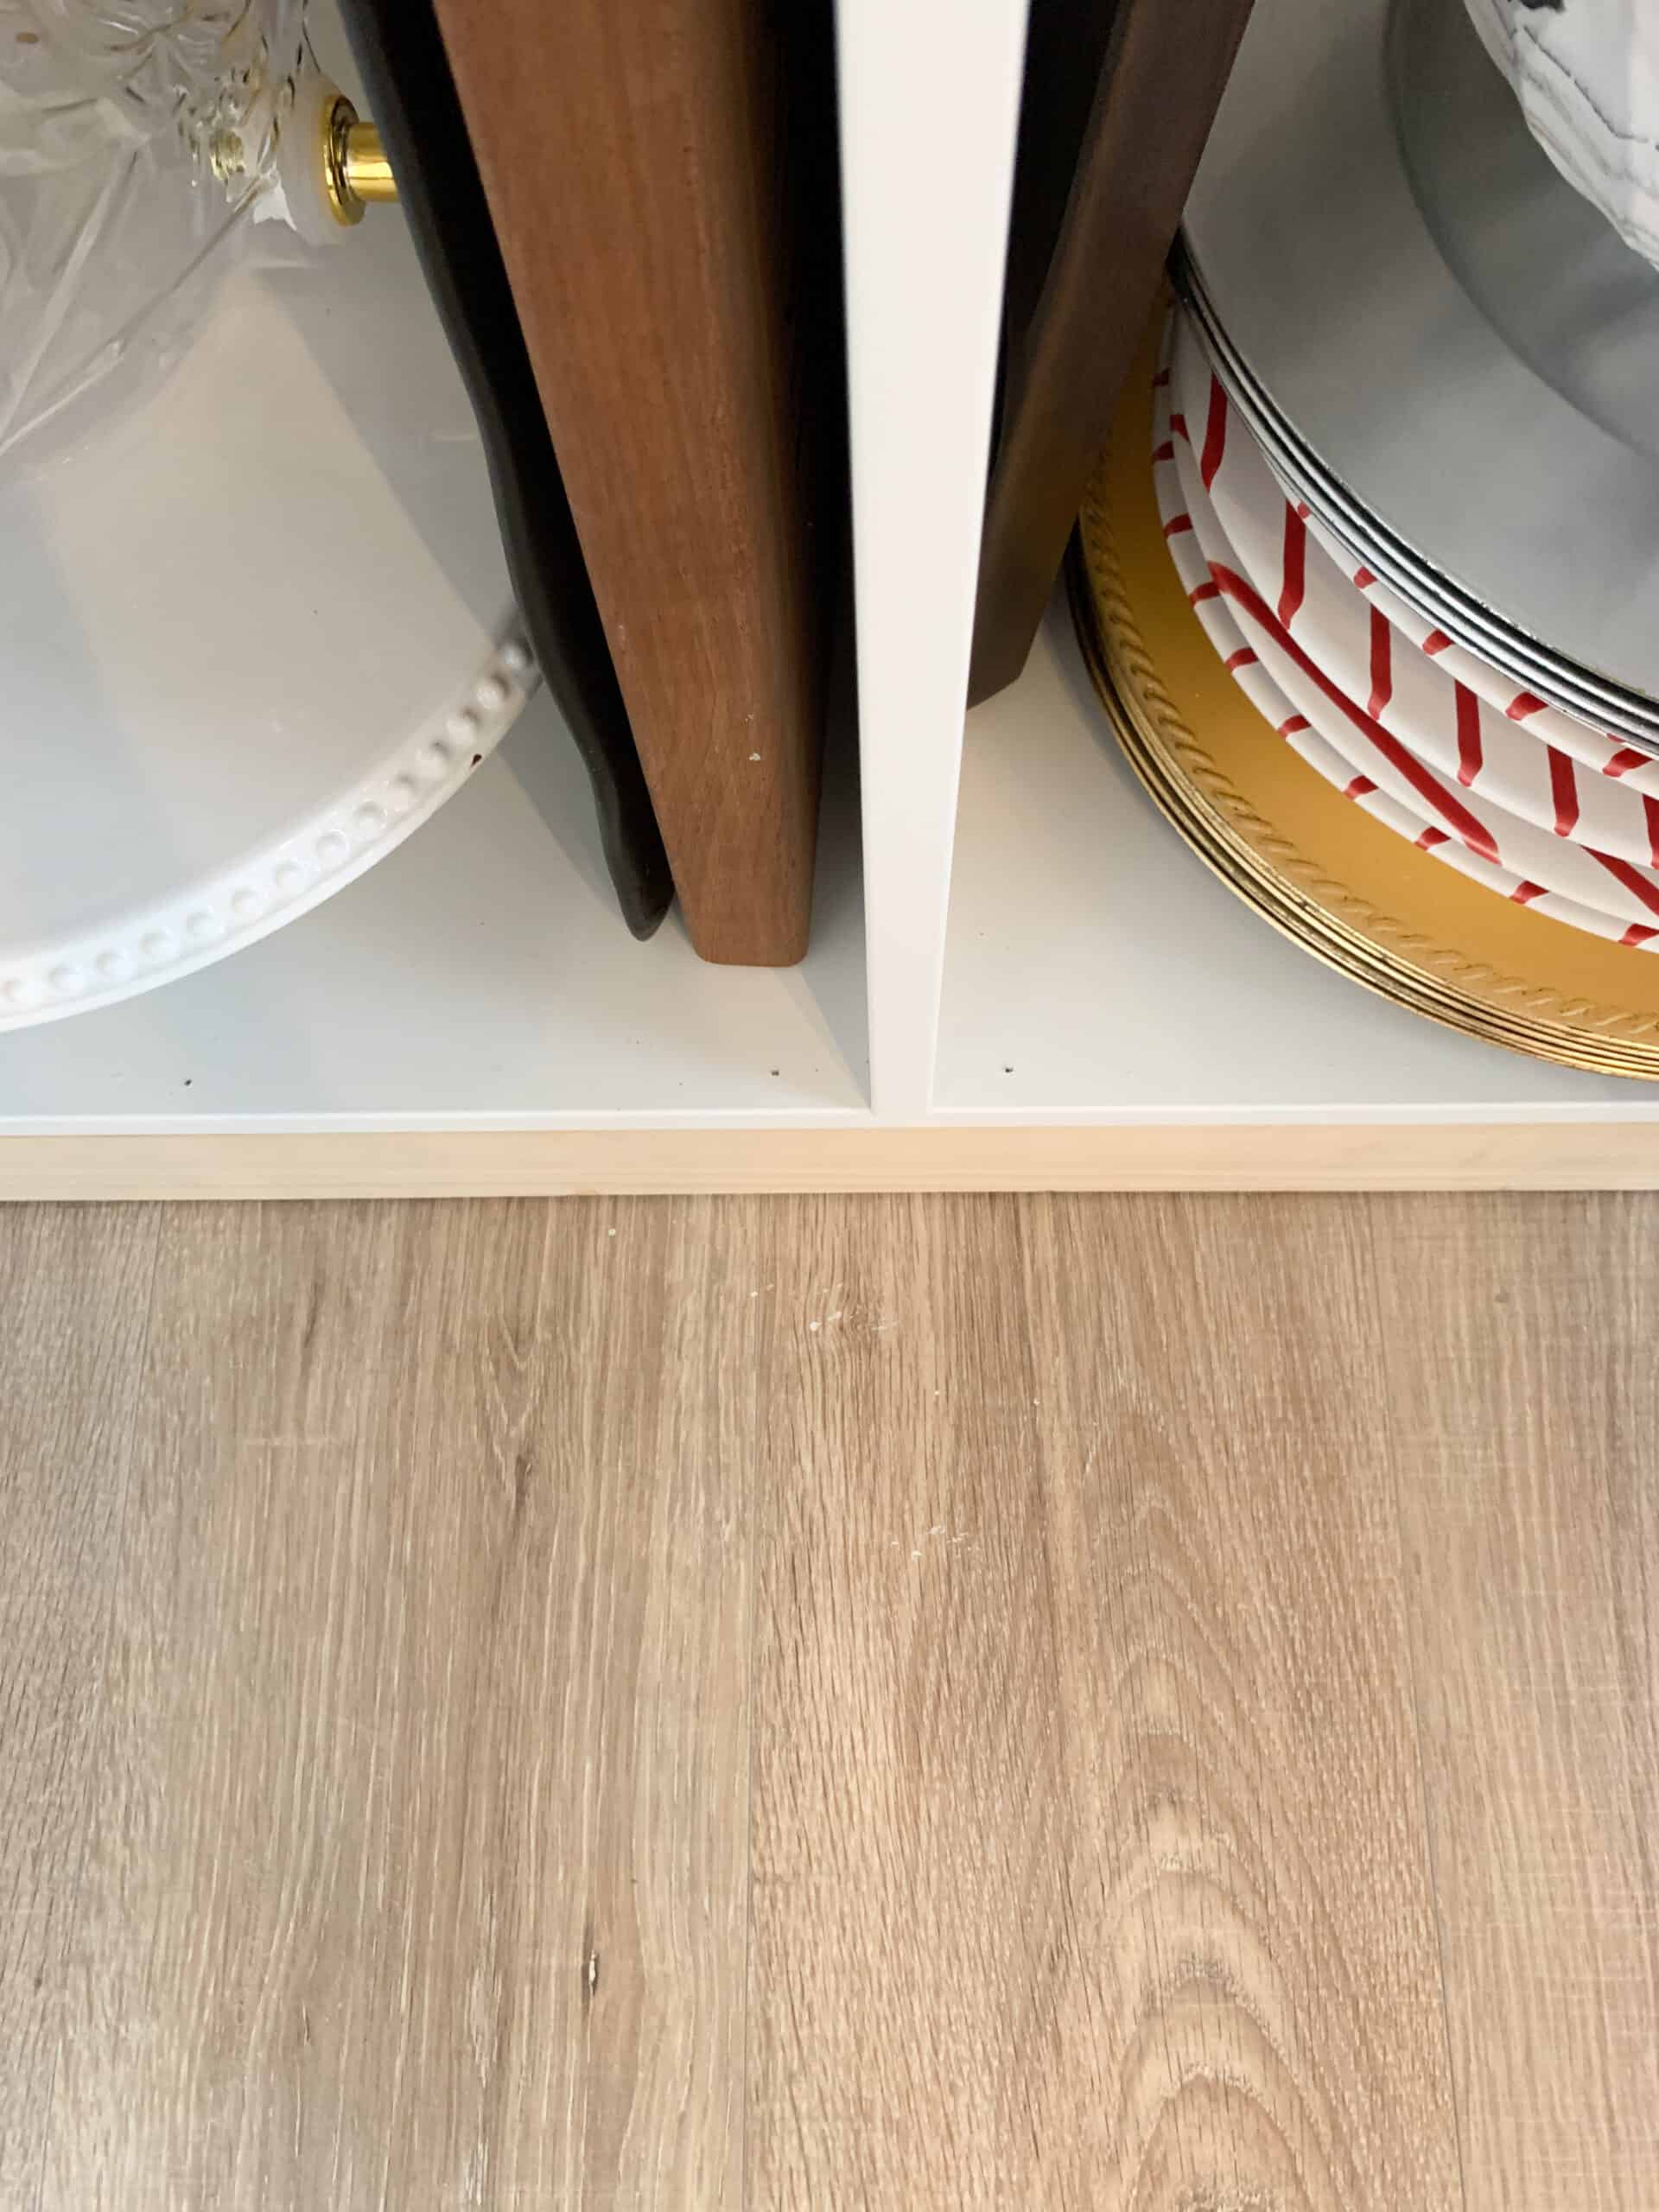
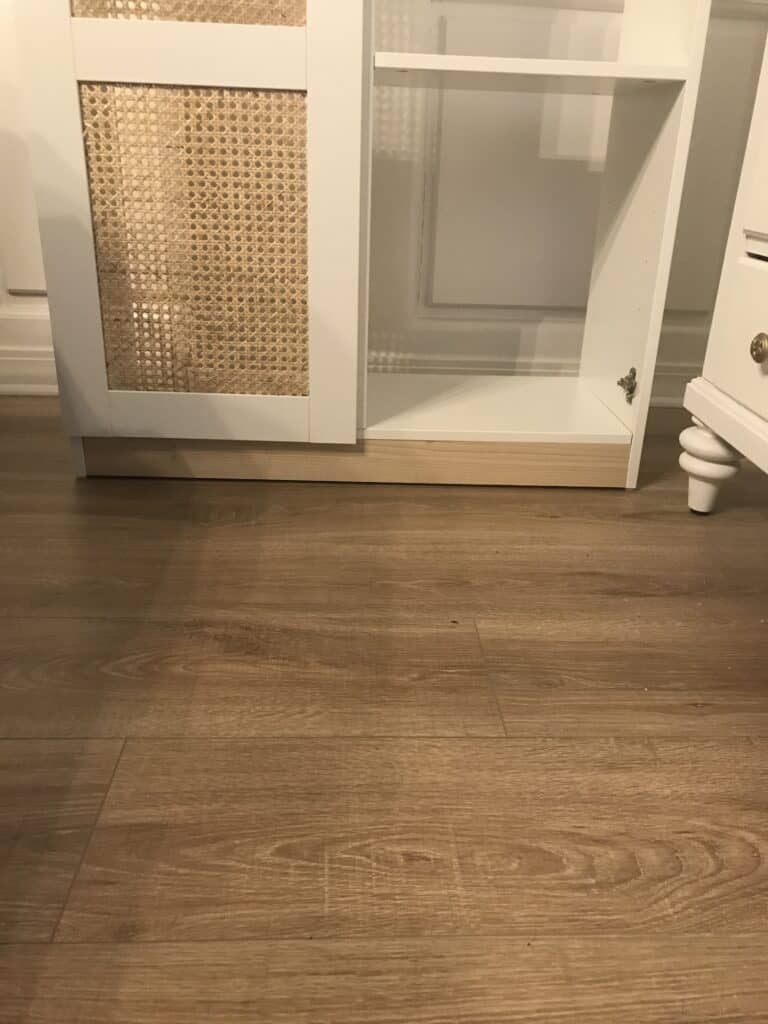
Now your IKEA Brimnes cabinet looks pretty well put together, but one thing I am not a huge fan of when it comes to IKEA pieces is that bottom piece. To me it has a slightly inexpensive look to it (because you know…it is), so I wanted to find a solution.
We took a board and nailed it in from inside the bottom of the cabinet. I left the board natural because that was actually a detail I loved about the alternative cabinet I mentioned above, so I thought it added interest.
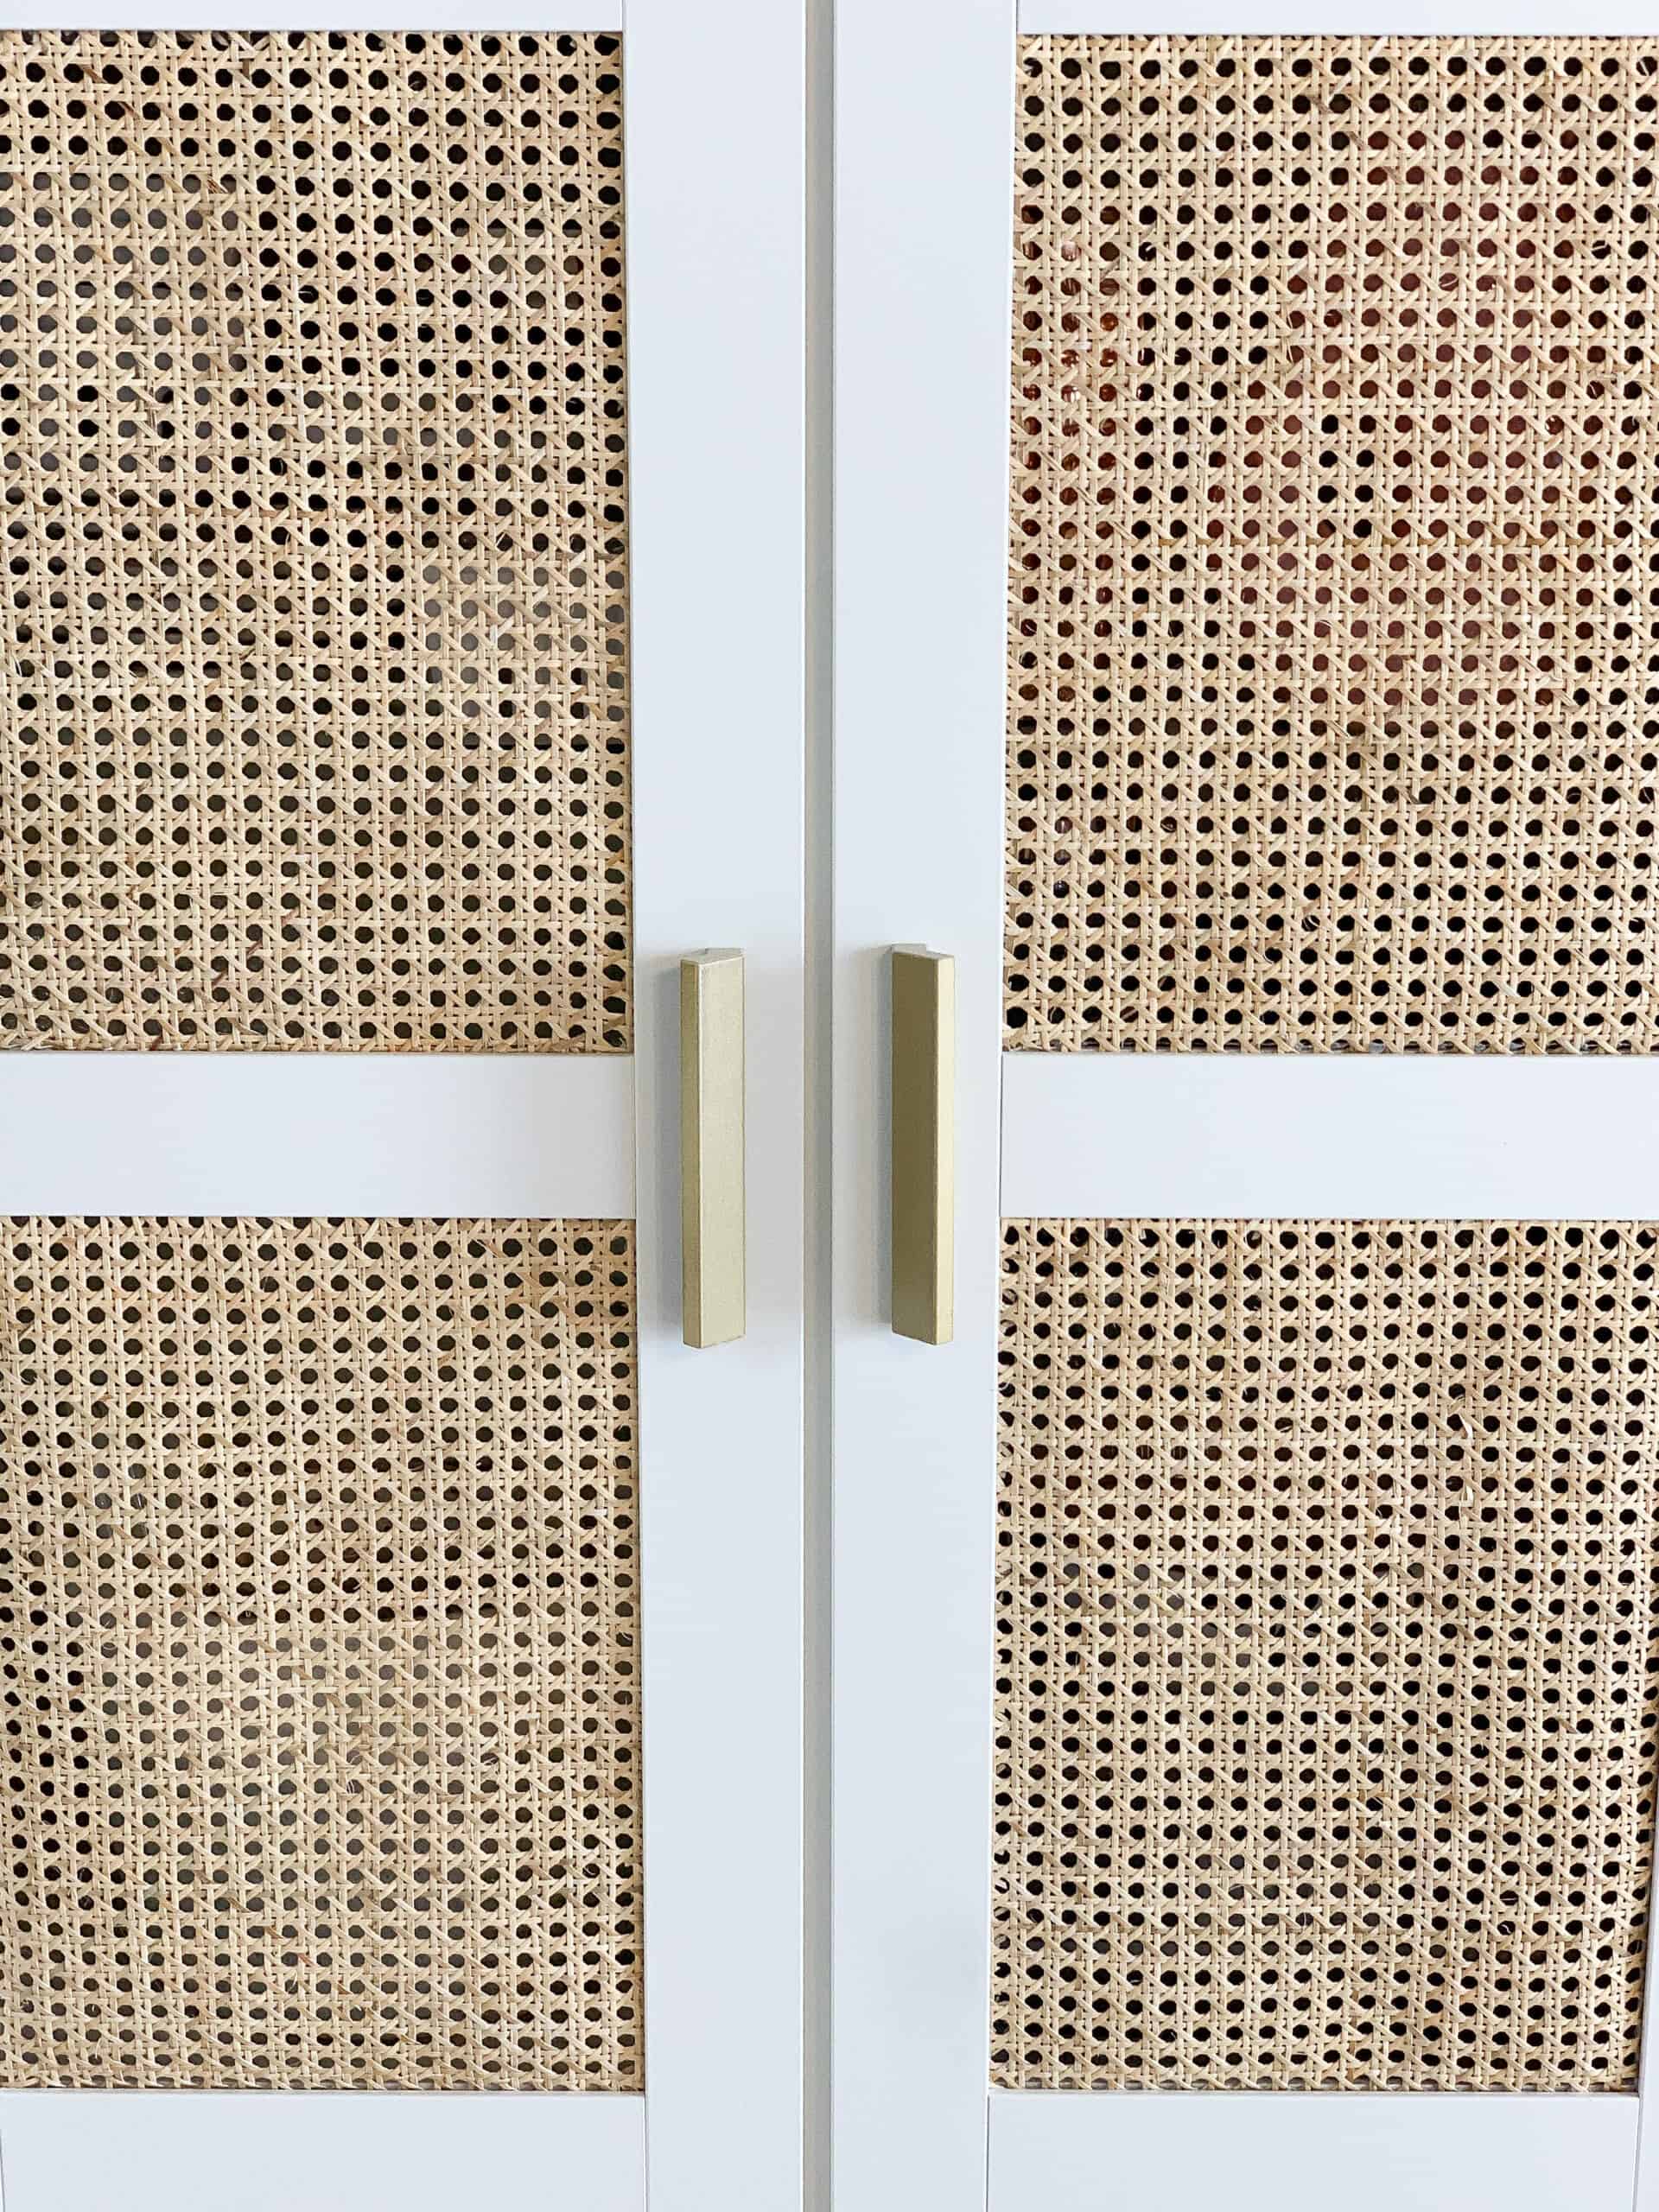
For the handles, I actually originally purchased pulls from a local store that I loved, but the measurements on these is not exact, and they didn’t fit.
We decided to try spray painting the ones that came with it gold and I figured if I didn’t love them, I would throw them out and buy another set. I LOVE the look of the handles that came with it painted, so it ended up being an affordable step!
Total Cost:
The total cost of this cabinet for me was $287. One thing to note – the cane is more expensive than the cabinet itself. It is definitely not a super affordable material, but made a huge impact and for me was worth it.
The gold spray paint and piece of wood were both items we already owned, so we were able to do this on a pretty small budget.
Overall I am super happy with the end outcome, and honestly am considering a second IKEA Brimnes down the road. Once we did the trouble shooting on the harder aspects of the project it really wasn’t too hard to put together.
I would say You will need about a week from start to finish, and be sure to order the cane right away so it is ready and waiting to be used.
Pin the Photo Below for Later
Pin the photo below for this cane IKEA Brimnes hack later, and if you have any questions leave me a comment below or dm me on Instagram!
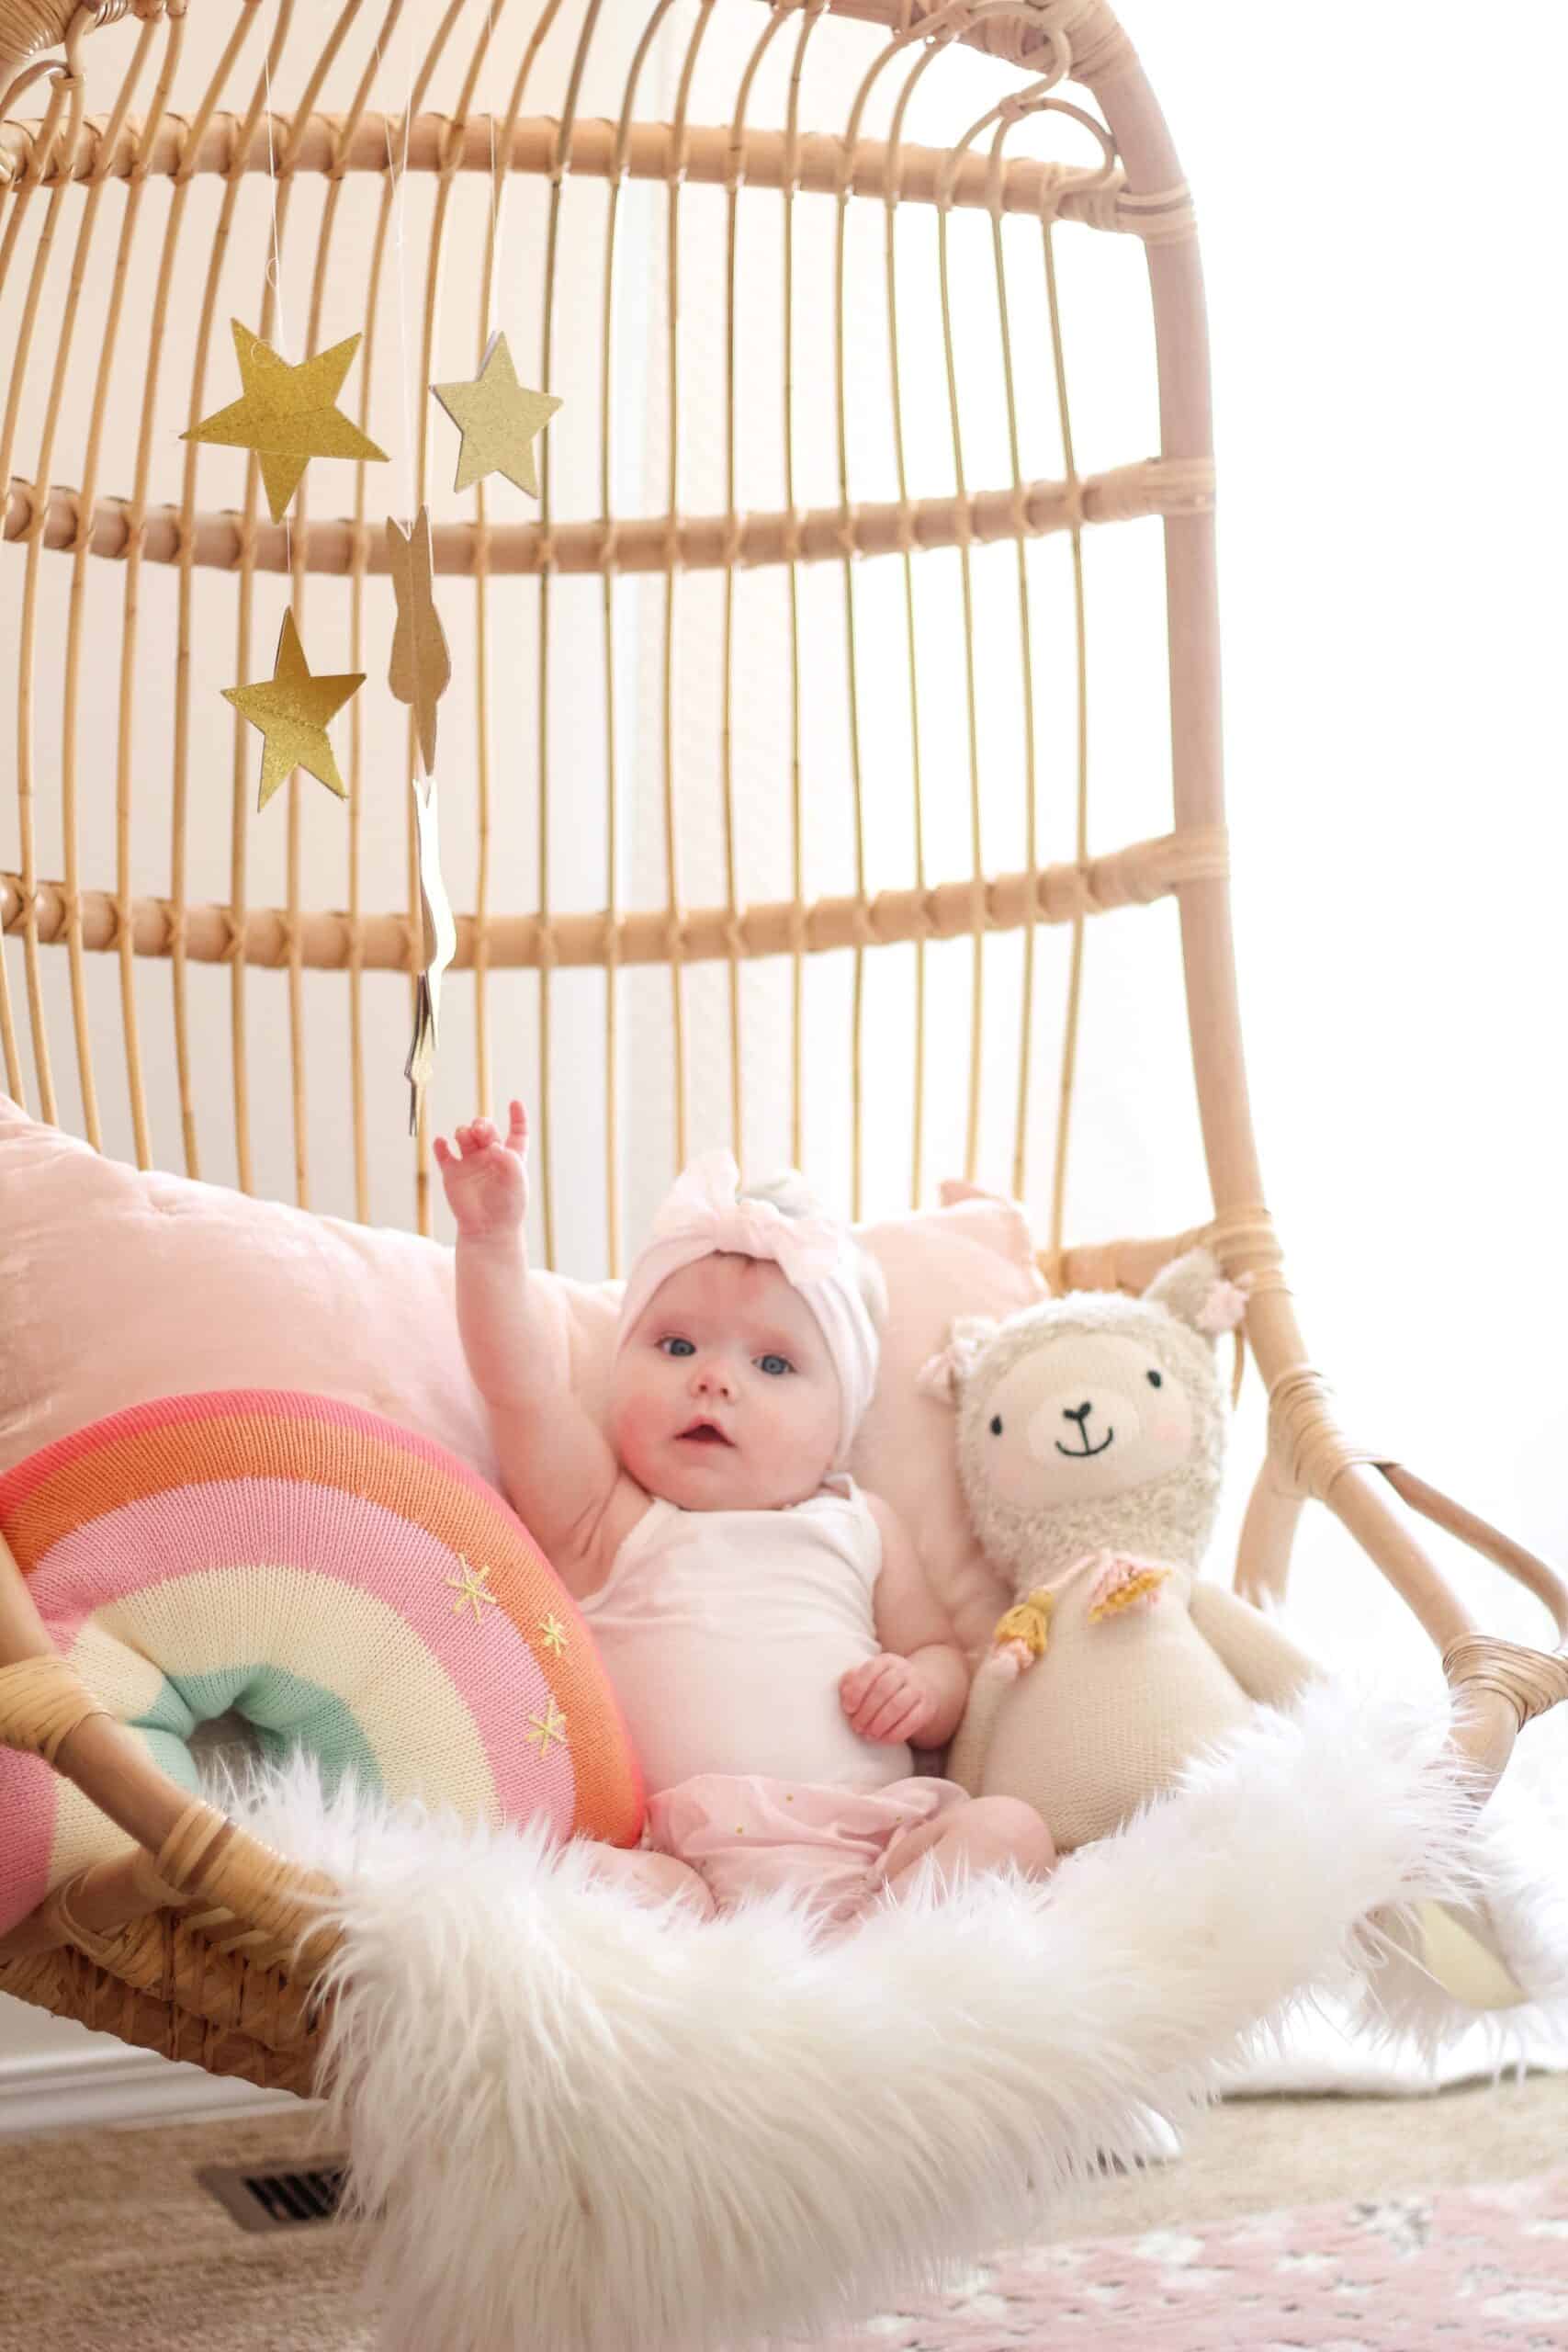
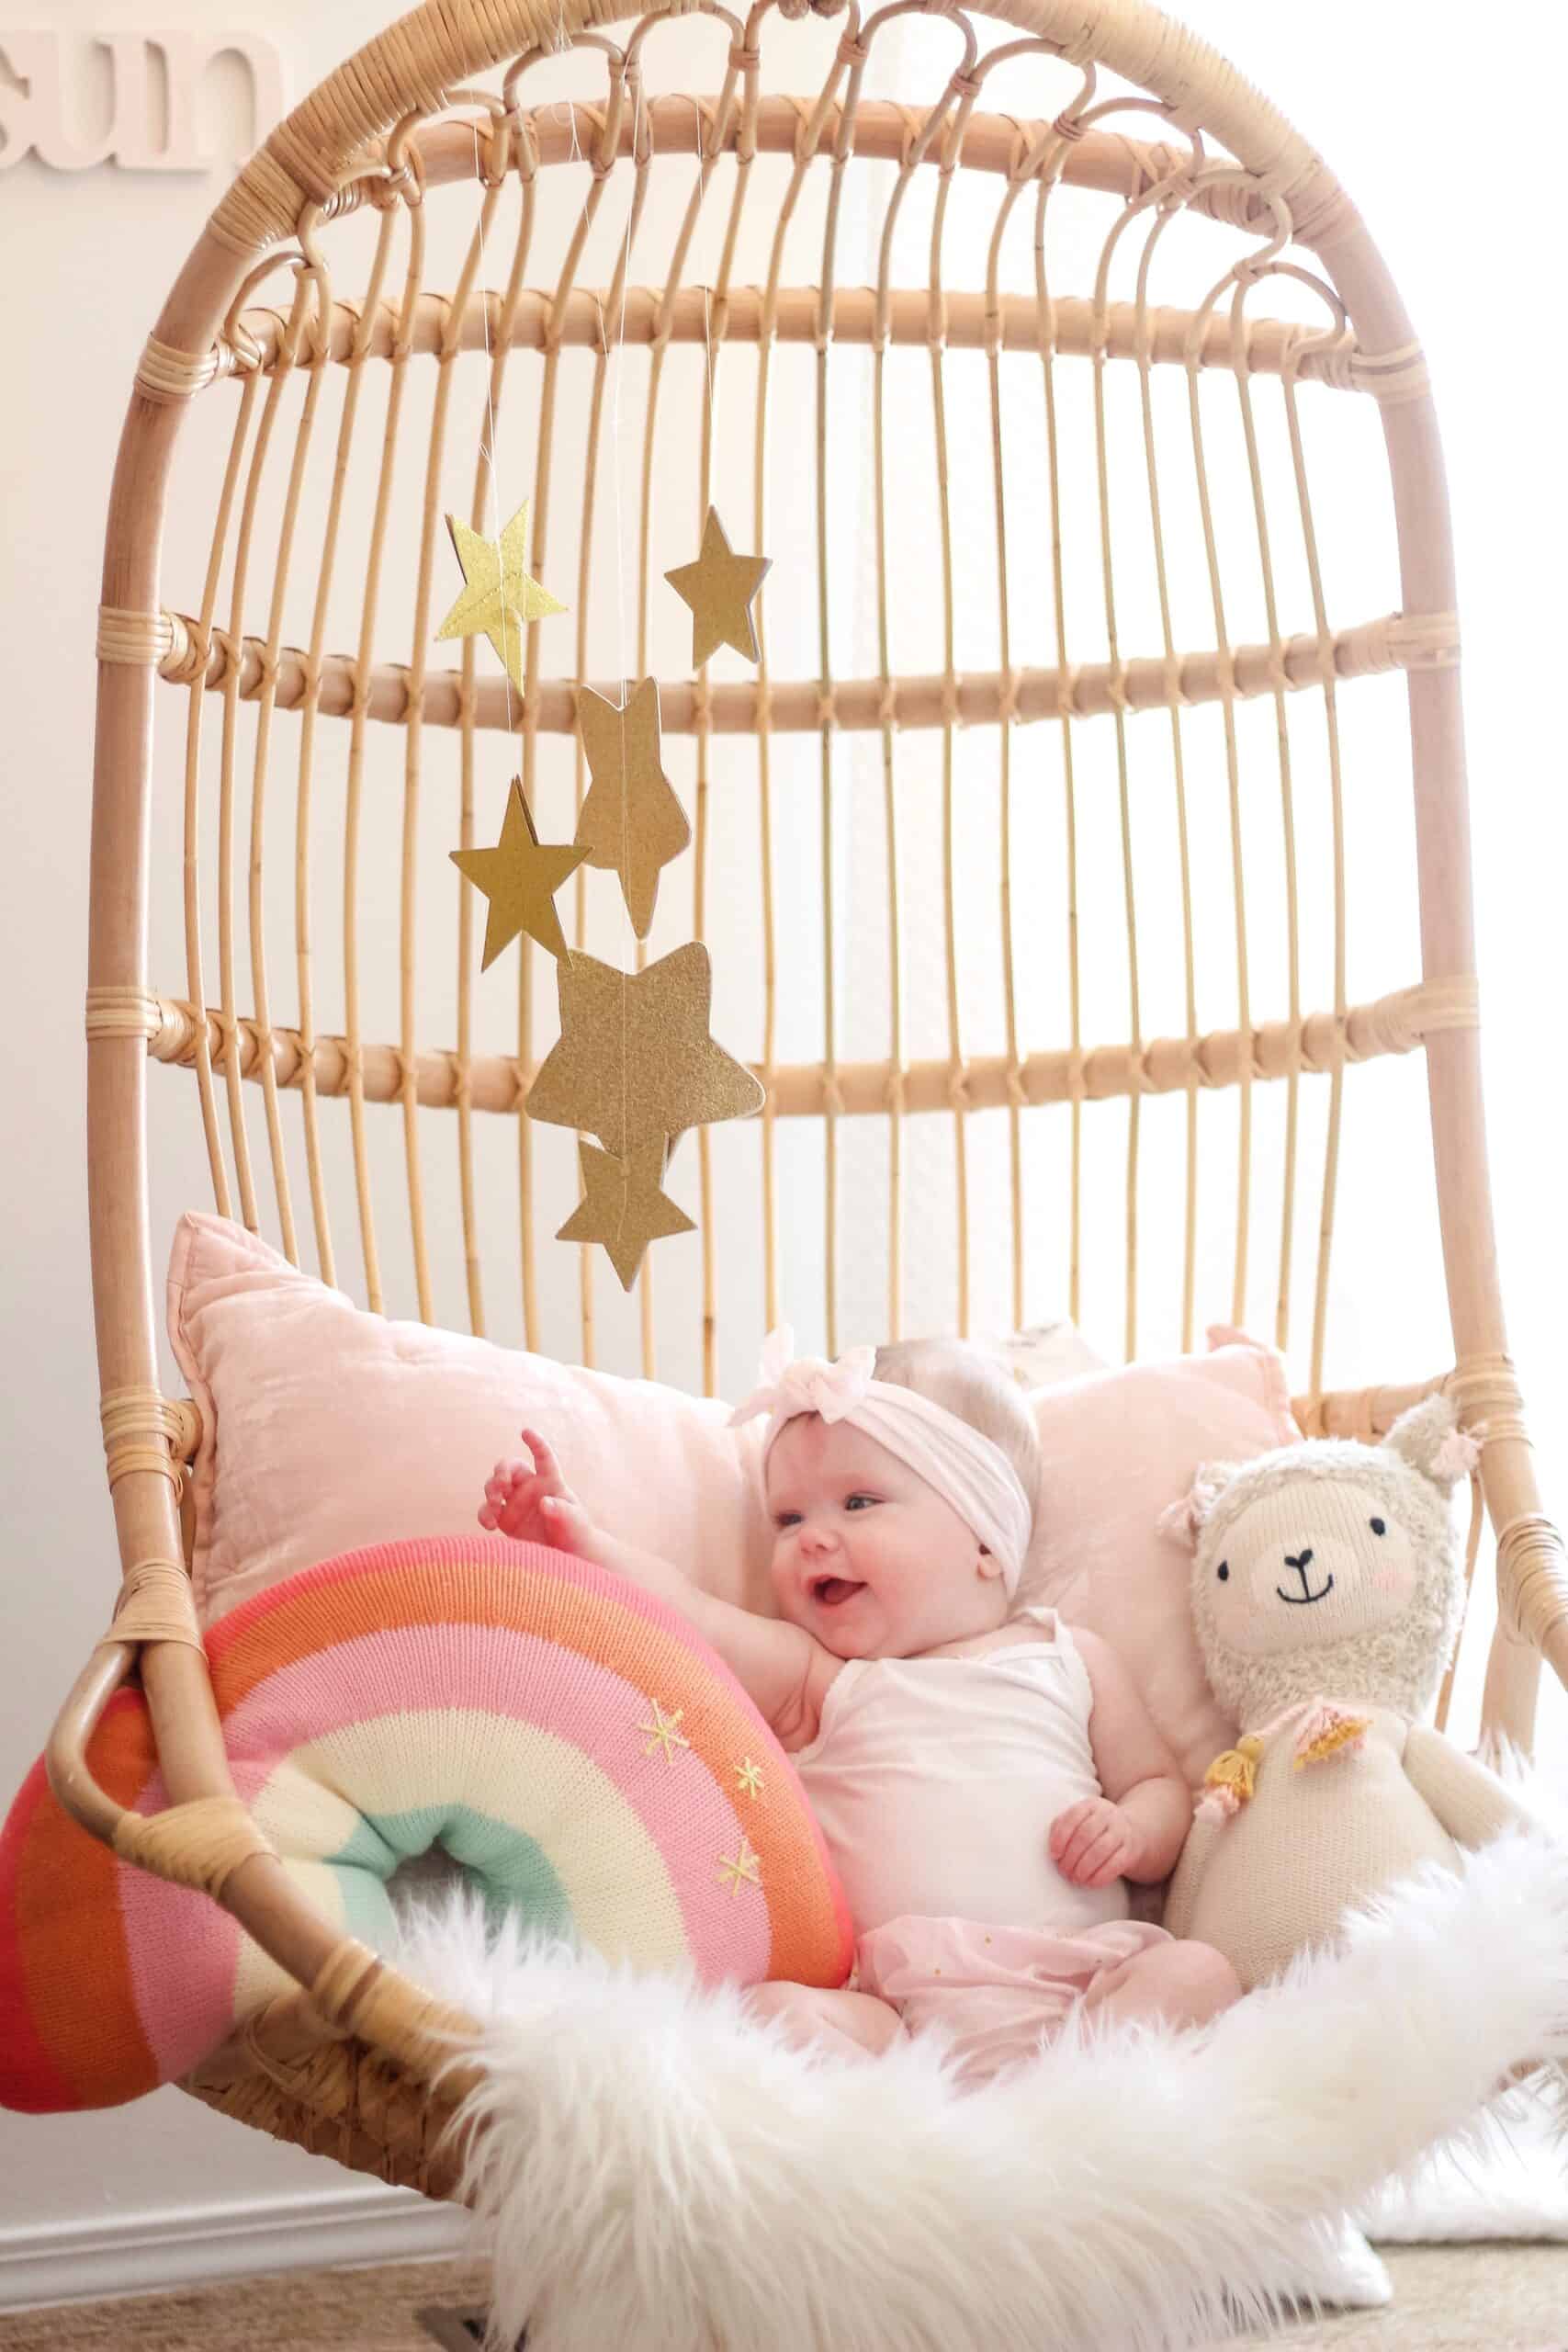
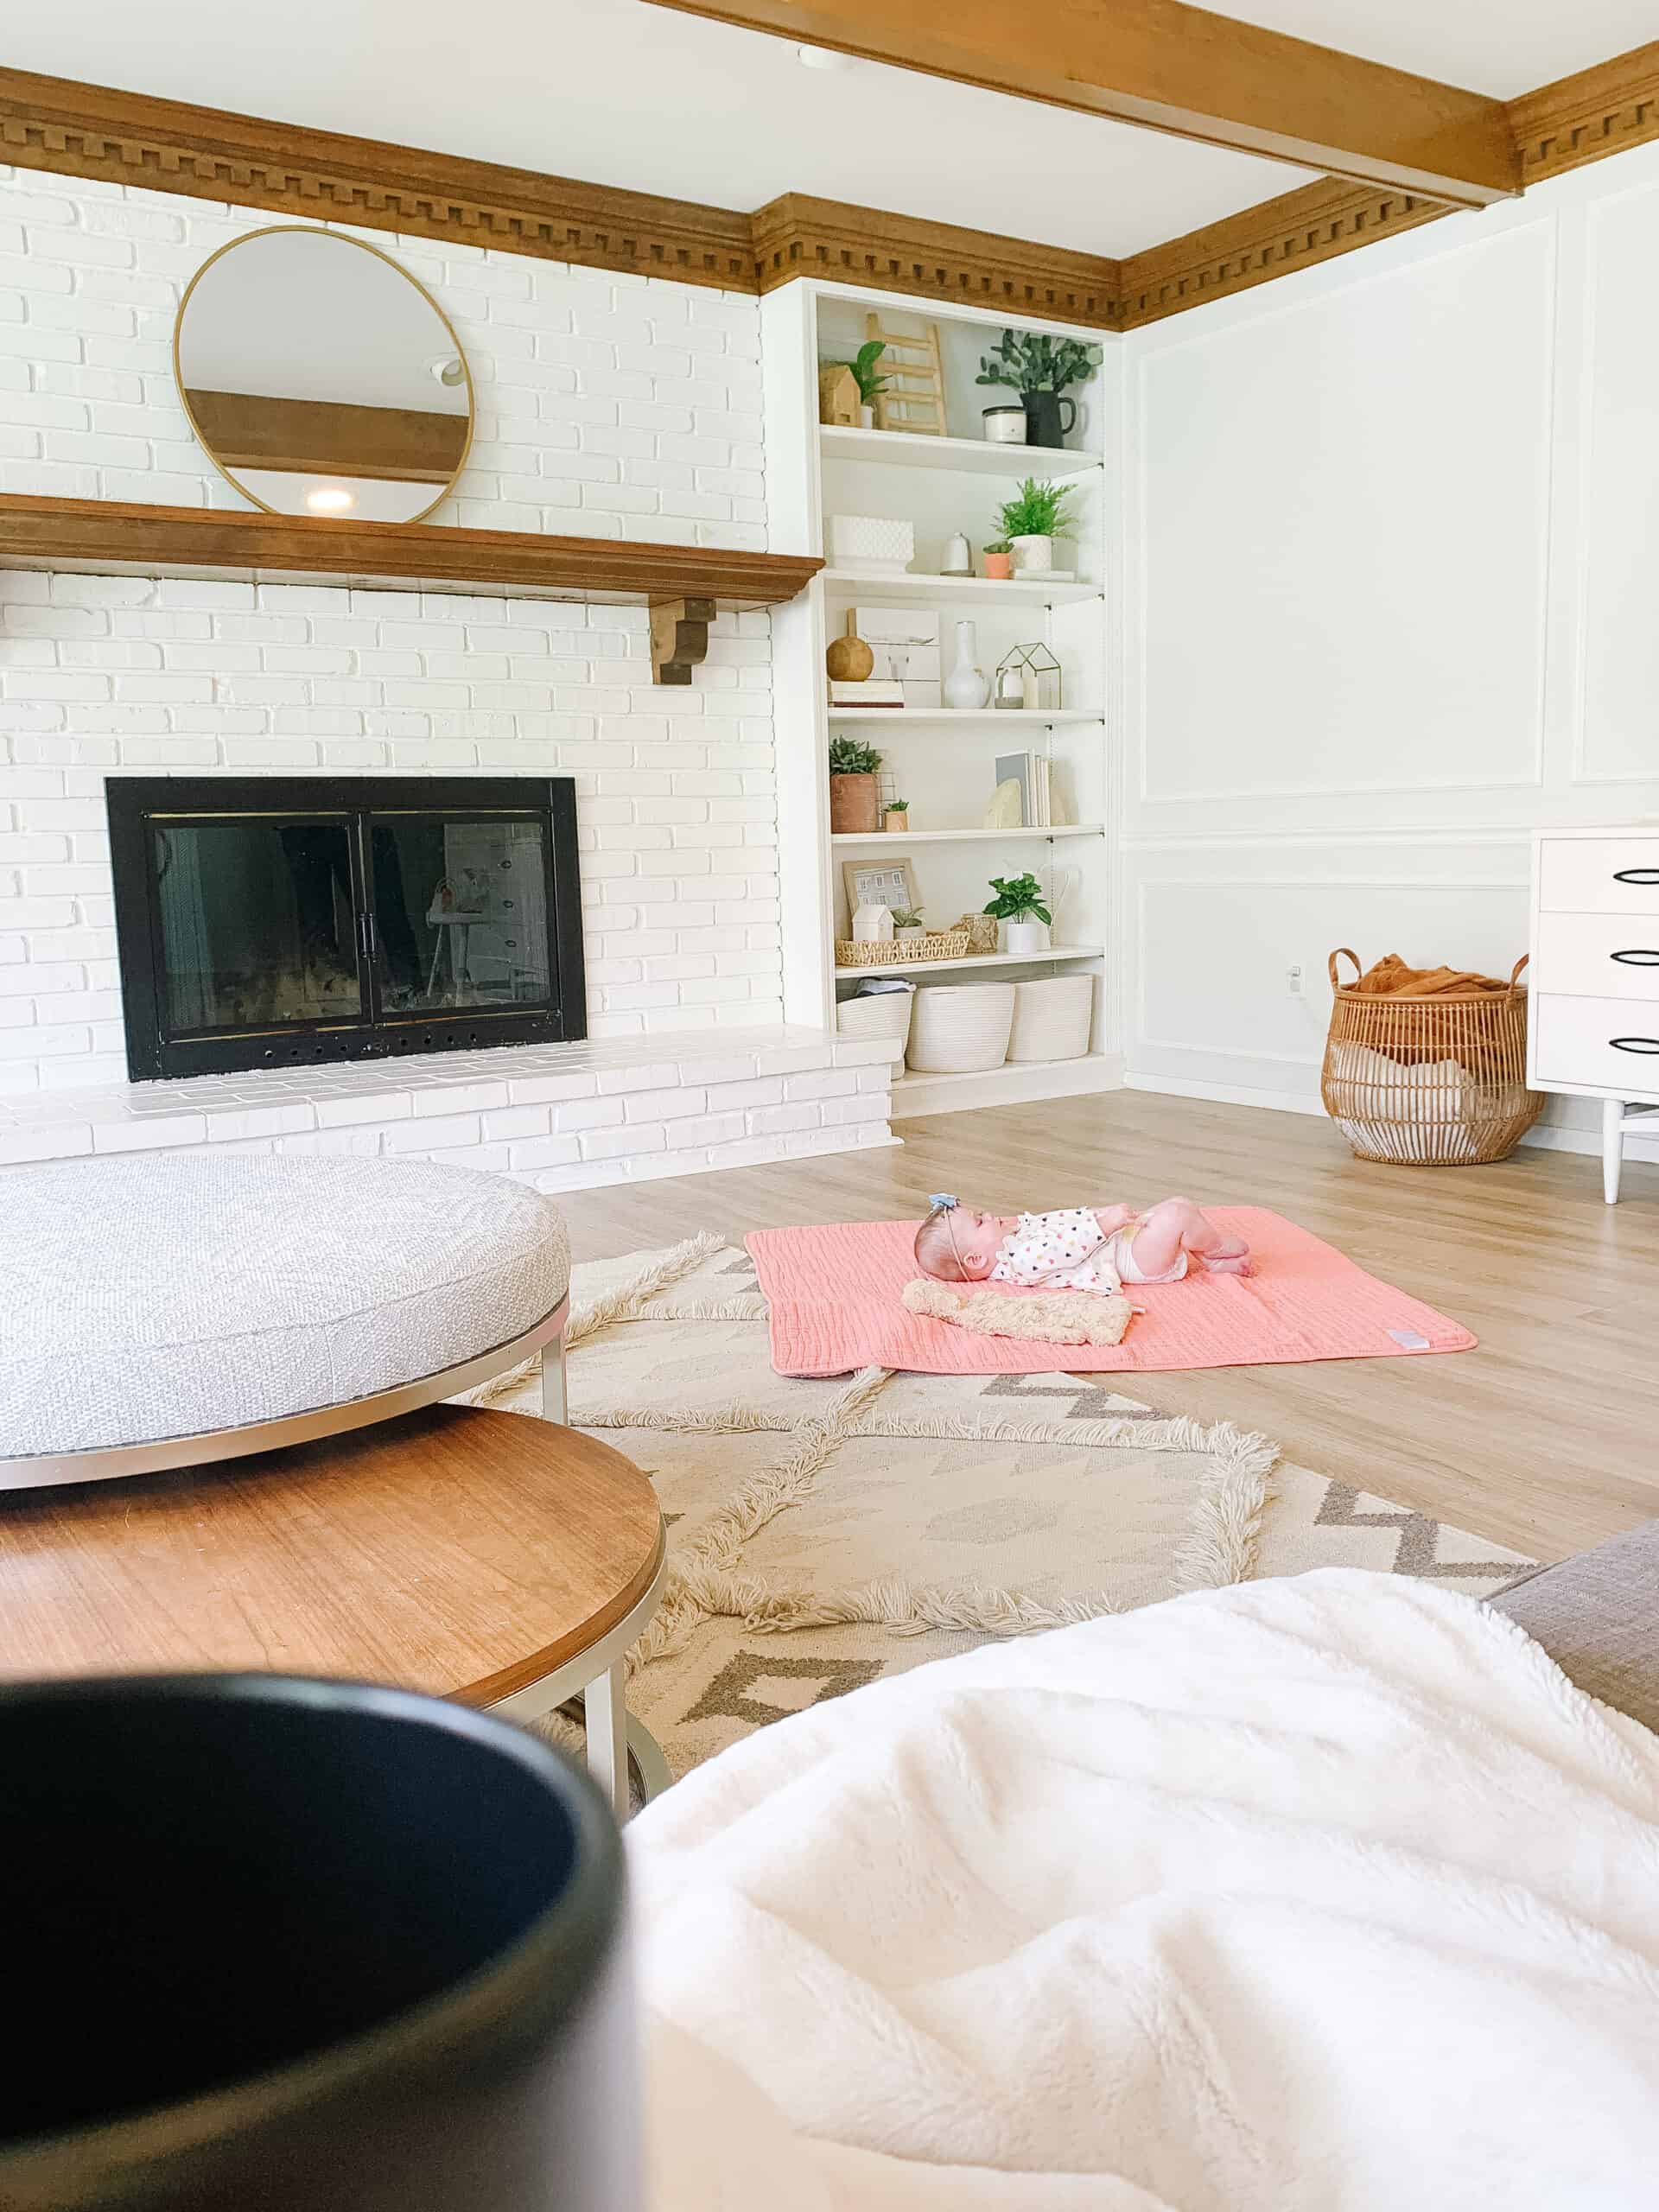
6 Month Old Baby Favorites – Goldie Mae 6 Month Update
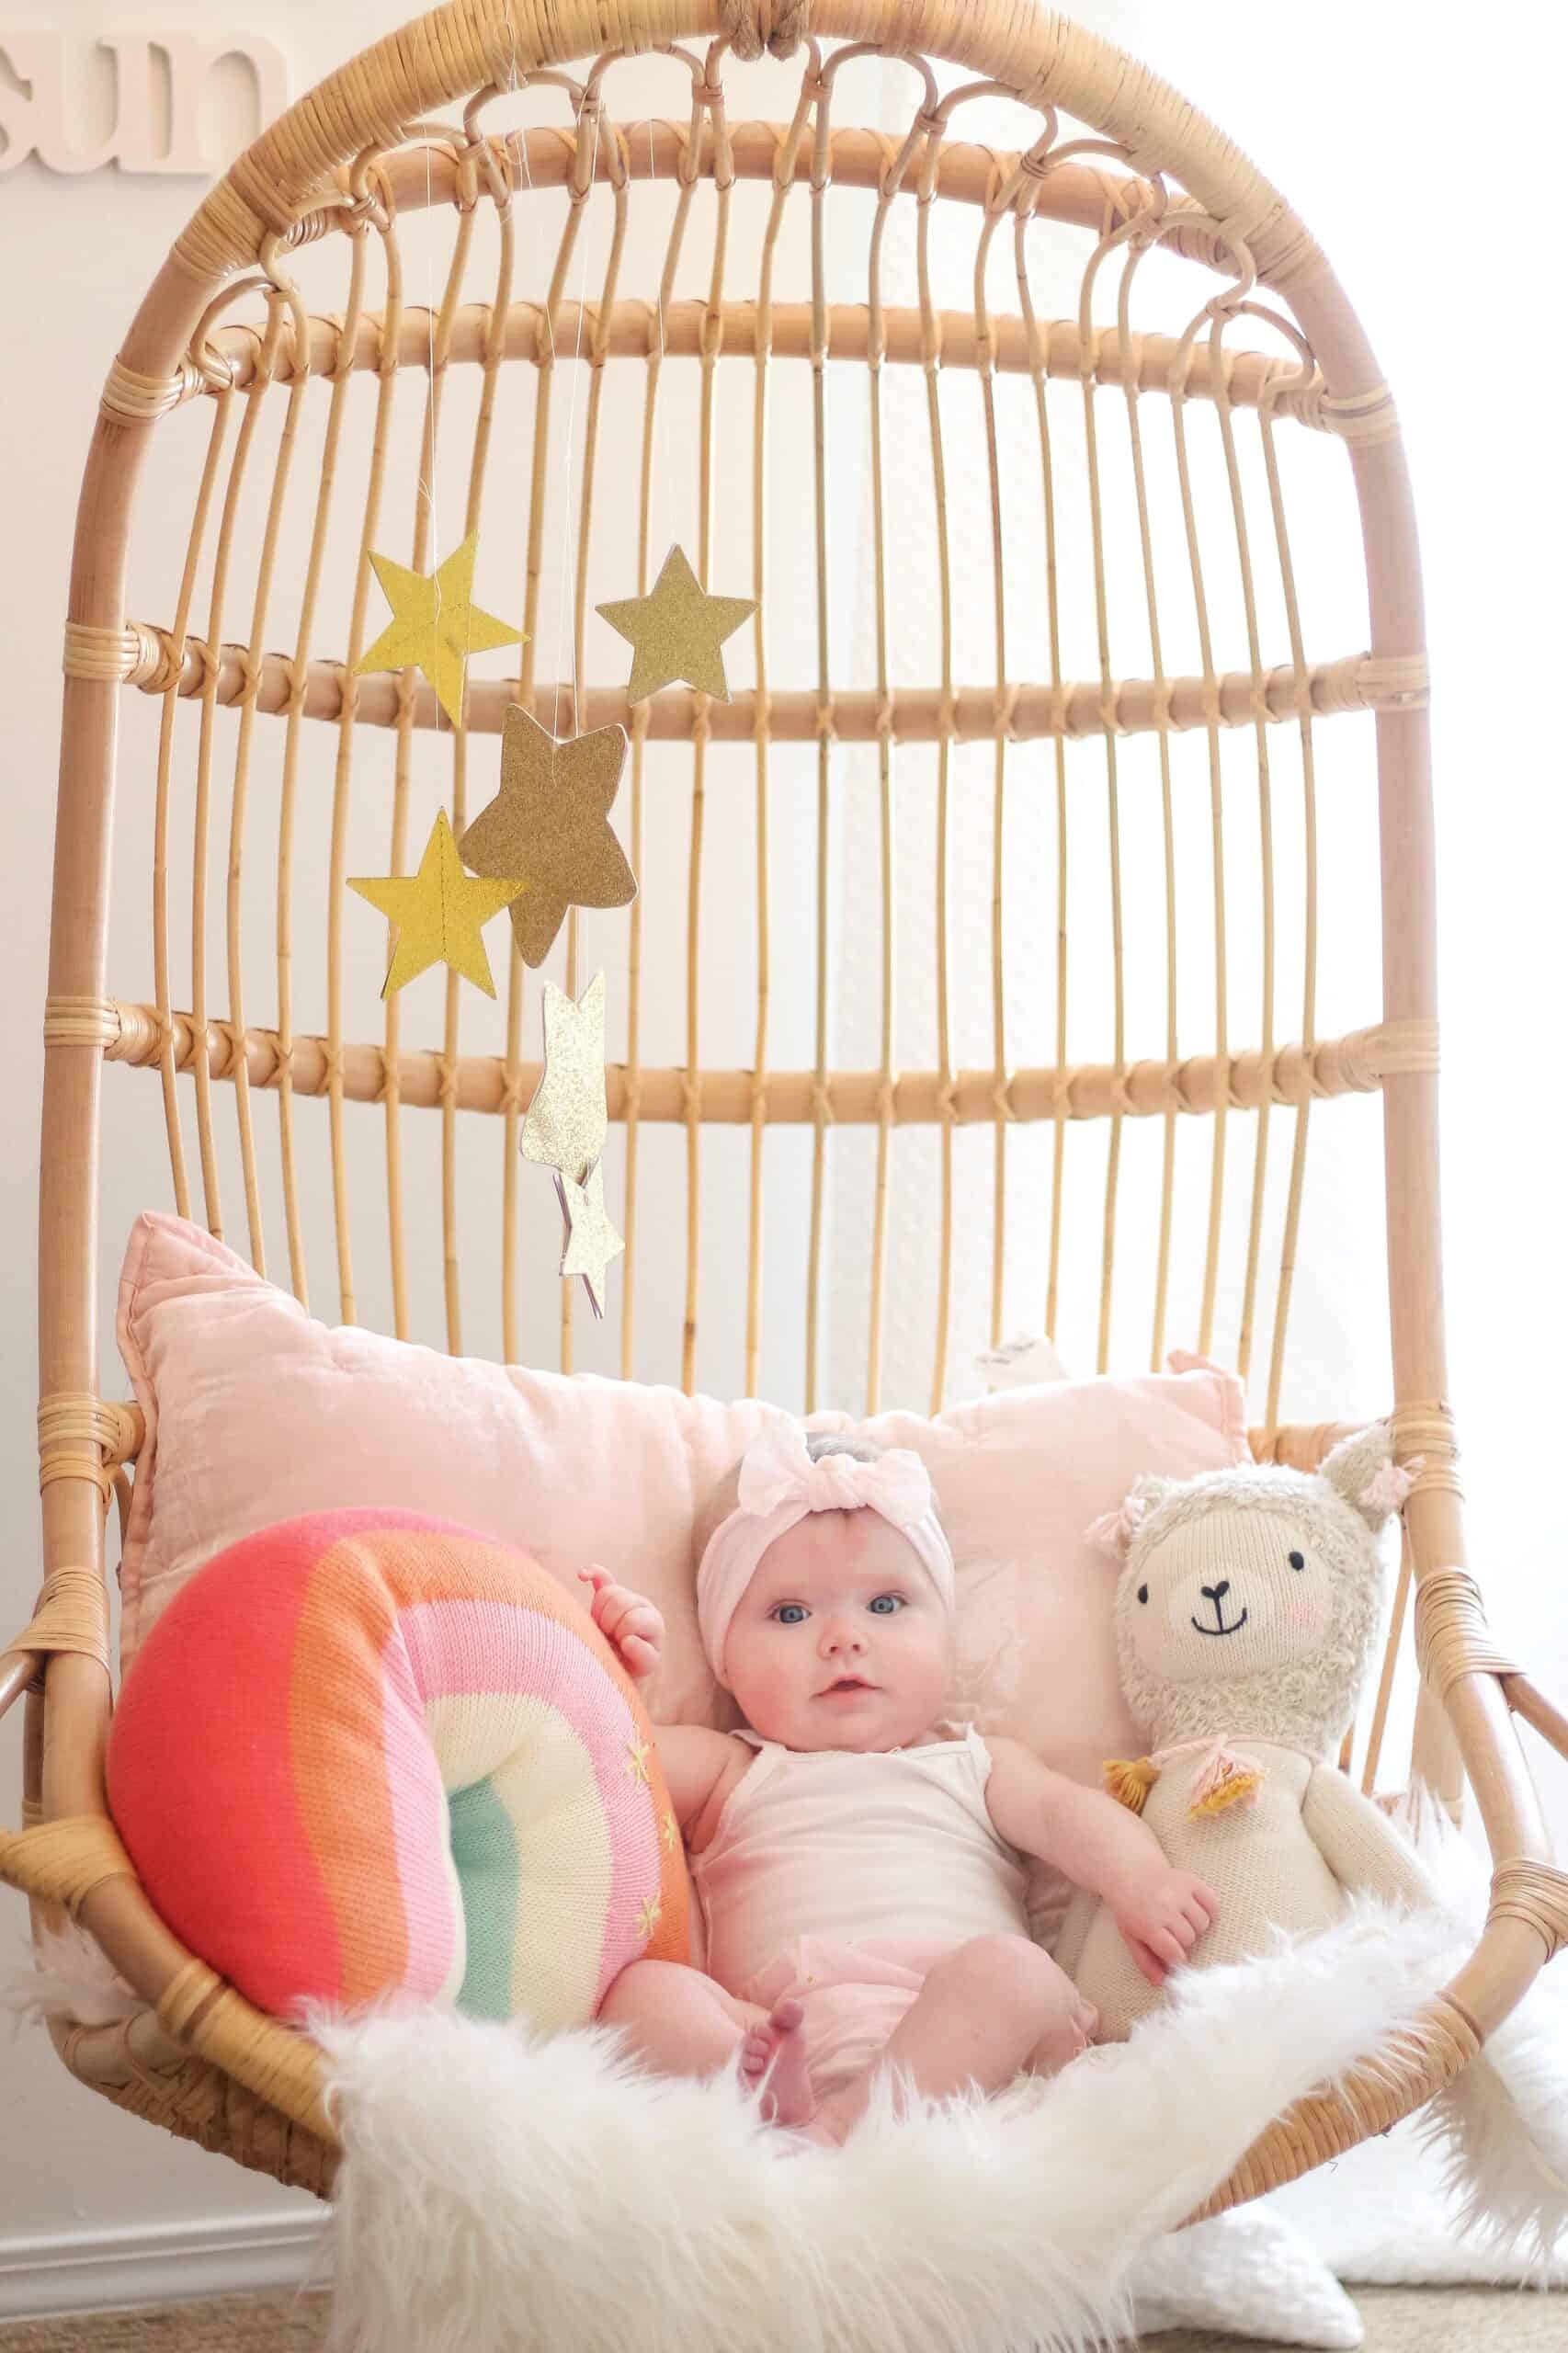
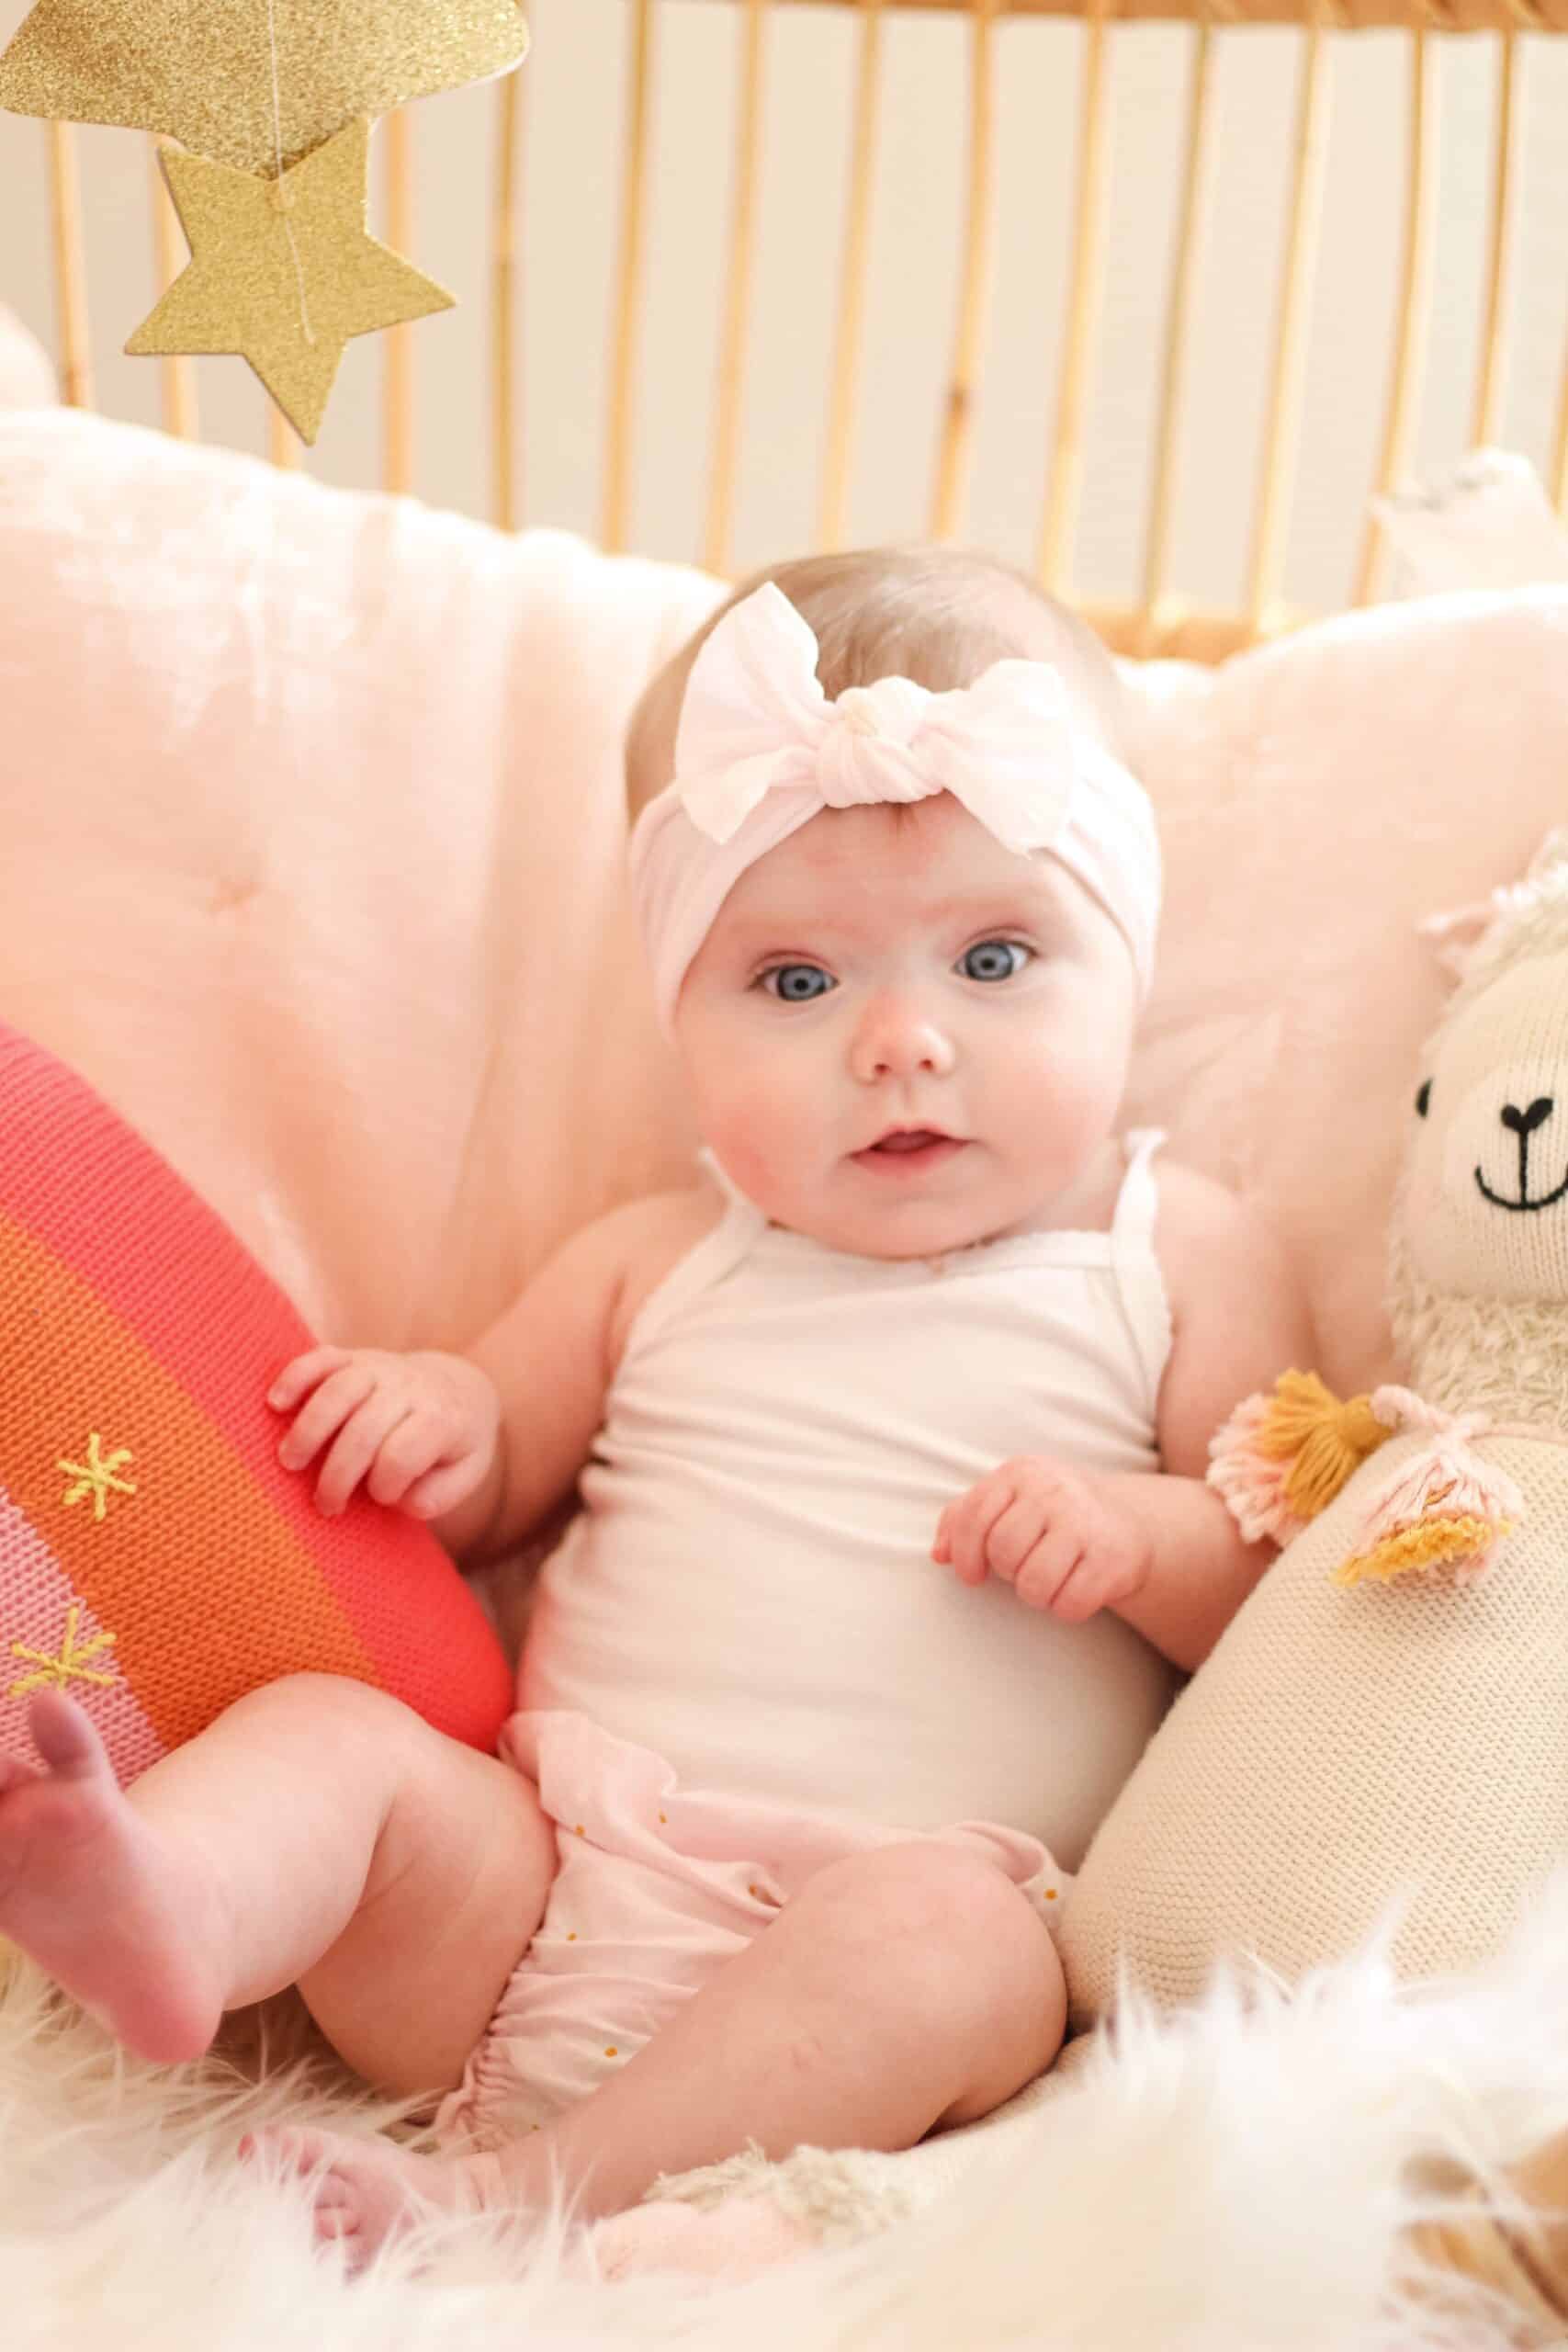
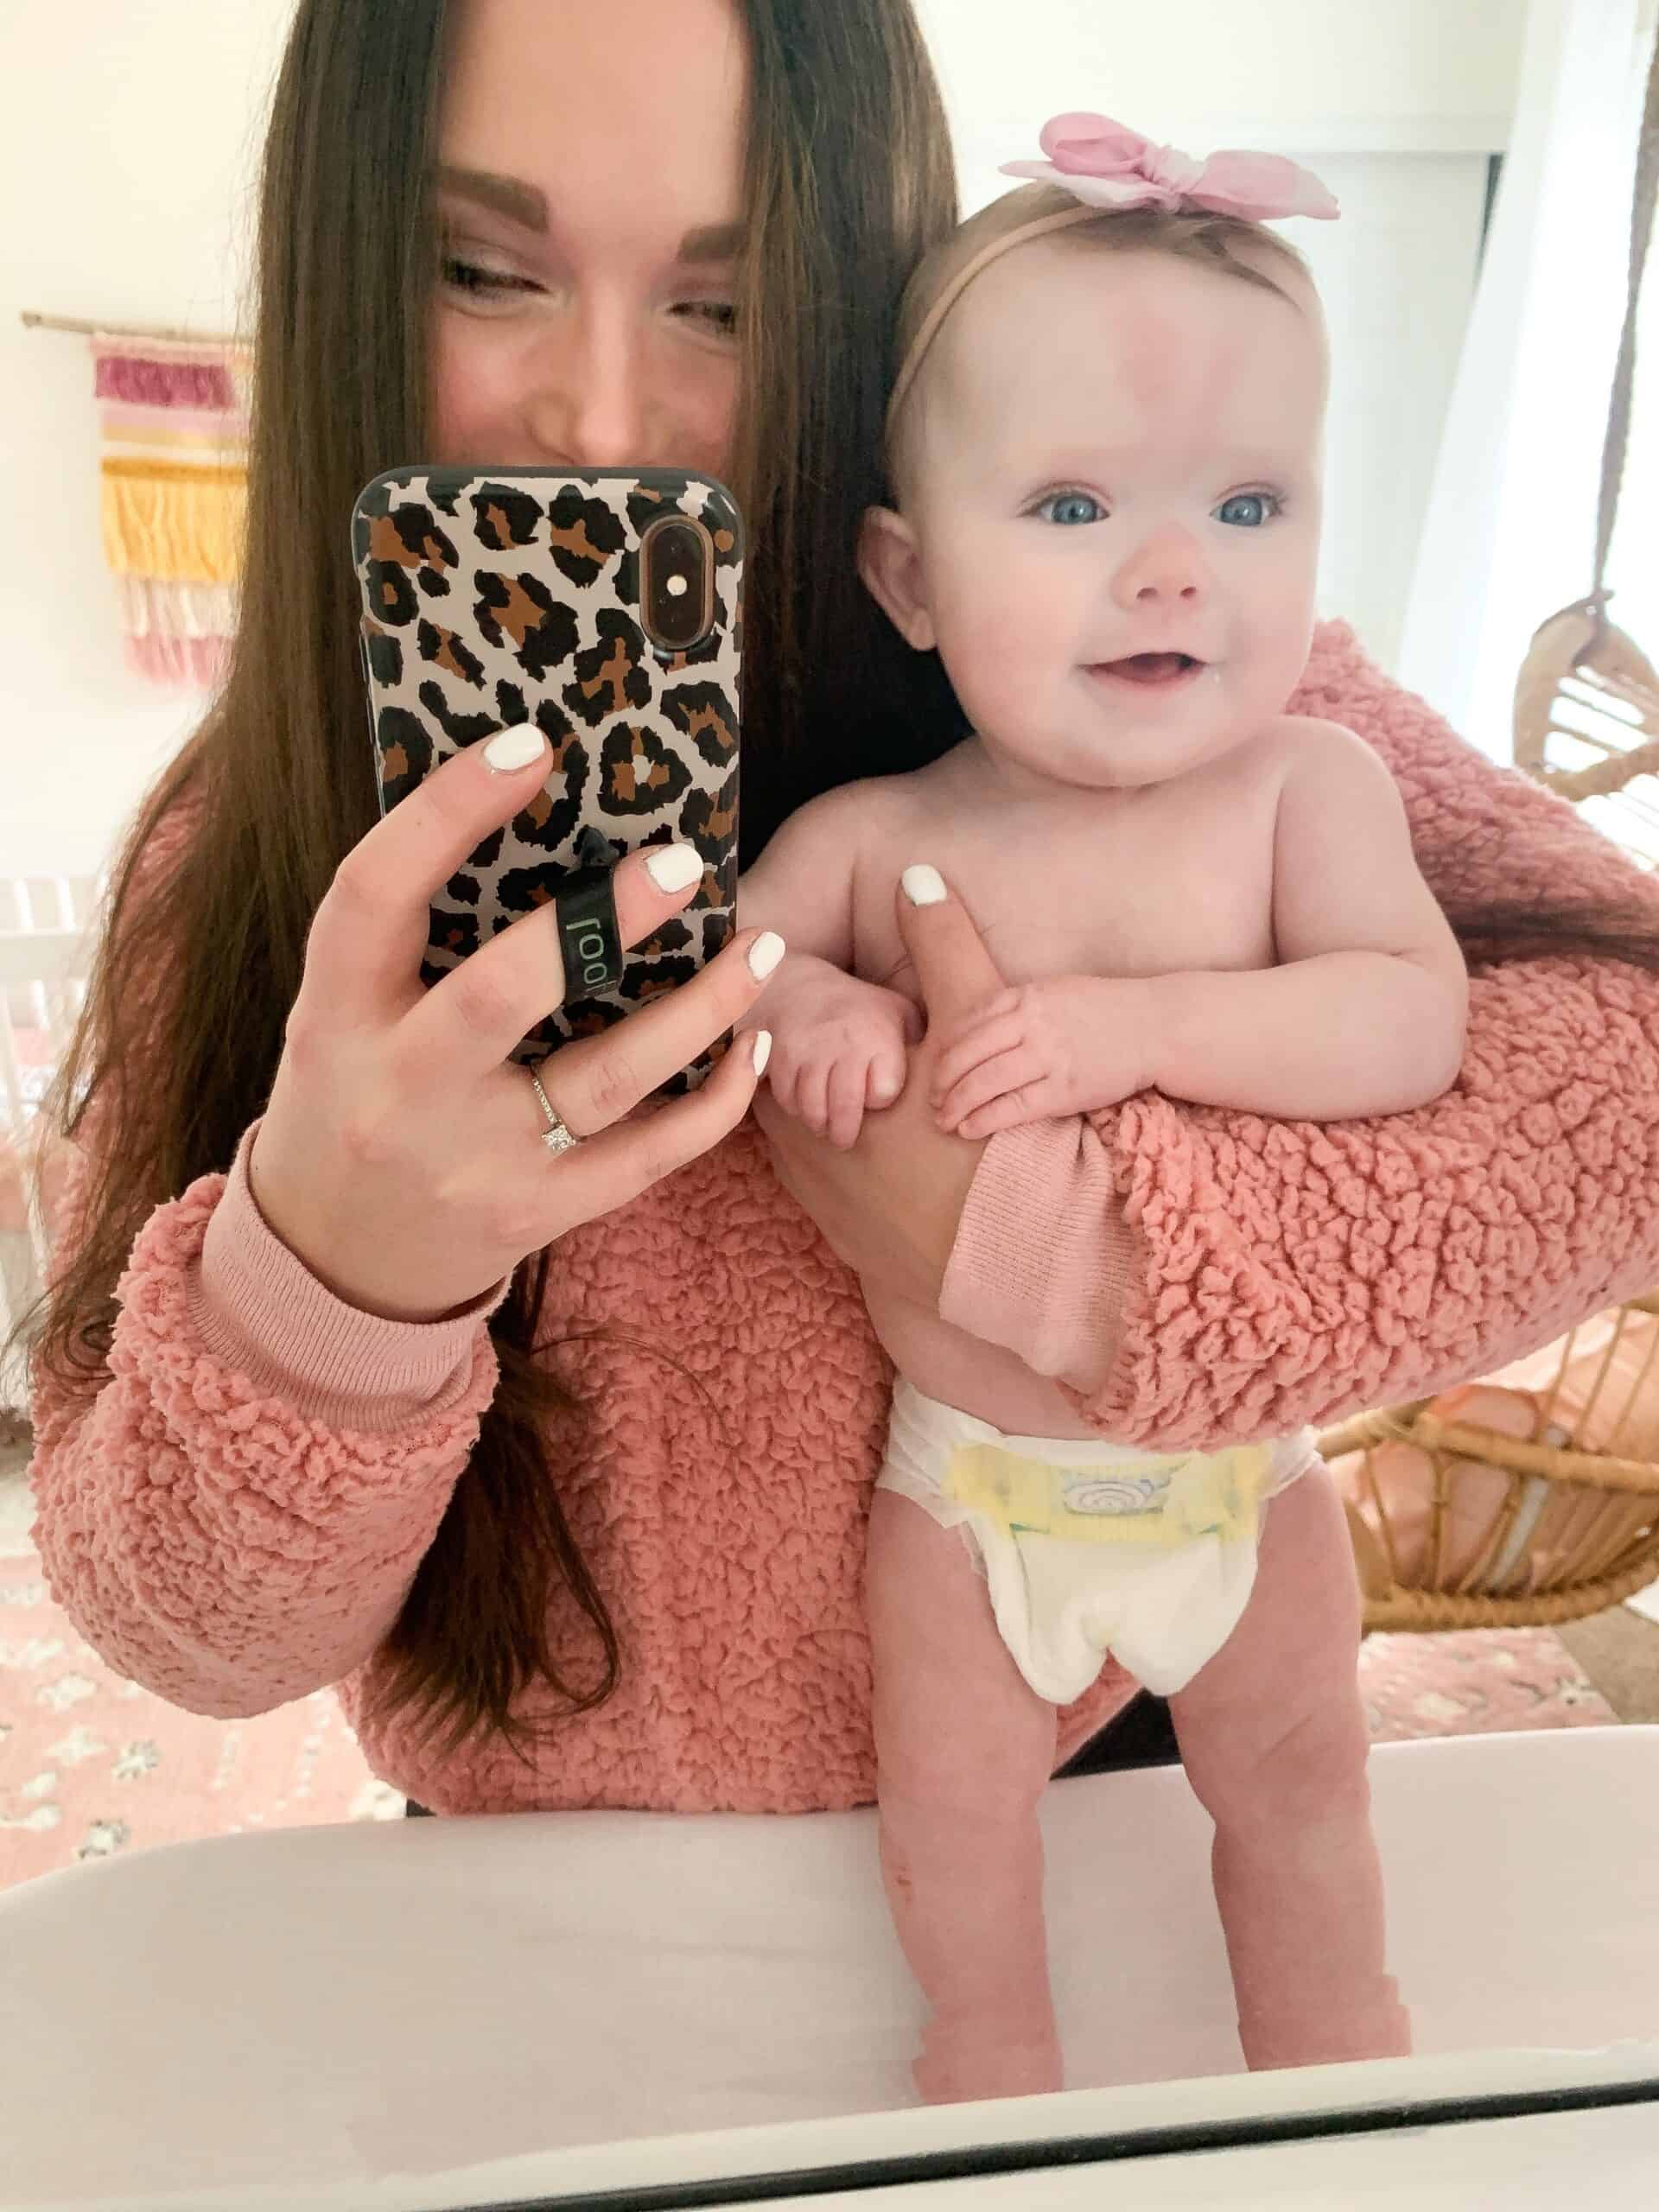
Our sweet Goldie Mae is SIX MONTHS OLD! HOW? How on earth do I have a 6 month old baby again? I am obsessed with this age, and especially with her, so it feels so bitter sweet. I think because she’s my 4th I am so aware that this stage will come and go with a blink which breaks my heart. But I also think because she’s my last its extra heart breaking.
This post contains affiliate links
As with every other month I am going to share our favorite items for her this month, as well as some updates on that sweet peanut.
6 Month Old Baby
Goldie Mae
Our sweet Goldie is 14 lbs and 26 inches long. She is definitely on the petite side, and reminds me size wise a lot of Jack at this age. Actually as far as looks reminds me a lot of a mix between Avé and Jack right now.
She is rolling both ways, trying to sit up, and loves to play with her toys more and more each day. She is seriously SOOOO smiley, but man oh man it takes a lot to et her to laugh. It actually is hilarious how hard it is to get her to laugh.
She loves when we sing to her, she sleeps pretty well and is down to just PJs which is great!! Her skin is still a battle, which isn’t fun, but thats okay, I think once the weather warms it will get better. Unfortunately we are no strangers to eczema for babies, and I know it will get better!
6 Month Postpartum Update
6 months of baby means 6 months of getting back to normal for mama. I am feeling better and better every day, and honestly feel like my body is fully healed from the c section which is great.
I definitely have a long way to go on losing the weight I gained which is so hard for me. I told myself that by a year so I know I have time, but honestly most days that doesn’t help. I have been making more and more time for working out, but this time getting back to the gym has been HARD time wise. Between having the moving parts of so many other people schedules, and my job, plus trying not to take Goldie out during the flu season. It has been rough.
Overall I would just say I am so so mentally and emotionally. I am getting better every day, but also just learning the new normal. I have realized that I didn’t really prepare myself this time…because I thought how much harder can 4 be than 3? The answer during the first few months was a lot!
Walker is starting to get a bit easier, and she is getting to be even a tiny bit less needy which honestly has been a huge help. But overall, also because this isn’t my first rodeo, I know that things will get easier, and we are just trying to find a new normal and enjoy our sweet girl!
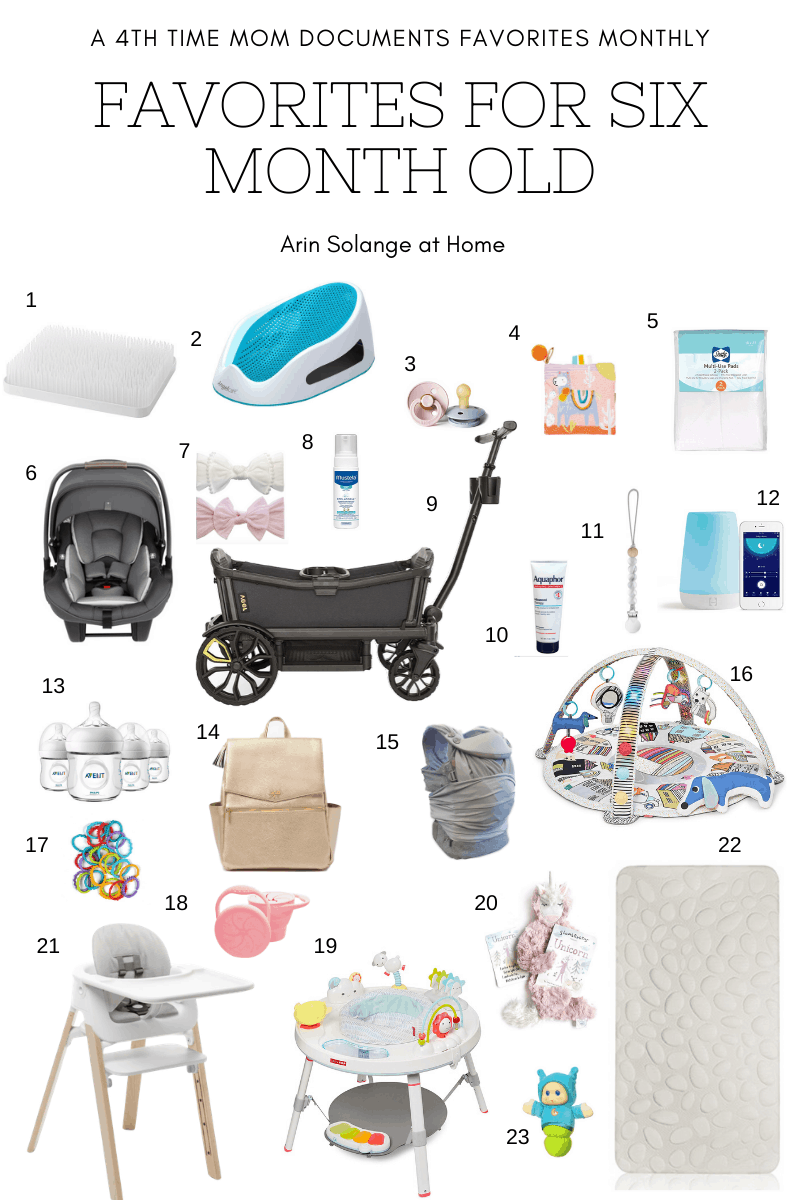
6 Month Old Baby Favorite Items
As with the past 5 months I have been documenting our favorite items for Goldie. We obviously use more than whats on this list, but these are the top items!
One reason I am doing this is to have a good way to document what items were worth the longer term expense. So if there is an item that is a favorite for months and months and months it might be more worth the cost, verses an item that only makes it one month.
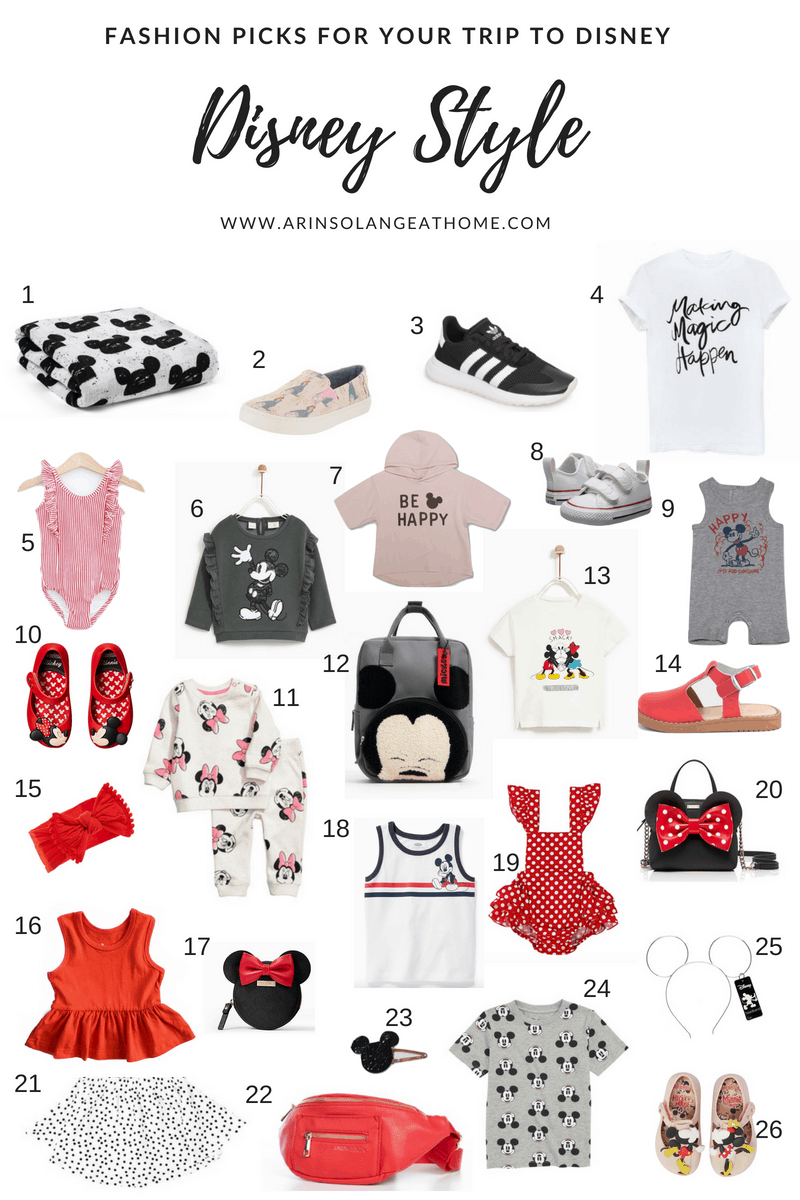
To shop this image you can either click the item in the image below to grab what you are looking for or you can go to the descriptions below.
Baby play seat – Goldie loves this and I love that the footprint isn’t horribly big
Slumberkins – OBSESSED WITH THESE, and Goldie is loving hers
This highchair – I linked a different one the past few months. I truly love both, and we owned both, but I ultimately decided to keep this one over the other – I have a comparison review coming
Hopefully you find these helpful, and you will have a better idea of what a 6 month old baby needs, or what you need to think about when buying for your baby! If you have any additional questions on items we may be using that aren’t on this list please always feel free to DM me on Instagram (@arinsolange) or Leave me a comment below!
It’s spring break time right around the corner (YAHOO), and as always we will be making a short stop at Disney world. I have a couple of Disney fashion posts coming this year, so if you are searching for yourself or boys, don’t worry – that is coming yet this week. But today I am focusing on Disney outfits for girls.
This post may contains affiliate links
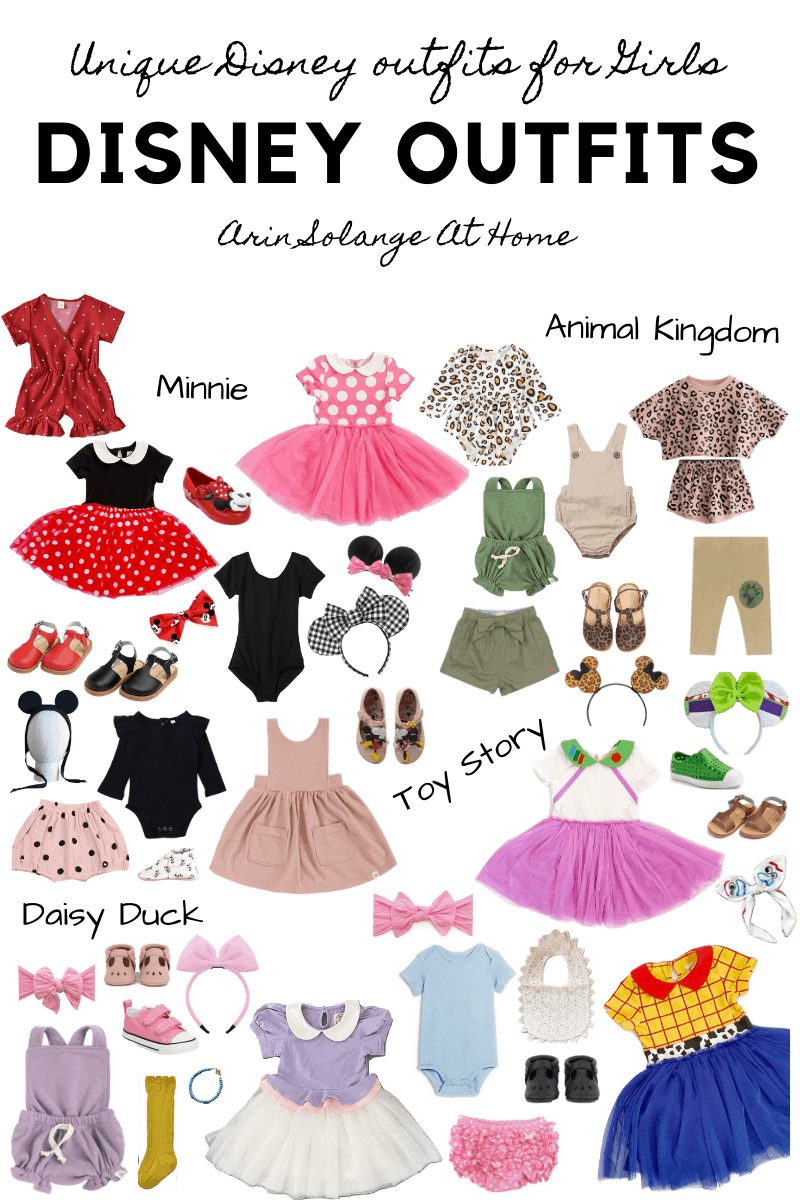
This Disney fashion post is a little different than most of them I have done. I am pondering my own outfits, with a fun plan in my head, so thought I would share some character inspired looks for girls.
I tried to give ideas for baby – little girl as best I could, and hopefully if nothing else it will inspire your own looks!
Disney Outfits for Girls
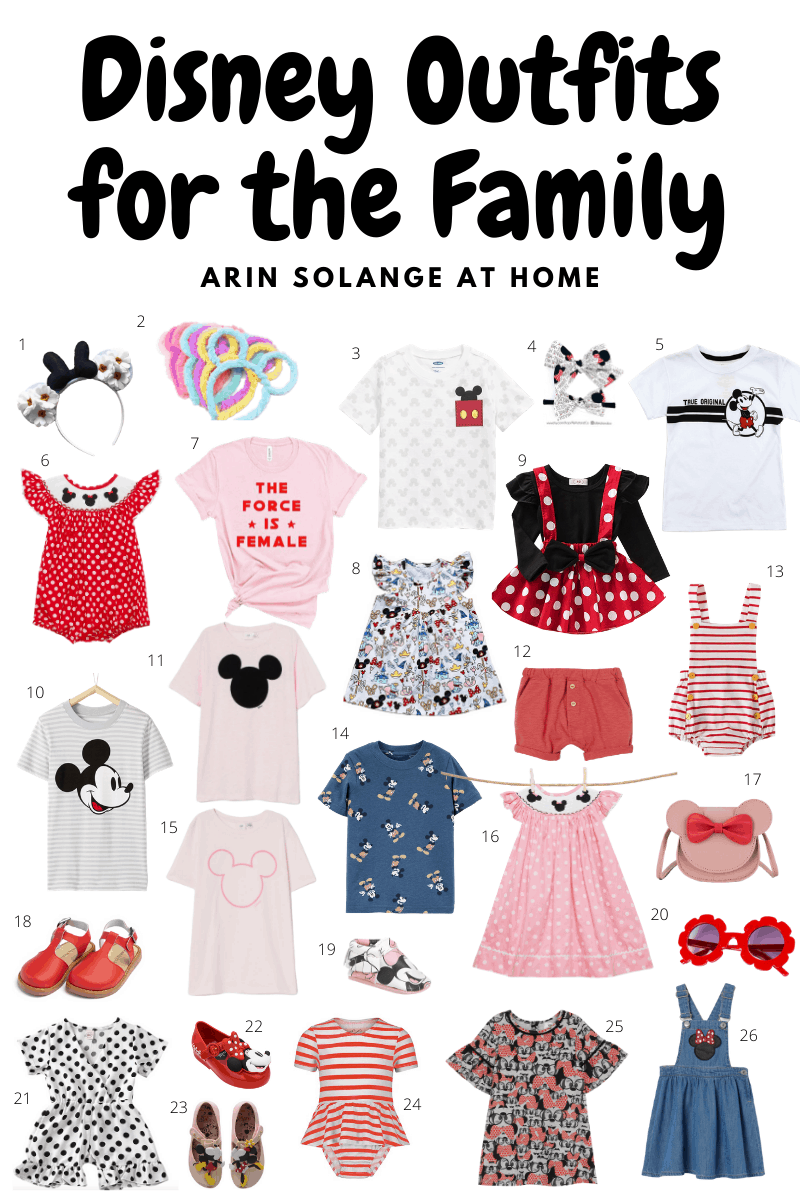
I typically try to make these posts ‘clickable’ in terms of the image, but I was truly on an mission to find the best items I could, and many of those are not affiliate and also don’t work with that platform. So to shop this image just head to the caption below, and if you have any questions, as always just let me know!
You will notice that I love finding items that just give a nod to Disney but can easily be worn so many other times in this image. We tend to dress that way when we head to Disney, and I love getting creative with our outfits!
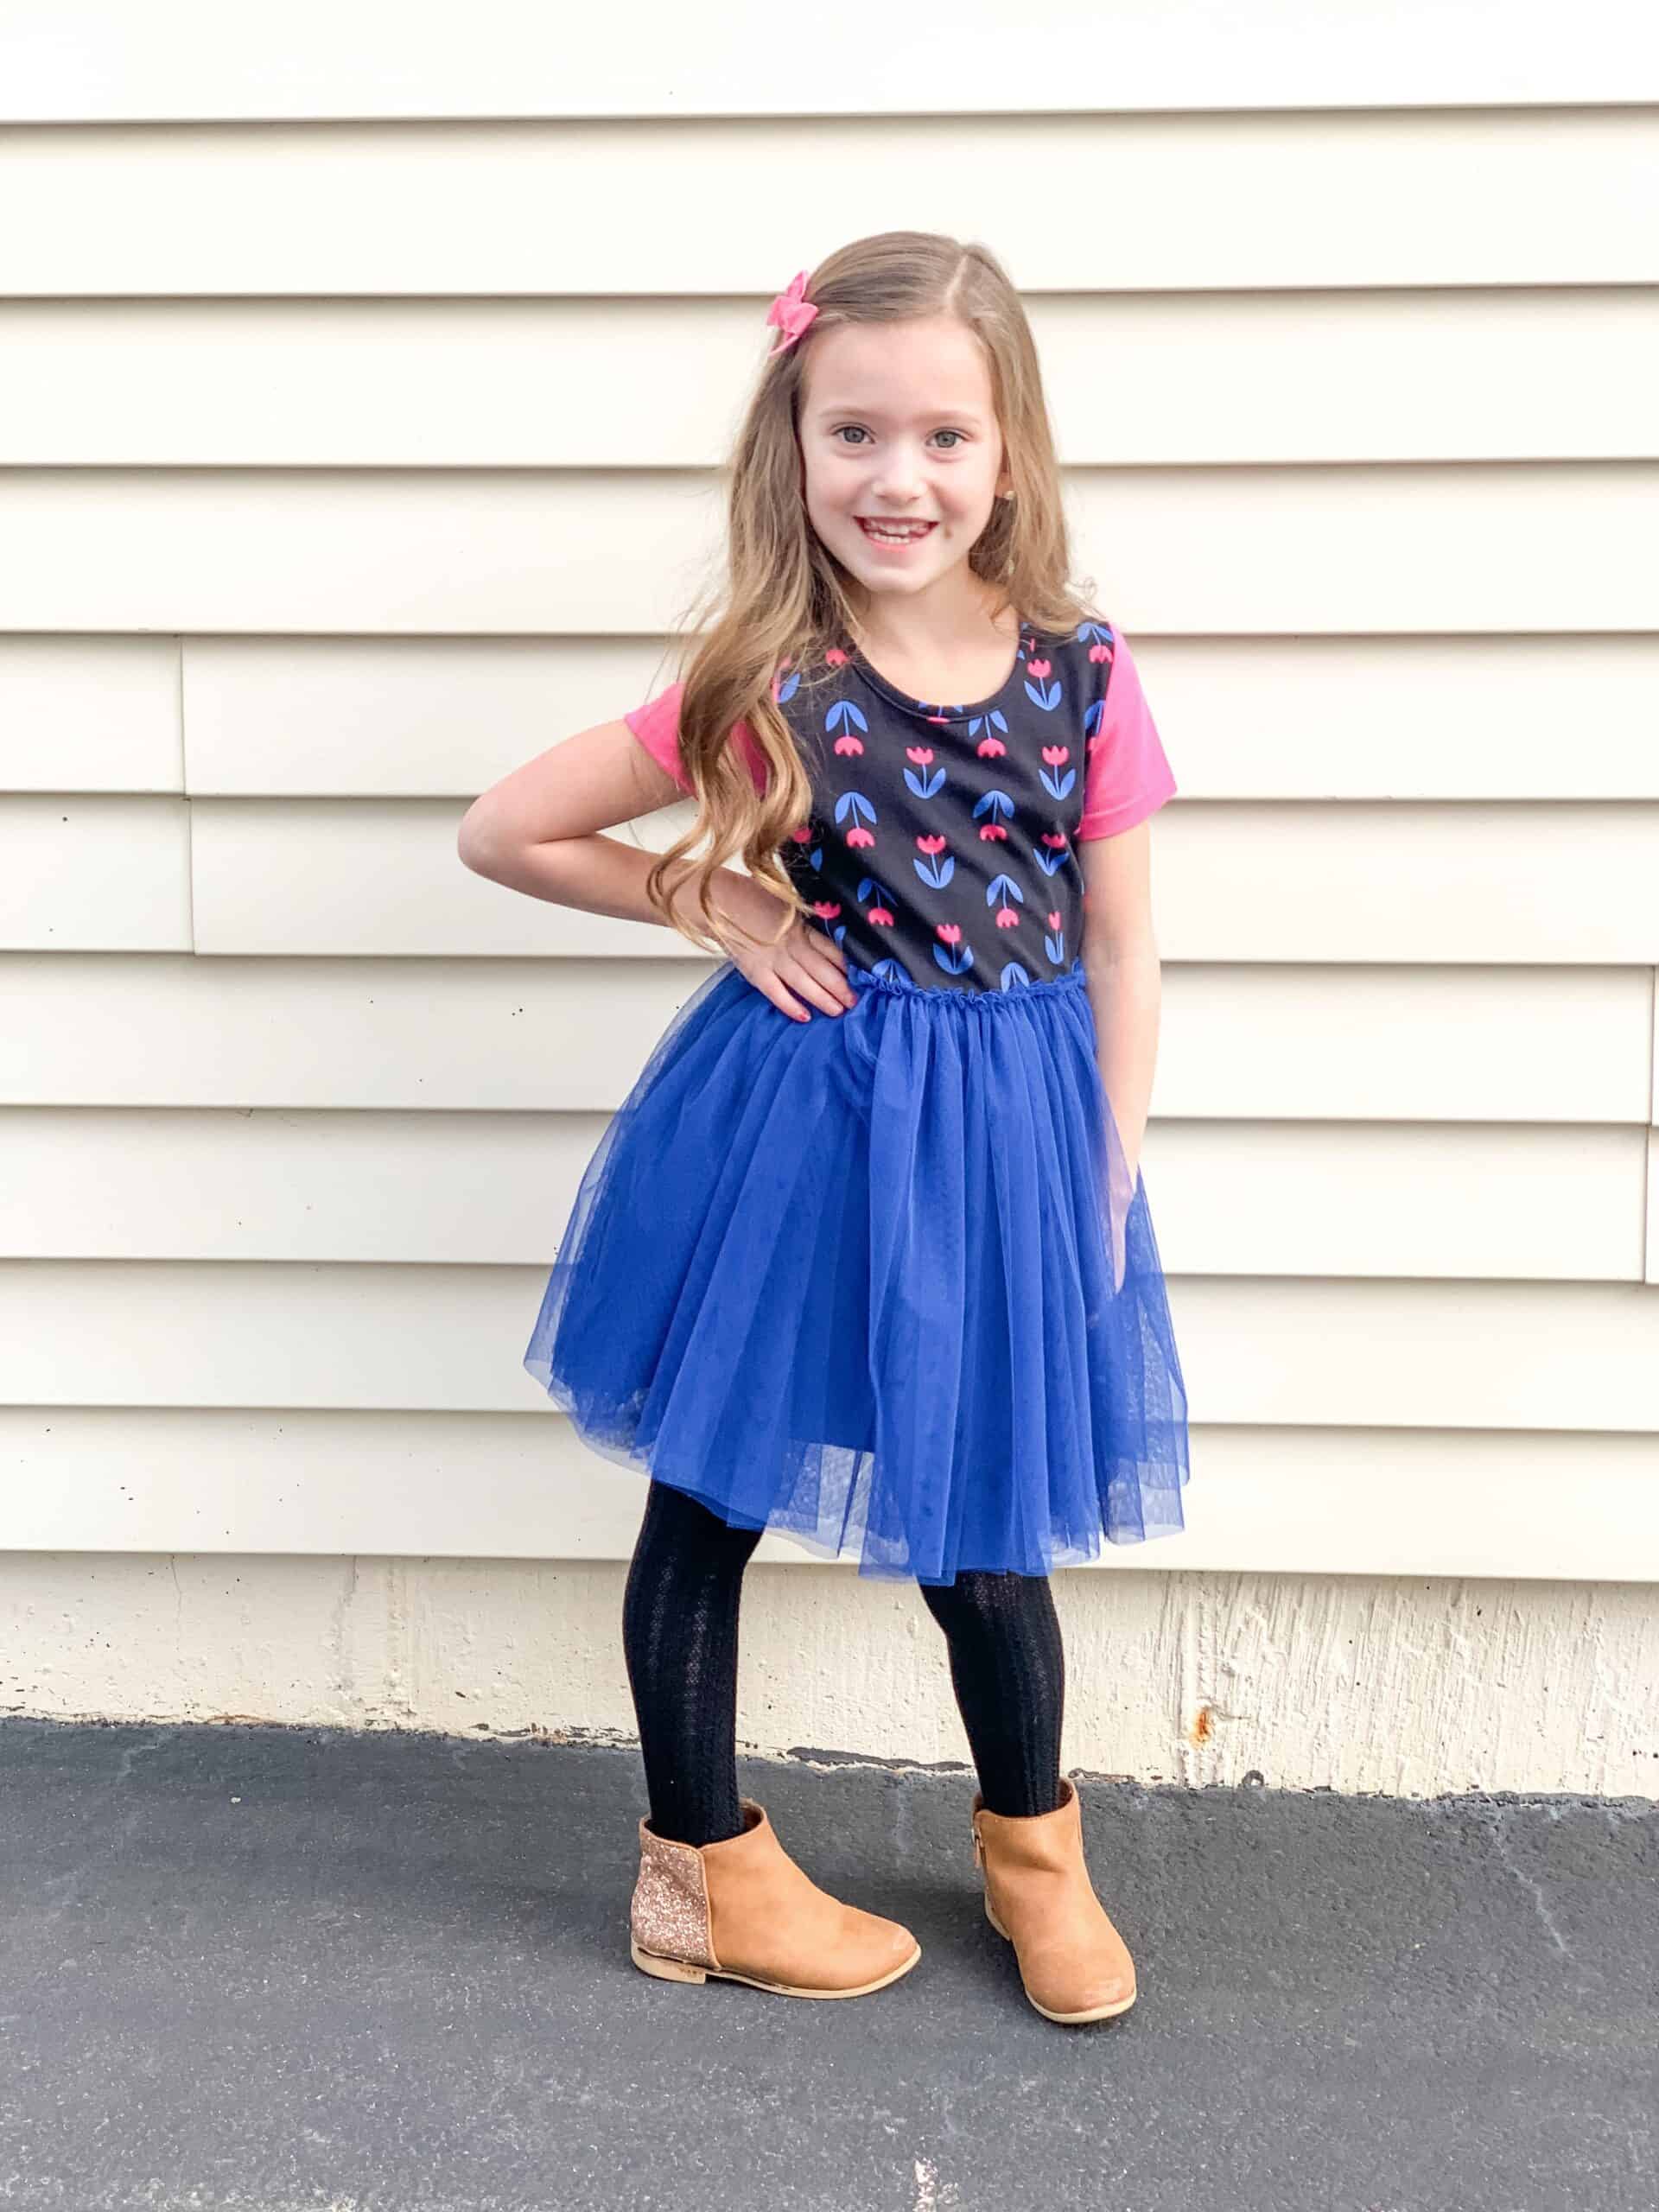
Black, Red, & White Dress – Taylor Joelle Dresses are all over this post. I will share some photos of a couple of the dresses we own. They are so well made, and honestly just amazing choices for Disney!
Red Minnie Mouse Shoes – We do these every time we go and they are REALLY comfortable for my daughter to walk in all day.
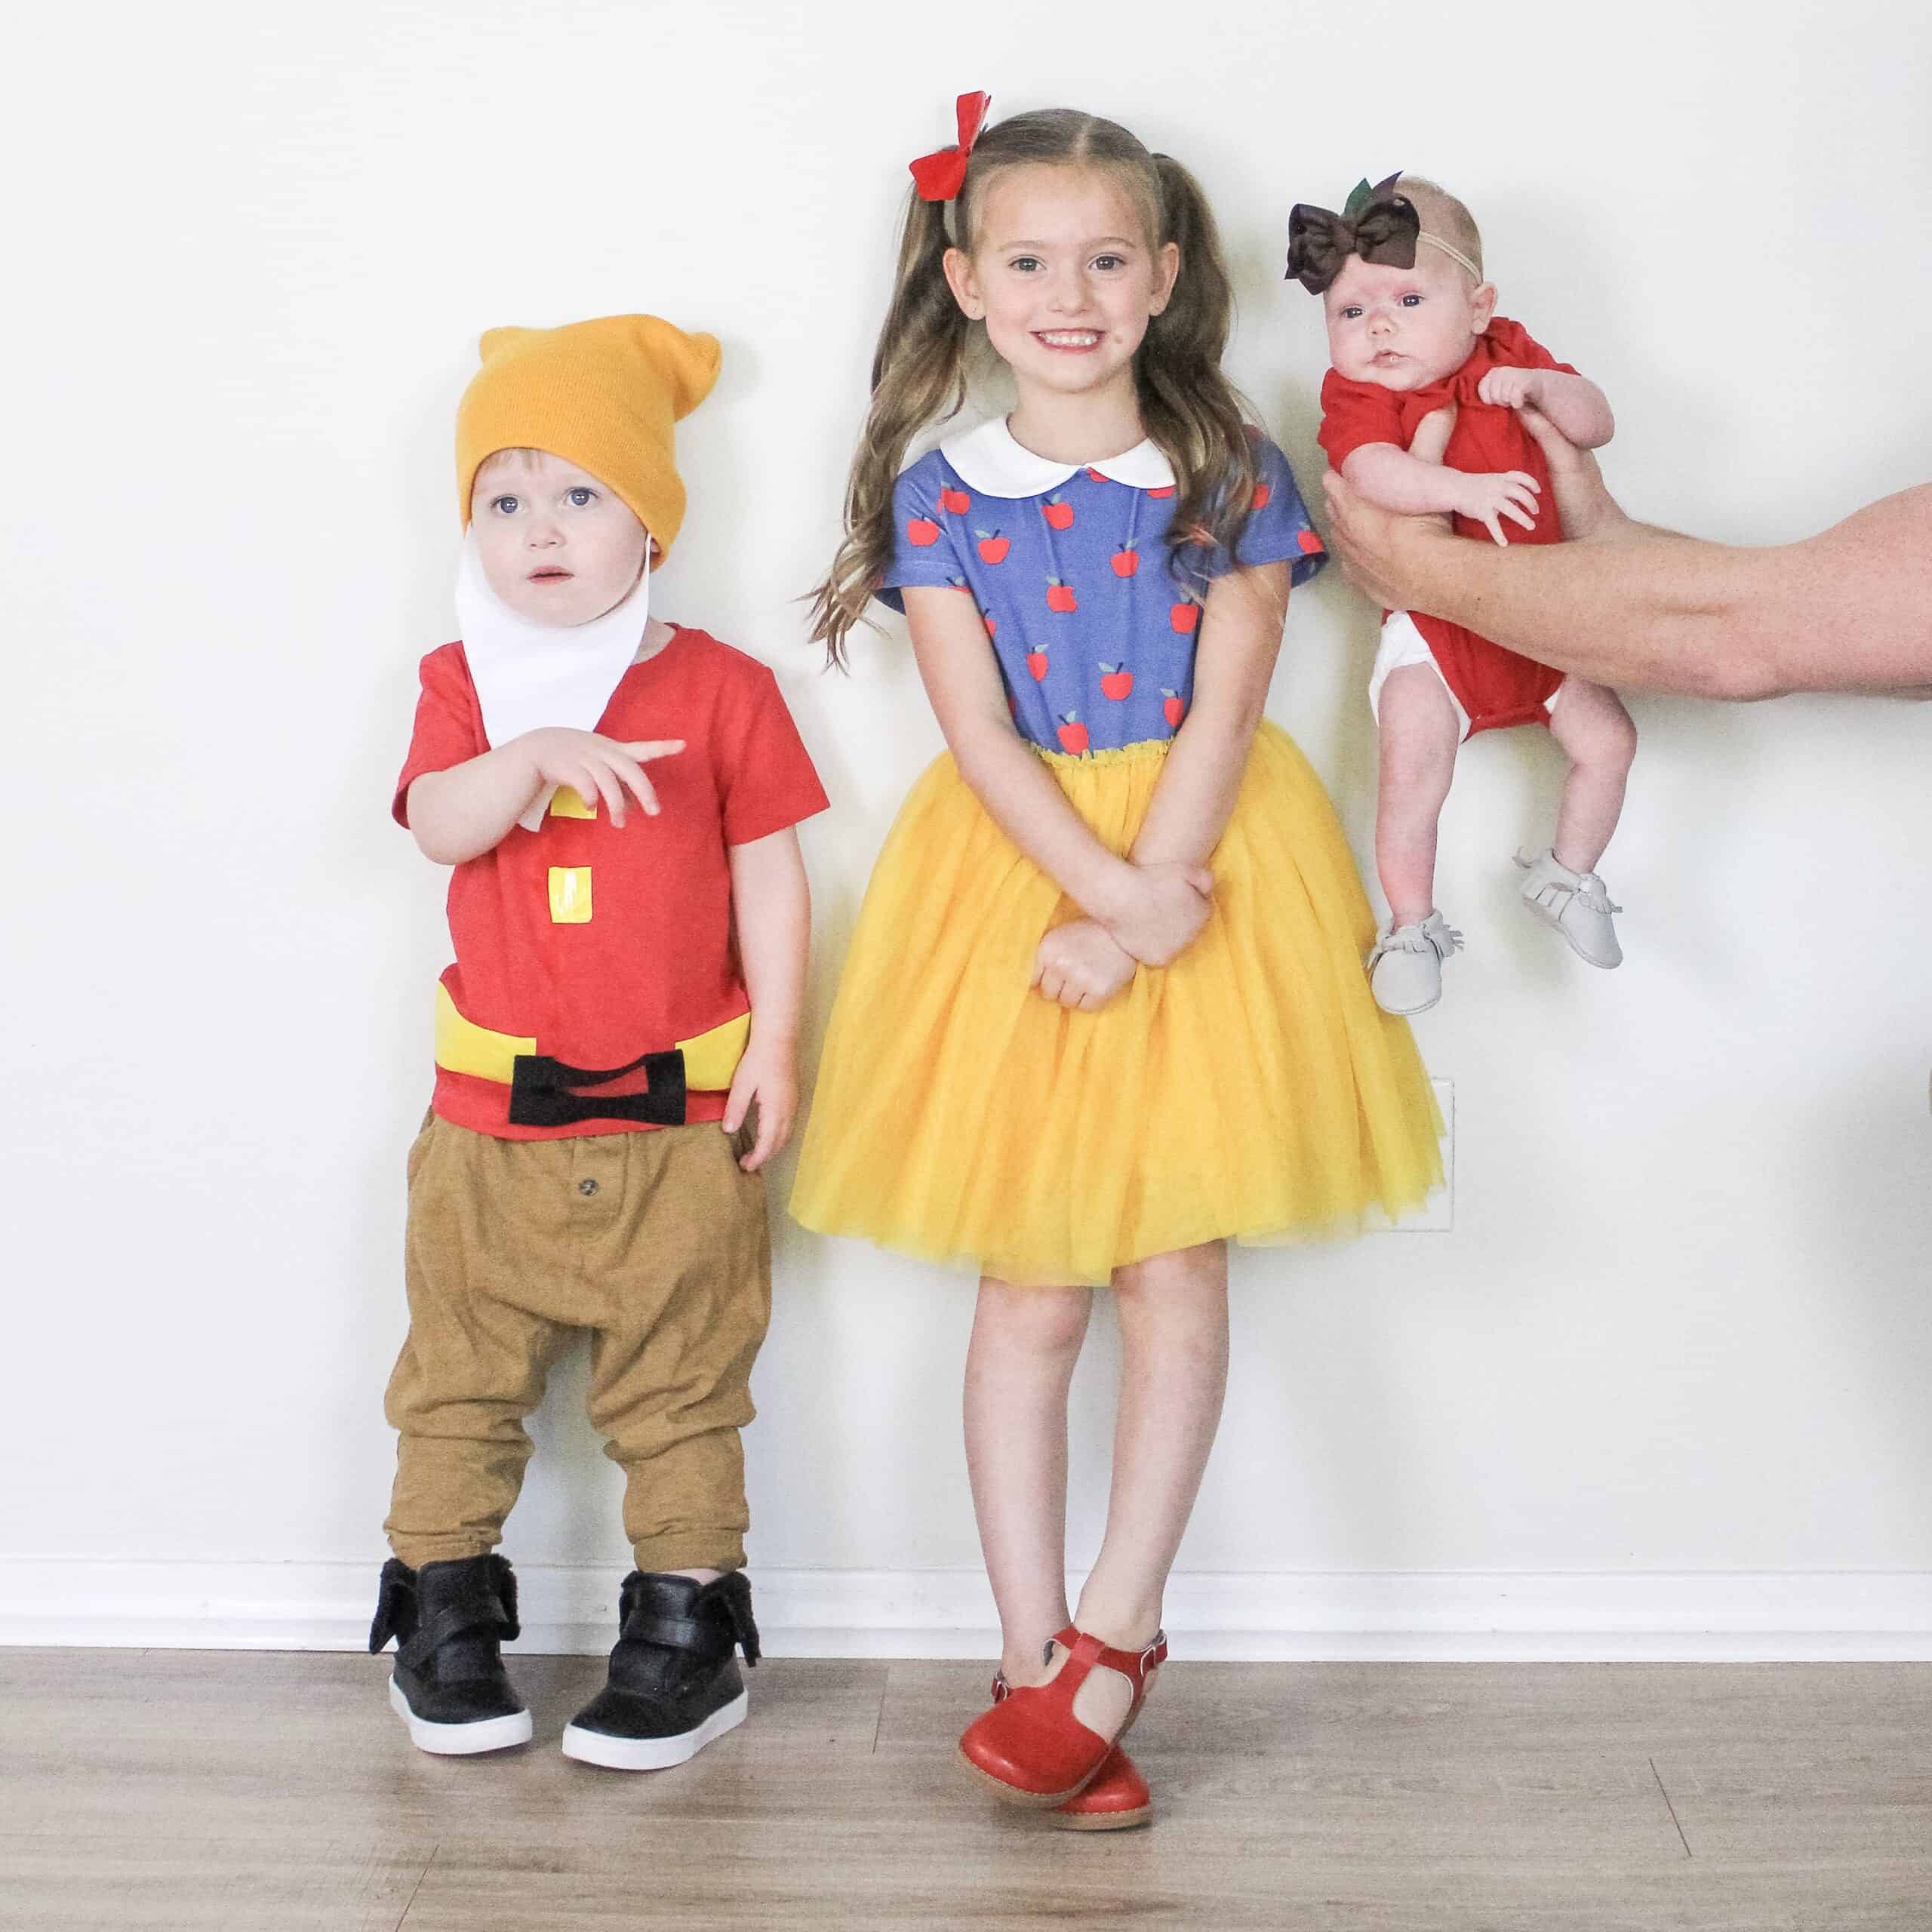
As you can see – Dressing for Disney doesn’t have to be just black, red and white Mickey Mouse! I have several other fun posts with great Disney Fashion posts that I have linked below, but also wanted to show you a couple of the Taylor Joelle dresses in action.
She offers dresses in SO MANY Disney options, and my daughter Avé has a couple of the princesses.
Below shoes not only the Snow white Taylor Joelle dress, but also the red Mary Janes
I know this round up was only Disney outfits for girls, but stay tuned for more Disney outfits this week for the whole family, and if you are looking for more ideas, here are some of my other Disney fashion posts!
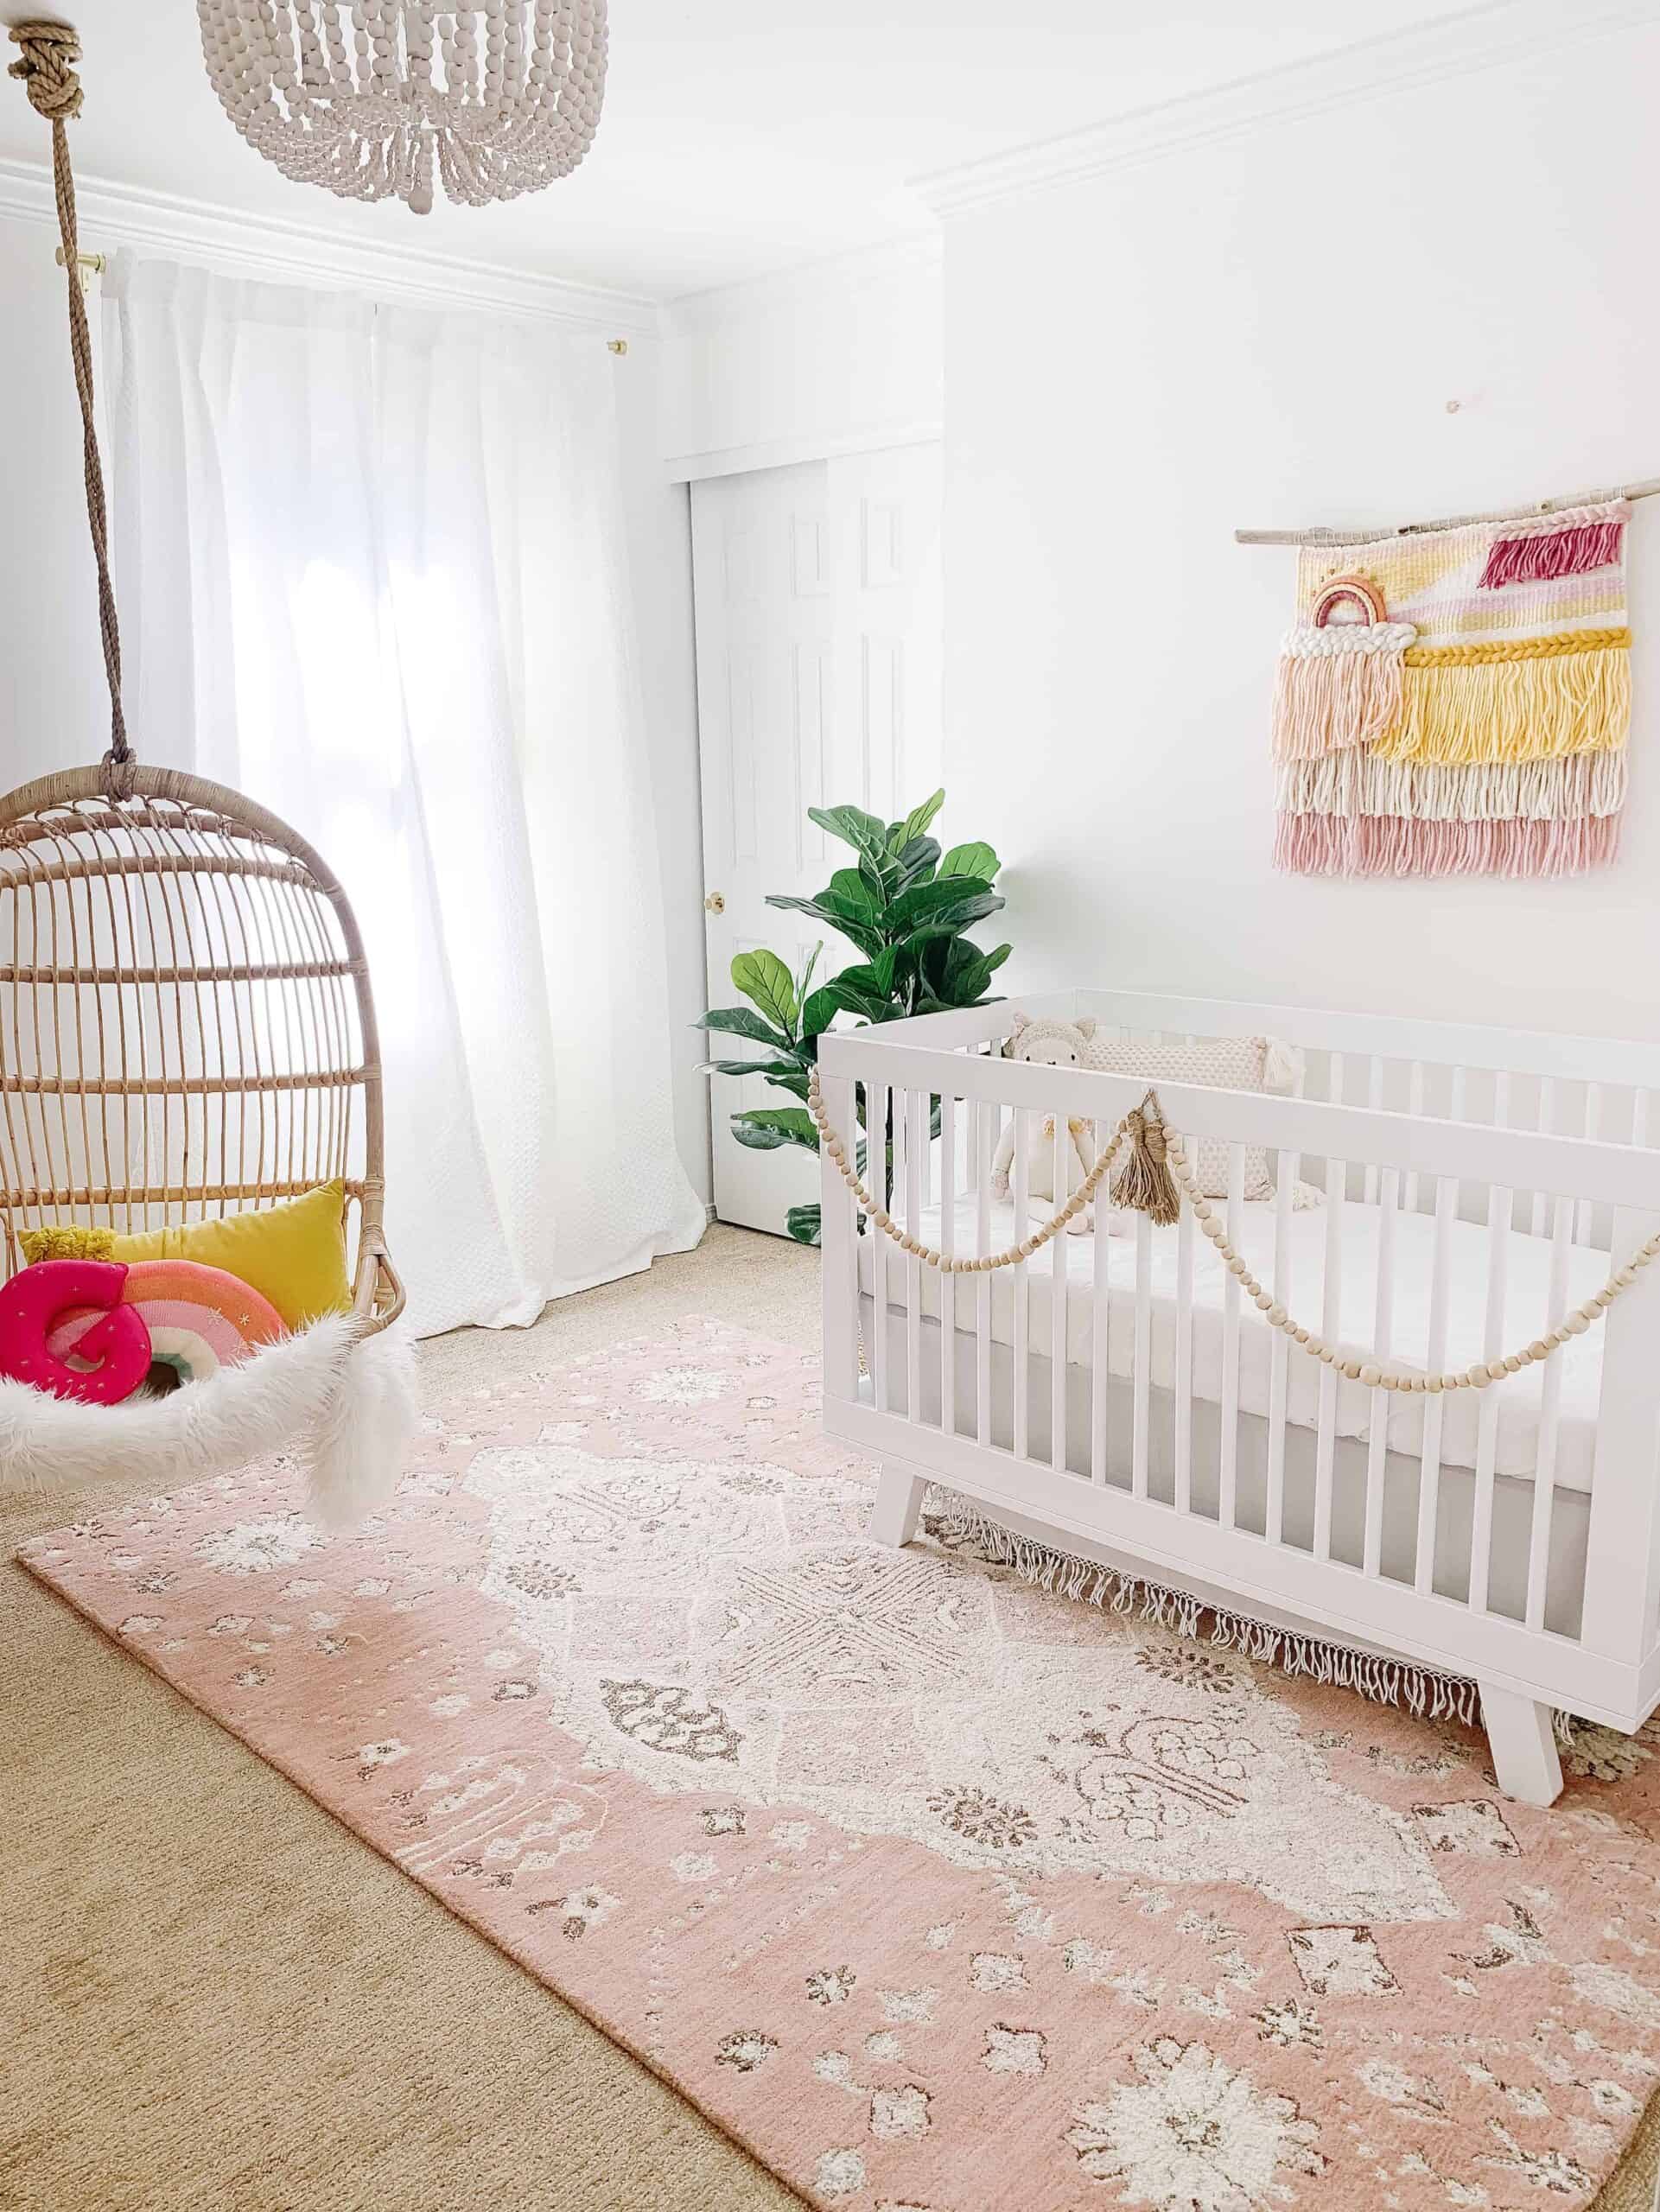
Last week, I announced that there a couple friends and I are hosting a room refresh challenge on Instagram – you can see all the details to that here! But to kick it off, I wanted to share my 3 week refresh project in our new bold pink powder room!
This post contains affiliate links
March Room Refresh Challenge
Like I said before, this is part of our March Room Refresh Challenge with my friends Jen and Chrissy. If you haven’t yet checked out all the details to that challenge be sure you go to THIS POST and read It, but I will also give you a small recap.
From now until March 15th you will pick one area to refresh. Big or small changes are welcome, and encouraged. You will use the hashtag #MarchRoomRefresh on Instagram, tag Chrissy, Jen, and myself. By the 15th you will then submit your room. One winner voted on by our readers and followers will win $250!
Be sure to be tagging and following so that we can share progress on Instagram, blog and email!
This weeks Posts From Jen and Chrissy
Paisley and Sparrow – Jen made changes to her master bedroom. I love how she made things more monochrome and simple to make a big change.
Chrissy Marie Blog – Chrissy updated her Living room with minor changes that made a big impact!
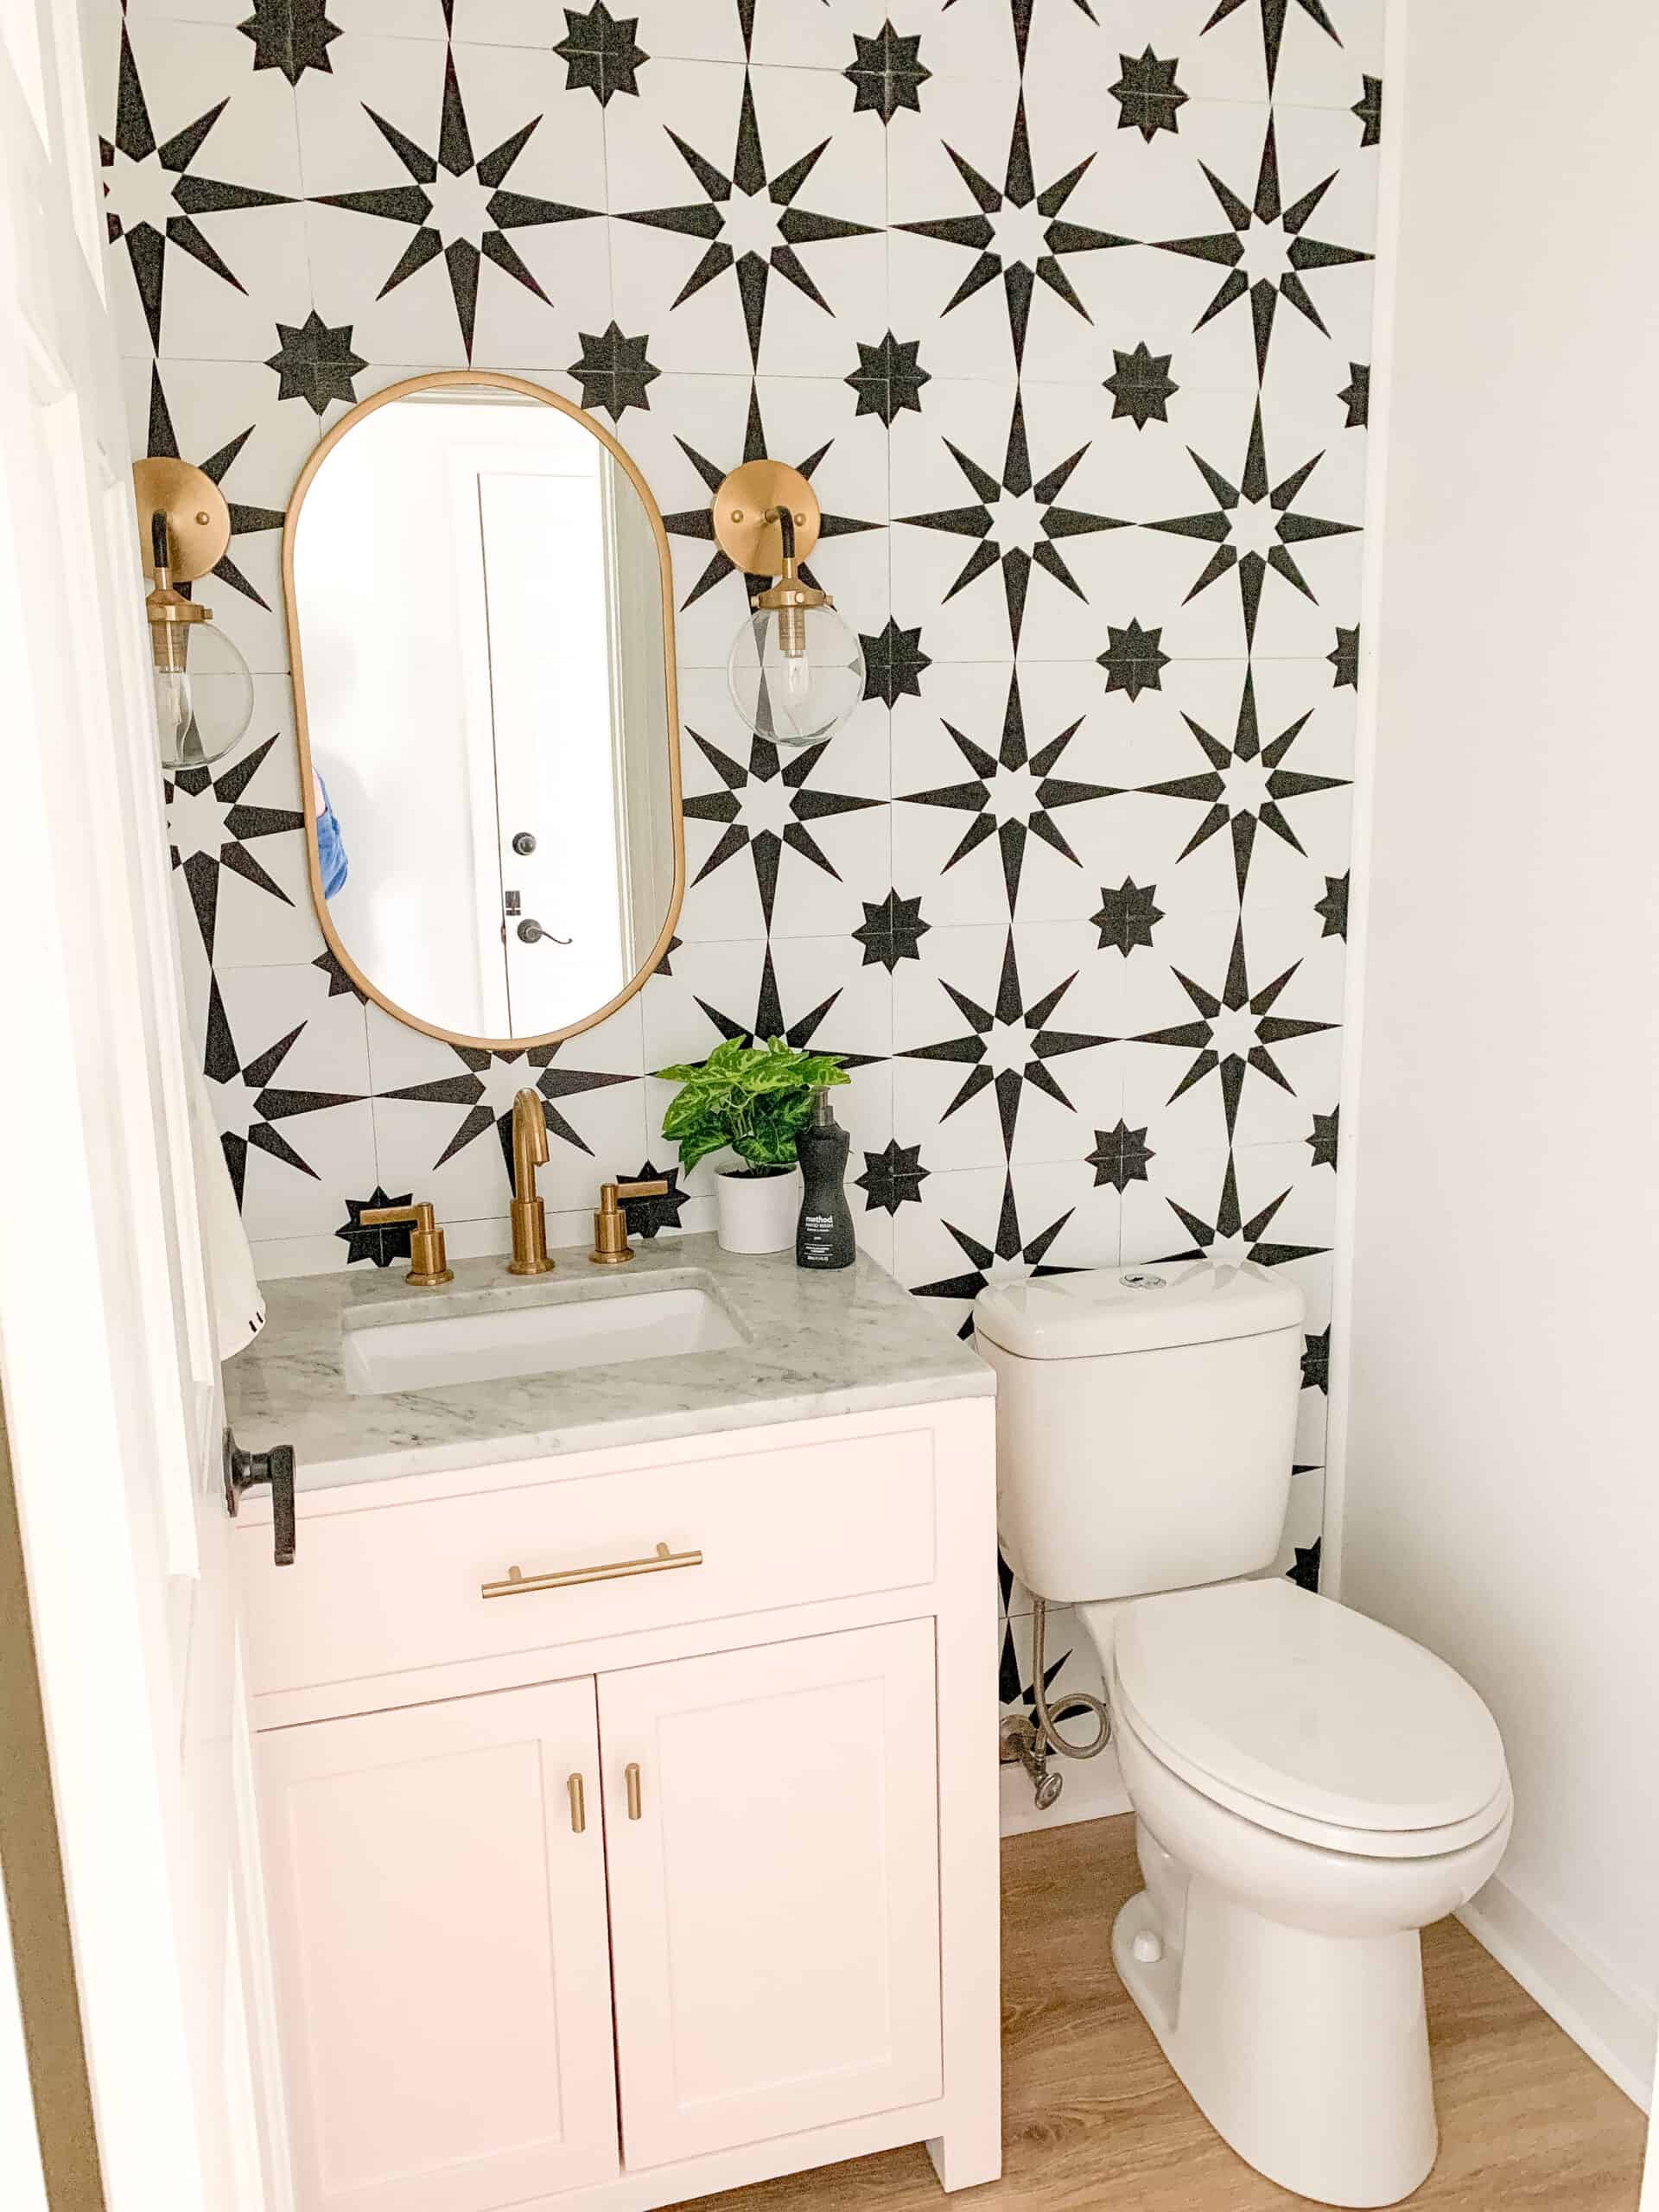
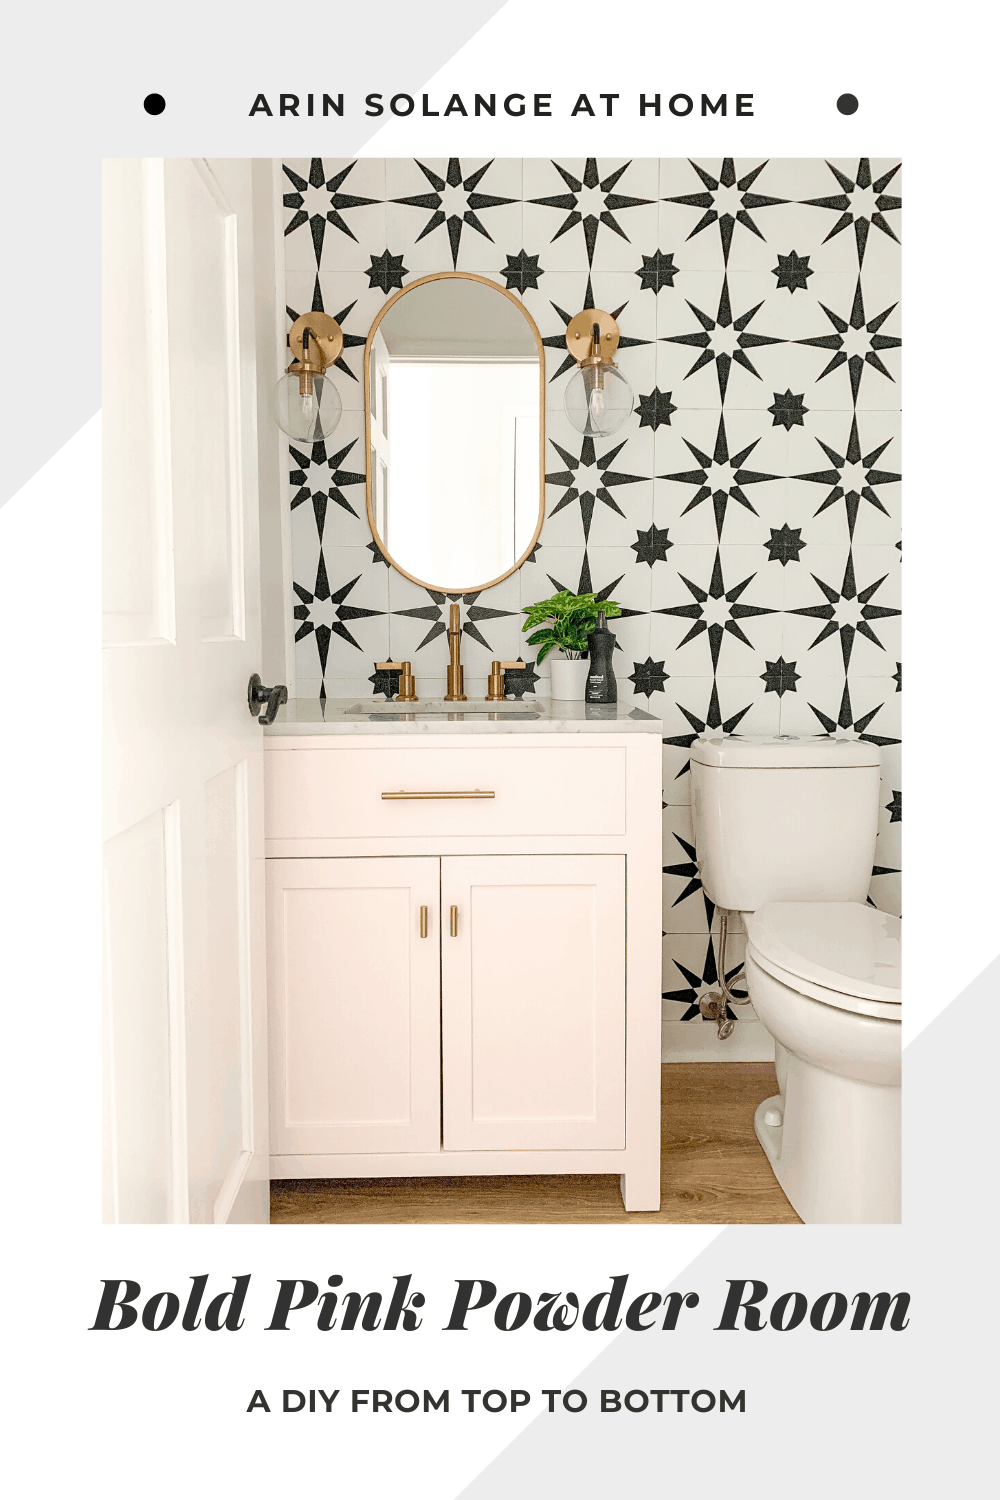
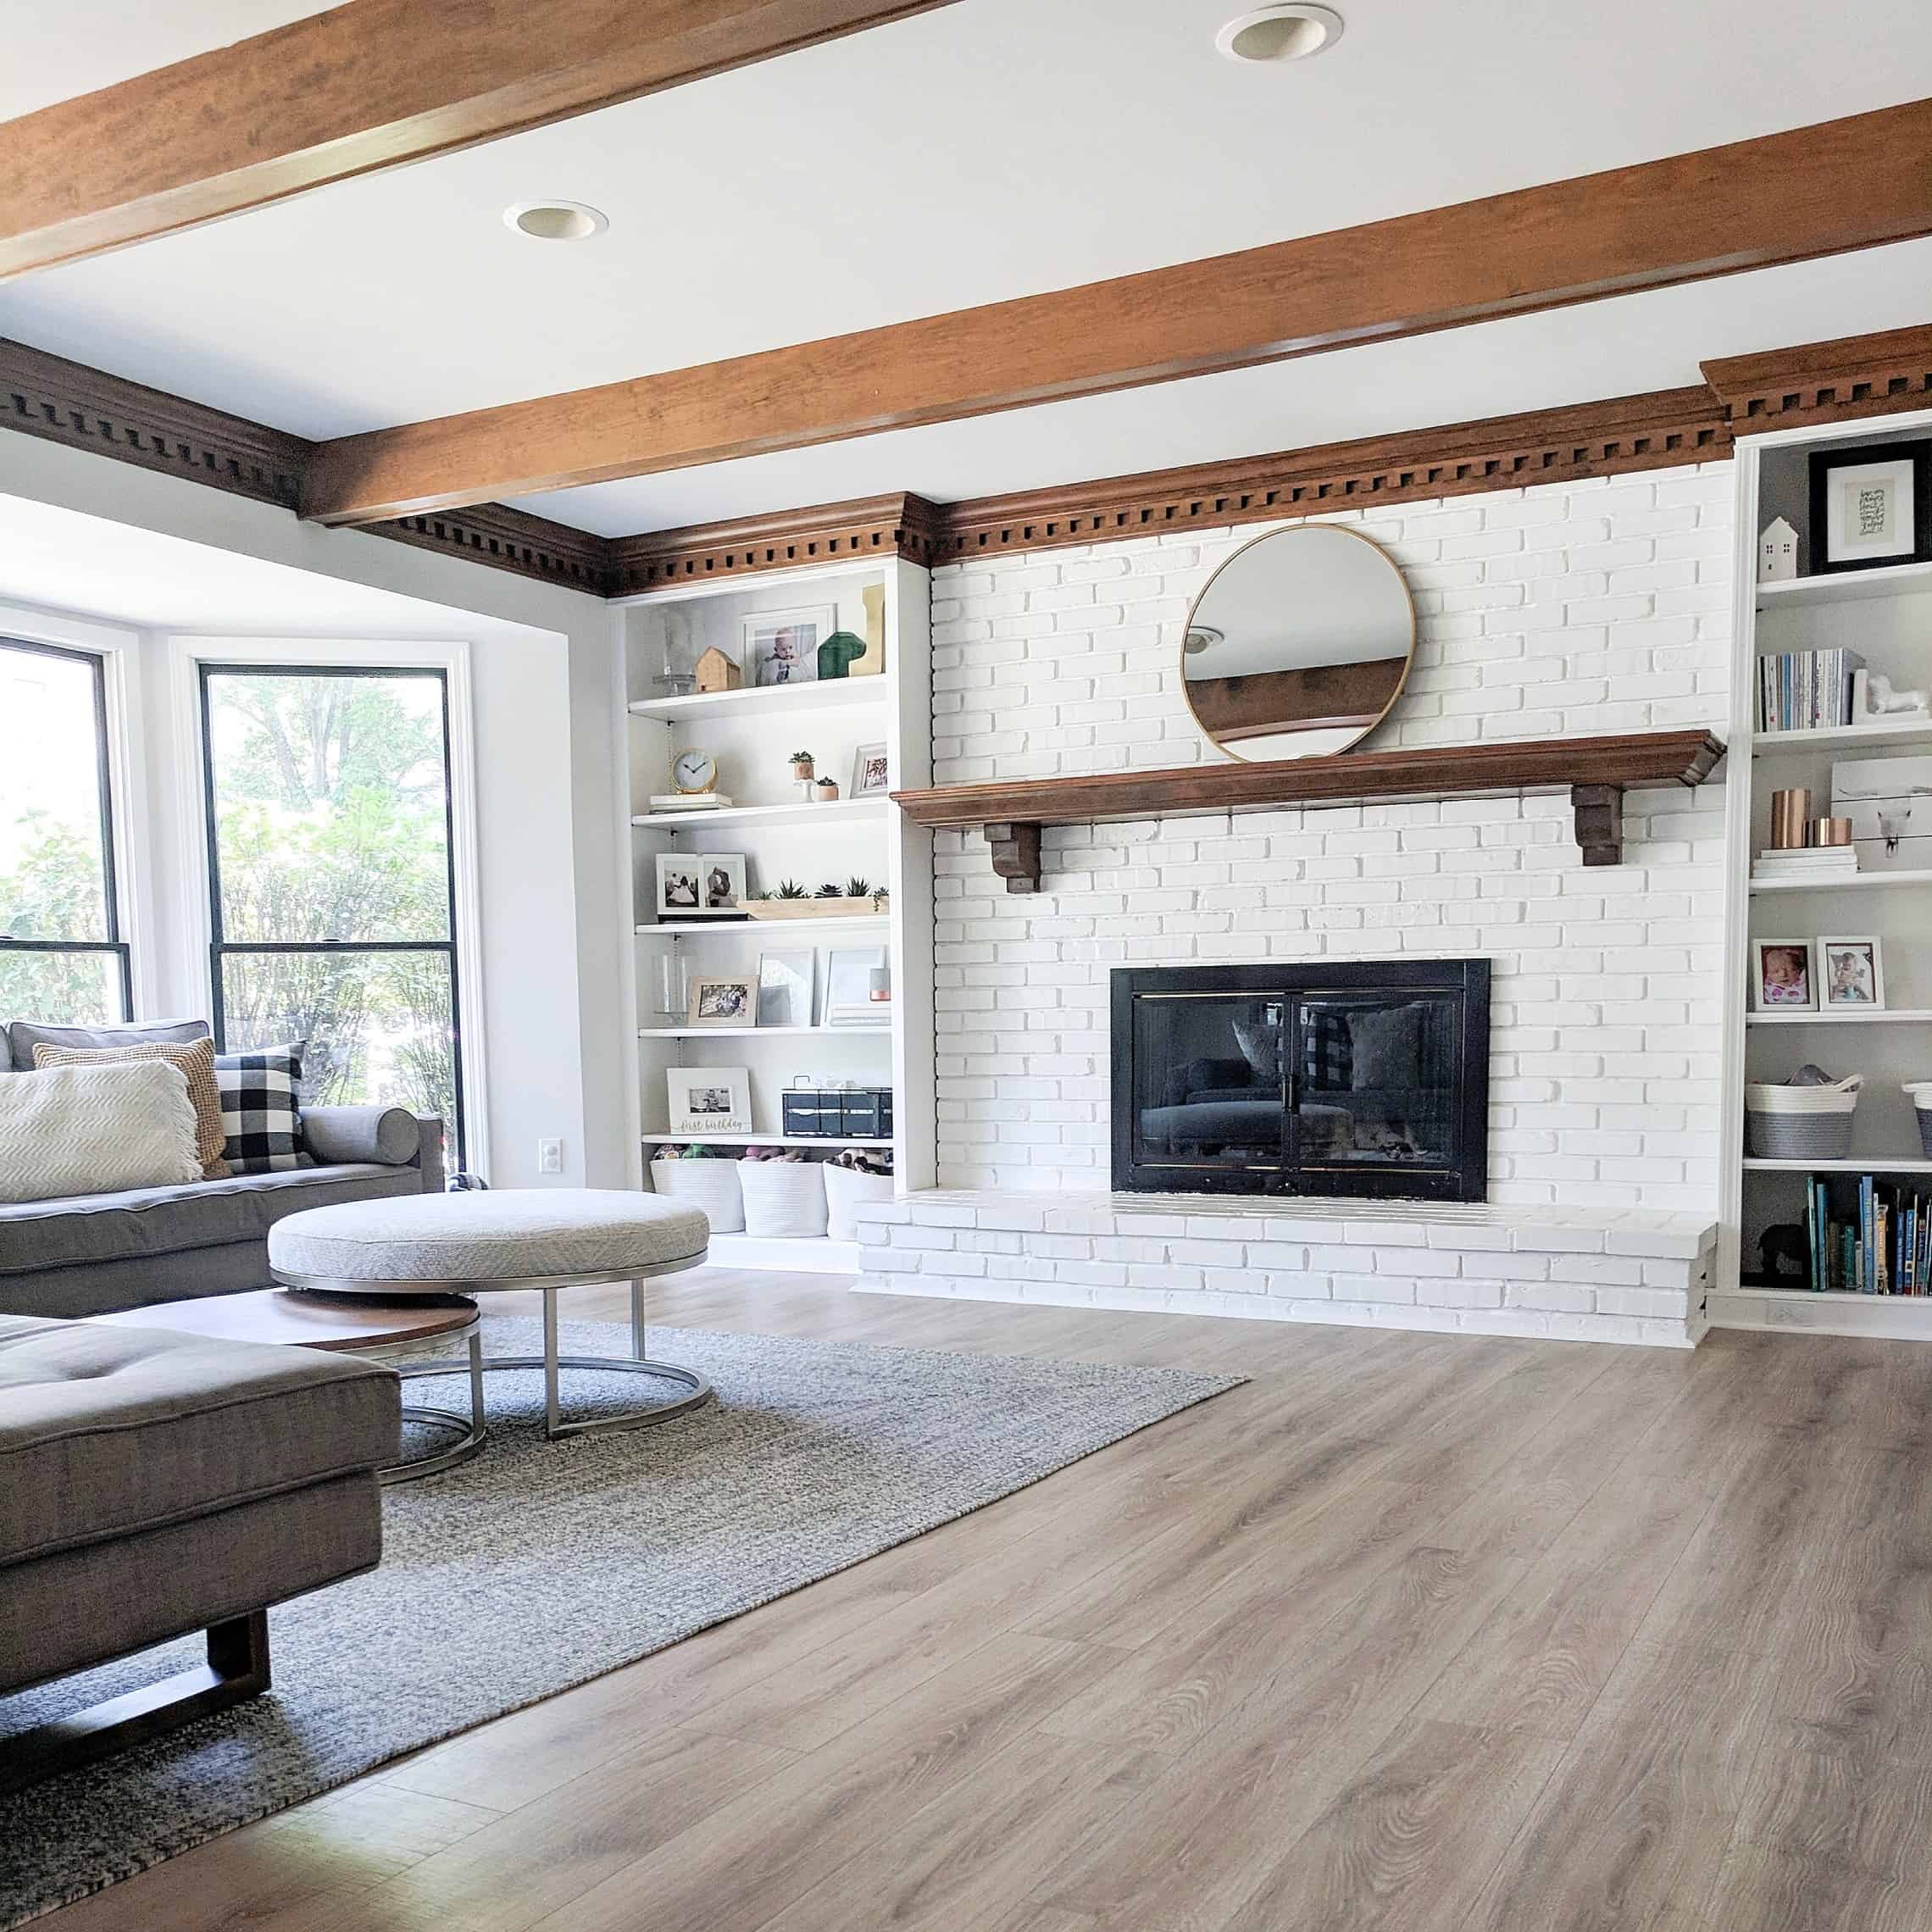
Bold Pink Powder Room
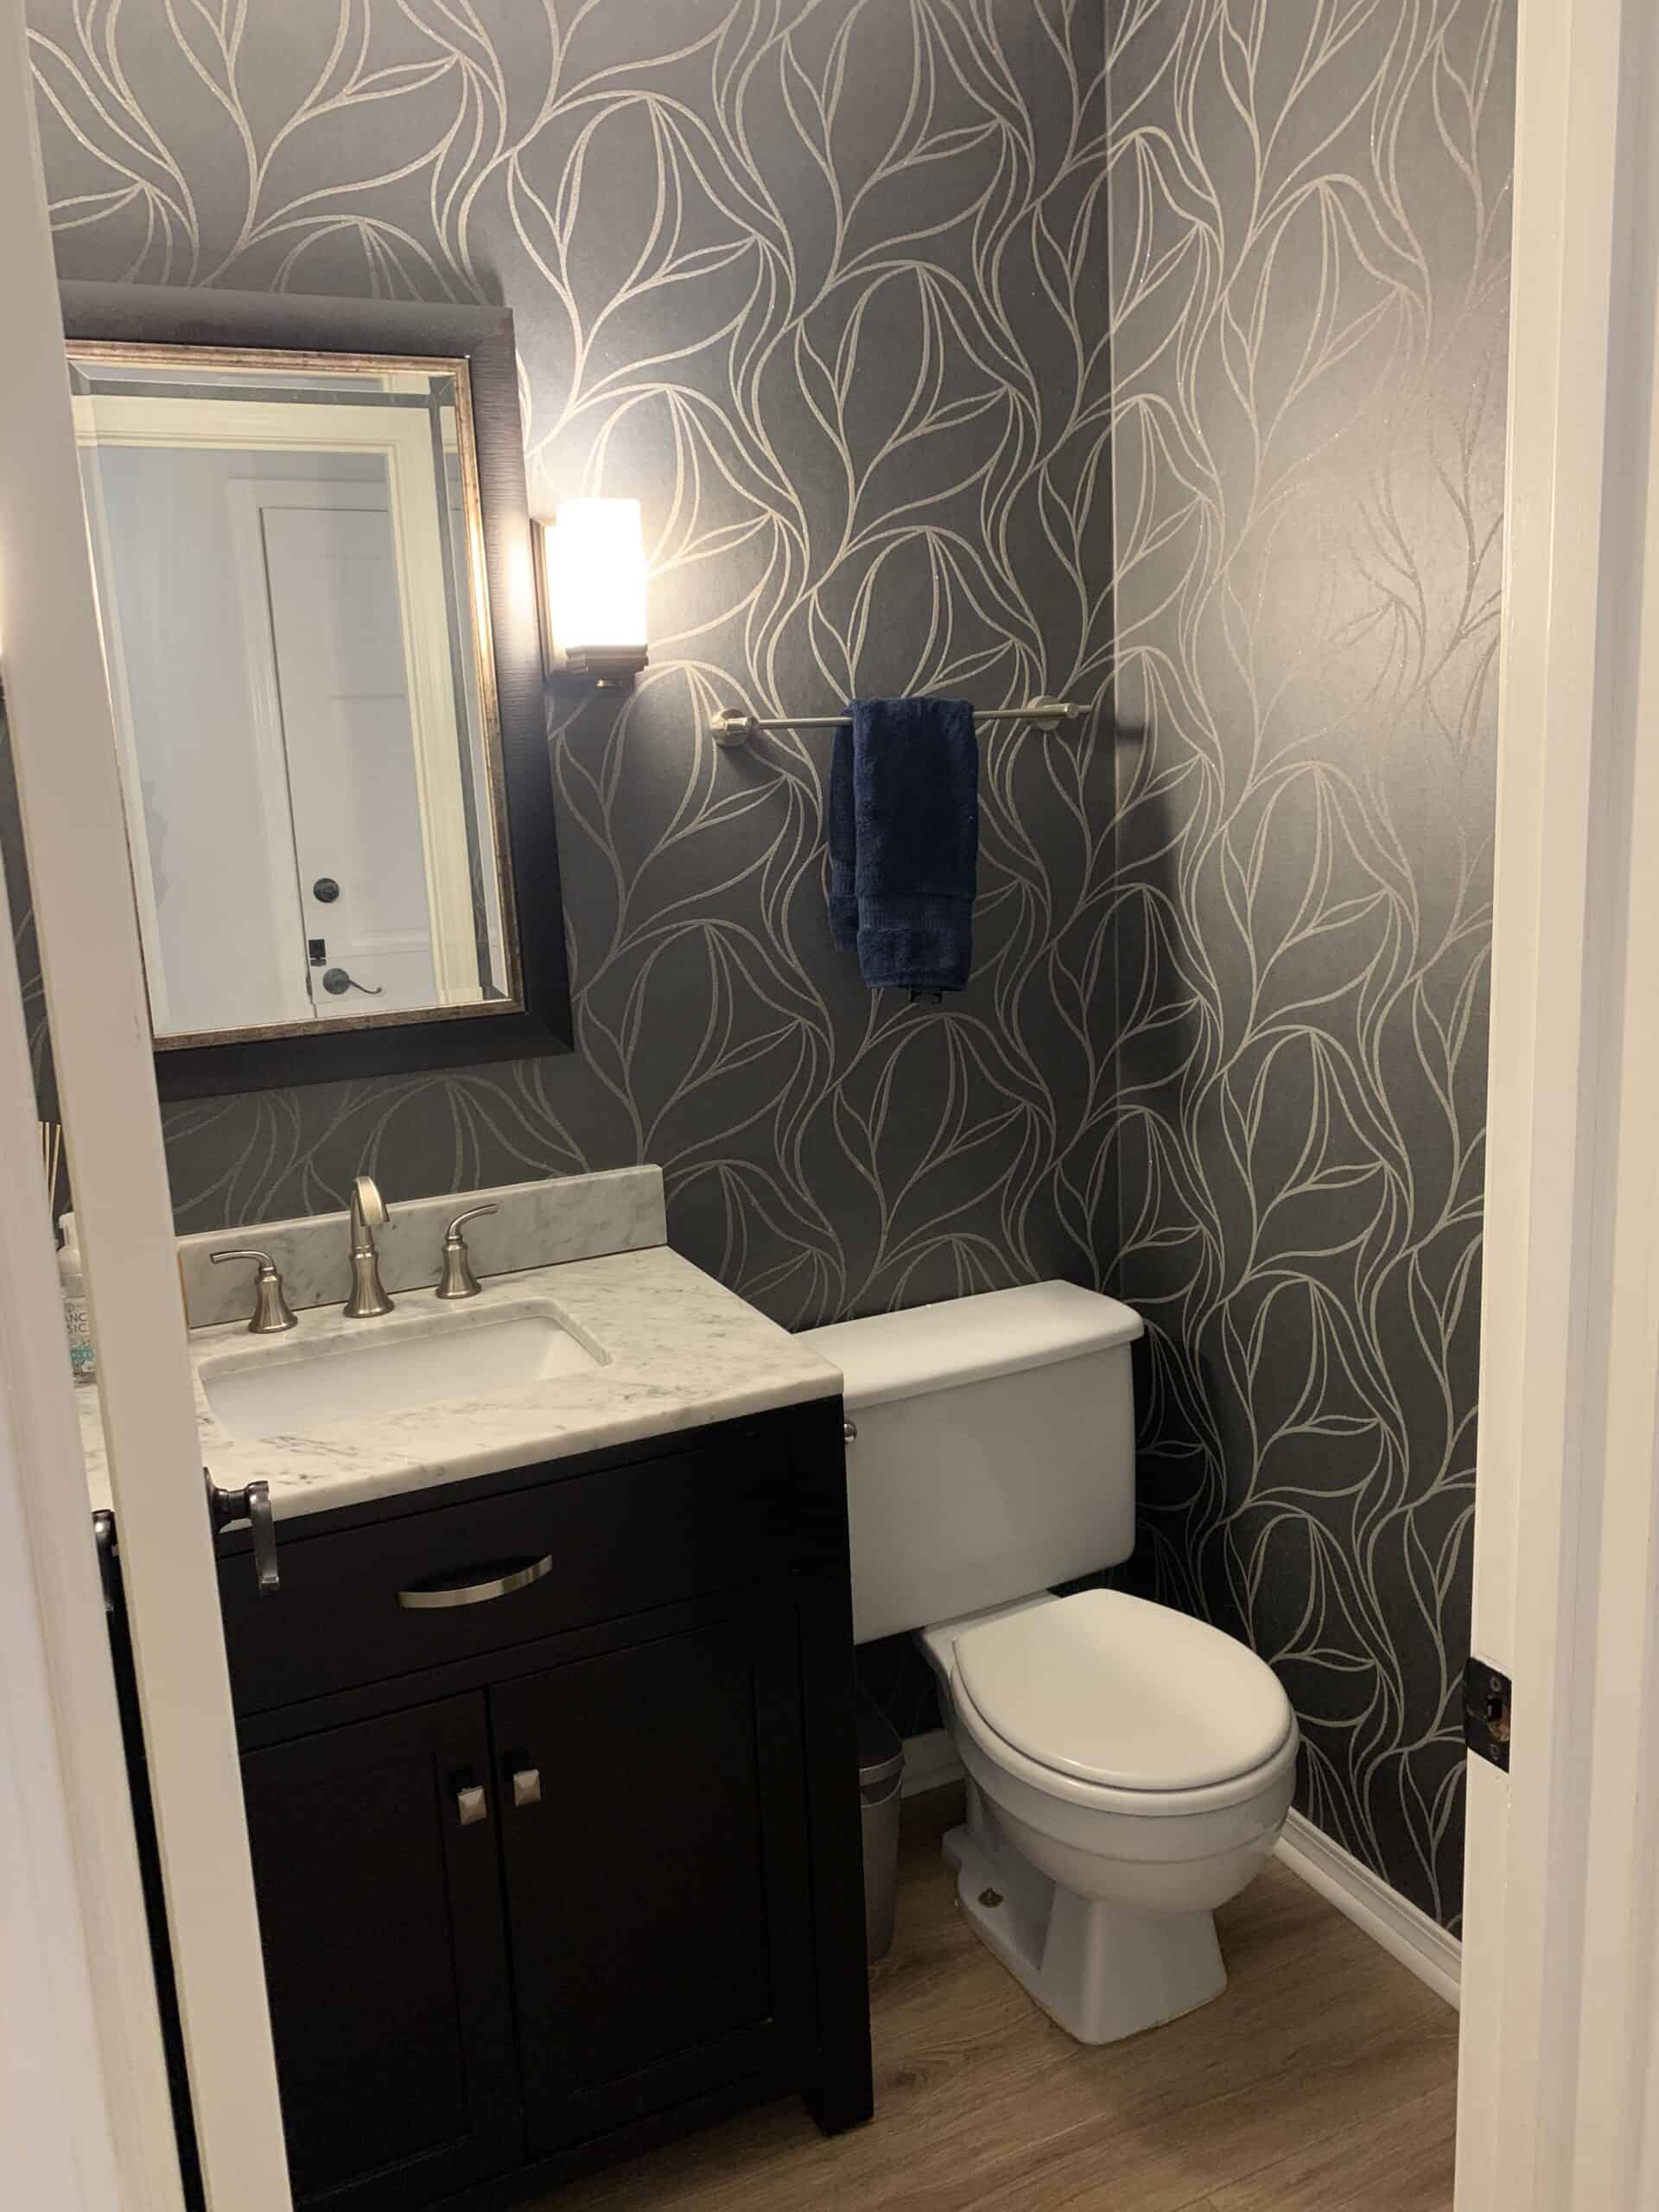
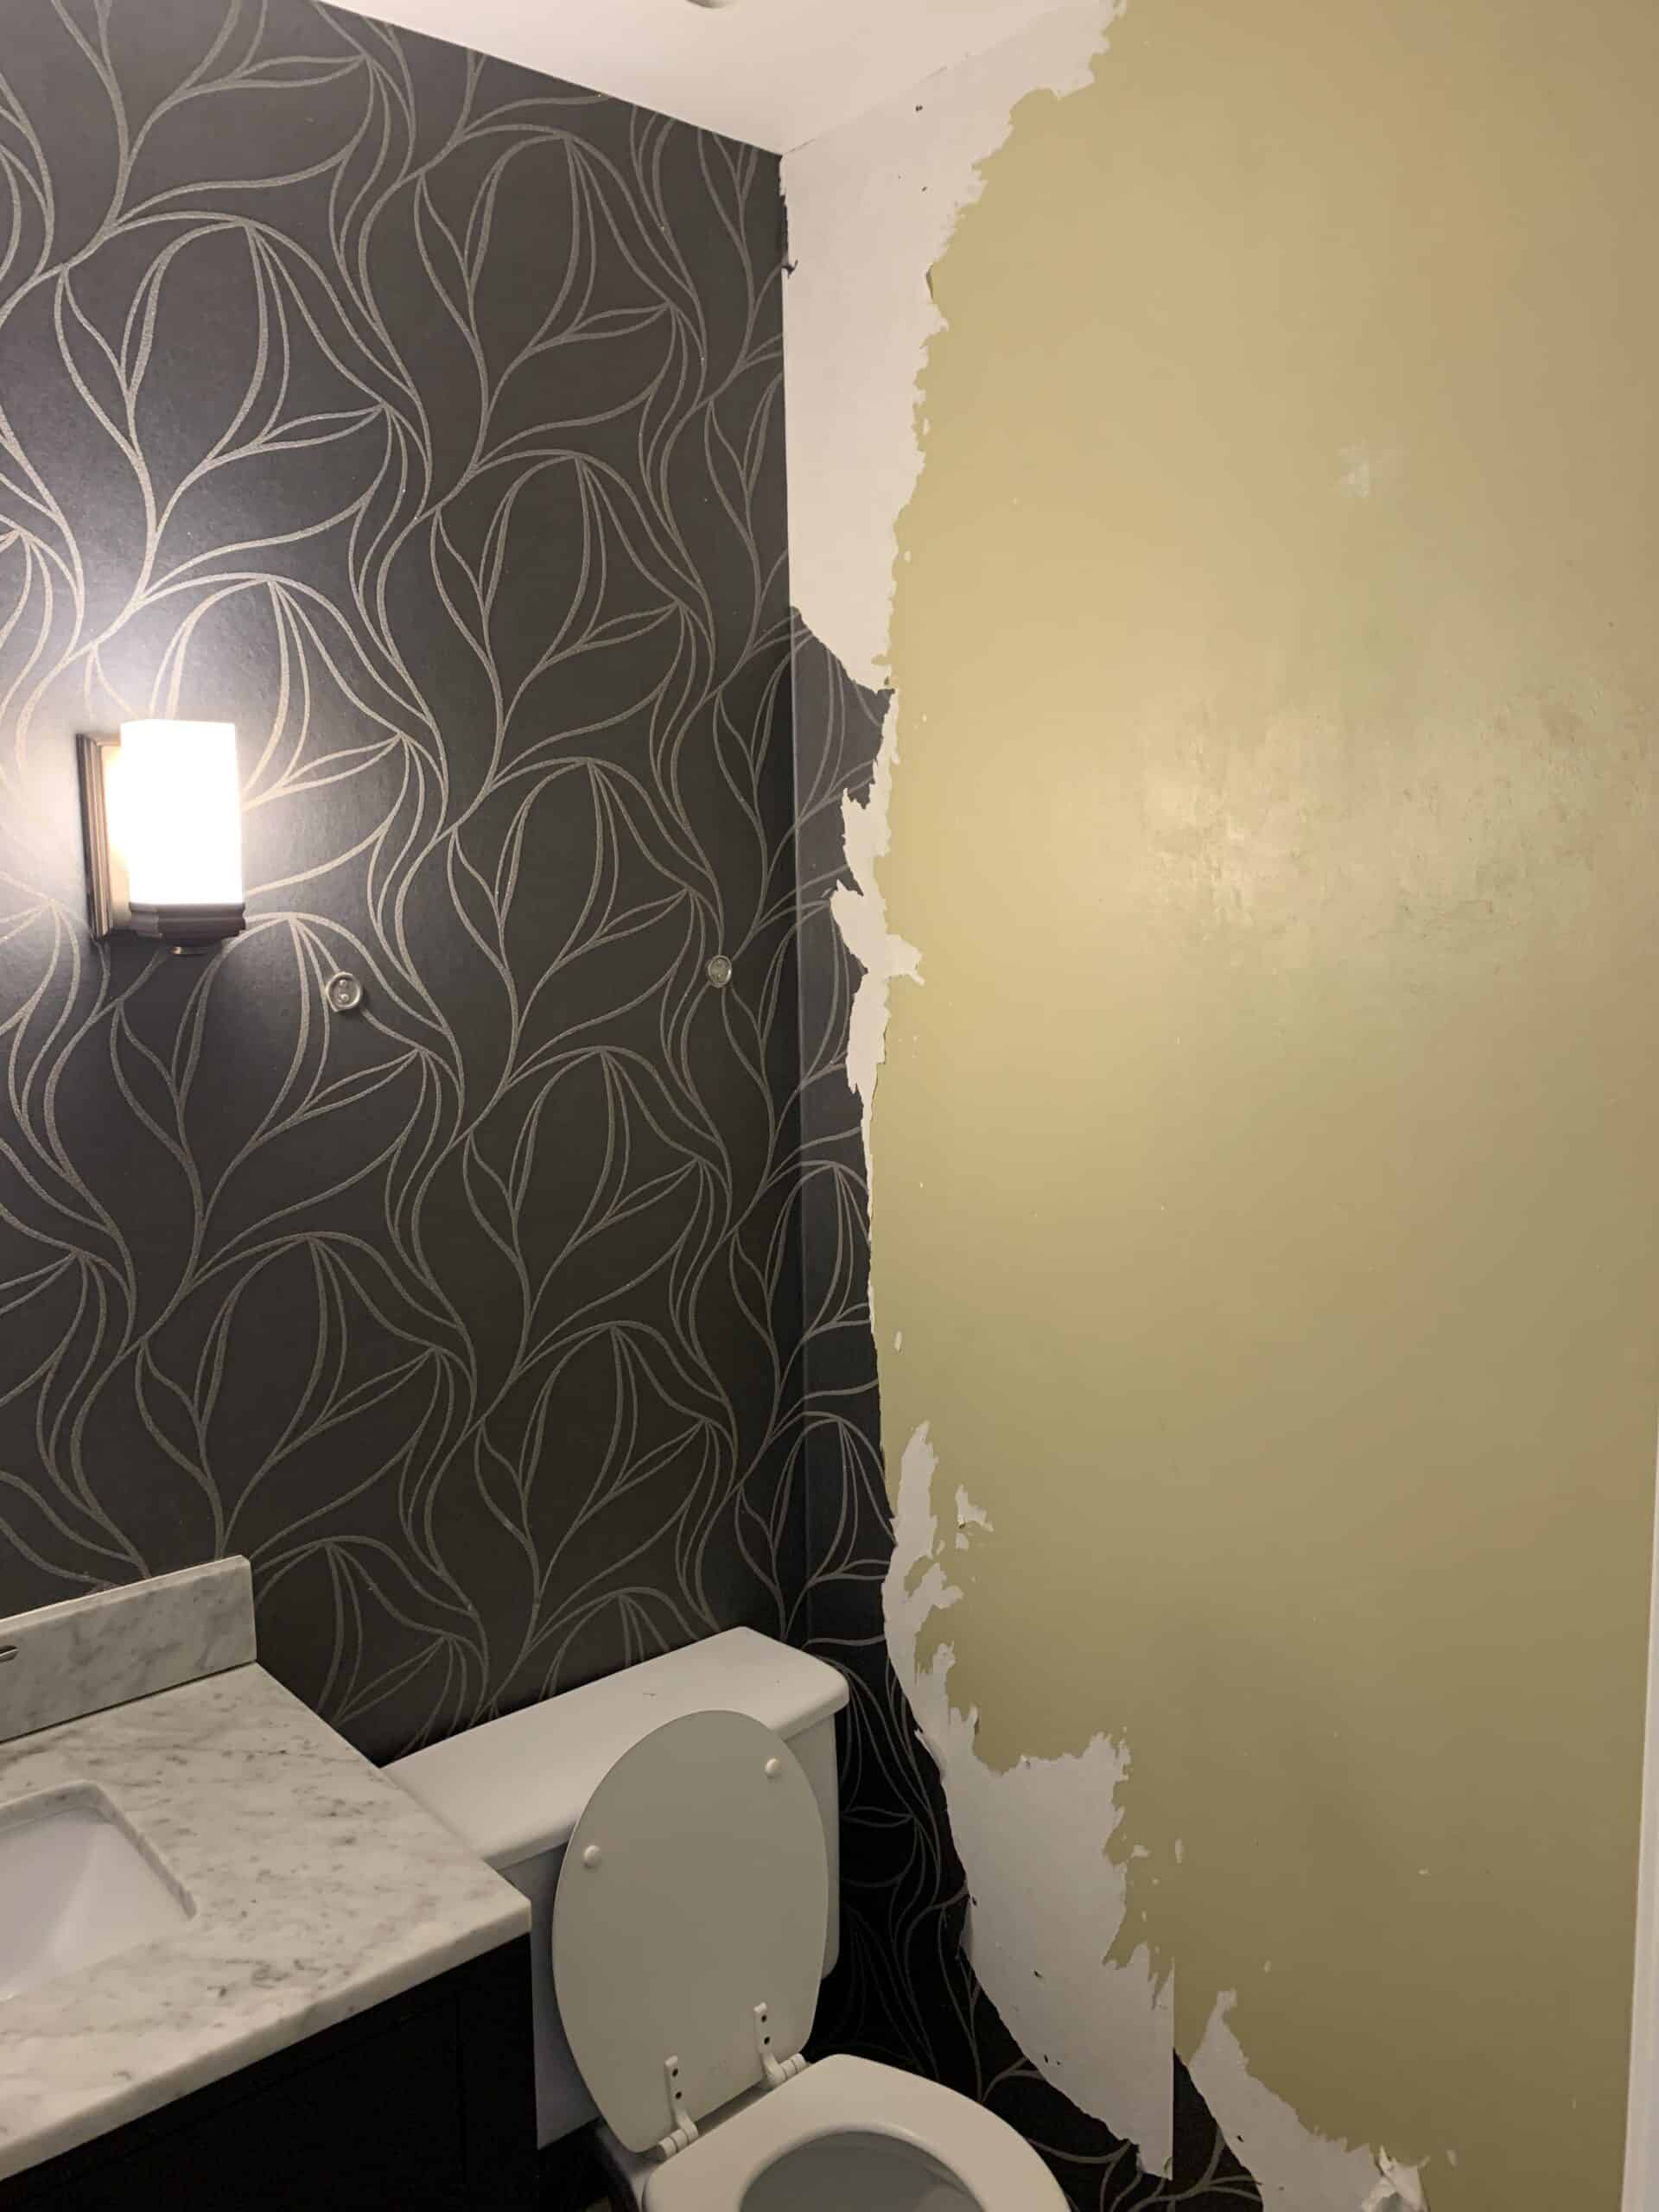
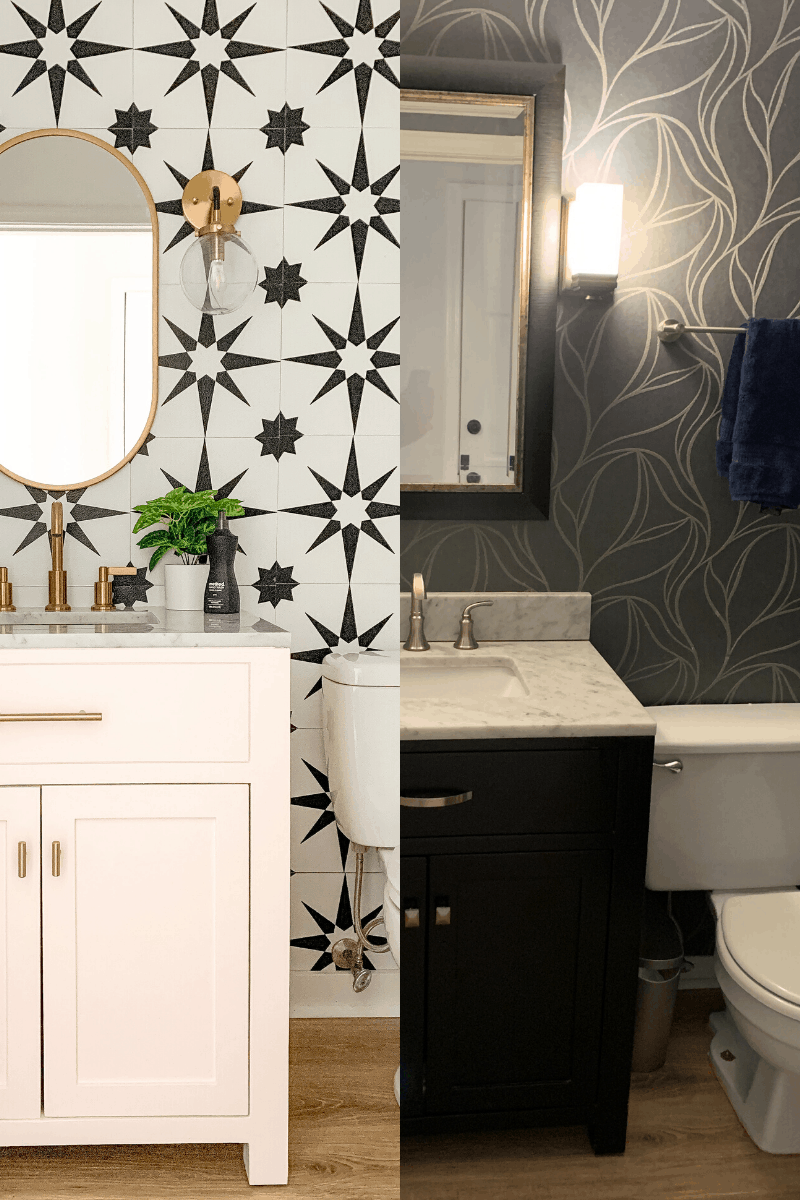
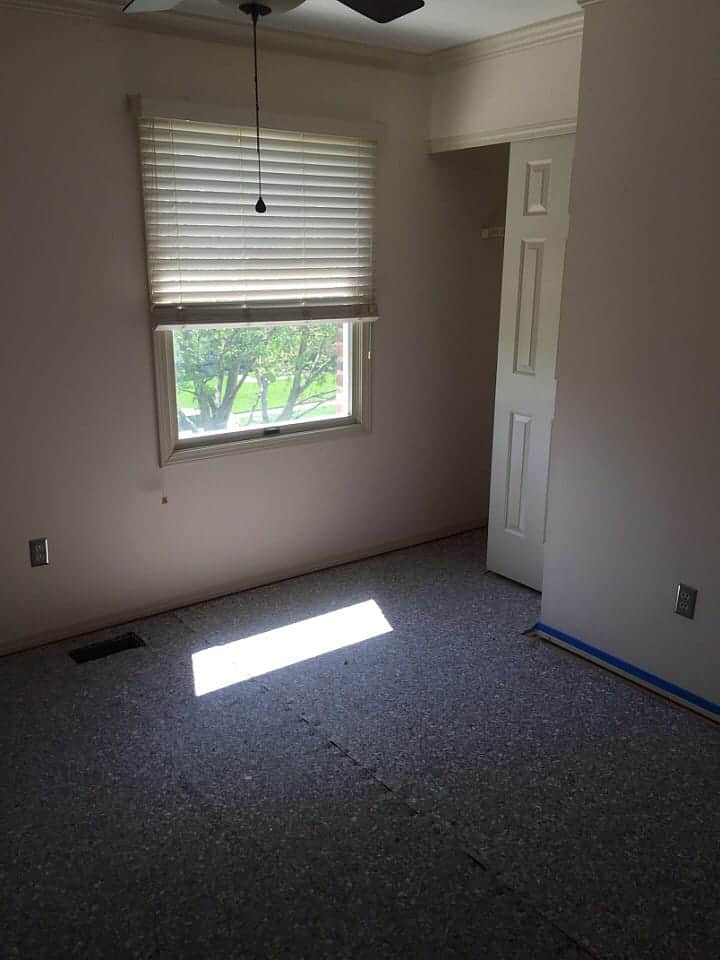
Our powder room has not changed even a TINY bit since we moved in. (well okay new floors, but that is it!). It was 100% not our style, and really dark and dreary for such a small powder room.
Truly the only thing that held us back from doing this bathroom long ago was the wallpaper – you hear horror stories of removing it, and we didn’t want to do it haha. Honestly so much so that probably 9 months ago my husband tore a tiny piece off to see what was under it, and we still drug our feet.
When the thought of a 3 week challenge room refresh challenge came up, I knew this was perfect. I wanted to show a HUGE change in 3 weeks. The end results DID NOT DISAPPOINT.
Video with Tour
This is the before!
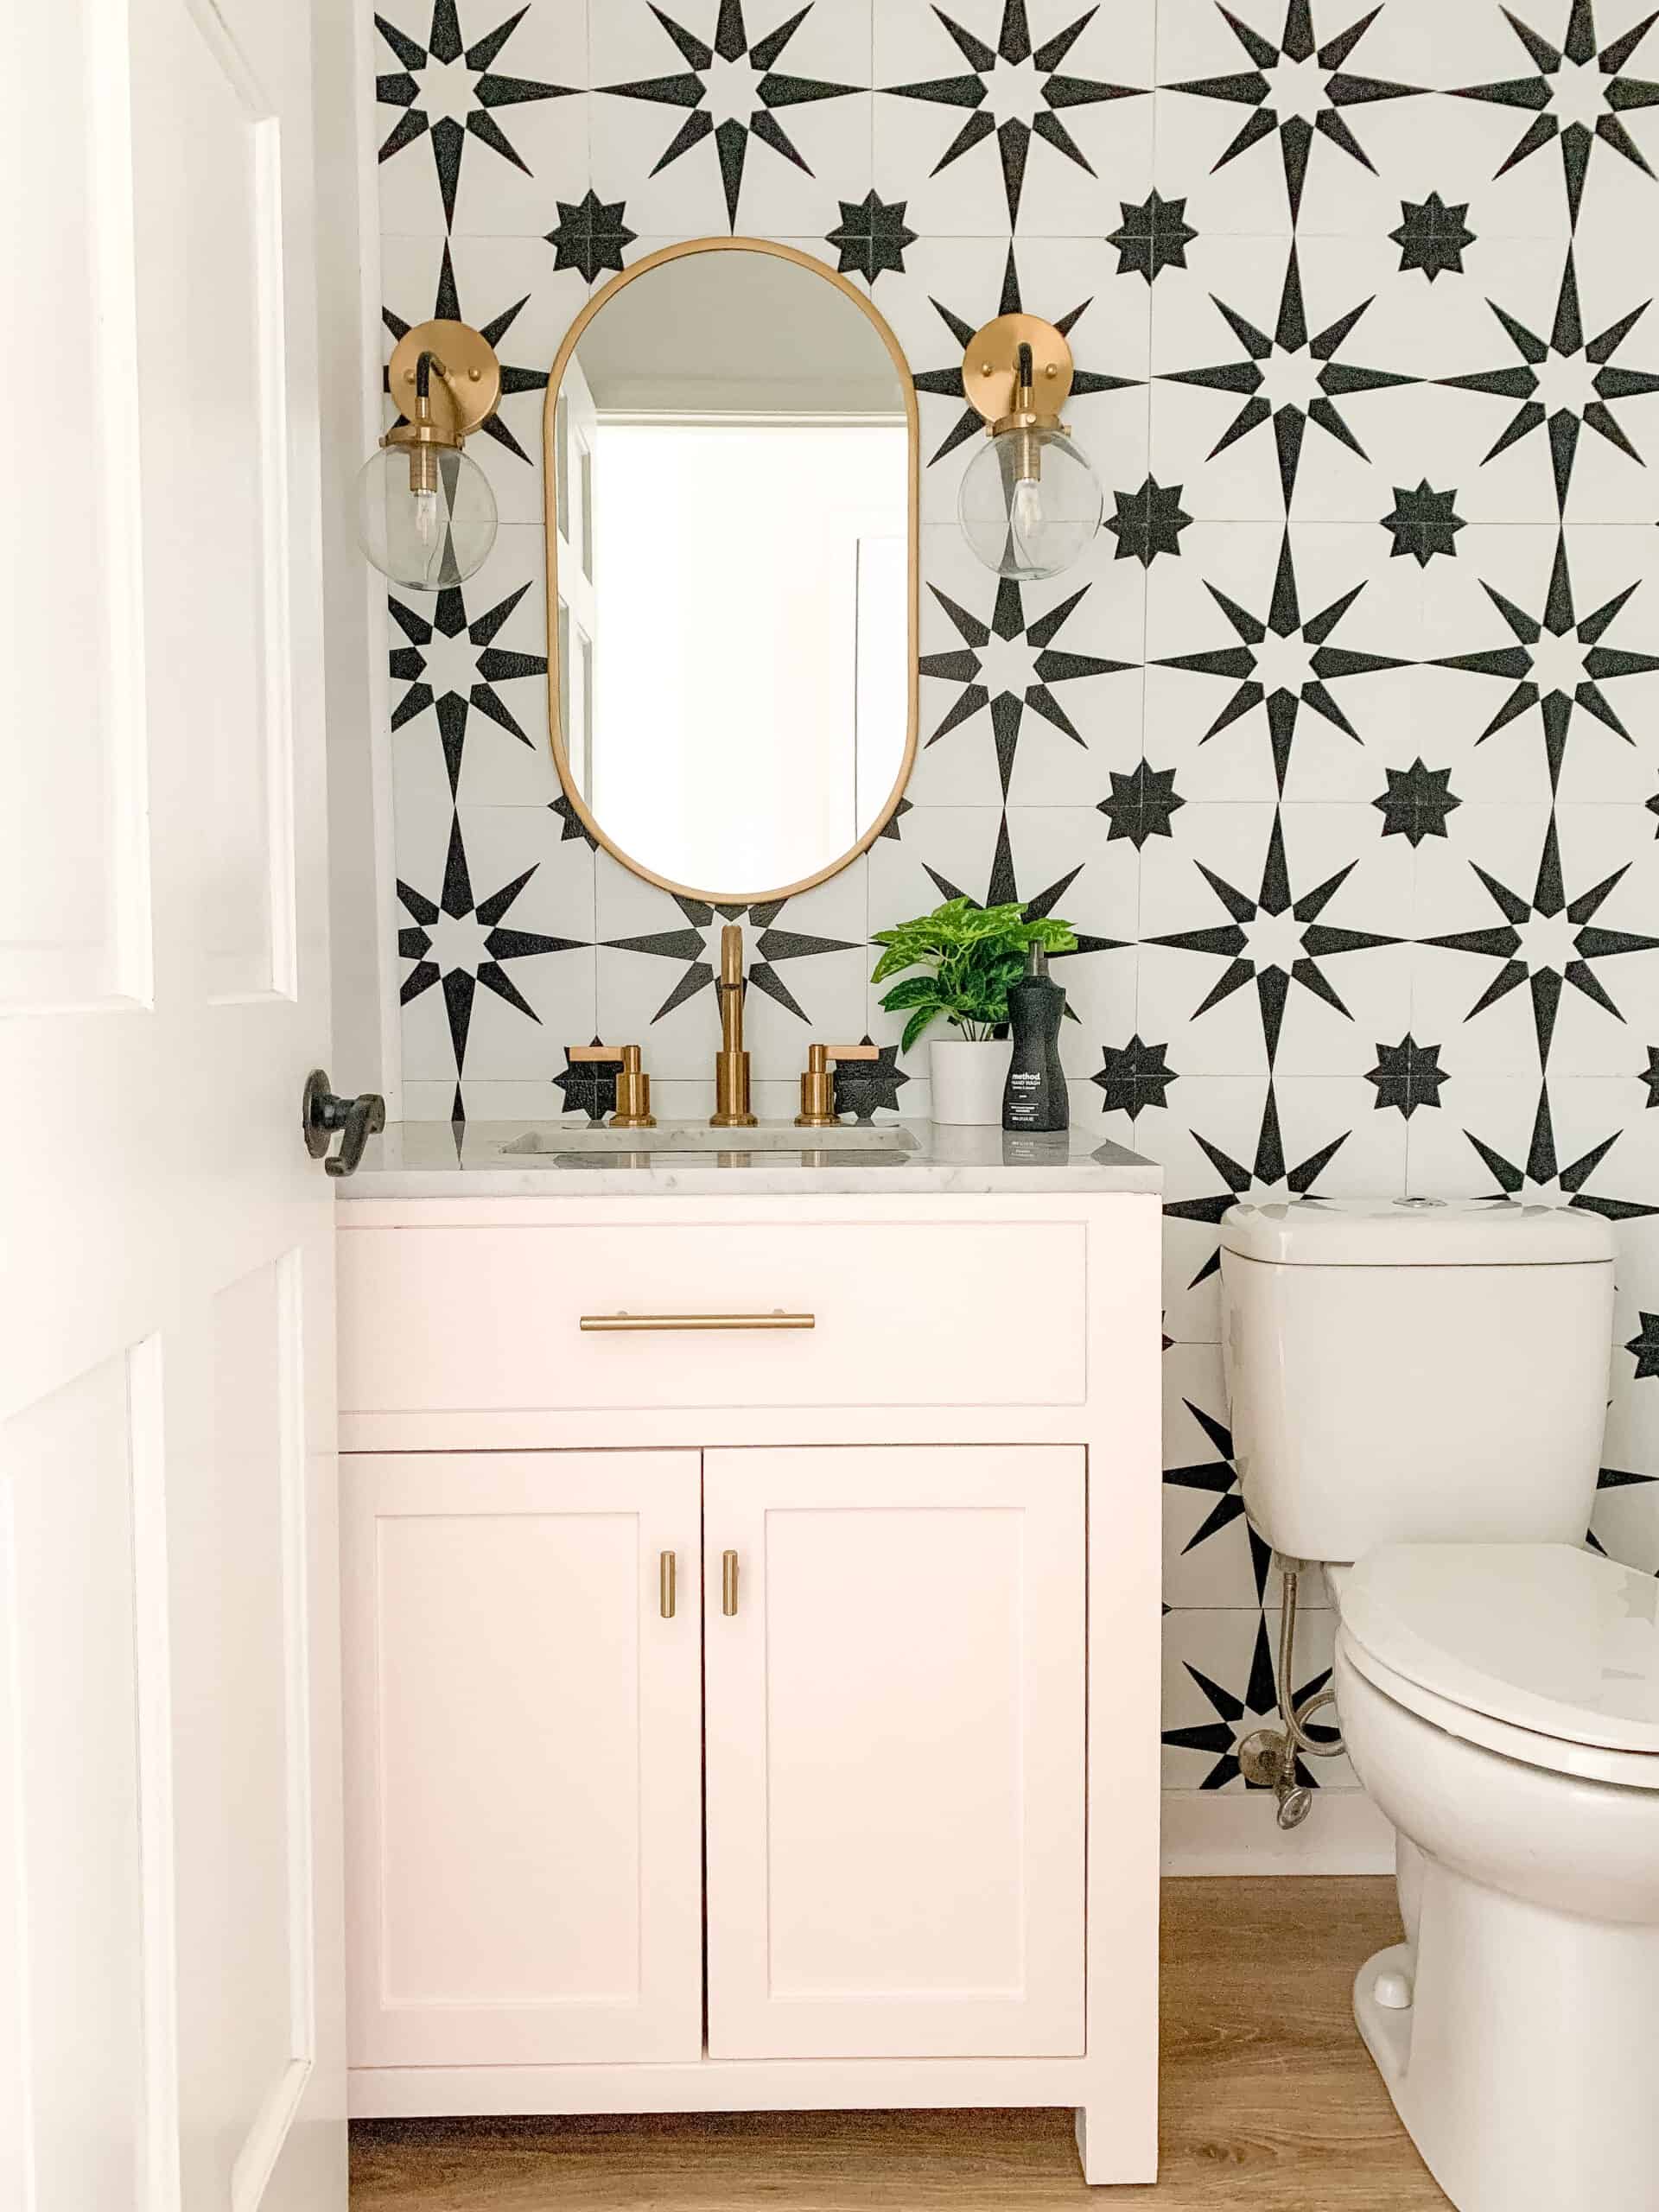
And this is at the after
The Design Process
I am going to show you the mood board I created for this room, which we walked you through via a free document on the original blog post – grab that here!
For me, I normally find something that really gets the ball rolling for a room. One item that is bold and fun, and I go from there. In this case it was these tiles. I found boxes of these basically faux tiles on sale for $11 each, and couldn’t resist, knowing that I would have a place for them somewhere.
I grabbed 4 boxes, and ultimately decide they would be really fun on the wall on the bathroom. The fun part about bathrooms, is there aren’t that many choices that have to be made, especially one this small.
I knew I wanted brass fixtures with the bold wall, and went back and forth on the vanity, but ultimately, decided to go big or go home and do pink. I am a huge sucker for pink, and I knew it was something that could so easily be changed for resale, so we went for it.
Mood Board
One thing I tend to always do for a room is create a mood board. Sometimes seeing items together can help give you direction and keep you on track. This can be in the form of an actual mood board or a Pinterest board. Normally for me it’s the mood board.
Below is my mood board. I will link each item on this board, and then talk to you about my thought process going through it.
To shop this mood board, click on the item you are interested in!
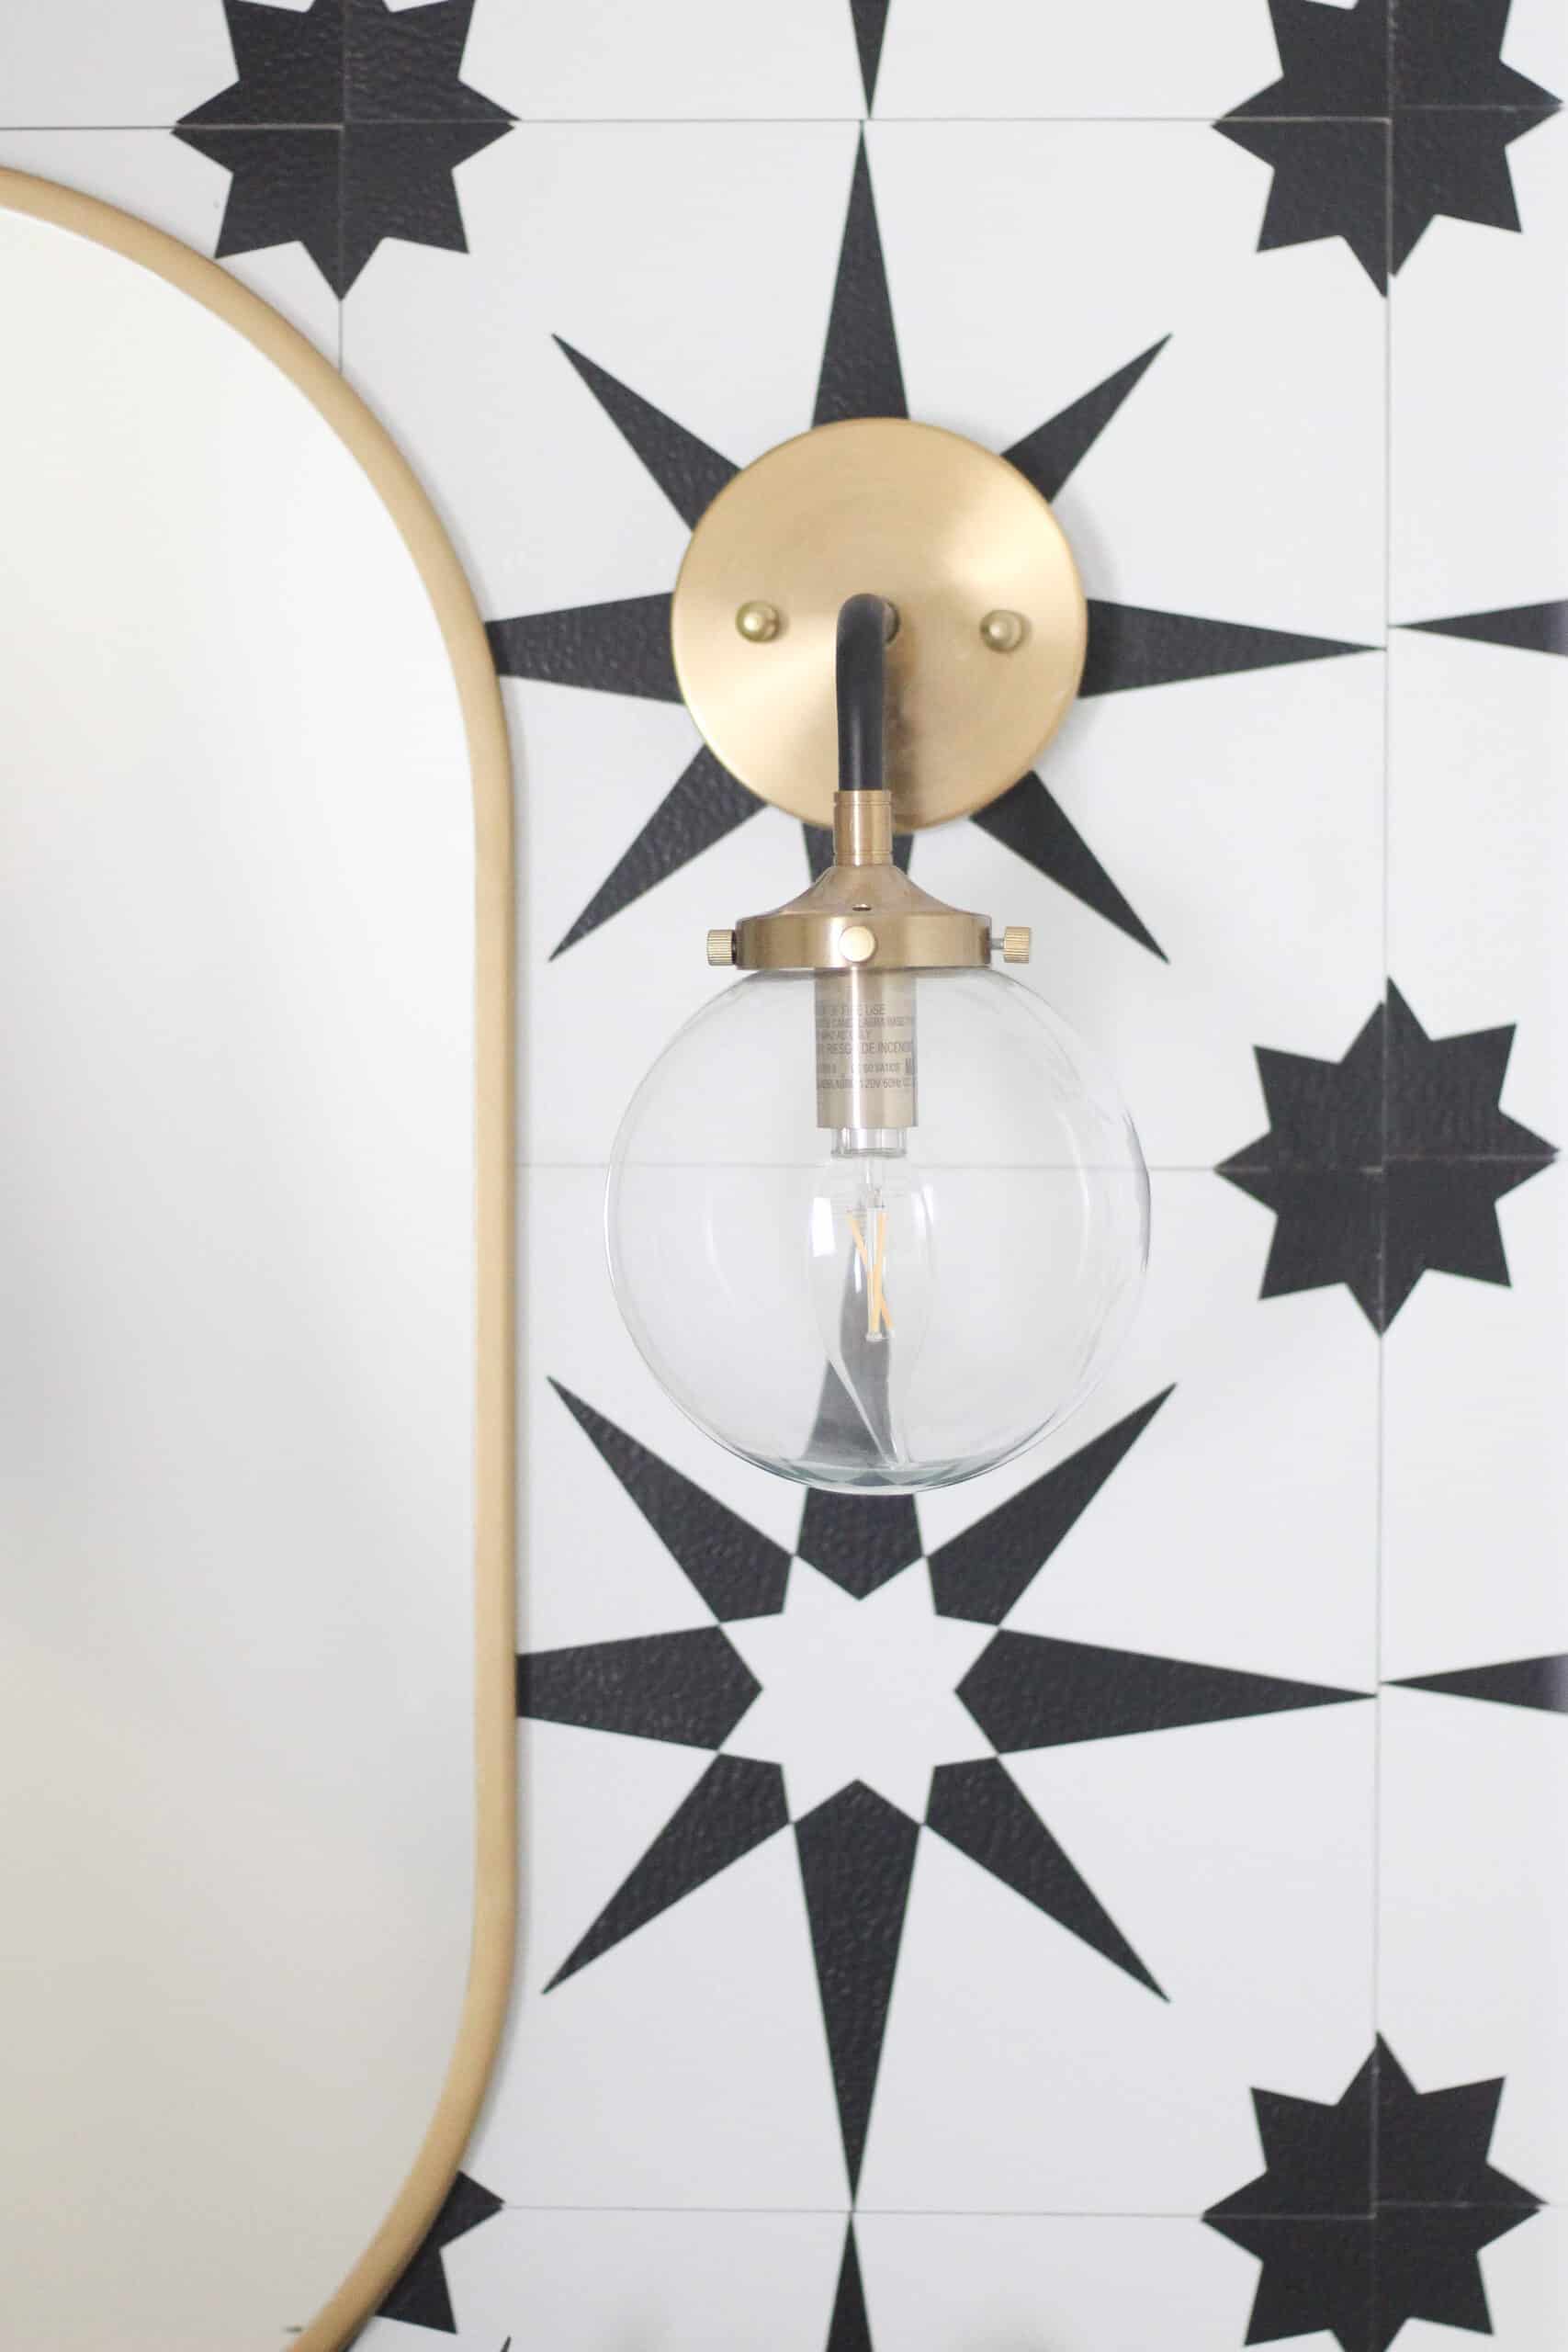
This light has a blush glass to it and its gorgeous – and actually a great price point!
I loved loved loved this light and will be looking for a place to use it!
A plant – I used this as a way to see how a pop of green would look
The paint color we ended with – Glidden Slightly Peach
Another color I was considering – Glidden Deep Emerald
As you can see – lighting and vanity color were my hardest choices. I knew I wanted some pink in the bathroom, and two of the light fixtures I linked had that pop of pink. Ultimately I found that the one I really loved (with the tassel) wouldn’t fit, and I wanted to go with more of a brushed brass than gold.
I was also torn on emerald or pink for the vanity. I think I was just scared to do pink because of other peoples thoughts, but then quickly. remembered – this is my home! – you will see that some of the other items are in the room at the end, and I incorporated the tiles on the board because I knew they were happening.
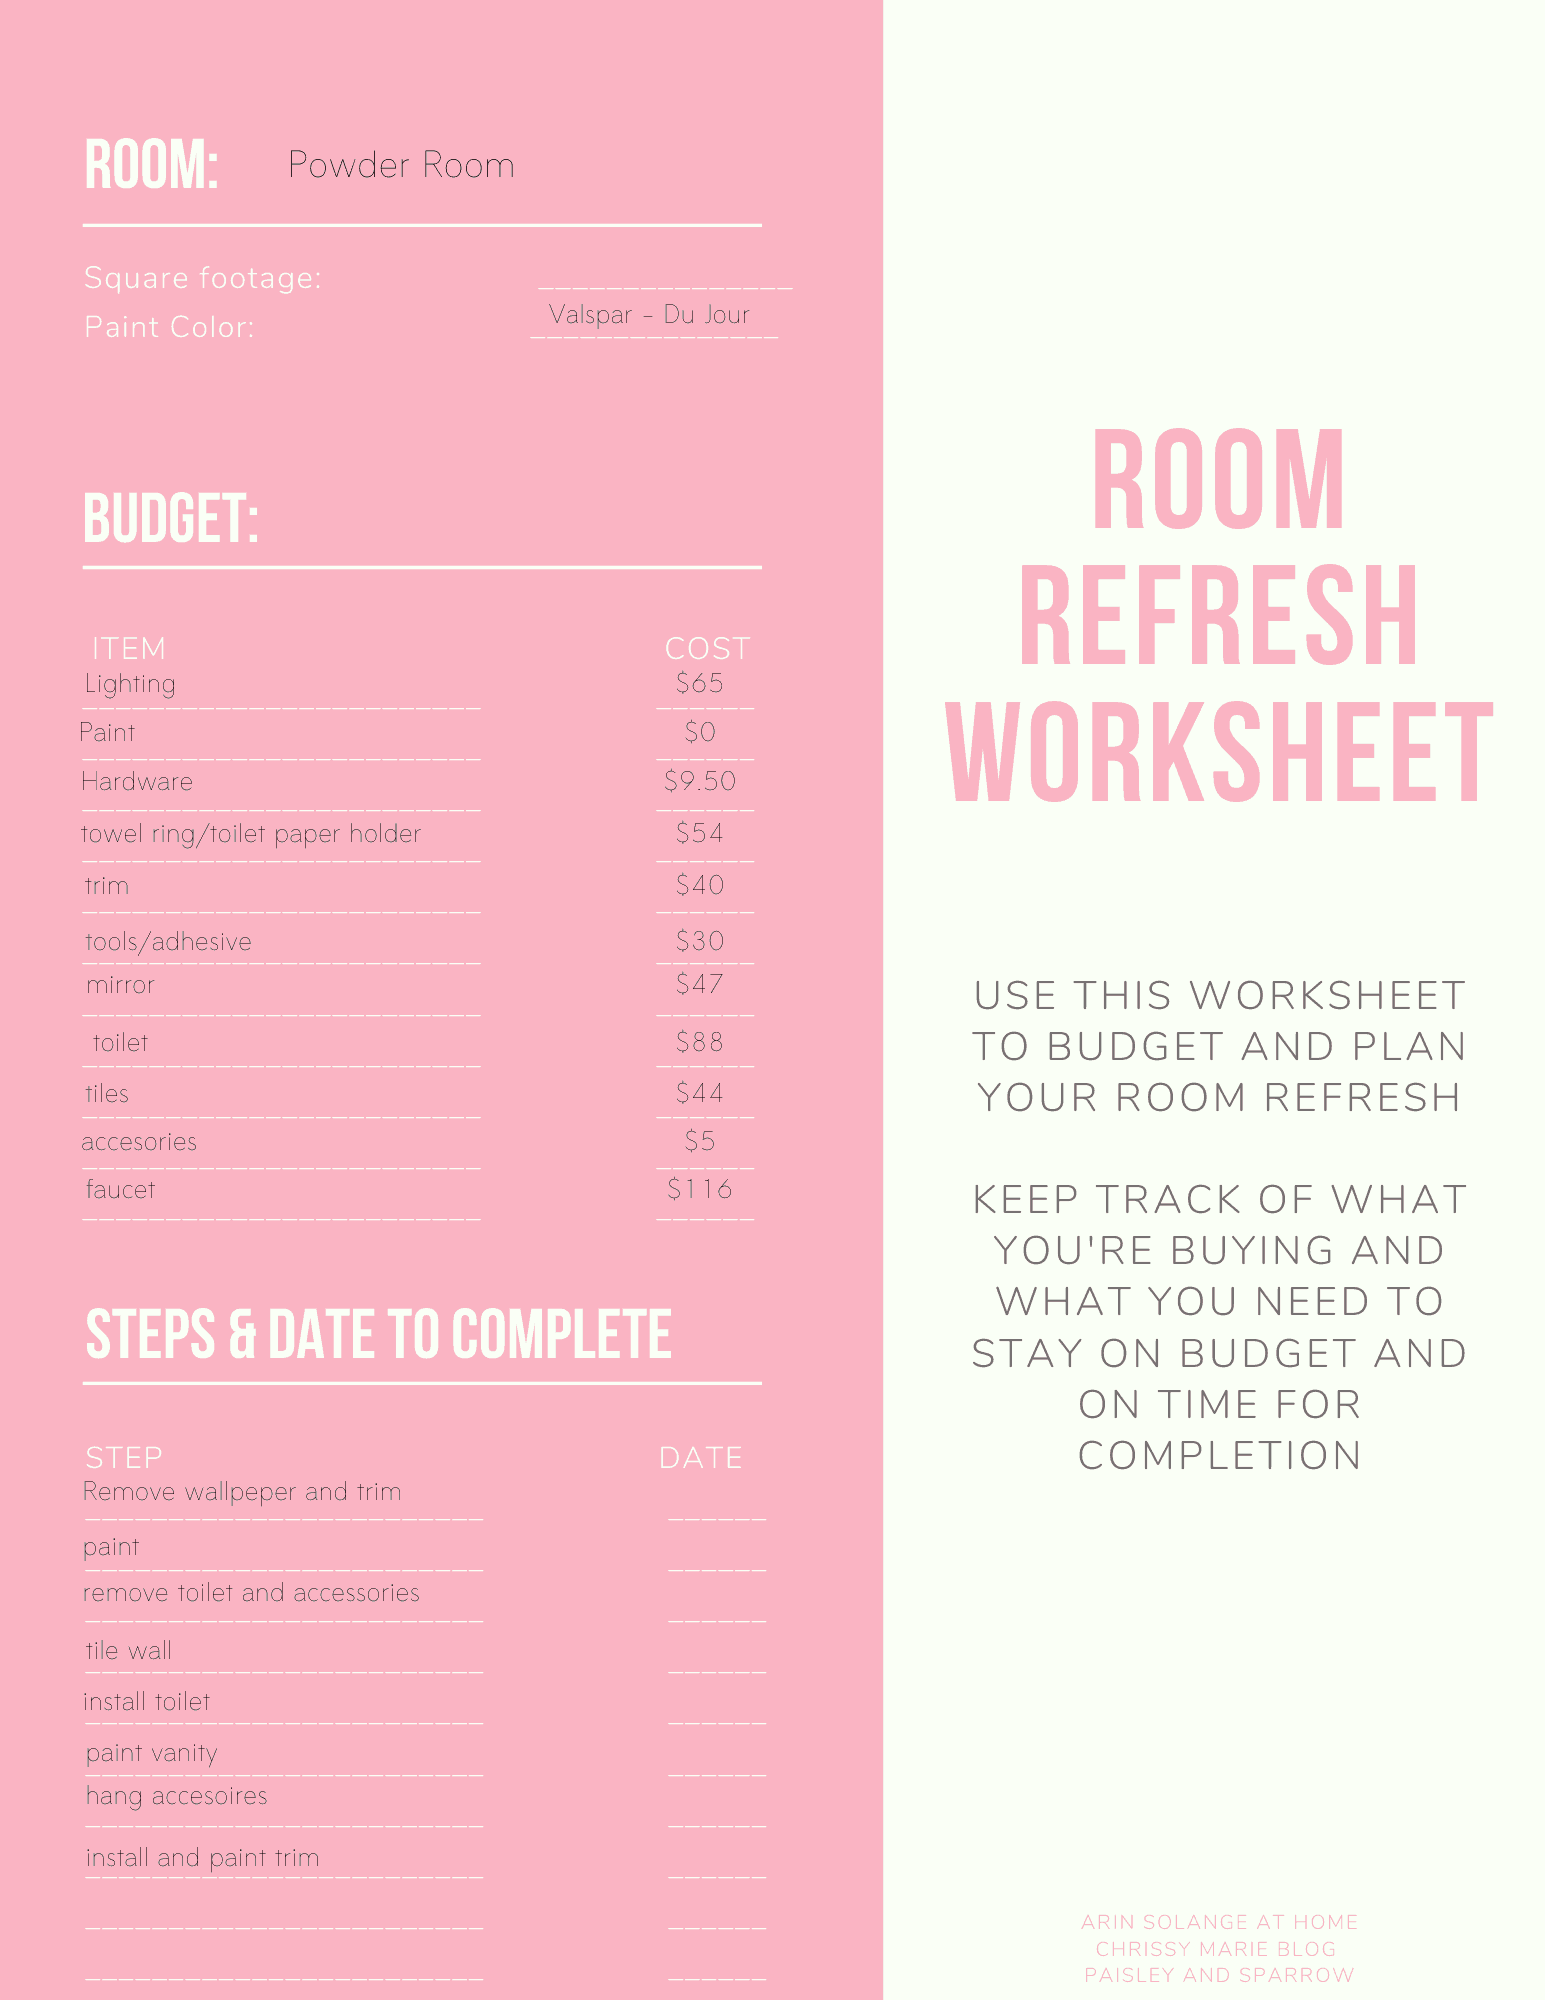
Budget
Something else to consider always when it comes to a room is your budget – I really wanted to keep this to $350 ish. Below I filled out our steps and budget form from the original March Room Refresh Post to show you where we ended up.
For me the budget was not firm, but I try to get a good idea of how much will be spent. We ended up deciding to get a new toilet since we needed to take the old one off, which was an added expense, but worth it for us.
Our end amount spent was roughly: $497
Assembling The Room
So like I said – the starting point for this room was the tile wall. We had to remove the wallpaper that was already there – and PRAISE GOD it wasn’t a horror story, and actually came off rather easily. Once that was done we removed baseboards, cleaned and sanded the walls, and prepped them to be painted.
We painted the bathroom Valspar – Du Jour which is a white we use a lot. Luckily we had it on hand so there was no cost involved. We painted all the walls, then into the corner of the wall with the tile just sort of trimming it out.
Once the walls were dry it was time to tile. We had already removed everything aside from the lights. We decided to move those when needed to give us light to work with for as much time as possible. you will see what I mean before.
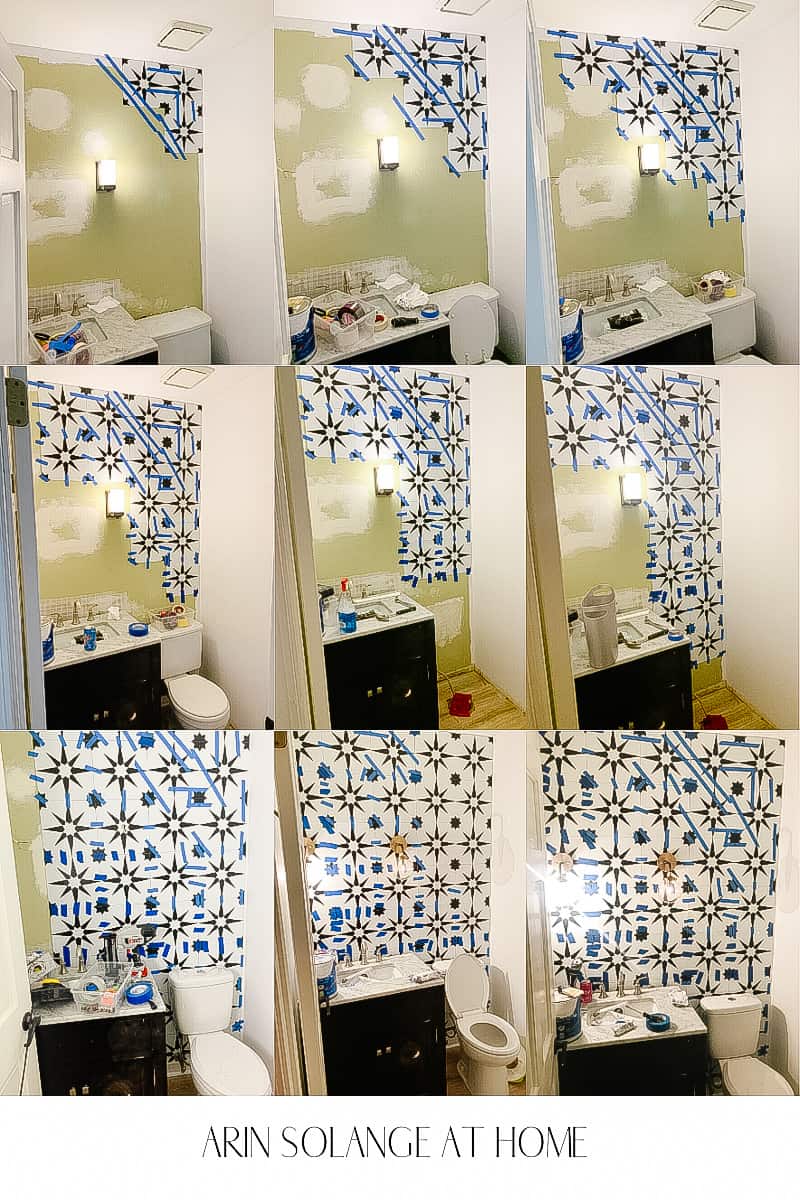
Hanging The Tiles
The tiles ARE NOT FOR WALLS. So the adhesive on them doesn’t work for this. We broke all the rules and used THIS adhesive. I have used it before for other projects and know how strong it is.
We hung a few tiles at a time, and used painters tape to keep them in place while they dried. The Adhesive doesn’t take a terrible amount of time to dry, but basically we worked where we could tape the wall then dried tiles working from one corner out.
The tiles are super easy to hang and cut, but it isn’t fast as far as first tile to last because of the drying. It probably took us 4 days to complete the wall (but we had worked activities in there). We would hang a few which took about 10 min then move on and do something else for hours.
The best news is we had one tile with a weird mark we decided to remove after the full wall was done. We were worried it would be a pain, but honestly it wasn’t horrible and didn’t destroy the wall behind it if you are concerned about that!
The Vanity
One the tiles were up, we had to paint the vanity. We went back and forth on buying a vanity, but this one was in good shape, and I love the storage it offers for the space. I also love the sink and countertop, so there was no real reason to spend the money to replace it when we could just give it a coat of paint!
I obviously went with a blush pink, and actually had left over paint from Goldie’s Dresser so just used that. I knew I loved it and it was a great way to save money.
To read more about painting bathroom vanities, you can check out this post – those cabinets are still looking great years later!
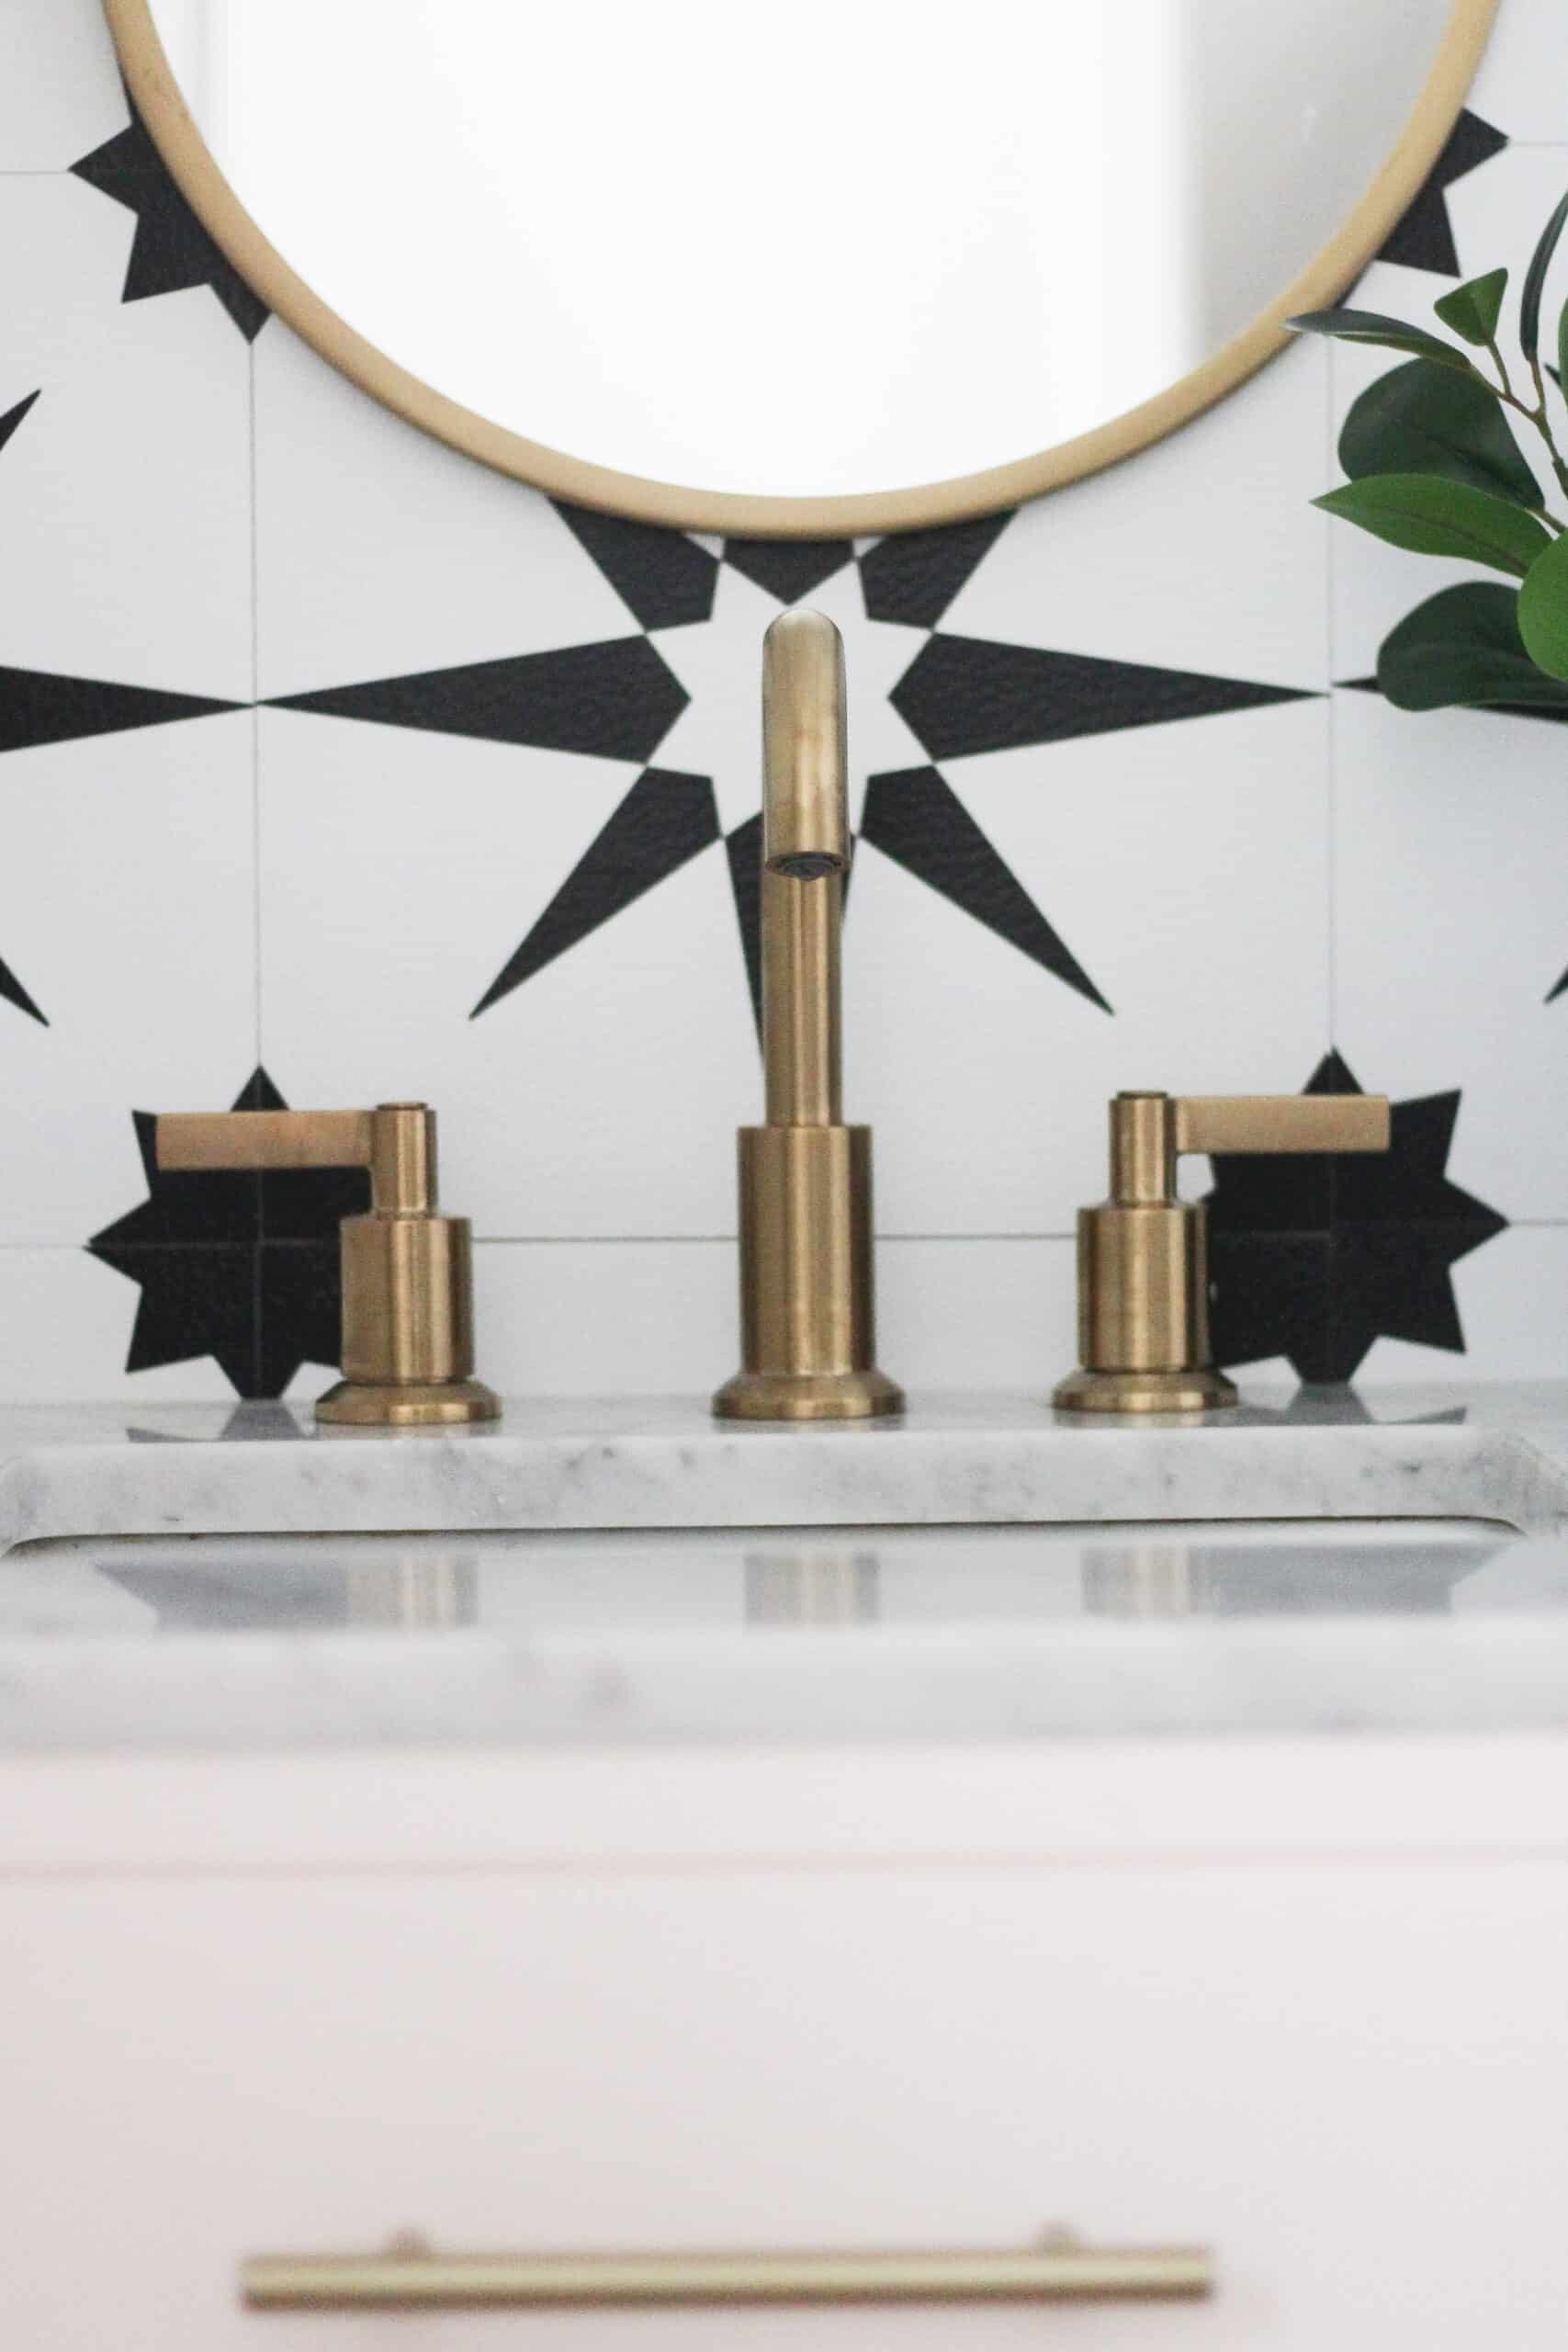
Finding the accessories/lighting and all of that was tricky. I wanted to find affordable options, but brushed brass is not all created equally. The first faucet I ordered was too yellow in comparison to the mirror and lights.
I also had to find lights that weren’t too wide because of the tight quarters. Ultimately I found the lights for $32 each and I love them, and the mirror was a great deal too. The faucet was a bit more of a splurge.
I also went with kind of an odd choice for the toilet paper holder. I loved the idea of these new ones that have a ‘cell phone shelf’, because we have 4 little kids at home, so always have flushable wipes. On the day to day we now have a place to store those, which I LOVE. like can not recommend it more!
I don’t do a lot in terms of decor in bathrooms – this bathroom is small and it just didn’t need much. A small little planter and stems from the Target Dollar Spot did the trick. I would have added a rug, but this is an older home and the doors are so low that we can’t do rugs where the doors swing. So rug-less is sort of our normal.
Overall I am INSANELY excited about the end outcome with this pink powder room, and how big of a change 3 weeks can make. I hope this is inspiring to you all who are joining us in the March room Refresh, and if you have questions along the way (or any time after) feel free to DM me on Instagram or leave me a comment.
Pin Post Below to Find this Pink Powder Room Later
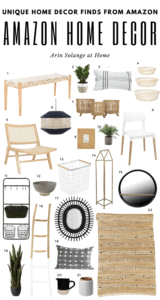
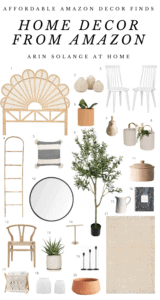
What is better than finding affordable home decor? Finding it online with prime shipping! I love to shop for home decor, but sometimes the finishing touches to a room are easier found online. I took to amazon to find you guys the best affordable Amazon home finds.
This post was originally posted on 5/21/18, and was updated on 1/21 – this post contains affiliate links
Affordable Amazon Home Finds
I am a mom of 4 little ones – so let’s just say that decor needs to be affordable when possible and easily found. I think by my 3rd terror I learned to succumb to online shopping instead of heading to the store. That little man can get out of any cart no matter how tight he strapped in!
When I am shopping for my house I love finding unique finds from Amazon because although Target is a girls best friend, those items seem to be in every house. Finding hidden gems on Amazon helps to keep things unique but still affordable.
If you stick with neutrals and metallics in your home, this post will be perfect for you, and those color pallets allow you to mix and match really well.
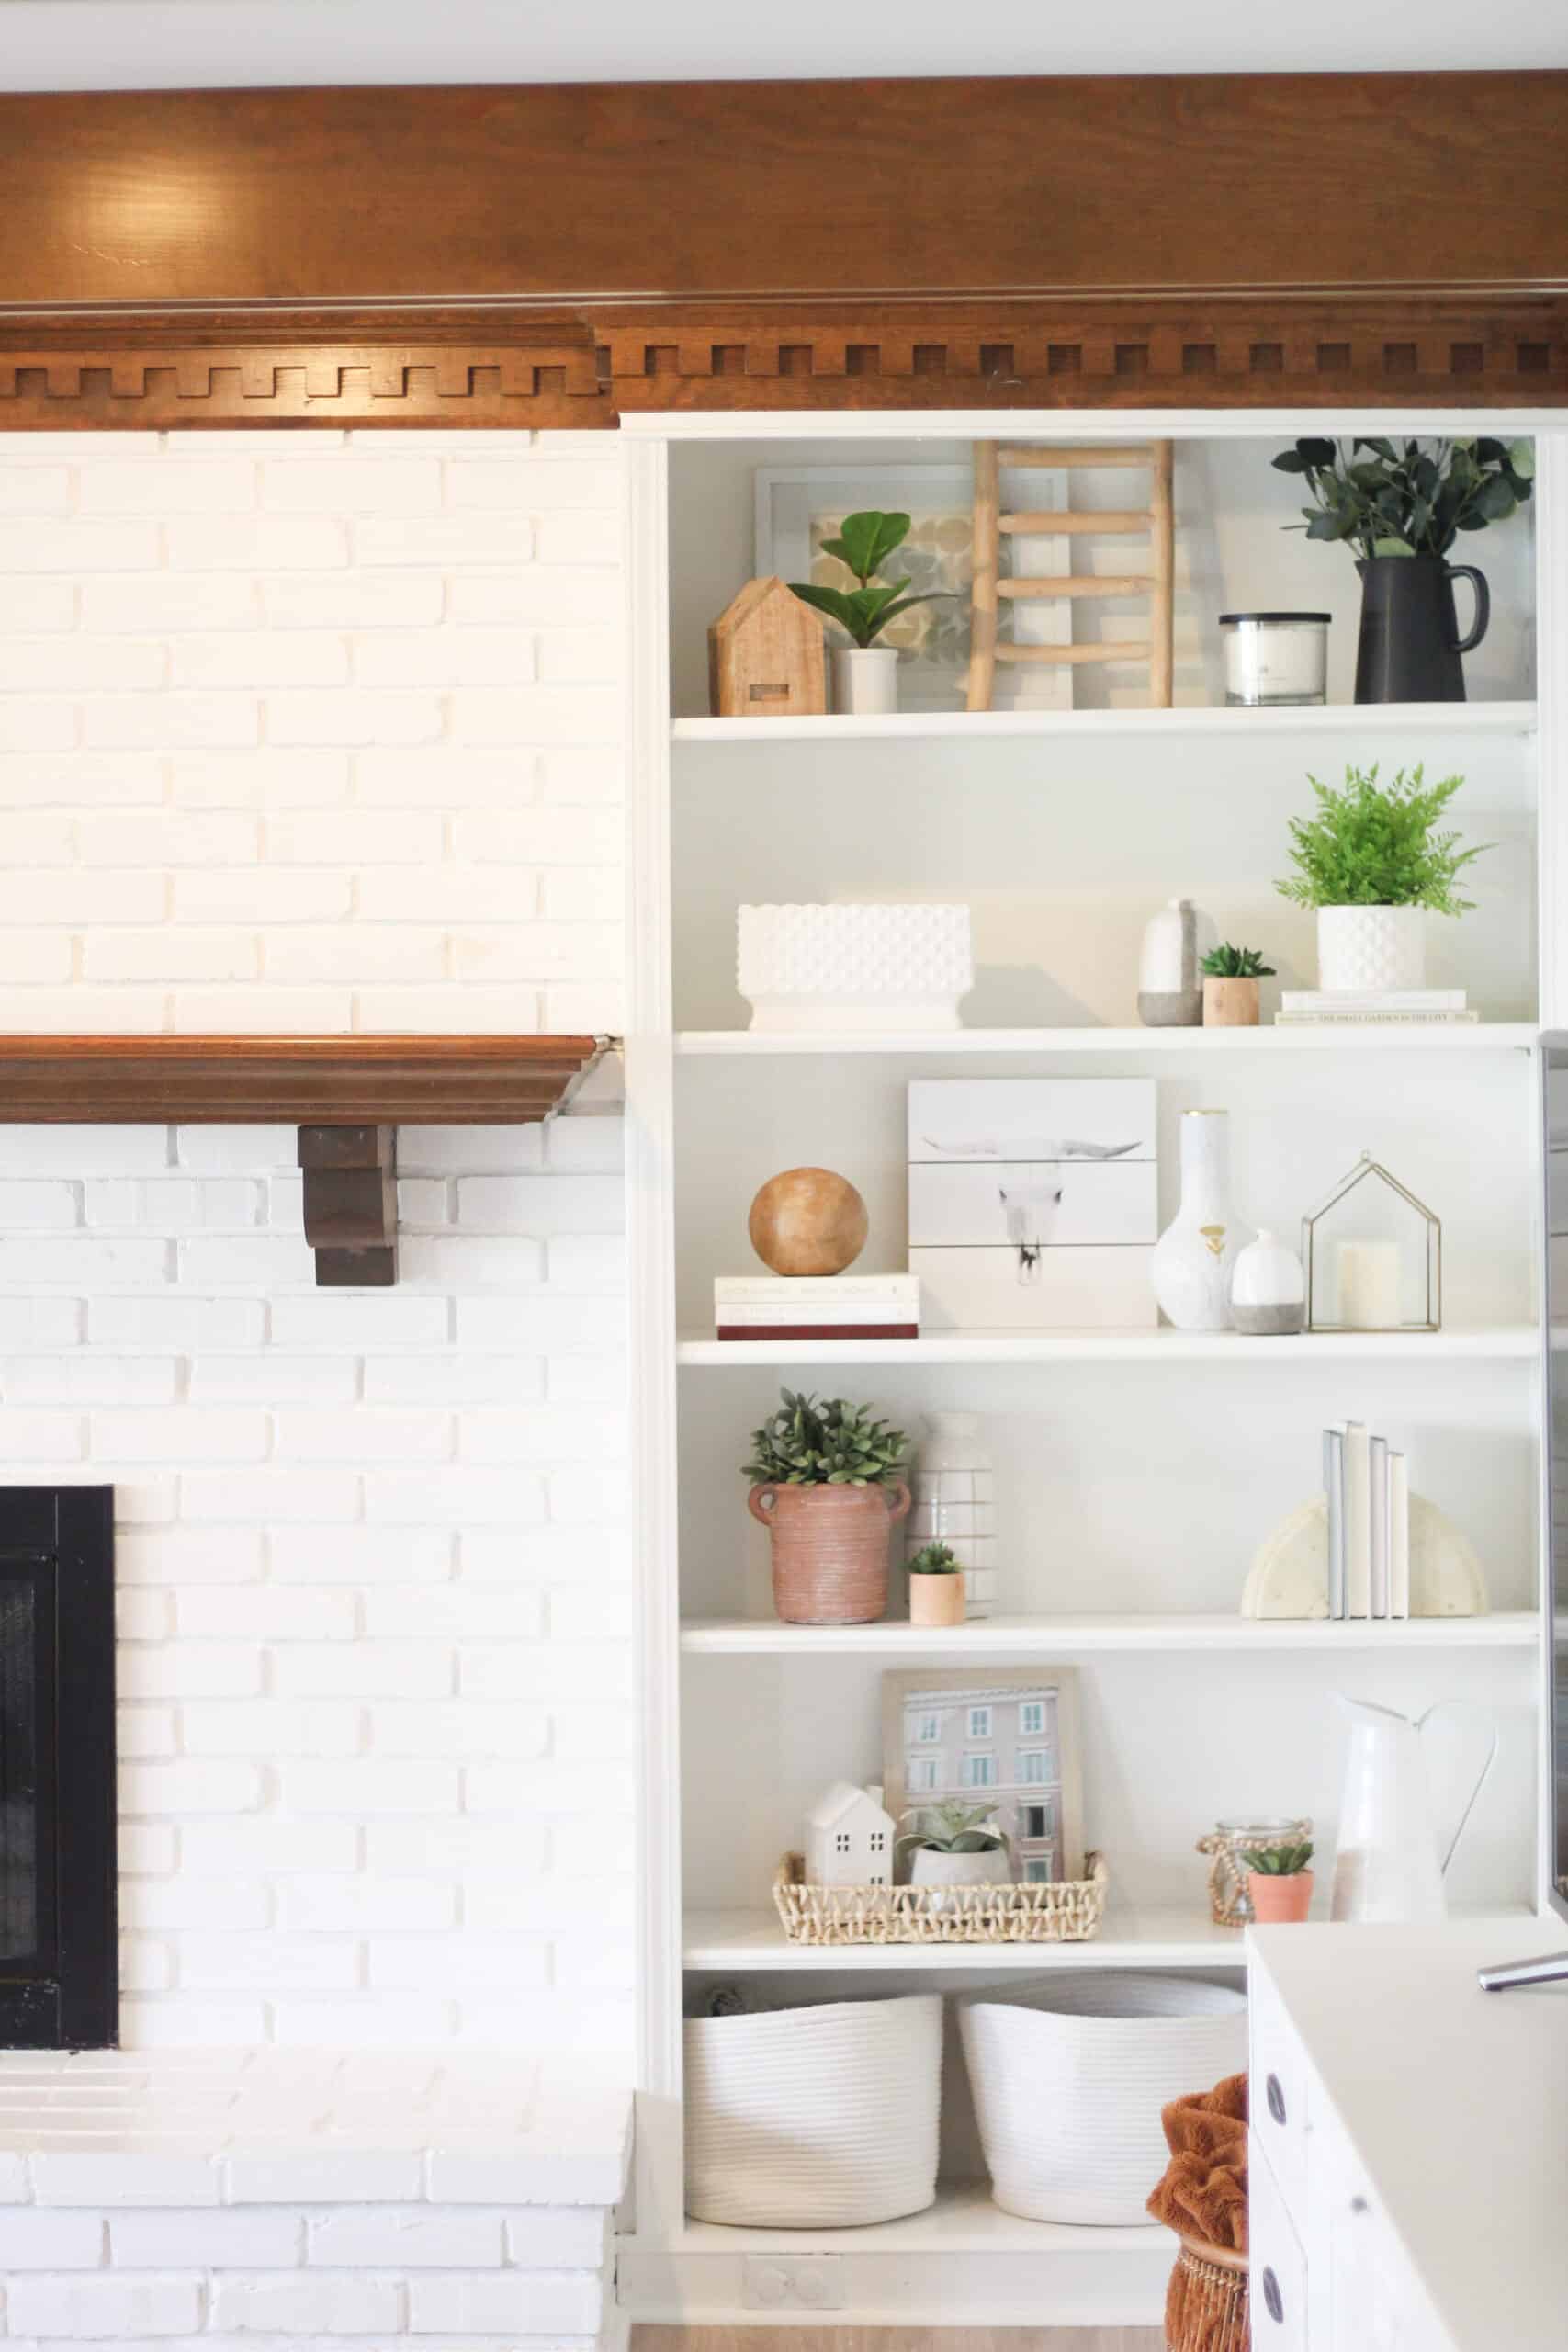
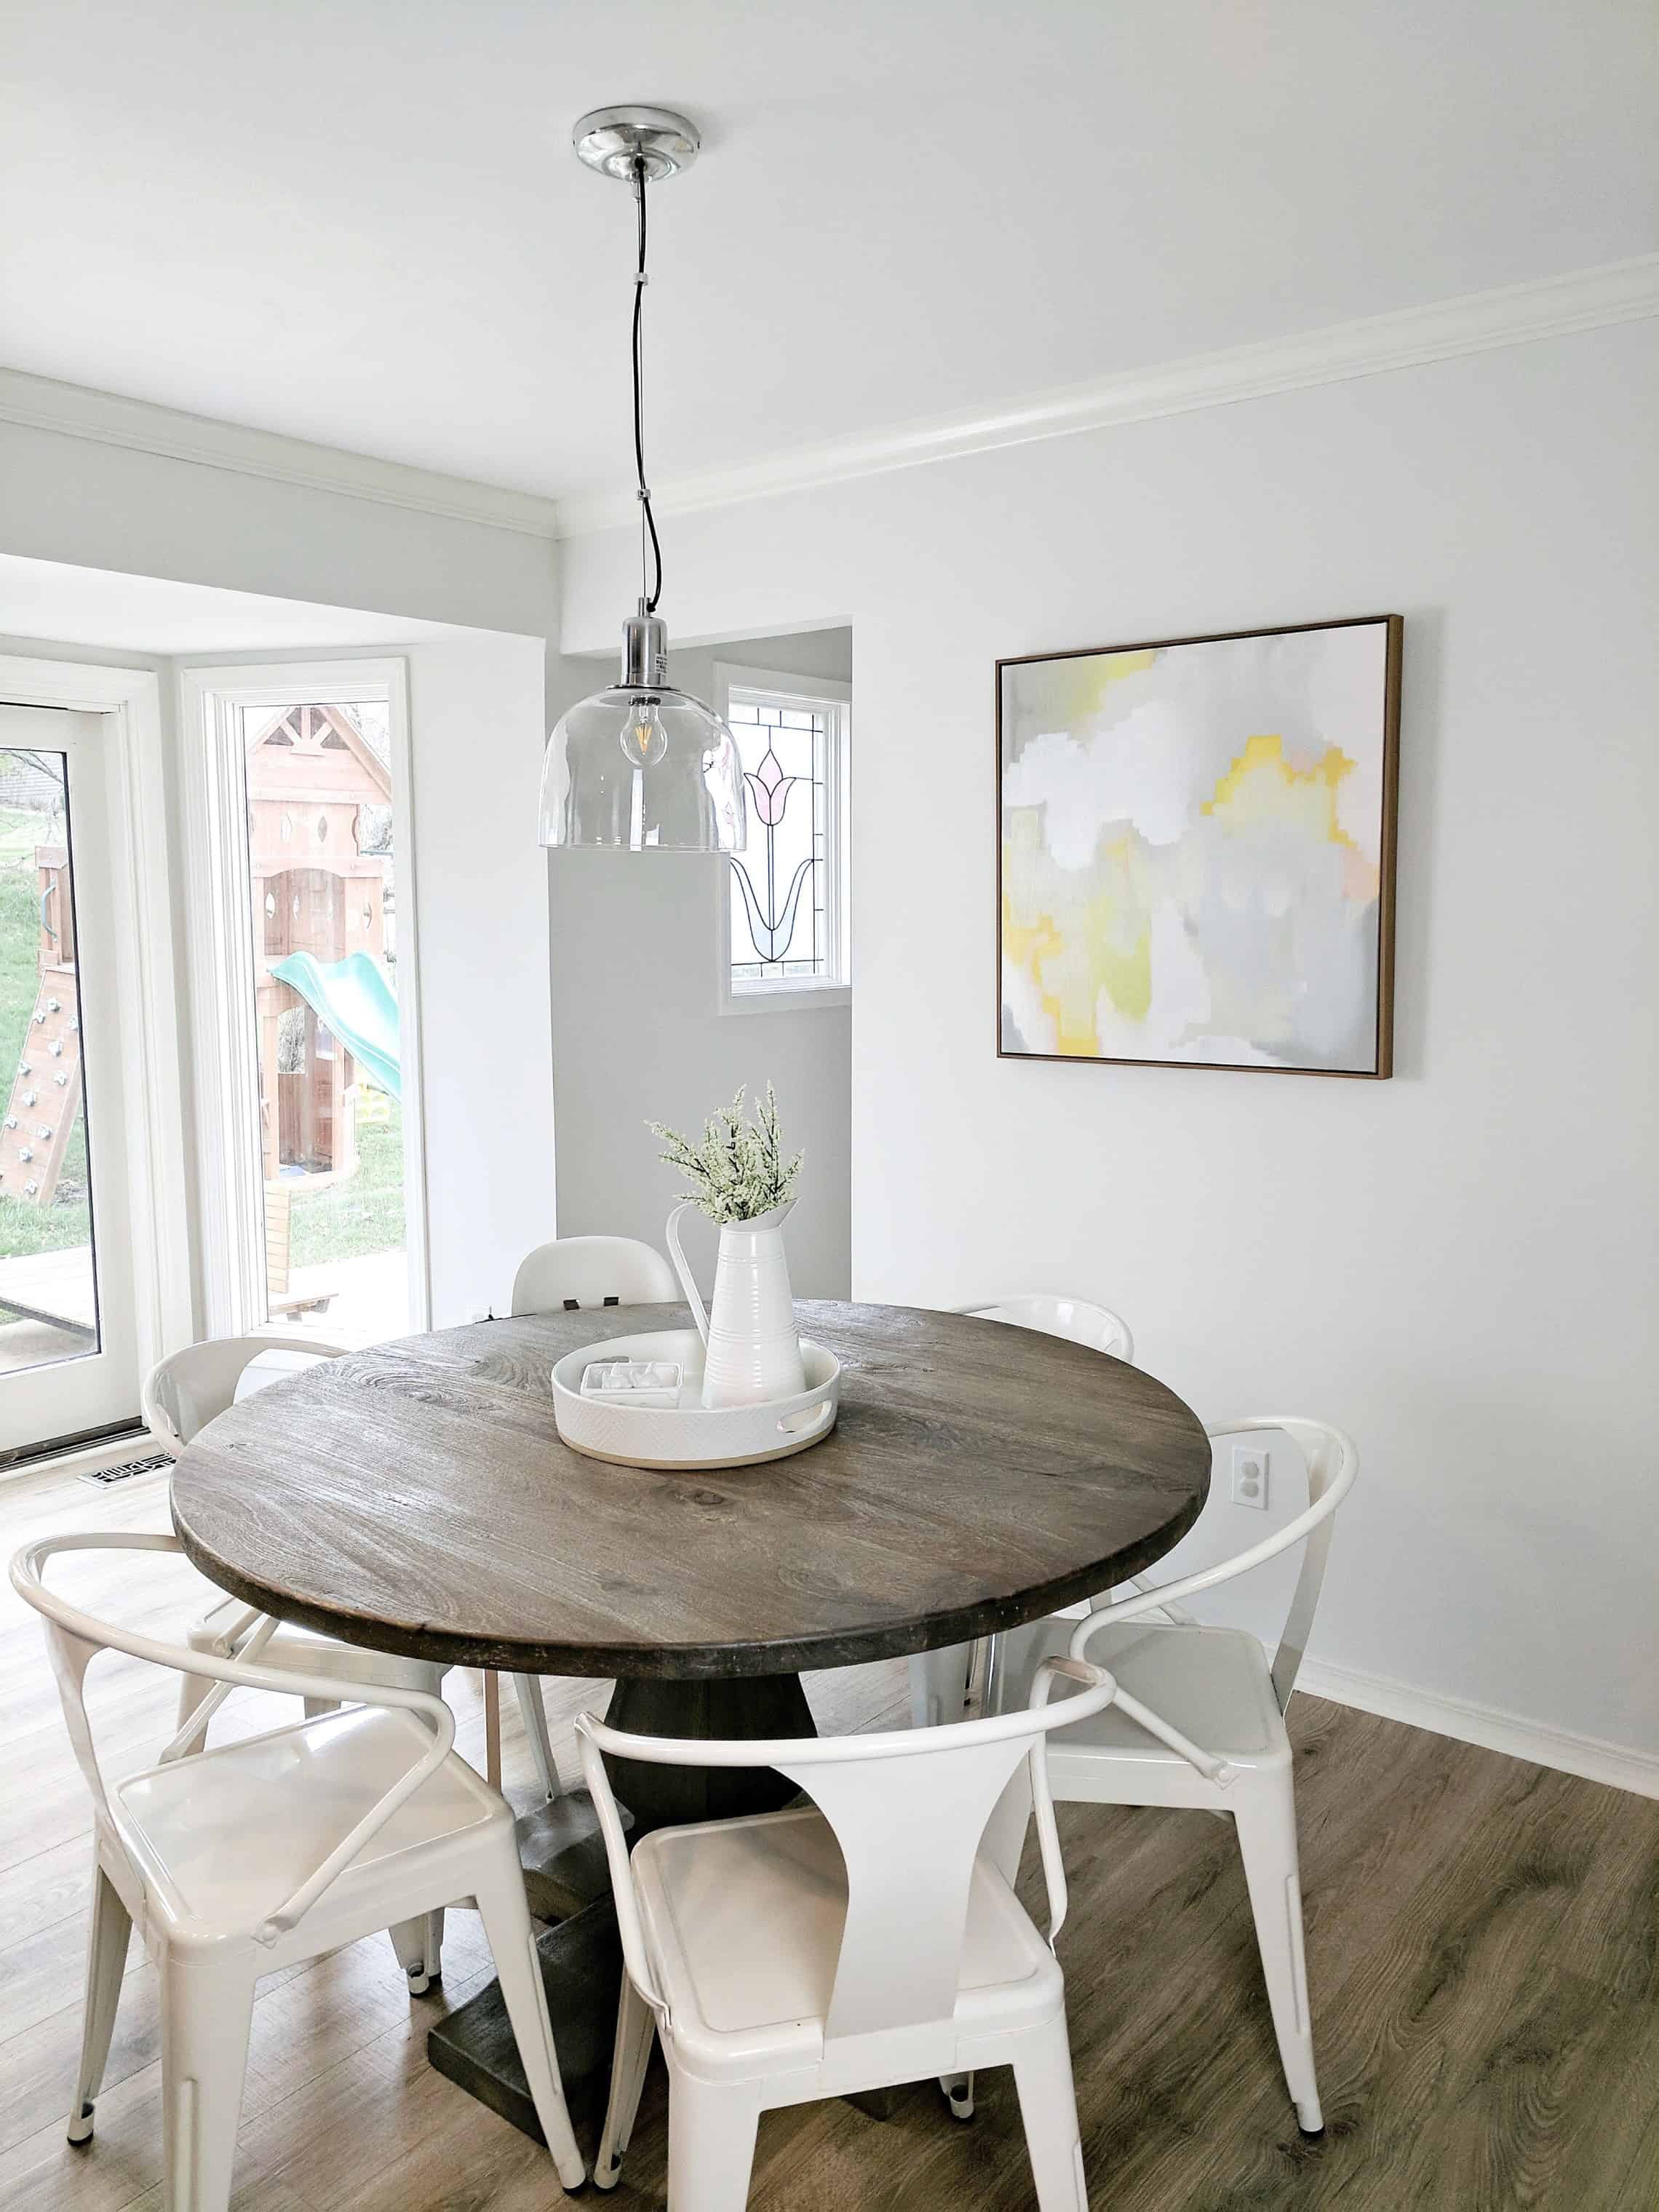
If you check out my house tour tab you will see the I use items like this all over my home and love that I can move them room to room to change things up.
Check Out the Video Below for More
This post has become so popular that I have started to round up weekly Amazon finds – be sure to check out this tab to see them all, but I also have been sharing them to my Amazon store front for easier shopping.
If Amazon is your jam check out that page – and if you are a fan you can bookmark it to check back often for what I am sharing and loving!
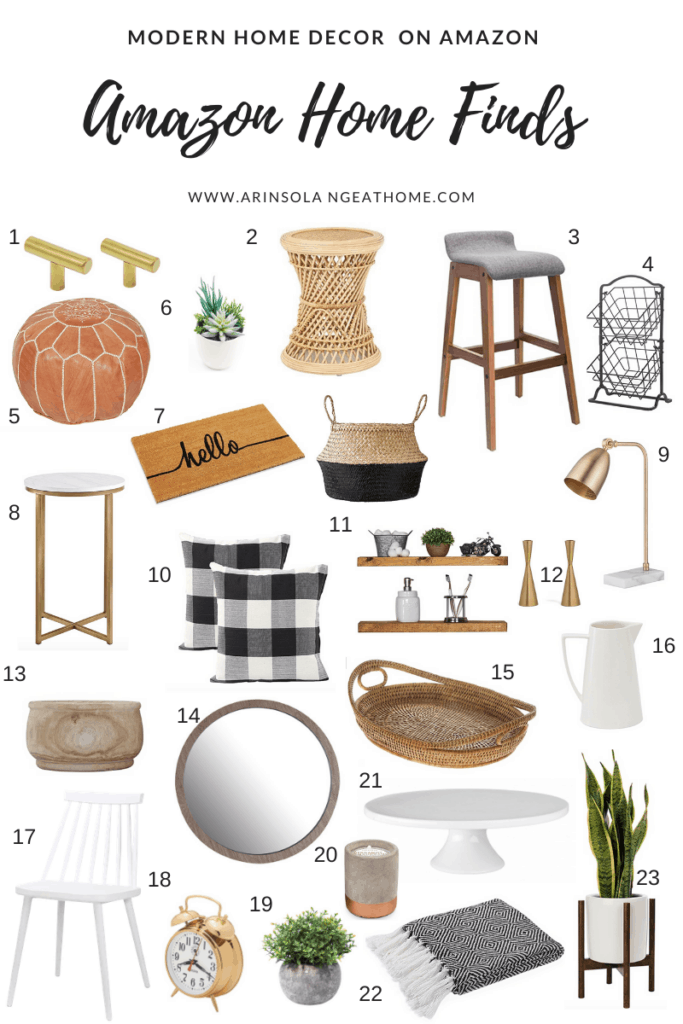
Now onto the round up – This round up has lots of farmhouse vibes with crossovers that can make it modern. I am a firm believer in mixing items from different styles to create a gorgeous home, and the items below will do that.
All of these finds are such great deals for what they are, and the perk of getting items like this, is that you won’t have the same thing as everyone else.
Often times I have readers or followers who think that you have to spend a lot of money to get more unique items, but thats really not the case. Especially on smaller decorative items.
These items will keep your decor looking unique and on trend without being the same thing that everyone else has from Target. (but don’t worry… of course I still love Target!)
Hopefully you found some new decor find that you love in this post, and if you have any questions feel free to leave a comment below! Be sure to follow me on Instagram (@arinsolange) for more fun Amazon finds and home decor!
6 Bags for 6 Weeks (our declutter challenge) is officially over, so we are onto the next Instagram challenge! If you follow me on Instagram, or are a regular blog reader, then you know that I LOVE a good room makeover. SO starting next week that is just what is going to happen! I am teaming up with my friends Jen and Chrissy on a March Room Refresh Challenge.
This post could contain affiliate links
After decluttering every inch of our homes, Jen and I knew we wanted to spruce up a room or two, but we wanted to bring in fresh perspective while we helped you do it. If you follow Chrissy, you know she has amazing taste in home decor! Thus the idea was born!
March Room Refresh Challenge
So, when I say a room refresh challenge, you are probably wondering what the heck I am talking about!
Jen, Chrissy, and I are going to walk you through how to refresh a room from start to finish in just a few weeks time. We are both going to be showing you next week how we did this ourselves, as well as giving you ALL the tips and tricks.
The challenge will be held on INSTAGRAM, however most of what you need, and lots of the info will be here on my blog, as well as theirs to keep track of everything!
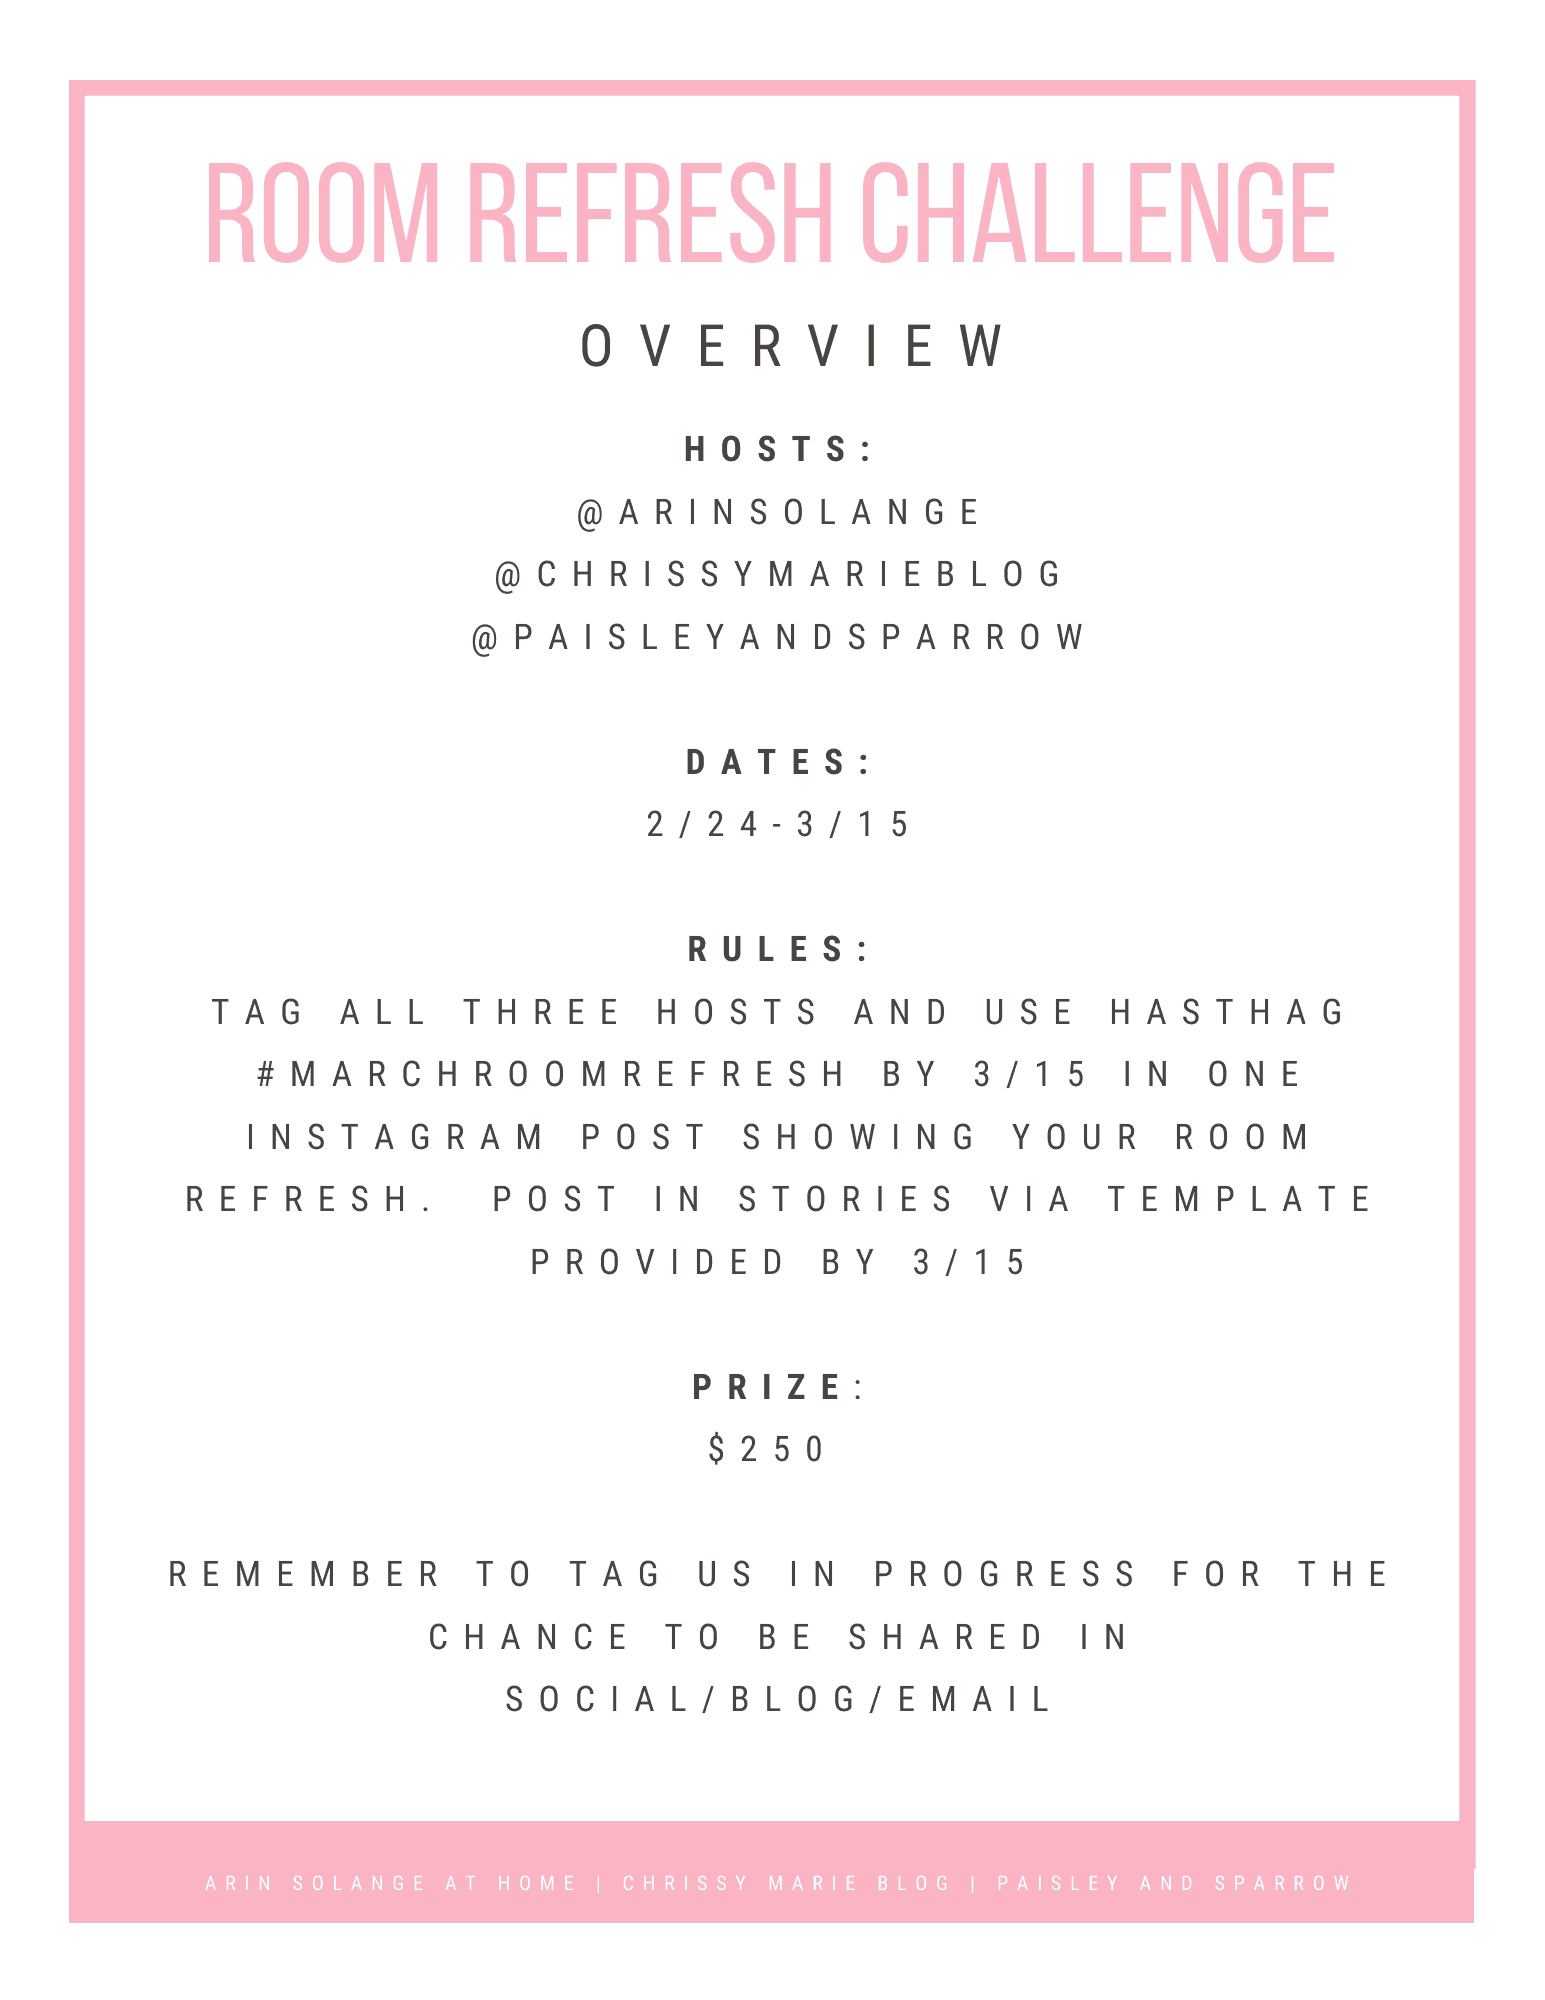
Dates: The Challenge starts on Monday Feb 24 and all entries must be submitted by Sunday March 15th.
You can certainly start right away, and YOU DON’T HAVE TO BE READY BY THE 24TH! You must simply be done by the 15th to be eligible to win.
What do we mean by Refresh: This can be as big or little as you want. You can change our paint, change your bedding, or change everything. It is totally up to you.
How it works: For the weeks of the challenge Chrissy, Jen and Myself will all be posting weekly blog posts with tips and tricks for refreshing your space. You will have to use an Instagram story template AND tag us in a post us for final entry. We will then pick our top 5 rooms and our readers and followers will vote via Instagram.
The big thing to note – you don’t need to be a blogger to do this. Our hope is that we can inspire and help lots of you to share a fun home project via Instagram!
We want to see your progress, so be tagging us in stories and posts using the hashtag #MarchRoomRefresh as well as tagging our handles so we can share them. We will share favorites in our weekly newsletters as well, so definitely keep an eye out!
Prize: The winner of the challenge with the best room refresh will win $250!
Rules: Must post your finished room by March 15th on Instagram tagging @paisleyandsparrow, @chrissymarieblog, and @arinsolange. Must use the hashtag #MarchRoomRefresh. Your profile needs to be set to public for the time of the challenge so we are able to see the posts. You also must post the story template that will be provided on 3/9!
How we will help:
Jen, Chrissy and I are all huge home decor fanatics with totally different styles. But – we do all have a similar planning process. So to help you along the way we will be giving you a couple of documents that will help you design you room and decide what you want to do with your space.
Then next Monday you can expect to see a room we have each been working on with this challenge in mind. We will show you how we utilized the documents, and our process for decorating, designing or refreshing a room!
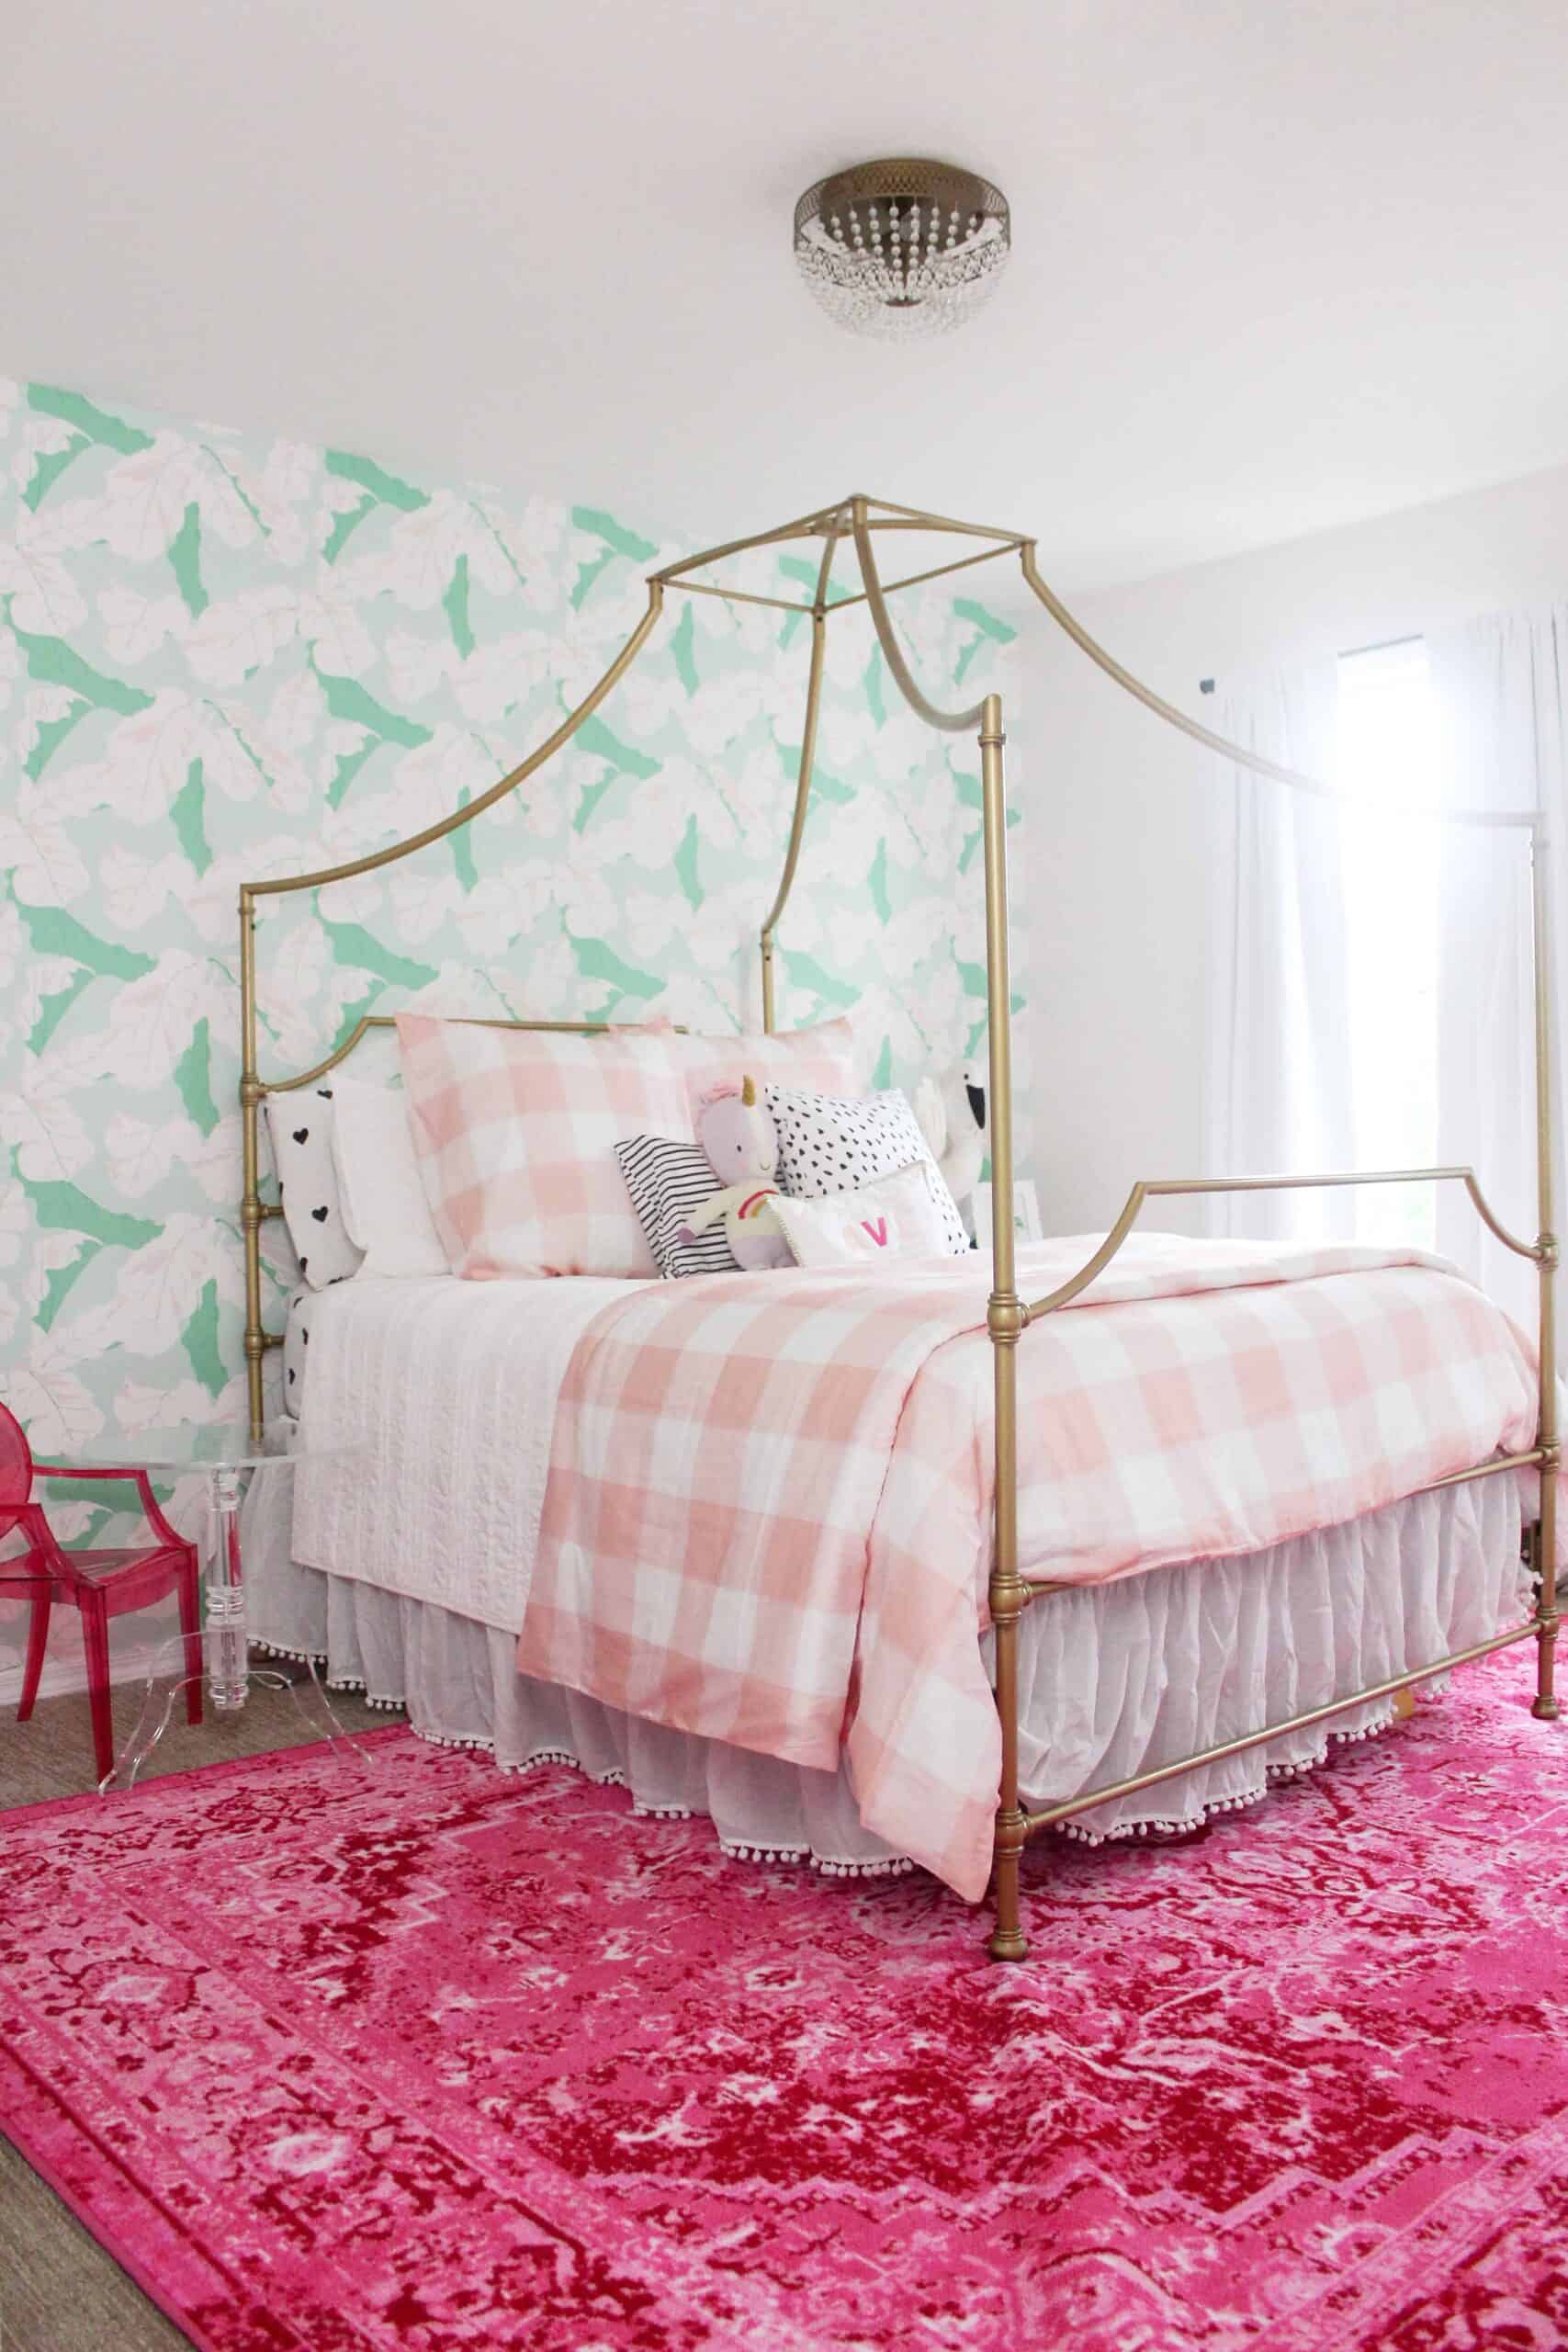
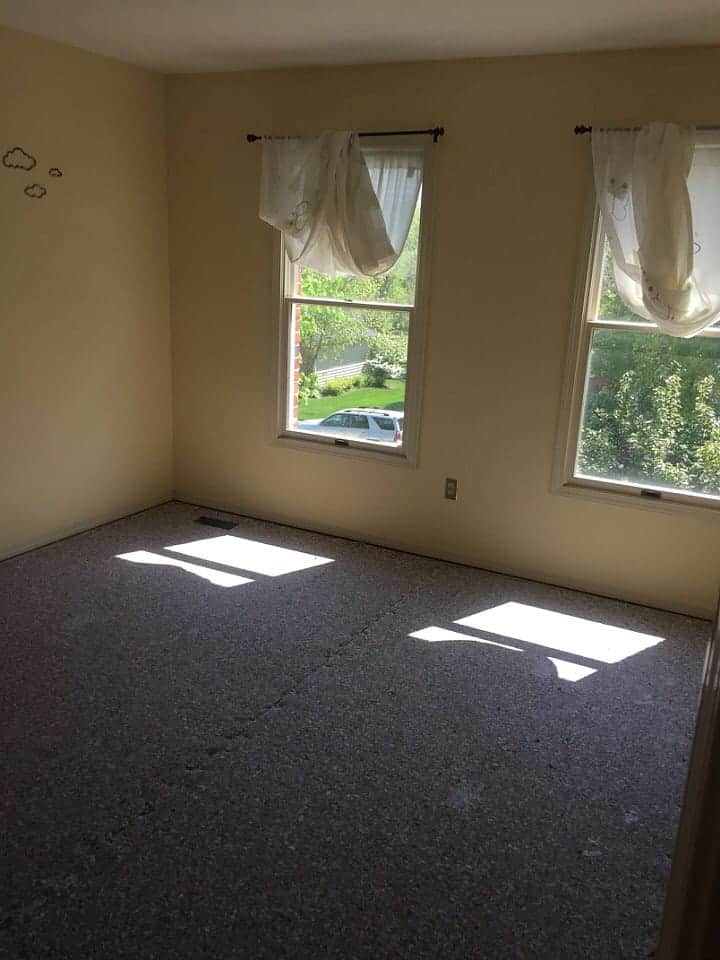
Above is an example of a before and after of Ave’s room
Room Planning
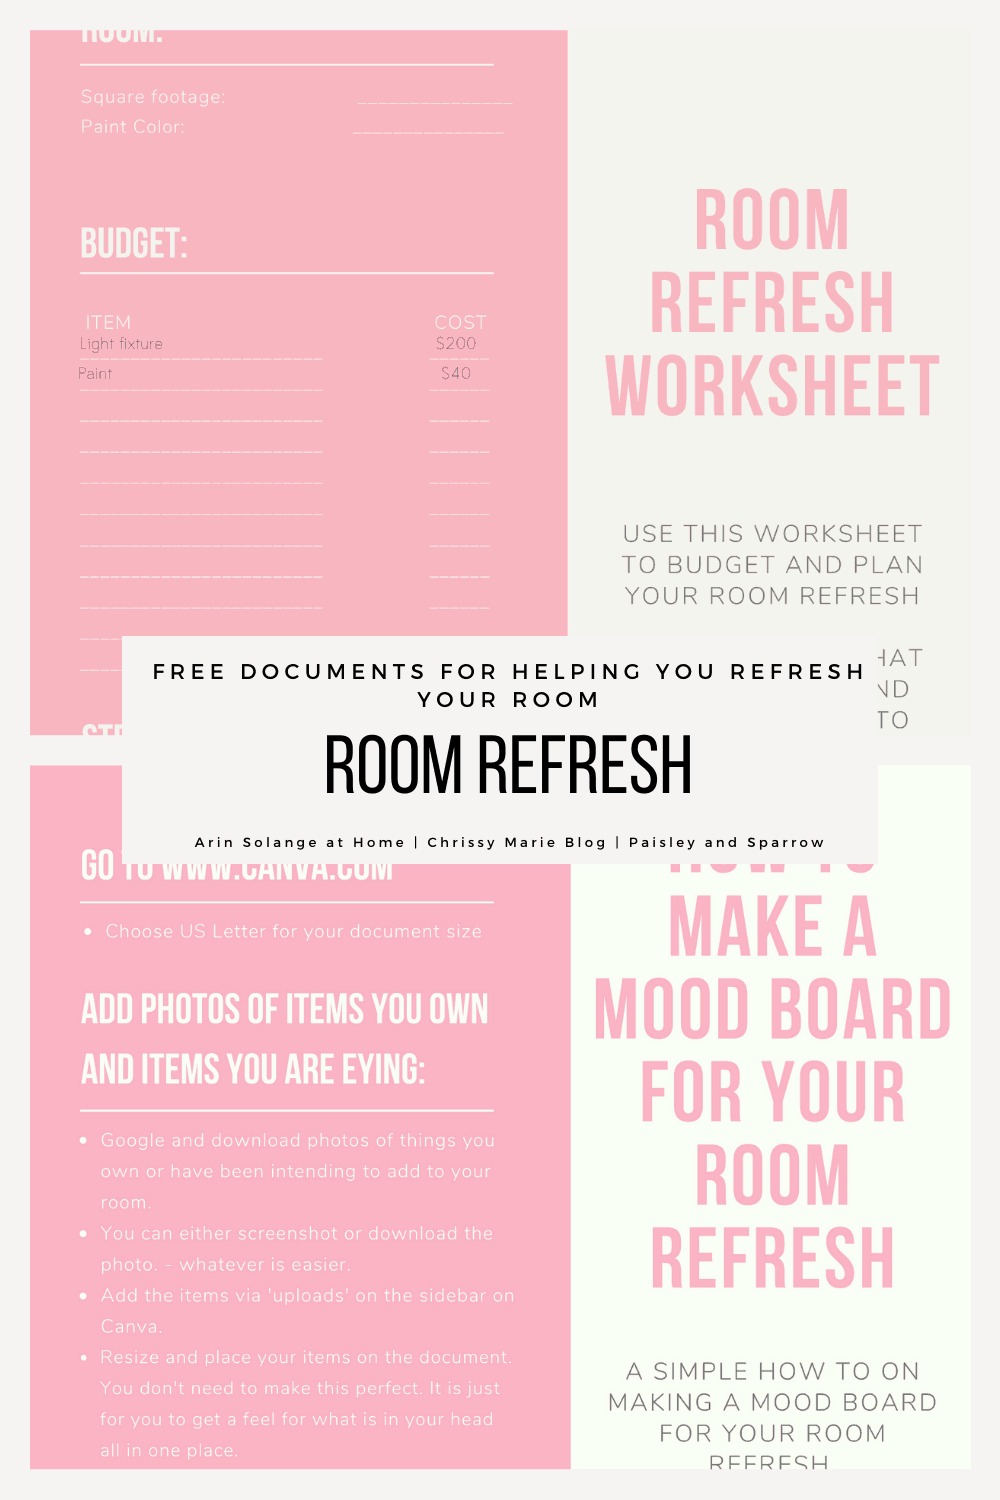
So About the documents I was talking abut. Planning a room can be really daunting, and there are so many steps and things to plan out. Below we have a link to receive 2 documents directly to your email.
The first document is a planning page – use this to stay on budget and wrap your head fully around this project. Hopefully it is really helpful for this room as well as any rooms you do in the future. Sometimes having everything in one place is just more helpful than anything else!
The second is a tutorial to make your own mood board. Remember – having a mood board doesn’t have to be perfect. But sometimes having patterns, colors, and items together on one board will help you decide what works and what doesn’t!
Next week when we share our ‘example rooms’ we will share more about the mood boards and our process and what those boards looked like for us for those rooms!
When it comes to doing this, because there is a time restraint, remember to utilize your document from above and set dates or an order of operations. One thing I love about doing a project with a time restraint is it really forces you to keep the steam going and not lag on steps.
You will see next week that I COMPLETELY redid and refreshed a bathroom, from top to bottom, and were able to stick in this time frame (even with a return or two), so it can be done.
Jen and Chrissy did more decor related projects, so you will get a feel for a good range of options.
We are SO excited to have you all join in on this fun challenge. I can’t wait to see the mood boards, the progress and the final results. Our hope is that as you are doing these rooms we can be there to help you. For the next few weeks we are going to be really hands on with giving you advice, and can’t wait to see stories and posts with your progress.
Remember to tag myself (@arinsolange), Chrissy (@chrissymarieblog) and Jen (@paisleyandsparrow) in all your posts and progress and use the hashtag #marchroomrefresh so others can see what you are doing!
Please DM me with any questions you have or leave them in the comments, and start your brainstorming for this fun room refresh challenge!
Valentine Gifts with Free Printable Kindness Cards
Valentine’s Day is coming up, and I seriously LOVE giving my kids something special every year. I will be really honest – I don’t go big on Valentine’s Day, but do love to make the day special from start to finish, so thought it might be fun to share some SIMPLE gift ideas, as well as share some ways we make the day feel special for our kids without gifts, and giving you all some free printable kindness cards.
This post contains affiliate links
Making a holiday special for your kids never has to be over the top. (but totally can be too!). Just remember, you are in charge of how you want the holiday to look, and whatever you do will be what they remember as magical.
My parents didn’t do a ton on Valentine’s Day for me, but I still remember the little gifts, or candy that set the day apart.
Spreading Love with Free Printable Kindness Cards
One thing I am going to start this year is using some simple cards and spread love to strangers. I think that it can be REALLY easy in this day and age for holidays to seem like just an occasion for presents.
This year I whipped up these free printable kindness cards you can print out and hand give out with random acts of kindness!
Buy the person behind you coffee and hand this little kindness note to the person in the window to pass along.
Leave a generous tip
A small kind gift to bus driver/ garbage man/ and so on
tie them around drinks or snacks for delivery men
Buy groceries for family in need
There are MANY other great ways you can use these, but this is a great start that will hopefully help teach your kids that spreading love and kindness is much better than getting presents!
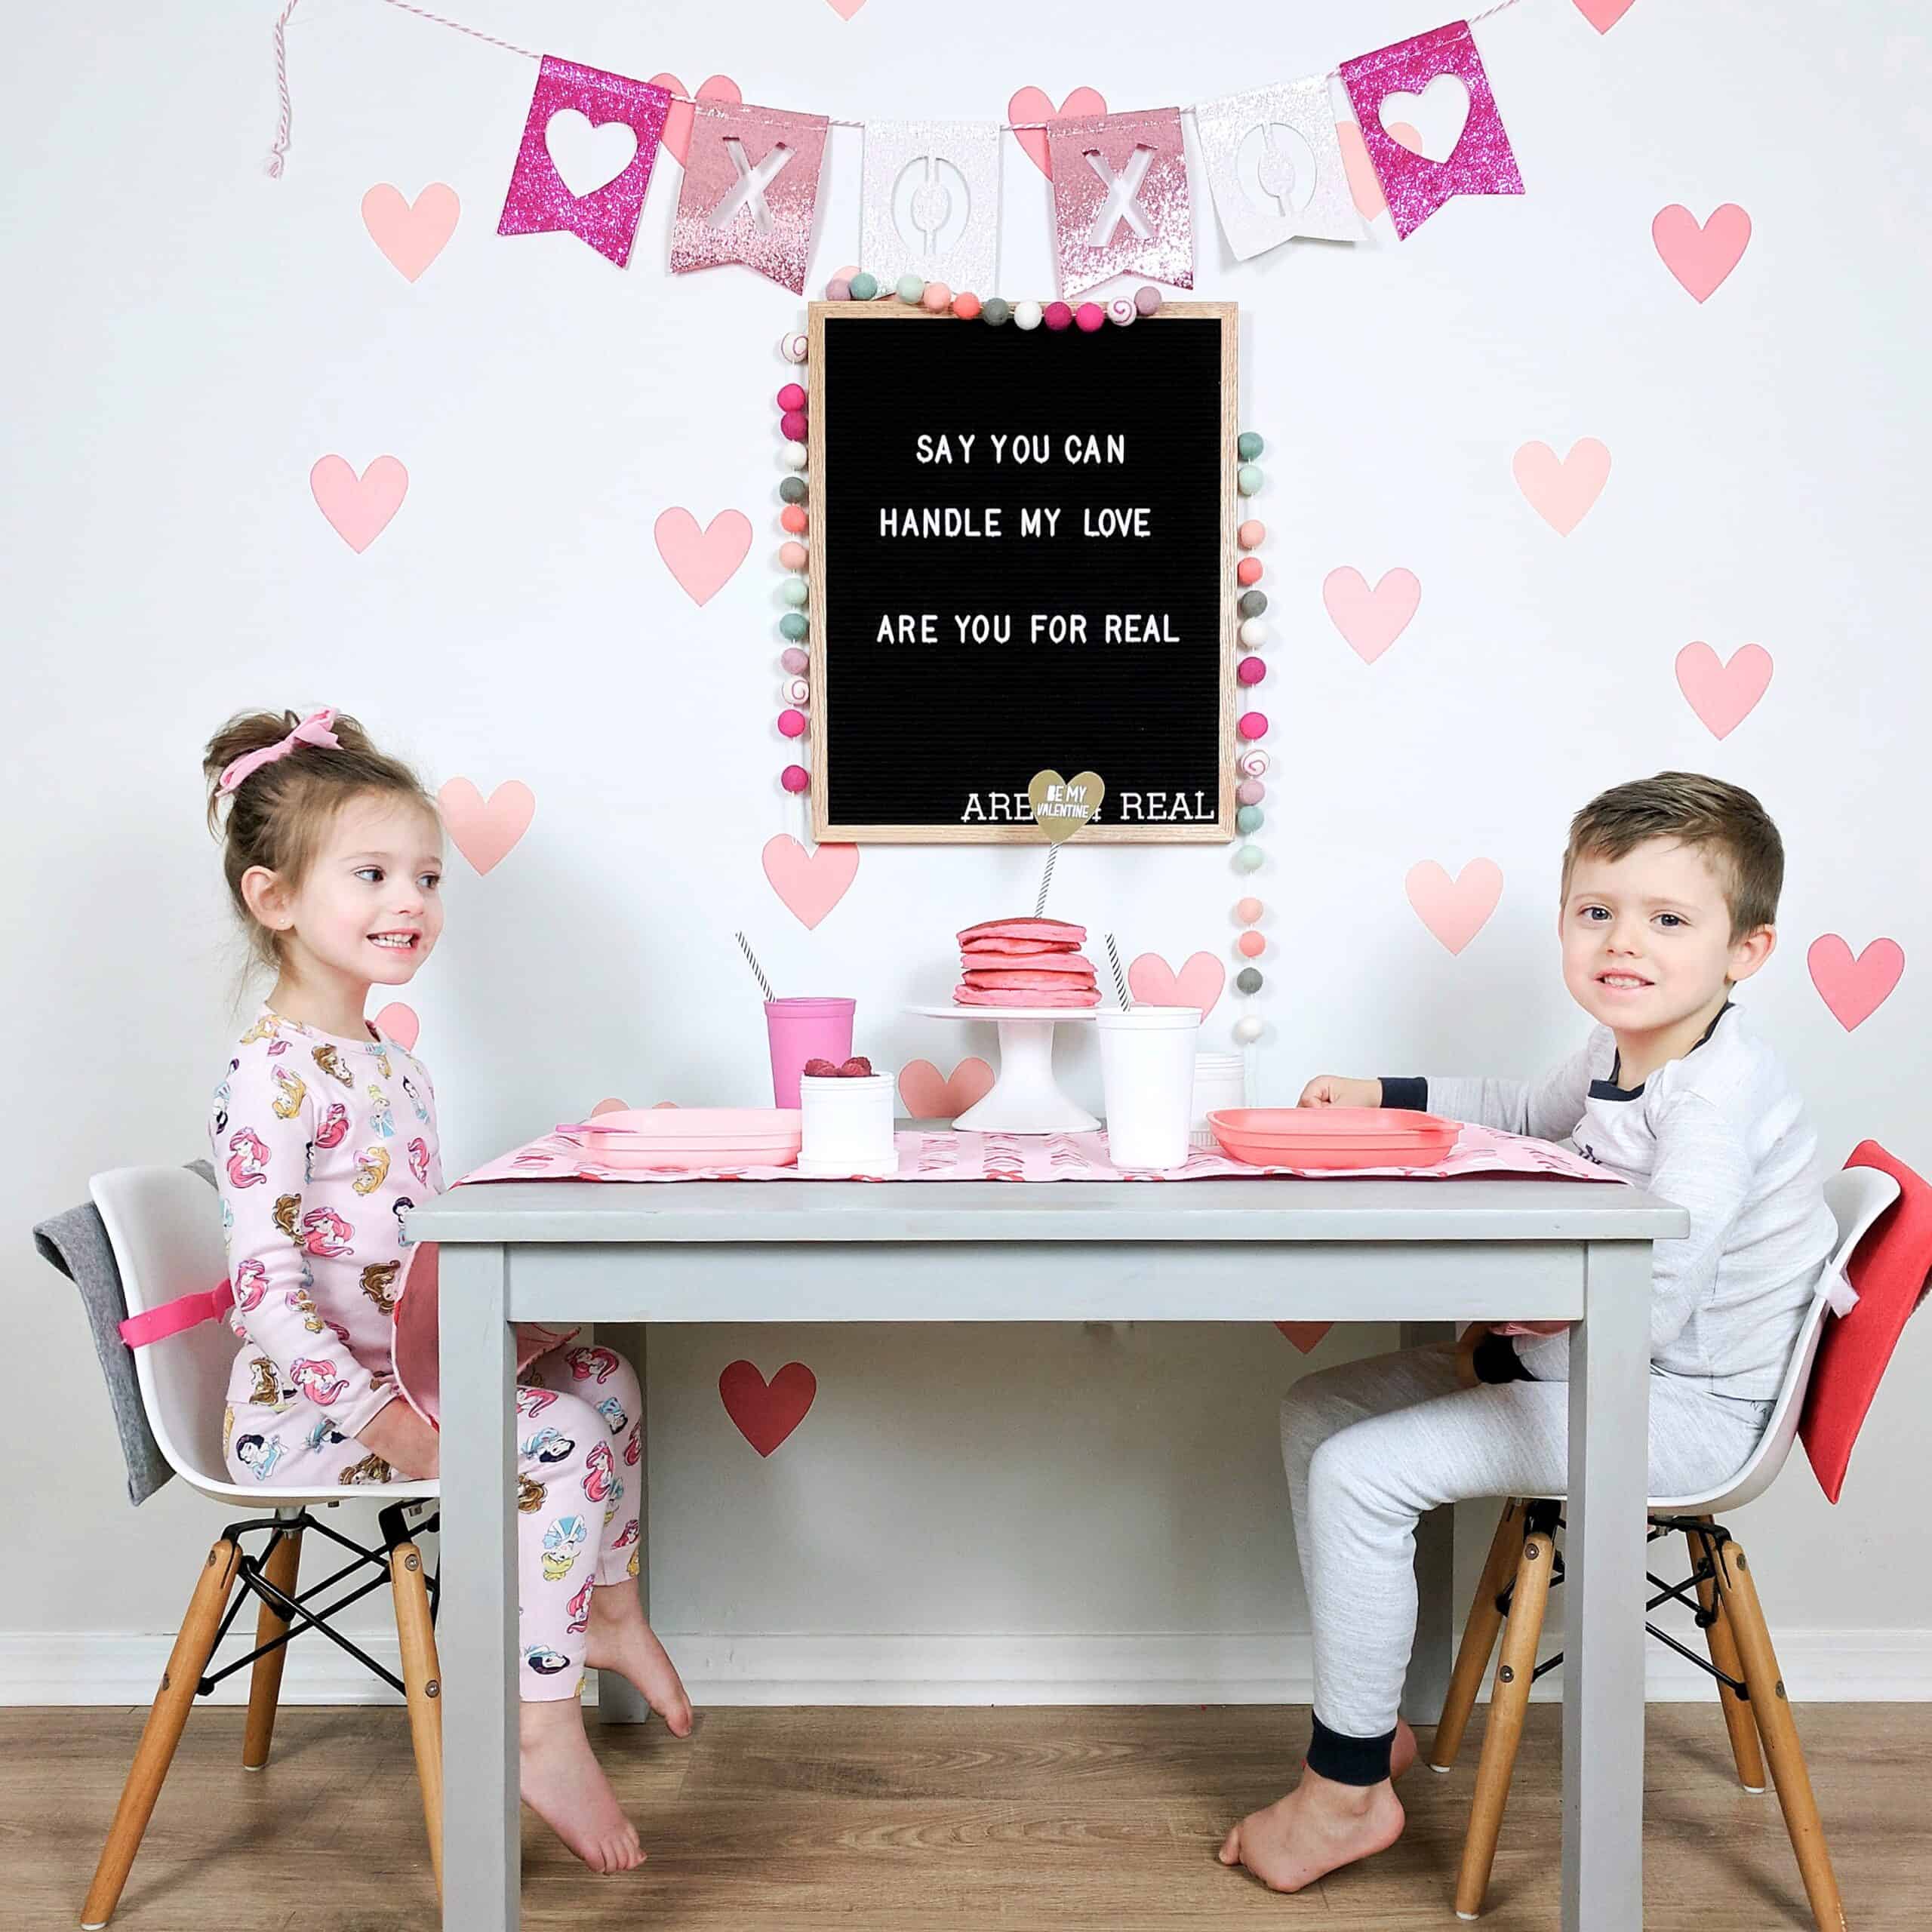
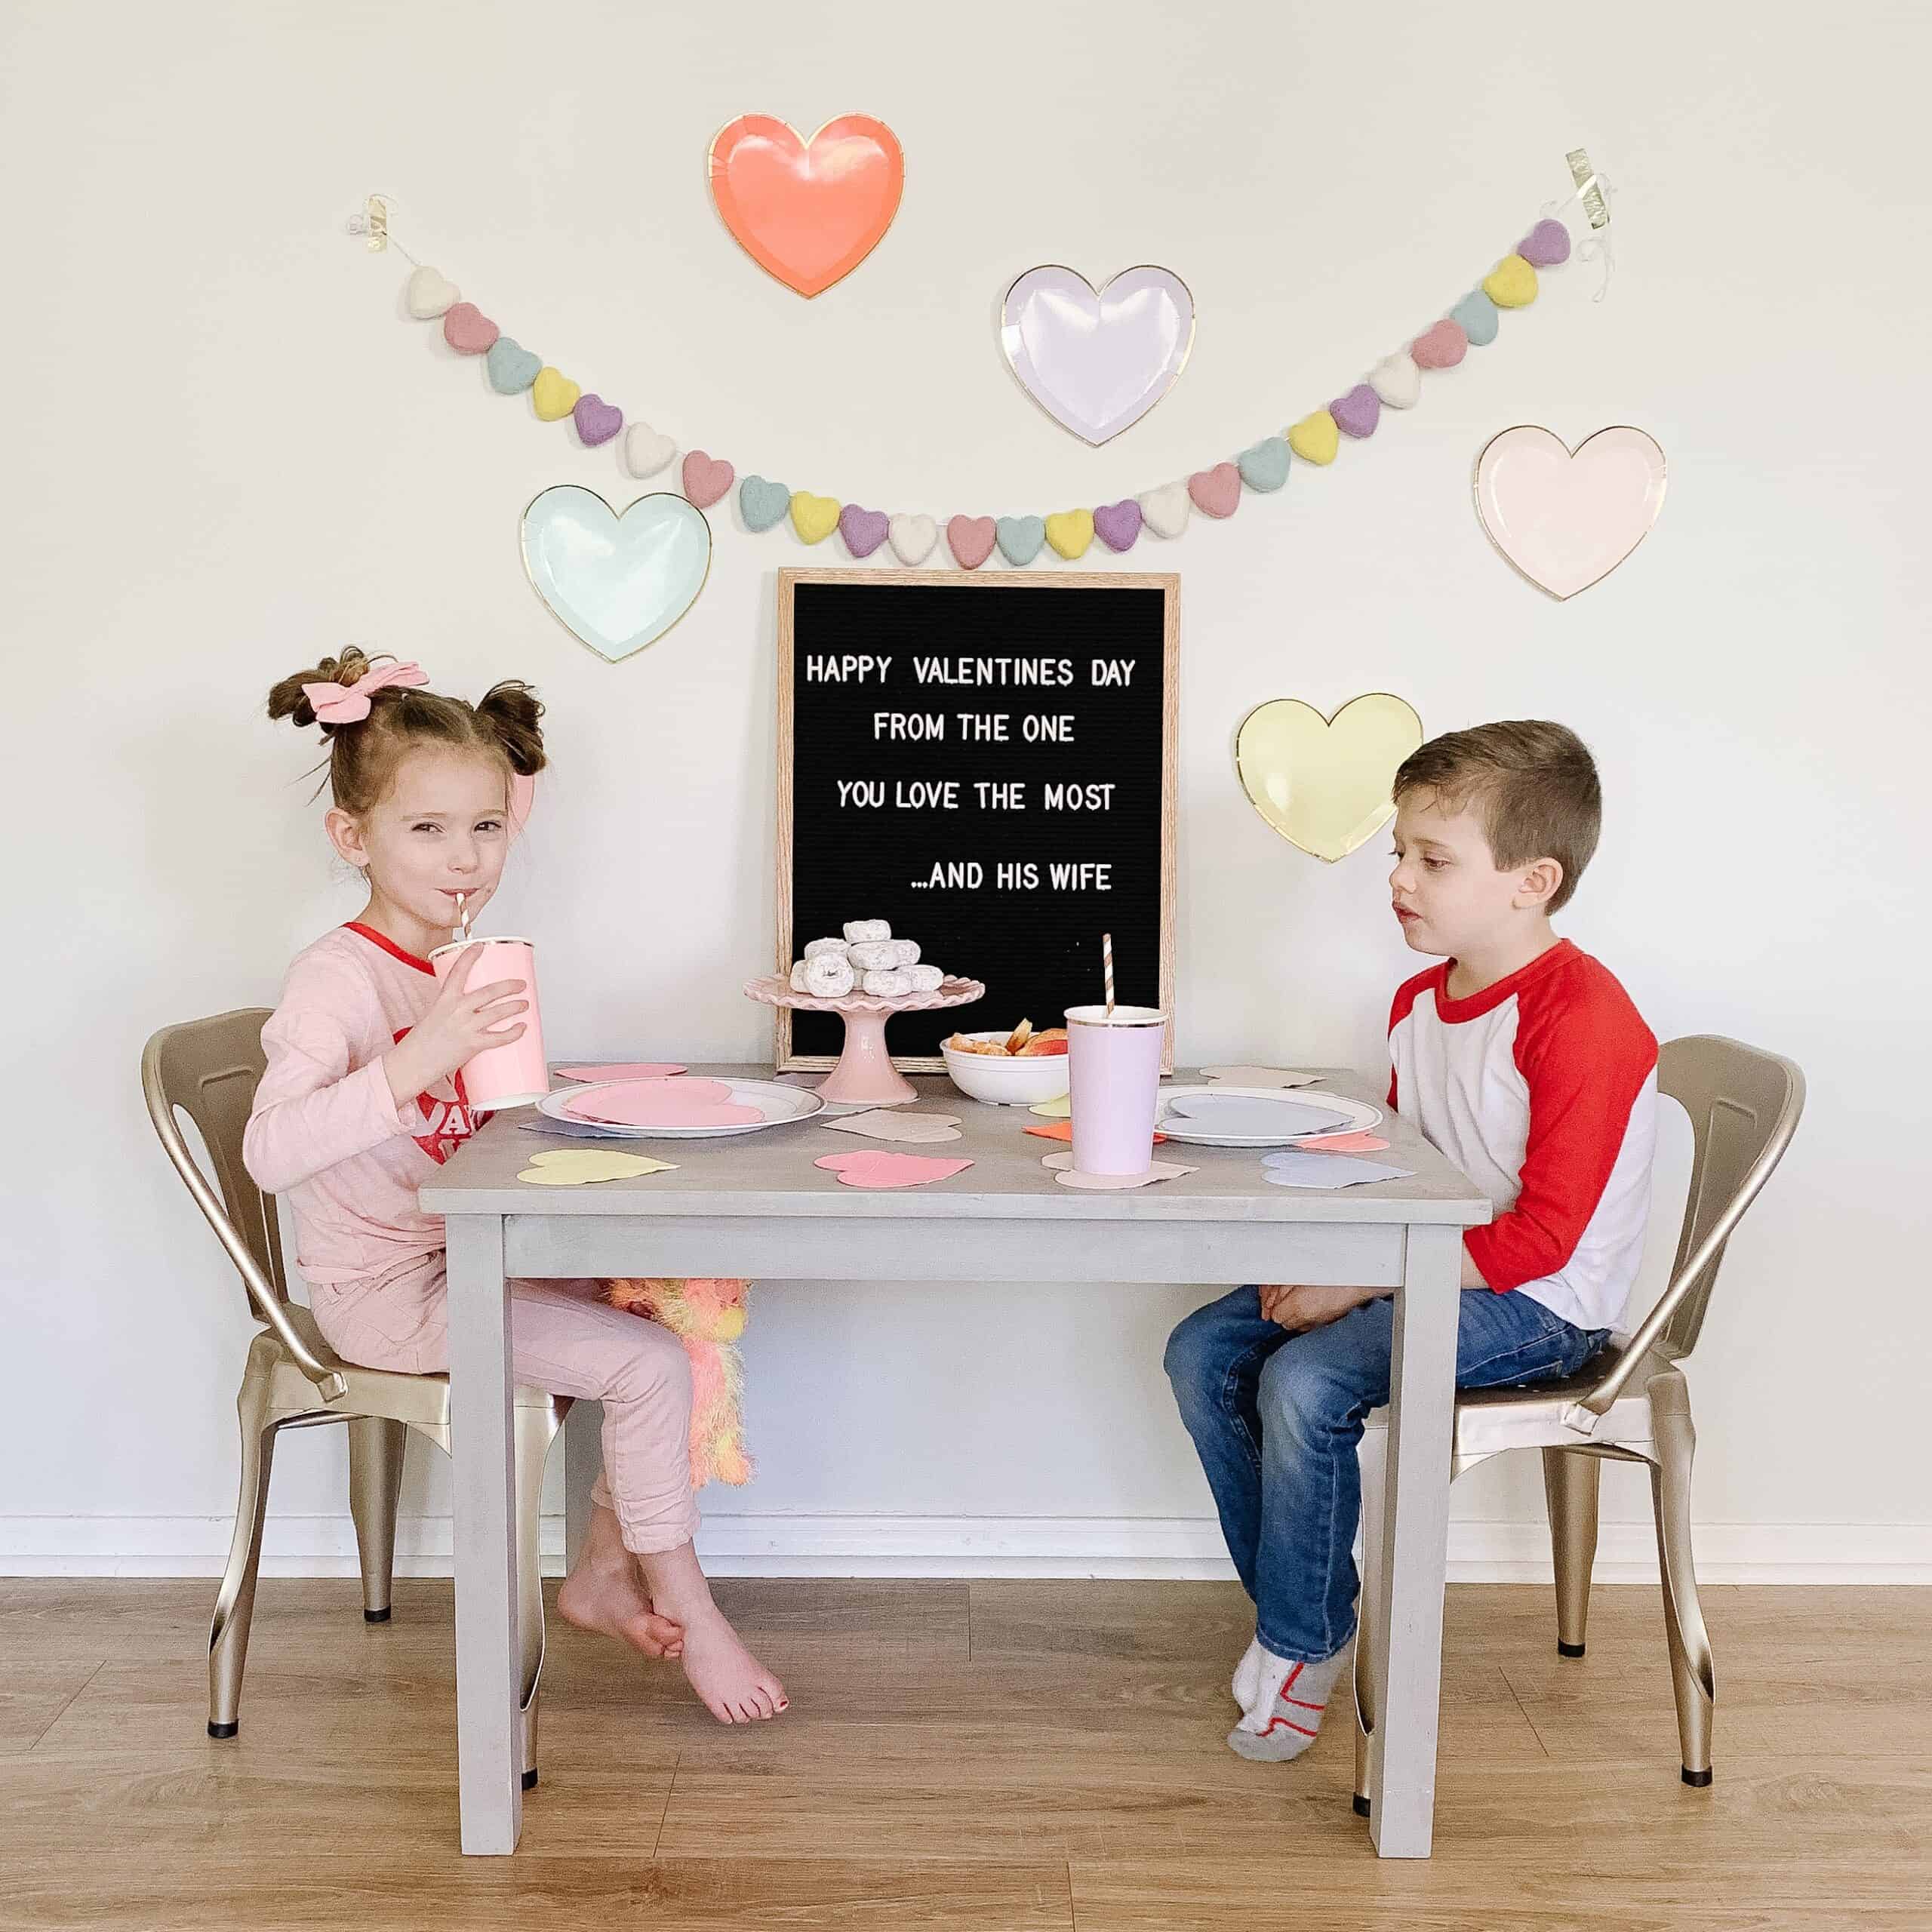
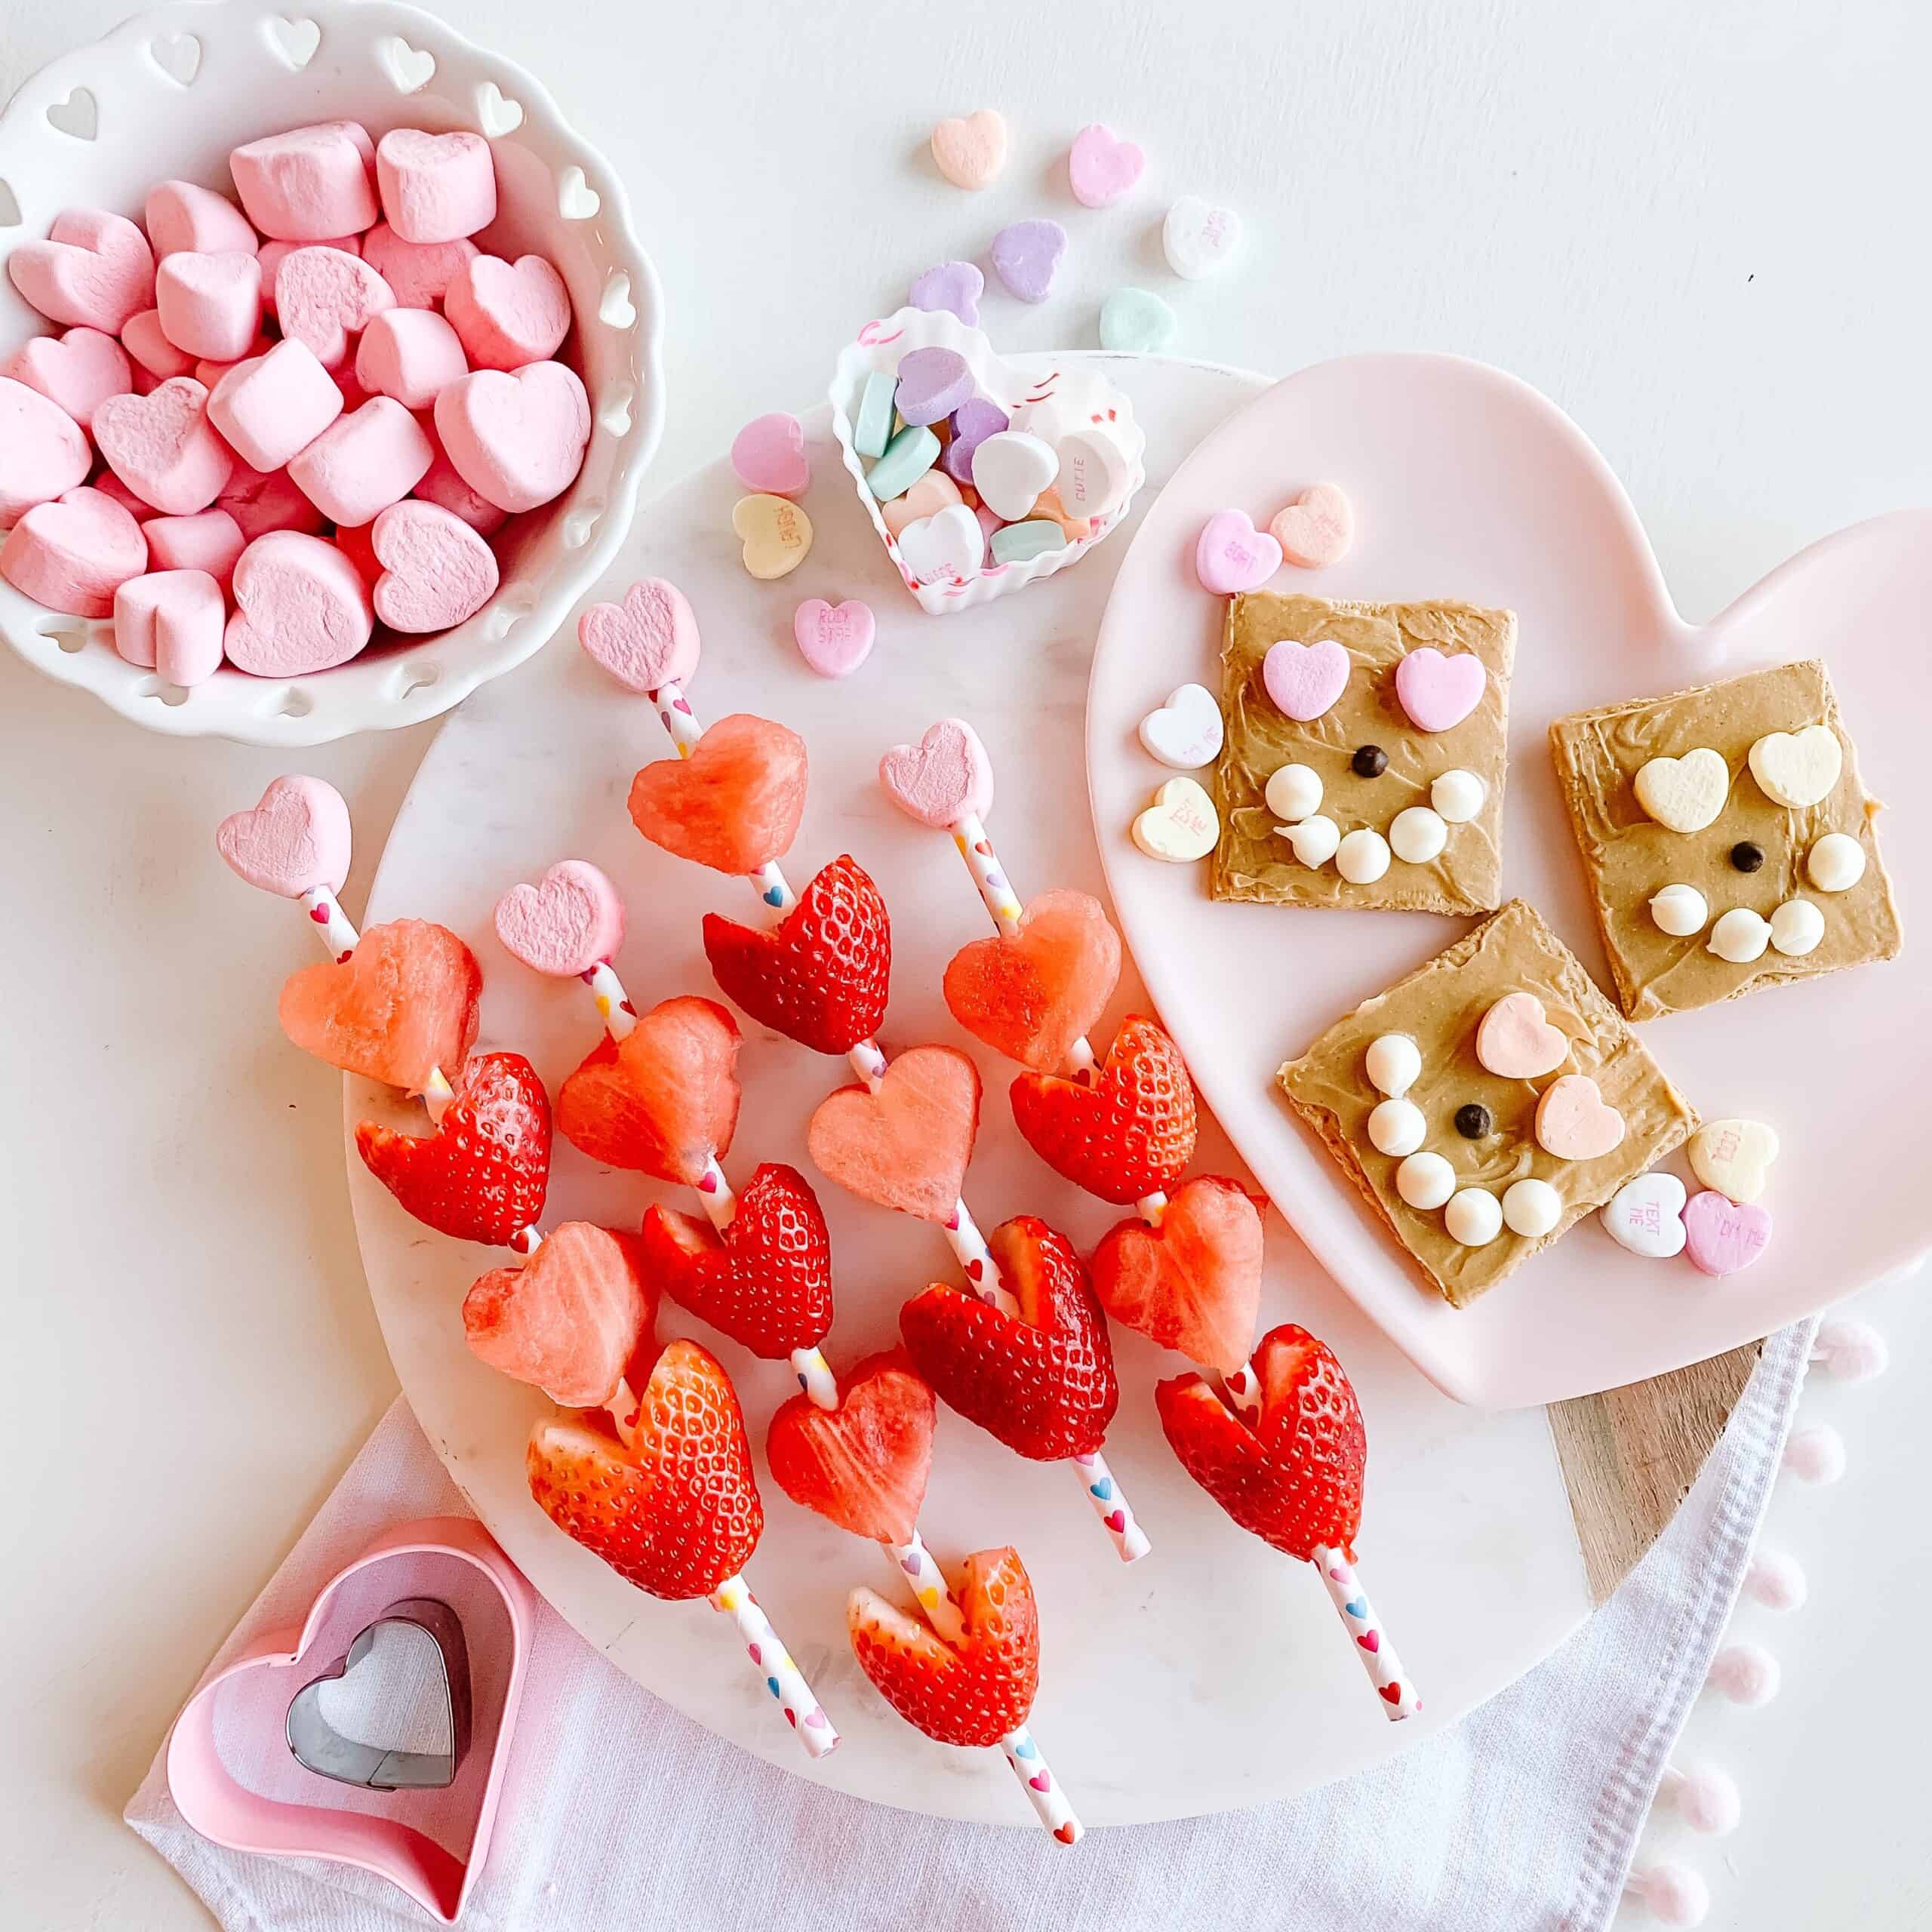
Cupid’s Breakfast
One really fun idea to kick off Valentine’s Day is to throw a cupids breakfast. When I throw these fun breakfast’s I normally use either paper plates that are per the theme, or replay recycled plates we have on hand that fit the colors I am going for.
Add some fun decor, or a banner, and some festive food and you are set. Honestly anything out of the ordinary blows their minds. For me sometimes its nothing more than bagged donuts and fruit, but when we can we get donuts from the store.
Starting their day off in this way gets them so excited for the magic of the day to come, and is such a fun ‘non gift’ way to share your love with your kids!
Love Lunch
Another great idea is if your kids are in school make their lunch special with a little note (if they can read). Maybe everything is heart shaped with a treat they normally wouldn’t ever get. I also love to try to bring my kids lunch on those special days, but I don’t know if every school allows for that.
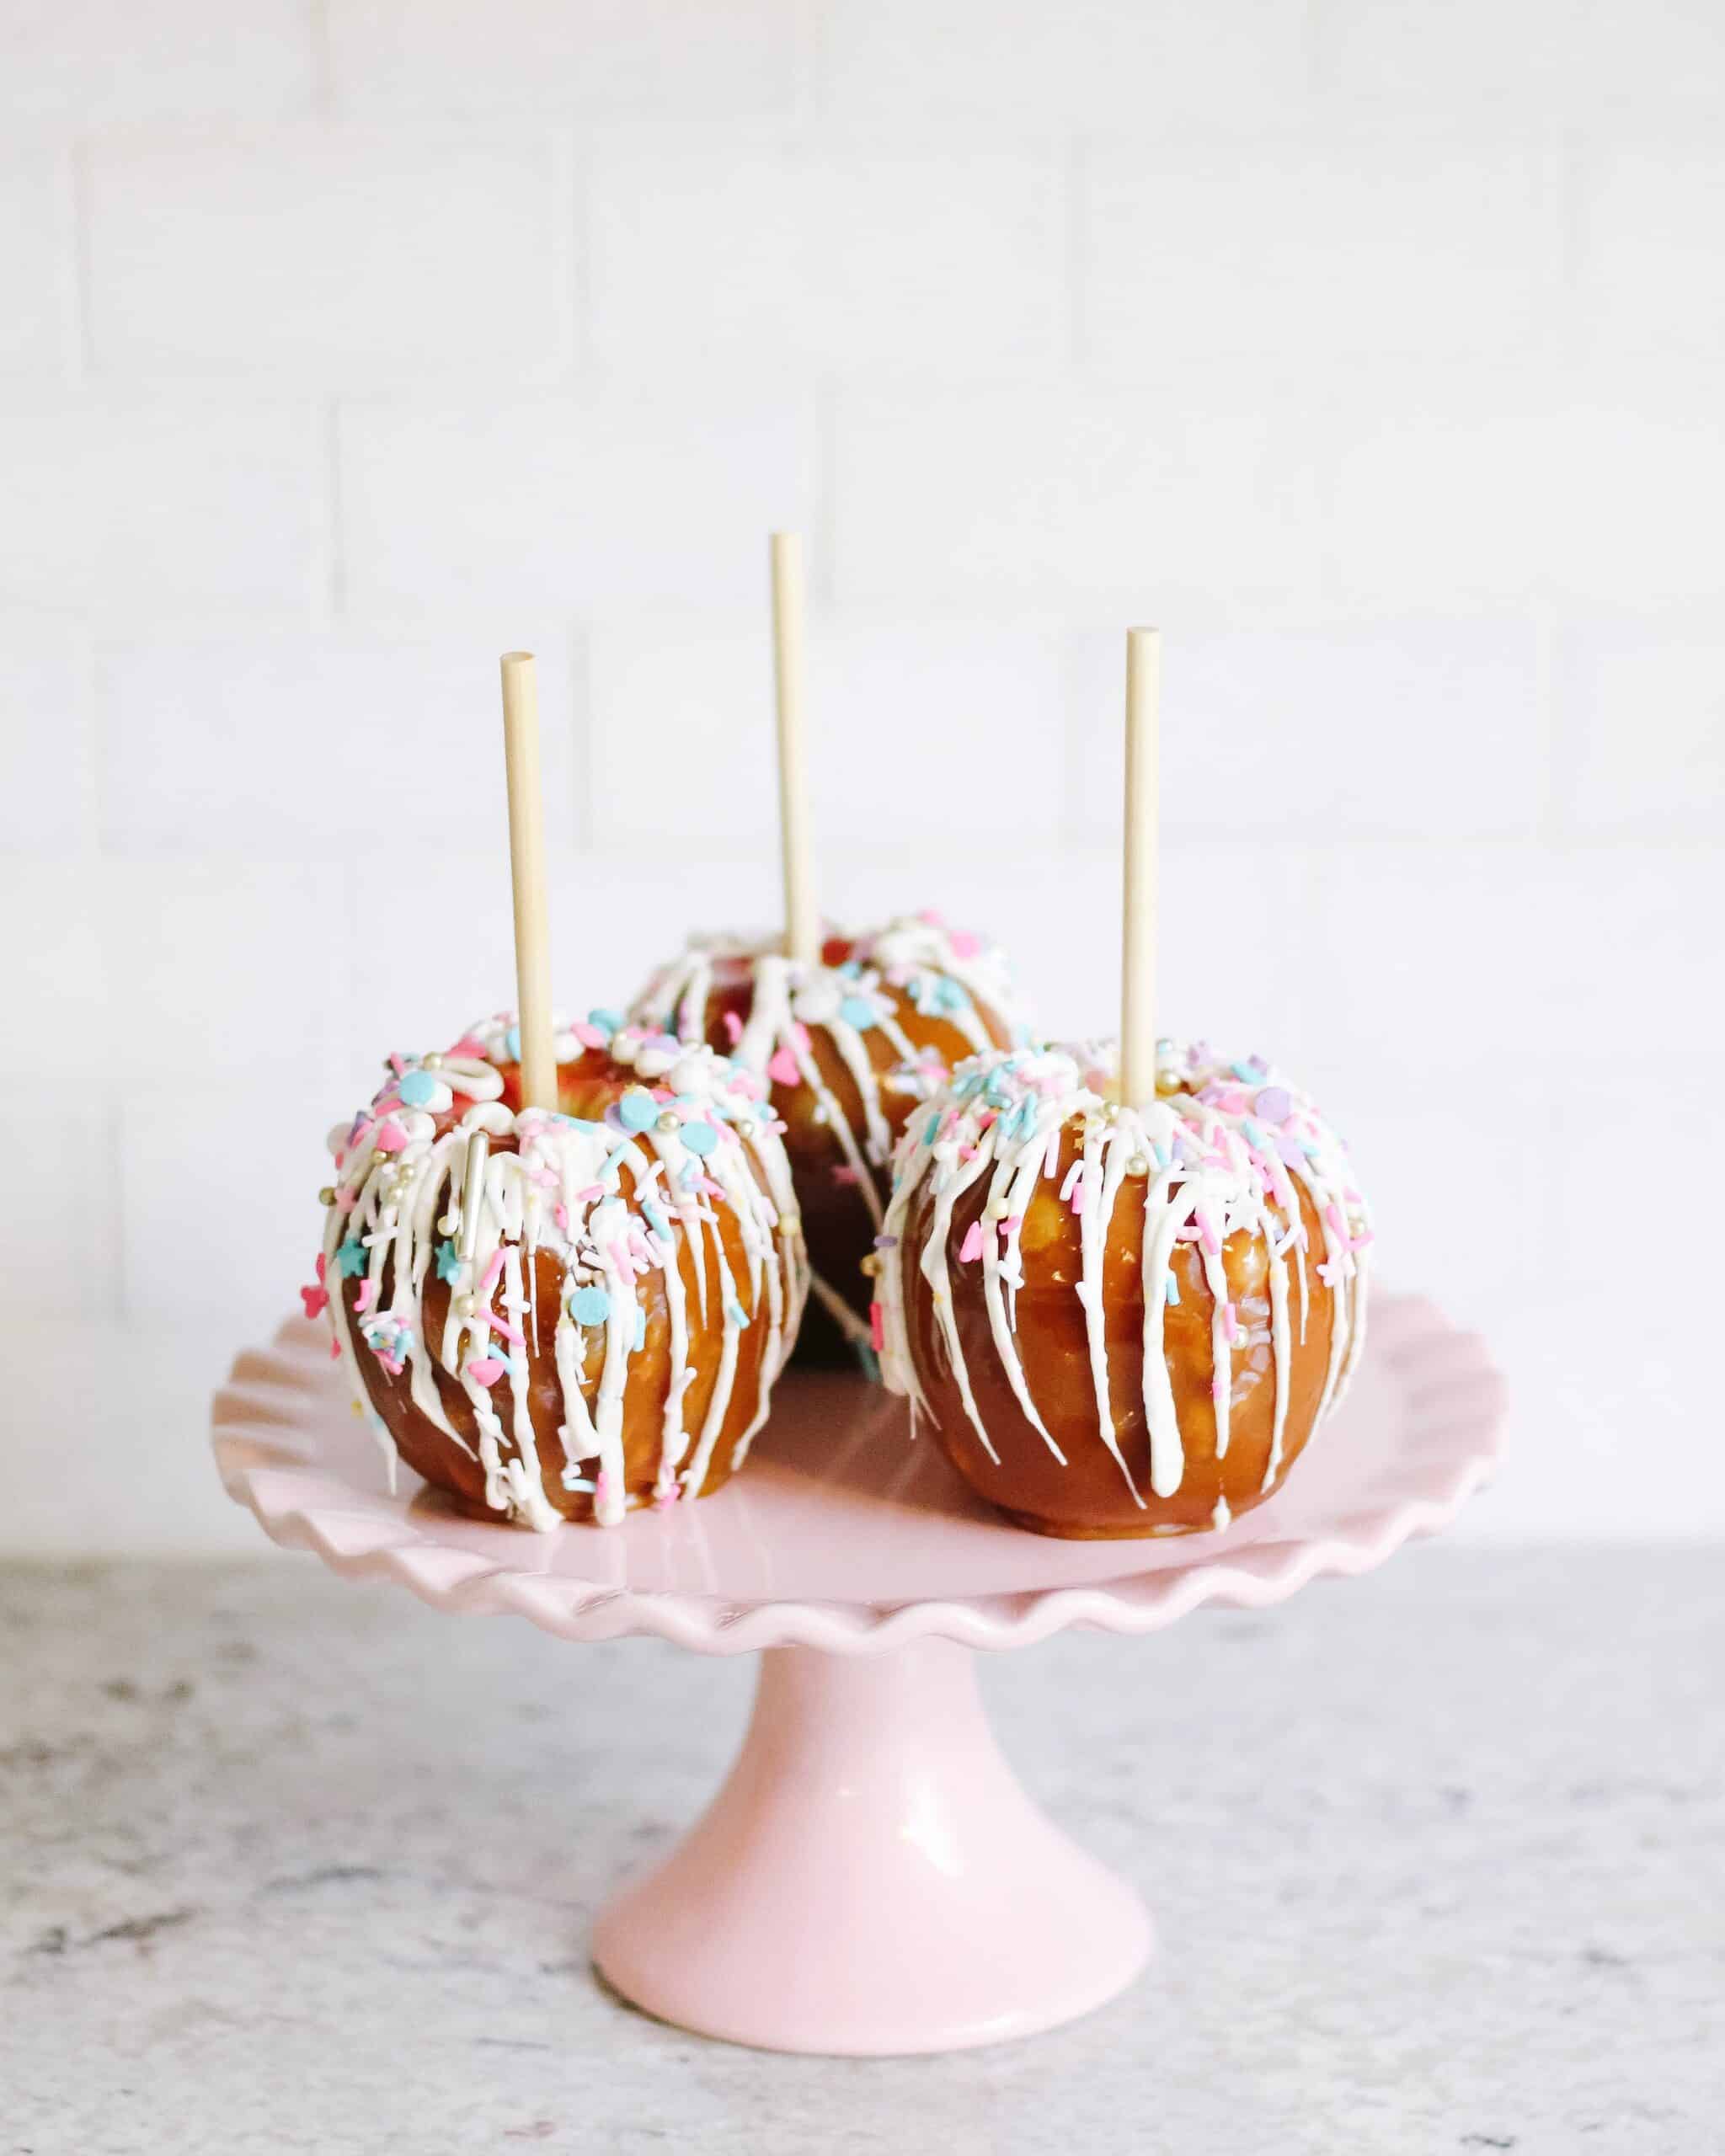
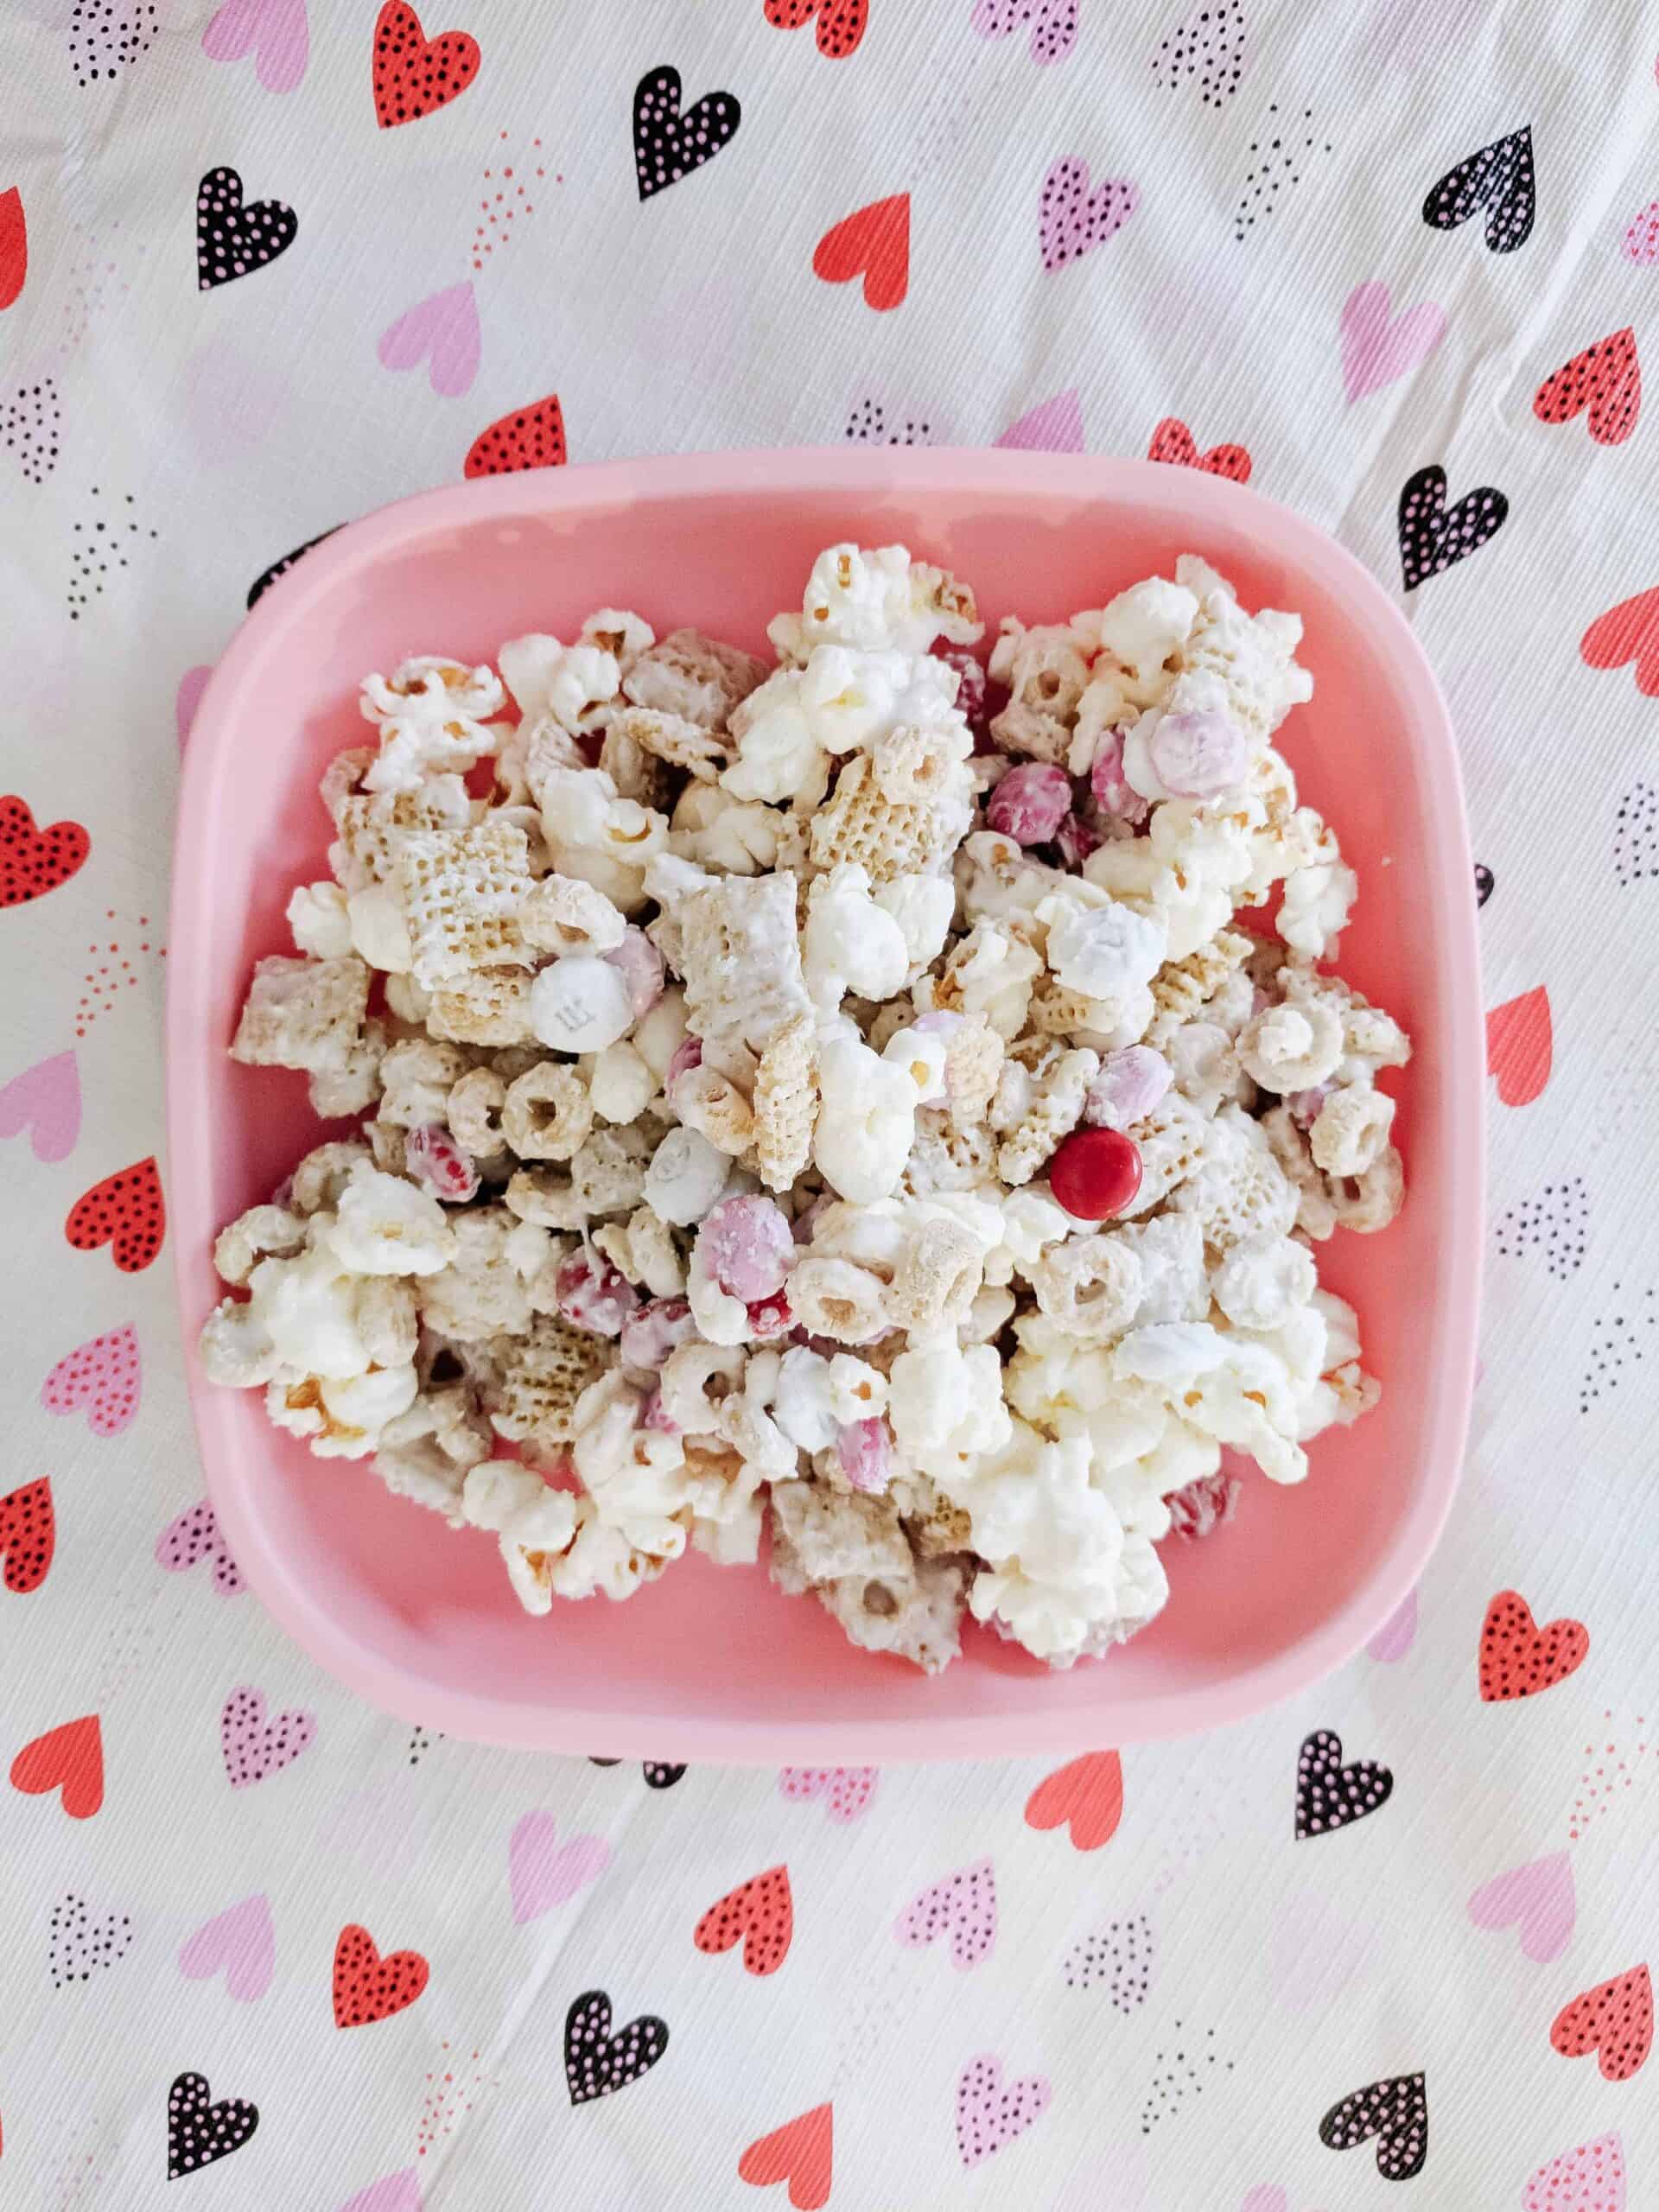
Festive Dinner / Dessert/ Treat
Kids love anything festive. Whether its heart shaped pizza, heart shaped sandwiches, or some festive desserts with their dinner they will feel loved. I have a whole blog post sharing fun sweet treats of the day here that will make their day.
Last but not least is the gifts. I have always done a small gift for my kids each Valentine’s Day, but never anything major.
Maybe some candy and a blanket or stuffed animal. I love to make it cute and get creative, but let’s be honest – kids love toys and gifts and I think it can be such a sweet way to share your love with them.
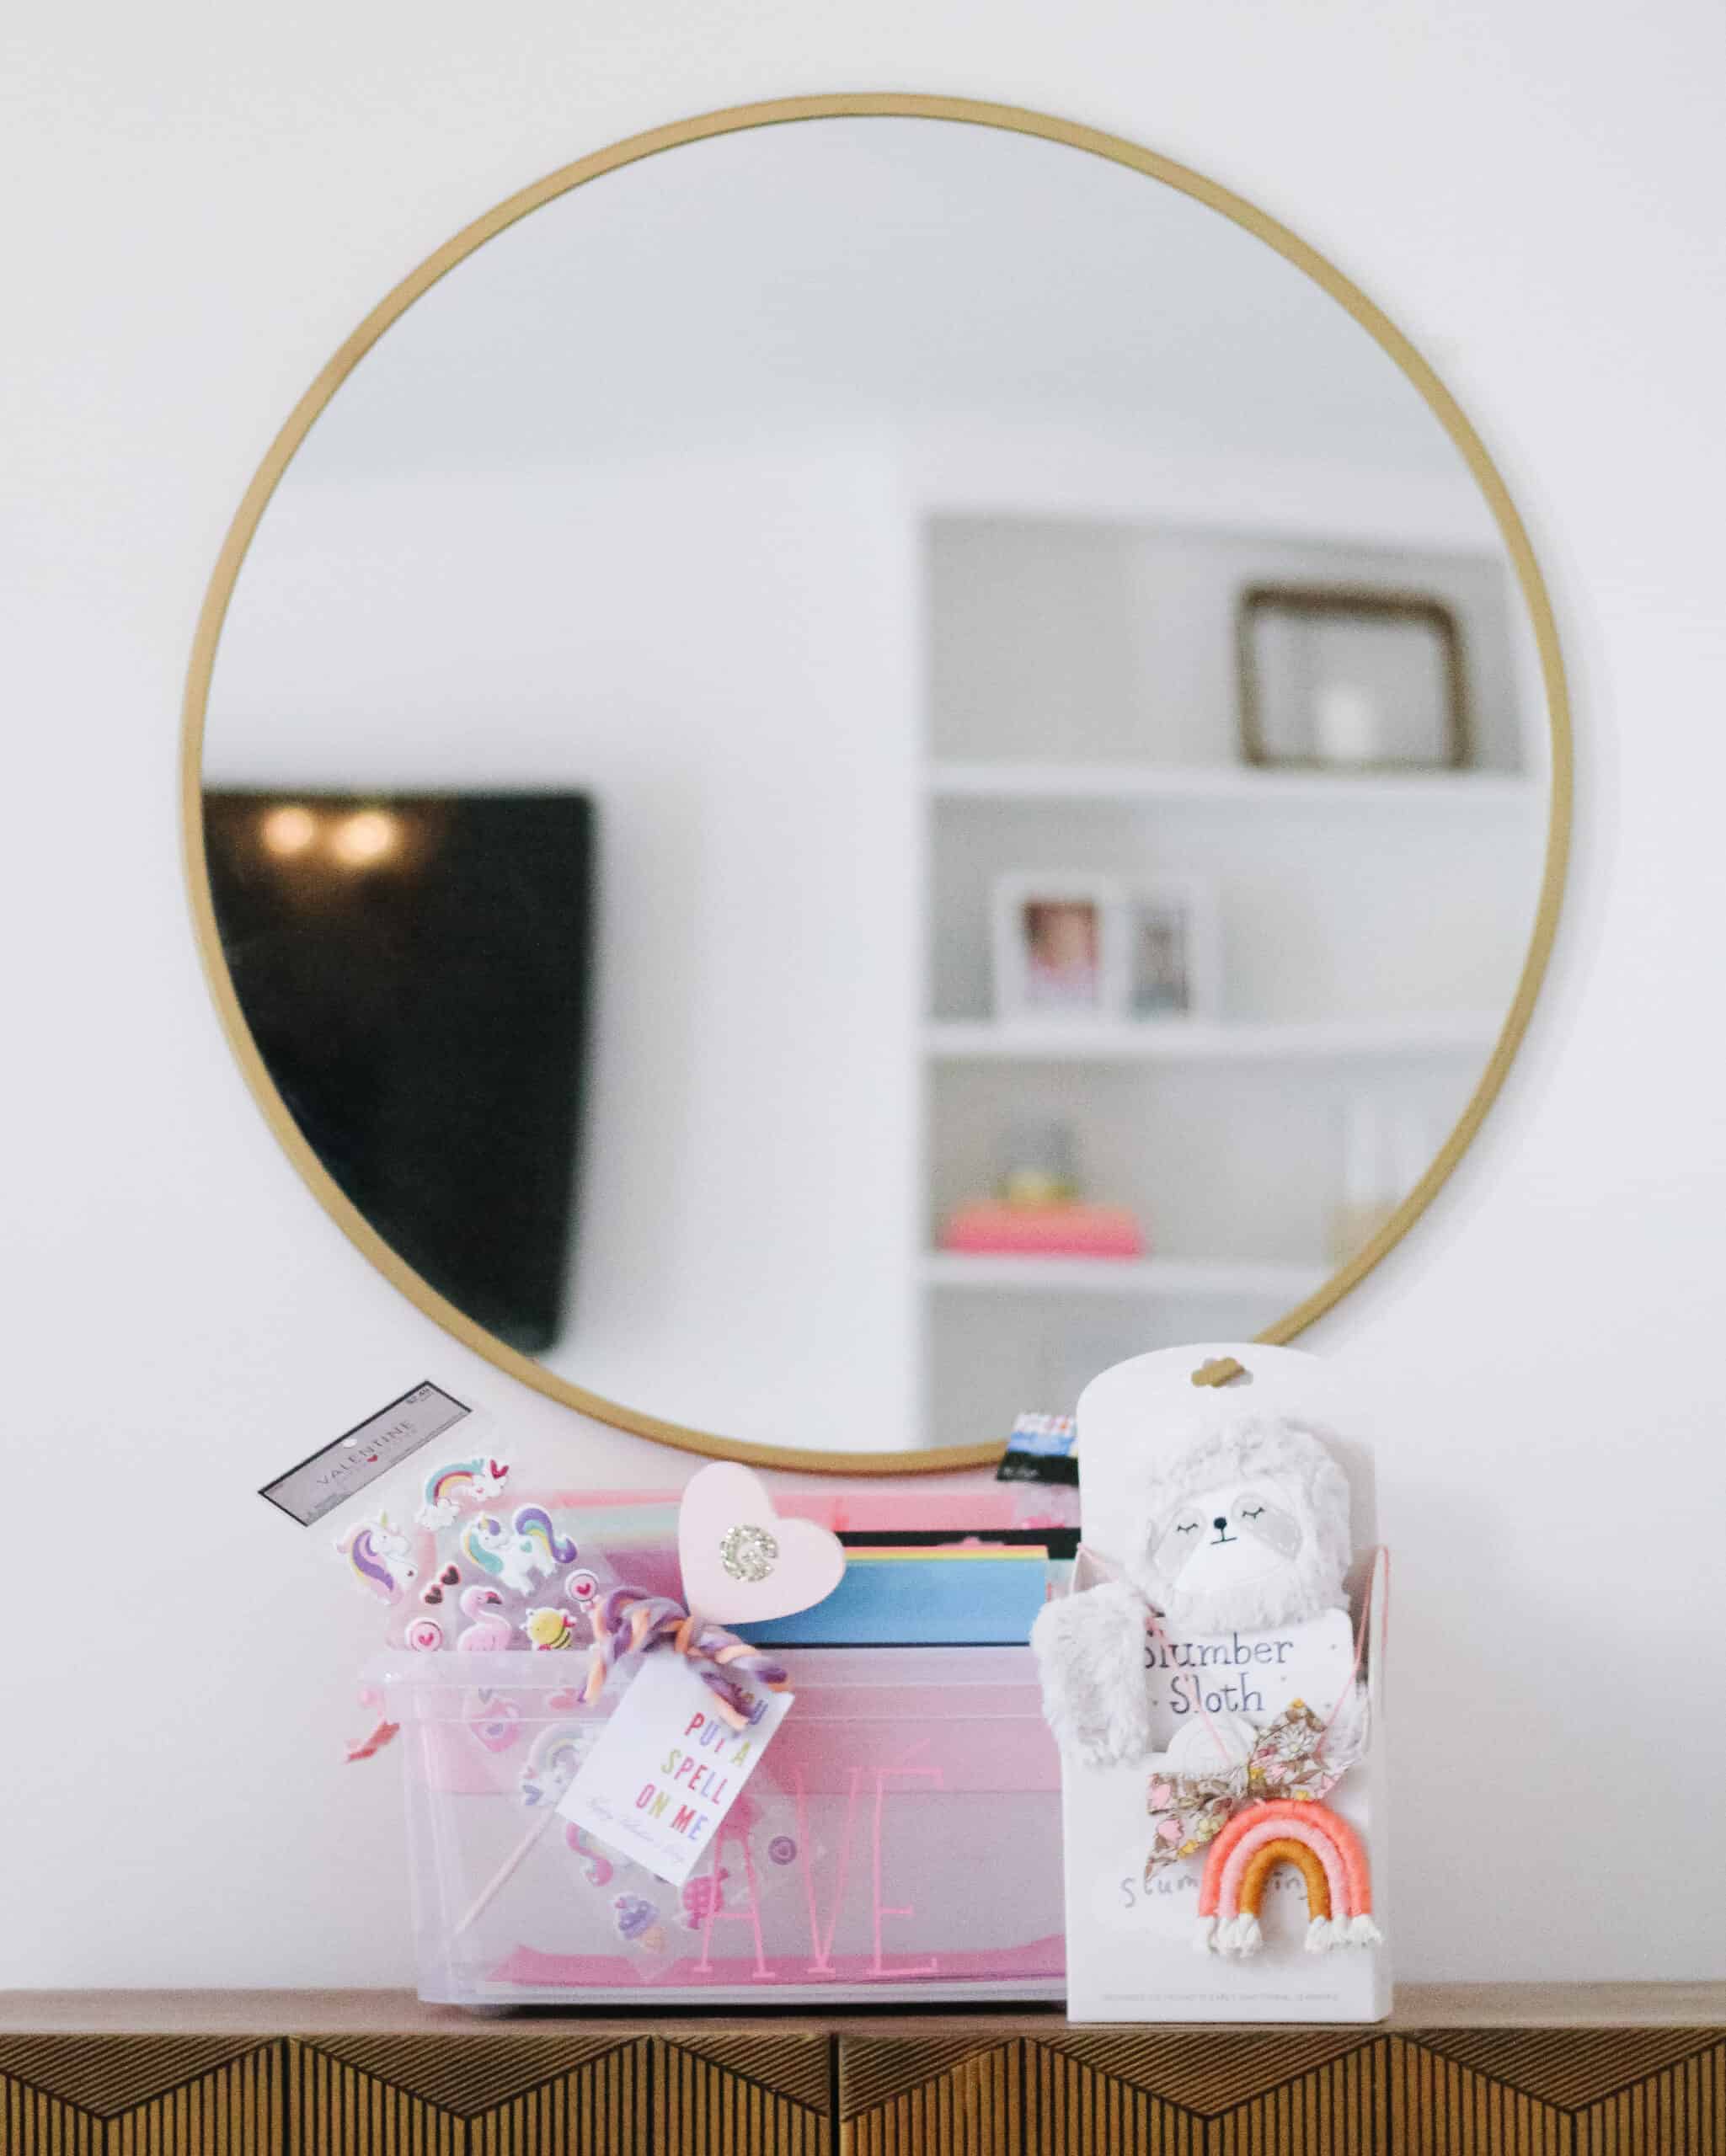
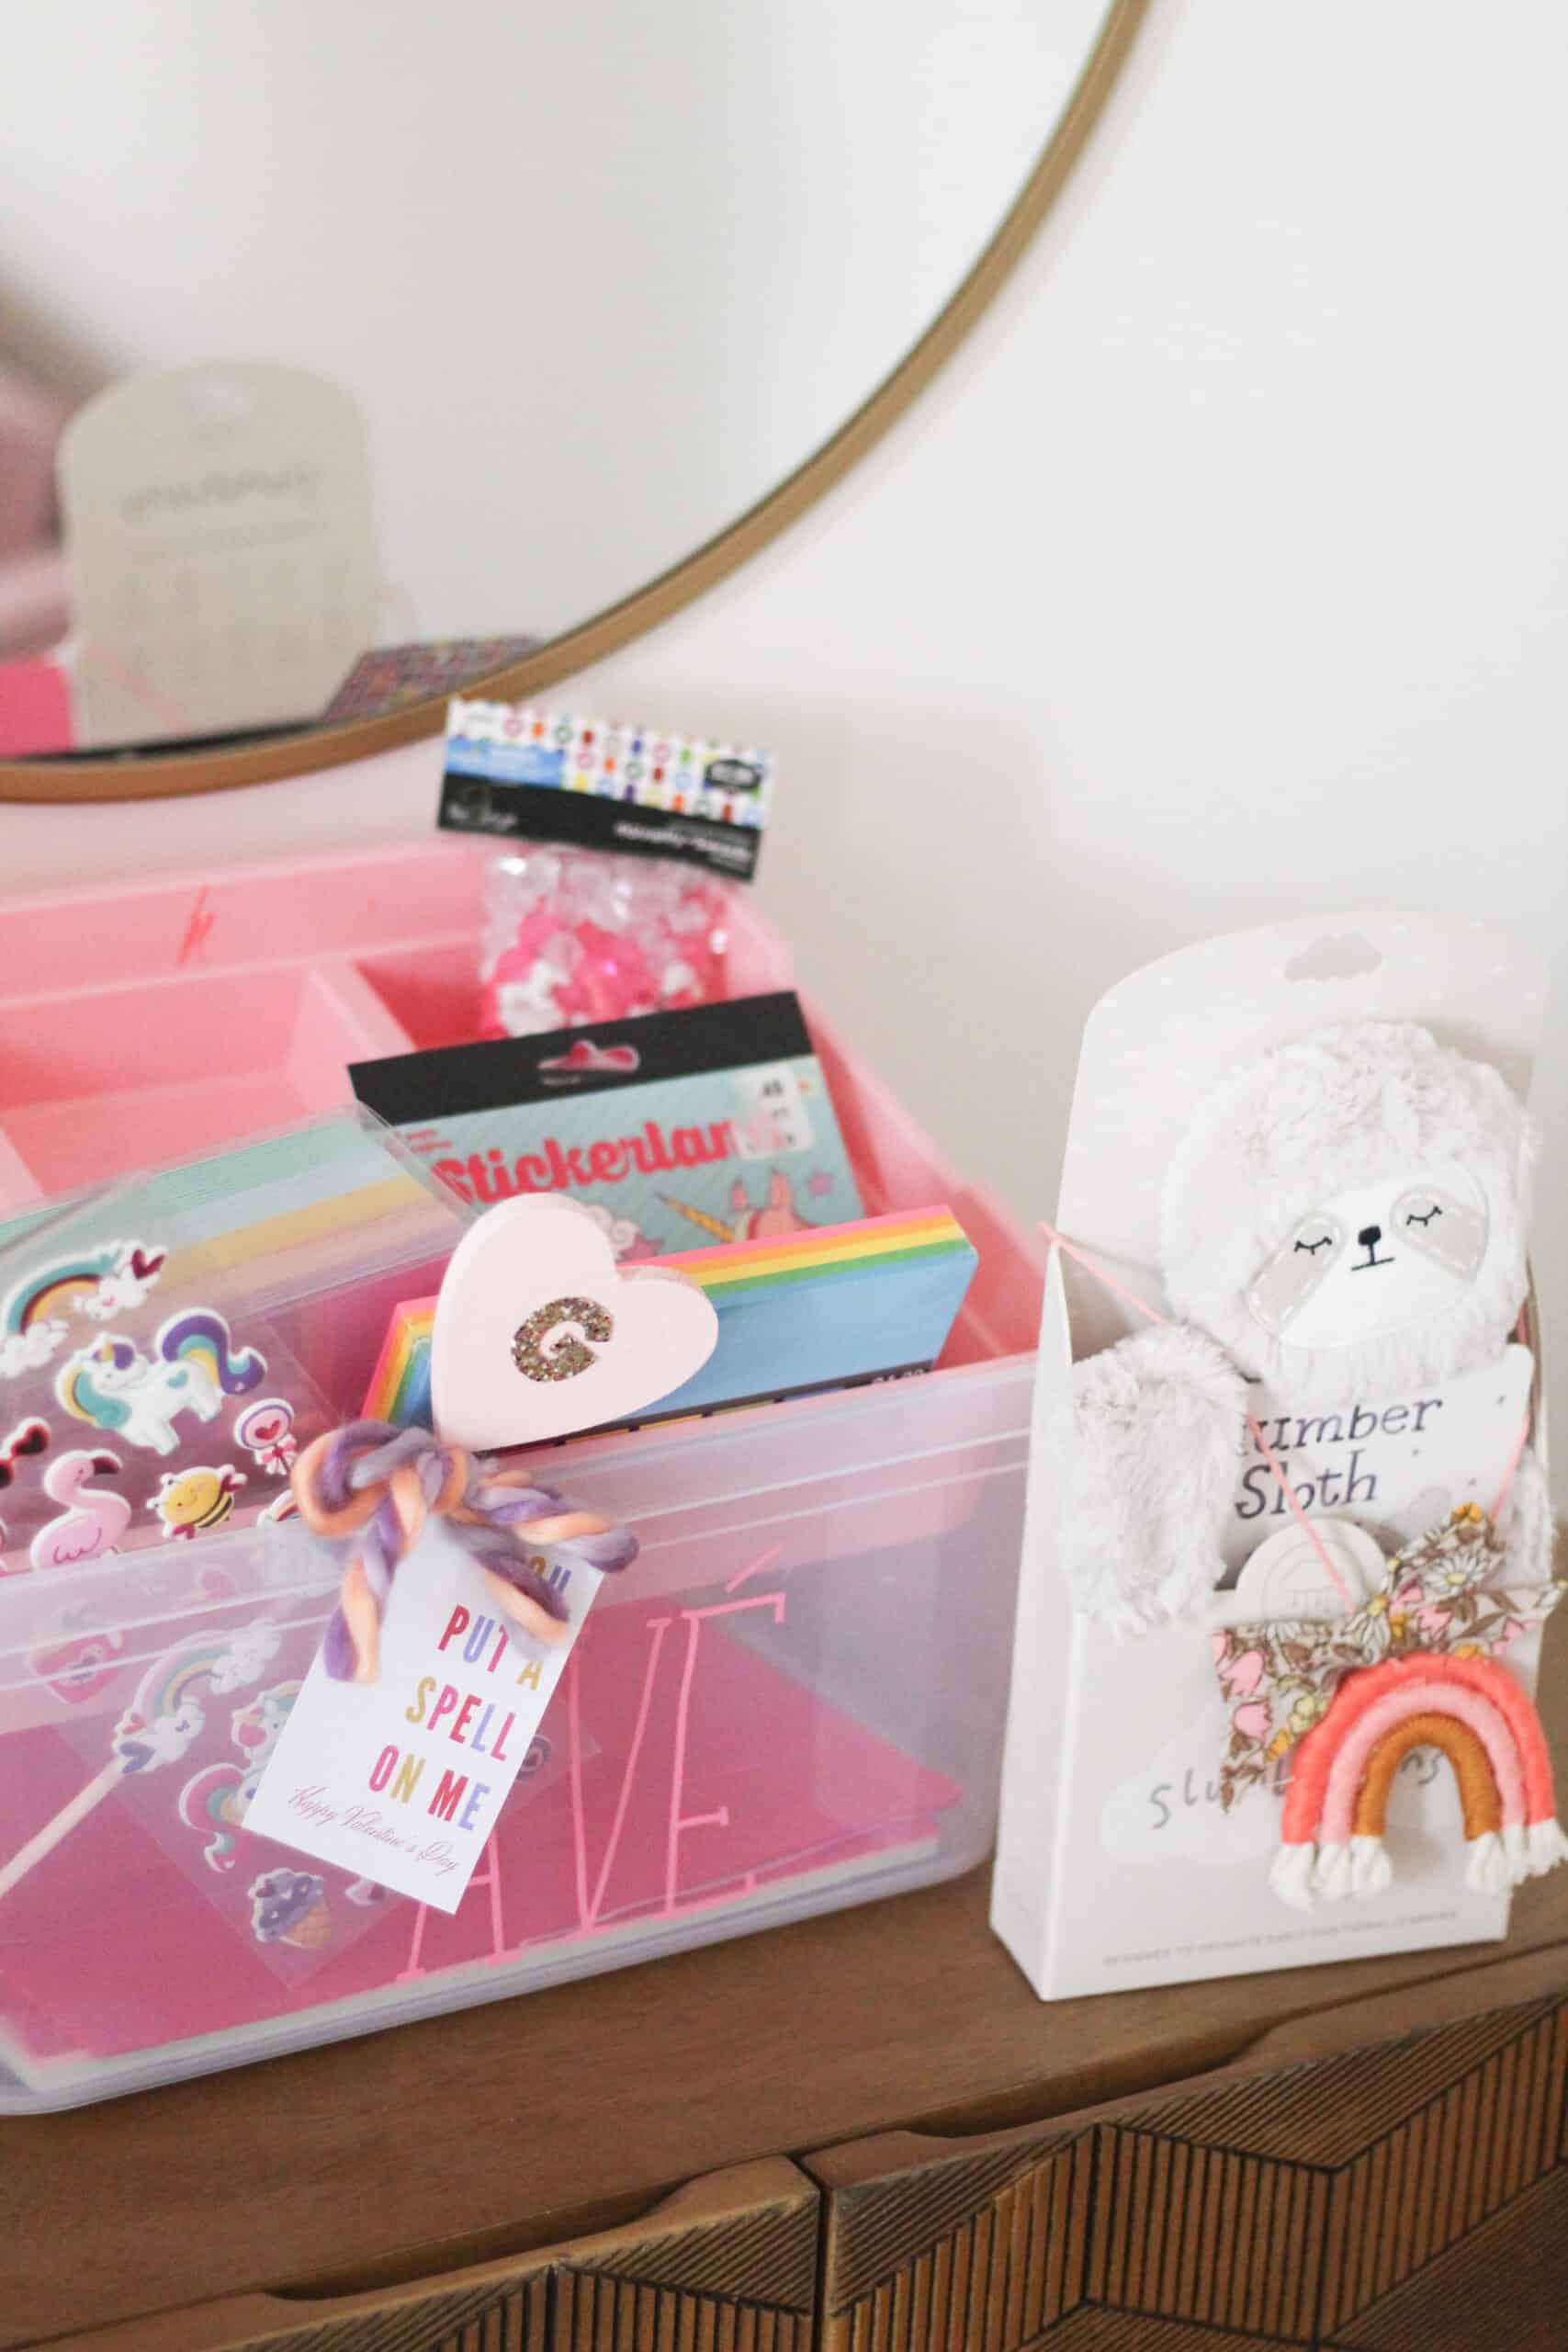
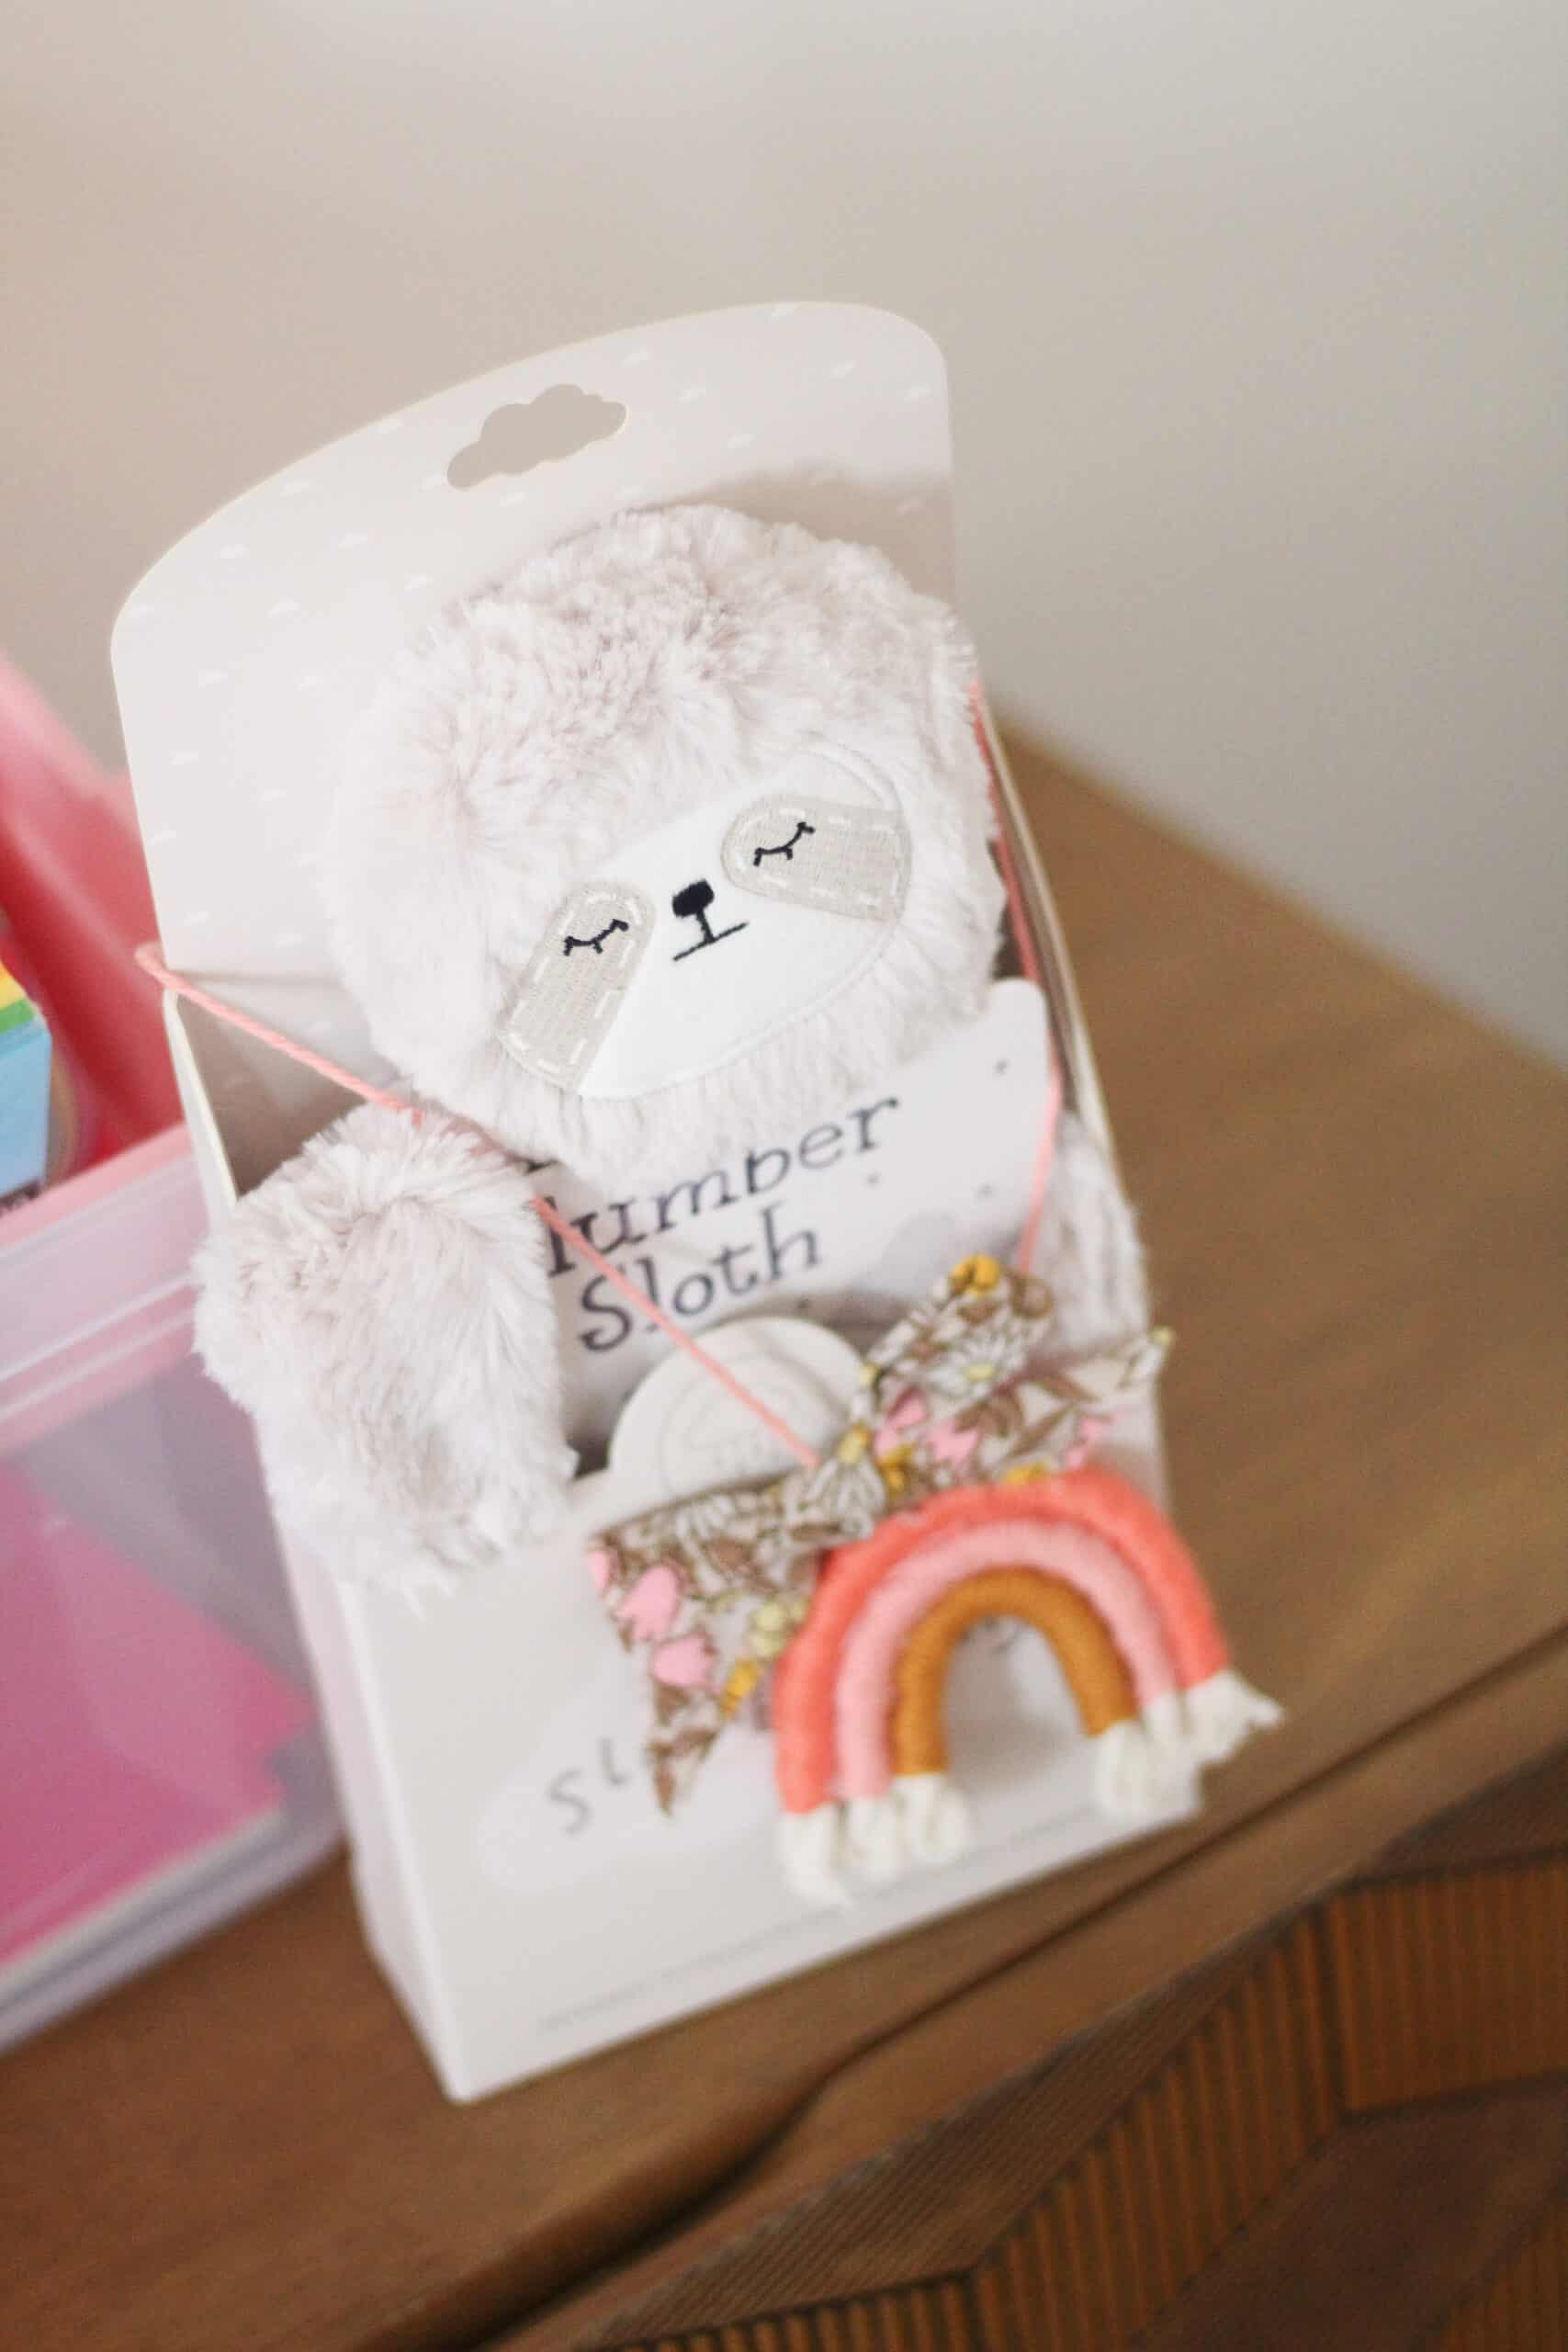
This year for my kids I am personally getting them each a new Slumberkins which is by far my favorite (and their favorite) stuffed animal brand. They are the sweetest, softest animals with such an amazing mission.
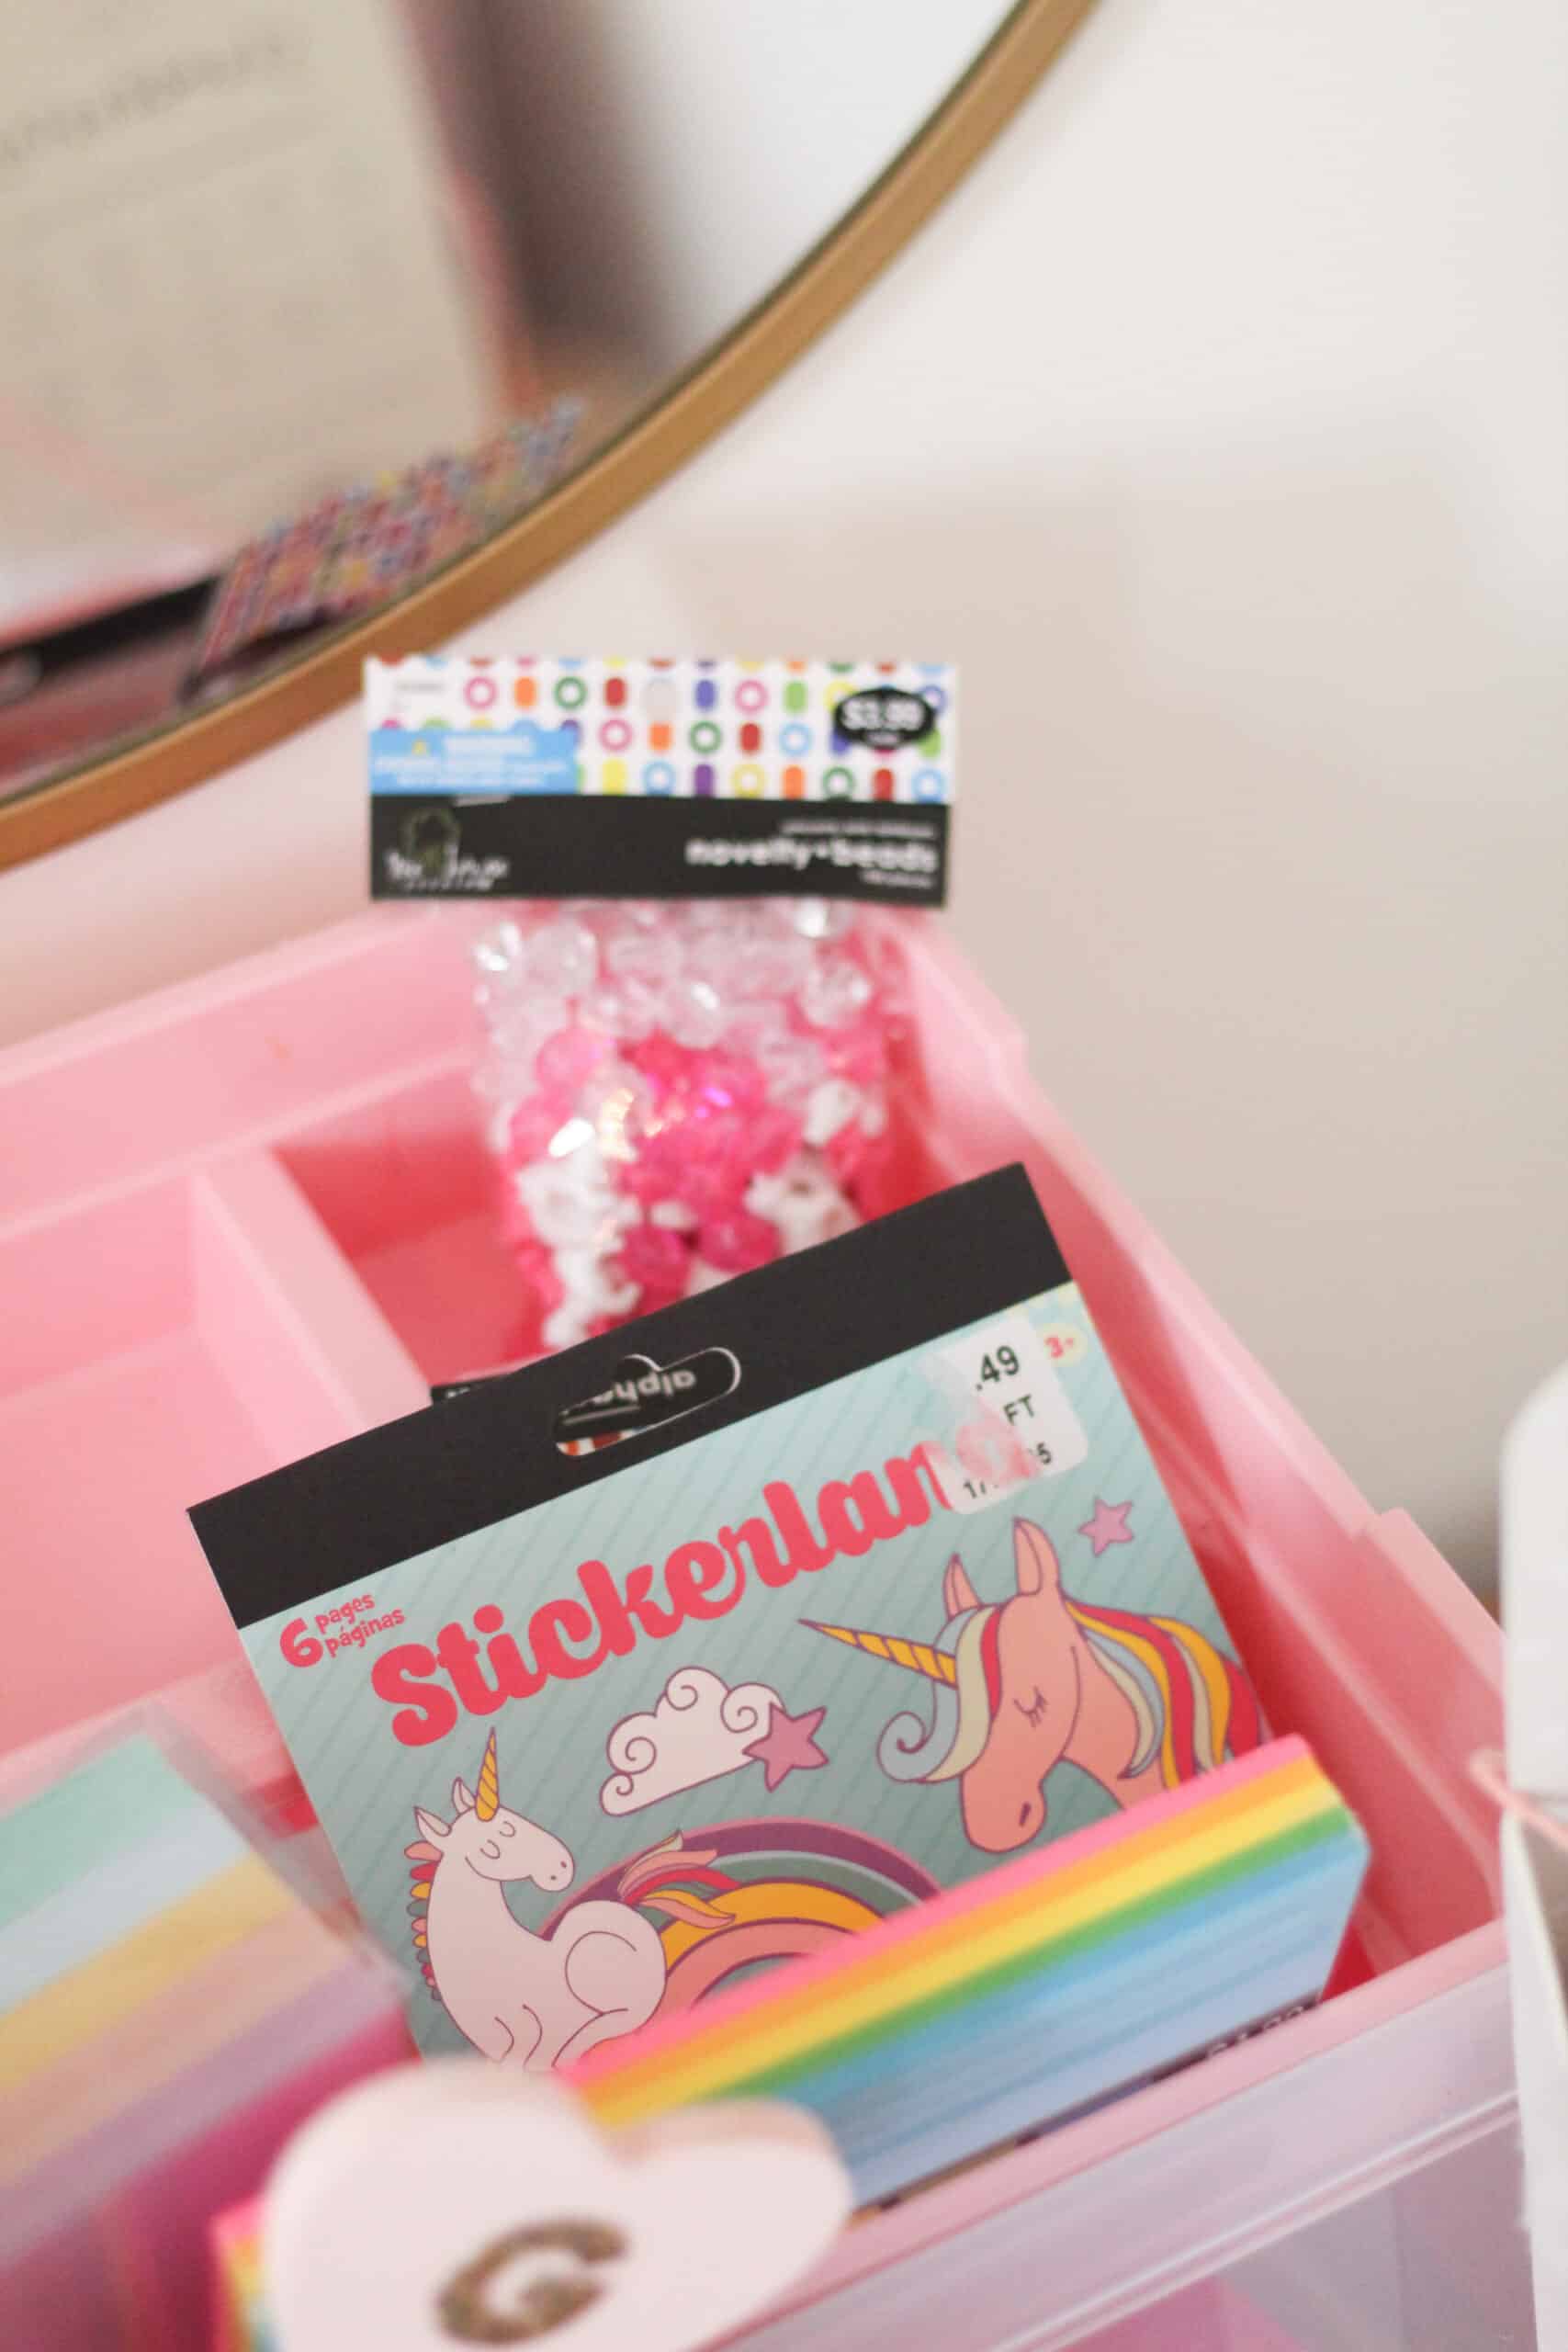
They are all each also getting new goodies for their craft bins we did for Christmas. New stickers, paper, crayons. That kind of thing. I love the idea of refilling things they use all the time, because I am not a good person with clutter, so for me that works great.
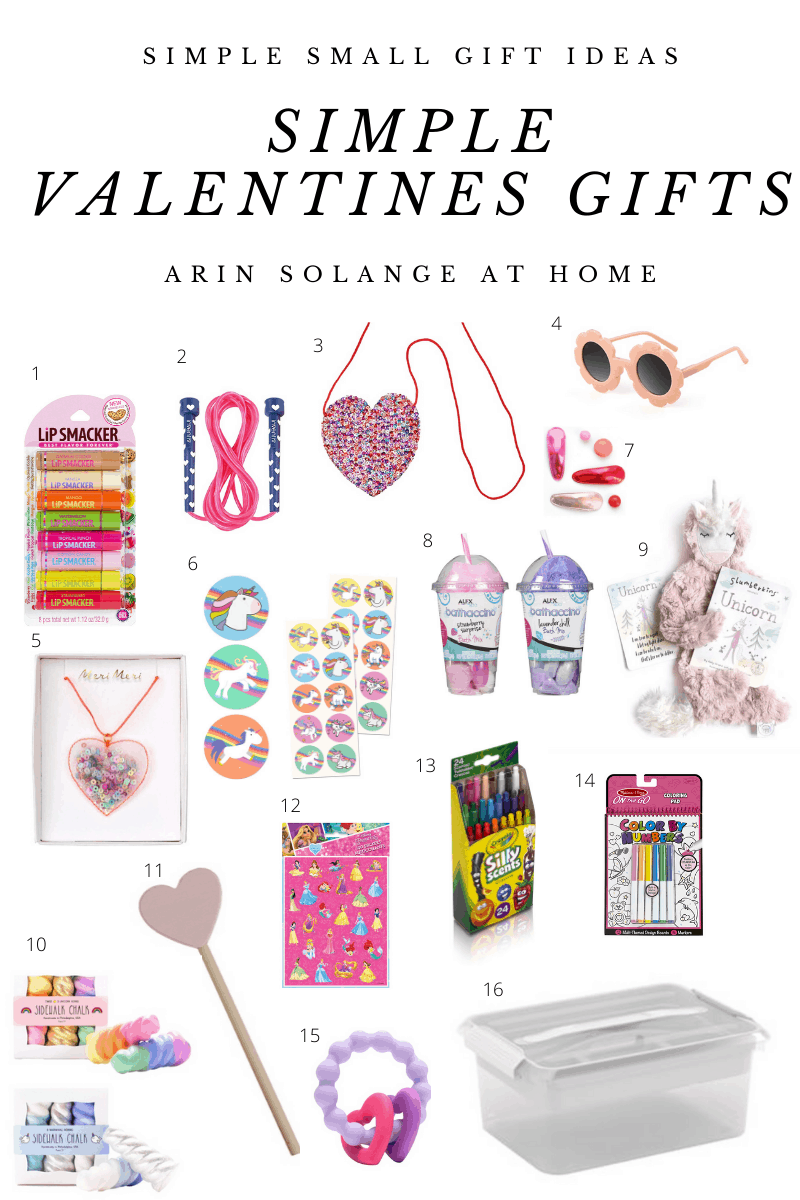
I am going to share some of my other favorite ideas for Valentine’s Day gifts below. To shop this image just click the image on the item you are interested in.
Chapstick – this is something fun, useful, and special for kids.
A little purse – I love getting my daughter special accessories for days like this. I don’t normally buy things like this for her, so its special yet semi useful.
Hopefully this blog post gave you lots of fun ideas for celebrating Valentine’s Day with your kids. Remember that the day is about love. Receiving it and giving it. You can teach them that its about more than presents.
Using the free printable kindness cards is such an easy way to make it bigger than them. But also, I get it – kinds are kids. They will only be kids once. So while you are spreading love and kindness with others, you can continue to spread it to them with some of these other fun ways too!
Make the holiday what you want it to be in your home, and remember to enjoy it yourself too!
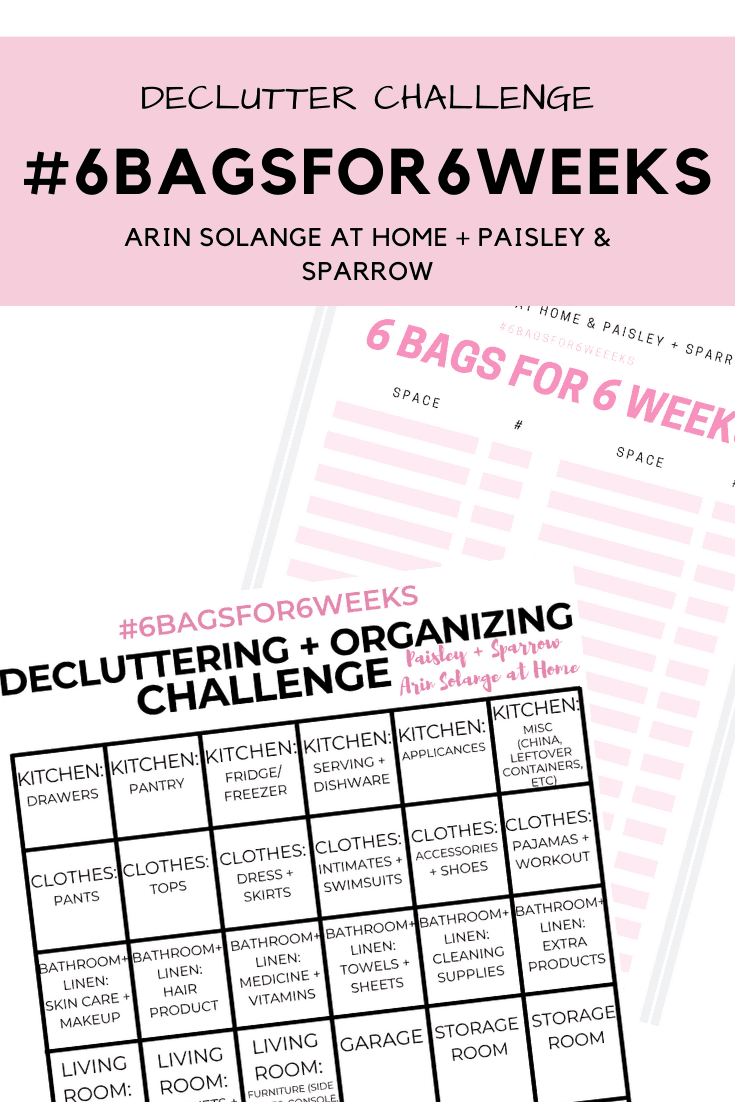
I equal parts can’t believe we are on the last week of 6 Bags for 6 Weeks, and am so READY to be done haha. I have been asked quite a few times along this journey, what my organizing tips are or keeping your house tidy, so you don’t go back to the previous state.
This post will aim to give you all those tips, and the tools I use to keep your house clutter free!
This post may contain affiliate links
6 Bags for 6 Weeks
Before I get into the organizing tips, I want to bring you up to speed incase you’re scratching your head at the term ‘6 bags for 6 weeks’. My friend Jen and I designed a home declutter challenge that will allow you to organize your home, room by room and space by space.
The goal is that in 6 weeks you will have gotten rid of 36 bags of clutter at a minimum!
If you haven’t yet started the challenge, be sure to grab your free documents below, and dive right in!
This week we have teamed up with Christina! If you don’t follow her on Instagram, or on her blog – Christina on the Daily you are missing out. She has amazing home and personal style, and is such a sweet, open mama sharing her home and heart with her readers and followers.
We are giving away a Faribault quilt this week, and I can’t wait for one of you to have an amazing new blanket to decorate with!
And because you know Jen has a great post every week – she is walking you through organizing her office!!
Organizing Tips for a Tidy Home
I am going to share with you 10 tips that will help get and keep your home organized moving forward from this challenge. There is nothing worse than organizing your home only to feel like weeks later it is already a mess again.
I will tell you – life will mean that it isn’t going to stay perfect. There is and will be some maintenance required for things to get messy and unorganized.
10 Organizing Tips
Okay I know you all will hate me for saying it, but it is a reality – put things back where they belong when you are done with them. If you take the extra 3 seconds at that time it will save you a huge headache later.
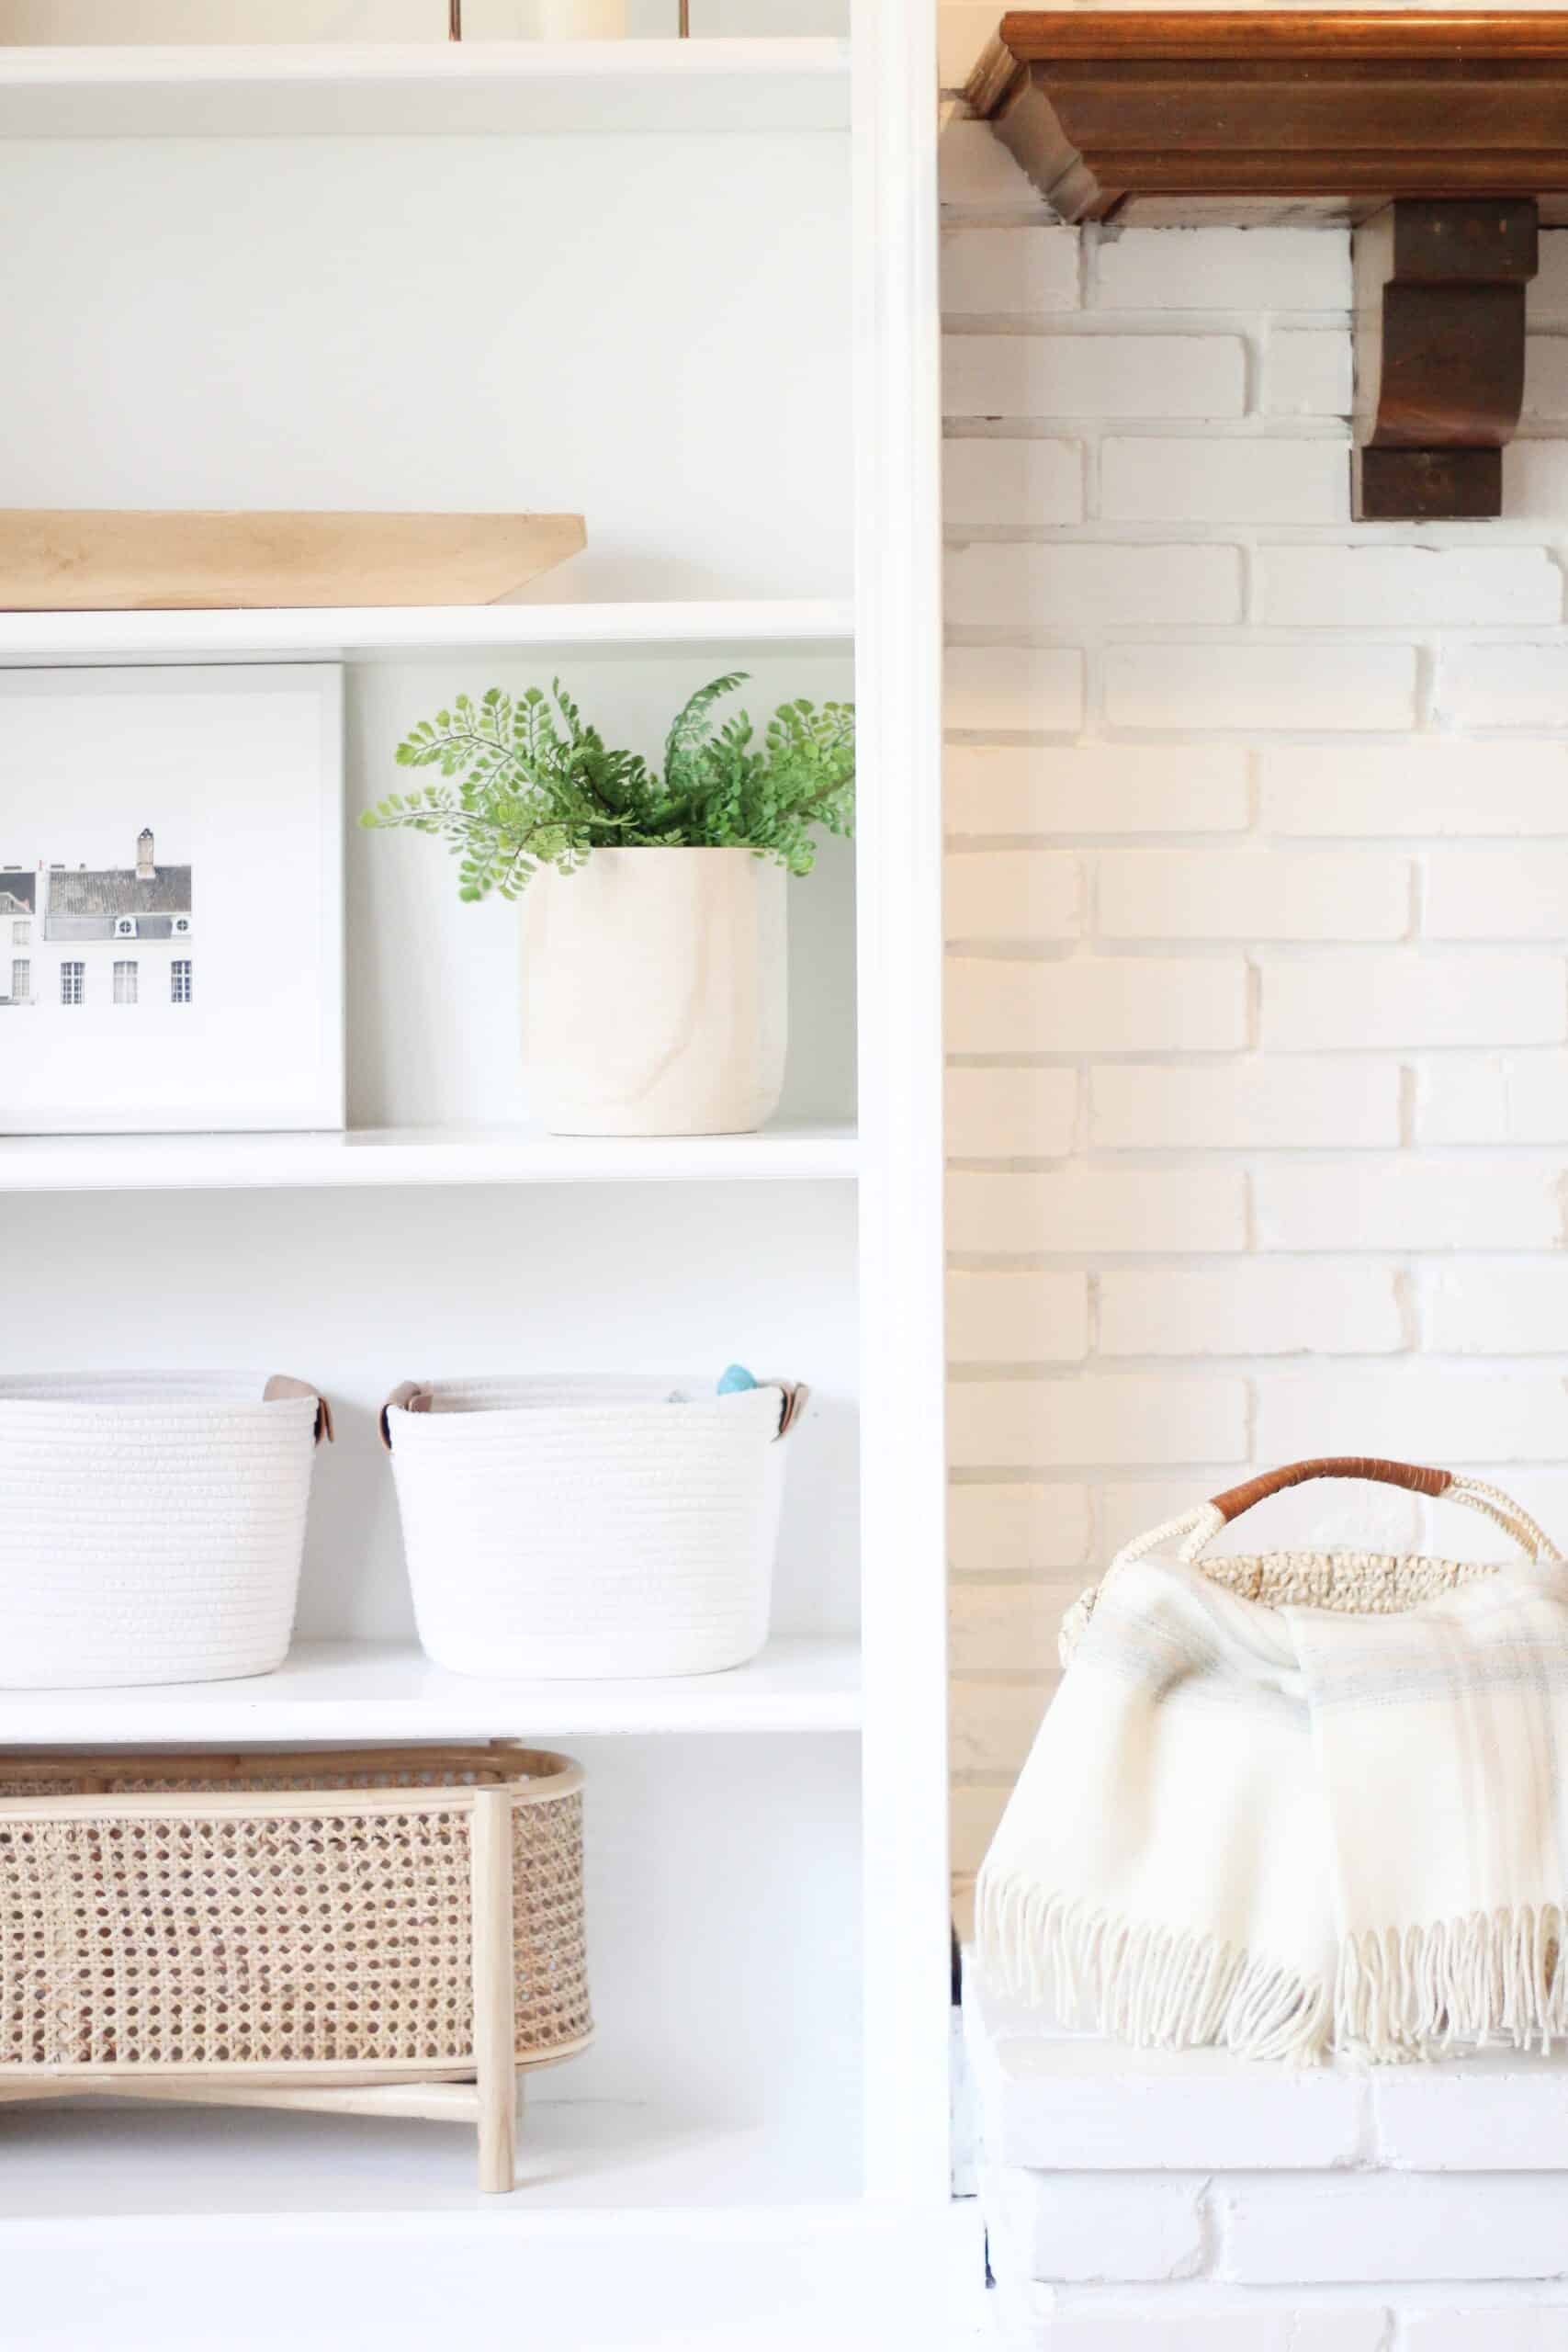
Have systems in place – if you have stairs, one of my biggest tips is to have a basket, or baskets that stay on the steps (like this one) that hold items that need to go upstairs later. I know that for me with little ones, sometimes moving from floor to floor during the day is not always possible.
Designate a day of the week for general maintaince – for me I keep a Sunday checklist and run through it quickly each week. Things like emptying that basket are on the list and allow me to keep things much more organized. Anything that needs to be done weekly might be helpful to be put on a list.
Have a place for everything. If during this project you found that you didn’t have a place for something, find one or make one. Otherwise that item, or those items, will be a constant source of struggle for you!
Keep a donation box – if you have a storage room, or maybe in a closet, keep a bin or box that you can easily throw items in that are ready to be donated. Personally, we keep 1 large box in our storage room. When the box is full we load it in the car and drop it off at a donation center.
On that note – if you choose not to use something because you don’t like it – your taste will likely not change. Whether its clothing, or a piece of holiday decor, don’t sit on it. The joys of having that donation bin is you can instantly move the item to donation and not wait until you feel you need to do a huge purge.
1 in 1 out – this rule doesn’t work for everything, but it certainly does for A LOT. If you got new tennis shoes because your old ones were worn out – donate the old. With kids and toys/stuffed animals definitly do a purge around holidays and birthdays. My kids also generally know that if they choose a larger toy on an outing with Grandma or something, they will have to choose one to donate later. Follow this rule in all areas of your home and things will work much better!
If they don’t sell quickly donate them – if you are like me, you might like to sell some of your items. If an item makes it to the sell pile it doesn’t come back into circulation if it doesn’t sell. I either A: choose to donate it with the rest of my stuff, or B: find a close friend to give it to. Sometimes it hurts just a little to know the $80 shoes will be resold for $3, so instead I will find a friend who will be excited to own them! Don’t keep them just because – if you didn’t want them, they will just take up space and not get used!
Keep your home tidy DAILY – Make your bed in the morning, put away all toys and do all dishes at night, and just keep up with general tidiness. I find when I let that slide everything else slides with it. I know some people will say “I am not a tidy or organized person” which is probably slightly true for some people, but understand it is to some degree a learned behavior too.
Finish one thing before you move to the next – Again, I know this is sort of a DUH thing, but honestly it will make a huge difference. If you are decluttering in the future, fixate on one room or task first. If you are doing a project, do that project, start to finish. Get rid of or store the other stuff properly, and fully wash your hands of it before you move on.
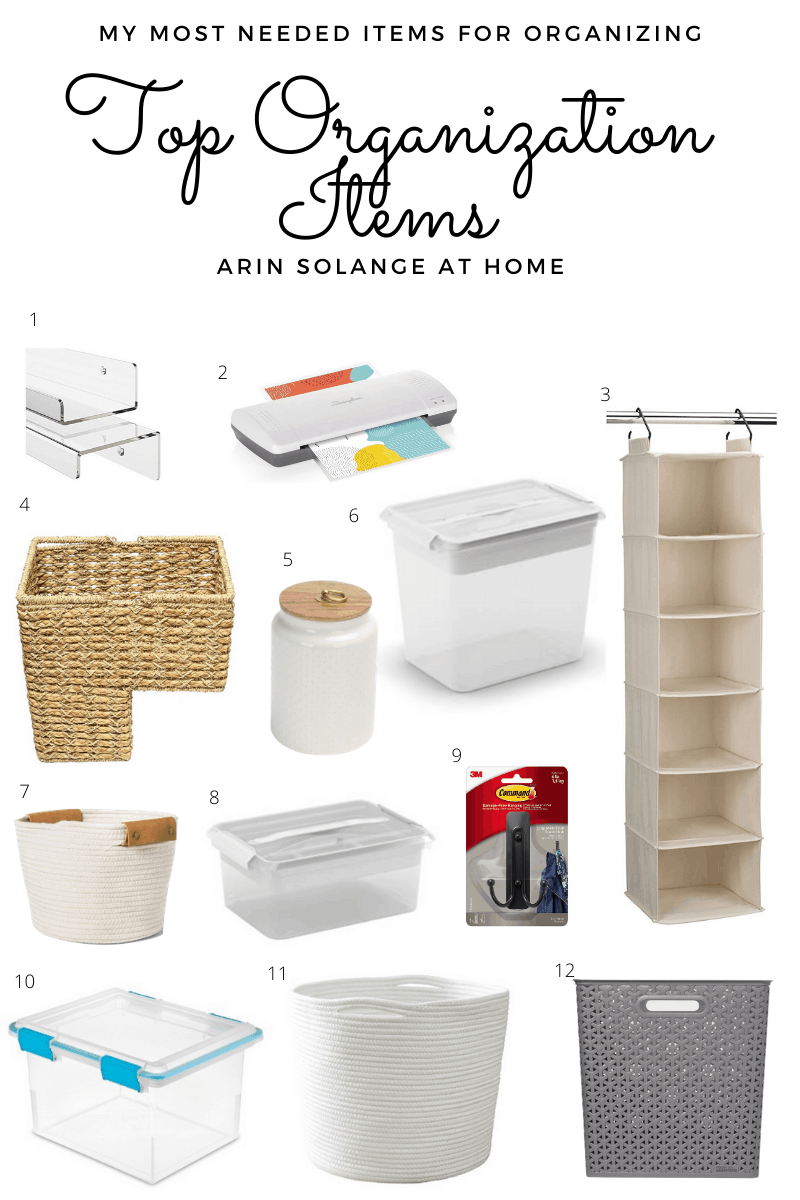
Absolute Favorite Organization Items
On the note of keeping things organized, I am going to share my absolute favorite items, and how I use them. I truly think having a few great items in the right place, with the right tools can make a world of difference.
Remember that none of these items will just solve all your problems. To some degree, you have to follow the process and the rules above to make them work well, but also following the rules above without some of the right items won’t help you either!
My laminator – super inexpensive and the best way to make tags for bins!
This hanging organizer – works great in closets, and I use one in our closet for the kids clothes of the week. Load one bin up for each day on Sunday and you won’t have to fuss over kids clothes all week long – read about it here!
This canister and the others from Walmart are such a good deal. I use them on my counter for daily items, but especially love it right now for infant formula!
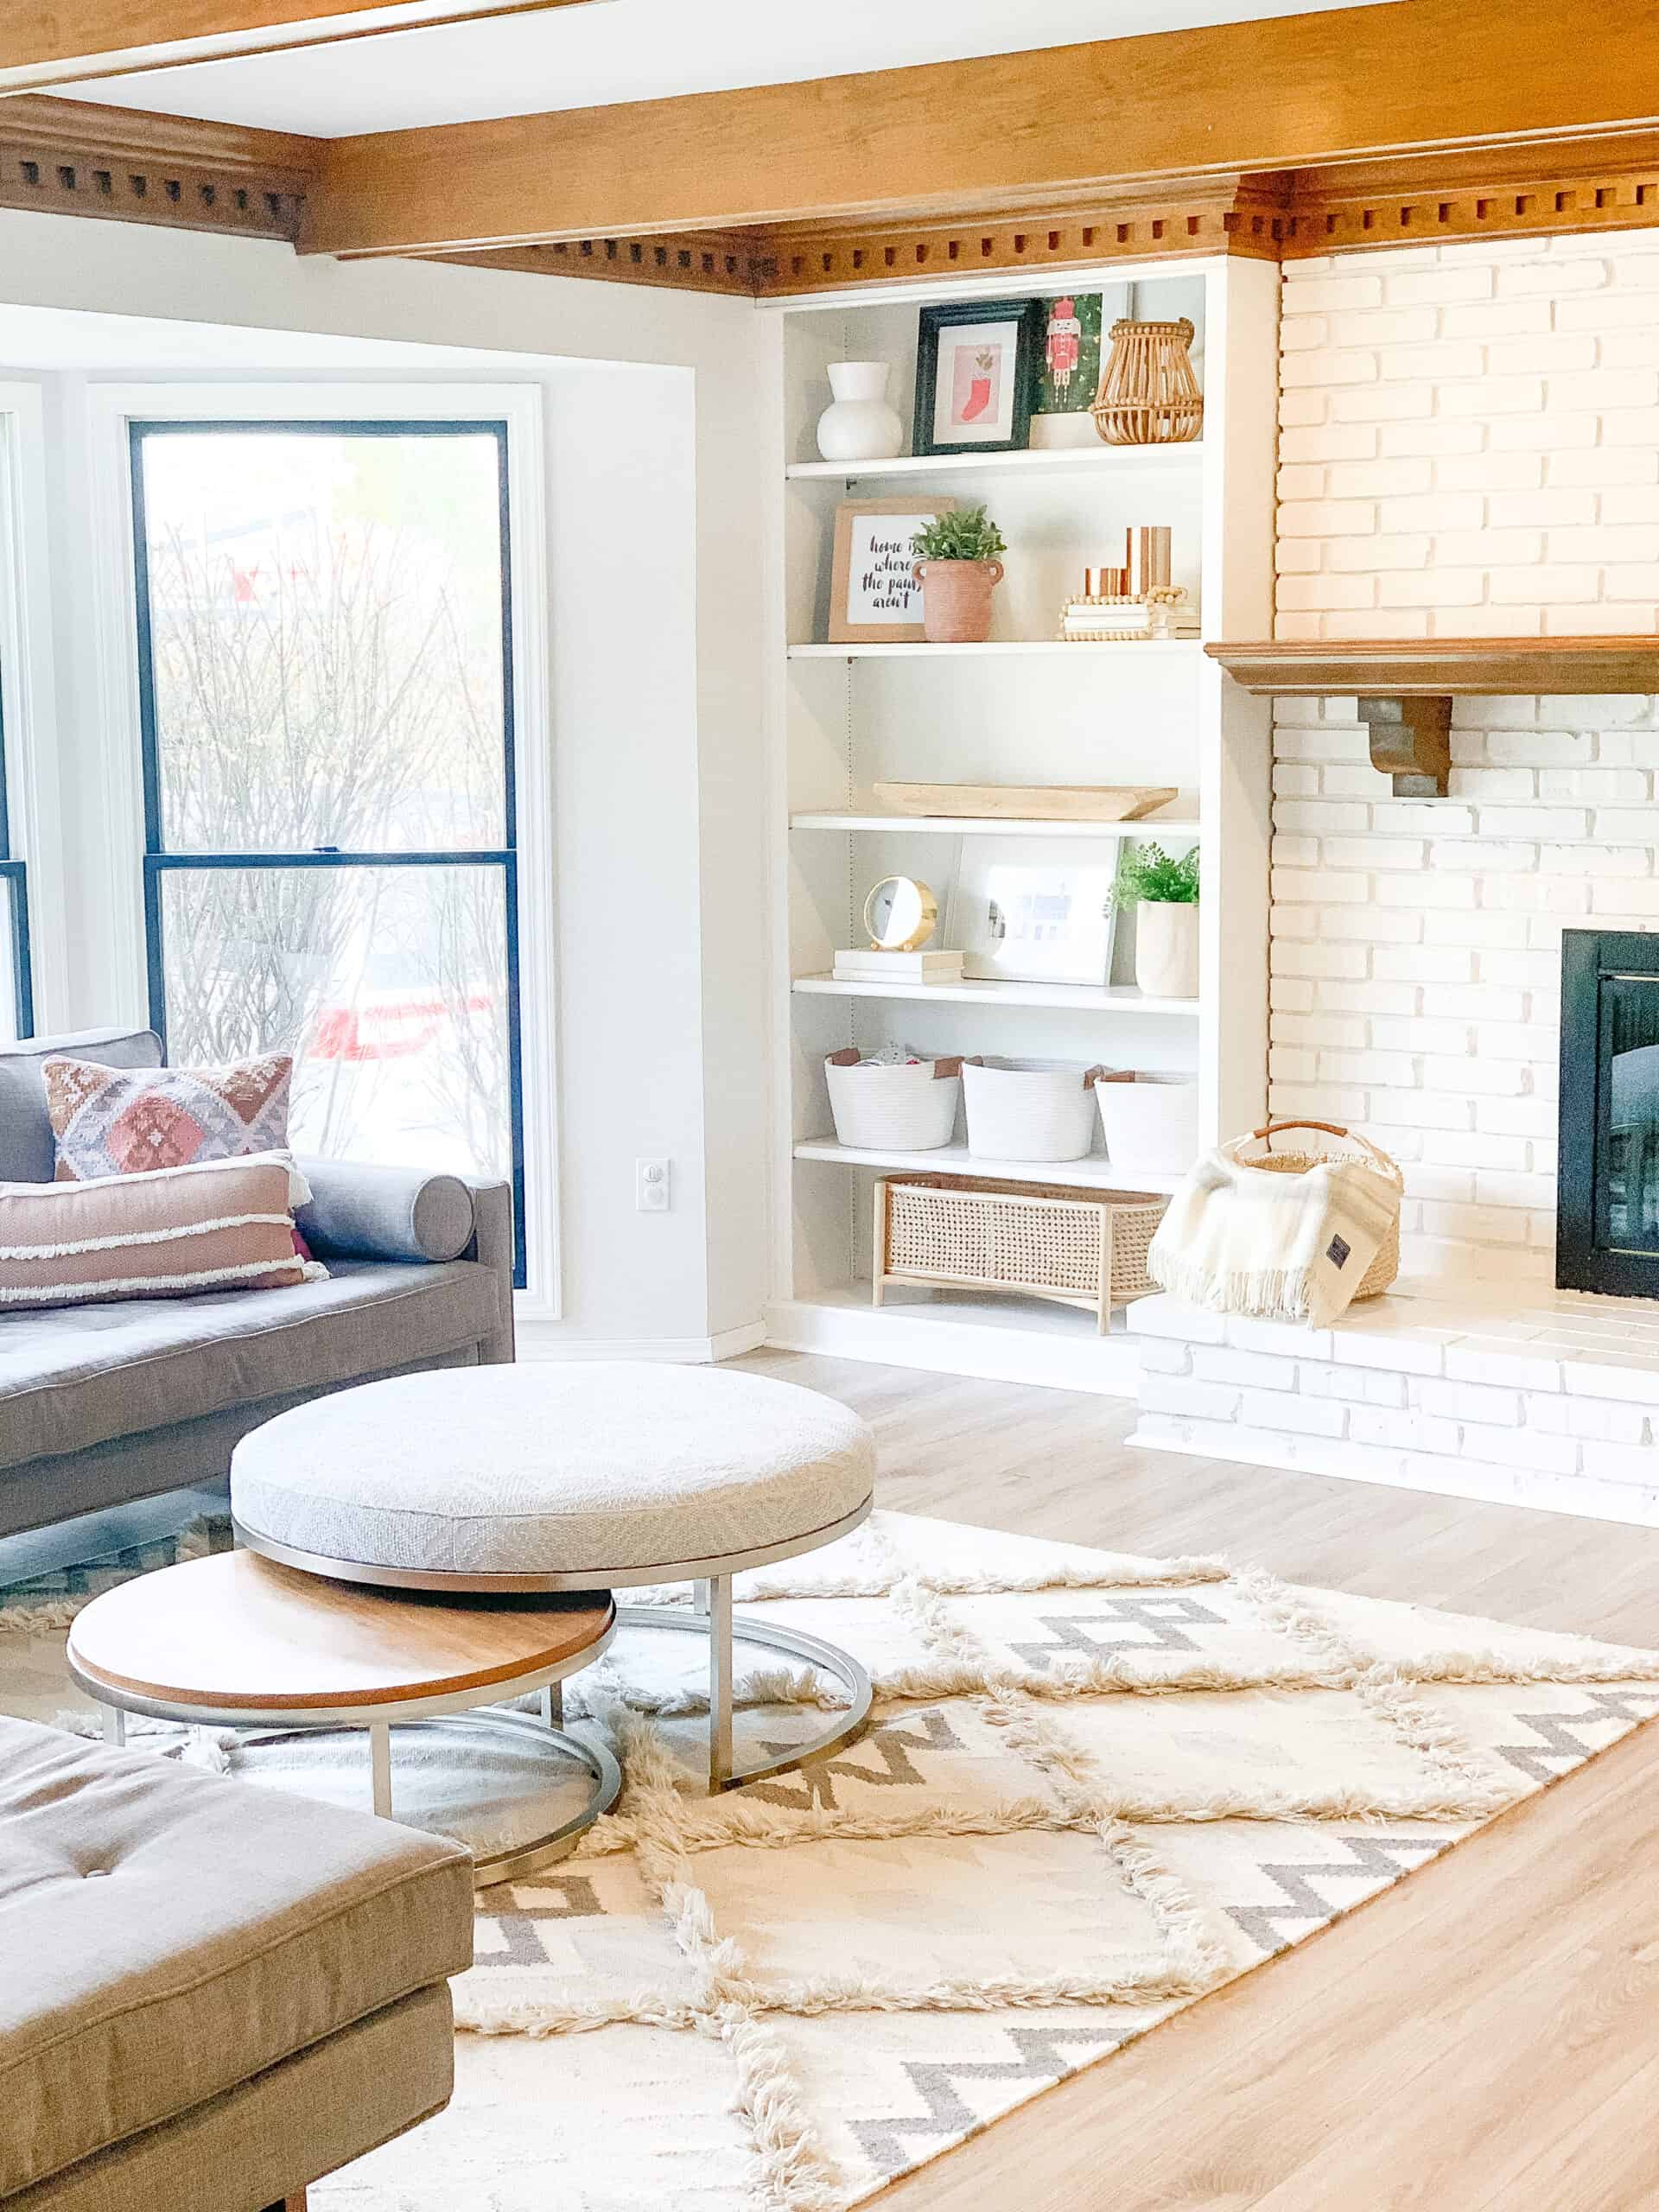
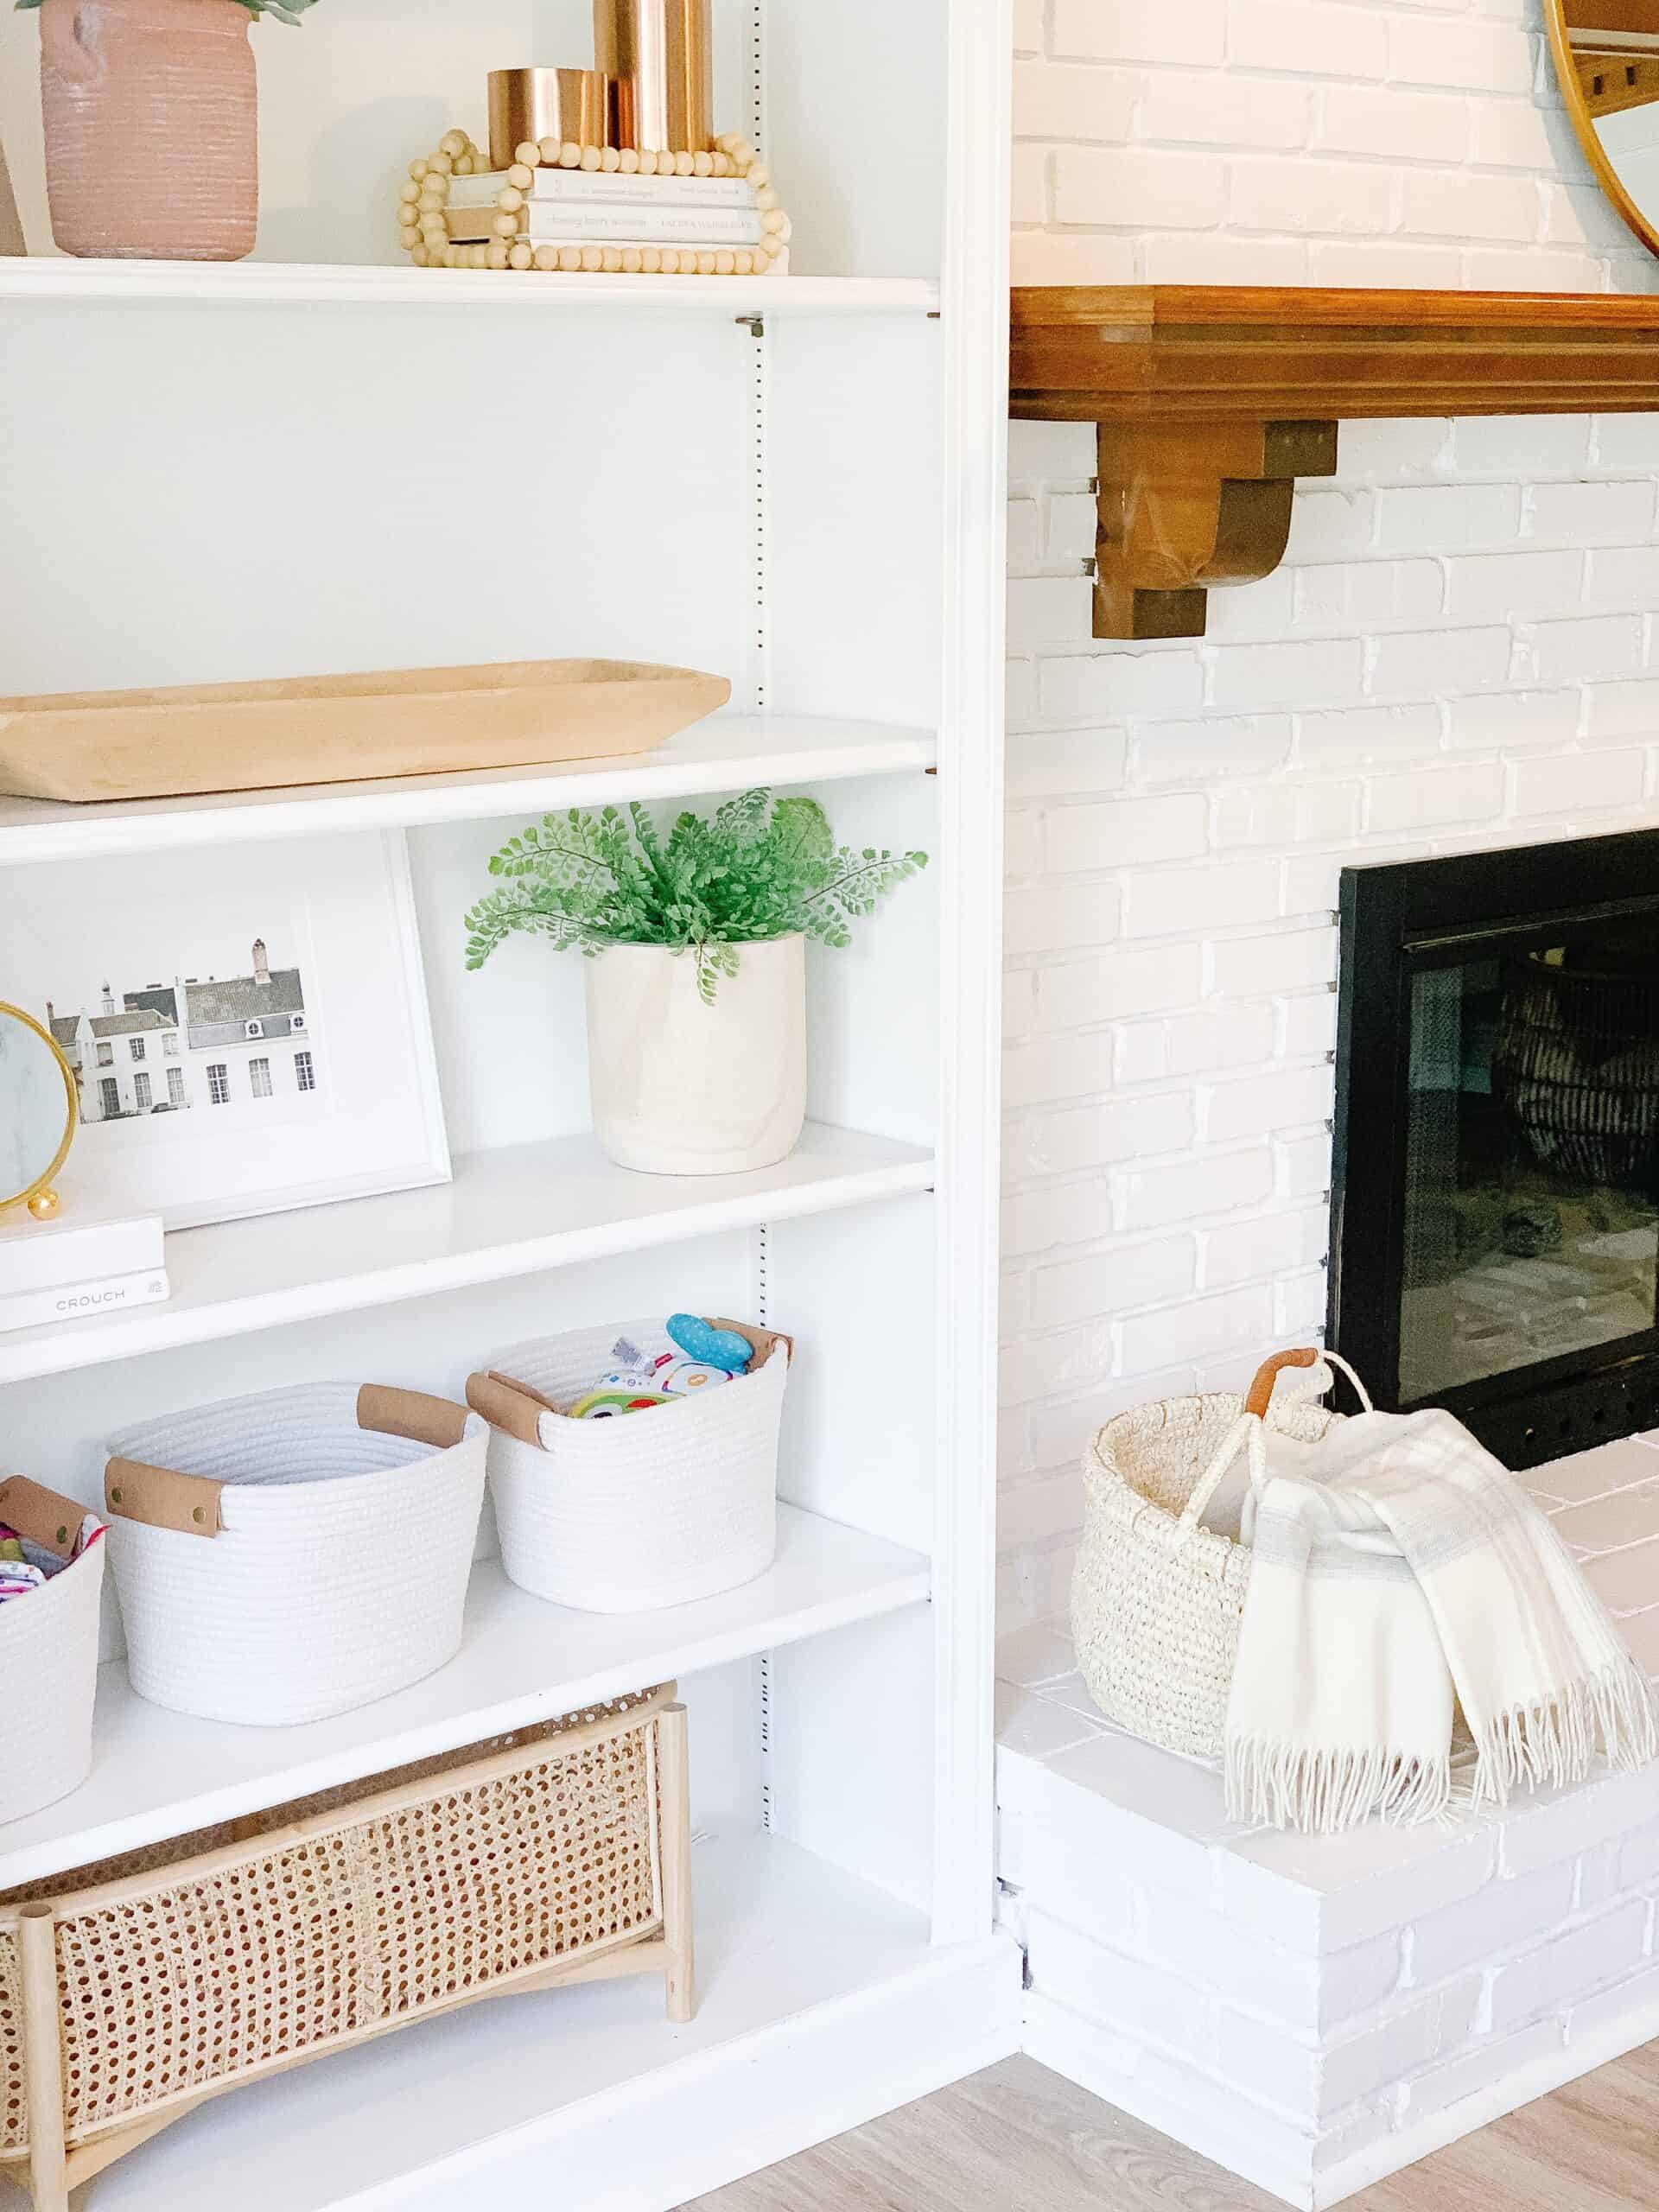
These bins for toys and such on my built ins as well!
I use these all OVER. they are the best, but I especially love how they are a better version of the canvas ones in cube organizers!
Hopefully you are able to utilize some of these items, and these organizing tips for keeping a tidy home are super helpful for you! If you have any questions leave them in the comments below or DM me on Instagram (@arinsolange).
This post was written in 2020 and updated in 2023.
Every January, my friend Jen and I do a declutter and organization challenge, that has helped us clear out EVERY area of our homes. One of the areas we had to tackle this week was kid’s paperwork and school work. This post is going to walk you through my kids school papers storage bins, and all things organizing to get there.
This post contains affiliate links
I got on my Instagram stories to show how we go about organizing those spaces with our kids, and my followers seemed to really love it, so I wanted to get it on here to show up close.
I talked about organizing bills and paperwork a few years ago, but I will go more in depth in this post. And if you’re more of a visual person, you can check out my Instagram Story that shows my process for organizing paperwork.
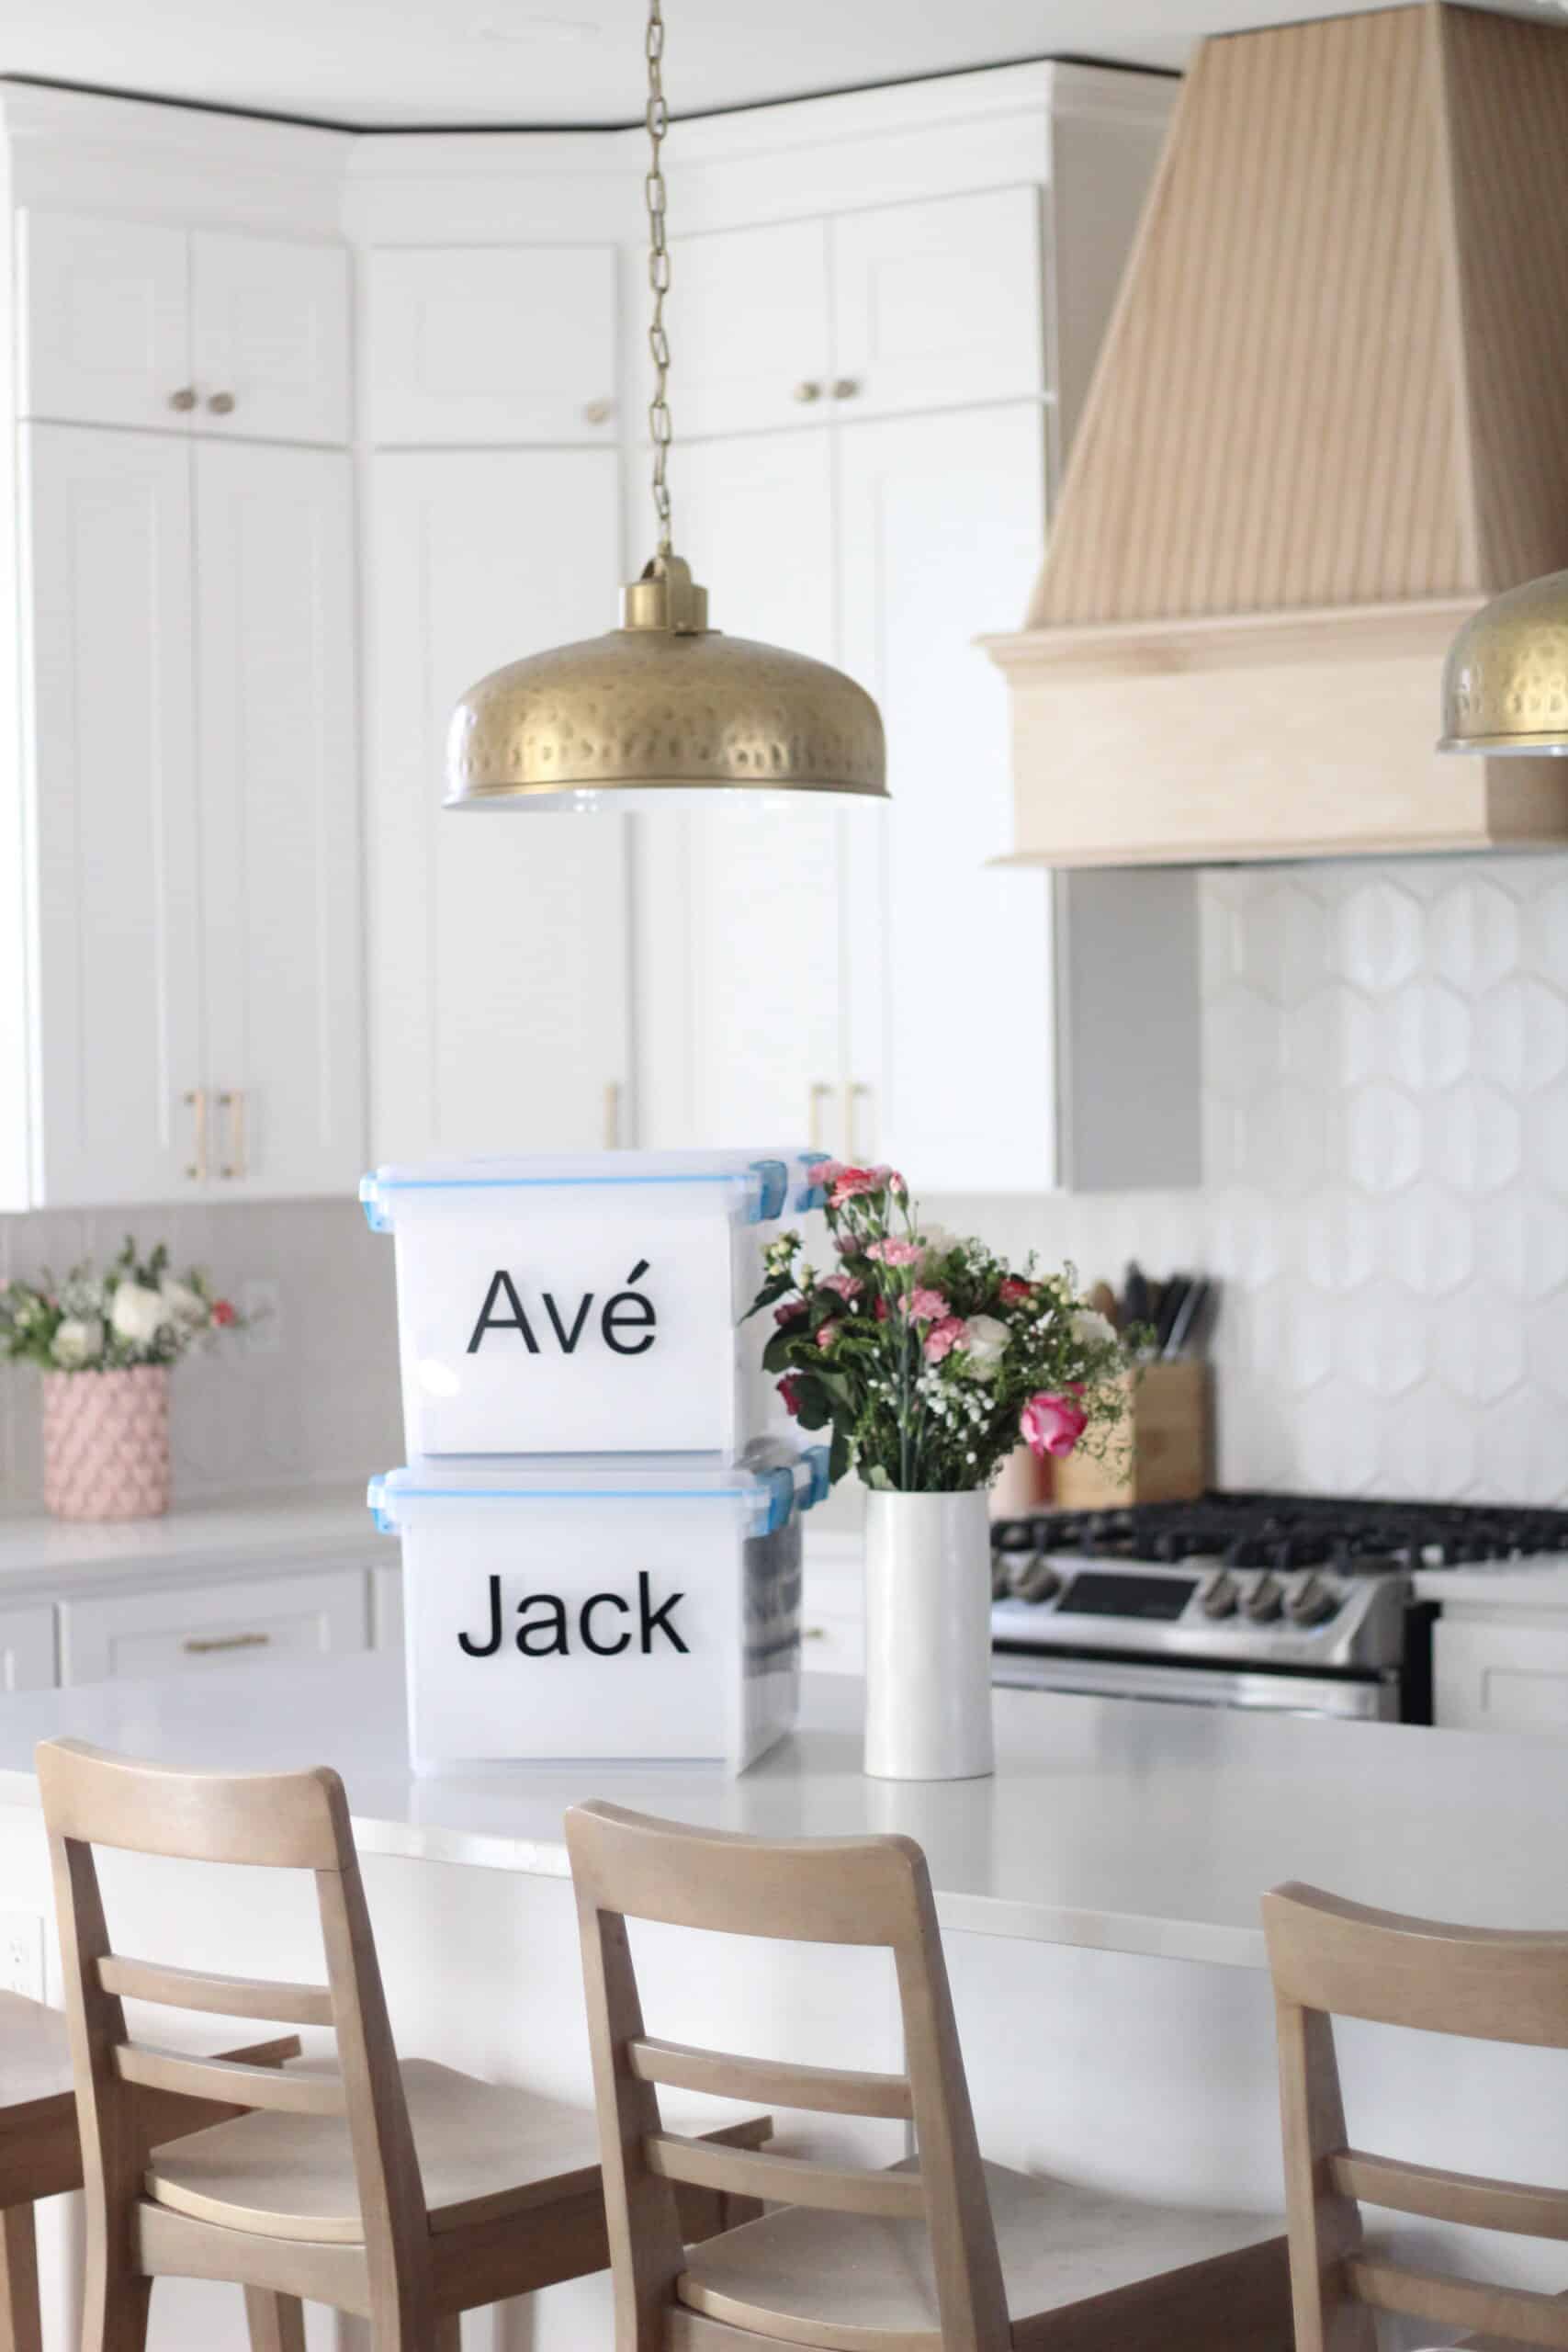
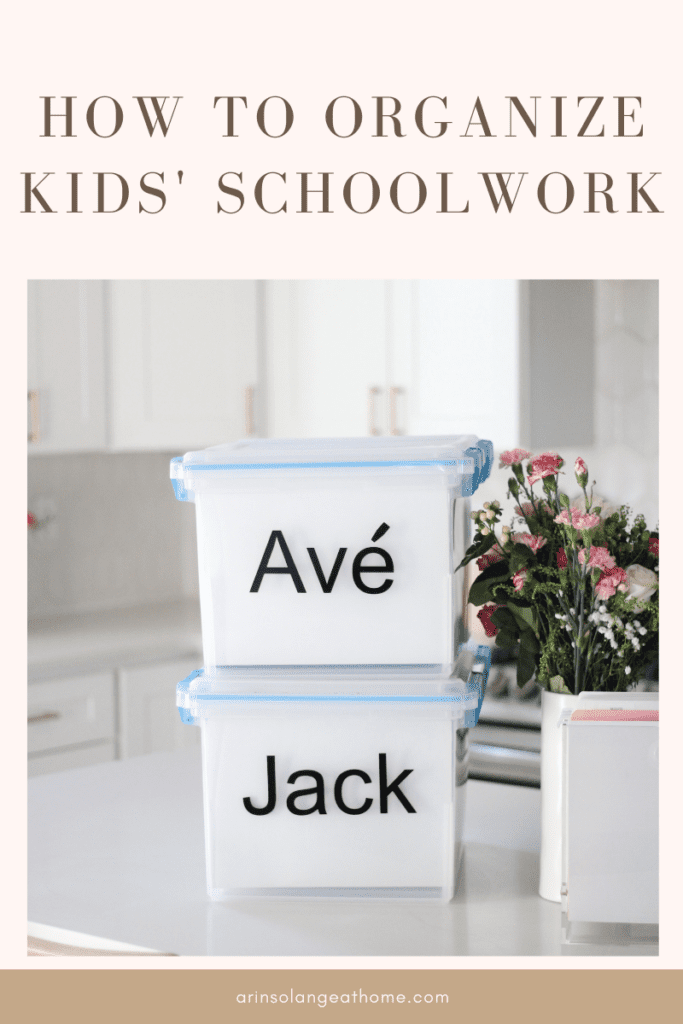
Kids School Papers Storage Bins
When my oldest, Jack, started school around 2 years old, I realized we were going to have a TON of school work and papers, and really wanted a good way to store it. If it went in his keepsake bin, full of other special things I knew it would be a disaster all the time.
Basically I came up with the idea (likely from seeing it on Pinterest or something) to do file boxes for my kids for all these papers. It has helped keep things organized and allowed me to store the items I love in a safe place.
Before I get into how I organize the bins, and what goes in them, I want to talk about my process of getting TO the bins.
Daily School Work Storage
When my kids come home from school each day I empty their backpacks into a storage bin on the “command center” wall in our laundry room. This bin holds their library books, and basically all things school.
I know that I will never keep all of it, but during the busy week days I don’t want to have to think about it. So it all goes in the bin.
As that bin gets full I take everything out and typically 99% of it goes straight in the trash. The items that I want to keep at that time go down to their bins.
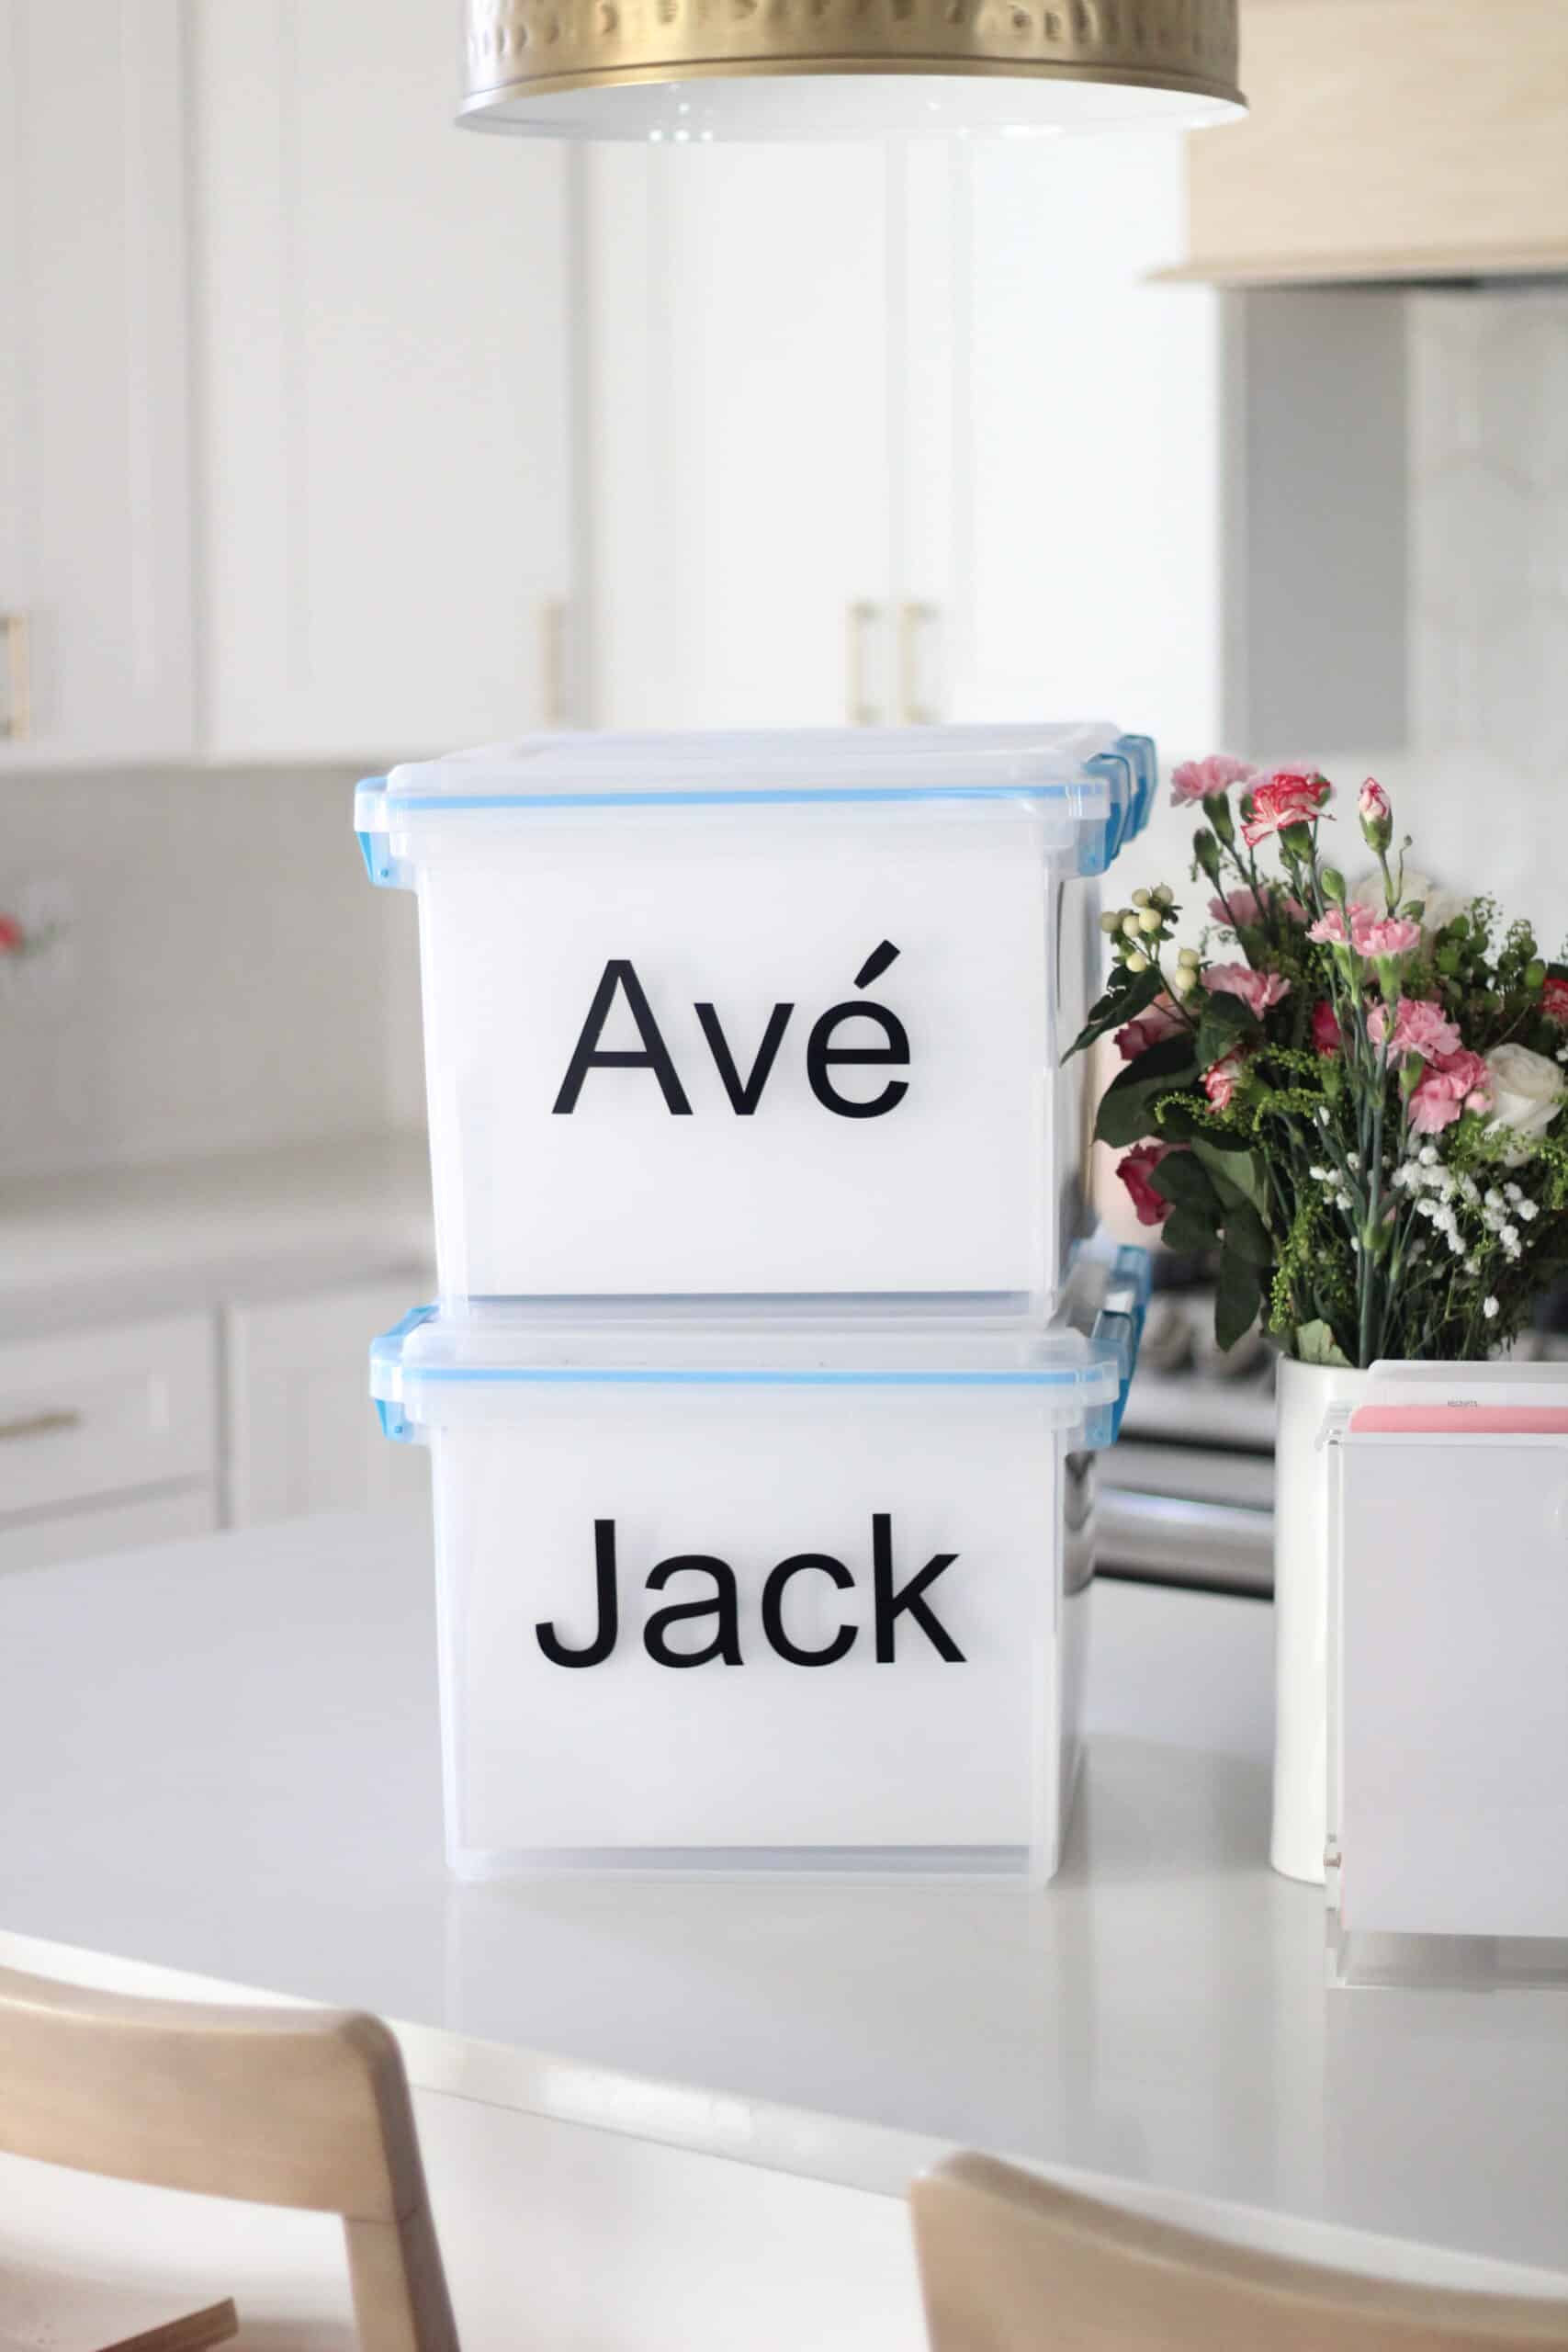
One thing that I do a bit differently from a lot of these bins, is how I organize the front couple of slots. Each child’s bin has files for Doctor, Immunization records, School Papers, and anything specialty ( Therapy, Allergist, so on).
After that I start into the file folders per grade. So essentially pending the grade yours starts on you will have Pre-k and anything up. I write both the grade and the year just to keep things a little easier down the road in case I am looking for something from a particular year vs a school grade.
What goes in each file
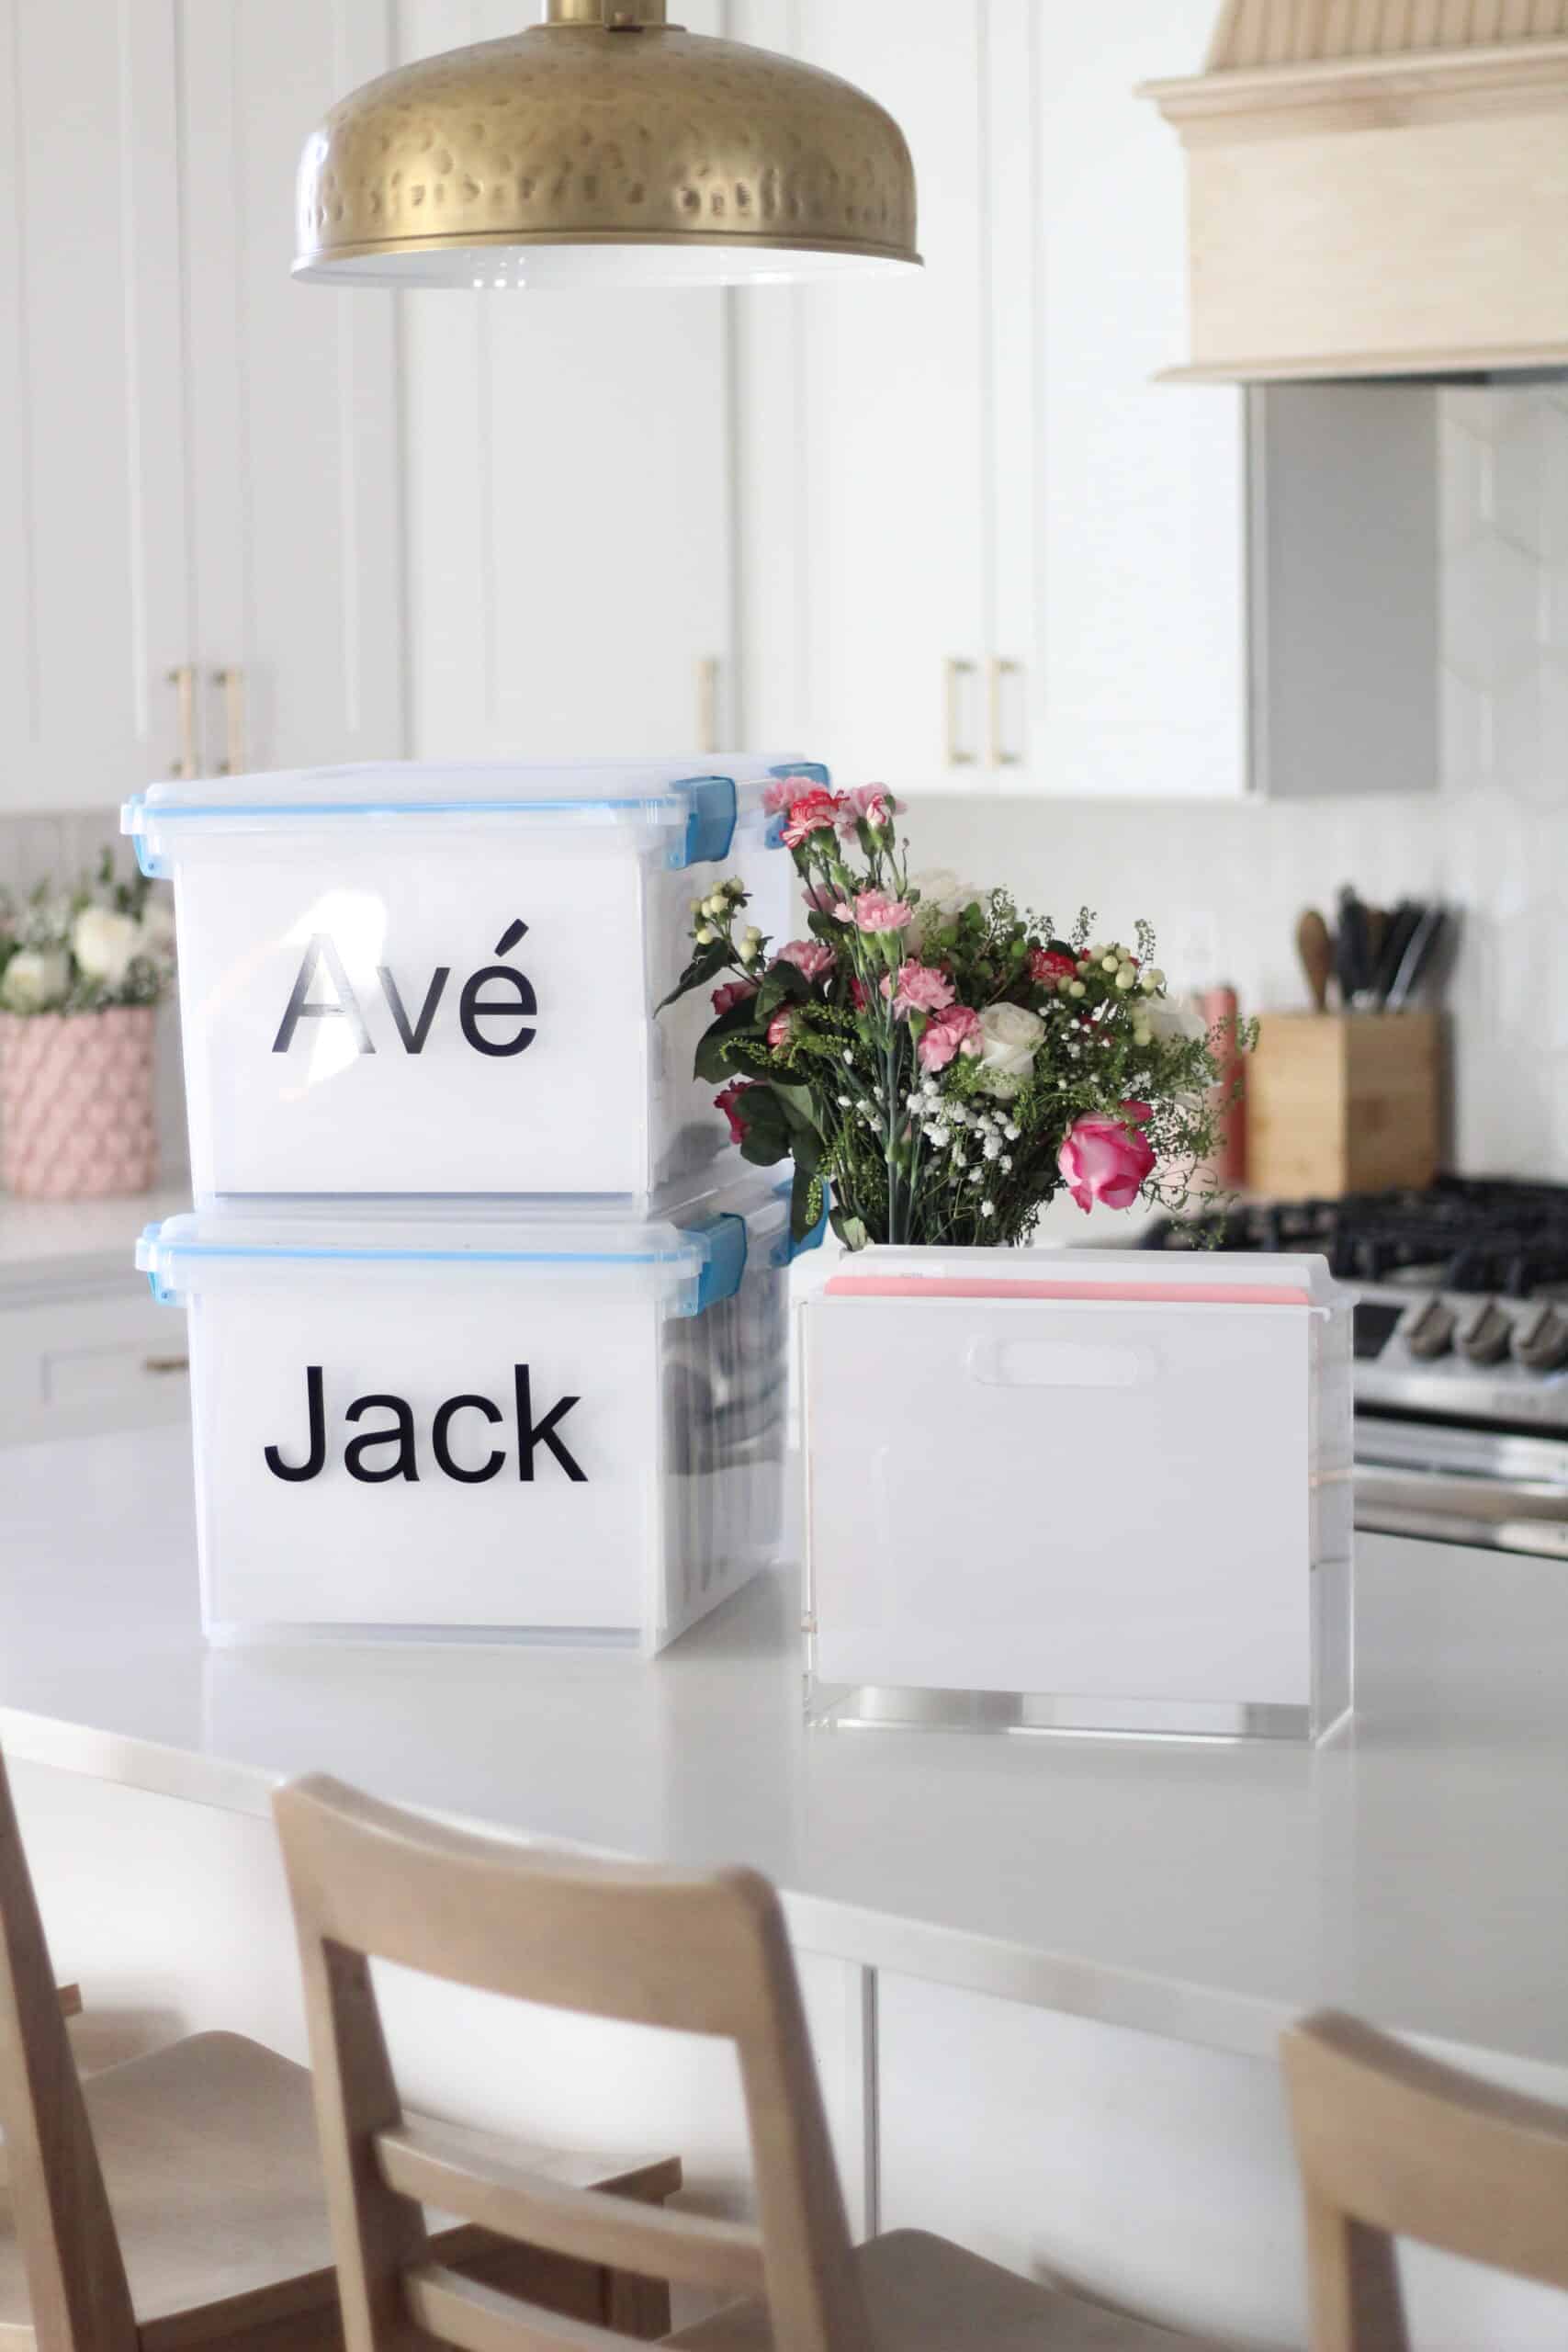
The files have anything and everything flat or paper-ish from that school year. It doesn’t have to be school related. It could be special birthday cards, a ribbon from a dance recital, school pictures, yearbooks, sports pictures, and then of course special items from school.
I don’t keep a ton of “stuff” from my kids, but I do always have a good mix of items from school and outside of school in the bins. Last year Jack made an adorable book at home that I kept.
When putting the last load into a certain grade (say when putting the last load of things into the 1st grade file), I look through the file from a year or two before to see if there are things I kept that might have been unnecessary long term.
Maybe something was mind blowing at the time, but I no longer felt I would love looking back on it. I know that realistically my kids and I won’t want to look back on TONS of paperwork type items from school, so I am very picky about it.
This is just my process. You have to find what works best for you. These bins go in our storage room, and it has been something I can keep up with that works well. But the most important thing is to simply find something that you can maintain for your kids.
I hope this post gave you some great inspiration to create a system to organize your kids’ schoolwork and beyond! If you’re looking for more great organization items, make sure you follow my Amazon Storefront. If you have any questions, feel free to leave them in the comments section, and follow me on Instagram @arinsolange and Tik Tok for more home, decor, and DIY.
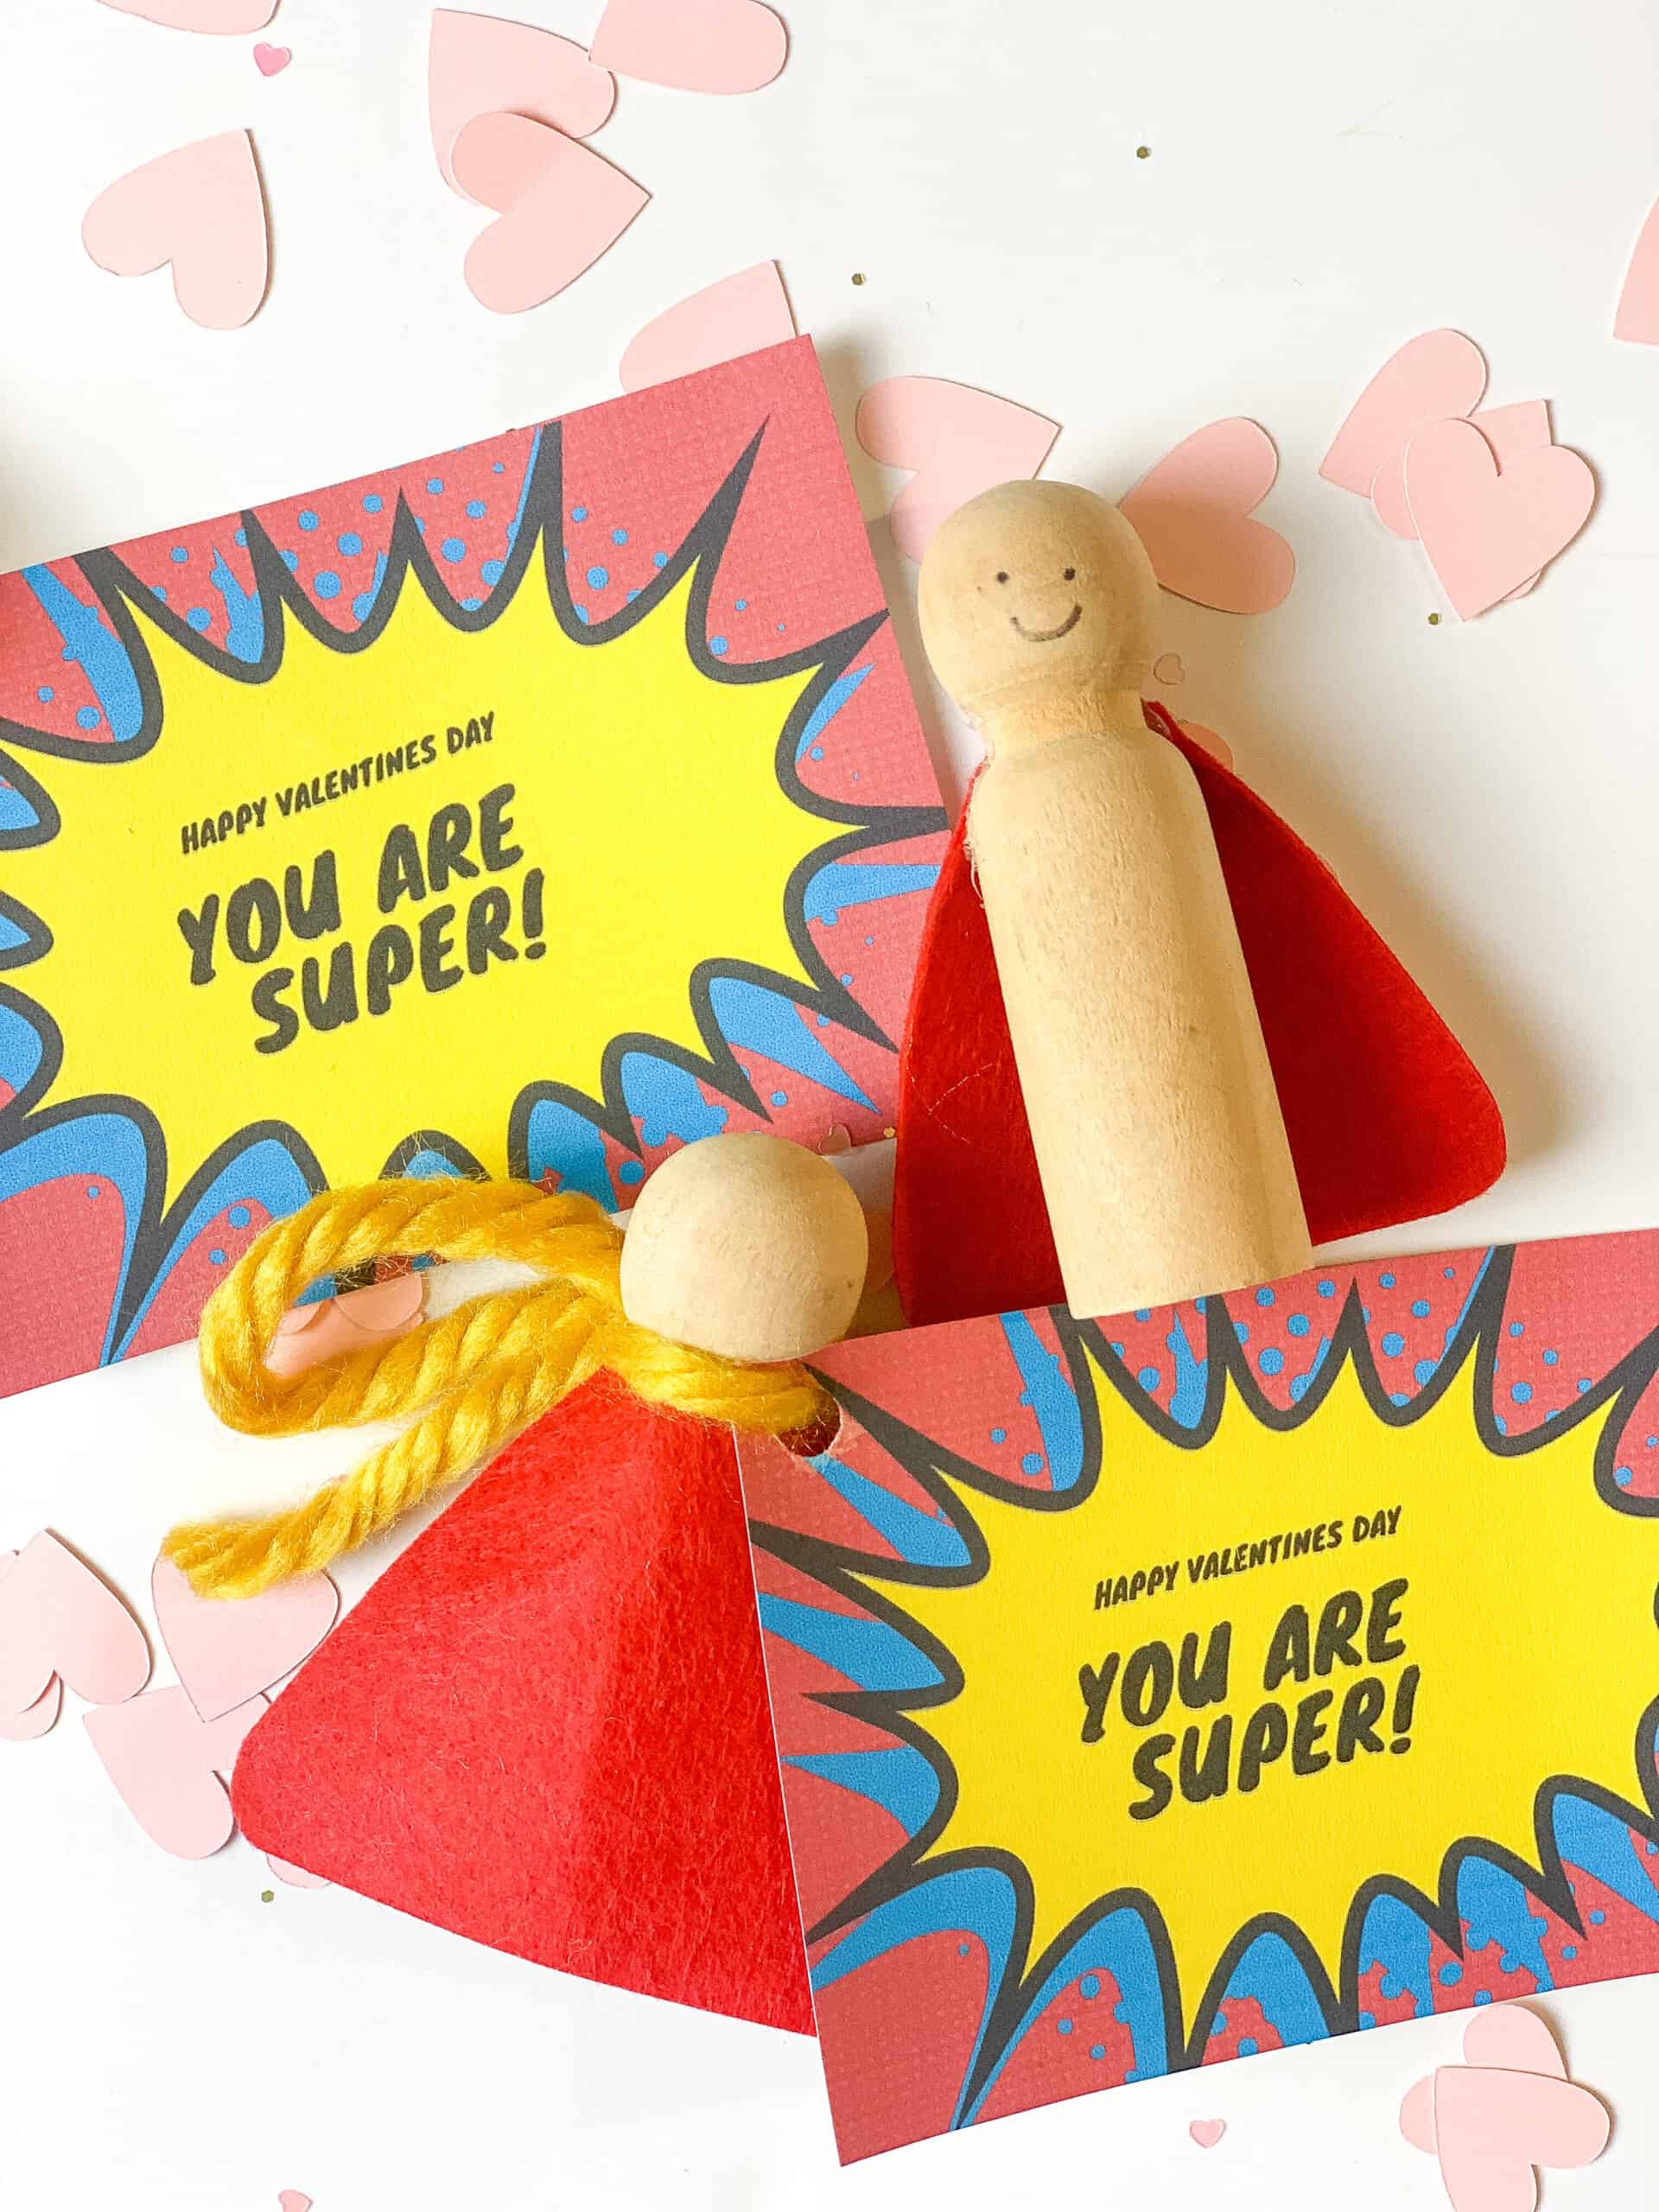
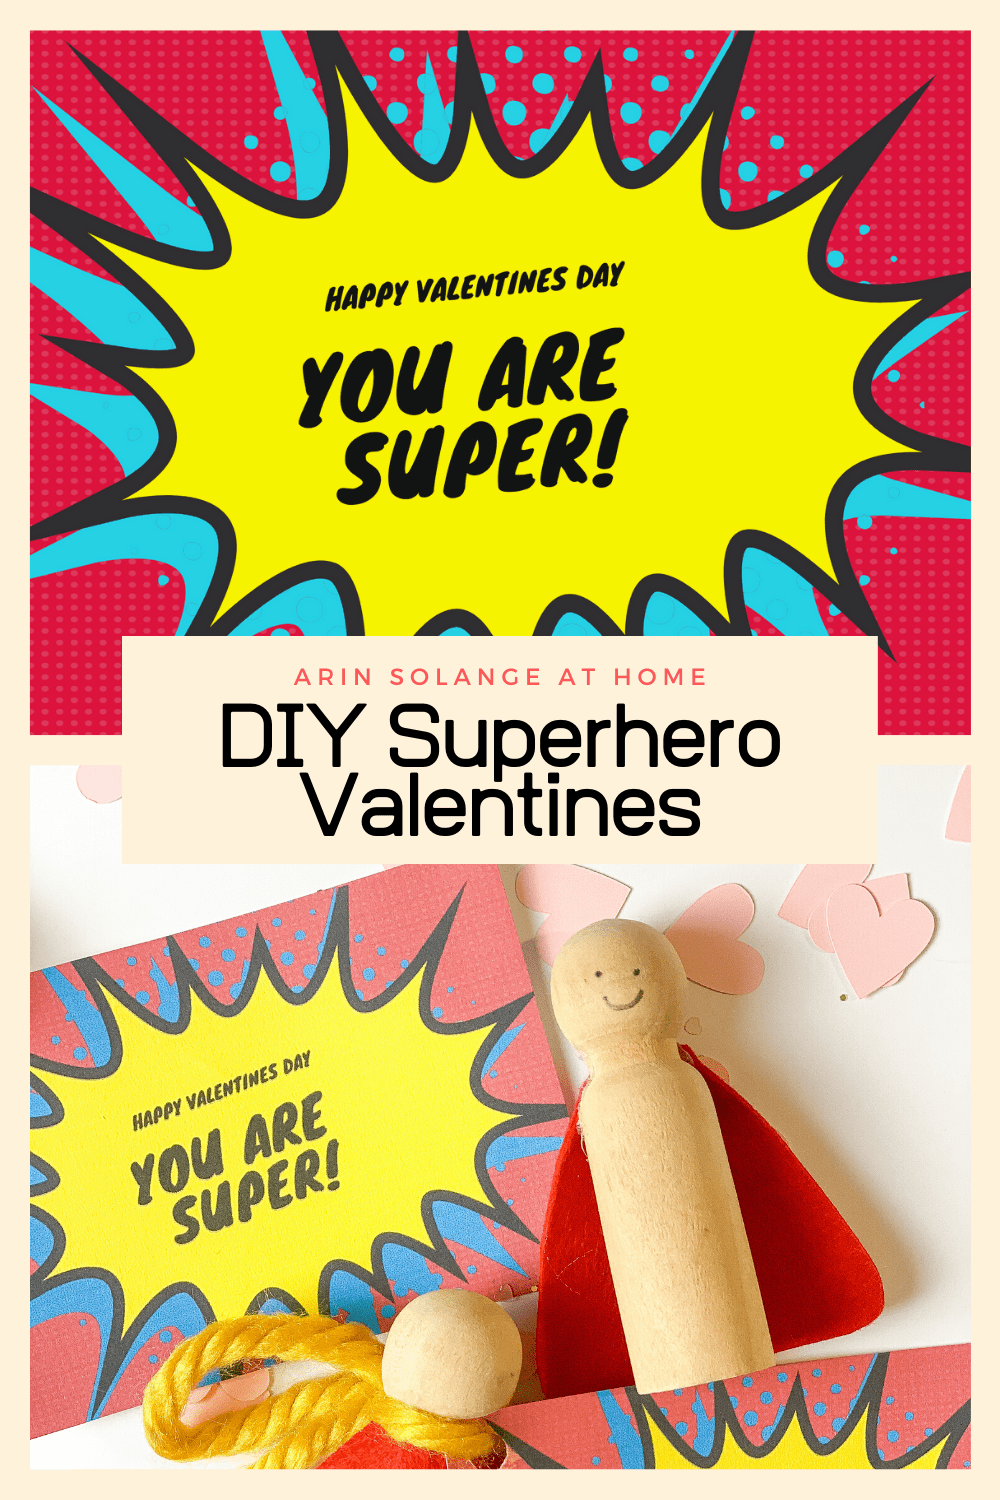
My last DIY Valentine for the year. And I won’t lie…this one is super simple, but that’s what I needed. I made these DIY Superhero Valentines in about 20 min to make all 6 I needed, so this is your true last minute option!
This post contains affiliate links
Like I said, this is the LAST of this years DIY Valentines – I have already made 3 others, so now my kids are set for next week. I wanted to do something different for the boys and girls in both Jack and Ave’s classes this year because they are young.
I also try so hard to stay away from candy Valentine’s on the years when I have time to think of it because I know they will get lots of other candy and snacks!
You will also need hot glue and a Sharpie to complete it.
I simply cut some triangles with a flat top about 1.5 inches wide at the smaller end out of the felt – see the picture below, and glued them onto the neck of the peg dolls. If you add the glue to the cape it is much easier to do this (as opposed to adding the glue to the doll).
Once the cape is on the doll I drew a simple face and called it a day. I played around with hair on some extras, and I think there is a lot more that can be done, I just didn’t have time.
They are super simple, and nothing the kids are going to freak over, but a fun little Valentine that isn’t Candy none the less.
Free Printable Superhero Valentines
To go along with the little peg doll superheros I threw together some quick printable Valentines, so those are available for you to print for free below. I then Simply hole punched them and tied them around the neck of the dolls.
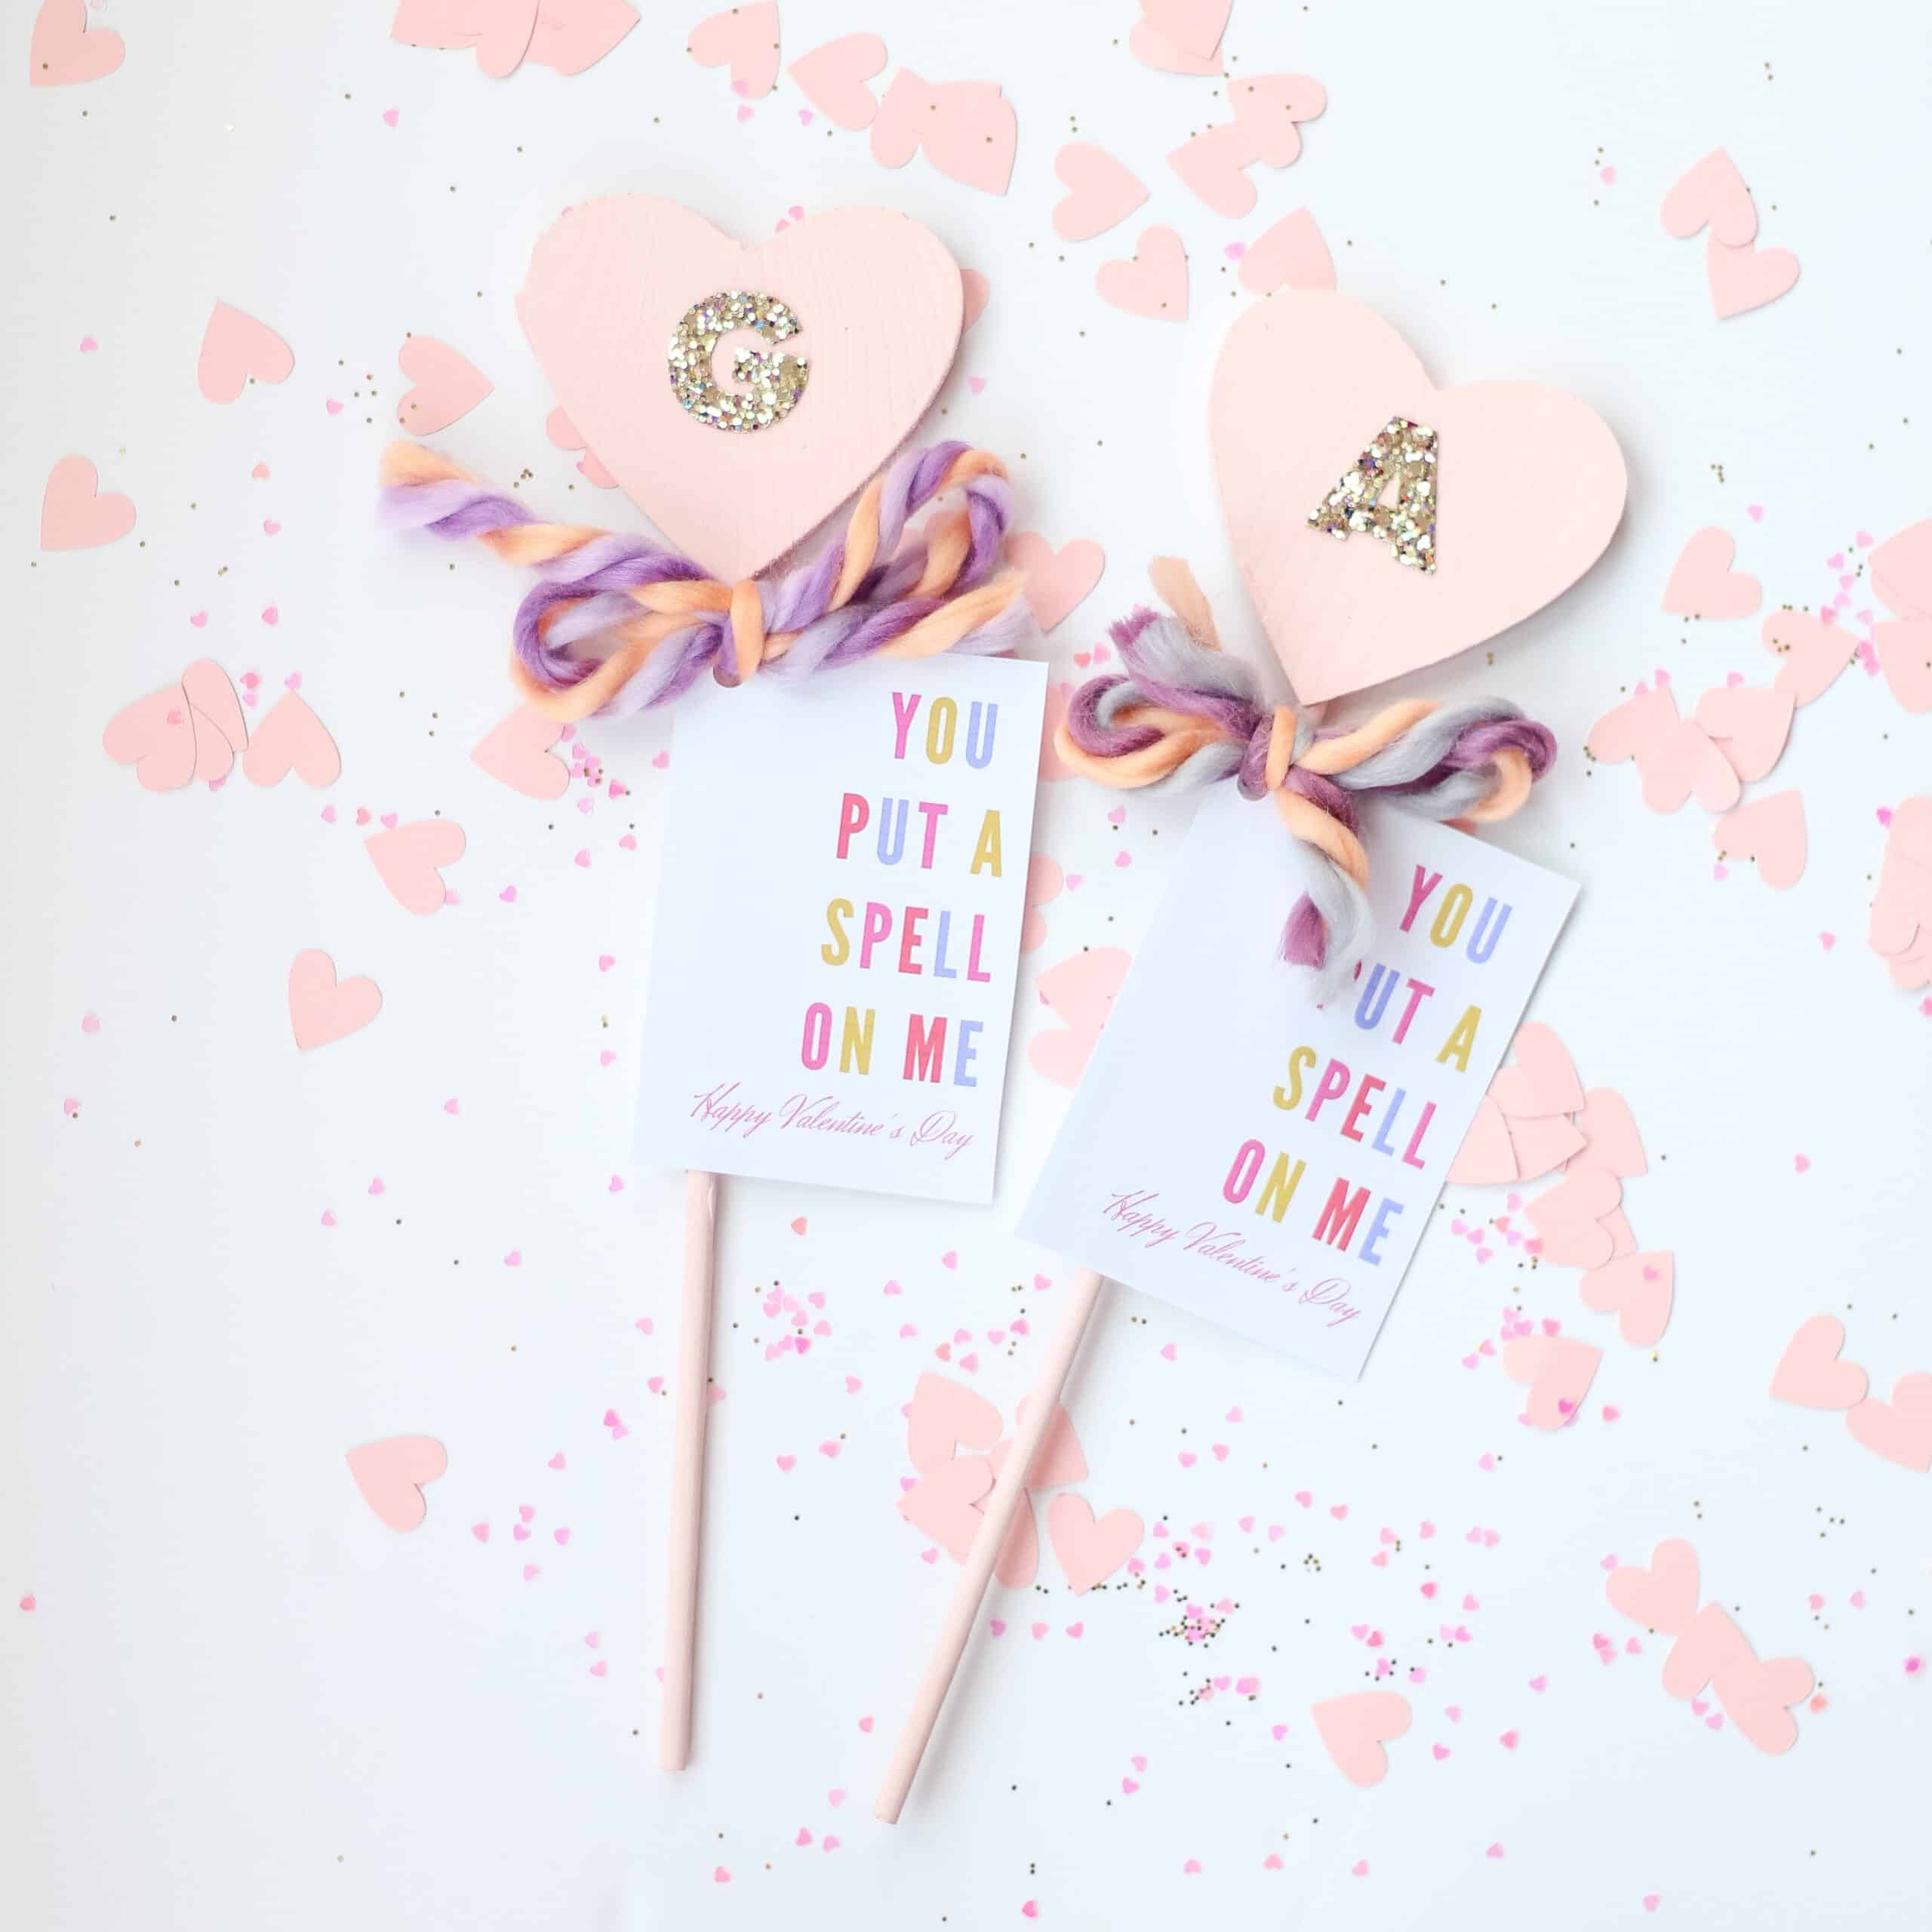
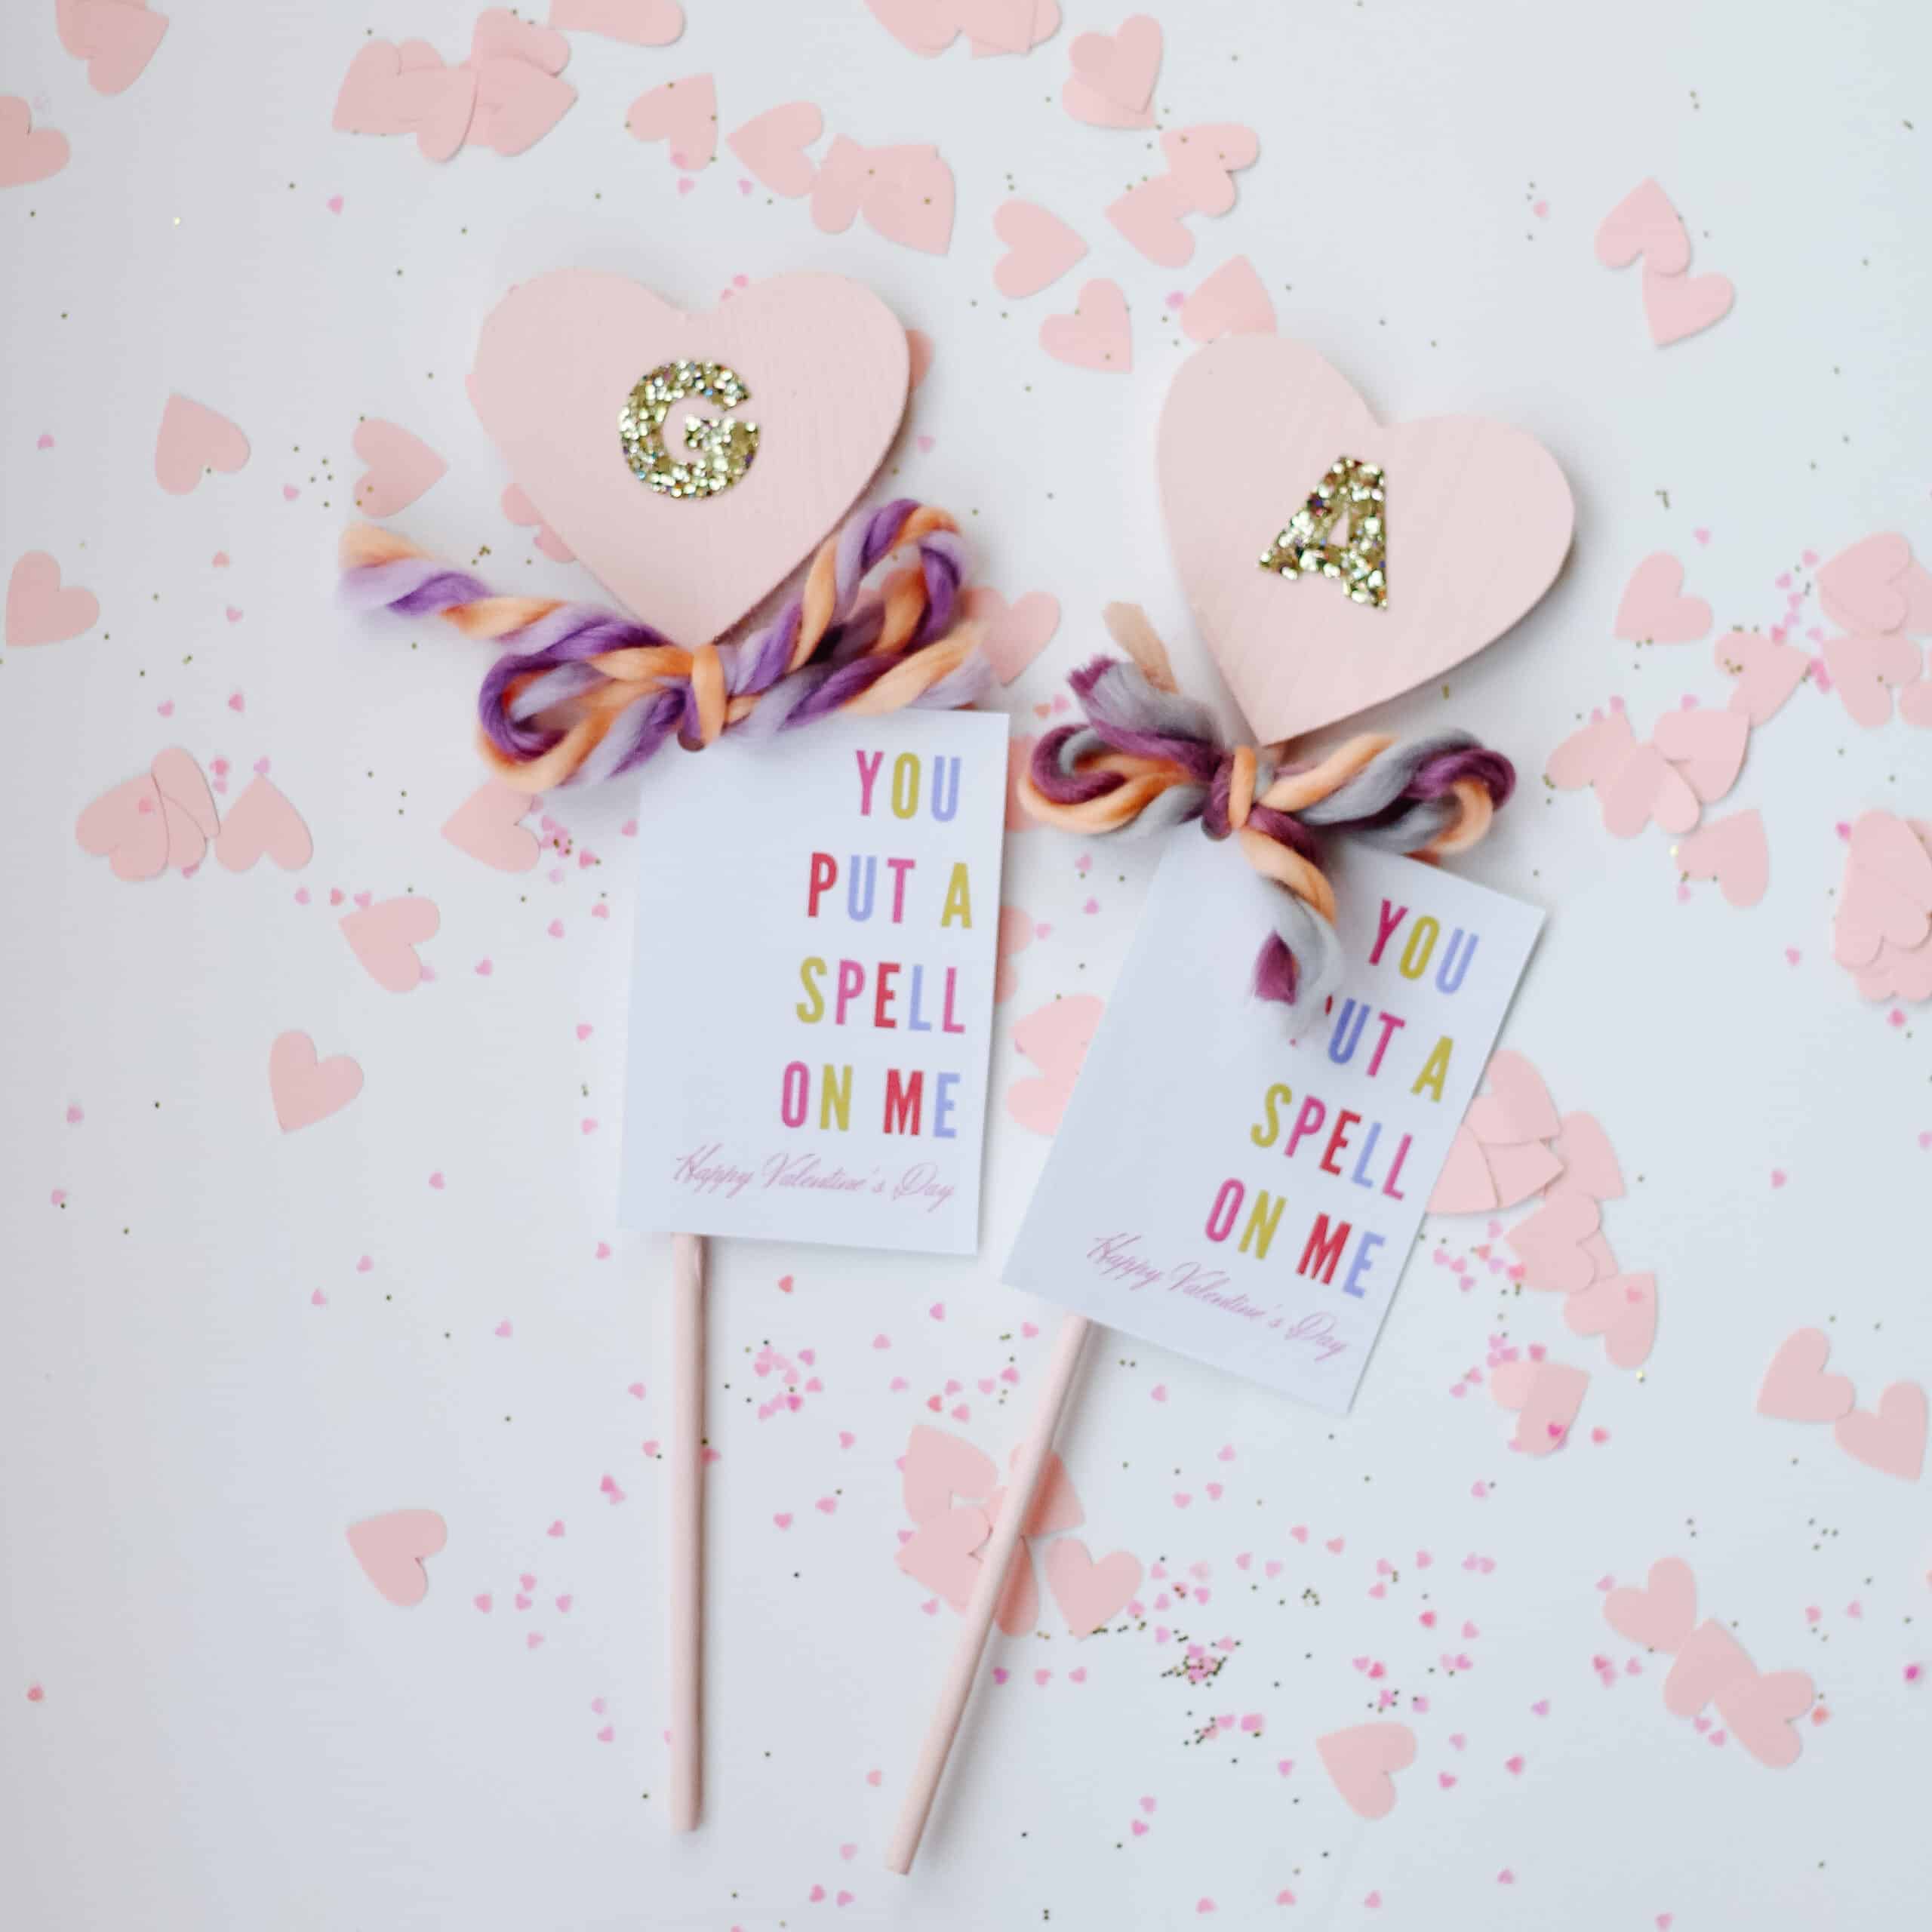
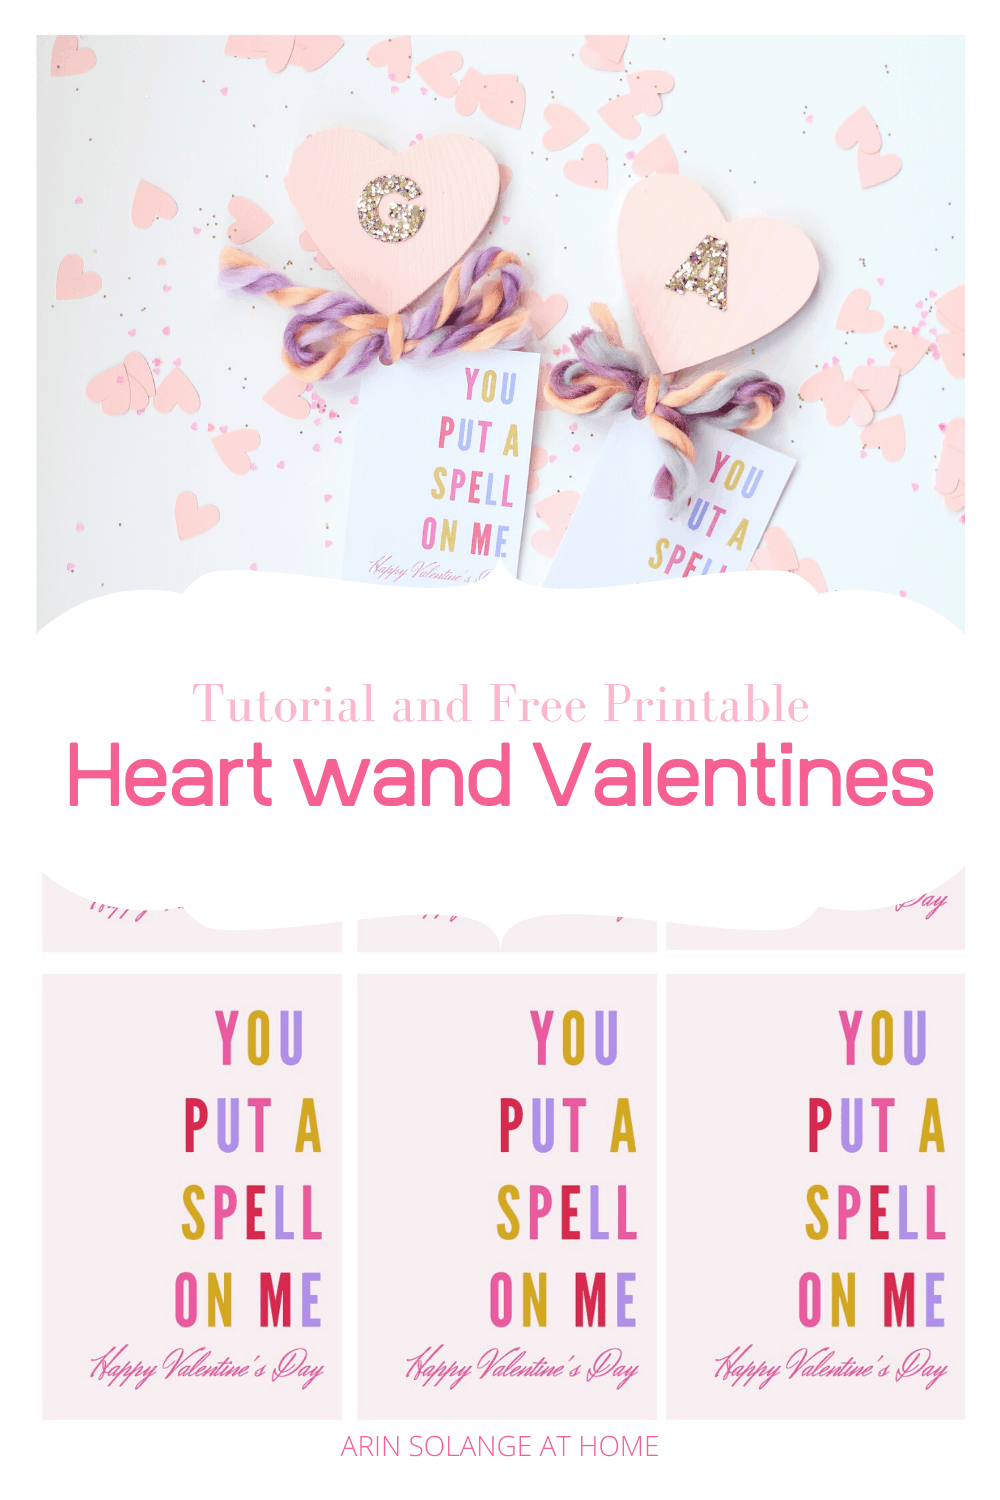
I had hoped to have the last 2 Valentines up for you all sooner than this, but thanks to getting sick am behind – as always. Today I wanted to share my DIY heart wand Valentines I made for Ave’s preschool class!
This post contains affiliate links
When it comes to Valentine’s for my kids and their classmates I try my best to do non candy on the years where I have time. I am not anti candy AT ALL, but my kids, especially Jack, get so crazy from too much sugar, so love to mix some non candy options in.
So far this year I have done DIY Pokeball keychains for Jacks class boys and DIY Ice Cream cone keychains for the girls in his class. (first grade). I am working on finishing the Superhero Valentines for the preschool boys, but also did some super cute heart wand’s for the girls in her class.
This is not a huge DIY – more or less its just doctoring up the adorable option that Hobby Lobby had!
I will link to the supplies in the closest version from Amazon as well because I know Hobby Lobby is not always convenient for everyone, and some of them have already been sold out on the wands!
Supplies:
Vier liefde en geluk deze Valentijnsdag met een online casino-ervaring met Heart Wand-thema. Stel je een virtuele gamewereld voor, versierd met charmante hartvormige toverstokken terwijl je door de online casino’s van Payz navigeert, wat een vleugje romantiek toevoegt aan je game-avontuur. Stel je een virtueel landschap voor dat versierd is met toverstokken met een hartthema op Valentijnsdag, waardoor een romantische en veilige sfeer ontstaat voor je online gokactiviteiten. Met EcoPayz als uw vertrouwde betaalmethode https://tofcasino.com/online-casinos/top-10-ecopayz-casino/ verhoogt de combinatie van milieubewust spelen en moeiteloze financiële transacties uw algehele casino-ervaring. Dompel jezelf onder in de spanning van games terwijl je geniet van het gemak van Payz-transacties, waardoor een perfecte synergie ontstaat tussen milieuvriendelijke keuzes en de opwinding van online casino-entertainment.
Wood heart wands – like I said, I got mine at Hobby Lobby, but you could DIY a quick option by attaching these hearts to these dowels.
Light pink craft paint – or whatever color you want them to be
Paint Brush
Letter Stickers – I got Glittery ones from Hobby Lobby that I am mildly obsessed with, but loved these on Amazon as well!
Yarn
To make them you literally just need to paint your wands then add the sticker. But to make them a Valentine you need the fun Valentine to go with, and I have got you covered in that regard!
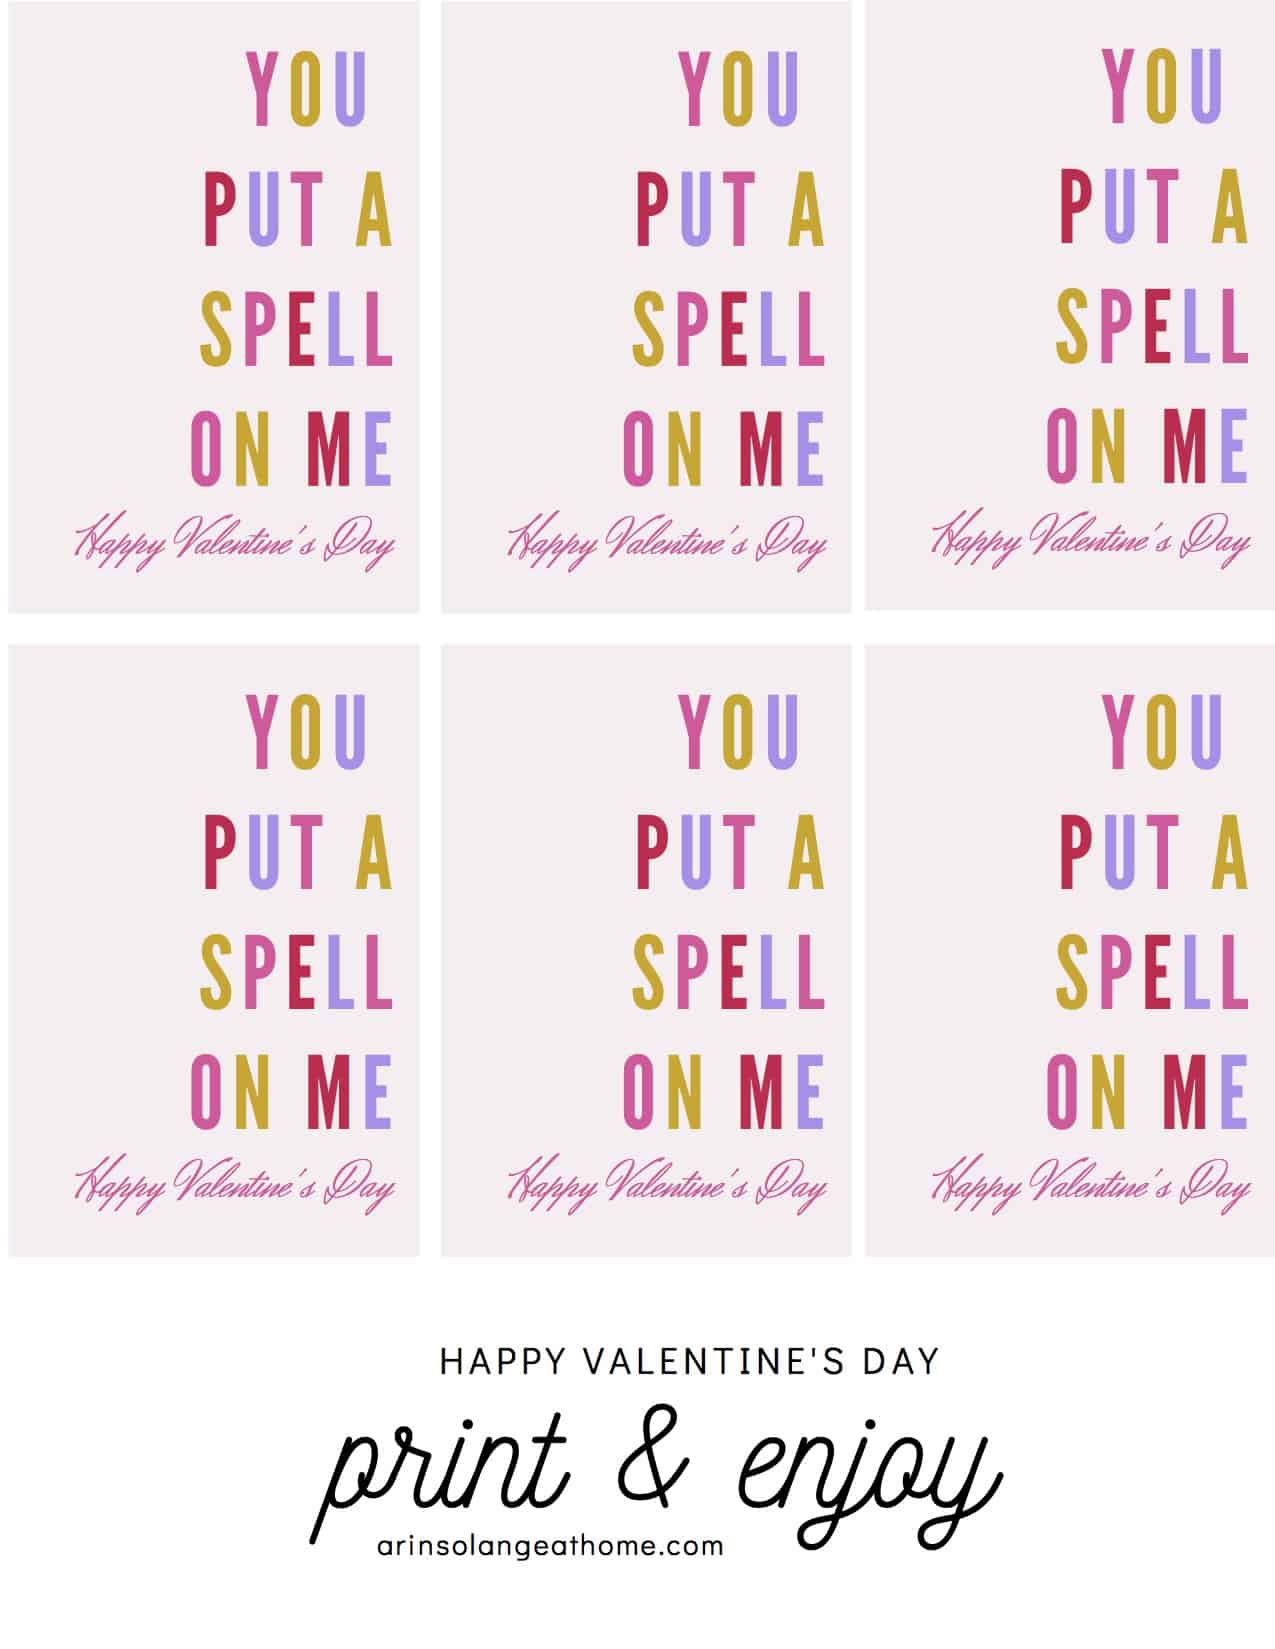
Free Printable Wand Valentine
I created some free printable Valentines to go along with these cute little wands that you can hole punch and tie to your wand with a cute piece of yarn! Avé LOVED the end result, and I think she will actually play with it.
If you have any questions, feel free to leave me a comment, and hopefully you enjoy these fun, easy heart wand Valentines!
Vavada to dynamicznie rozwijające się kasyno online, które zaskarbiło sobie uznanie wśród polskich graczy. Dzięki intuicyjnej platformie, Vavada oferuje szeroki wybór gier, w tym najpopularniejsze automaty, gry stołowe oraz kasyno na żywo z prawdziwymi krupierami. Bezpieczeństwo transakcji jest tu priorytetem, więc gracze mogą być pewni ochrony swoich danych i środków. Atrakcyjne bonusy powitalne oraz regularne promocje to tylko niektóre z korzyści, jakie czekają na użytkowników. Zapraszamy do odwiedzenia Vavada, aby przekonać się osobiście o hojności tej platformy i zacząć grać w swoje ulubione tytuły. Vavada to miejsce, gdzie każda runda może prowadzić do ekscytującej wygranej, a różnorodność oferowanych gier sprawia, że każdy gracz znajdzie coś dla siebie.