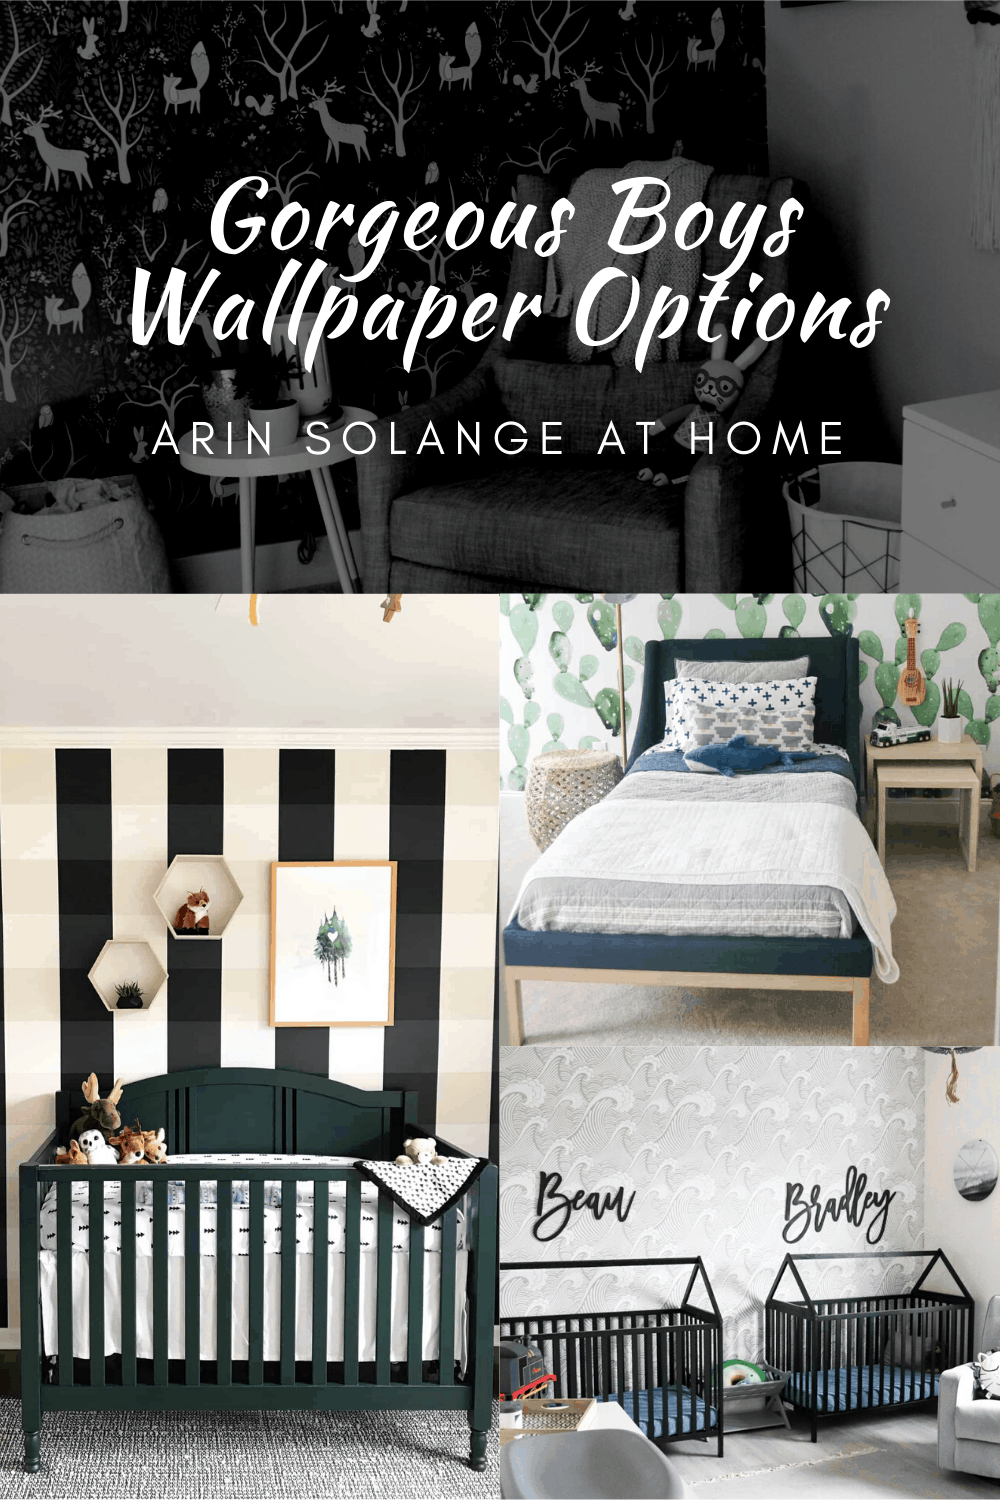
I have been thinking about boys wallpaper recently. I guess because I only have 1 boy room for 2 boys I tell myself I can redecorate the room twice as often, and I want to go bold this time.
I thought I would round up some of my favorite boys rooms with wallpaper in this post to give you all the Inspo going forward!
This post may contain affiliate links\
Unique Boys Wallpaper Inspiration
When it comes to my boys rooms I tend to stay on the more neutral side of things. Which is pretty funny because I LOVE color in my girls rooms.
I had picked out wallpaper for Walker’s nursery and never pulled the trigger – which in hind site I should have because I am still obsessed with it and want it somewhere in the house.
Finding wallpaper is easier than ever with SO MANY options. I have shared Avé’s room with you all 2 times over where I have done wallpaper from Spoonflower which I LOVE, but now you can even get peel and stick wallpaper that is gorgeous and trendy at places like Target.
My suggestion with wallpaper is to make sure you love it and can change the room a bit with your child as they grow if you decide to get it. It tends to be an investment, and you clearly can’t take it with you if you ever move, so you want to make sure you love it and get use out of it.
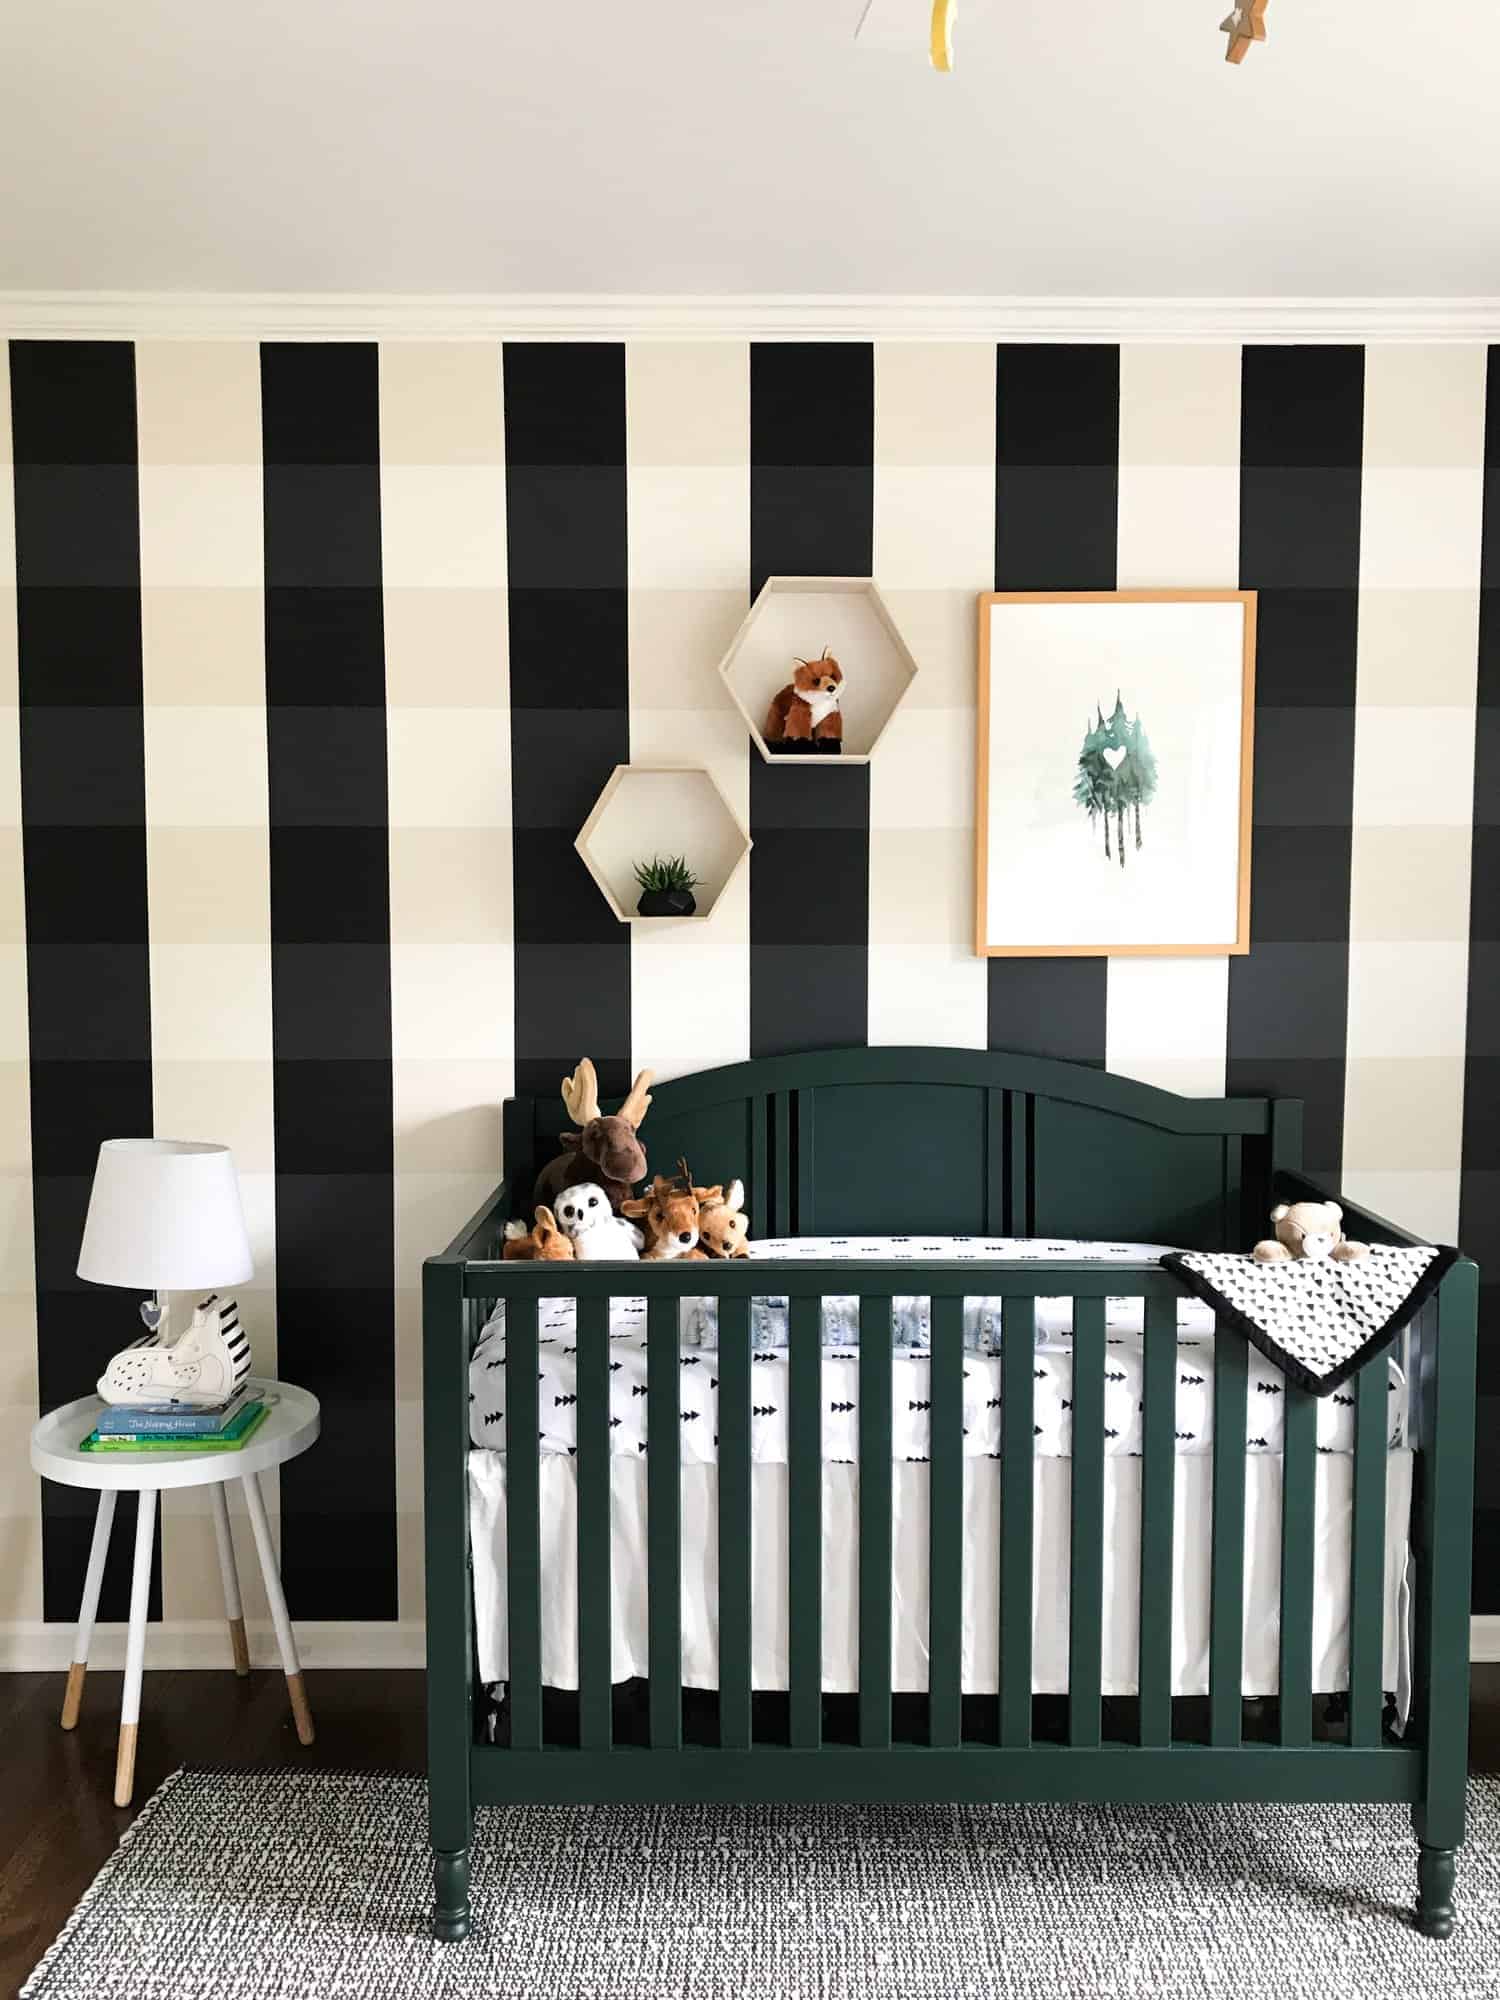
I am obsessed with this nursery – the black and white plaid is so in and would grow with any boy from nursery to college.
I am all about buffalo check being transitional with farmhouse and modern – and this is a perfect example of how it can be gorgeous in a modern room (which is so my style) – See that room here and more modern nurseries here!
I also was so inspired by the picture above that I went with very similar colors in my oldest sons room. Check out his perfect little space, and be inspired to make a classic too with black and white plaid wallpaper for your son!
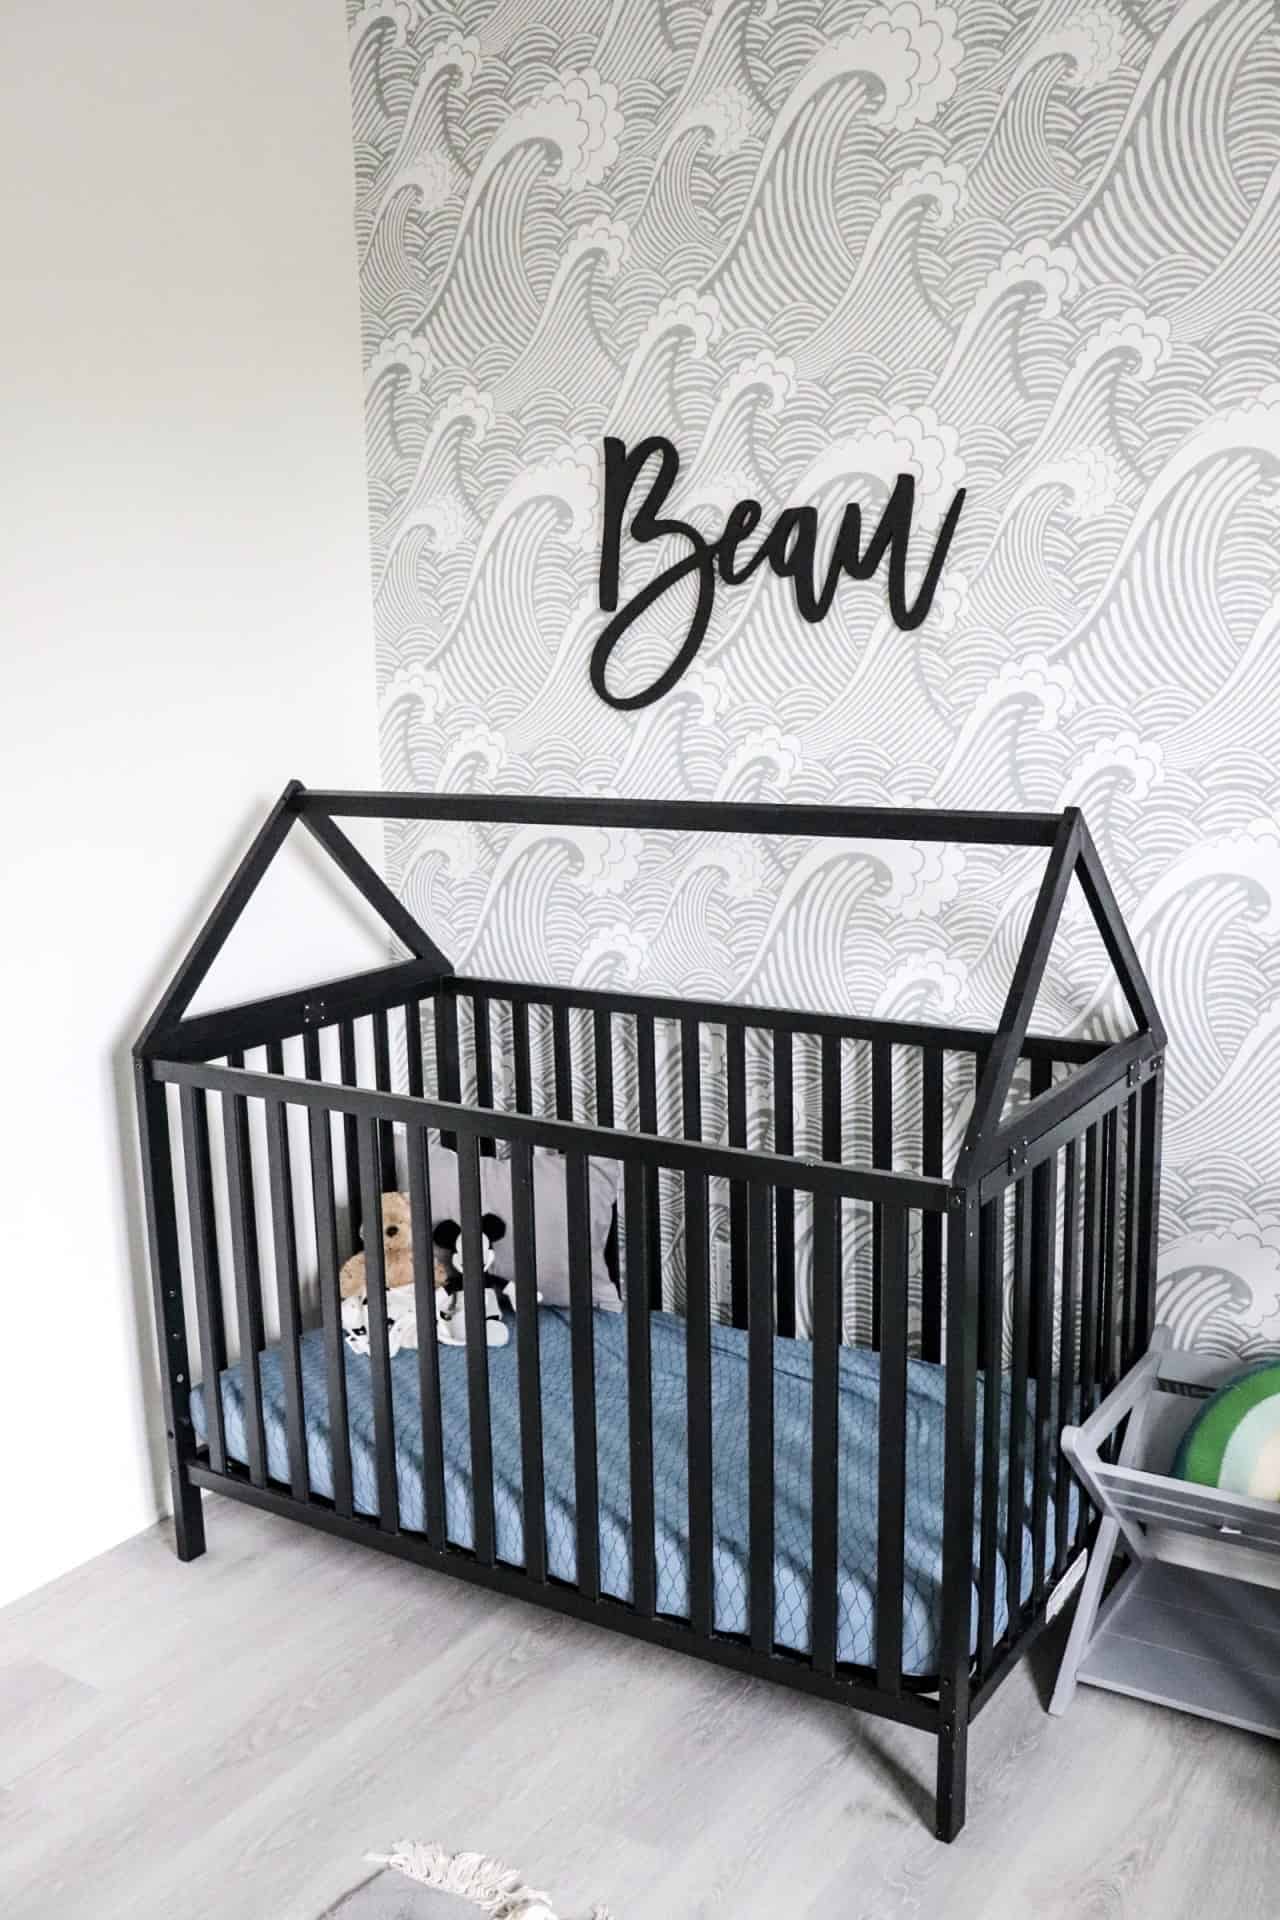
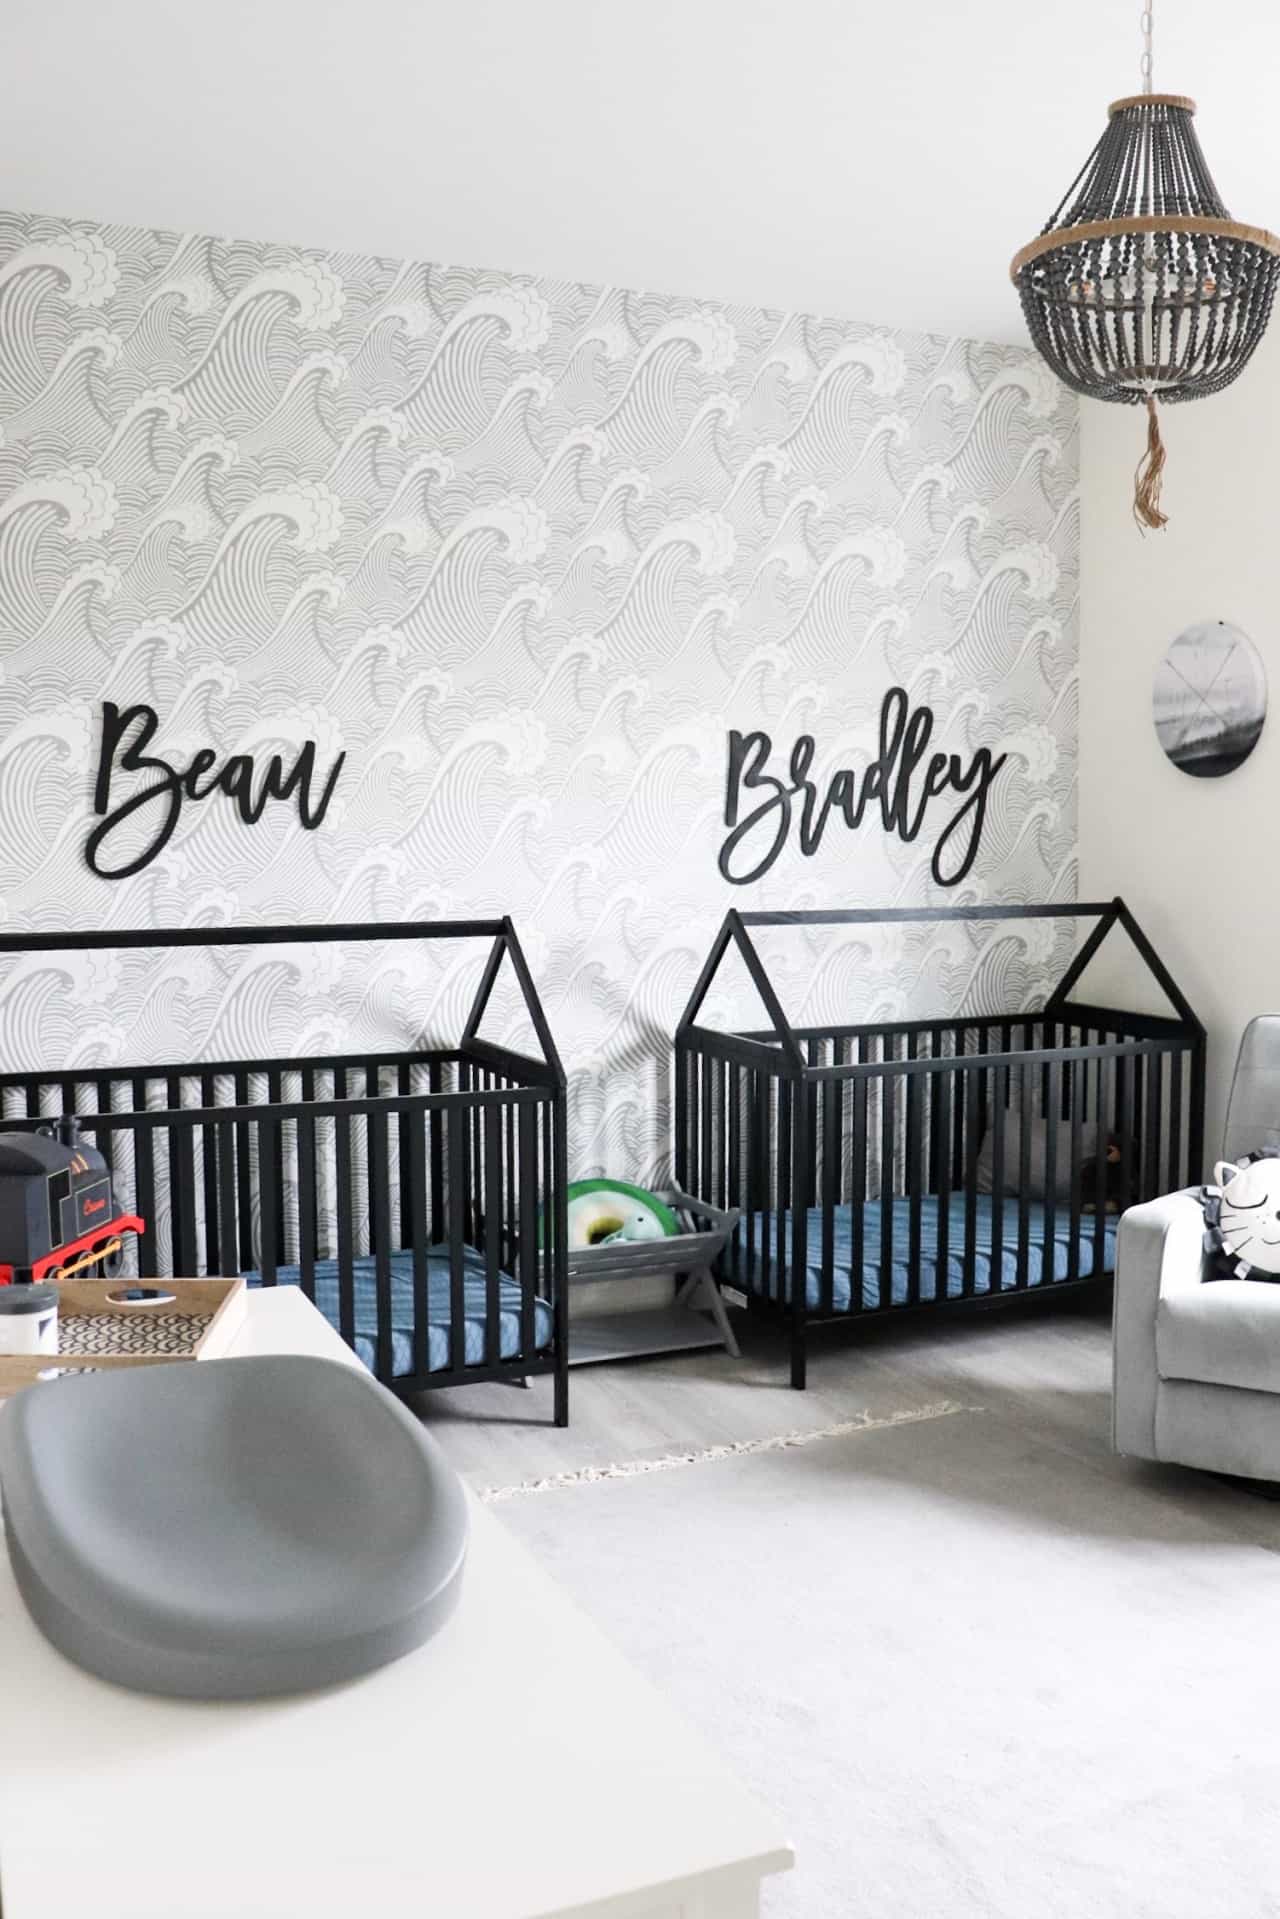
Another fun neutral option that is seriously mind blowingly gorgeous is this fun wave print that my friend Noelle did in her twin boys nursery. The whole room is probably one of my favorite boy nurseries I have seen, so you need to check out the rest of the details.
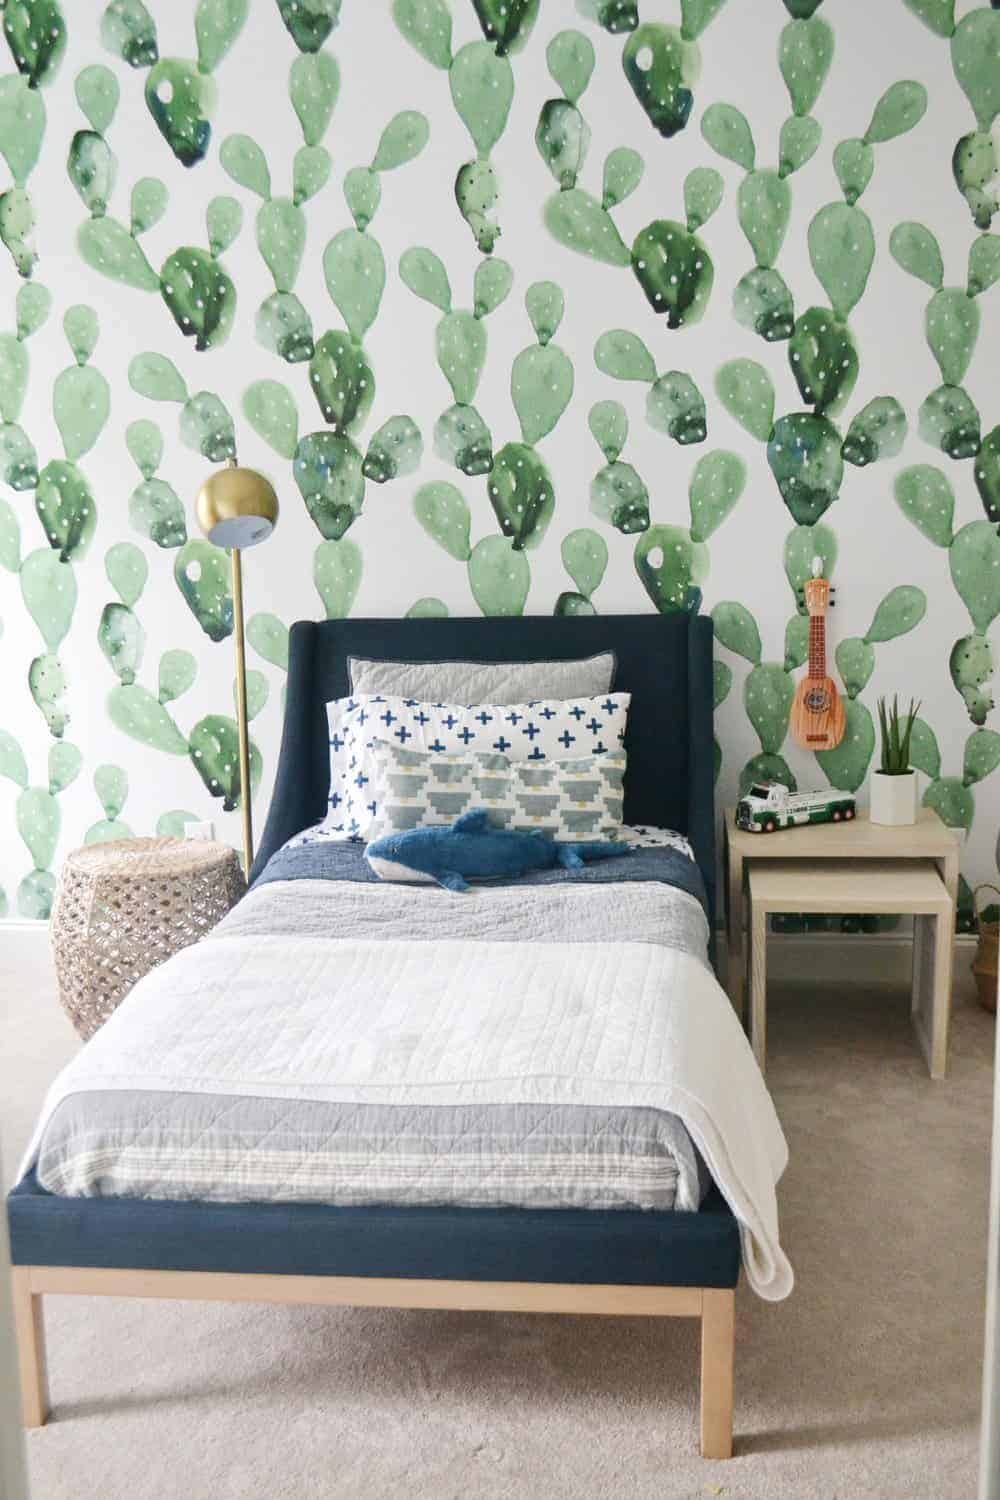
Boys Wallpaper with a Pop of Greenery
If you have been following me for very long you probably know that a pop of greenery is possibly my favorite thing in a room.
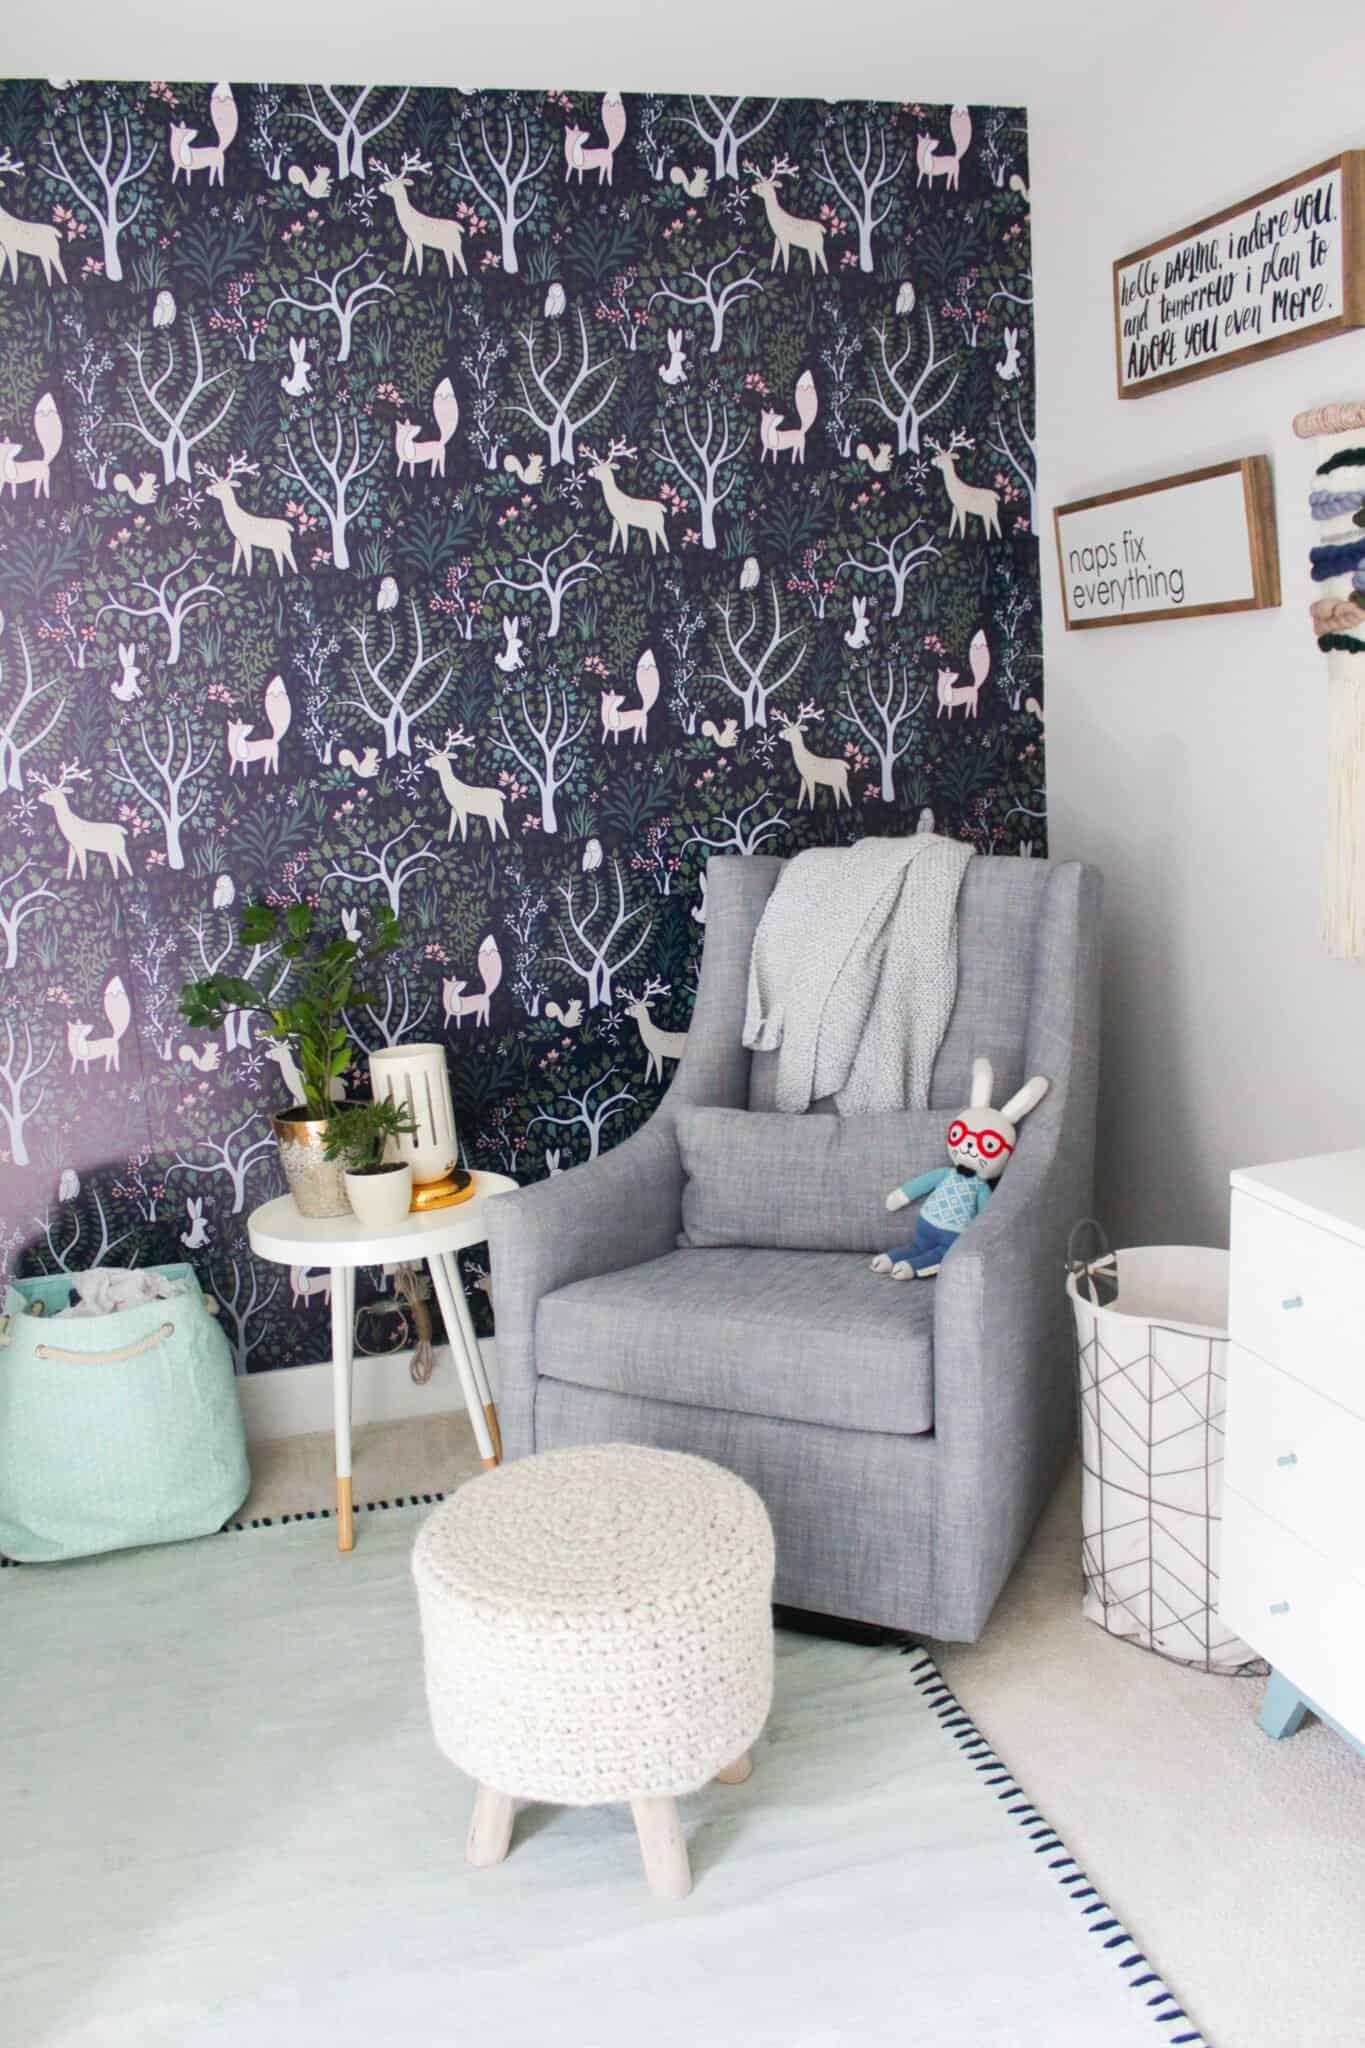
I am all for some whimsy in a kids room, and one thing I love about the room my friend Jen created for her son, Miles, is that to me it was a gender neutral wallpaper option that added so much fun and brightness to the room without actually adding a bright color.
She went with this woodland animal print and it is beyond gorgeous in the space! Just goes to show the wallpaper doesn’t have to be super plain!!
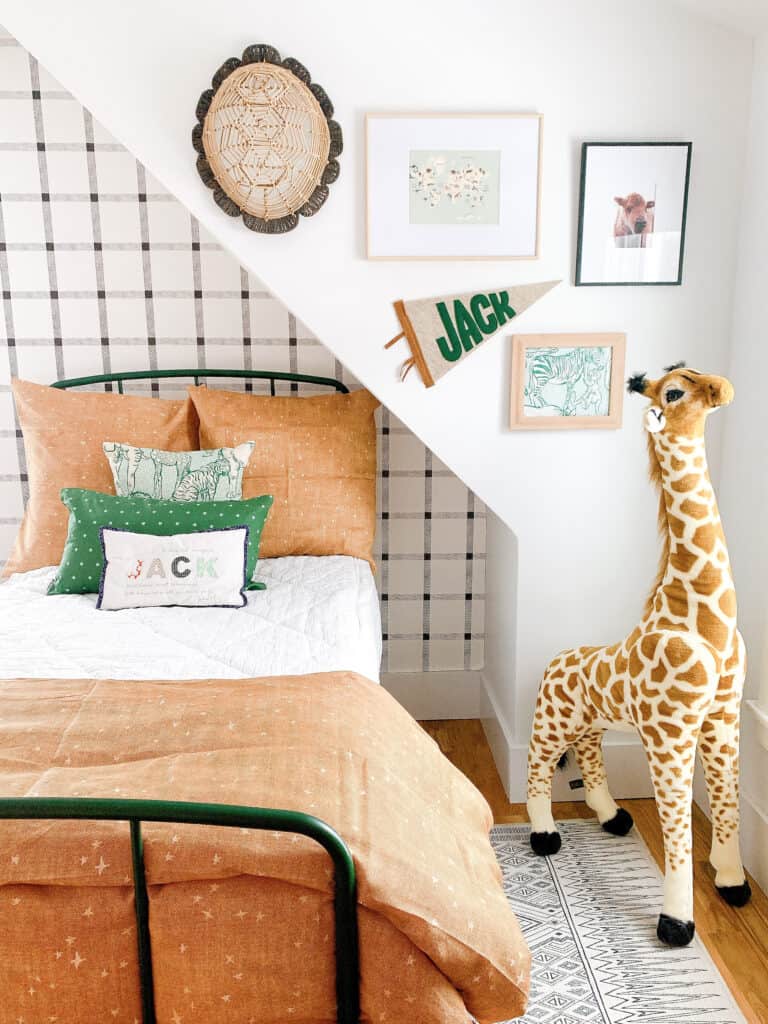
Miranda, from When Life Gives you Lehmanns hit it out of the park with her incorporation of the exact wallpaper I have been eying for years haha. I LOVE how she showed that you don’t have to invest in doing the full room – you can make a huge impact by just wallpapering a small space.
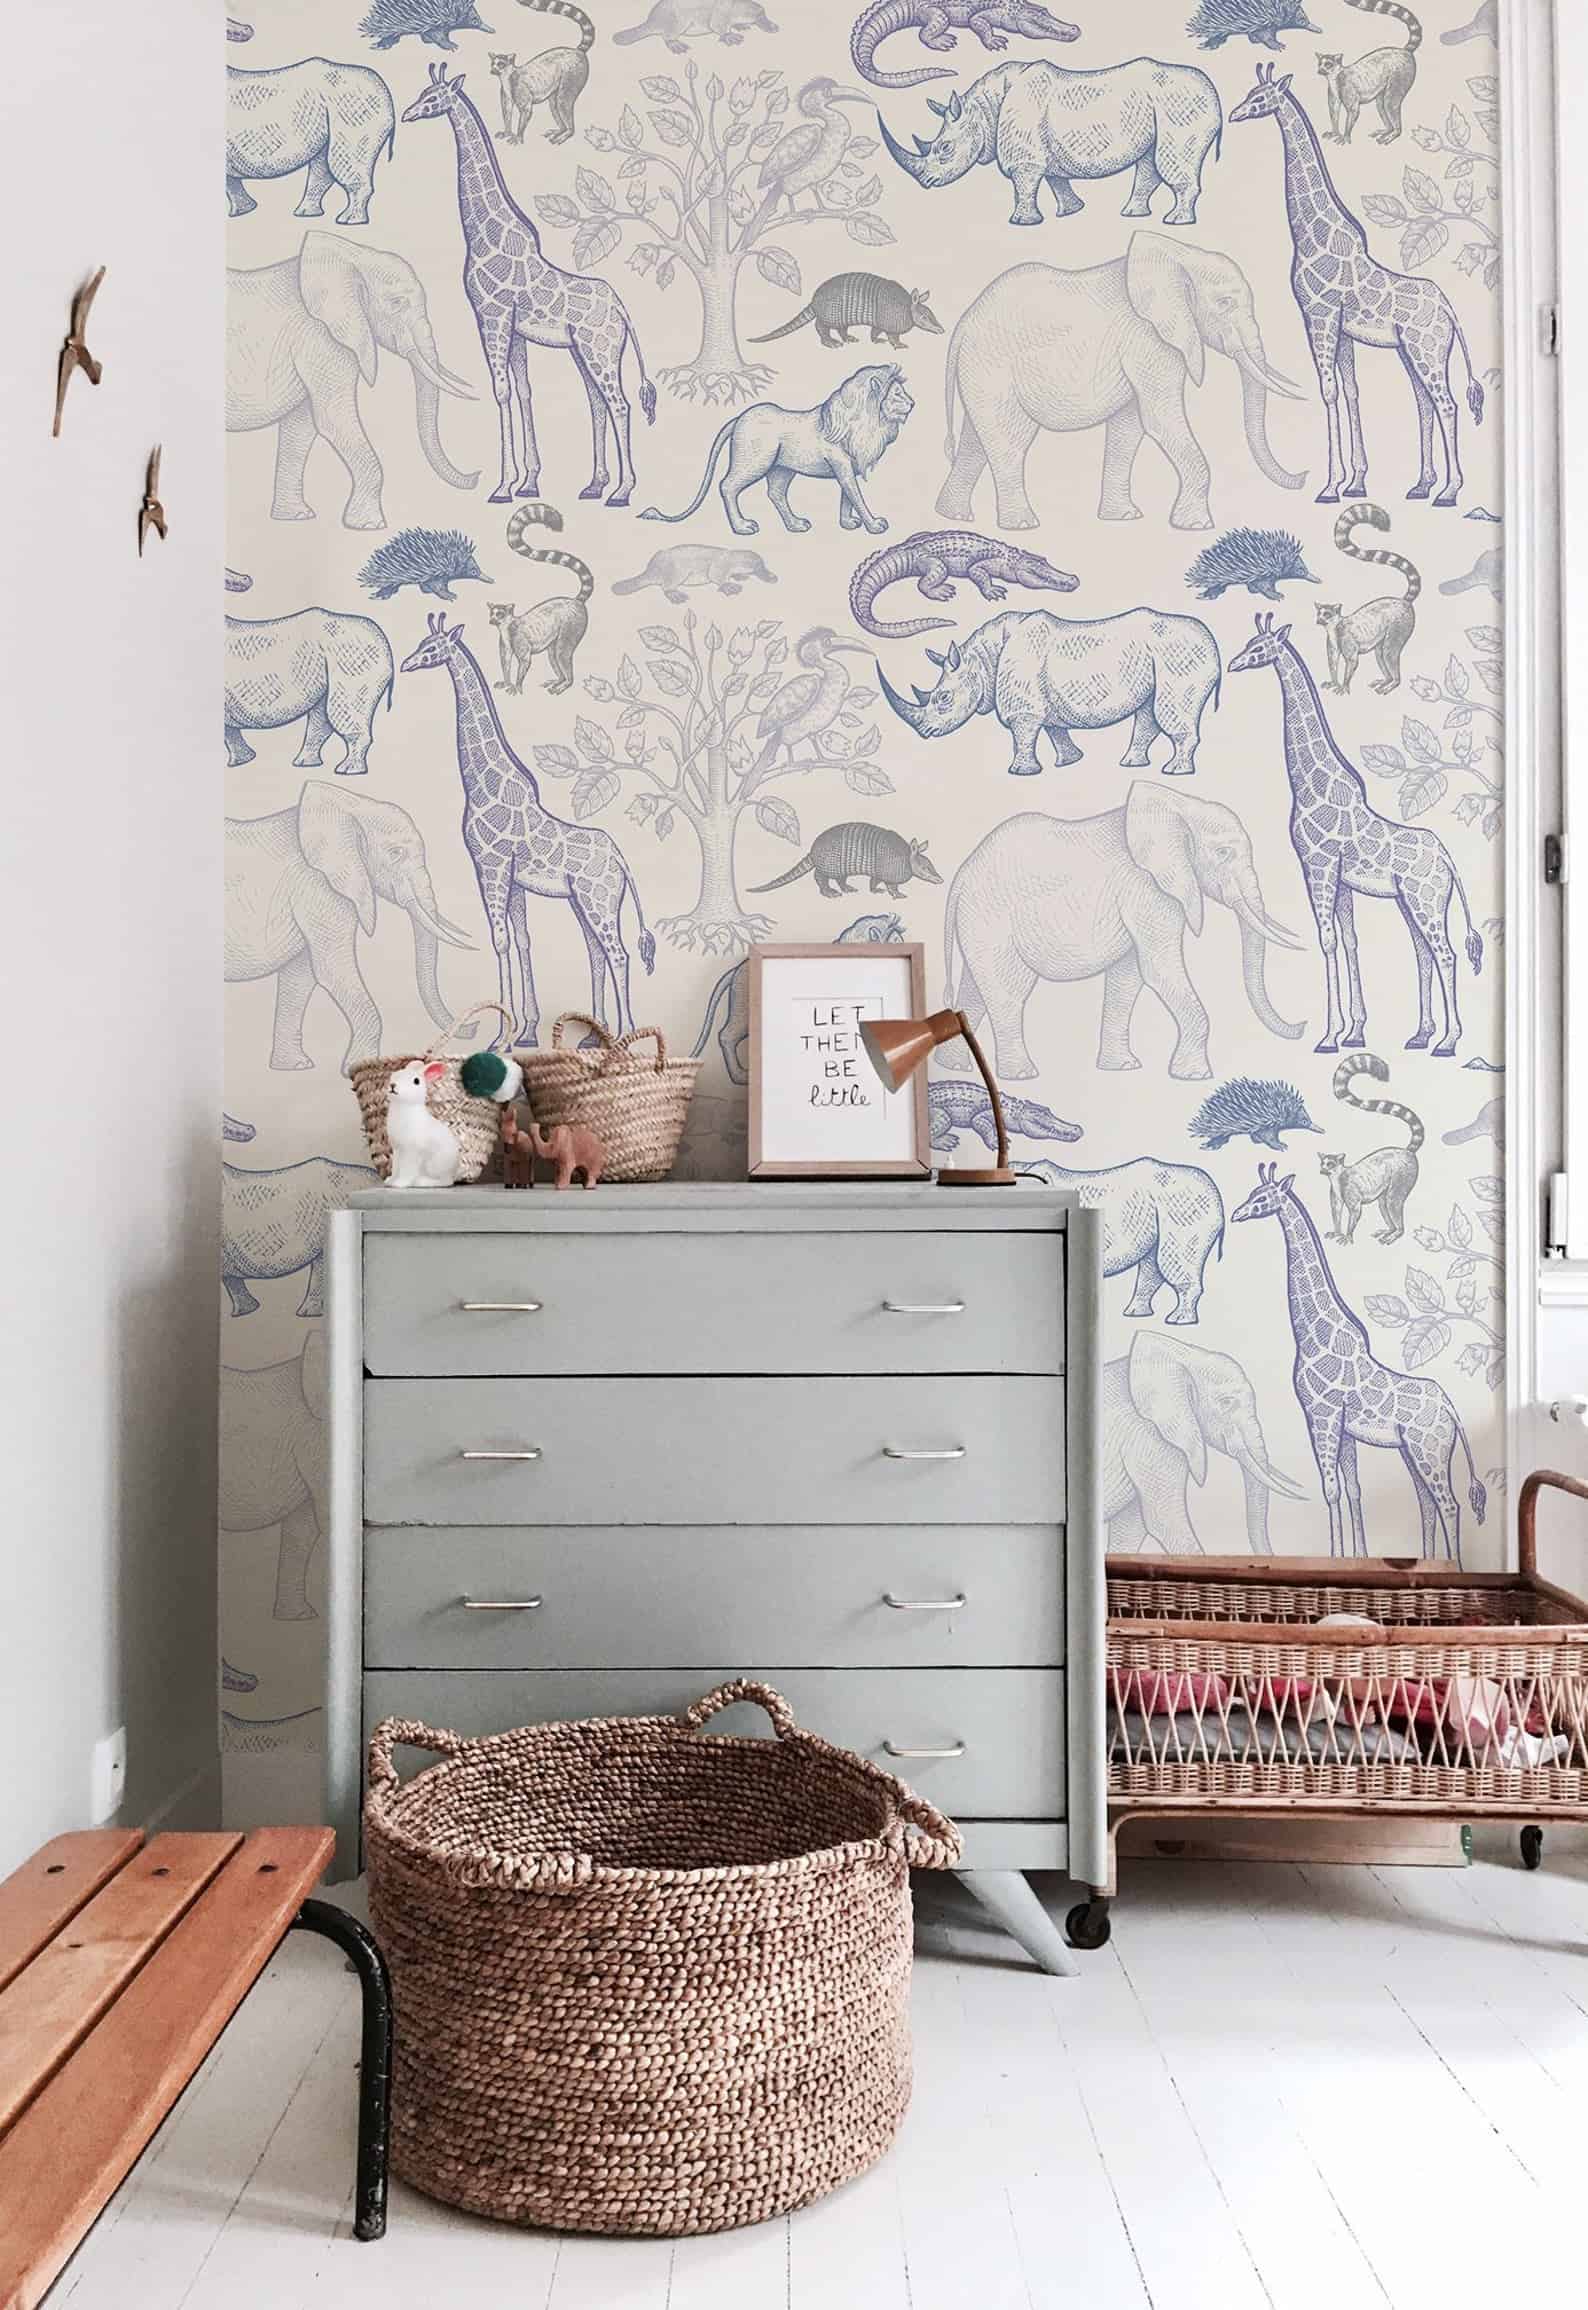
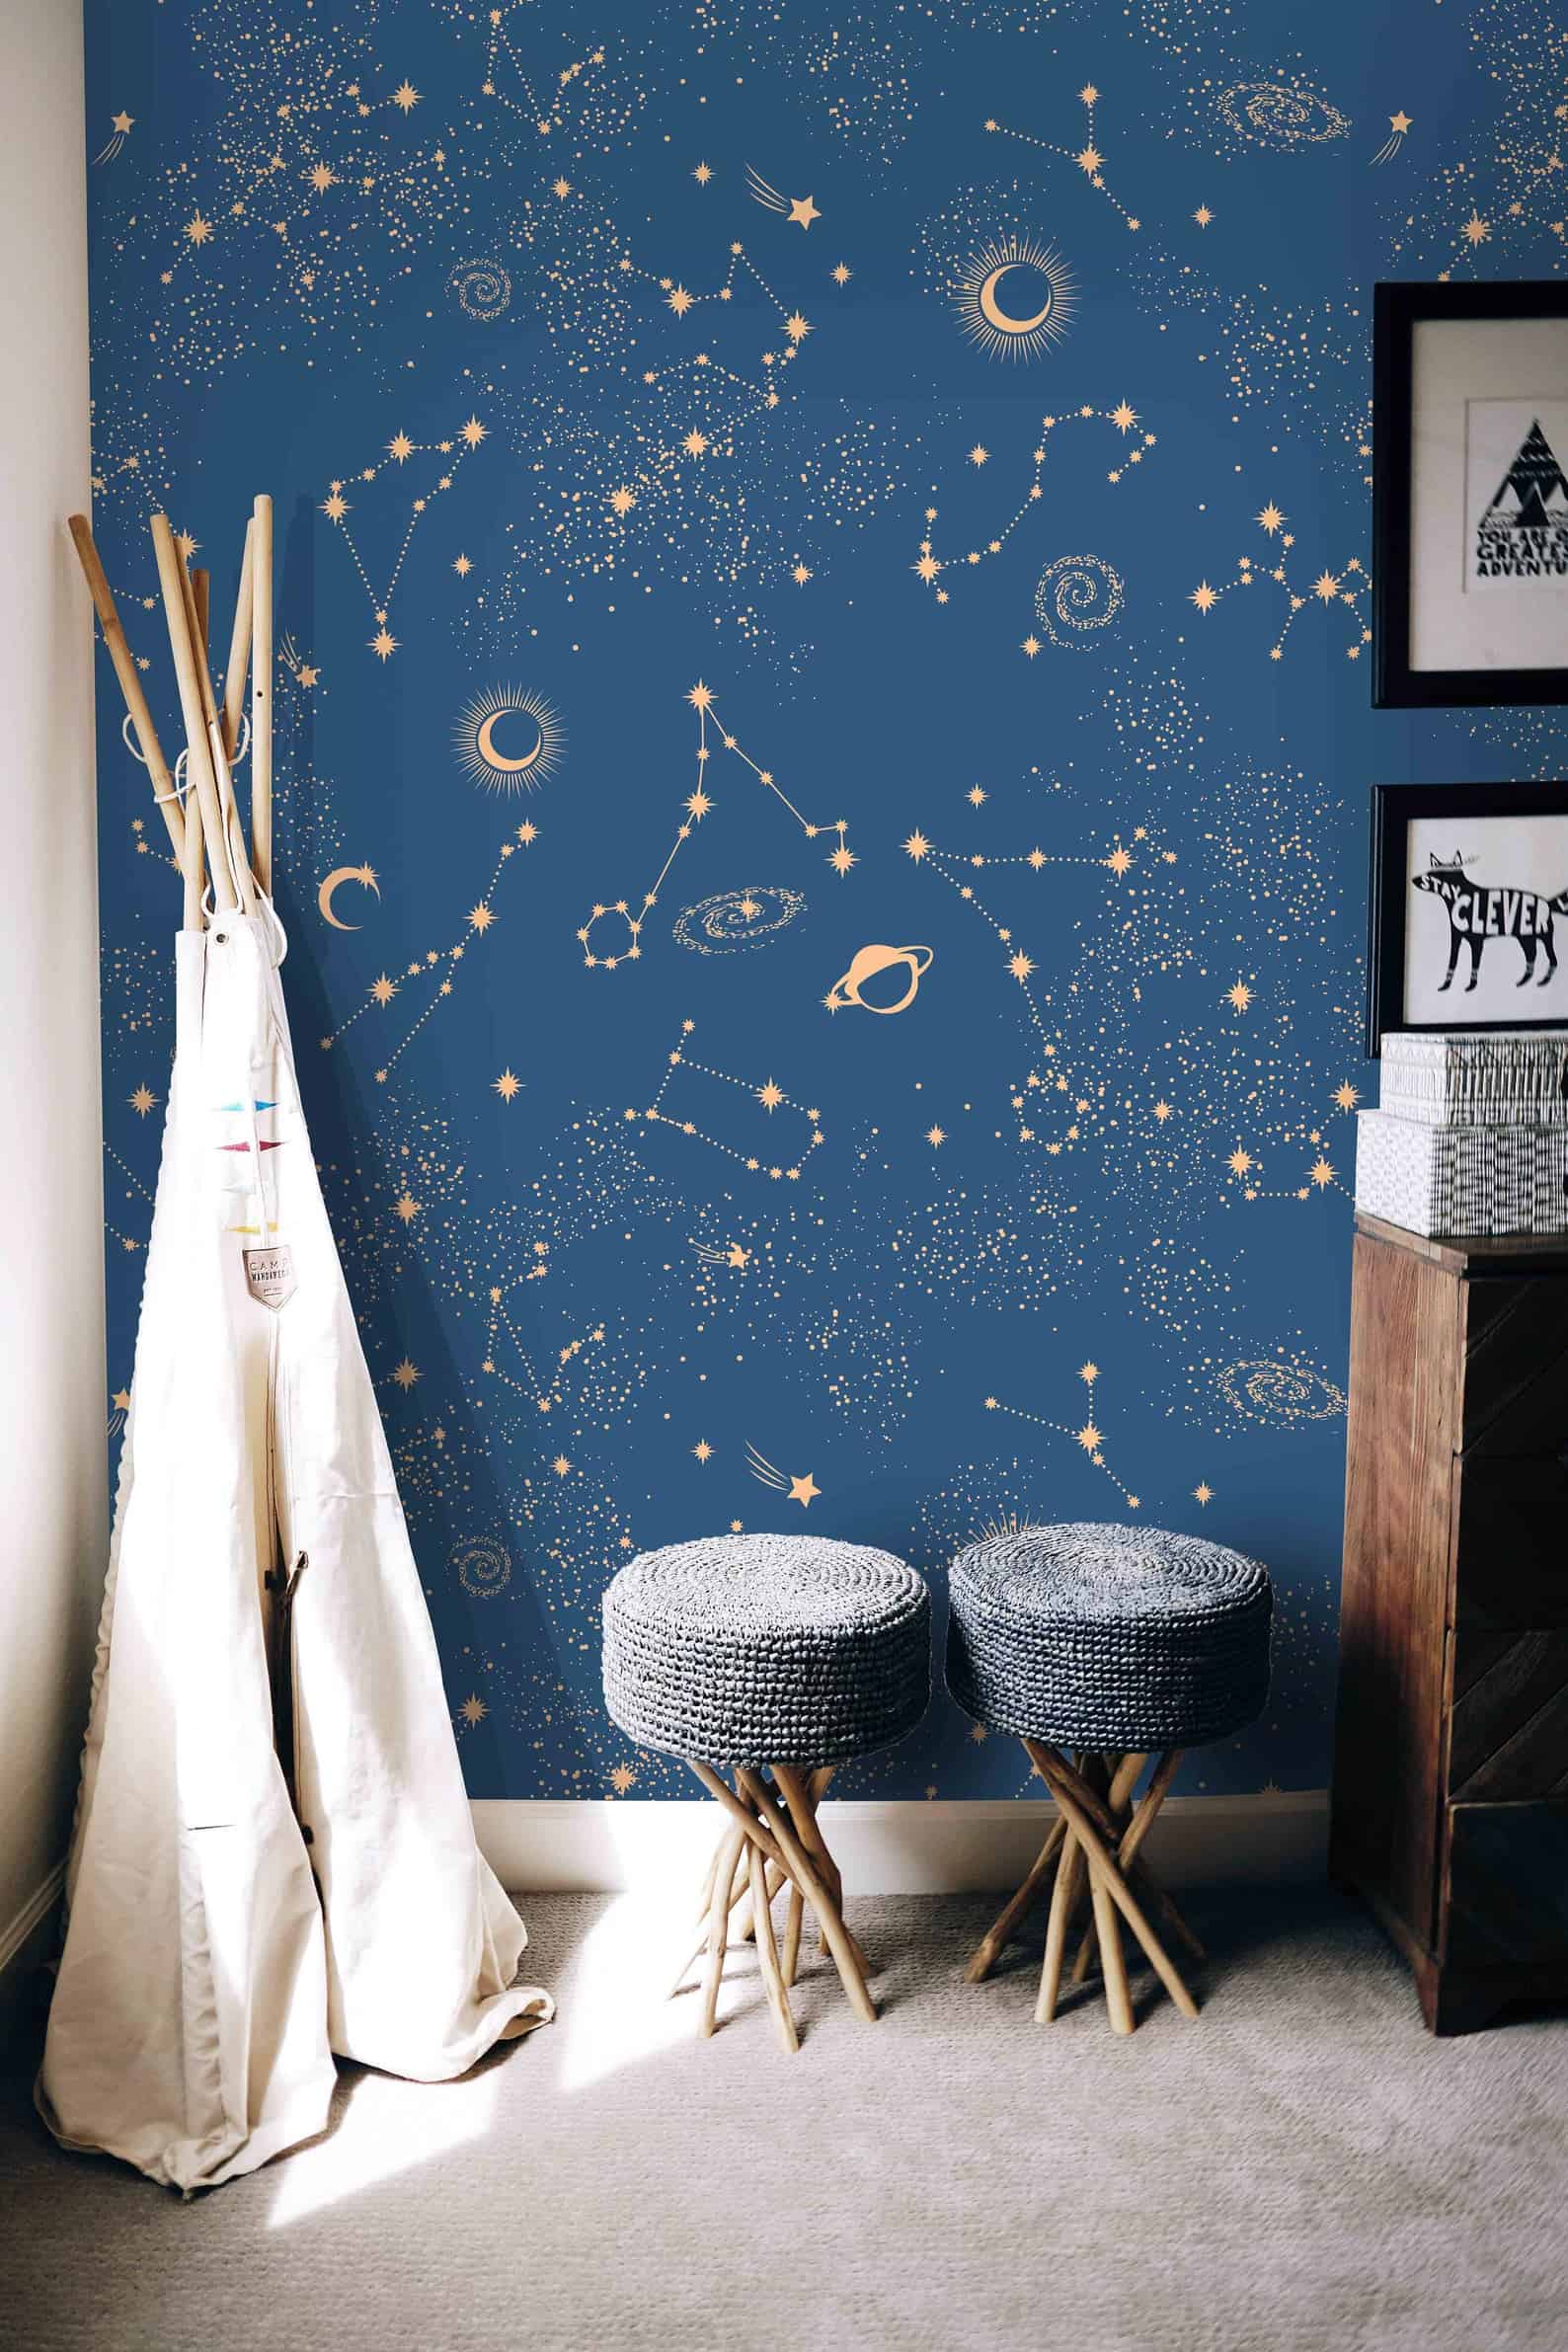
Blue Hue
Blues are timeless in a little boys room. Finding fun ways to incorperate blue into the room is easy with these options. Bellow are two perfect examples. The first is this gorgeous animal print – this would be gorgeous in any boys room, and I would LOVE to incorporate it for my older son!
I don’t know what I will decide on for the boys room – but I can tell you that this blog post made me want to give them their own rooms so I can do two haha.
Pin the Photo Below for Later
Hopefully this helped give you boys wallpaper inspiration for your space, and if you have any questions be sure to leave me a comment below! Be sure to follow me on Instagram – I have some fun boys room designs coming up soon!
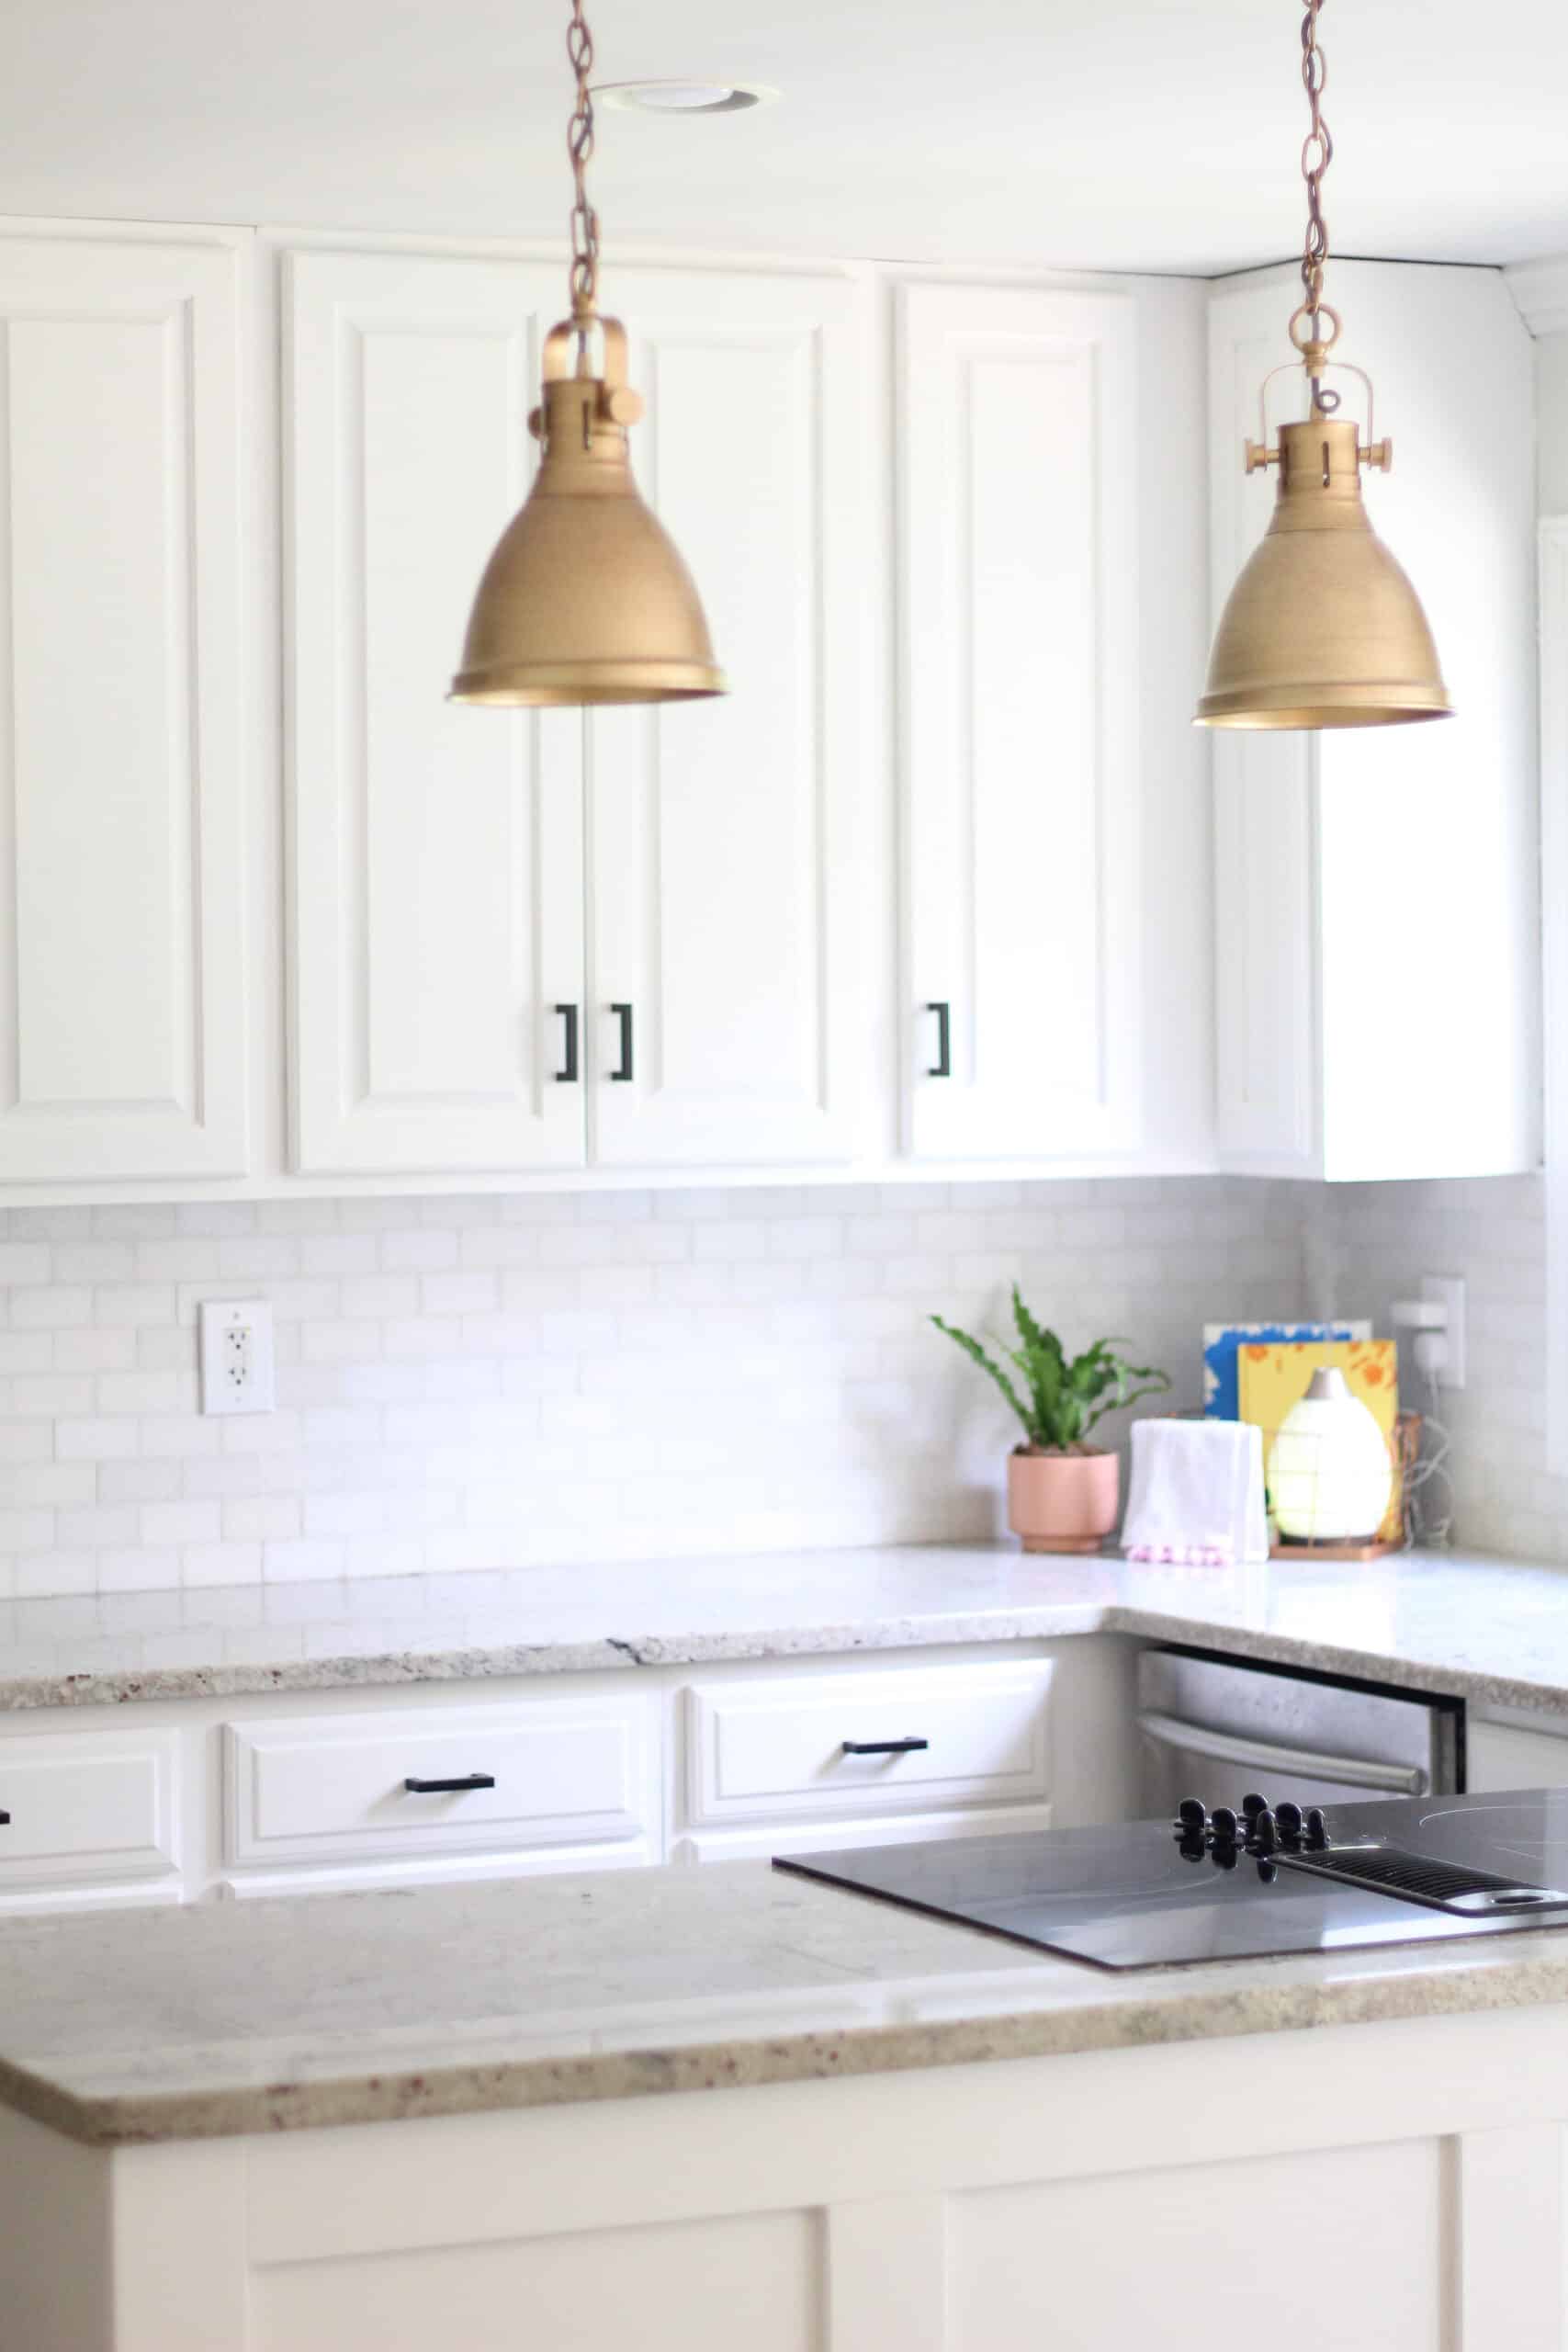
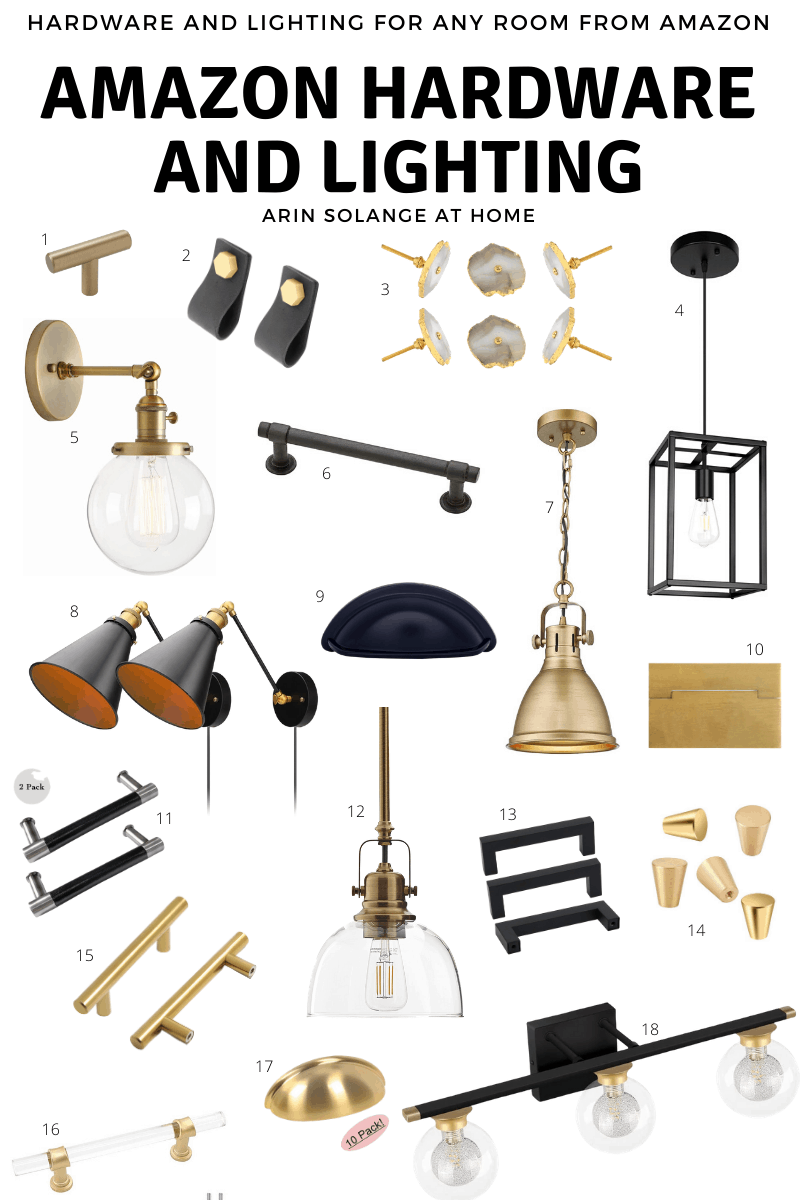
Another week, and more Amazon finds. This week I wanted to share some lighting and hardware from Amazon after sharing my kitchen reveal. We just re-did our kitchen and all the hardware and lighting came from Amazon – so it seemed like a great, organic fit to share that this week.
This post contains affiliate links
Lighting and Hardware from Amazon
When I am working on a room to update – you guys probably already know that Amazon is my go to for unique finds. With 4 little ones at home I don’t have time to run to a lot of the little stores, so the convince that Amazon offers is my go to.
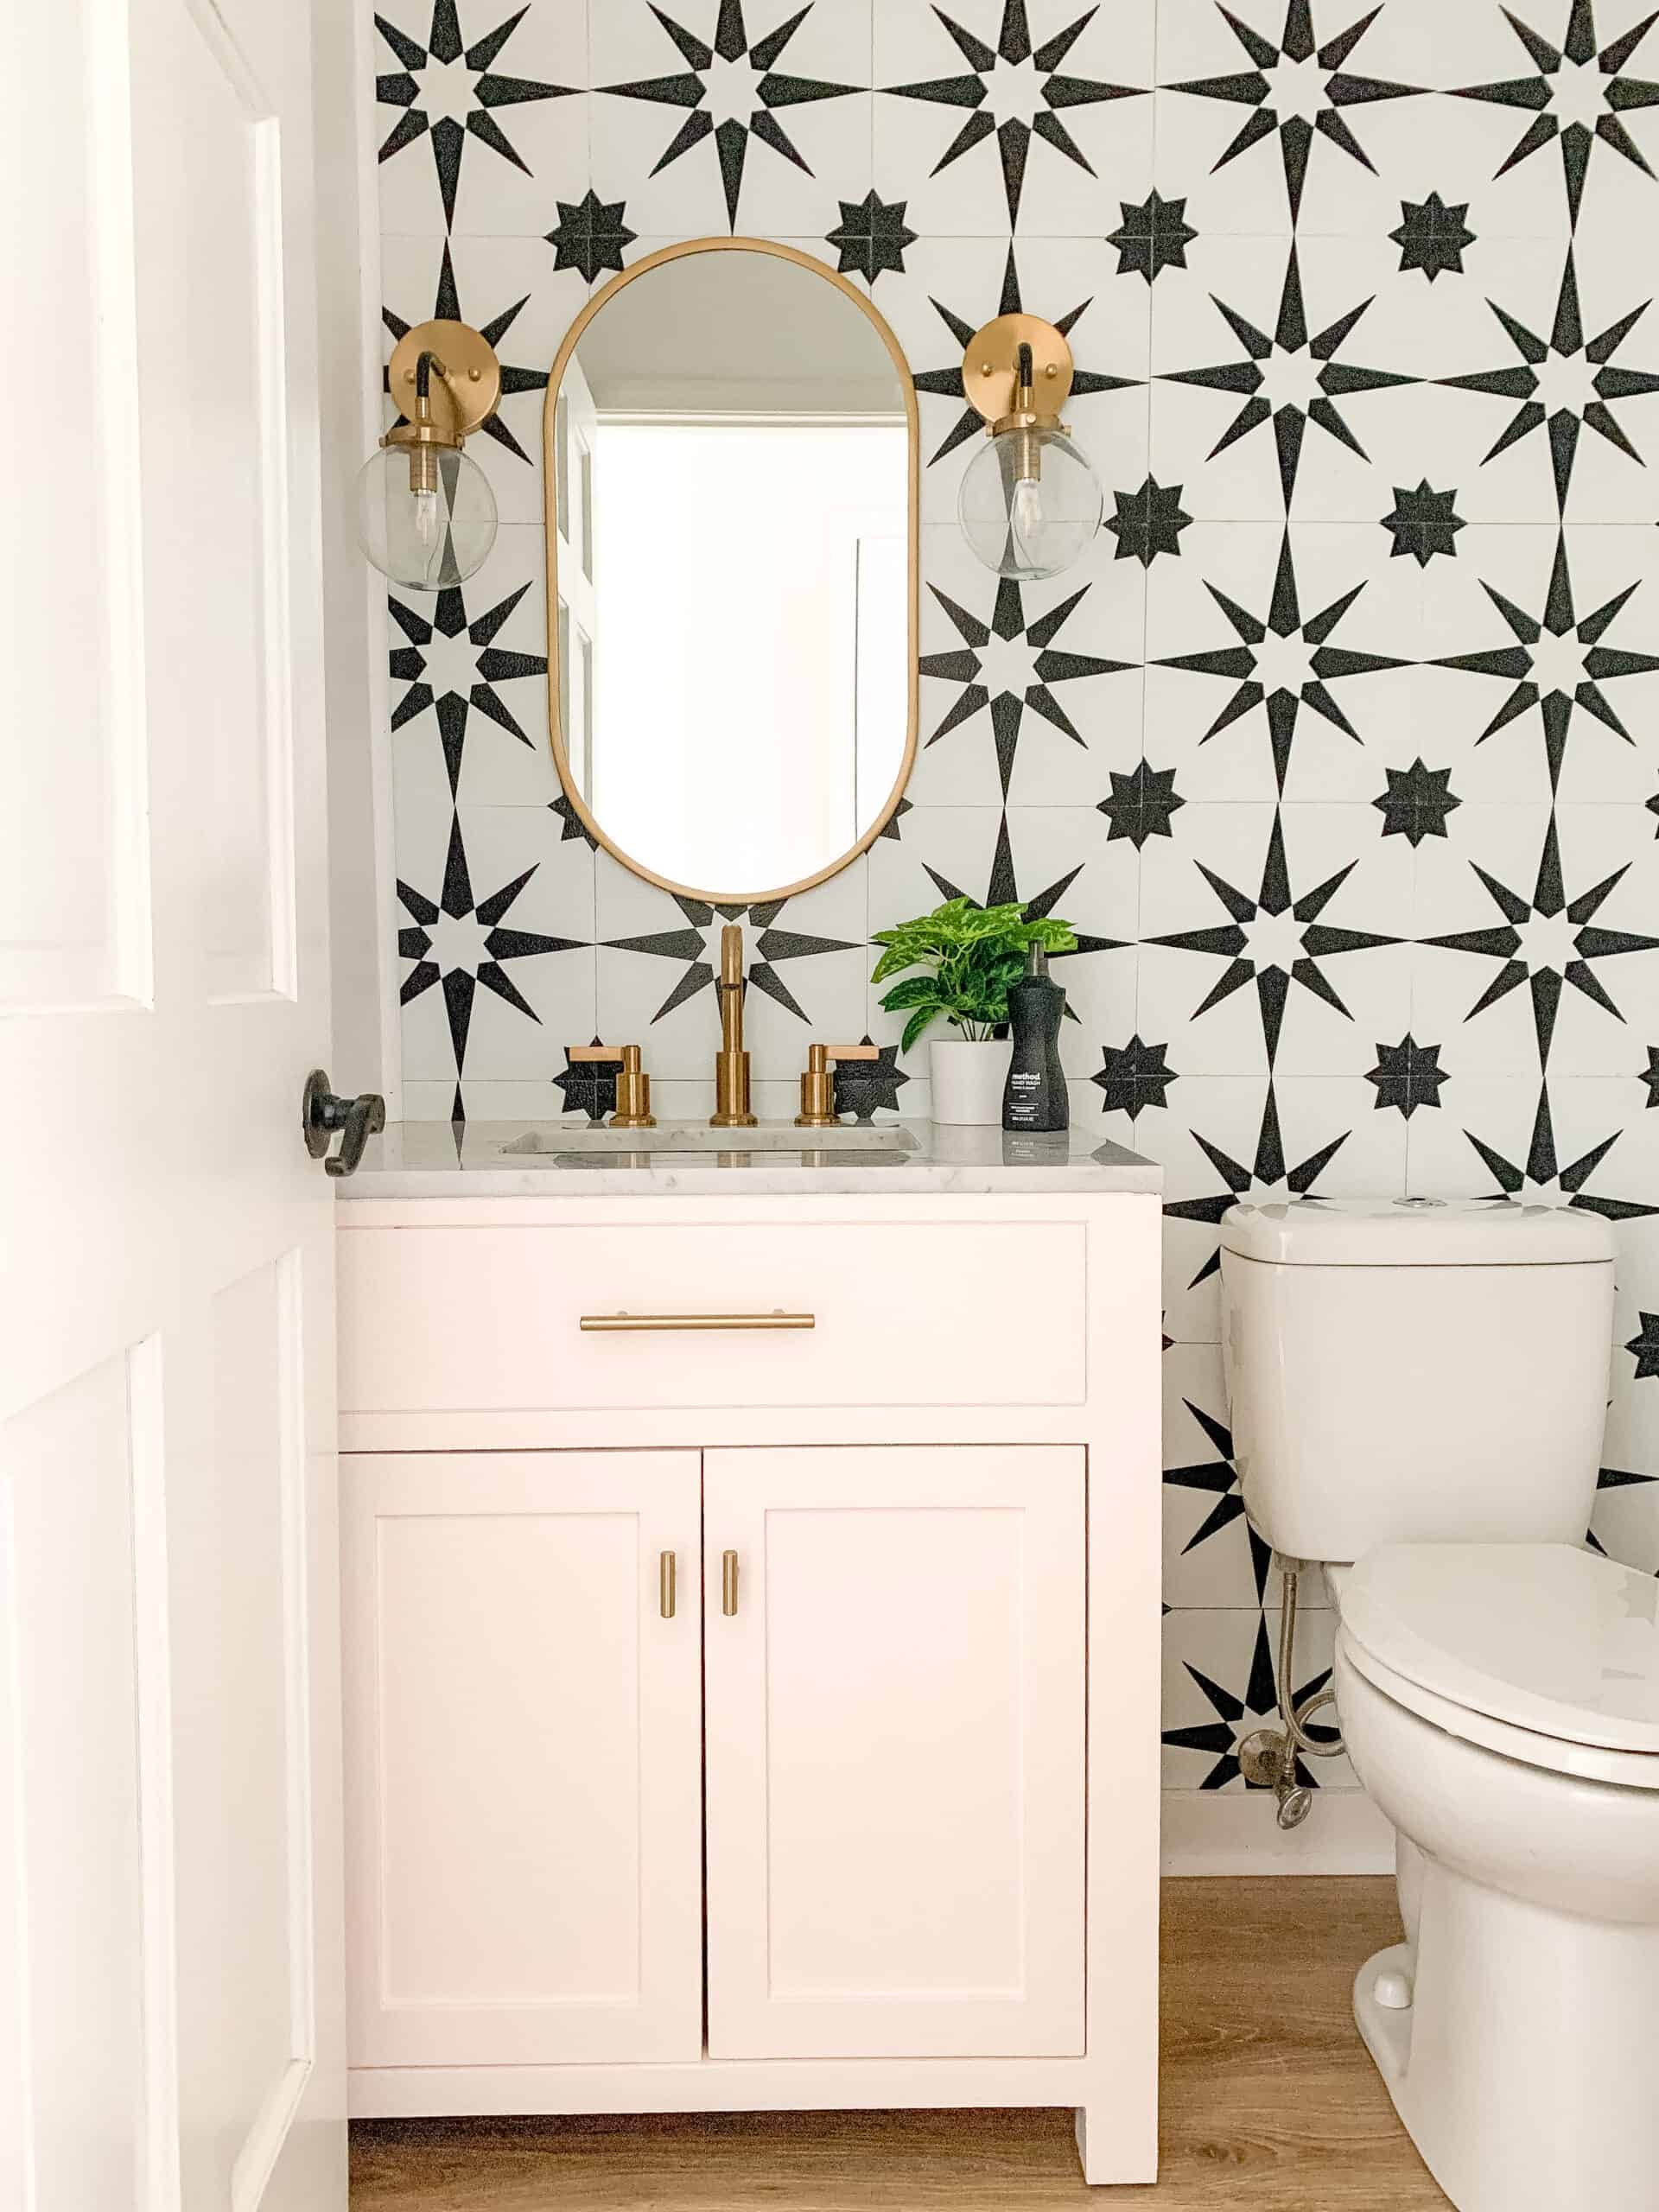
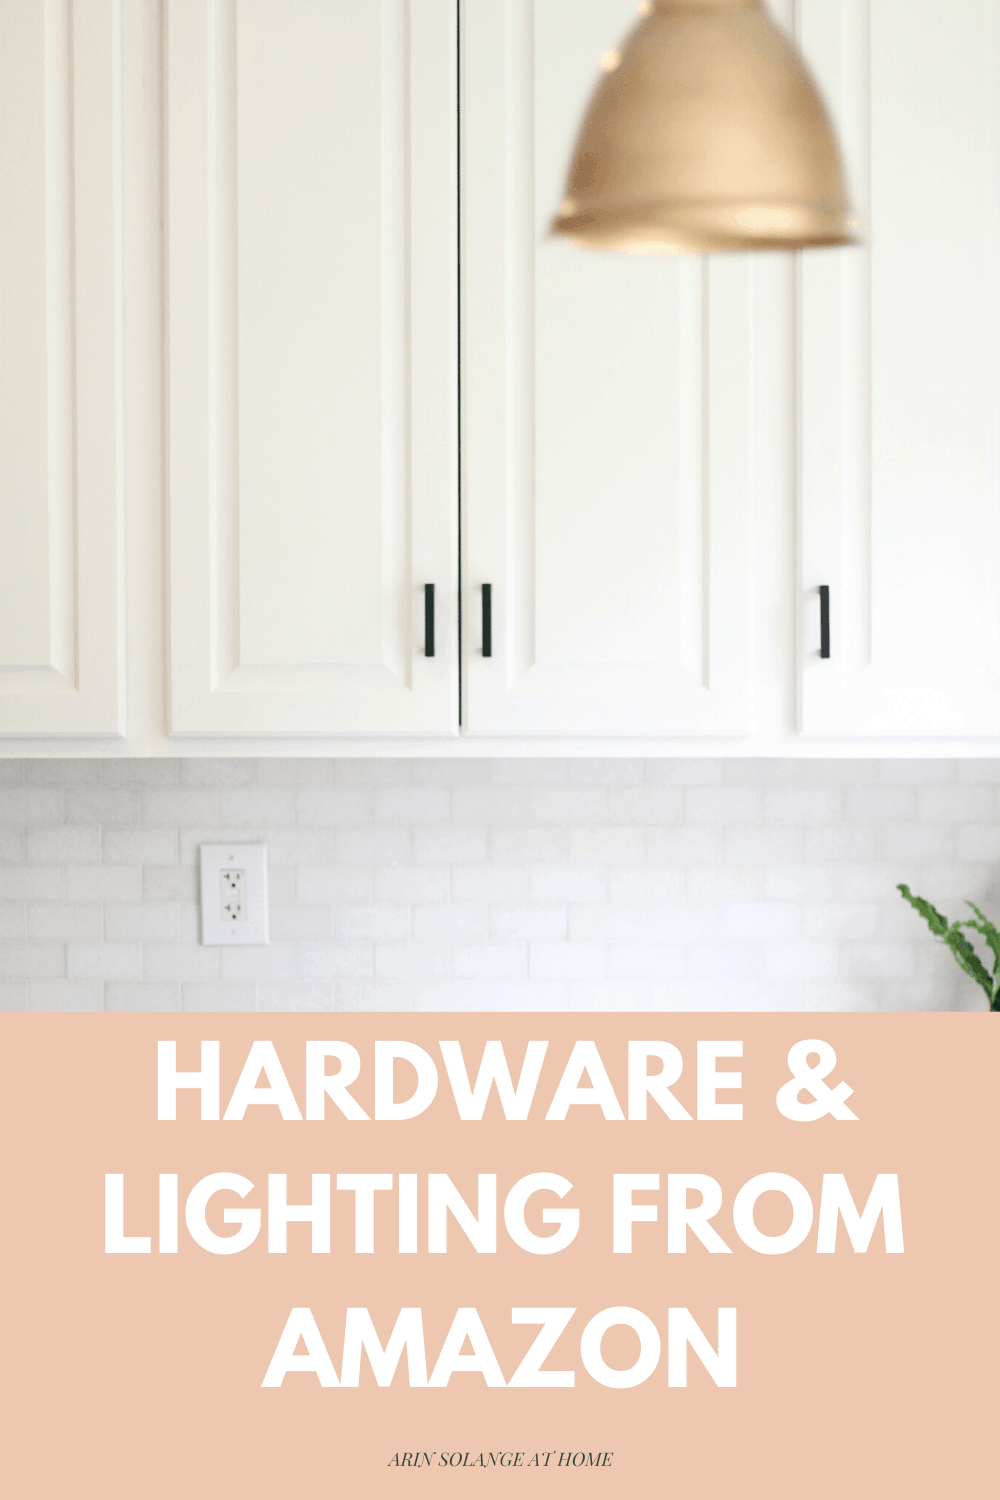
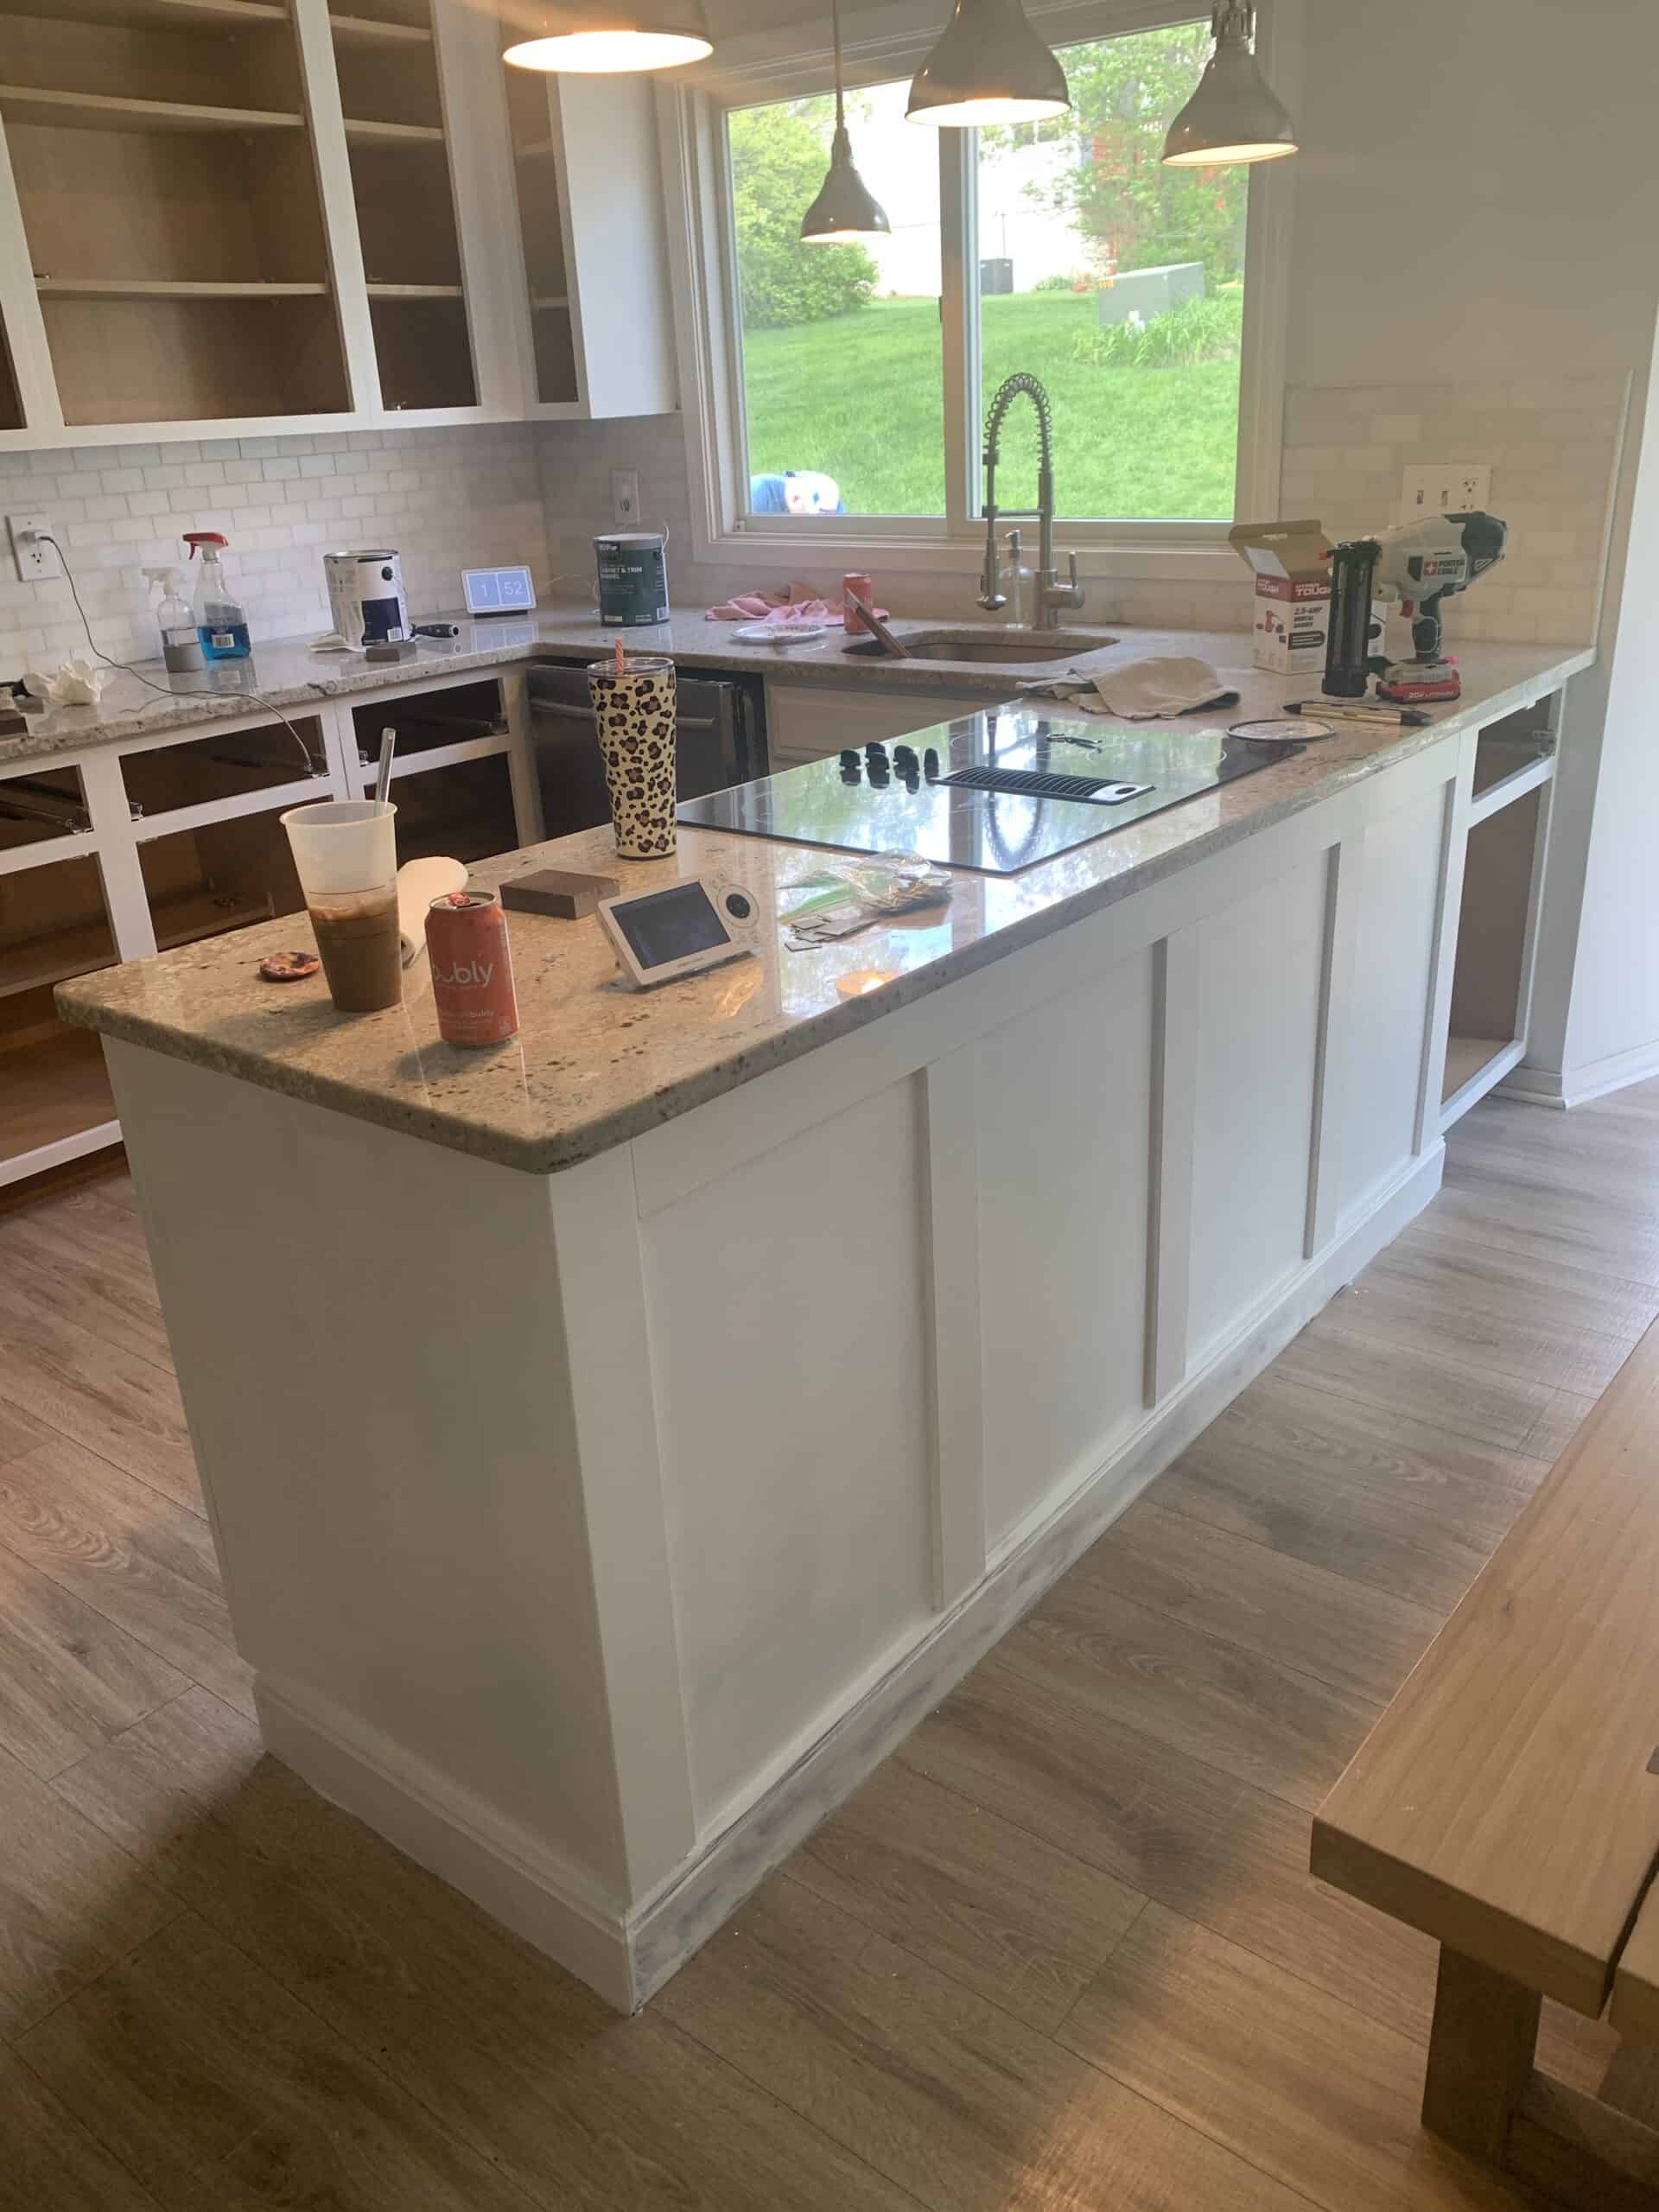
We recently updated our kitchen as well as our powder room on our main floor, and for both spaces I chose to use hardware from Amazon for the cabinets, and in the kitchen I also went with lighting from Amazon.
The only reason I didn’t do lighting from Amazon in the bathroom above was because I was in a hurry and didn’t want to deal with returns in the shade of gold was off.
Check out all my other Amazon Finds
This video gives you a glimpse at a few of the other Amazon find round ups I have done! Search them all here!
Mixing Metals
When I put together this round up I tried to design it so that you could kind of pick and choose and mix anything on the post. I love the idea of mixing metals and think it opens up opportunities for decorating as time goes on.
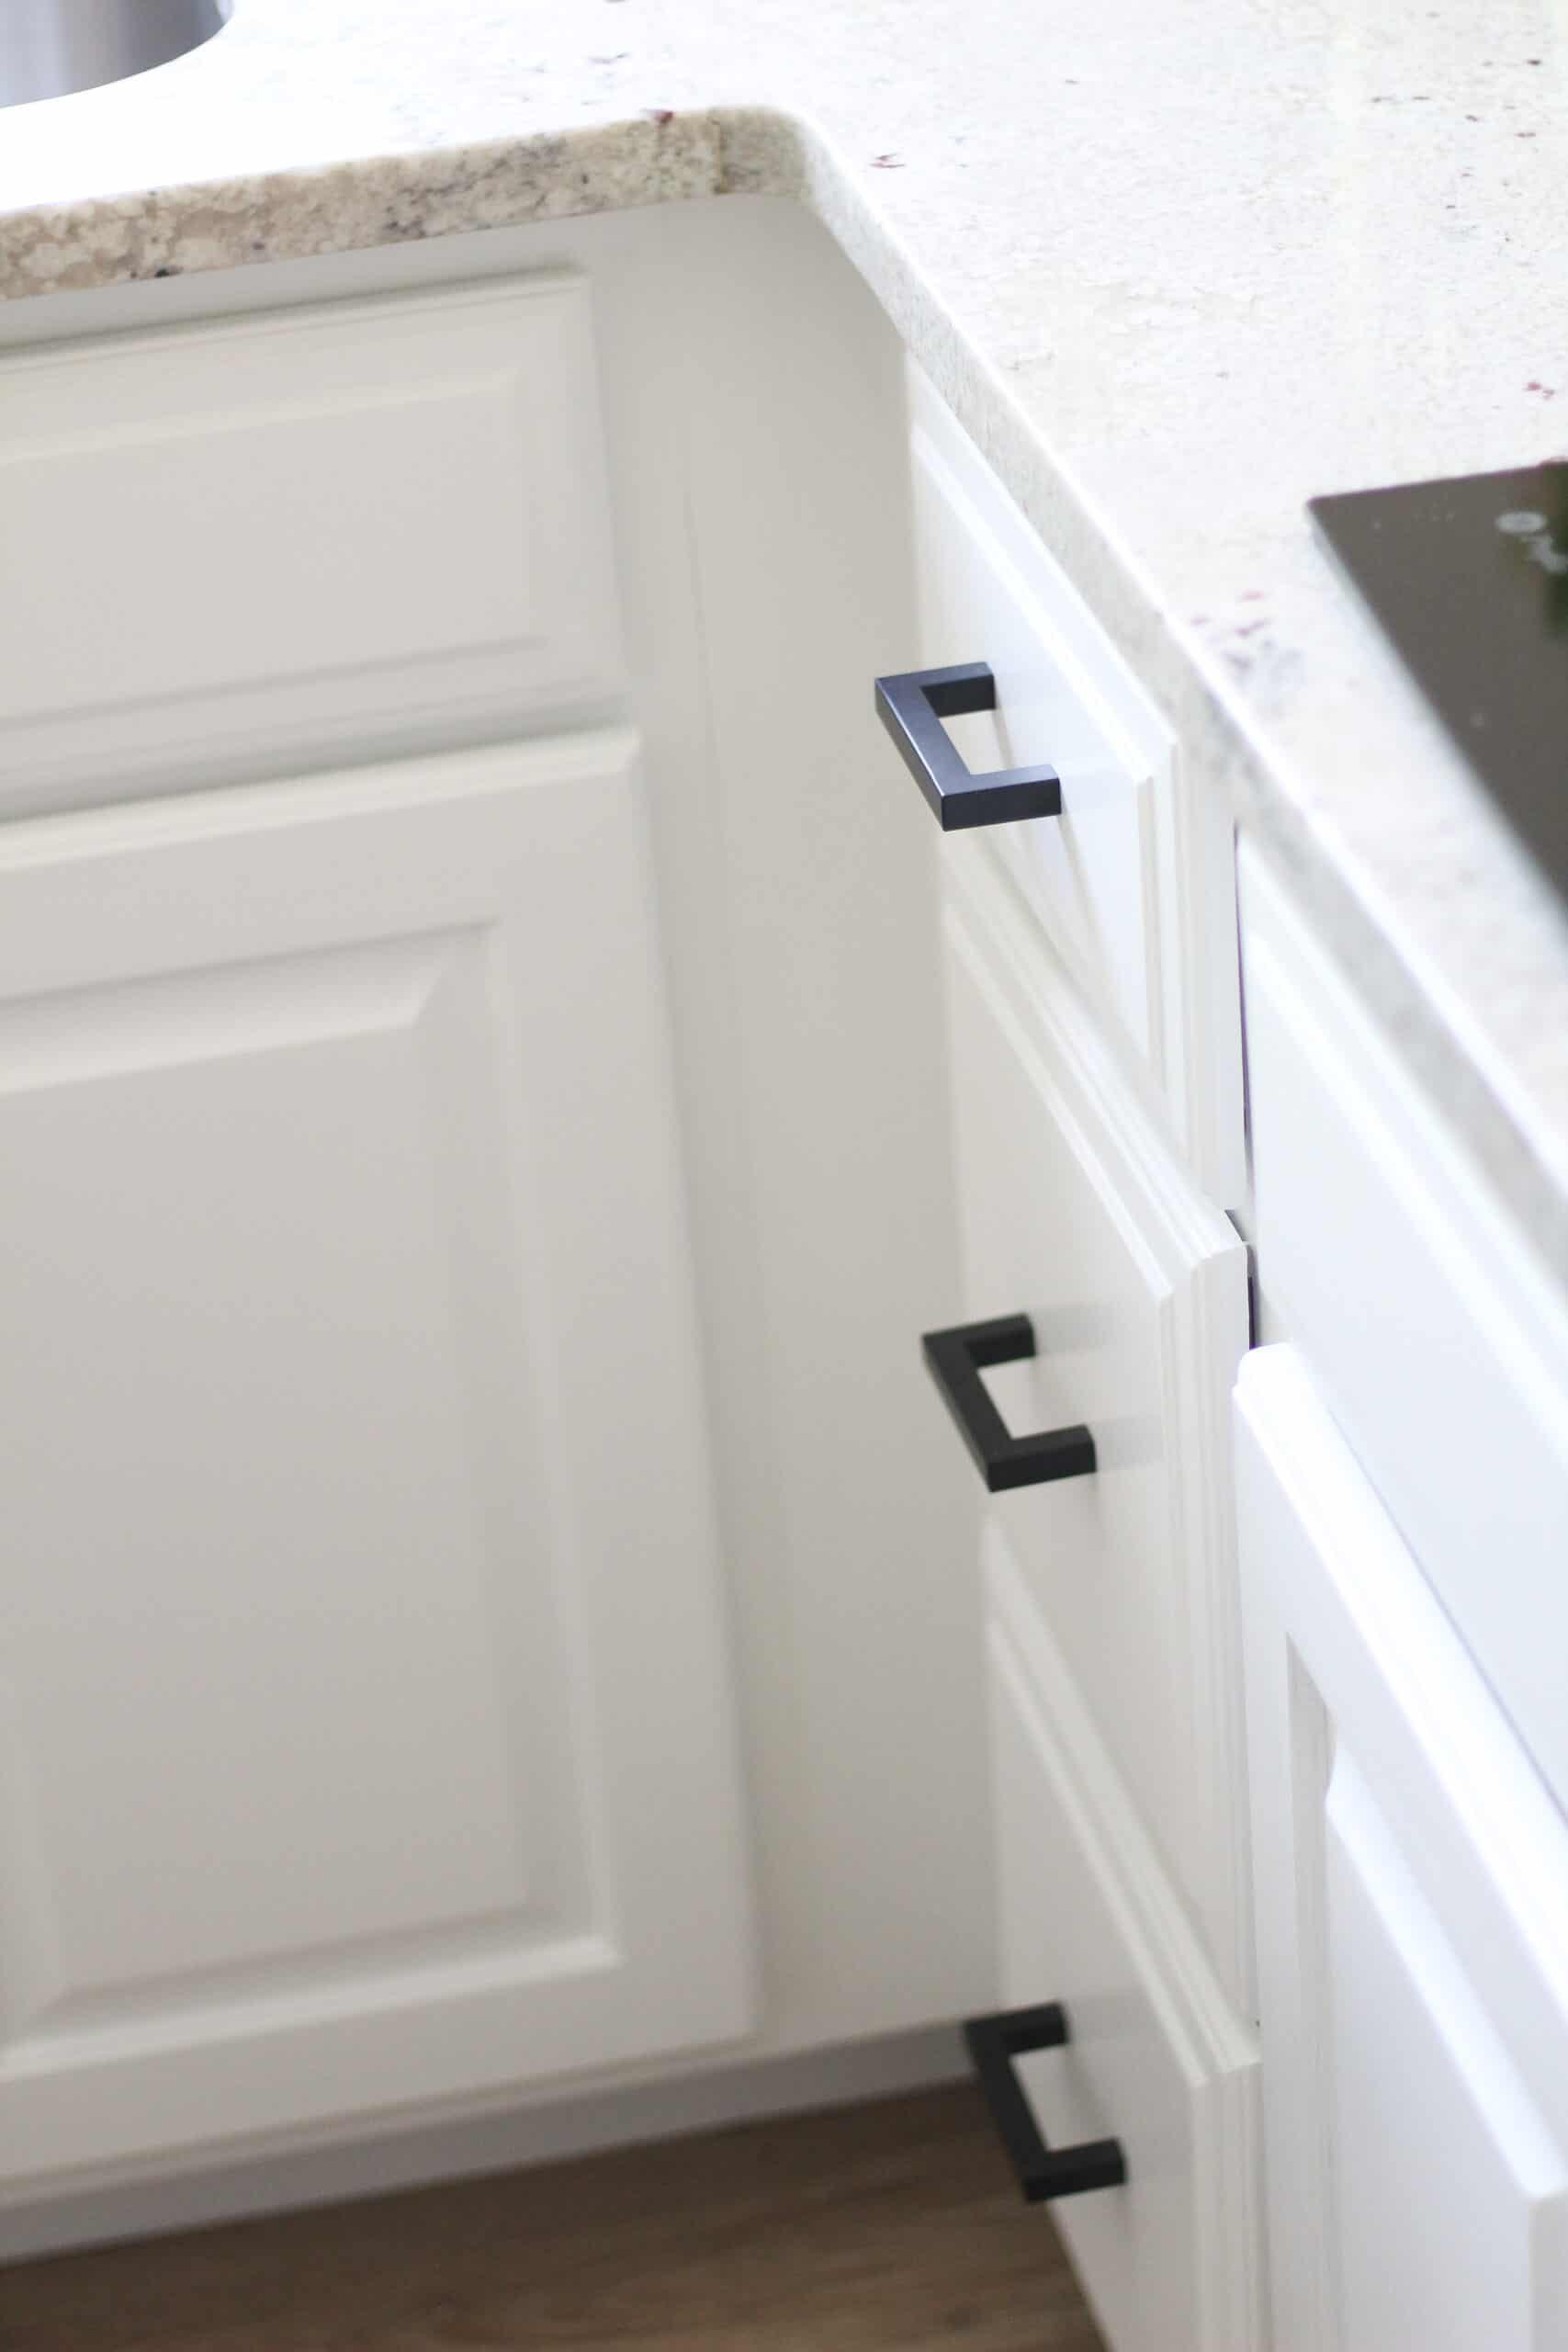
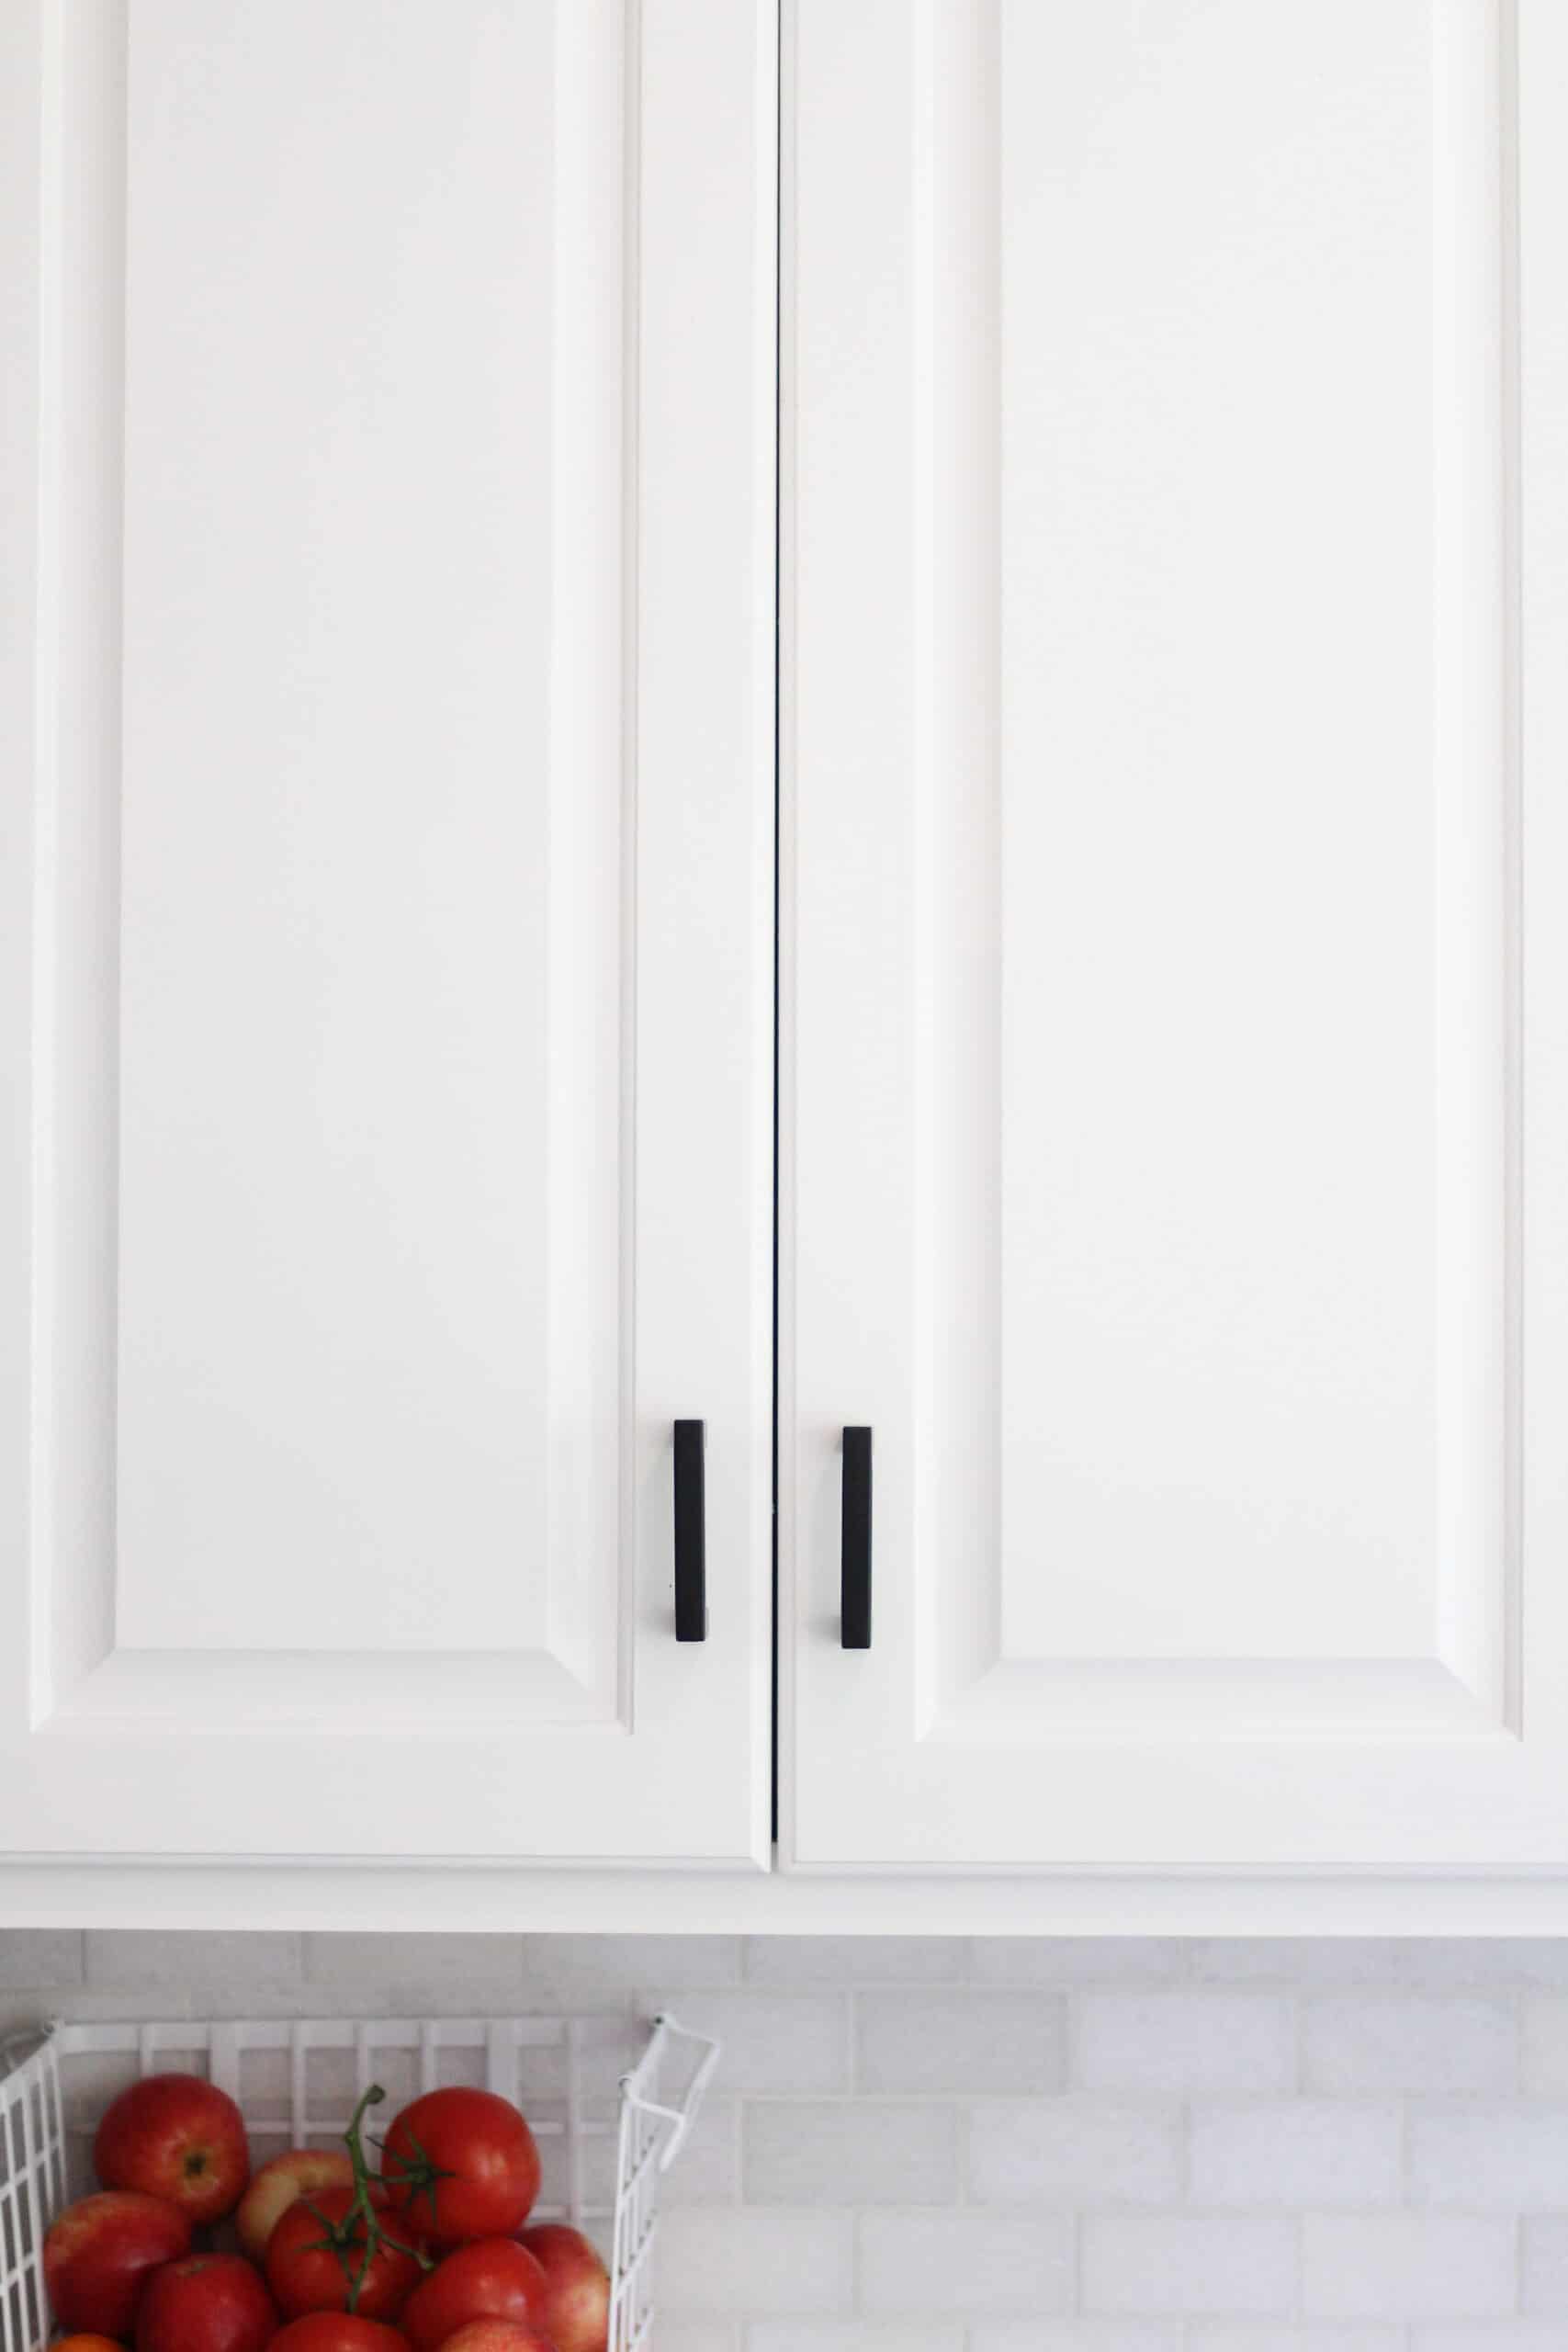
Right now brass and black are both really in, so I stuck to that color way for this post, as well as my kitchen, and have been so happy with the end outcome.
Be sure to check the sizes for many of these, most of the hardware I have purchased from Amazon comes in several different lengths which is great. When you are measuring you need to measure from the center of the drilled hole to the the center of the drilled hole – sometimes even the slightest miss measurement can end in the wrong hardware.
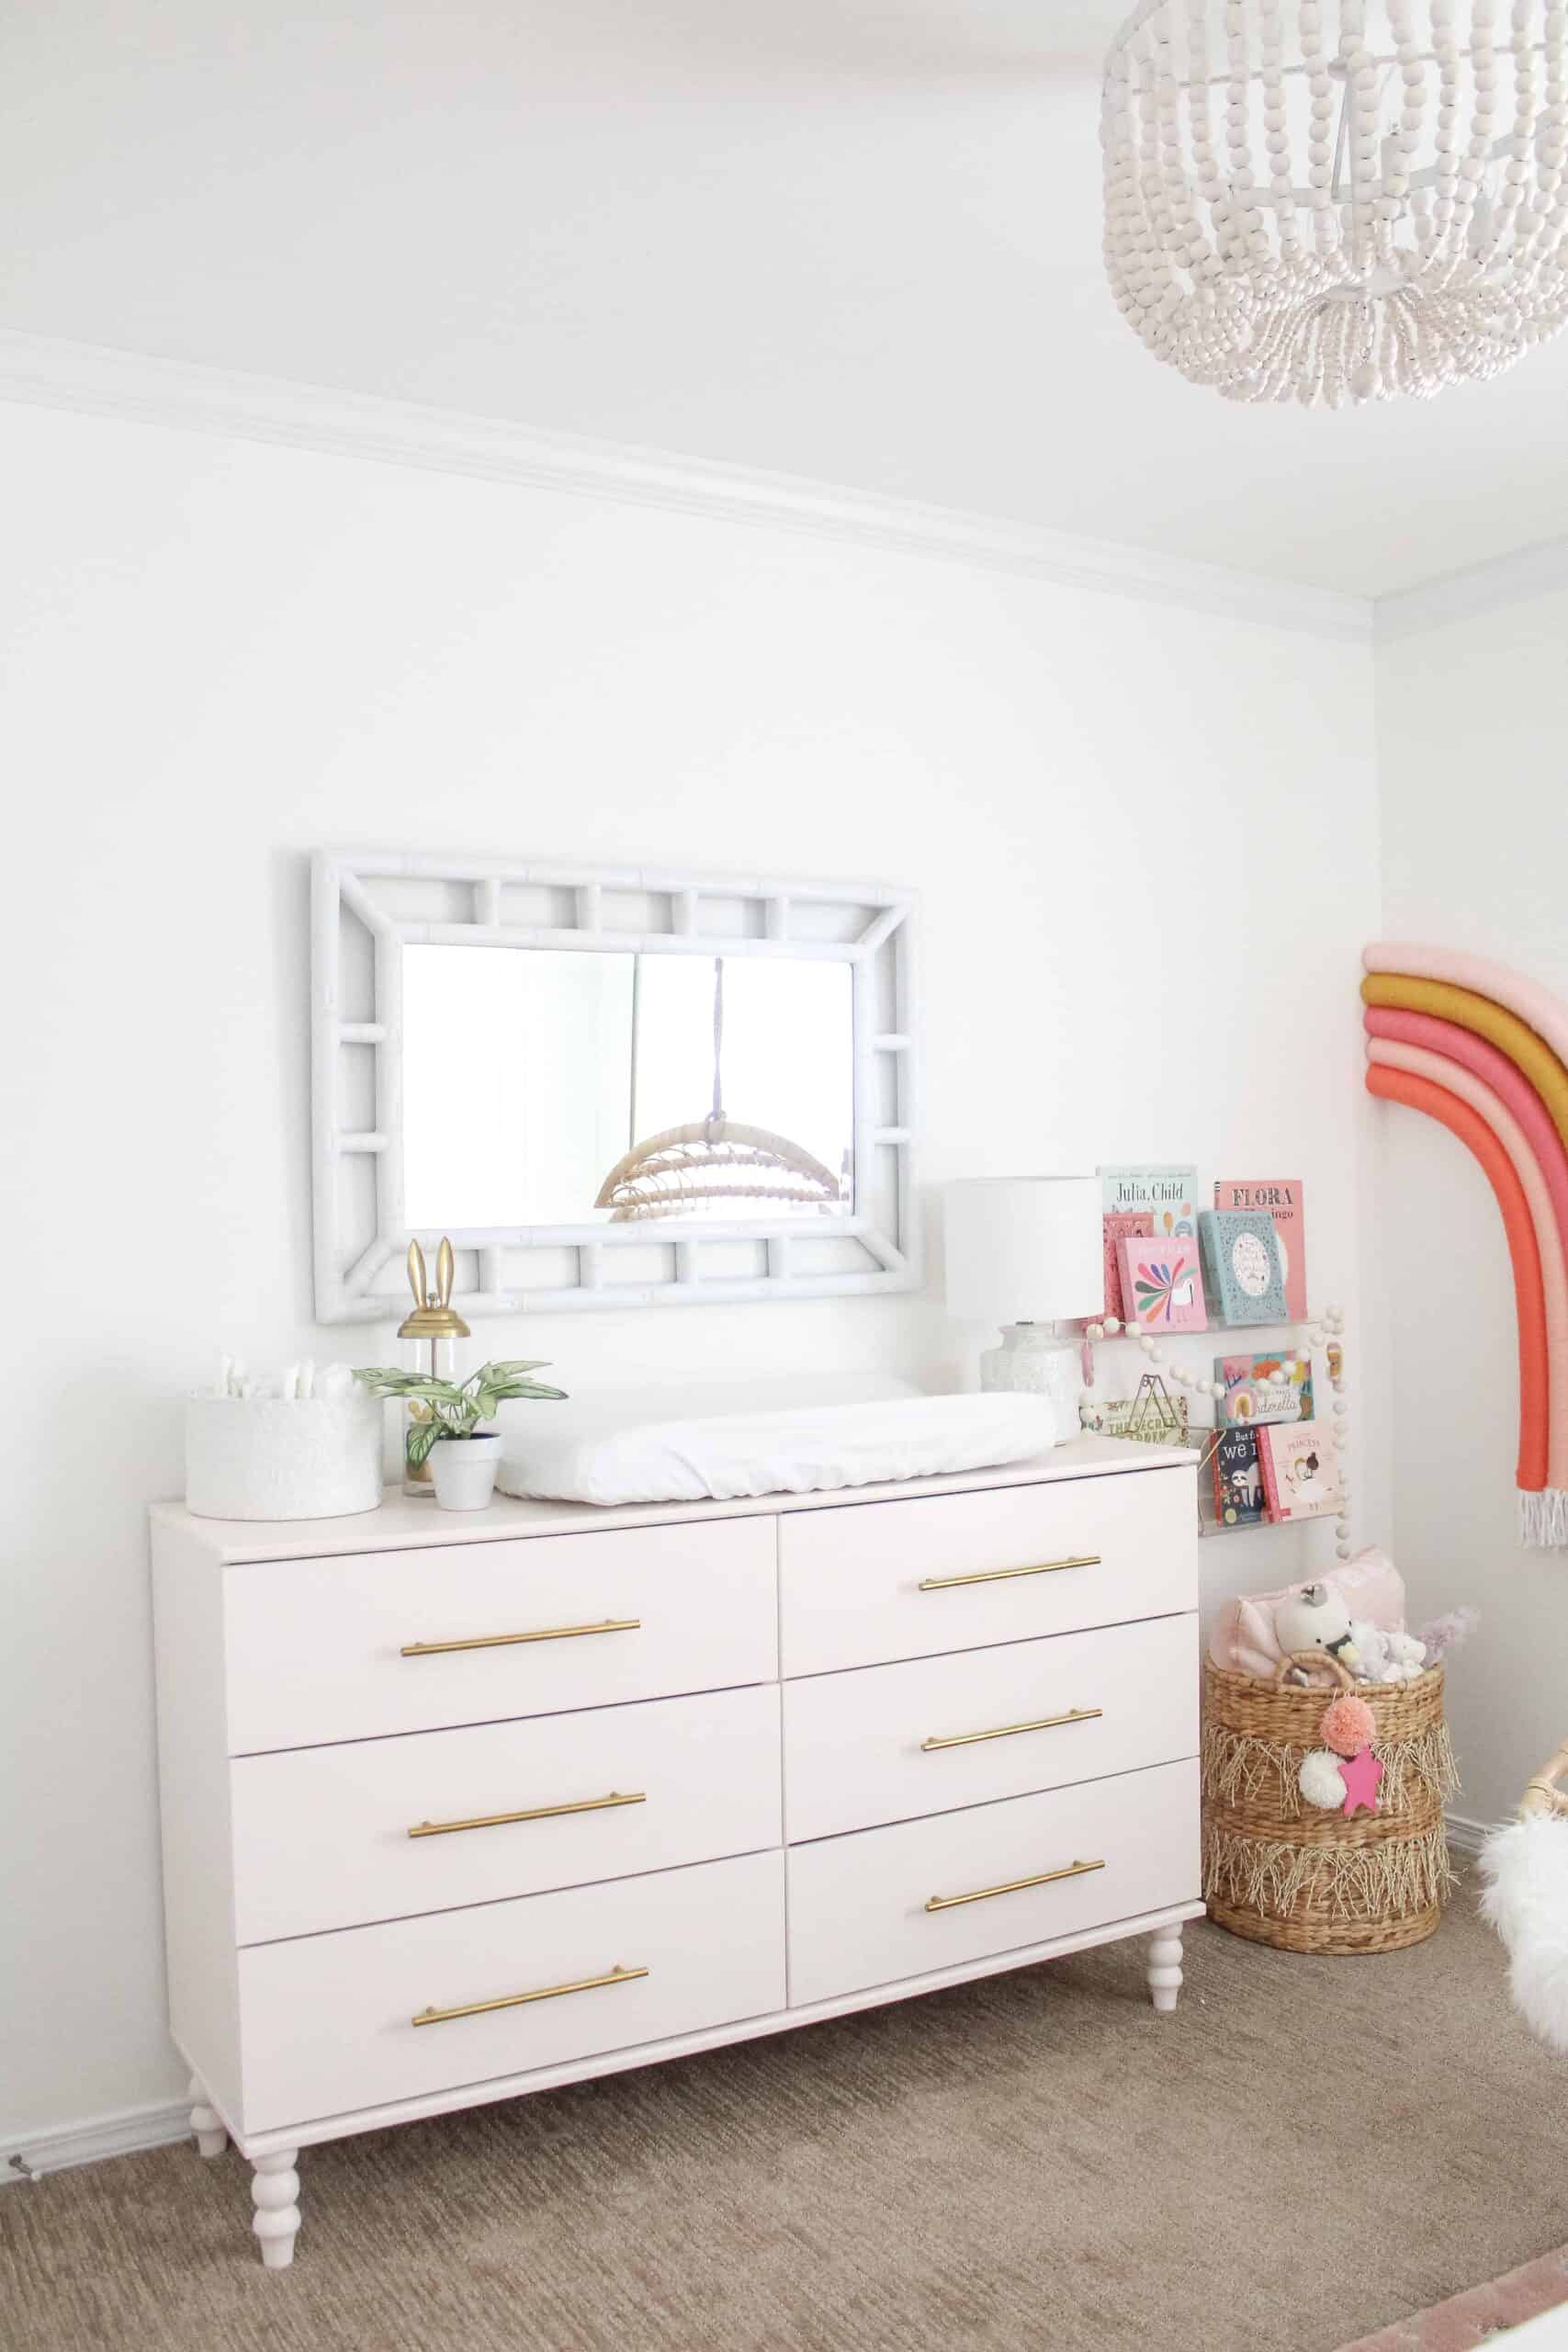
We also used hardware from Amazon for Goldie Dresser – which is an IKEA hack (check out the post here). I loved that with the pulls we got for Goldie’s dresser we had the option to get them really long!
Find all the hardware from the images above, and lots more in the image below!
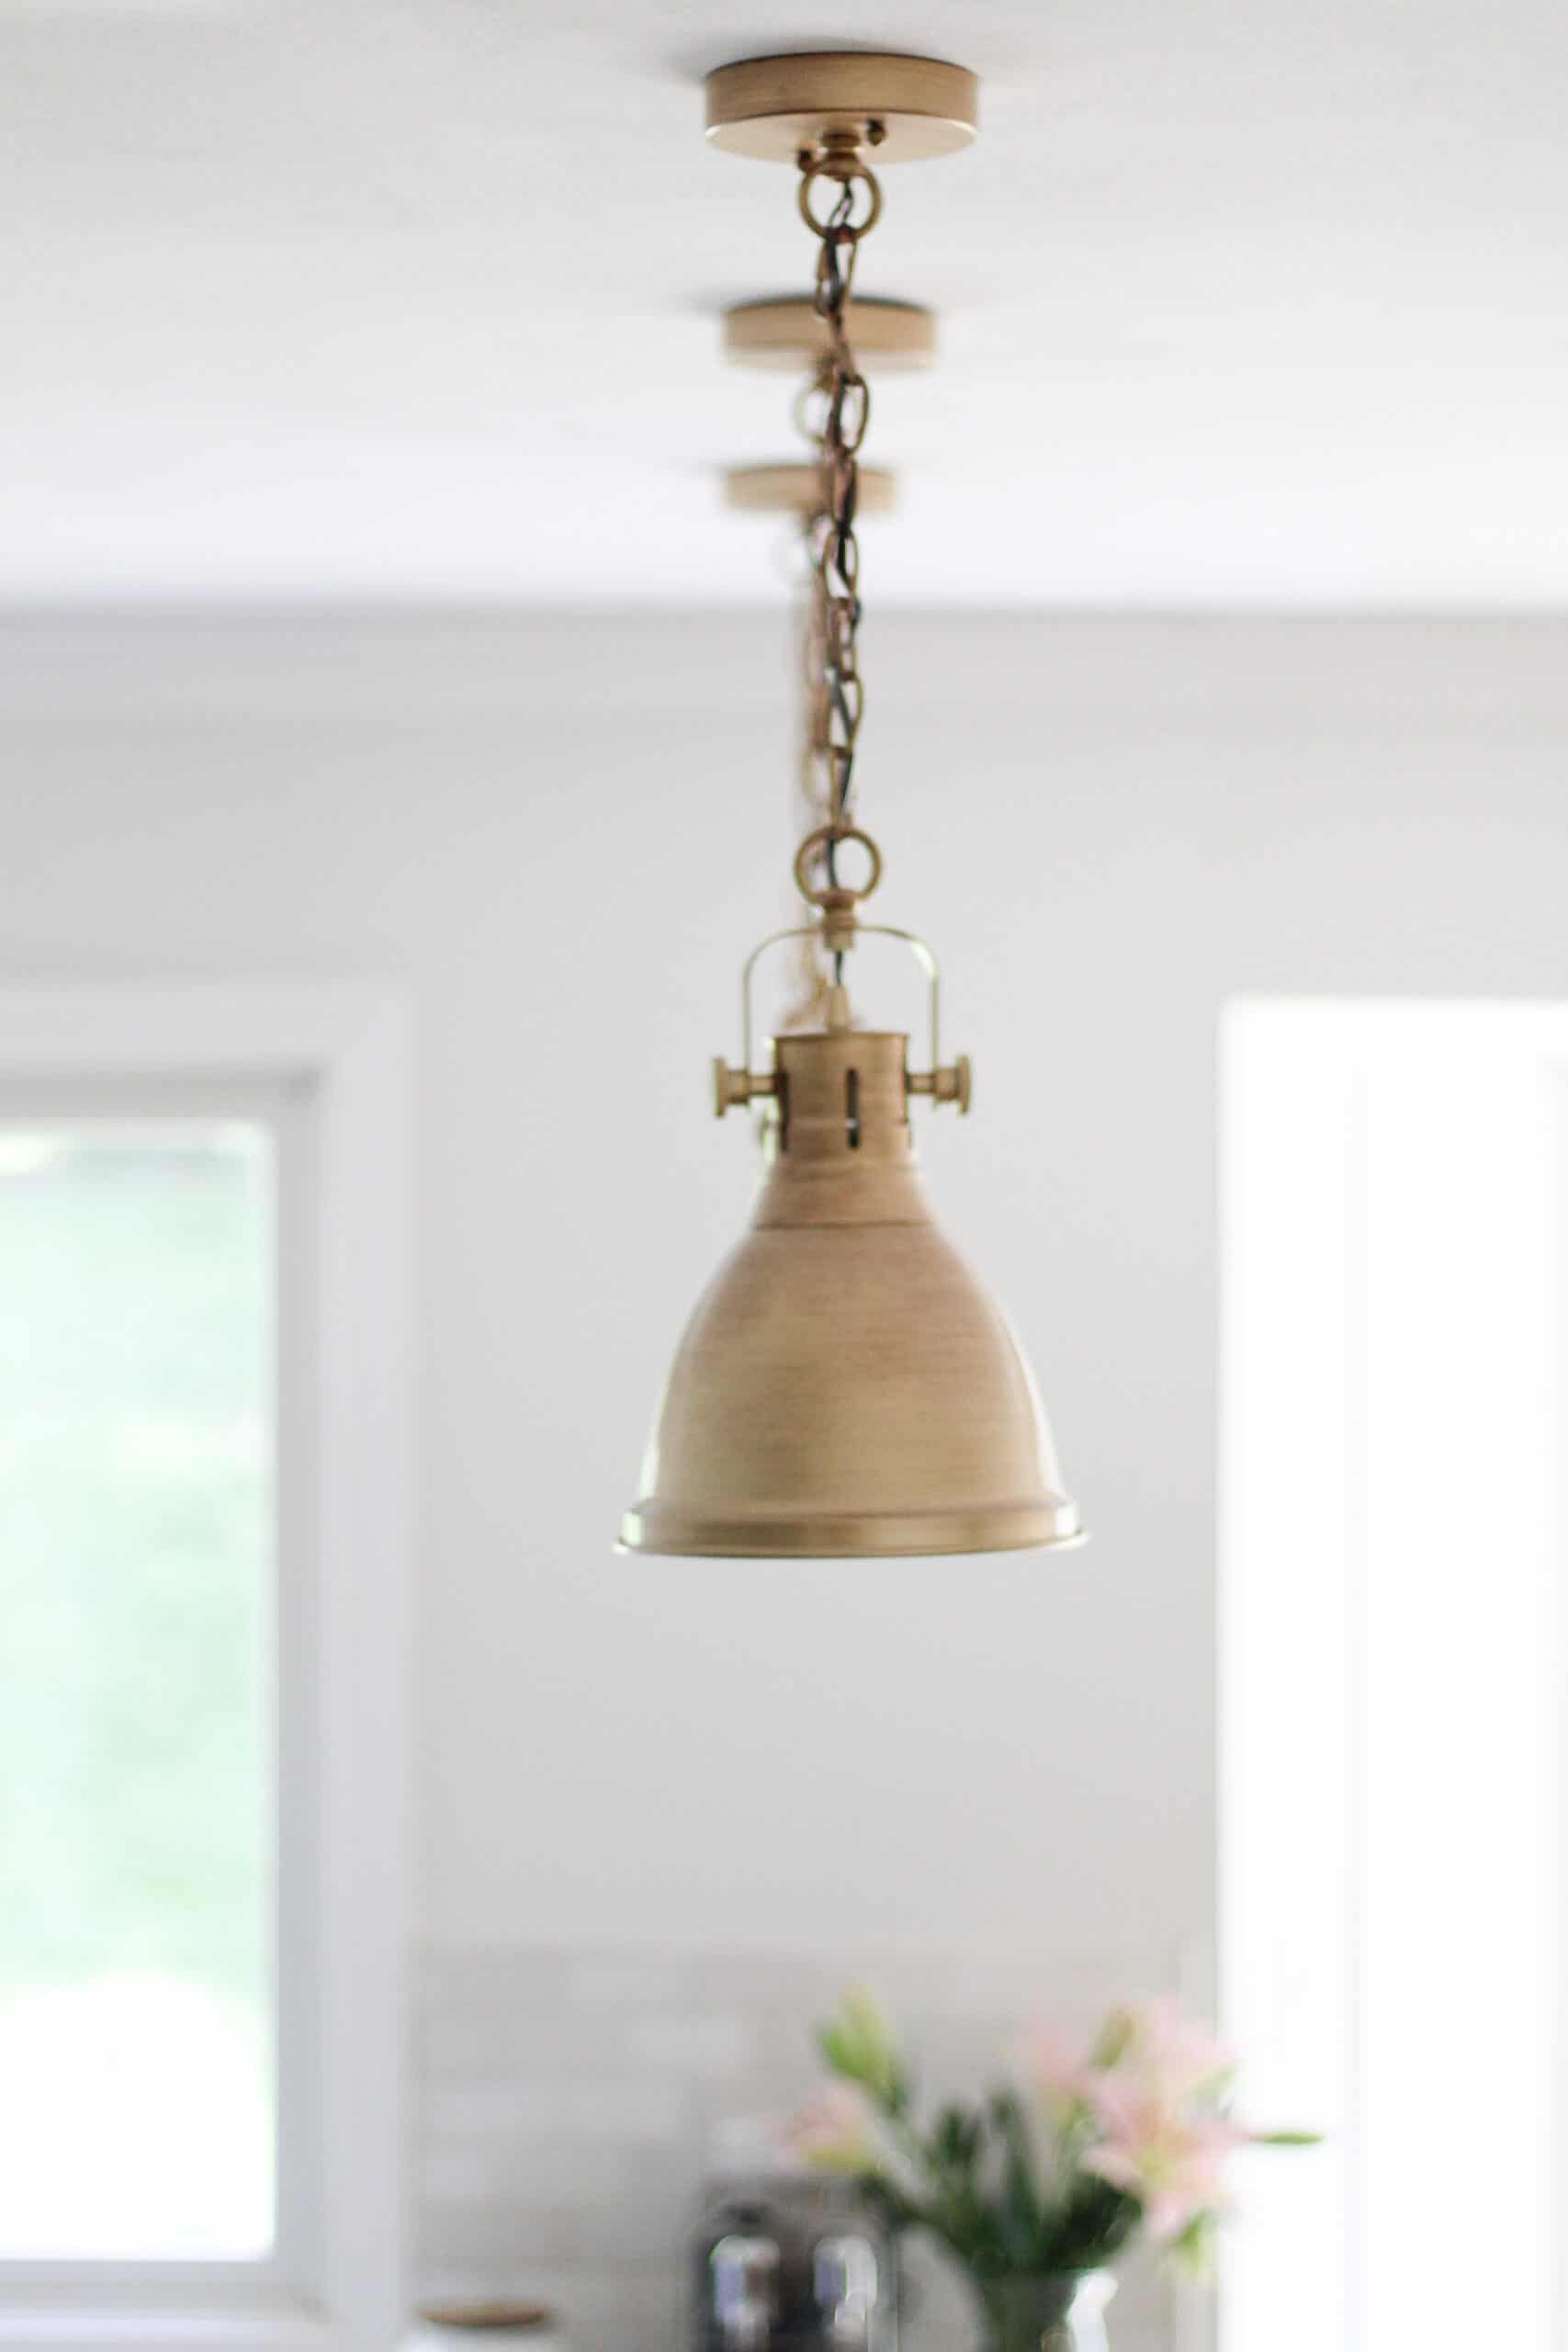
Black and gold 3 light fixture – this is perfectly modern and gorgeous. I would love to change up my master bathroom and add this in!
Overall – all of these are super fun, and gorgeous options for your home. Right now, while we are all stuck at home, getting creative with finding home decor on Amazon can be so helpful! I have several other Amazon posts with Decor from Amazon that I will link below incase you are looking.
If you have any questions on any of these items, I love to connect via DM on Instagram (@arinsolange), or in the comments below!! Hopefully you find some hardware and lighting from Amazon that you Love and inspires you to make your space just the way you want it!
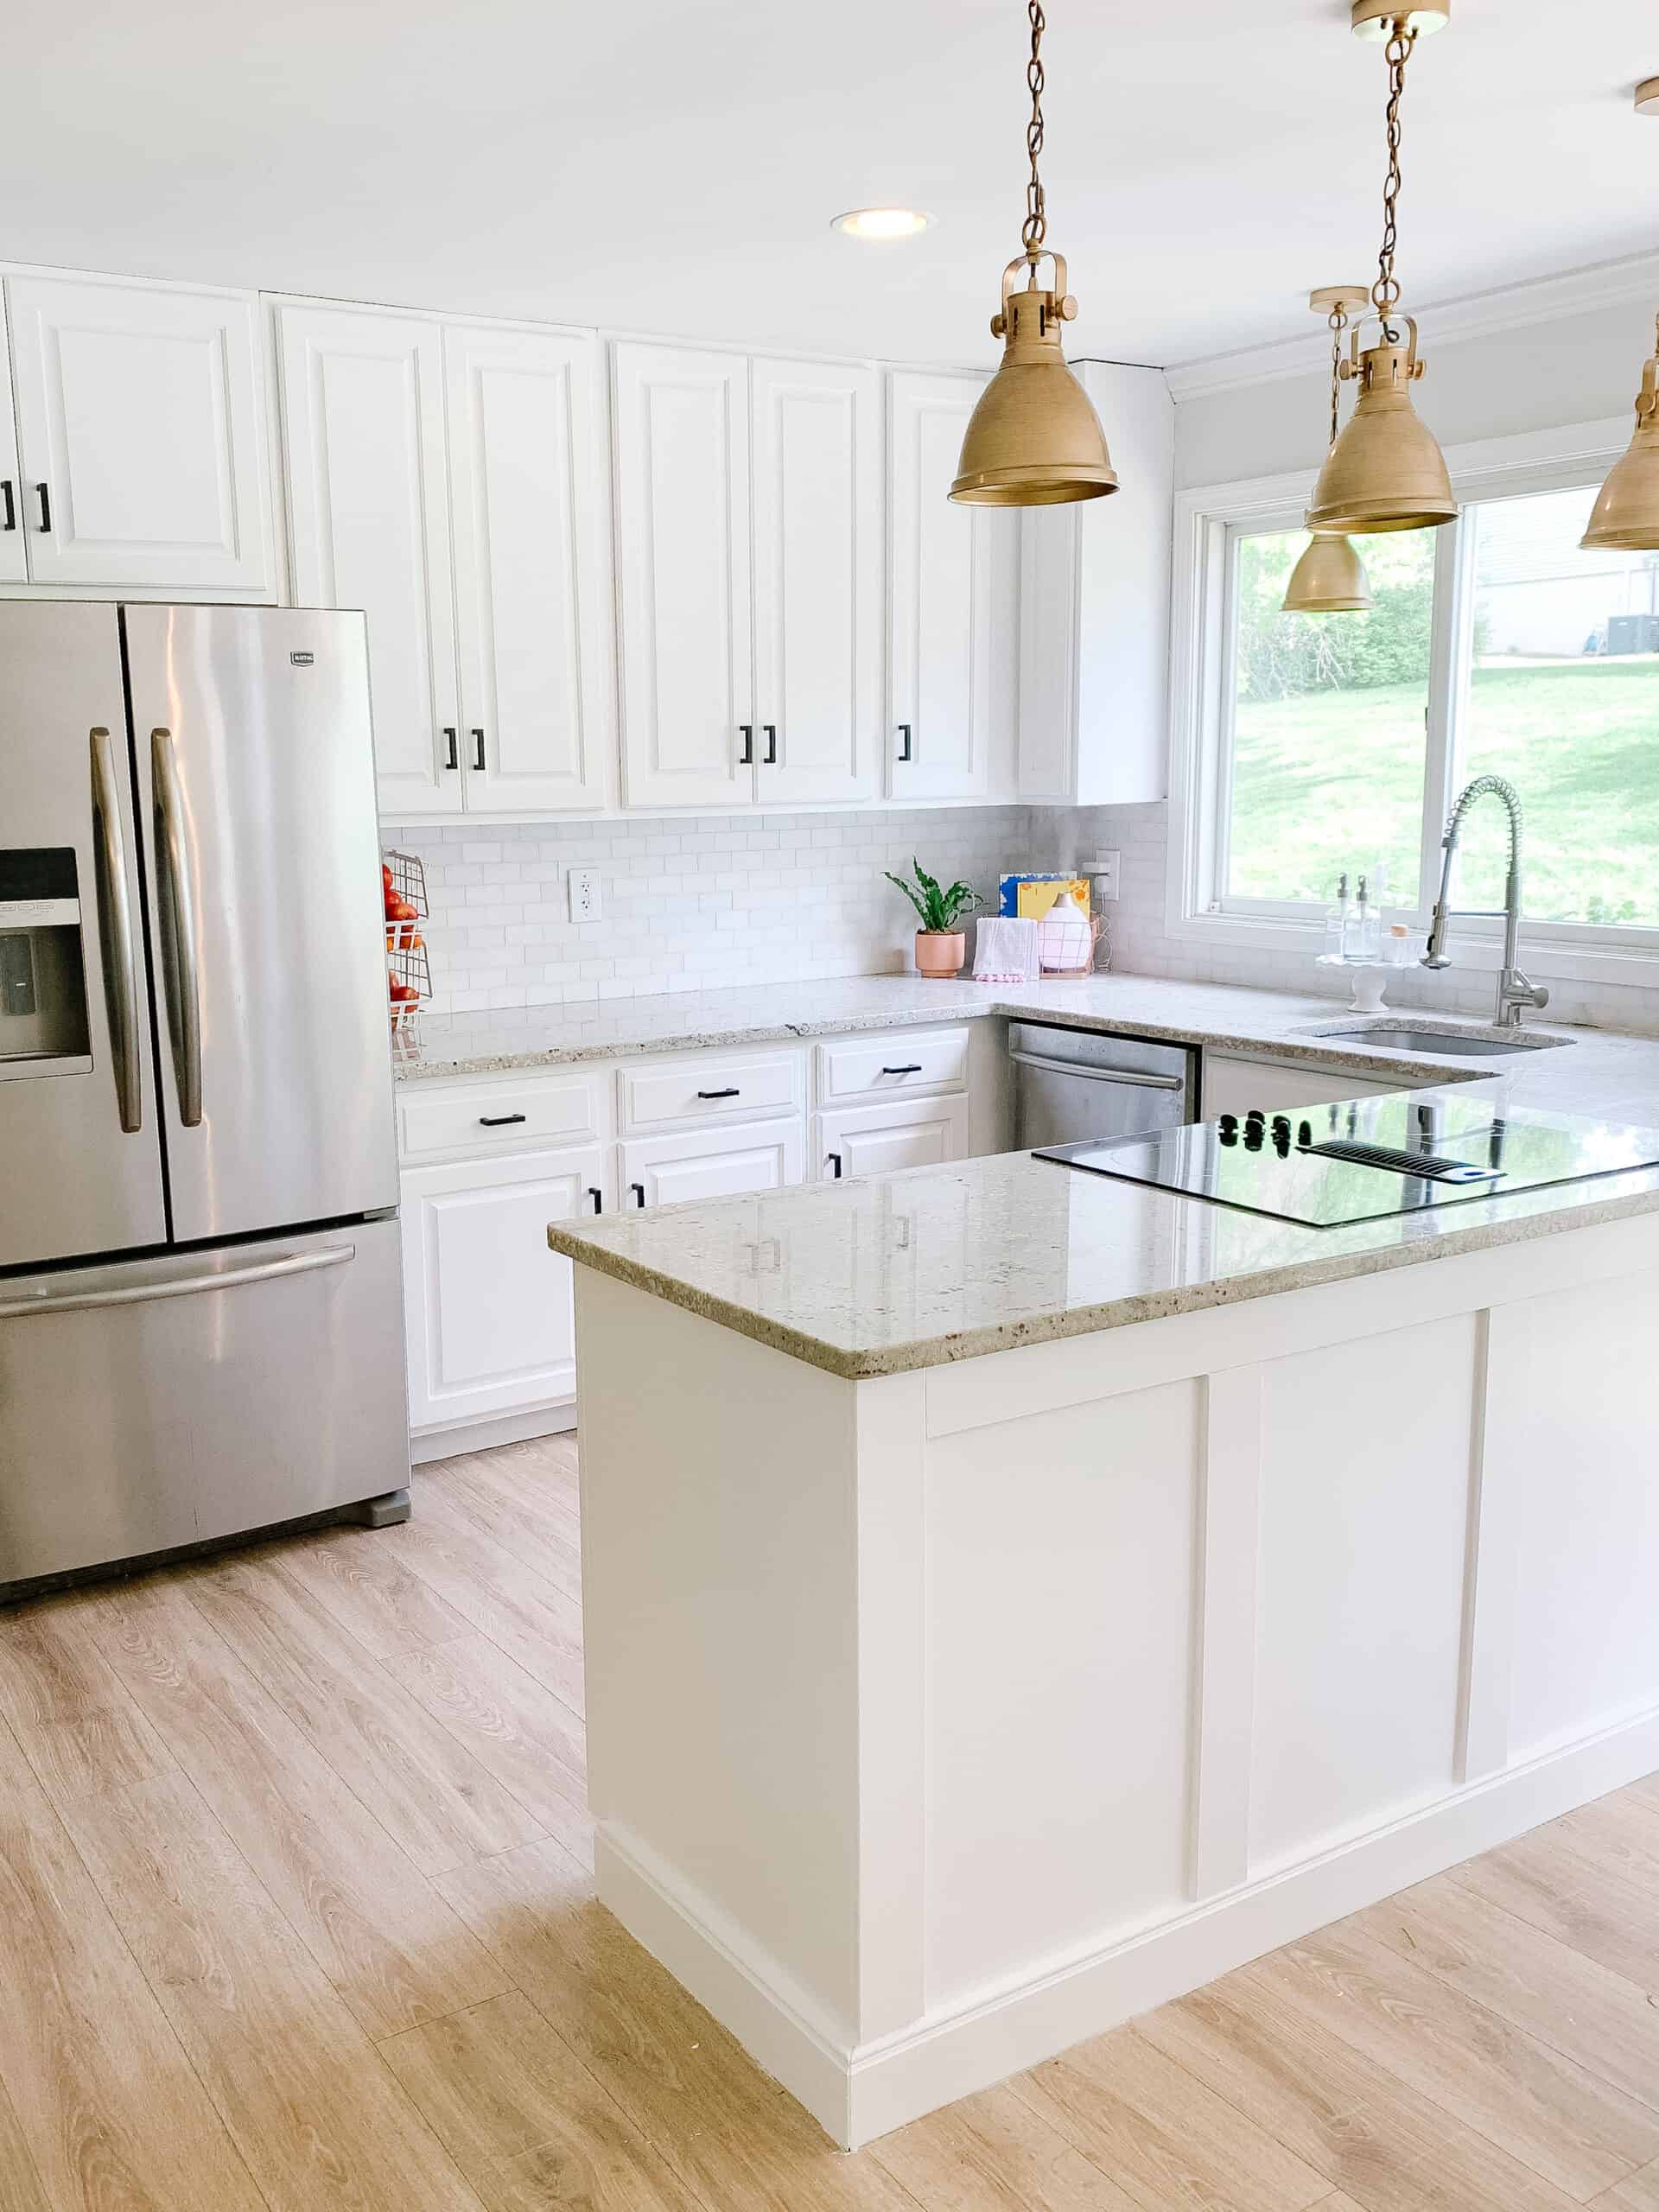
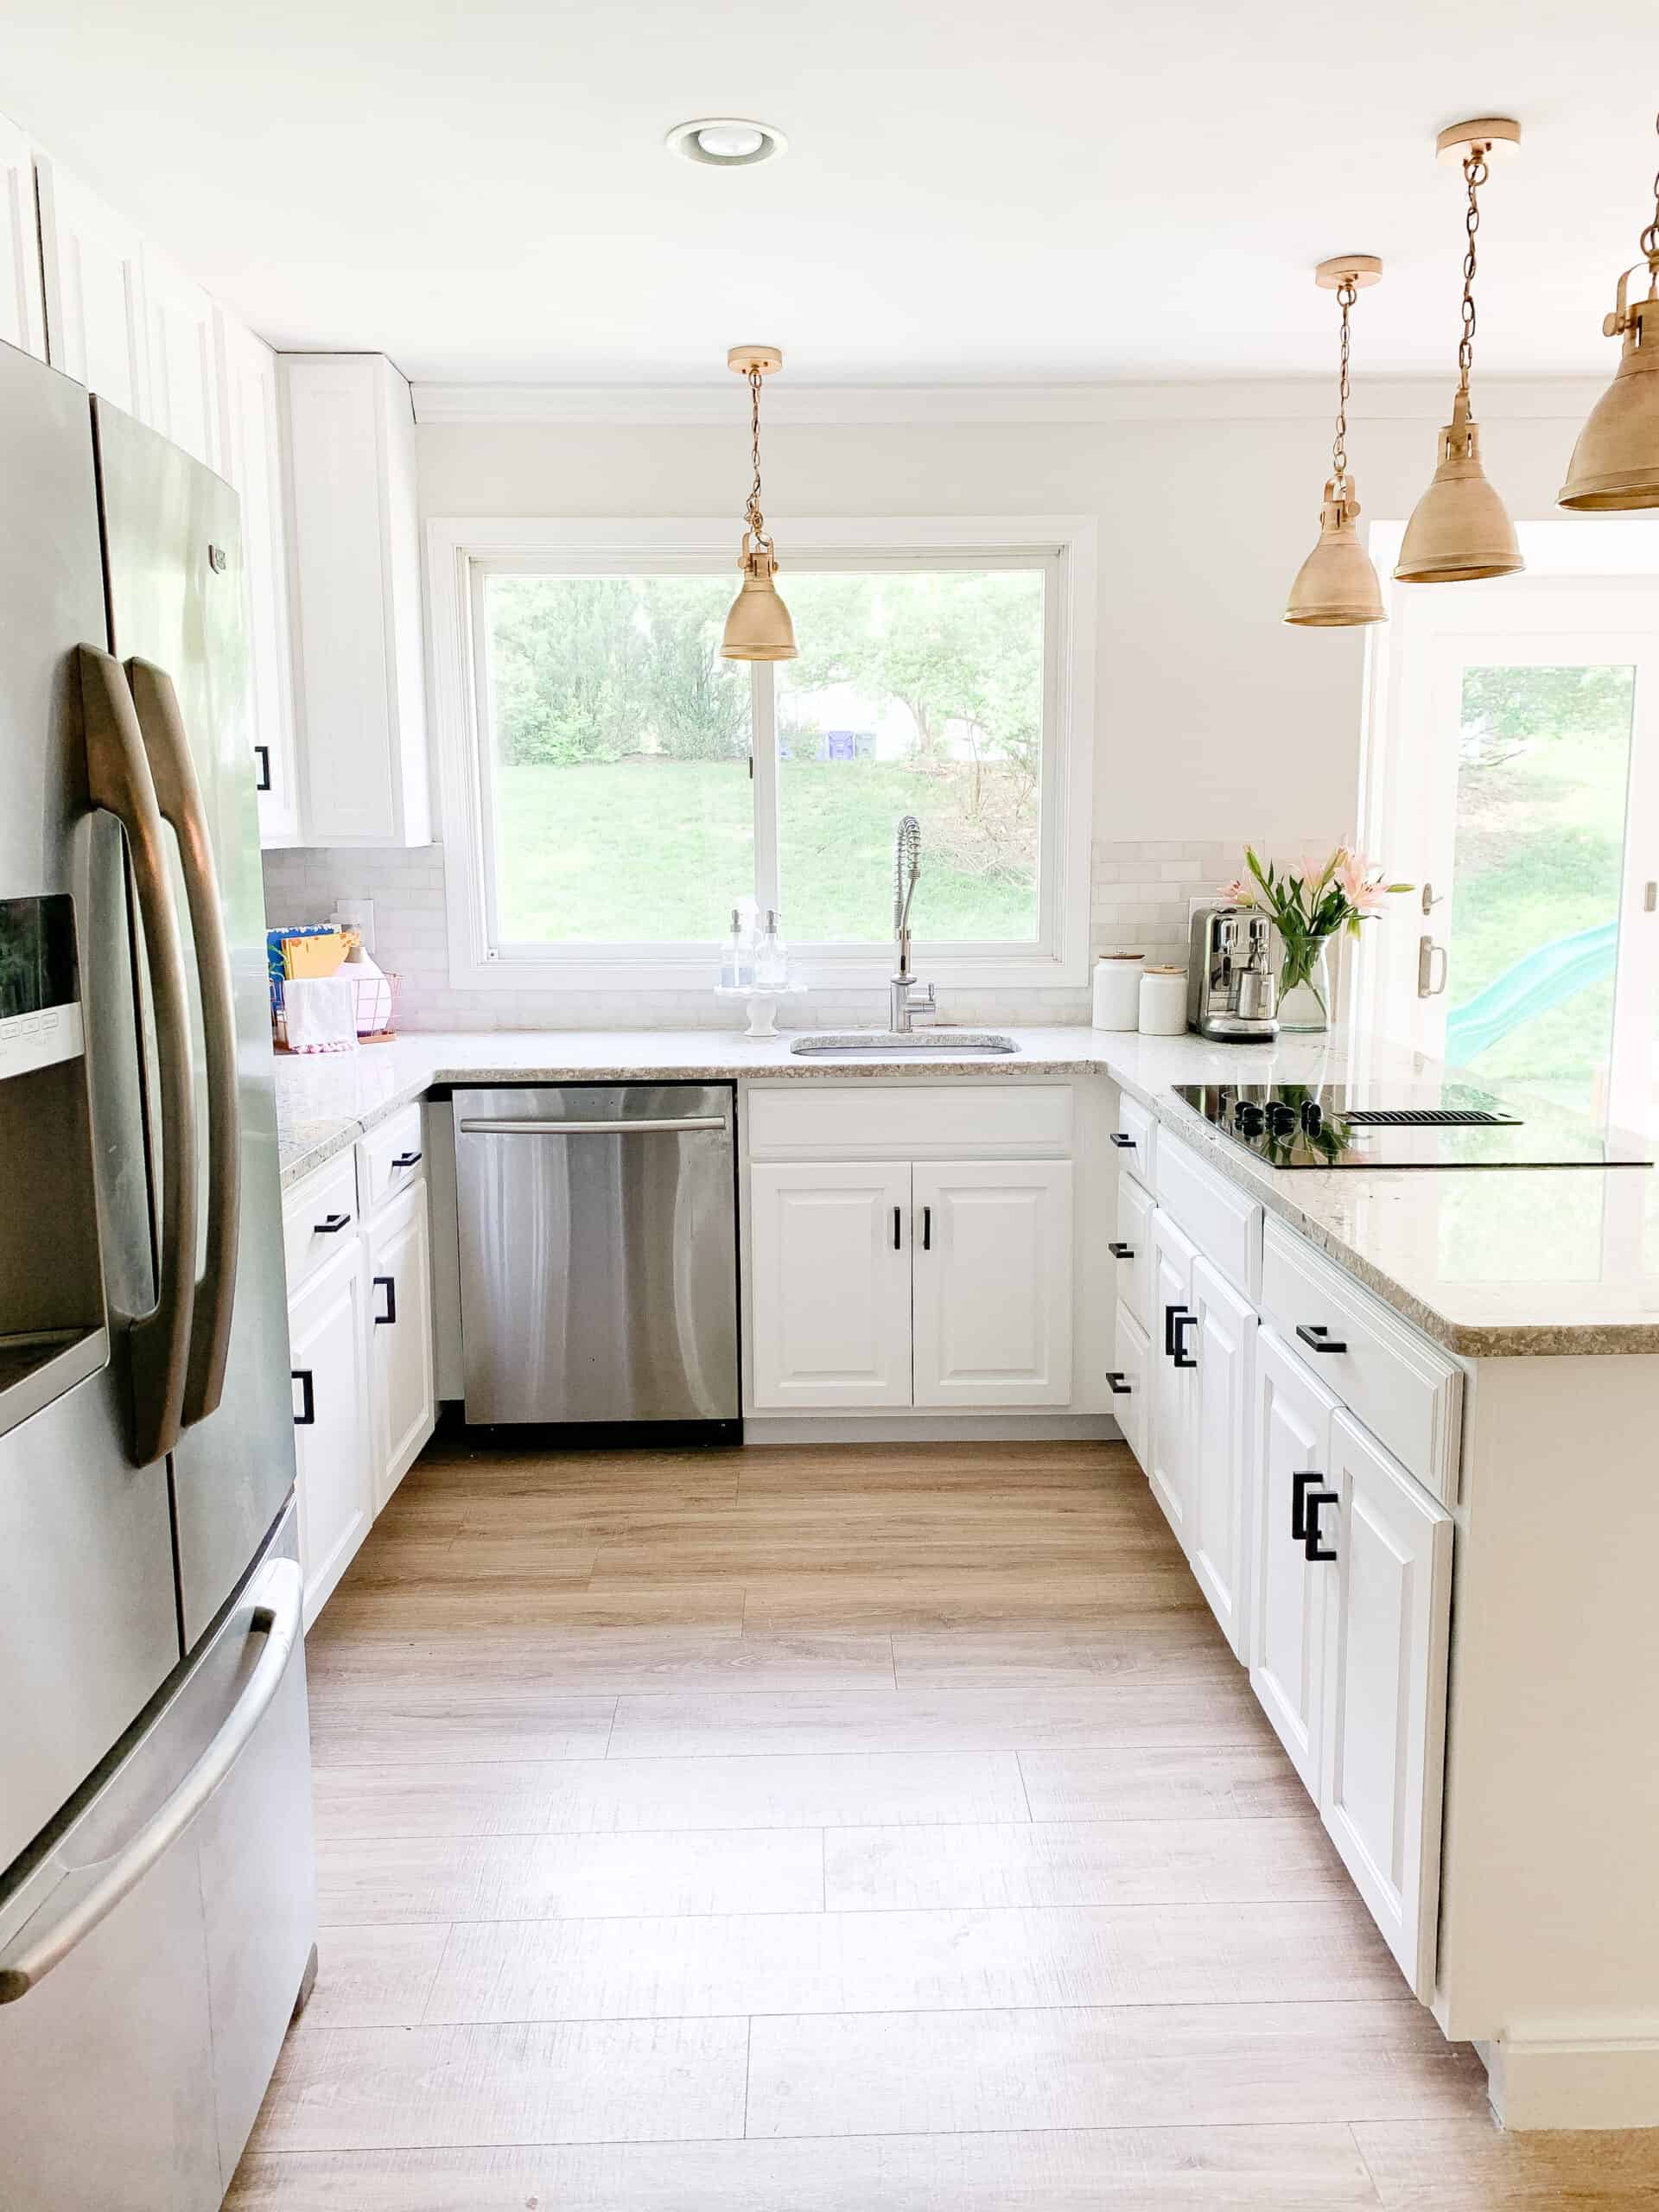
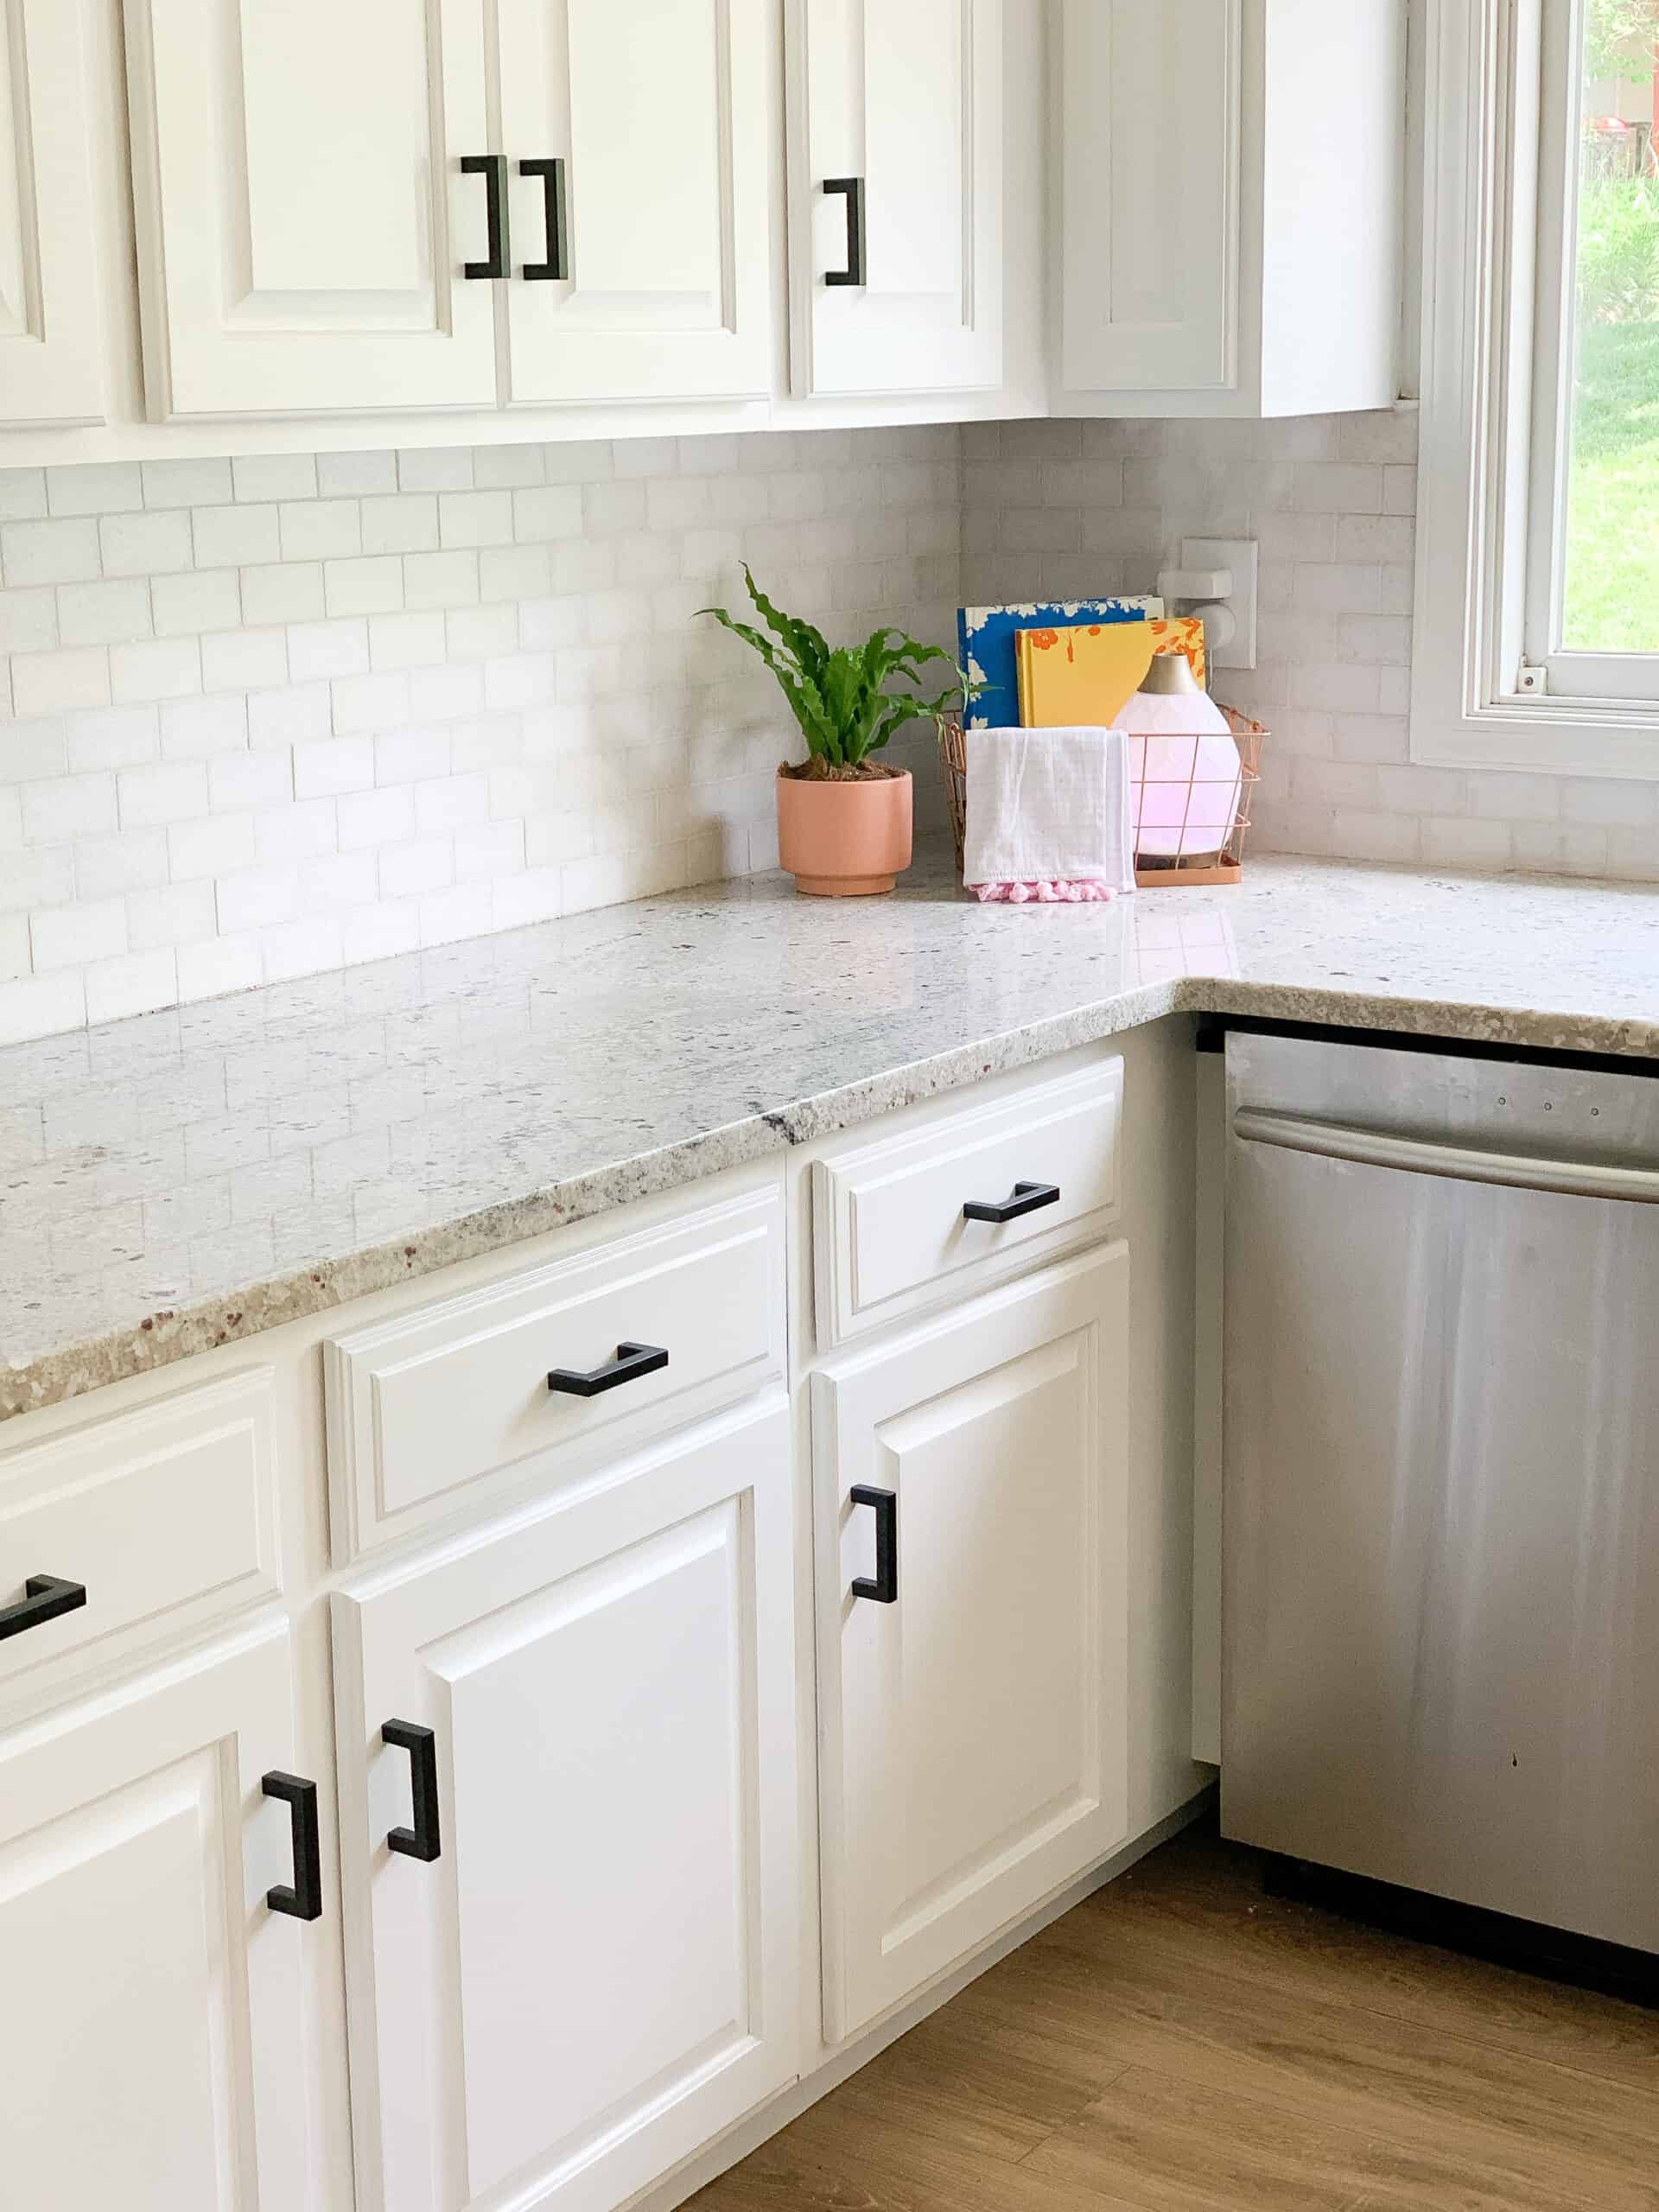
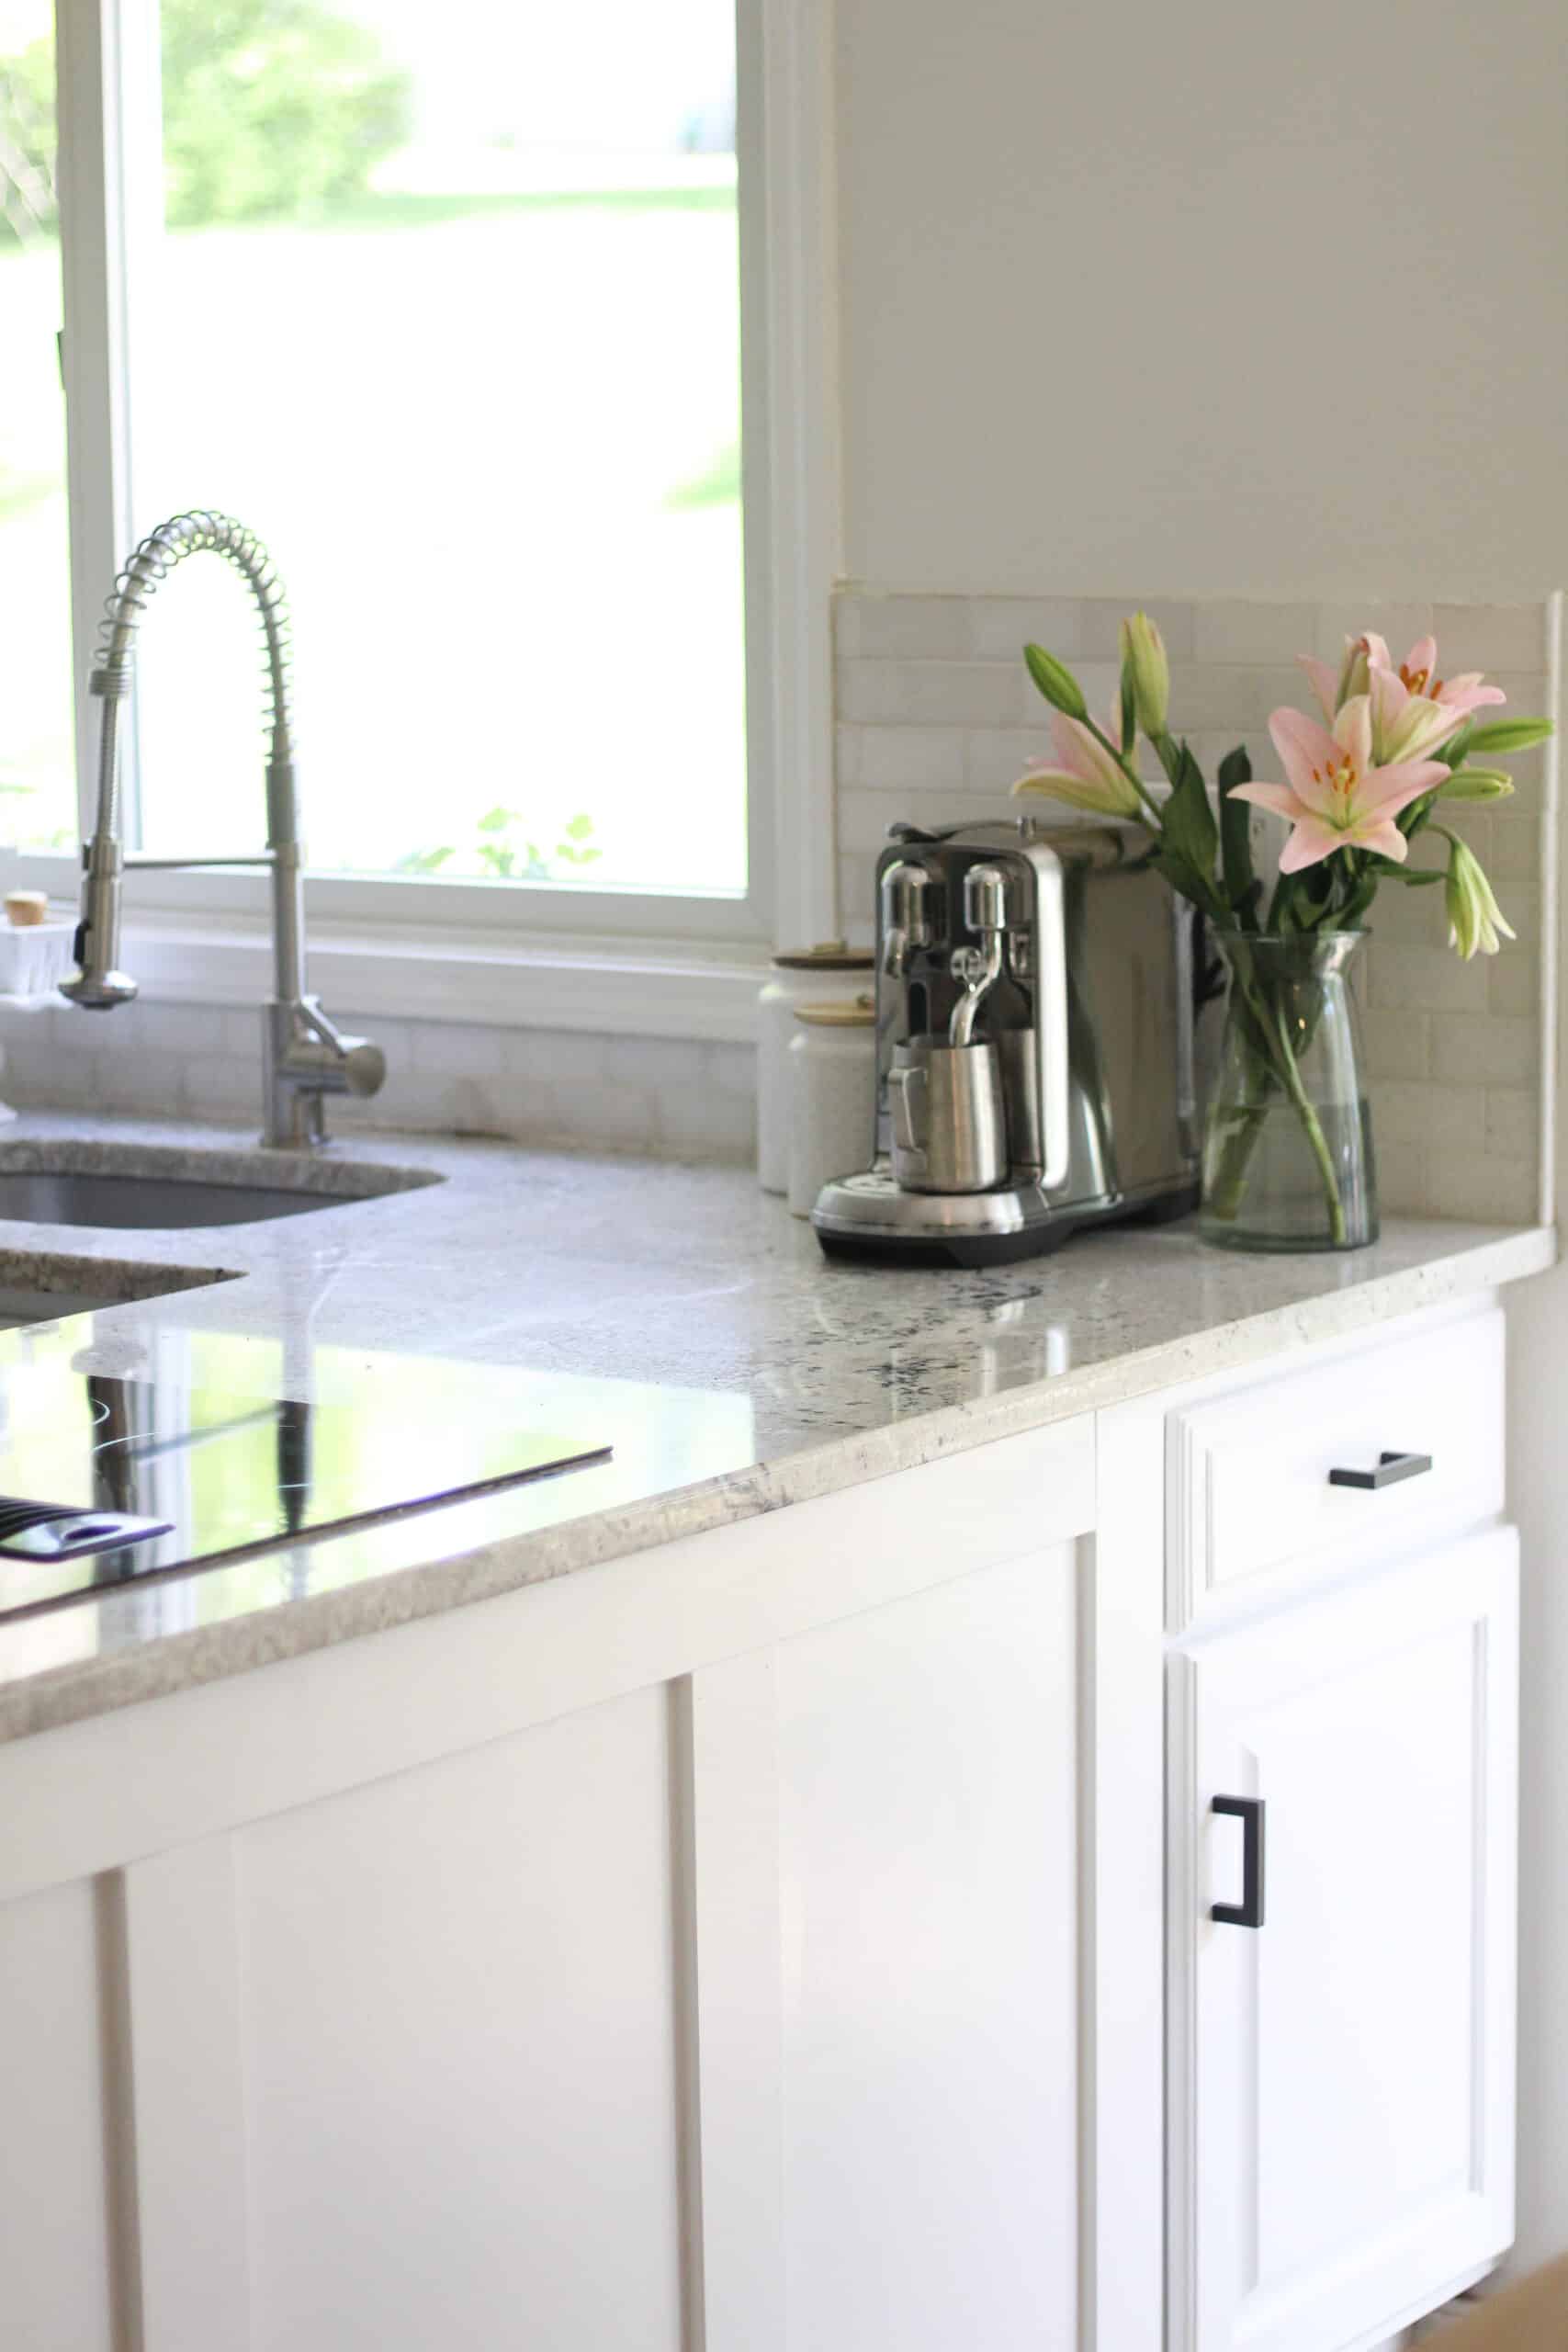
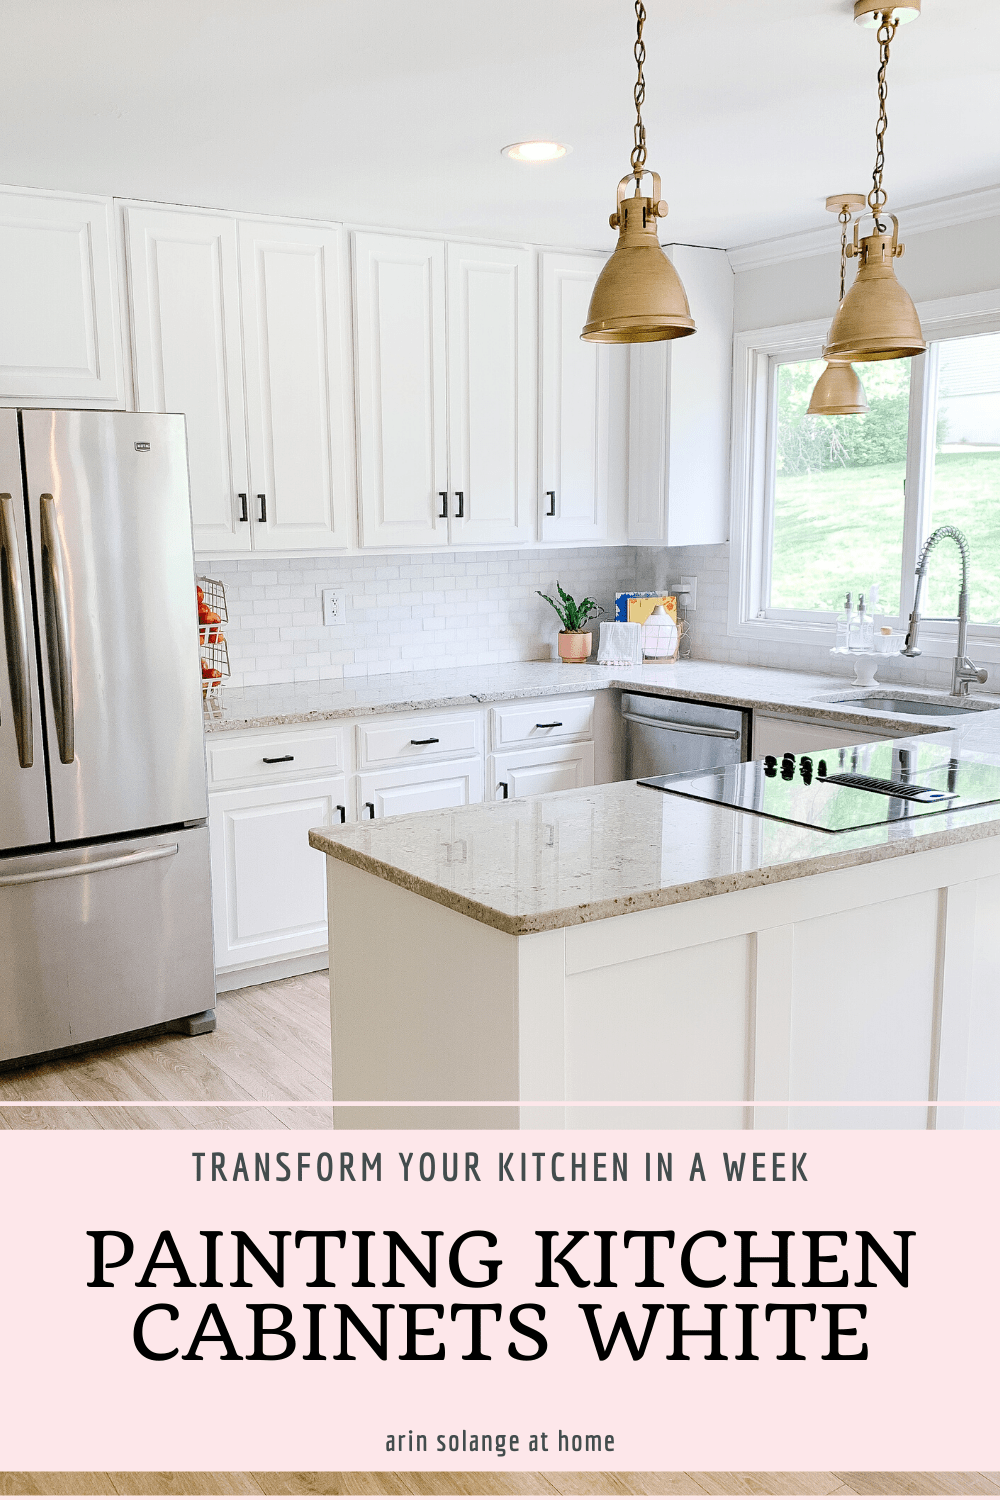
Painting kitchen cabinets white…basically the most popular thing ever right now, right? When we moved into our house 4 years ago the kitchen was okay – fairly updated, but definitely not my taste.
We have wavered back and forth on the idea of painting the cabinets white since then, but knew it would be a huge project…so nothing a little stay at home order couldn’t kick us in gear to get done!
this post contains affiliate links
Painting Kitchen Cabinets White
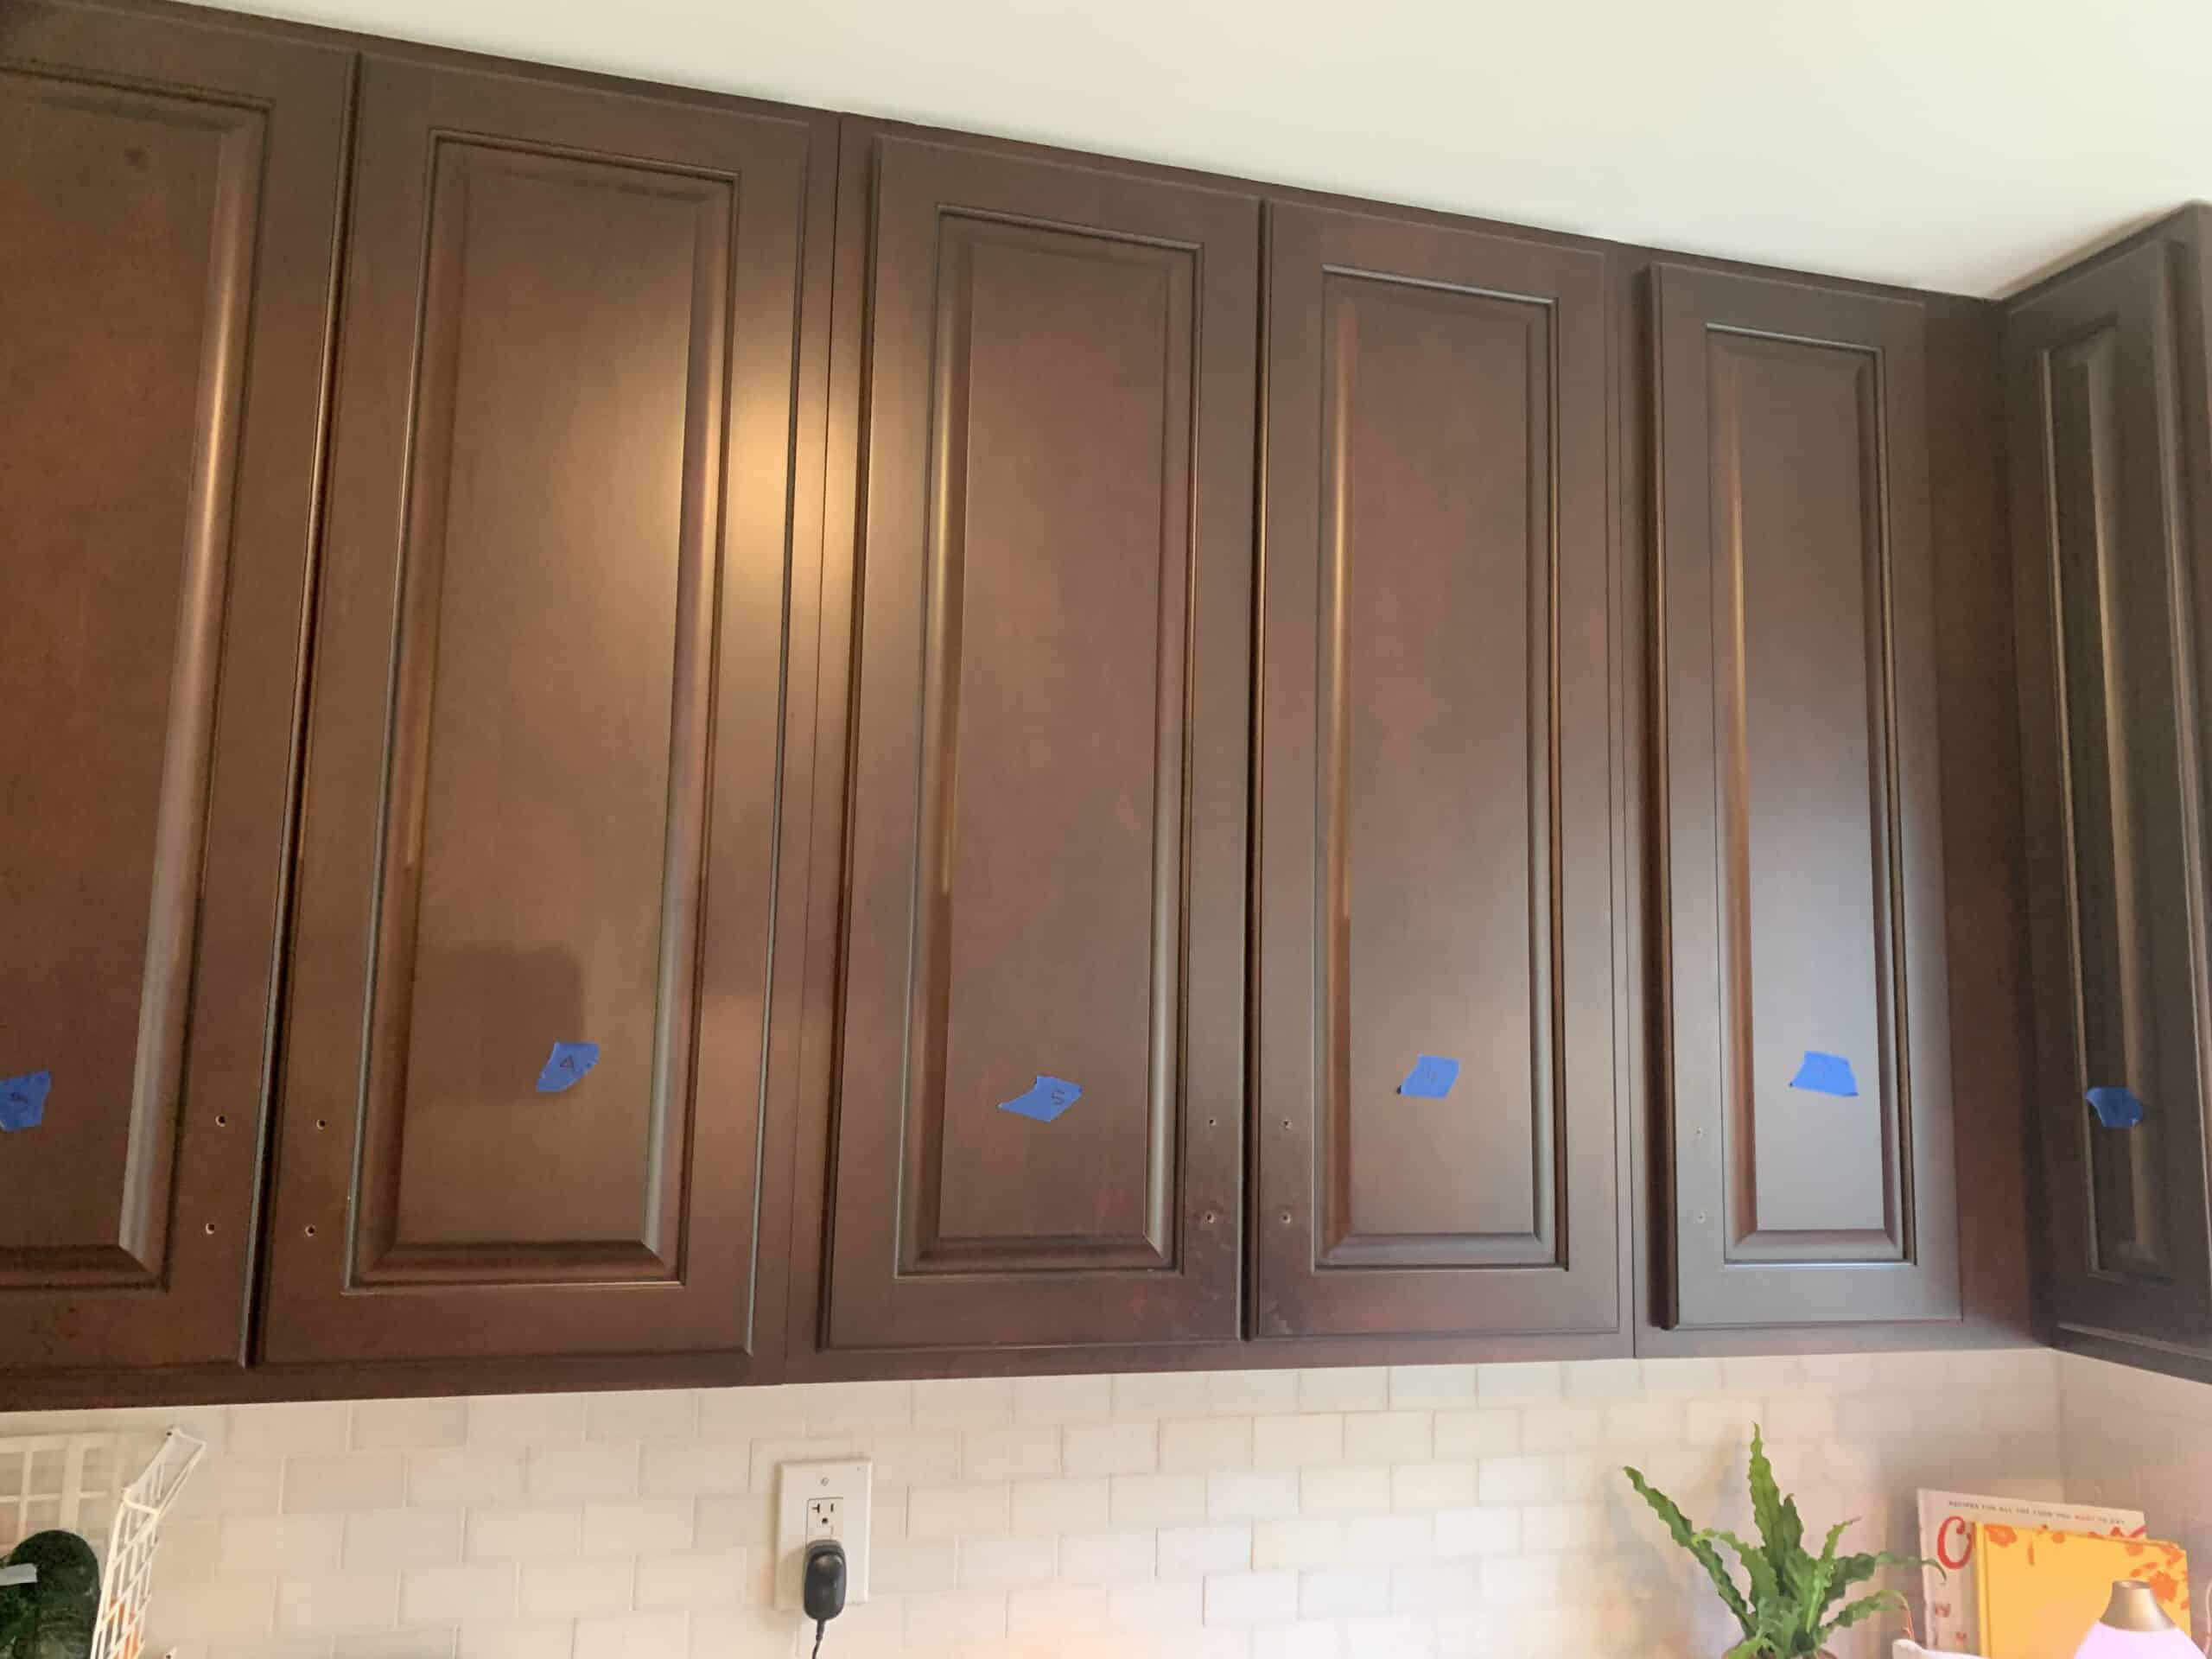
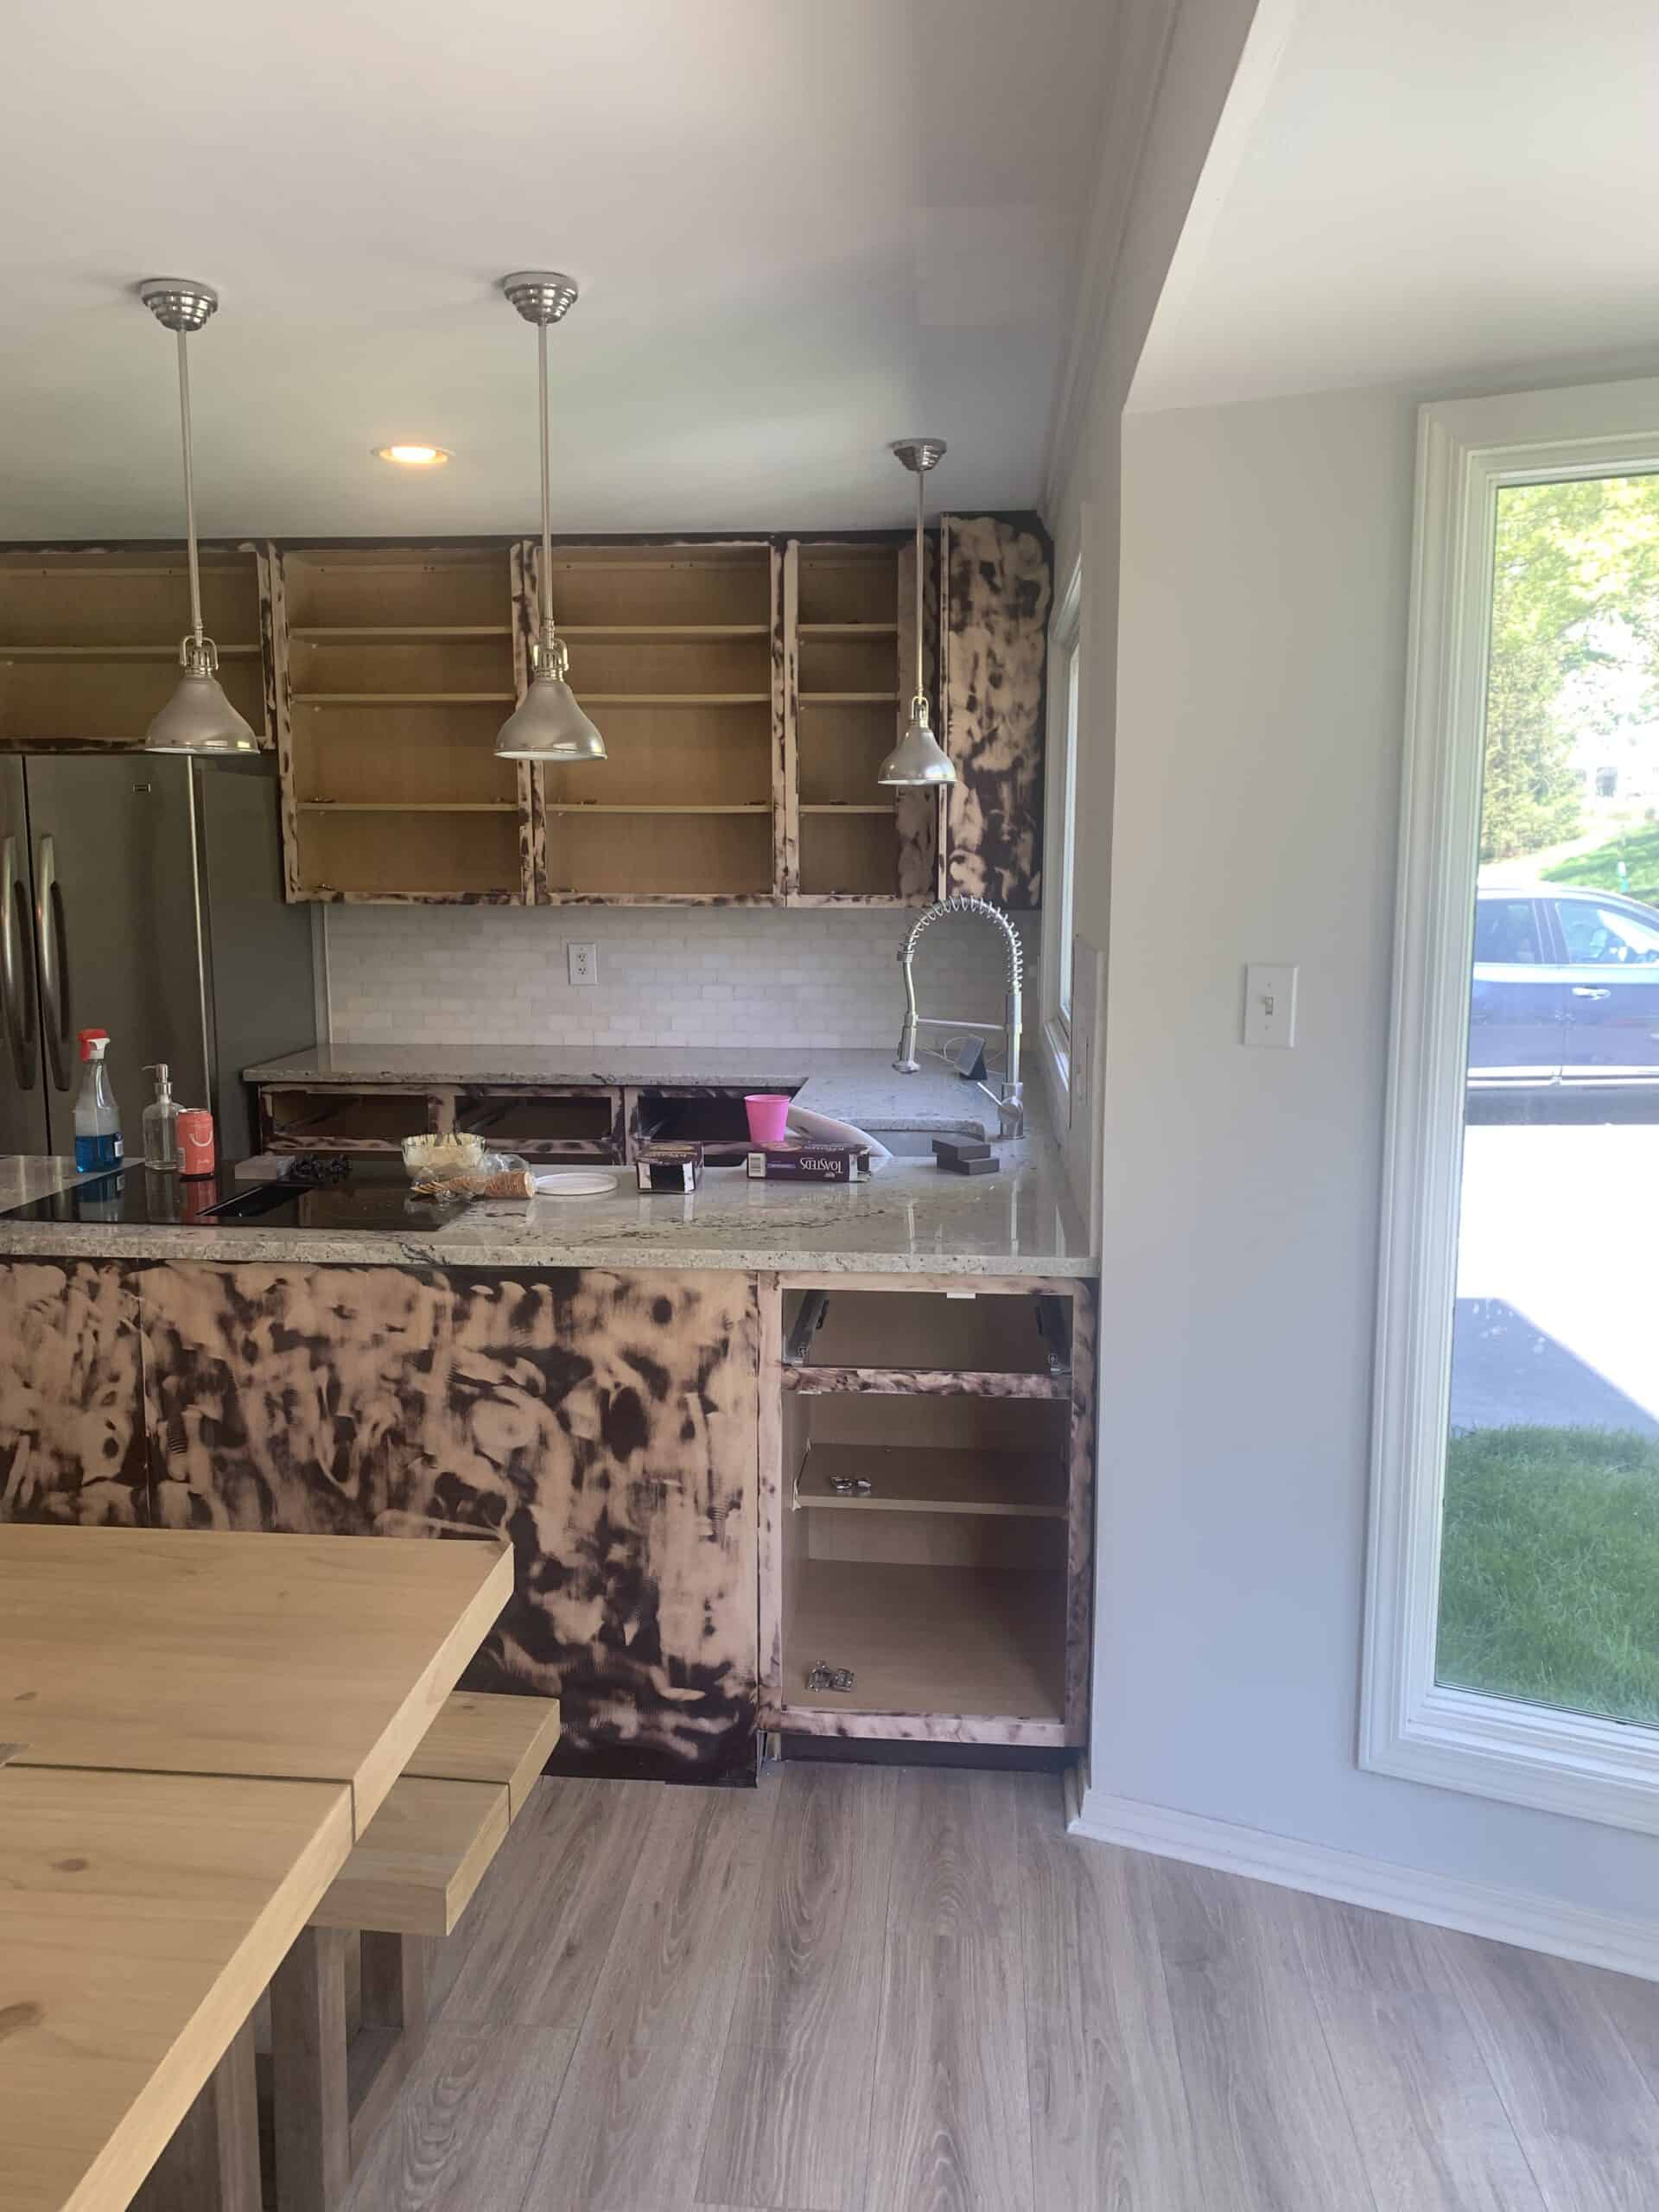
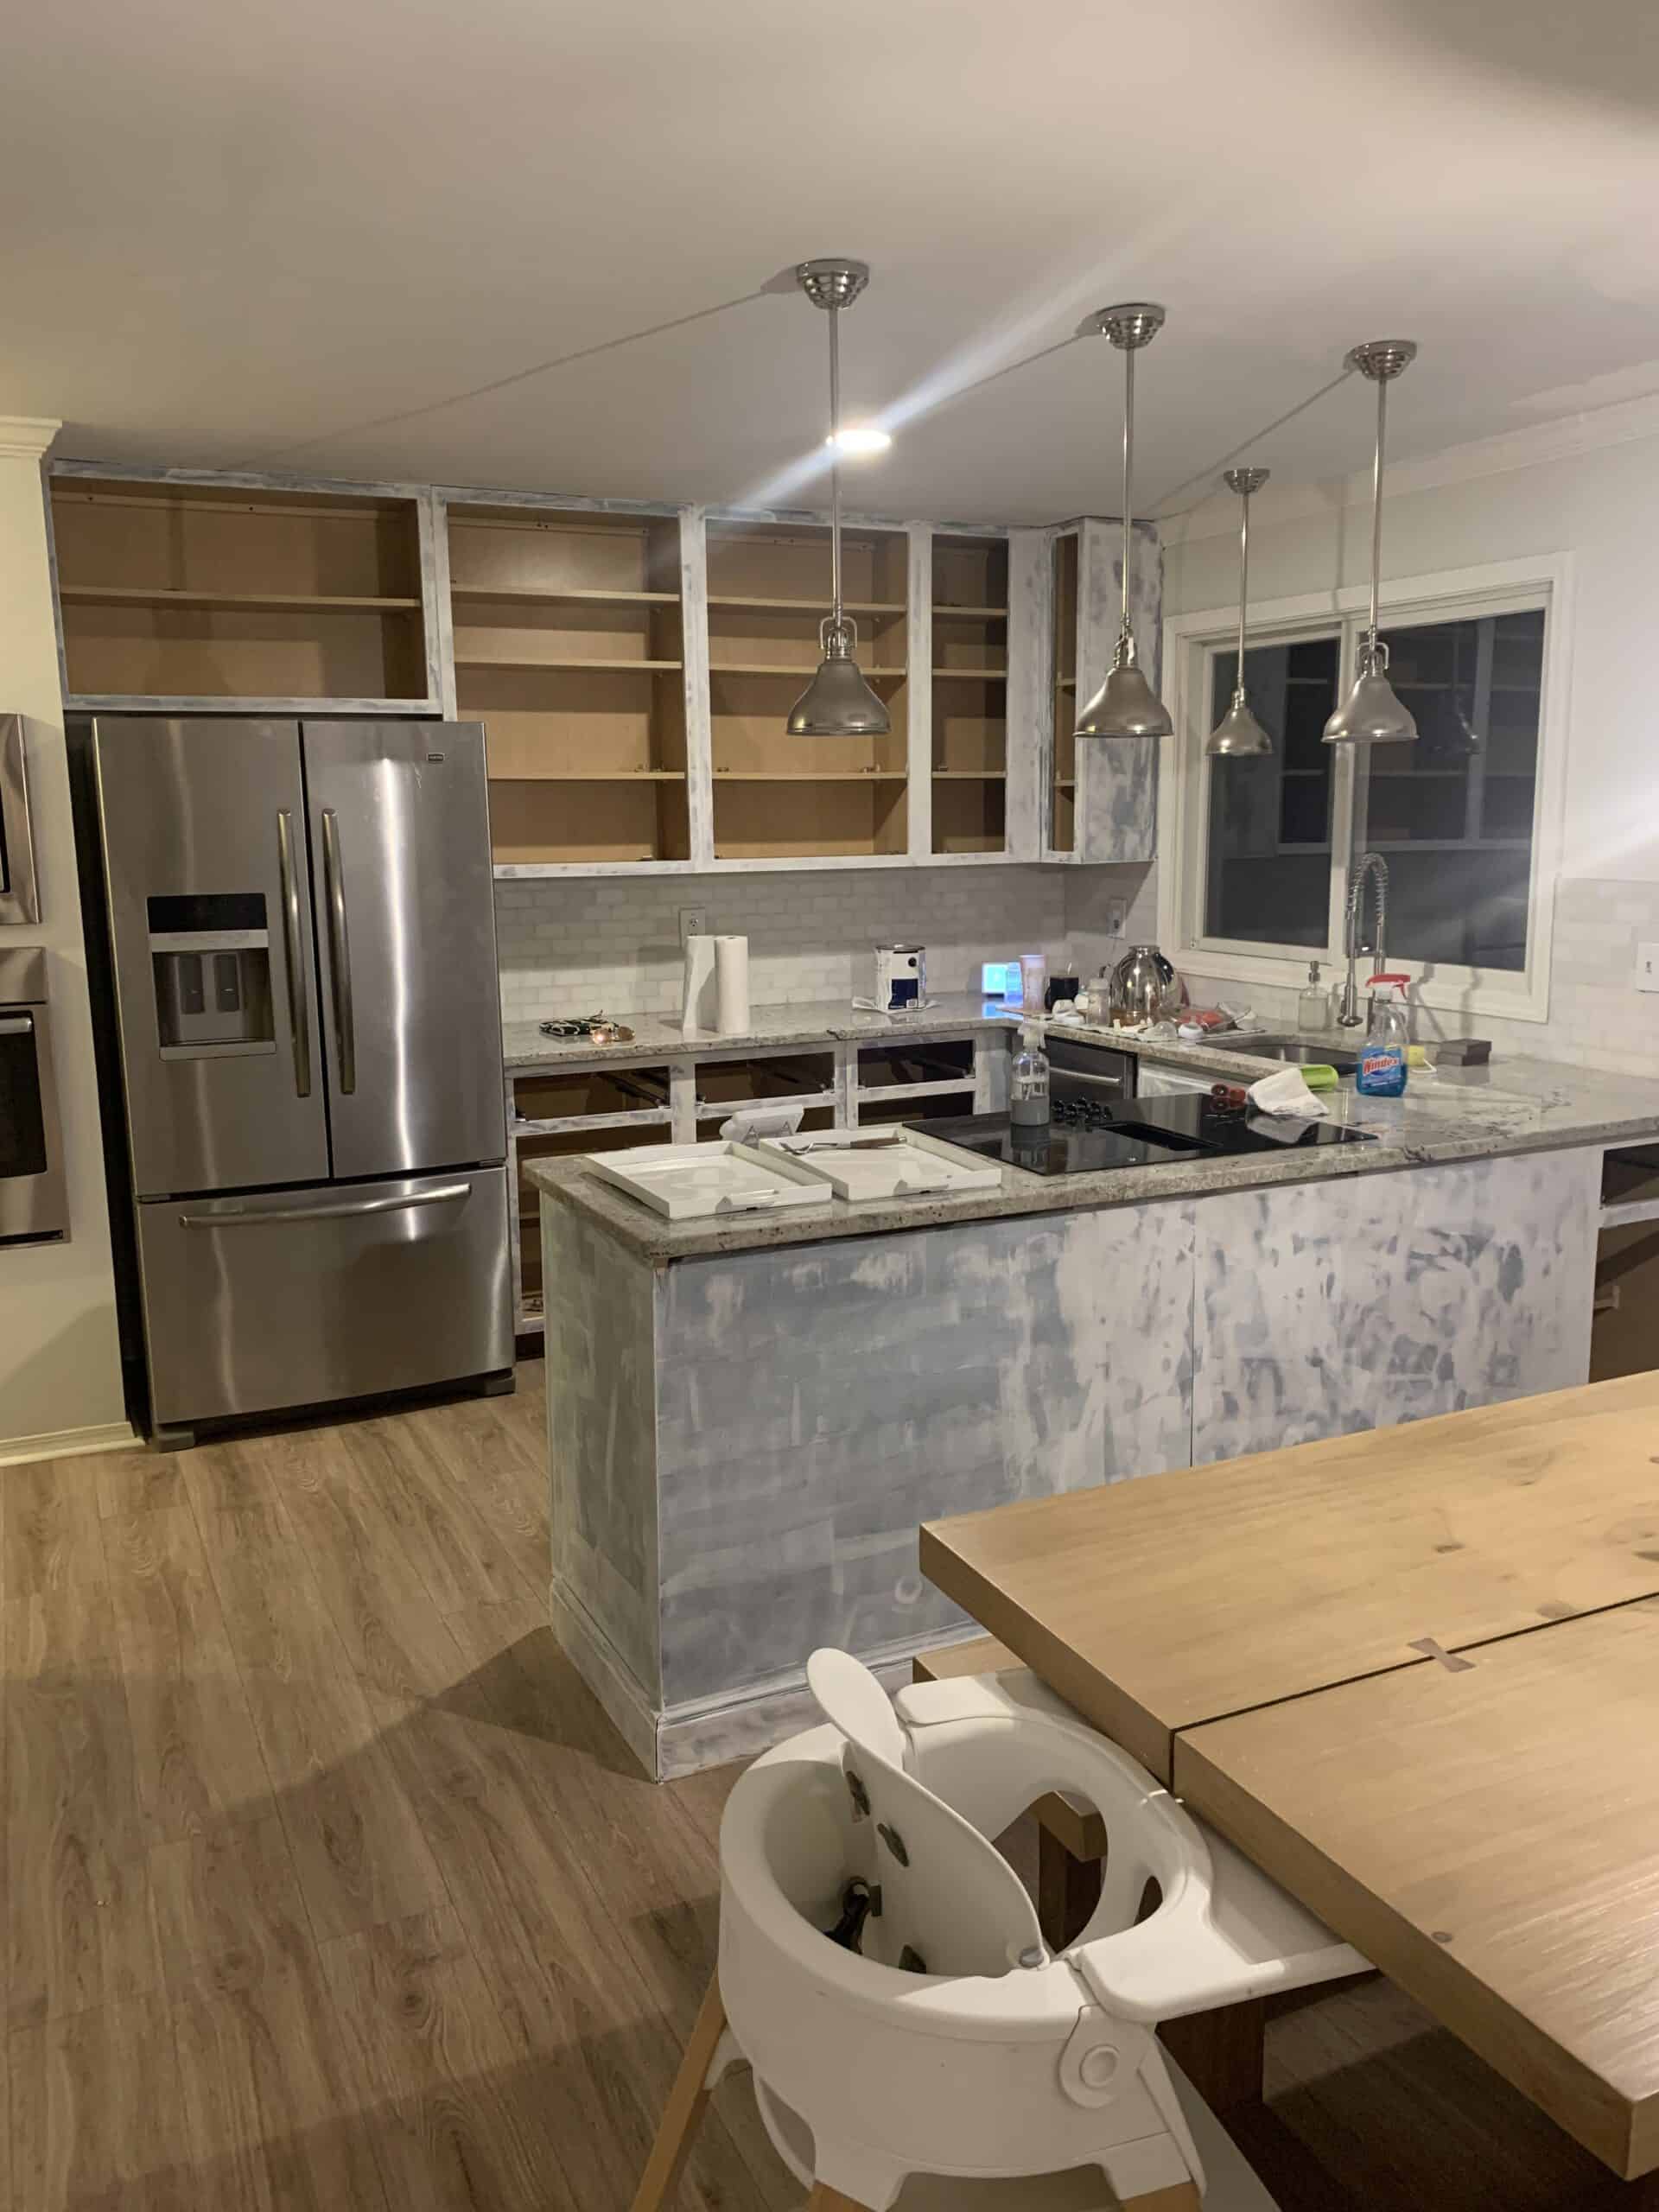
Like I said – we have lived with our dark brown (pretty, but not our taste – see the before here!) cabinets for 4 years. The previous owners to our home did an update while they lived here, so I want to say they are probably no more than 10 years old all together.
In this post I will talk about how I painted them, the choices we made when it came to lighting and hardware. Steps, tools, disclaimers – ALL OF IT.
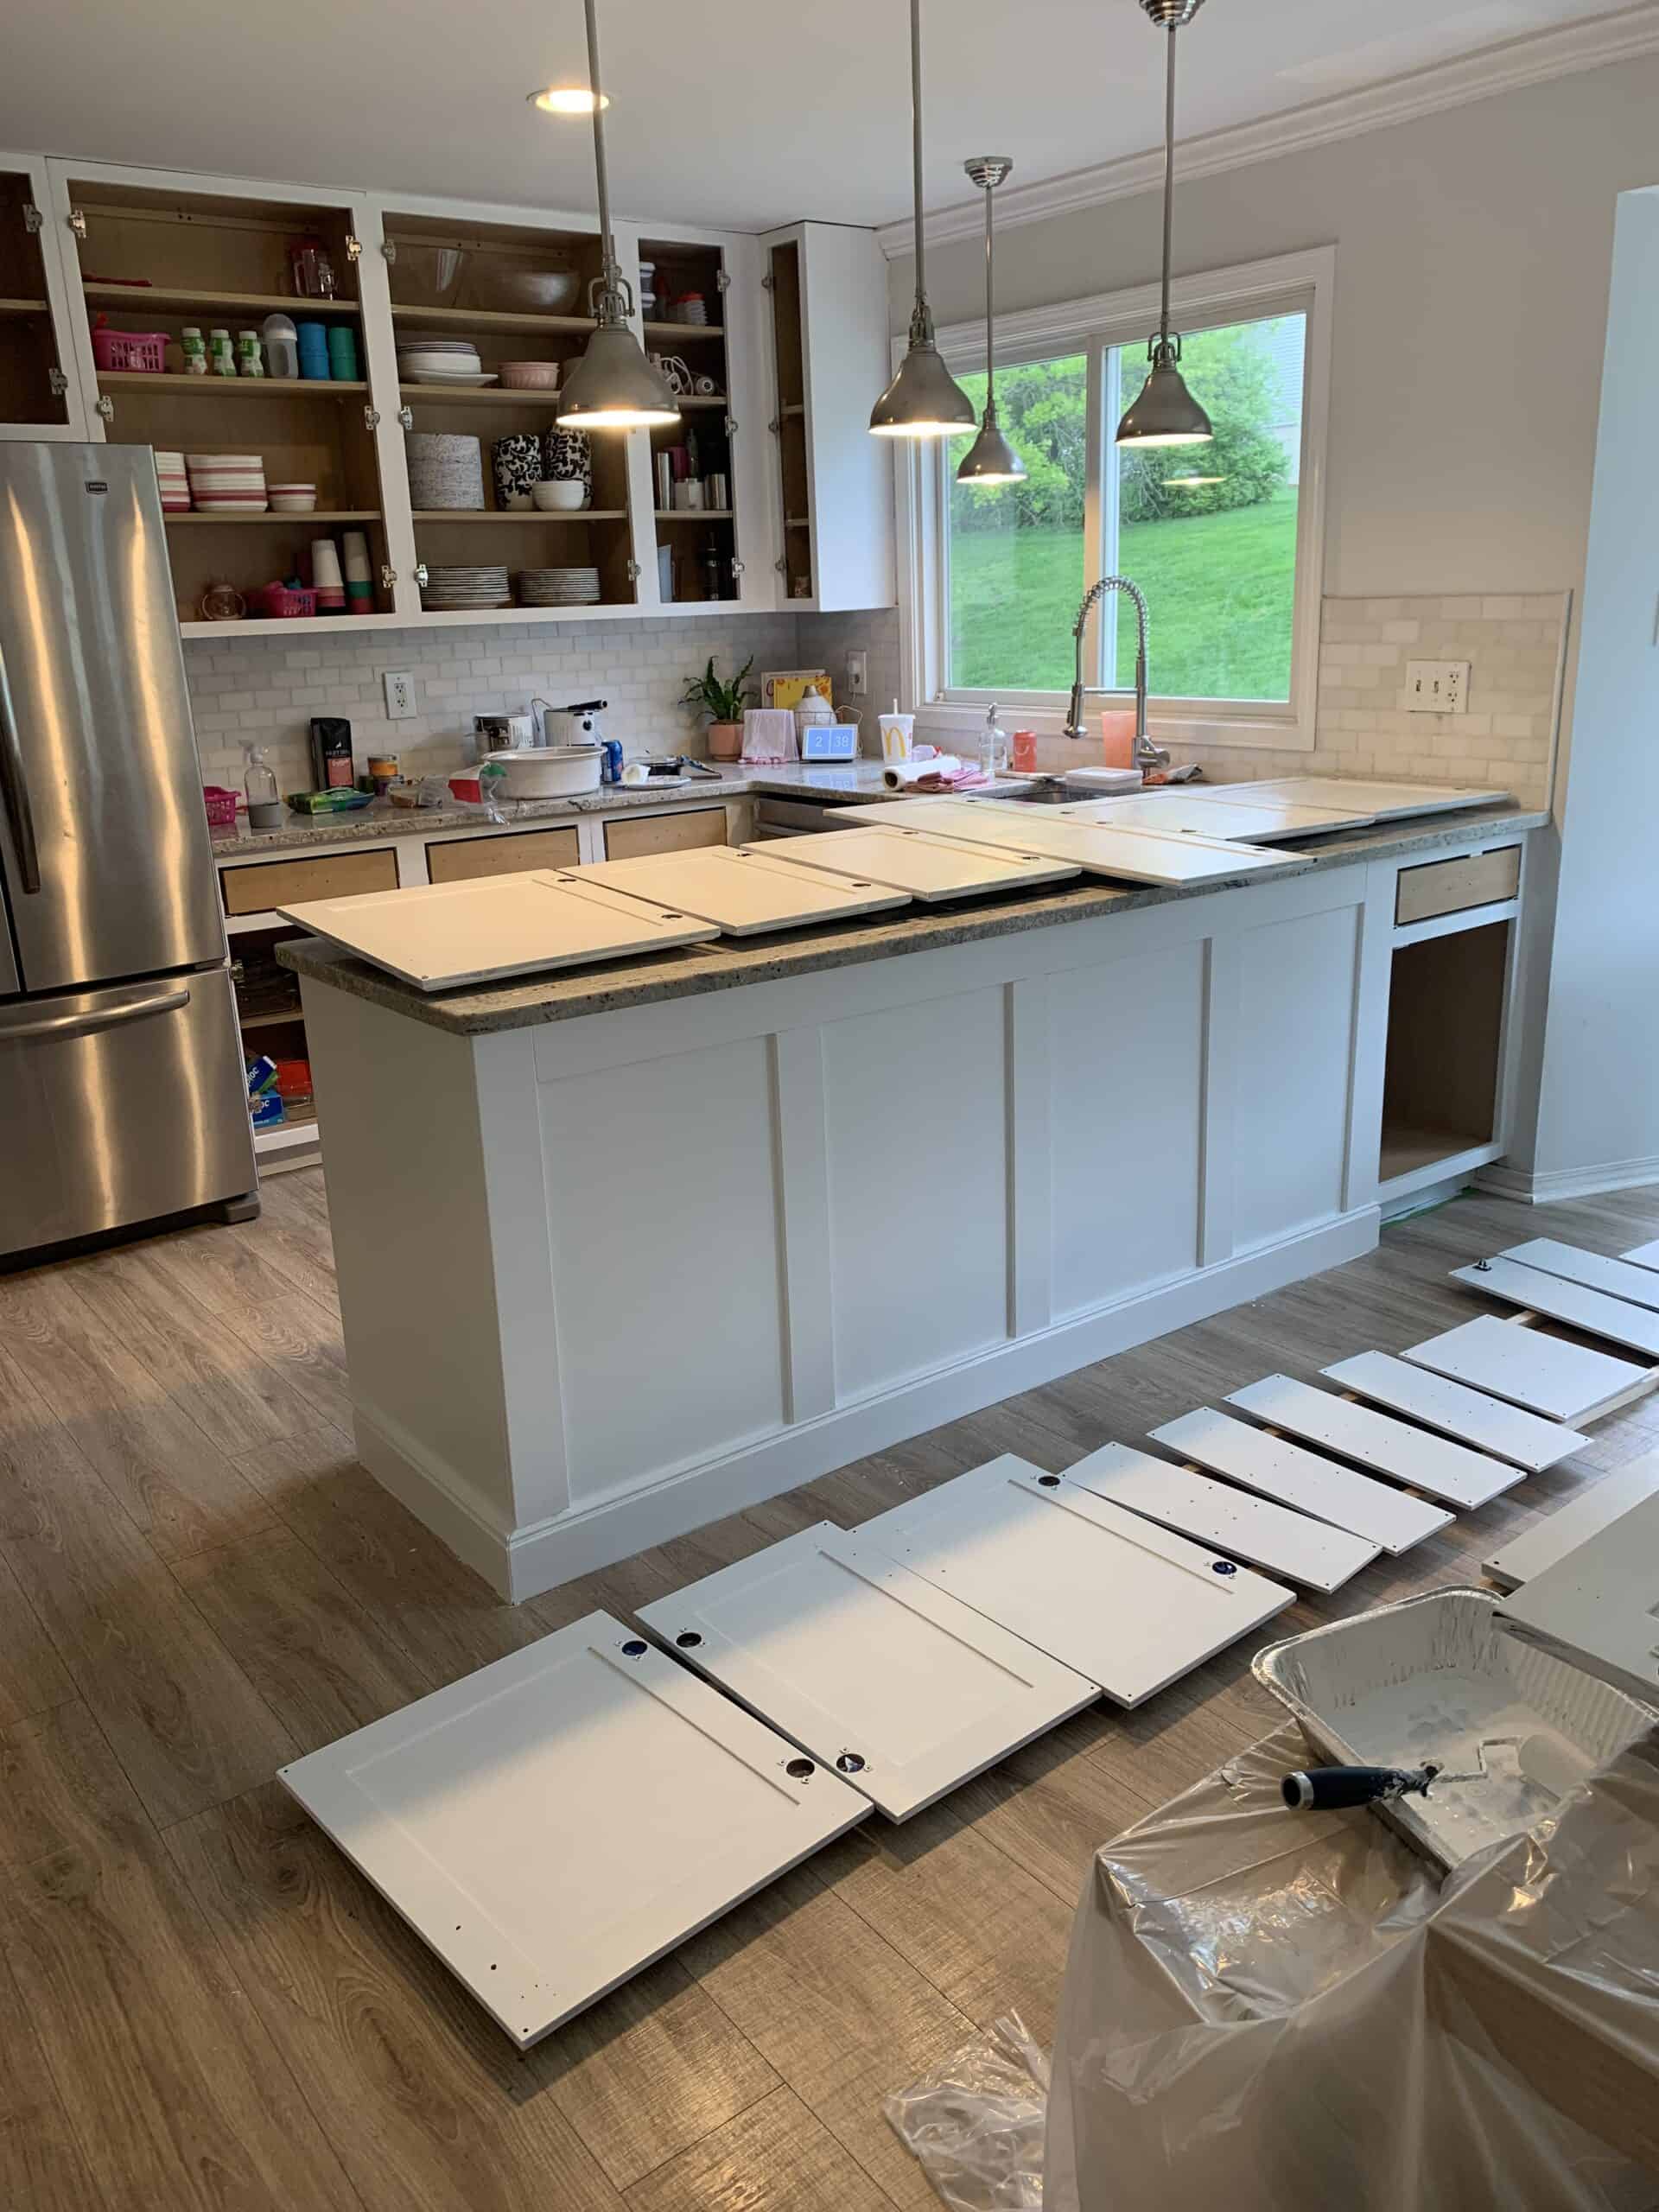
I have done so many DIY projects over the years, and I will say that hands down this one probably made the biggest impact. It was a 1 week project start to finish and honestly it was a lot of work, but also not as bad as I expected.
The fact that the kitchen was torn apart while 6 people were home 24/7 was by far worse than the actual work.
Total Time for Project: 7 days ( could be done in 4 – we spread steps out)
Total Money Spent: $200 ish – this included lumber for the option addition we did.
Printable Supplies and Steps
Below is a shortened version of your steps and supplies to make things easier – I elaborate in the post, so I suggest you read the post once through then use this card if needed while you’re working! I am hoping adding these to my posts makes creating easier for you!
Painting Kitchen Cabinets White
In 1 week we transformed our cabinets from dark brown to white, with a well researched painting technique and some small steps to make the space more modern. Check out the steps and tools we used heer!
Prep your kitchen - remove everything from inside the cabinets and all items from counter tops.
Clear Tape off the room for sanding unless you got the higher priced dustles sander (recommended).
Label all drawers and cabinets with painters tape and a number.
Remove all Cabinet doors and Drawer fronts. Leave Hardware right next to where it came off inside the cabinet (you want the same hinges in the same spots).
Sand all Cabinets doors and drawers.
If you are adding the detail to your counters like we did this is where you will then insert that step.
Clean all cabinets WELL
Sand all Cabinet doors and drawer fronts.
Prime - 1 or 2 coats of primer using a paint brush and a foam roller. Sand lightly between the 2 coats (if you do 2). I personally did all the cabinets first leaving doors and drawers. This allowed me to reload my cabinets. For the doors do the BACK first and use your painters triangles so you can flip sooner.
Lightly Sand and clean WELL. (using FINE grit sanding block)
Apply first coat of Paint
Lightly sand and clean WELL. (using FINE grit sanding block)
Apply second coat - you may have to sand lightly and do a third coat, or you might be fine with the 2.
Reassemble.
Notes
This is not overly hard, but it a long few days with work and your home torn up. There is more detail in this post if you need more clarificiation.
Supplies
Before you get started you need to get all of your supplies. I will list exactly what we got and WHY.
PAINT – I went with Behr Cabinet paint from Home Depot. We chose the color Bit of Sugar, and in my opinion it is a perfect color. We personally purchased 3 gallons but ONLY NEEDED 1!!!
PRIMER – we got 1 gallon of this primer and it was amazing – we went with a higher quality primer and it was worth the price in my opinion.
SANDER – I recommend a disk sander for this project. The amount of time that will save you is priceless. We have had this one for years and it is great! However – If I did this again I would have invested in this one for less mess.
SANDING BLOCKS – Also grab a pack of these – you will need them several times during the project!
FOAM ROLLERS – HIGH DENSITY is key – get a good sized pack of these
OPTIONAL – PAINT SPRAYER. I have done cabinets both ways. for this project I didn’t spray, but I have before, and it does save a lot of headache. The sprayer we owned at the time was THIS ONE. We got a new one that I hate, so I highly recommend that one, and will walk you through either method when it comes to painting.
There are a couple of things you need to think about before getting started – one of those things is what hardware are you going to use? The same, or are you changing it?
If you are sticking with the same no big deal. If you are changing them you either need the exact same size or to fill your holes before you get started!
Are there any other changes you want to make? We personally decided to get rid of one cabinet, so we took that down before we got started – I figured now was the time to make that change because I didn’t want to paint the cabinet then decide to do that later!
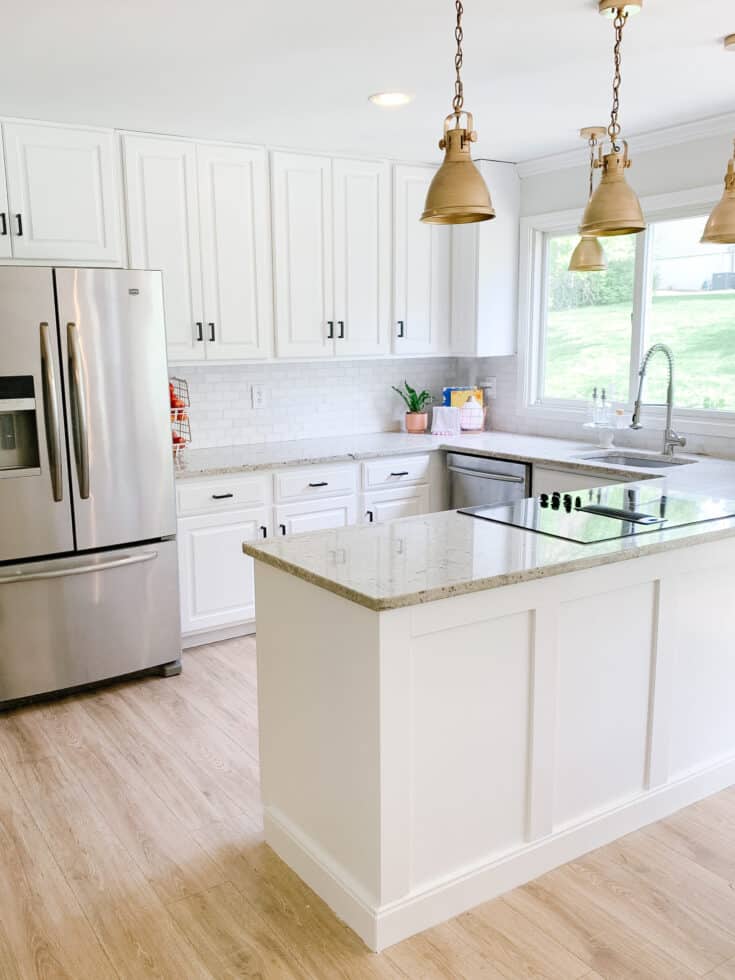
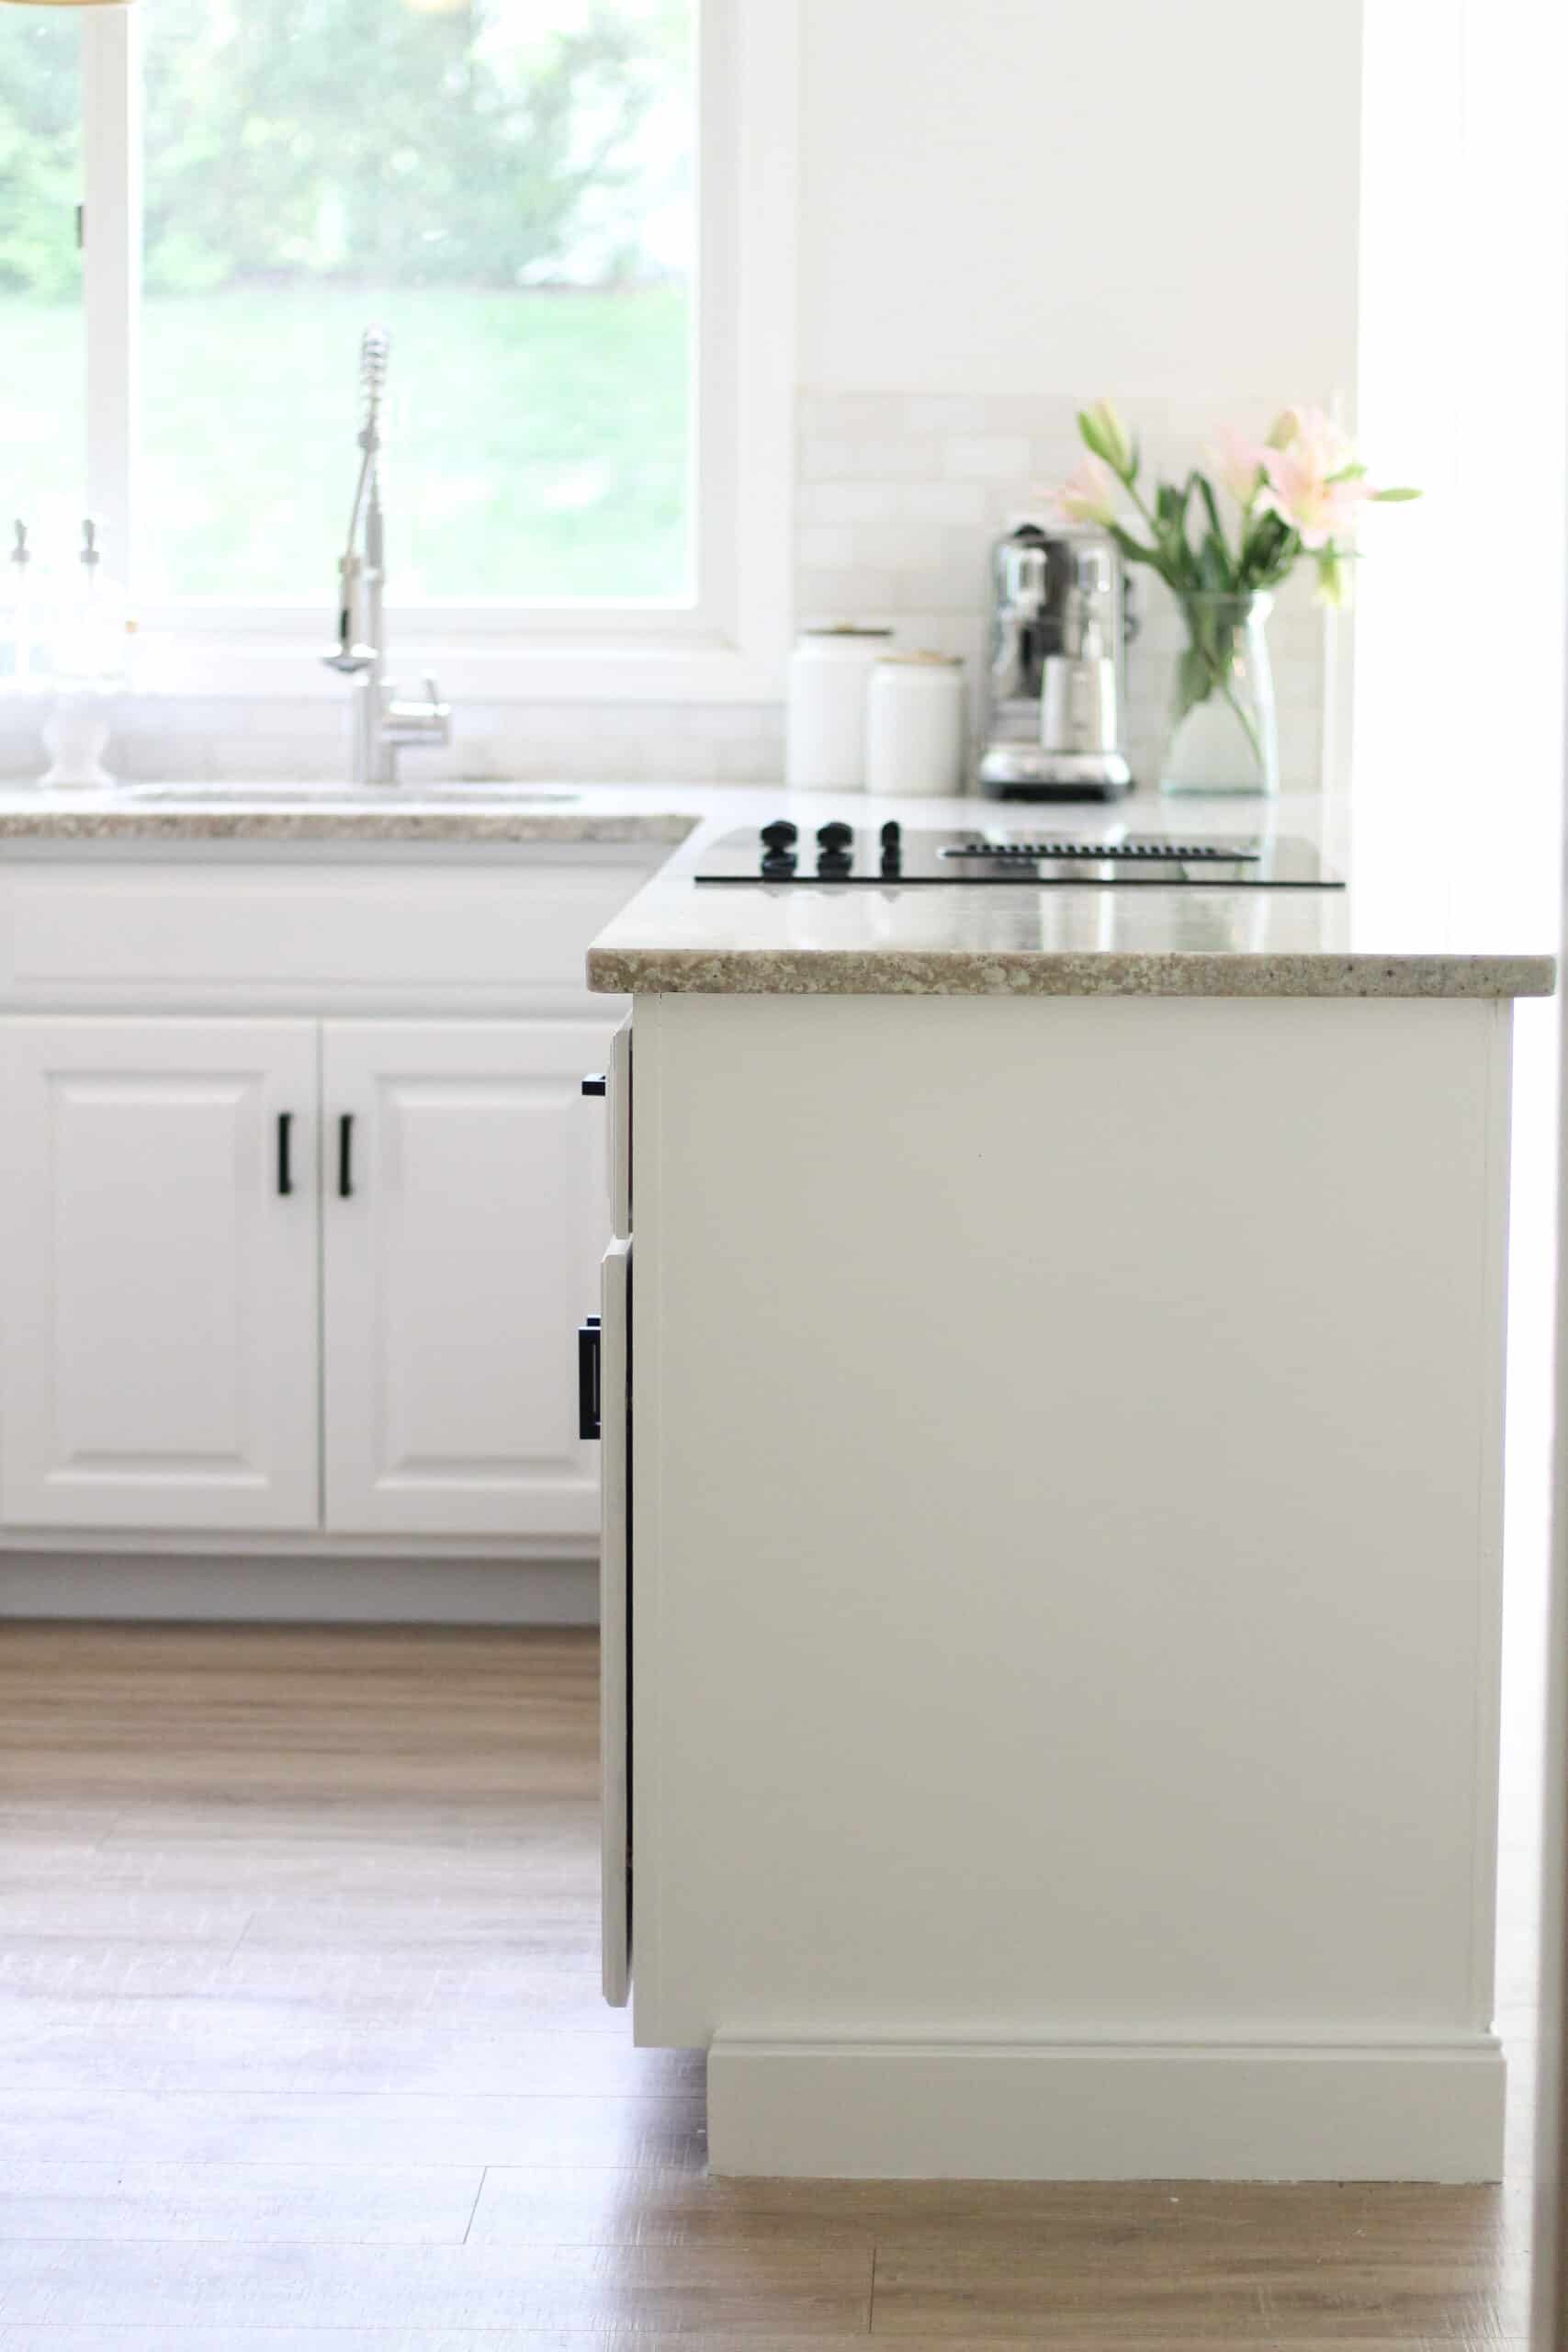
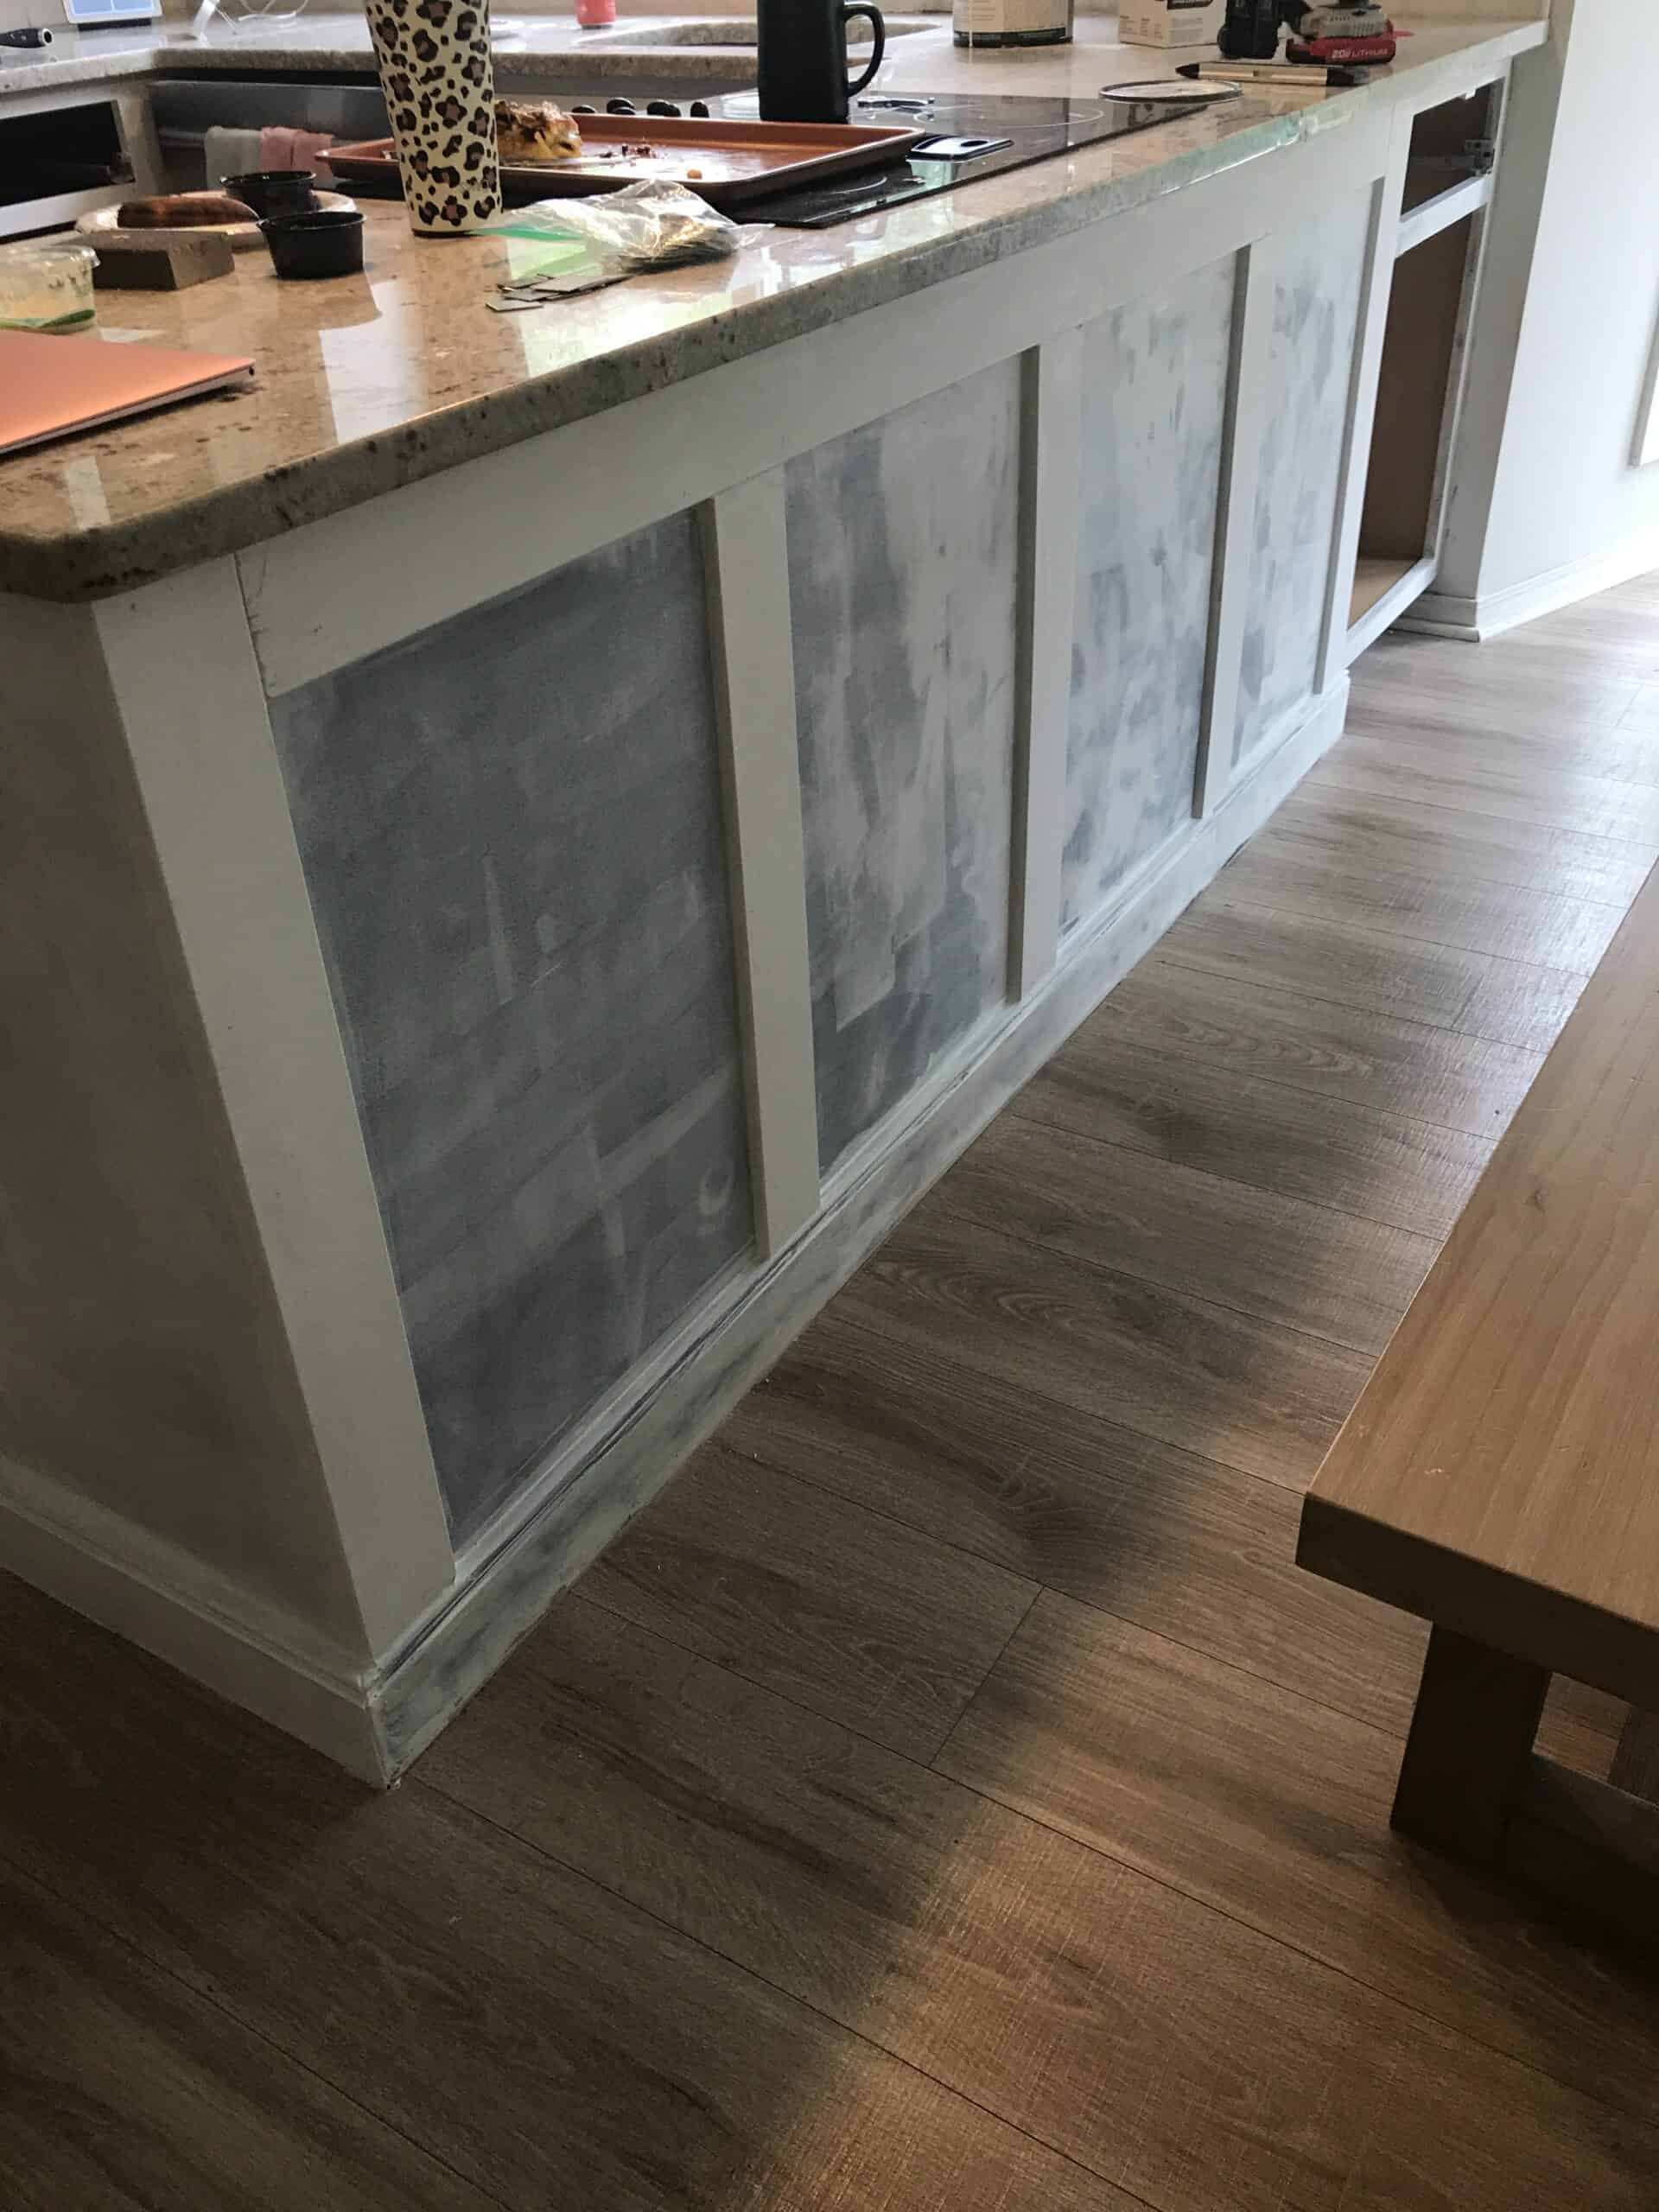
In our kitchen we also added detail to the front side of our peninsula. That honestly was maybe the biggest and best change we made in the space – but it was far easier to do pre-thought.
The last thing to consider – budget. There are ways to make this easier, but they cost a little extra money. Make a budget for this project and decide what you want to spend on it. If you pay to have your cabinets painted it will cost thousands, so you will save money no matter what. There are just ways to make it less awful with a little extra money in the budget.
Getting Started
Now that you have a plan it is time to get going on your kitchen. There are a few really important steps that need to happen during the dismantling of the cabinets.
First – take a piece of painters tape and label each door and drawer with a sharpie on the tape. Then take a picture of your cabinets so you remember the order you went with. This is important.
The other thing is that you need to keep your hardware in the right place so it can go back in its original spot. For us that meant when we started taking doors off we laid the hinges down on the shelves inside the cabinets right in line with where they came off (IE – top hinge went on top shelf, middle went on middle, and bottom went on the bottom).
So now that you know to do all of this – it’s time to start taking off all your cabinet doors and drawer fronts.
Once all cabinet doors are off and drawers are out, it is time to prep for sanding. You have a few options on how you prep for this.
now is when we added the detailing on our peninsula – I will talk about how towards the end of the post, but this is when we did it!
Sanding
How it is time to sand. I am going to warn you this is A PROJECT. But I have some tips and tricks to make it less awful.
ALSO – this step is important. Don’t skip it. Do it well, and thoroughly. ( i’ll tell you later how I learned how important this is!)
To prep for sanding inside your house you will want tape off and block off the kitchen area with plastic sheets as best you can. You also want to either empty all cabinets and be prepped to clean them well, or tape off the cabinets inside with plastic. Or both haha.
For the inside we personally used this sander, however someone told me about THIS sander, ($200 on AMAZON) that I think if I were to do it again I would have rented or purchased for the simple aspect of the lack of mess. Use this with 220 Grit Sandpaper.
You need to sand down everything inside and all doors and drawer fronts front and back. For areas you can’t get to with the sander or don’t feel comfortable using it, use your sanding block!
Once everything is sanded well you want to clean them well with water. Then wipe them again with a microfiber cloth. Just make sure everything is very very clean and has no sand on it.
Priming
Next up is priming – make sure you have some windows open – the primer is pretty strong smelling, but it works well. use a paint brush and foam roller to prime all of your cabinets and doors.
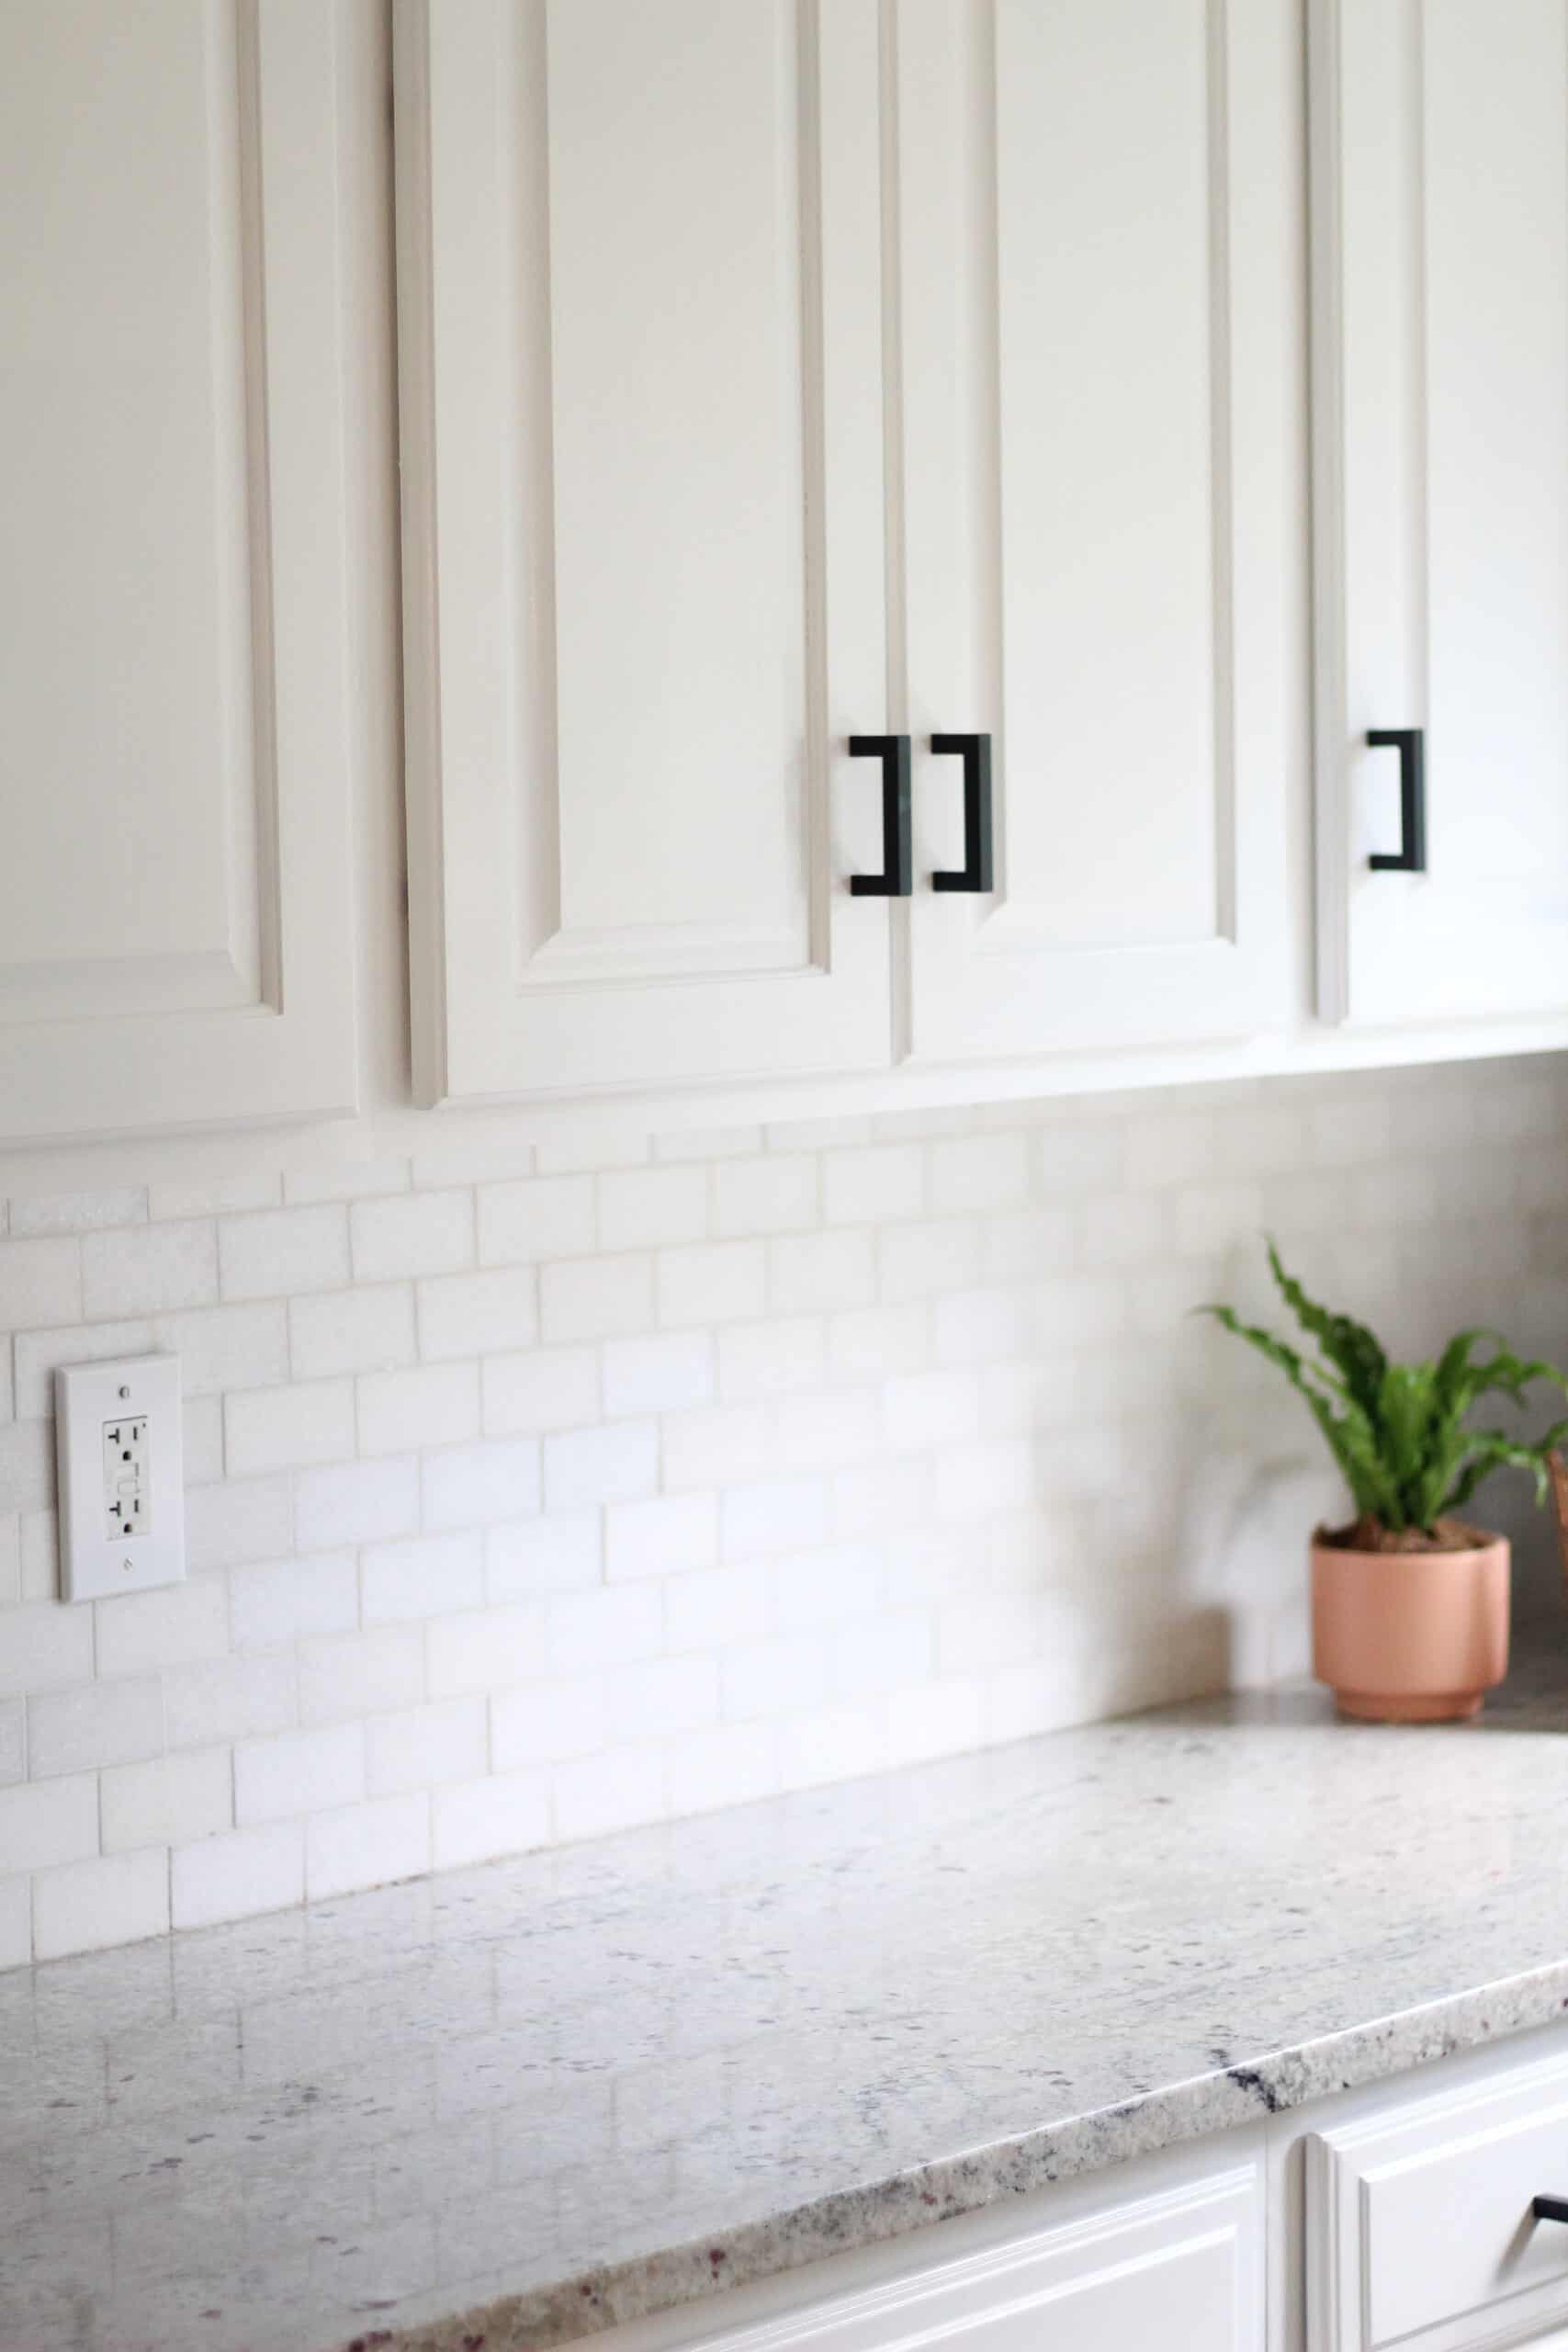
to keep track of our cabinets we took that small piece of painters tape with the number and put it where the hinge goes. For us that part of the cabinet is lower and worked great (seee photo). Another option is to write the number on a small piece of paper and put it in the hole for the hardware. You could also place the number on the counter or ground under where you’re working on that one and leave them all in one spot. Doesn’t matter how you do it – but make sure YOU DO IT
For your doors – do the BACK SIDE FIRST. I would personally set them on THESE so you don’t have to wait as long to flip. Then once you have done the back and it has dried for a few hours flip to do the fronts. Pay attention not to get any globs – we really took our time on this step. I also Will say -pending how dark your wood is I would consider doing a second coat of primer.
1 gallon is MORE than enough for 2 coats and the primer dries much faster than the actual paint so you will be thankful you did. I wish I had done 2 coats of primer personally.
Once your primer is fully dry use a very fine grit sanding block to lightly sand everything you painted. This step will help make your end result so much smoother, so don’t skip it. Then wipe down everything again with a wet cloth, then a dry microfiber cloth to keep it very clean.
NOW YOU’RE READY TO PAINT!
Painting Kitchen Cabinets White
Once your cabinets are sanded, and primed it is time for the fun part! PAINTING. As with all the steps – this step needs to be taken SLOW.
What we did personally was start with the cabinets themselves (no doors) first, then followed the same steps for the doors.
First apply one coat of paint using a brush and foam roller. Once that fully dried for 24 hours we lightly sanded using the same method as the primer.
We then did a second coat of paint after – and after that one dried for a few hours did a light third coat. For the second and third coats we didn’t sand and follow that full process between.
I followed the same method with the doors. For the doors – START WITH THE BACKS, and for the last coat try to do all foam roller. If you have detail like mine do any brush work first then foam rollers for a smooth finish!
as a side note – we didn’t do this and I wish we had. If you take paintable caulk and caulk in the seams on doors where they connect you will get a better finished product. I was going to do it and decided I didn’t need to. It isn’t a huge difference, but I do wish I had just gone ahead and done that step!
If you are using your sprayer follow these same steps. I would probably use the foam roller and brush for the cabinets themselves but the paint sprayer for the doors. Be sure to get a paint tent or have a good area to spray them where debris won’t get on them!
Details and Reassembly
Make sure you wait until your cabinets are fully dry to reassemble. Your hinges should all still be in the spot near where they go, and your cabinets and drawers are numbered.
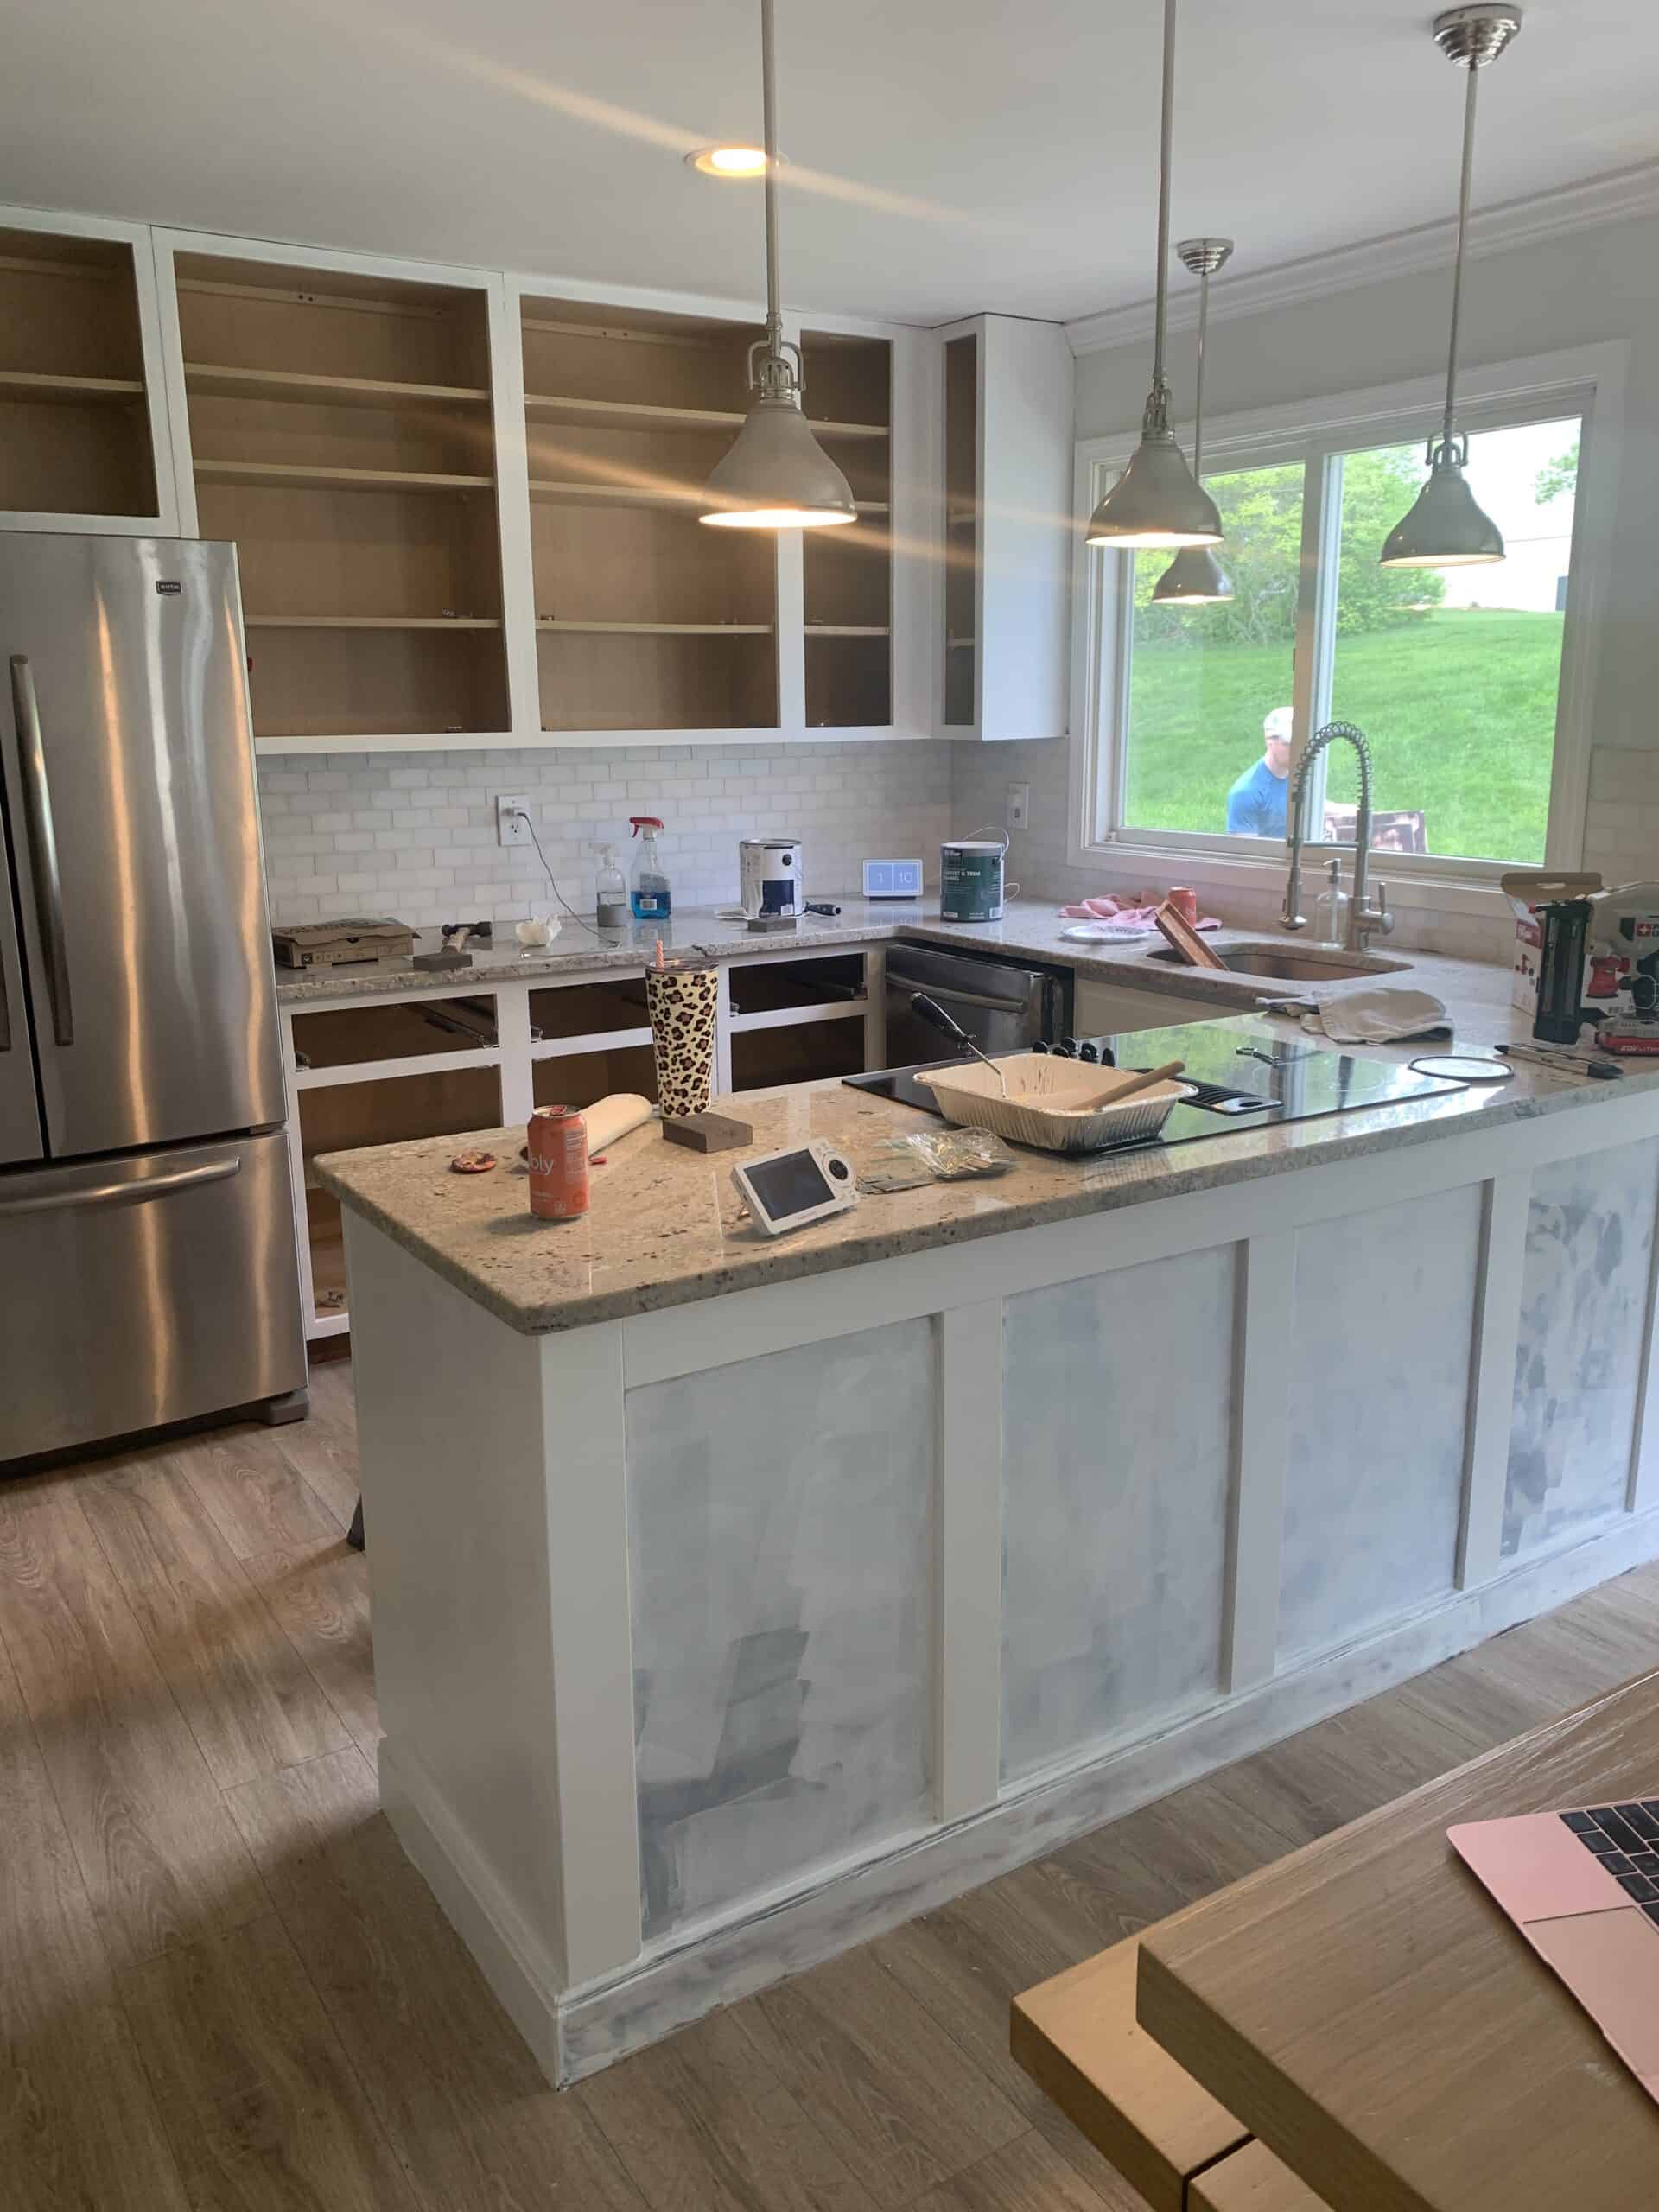
Detail on Peninsula
Like I said above – we did this step BEFORE priming but after sanding. For the details we added 3 inch tall trim – our cabinets already had nice piece along the bottom, so we added only to the top and the vertical pieces.
(If you don’t have bottom trim in place already add that first). We first cut the vertical boards for the corner and the end (near the cupboard). Ours was a bit different than some due to having the cupboard at the end of the space. Measure up from the bottom trim to the top (base of the counter tops) and cut a piece. Nail that in – on on each side.
Now measure a piece to hang horizontally between those two boards. Now you should have one big rectangle out of trim.
Now pending the size of your space you can decide how many boards you want to add vertically between those two. We personally did 3 to split the space evenly. I liked the overall look of that. You will cut 3 (or how ever many you need) boards in the length to fit between the top and bottom trim.
Now that this is done you will caulk every seam with paintable caulk – which is not a fun process but will make things look so much more seamless. Once that is done treat the space like the rest of the cabinets and start priming!
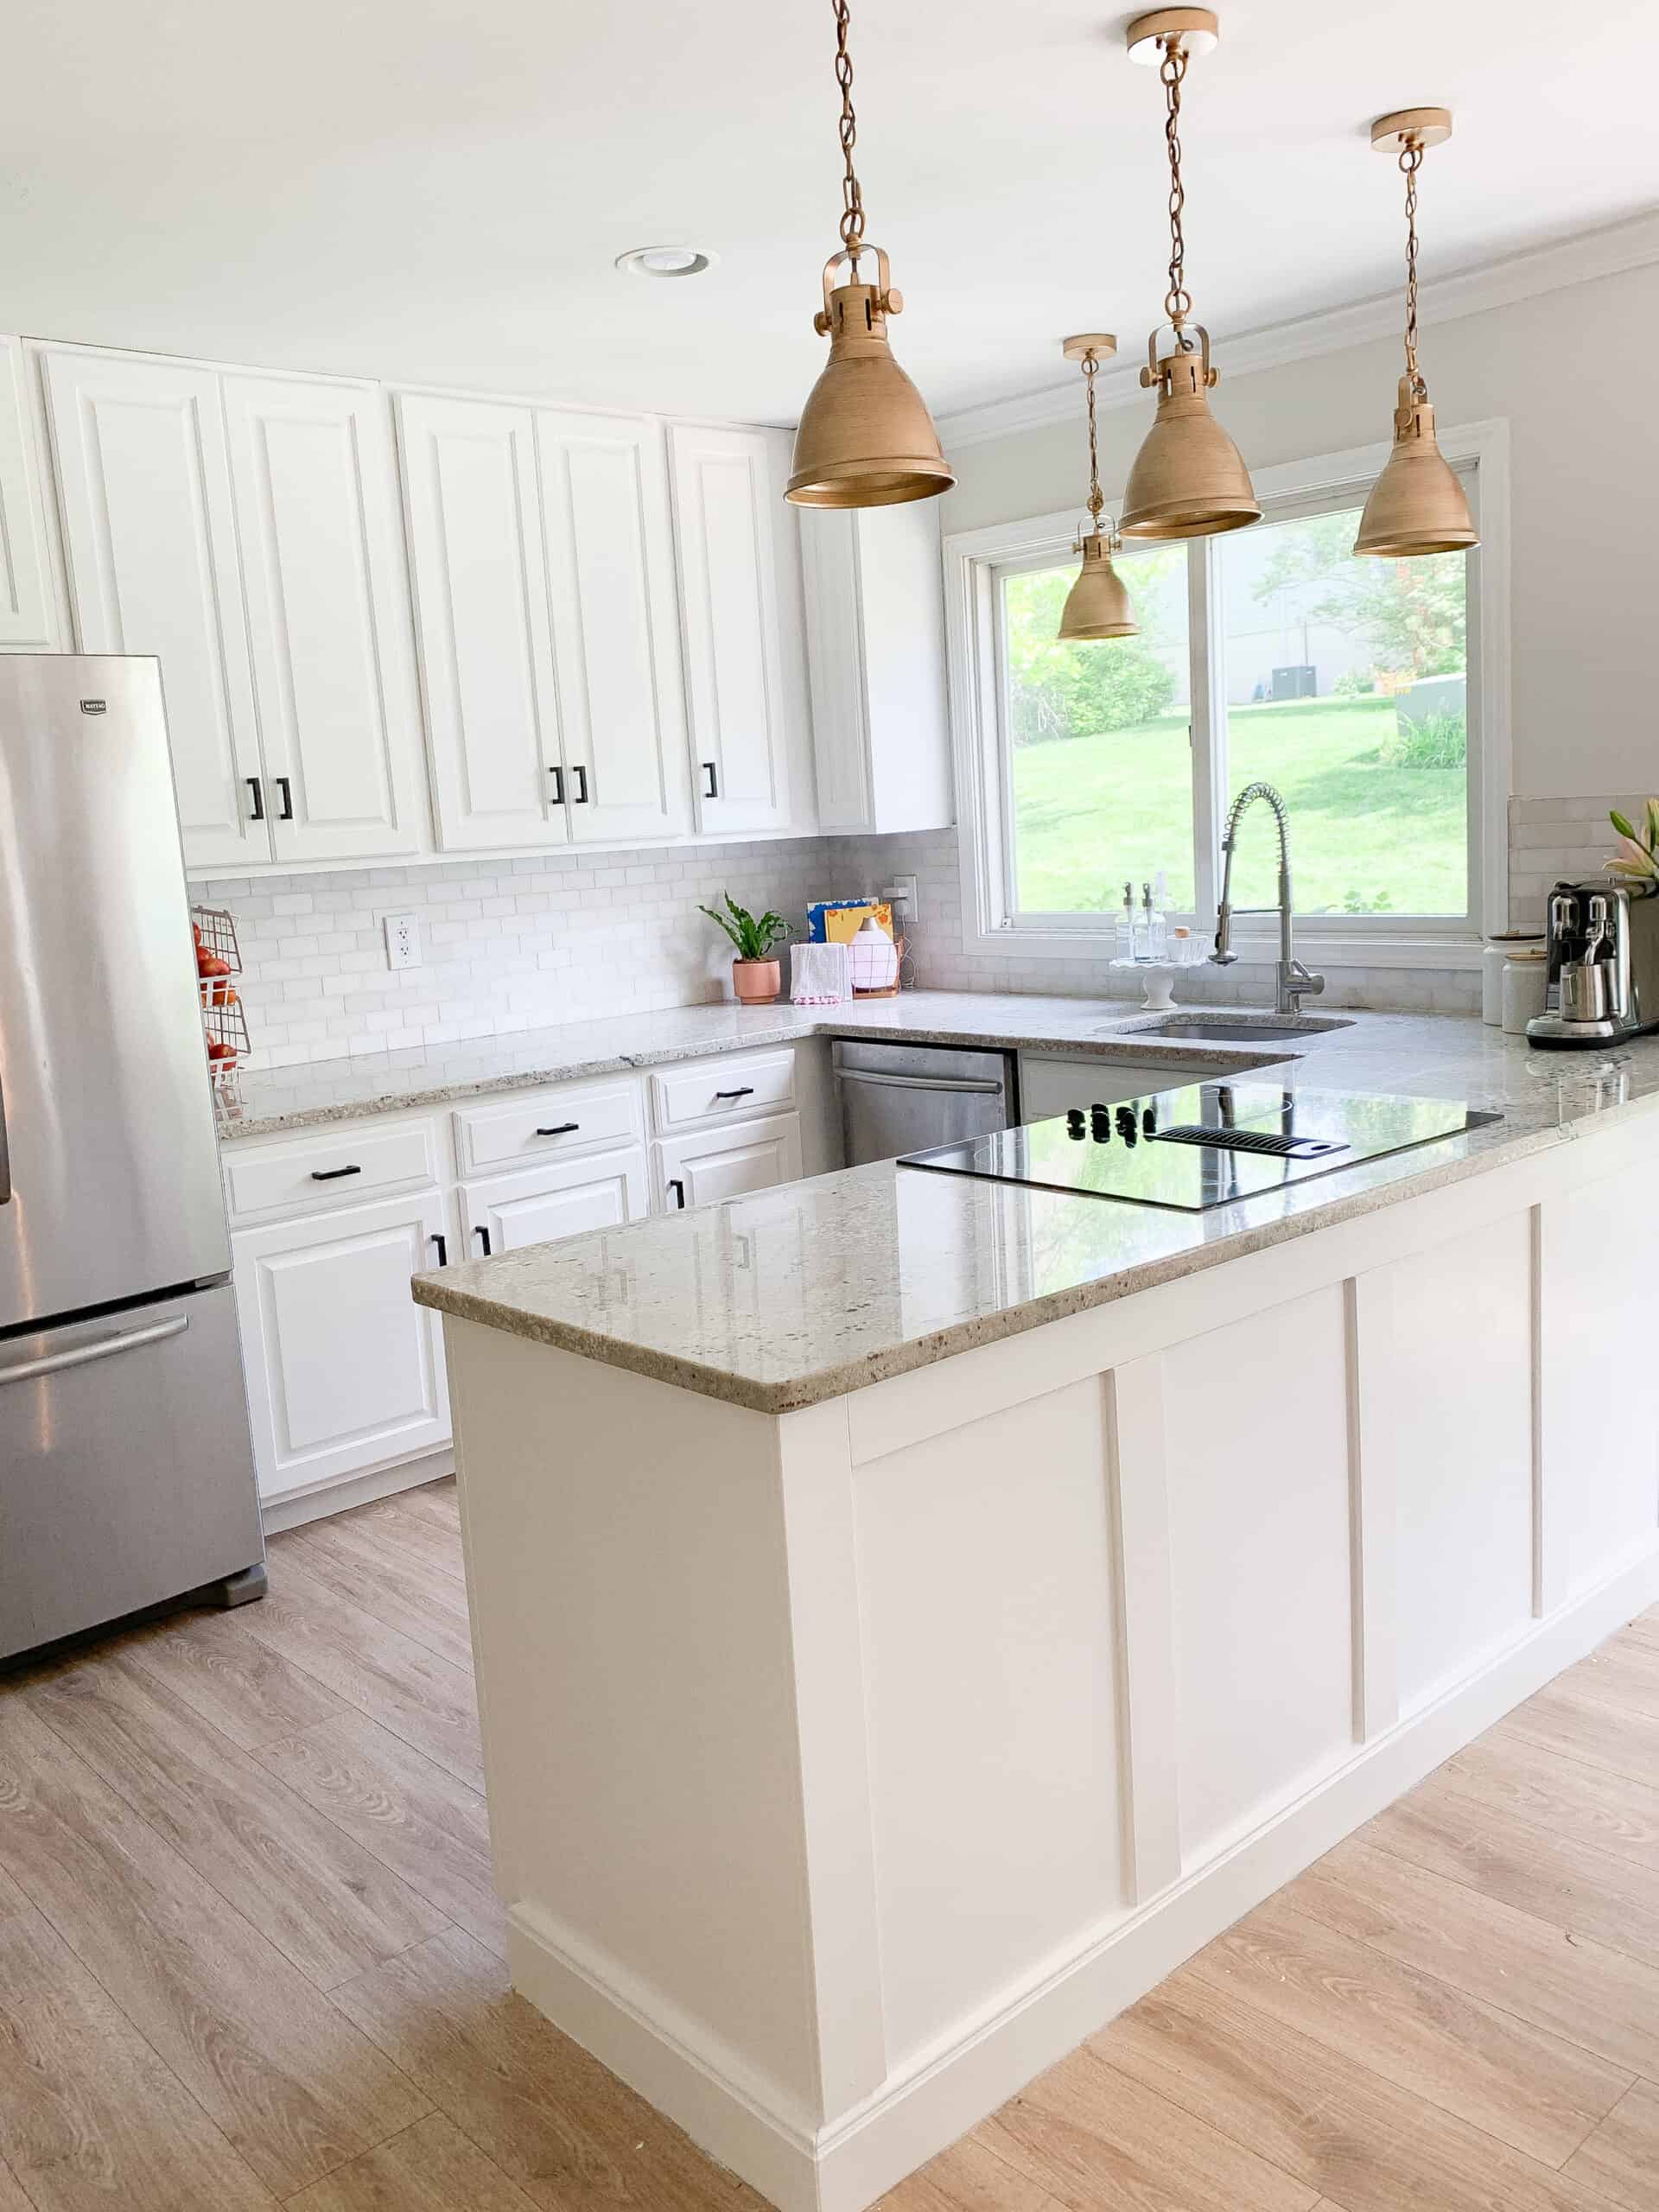
Hardware, Lighting, and Details
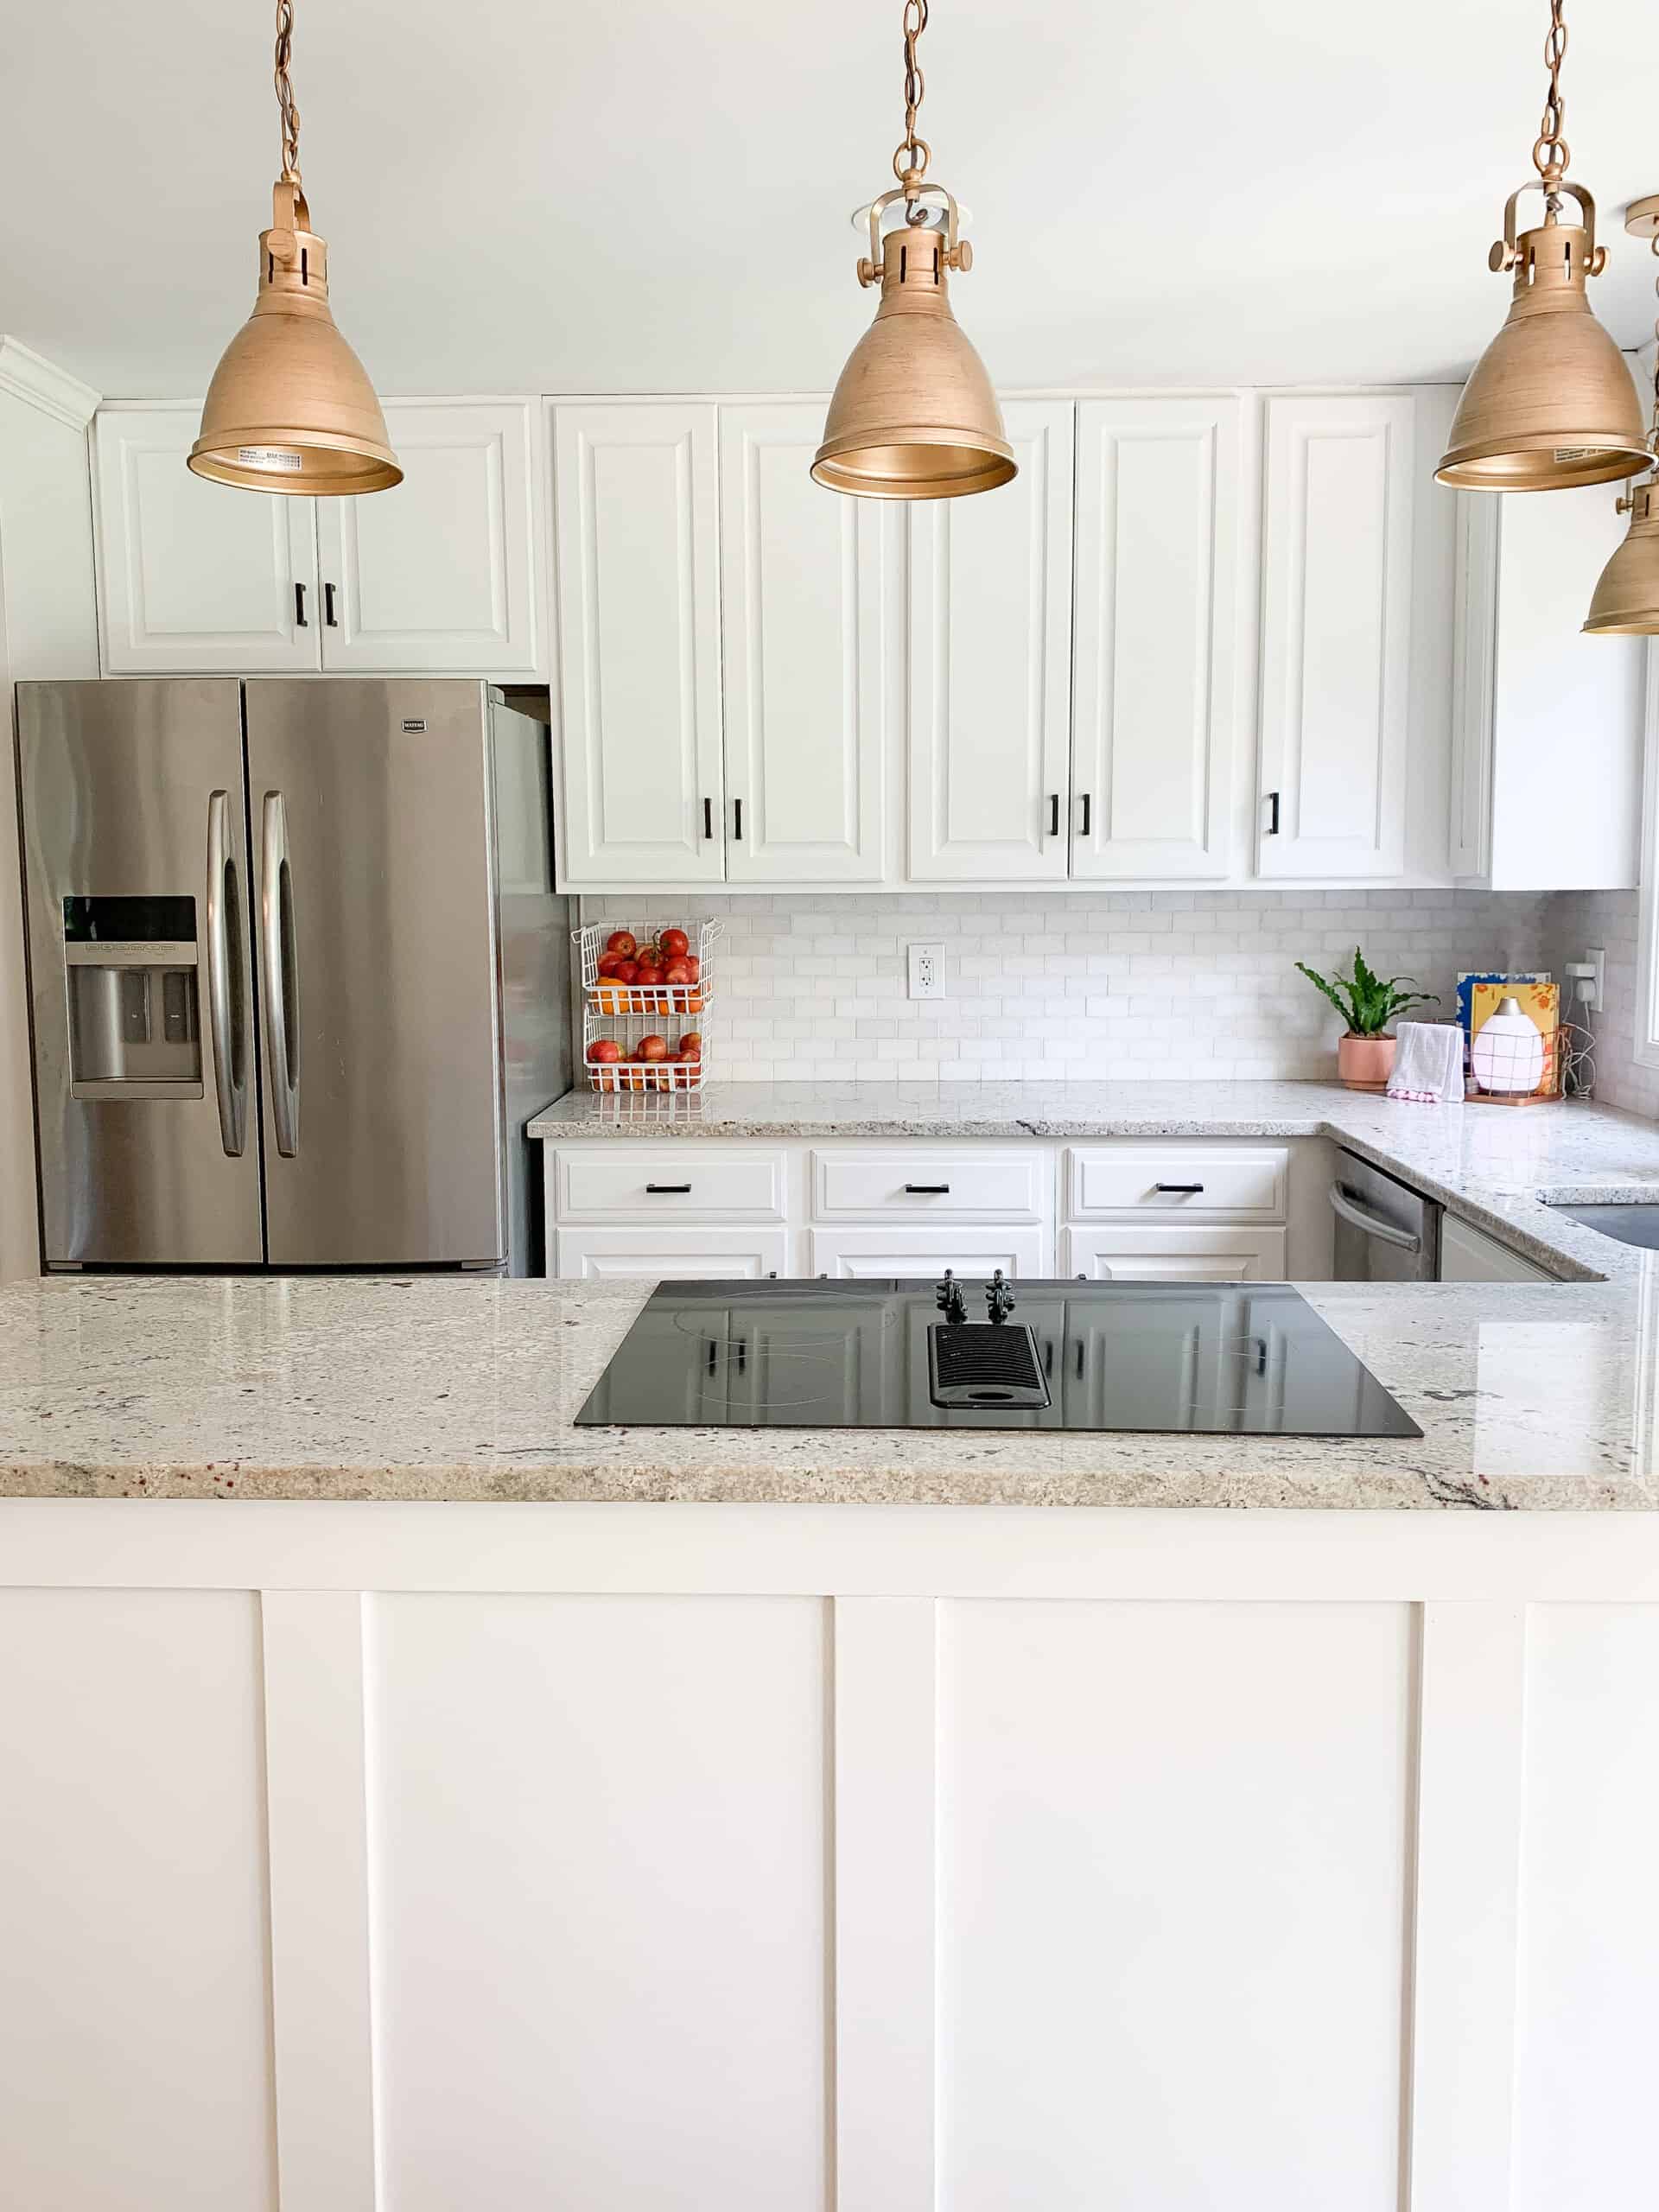
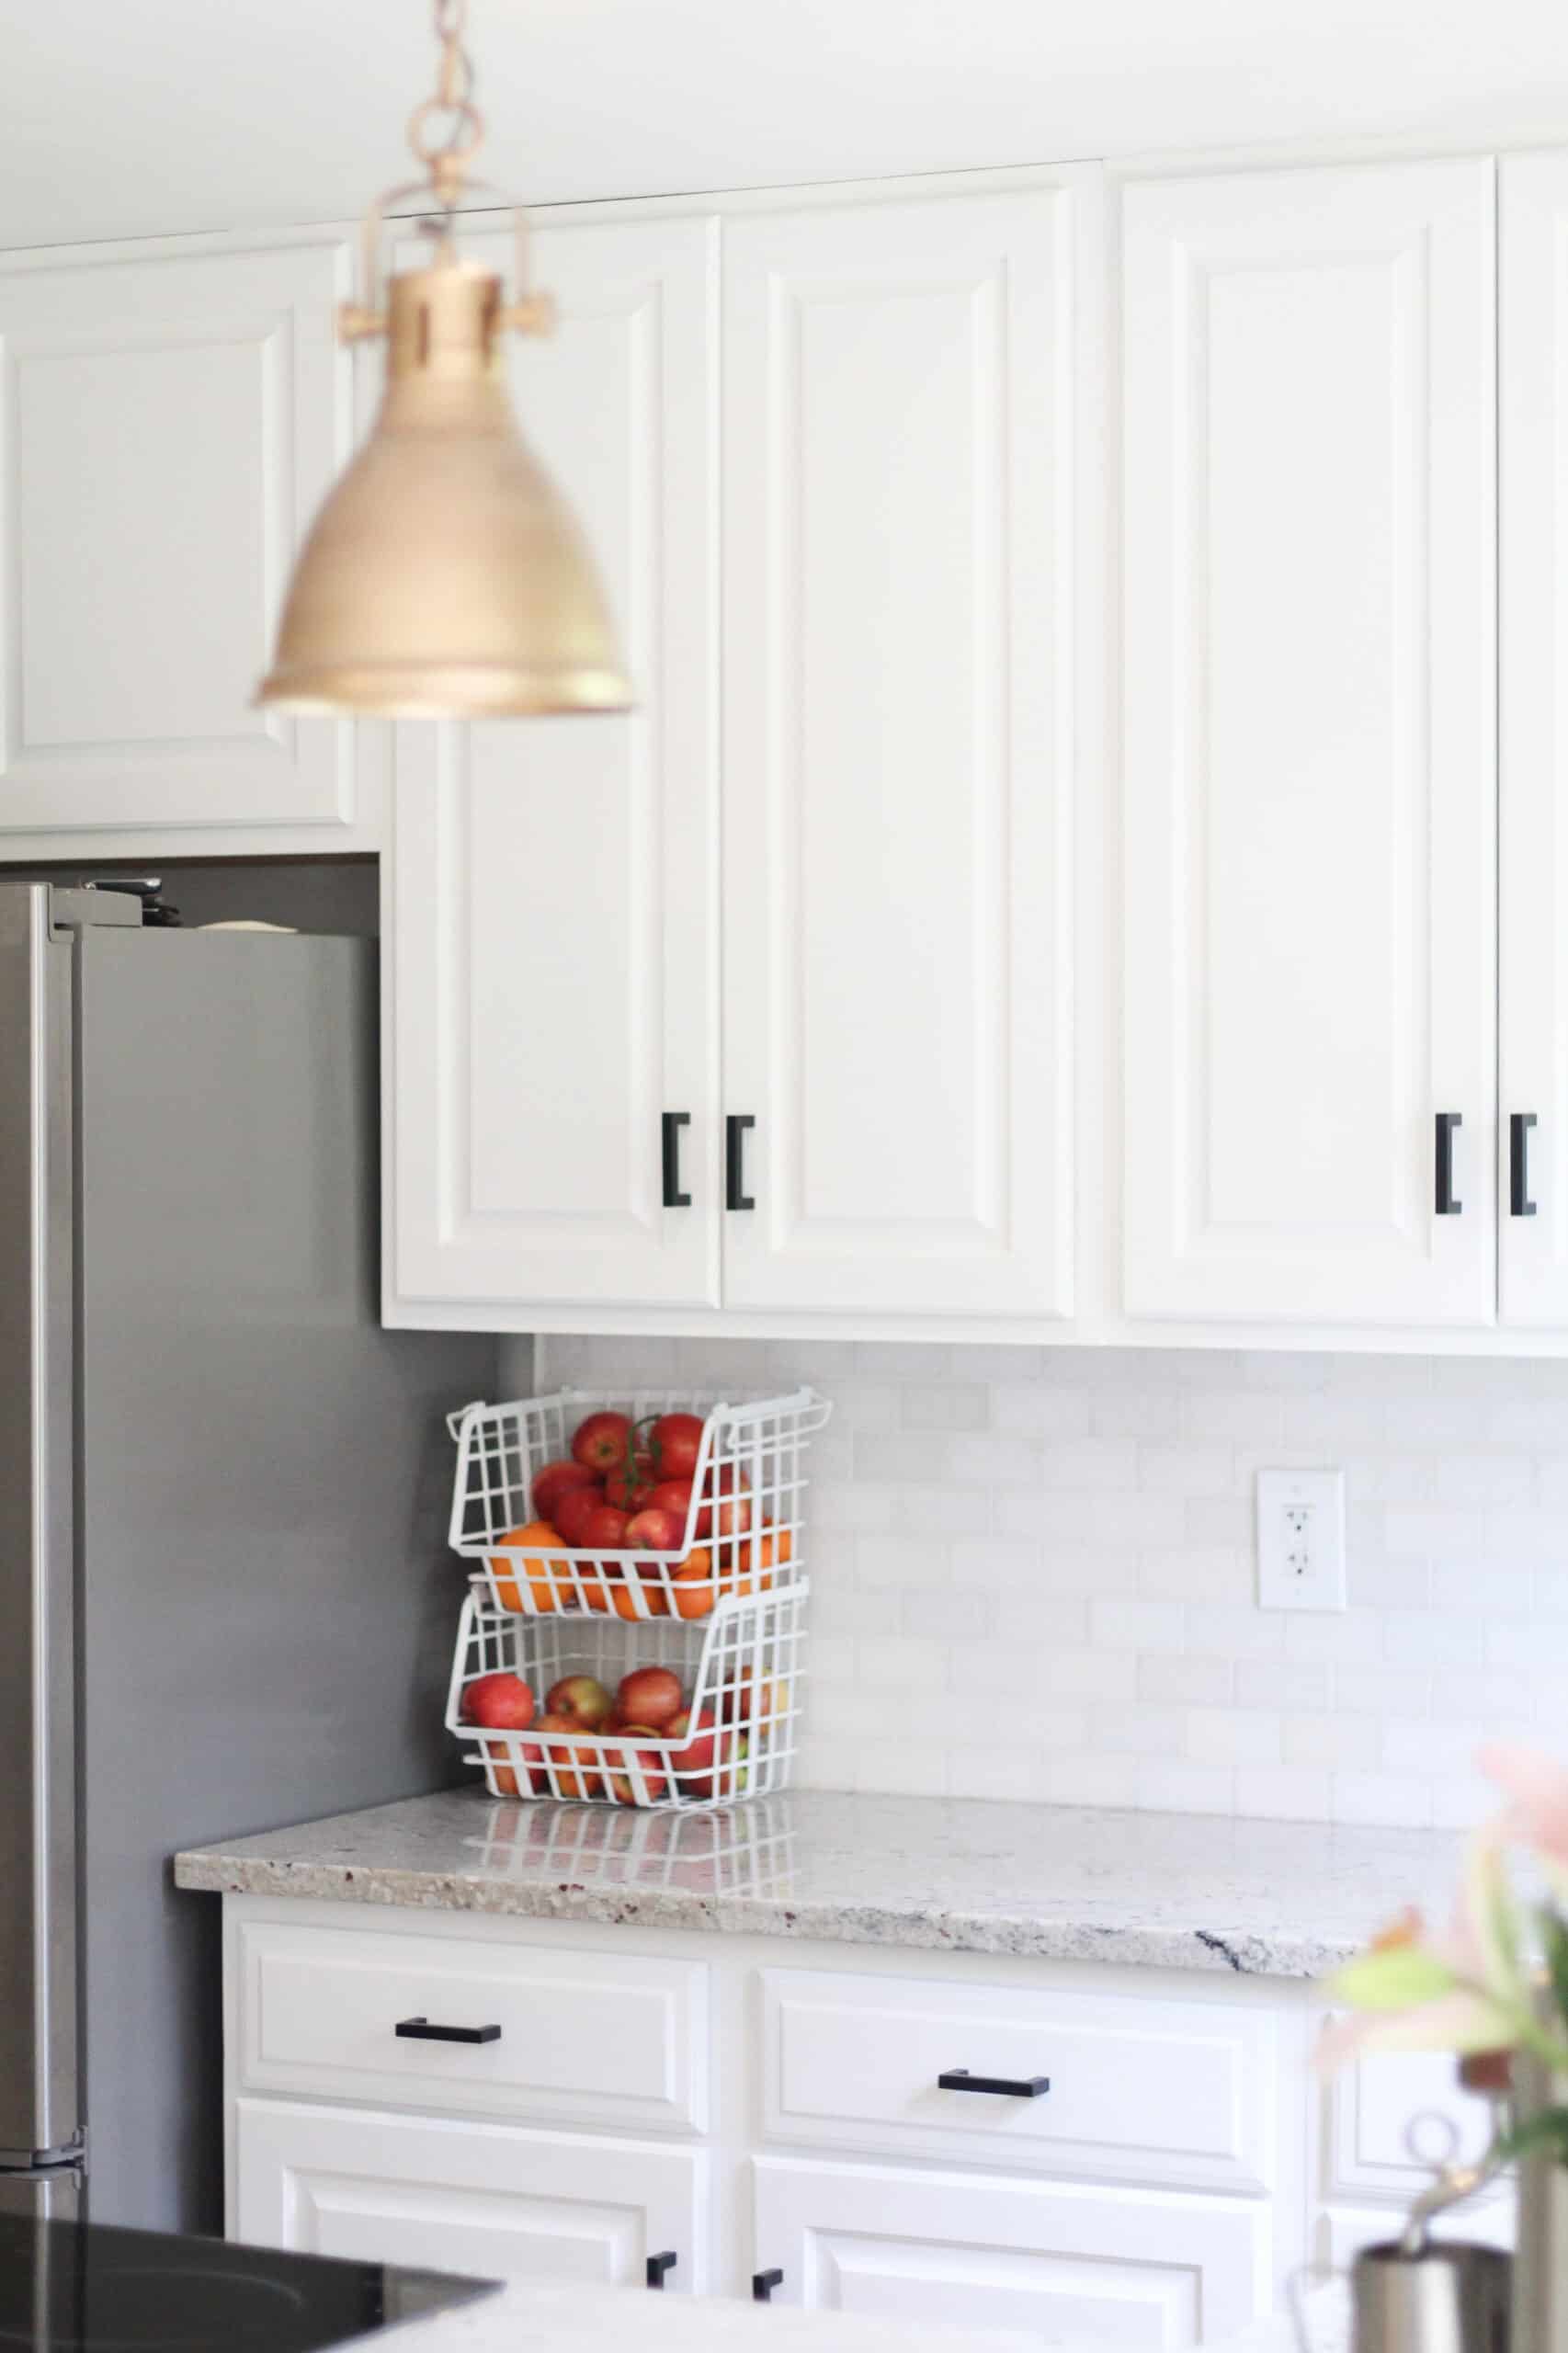
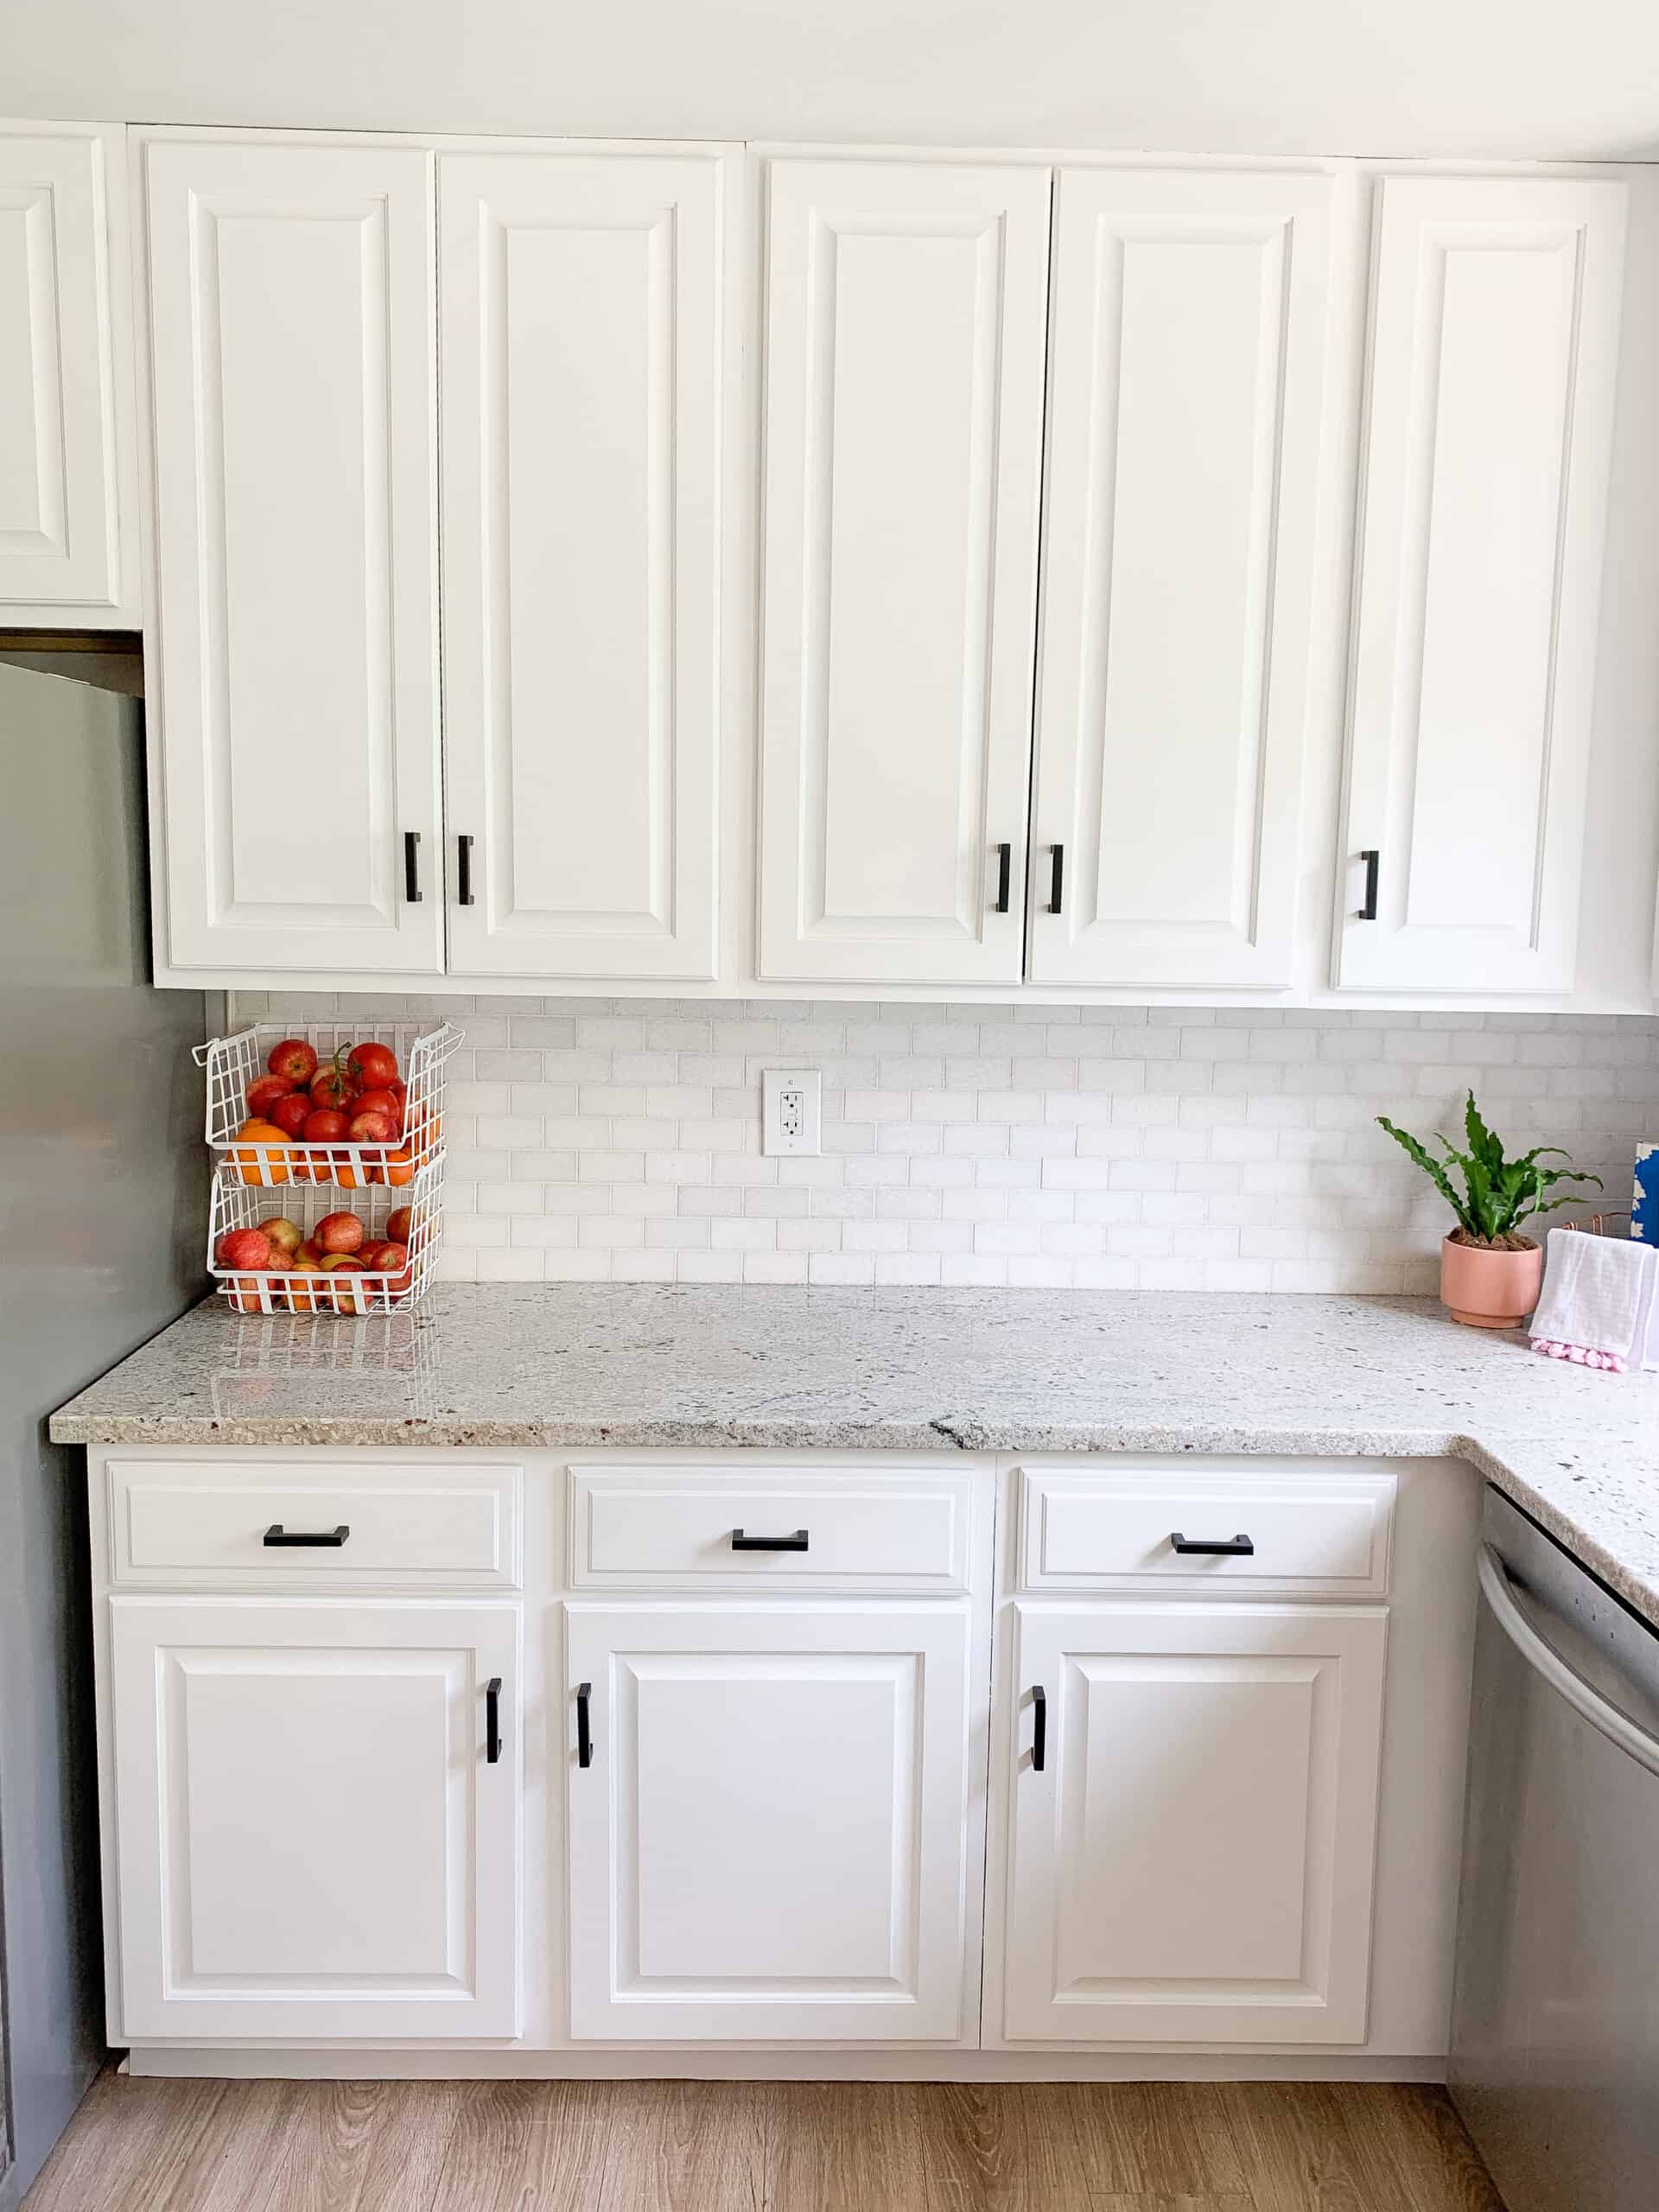
We personally got our lighting from Amazon – this is the option we went with (check out more Lighting from Amazon here). I LOVE them – they were affordable I liked that I could hang them higher. I personally do a lot of Instagram campaign photos in my kitchen, and I am on the taller side, so I wanted higher hanging lights.
We also have 2 open shelves coming in the next couple of weeks and I can’t wait to share all the details on those when they come! They will go in the place of the cabinet we removed and hold our glasses.
If you have any questions on painting your kitchen cabinets white be sure to DM on Instagram or leave me a comment below. Overall – its been about a week and a half and I grow more in love with them daily. This project was well with the time and effort it took, and I can’t wait to see yours when do do them!
When you’re done painting your kitchen cabinets white you might want to do another DIY – check out the rest of my DIY’s here, or these projects you may love!
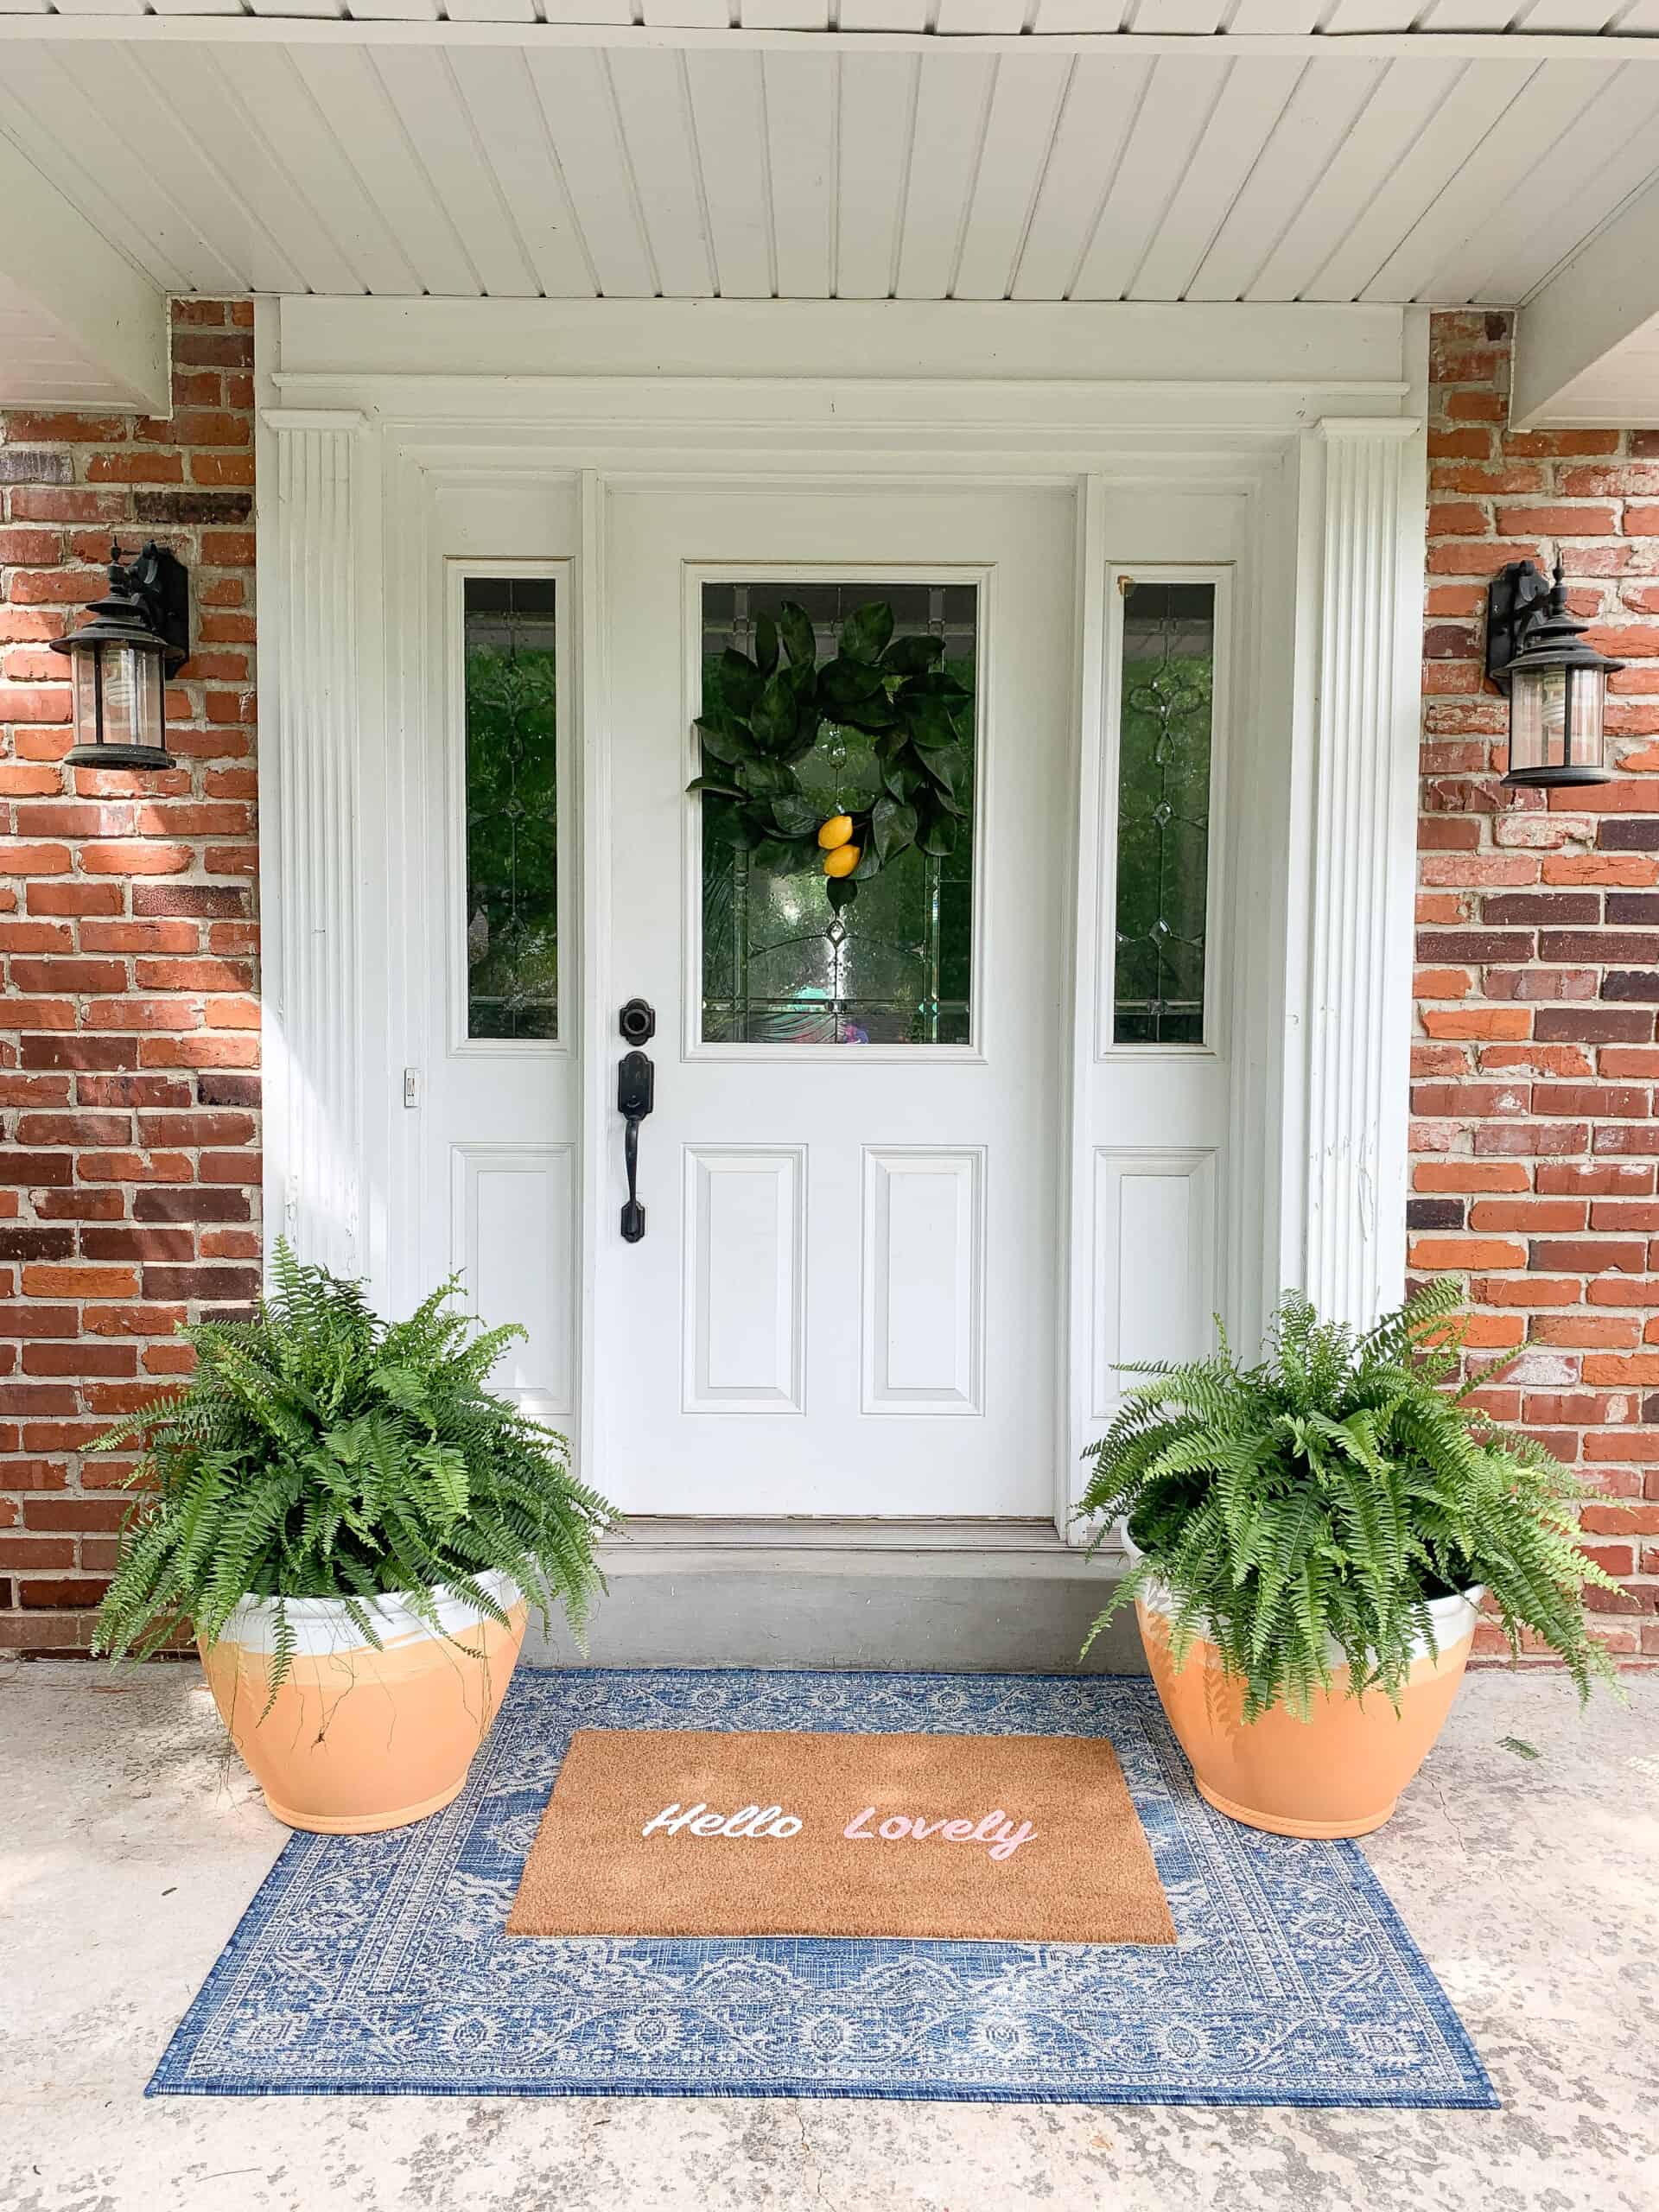
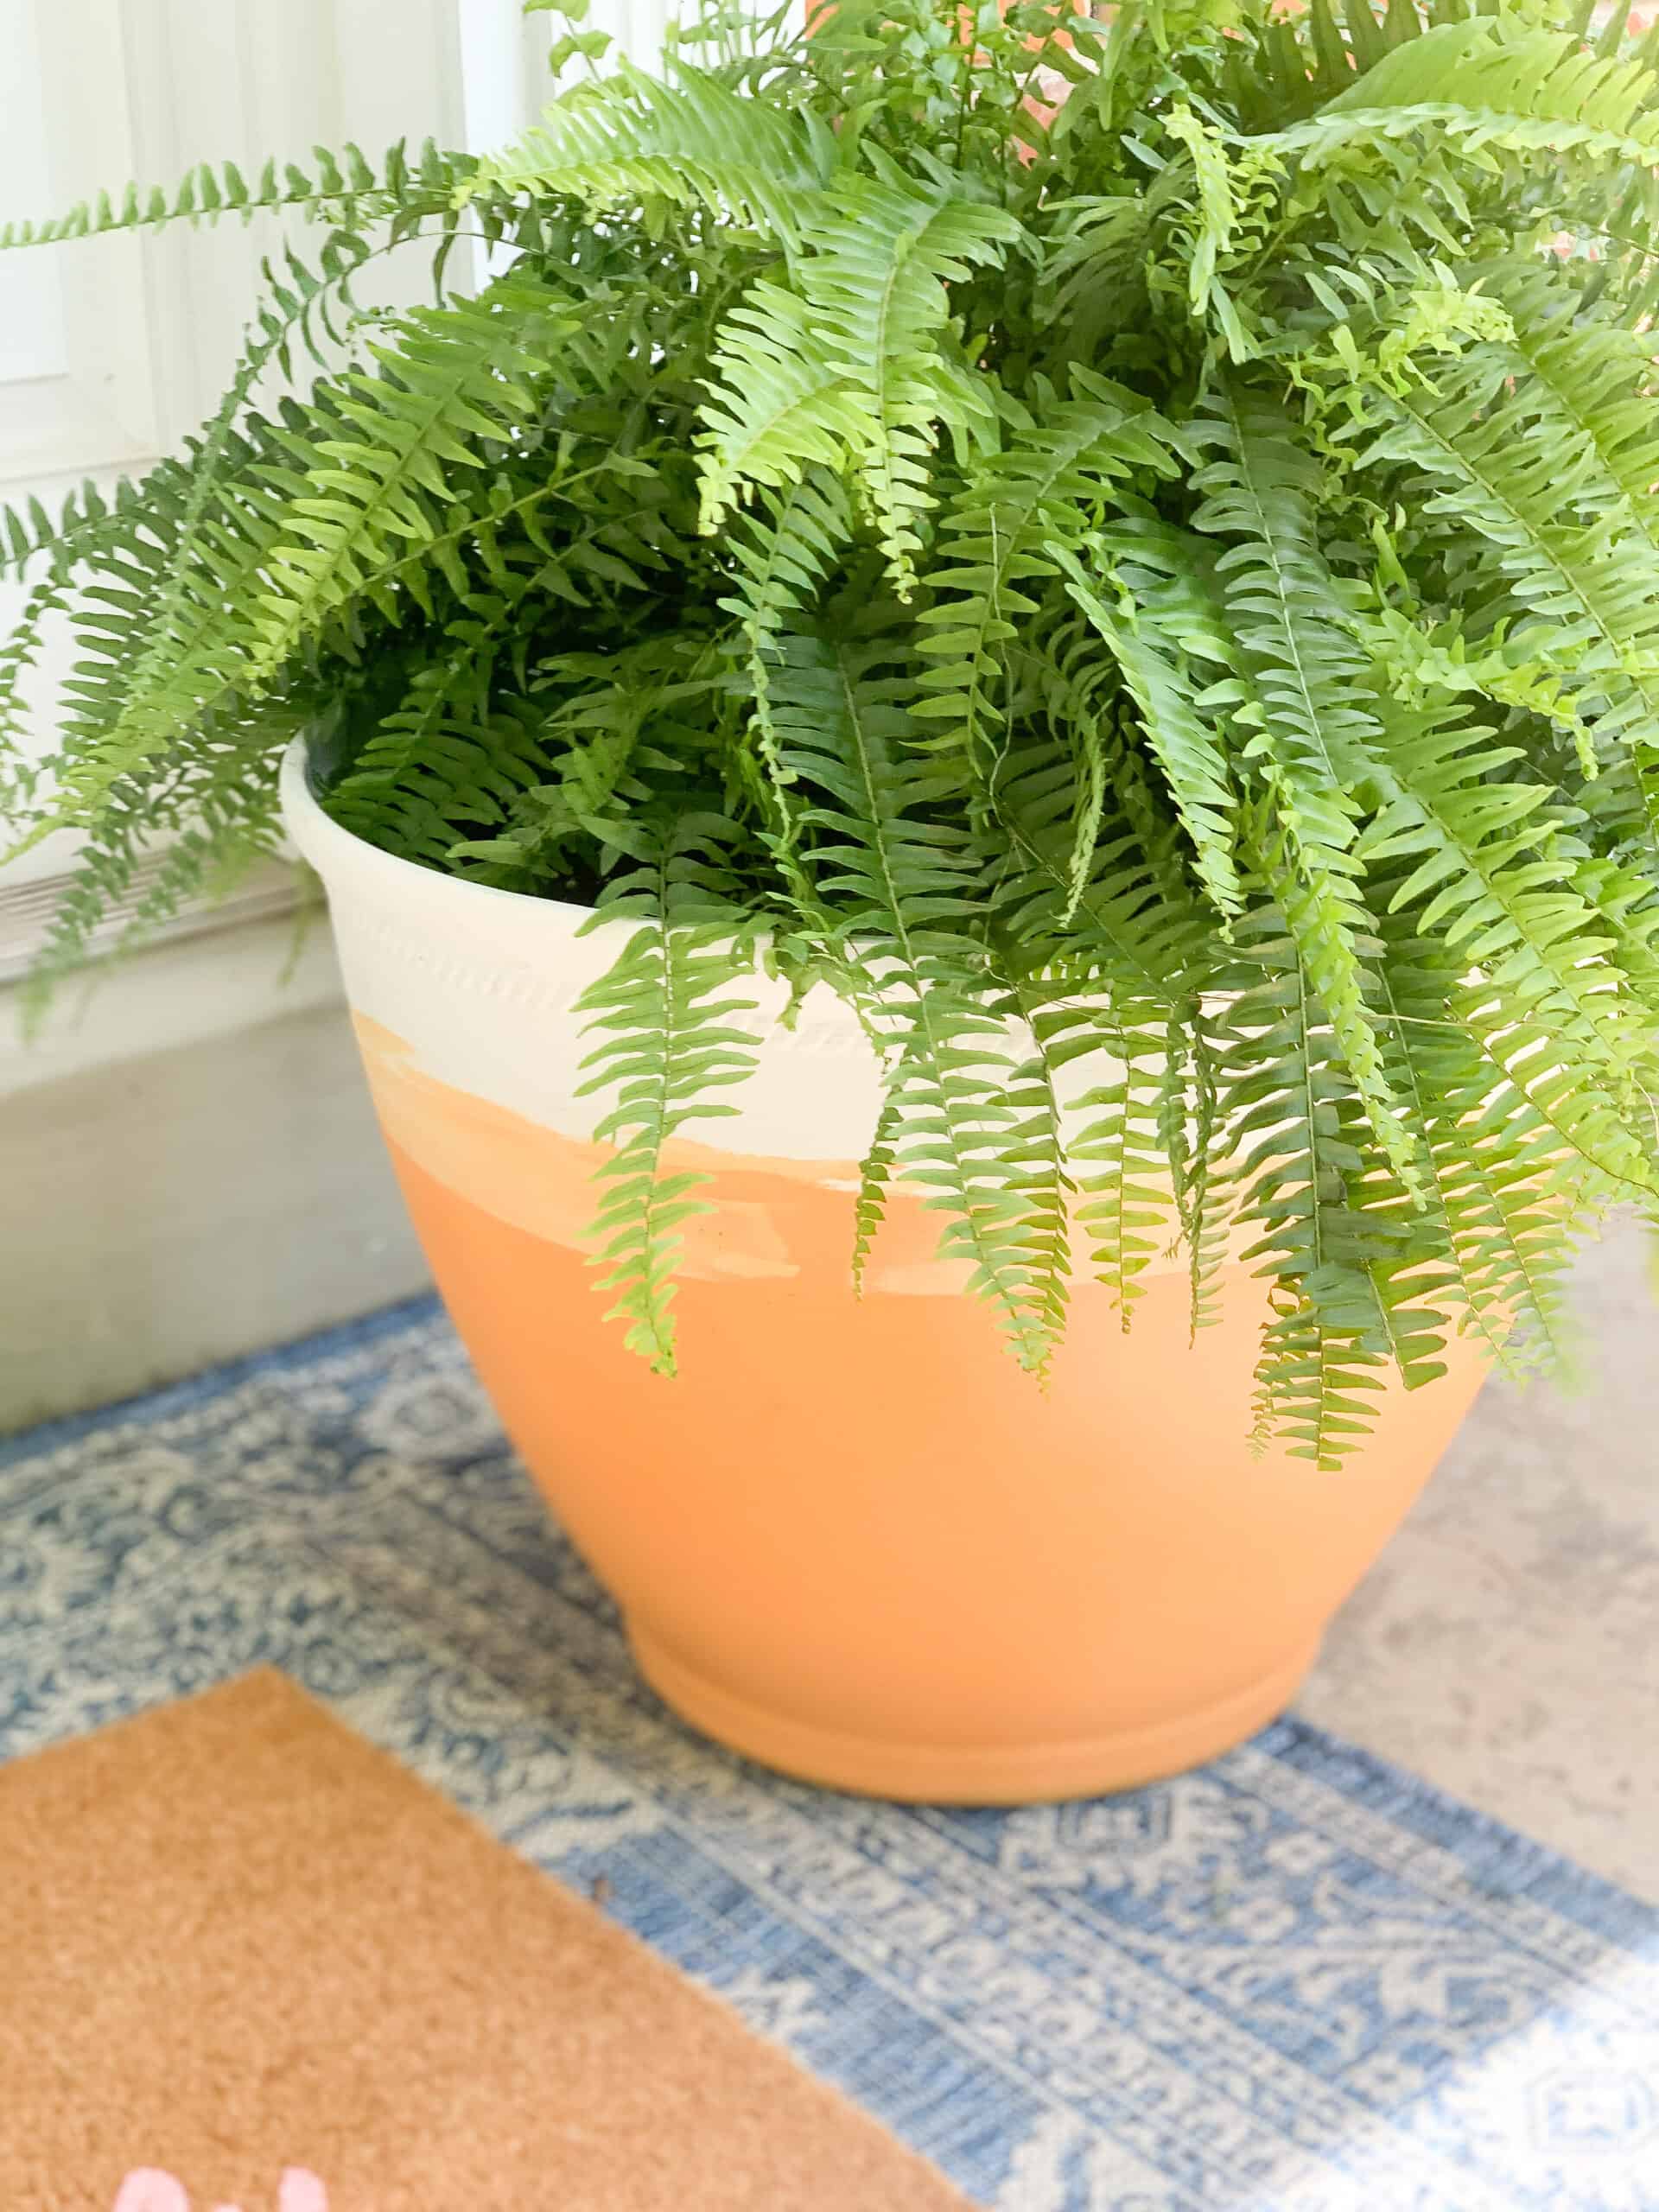
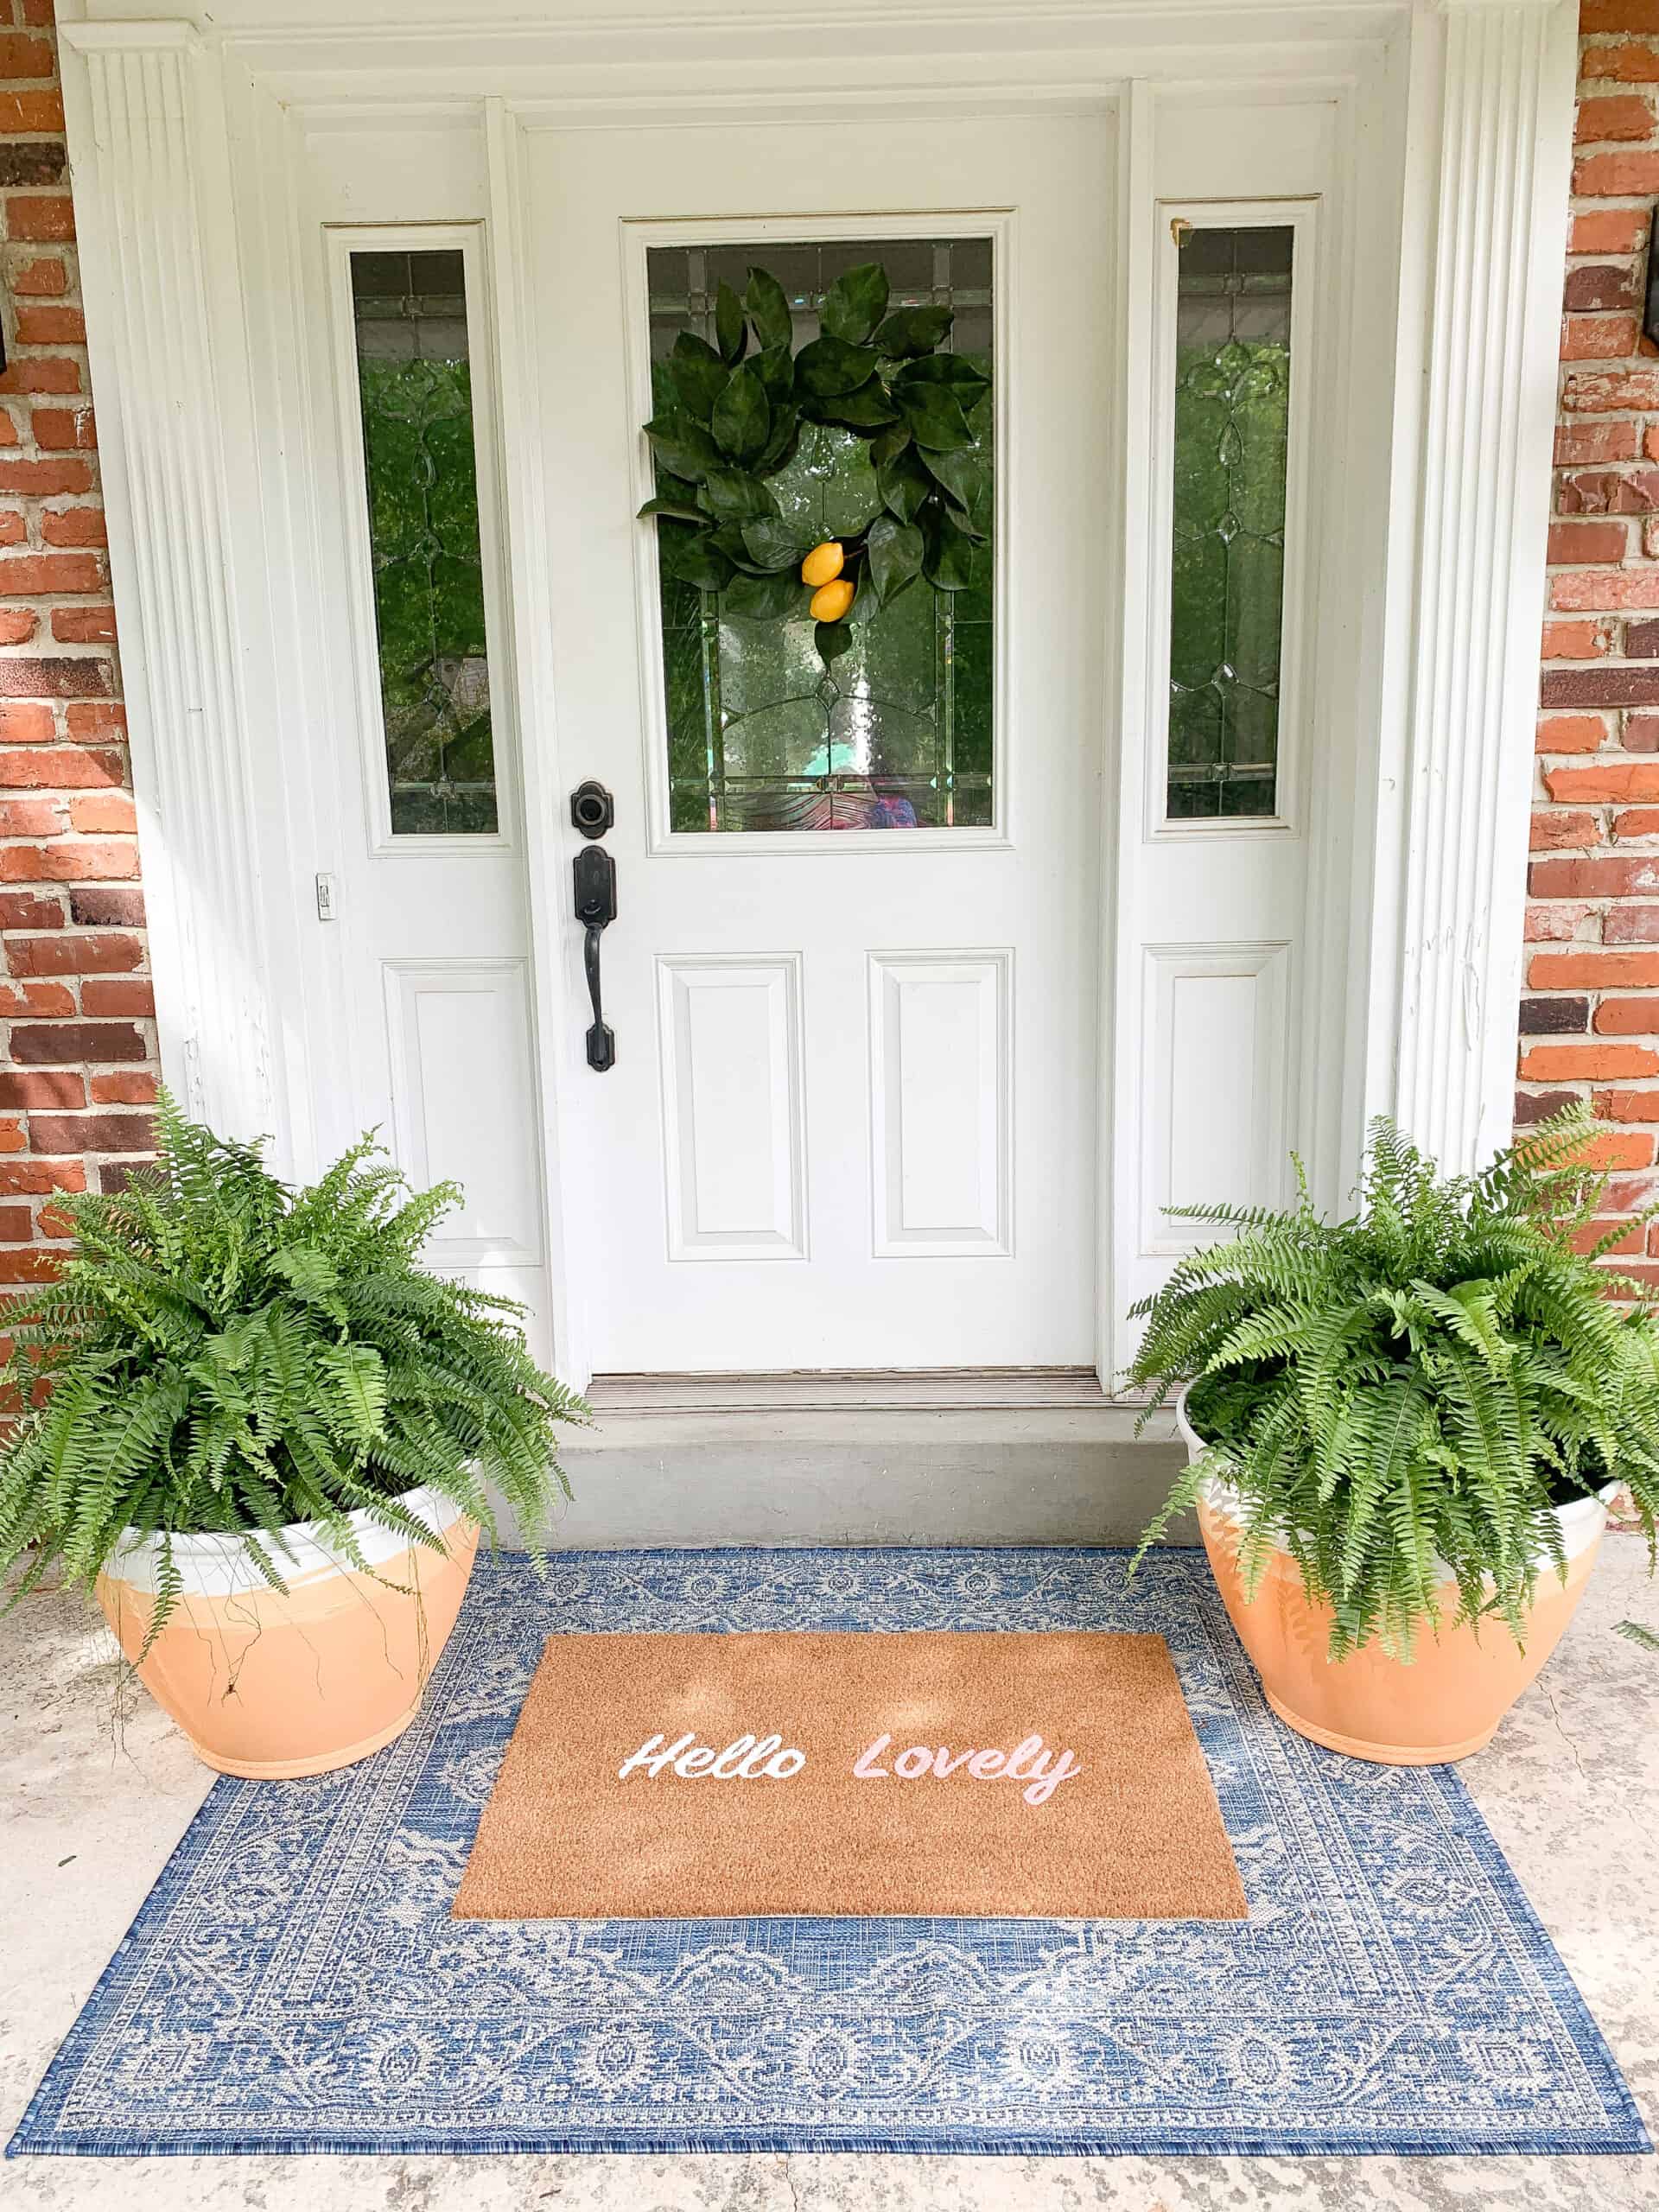
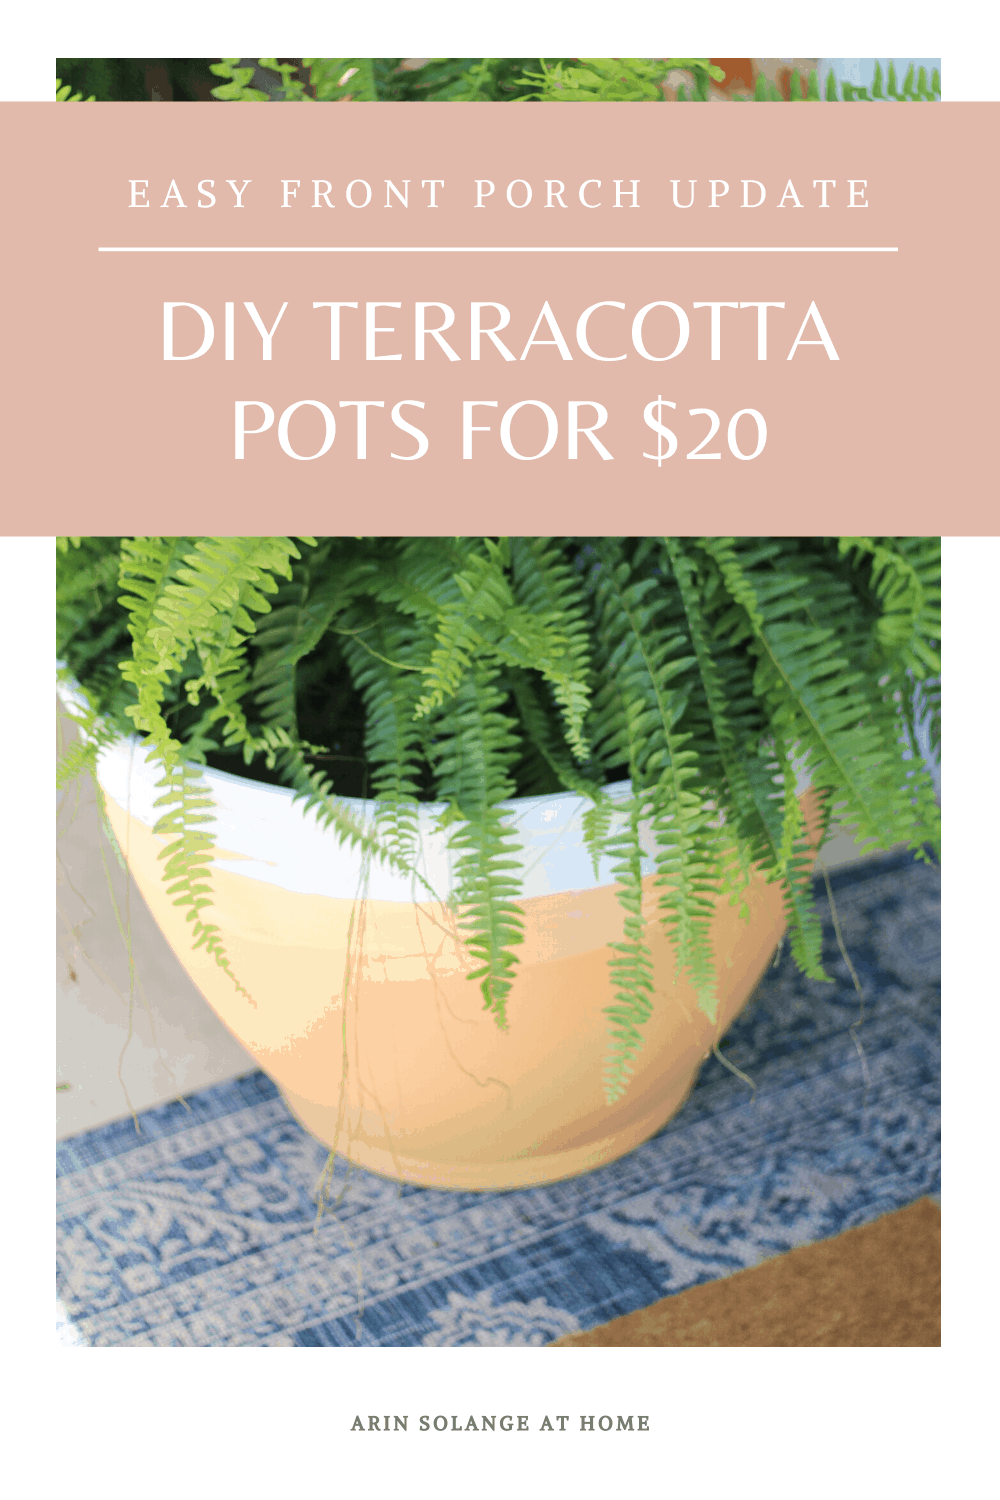
Outdoor living is finally happening in the great midwest…so that means I am finally making my porch look like its not a disheveled Christmas mess. I made some DIY Terracotta pot to spruce up the front porch and I am thinking out delivery drivers will be giving me a slow clap when they arrive next week! (things were looking less than ‘picture perfect’ out there.
this post contains affiliate links
DIY Terracotta Pot
2 years ago when I was sprucing up our door way I wanted to come up with some inexpensive planters that were big enough to handle the space. We have a large brick home, with a somewhat small little porch, so finding a way to decorate the space just right isn’t always easy.
My solution two years ago that has been going strong ever since was a Trash Can planter hack – and Let me tell you, that has been a winner for both me, and many of you! It worked great, and I truly loved them for 2 solid years on my porch.
Actually I loved them so much I think they will get a coat of paint and head to the back patio now to hold some of our cute little patio garden plants!
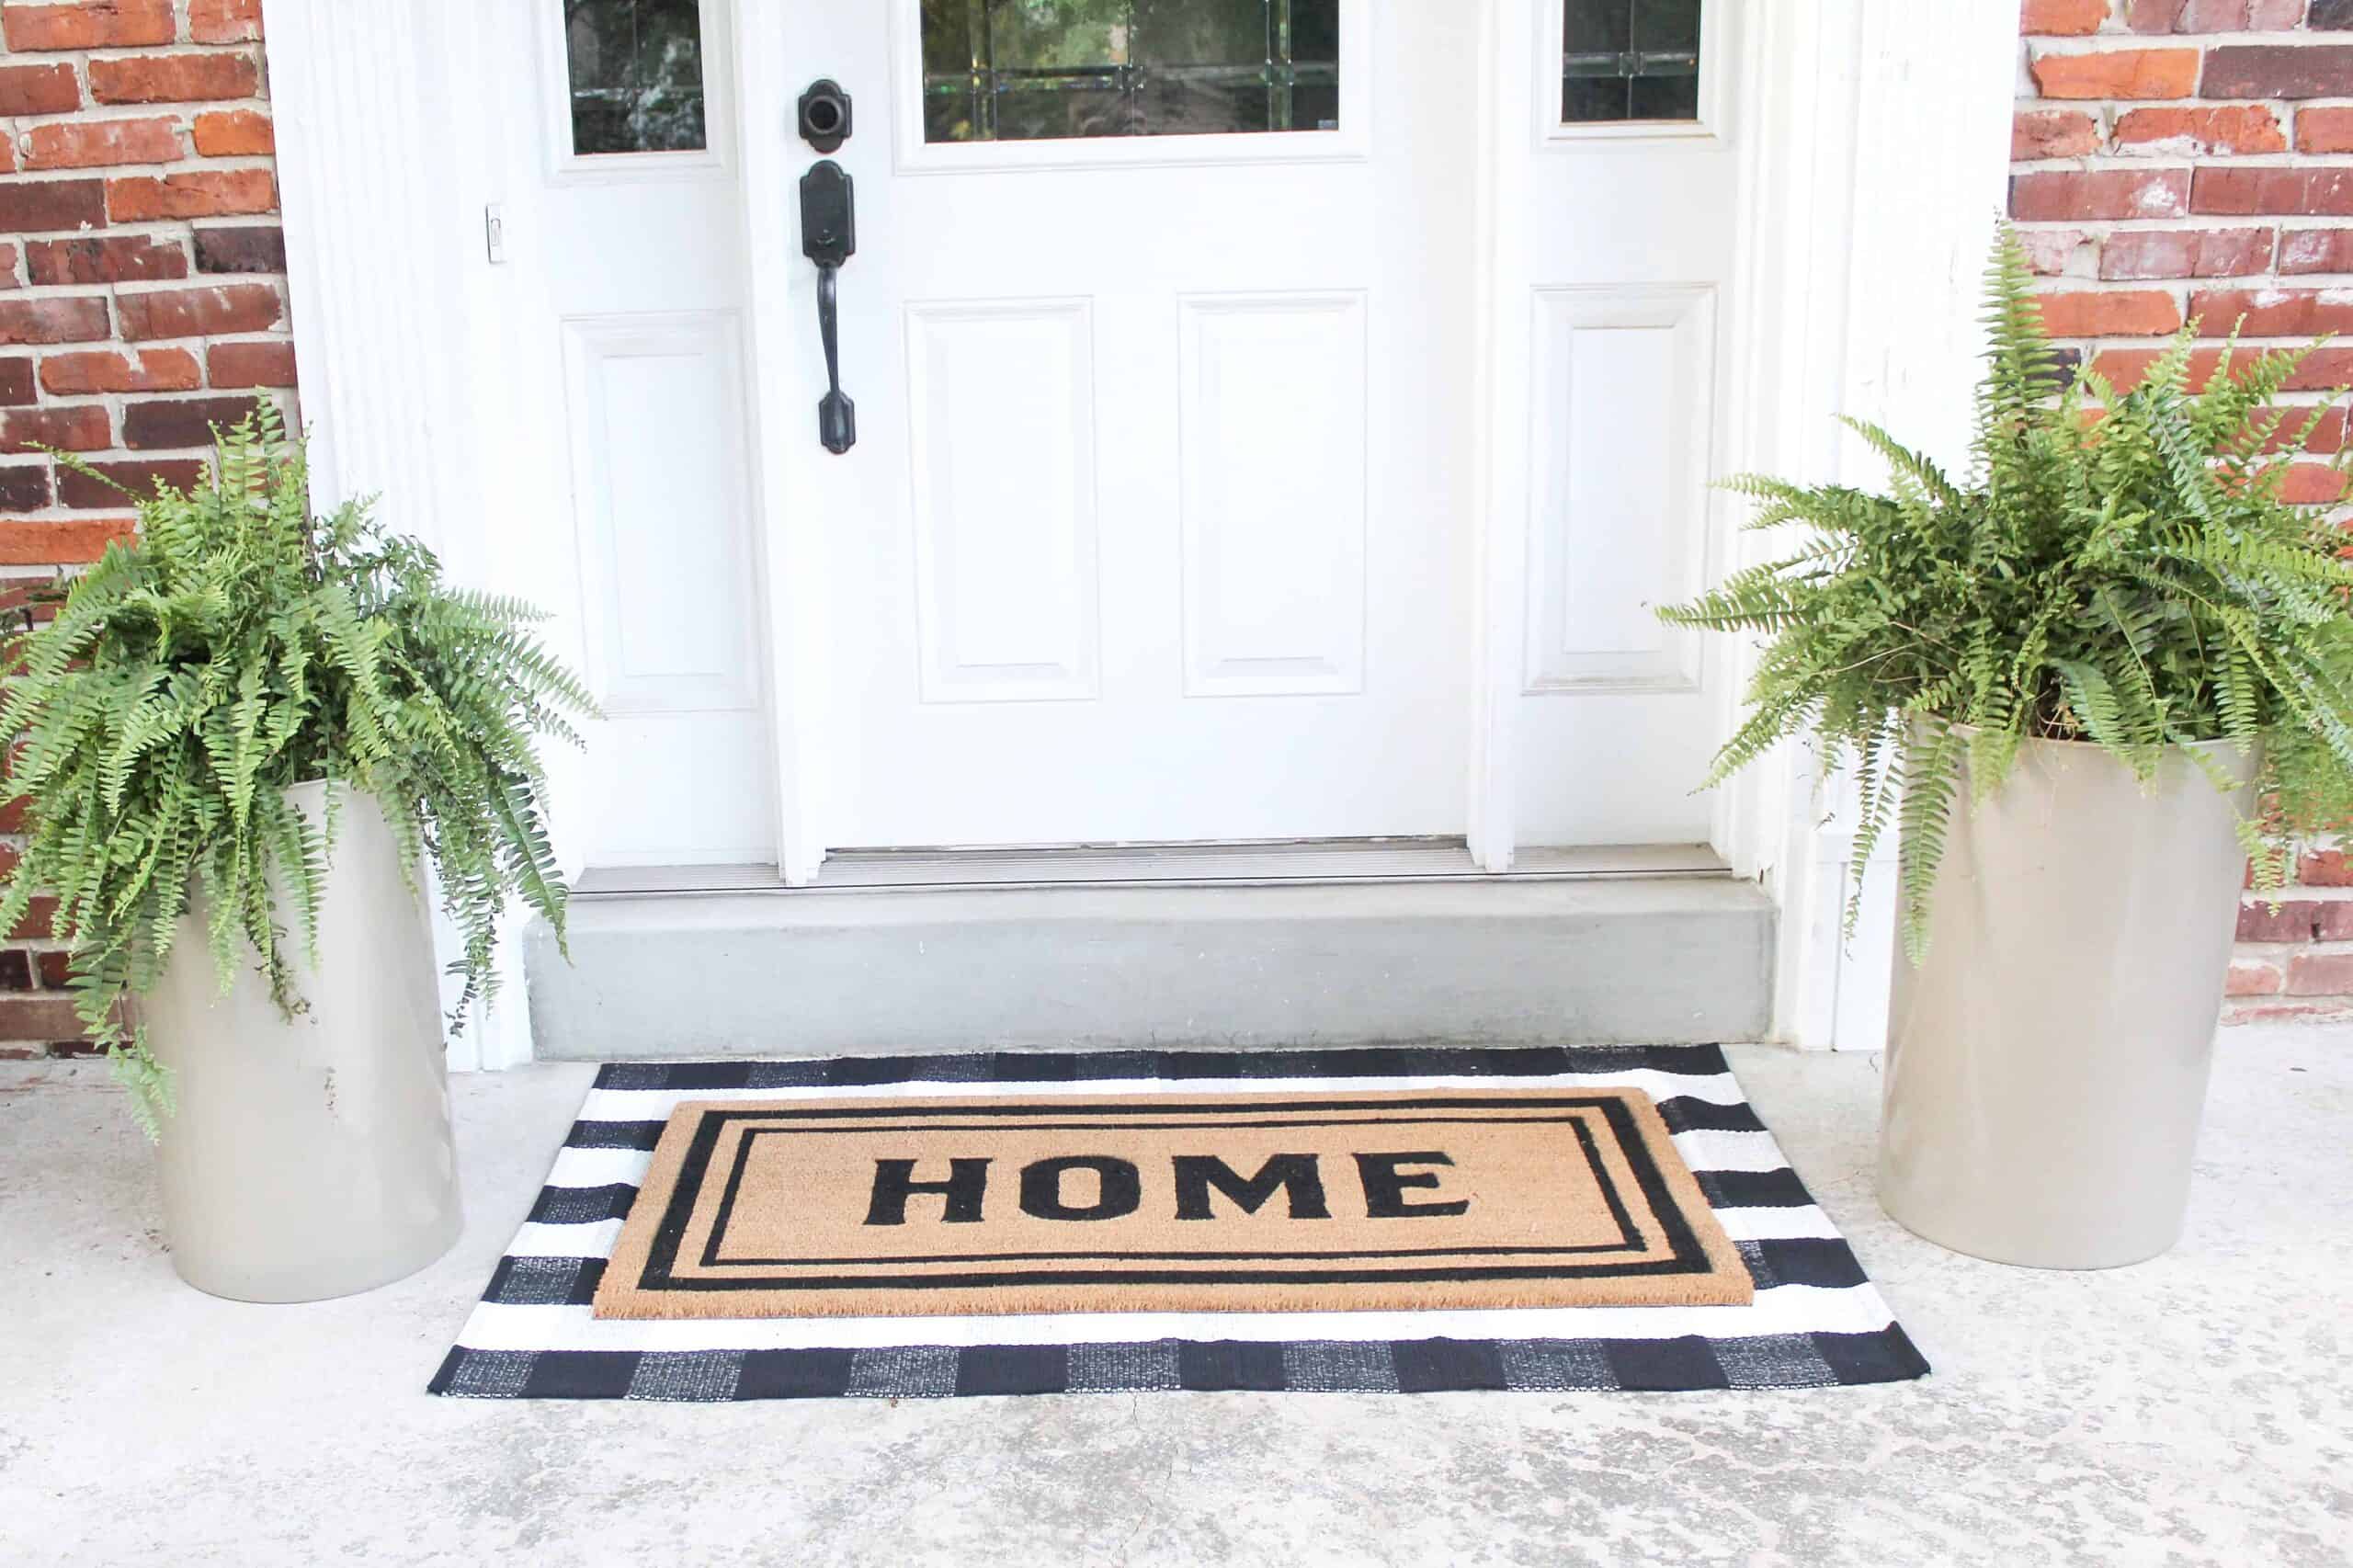
That said – it was time for change. I wanted a new look with the doormats. I was early on the buffalo check layered look, and now I see it all over, so decided to get creative with something different.
I will share all the details to our porch decor, as well as how I made these DIY terracotta pots for roughly $50 for the pair.
How I Made the Planters
Finding large terracotta pots is really expensive. Actually I tend to think finding any large pots that fit my style is expensive. I really wanted the look of terracotta without the price tag…and I also was hoping for something that wouldn’t break so easily.
We grabbed these large planters at Sam’s club for $20 each, and they were the perfect starting point. They are plastic, and I found some for you here that are very similar in price and size!
Sealer – you could skip this if you did outdoor paint
paint brushes – I used what I had on hand so did a foam roller then foam brushes
How to
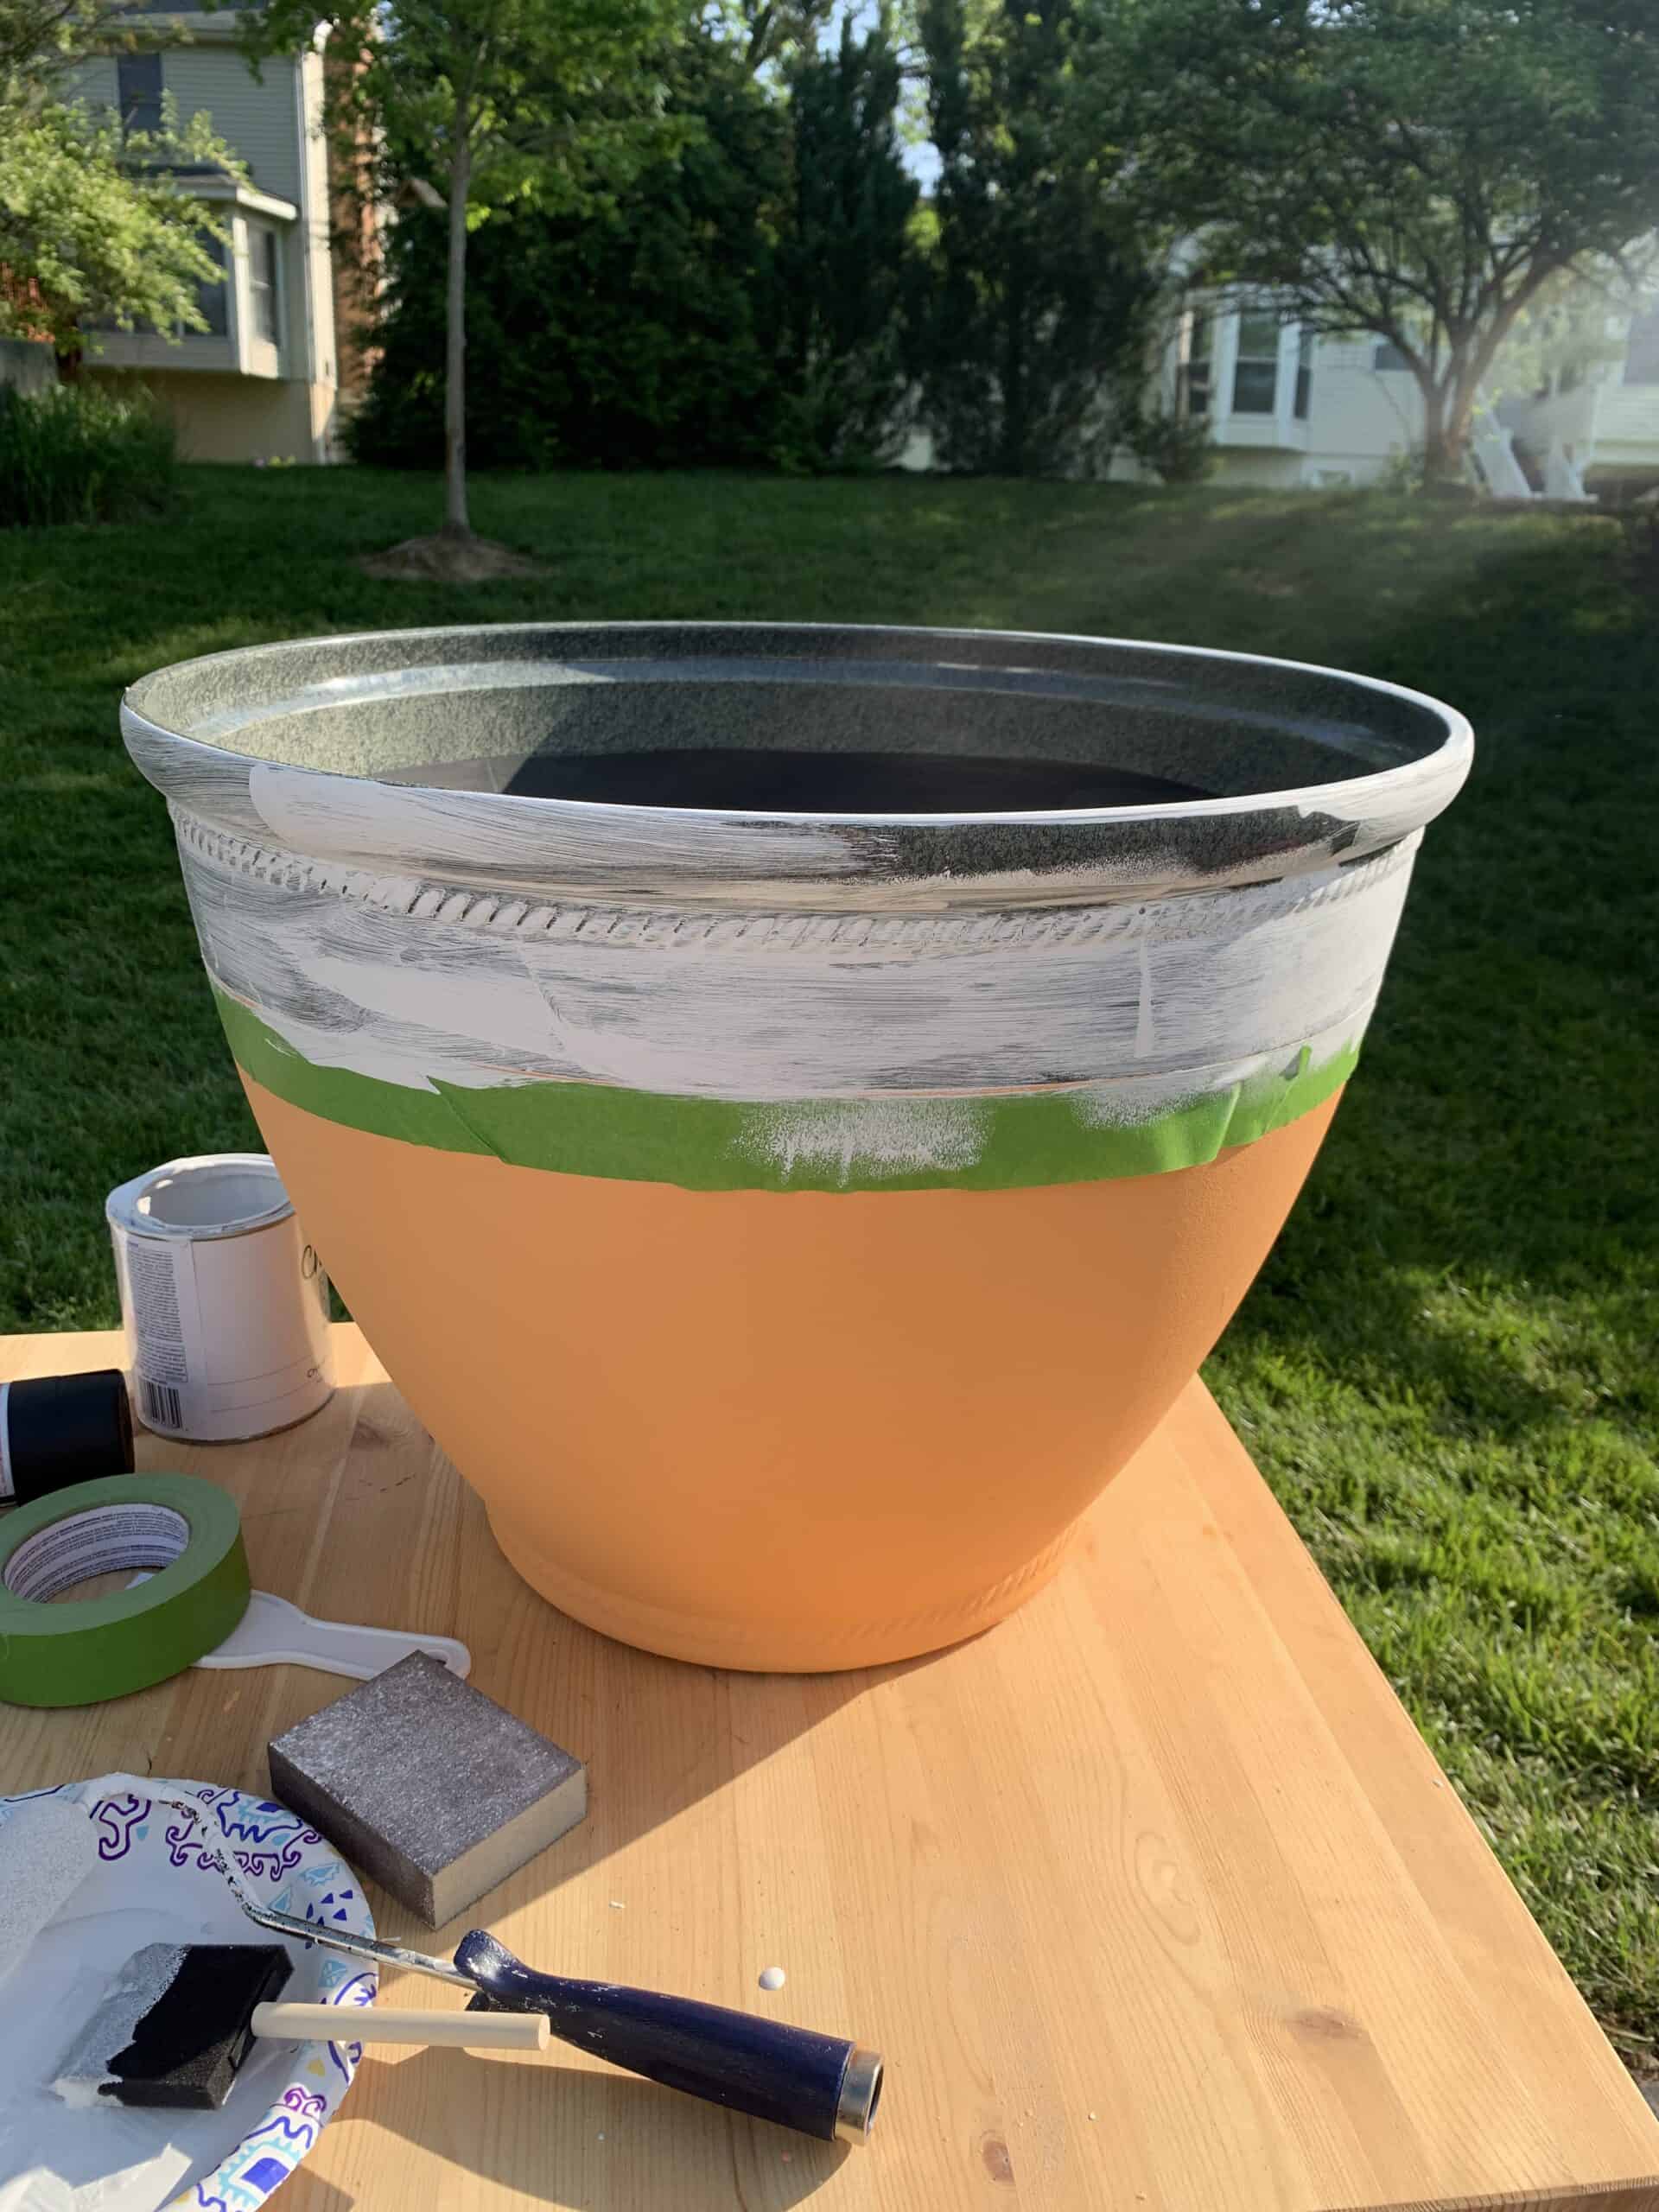
Give your pot a slight scrub down with sand paper – just enough to take some of the shine off.
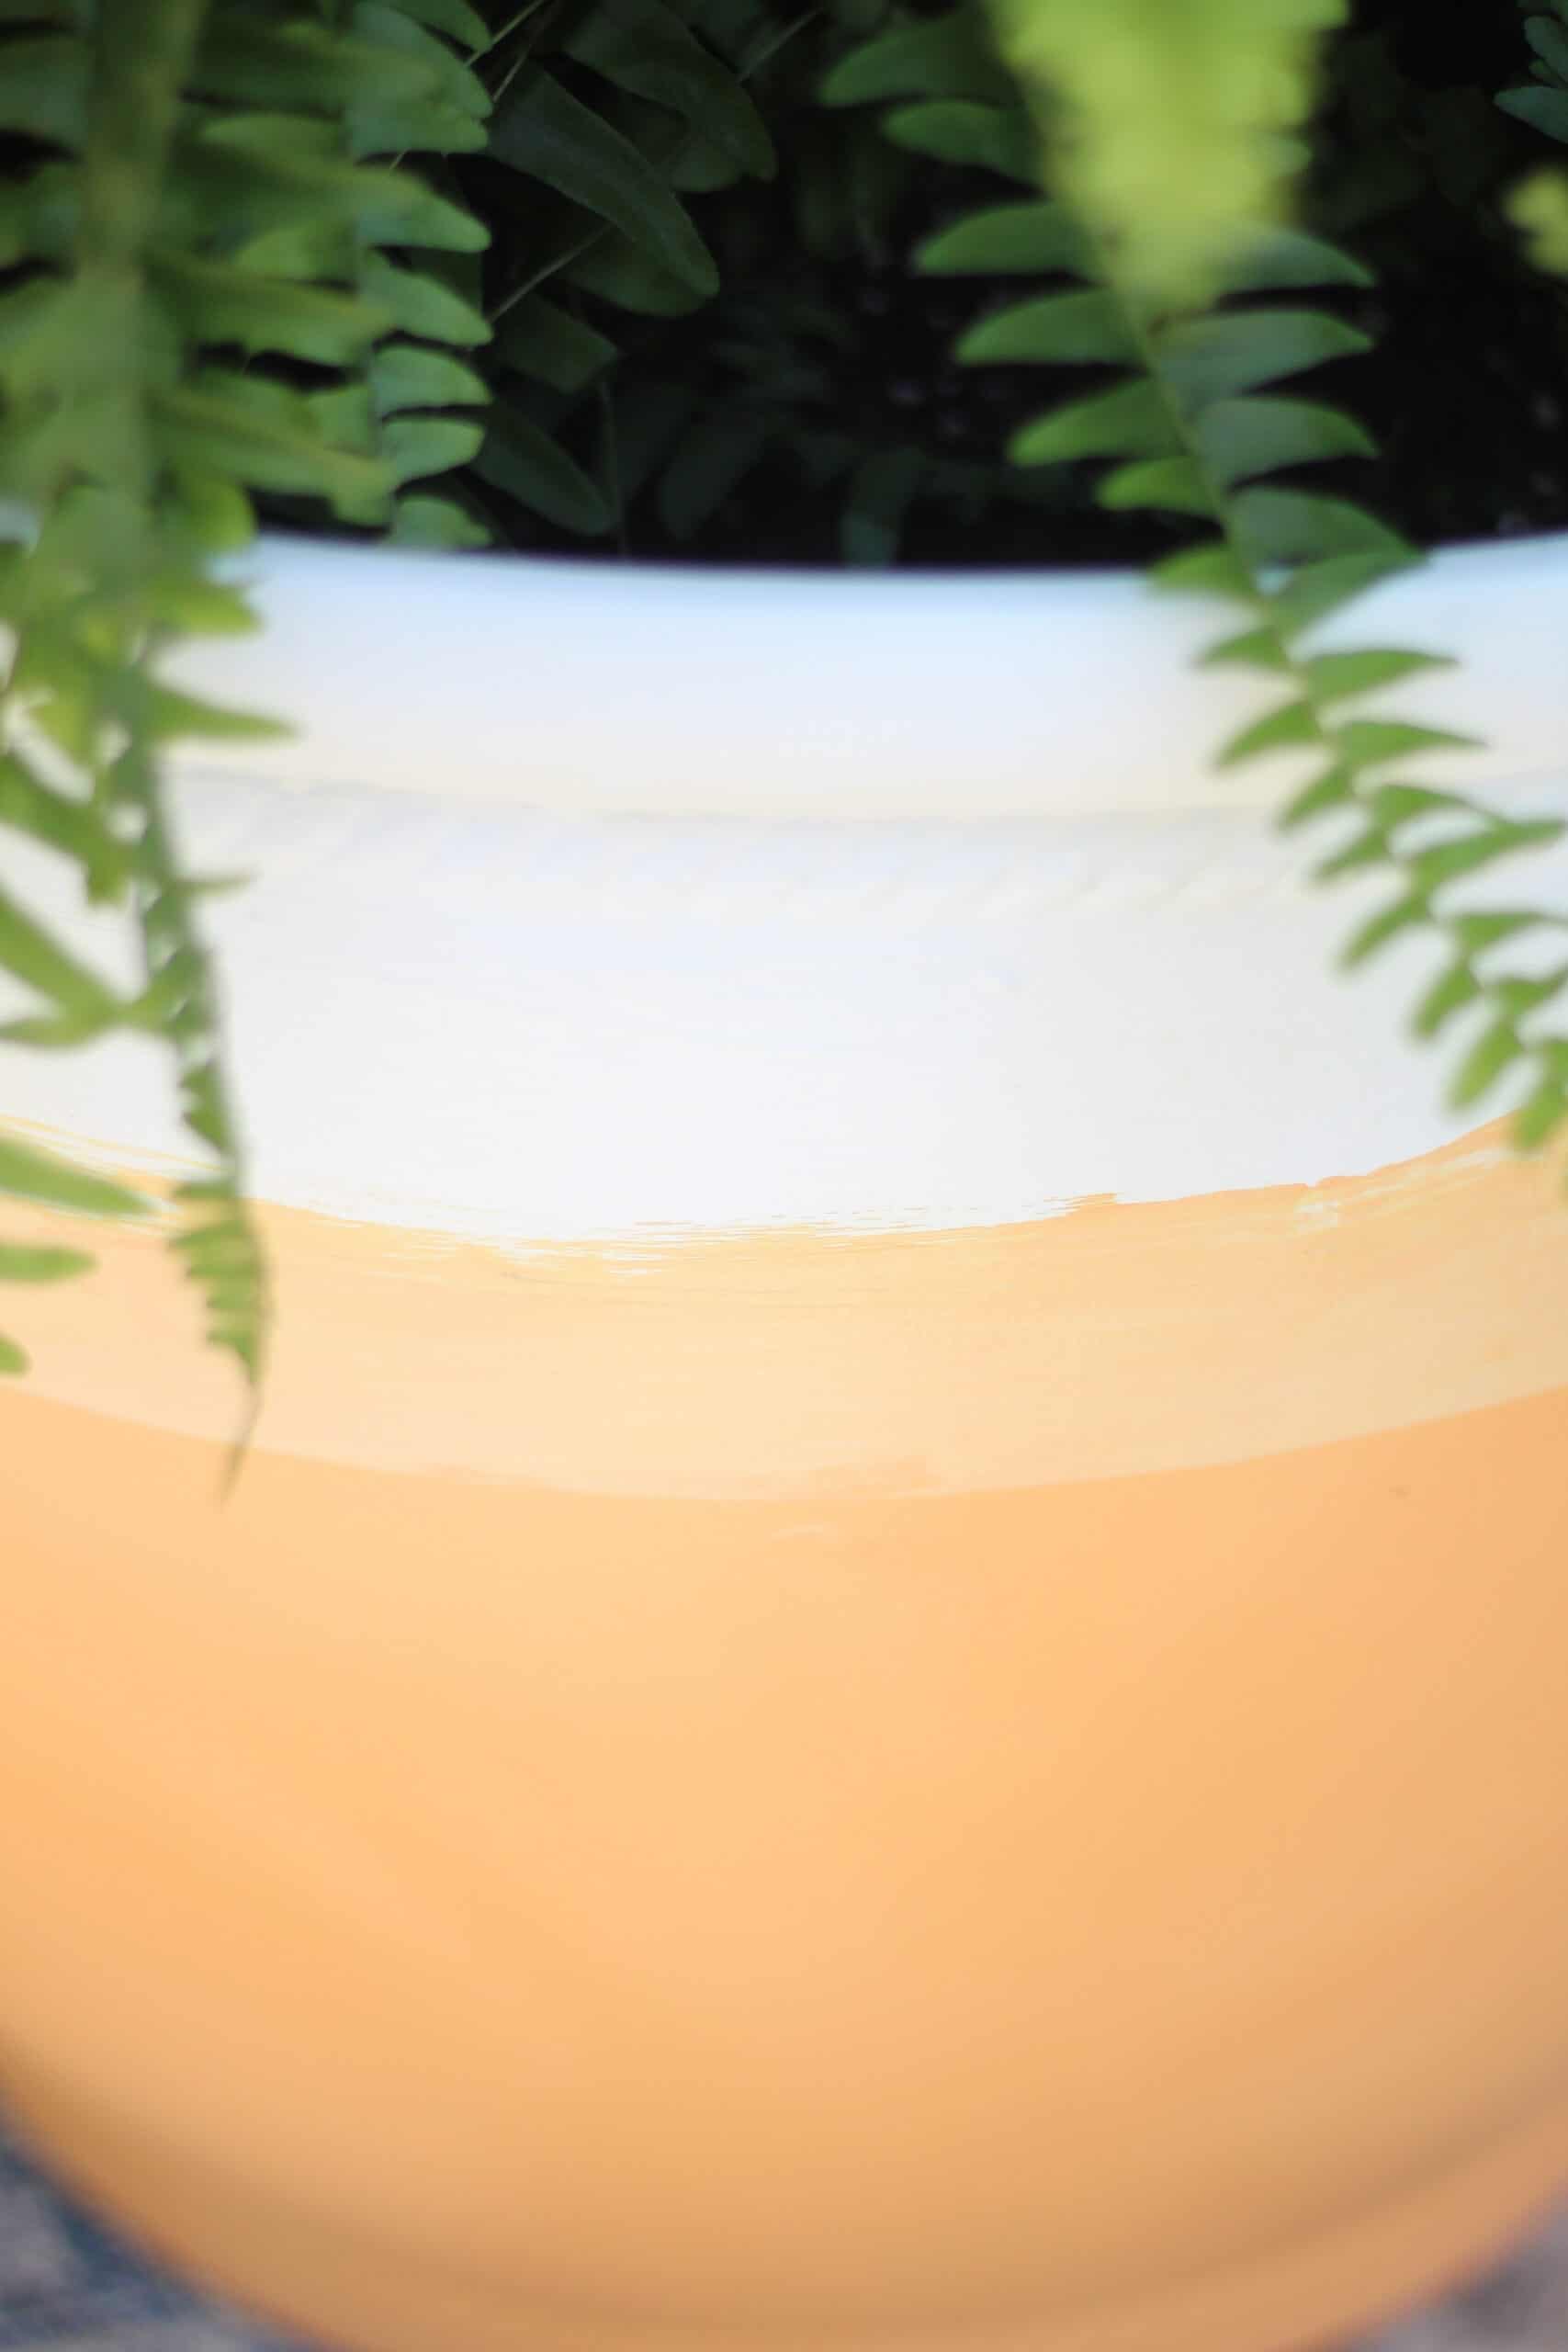
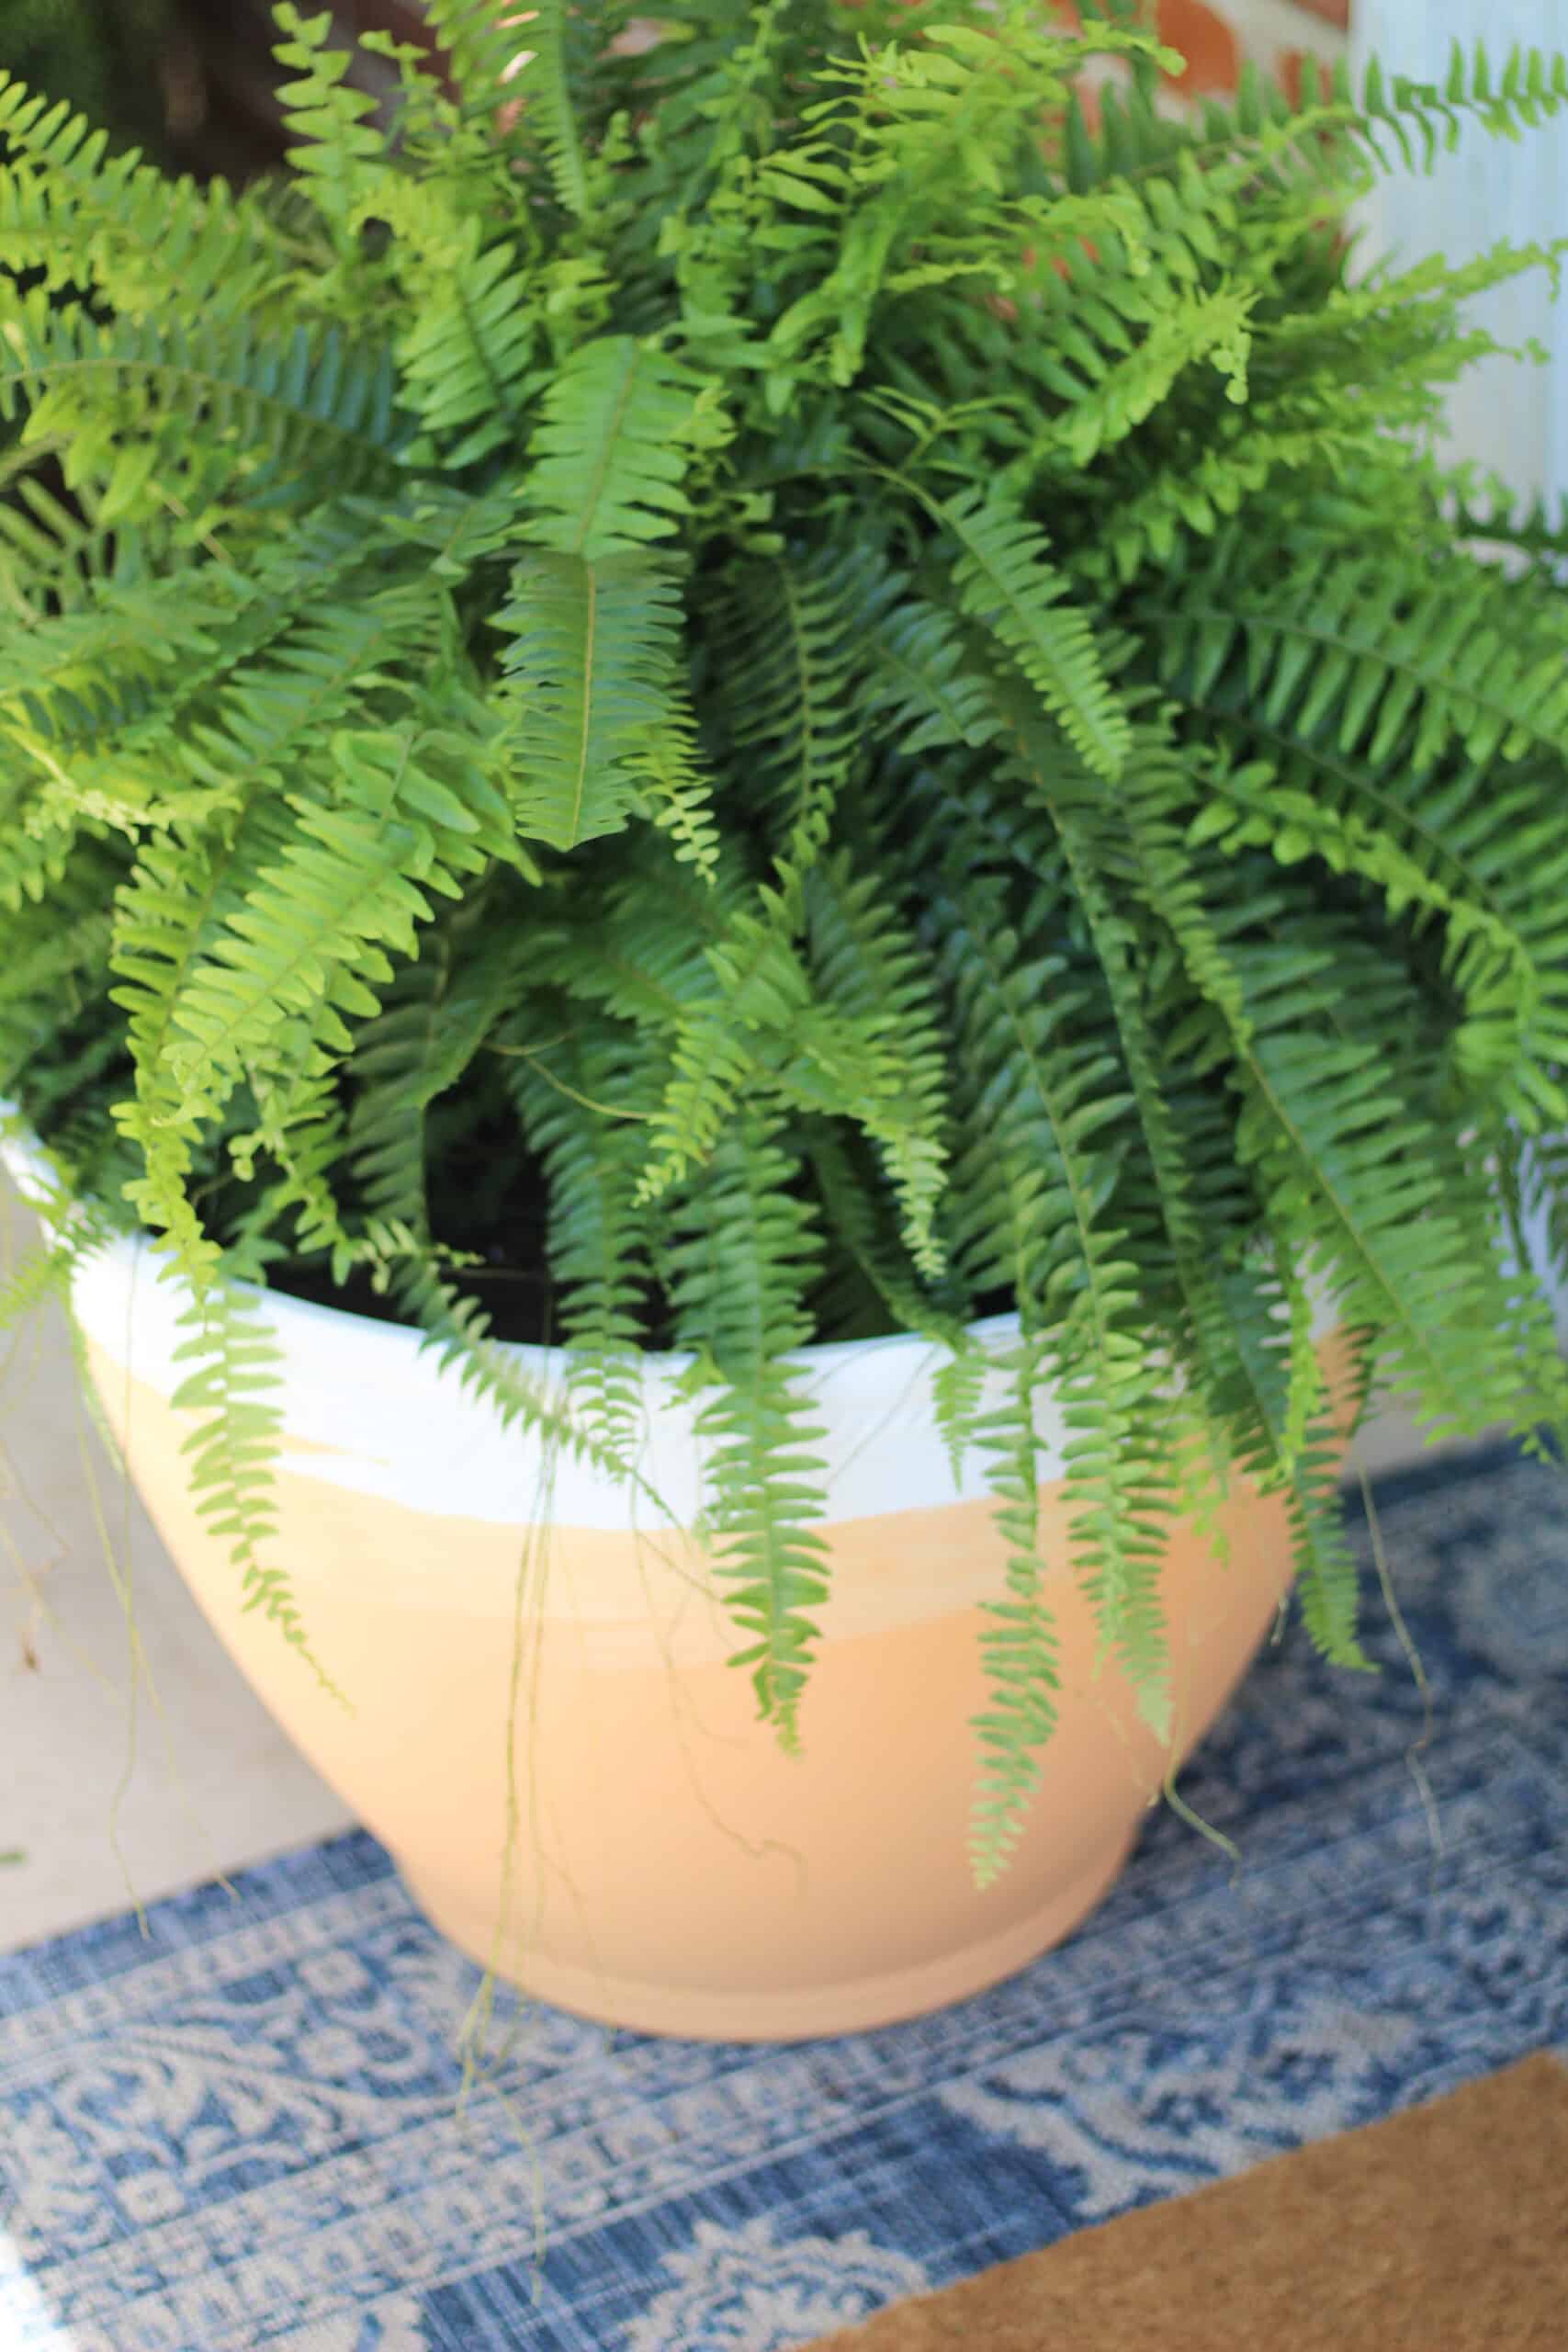
Wrap the pots with a line of painters tape roughly 3/4 inches down from the top. This is the top of the solid orange, so you can use your own discretion. And because of the nature of the pots it doesn’t have to be perfect.
Now paint below that line with the orange paint. You will have to do a few light coats – let them dry for a bit between each or you will pick up the paint. (as a reminder – terracotta pots are supposed to be a little rustic, so don’t worry if its perfectly smooth)
Paint above the Tape with white paint – I also painted the inside going down about 4 inches.
Once both of those areas are fully covered with a few coats and the paint is dry, remove the painters tape.
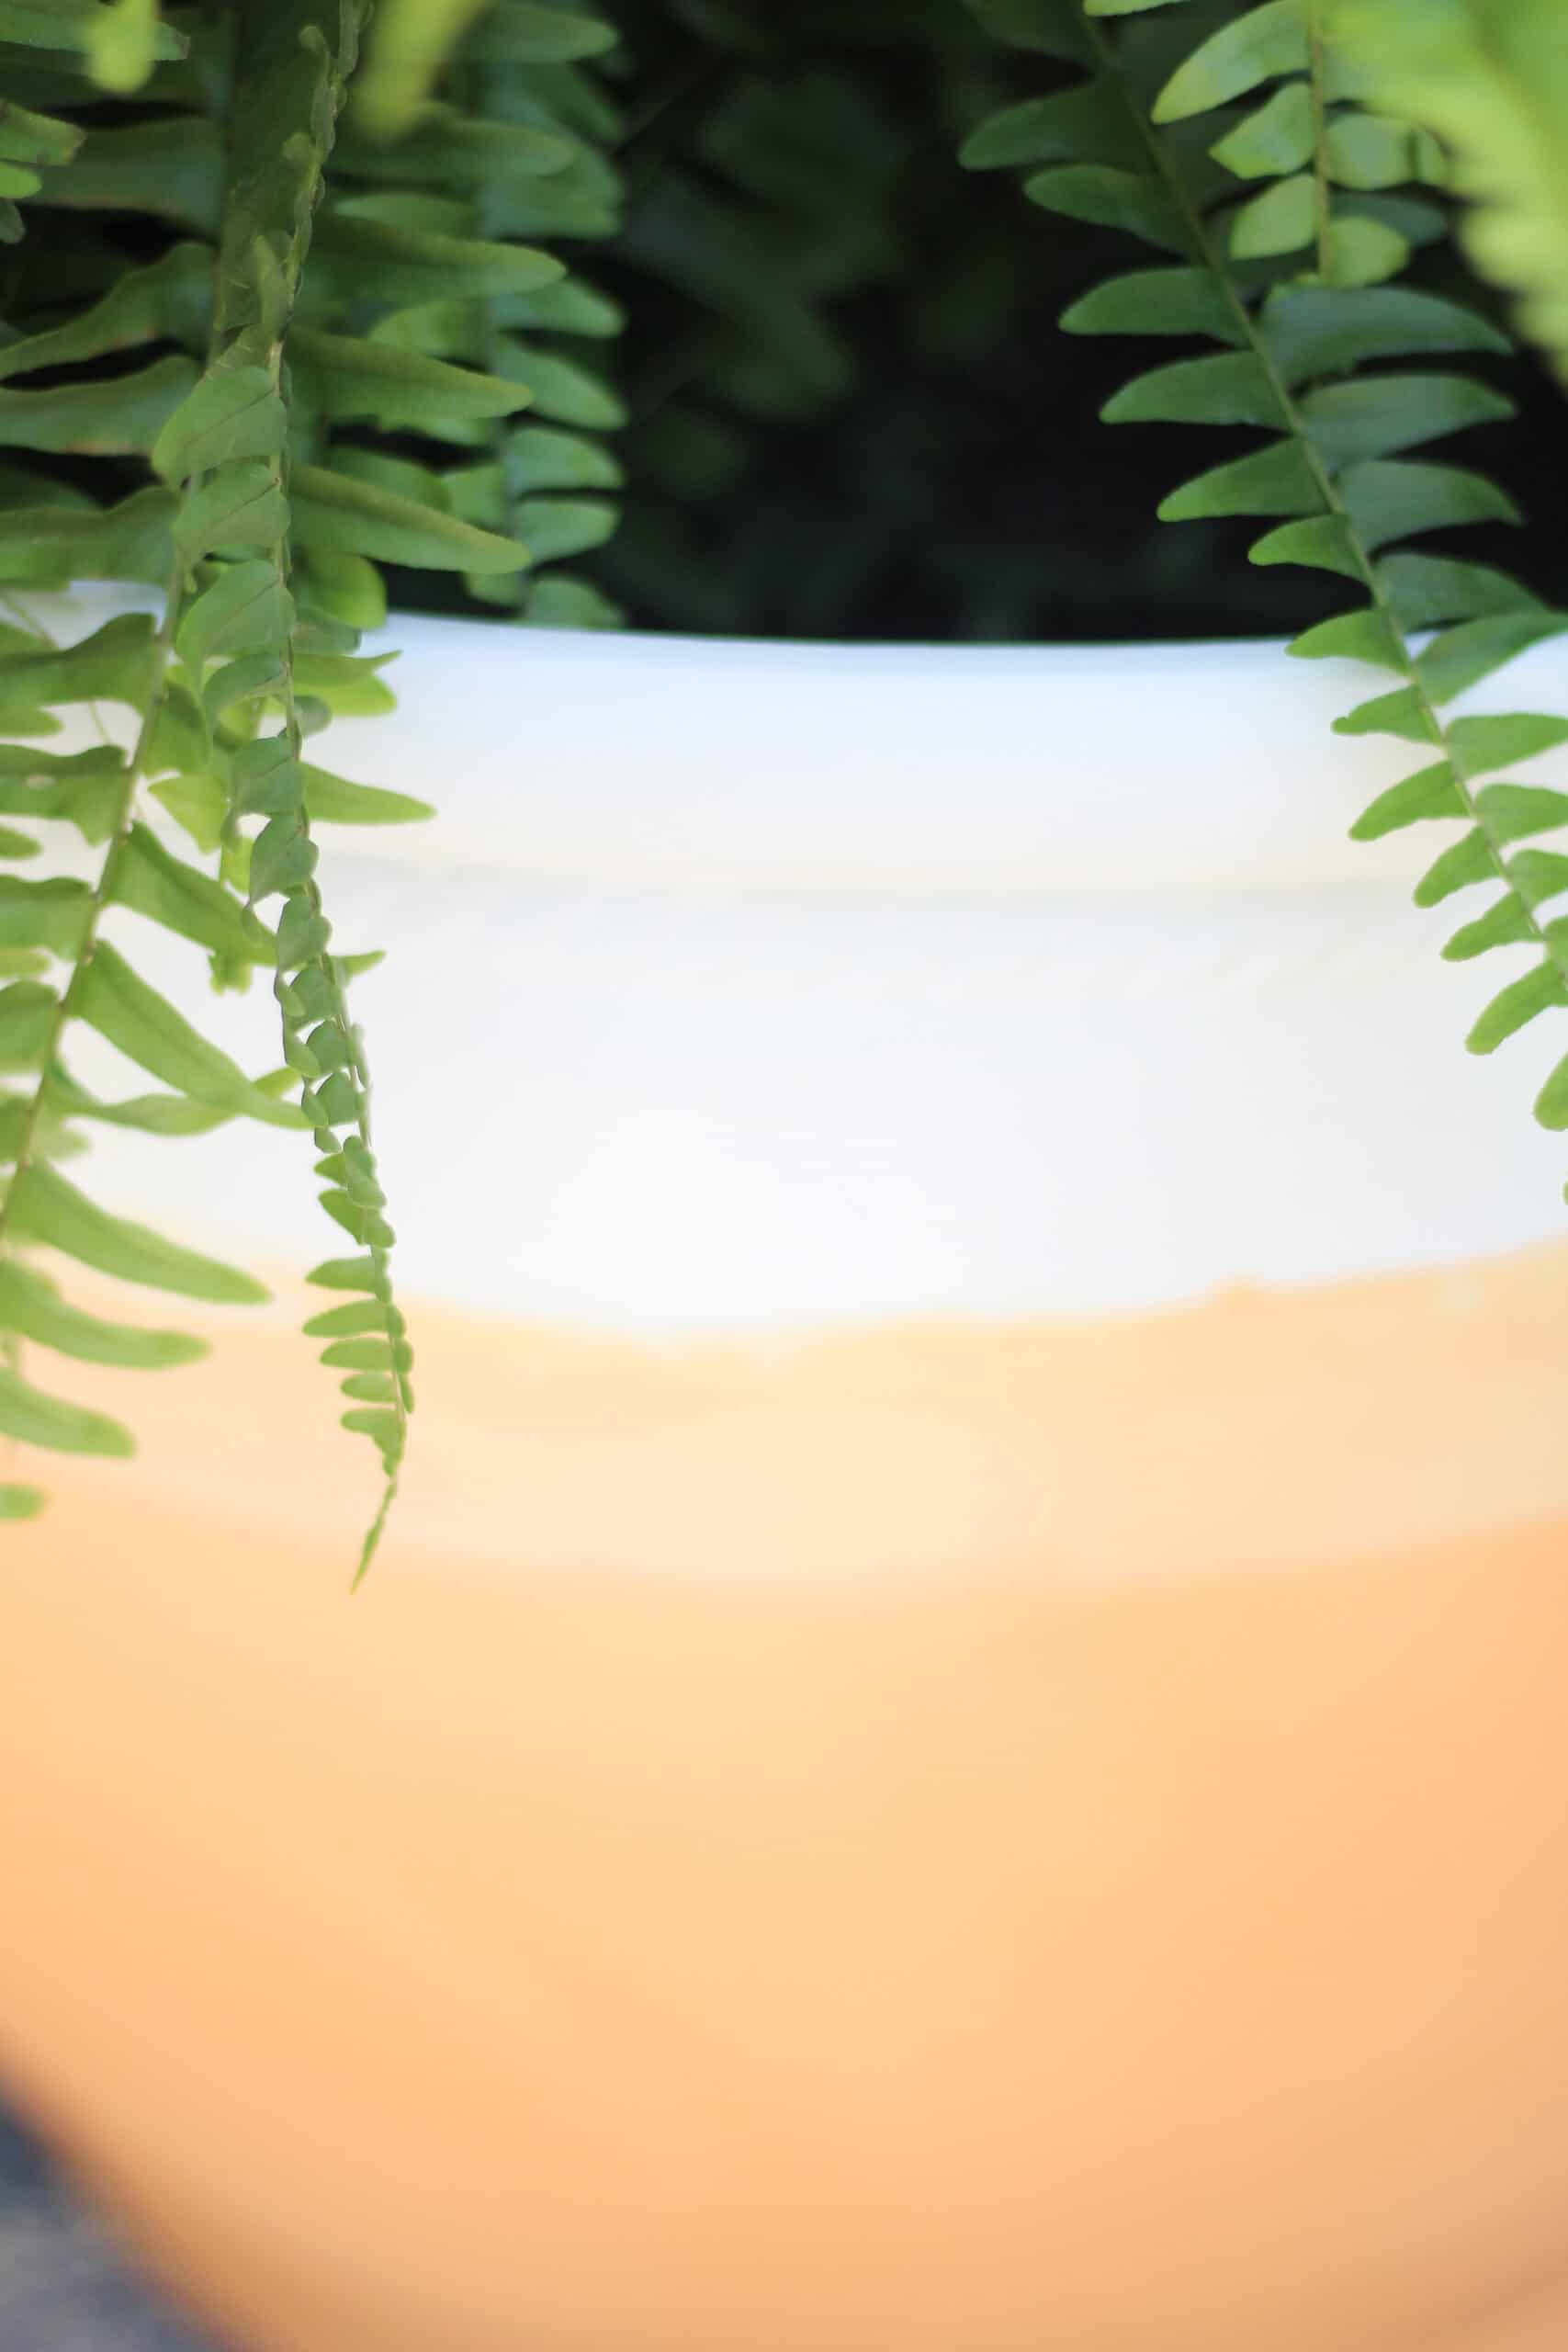
Mix equal parts orange and white paint – but leave it a little unmixed. – Take a paint brush and fill in the unpainted line that was under the painters tape. Make the line a bit messy going onto the orange and white to give it a a sunrise look.
Once it is done to your liking let it dry, then spray it well with 2 coats of polly spray paint and you are set!
Styling the Porch
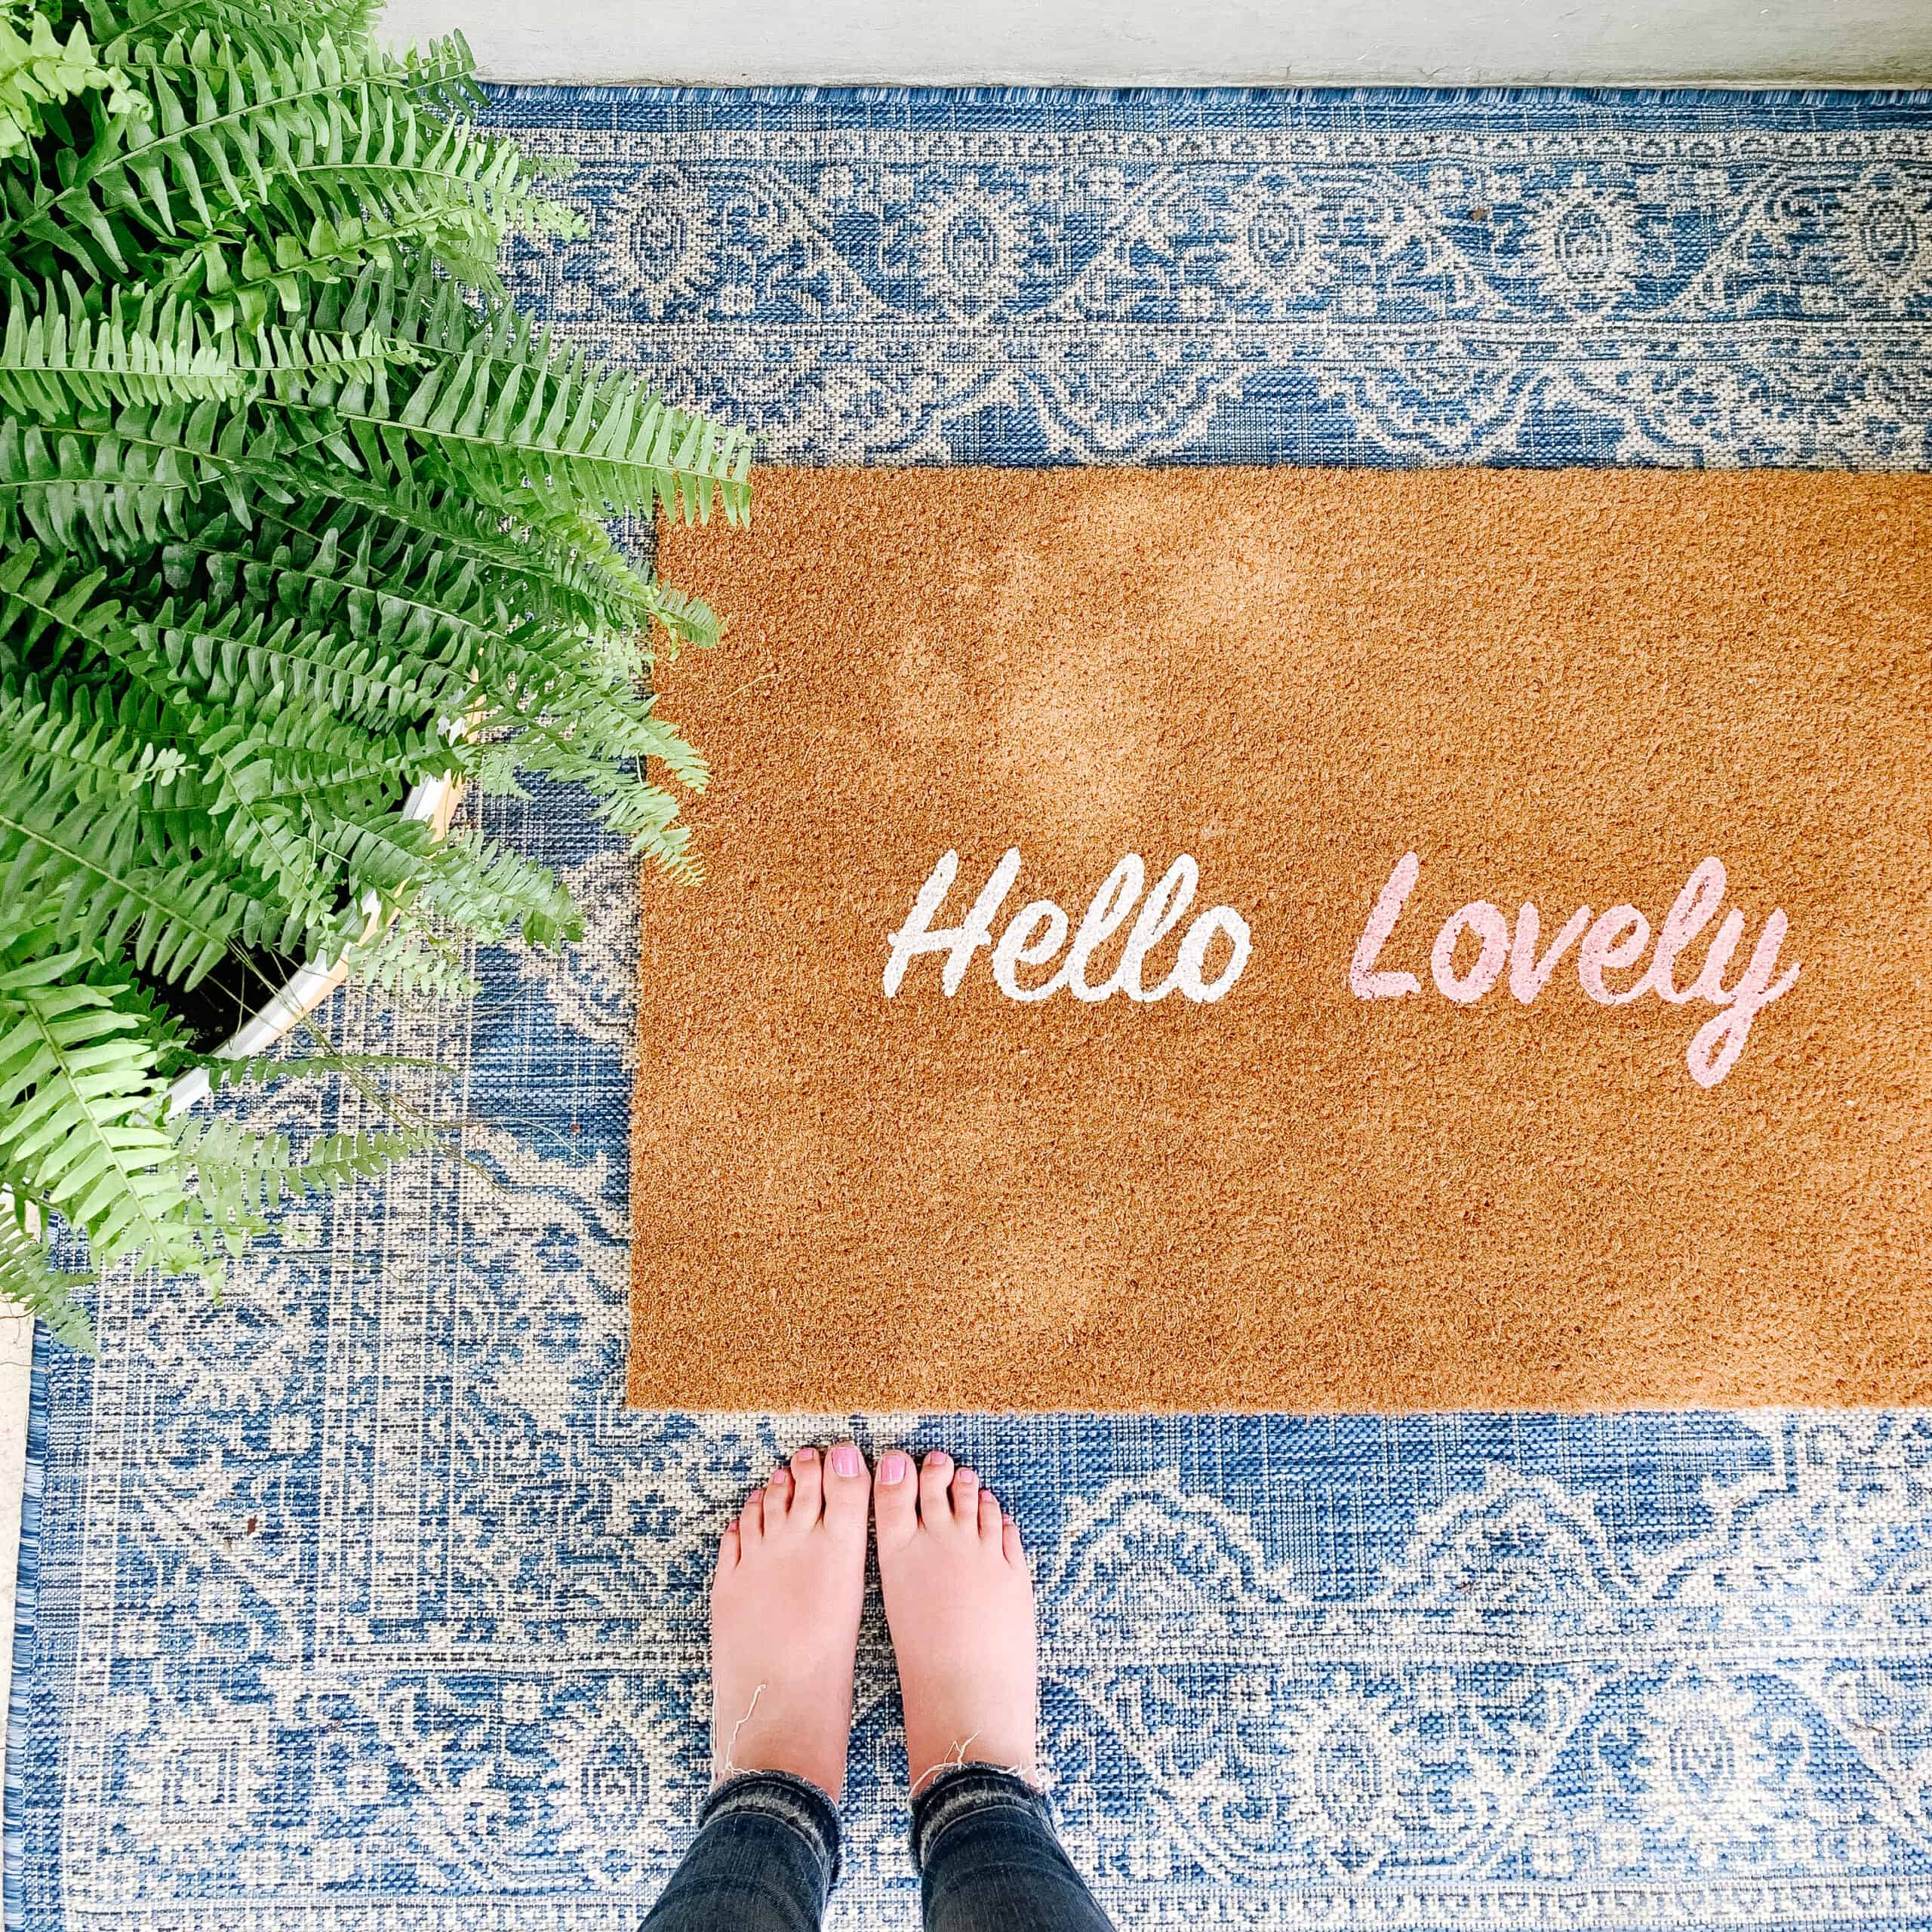
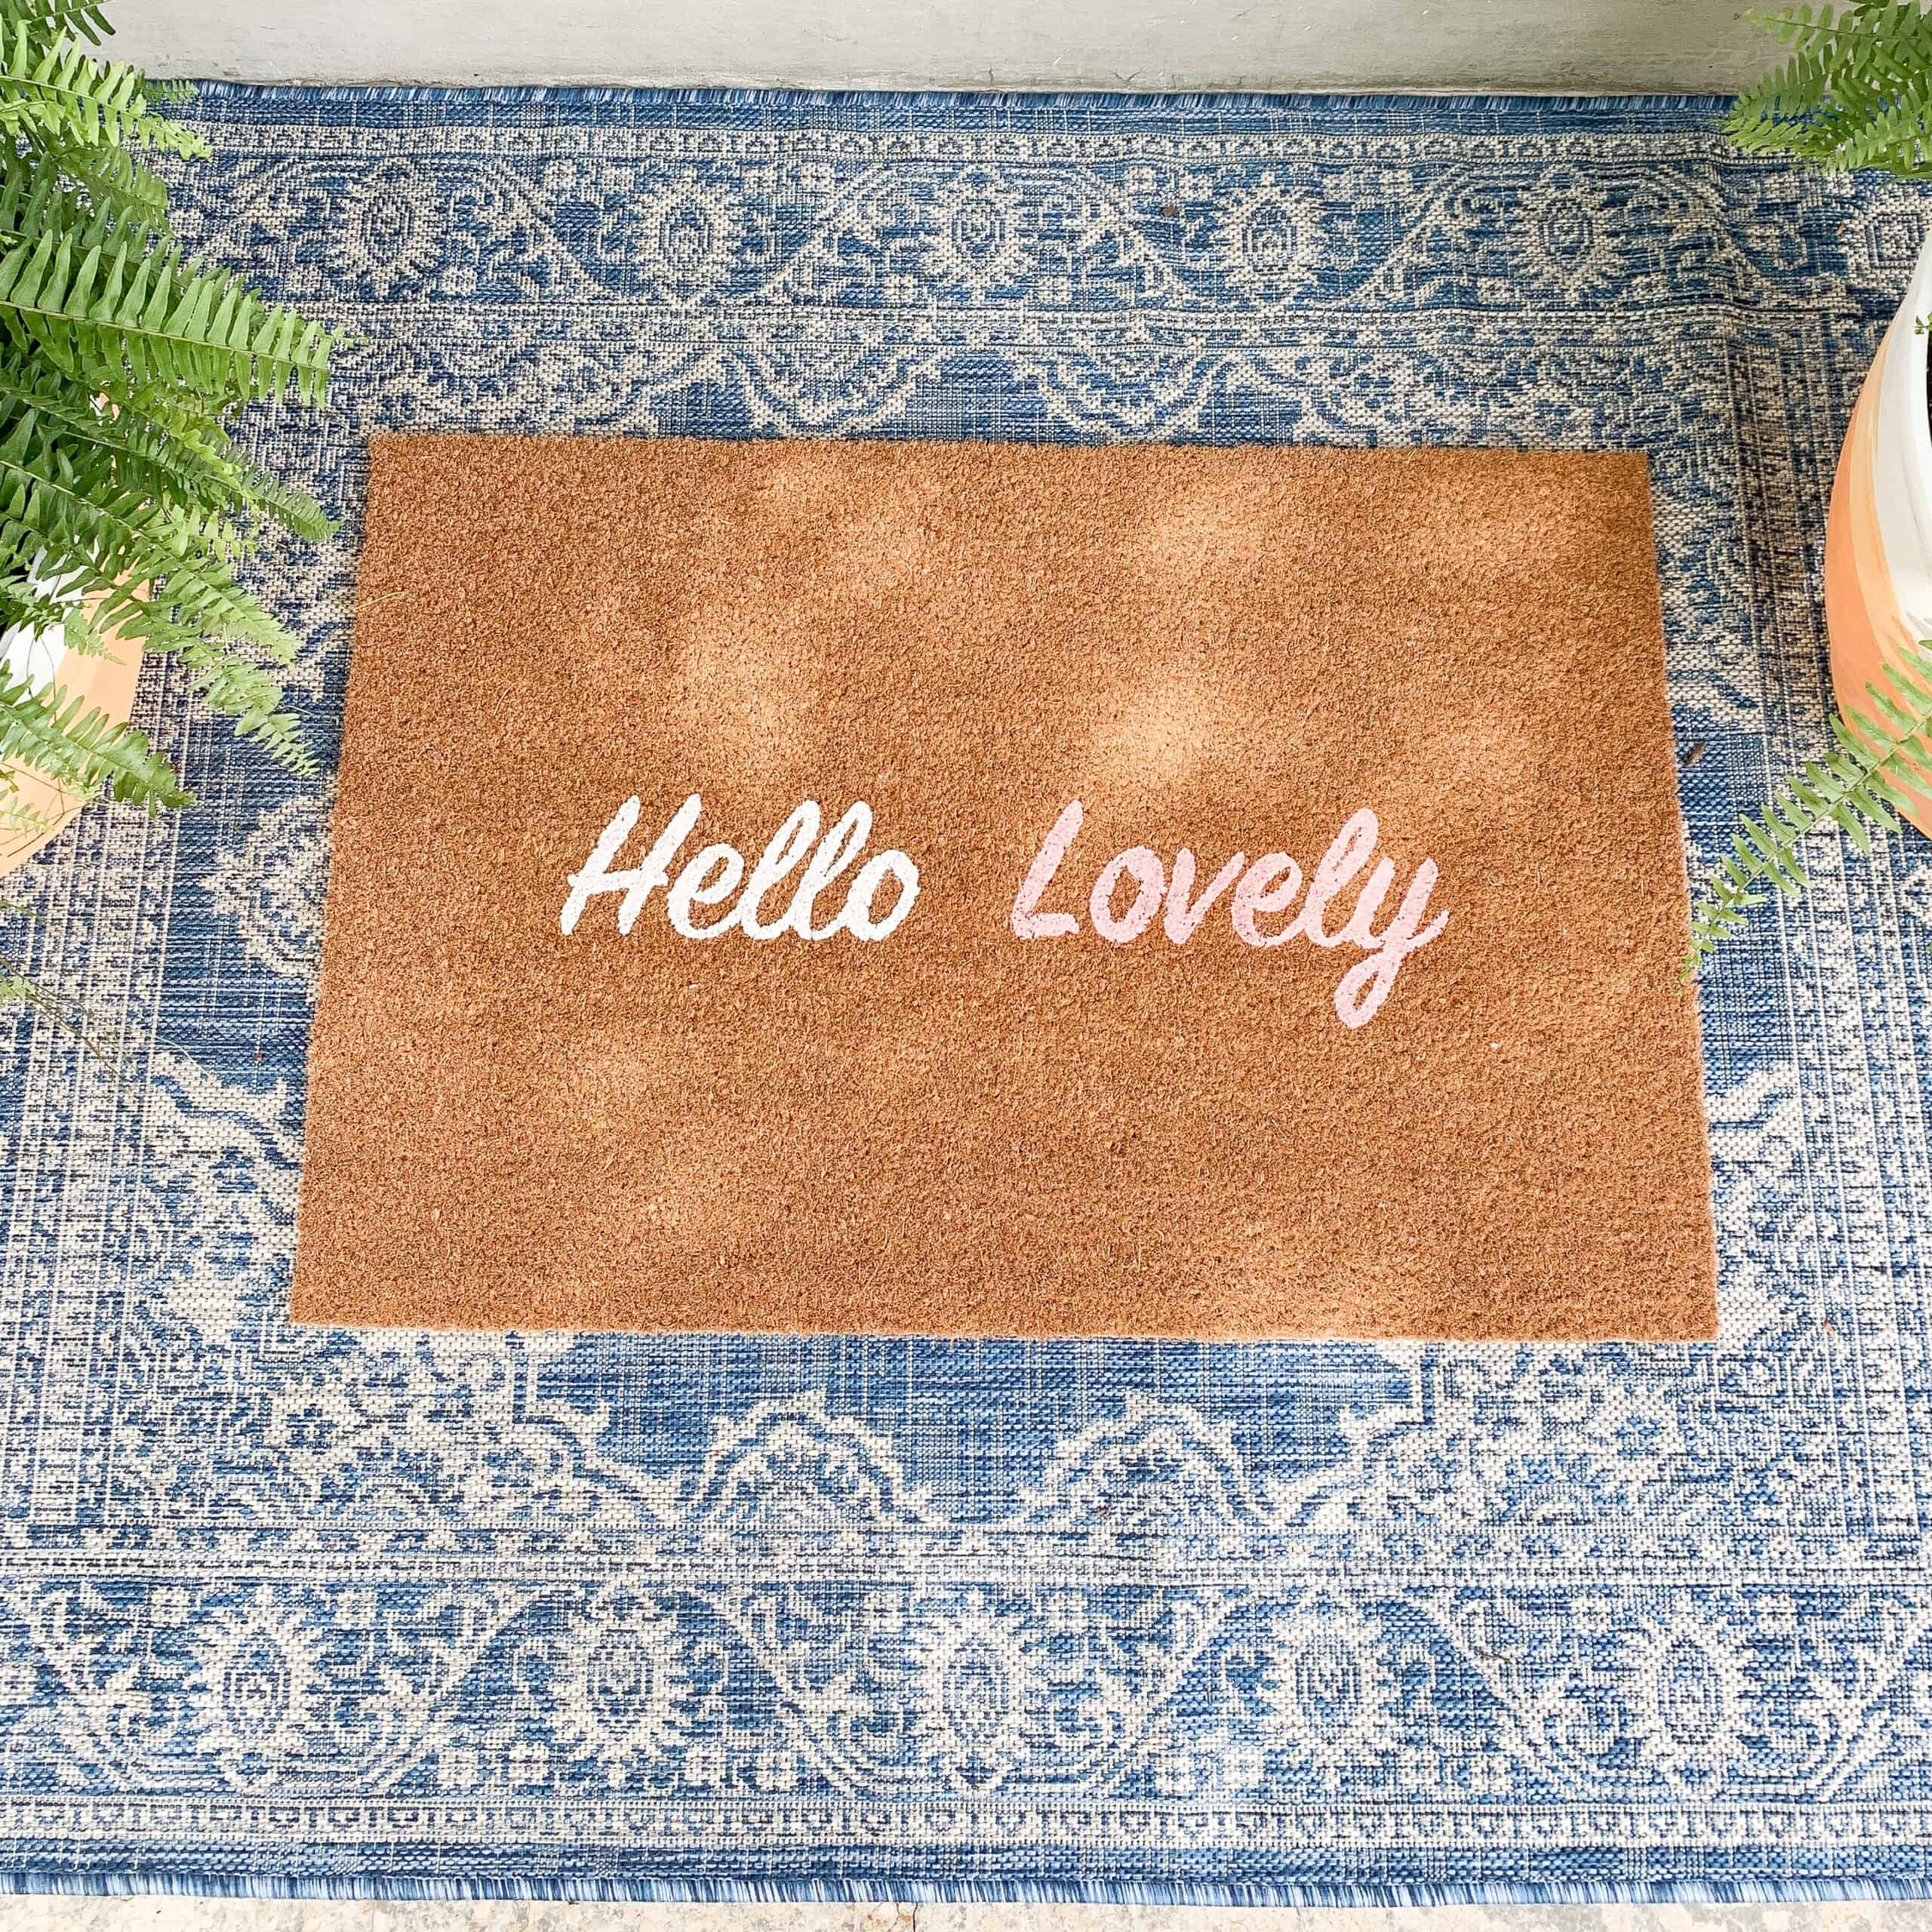
Now it came time to style my porch for these little beauties, and like I said – I was ready for a change from my previous mats.
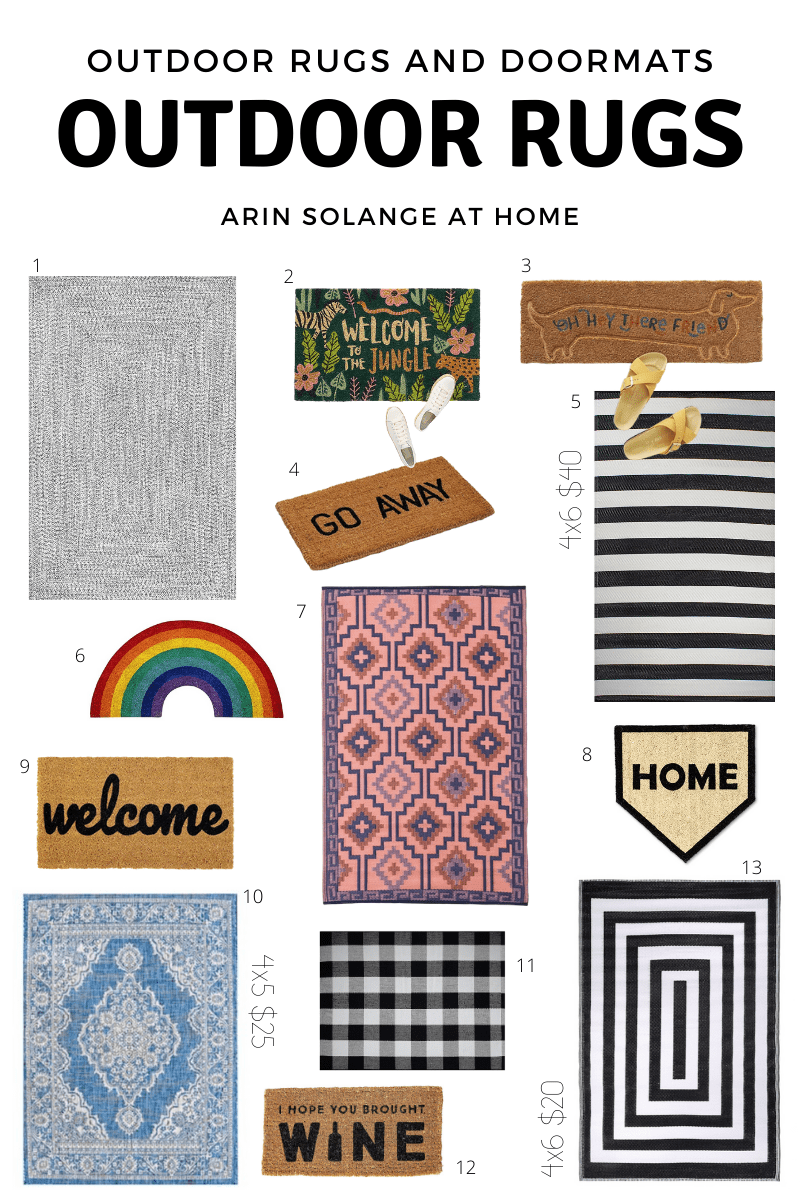
I went with this blue large under rug for $25 dollars (seriously such. a. deal!) and did a DIY mat on the top. The DIY Tutorial is highlighted on my Instagram, but because layering rugs can be so much fun, I rounded up some other great options that you might love below!
Hopefully between the DIY terracotta pot and these fun doormat and rug options this gives you great inspiration for your outdoor space! Be sure to check out the posts below for more inspiration, and if you have any questions or want to see how I made my doormat check out my Instagram!
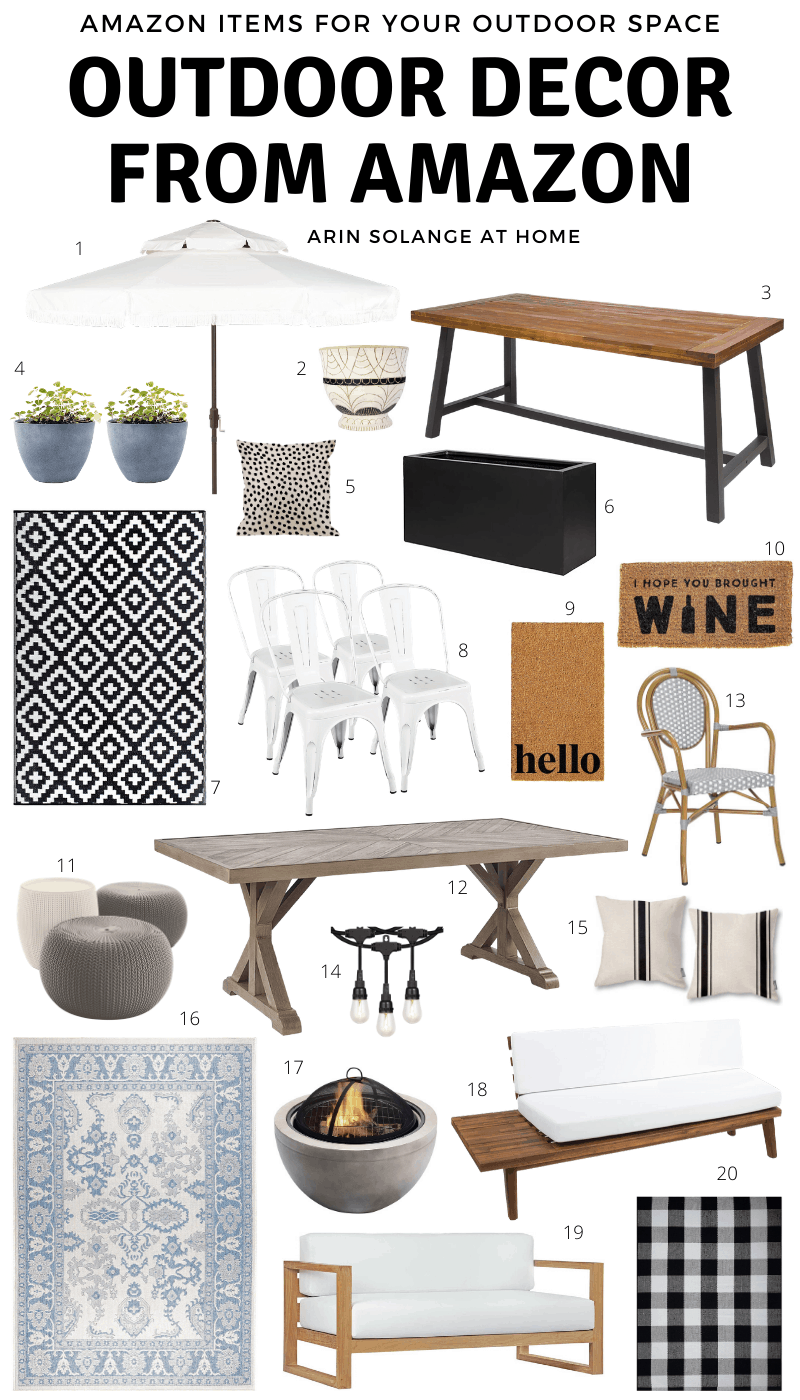
I have had the request for more Amazon round ups recently, so I am going to try to crank a few out over the next few weeks! Today is all about outdoor furniture and decor from Amazon. I am focusing on my outdoor space right now, so I figure many of you are too, and this might be a helpful post for finding fun decor in your home!
this post may contain affiliate links read more in my disclosure policy
Outdoor Furniture and Decor from Amazon
If you are new around here – I round up Amazon decor or fashion pretty often. I am fairly passionate about finding hidden gems on Amazon that take some digging, but the best part about it is that many times they are super affordable.
Not always is it a budget find – I try to read reviews and make sure I am only sharing high quality items, but for some items you just can’t beat the prices on Amazon.
If you are looking for other Amazon finds they are all HERE!
Decorating an Outdoor Space
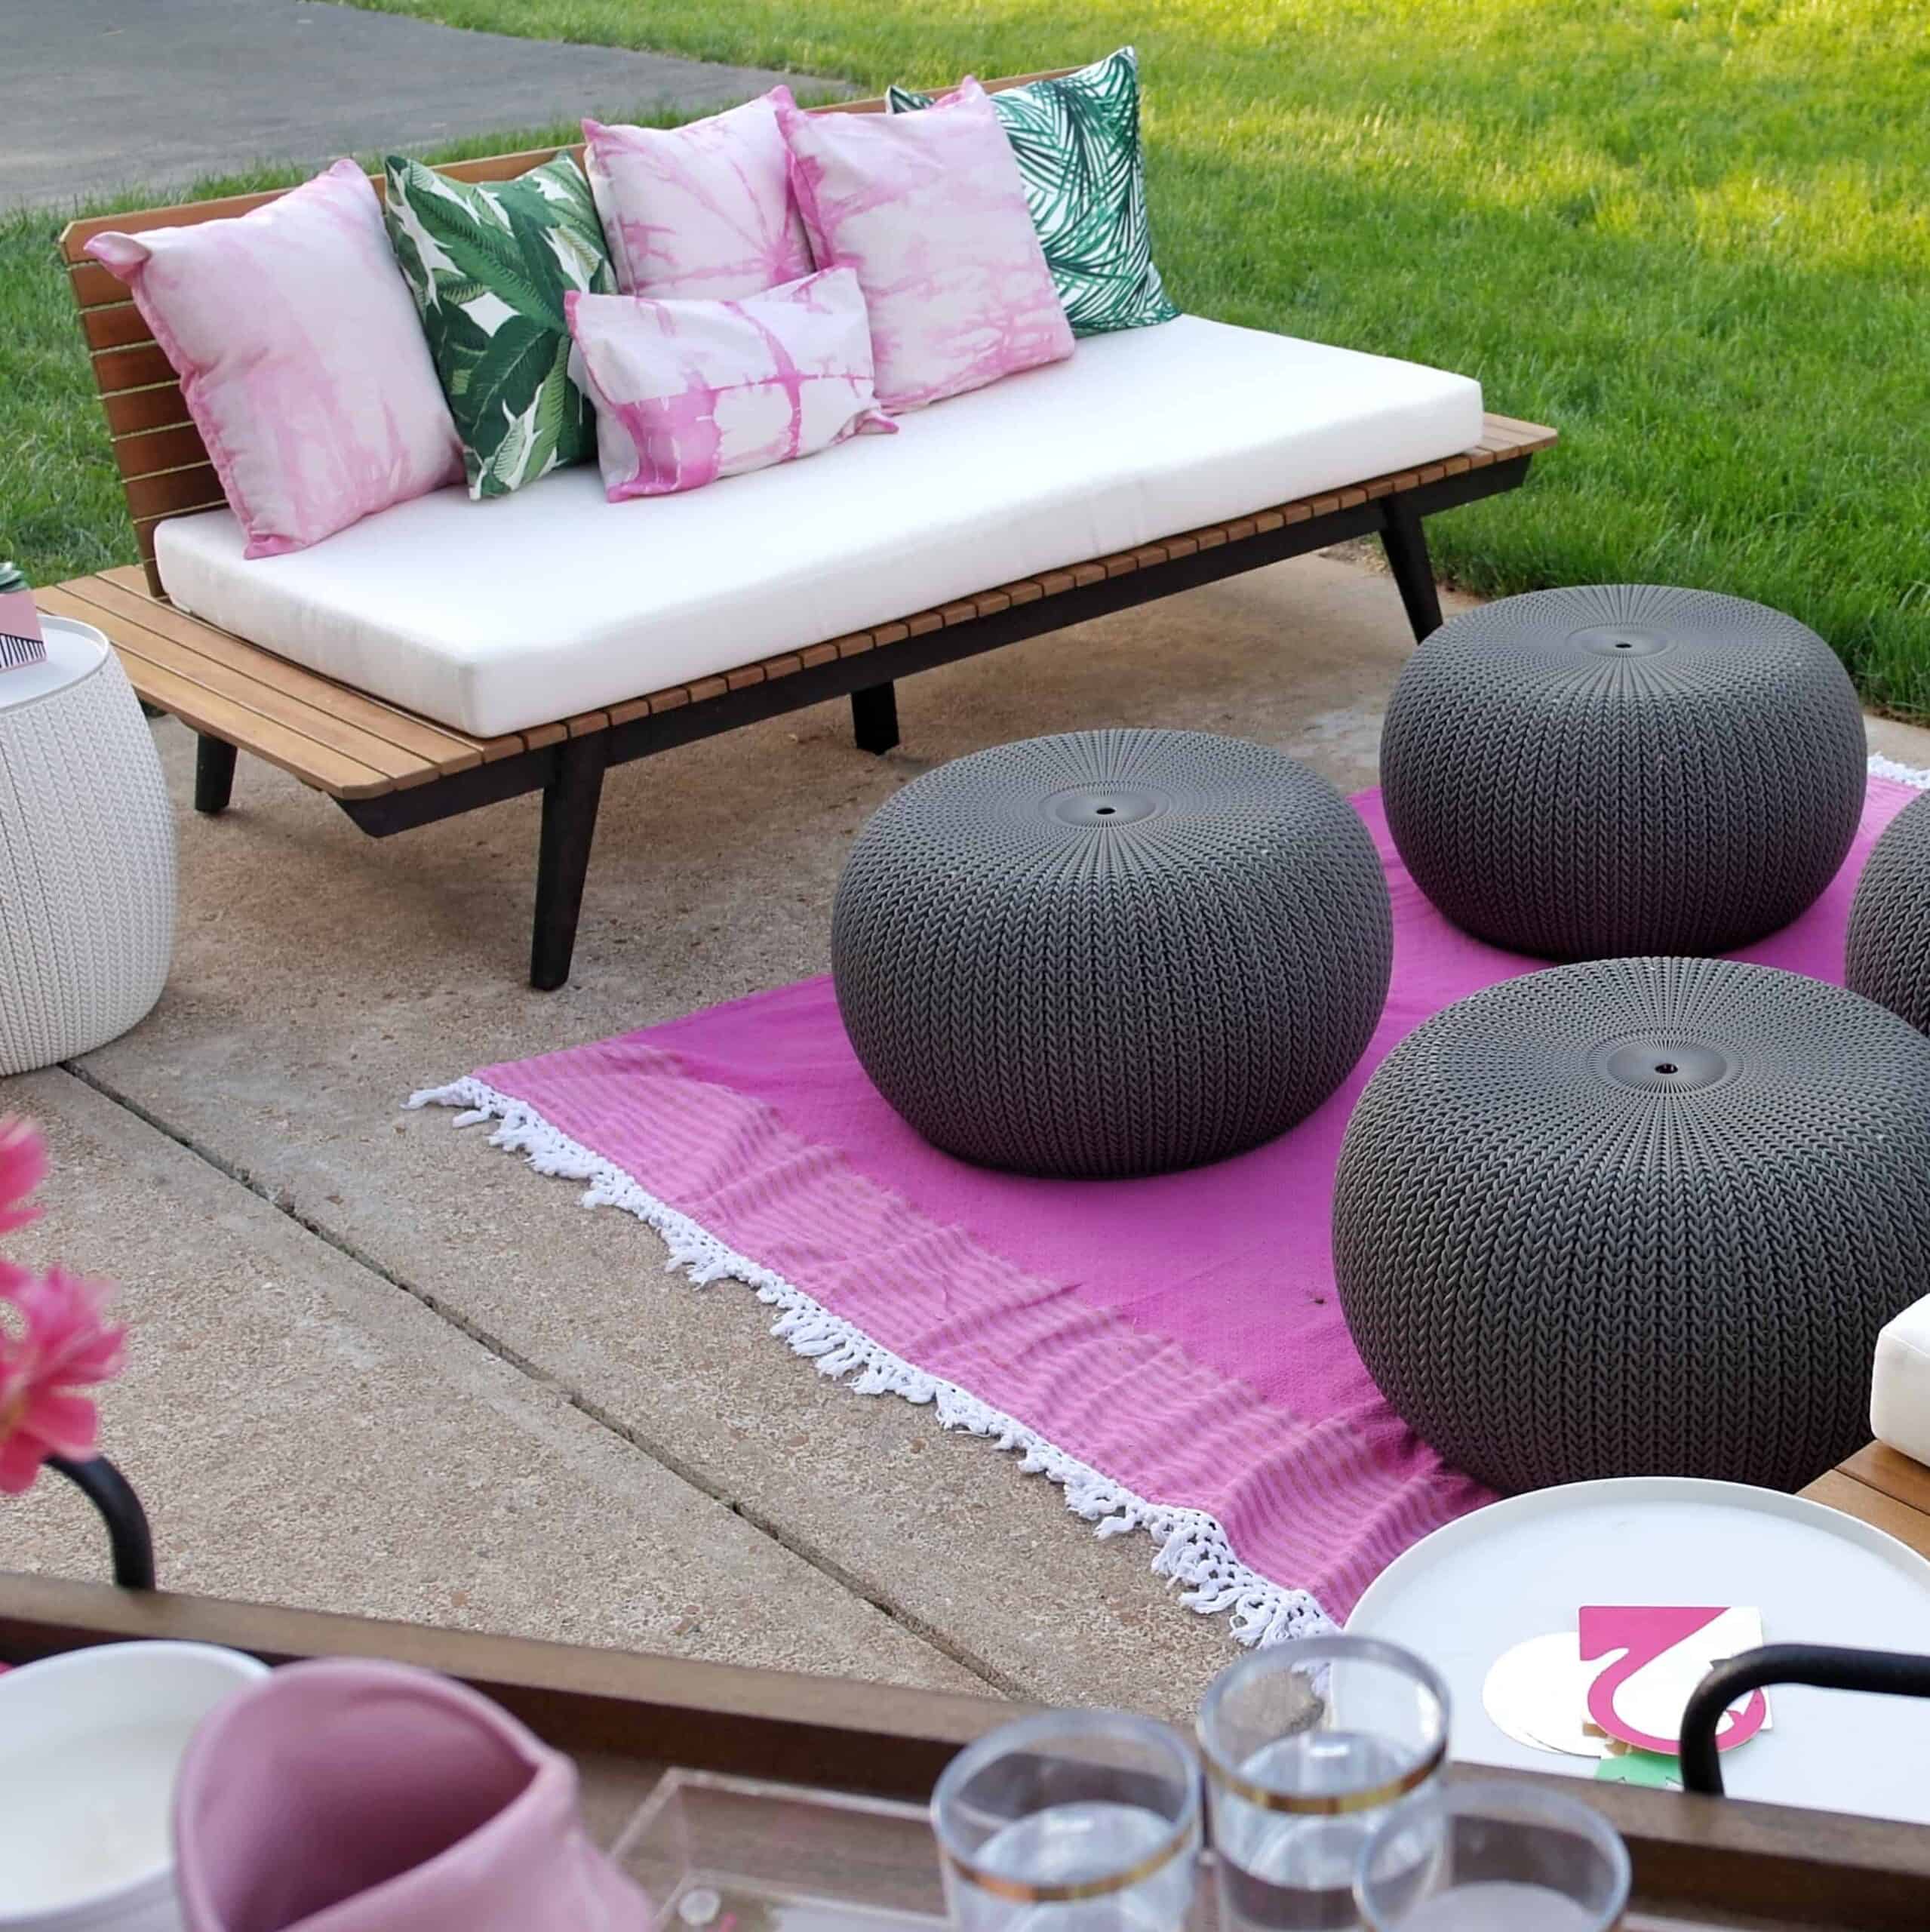
Decorating an outdoor space is really fun – and tends to be a bit more simple without having to think much about wall decor and such (in most cases). A couple of years ago I decorated ours with a couple of modern couches (similar ones in the round up below) and the nesting ottomans in this post and have LOVED IT.
Now that my kids are a bit older, we are going to redecorate with a table and chairs so we can do school work or have family meals outside, which had me going down the rabbit hole of new decor.
My recommendation when it comes to outdoor space decor is to think about how you most want to use the space first. Do you want to lounge? Eat? Entertain? Will you use a fire pit to deter bugs?
All of those questions are really important when it comes to figuring out your direction you want to go. Once you’ve decided all of that, you can start finding items that fit your space well. One other thing to keep in mind is climate – can you leave things out year round? Do you need covers?
For us we are going with chairs that stack so we can put them away in the winter and simply cover the table. We also are going to skip the rug (which makes me so sad). We have tried rugs on our patio several times but due to the constant wet nature of our patio they are never dry and just make the space less livable, so although I will miss the look, I am going to skip this time.
Fringe Umbrella – I have been looking for a fringe umbrella and I think ill personally get this one. I love that it is clean and classic with a fun flair.
Pillows – I actually just grabbed these for inside not knowing they were outdoor, so I will share on Instagram how I like them when they come this week.
Large Black Planter – I have been obsessed with these for years and am actually setting out to do a DIY hack to make something similar. But in the mean time I can’t get enough of these.
STACKABLE white chairs – I have similar ones in our kitchen and the fact that they stack is my favorite. I love that I have extra chairs in the storage room that are nicer looking
Chairs – I actually got these for our dining room and decided they are a bit more ‘outdoor’ so they will be what I am doing outside. – you can see them HERE in our dining room.
Hopefully this helps you make your outdoor oasis dreams come true with some great outdoor decor and furniture from Amazon. If you have any questions on any of the items above, leave me a comment below or shoot me a DM on Instagram (@arinsolange)! I love connecting with you all there.
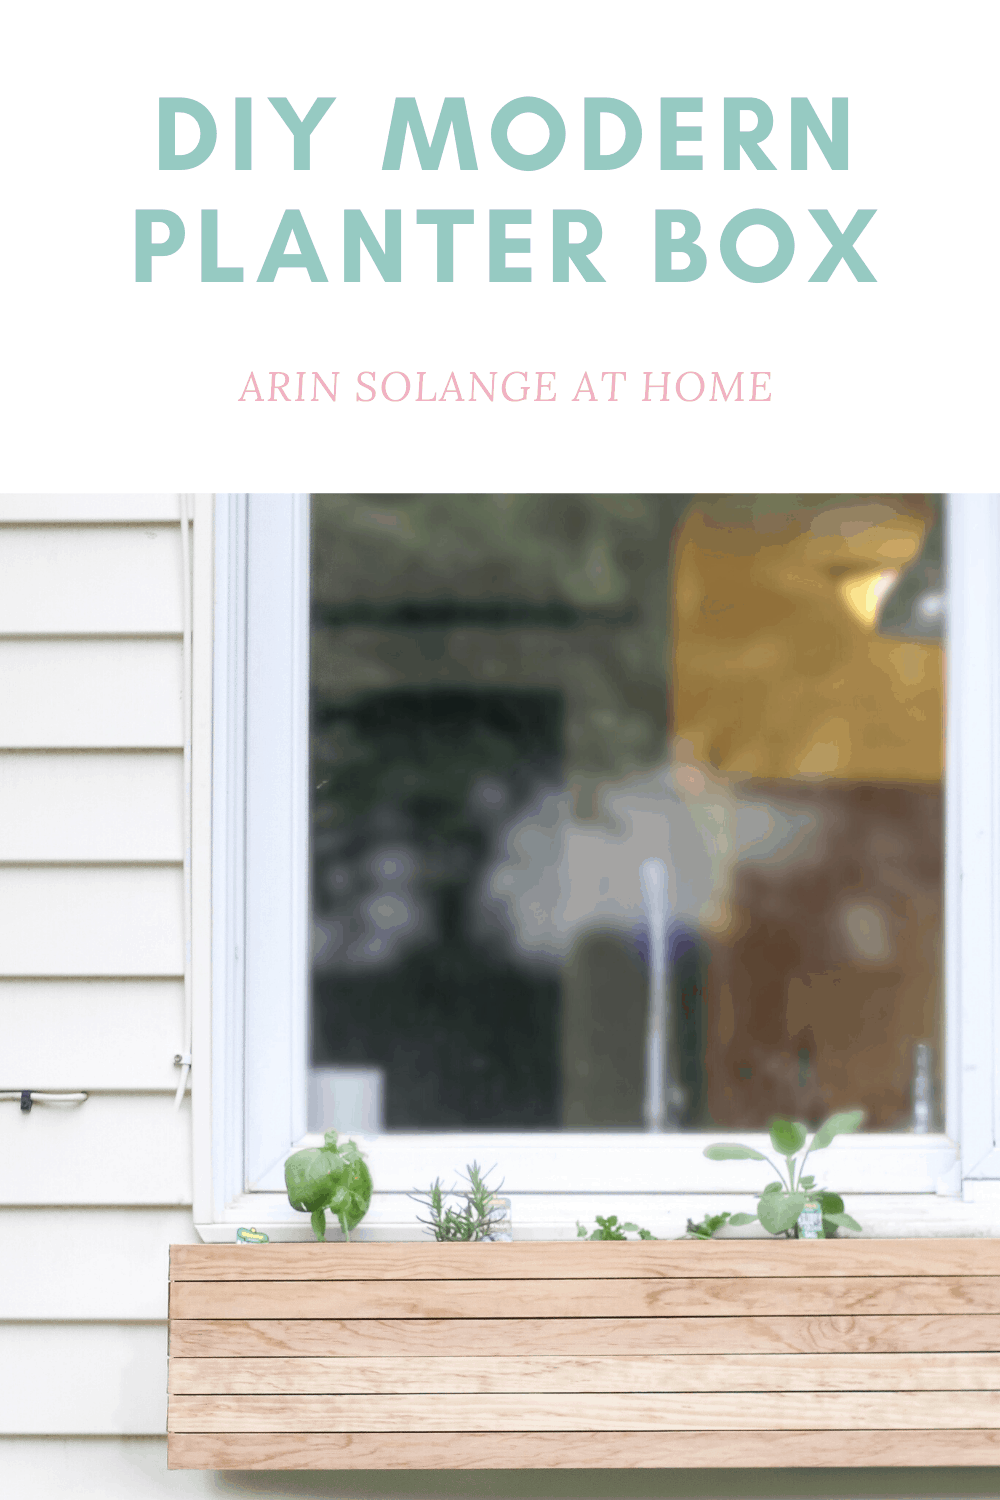
I have a quick easy DIY planter box tutorial for you guys today, and let me tell you – I AM EXCITED FOR THIS. My mission this week in blog land is to get some outdoor DIY’s and projects done so we can start enjoying our outdoor space, and keep the chaos and mess outside of the house.
this post may contain affiliate links – more about that here
Easy DIY Planter Box
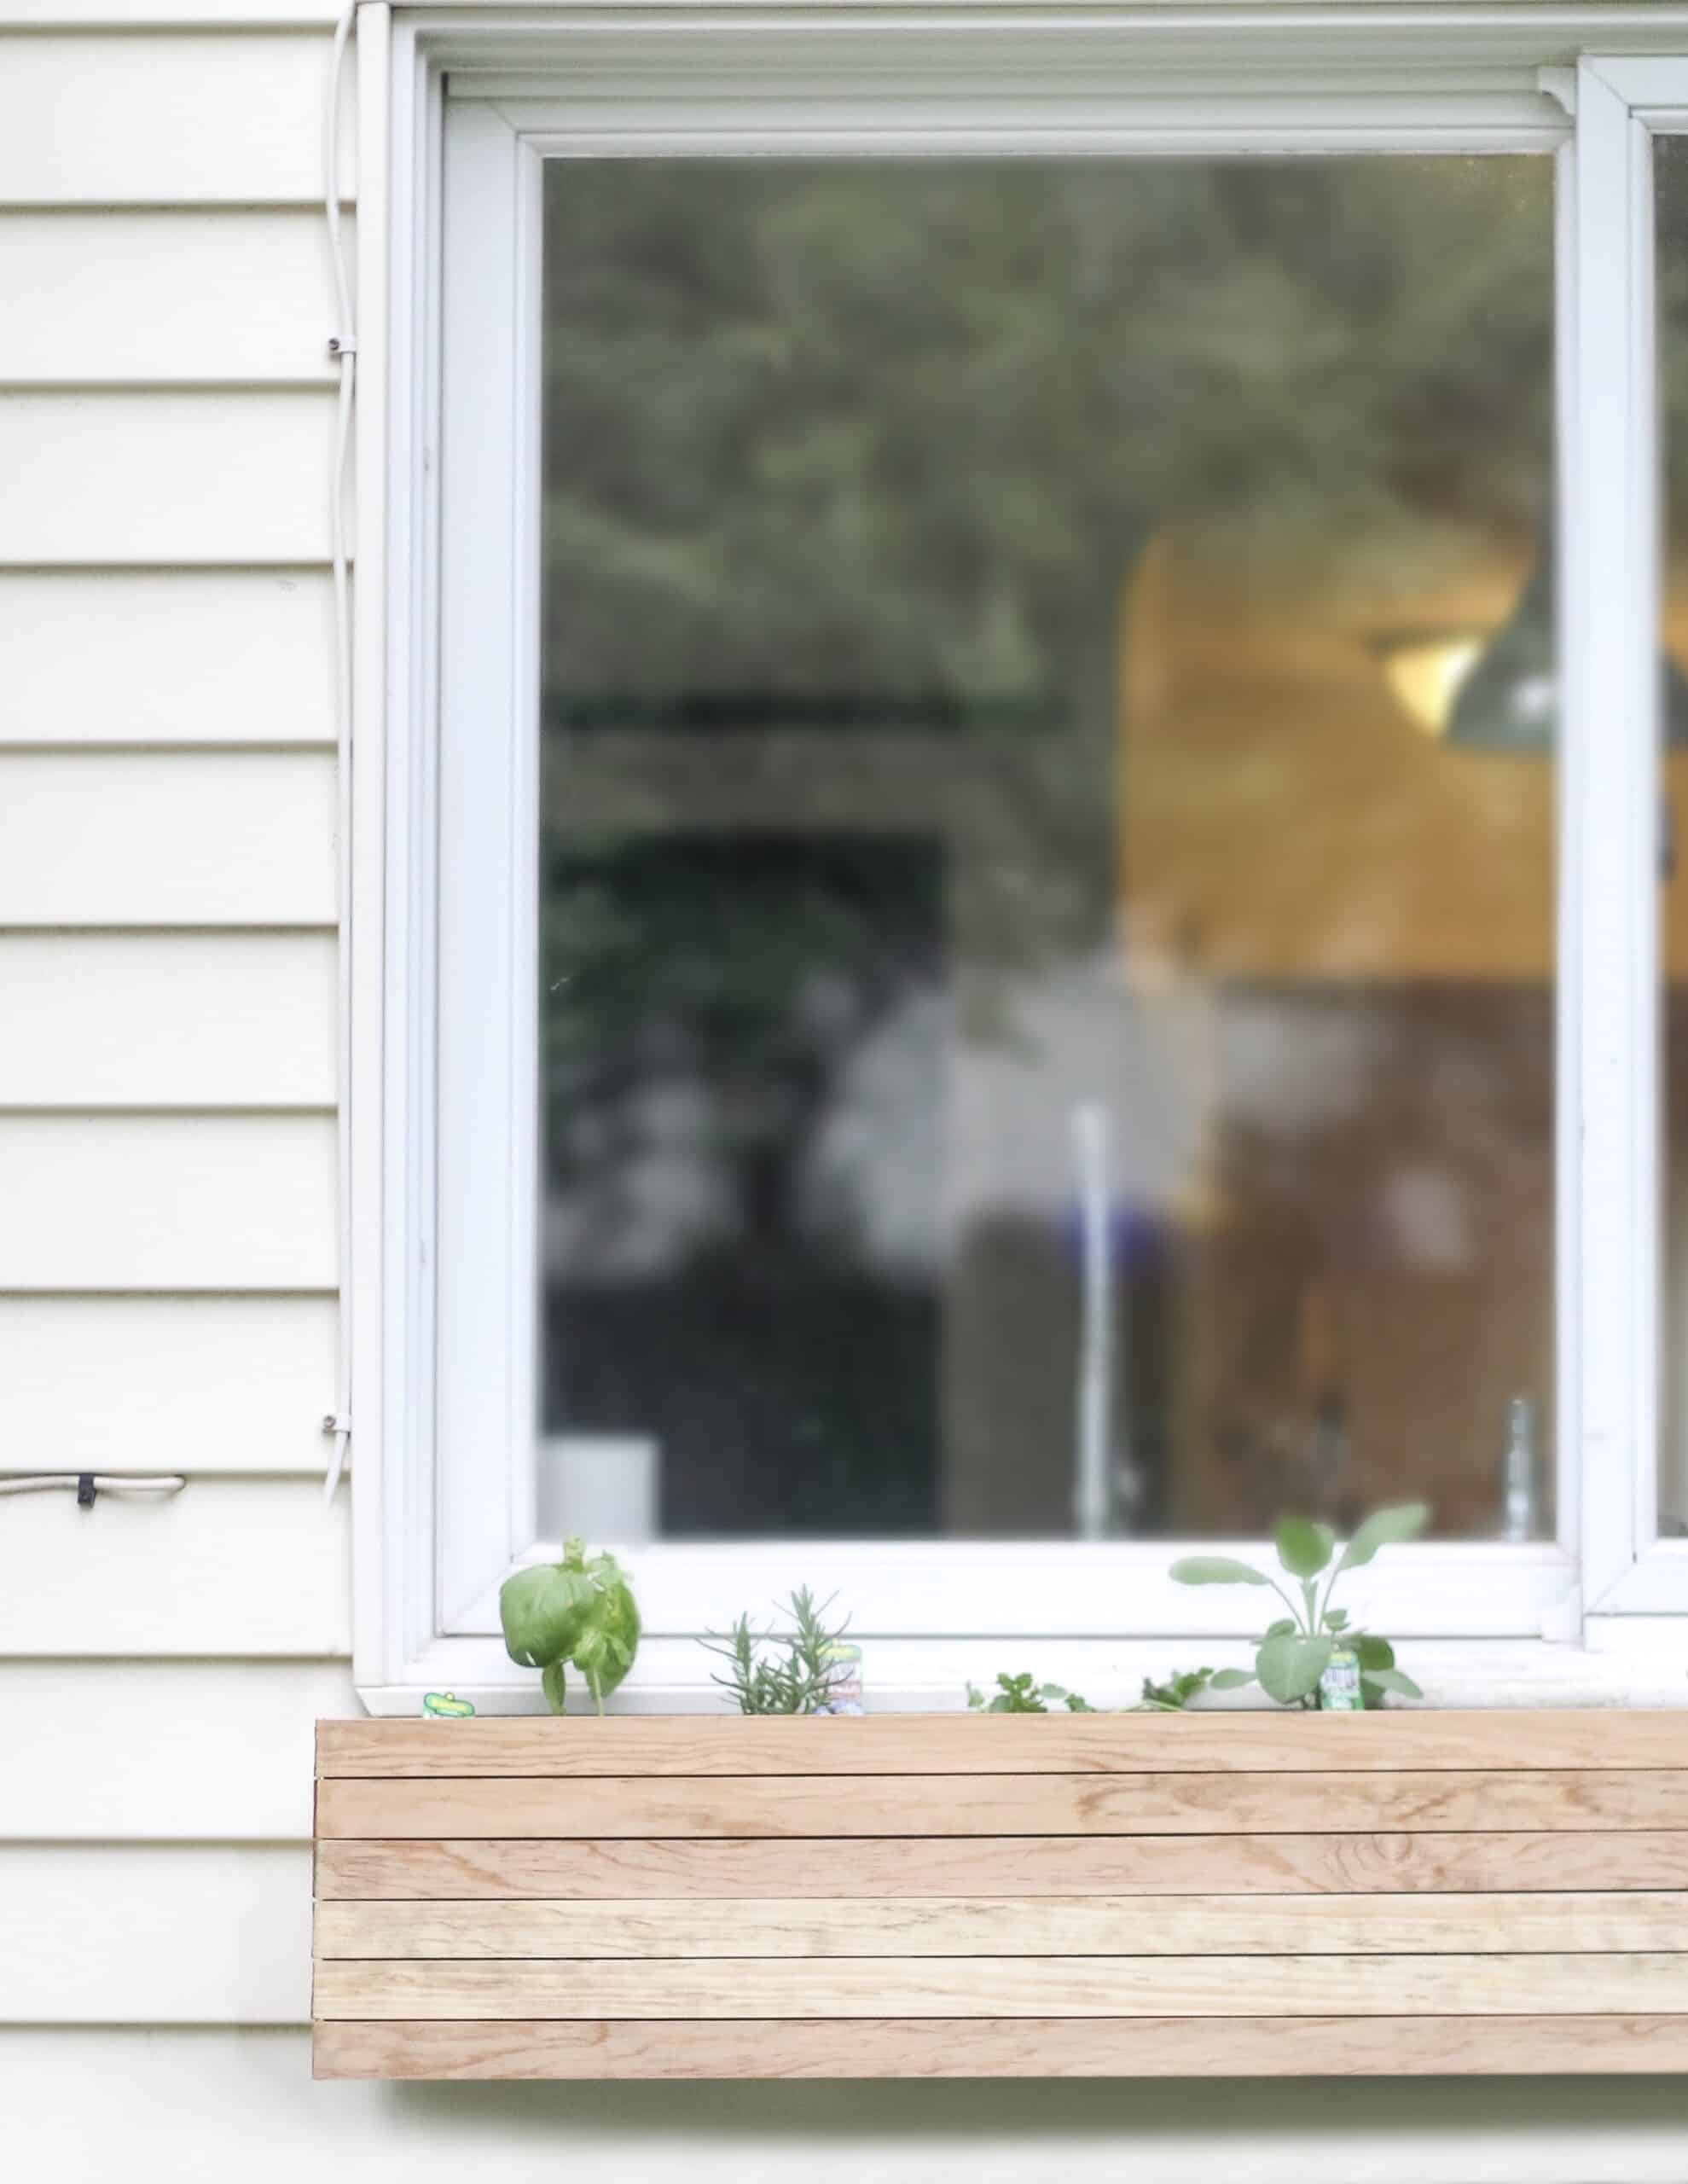
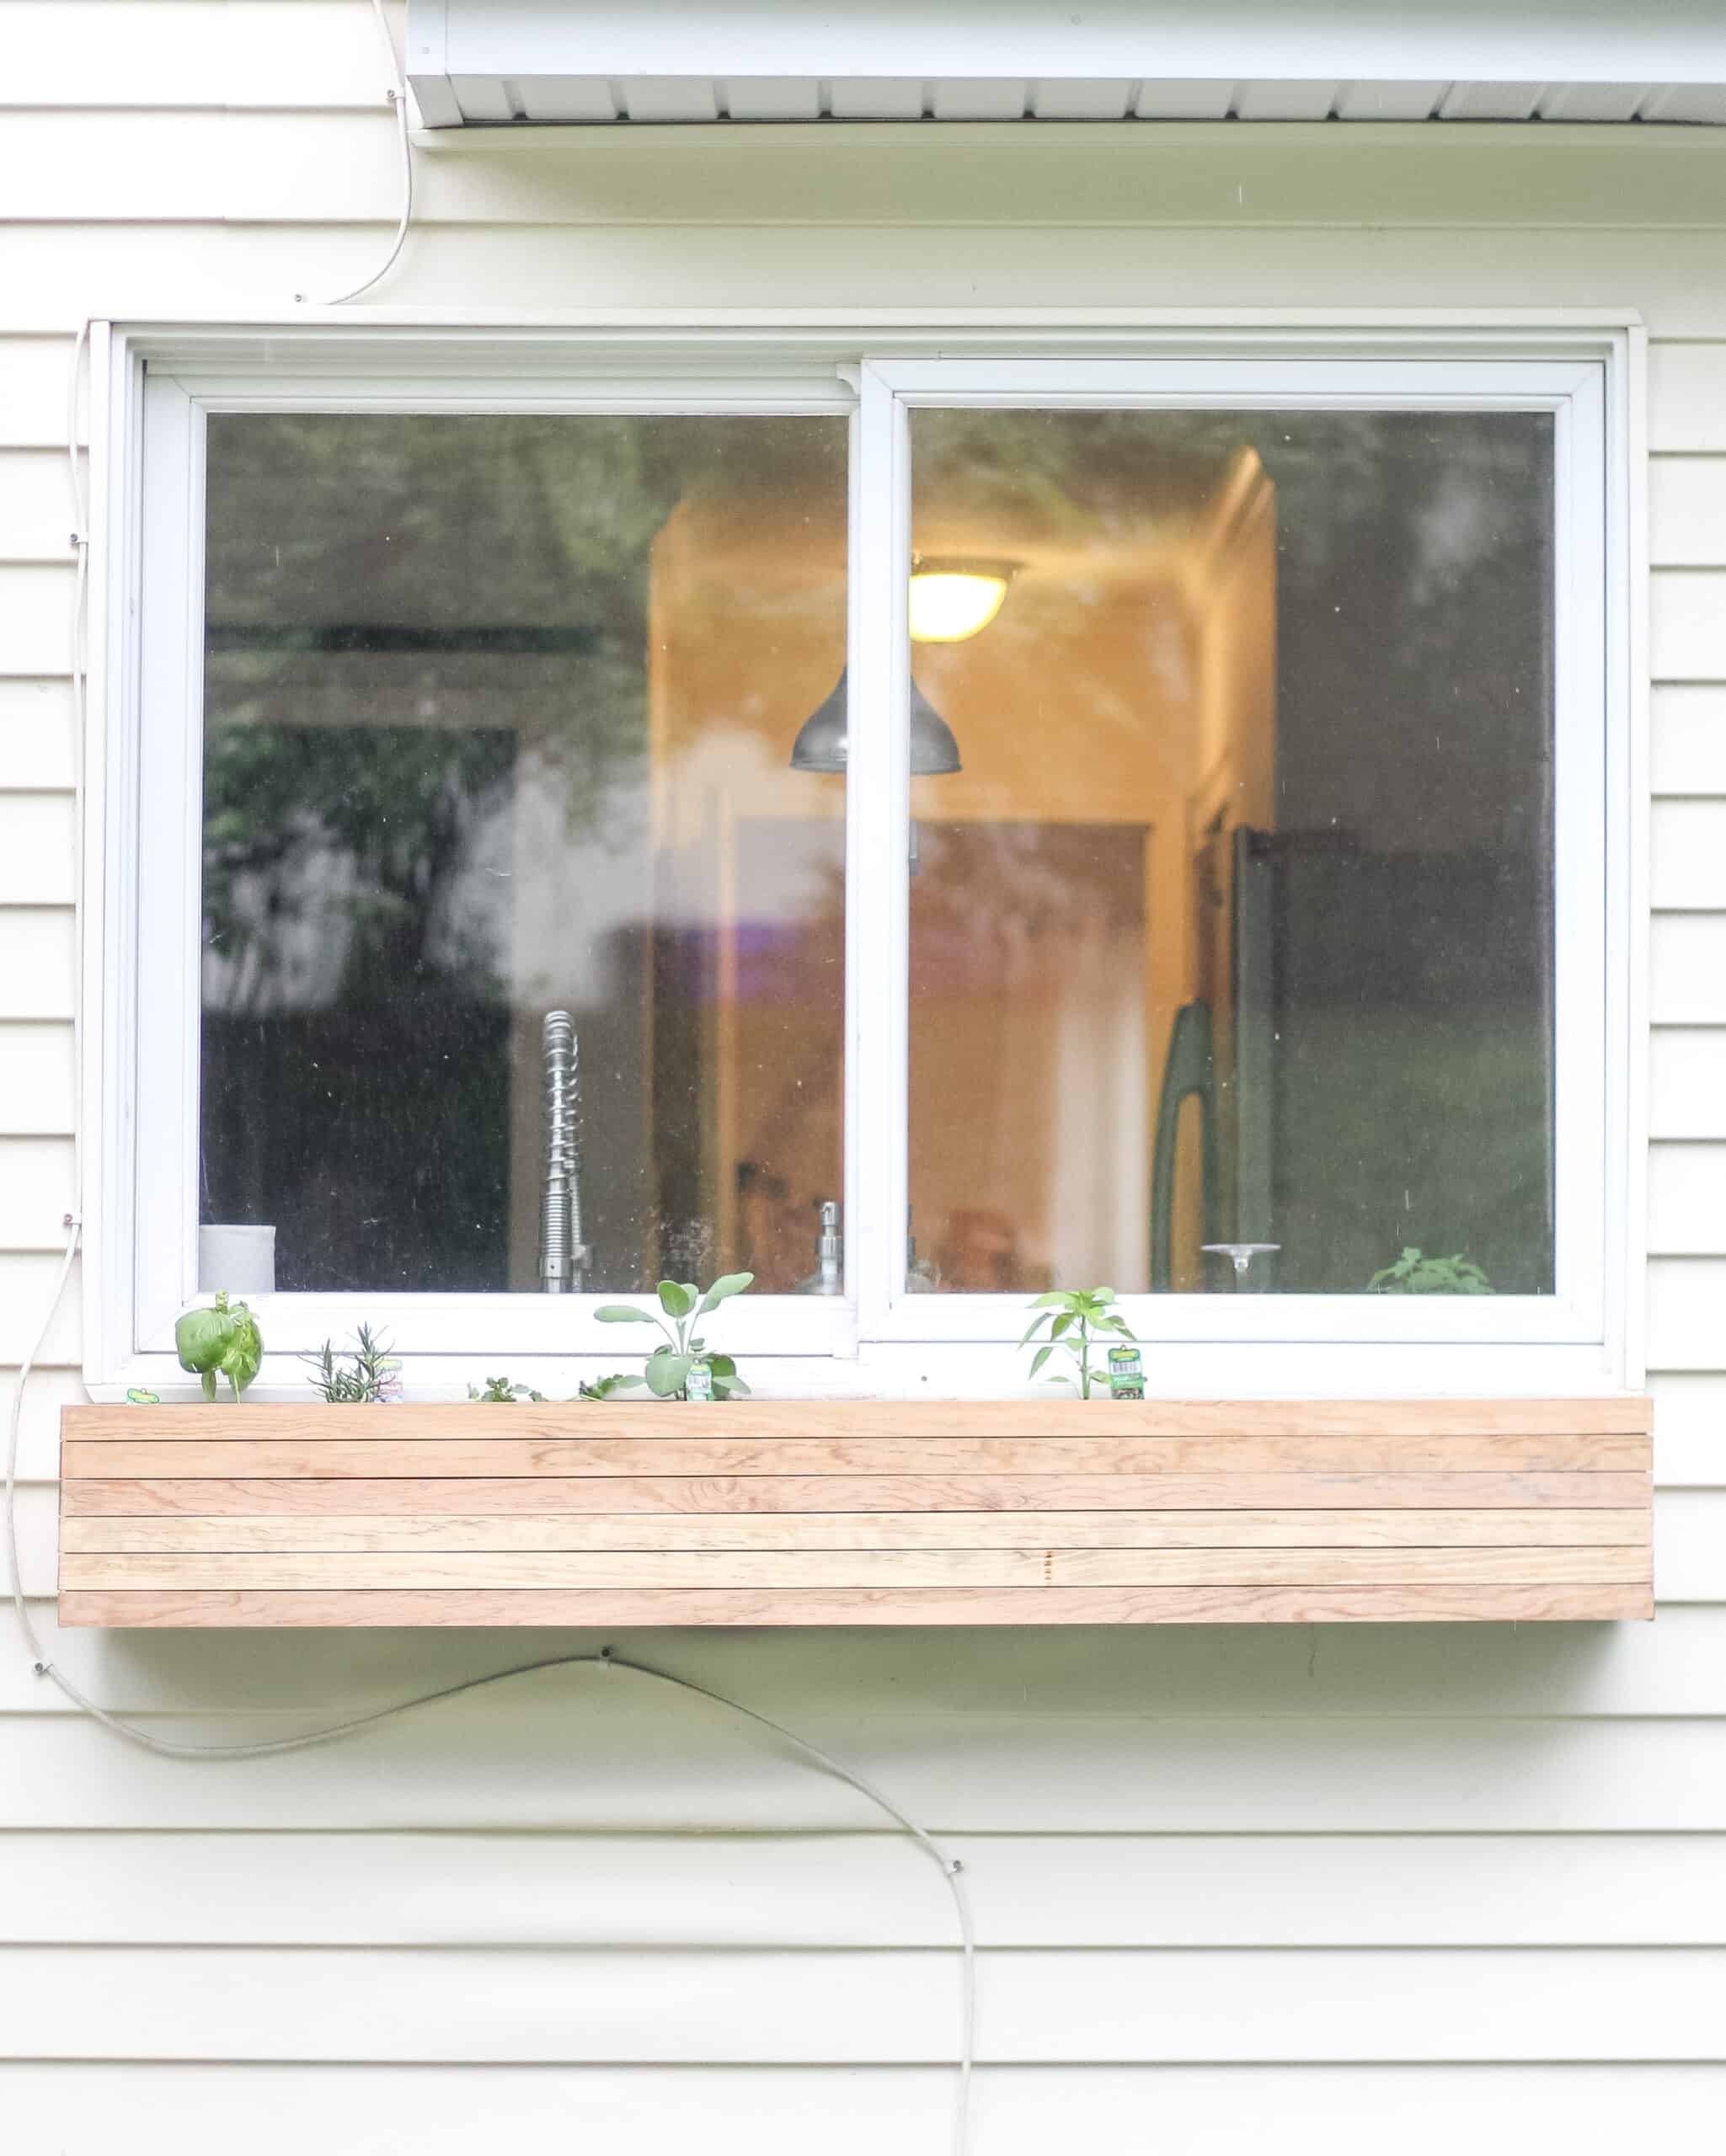
I have been trying to come up with a plan for a DIY planter box for weeks now, but knew wanted something different than what you normally see. I tend to like clean lines and modern, so really wanted to make this fit that look. I actually think these on the front of a white brick house would be INSANELY GORGEOUS.
I am going to walk you through how to make the planter boxes, how to hang them, and what I would have done differently…because that’s always the perk of using someone else tutorial…you get to learn from their mistakes.
Supplies
This project takes very few supplies. I will say – we used our nail gun, like we do for almost all our projects, and that was needed. If you have been on the fence about getting one, I say do it. My husband raves every time we work on a DIY about how our nail gun is his favorite tool!
1 piece of plywood or other wood 1/2 inch thick – because it was nearly all covered we used simple plywood for the base box to save money.
lattice trim – as a side note – one thing I would have done differently is made sure that the trim piece matched as closely as possible in color
Table Saw (or you will need your large pieces cut at Home Depot)
spacers (we used nickels)
wood filler and sand paper
Large drywall screws
How Much Lumber Do You Need?
Configuring lumber can be kind of tricky, and because it will totally differ based on your home and window, I can’t give you exact amounts, but I can explain how we figured up sizing!
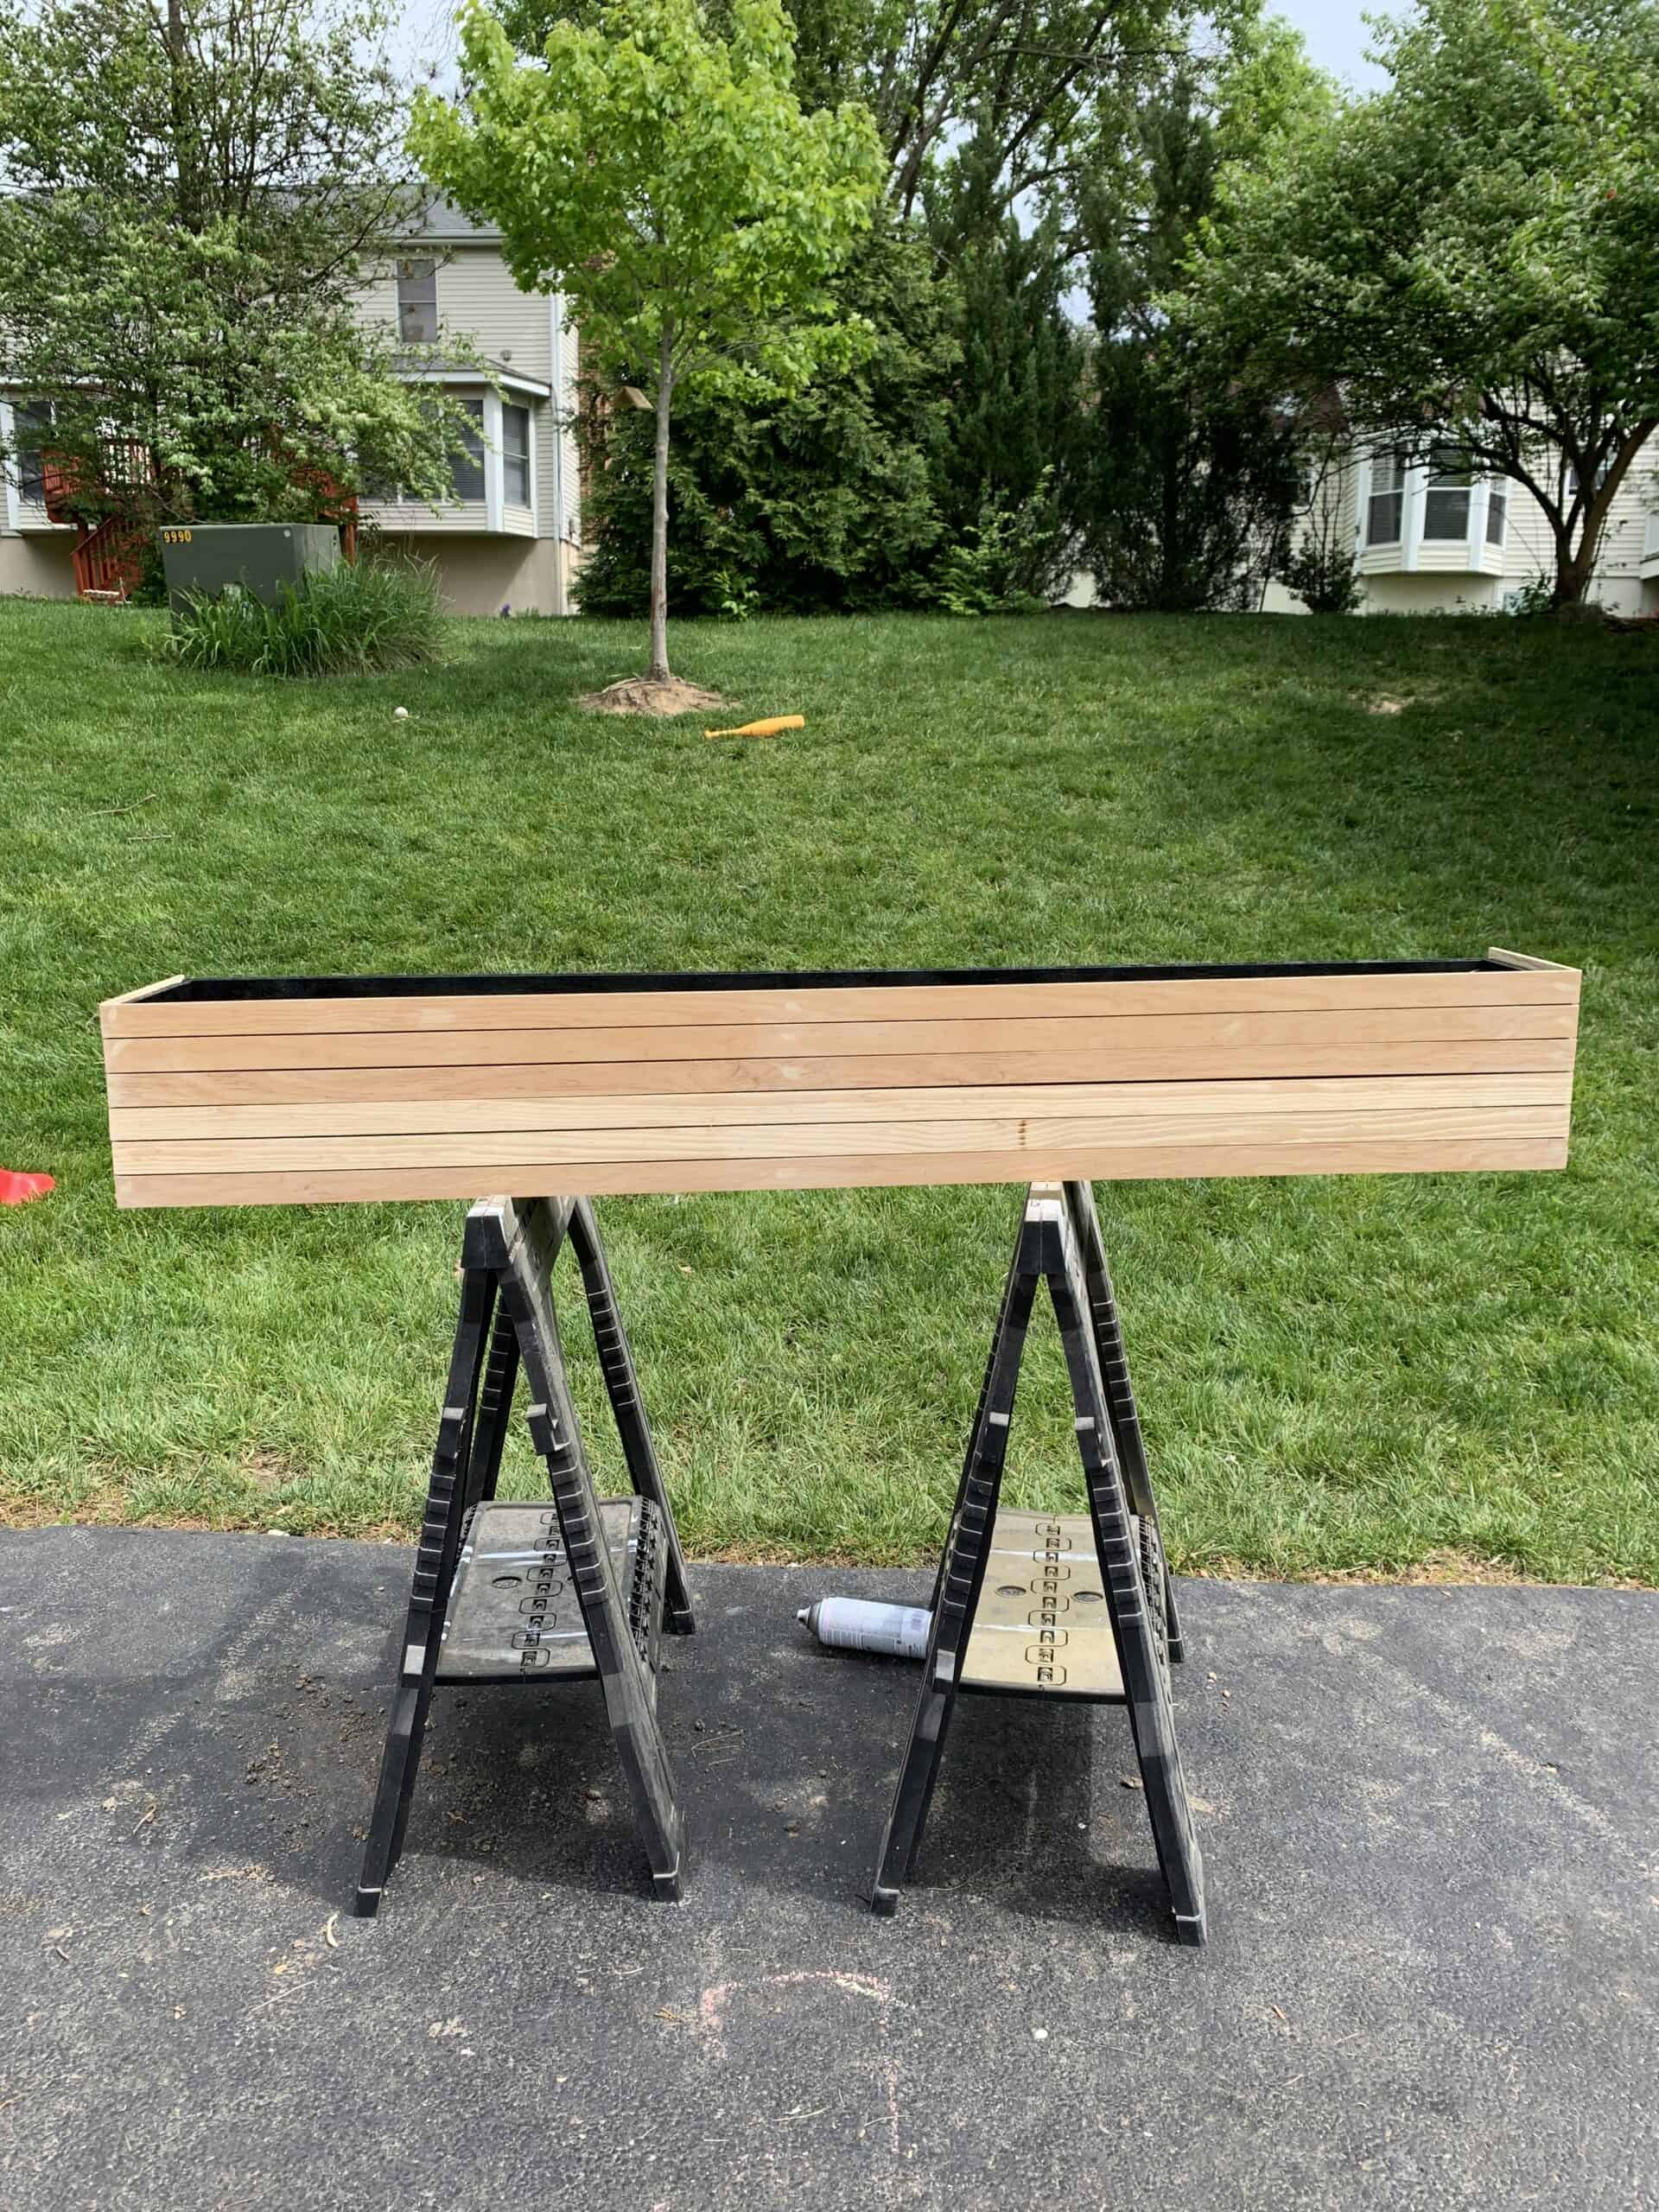
Our window is 5 feet long so we made our box 5 feet by 8 inches by 8 inches.
Essentially we needed enough lumber for 3 sheets of 5 ft by 8 inches and 2 8×8 squares
We then used 6 rows of lattice for our 8 inch tall box – but you need enough length to cover the front and 2 sides.
Assembling the DIY Planter Box
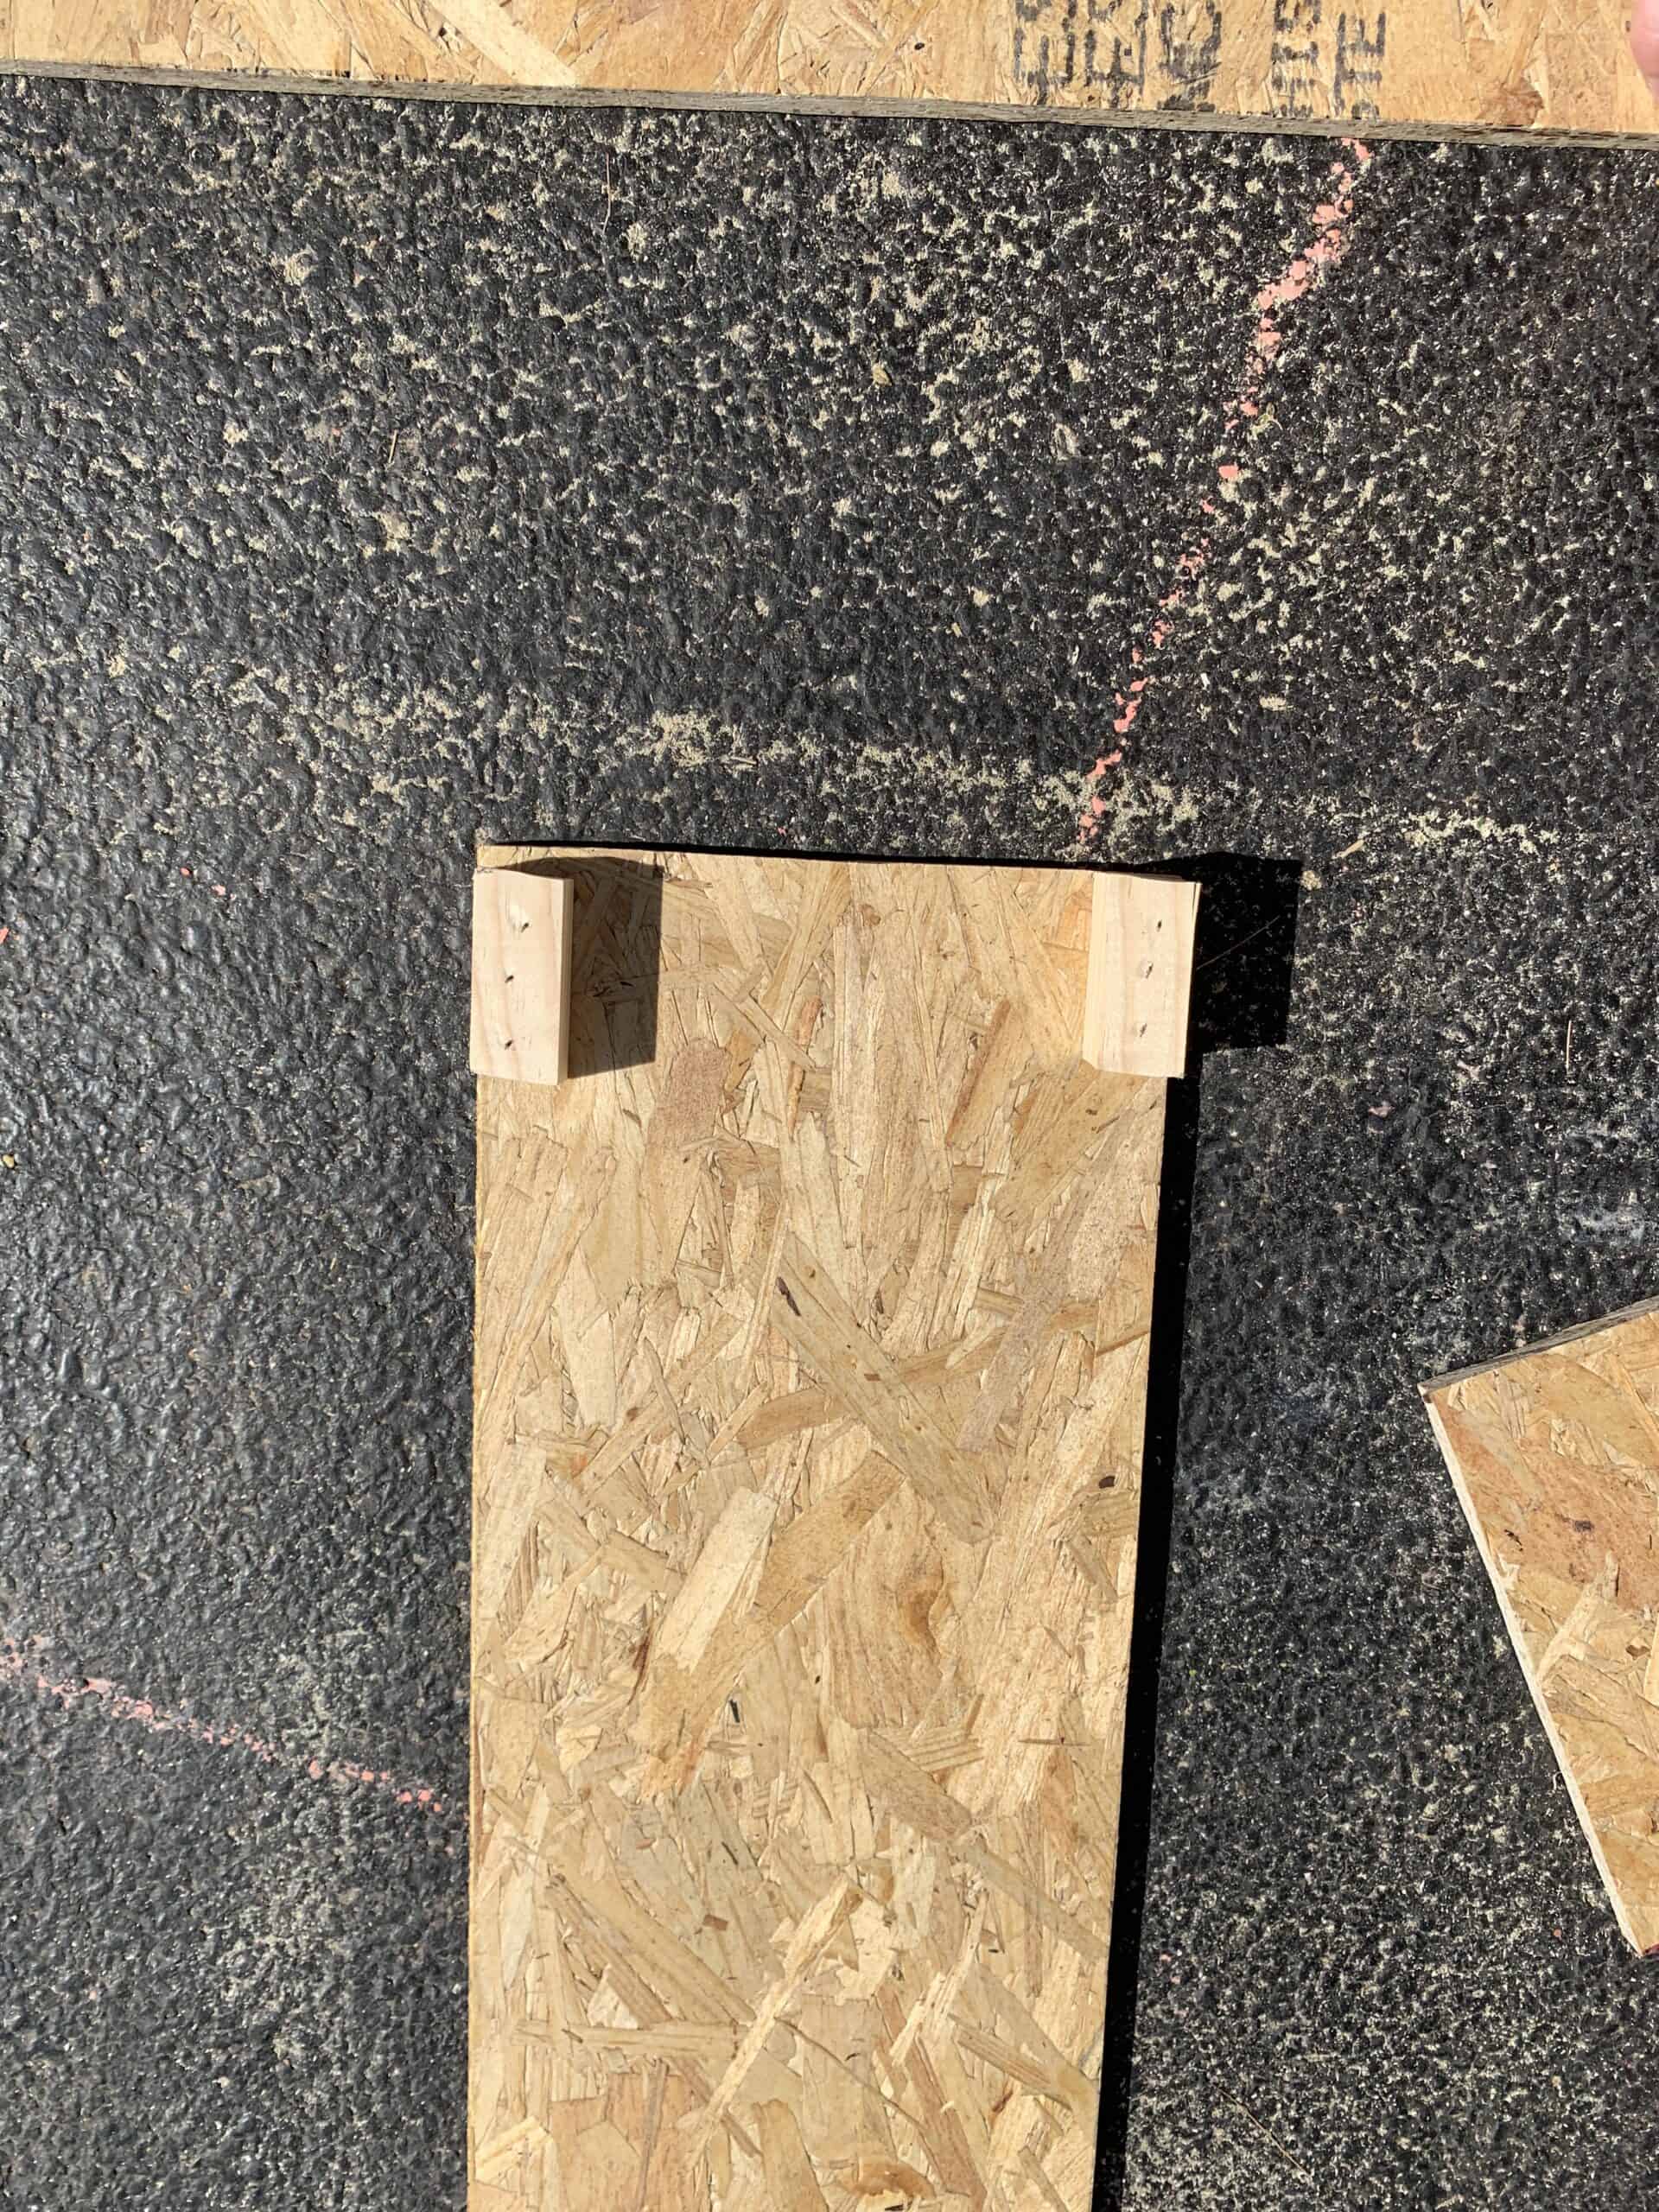
First things first you need to cut all your plywood (or whatever you went with) to make your planter box. We cut 2 boards to the length of the box (for us 5ft) and 1 board 1 inch shorter.
Our wood was 1 inch thick, so that made up for the addition of the end pieces. Start with your bottom piece of wood and attach small blocks of wood in the corners and middle along the side. You can do as much or as little of this as you want. Basically you are adding space to connect your sides initially before adding the more precise nails.
Once your little scrap blocks are in place nail your end pieces (these are our 8×8 squares) onto the bottom board. Once those are on you can add your side pieces. This is honestly not hard at all, just be careful and take your time with your nails.
If you want tighter seams you could add wood glue, but honestly due to this being covered, and being okay with the slight drainage the seams would offer we didn’t do that.
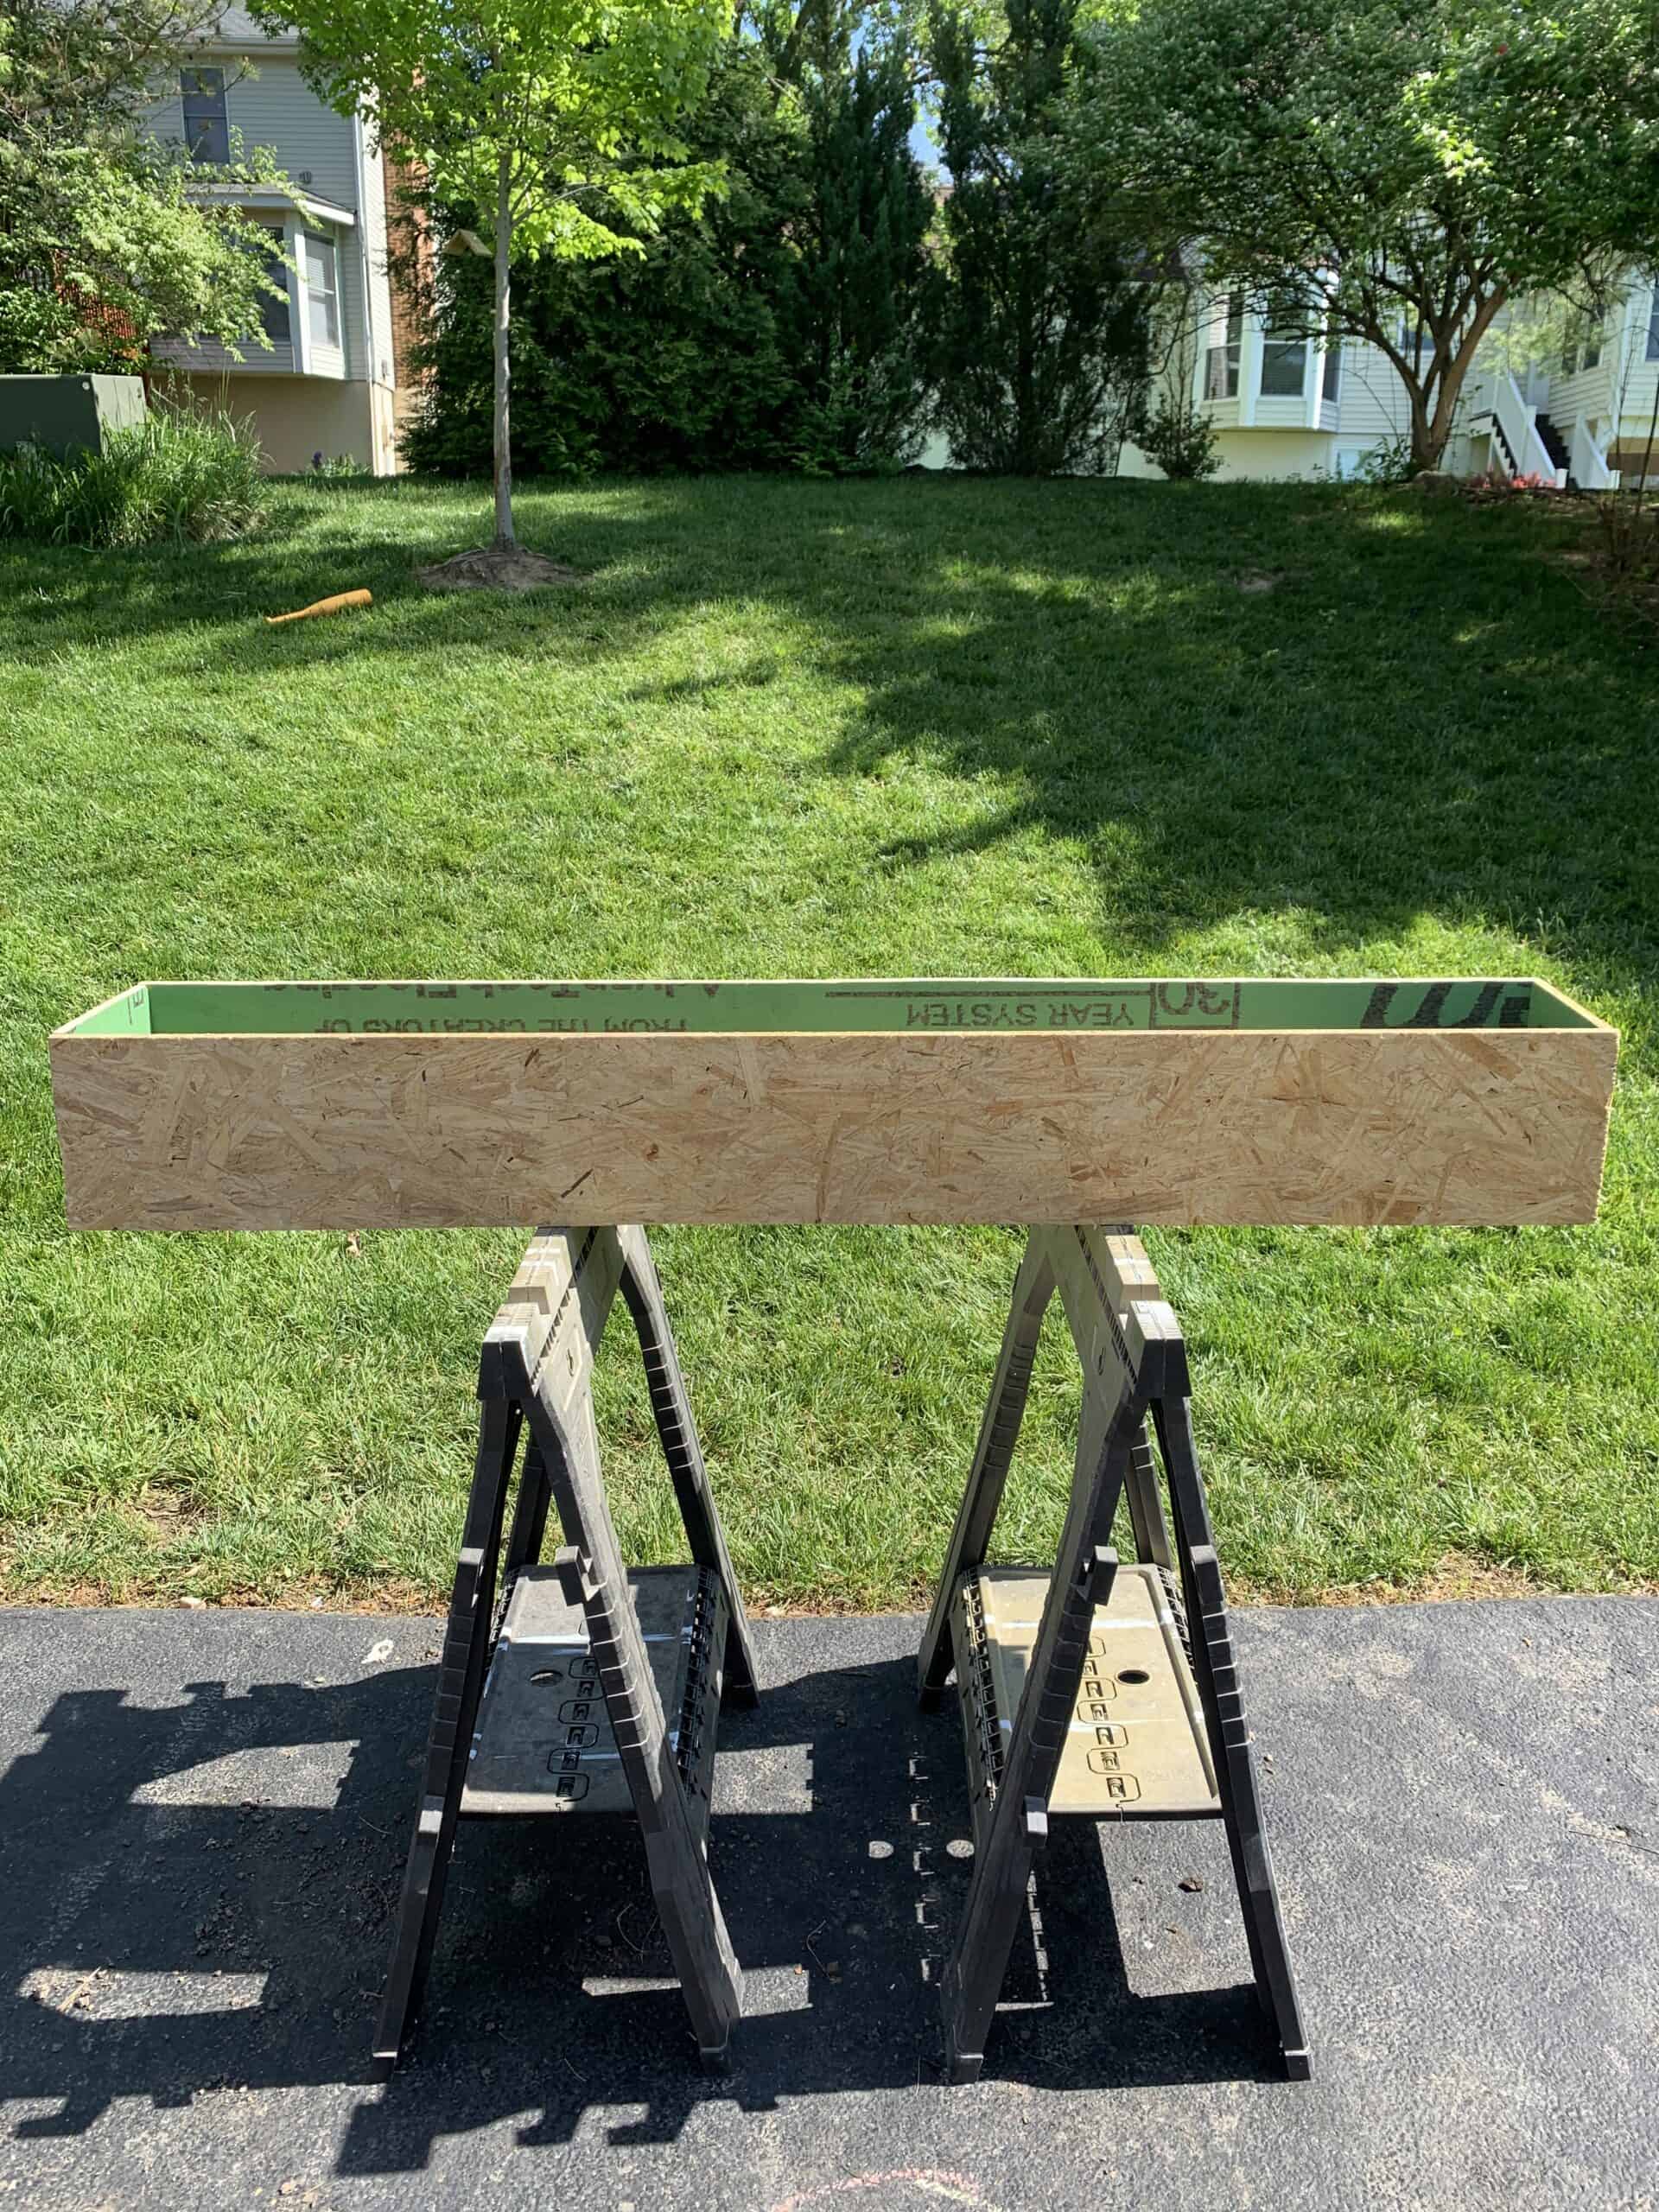
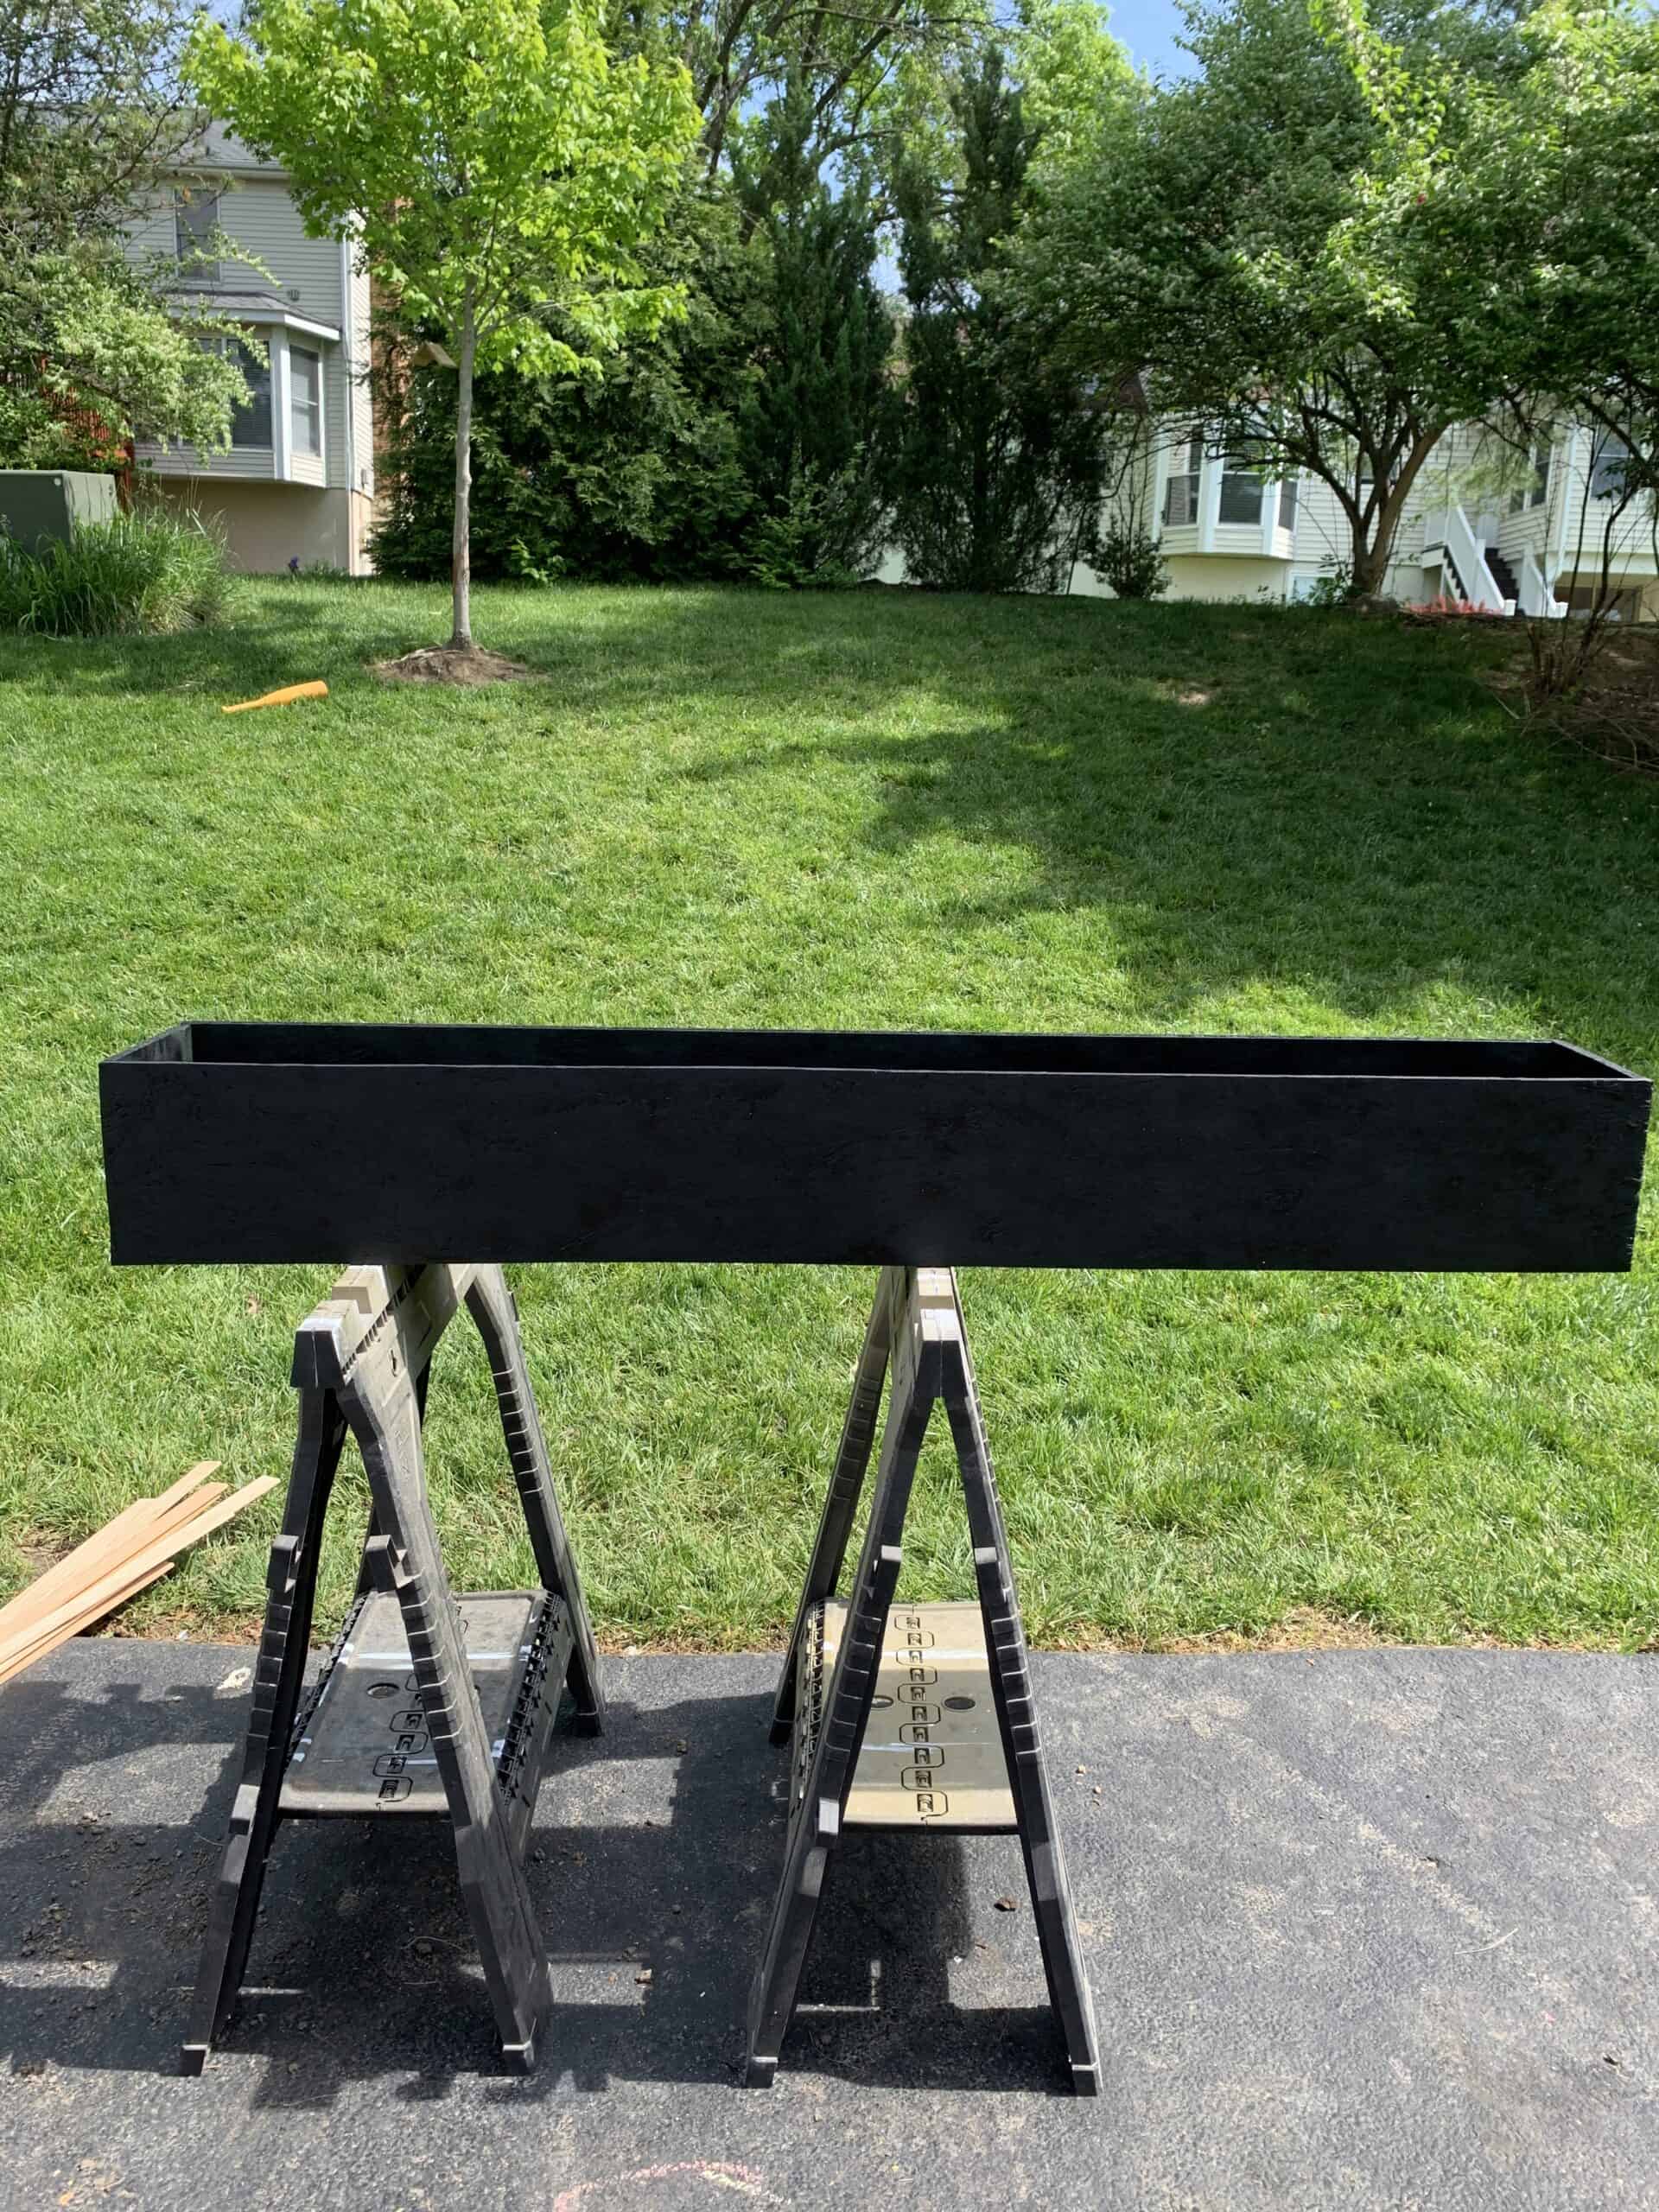
Now you should have what resembles a super simple (slightly trashy if you went with plywood) planter box.
Once it is together give it a good coat of black spray paint on all sides! You are covering 3 of the four sides that will show but you still want it to be black for what will peak through.
Adding the Lattice Wood for a Modern Look
Like I said at the beginning – I wanted a modern planter box, so now you are going to start making that happen.
You need to cut long strips of lattice wood 1/2 inch longer than your box (for us that meant 5 ft + 1/2 inch). If you are doing yours 8 inches tall and go with the wood I linked you will need 6 strips.
You also need 12 strips that are 8 inches long.
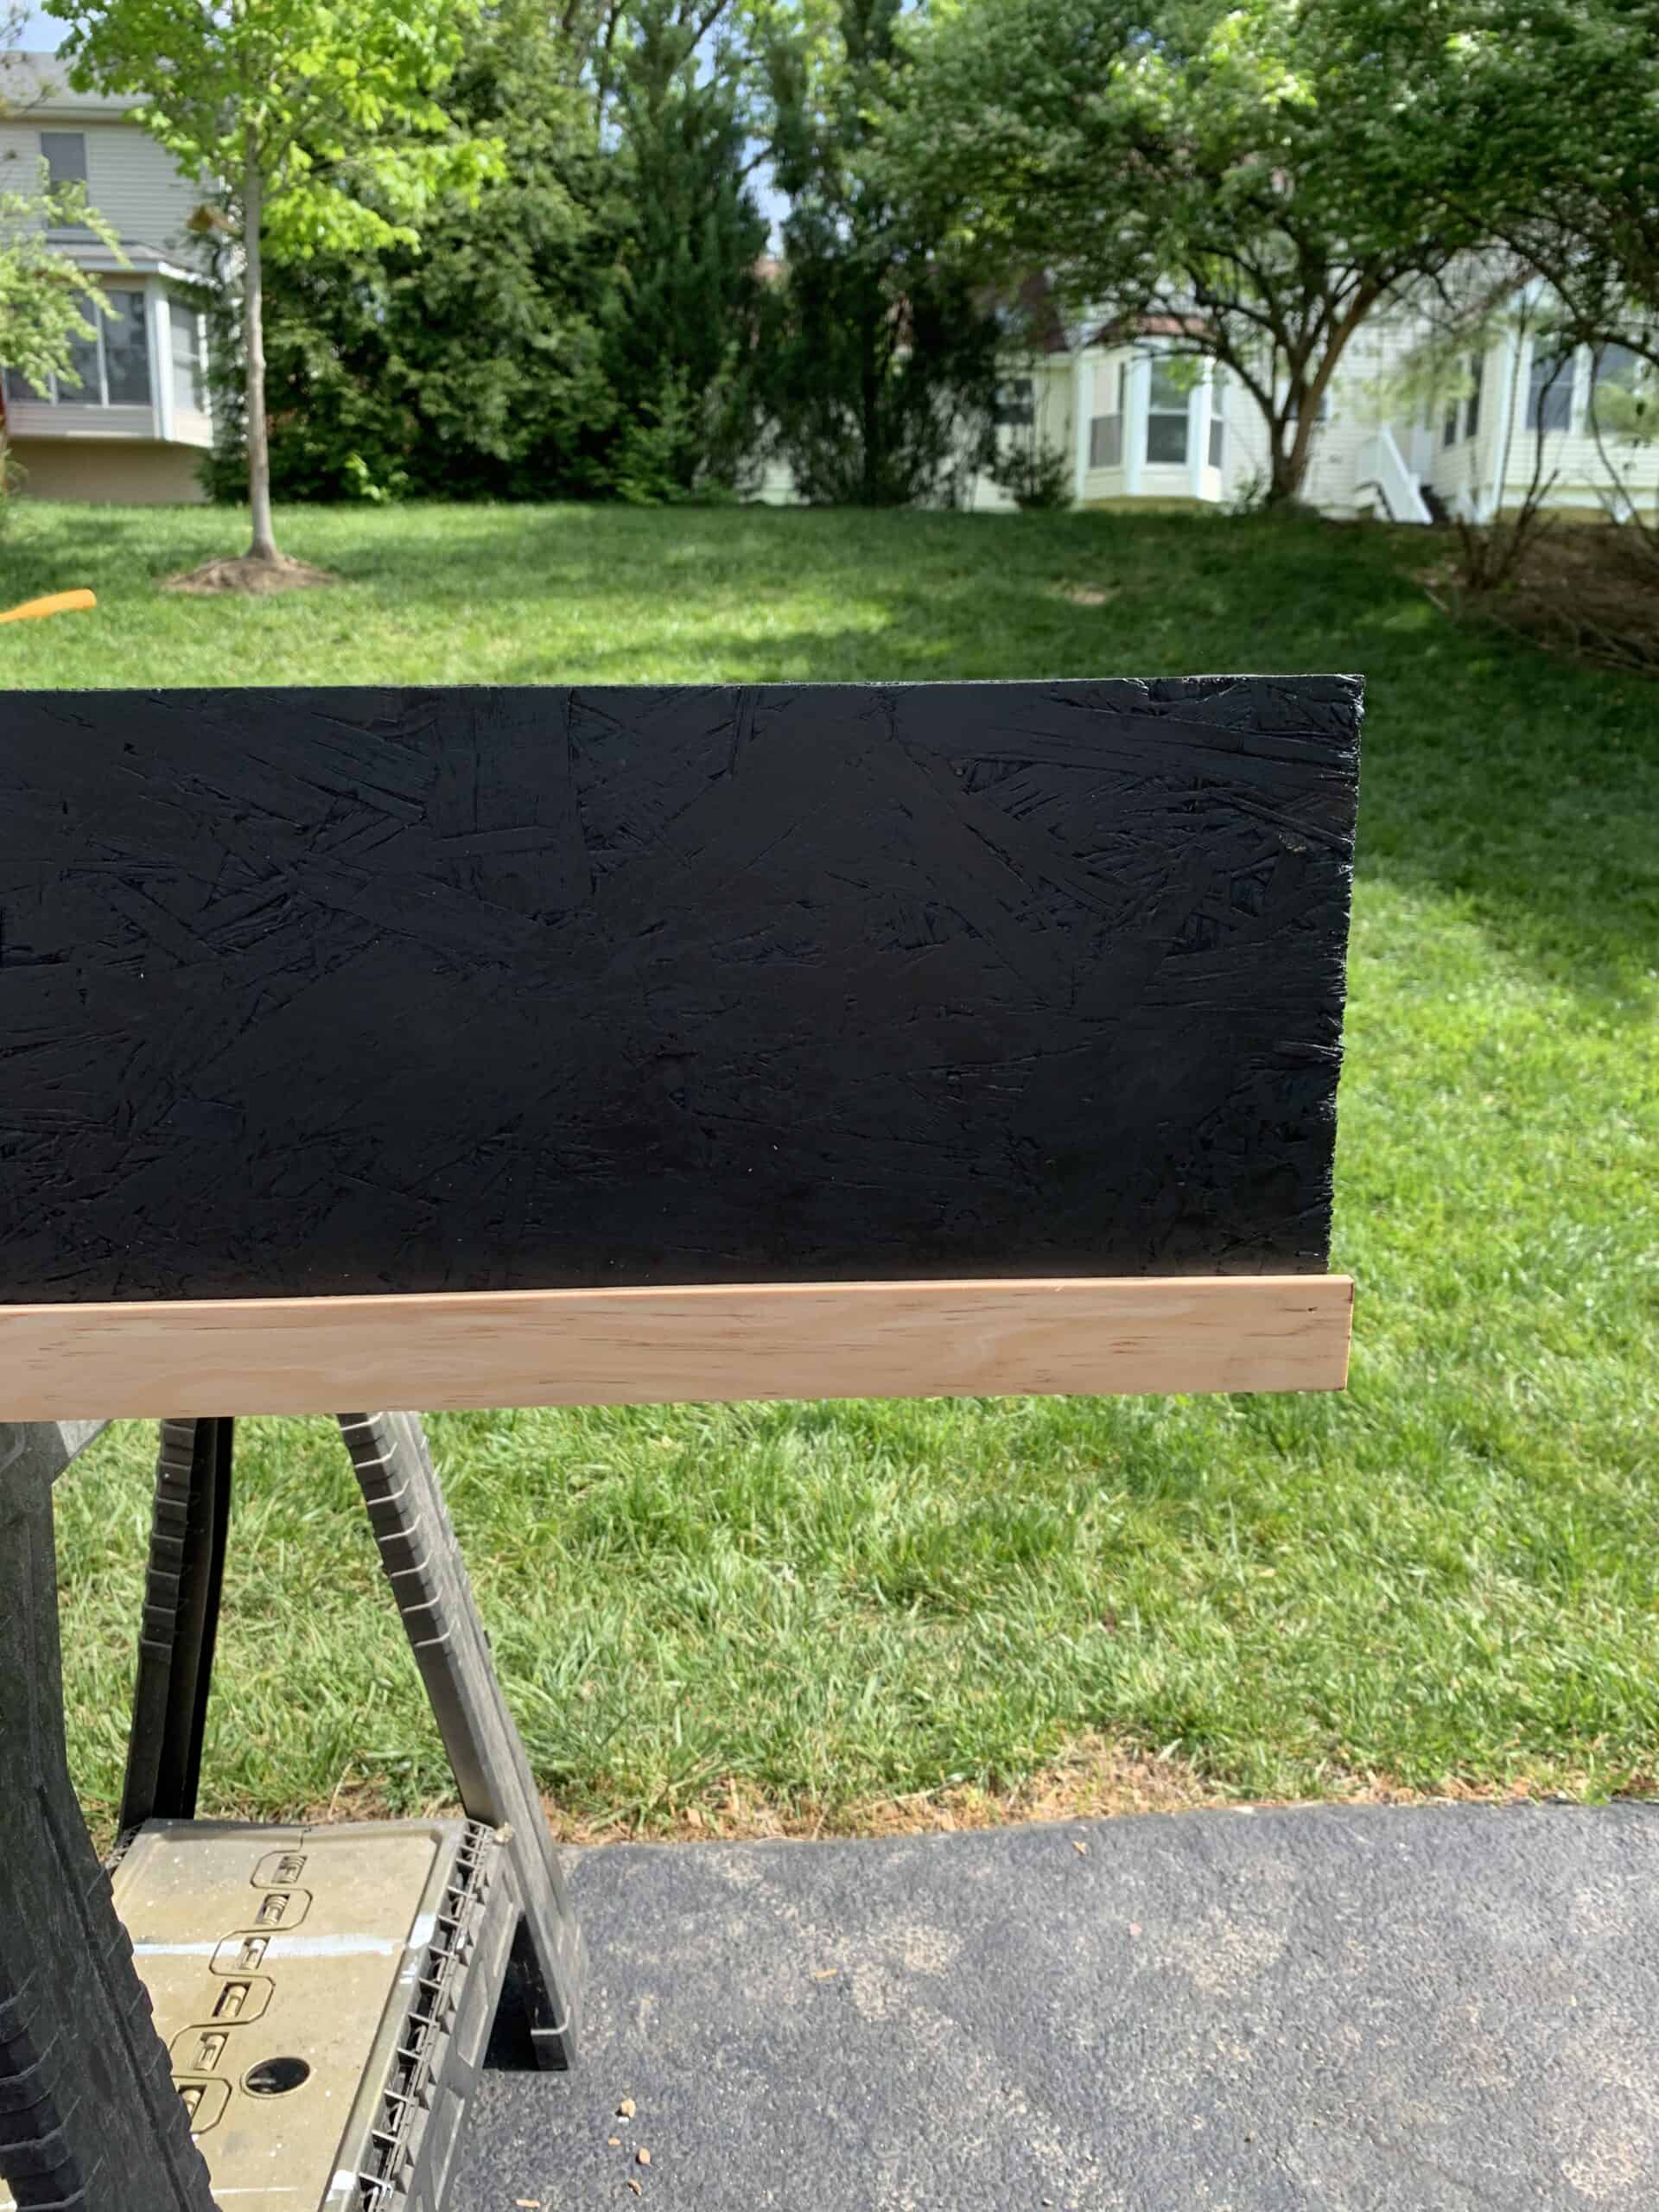
Before you start – one thing we wished we had done was add a block of scrap wood going all the way up the inside of front side of the planter. One in the center, and one half way between the center and the end on each side. Basically this piece of wood would have given us deeper wood to nail our lattice into instead of having to bend down each of those nails!
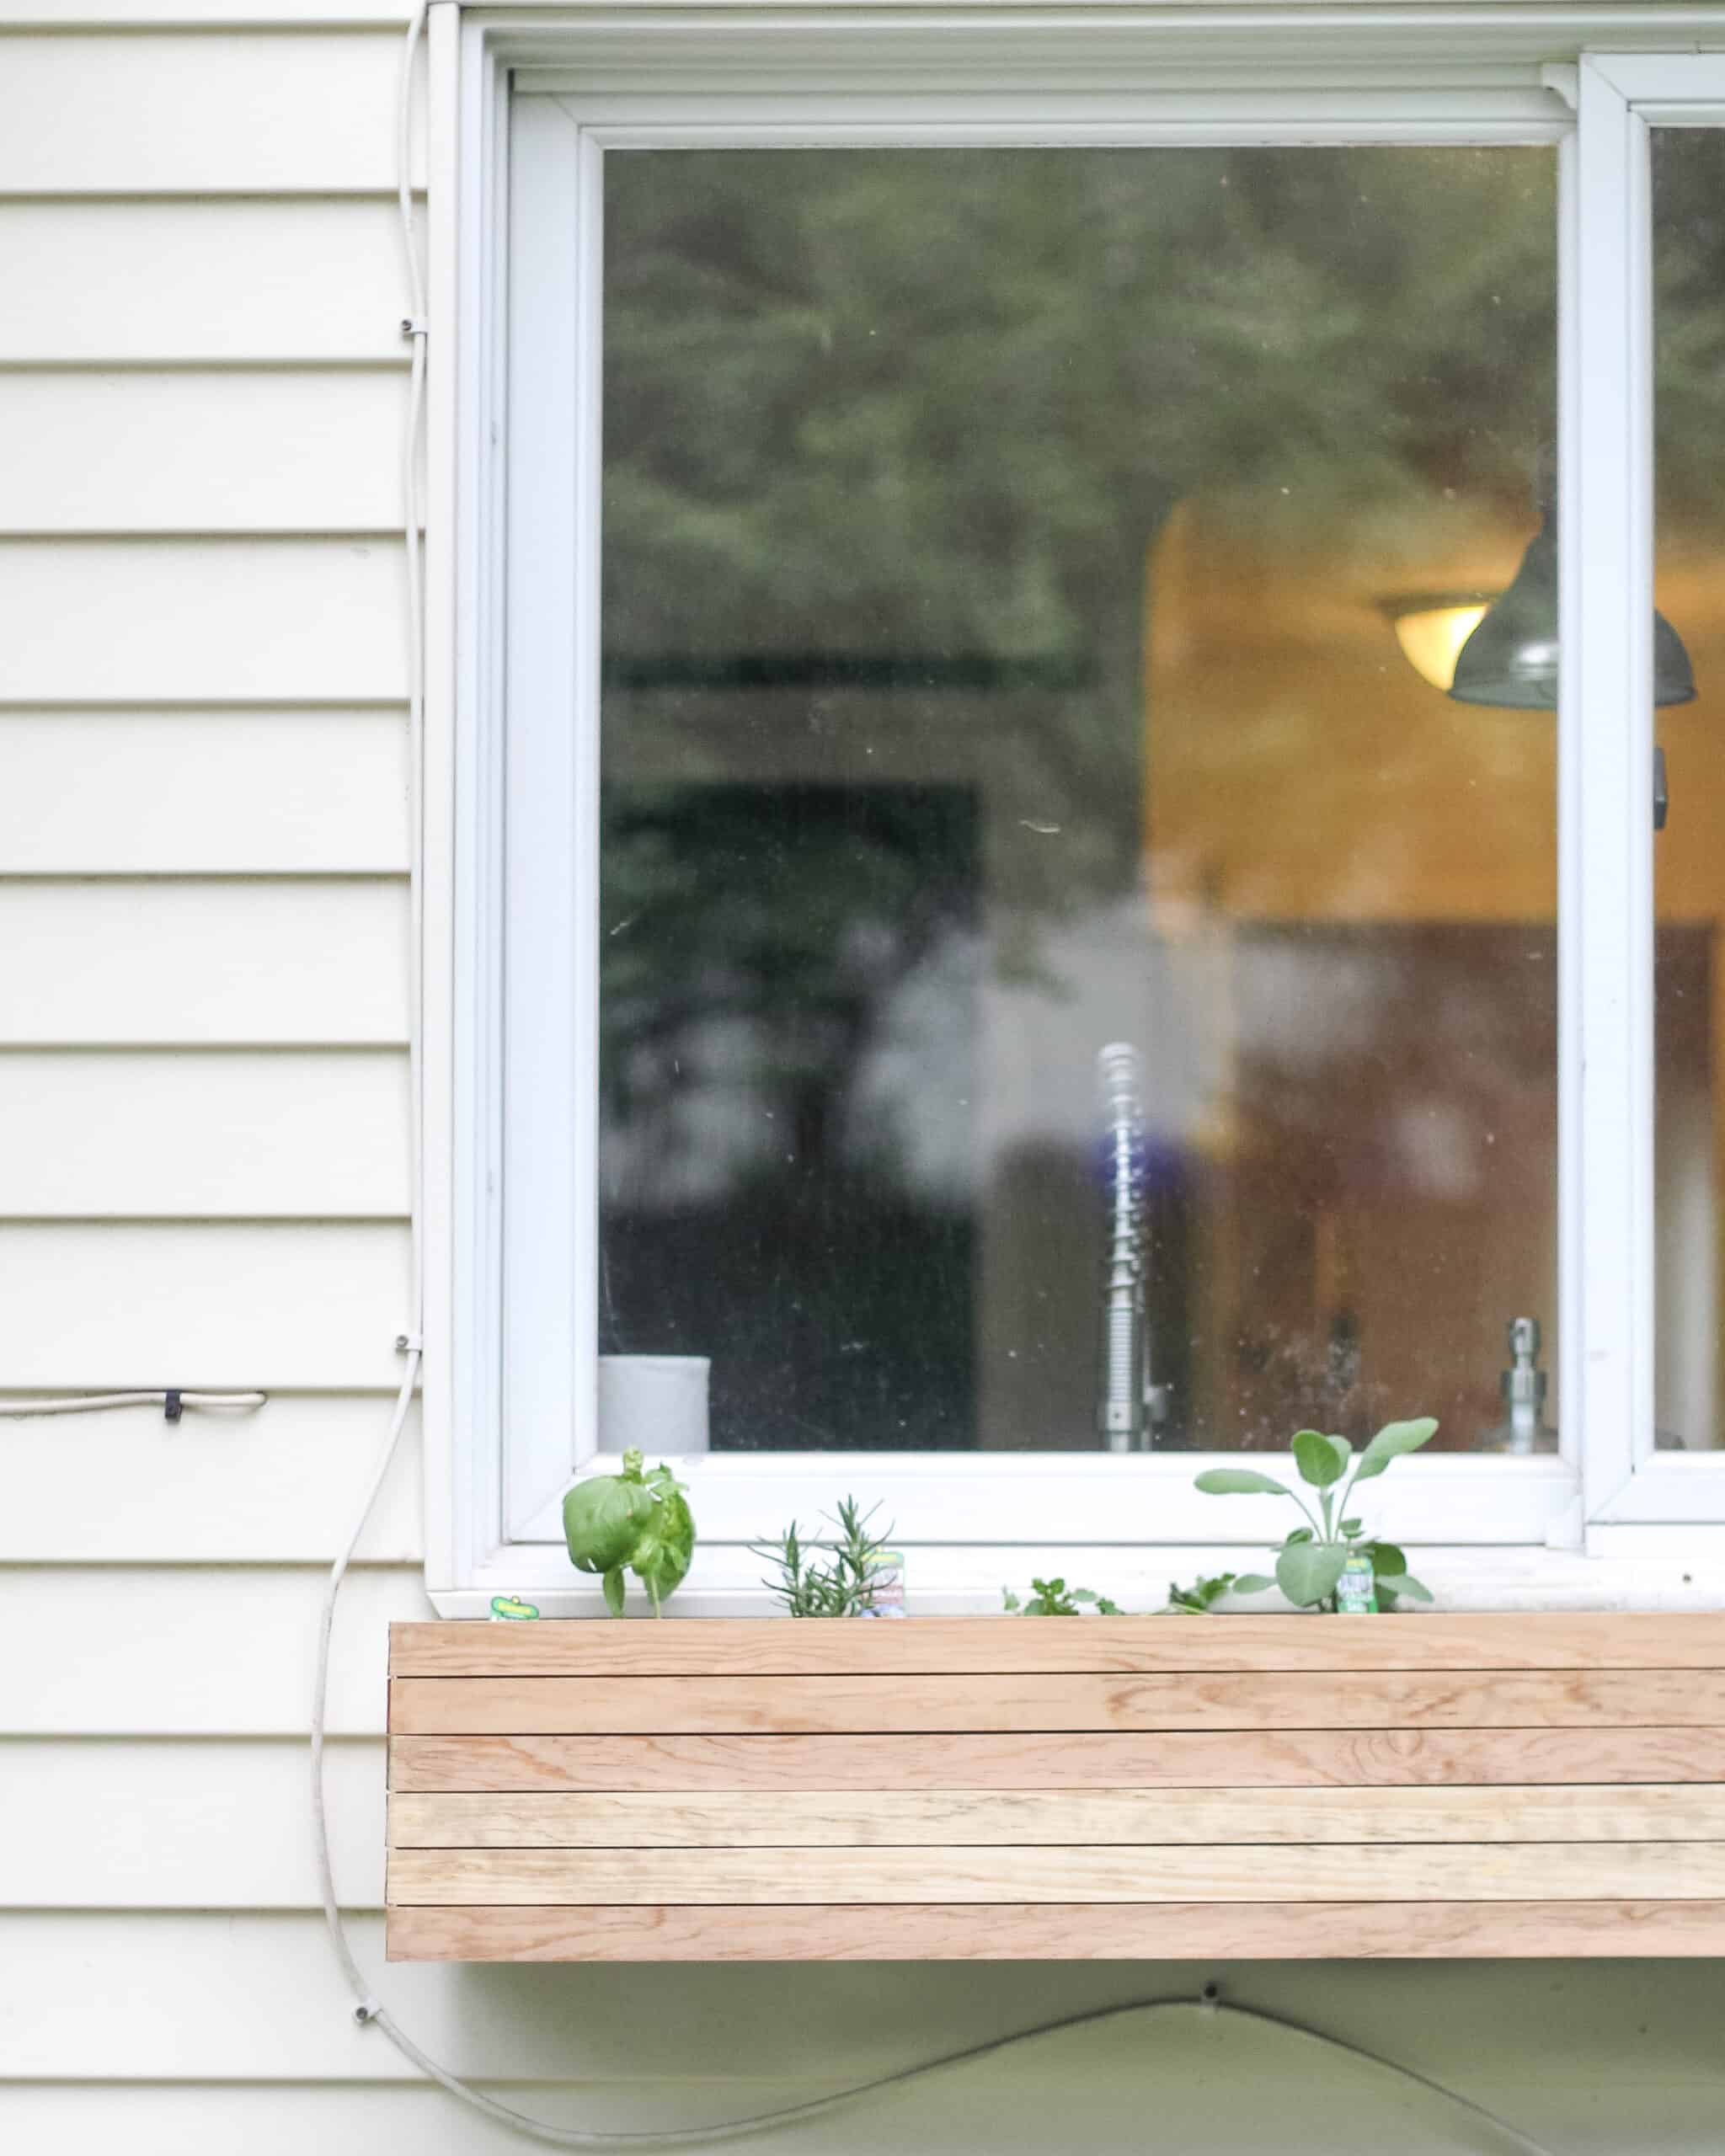
Now start at the bottom of the front and center your lattice so you have about 1/4 inch hanging off on both sides and the bottom of the planter. Making sure your first strip is level nail your strip on both sides and the center. You may have to add 2 other nails as well but that is up to you.
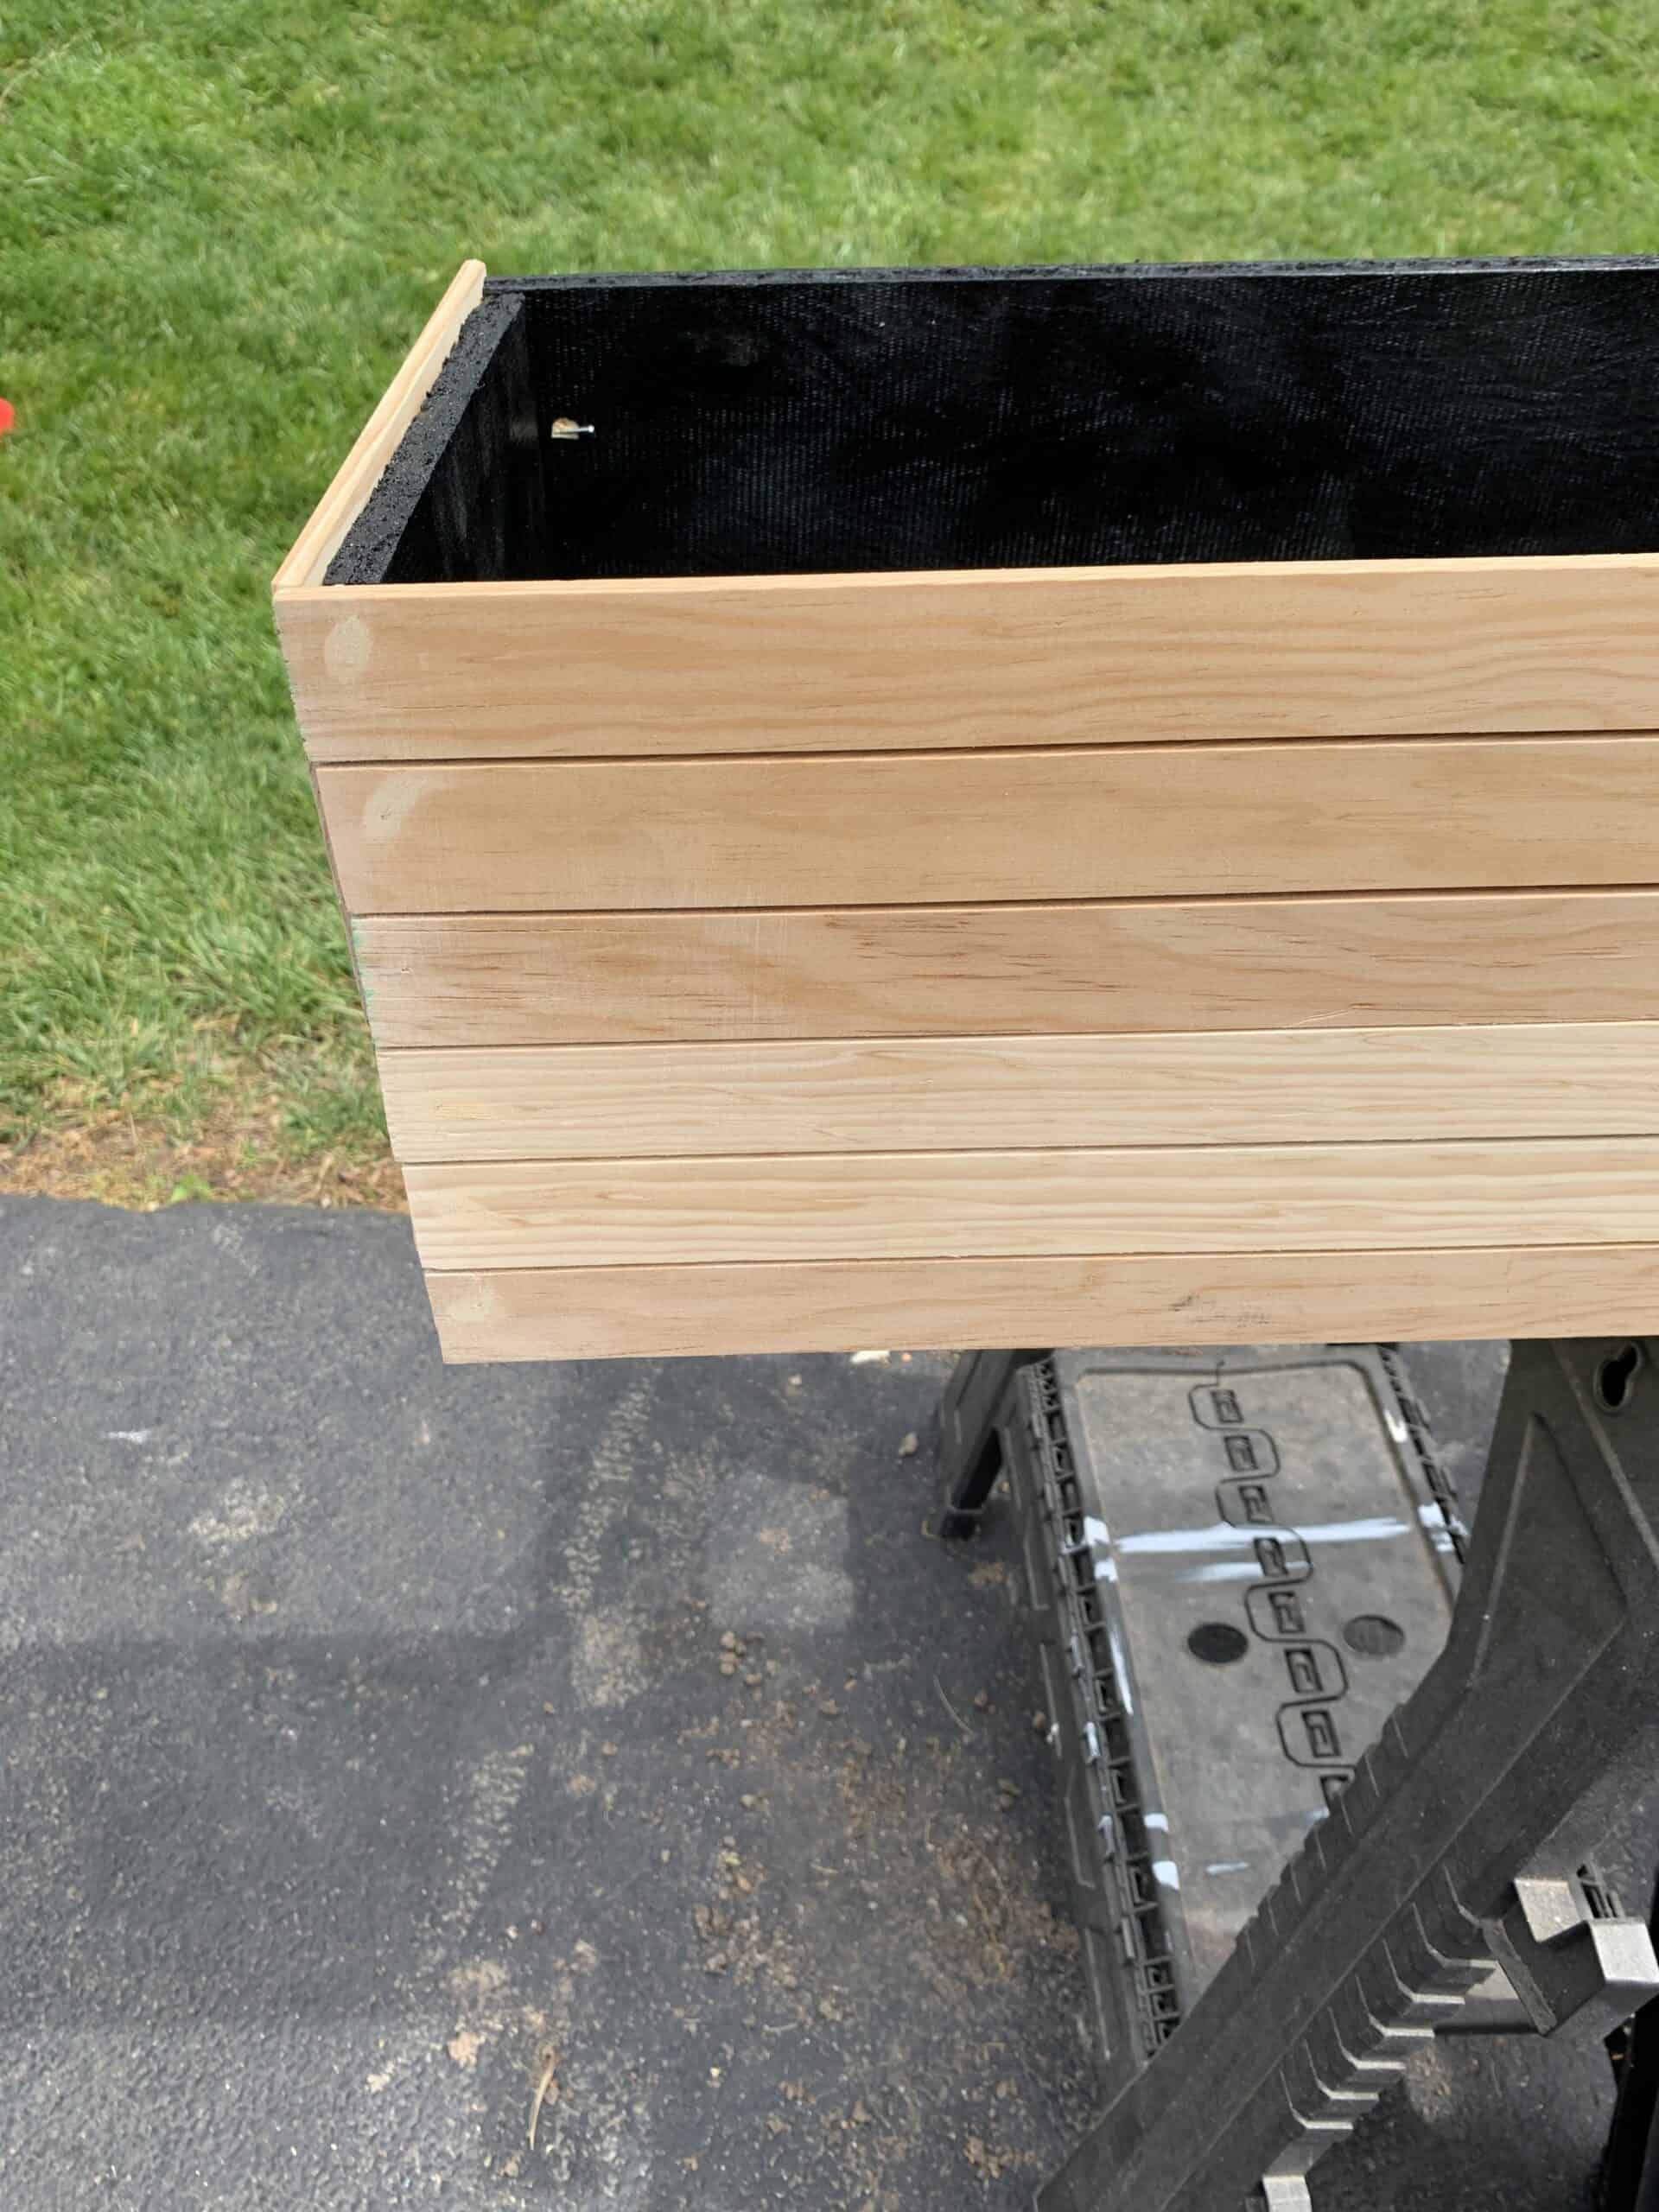
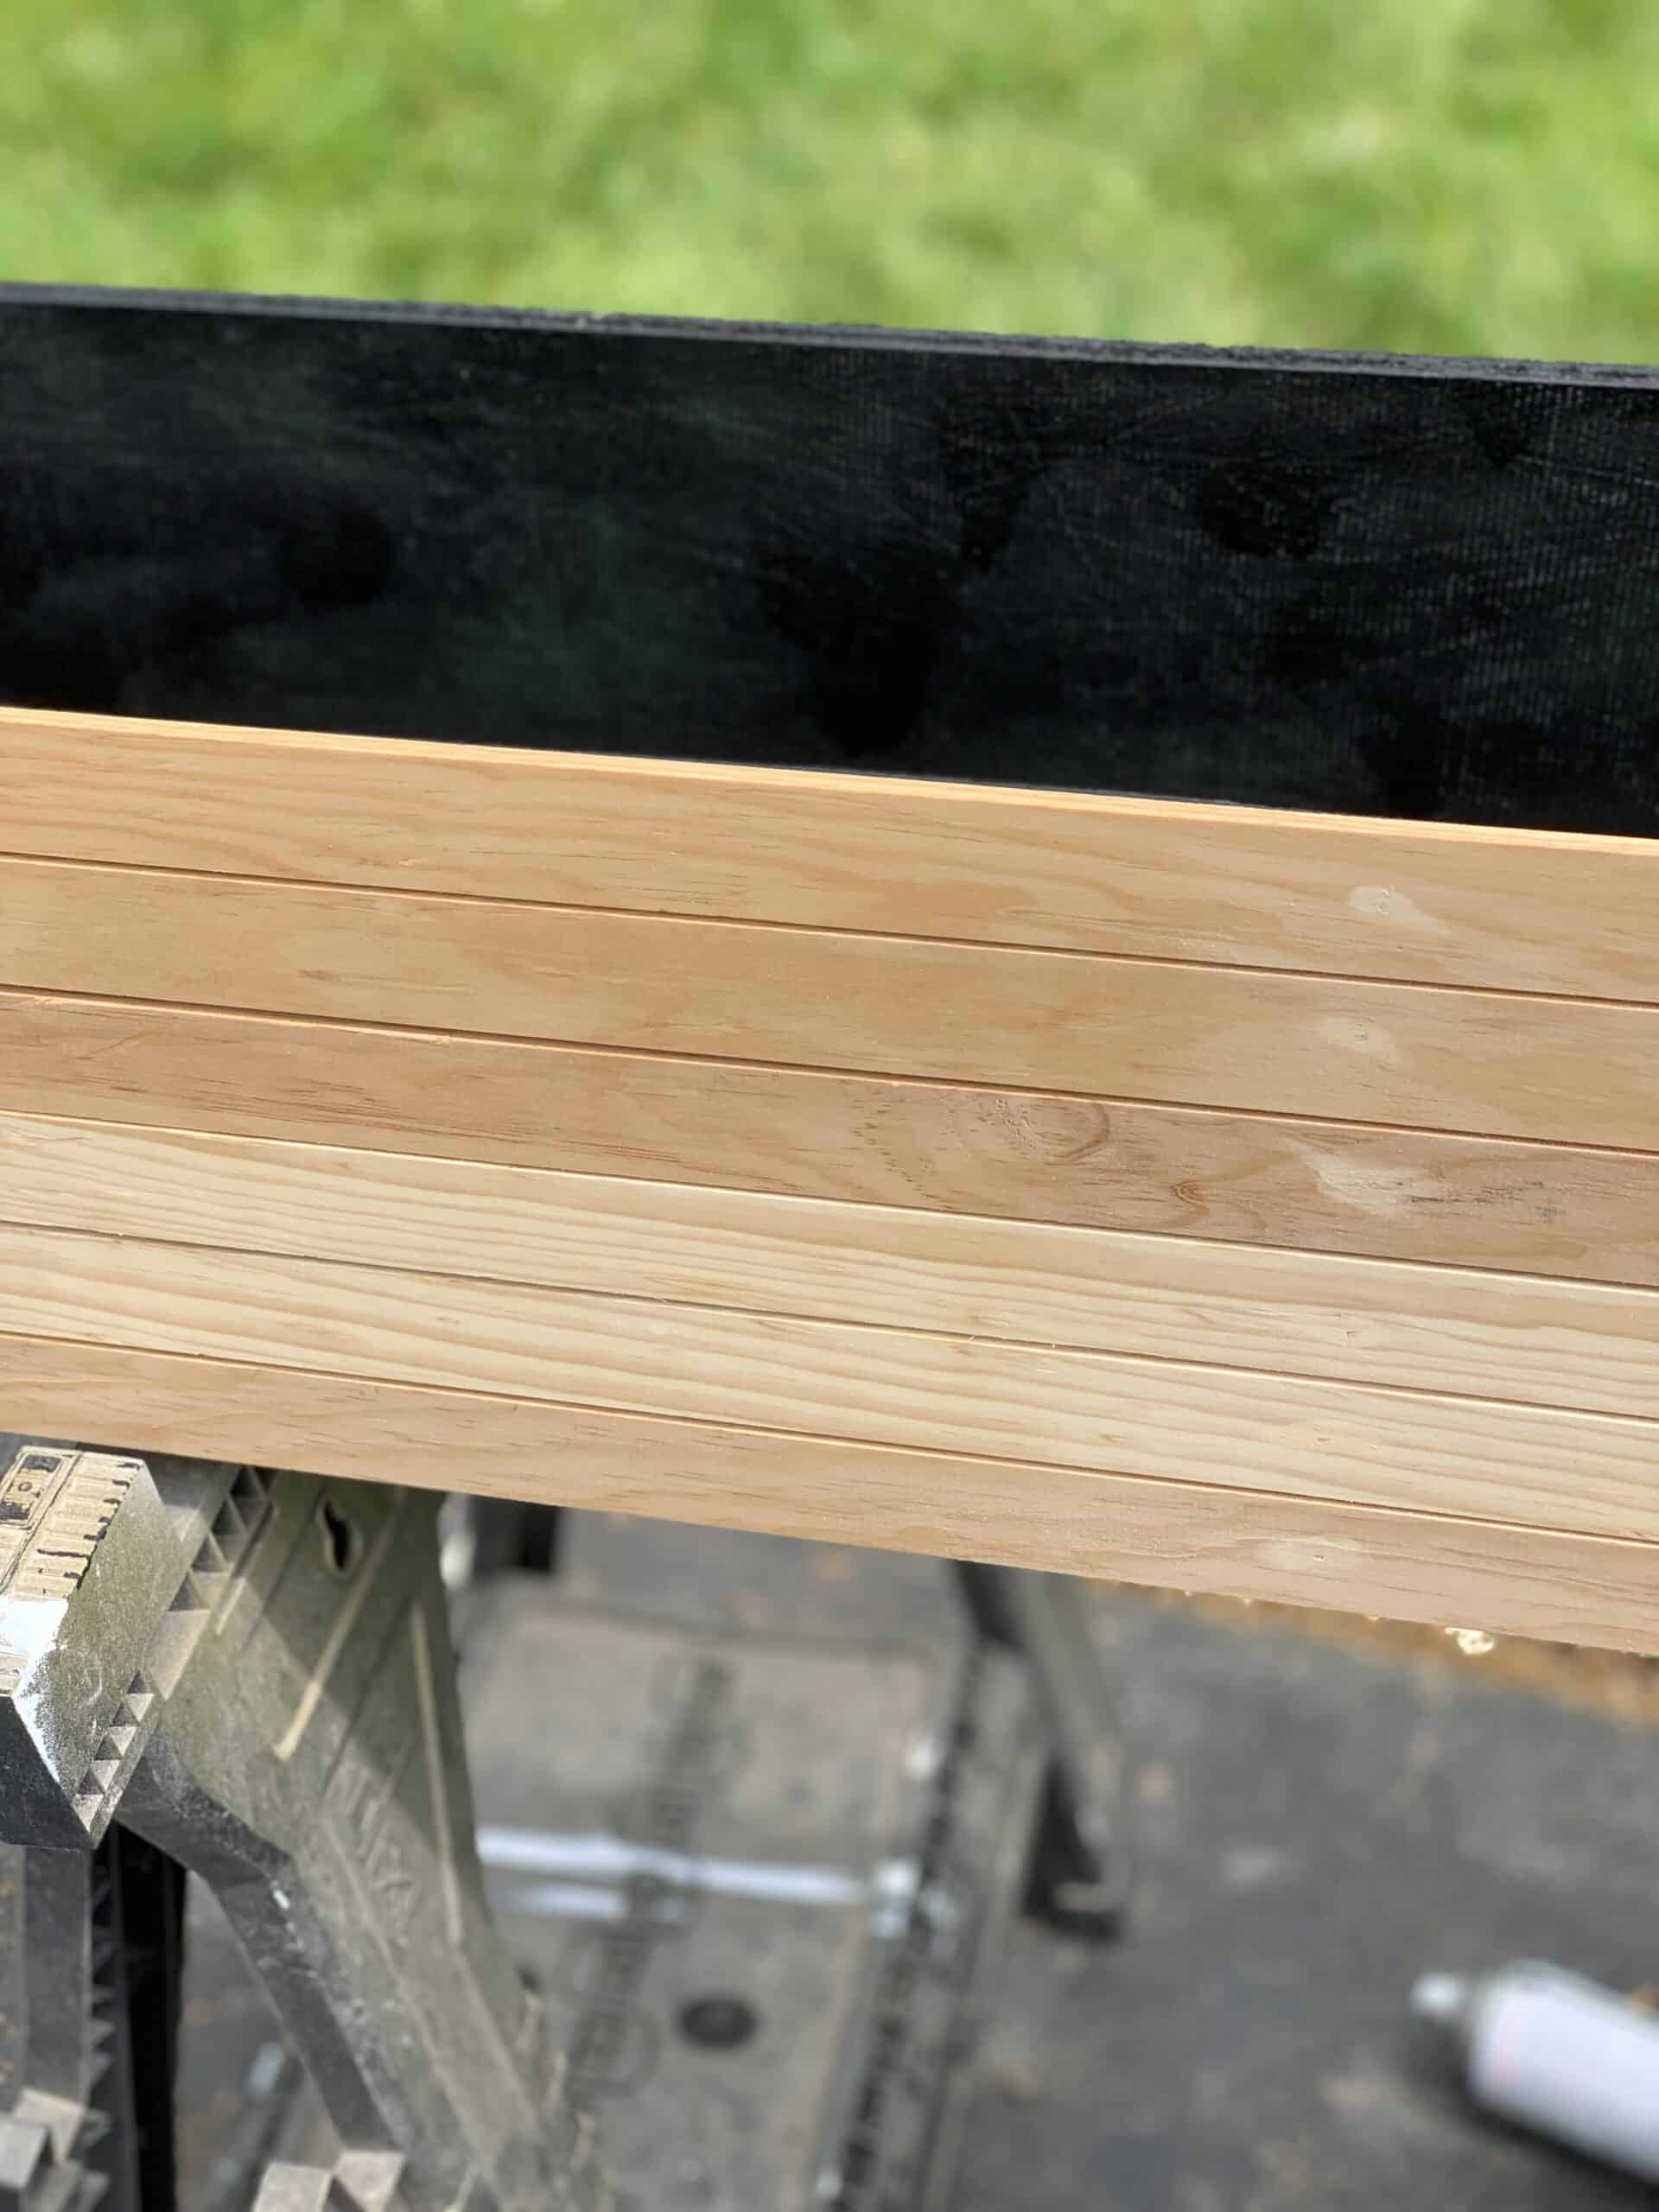
Next we grabbed our nickels we had for spacers and put a nickel between the bottom piece of lattice and the next piece and repeated. We did this all the way to the top. The top will hang over which is great! I loved that look.
Next do the same thing to each side lining up your lattice with the pieces along the front.
Finishing and Hanging
Now that it is done – use a little wood filler and touch up your nail holes. Sand those down, and apply a coat of stain – I personally used some weathered oak we had on hand.
Now you want to spray it really well with your weather proofing spray. This will ensure that your planter box lasts much longer!
Once it is fully dry, we personally used 4 Large drywall screws to attach it to the siding. The hardest part about this step is getting it level and not tightening it too much so that it sits nicely and doesn’t tilt up.
Once it’s up, fill your diy planter box with soil and whatever your heart desires. We personally are actually using ours for an herb garden. The window we built this for is over my kitchen sink, so the herbs that are on the side where the window opens will be able to be cut right there. We will do jalapeños and a couple of other smaller plants on the other side.
Cost and Time Breakdown
This is always a huge ask on all of my projects so I am going to try to add this every time I do one.
Total time for this project was: 2 hours working/ 1 hour dry time. (3 hours start to finish)
Cost: We owned all tools, stain, and so on, so our only cost for this project was lumber. $45 ($35 on lattice – $10 on plywood)
Overall this was one of my favorite projects we have done in a while. It turned out exactly how I pictured and was really simple to make happen. It is certainly nothing fancy, but was really fun and I think I will recreate it in a coming project!
If you have any questions on this DIY planter box tutorial feel free to DM me on Instagram, or leave a comment below! I can’t wait to see your finished projects, and hope you love the end outcome as much as we do!
Favorite Products for 8 Month Olds & Goldie Update
Our sweet Goldie Mae is 8 months old and getting bigger and sweet by the day. I think if you look back on these posts you will see me say “I can’t believe I am writing this” each time. I wish I could slow down time. This post has all her 8 month updates and my favorite products for 8 month olds.
this post may contain affiliate links
Favorite Products for 8 Month Olds
I have been tracking everything we have been using and loving with Goldie every month. It has been such a fun way show you whats ‘worth the splurge’ or where to save. With the posts – it is important to note that even if an item no longer makes the ‘favorites’ it may not be because we don’t use it anymore – sometimes it’s just that it isn’t a top favorite because of her age.
Before I get to all of those favorite products I will give you a little update on our girl, and how she’s doing!
8 Month Goldie Mae Update
Goldie girl is getting so big and chatty these days!! She is sitting up on her own really well, and rolling all over in her crib (which is an excellent way to avoid naps incase you didn’t know).
She is chatty like no ones business. She smiles all the time, and has recently started laughing SO HARD ALL THE TIME. She used to be kind of a tough cookie to crack, but especially Jack can get her really laughing.
She loves to eat, and although we have to take things slow thanks to her egg allergy, has taken to pasta, olives, and veggies as finger foods and loves them all!
We are hoping to test her eating peanut butter this next week to check that off the list, then attempt dairy. Having an allergy during this crazy time in our world has made things so much trickier.
She is definitely FULL OF STRANGER DANGER, which breaks my heart – I feel like we were trapped inside due to the flu season, then literally right after crap hit the fan, so she just hasn’t really been around anyone. I am hoping it’s something we can work through, but I know it will be a reality for so many babies this age!
Other than that, she is great! She is SUCH A JOY, and truly makes our world go round. The fact that she is our last baby has me sad because she is just so amazing, but I also am loving knowing she is going to just remain the baby. I feel like I have soaked every moment in with her as best I can!
Pack-n-play – we have owned so many over the years and switched to this one recently. I can’t believe how easily it sets up, which is exactly what I wanted so we could move it around the house easily!
Walker – we got this with our third (coincidently named Walker). It is great for use all over the house. It has safe wheels, and I use it a lot as more of a travel jumper because I can take it outside easily. It folds flat which is amazing!
This highchair – I linked a different one the past few months. I truly love both, and we owned both, but I ultimately decided to keep this one over the other – I have a comparison review coming
Jumper – We love this jumper for Goldie – I love that it isn’t super bulky and ugly, and she loves it
Slumberkins – OBSESSED WITH THESE, and Goldie is loving hers
This glowworm – I’ve talked about this a few times, but honestly it’s the ugliest, but best item ever!
If you have any questions on my favorite items for 8 month olds leave me a comment below or send me a DM on Instagram. I love connecting with you all on social, so I hope you pop by to say hi!
Mother’s Day is less than 2 weeks away, and you guys I have been dragging my feet on this post! But I have finally rounded up some useful Mother’s Day gift ideas that I think moms will love!
This post contains affiliate links -updated in October 2025
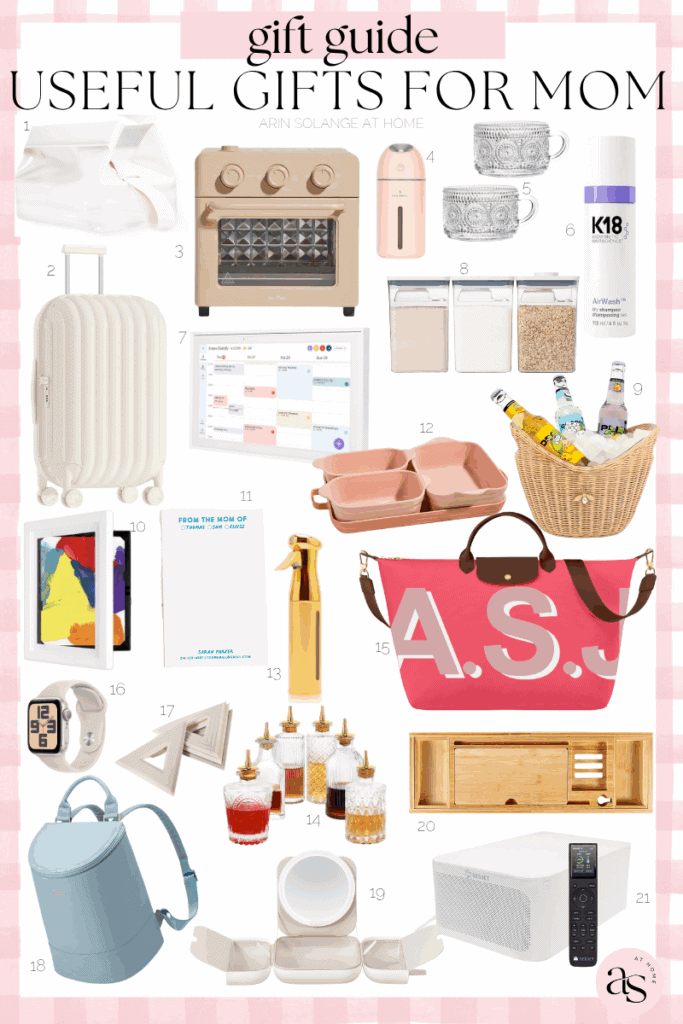
Useful Mother’s Day Gift Ideas
To me mothers day is both such a treat (hello – a day where everyone worships you and tells you what a great job you’re doing), and an honor! There is something so special knowing that I am lucky enough to get that title.
I tried to round up some ideas for Mother’s Day that would be useful while you’re home, and beyond. Fun ideas that I personally would want, and some that I will definitely be asking for. – I mean after all, I get to ask for double since we skipped birthday presents right?
Hopefully there are great items for yourself, or your mom, sister, friend. Items that you will enjoy using or gifting that fit in every budget!
Our Place Wonder Oven – the answer to quick dinners, and this one isn’t an eye sore on the countertop!
Portable Cool Mist Humidifier – this humidifier has been amazing for my skin when the air is super dry and it is portable which makes this even more of a good purchase!
These vintage glasses are perfection sitting out, but they also just make me happy any time I use them.
A beautiful phone caseso we can feel cute making calls to the pediatrician about poop – IYKYK
The Digital Calendar is a bigger purchase but this calendar has truly changed our lives! I love that it syncs with my phone calendar system so the whole family can stay organized and running smoothly. The perfect calendar!
OXO Containers – These are my favorite containers and they help keep everything organized and looking nice.
You might use this rattan ice basket more to serve drinks, but it will look gorgeous sitting out on a table!
Not only is this makeup organizerbeautiful, but it also keeps all your makeup organized and handy!
How cool is this mom personalized notepad with your name and your kids names for sending easy notes!
This Our Place Ovenware Set is gorgeous! So when you opt to leave dirty pans on the stove, at least they will look great!
This gold bottle is so pretty and can be used for so many different things!
I use these bitters bottles for my coffee syrup, but they would be great for olive oil too. This is another example of something that I have that just makes me so happy!
Longchamp Travel Pliage Signature Bag – I absolutely love this bag since it can fit everything and it is perfect for traveling. I also love that you can personalize it with your initials!
Apple Watch – again, the price tag. But, I use this thing constantly – checking the weather, tracking steps, setting timers, adding reminders. It is SO useful!
A trivet set works great a coaster for your coffee cup or hot dishes and it looks so cute sitting out!
This Cooler Backpack is perfect for bringing food or drinks to the beach or a picnic!
This travel makeup mirror is perfect because you not only have this travel mirror, but your makeup can be easily organized in the attached compartment!
A bath caddy is an absolute life changer! It’s perfect for holding your book, computer, tablet, wine glass, etc. while taking a bath!
And finally, the one thing that unites all mothers is the need for more sleep. The Bed Jet is a climate comfort system and is exactly what mom needs for a night of shut eye!
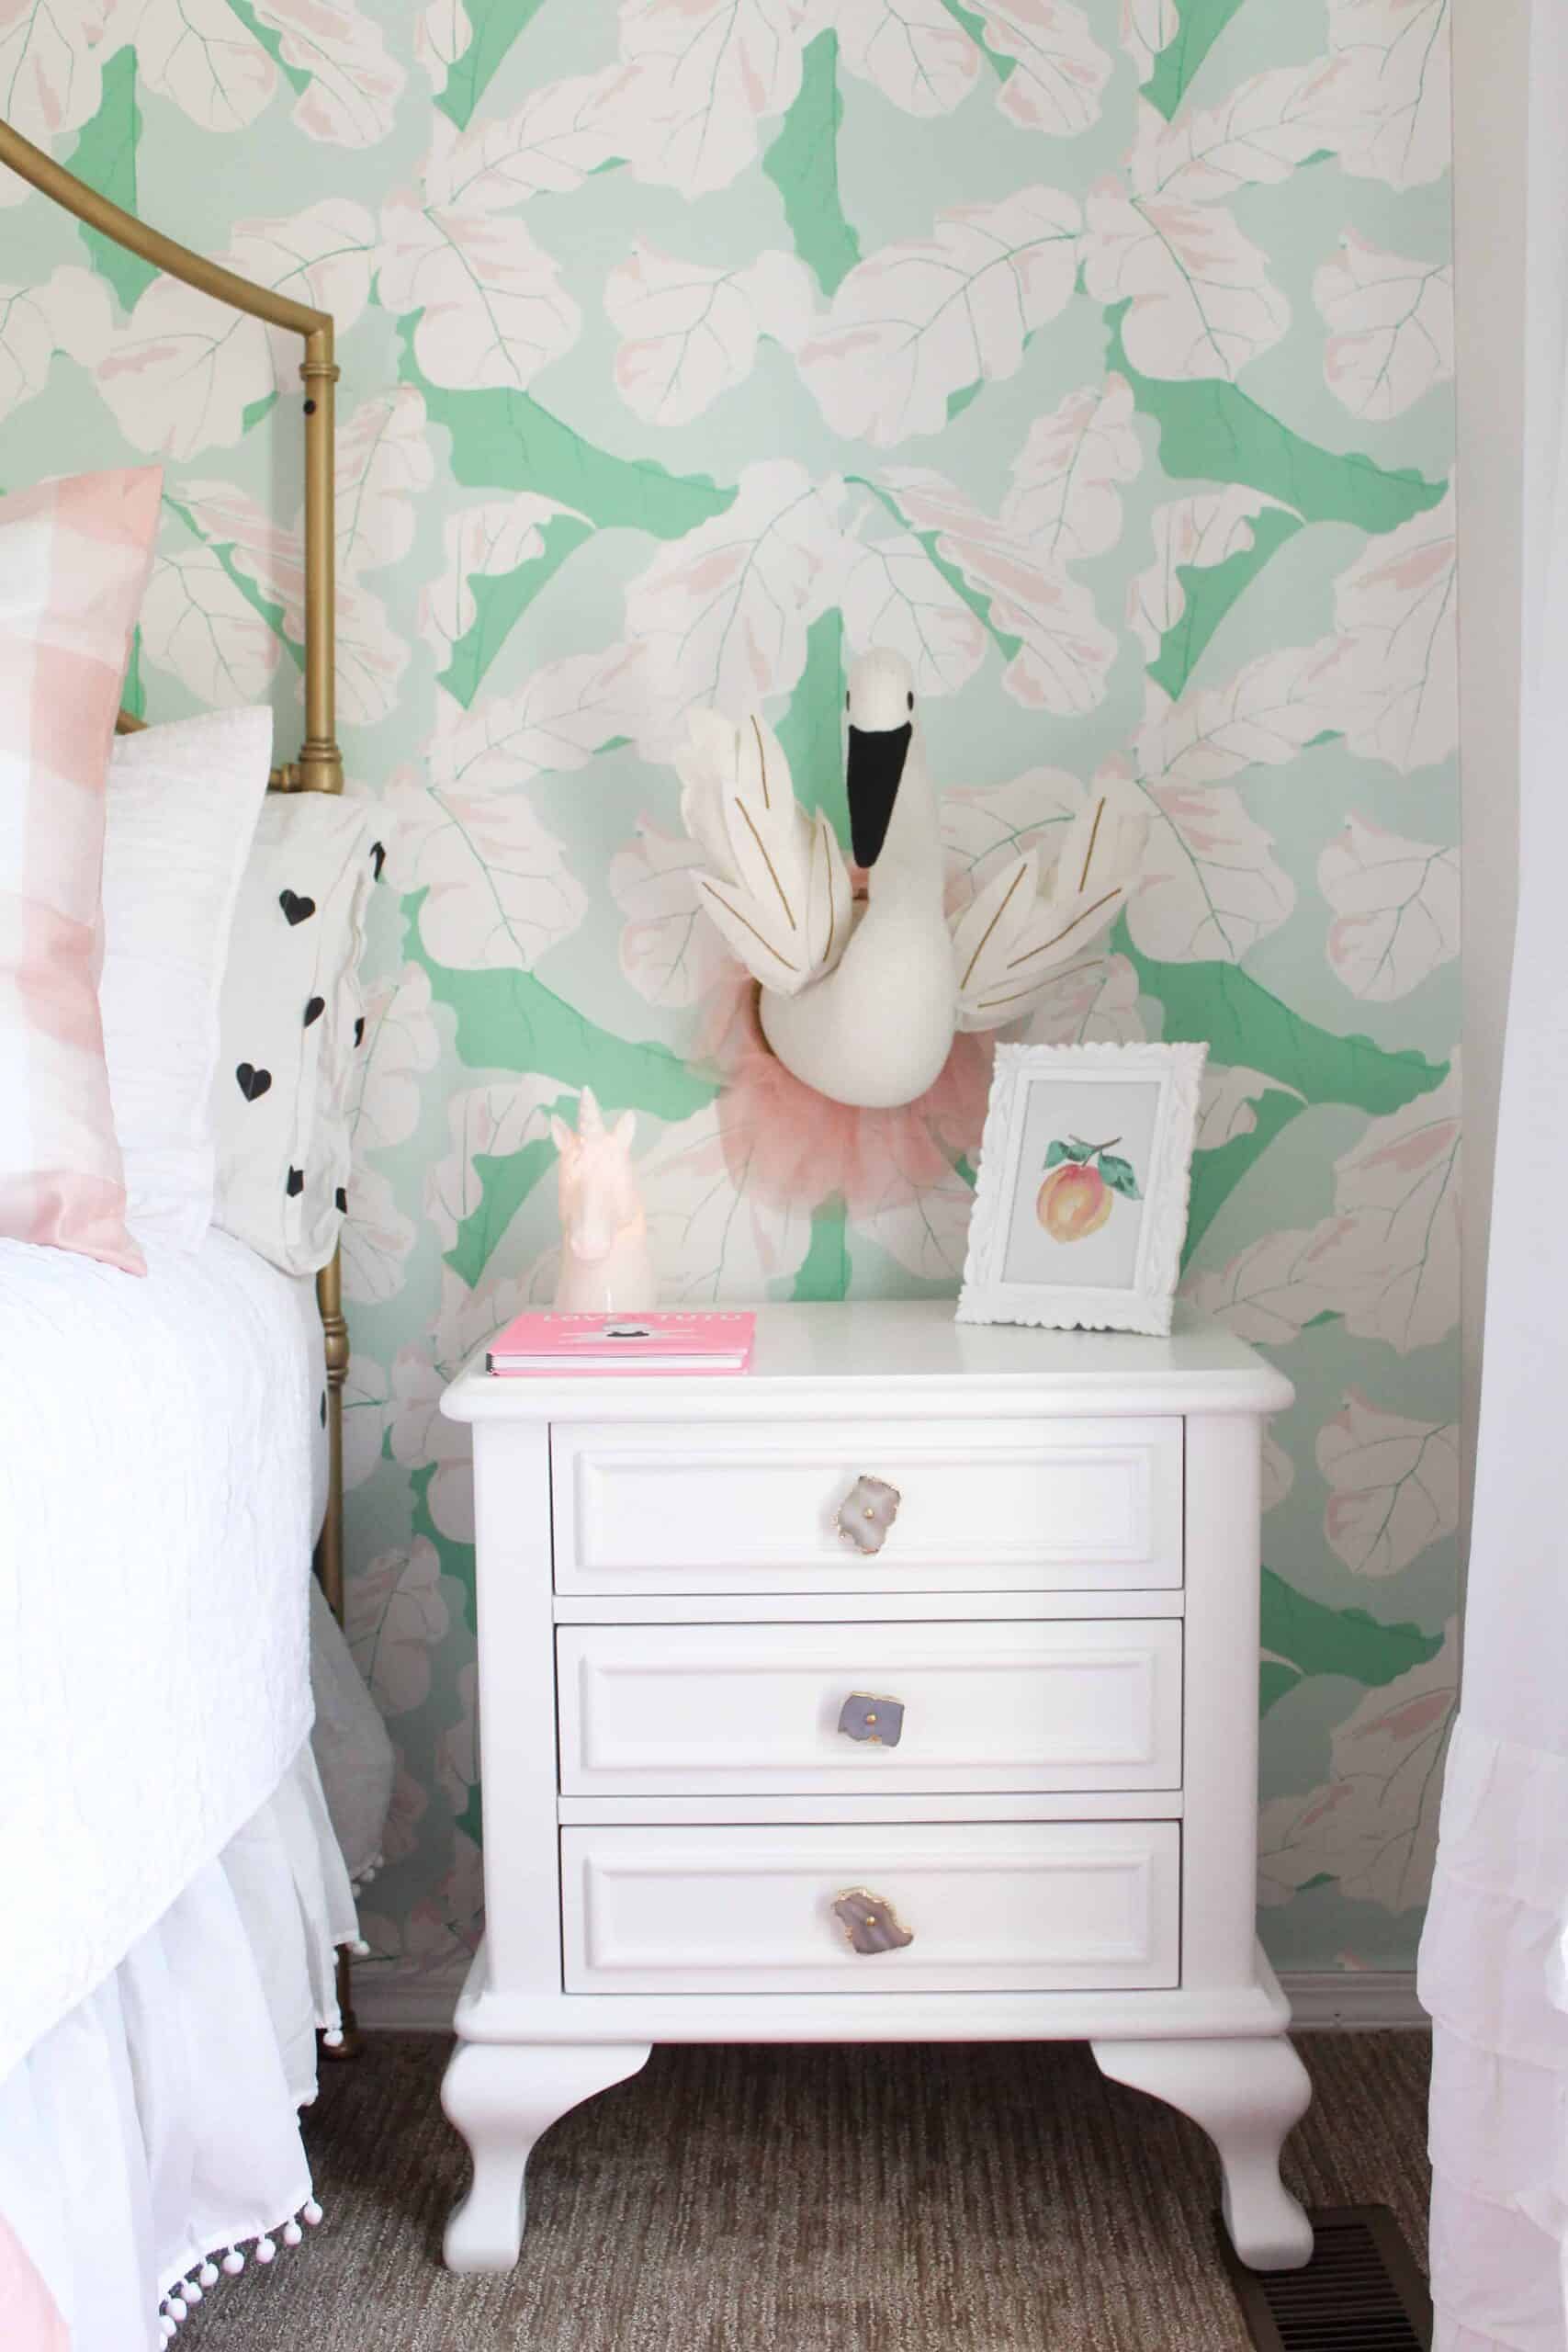
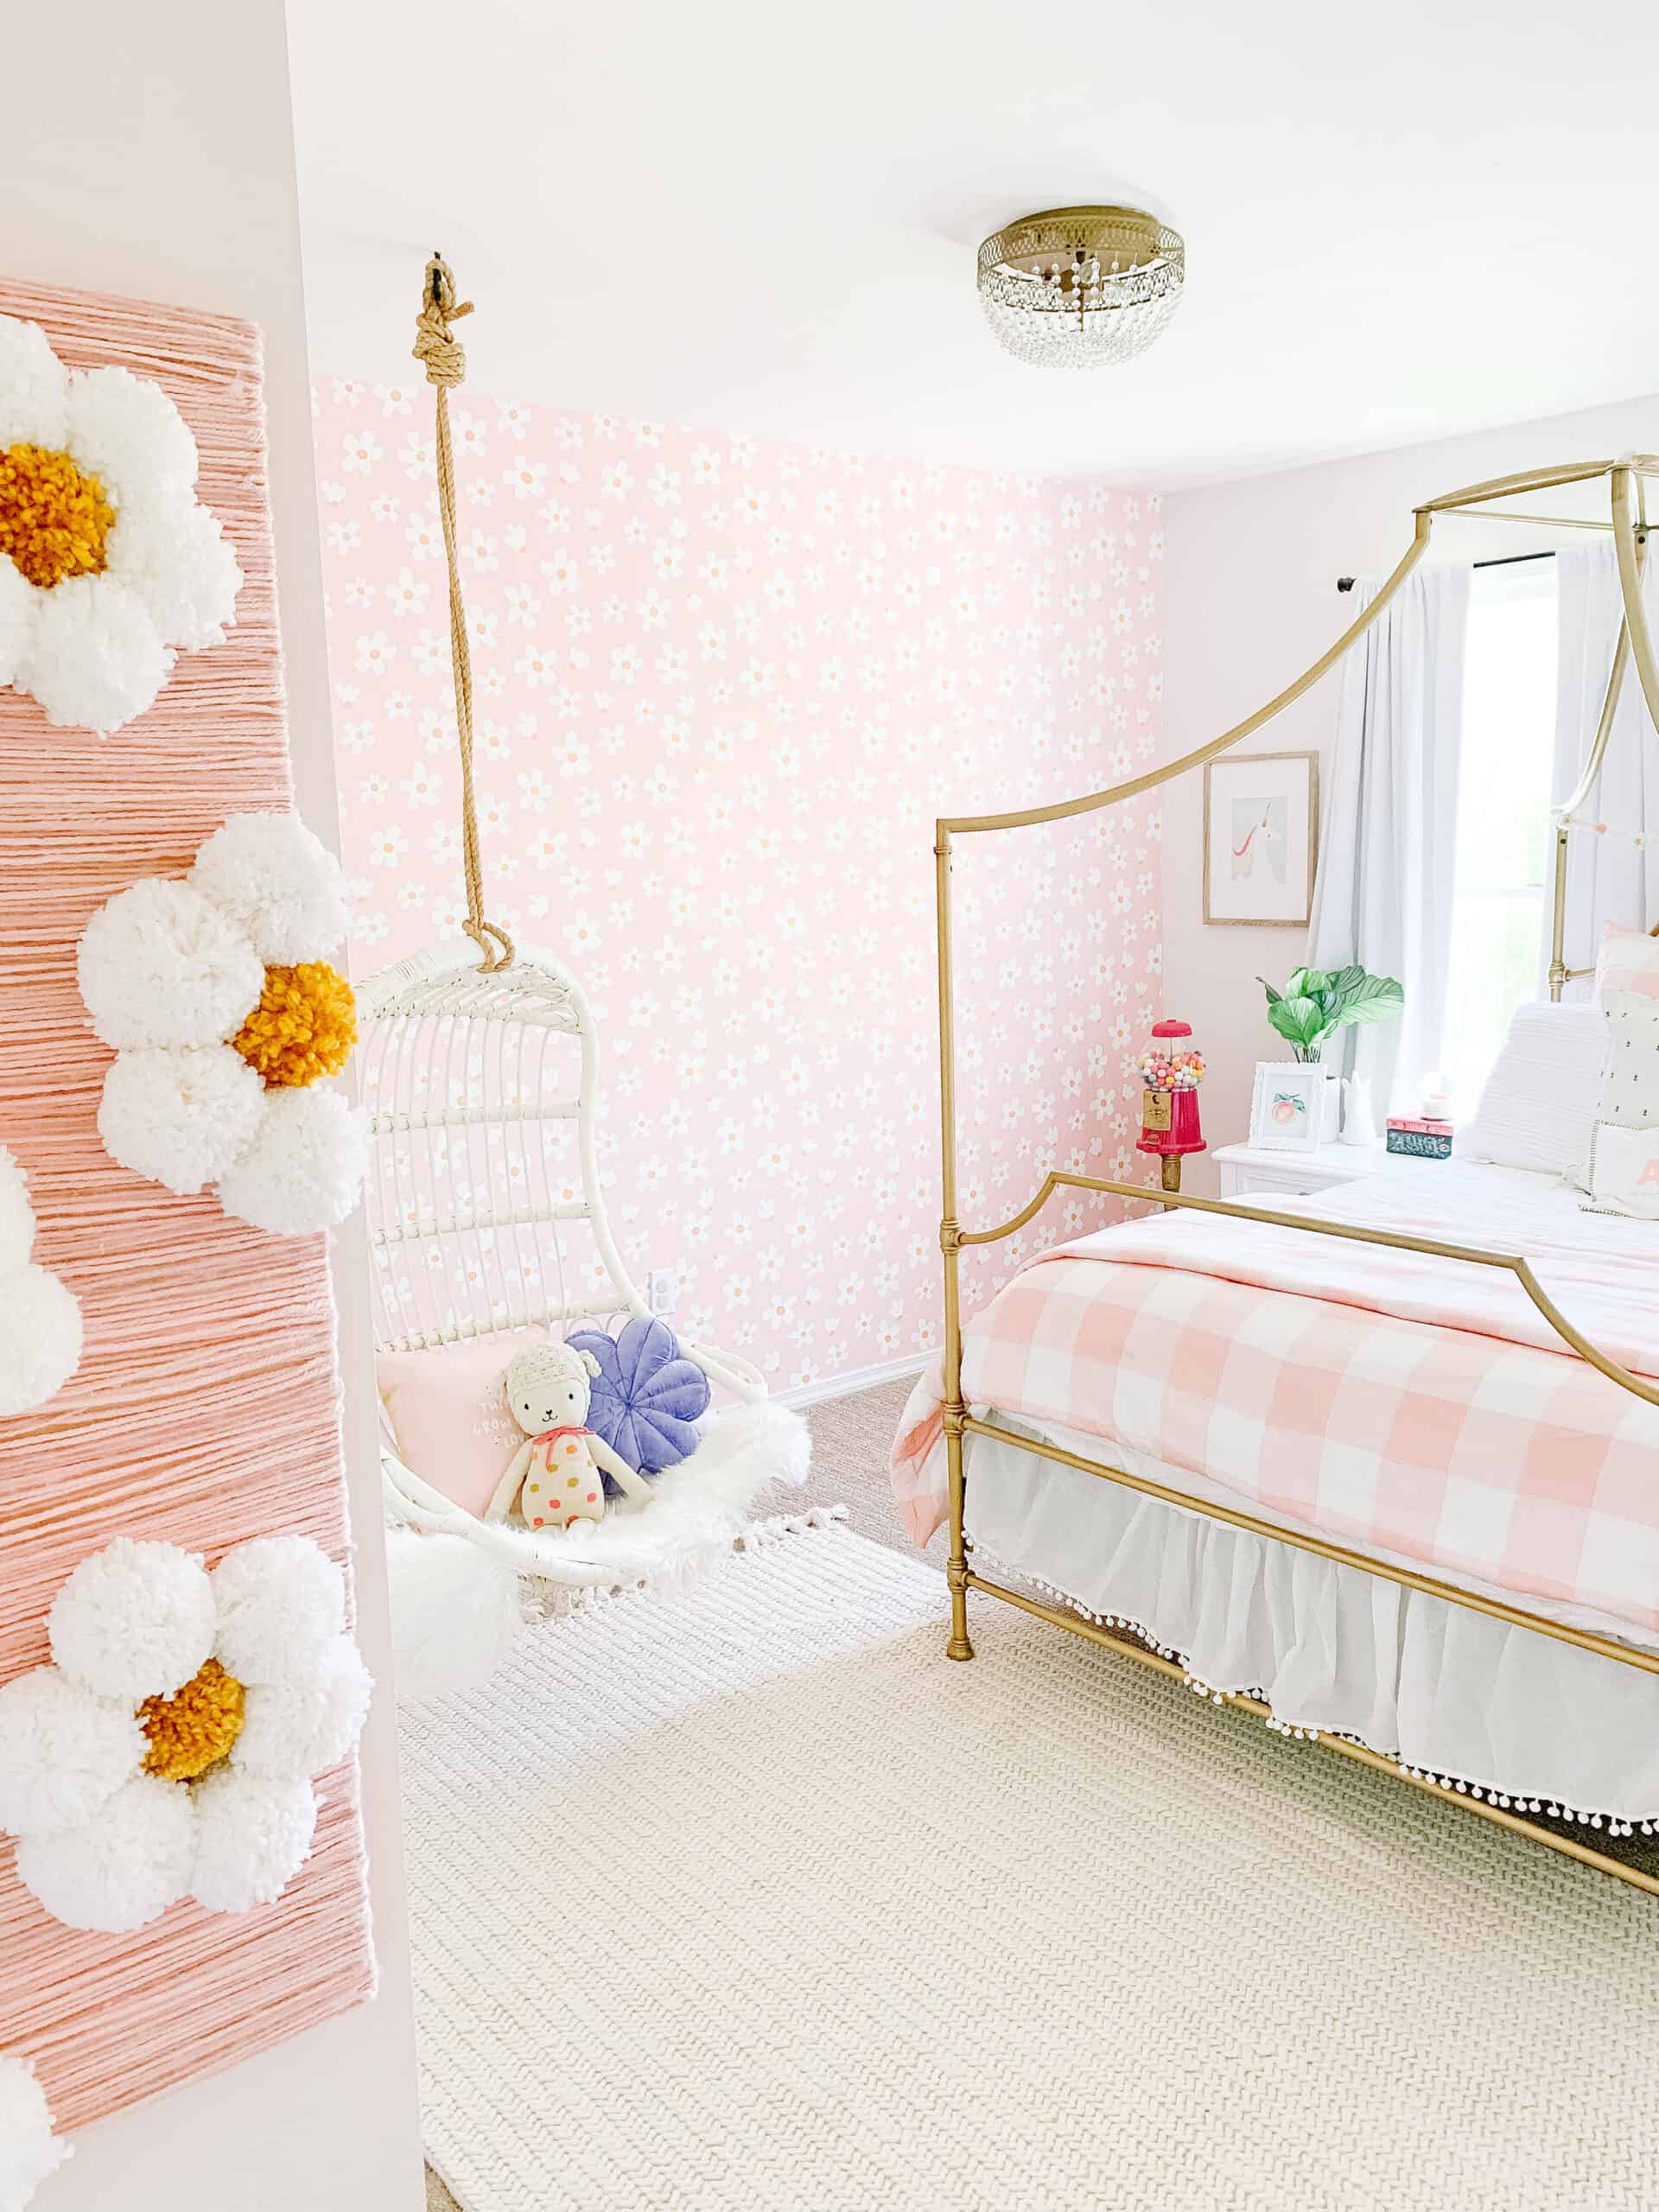
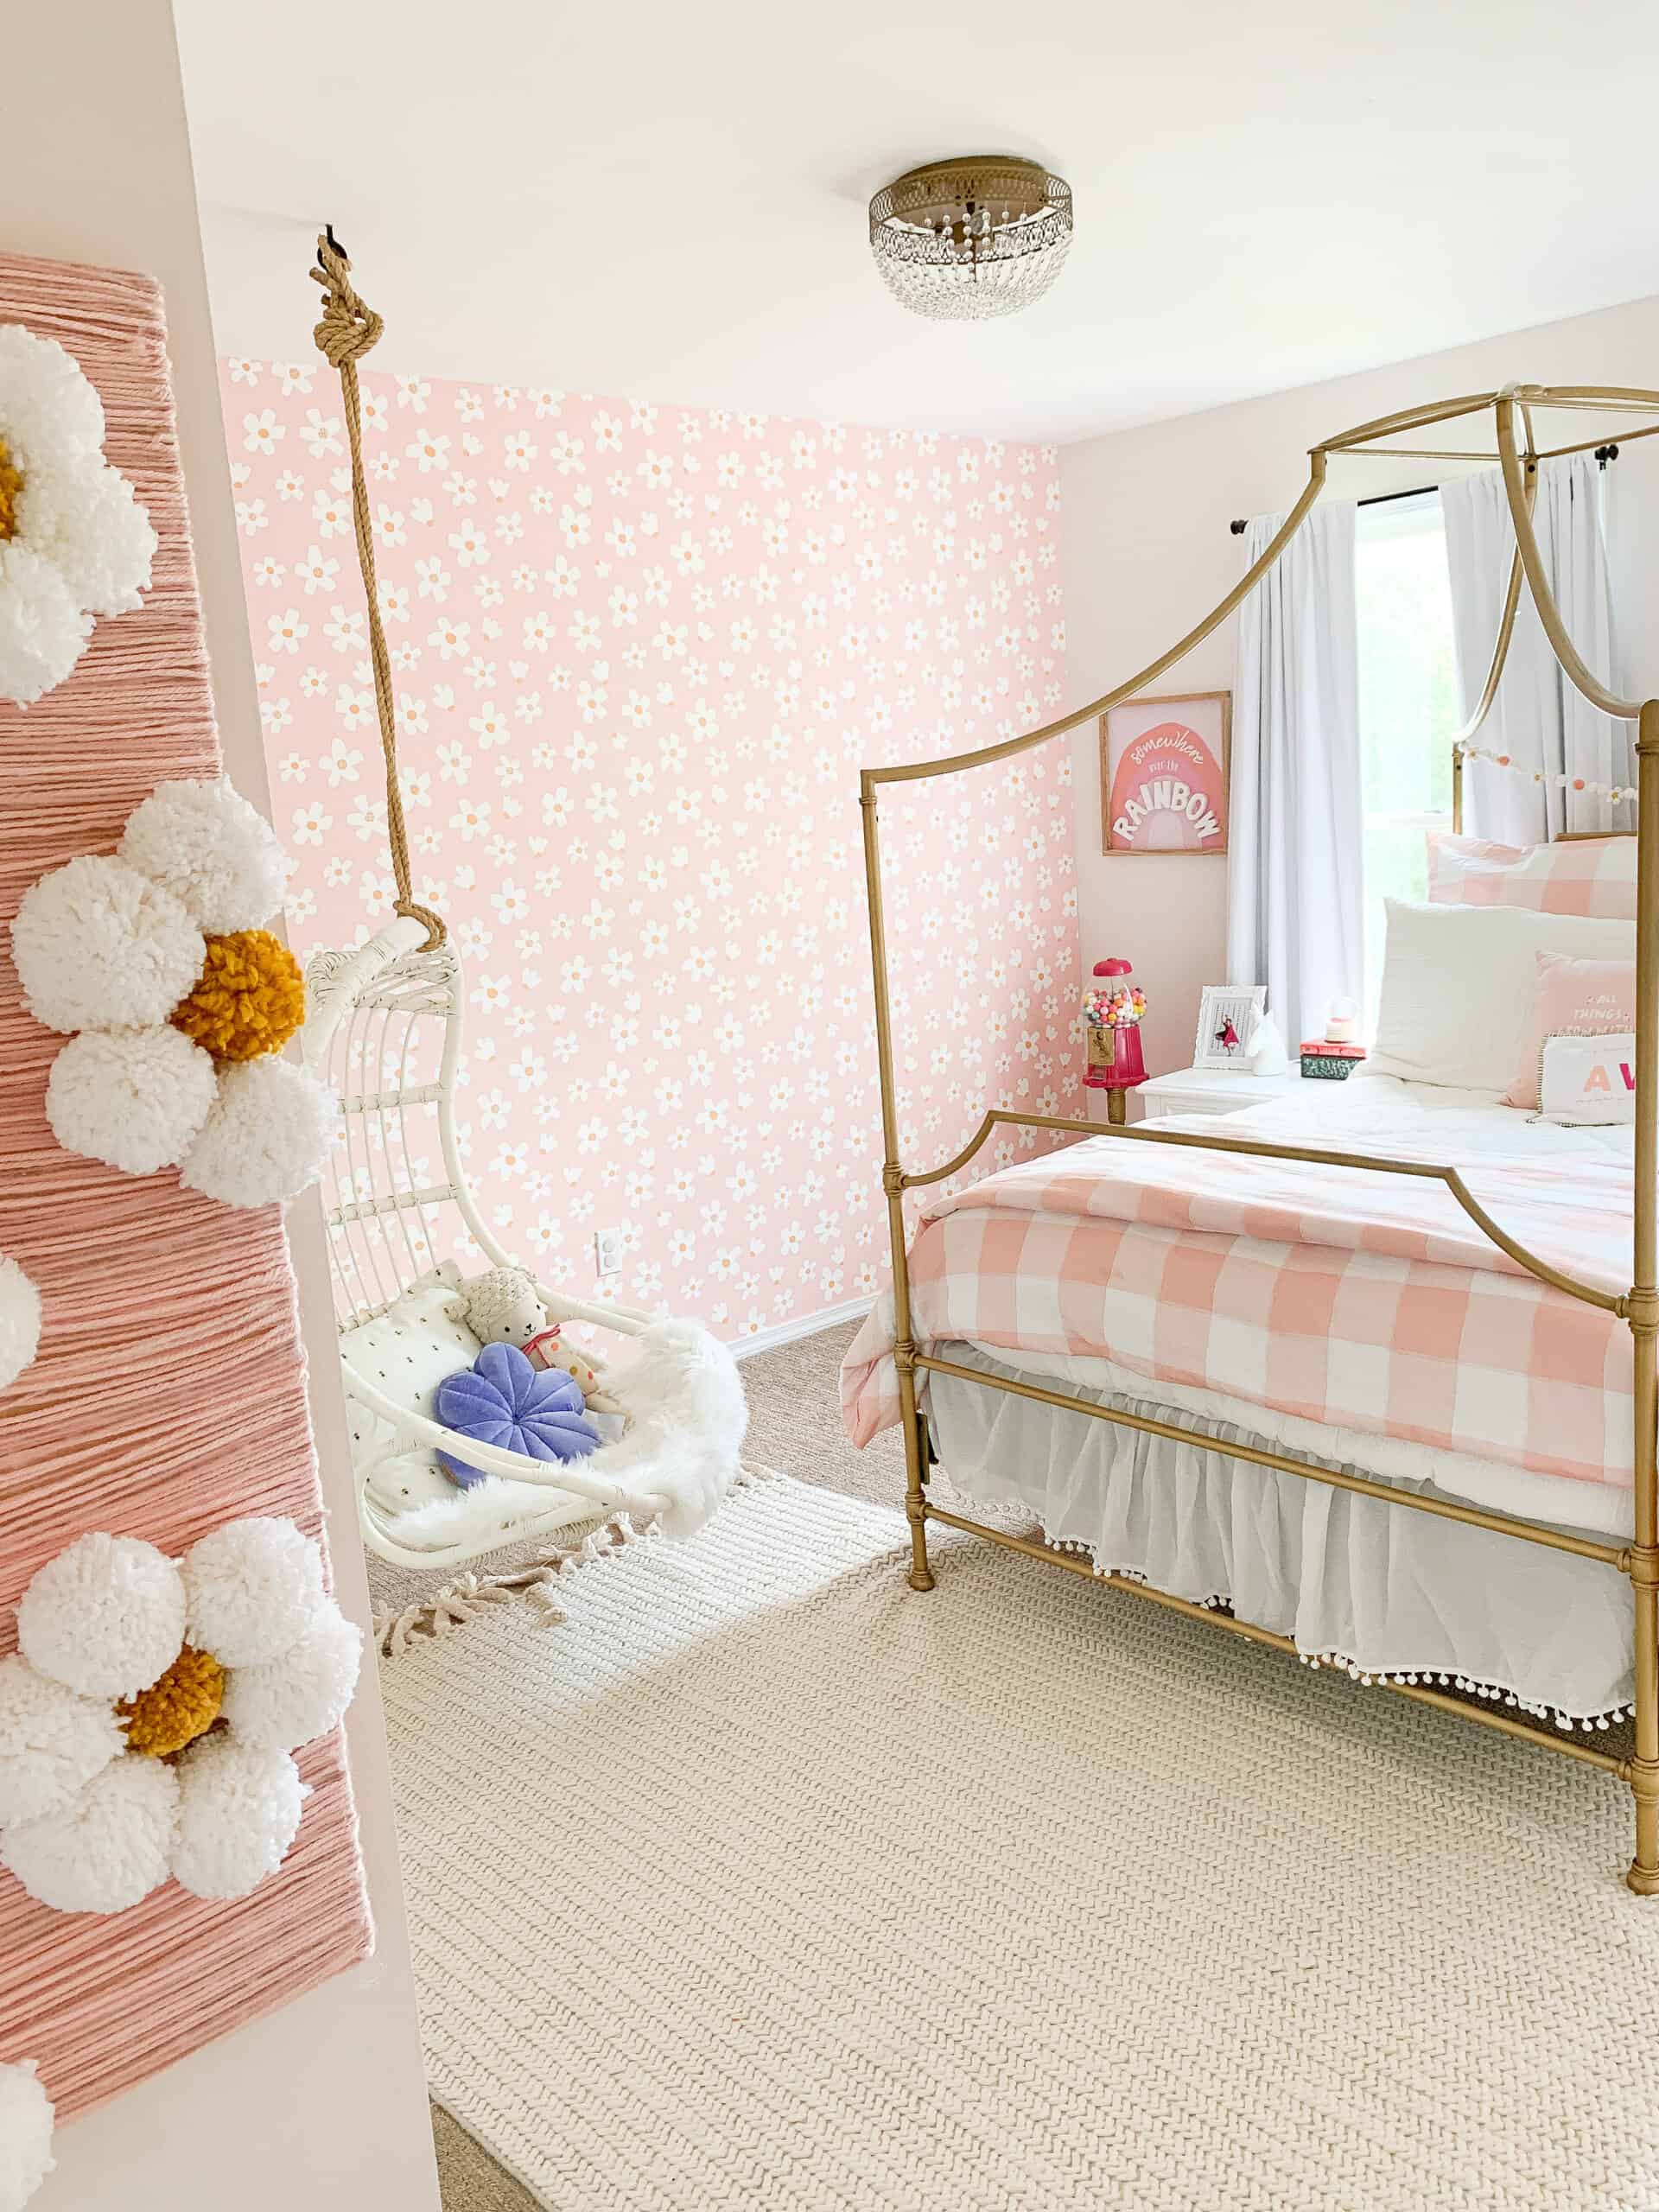
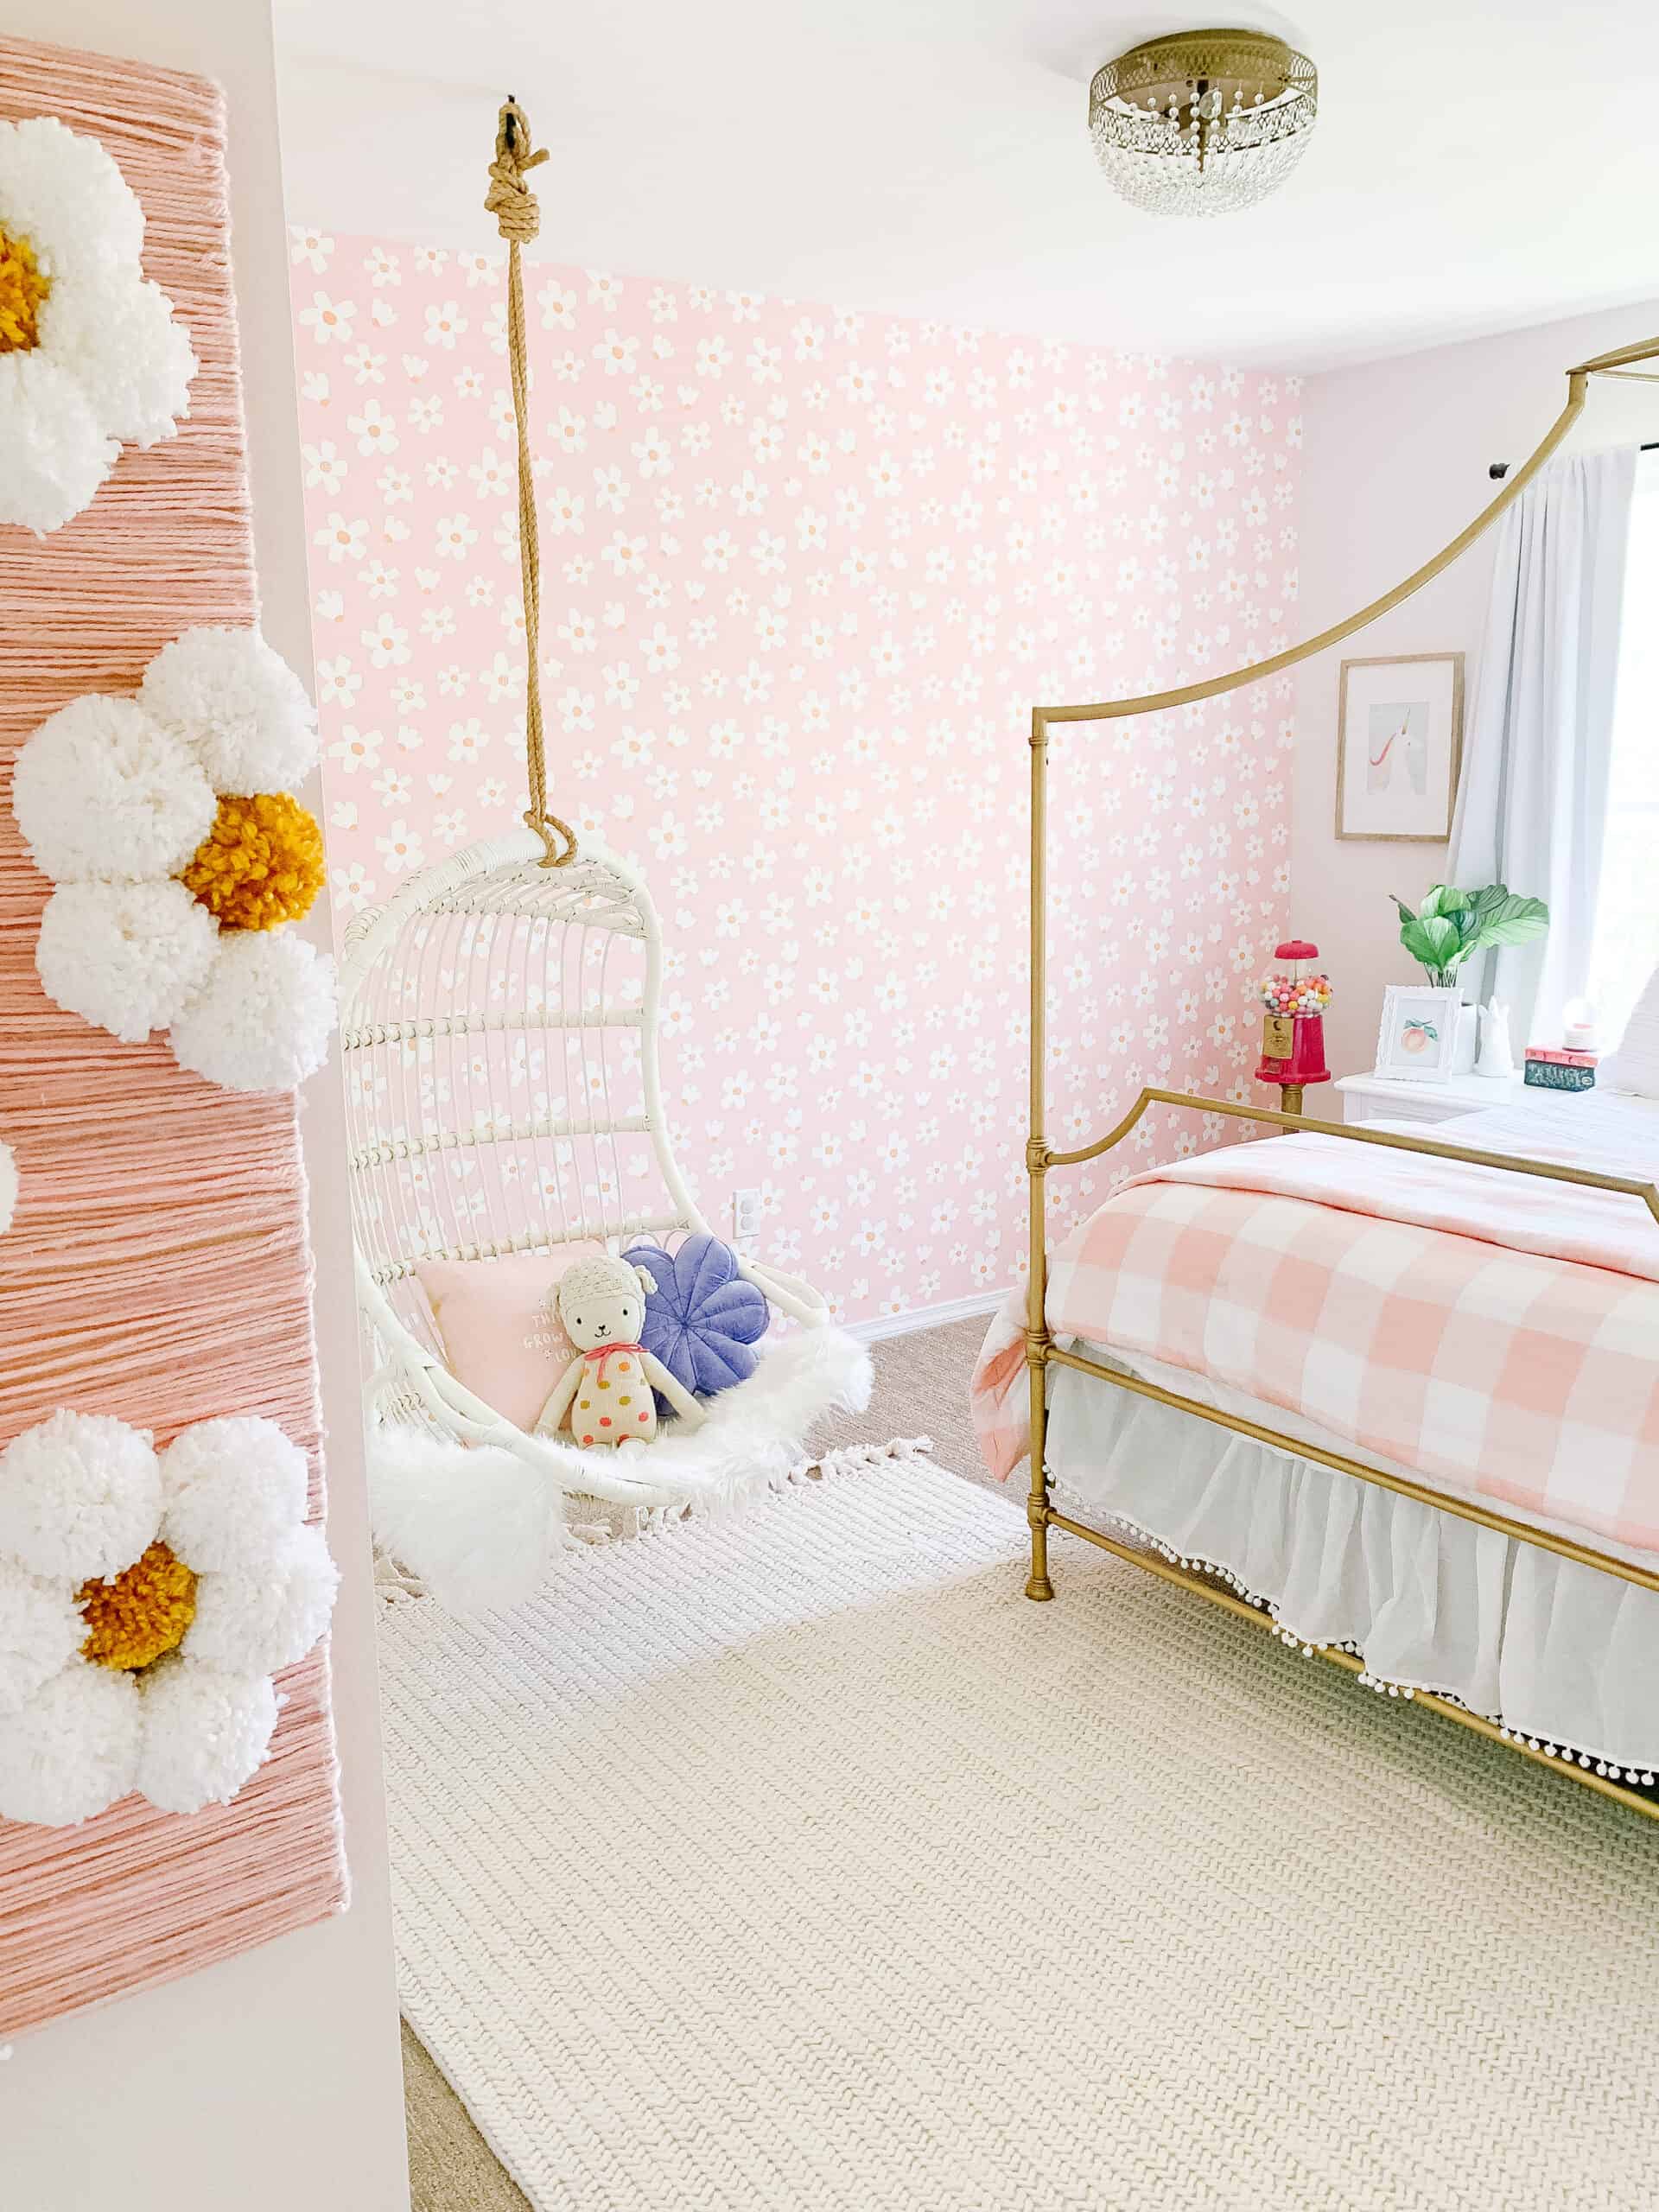
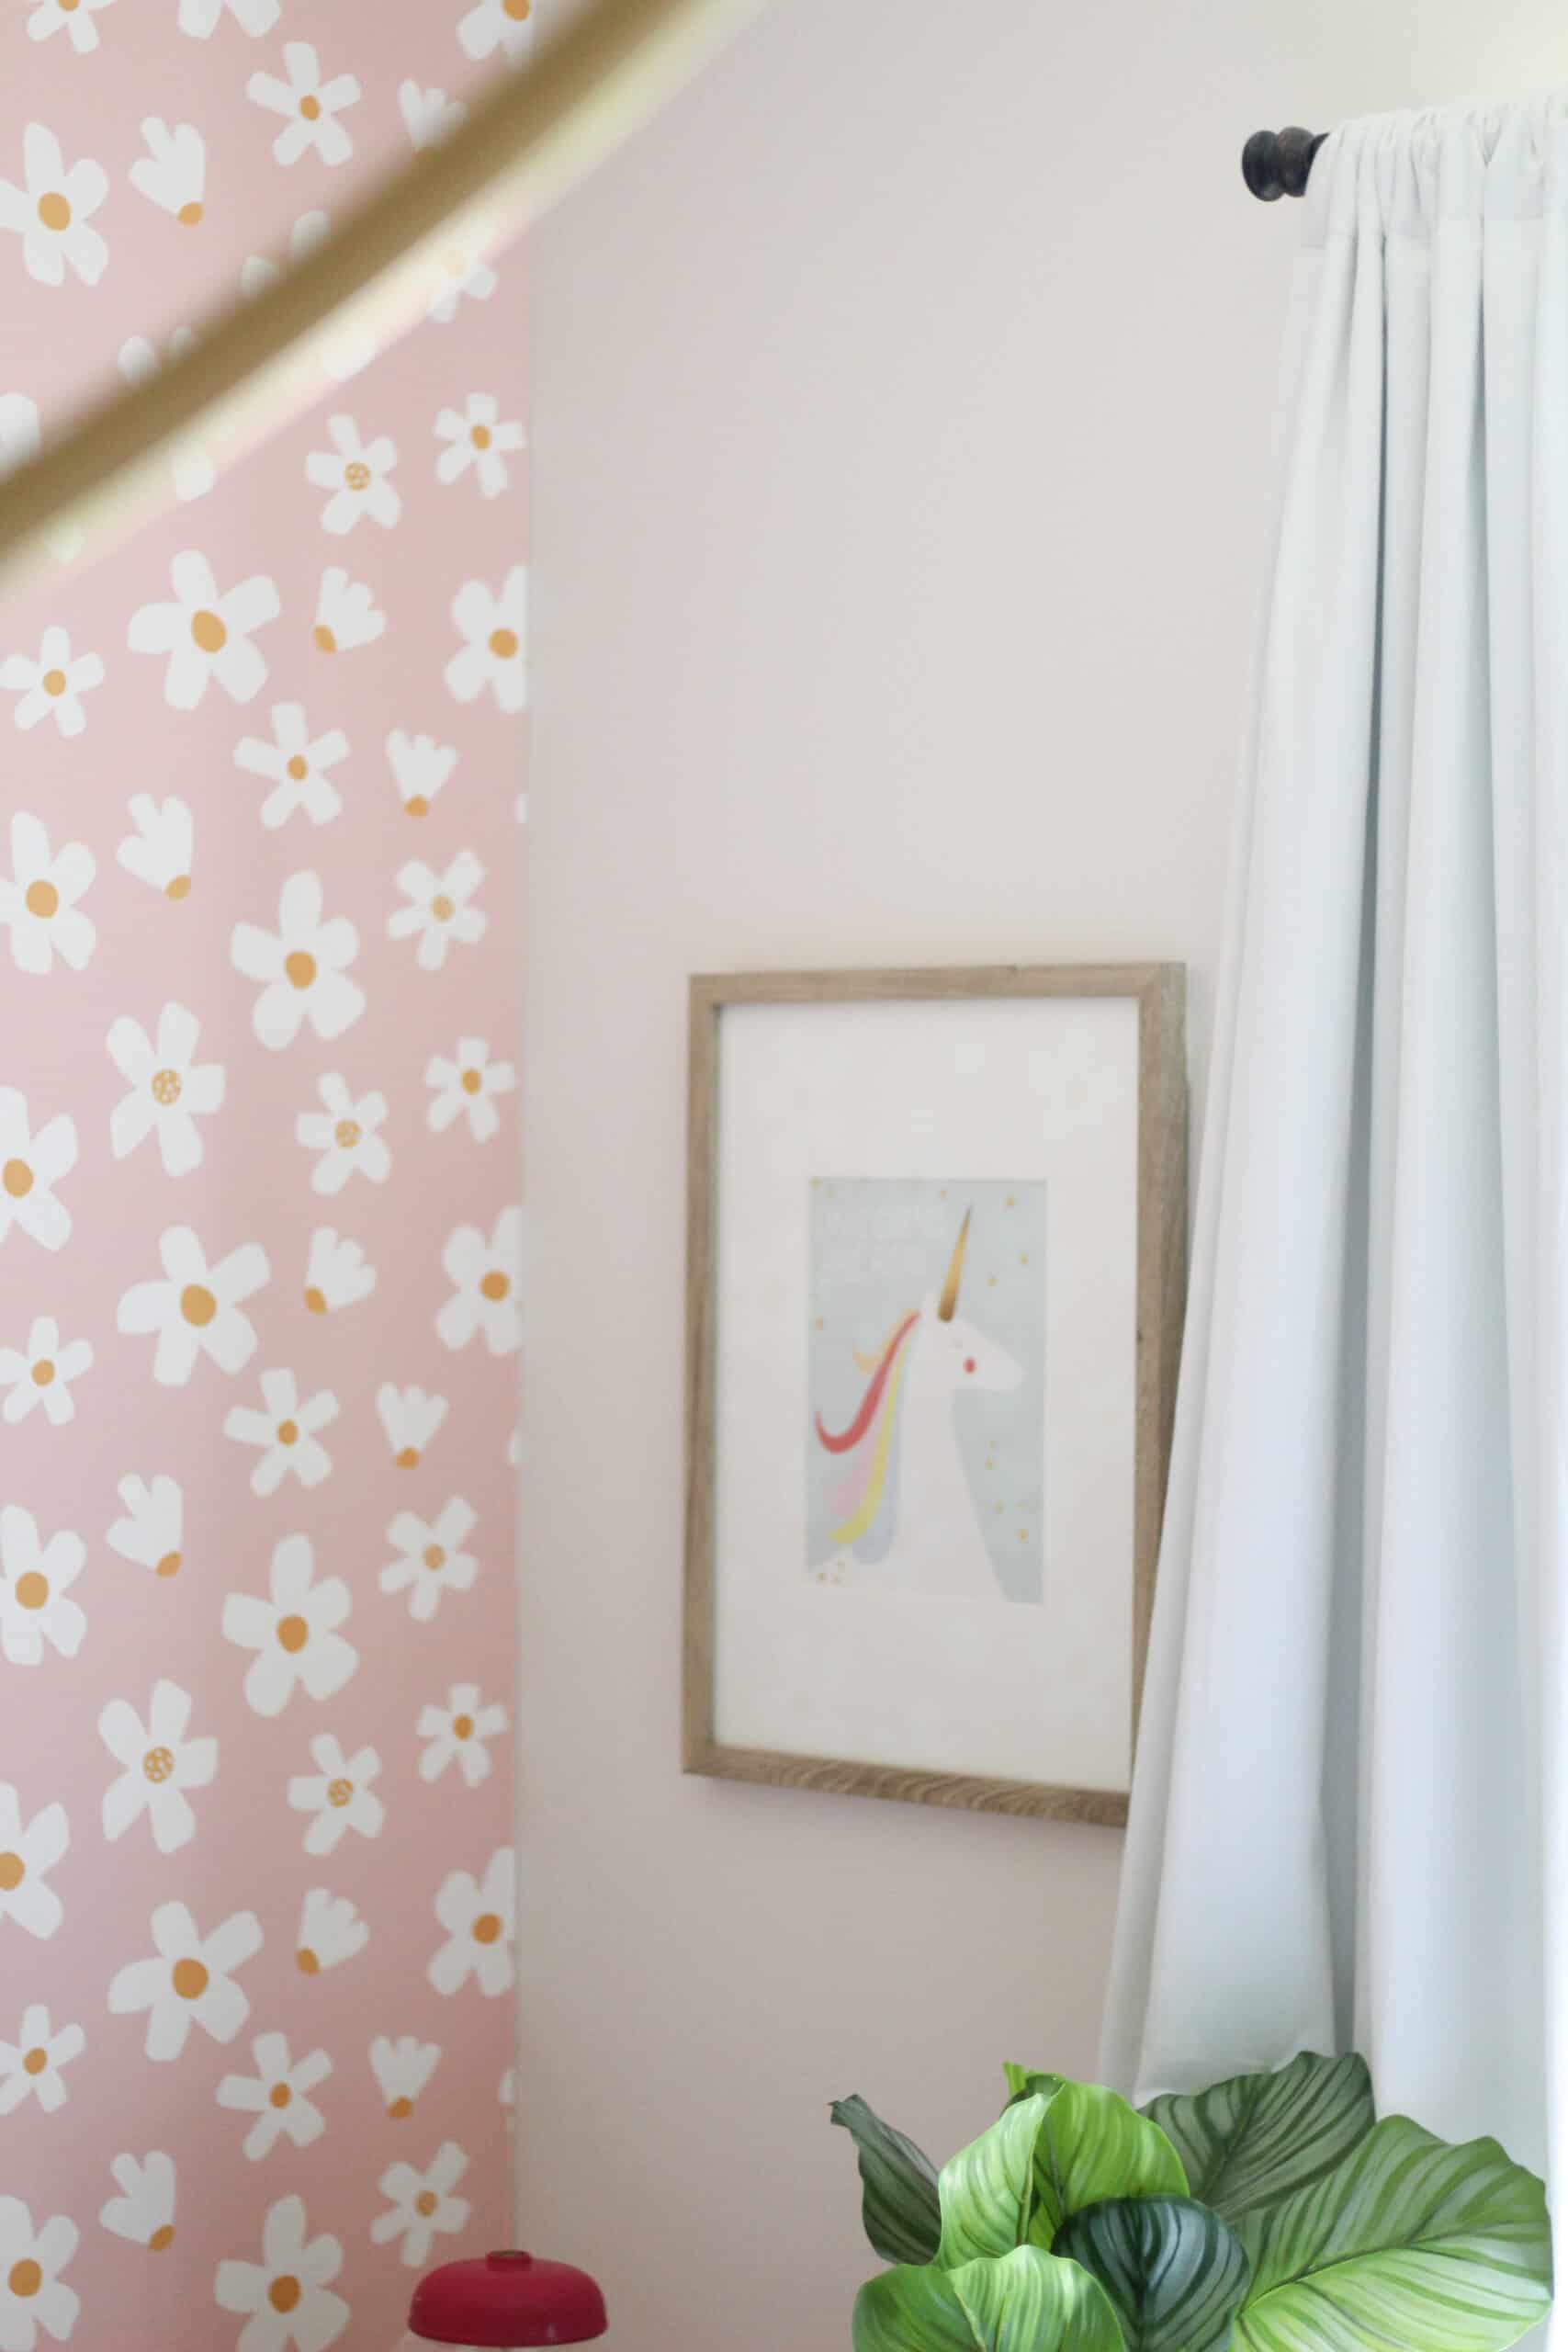
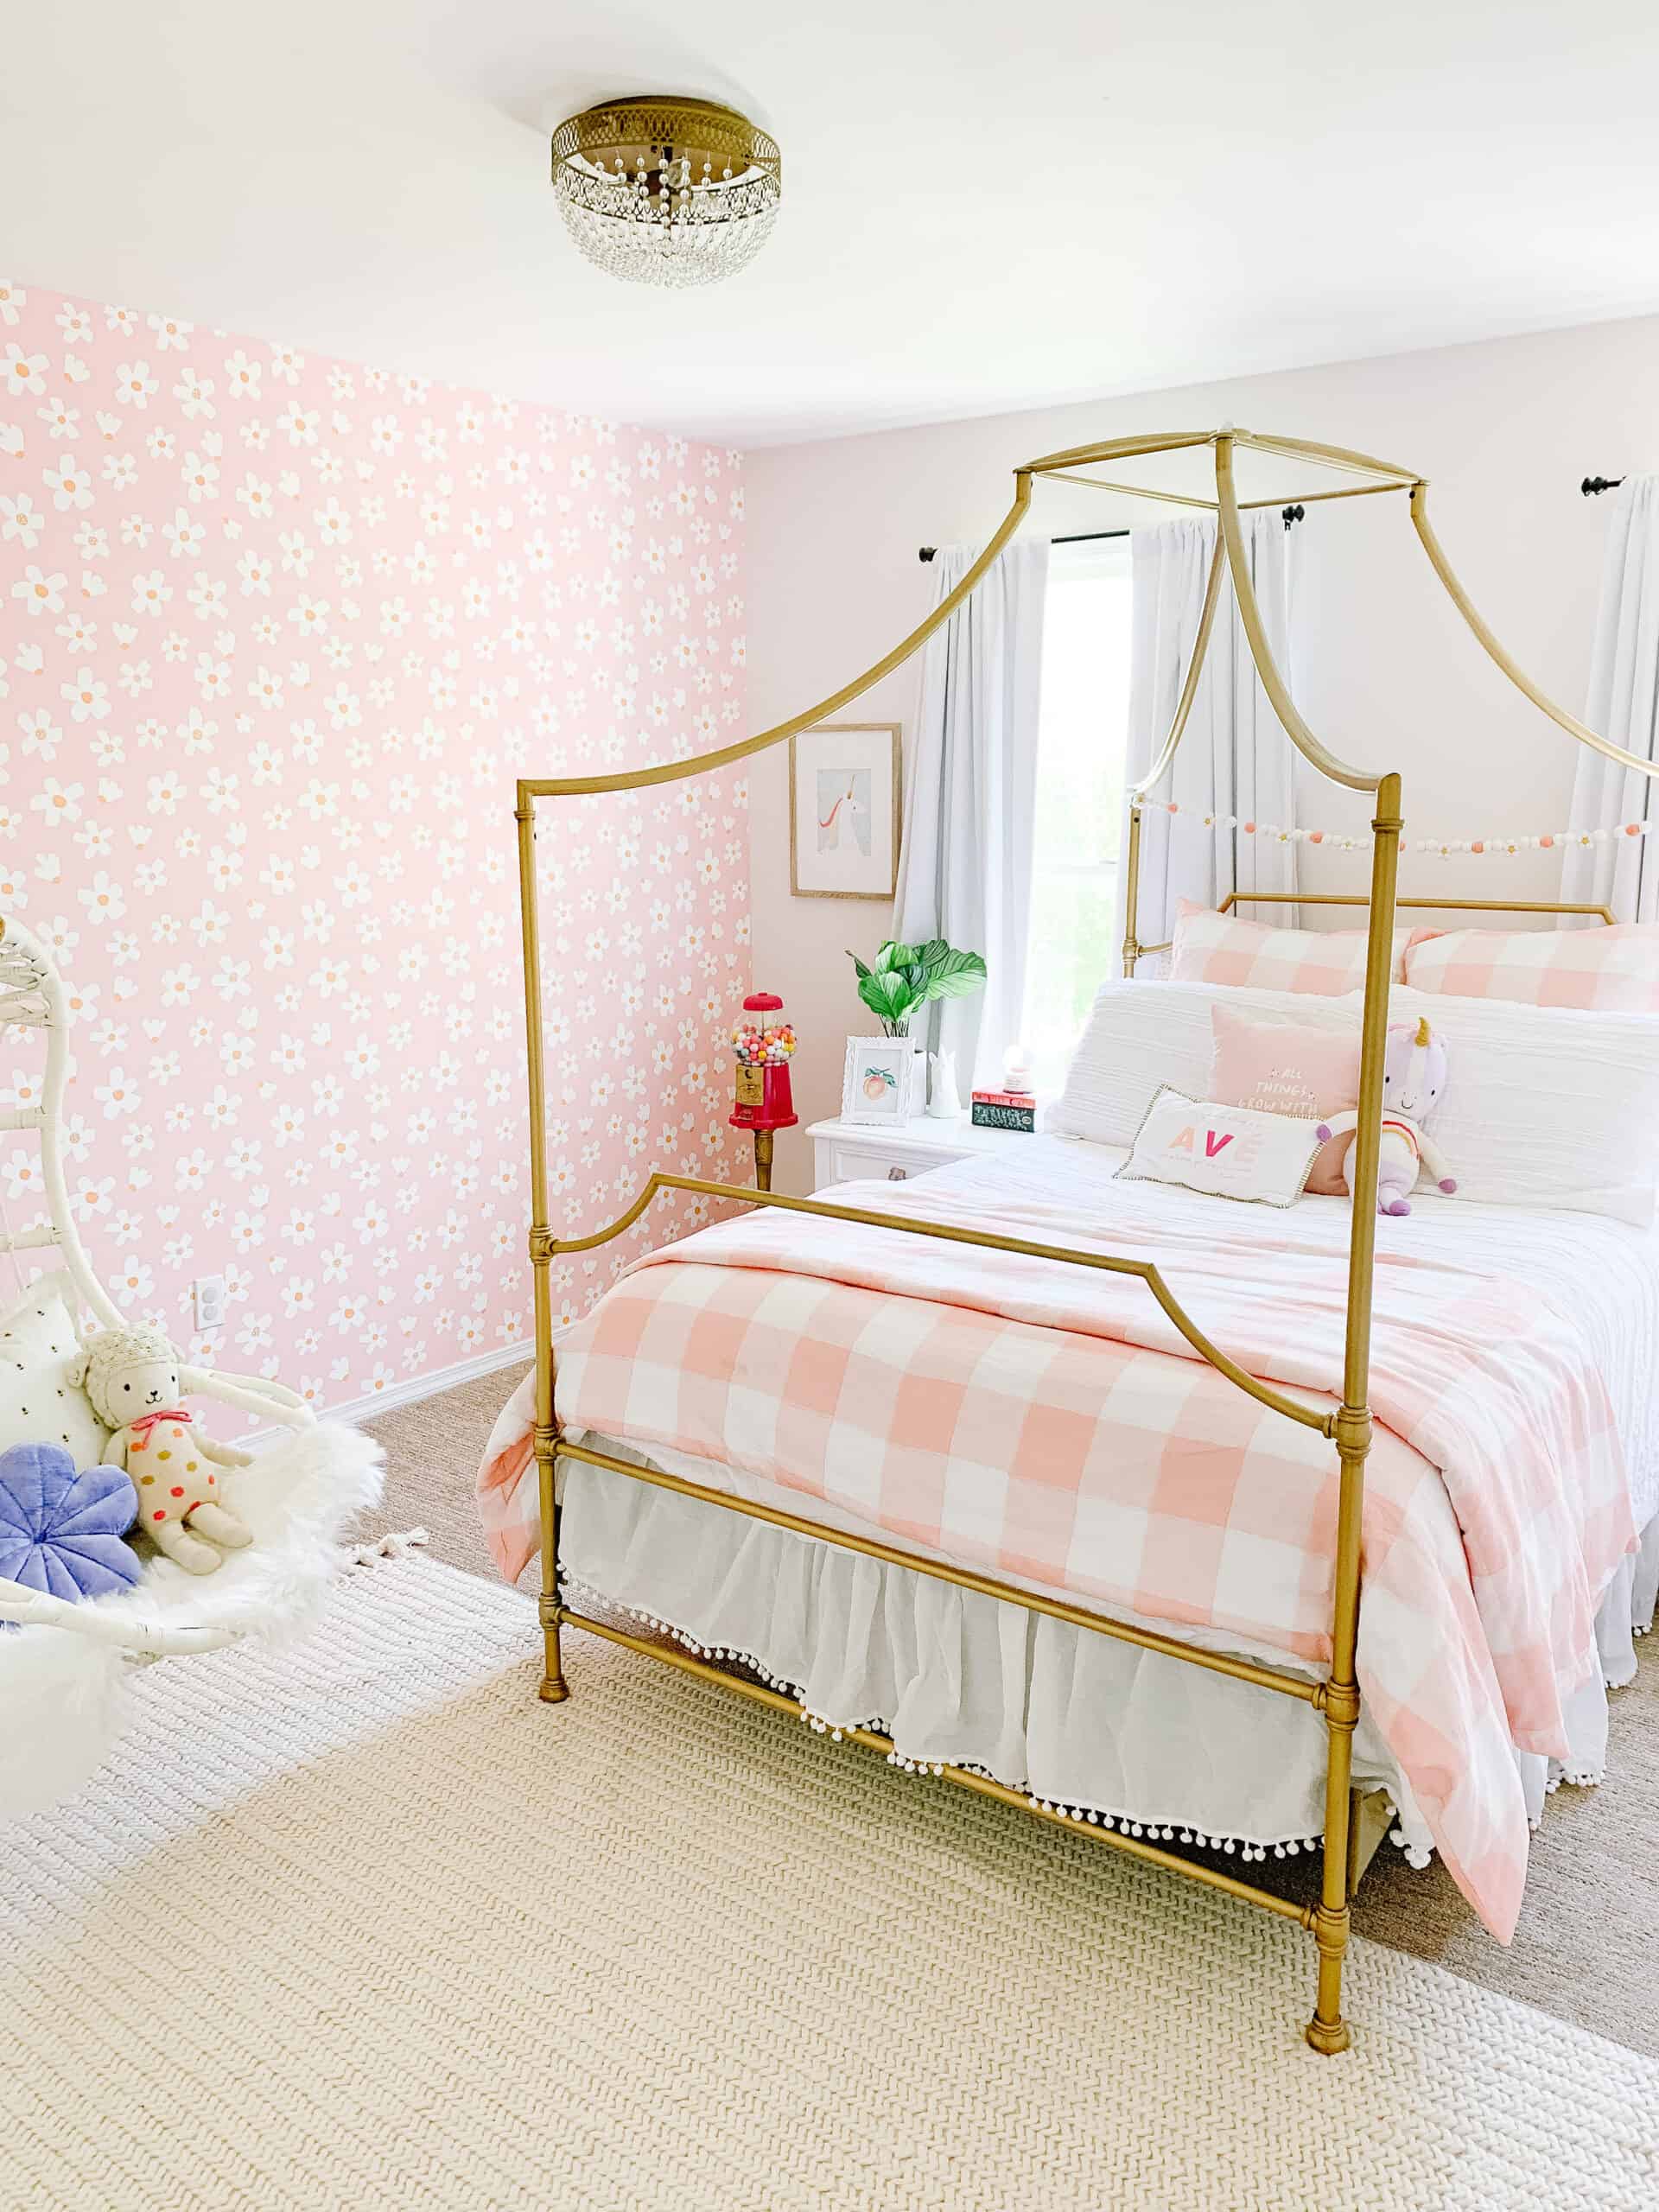
I have been so excited to change up Avé’s room for a while now. In the past year the boys got their shared room (she thinks that is a win…), and Goldie got her nursery, so I knew she was feeling a bit left out. LOVED her previous wallpaper, but it wasn’t super ‘her’ and I wanted to give her a little update to her space. I had been wanting Daisy wallpaper in her room for a while so this seemed like the logical time to do it.
this post may contain affiliate links – the wallpaper was gifted from Spoonflower, however all opinions are my own.
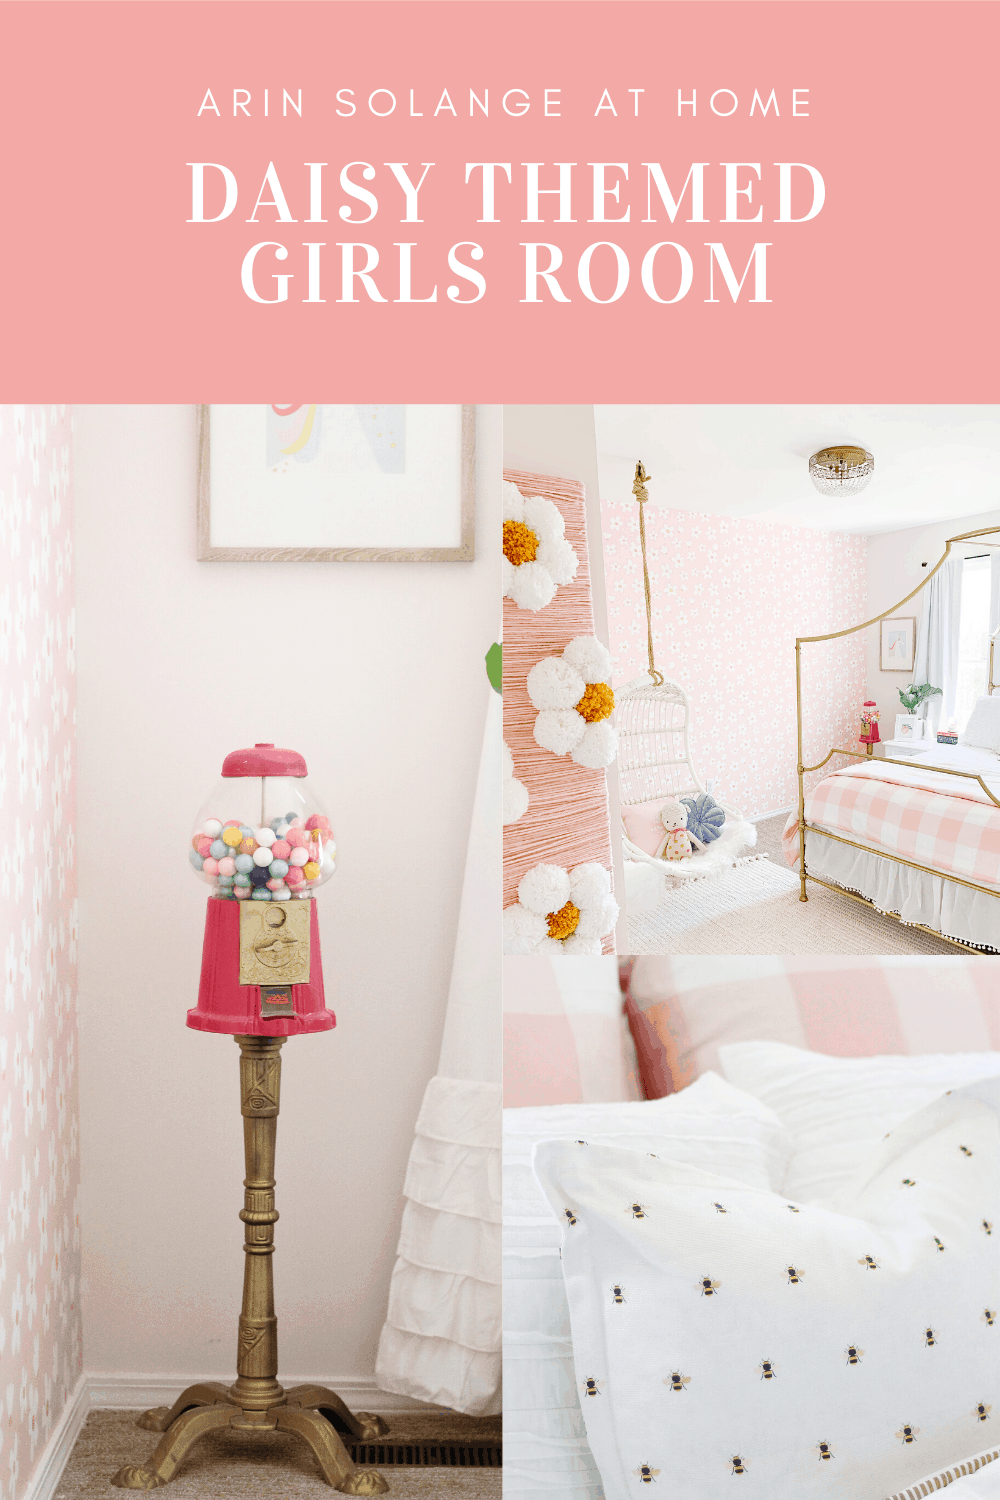
Avé’s Room with Daisy Wallpaper
Roughly 2 years ago we upgraded Avé’s room with Spoonflower Wallpaper and let me tell you – IT WAS LOVE. The process was so easy, and the outcome was beyond stunning.
If I didn’t blog for a job I definitely would have just left that alone for years to come, but I am always looking for fun ways to change up rooms with my job, and I couldn’t help but but tackle Avé’s room.
I have a blog post here talking about hanging Spoonflower Wallpaper, because that is what we used 2 years ago as well, so I won’t go into that full process, BUT I will tell you – I loved that this gave me the opportunity to take down the water activated wallpaper and report back on how that worked for us.
As always – no matter the circumstances behind the gifting of a product, I will be real with you all. I shared on my Instagram stories how long it took to take down a full wall of the paper and it was LITERALLY about 4 min.
And that was with me being somewhat careful with the first 3 strips because I have a little project in mind with it. (it is not meant to be saved – I just personally had a fun idea).
As with last time, hanging the daisy wallpaper was really easy, however I will say it is kind of a 2 person job. Because we had done it one time previously, this time went even better, and much faster. It was I think about 1.5 hours from start to finish on hanging the 12 foot long wall.
Daisy Wallpaper Details
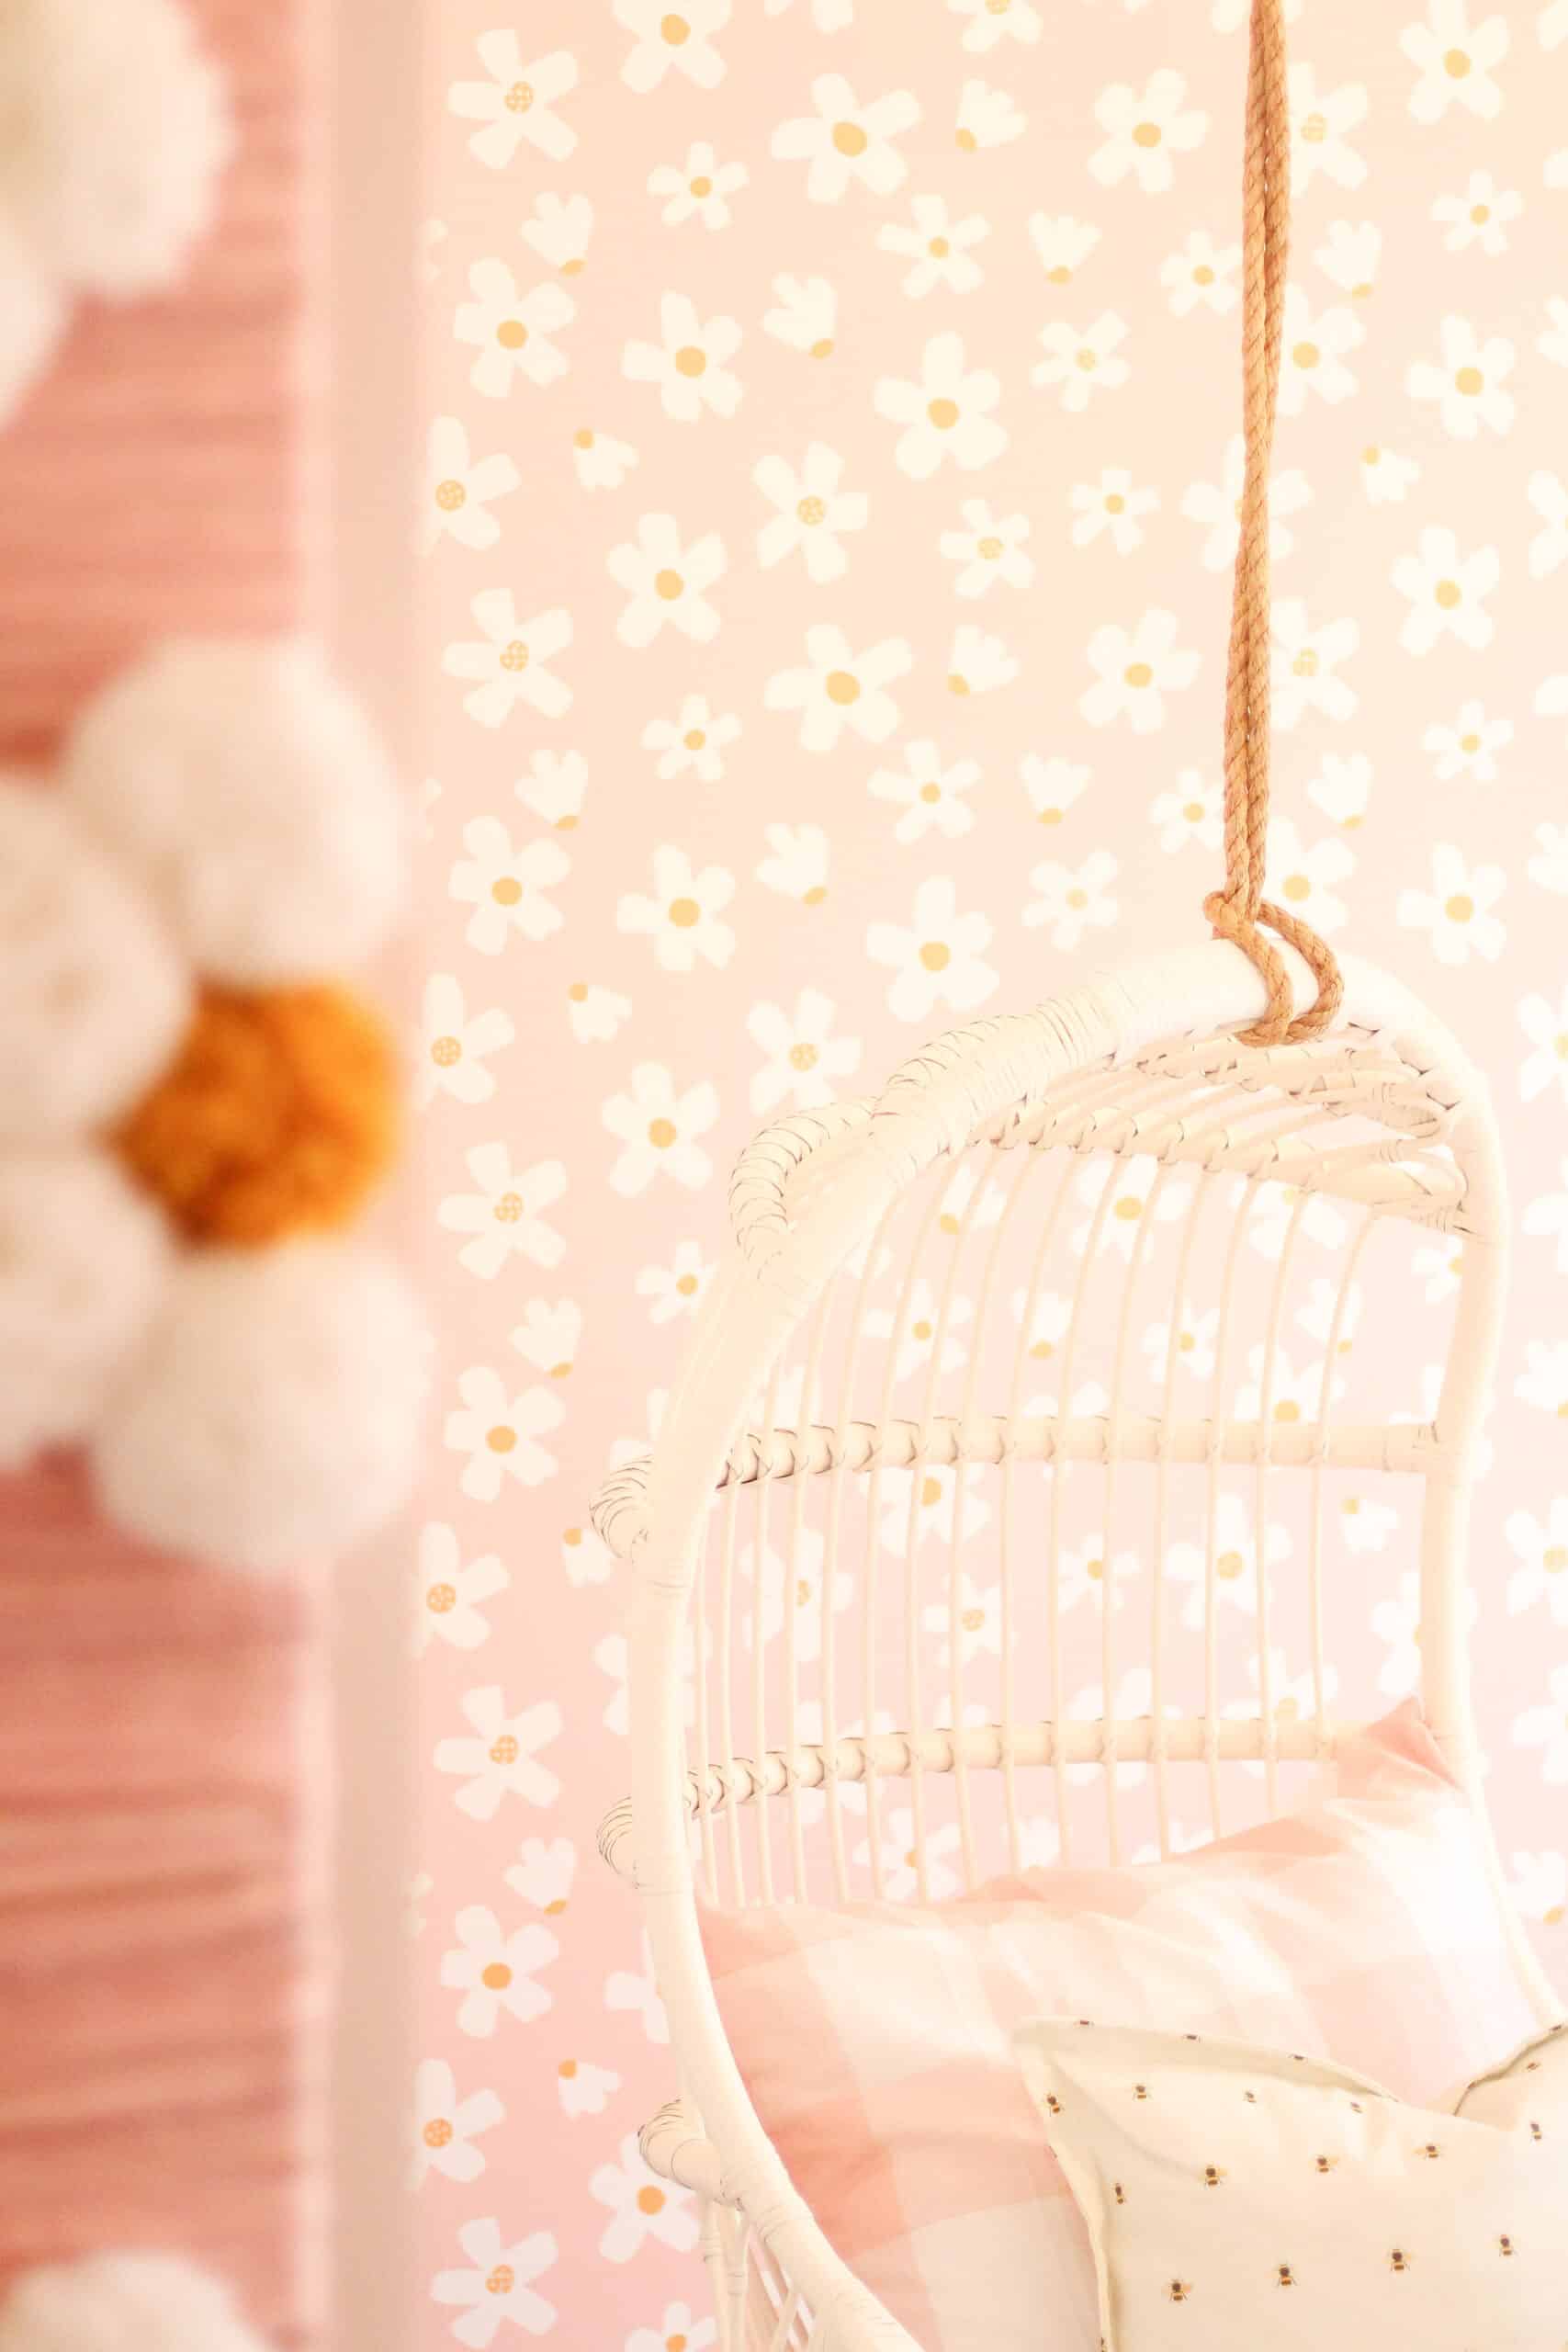
Spoonflower is an amazing company that allows artists (or yourself) to upload any design on the site to be printed on a wide variety of materials, wallpaper included. For this room I went with Small Daisy Garden in pink and mustard by Erin Kendal. I loved that it had the perfect little girl feel – and I am honestly doing everything I can to persevere that with Avé!
(updating this post a couple years later – we have since moved and I loved showcasing the same artist again in my sons room in our new house! Check that room out here! )
As I stated above we did the smooth water activated wallpaper and it turned out perfect!! The application with water activated wallpaper is a bit more forgiving at the moment than adhesive wallpaper.
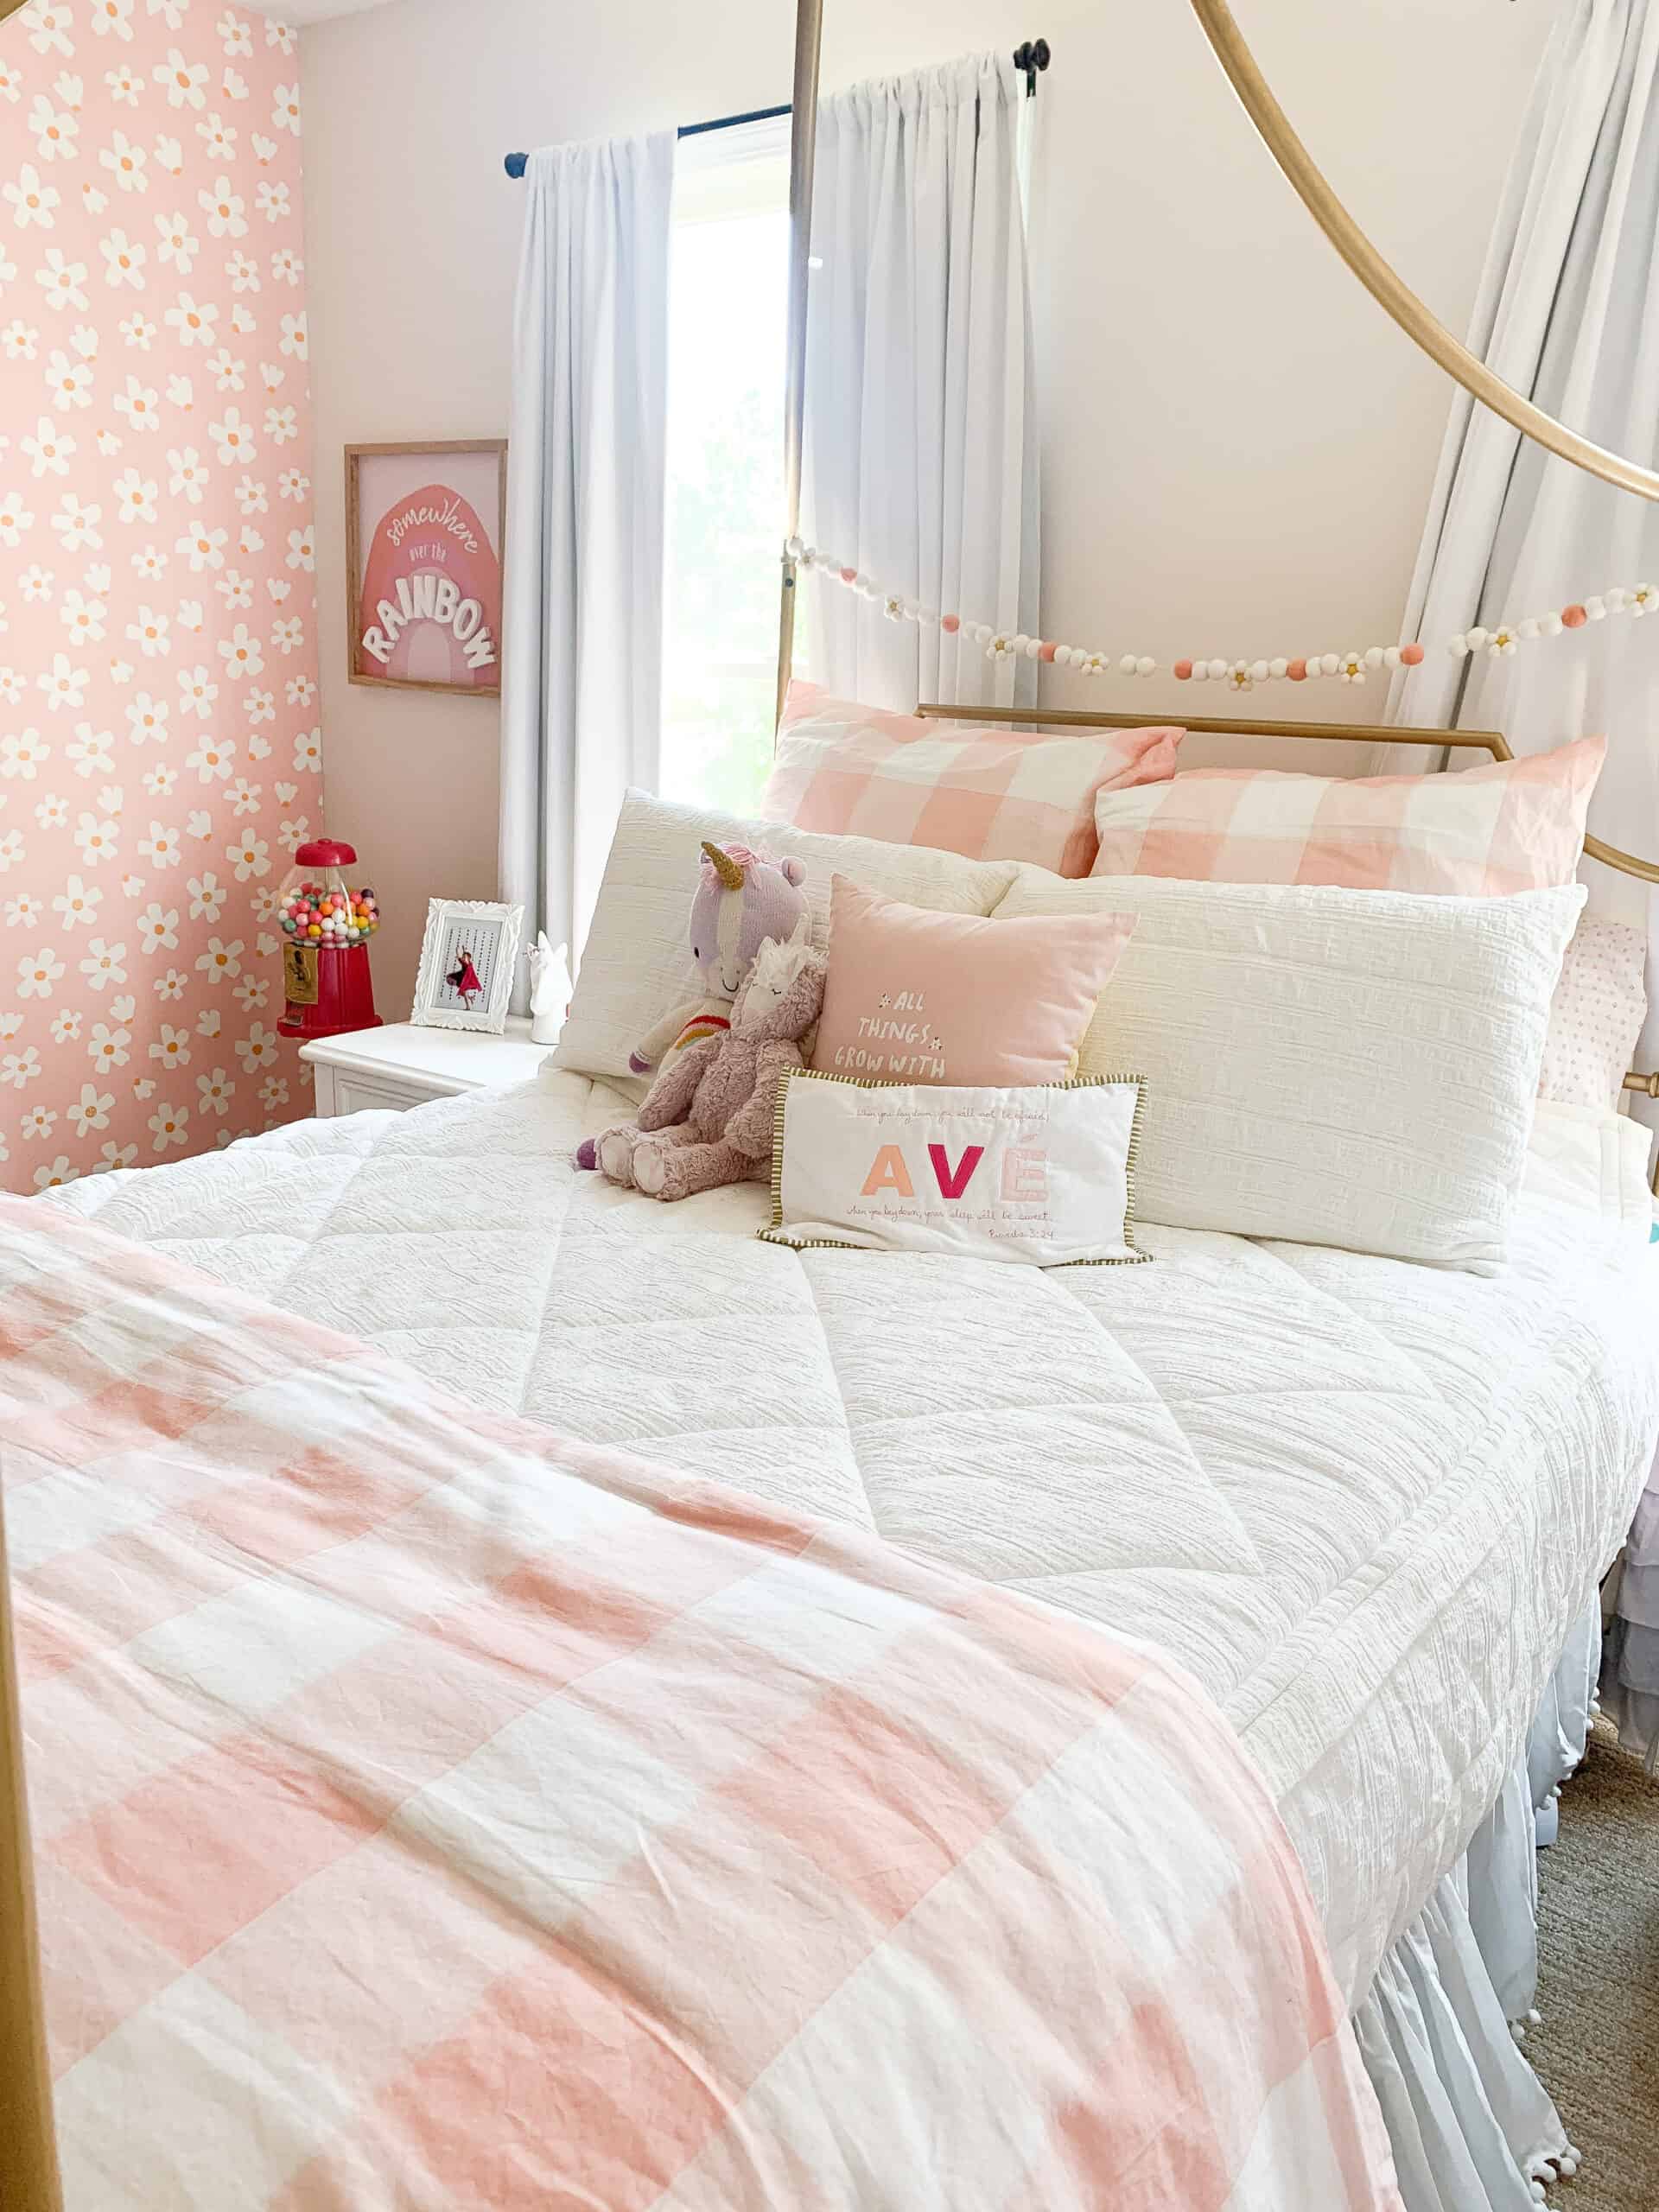
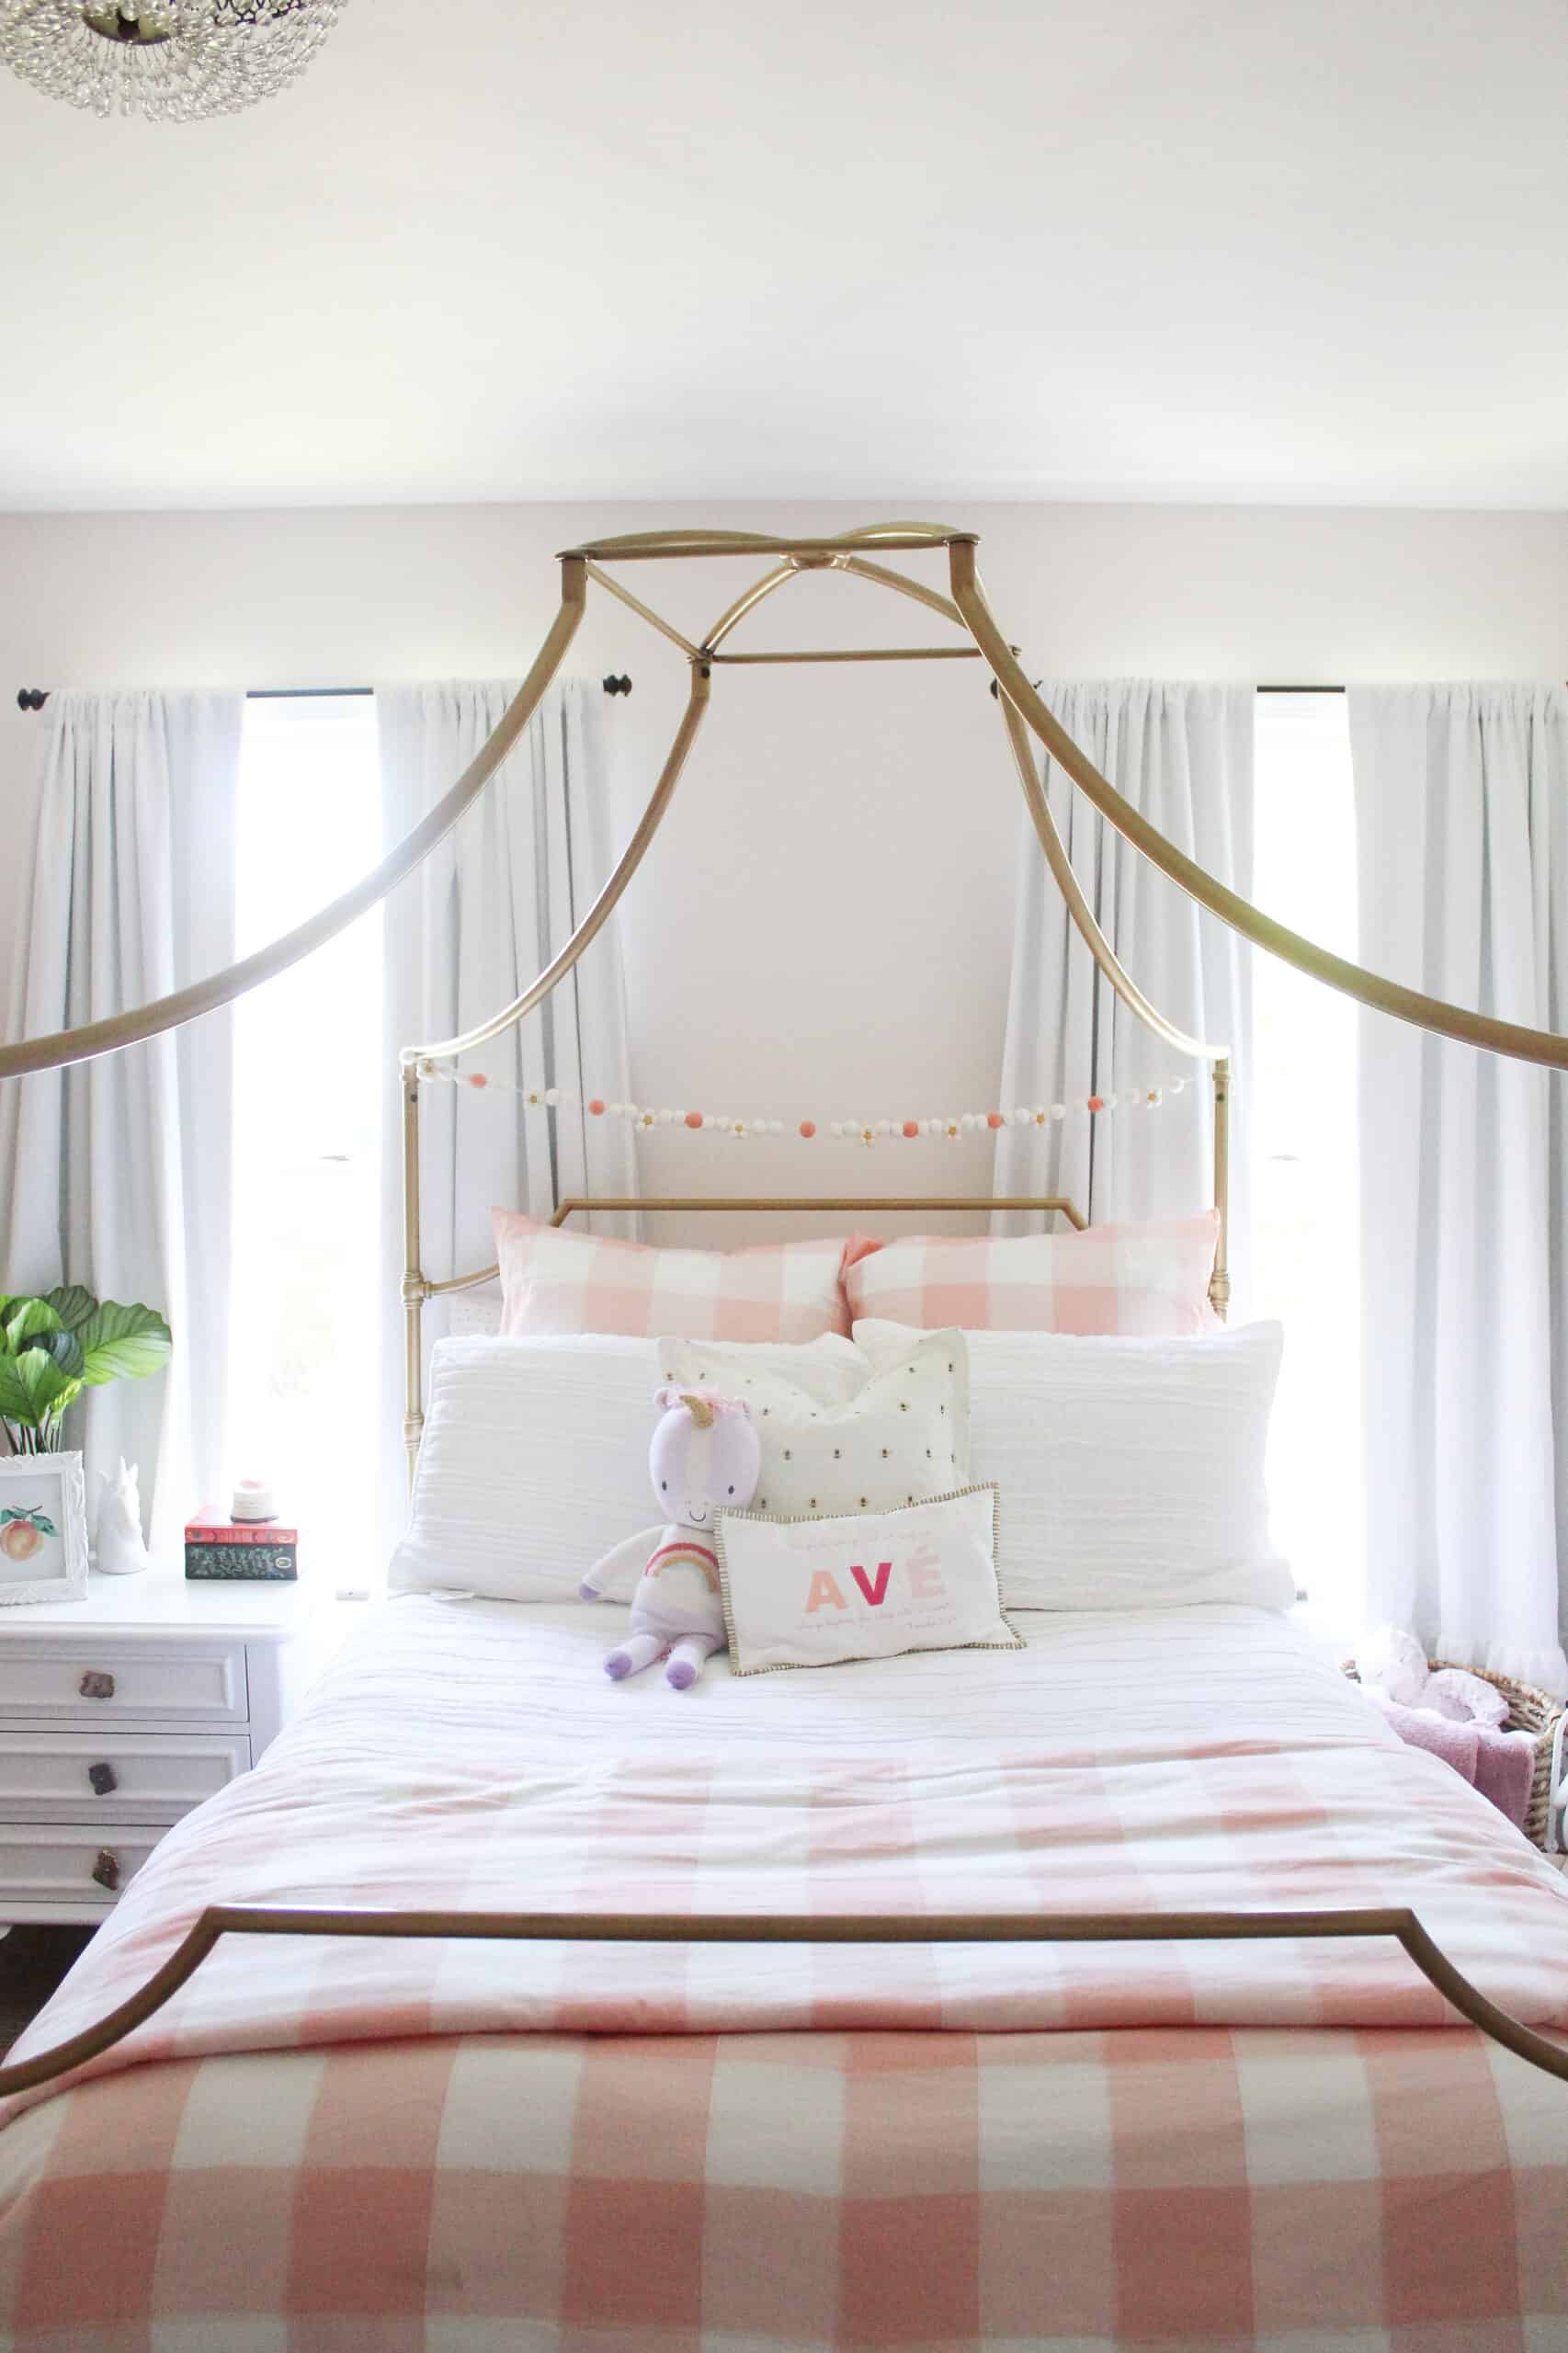
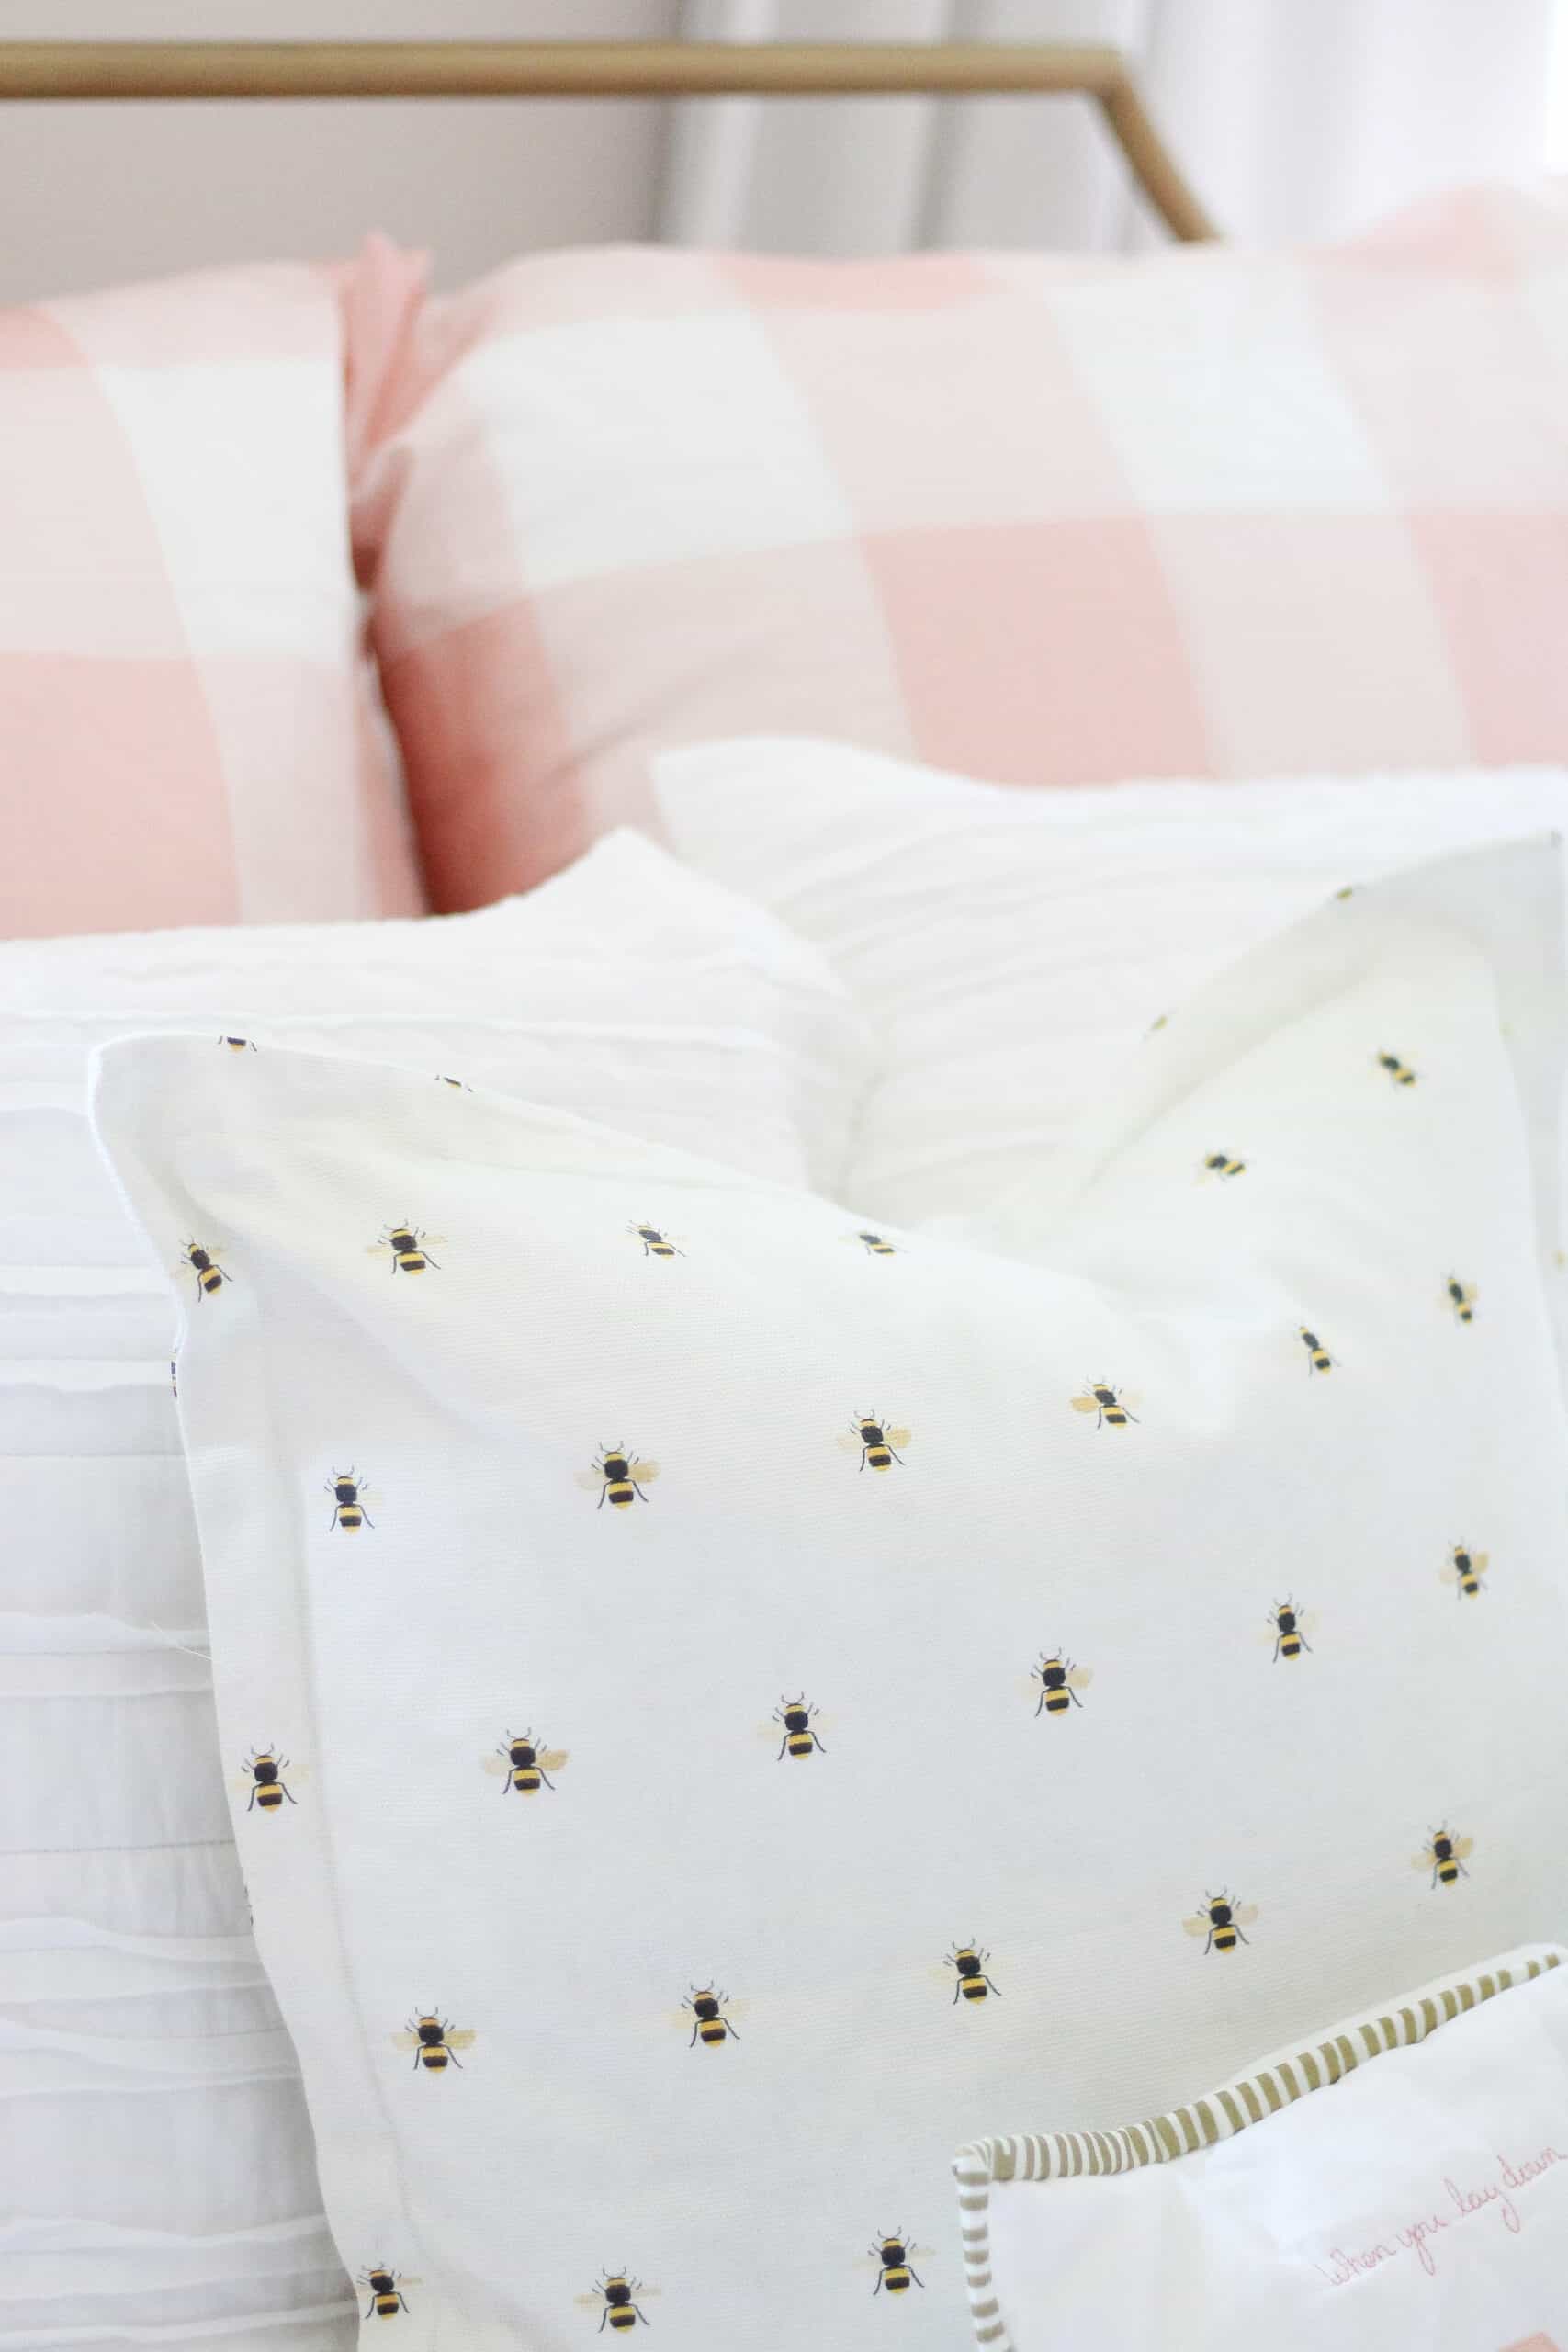
The Bedding Details
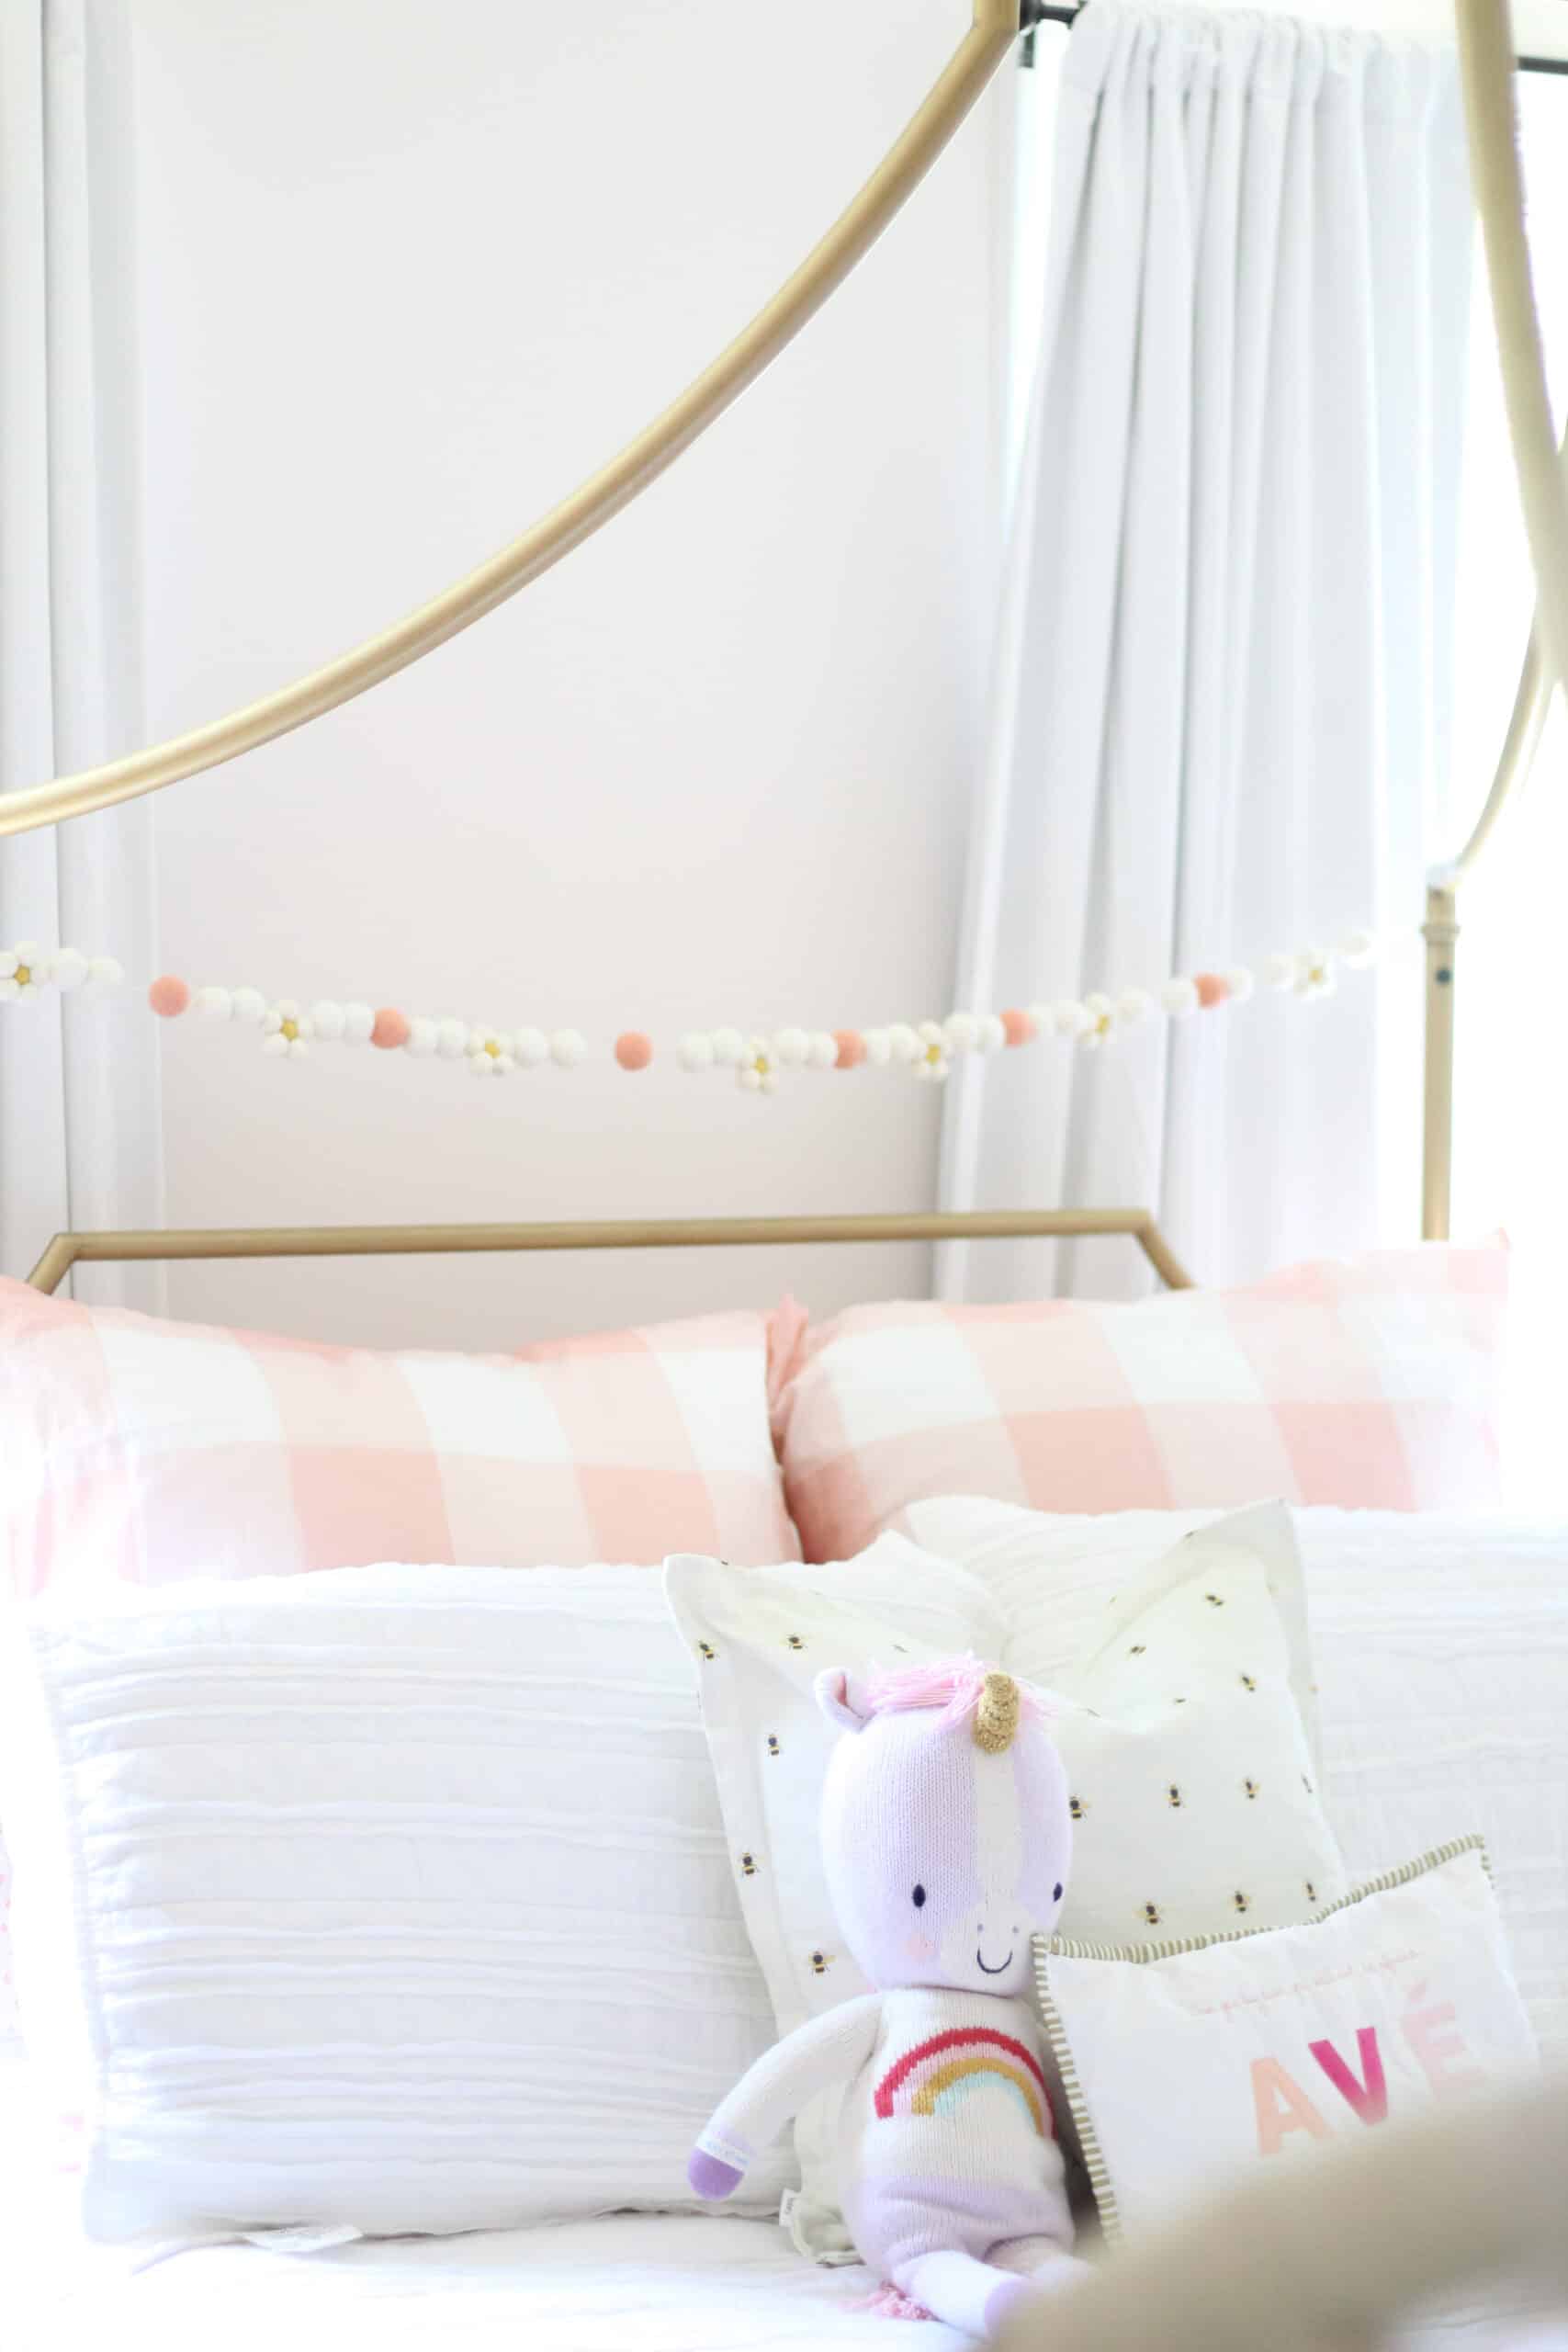
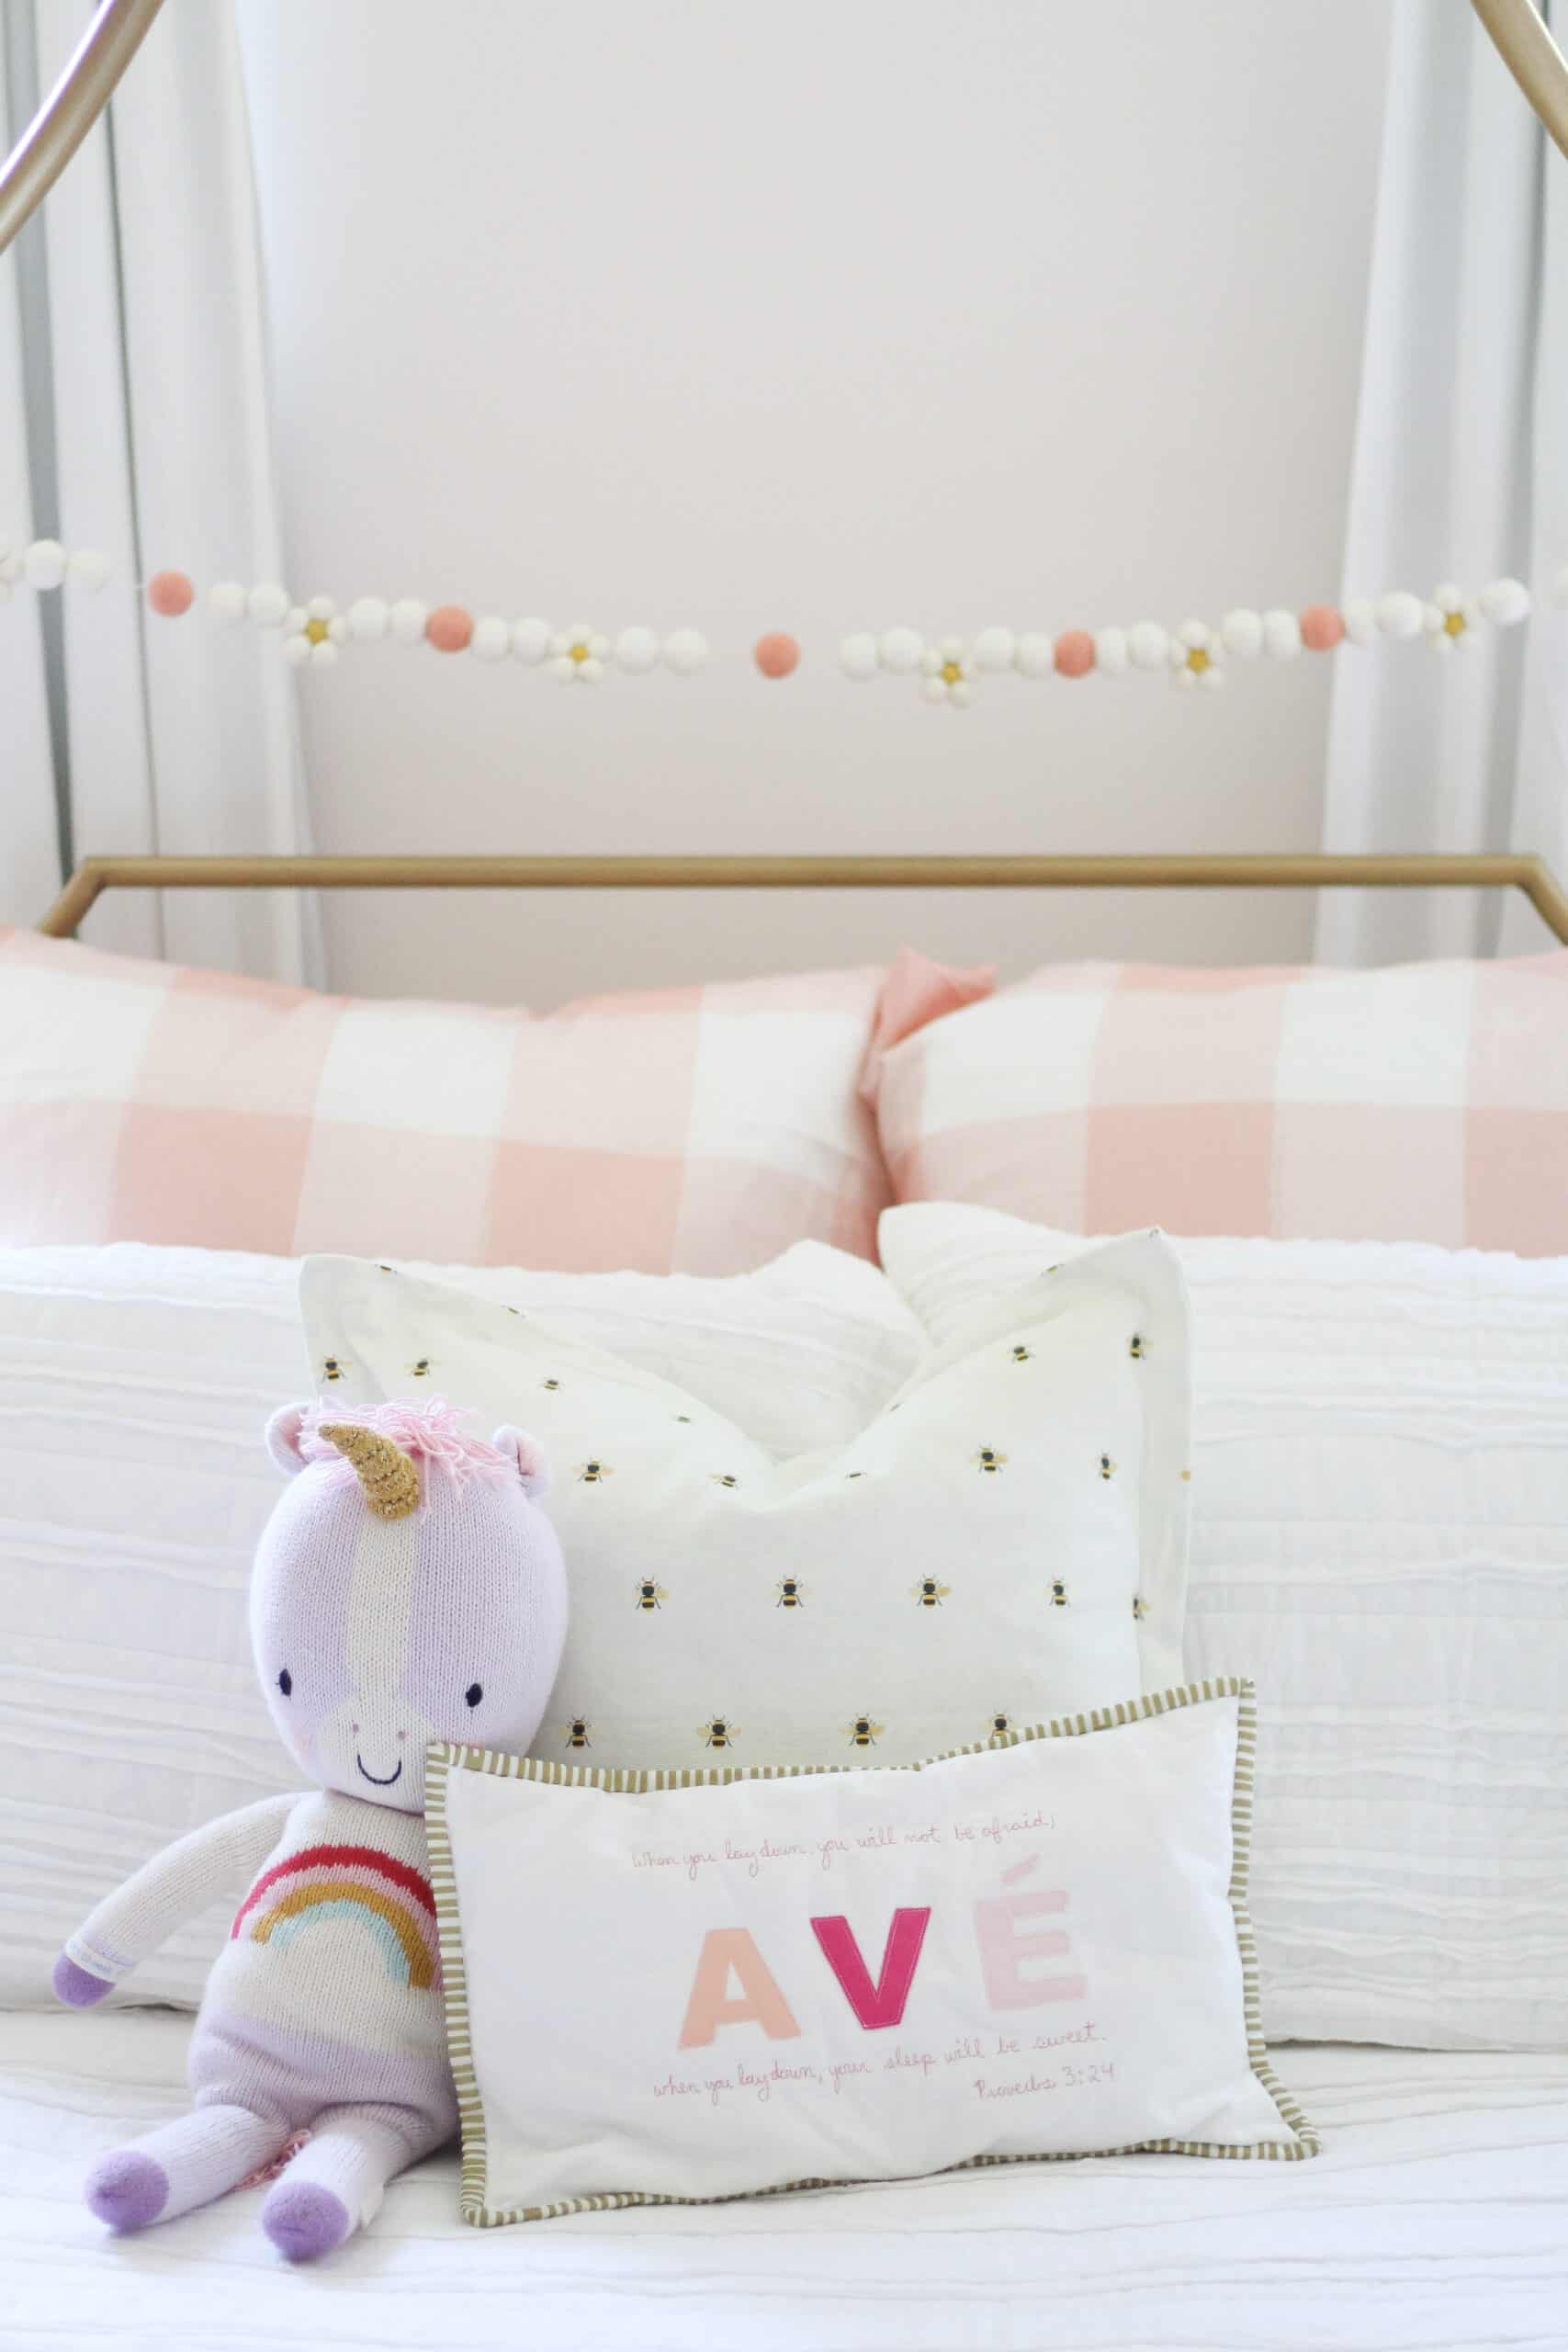
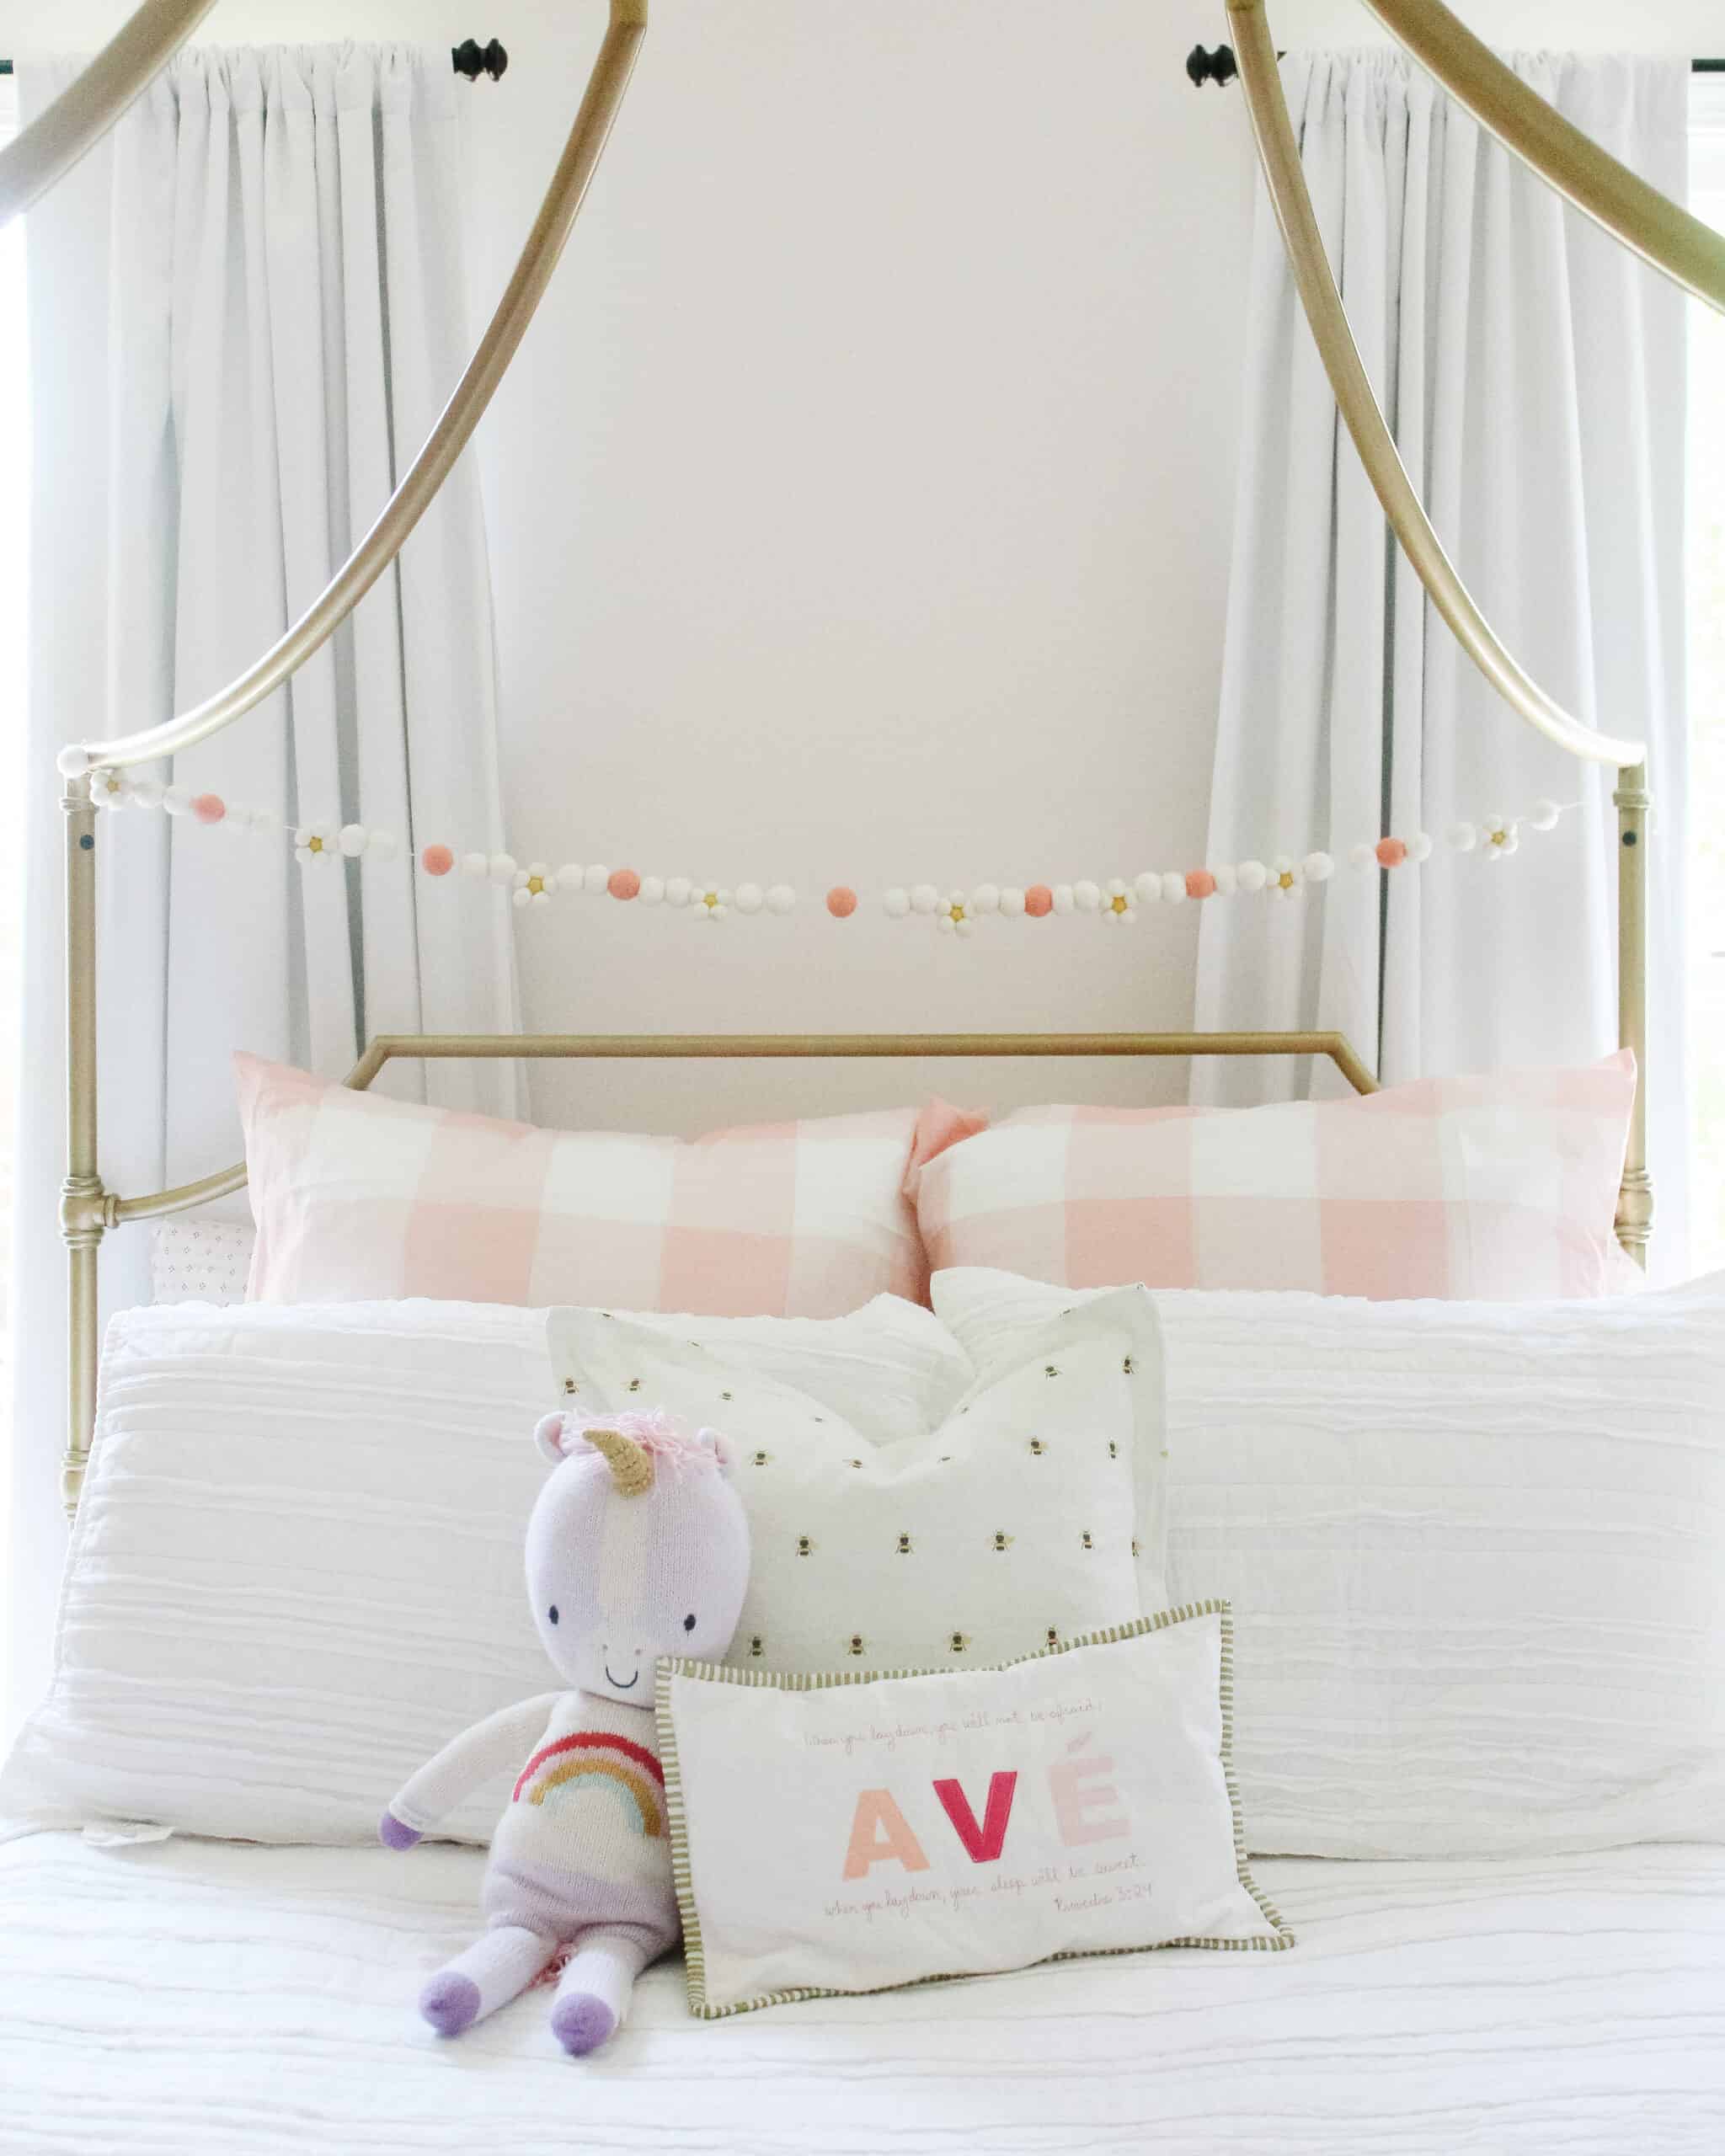
I didn’t change the overall look to Avé’s bedding this time, but did change the function – I ended up switching her to Beddys Bedding to give her a more function bedding set that she can make daily. She loves IT, and we couldn’t be happier!
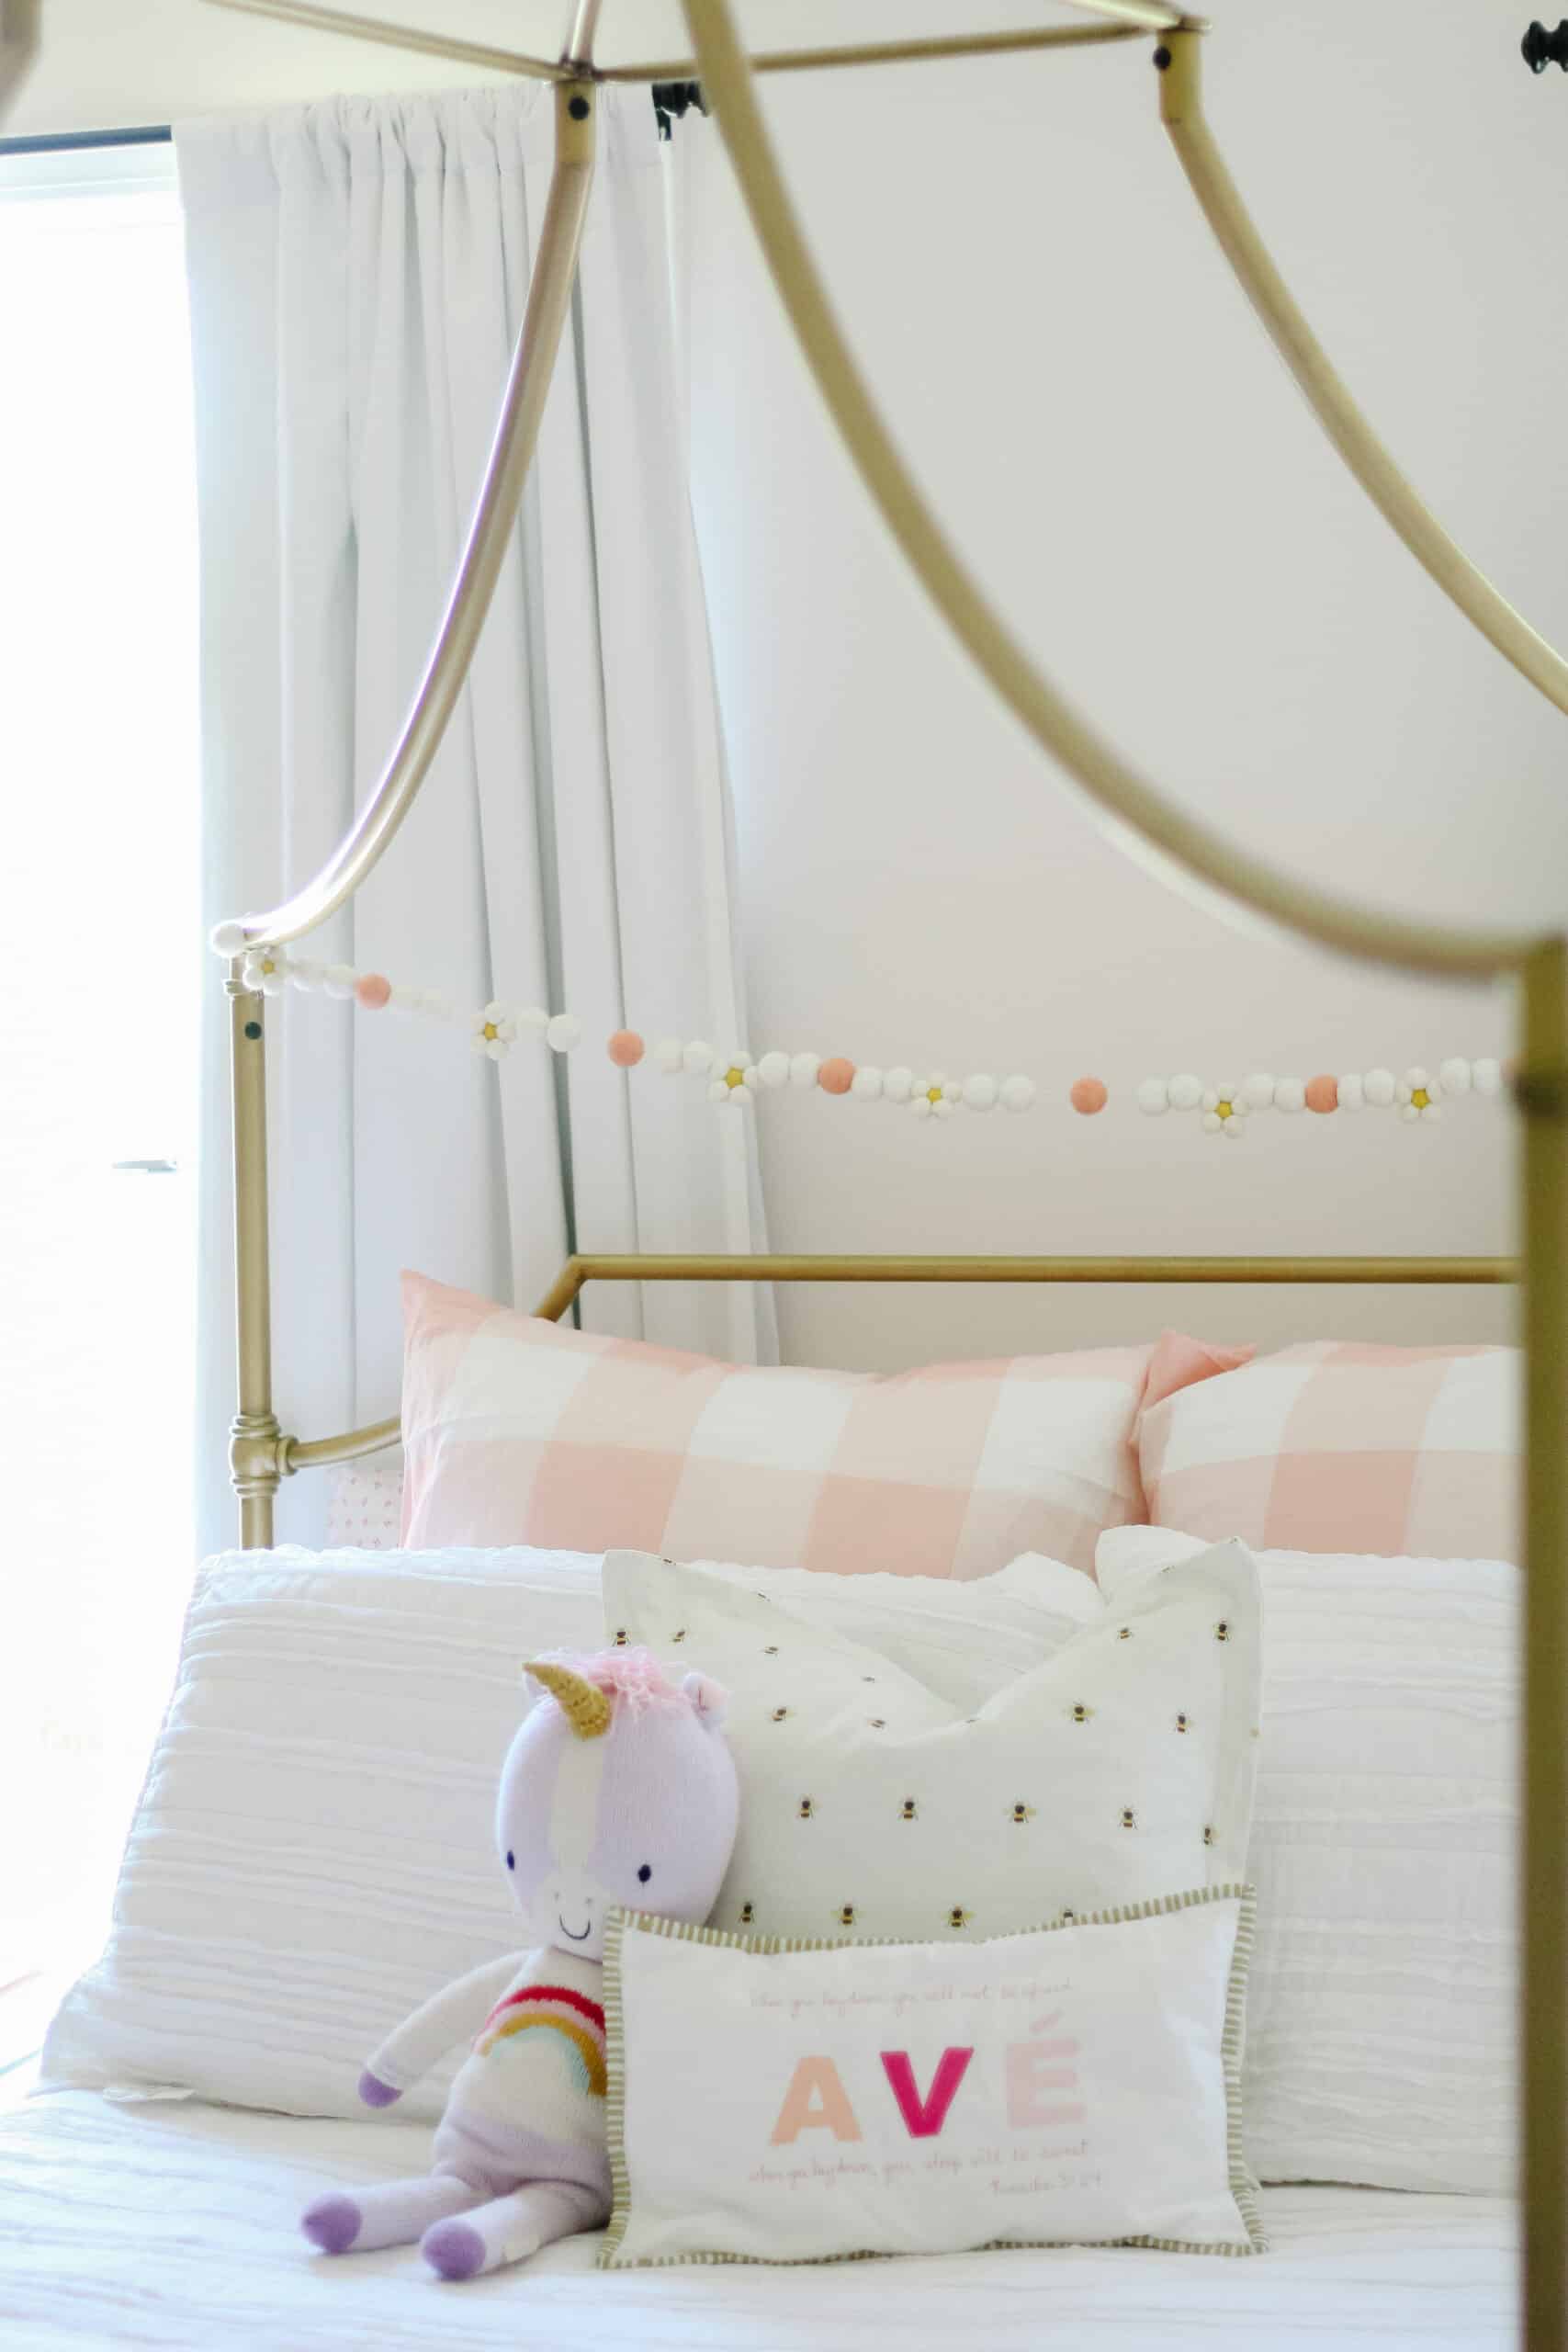
I did add this fun bee pillow tho, and it is SO fun and cute!! I didn’t want to go overboard with the flowers…but I can’t help it..I like a good theme hahaha. The bee pillow is so sweet and was a great whimsical touch to the room.
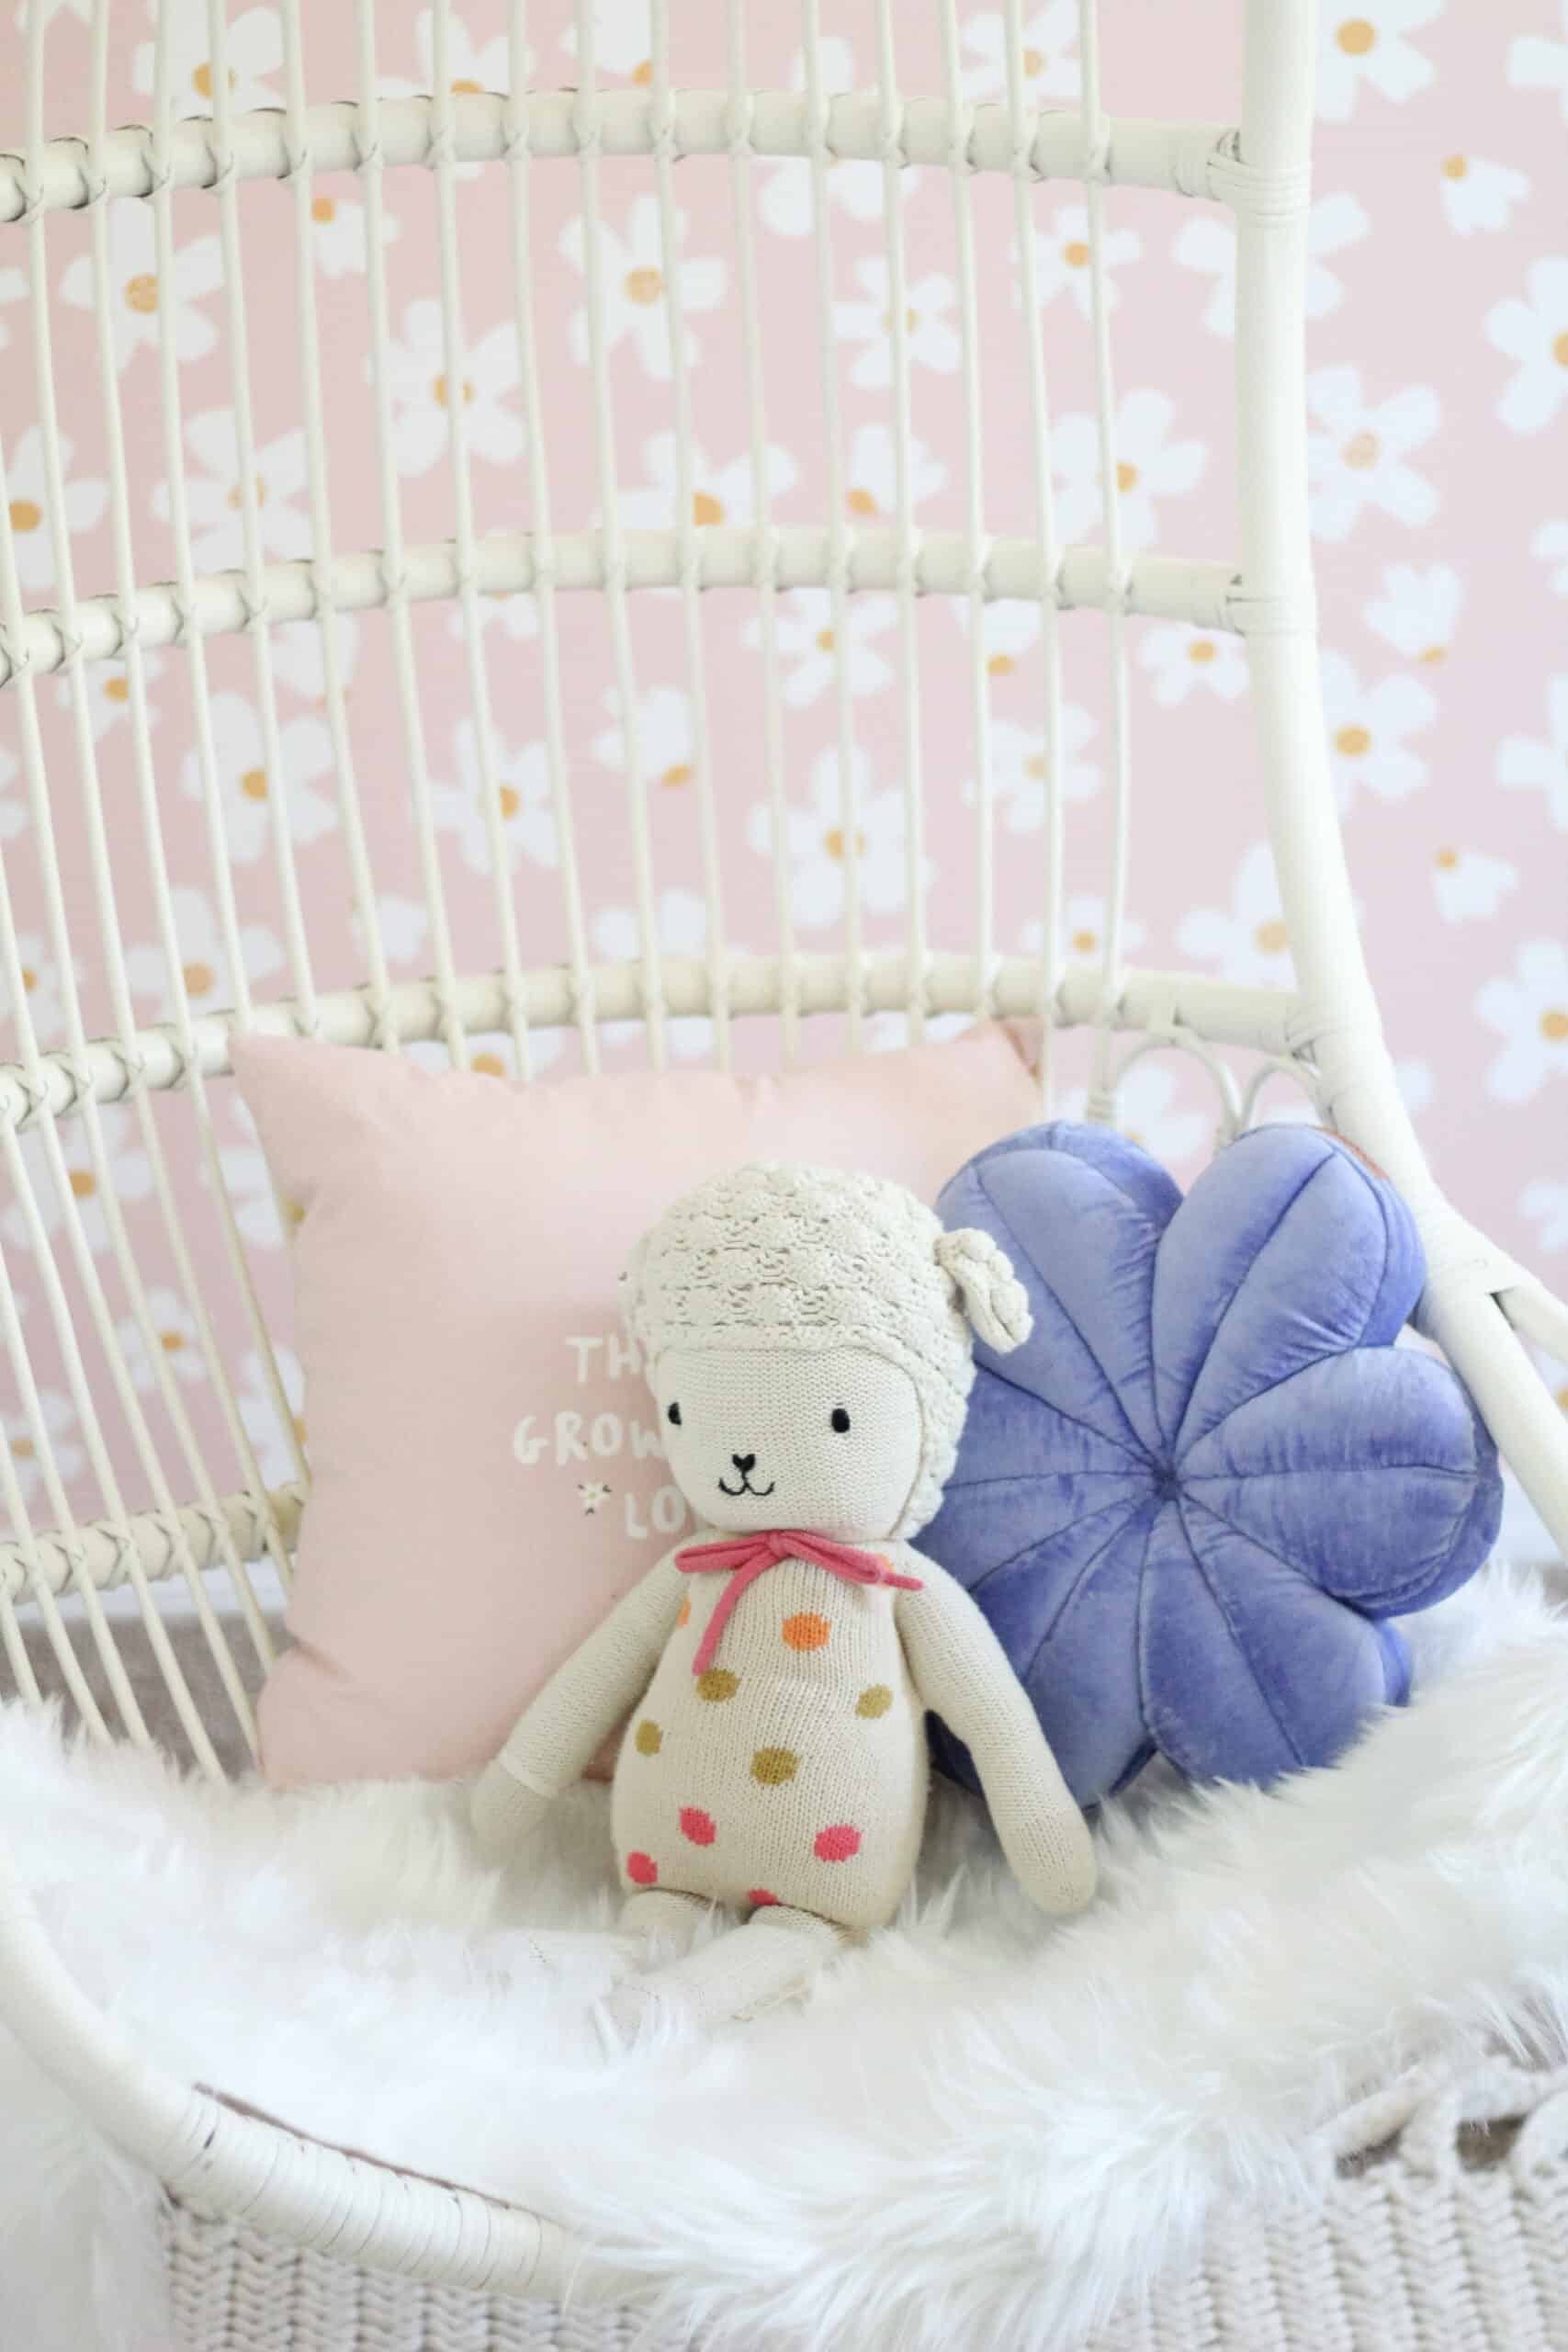
I also added this purple flower pillow, a fun pillow that matched perfectly, and left everything else that was already in the room.
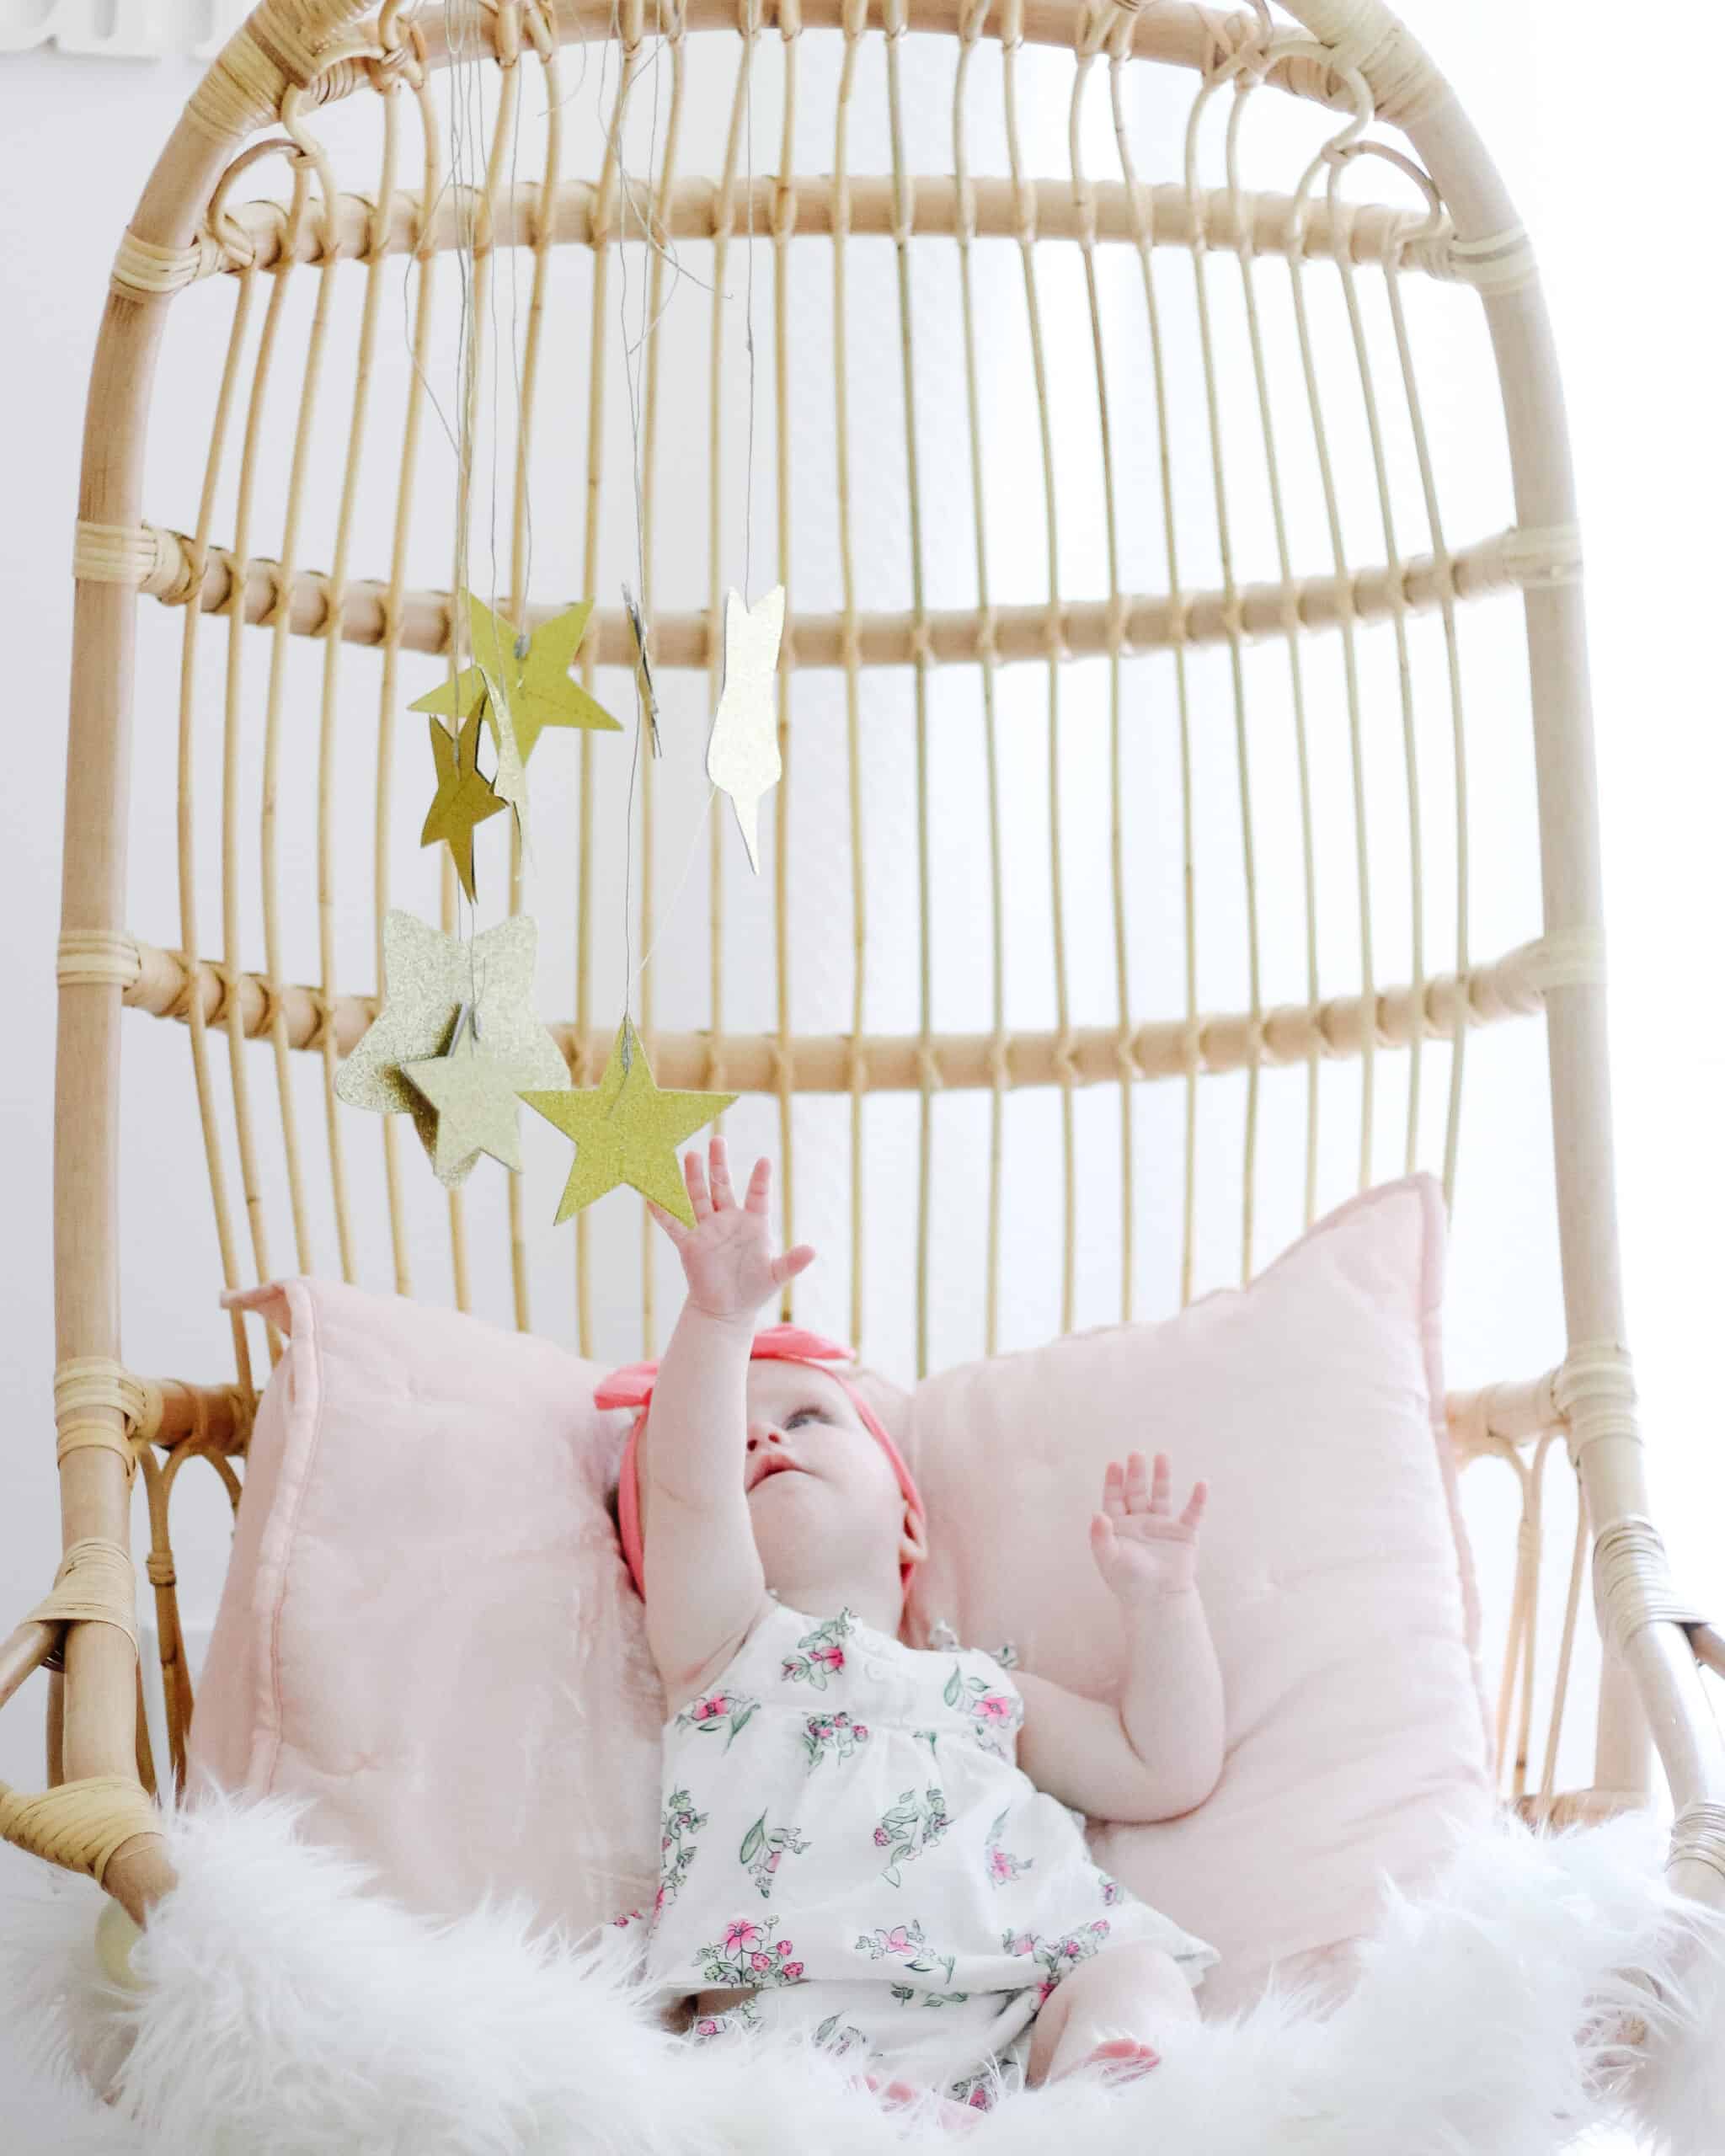
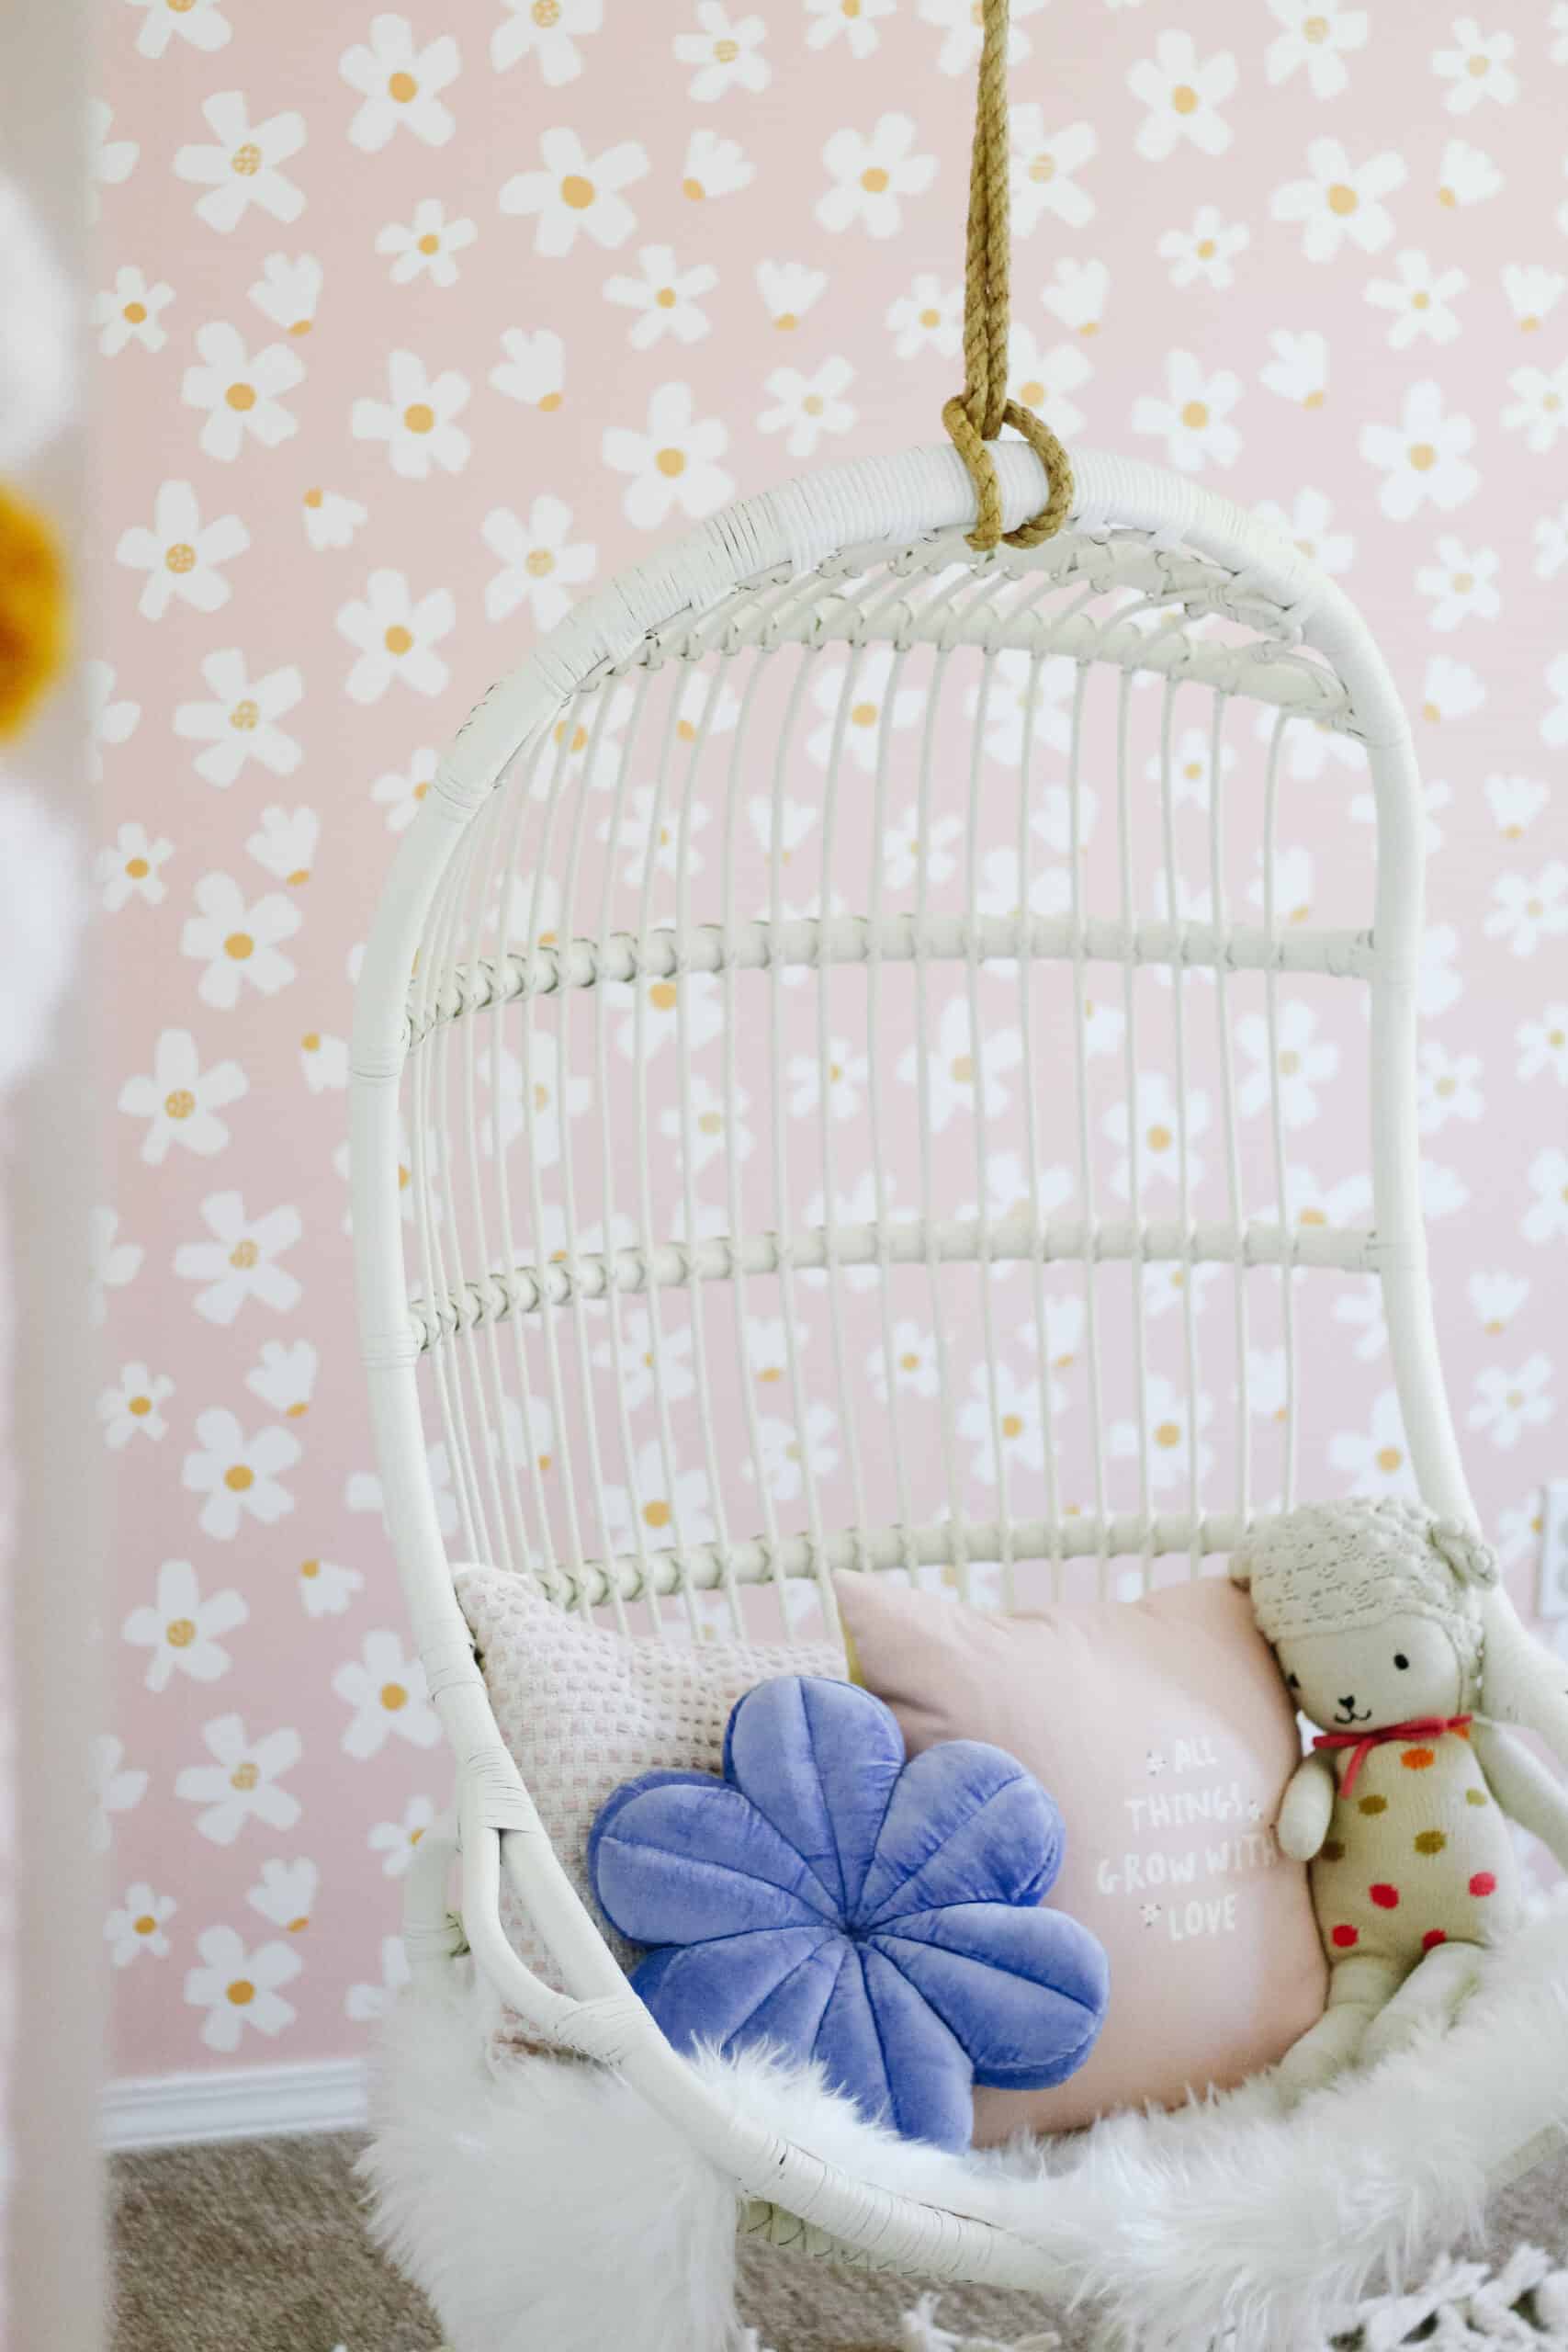
One thing that Avé has wanted since we hung Goldie’s is a hanging chair. Goldie’s nursery has the natural colored version of the one we got for Avé, and I love that they both have them now.
We aren’t in the habit of making things “even” but I will say that this past fall we were fairly certain we were going to move so we had told her that would be in her room at the new house, and we decided to do it here, instead of waiting since she was so excited.
If you are in the market for a rattan chair I highly suggest checking this one out – it is made so well and if you wait for a sale you can get it for a better deal than many other similar chairs.
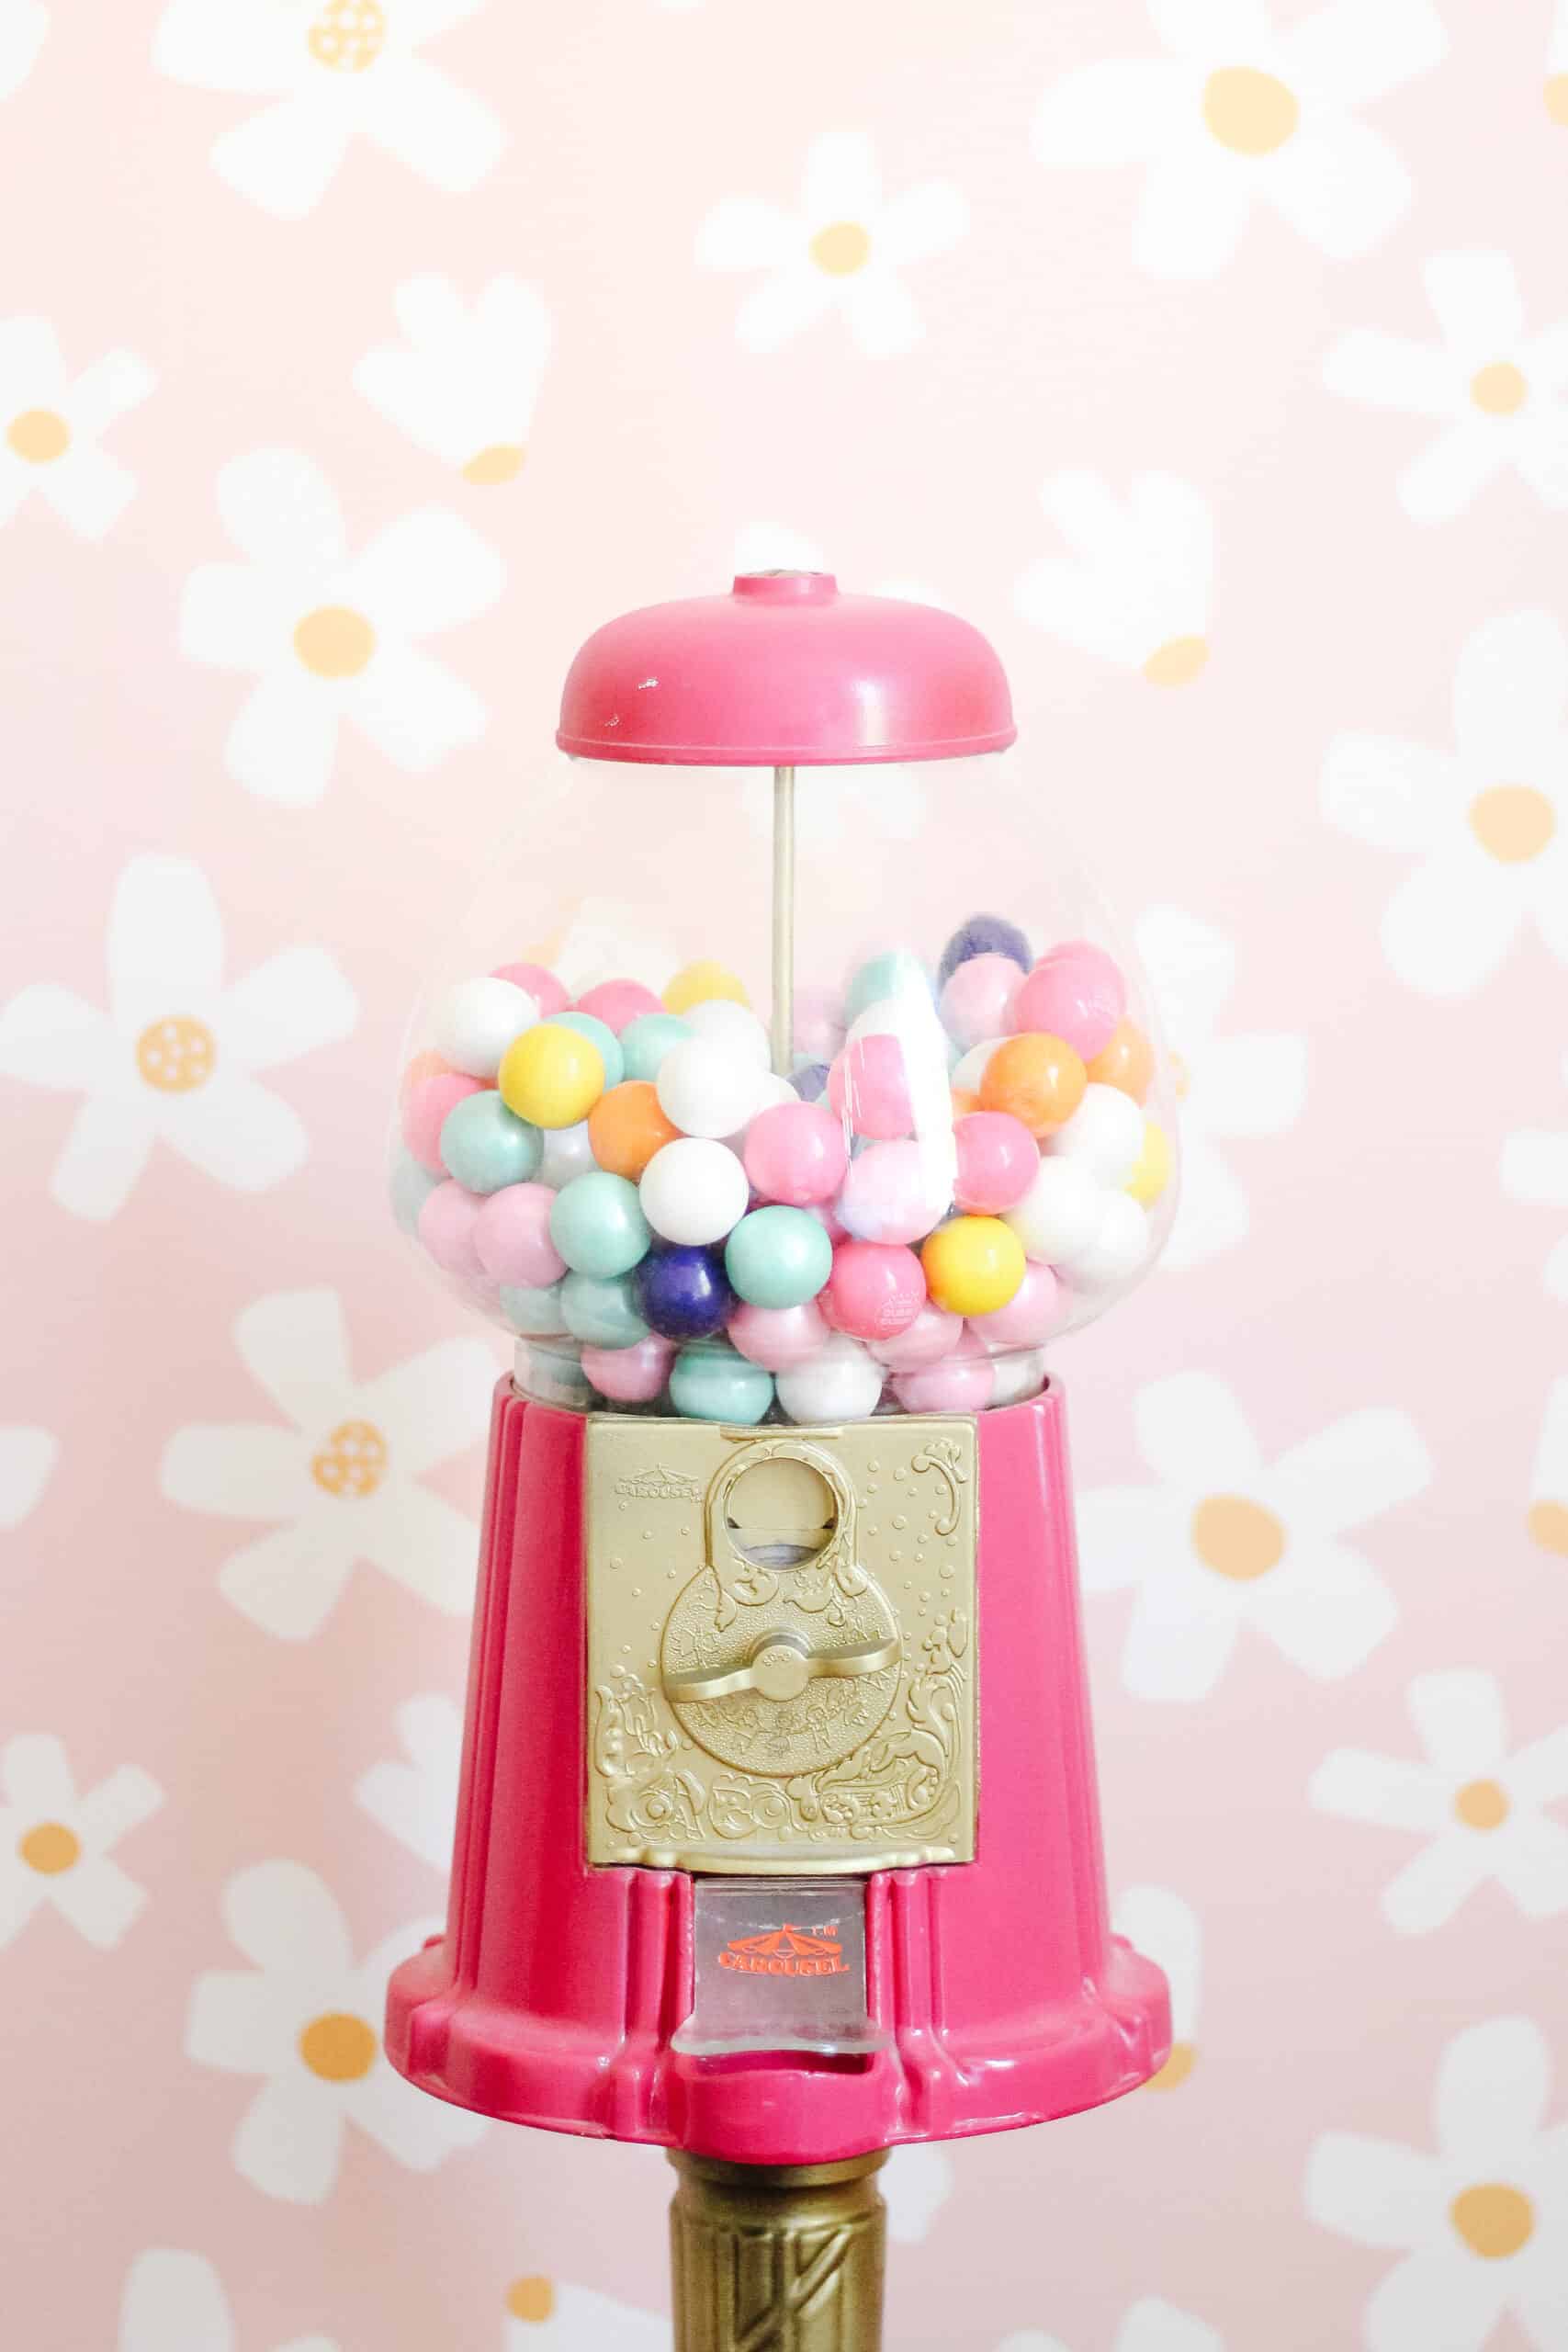
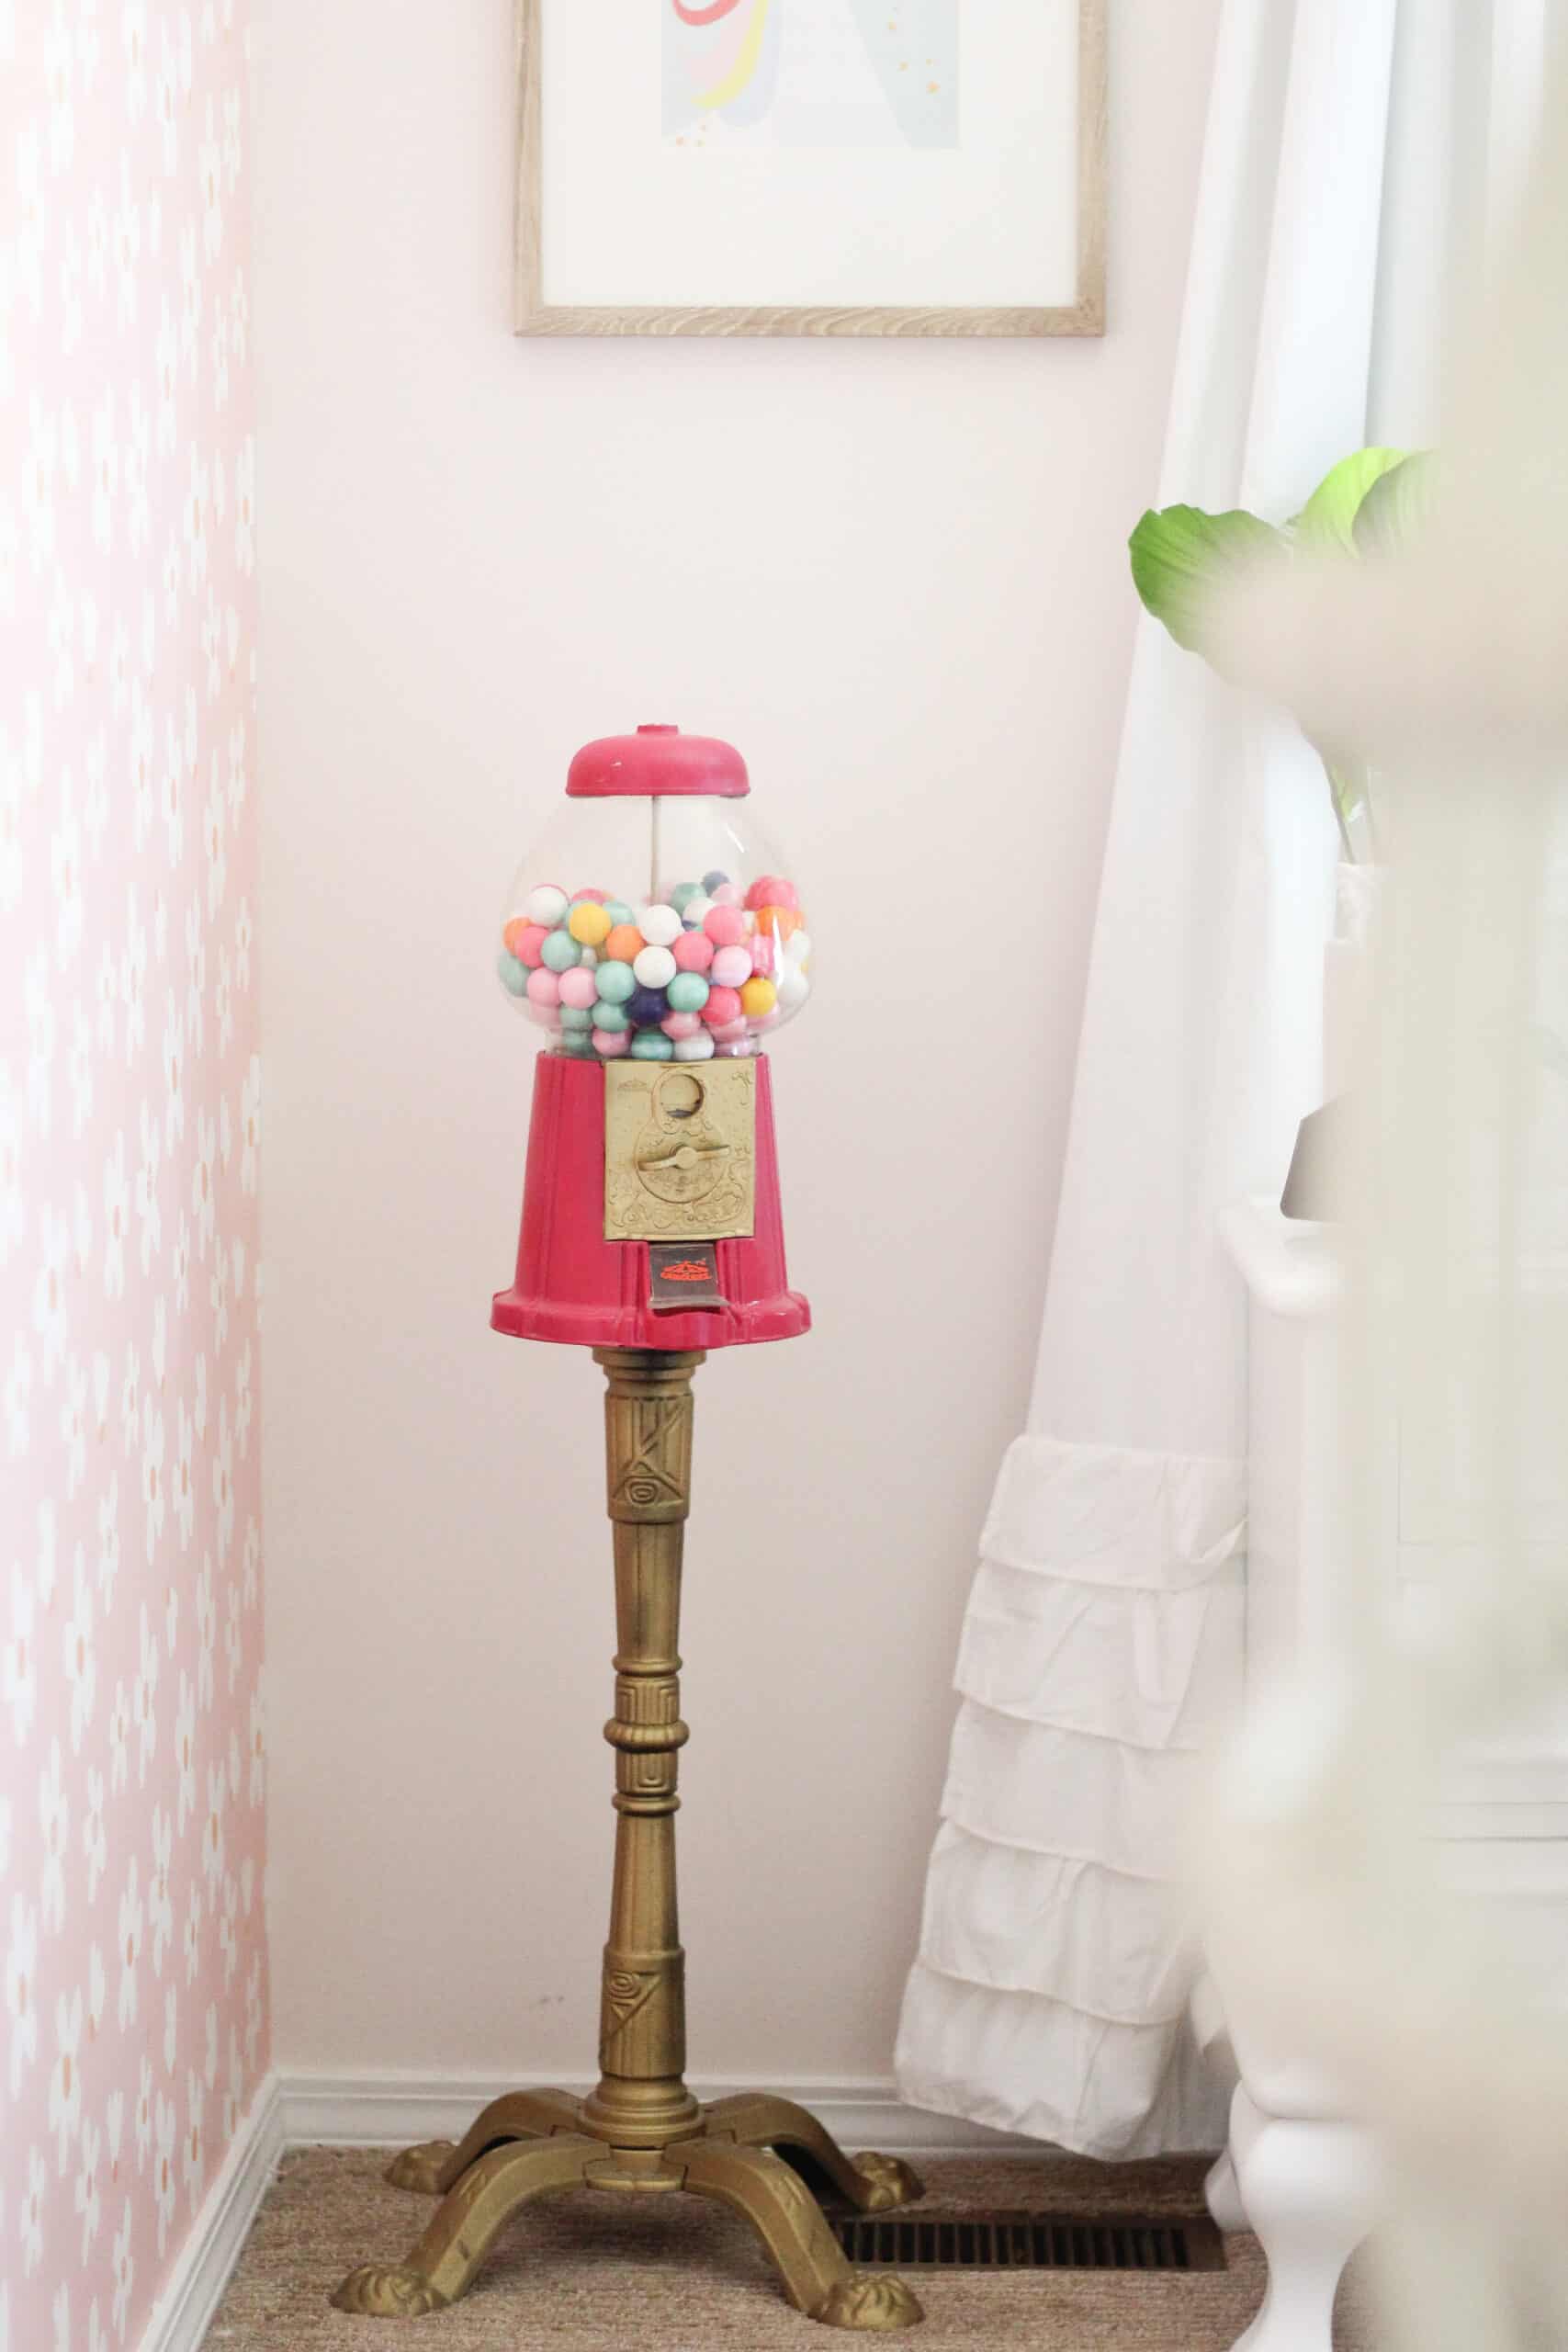
I kept her gumball machine in her room – which has been a part of her room since she was born, and I have simply changed up the gumballs.
This time I went really colorful and love the pop of color. I added a fun framed Unicorn picture (because 5 year olds love unicorns), and left her acrylic book shelves where they are.
I also added this fun daisy felt ball banner to her bed which I LOVE! I have one in Goldie’s room too and they are such a sweet little touch for the girls rooms.
We got a new rug in a natural texture because I needed to tone down the pink (much to Avé’s dismay haha). It is gorgeous in person and so soft!! I think it will be a great rug for her for years to come.
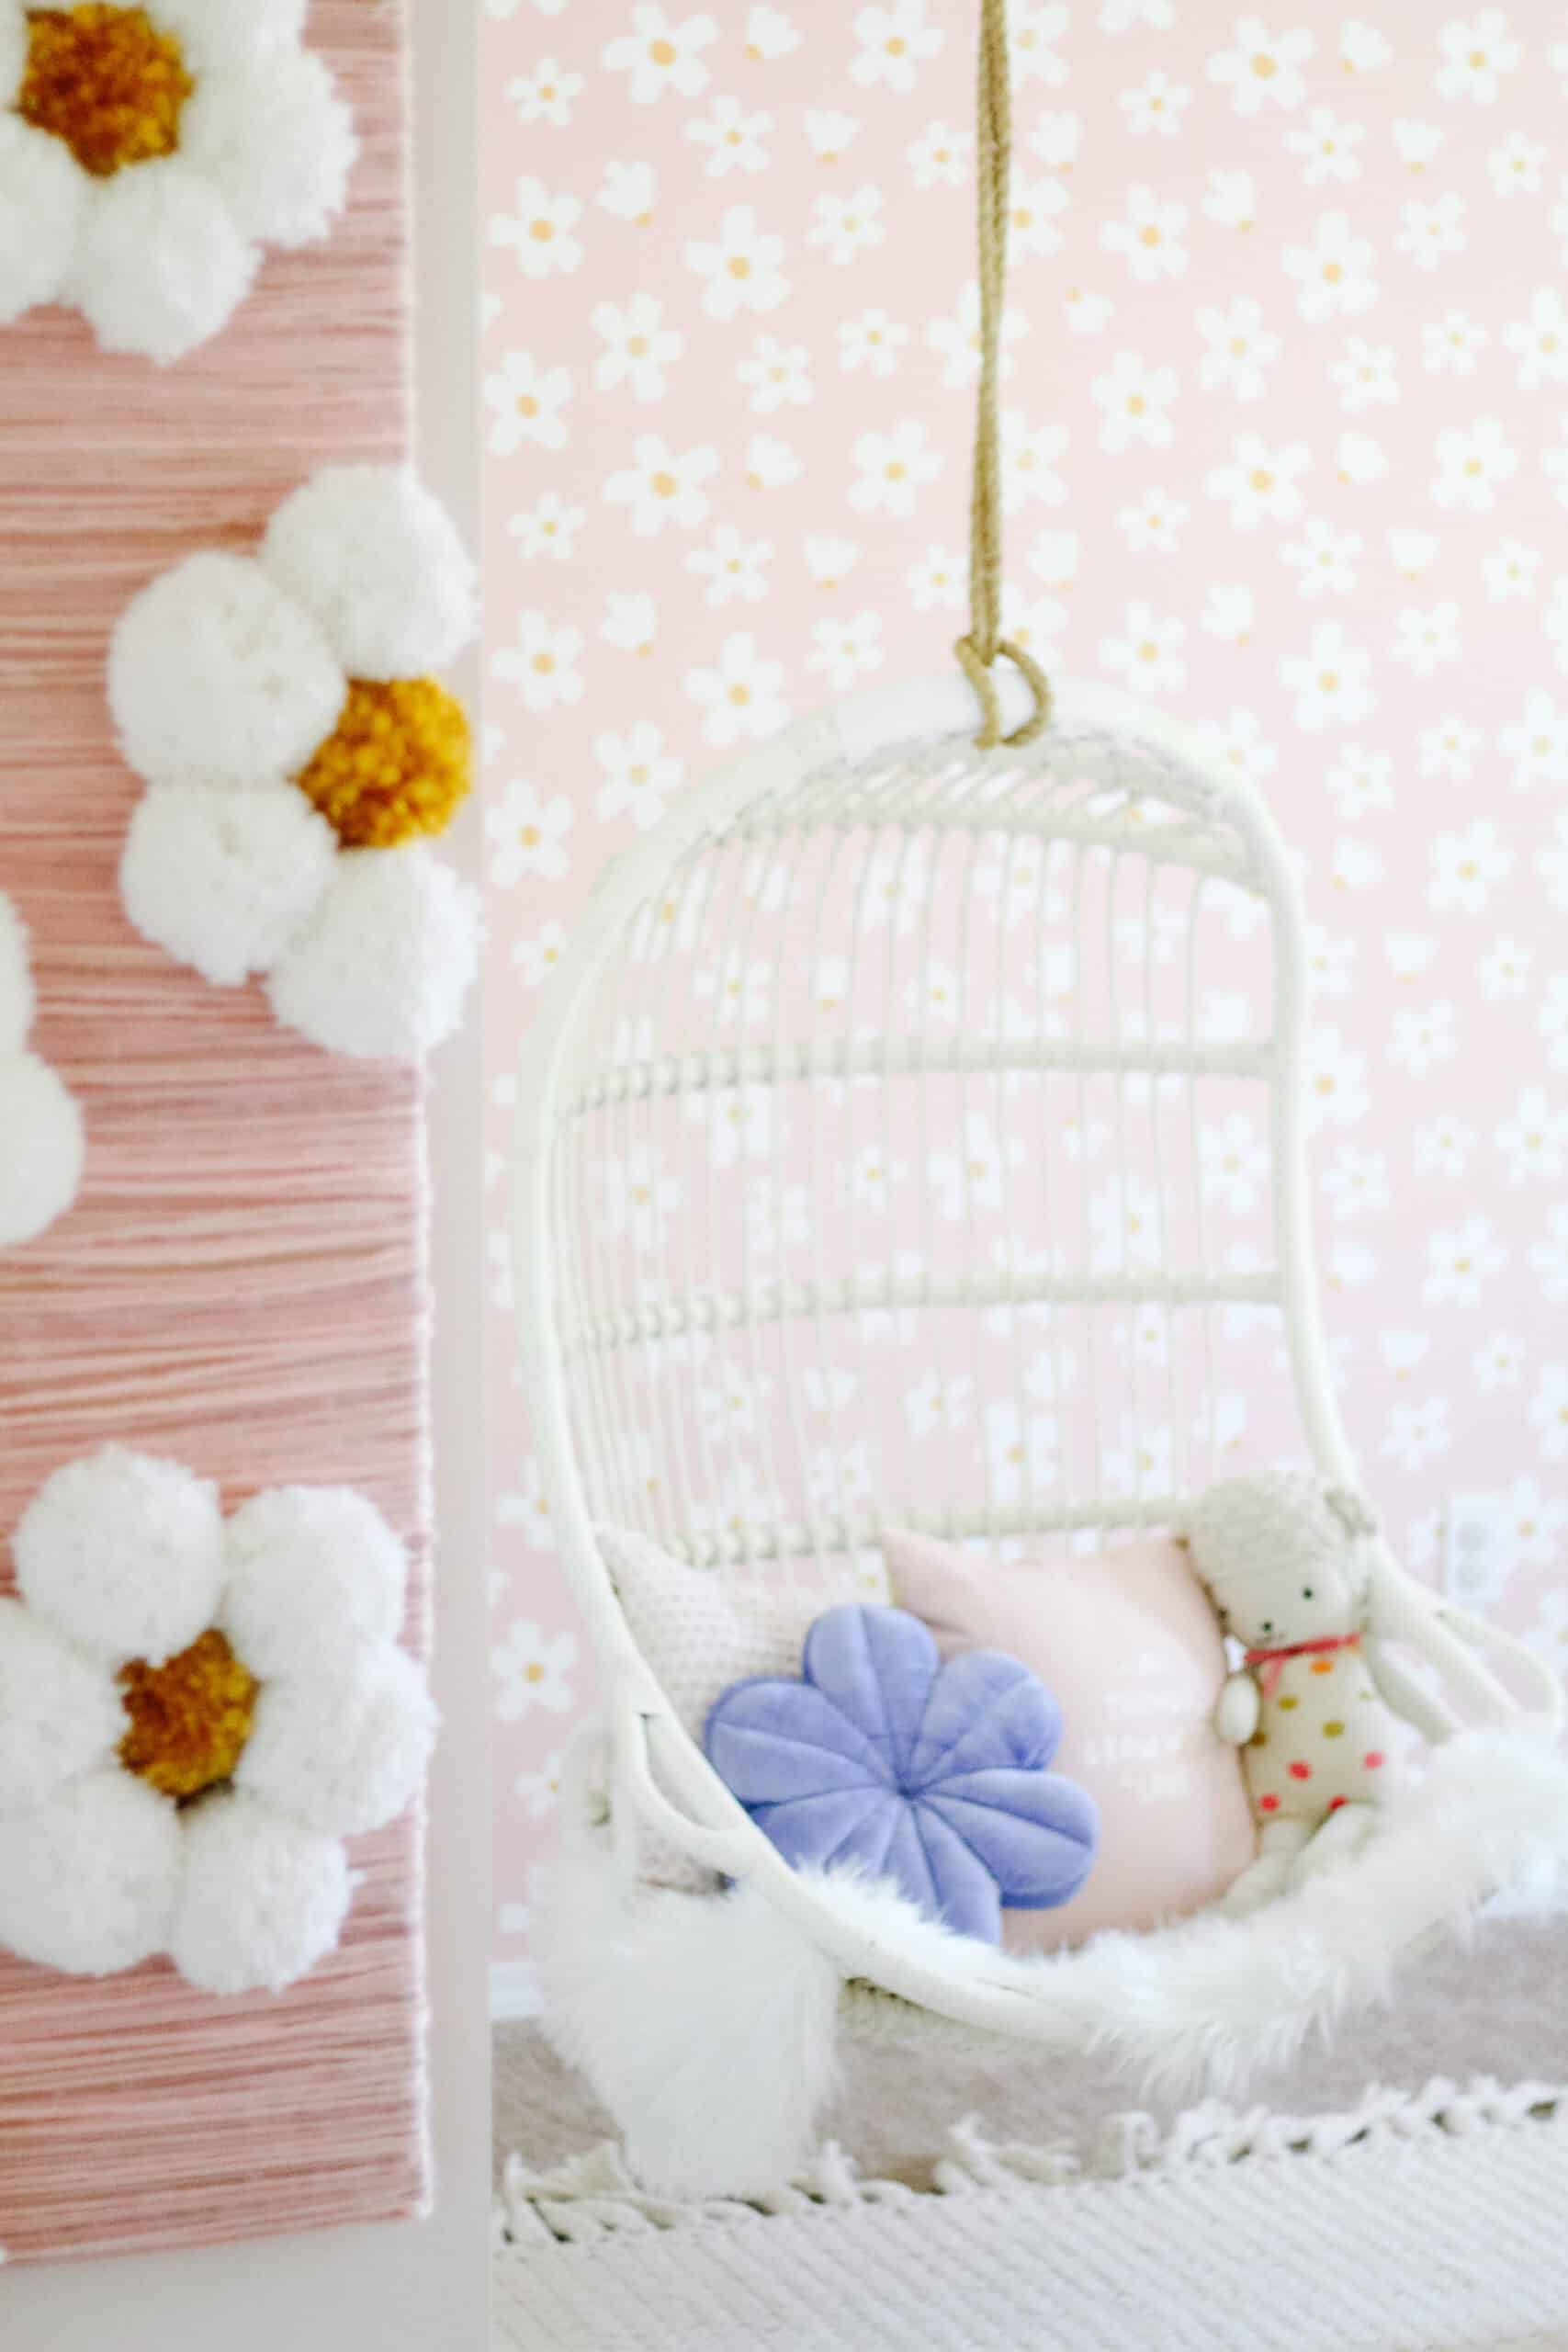
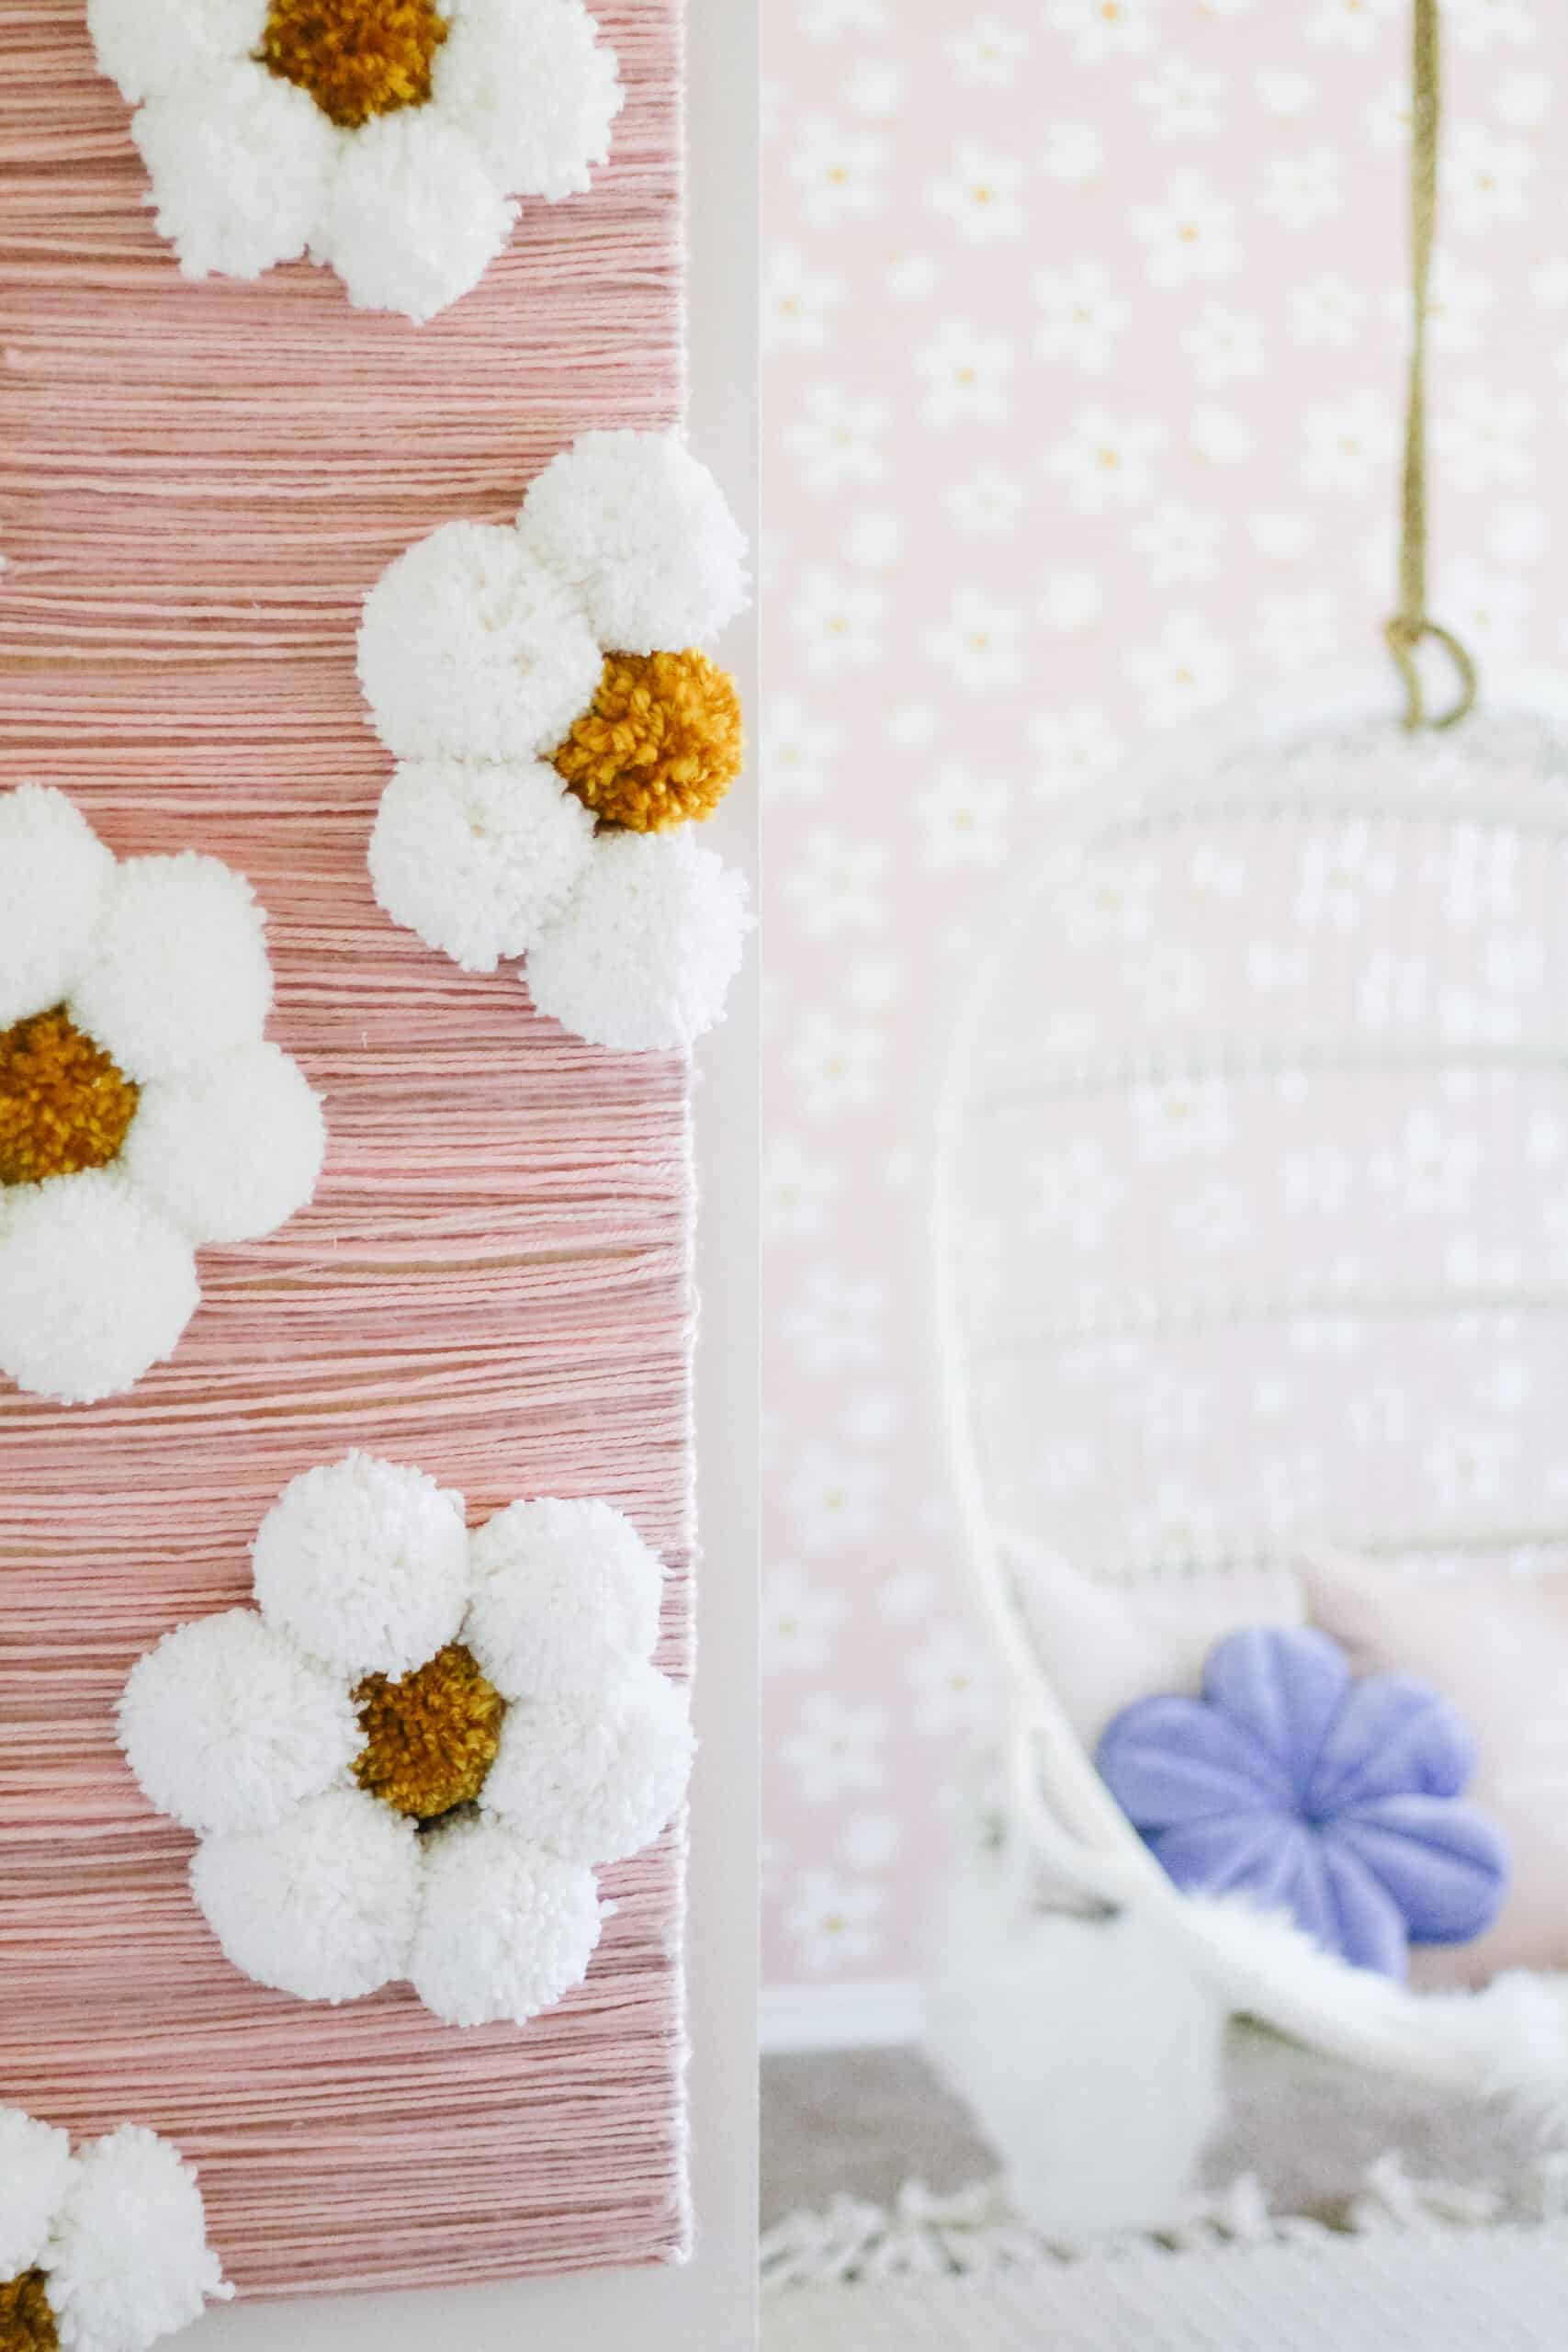
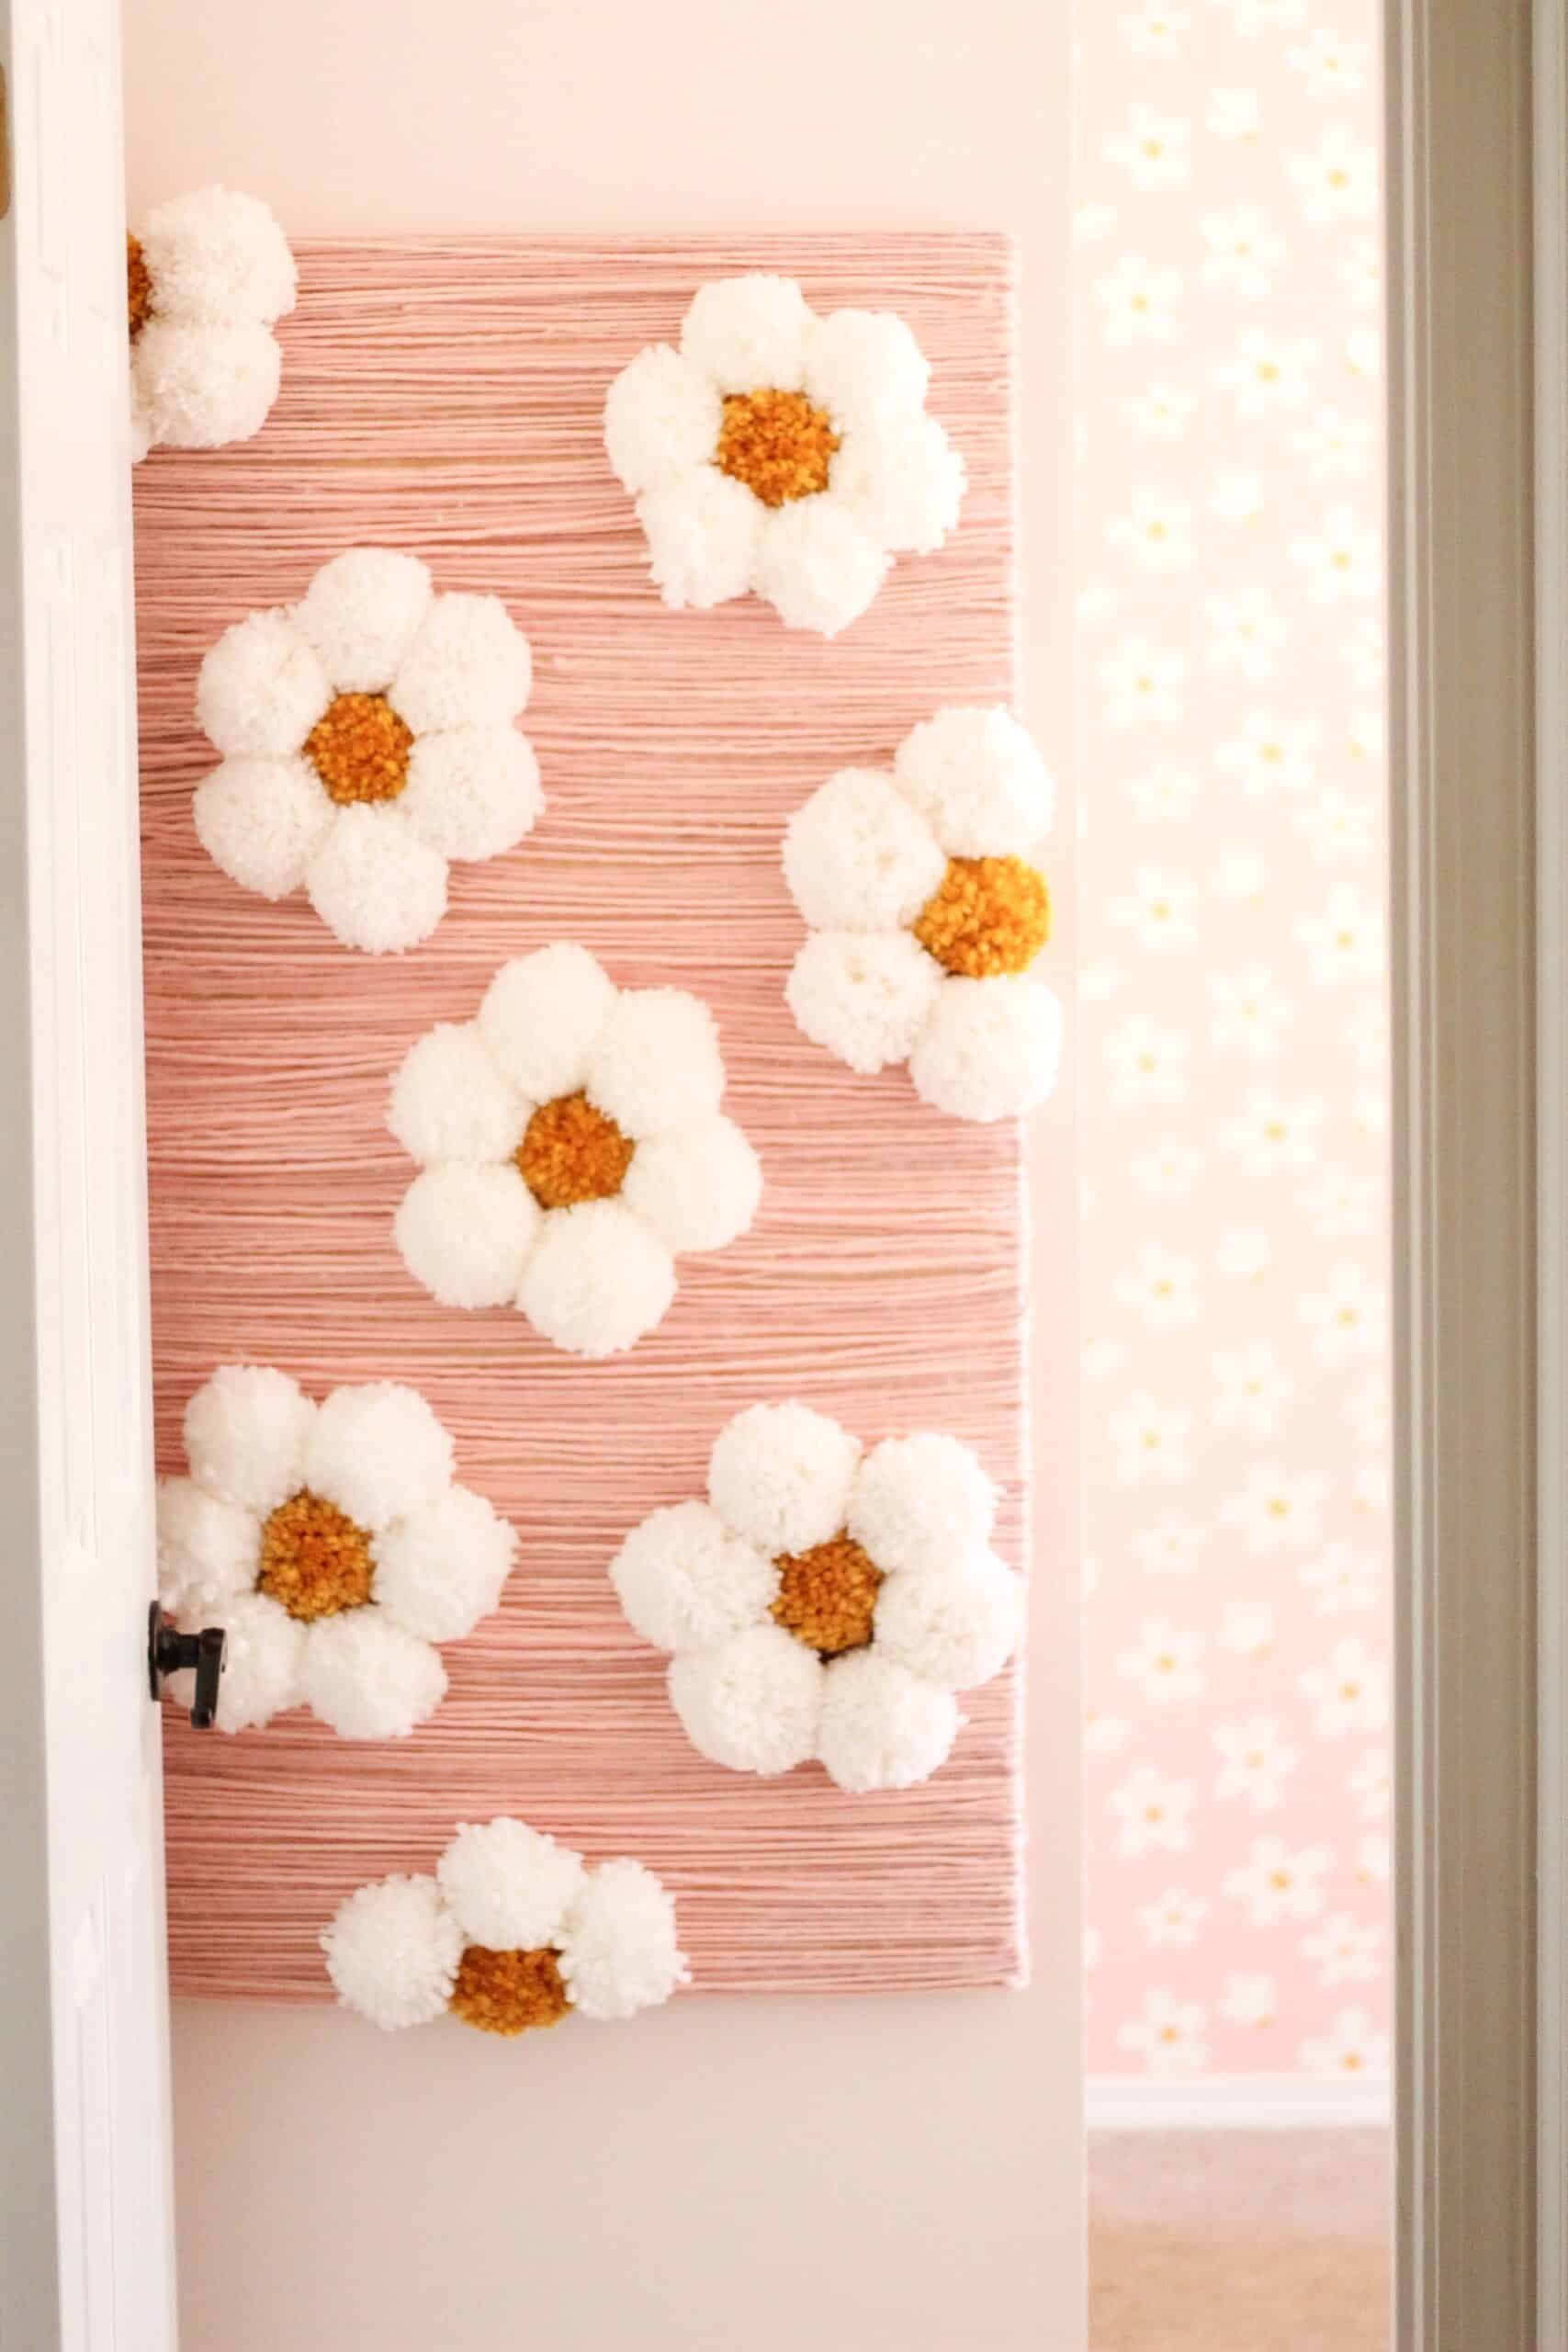
Last but not least was a huge DIY I did for her entry way wall. I did a full blog post on that piece and how I did it the flower wall HERE if you are interested. I am in love with how it looks, and although it was a lot of work, it was super budget friendly and could be customized for any space.
Overall this room was beyond what I could have wanted. We turned her bed to give her more room to just be a little girl, and I love watching her enjoy her space. One of my biggest goals with this job and the spaces I create is both to make them beautiful and ‘picture perfect’ as well as livable and enjoyable for my kids.
The sweet Daisy wallpaper in here accomplished that for Avé, and she spends so much time curled up in the chair that its been so much fun to watch her enjoy it. If you have any questions on the space, or anything else, you can always DM me via Instagram or comment below!
Hopefully you are inspired to add daisy wallpaper to your house and are more confident in shopping on Spoonflower. To see what I do in the rest of our rooms at our new house follow me on Instagram (@arinsolange) and comment below with any questions. `
This post on the best life insurance for you was sponsored by Policygenius however all thoughts and opinions are always my own
Do you have life insurance? I know thats not my normal topic of discussion over here, but it’s actually something I am VERY VERY passionate about. It is also something that I will admit, I found very complicated and confusing when it came time for Sam and myself to get it.
Because I think, as a mom, who typically blogs here for other moms, that I should share not only the material goods I am passionate about, but also some of the more serious parts of life, lets talk life Insurance!
The Best Life Insurance for You
When Sam and I found out we were expecting Jack, one of the quickest things for me to jump to needing was life insurance, specifically for Sam. I already had a policy, so had SOME – n0t a lot – of knowledge about life insurance, but also was really passionate about needing it.
You see – I think that as young people we tend to think life insurance isn’t really needed, however for me, I knew that sometimes the unthinkable happens. When I was 4 I lost my mom suddenly in a plane crash, so I grew up knowing that prepping for the unthinkable makes horrific moments filled with one less worry.
So when Sam and I were pregnant with Jack and talking about me staying home with him, I knew that had to be a step in making that happen. THAT SAID, knowing what the best life insurance is for you is NOT EASY. And honestly we had no idea where to start, or what all the terms even meant.
Policygenius
When Policygenius came to me about doing this blog post I was honestly so excited to share with you all a great resource for finding life insurance. Policygenius is an online insurance marketplace that specifically has a mission for helping people get life insurance by making it easy for them to understand their options, as well as get quotes and buy a policy all in one place.
If you are anything like Sam and I, when you’re first figuring this out, you are not only stumped on what the terms mean, but also don’t know what even a ballpark figure should be for your insurance, so having a site that can help you see all of that in one place is so valuable, and can get you all the way from education on what you need to a policy all in one.
(Also – a fun fact – the Policygenius CEO, Jennifer Fitzgerald is one of only 4 women in the U.S. fintech space to raise over $50 million in venture capital funding.)
Why Use Policygenius and Compare Life Insurance
If you are new to life insurance, then you will quickly find out that the same policy can vary in price from insurer to insurer by up to $133 a month. That is a huge swing, and no one person has the time to call each place to get that started.
Using Policygenius helps you see them all in one place ( I mean – we all do it for airfare right? Go to one site to see how to get the best price for getting from point a to point B, so its the same idea.) And because life insurance tends to be a long term decision, choosing the wrong policy, and paying more now can mean paying up to $47,000 extra in a 30 year policy!
Why Get Insured Now?
Okay so now you know where to look for the best life insurance for you, but I am sure lots of you are wondering why. Aside from the fact that I truly believe we should all prep for the unknown of tomorrow today, there is more to it than that.
Life insurance rates naturally increase 8-10% yearly as you get older (I mean after all – your chances of needing it are going up as you get older), so locking in low rate when you are younger can save you so much money long term. We locked Sam in when he was 23 years old, so were able to get a really great rate, even tho we in no way anticipated him needing it.
I know for us, we are also offered a policy with Sam’s job but fora couple of reasons, even if you fall in that category you should have additional insurance. First off most people need 10x that amount to properly provide for your family. And second – for us we didn’t want to think that in the instance that Sam would lose or leave his job, that we would have a window where he wasn’t covered. I know in your mind you think “ill get it then when I need it”, but the reality of it is, normally at that time things are crazy and hectic and you just won’t even think of it!
I know this is such a ‘morbid’ topic for so many, and not quite the fun thing to shop for like the best Summer shoes, but I know for sam and I, it was such a sigh of relief to know it was done. I don’t like to think of the worst case scenarios, but I also would be lying if I said i never did based on my childhood, so knowing that at the very least if something happened to Sam or myself our kids would be financially well taken care of is a huge weight off my shoulders.
If you are looking for the best insurance for you, check out Policygenius and shop around. There are different aspects to different policies that can make them better for your situation. And honestly – hopefully if you are like me, you will be pleasantly surprised by how affordable it can be to add such a huge amount of peace of mind to your life!
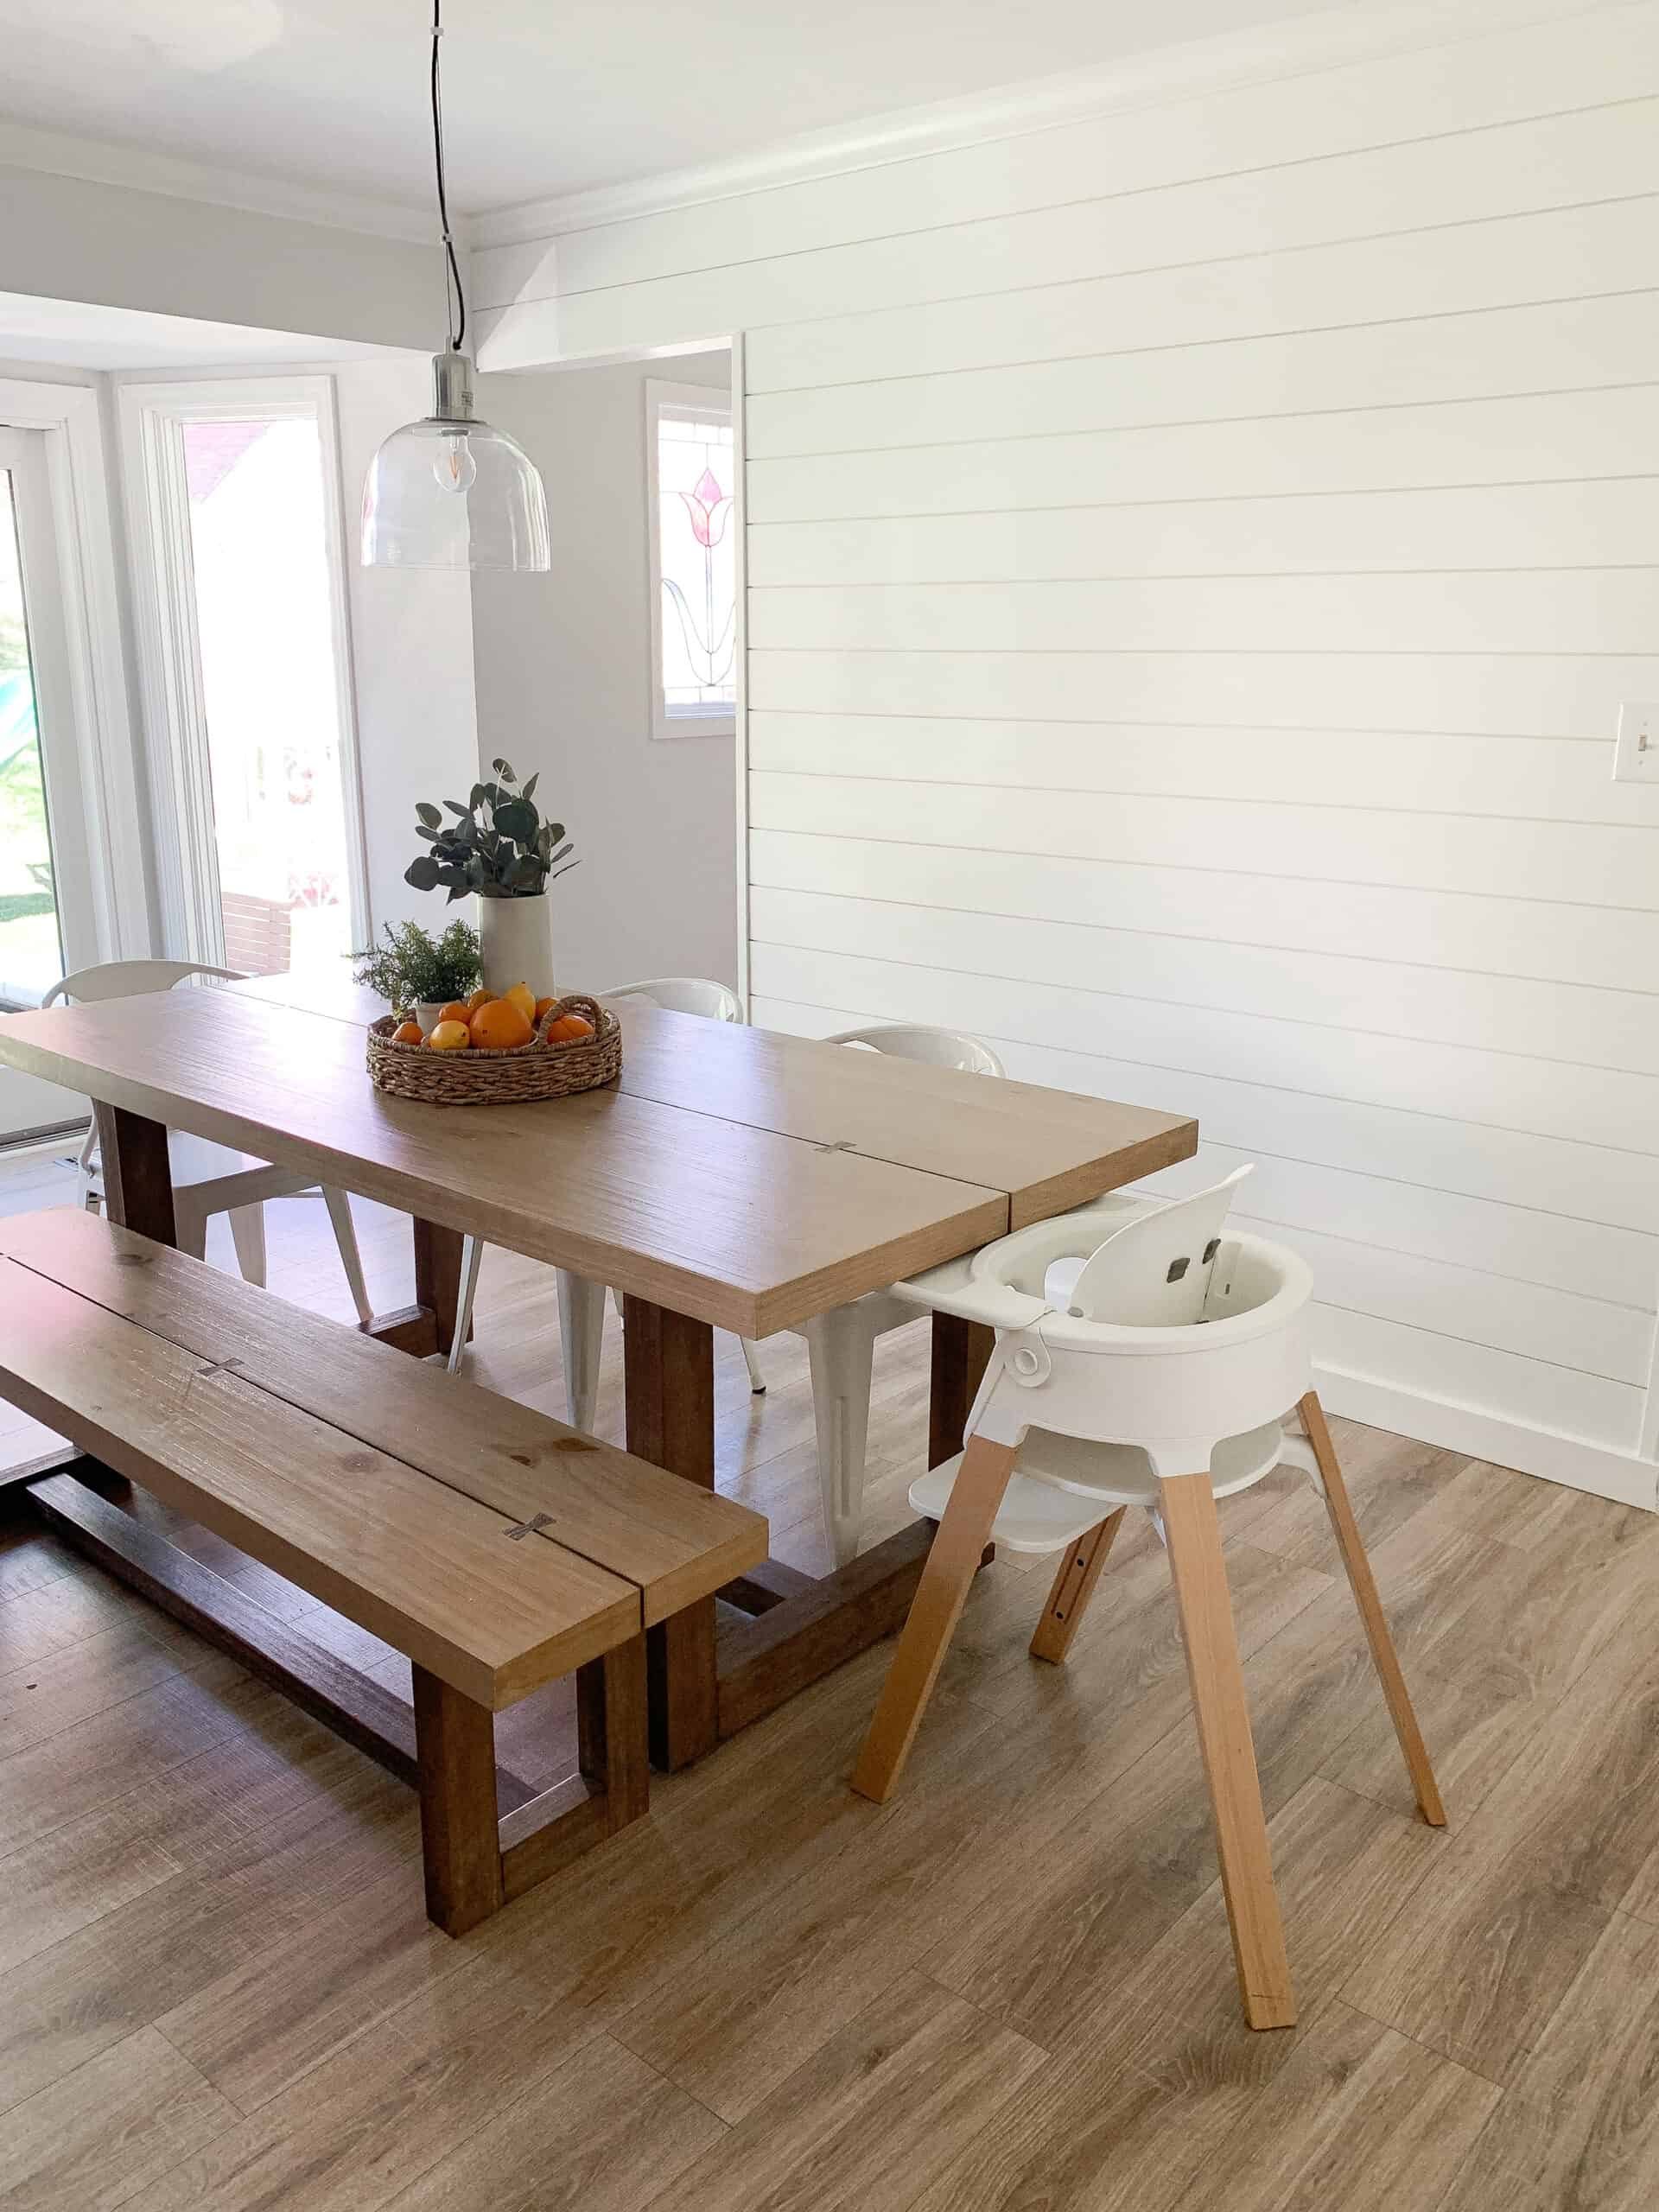
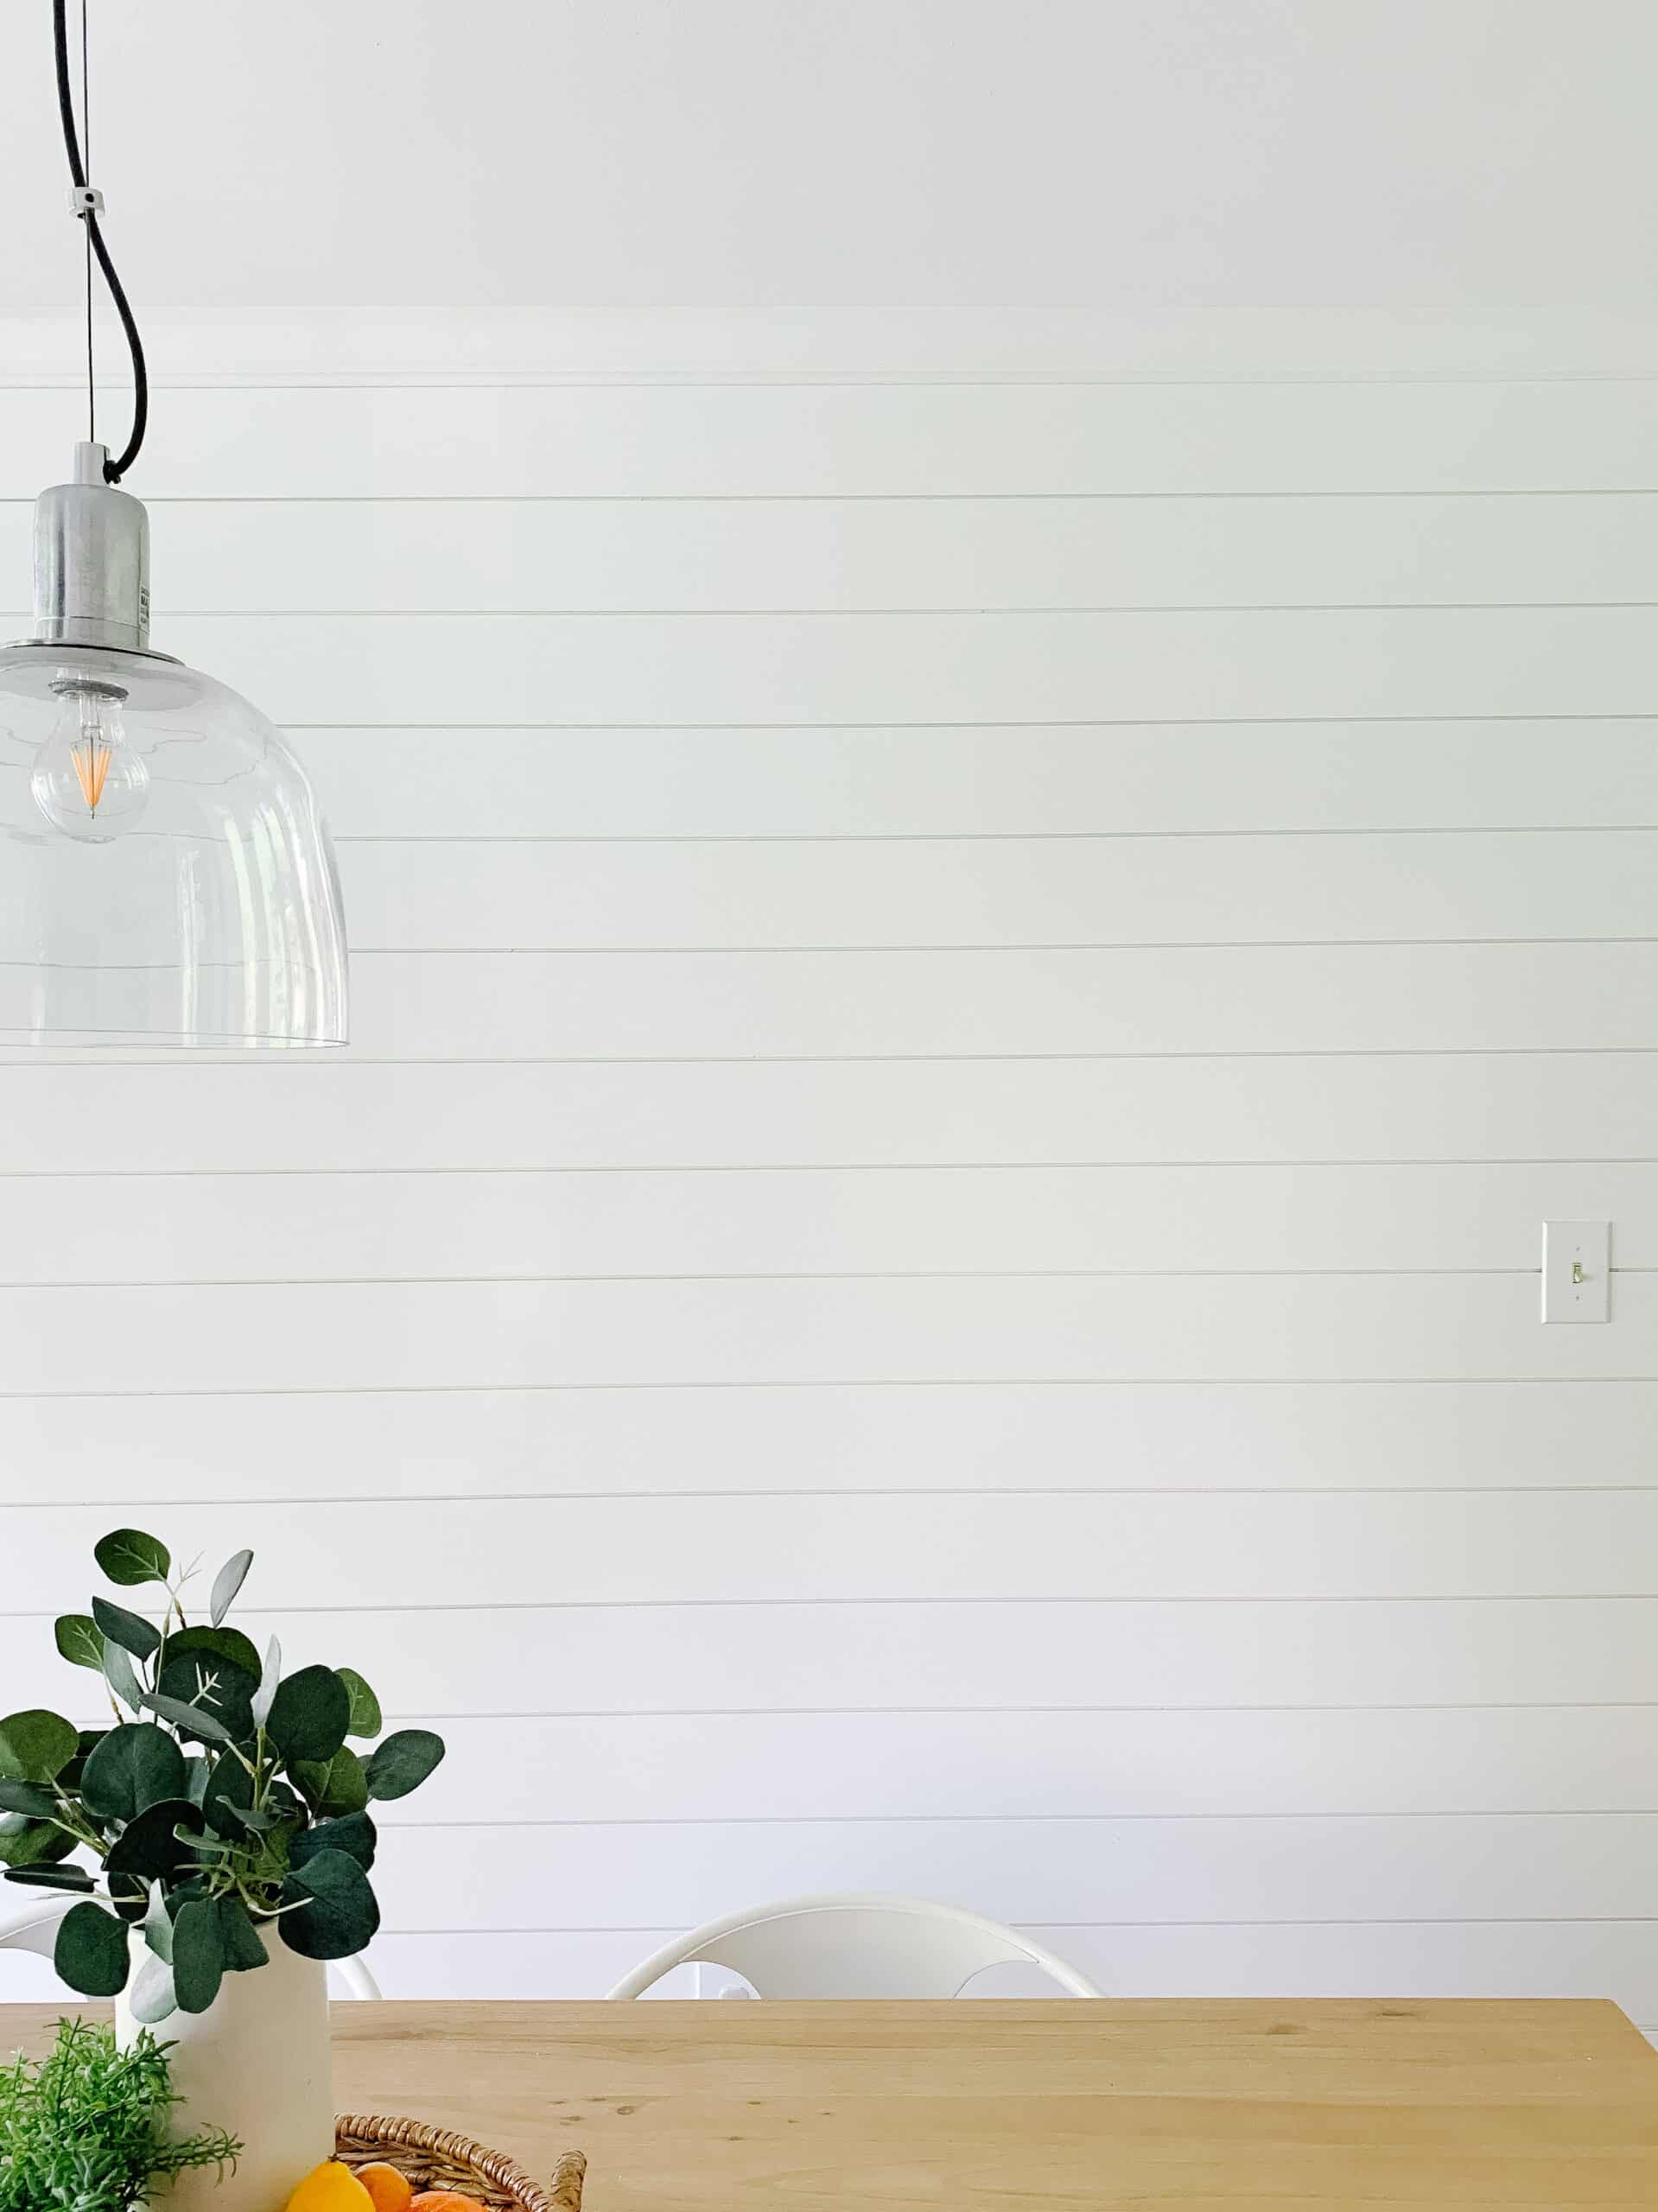
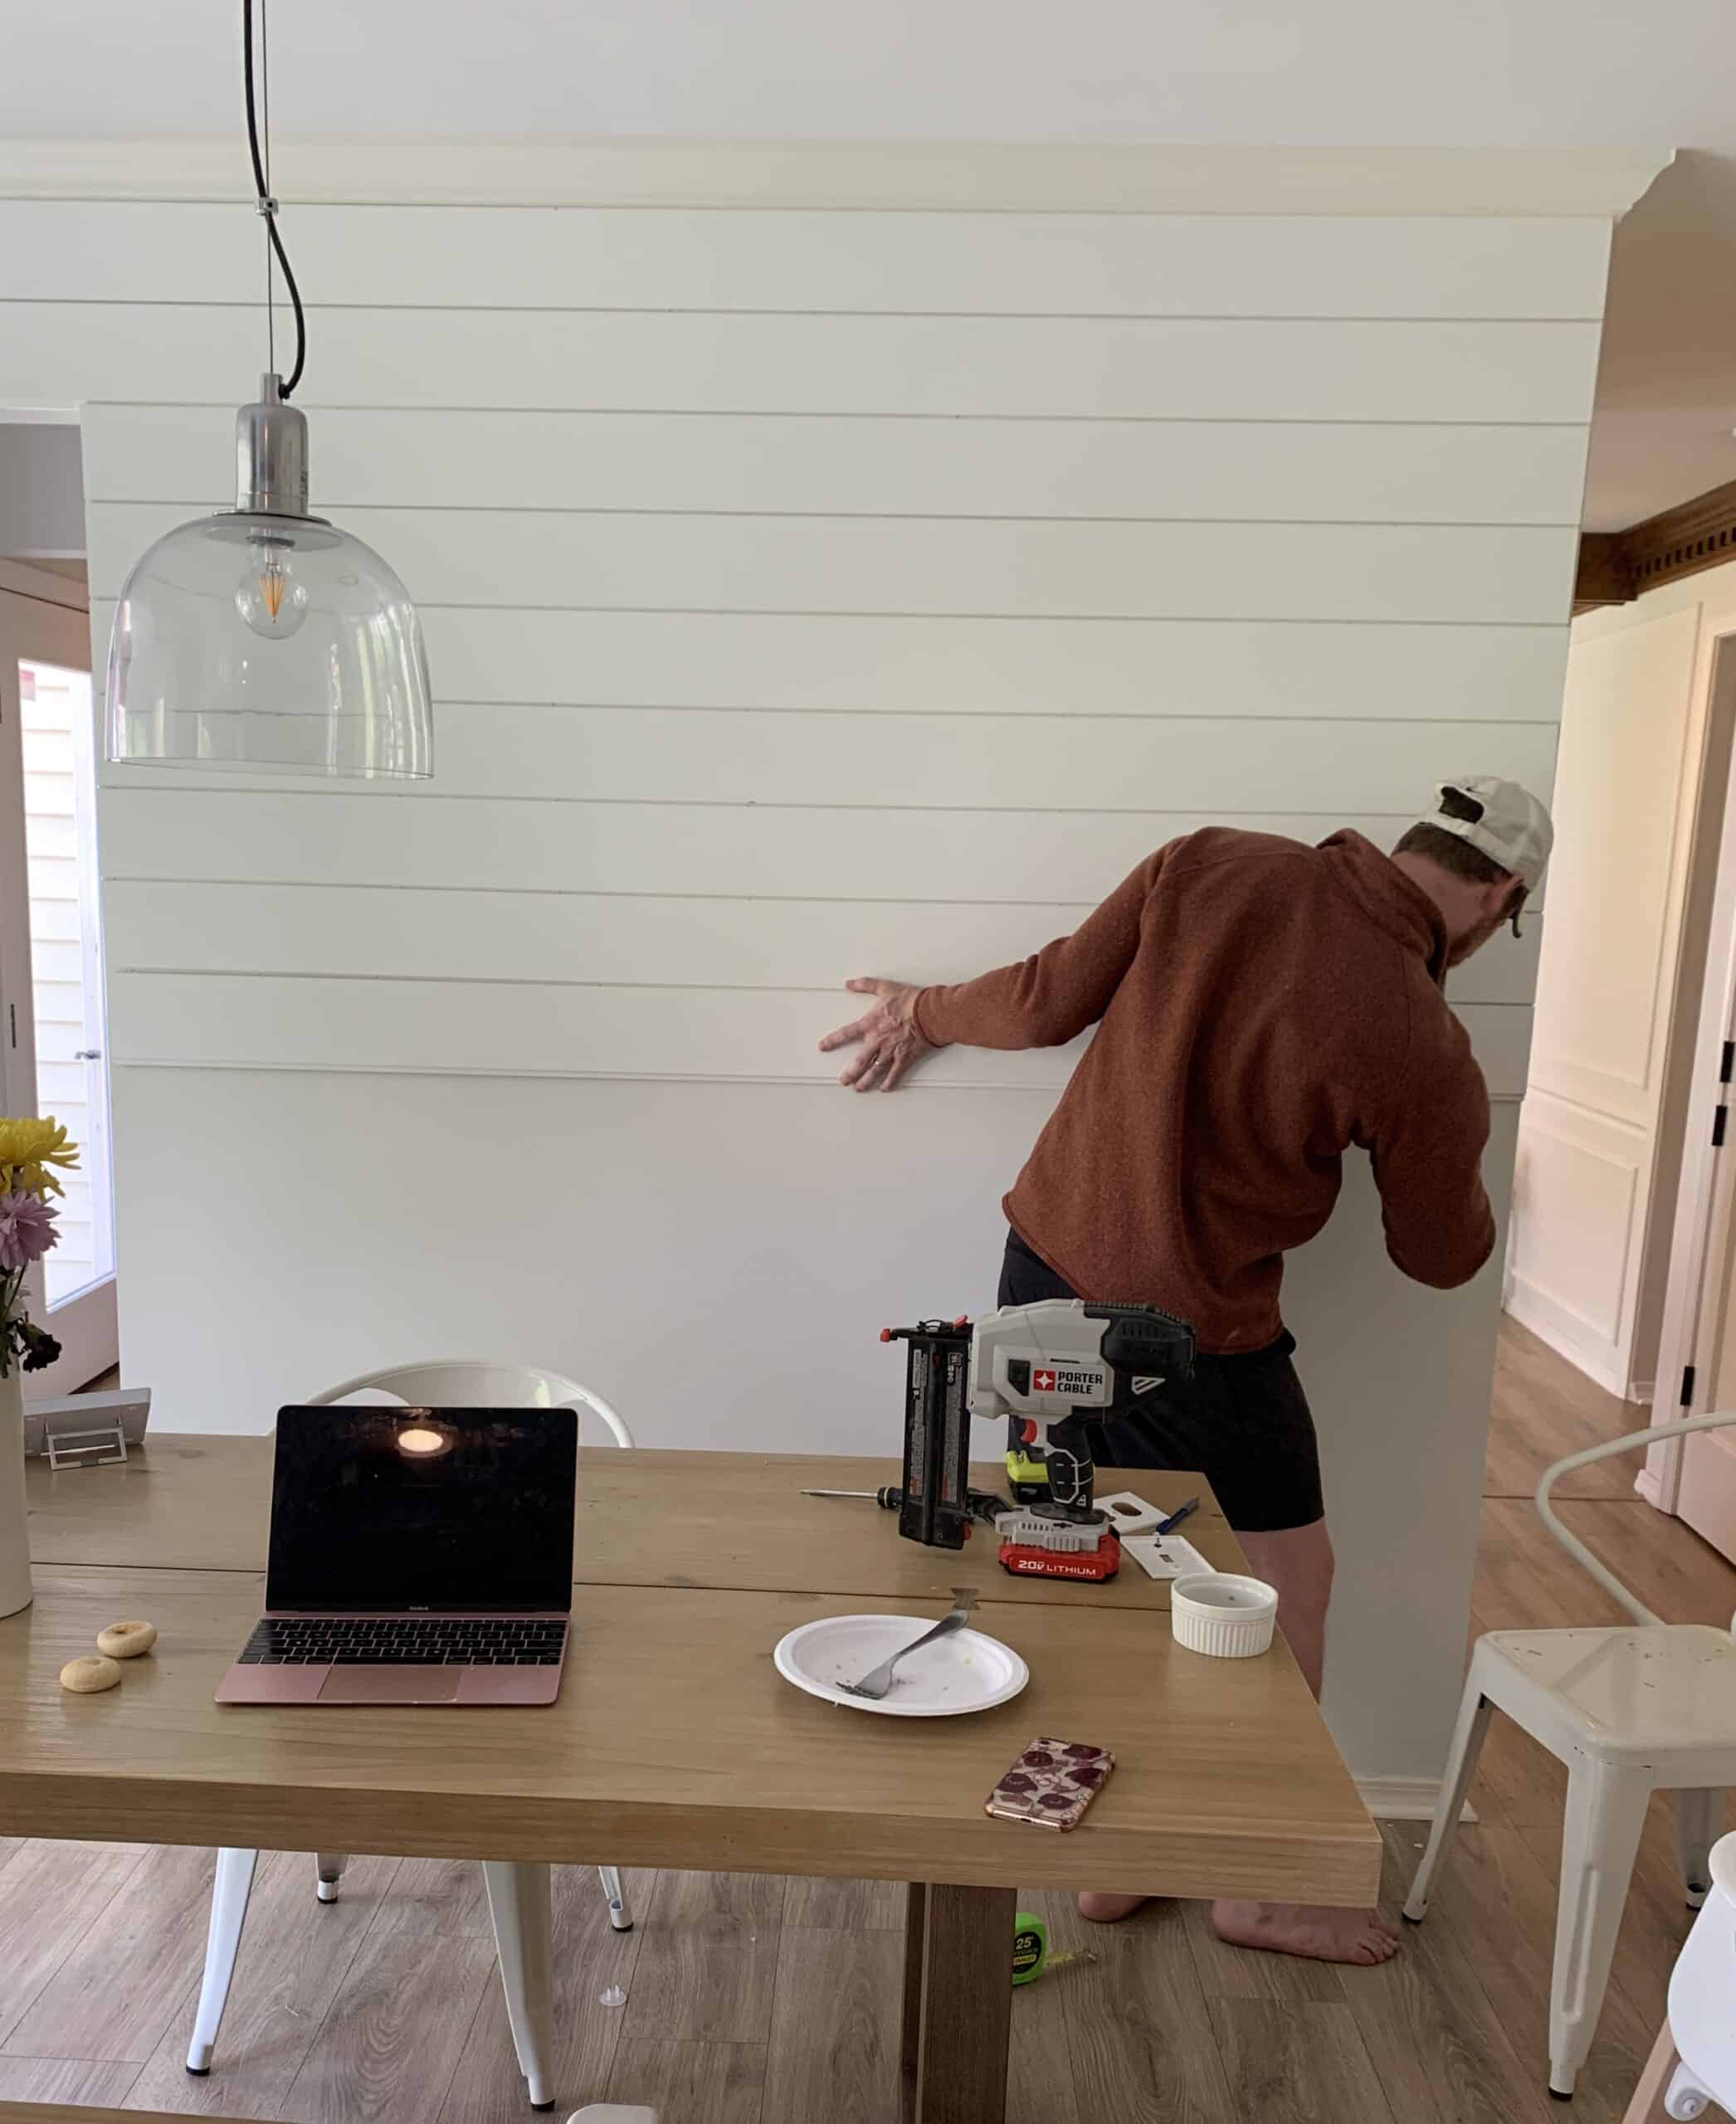
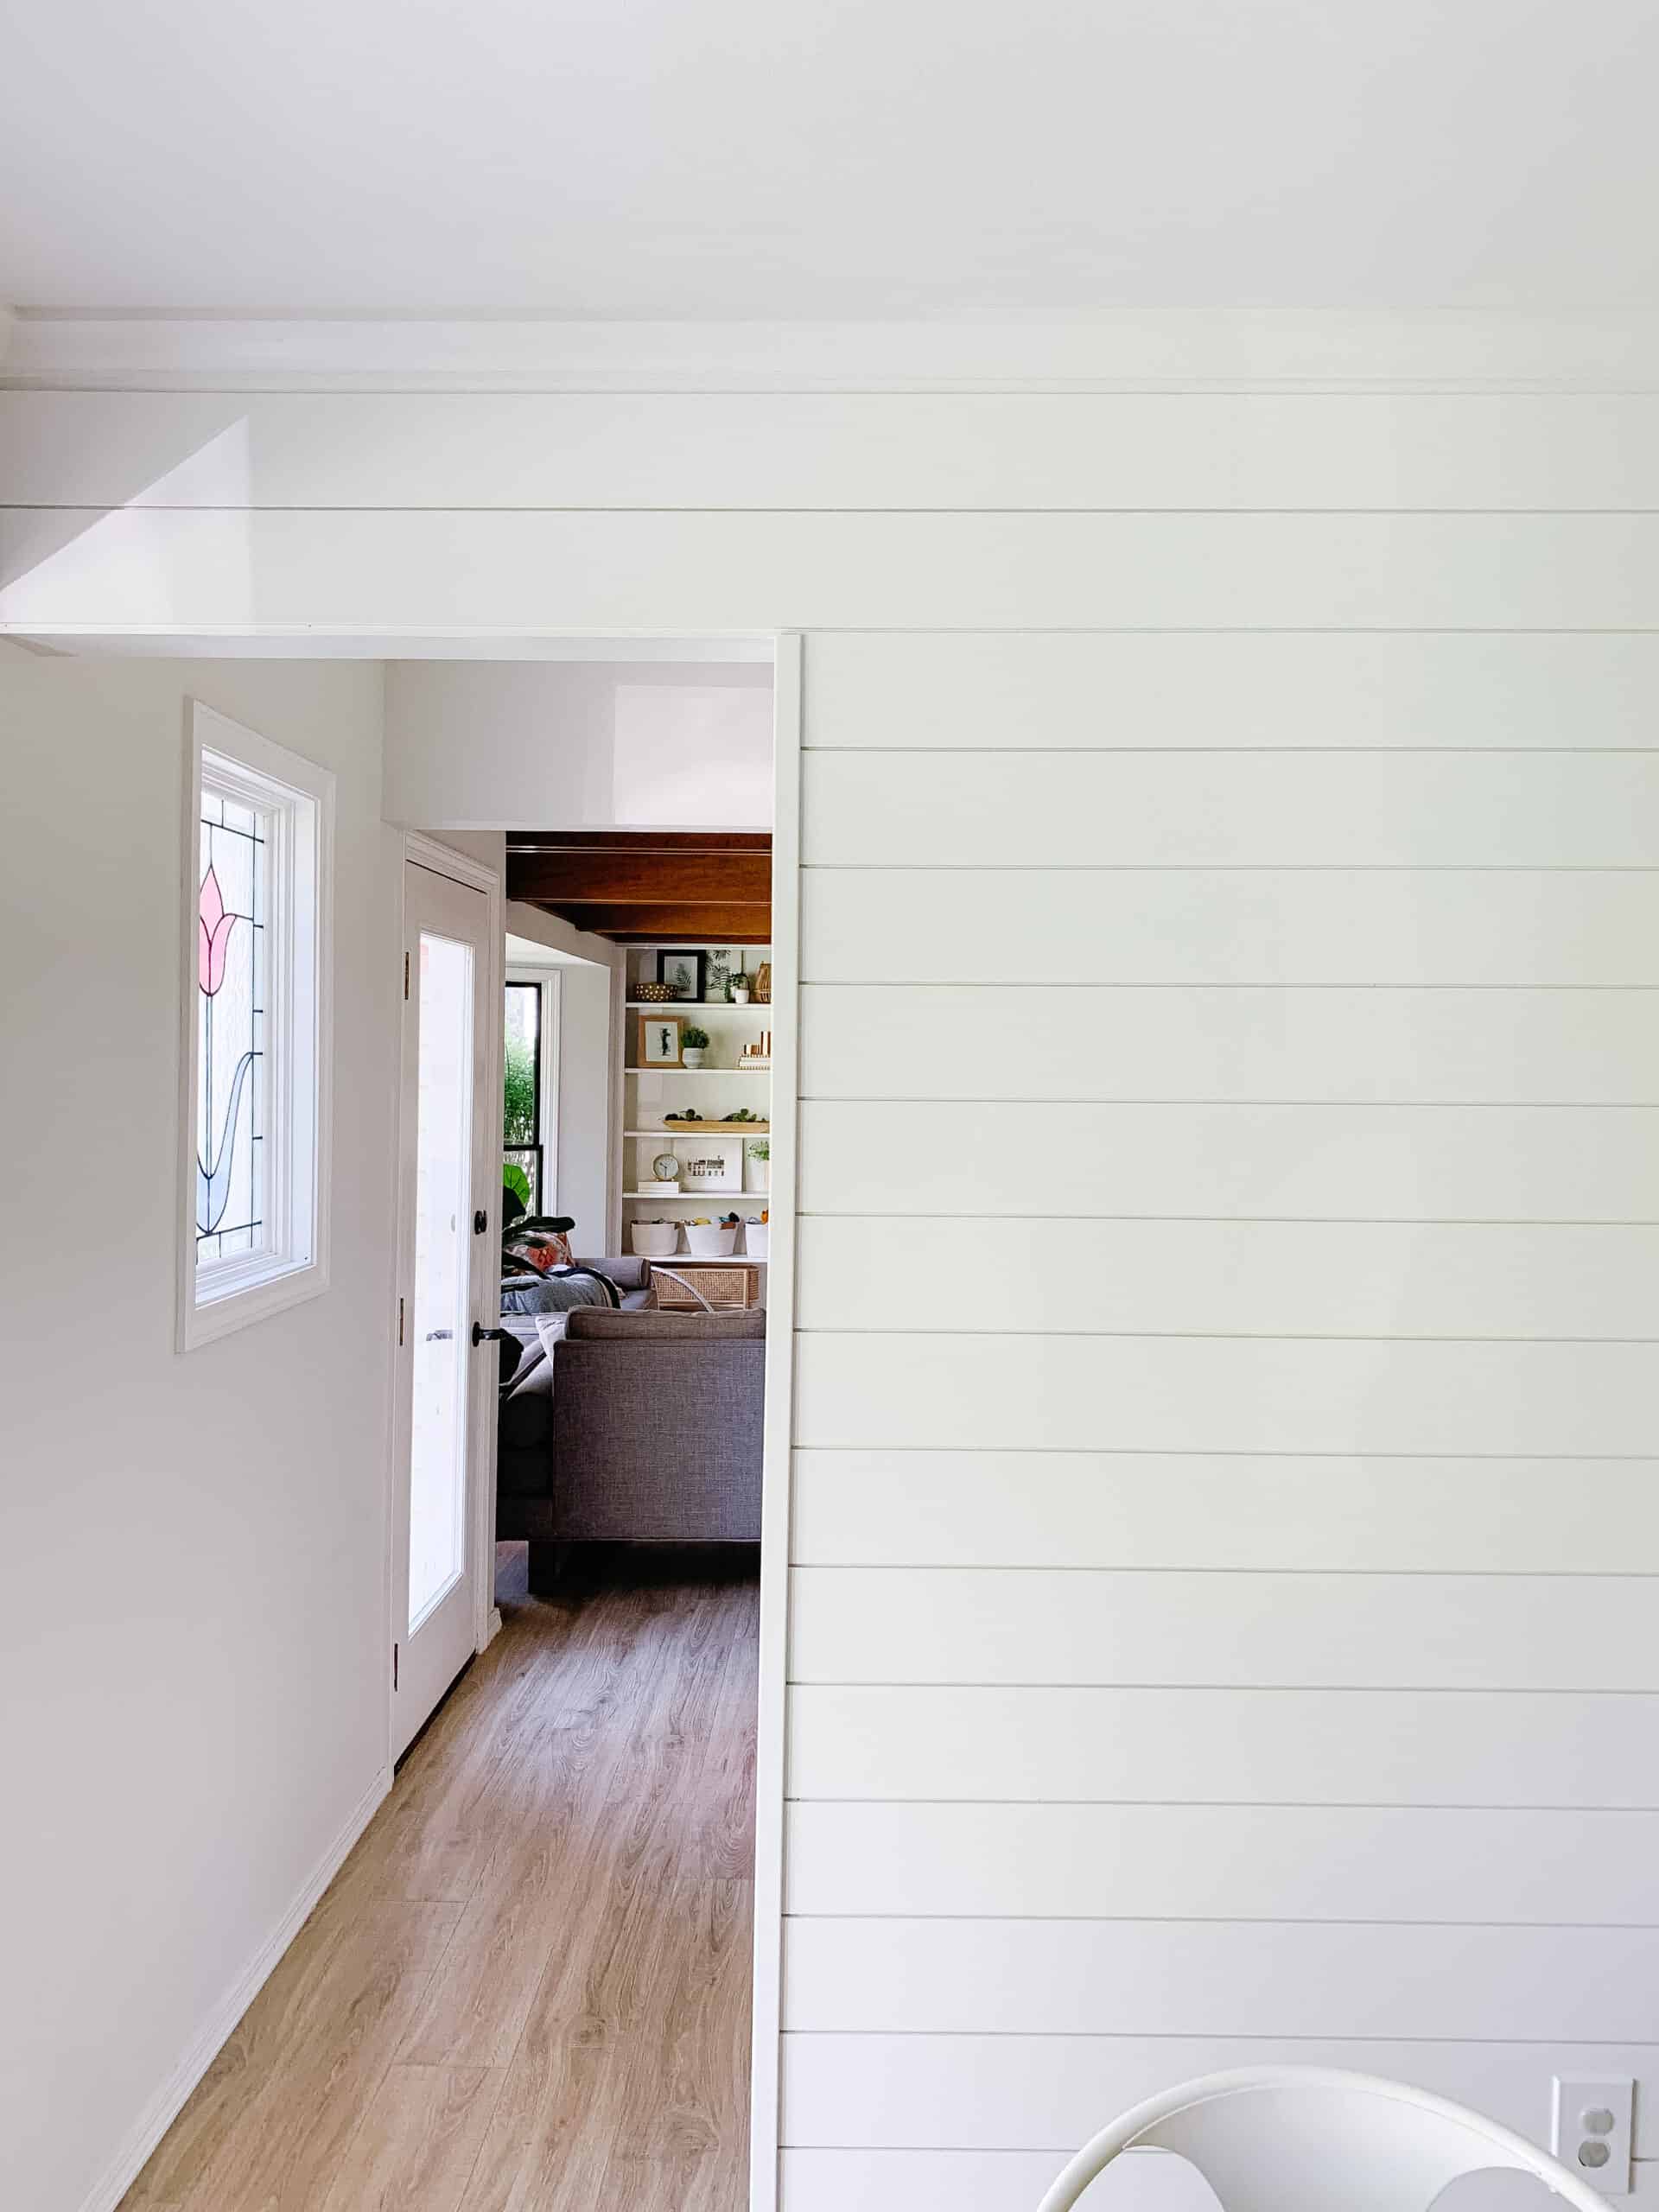
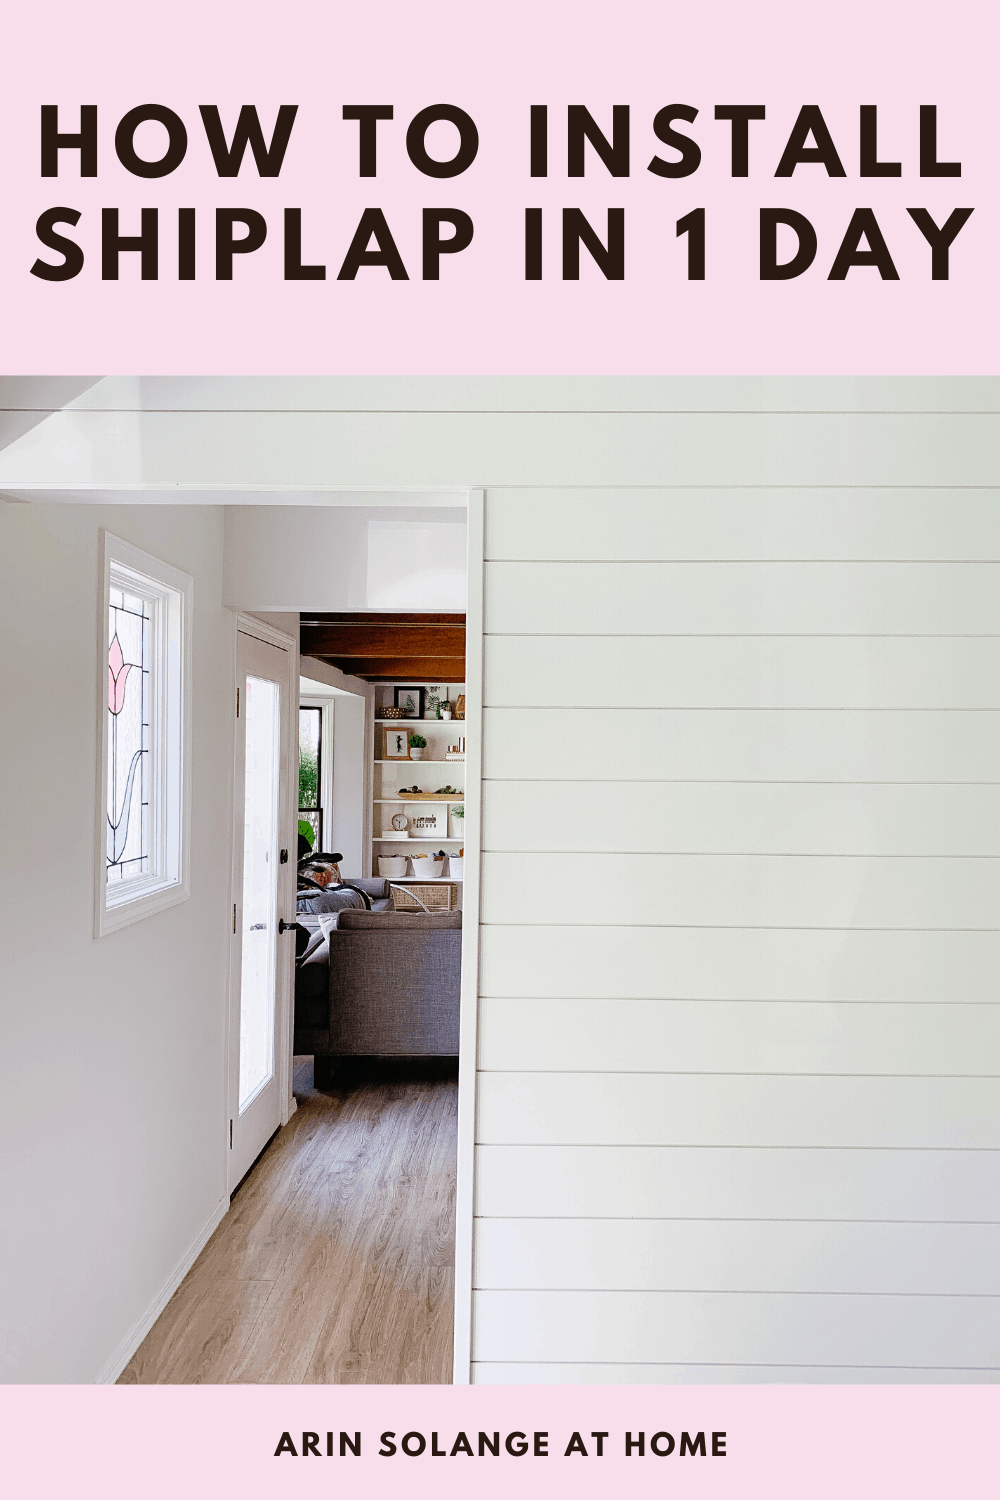
This past week my husband and I set out to turn a sort of awkward wall in our kitchen into something less boring by adding shiplap. In this post I am going to walk you through how to install shiplap, and what to do about things like corners. I will discuss what considerations I made when it came to selecting materials and more. It was a TRUE one day project, so if you are looking to transform a room this is a great choice!
This post may contain affiliate links – for more info read here
How to Install Shiplap – What you Need
Alright – I am not going to jump right into the installation process, because first and foremost you need to buy all of your materials. I am going to link to a few different options, as well as share what we personally used.
For us, the overall cost of the wall was roughly $100. The shiplap was on a small sale, and we already had all tools, and paint, so aside from the actual lumber we didn’t have to make any purchases for this wall! Some of the larger tools I will talk about can really add to the price of a project, but if you are thinking you will do more DIY’s in the future they can really become worth the cost.
Personally we many times will add one bigger tool to the cost of a project. We have found that the end outcome of DIY projects is typically MUCH better with better tools, so I would definitely consider doing that if it is in your budget. The nail gun is the real game changer on this particular DIY.
Materials
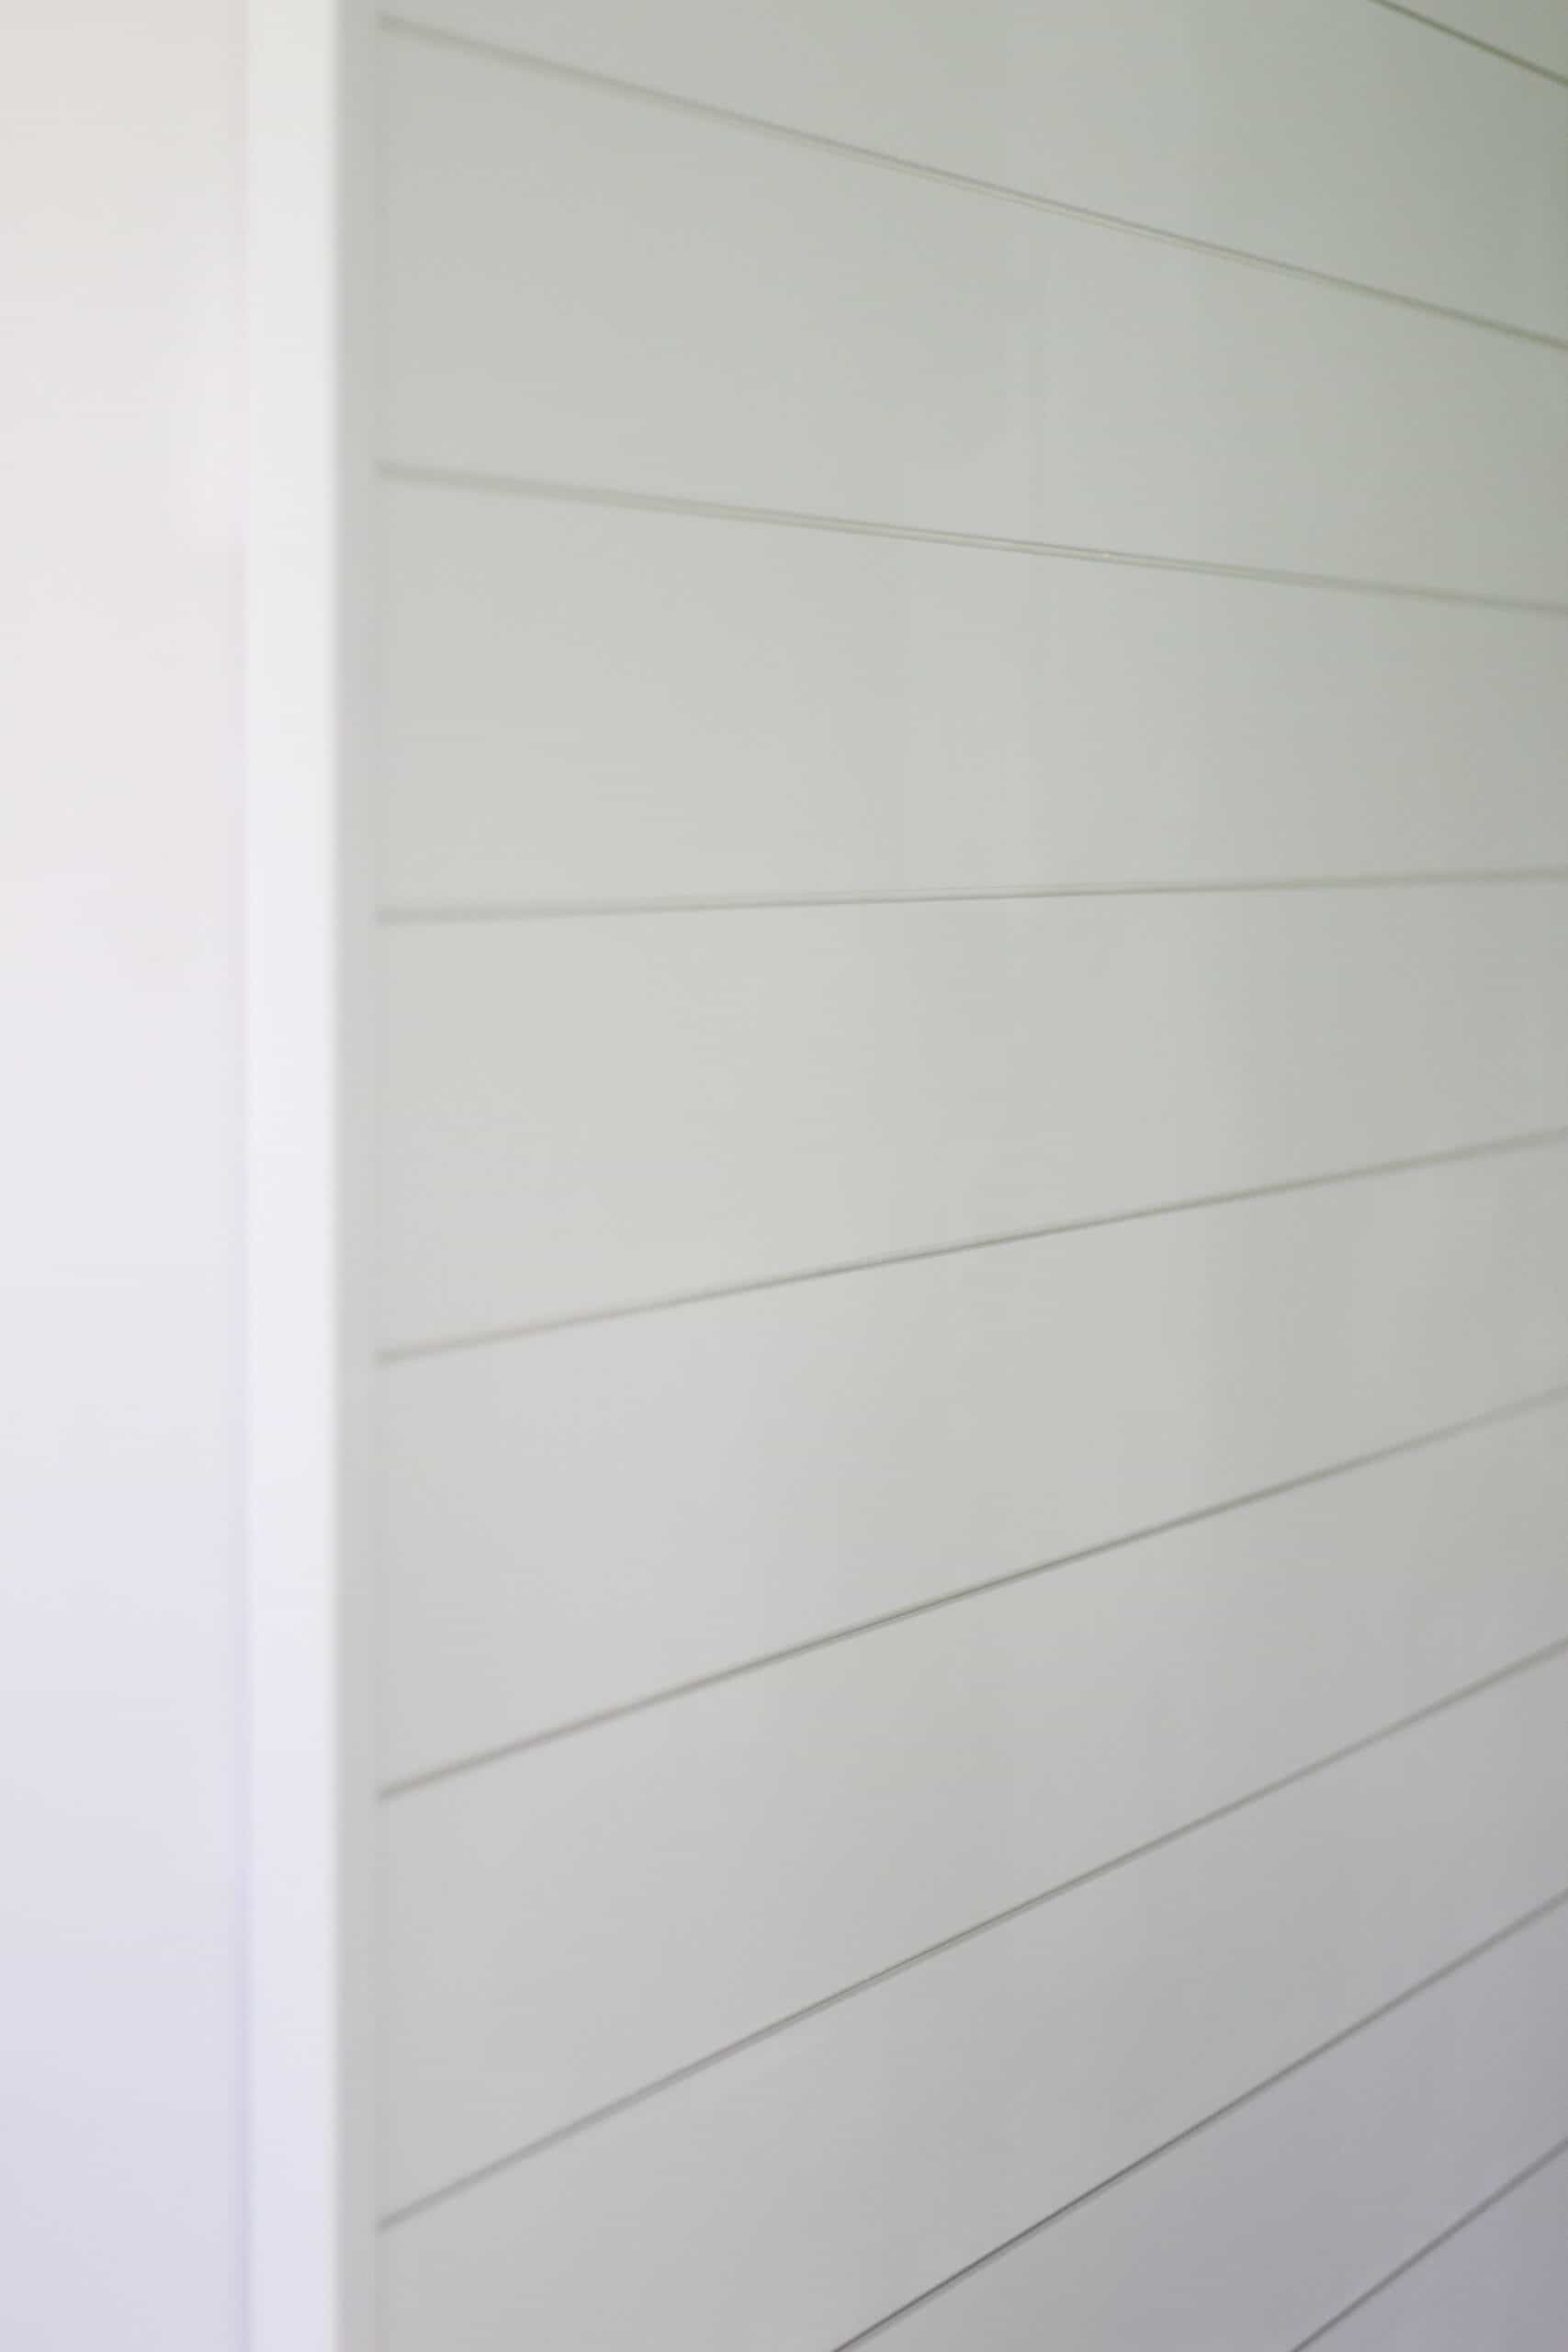
We personally went with an actual shiplap material for this wall. That means that the boards have lips that fit right into each other for perfect spacing. Because the wall isn’t huge, it was still affordable to go this route, and I am a fairly modern decorator, so I didn’t want to add any additional rustic charm.
There are less expensive methods using other materials. You can use plywood and cut it into strips and attach it with spacers, you can use trim, or other lumber, and a multitude of other options, but for the sake of this blog post I will only be sharing HOW TO INSTALL SHIPLAP. The other options in some cases are much more affordable, but also a lot more work. With 4 little ones at home easy was our friend.
We personally went horizontal with ours, but you can go vertical. Adding vertical can be a great way to give the illusion of higher ceilings if you decide to go that route!
First you need to measure your wall so you know how much material you will need. Our wall was 7 feet long for the majority, with a small area at the top that was 10 feet long. We went with a brand of shiplap that comes in both 8 foot boards and 12 foot boards. We were able to order only 2 – 12 foot boards, and the rest 8 foot.
We personally ordered ours from Lowes, but Home Depot has an almost identical product for a similar price available as well, so I will link to both pending what store is more convenient for you.
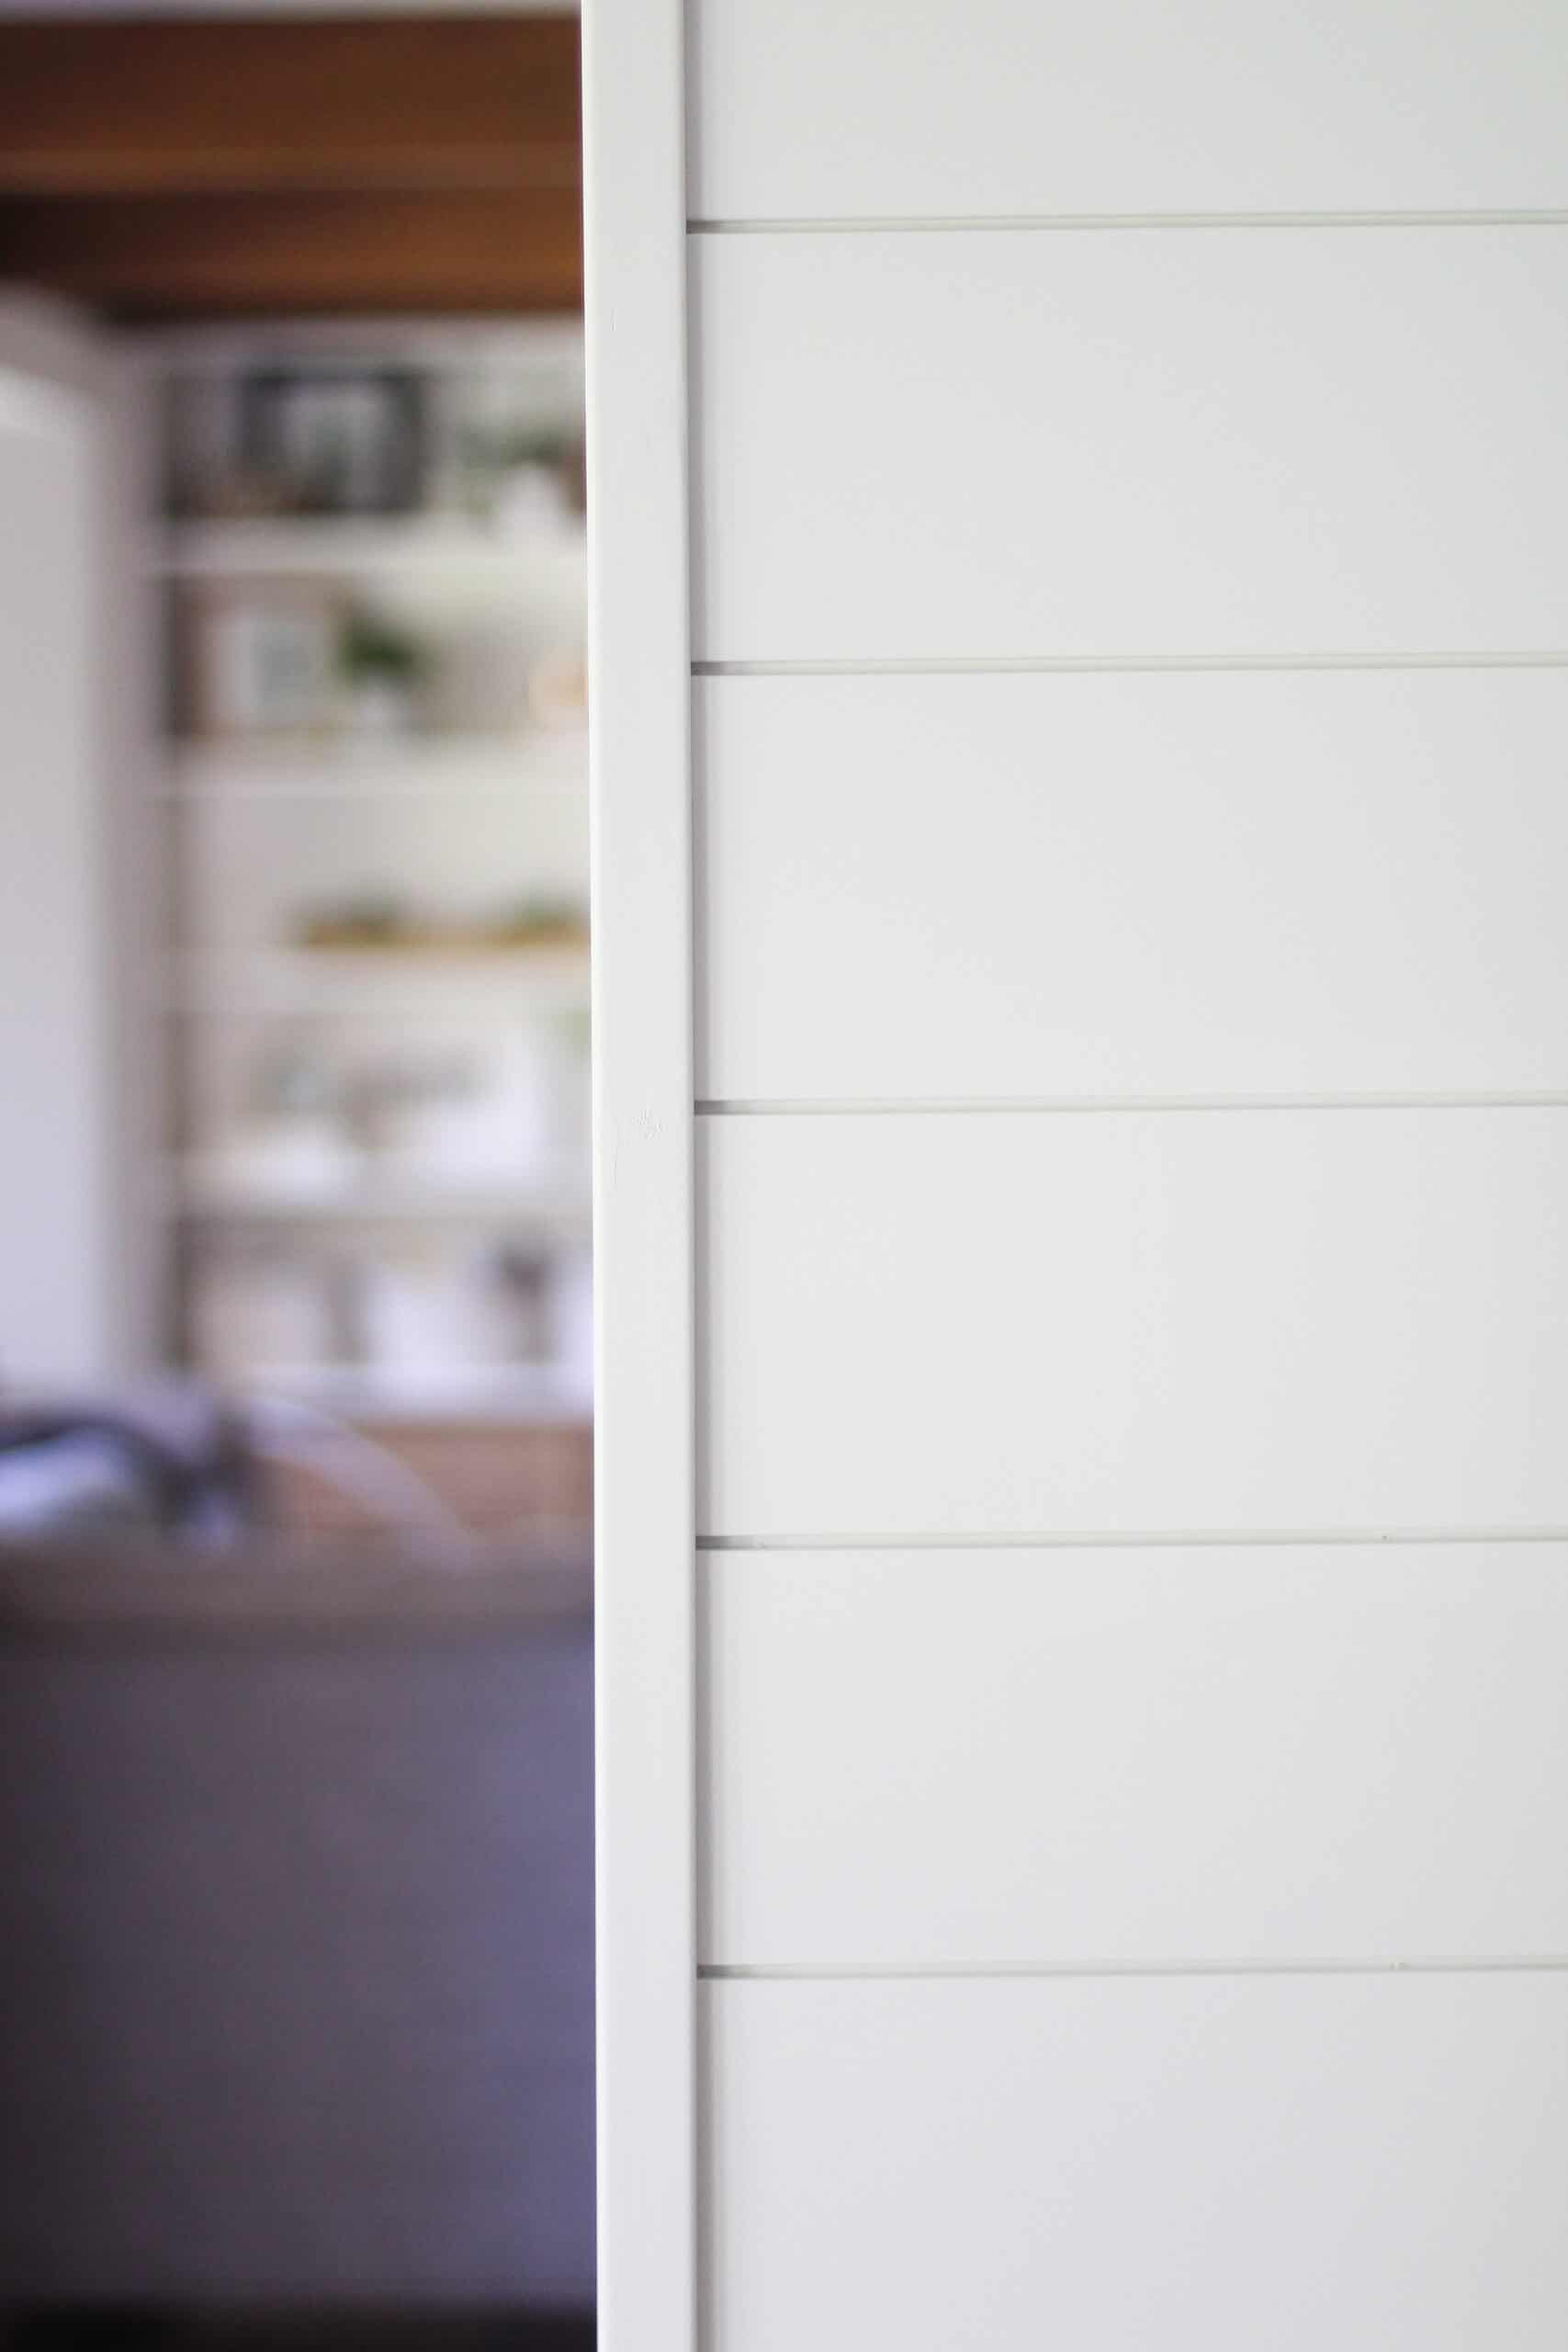
The only other lumber material you need is if you have exposed corners like we do. The way shiplap looks on the end is not a finished look, so we added these corner pieces to make things look clean and finished. You need enough of this to cover the height of any exposed corners.
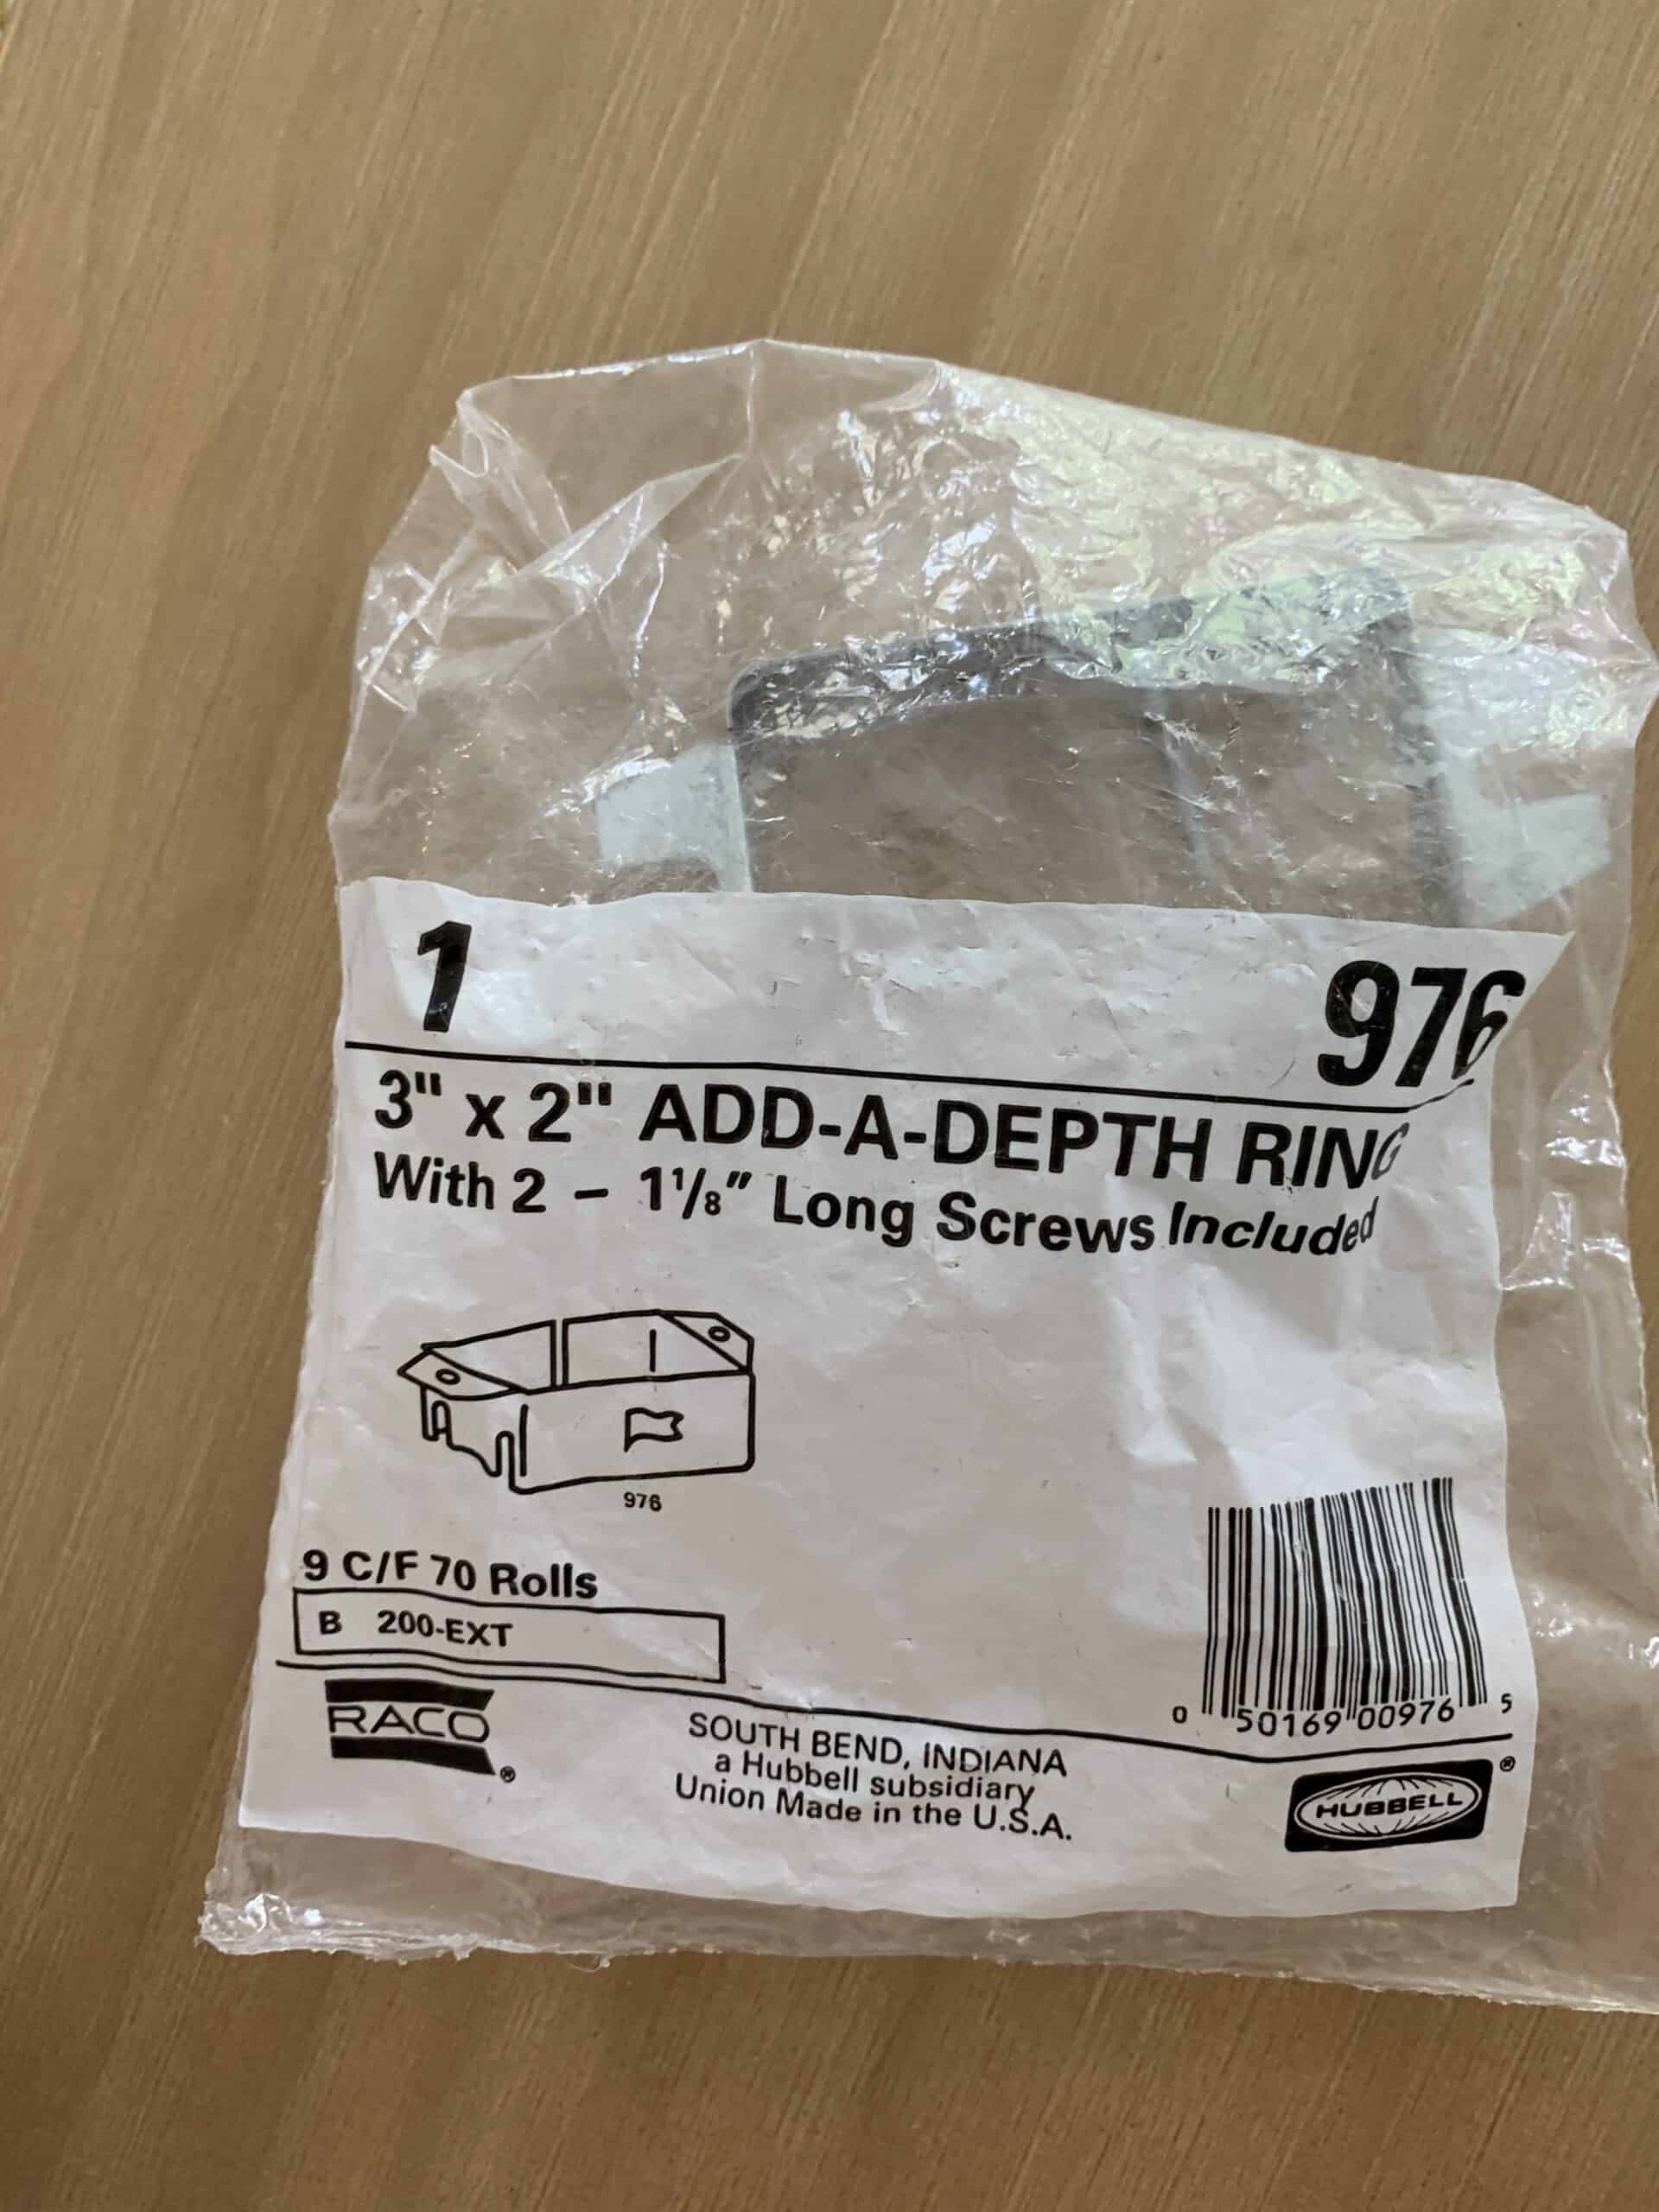
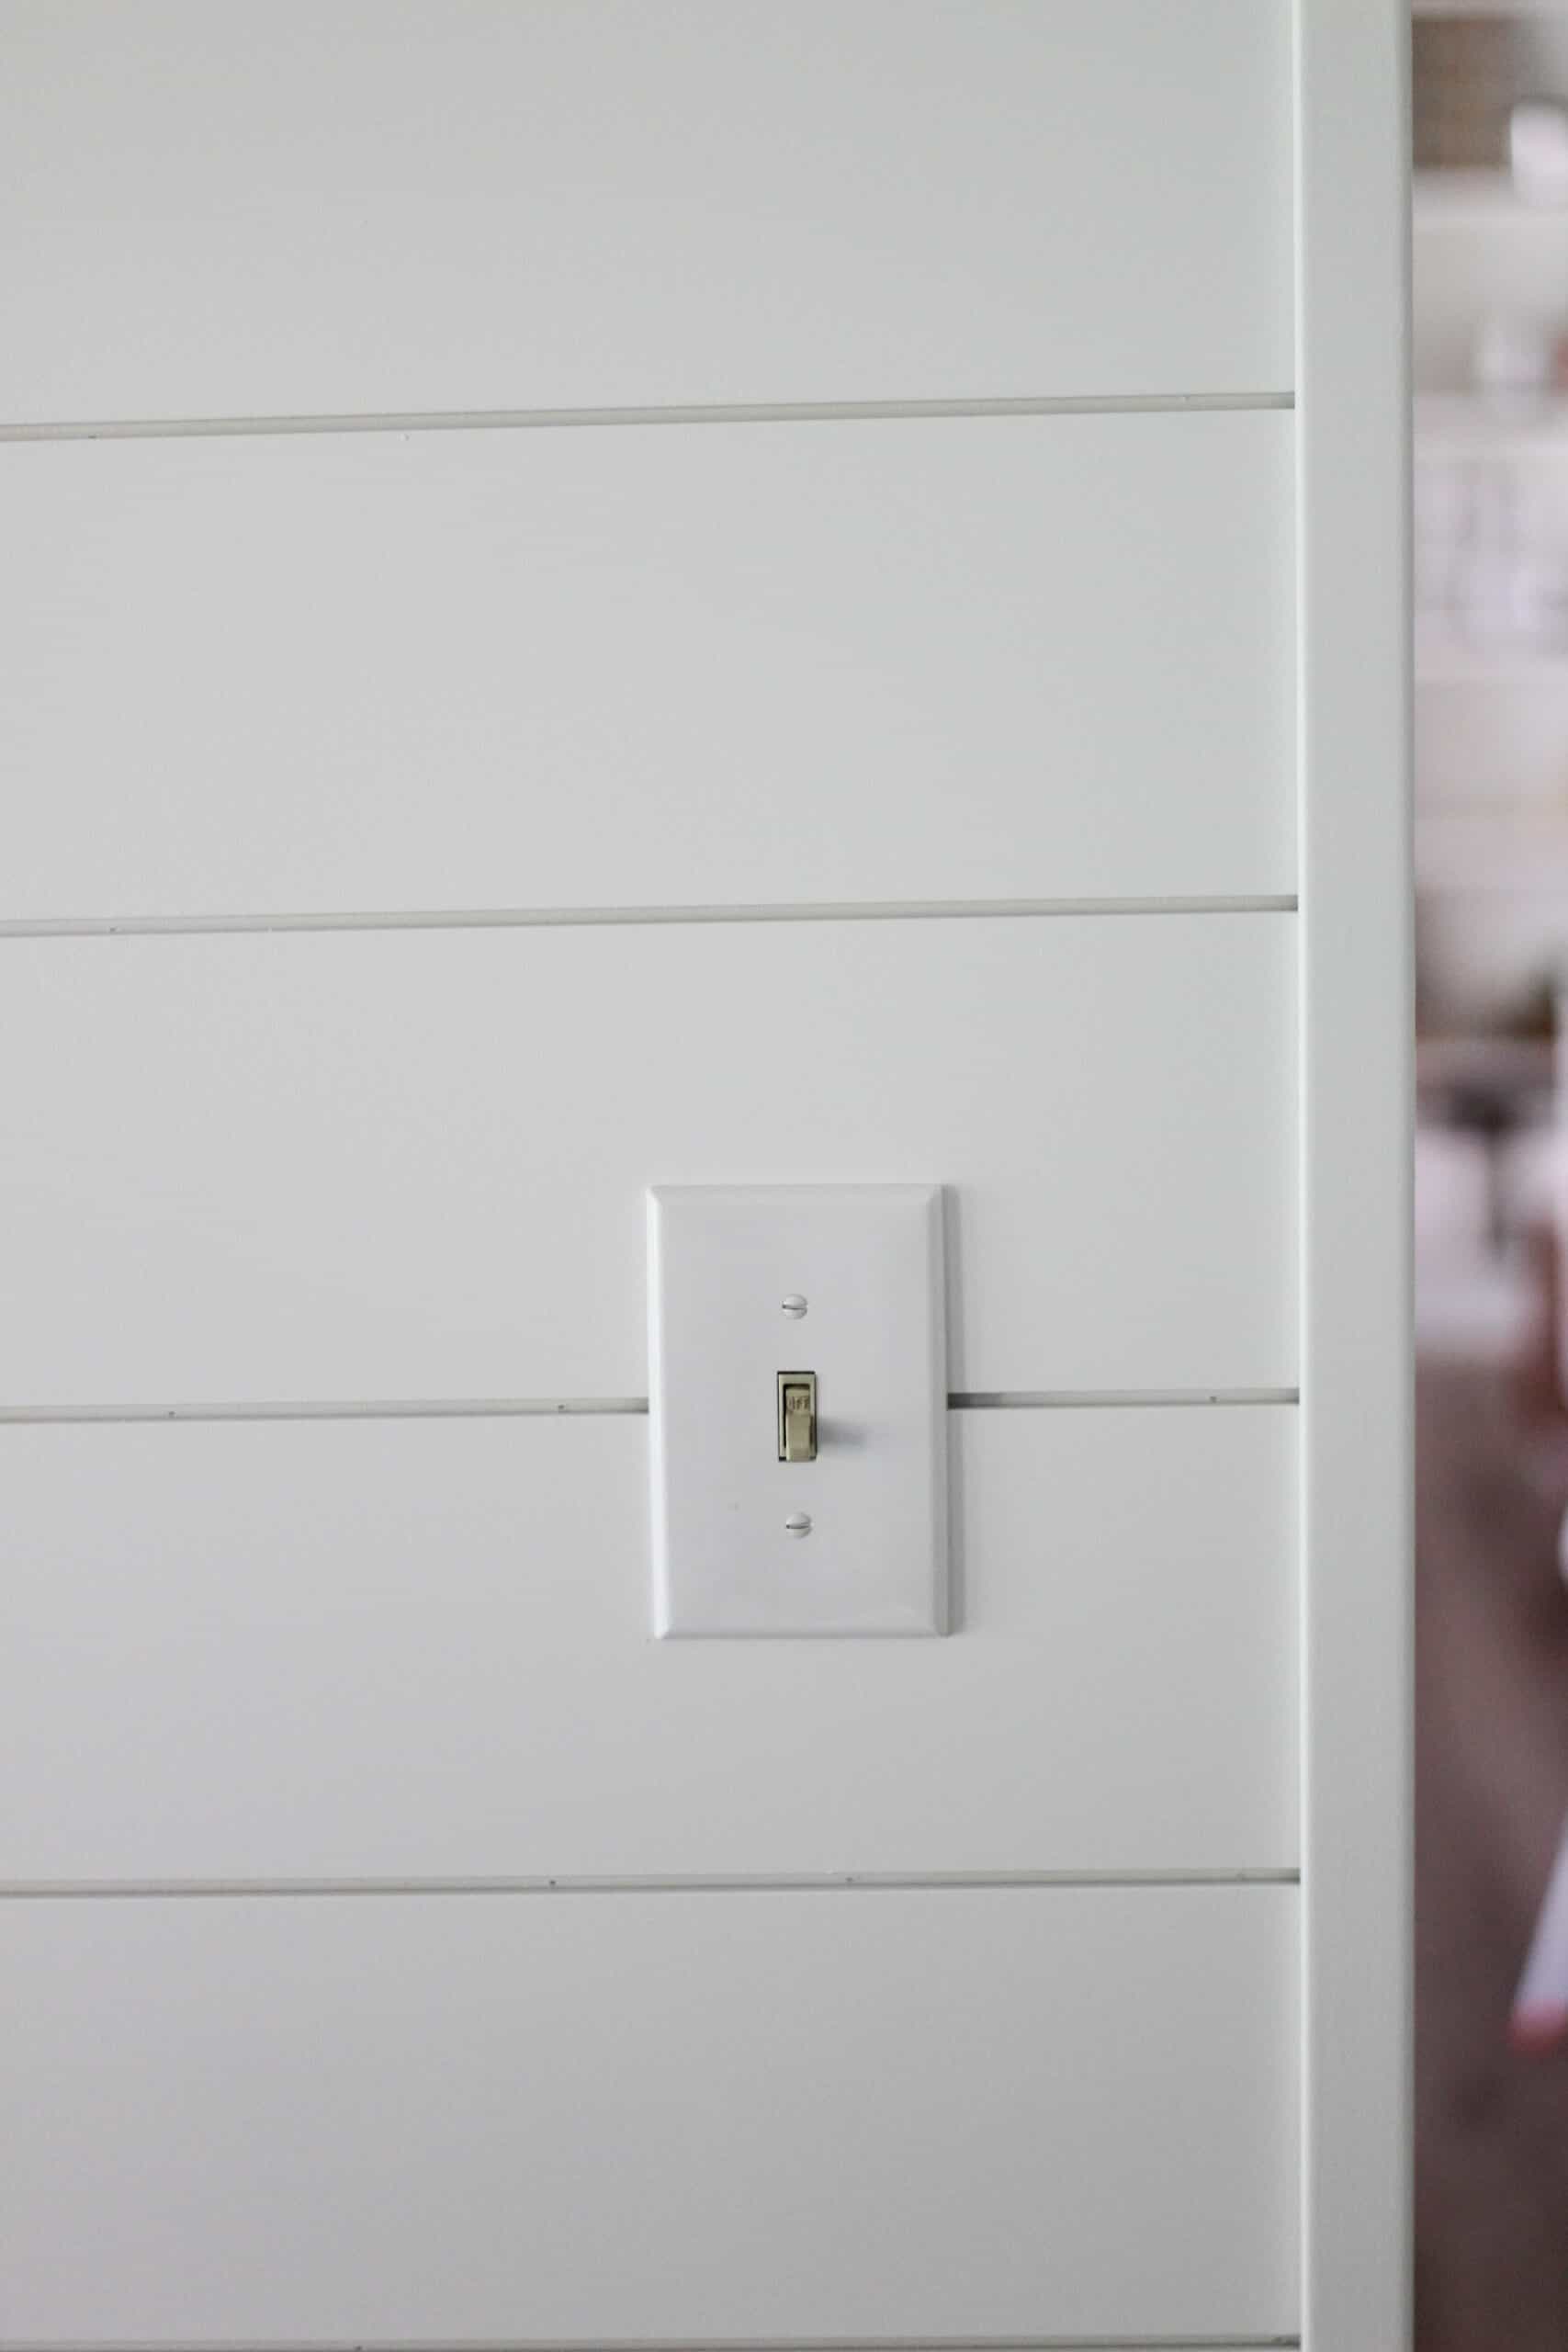
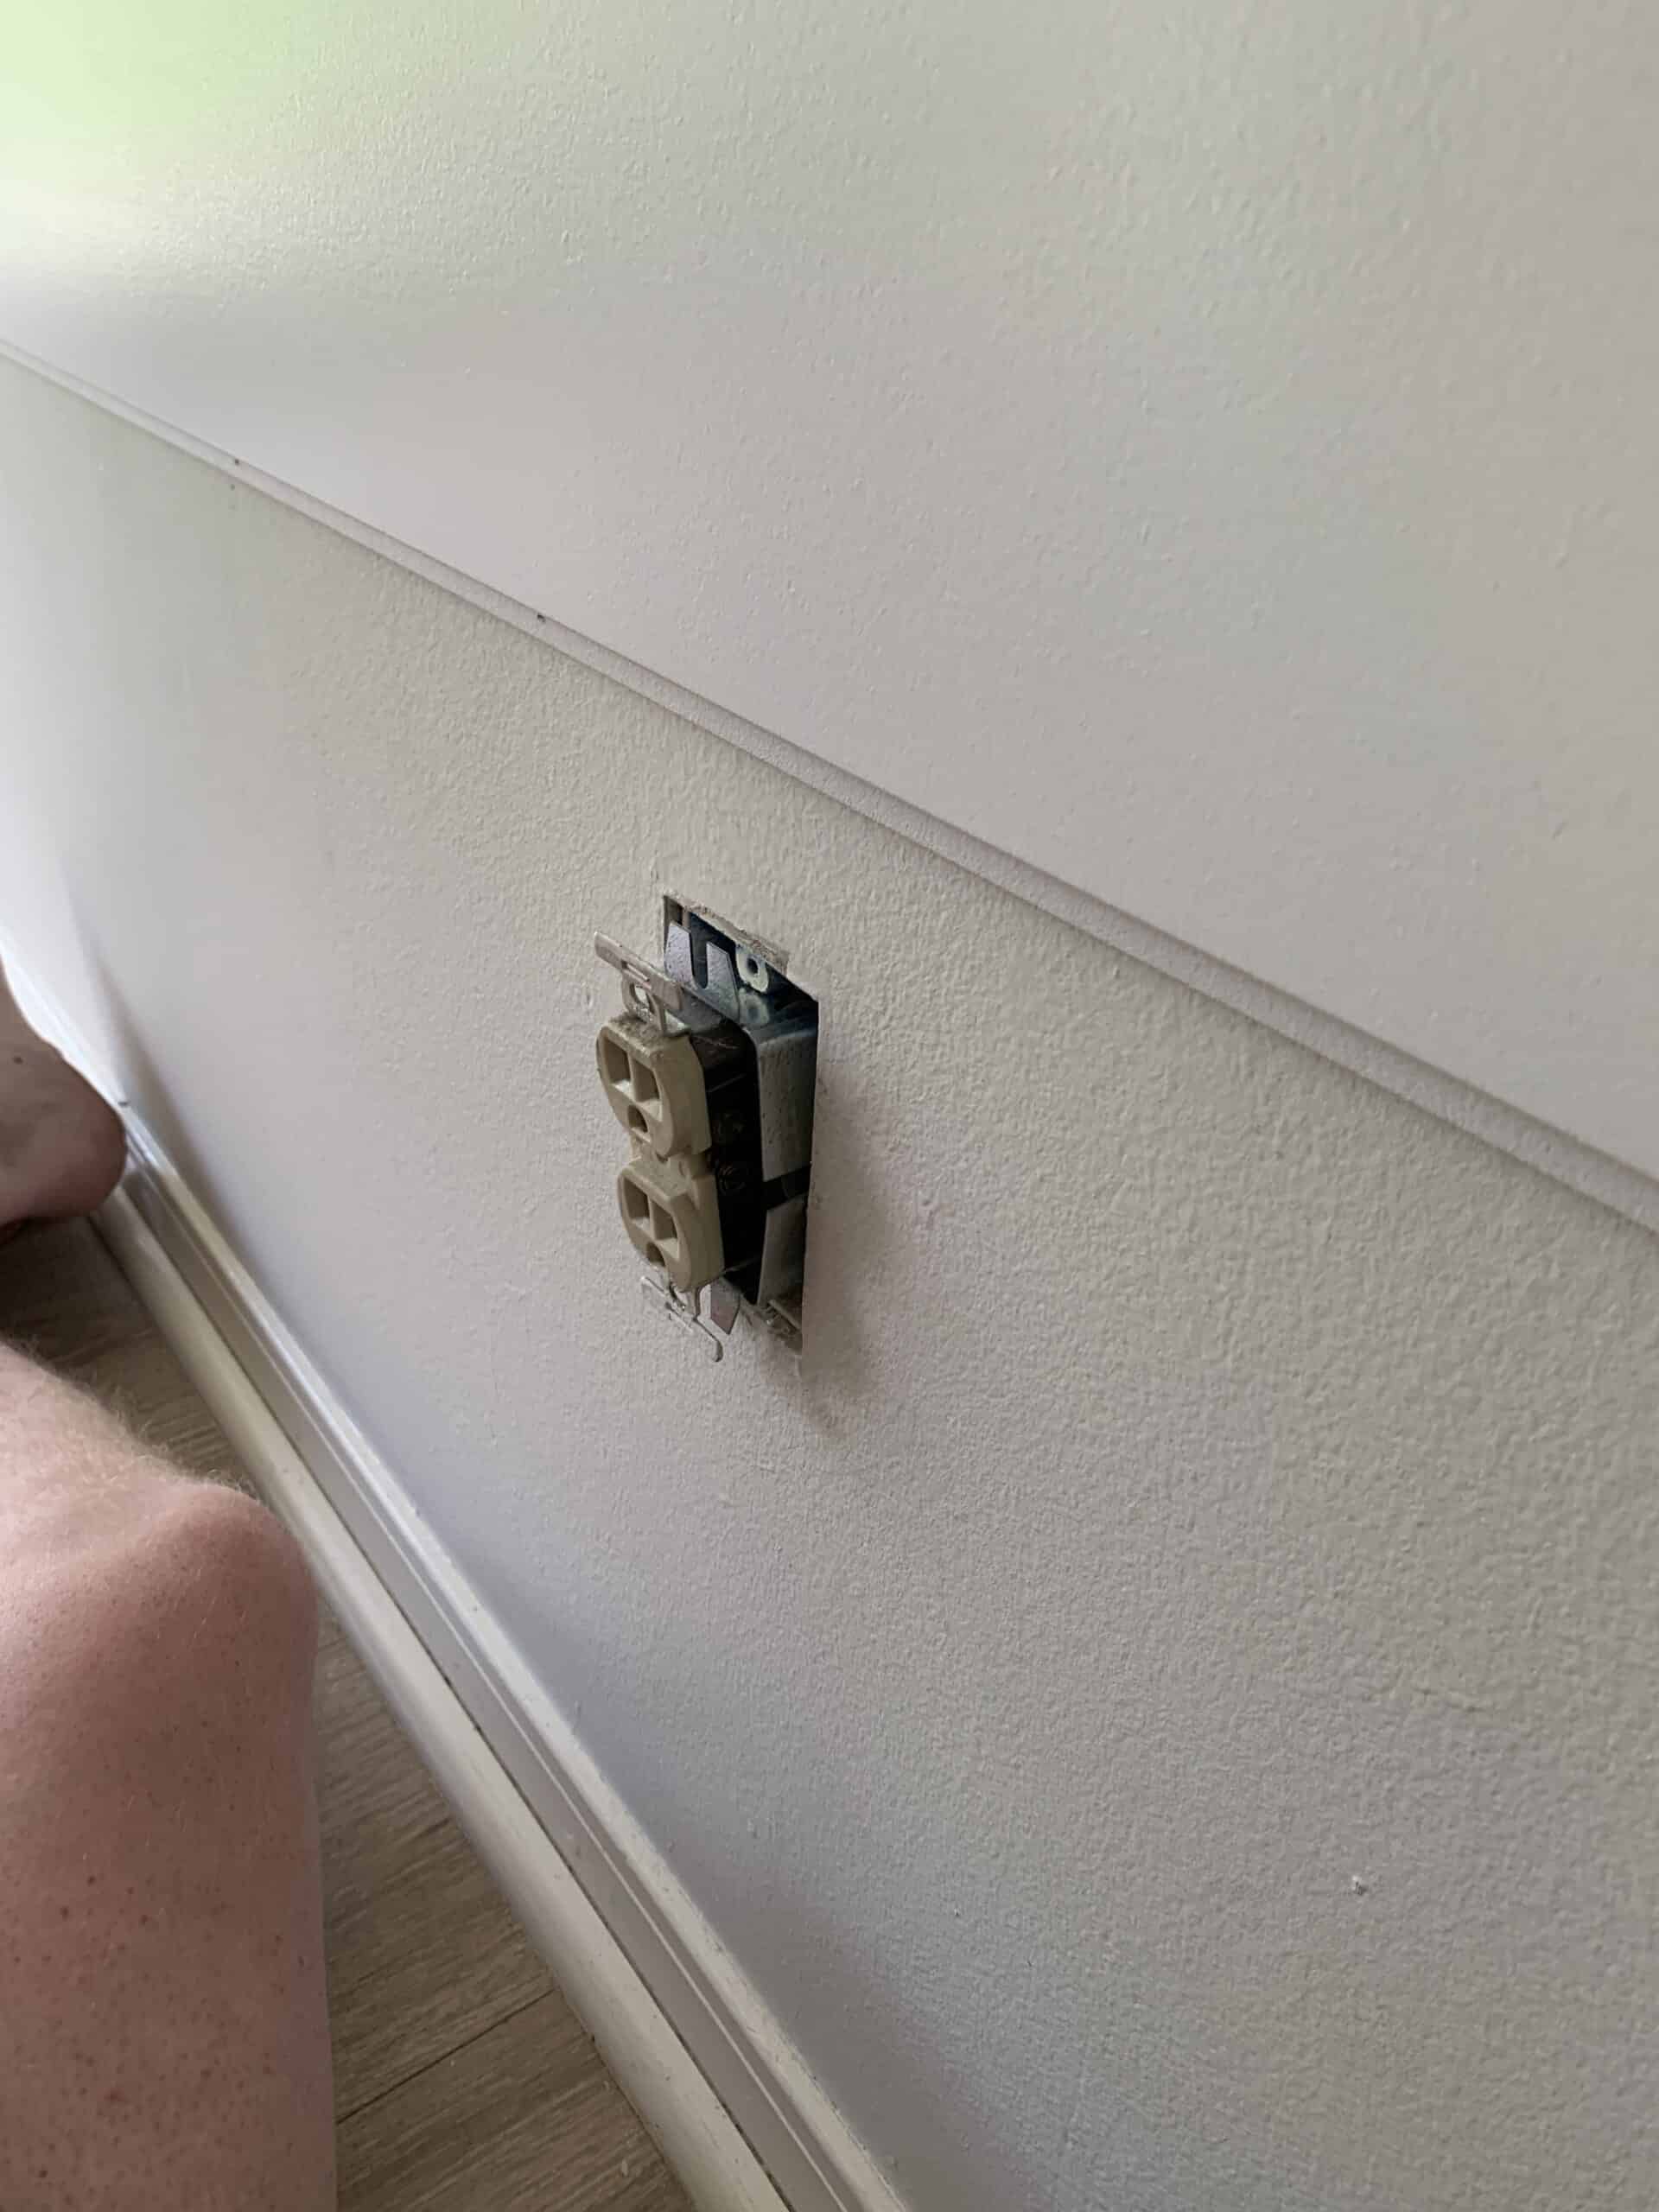
Outlet Extender – If you have outlets or light switches in the wall you will need outlet extenders to bring them forward. We will walk you though this in my Instagram stories, but it was a pretty simple process.
Paintable Caulk – Home Depot
Spackle – Home Depot
Sandpaper – Home Depot
Tools
As always – there are easier ways to do projects with nicer tools that tend to leave a better end result, and there are ways to do it without. I will walk you through the options when it comes time for install, but for the time being I will let you know if it is a total necessity or not.
Nail Gun – This is not a NEED, but without it the project will take a lot longer, and will not be quite as seamless. It is possible to do this with a hammer and nails tho.
Table Saw – We personally used a table saw to cut our ship lap. I think this is a project that could be done with a circular saw if you have one, but the table saw is just much easier. I will link to the table saw and circular saw we have.
Jigsaw – If you followed along in my stories you know that our jigsaw we ordered didn’t come with a battery, SO we were able to do our wall without it. BUT only because neither outlet/lightswitch was fully in one board. had it been in one board we would have needed the jigsaw. We also would love loved to have had one to do ours, but due to the stay at home order made due with what we had. I would say it is HIGHLY recommended, but I will talk to you about how my husband did it without in the how to portion. BUY AT Home Depot
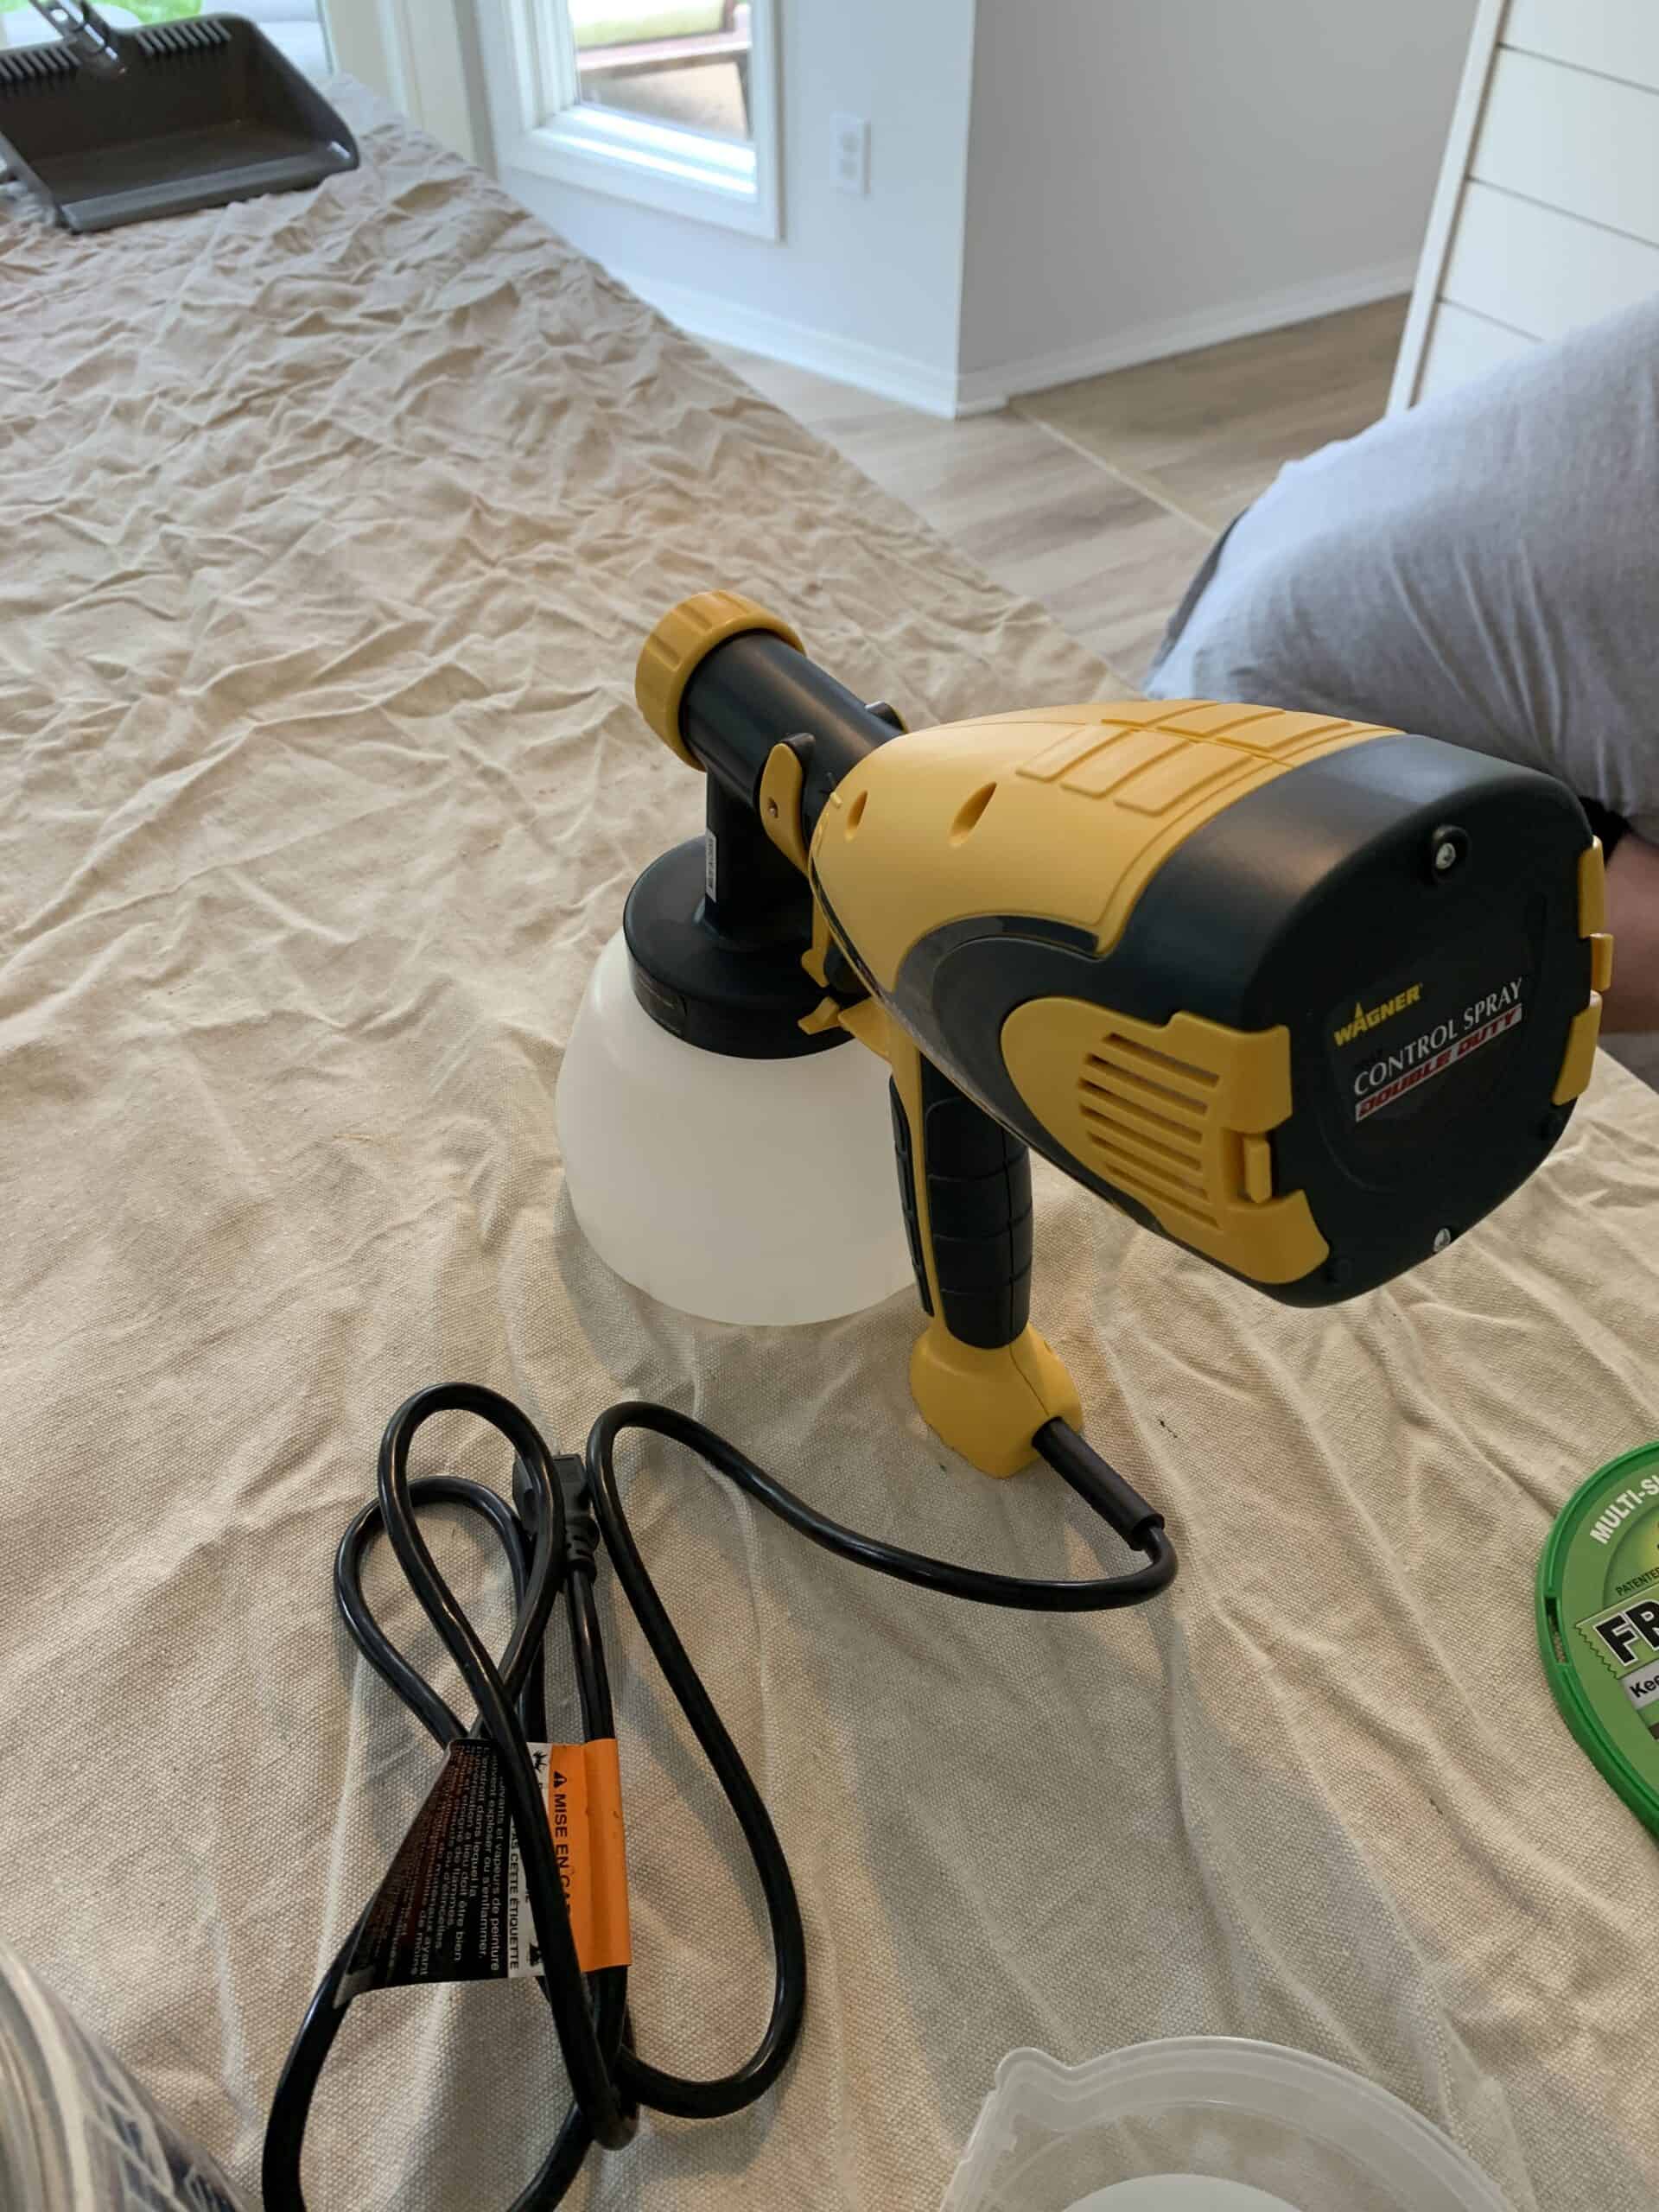
Paint Sprayer – We also used a paint sprayer to paint our wall when it was done. You can hand paint it, but the sprayer made it much faster with a better finish. Disclaimer – we tried a new paint sprayer after our old one broke, and I personally preferred the old one, but will link to both with perks to each per my husband who uses it.
Previous Paint Sprayer (Preferred by me) – This one has a harder clean up of the nozzle and such, and is harder to fill, but I do think the overall coverage is better with this paint sprayer, and you don’t have to thin the paint! – SOLD ON AMAZON HERE, OR Home Depot HERE
Current Paint sprayer – This one was easier clean up in my husbands opinion. You do have to thin the paint tho, and I didn’t think the coverage was as great with one coat. – HOME DEPOT
Small Tools
You will also need – Some tools you likely have on hand
Screw Driver for Outlets | Measuring Tape | Level (possibly)
Shop all Items Below
How to Install
Now that you have everything you need it is time to actually hang your ship lap. This is honestly easier than you think. I will say that although it could be done alone this is a project more much suited to two people.
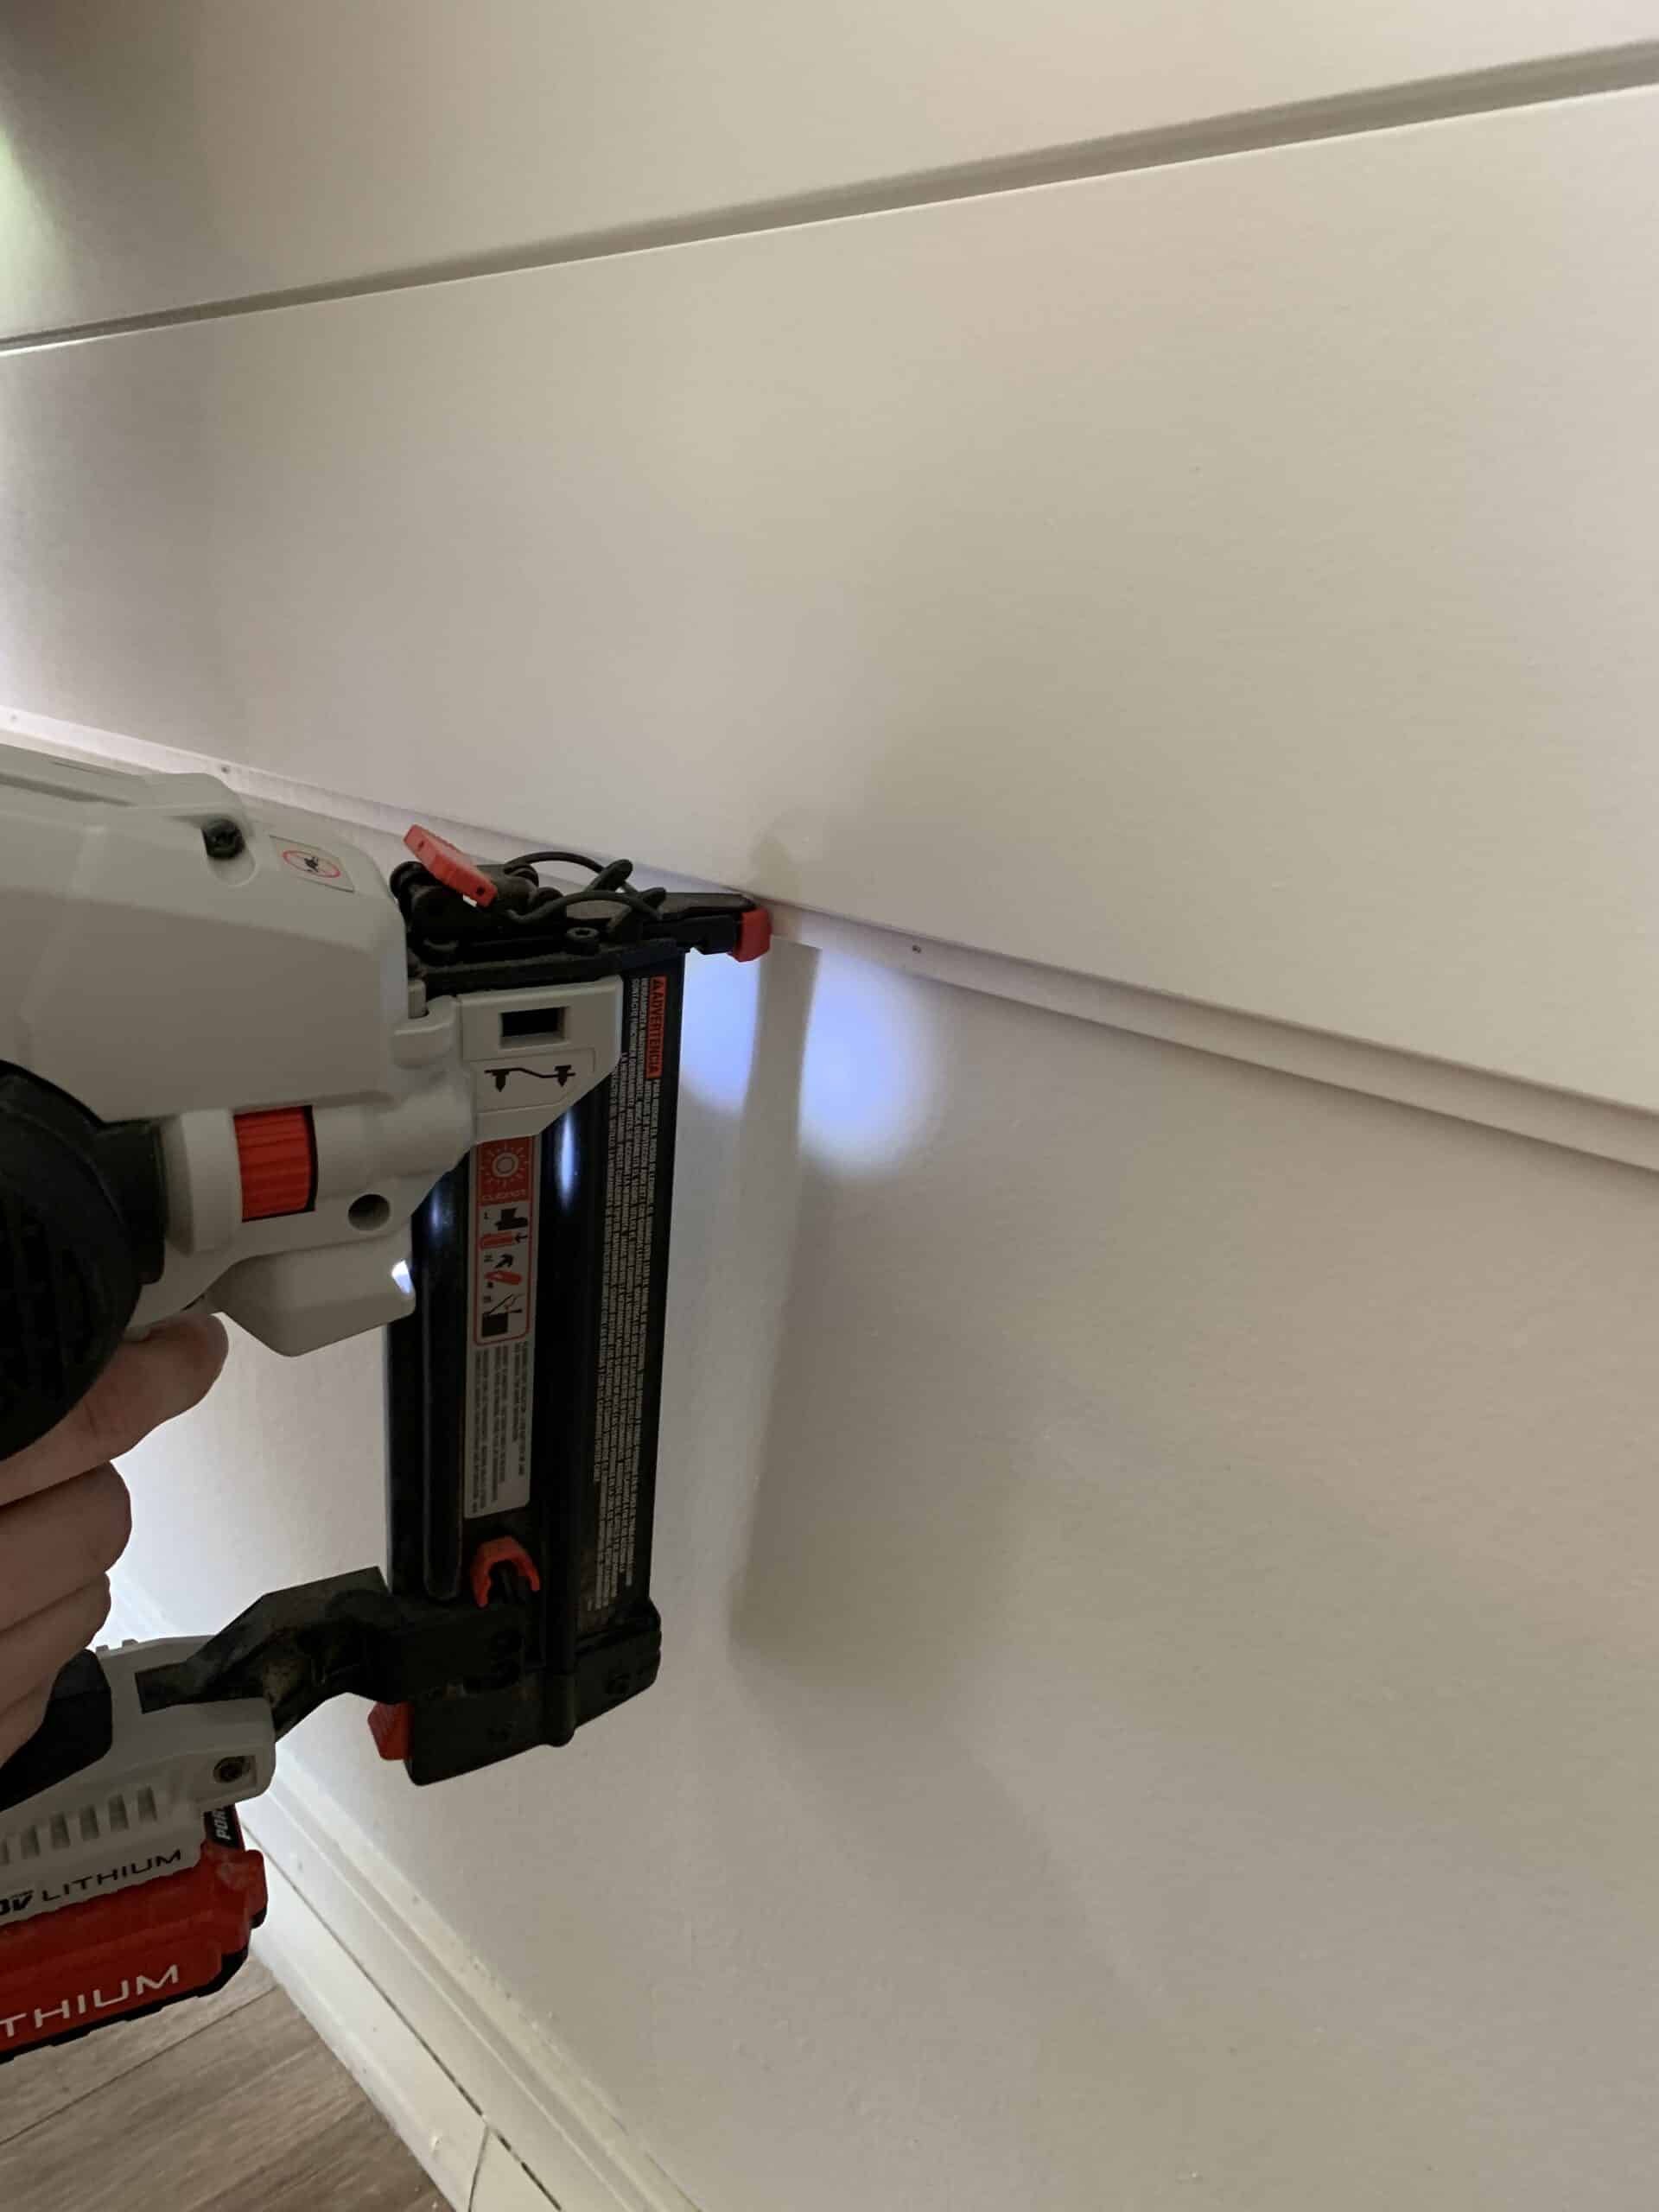
HANGING BOARDS – Measure your length for your board or boards. We did them a few at a time as to not accidentally be off with a measurement and waste all the ship lap. You will start with your TOP piece. So for us, we started with our 2 12-foot long boards. They needed to be cut to 10 feet long. standing on stools we started in one corner holding the shiplap tight against the ceiling or moulding use your nail gun and nail into the small lip on the bottom side of the shiplap board. Move along the board and nail into the small lip from one end other. The only thing to remember is to make sure you’re keeping it tight against the ceiling.
If you have an exposed corner like we did make sure that your boards don’t overhang the corner at all. If they are slightly short the corner piece will actually hide that, but they can’t hang over.
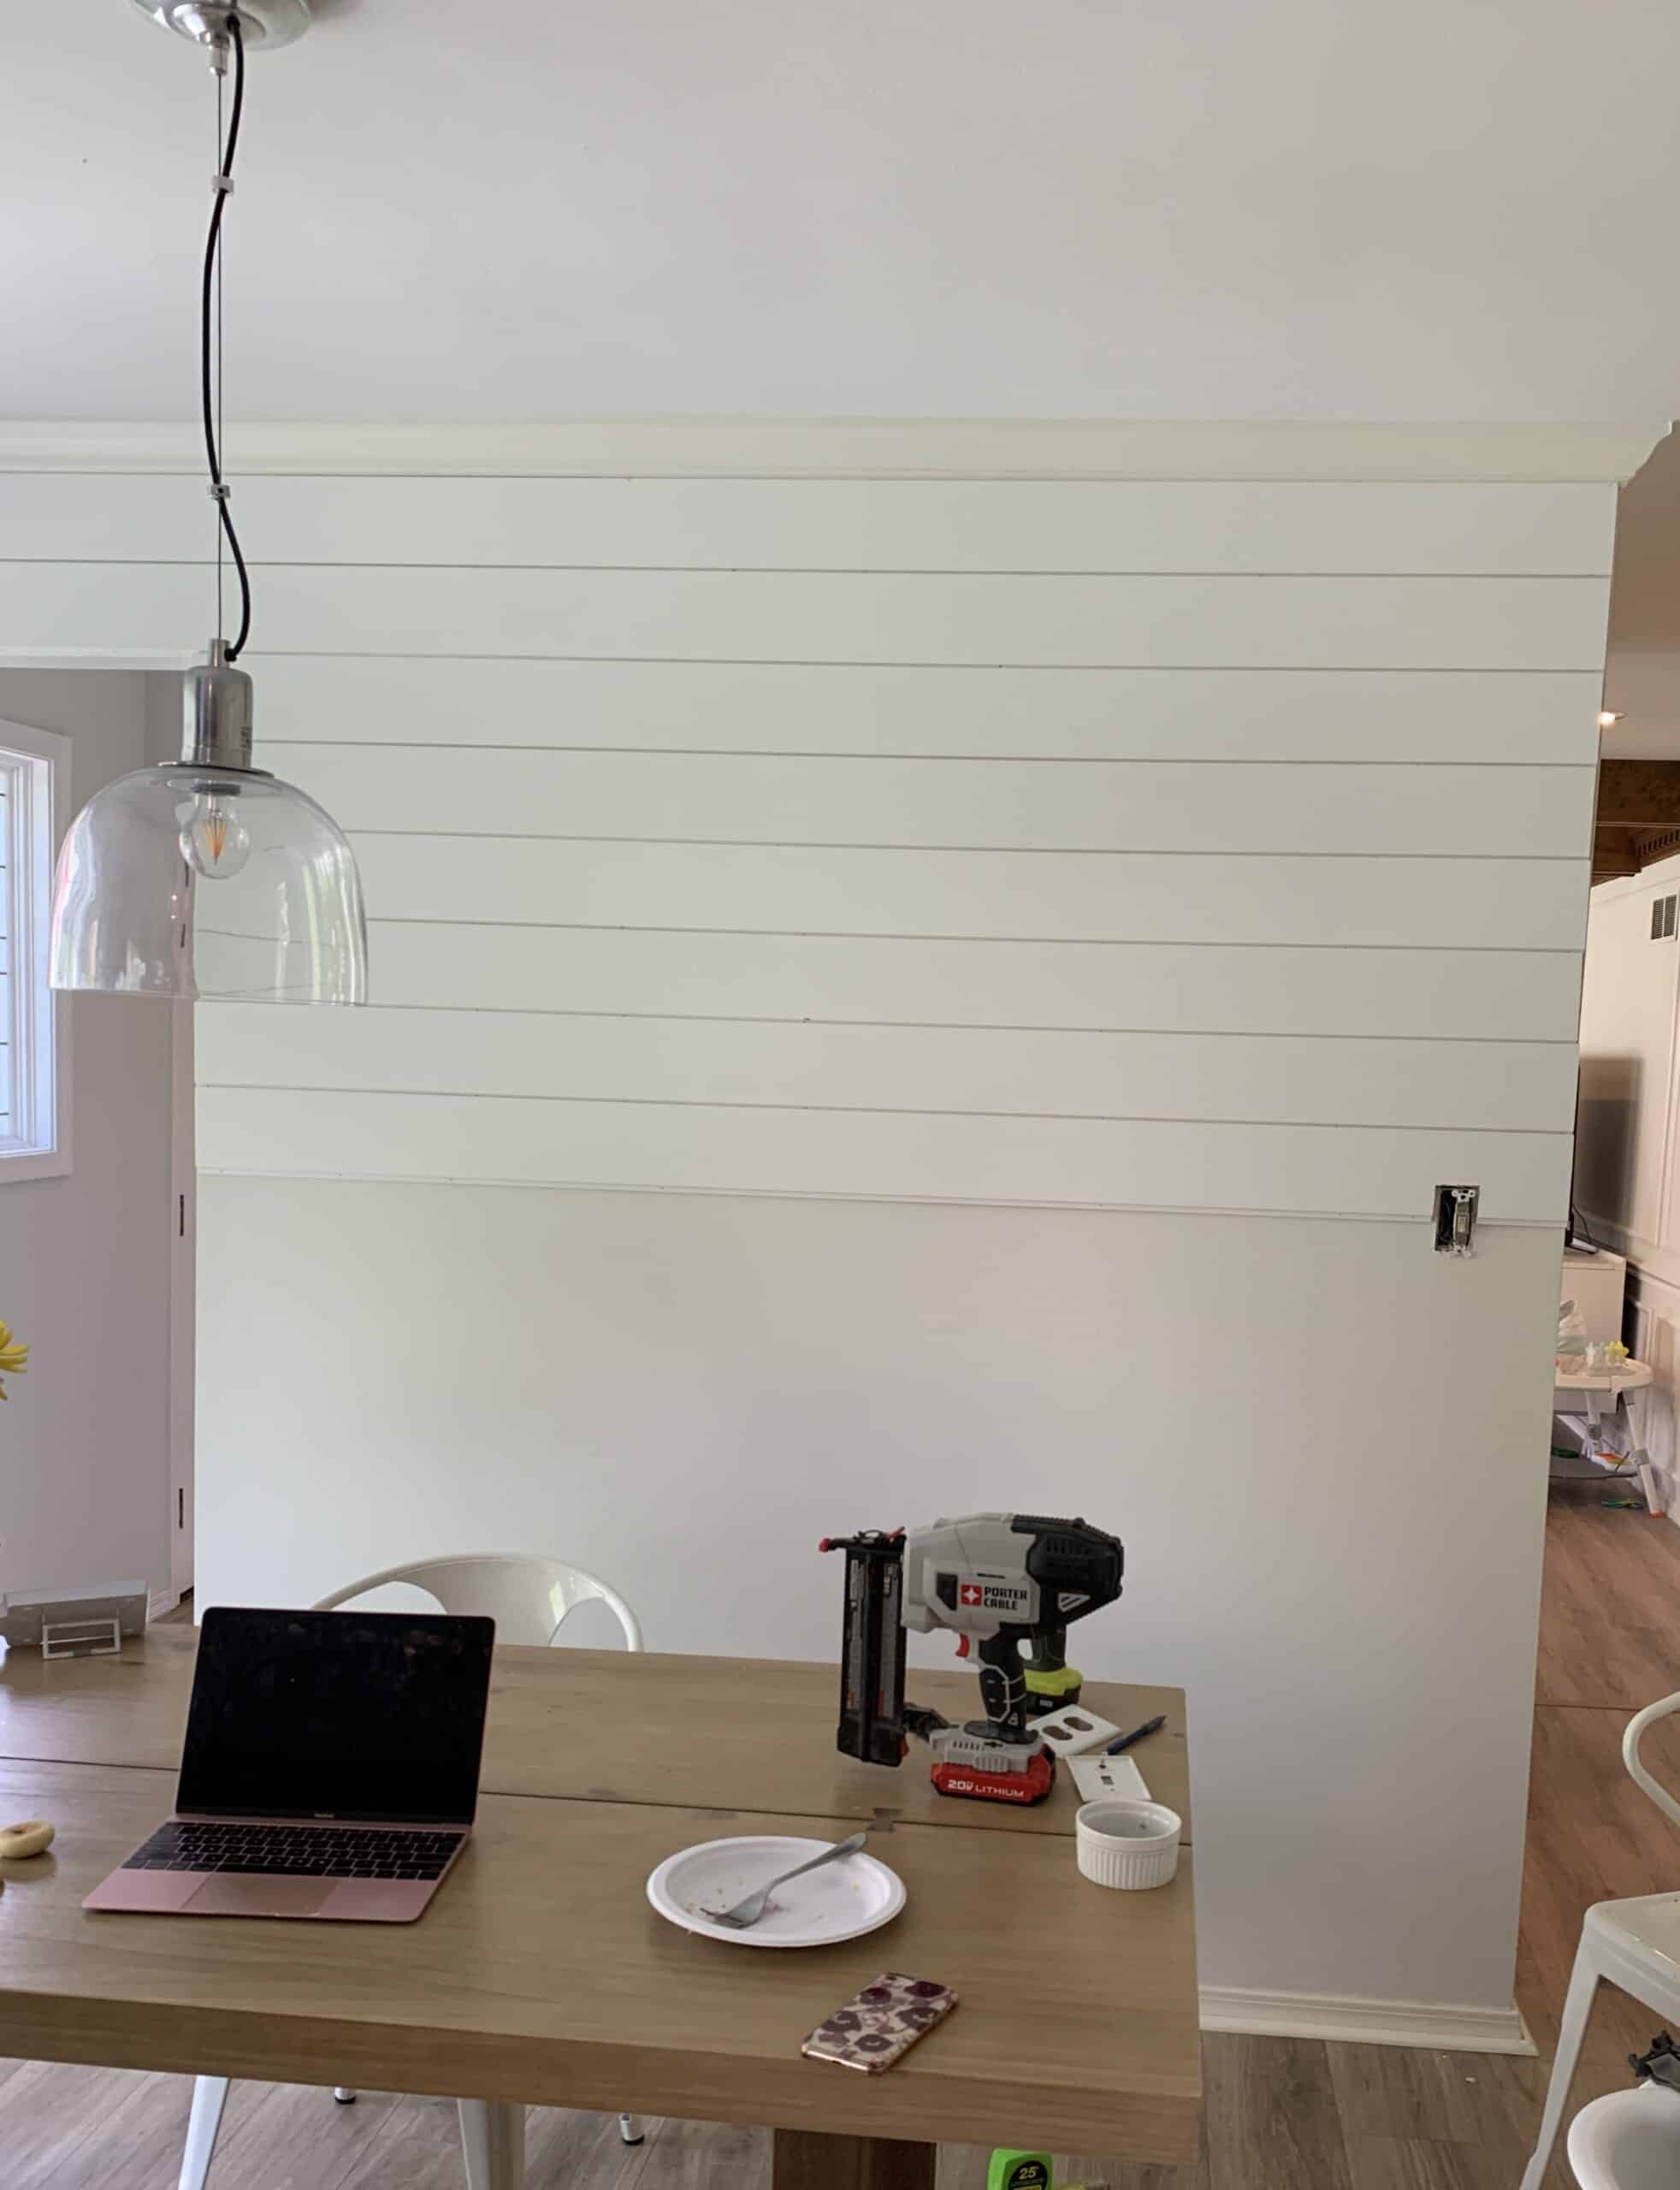
You will continue to do this for all boards, with no change until you get to a light switch or outlet.
This literally continues on all the way to the floor. We switched out our trim (because that is on the list of things to do down the road) and it fit perfectly, but you may have to cut your bottom board.
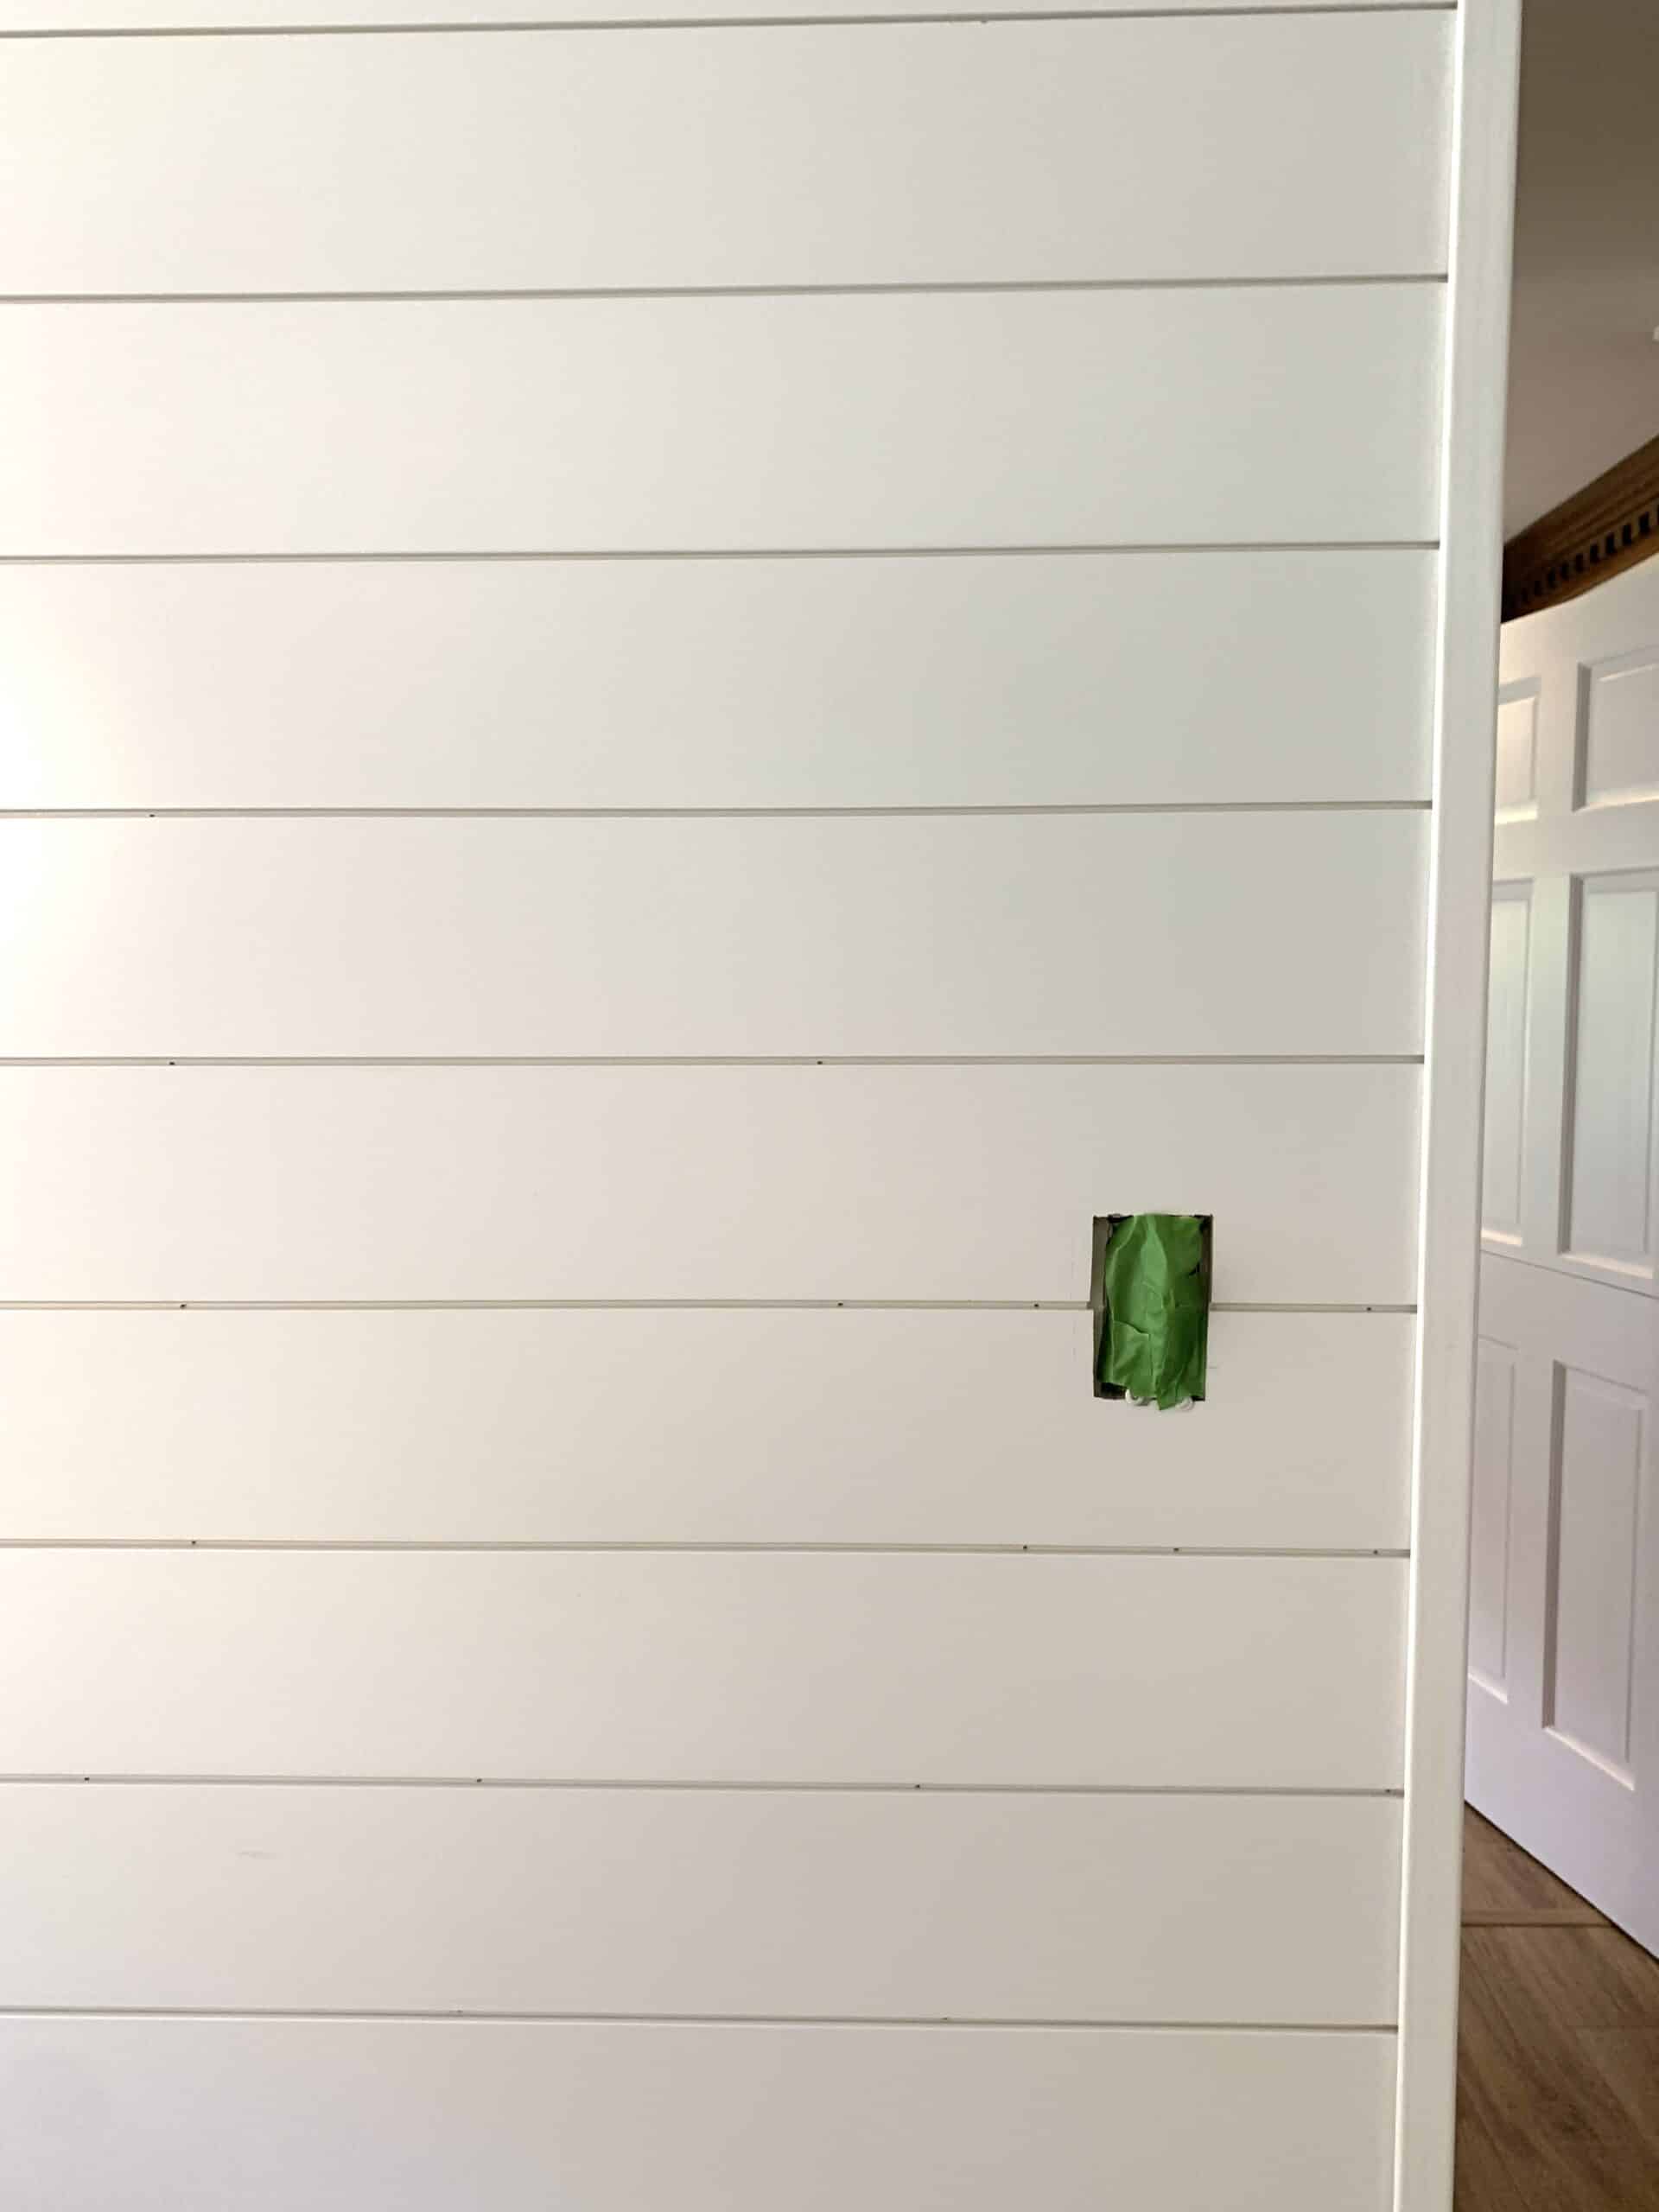
CUTTING FOR OUTLETS AND LIGHT SWITCHES – This part takes time and patience. Personally this is how we did it. For our light switch as an example the first board that was going to be cut would cover the top half of the light switch – this means we needed to cut a space out of the BOTTOM side of the board we were working with.
We measured on the wall to see how far in from the end of the board the top two corners would be on the board. We then marked those two measurements and drilled a hole into each measurement.
Sam then took the boards to the table saw and CAREFULLY and slowly cut to each of those holes, then cut up to that same top line over and over again until the small rectangle was cut out. This would have been much easier with a jigsaw, but the measurement process is the same.
One thing to note – if your outlet hole is just slightly too big there are oversized outlet and light switch covers. So don’t panic if your hole is SLIGHTLY off – there is a 1 dollar fix that looks exactly the same.
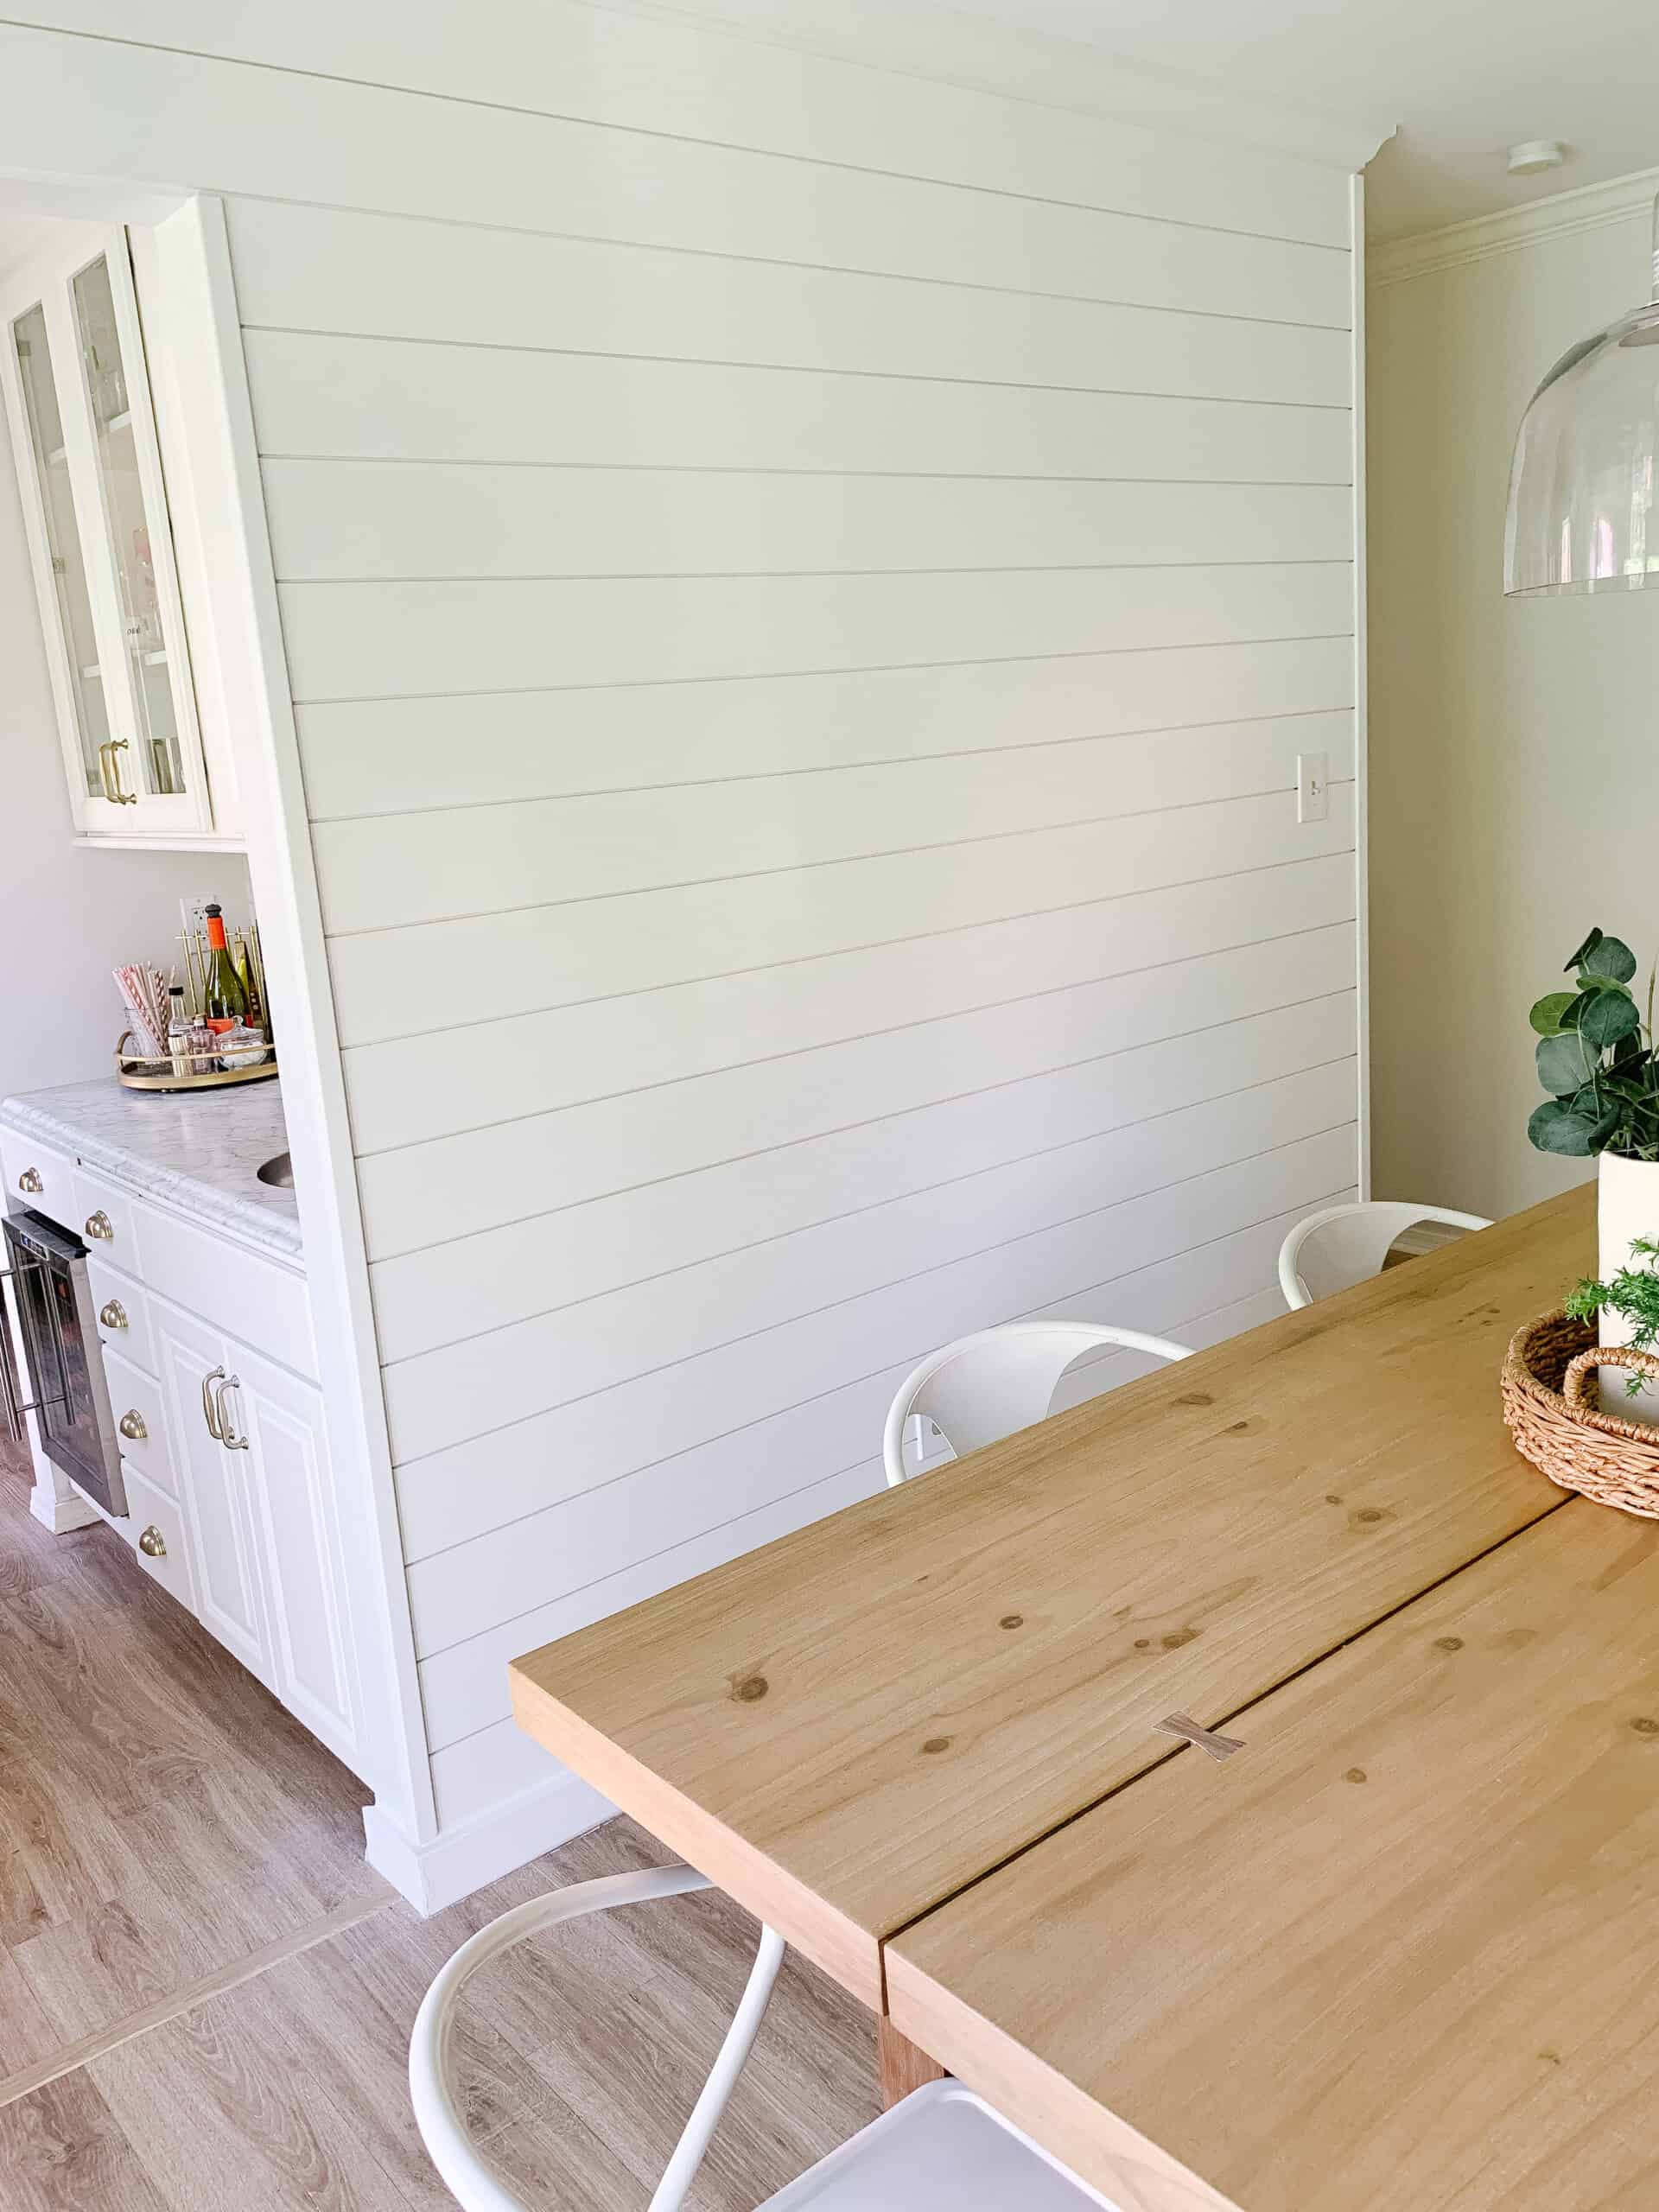
CORNER COVER – If you have an exposed corner and are using the corner cover you will simple measure the length from your baseboard to your ceiling or moulding and cap your corner and use your nail gun to put that on.
CAULK AND SPACKLE – Once you wall is done you need to do some clean up work to get ready for paint. Any seams along corners need paintable caulk. We also did the seam to our baseboards, and the seam on the NON SHIPLAPPED wall where the corner extender was. We Spackled the few nail holes on the corner pieces as well.
If you only nailed into the inner lips of the shiplap the step of caulking and spackling is really simple. Once the sparkle is dry sand that off and you’re ready to paint.
ADDING OUTLET EXTENDERS – You will need to add outlet extenders to the outlets and light switches on the wall. I am not going to tell you how to do that here, but will show how in my Instagram highlight ‘shiplap’ incase you want to see it done. (Otherwise I will leave it to you to google to find a more professional source on how to).
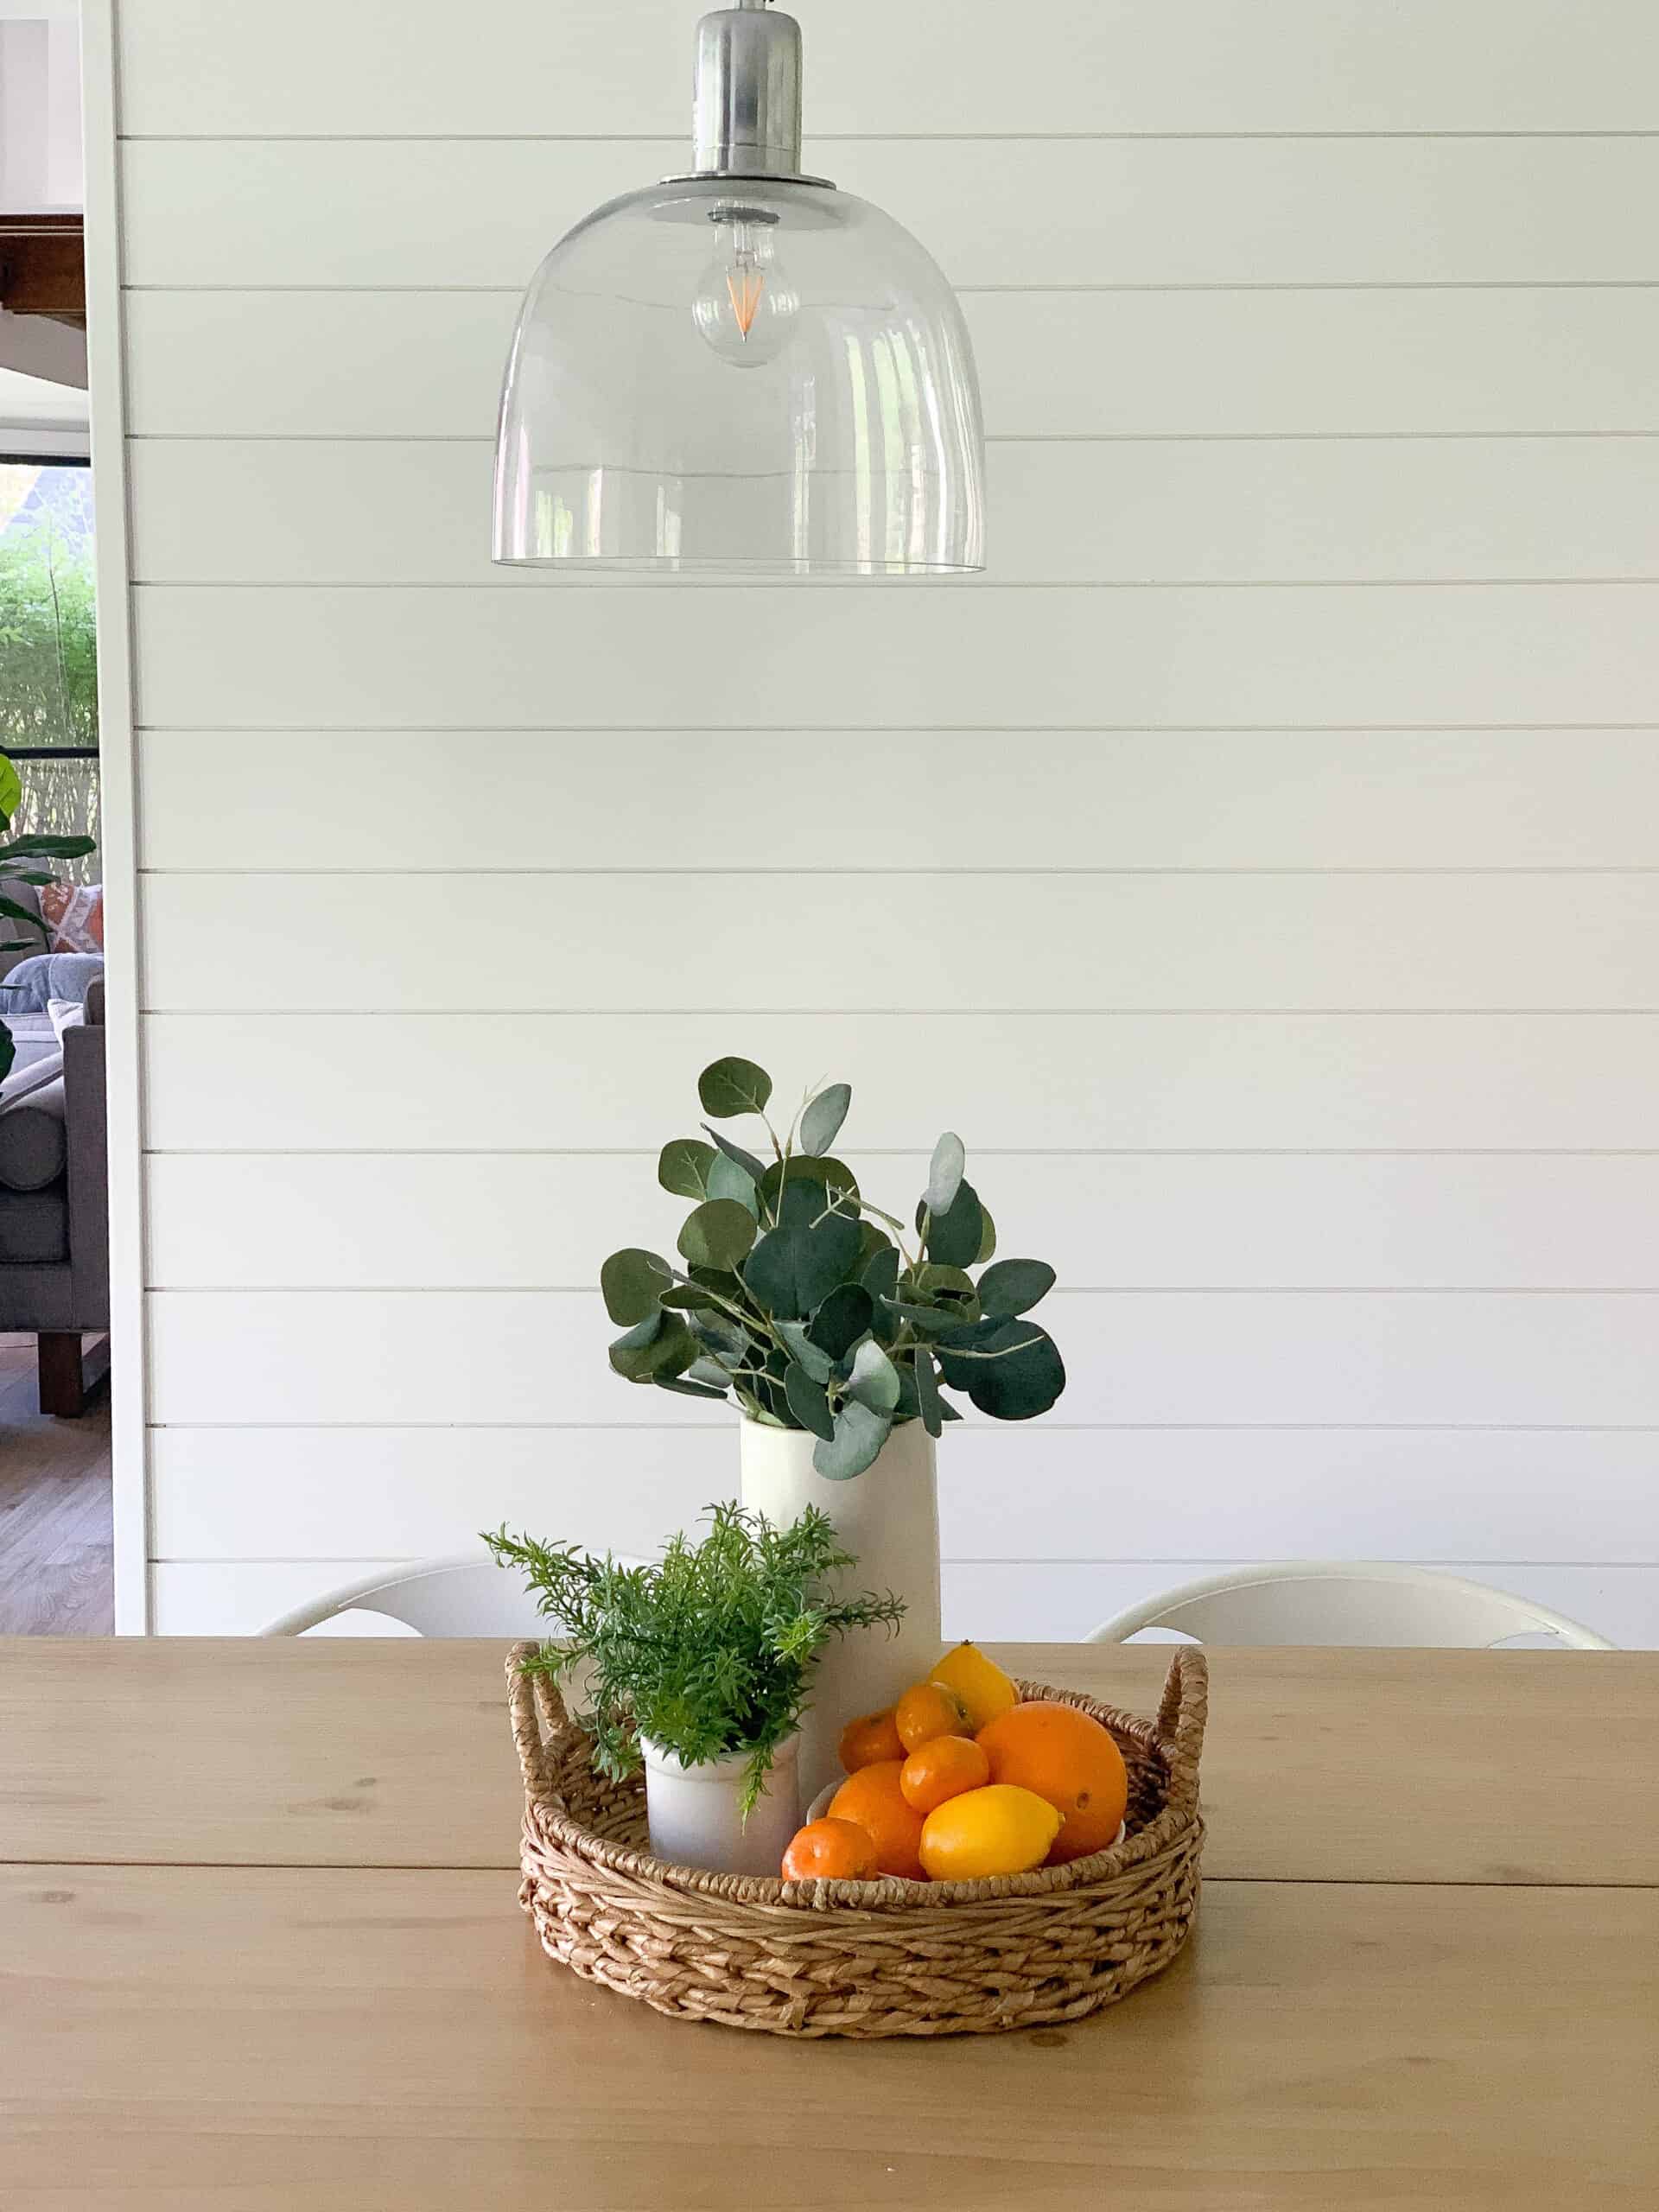
Painting the Shiplap Wall
As I stated in the tools section – we personally used a paint sprayer for this project. We purchased a paint sprayer for this room when we did the IKEA built in hack, and have never looked back. Seriously paint sprayers are the best thing ever.
We used this sprayer this time, and it was honestly not bad, but I personally liked the coverage from this sprayer a bit better – I think because it doesn’t have to be thinned it covered better. Either sprayer tho I think does a good job and will give you a great smooth finish.
If you’re going to use a roller you will want to use a foam roller. Use a brush first to get in the seams then a foam roller over the boards.
Overall this was honestly a 1 day project. We have 4 little ones at home so we took 2 days – one for install then painted the second, but it could 100% be done in one day. Hopefully this is helpful on how to install Shiplap. I have a full highlight showing us installing it on my Instagram stories, and am always happy to answer any questions via an Instagram DM or in the comments below. Good luck!
I have been working on a DIY flower wall white updating Avé’s room – which has been taking way too much time thanks to being unable to run any errands, SO instead of revealing her room first I am going to share this really fun DIY yarn wall art piece I did of daisies.
This post may contain affiliate links – read more about that here
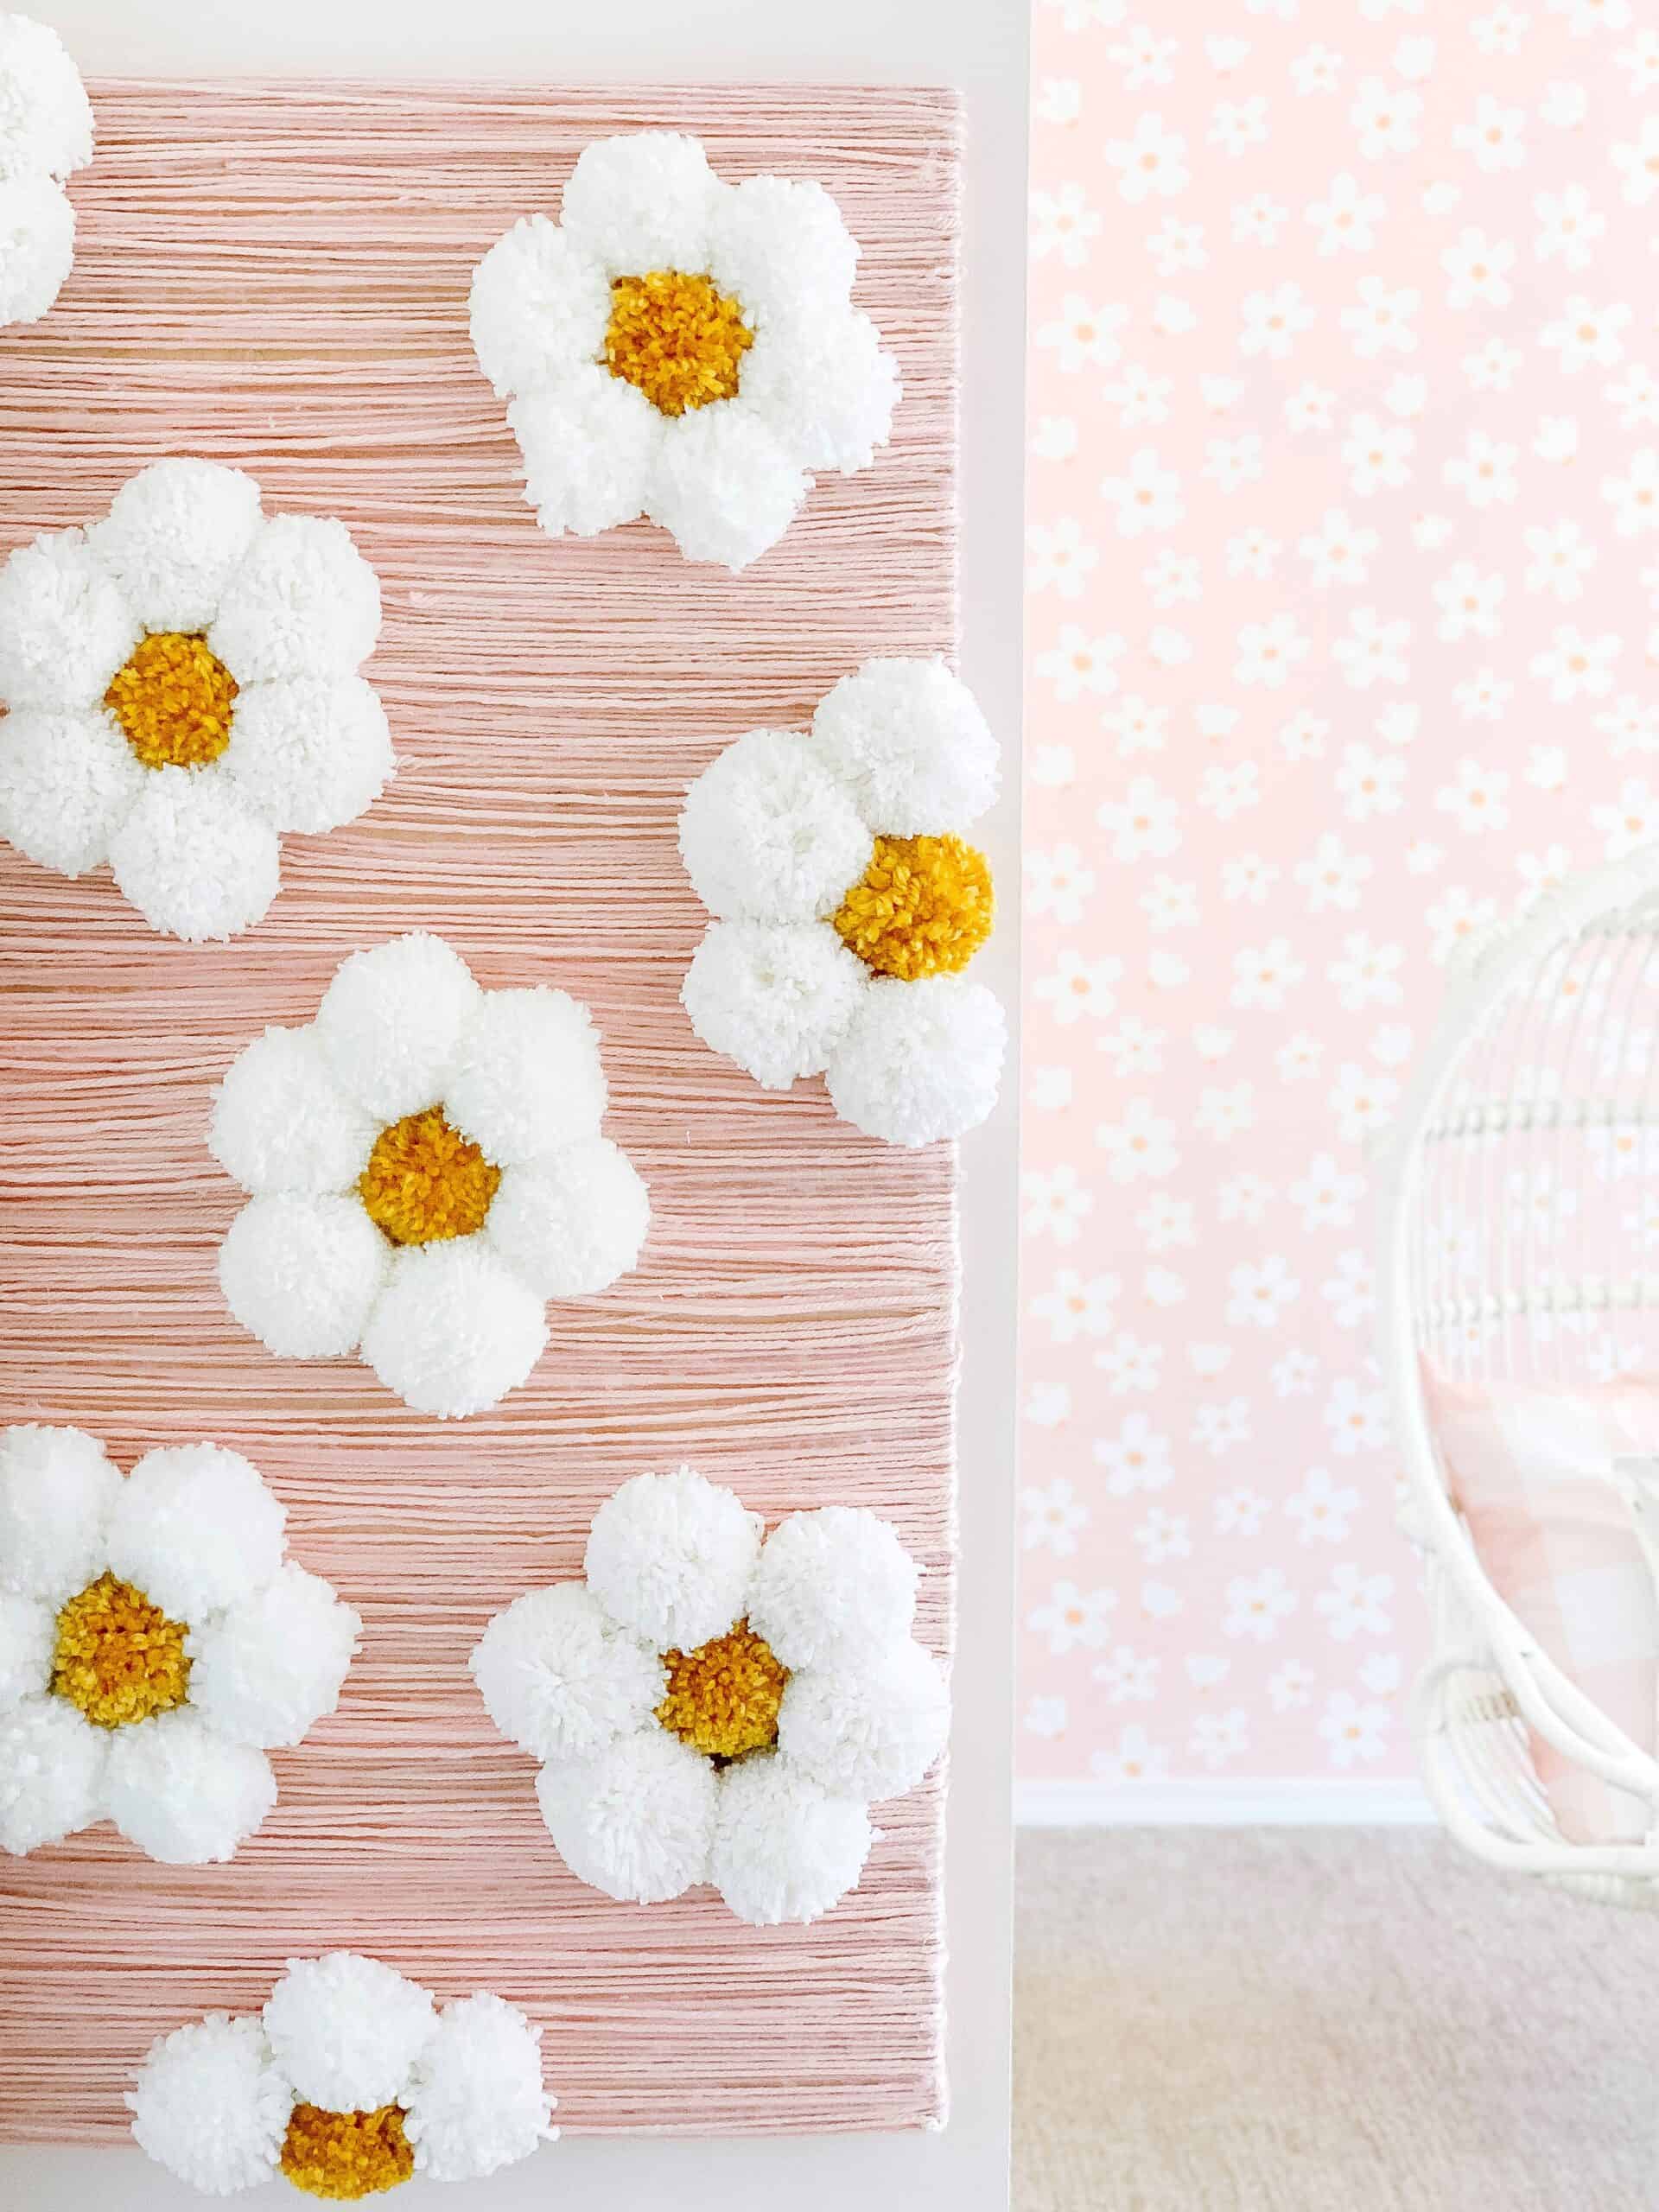
DIY Flower Wall
When I did Goldie’s Nursery this past summer by far my favorite aspect was the large DIY rainbow – and you all seemed to love that too, so I knew I wanted to do another inexpensive DIY for Avé’s room too.
This piece sort of took place as I was going. I usually go into a DIY with a plan and change it as it goes to make sure it is turning into what it needs to. This was no exception. I both had to change some plans due to being unable to get certain supplies, as well as changed my plan due to how it was coming together and wanting a bit more dimension.
I went into this DIY knowing I had a small little wall inside her room and I wanted to create a DIY flower wall. I thought about doing the full wall – and Honestly I still think that would have been amazing but I felt as tho the large piece worked as well, and allowed me to not completely lose my mind haha.
Once I decided on doing a board only – I originally thought I was going to cover the full board with pom-poms.
I thought if I put them close together both the daisies and pink poms filling in the areas surrounding it, but as I started to do that it felt like there was wasn’t enough dimension with it all being poms so I moved to the strips of yarn and was really happy with it.
Let it be known – this also saved me a lot of time to do the strips over the poms – however I won’t lie this was a beast of a DIY haha.
What Do you Need?
Total cost for me was roughly $30 because I already had most of the supplies
For this DIY I personally used white yarn, a yellow yarn, and several different light pink yarns.
I mix and matched the white – mostly on accident because I was unable to go to stores to get exactly the same ones, but I ended up loving that look. But I would say the majority of them arethis white yarn and I love it!
and a large board of some sort. I used a pretty thick one, but that wouldn’t be needed. I just had a scrap piece of wood and thats what I went with. – you will notice mine is not perfect, which didn’t matter because it was all getting covered!
I have been asked so many times how much yarn you will need – for a DIY flower wall of this size you need roughly 1 thing of white yarn per daisy, 2 yellows, and 6 pink if you are talking about average sized yarn balls. But keep in mind all yarn varies, and you can make pom poms tighter and less tight – so it will vary.
How to Make it
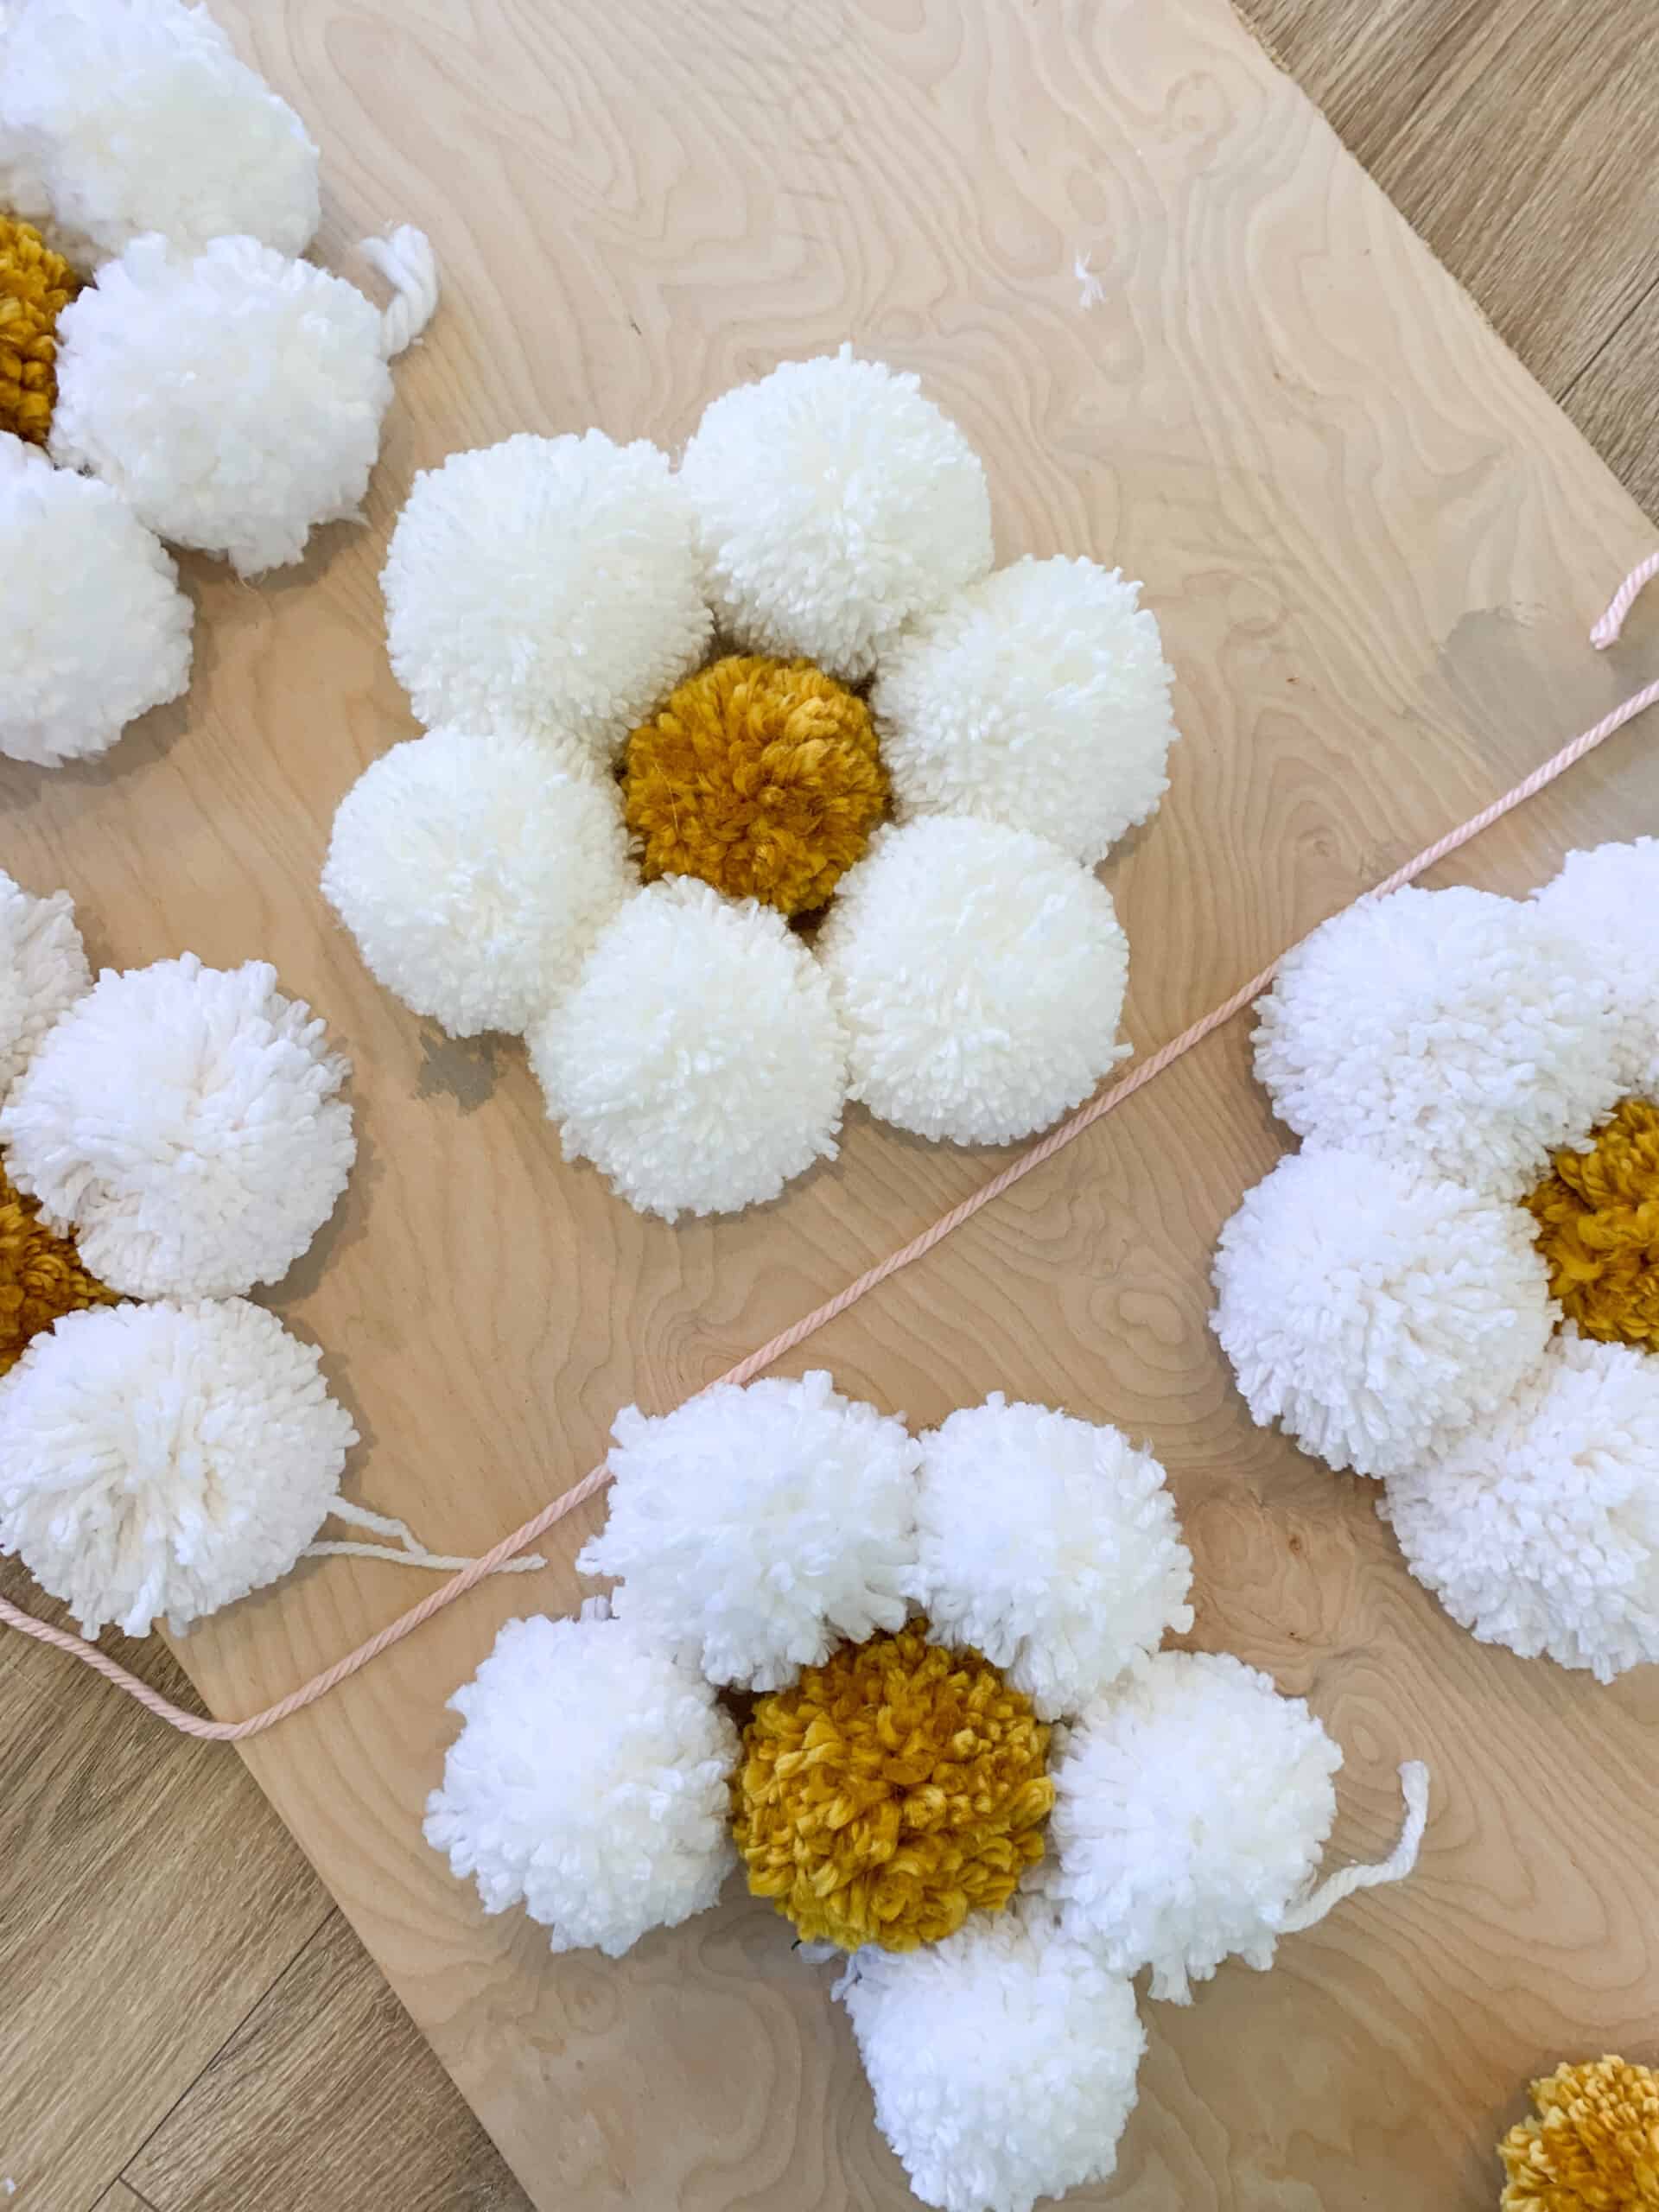
First of all you will first need to make several white pom poms, and some yellow.
For my flowers I did 6 white pots, and 1 yellow for each full flower. Now keep in mind some of them went off the edge so I needed less white. I highly recommend this to save yourself some sanity on the poms.
I did my white poms a size bigger than the yellow poms.
The yellow poms I used a medium 0r small (whatever you choose is fine, I just liked the yellow pom being smaller than the white)
here were the daisies laid out for me to picture
NOW it’s time to cover the board.
NOTE – follow what the text says not just the photos. One of the perks of using a blog post for a DIY verses coming up with one is you get to learn from my mistakes. Had I decided on the strips of yarn from the start I would have done all of those first.
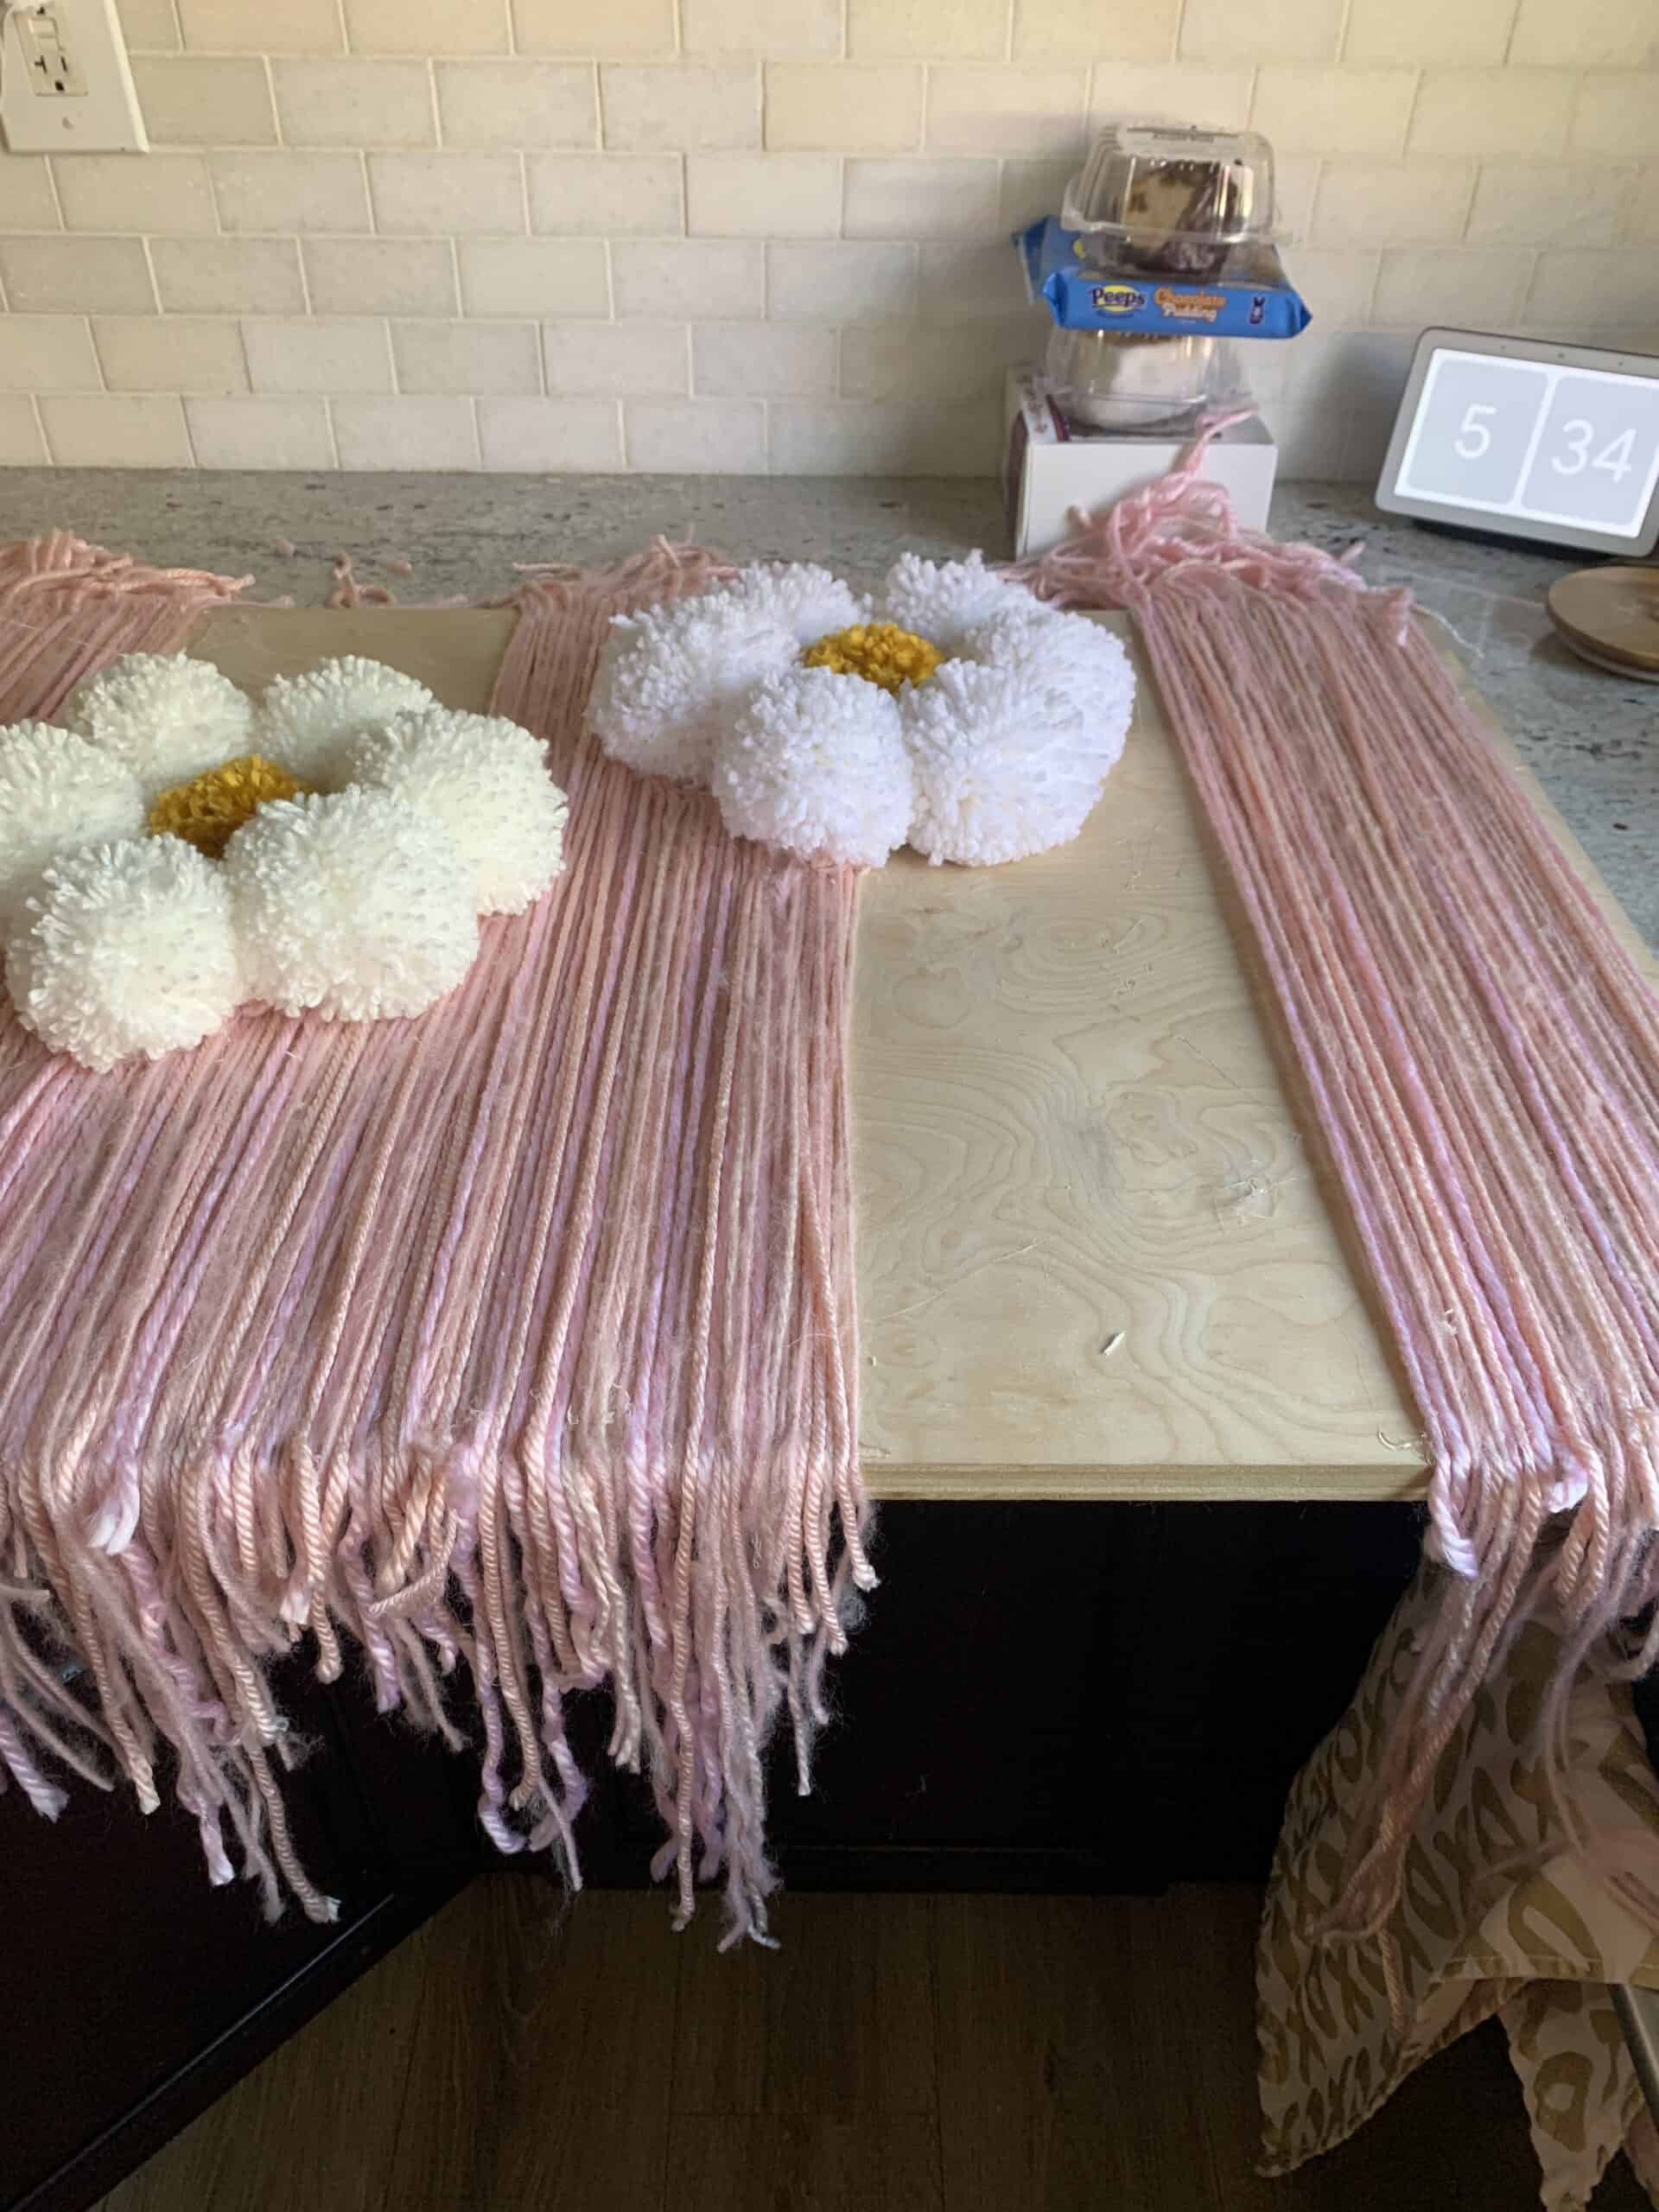
I did this sort of backwards – when I started covering the board I already had glued down 2 flowers, and it made it so much harder. So make sure you cover your board first for easiest results. I personally used 4 different light pink yarns (all in similar shades, but in different textures and sizes).
remember my picture shows a couple of pre glued flowers – follow the words, not the photos. Sometimes I work the kins out myself, thus making it easier for you guys.
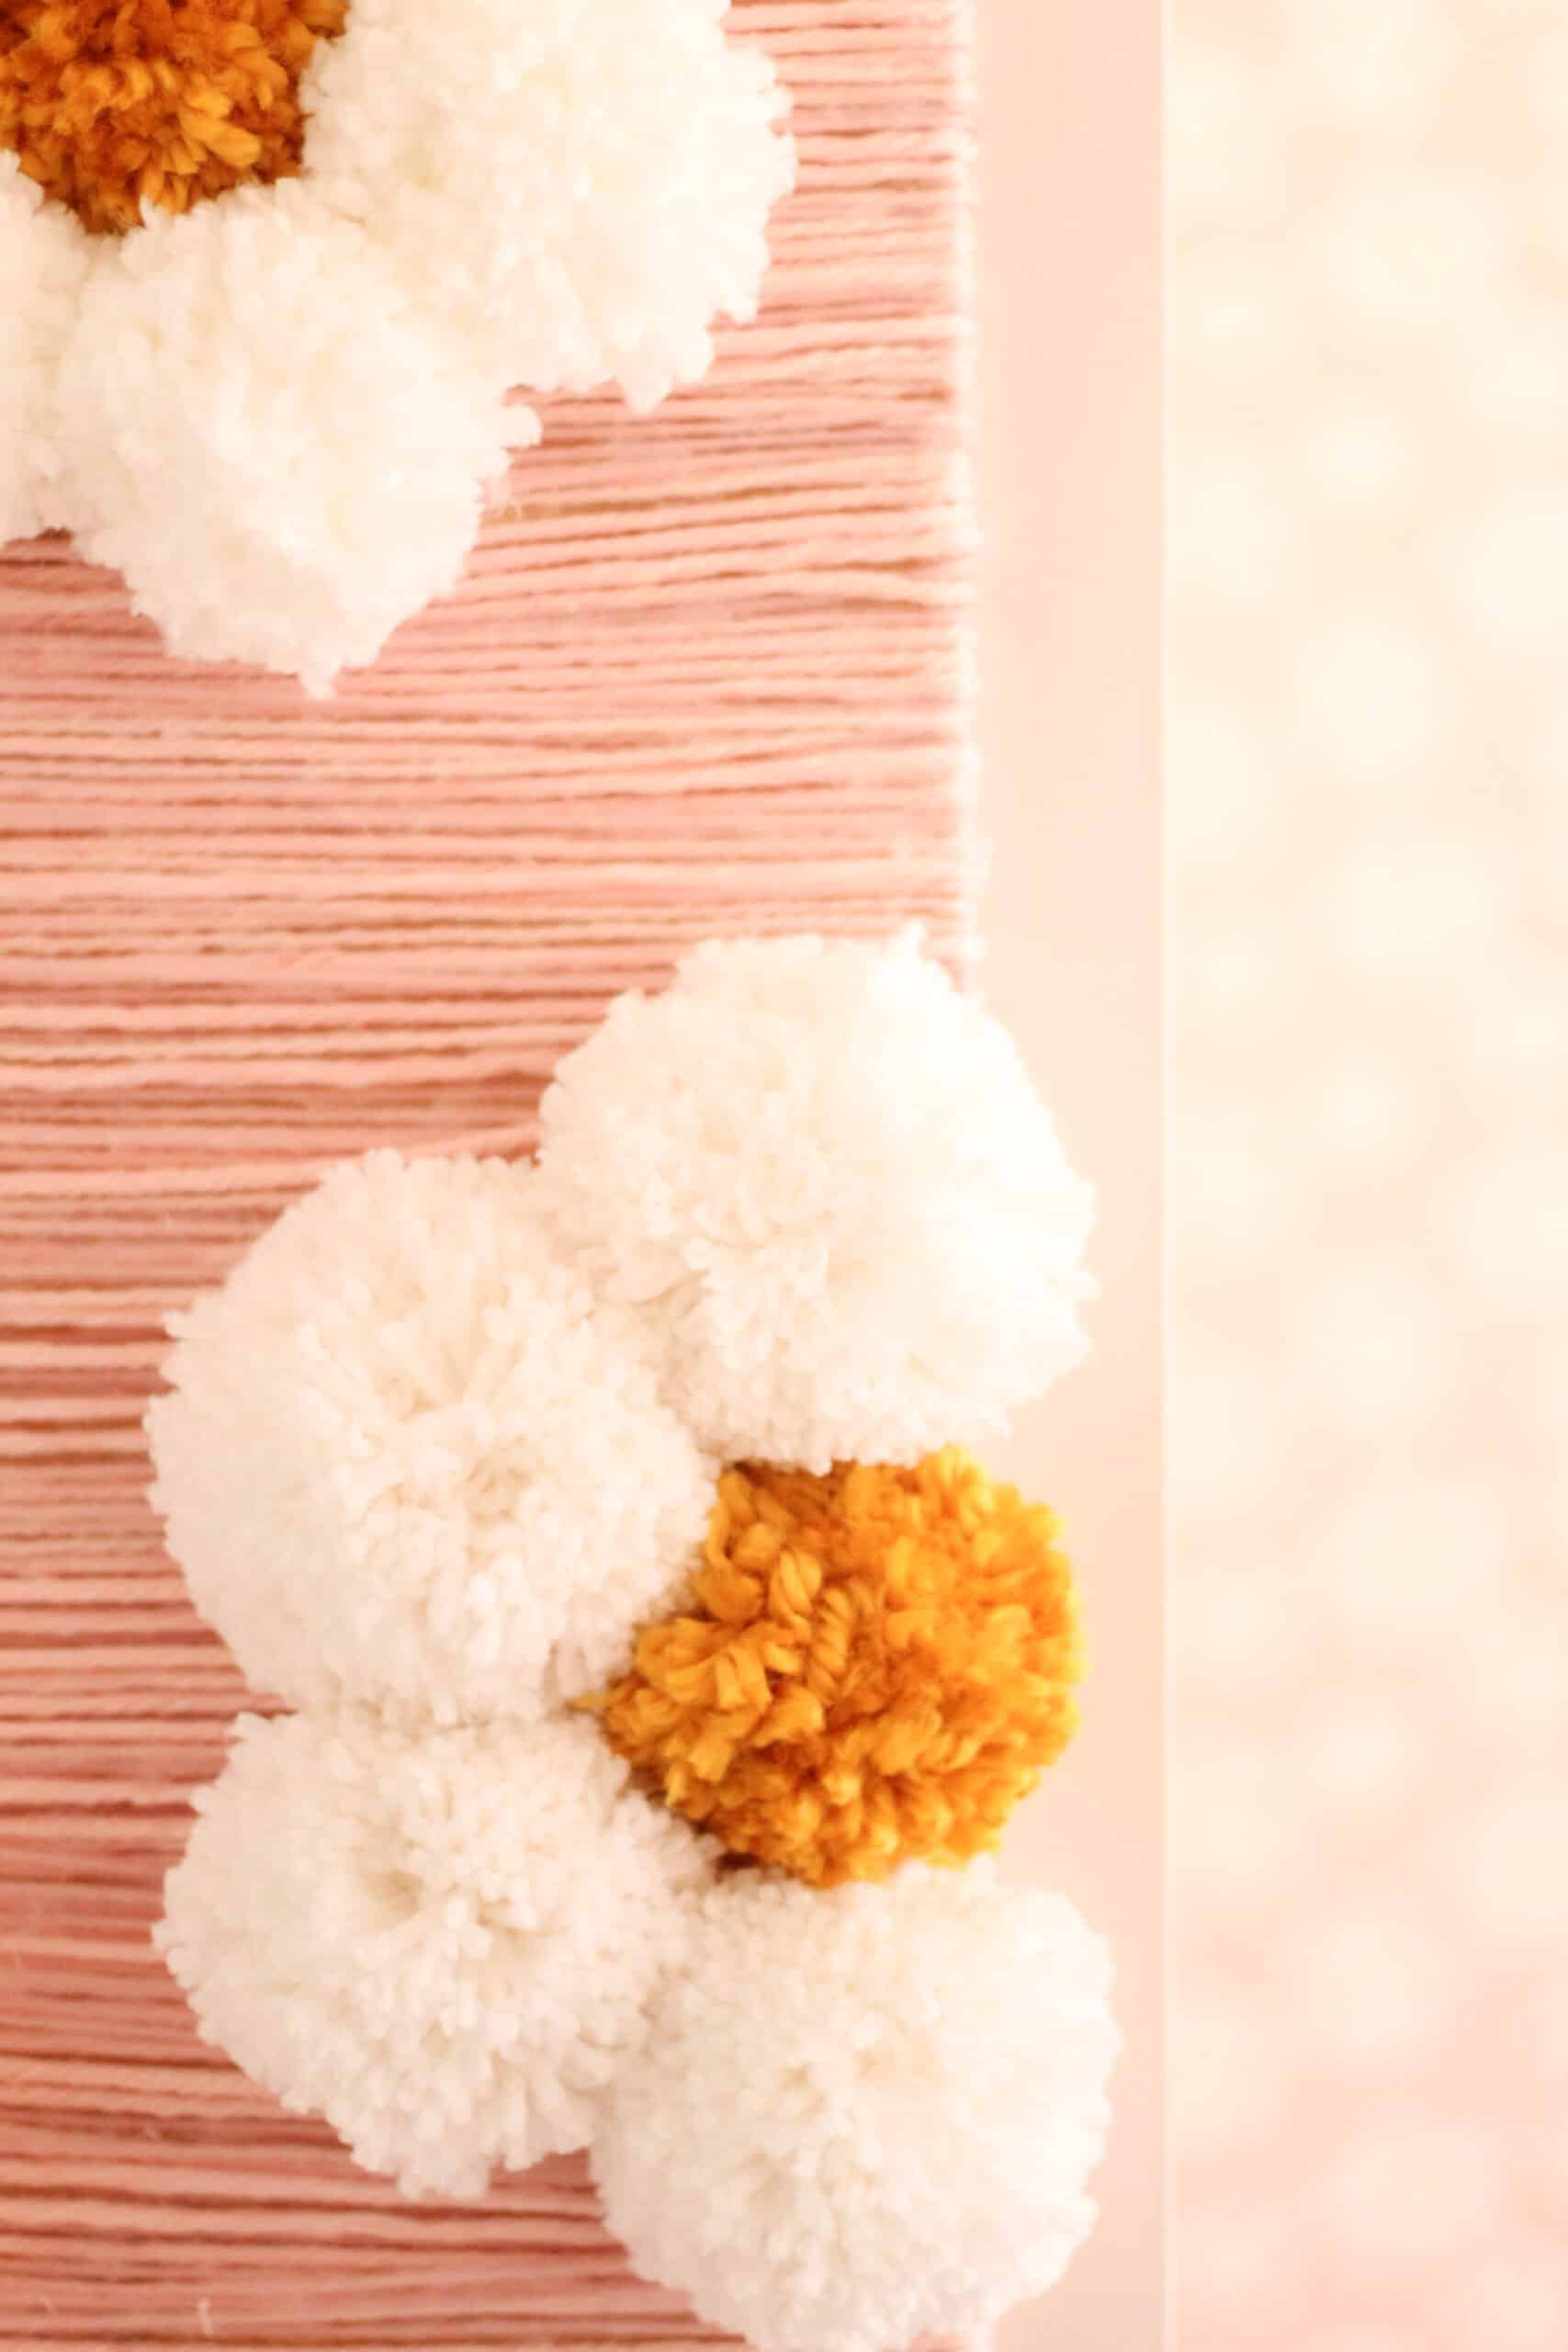
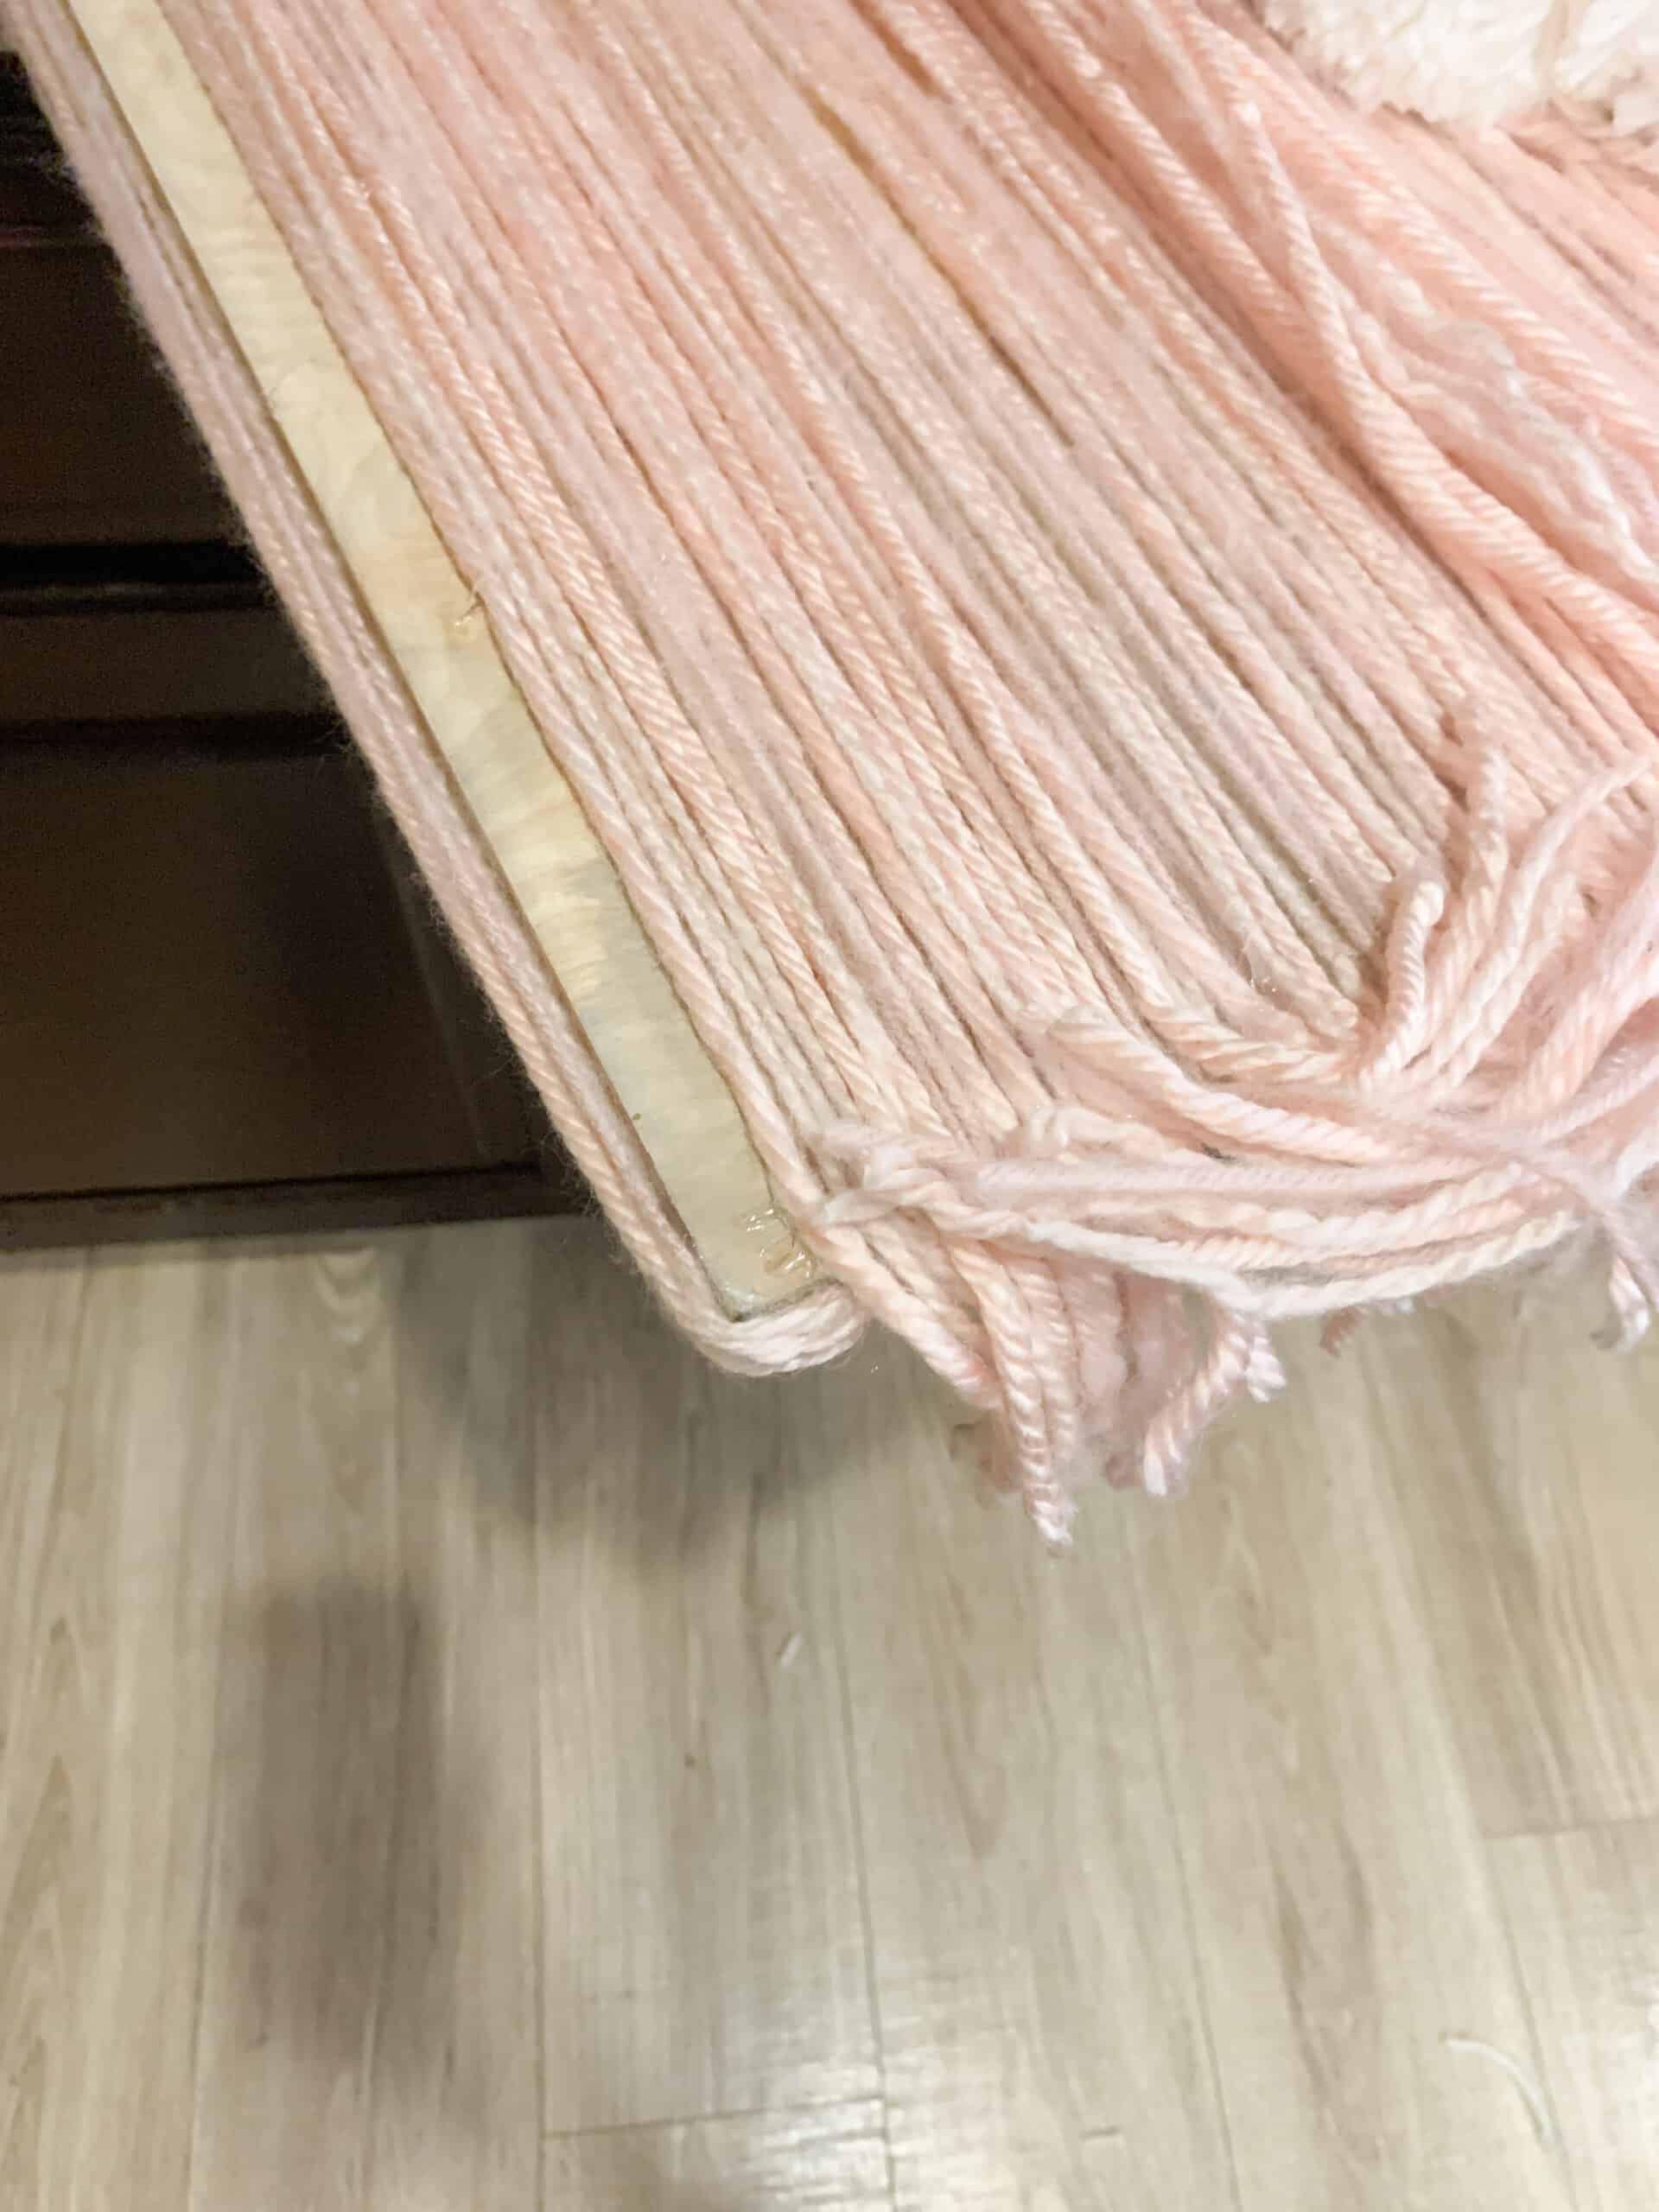
I cut the yarn so there was hang off on both sides of the board and glued the yarn strips along the edges all the way down. There will be over hang, which is needed. This step is a beast, but just cover your whole board with strips of your background color going horizontally.
Once the full front of your board is done you need to cover the top and bottom. My board was nearly 1/2 inch thick so I took several strands of yarn and did the same process as I did on the front to the top and bottom. I left overhang on those spots too.
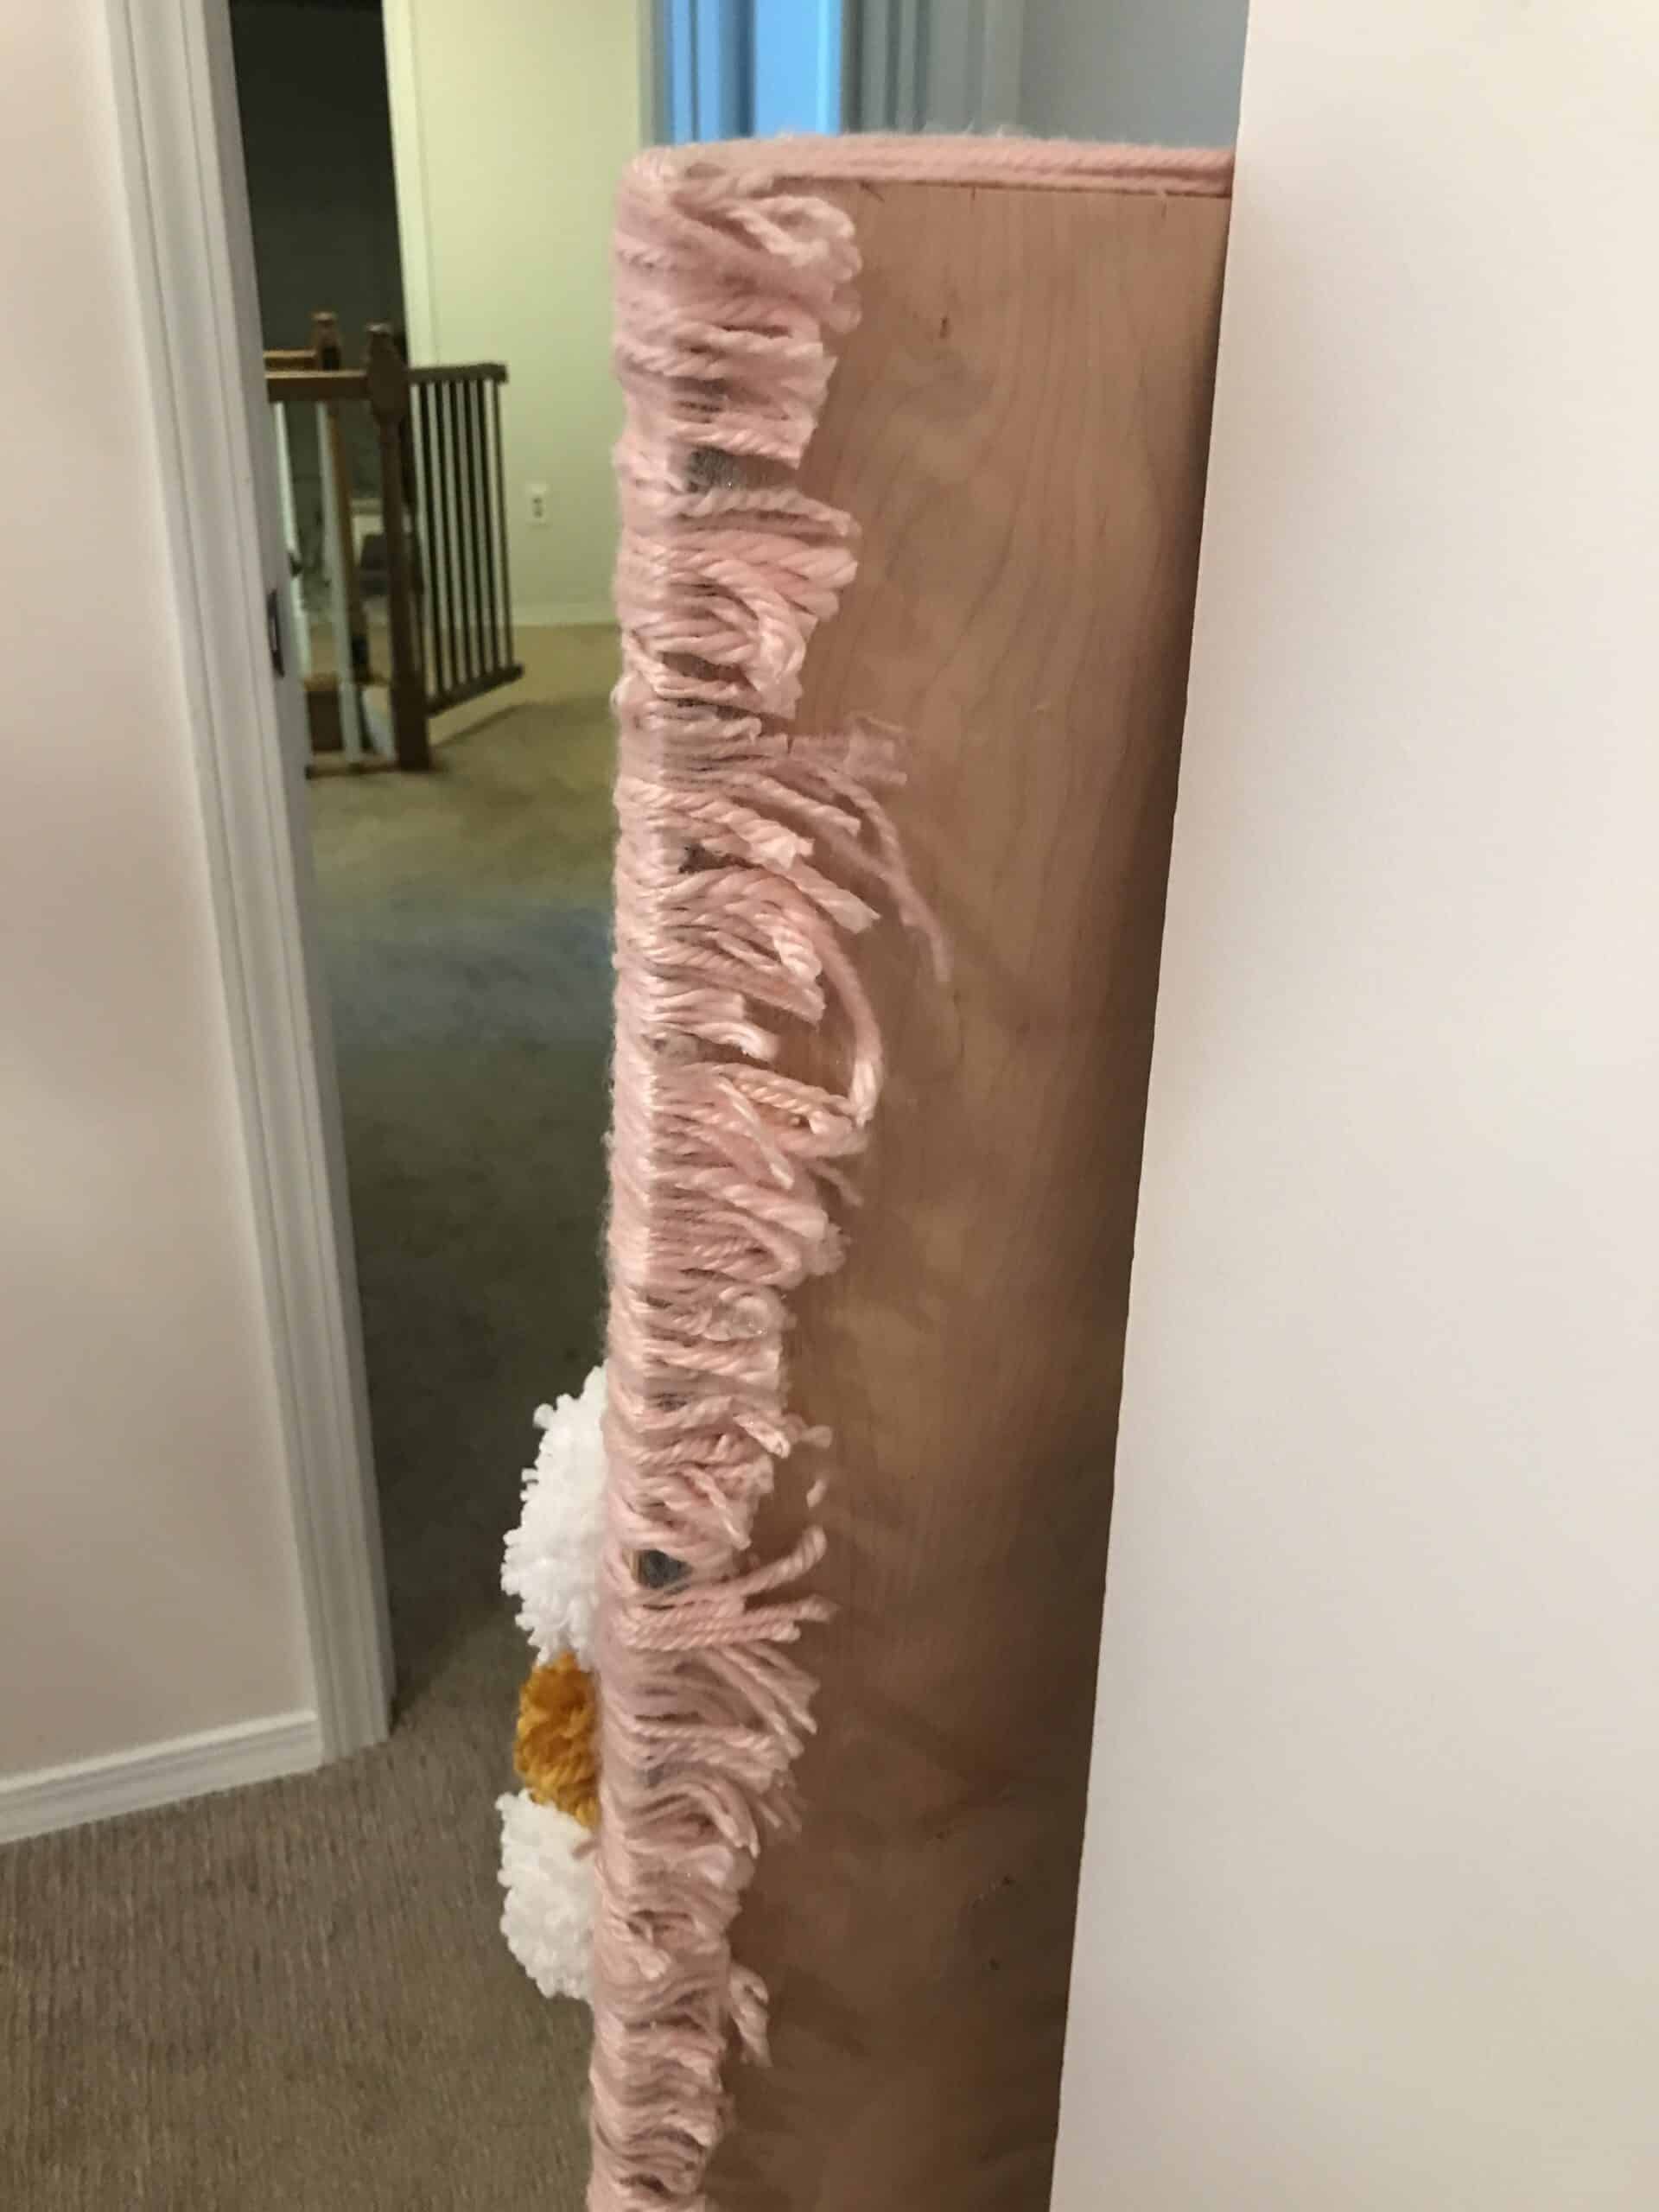
Now that your full board is covered with overhang on the front and top and bottom its time to cover the sides and make things look finished. Carefully flip your board and lay it on its front side. The first place to tackle is the top and bottom for the corners. glue down an inch or so if your overhang onto the sides FROM THE TOP AND BOTTOM on all 4 corners. Then trim any extra.
Now you will pull the overhang on both sides and do the same thing all the way down each side. The corners you will go over what you glued down in a vertical direction with the yarn going horizontal to give it a finished corner. Once it is all glued, trim off excess and you are ready for the finishing touch.
This is a view of the back of the board with the yarn glued then trimmed
Attaching the flowers –
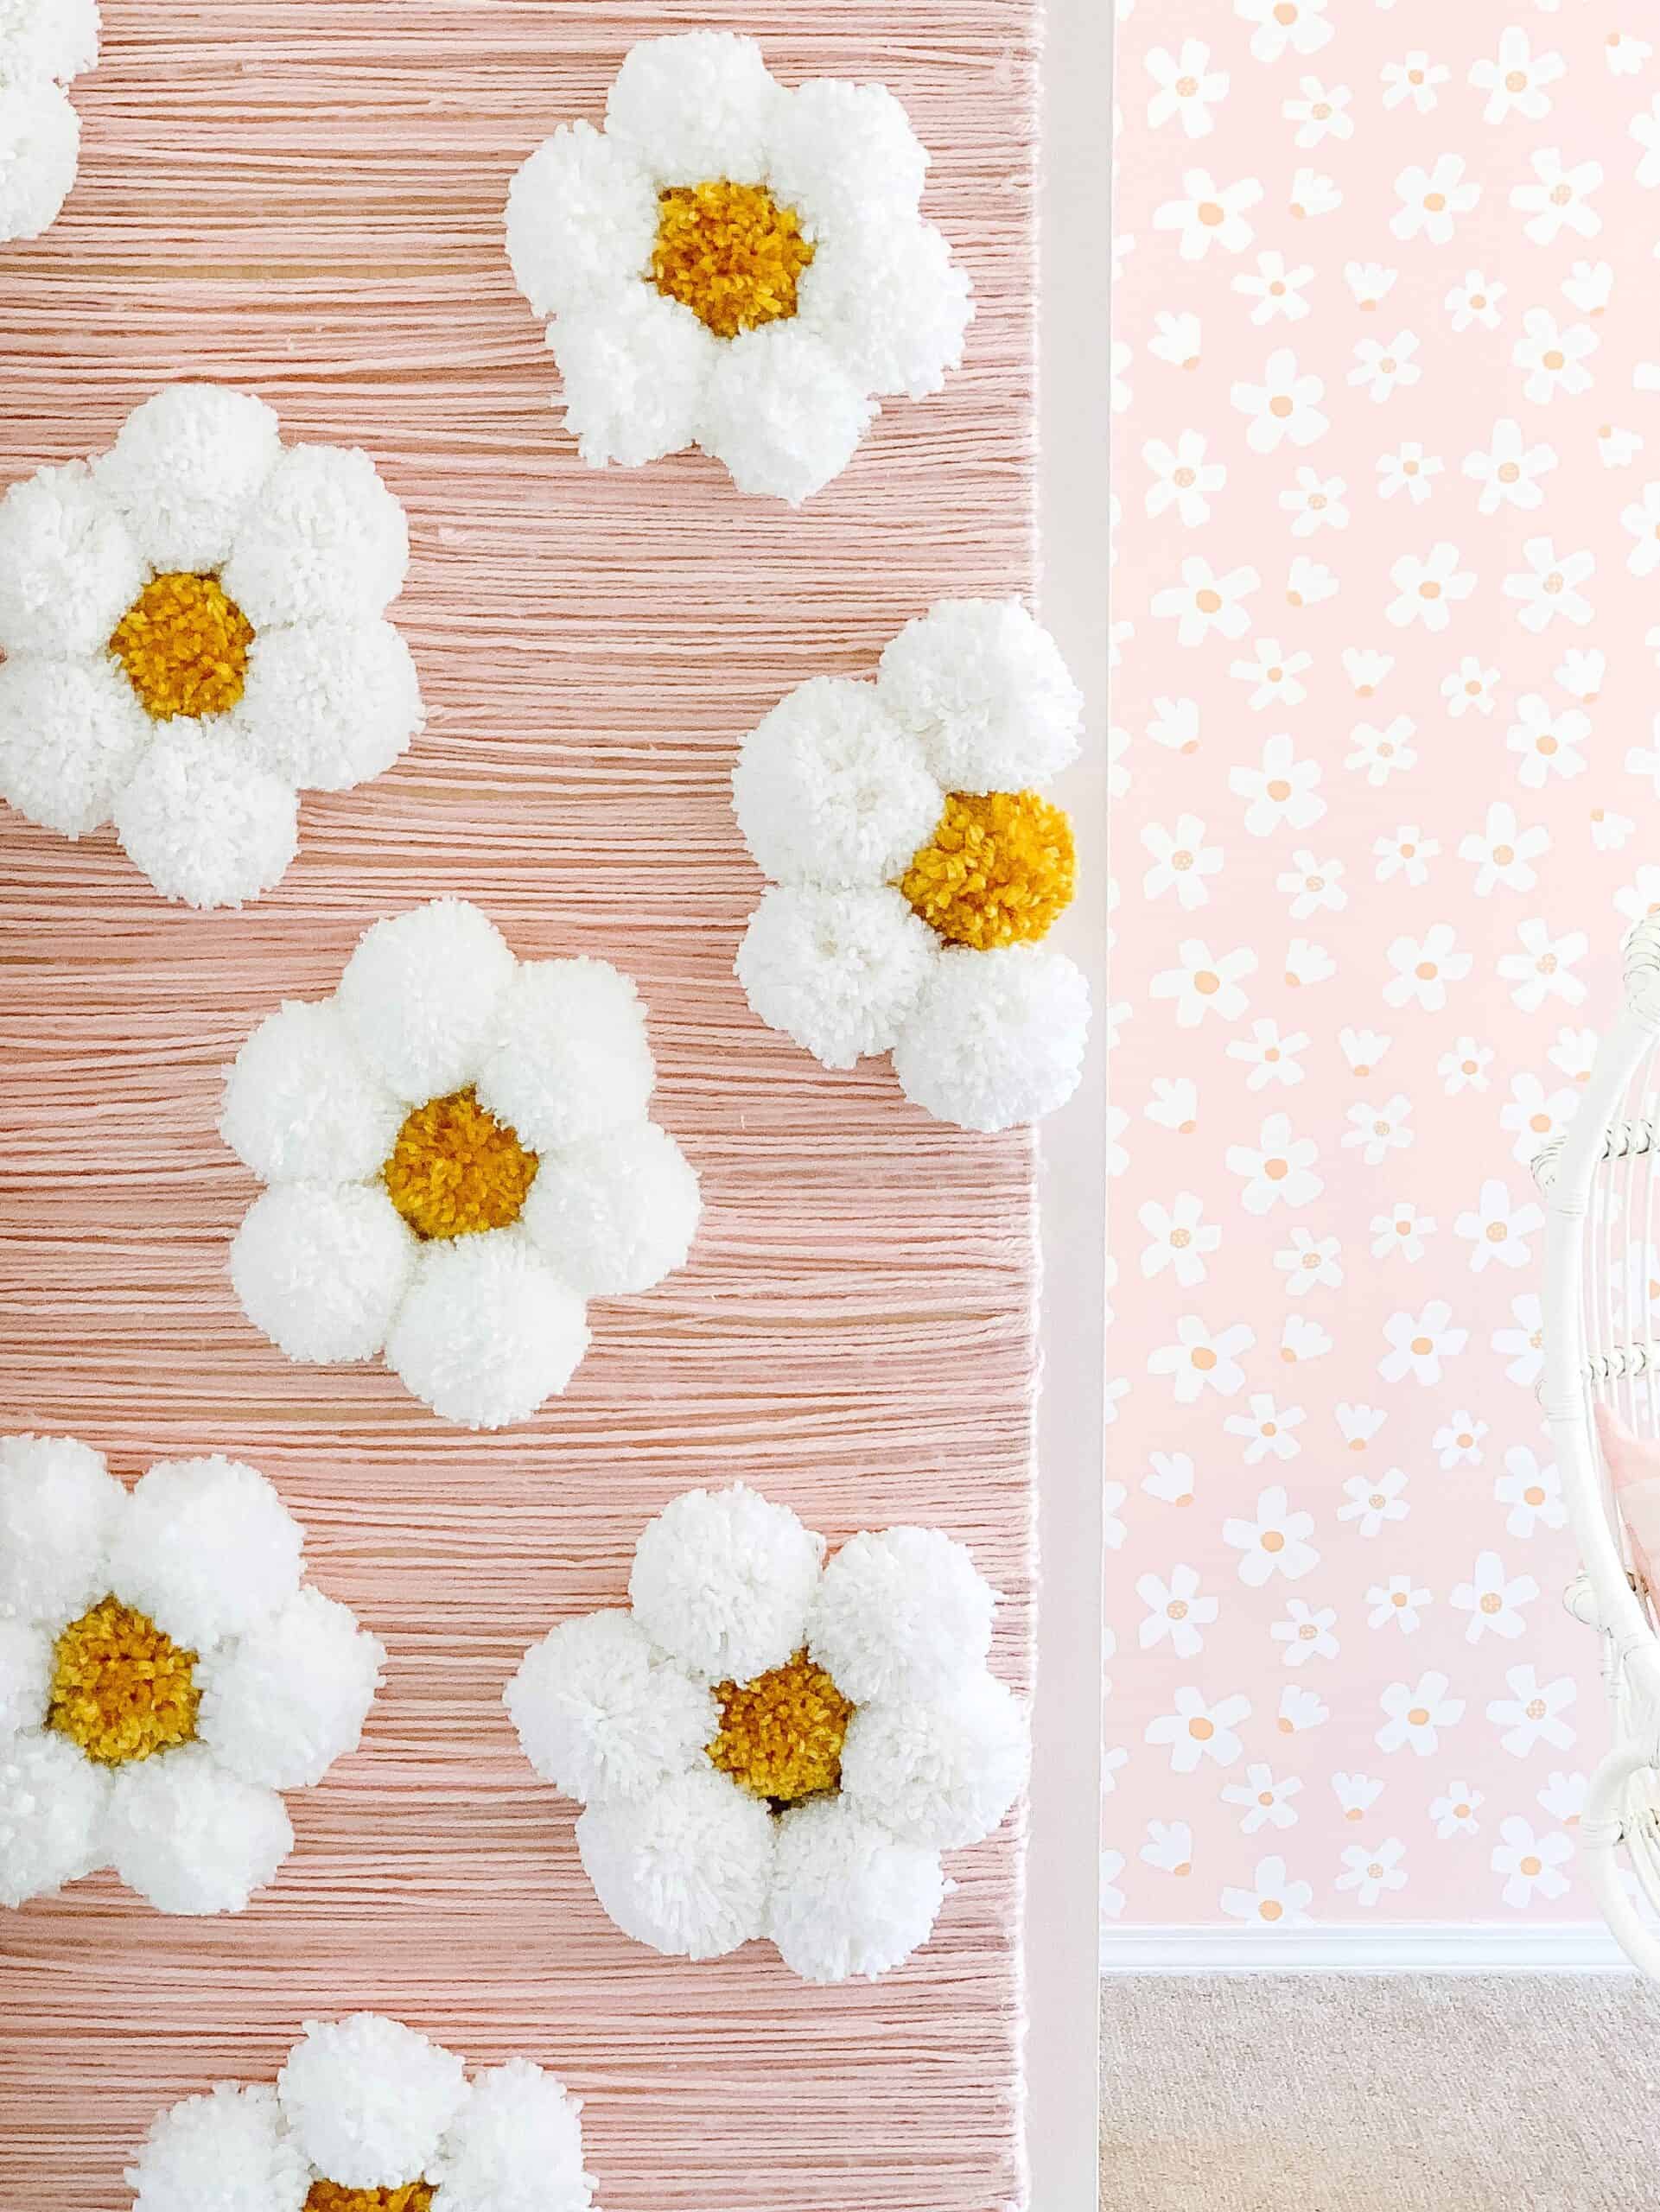
Now you are going to place your poms where you want them, and in the shape of the flowers. Once they are lined up where you want them you can hot glue down your pom poms – pretty simple and goes really fast. (but at this point you’re probably cursing me for your number of burns and the amount of hot glue you have gone though).
Hanging the yarn wall art
Our piece was personally pretty heavy, so we had to make sure we hung it in the studs, but that will differ based on the board you use. We personally hung it with 4 screws. I just carefully separated the yarn where we were screwing it in, then repositioned it over when the screws were in. It is purposefully not a “perfect” look with the different textures and such, so moving the yarn is fine.
Overall – this diy yarn wall art was an inexpensive project and made a huge impact in Avé’s new room and is such a fun piece.
A DIY flower wall is easily customizable and something you could do in a million different ways. If you have any questions I am happy to help, and make sure you are following along in my emails and on Instagram to see her finished room in the next week or so!