Garages are often the dumping ground for all unwanted and unusable items. Why donate or throw the items away when we can simply pile the items on top of another and wait for the cobwebs to collect? If that is you – I have a great post on how to organize garage on a budget that will get your space in tip top shape!
This post may contain affiliate links.
How to Organize Your Garage On A Budget: 15 Cheap & Practical Products
Is your garage so full you can’t even park your car in it anymore? If this sounds like your garage, you are in the right place. We are going to go over how to take your messy garage and transform it into an organized space. I’ll share with you my favorite garage storage ideas that you can implement without spending lots of money.
When we moved into our 1860’s historic home, I knew there were some things I would have to give up. A three-car-garage space was something I knew would never be possible in our older home.
What we did gain, however, was an incredible barn that is original to our home. So original in fact that you can still see where the horse would be tied up! We have huge plans for our barn and this week we took the first step in making those dreams a reality.
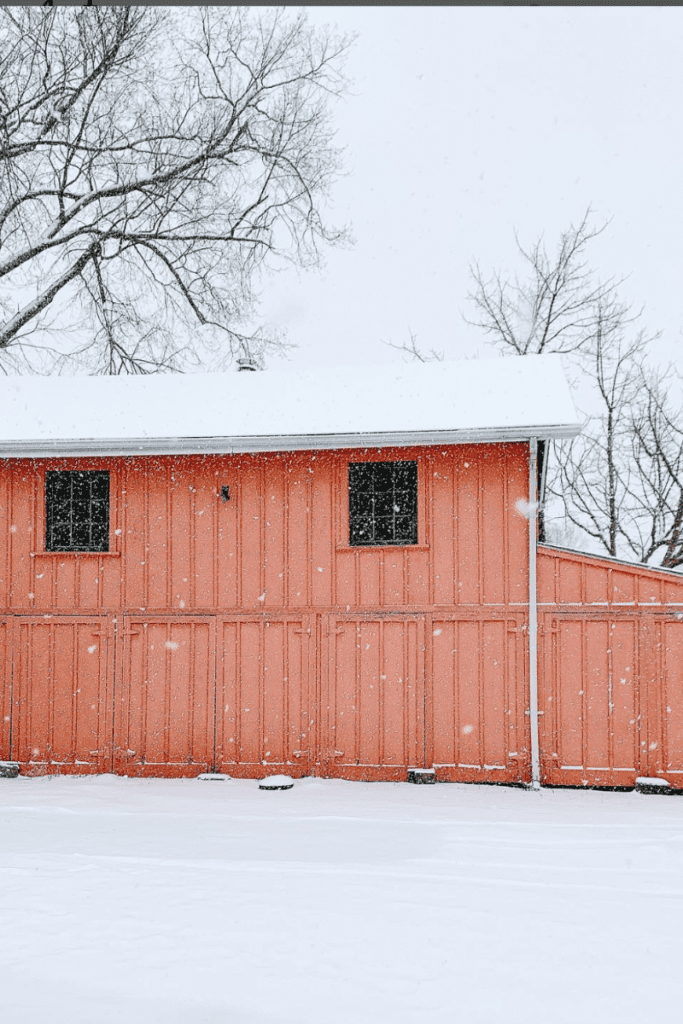
Our barn is going to be multiple big projects and the first step to being able to do any sort of work in there was to transform the original dirt floors to concrete. We went ahead and poured concrete in the foundation so that once we get to a place where we can begin tackling the barn, we will have a solid footing underneath us.
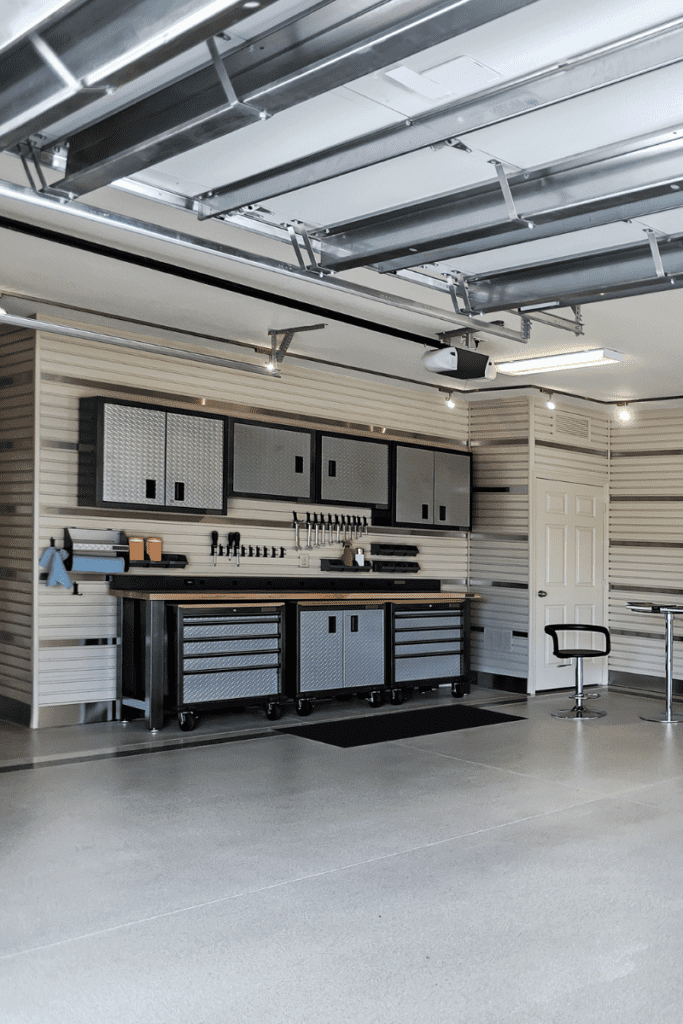
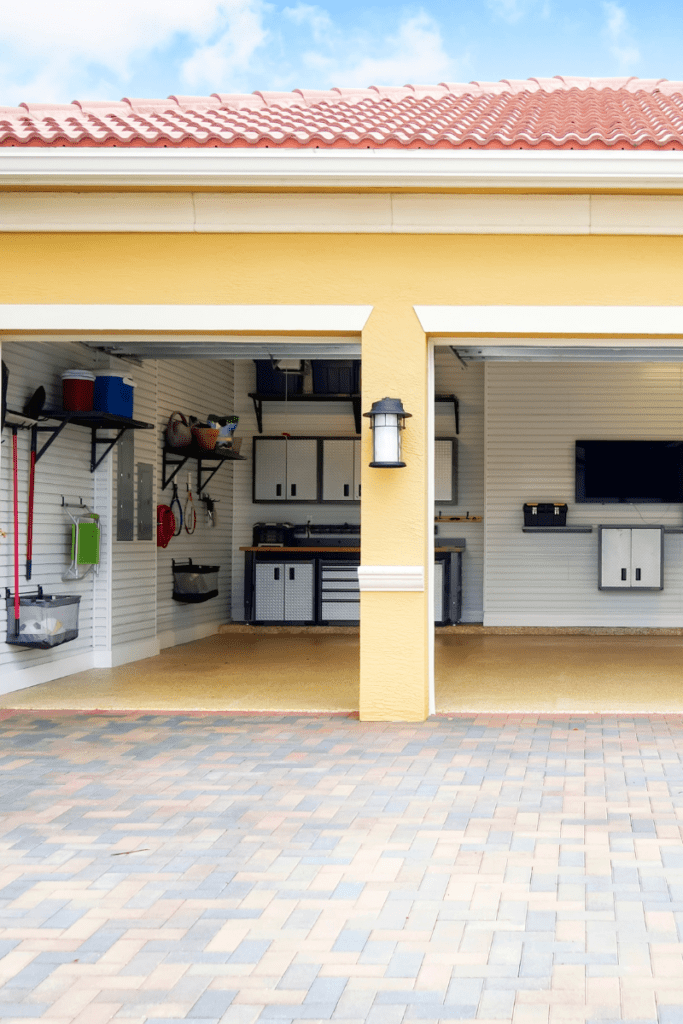
One area that I’m really excited about is the makeshift one-car garage space. We plan on using this space to park our golf cart and house other items that you typically find in garages. That got me thinking about all of the garage items we will need to store in a small space.
Ideally, I’d like to make this garage storage space available to use immediately, so in honor of our beautiful new concrete floors, I’m going to share with you my favorite garage organization tips that won’t break the bank and how to organize garage on a budget.
Tips To Begin Garage Organizing
Not all garages are built the same. Some garages are fully finished with walls and the ceiling enclosed, while other garages have exposed beams and studs in the walls. You may have a one-car-garage or a three-car-garage.
What you store in your garage is also specific to your family and your lifestyle. You may have more sports equipment while your neighbor owns the entire tool section of Home Depot. Your garage, the available space for storage, and what you store in that space is unique to your family.
There truly is no right way to organize your own garage. Use these tips as a guide to help you find what makes sense for your family’s needs and your own garage space.

This DIY garage update is incredible.
Set Aside Time For Garage Organization Ideas
Before you can begin to organize your garage you need to spend time preparing the space. Set aside a weekend for this project. Sure you could hire a professional organizer to help you with the space, but where is the fun in that?
Trust me, I get it, no one wants to take 2 full days going through items that have accumulated over the years and that may be surrounded by spiders. Once you’ve spent the time and have your storage solutions in place, you’ll reclaim so much more usable space. That just means you have another excuse to buy even more holiday decor.
Prepare Your Garage/Space
This next part is not going to be fun or easy. You are going to need to empty out your garage. The best way to do this is to grab garbage bags and storage bins for smaller items. You’ll want to sort your items into four piles: trash, sell, donate, and keep.
This will take up a lot of time, but will make the biggest impact. You cannot skip this step. You need to have a clean garage in order to know what you need and where your items will go in an organized manner.
As a bonus, you can always hold a garage sale with items you want to sell to help pay for any new storage options you may want for your improved space.
A great way to begin is by starting in one corner of your garage and to go from there. Take it in small sections and while you are clearing items, you’ll want to begin to sort any items you plan on keeping into categories. Common categories include the following: car supplies, tools, garden tools, holiday decorations and seasonal items, sports equipment, recycling, and kid’s toys.
Once you’ve cleared out your items, now is a good time to clean the garage floor. If you have a shop vac, grab it and get busy. Otherwise, sweep your garage free of any dirt, dust and debris. Check for any insects, oil stains, leaks, or furry friends. You’ll want to address any issues that you discover.
How to Organize Garage on a Budget – Make a Plan
Now that your space is clear and clean, you can get a much better idea of how much room you have for your items. Pay attention to the floor plan of your garage. This is going to be important later when you are implementing organization strategies.
Keep in mind that you want to get as much off your garage floor as possible. This way, you can use that garage floor for storing bigger items, like your car. You’ll want to take advantage of any surface area that could be used for extra storage space, including vertical space.
In other words, you’ll be using your garage ceiling and garage walls as prime real estate for storing your organized belongings.
You’ll want to take notice of what you are keeping and what you can currently use for storage. Perhaps you have plastic bins and storage shelves already. There is no need to get shelving systems if you already have something that you can use.
Use what you have now and buy what you need later. It doesn’t make sense to buy a new system ahead of time when you won’t know what you need until you are already in the process of organizing your belongings.
Garage Storage Ideas
Not all garages have enough room to have custom cabinets built into the space. While cabinets or lockers may be an easy one size fits all solution, the truth of the matter is that not all items will fit. Bulky items like bicycles or wheelbarrows can’t be conveniently packed away into a cabinet. Not to mention, garage cabinets can be extremely expensive to have built and installed.
Shelving Systems
An alternative to built-in cabinets is finding an organizing system that can hold lots of plastic bins that are filled with small items. Wire shelves or wooden wall shelves are a great addition to your garage that can help find extra storage space at a low cost.
If you prefer DIY projects, this is a great tutorial on how to create these wooden wall shelves for your garage. The open shelves allow for plenty of storage options and can be customized to fit your space.
I love that these types of open shelves allow for you to park bulkier items on the bottom shelf. You can store your lawn mower, shop vac, kid push toys, or wagon in this space. I also love that this plan has a section for hanging jackets and storing shoes.
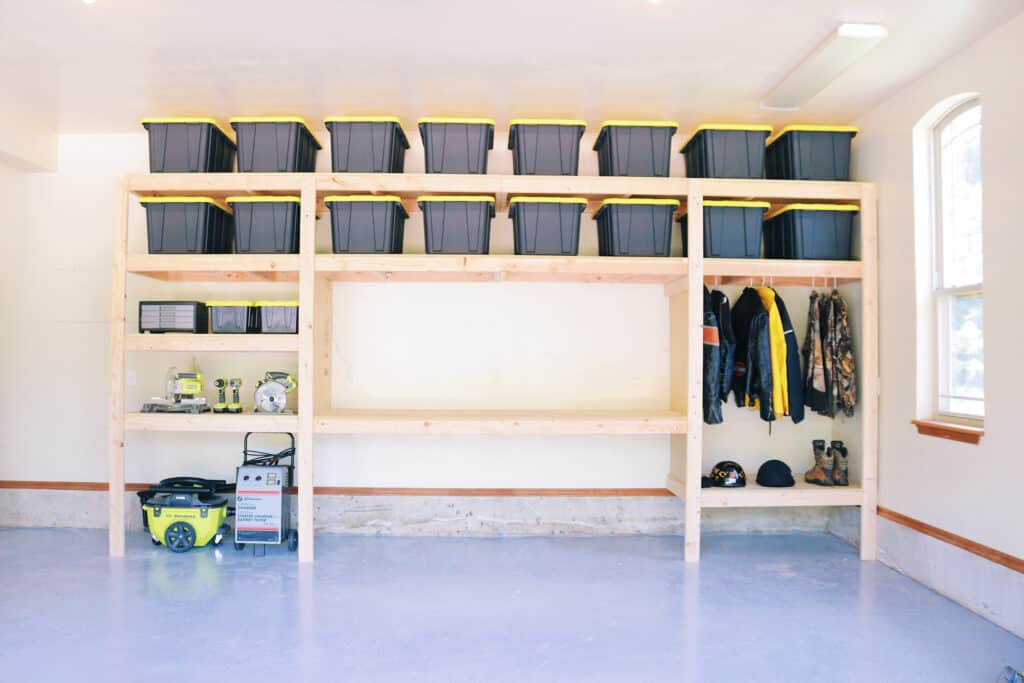
Check out this DIY garage storage.
If DIY is not your thing, you can always find shelves that can be easily installed and take up a bit less space.
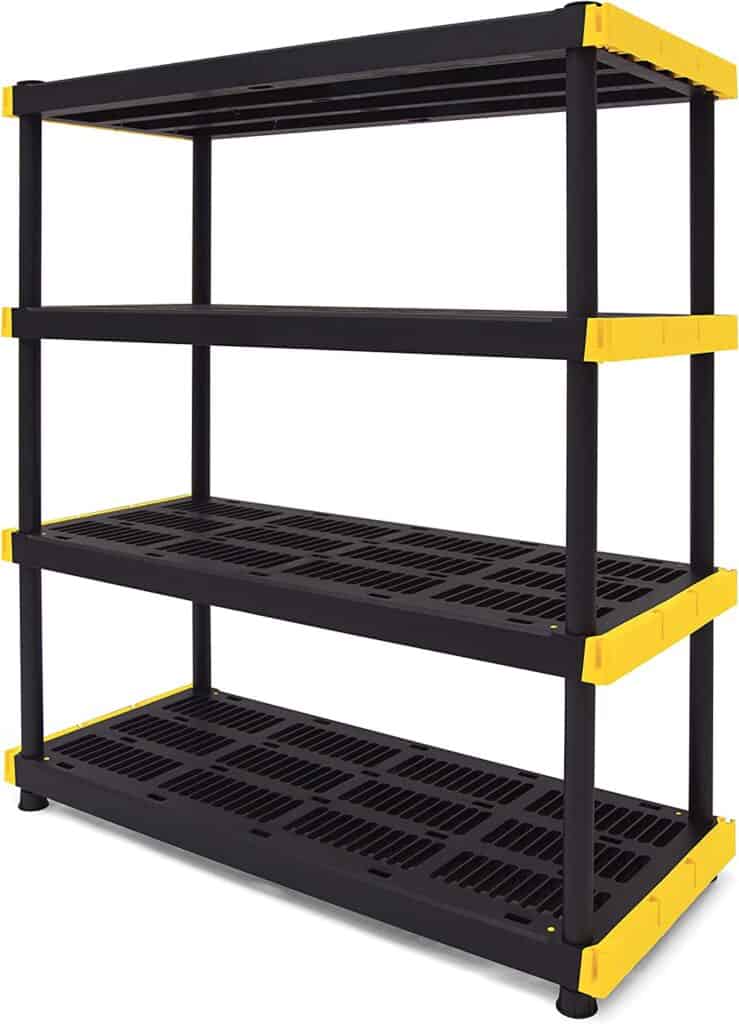
This four shelf storage tier can hold up to 200 pounds per shelf. You can purchase multiple units and connect them to line longer walls for that custom built in feel at a fraction of the cost. I’d highly recommend bolting these shelves into the wall for safety precautions.
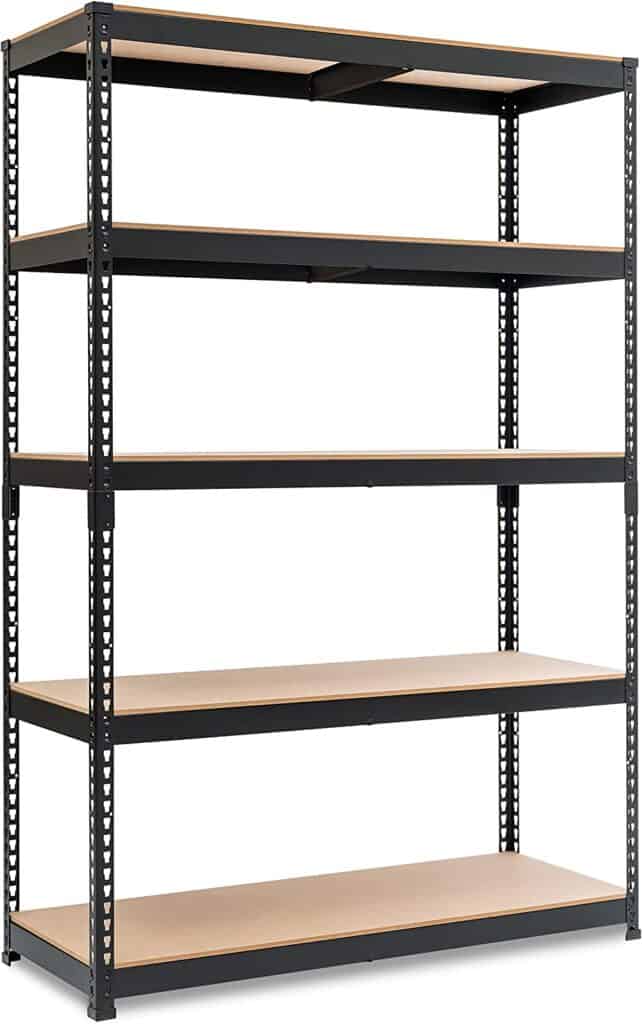
If you prefer a shelving system that can hold more weight, the use of metal shelving units is a good alternative. This five tier metal shelving unit can hold up to 770 pounds per shelf! Not only is it easy to assemble, it also is convertible. You can convert this into a 2 tier horizontal shelf that can double as a workbench.
With 3 of these units you could have your very own built in workstation. Set up two of these tiers on either side. Your third shelf can be set up horizontally. This would give you a setup of a workbench framed by two shelves on either side. This would not only look great but would provide so much space to house all of those miscellaneous items.
What I love about these shelving systems is that you can easily purchase plastic bins that can be stacked on each shelf. Once you have the bins, you can label each one with the contents and pack away your smaller items into each bin.
Extension cords, small tools, kids toys, or decorations can all be easily contained in these bins. I also love that you have easy access to all of the items stored. This is a great example of a vertical organization system that gets your items off the floor without taking up too much valuable floor space.
Ceiling Systems
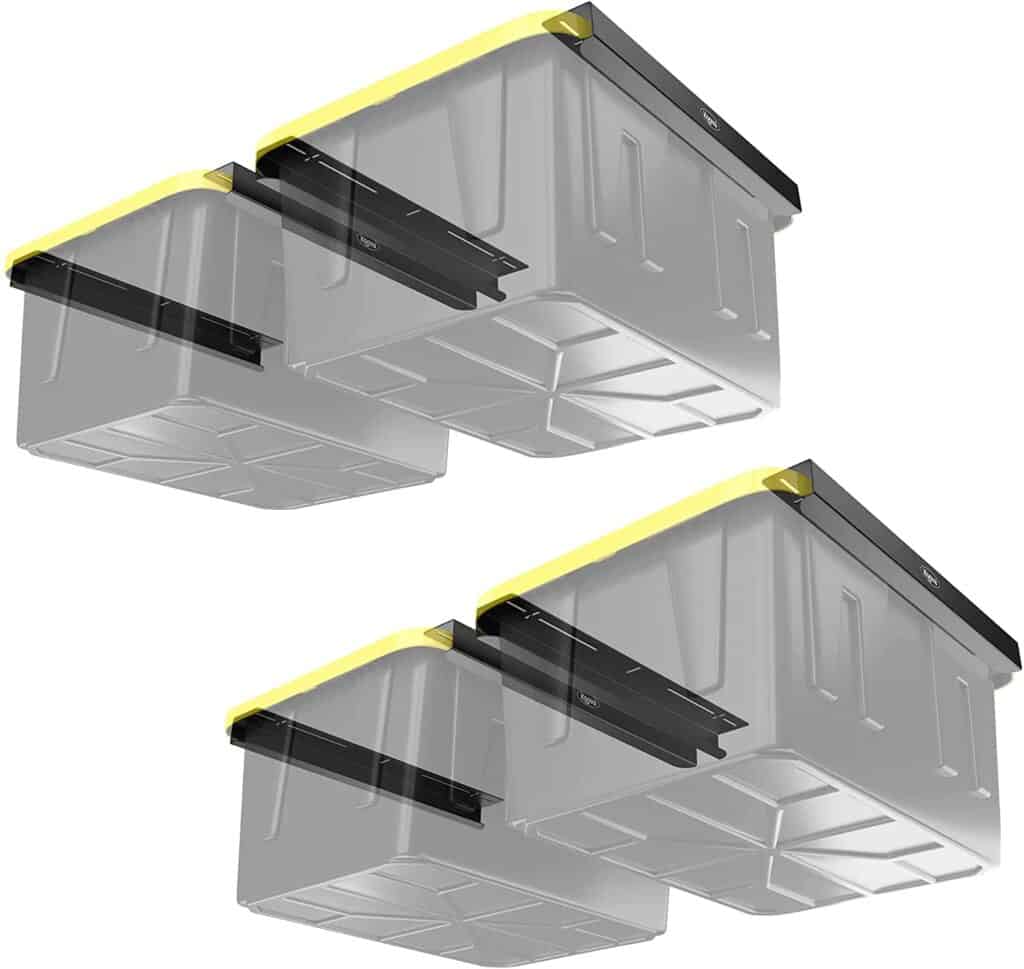
If you are limited on space, shelving units may not be the best option. You can, however, use overhead storage. Overhead racks are a great alternative to store items that you don’t necessarily use on a daily basis. These could be seasonal items like holiday decor, camping gear, or bicycles. An overhead storage system can be easily installed into your garage ceiling joists.
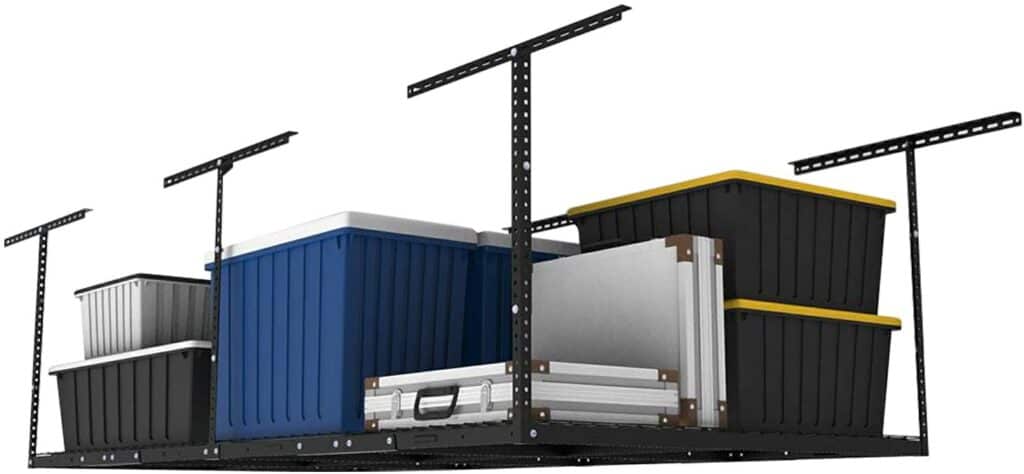
This overhead garage storage rack can hold up to 660 pounds. There are several different sizes available that can fit in any garage space. You will need to make sure you install these out of the way of your garage door or give it enough clearance that the two don’t have any issues.
What I love about overhead racks is that you can keep items off the floor which can be prone to water damage. Because it can be a pain to get these items down, you’ll most likely want to store items that aren’t terribly heavy and aren’t used daily.
If your family has a lot of bicycles, this overhead rack is a great idea for storing those bikes when they aren’t in use. Not only do you have the overhead storage rack, but you also have heavy-duty hooks, which allow you to hang your bicycles from above.
I don’t know about you but I have a ton of storage totes. I love that I can put my random items in there and have each tote be a dedicated space for various categories. If you prefer to have an overhead rack that simply holds only your plastic totes, this overhead bin rack is a good option. You are definitely limiting yourself to only allowing plastic bins to be placed above, but this works great if that is your method of storing your items.
Use Your Wall Space
Your garage walls are a great place to organize and hang your belongings. You can create zones in your garage to help keep everything organized.
I love the use of pegboards to organize power tools and smaller hand tools. Peg boards allow you to visually see your items out but still keep your smaller items in an organized fashion.
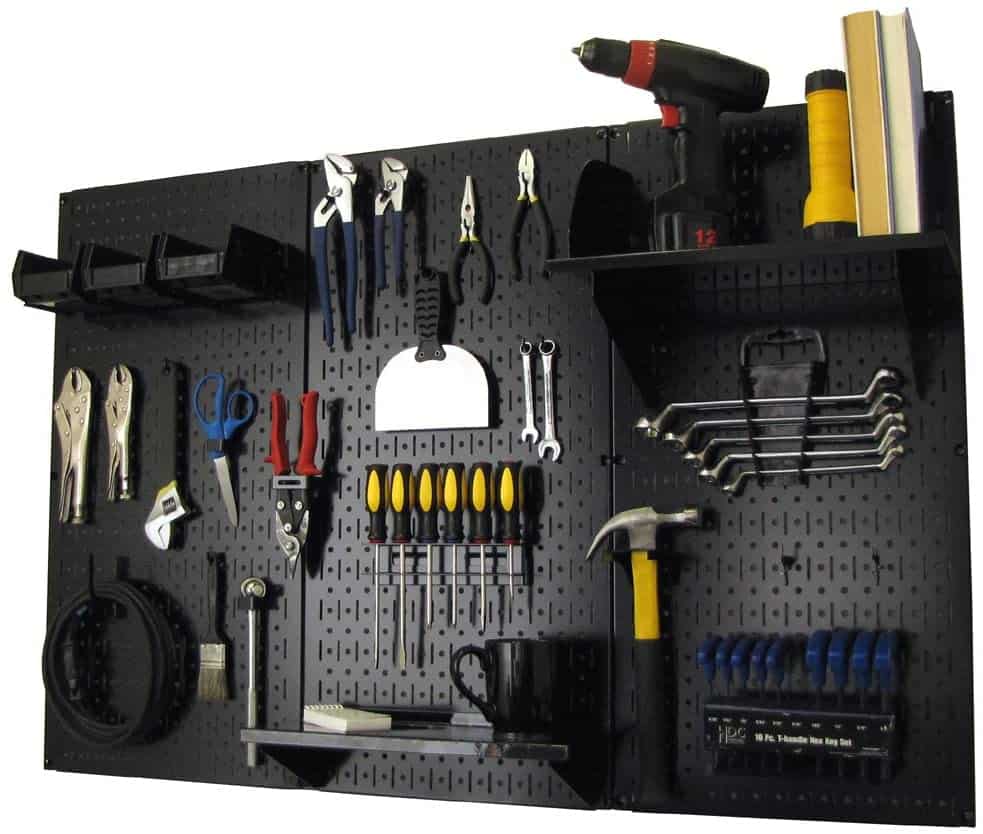
This 4 foot metal pegboard wall organizer is a great product. You have plenty of spaces to hang items like extension cords and hand tools. Plus, you have smaller bins to place hardware. You can recycle glass jars to hold loose hardware and place them in those smaller bins to stay organized. As an added bonus there are a ton of different styles you can purchase in a variety of colors.
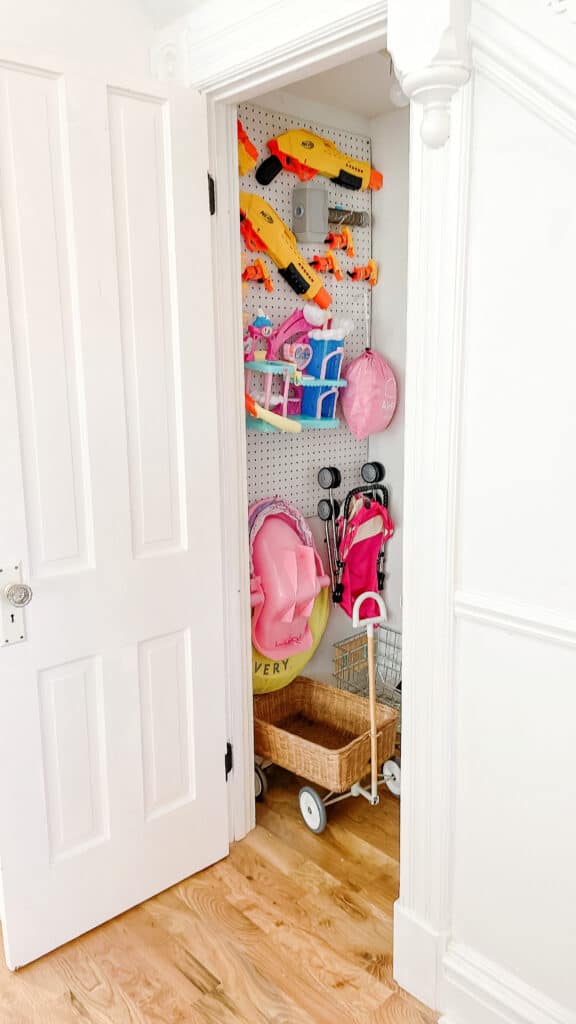
I actually love using pegboards to organize all of my kids’ toys. We use them in our small closets and this could easily be applied to all of your outdoor toys for your garage.
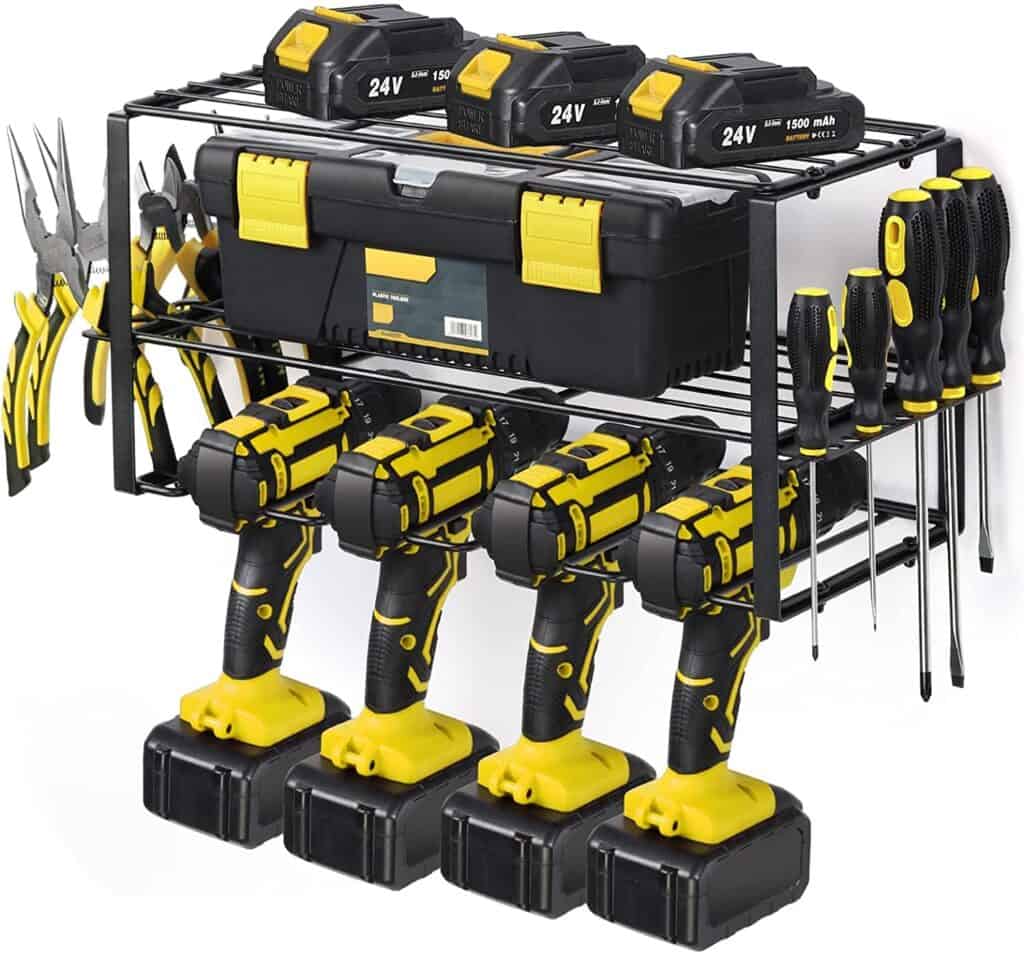
If you want something that is designed to hold your power tools, check out this power tool organizer. I love that you can hang this on your wall above your work space and all of your power tools are there at your fingertips!
This makes a huge difference when you are in the middle of a project and need to grab something fast! You can purchase a wall mounted battery holder that is specific to the brand of power tools you have. I love having a station that is easily accessible and off the floor.
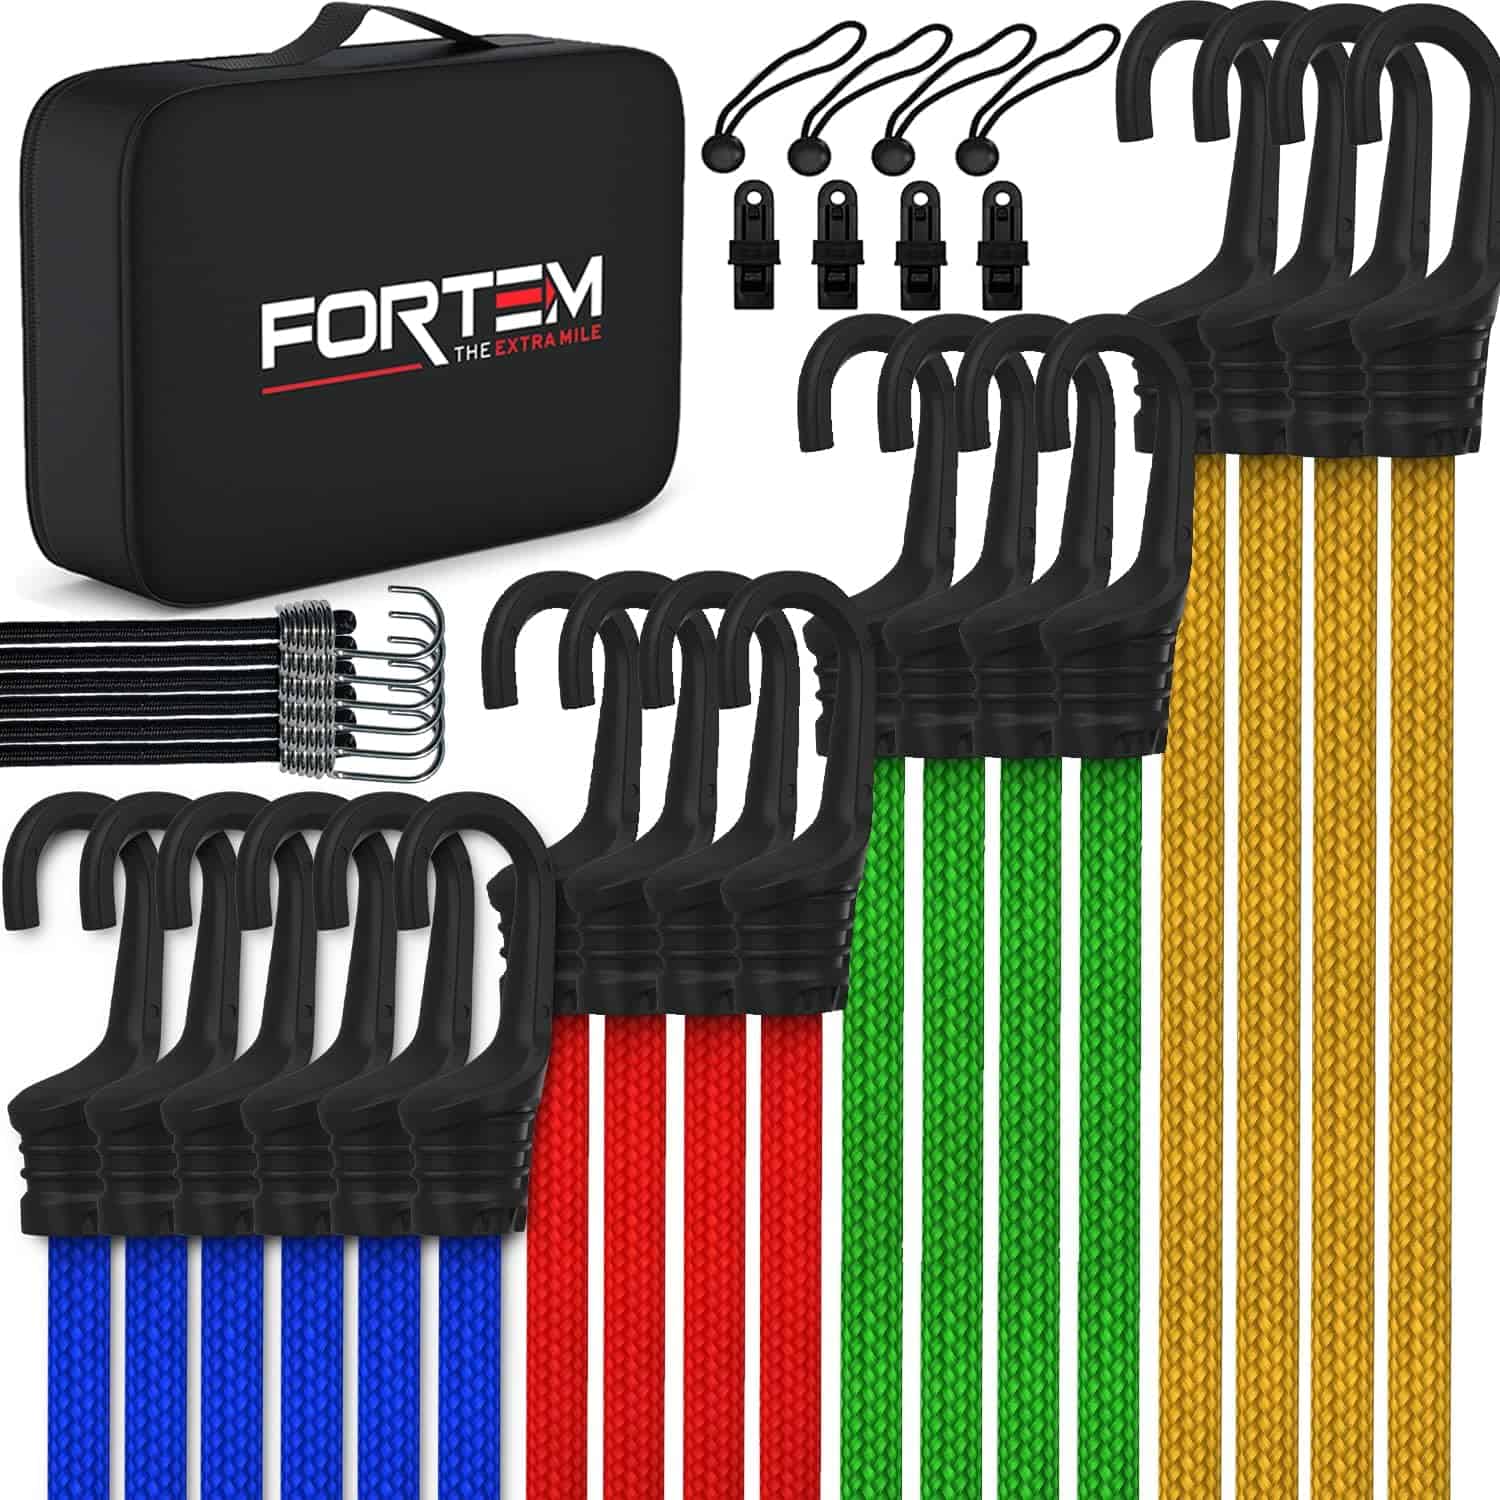
All homeowners should own a set of bungee cords. These versatile elastic tools can be used to secure all sorts of items. My favorite way to use bungee cords is to secure my trash cans, hold sports balls, secure extension cords to walls, and secure my groceries in my car. They come in different colors to signify the various length and sizes.
I also recommend all homeowners own a set of Command Strips, screw hooks, or coat rack hangers. These are all so versatile and can be used to hang miscellaneous items. Hang your bicycle helmets, garden gloves, holiday lights, and extension cords in your garage for easy access.
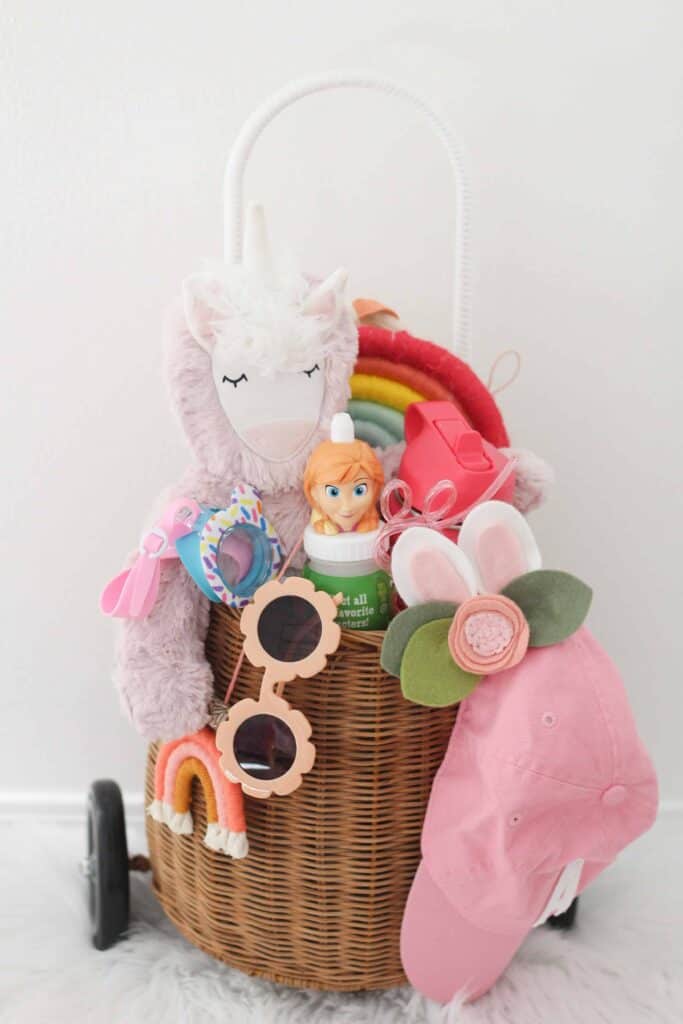
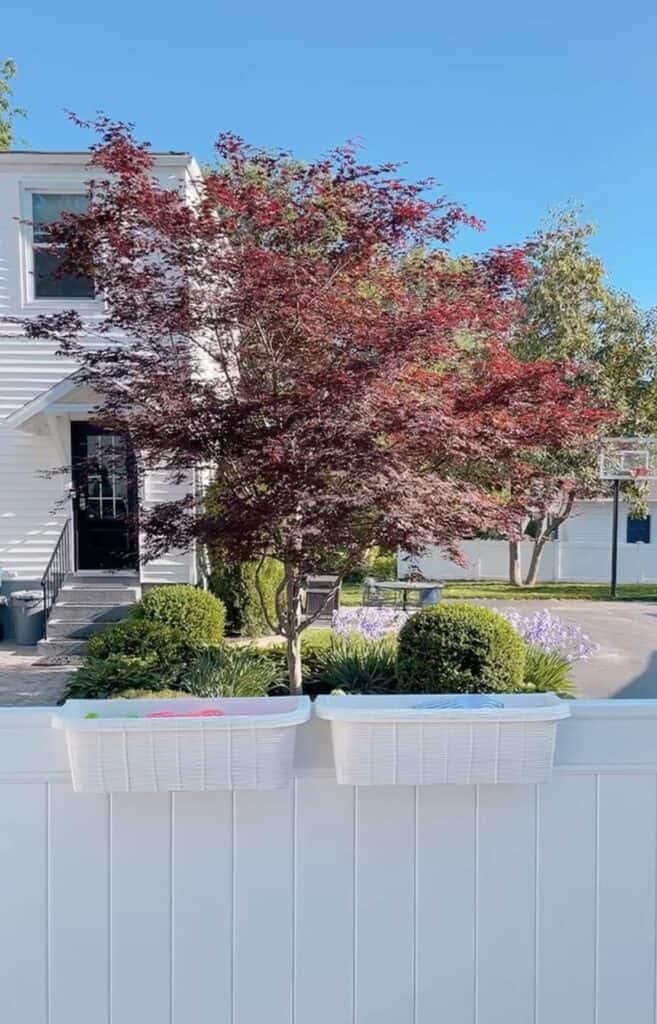
I love buying flower planter boxes that can be hung on your fence post or hung in your garage to store small items for your kids like bubbles, sidewalk chalk, and squirt guns.
This way they are easily accessible, you can customize the height for your kids, and they are secured. You can also do this to store balls and other small toys your kids play with that seem to get lost easily.
As an alternative, you can install magnetic strips on your garage wall or use your new metal shelving unit. This is a great place to store paint brushes, hardware, tools, or even toy cars.
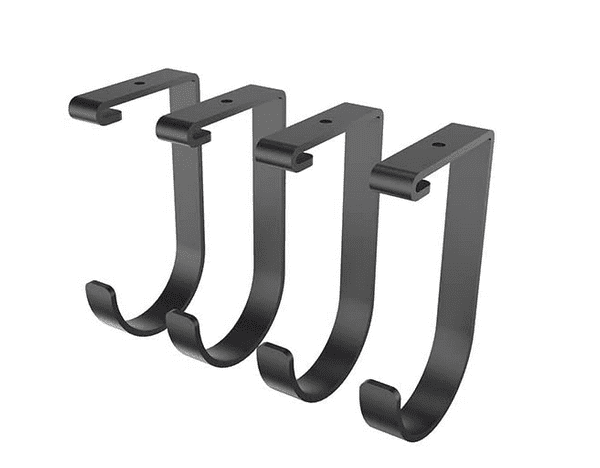
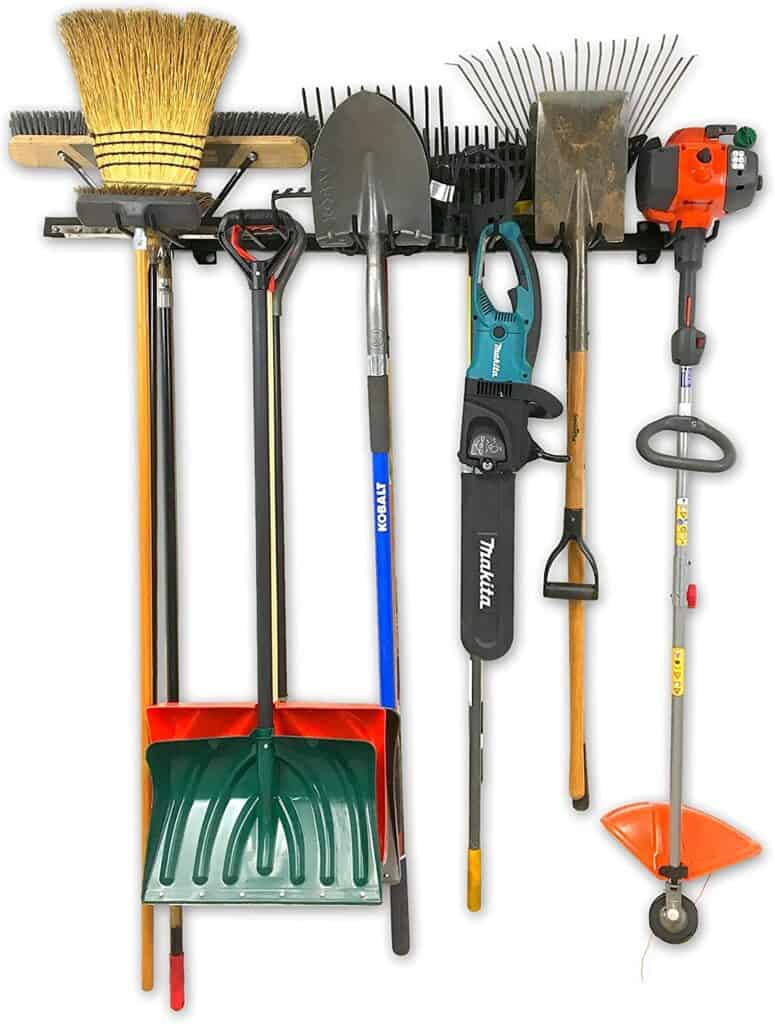
If you have yard tools taking up space, grab one of these hanging tool organizers to easily get your equipment safely off the floor.
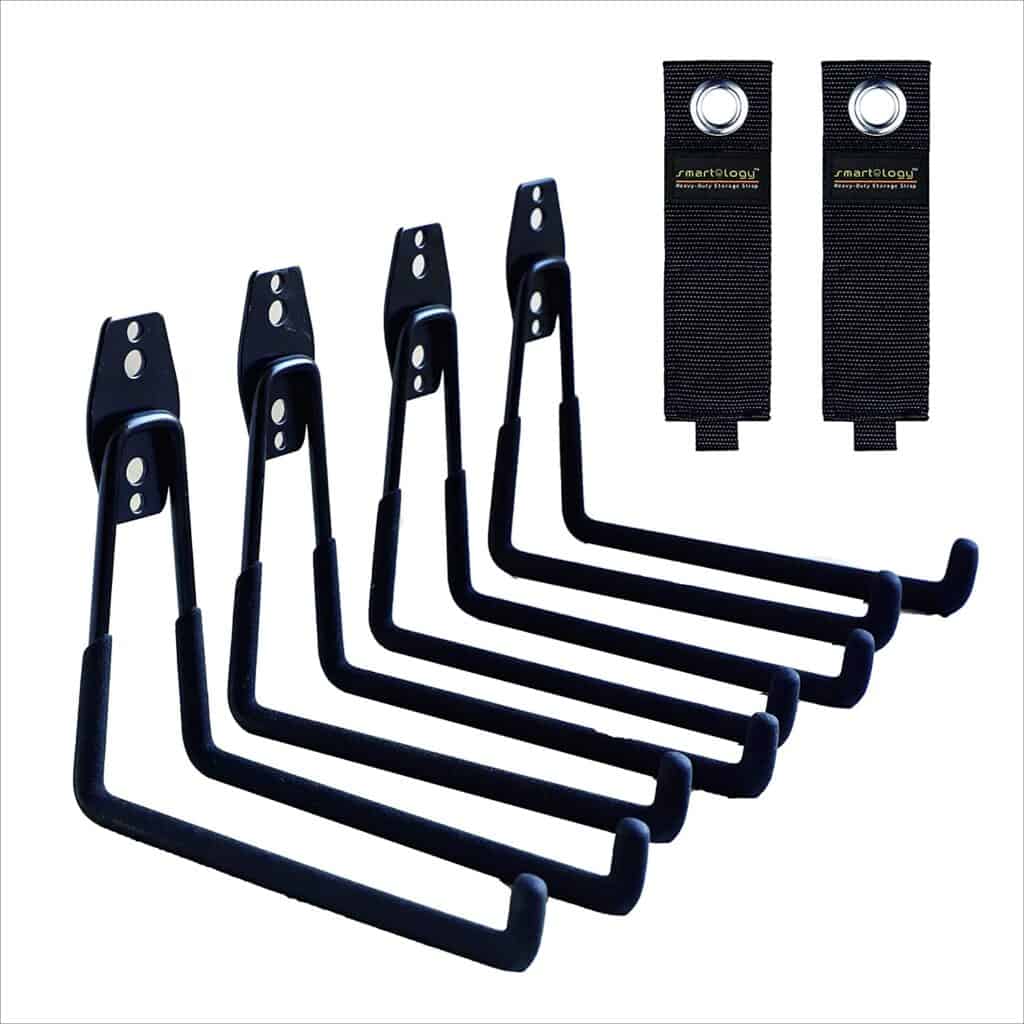
Wall hooks are another item that I recommend all homeowners utilize! You can get those bulky items off the floor and onto your wall. If you don’t have an overhead rack, this is a great place to hang your bicycles, ladders, lawn chairs, extension cords, holiday lights, and even golf bags. I love how versatile this is and on a tight budget you can make a big impact with one little tool.
DIY Storage Solutions
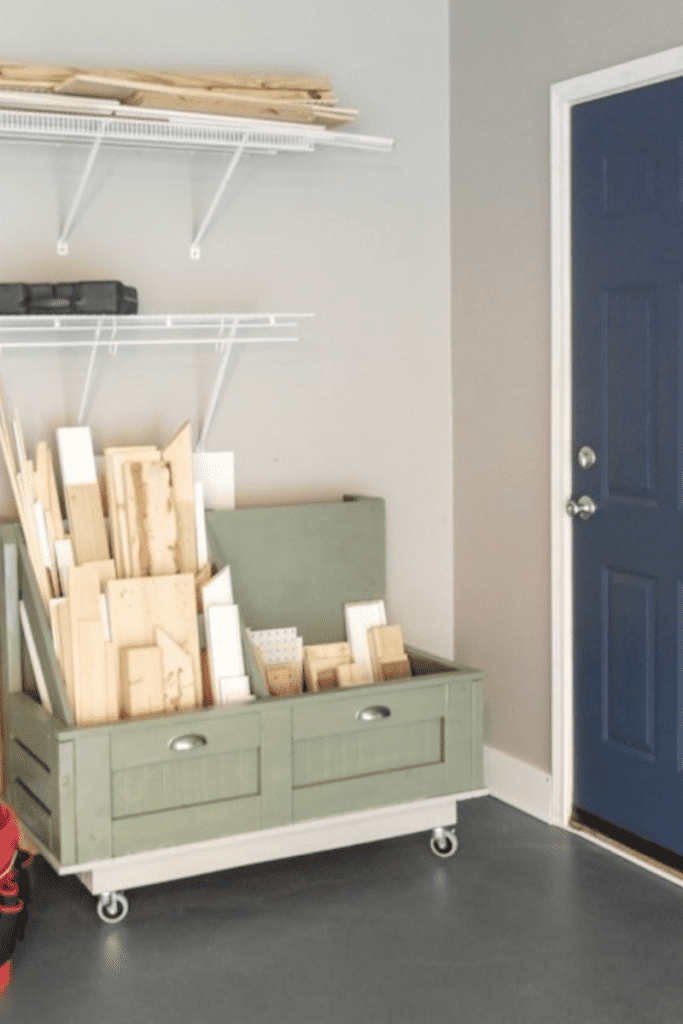
One of the downfalls about doing a lot of DIY projects is that you end up collecting a ton of scrap wood. Because of the crazy price of wood, I never want to throw any of my scrap wood away.
As a result, it just collects and my pile gets higher and higher. I love this DIY storage chest on wheels to hold all your scrap wood! If you have an unused toy chest laying around, you can easily create your own too!
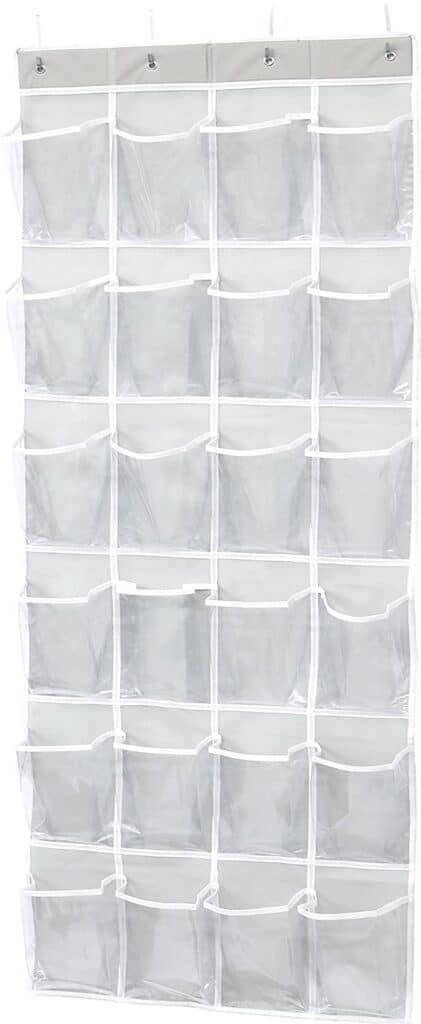
I tend to have a lot of spray paint cans laying around our garage. It never fails that I think I am out of one color, only to realize I had a full can after I already bought another completely full can of that same color.
To organize your spray paint cans, try hanging a shoe organizer. This will allow you to see what colors you have and can easily be hung with Command Strip hooks or hook screws.
Shop Items for Organizing Your Garage on a Budget
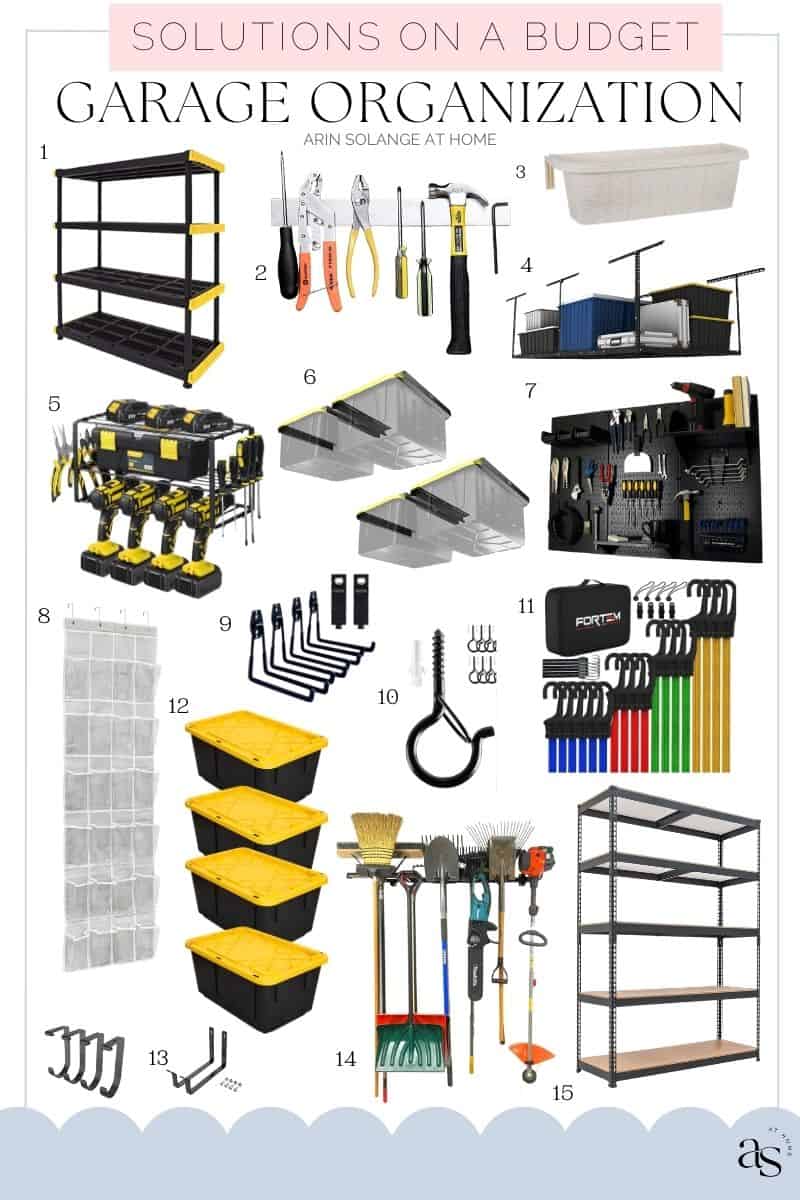
1 | 2 | 3 | 4 | 5 | 6 | 7 | 8 | 9 | 10 | 11 | 12 | 13 | 14 | 15
- Four Shelf Storage Tier
- Magnetic bar
- Hanging Planter Box – check out how I used this planter as toy organization
- Overhead Garage Storage Rack
- Power Tool Organizer
- Overhead Bin Rack
- Metal Pegboard Wall Organizer
- Shoe Organizer– use this to store spray paint cans, miscellaneous items, chargers, etc.
- Wall Hooks
- Screw Hooks– these screw hooks come with cable storage wraps too
- Bungee Cords
- 27 Gallon Storage Tubs- The four shelf storage tier can hold up to 8 of these tubs.
- Overhead Garage Storage Rack with Bicycle Hooks
- Yard Tool Organizer
- 5 Tier Metal Shelving Unit
Take Inventory Twice a Year
How to organize garage on a budget? We tackled that – but now we need to figure out how to maintain that organization. Now that you’ve organized your garage, you need to keep it this way. Each item should have its designated spot. If you move the item from its spot to use it, make sure you return it. I say this constantly to my kids!
Put your toys back where you find them. But the truth is, sometimes we get lazy or interrupted and inevitably, the item we were using doesn’t get put back and ends up lost. Make sure you reap the benefits of all your hard work and keep it organized. I’d also recommend taking inventory of your garage and the items you use twice a year.
It makes sense to do this when the seasons change and you can switch out those seasonal needs and then dump what you no longer need. This will keep your space tidy and functional.